

How to Use Keyboard Shortcuts
A cashier with a keyboard should not be reaching for the mouse to change screen. Eight shortcuts cover every screen in the terminal, and each one is remappable.
They are per-cashier and per-browser, so one person’s layout does not land on the terminal next to them.
Step 1: Open the Shortcuts settings
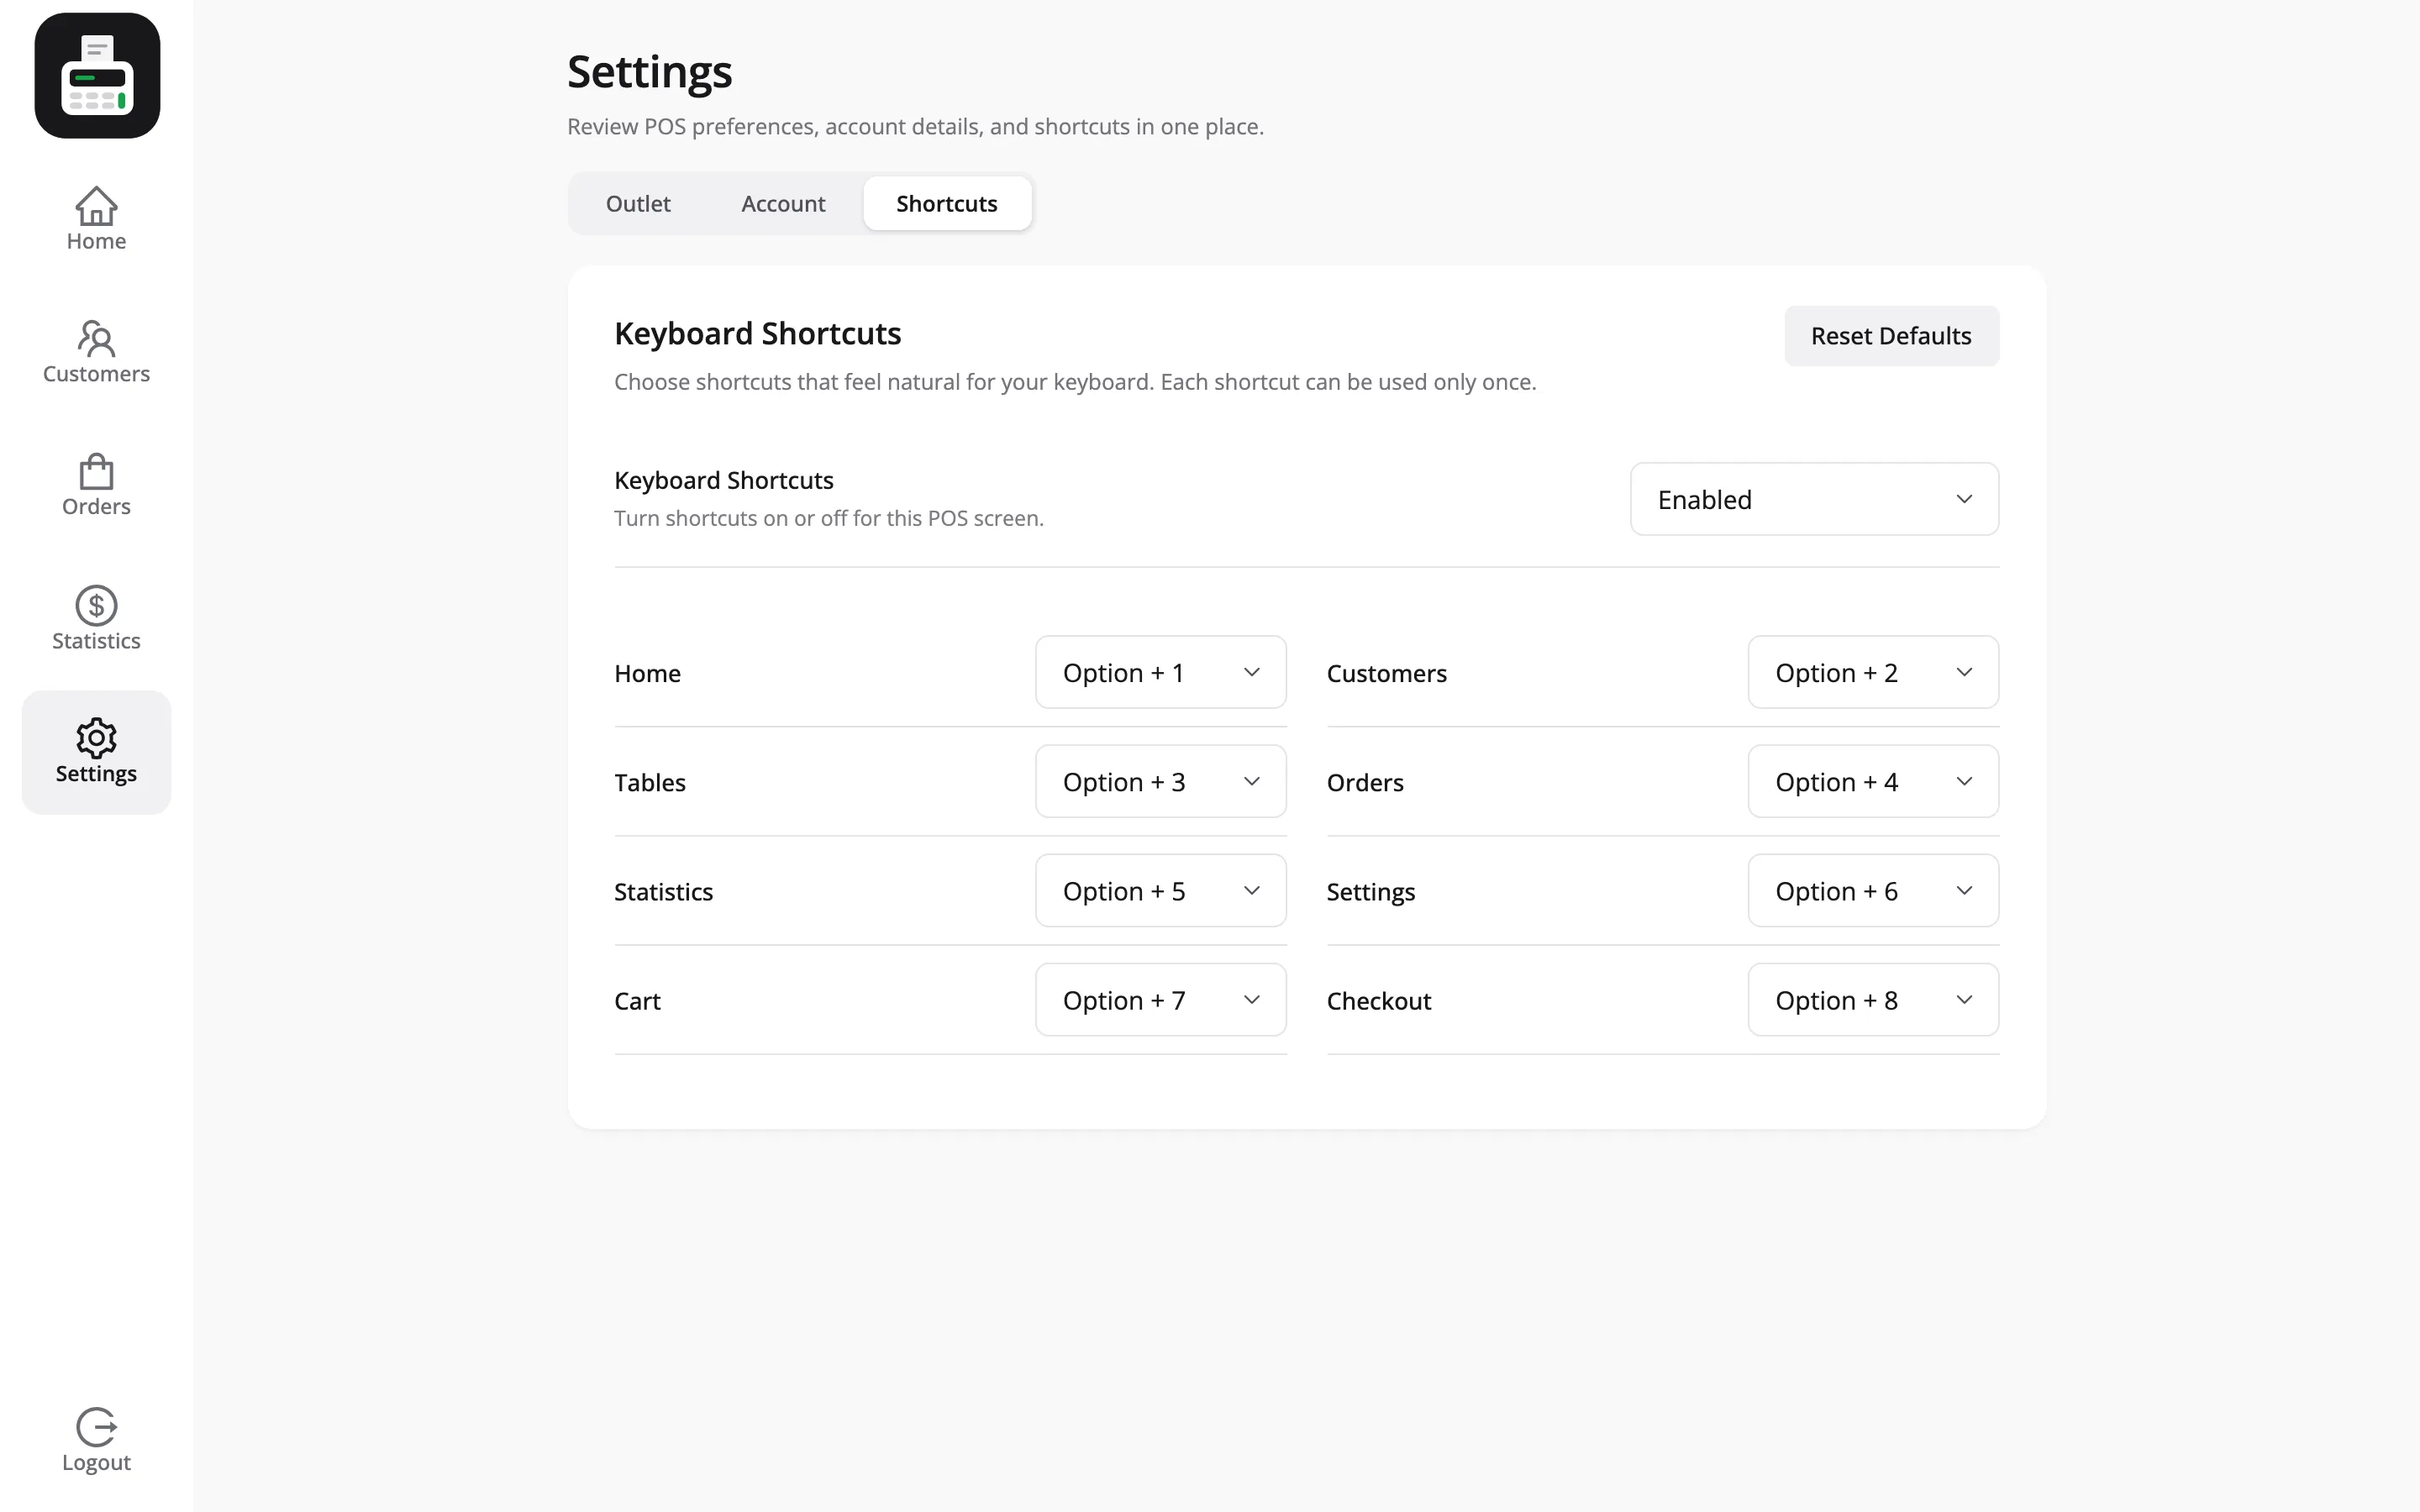
Section titled “Step 1: Open the Shortcuts settings”In the terminal, click Settings in the sidebar, then Shortcuts.
Step 2: Learn the eight defaults
Section titled “Step 2: Learn the eight defaults”| Shortcut | Goes to |
|---|---|
| Alt + 1 | Home |
| Alt + 2 | Customers |
| Alt + 3 | Tables |
| Alt + 4 | Orders |
| Alt + 5 | Statistics |
| Alt + 6 | Settings |
| Alt + 7 | Cart |
| Alt + 8 | Checkout |
Those are the same eight screens as the sidebar.
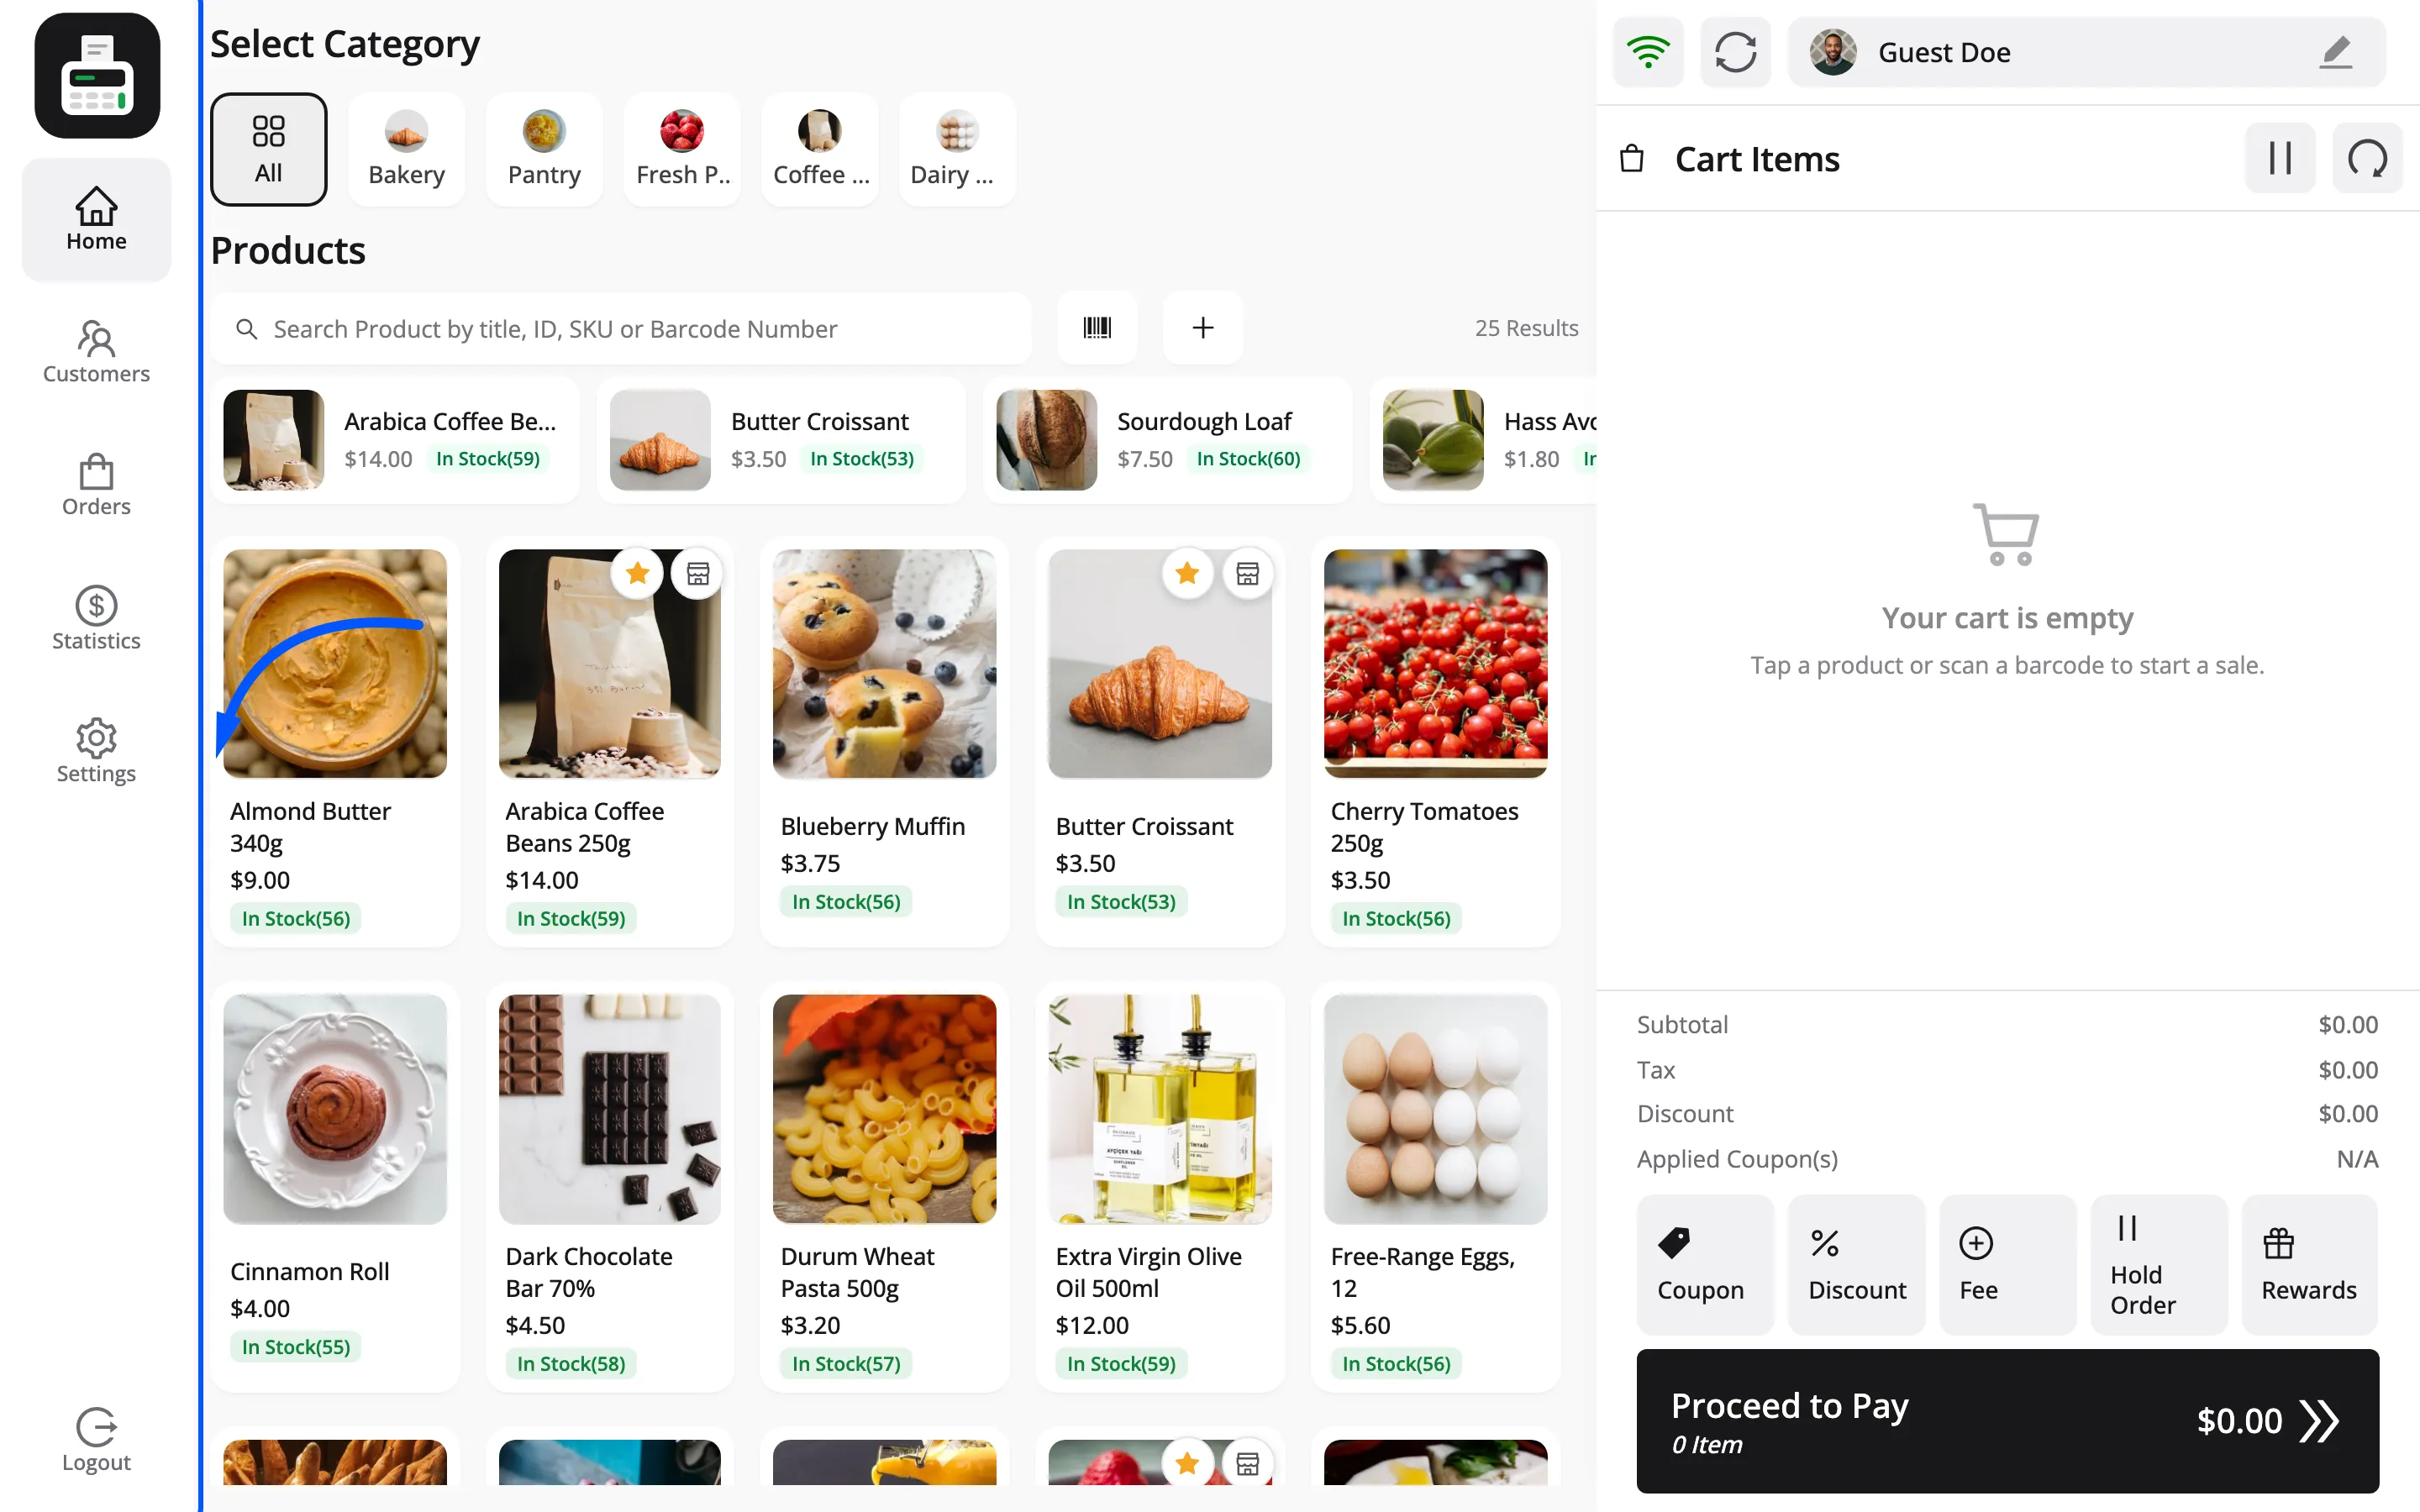
On a Mac the terminal displays these as Option and Control rather than Alt and Ctrl, and the keys are the same physical ones.
The two worth learning first are Alt + 1 and Alt + 8. Home and Checkout are the two ends of every sale, and jumping between them is most of a shift.
Step 3: Remap a shortcut
Section titled “Step 3: Remap a shortcut”Each action carries a dropdown. Pick a different combination.
The available options are:
- Alt + 1 to Alt + 9
- Alt + A to Alt + Z
- Ctrl + Shift + 1 to Ctrl + Shift + 9
On a Mac the same options read Option and Control. MultiPOS swaps the label to match the keyboard in front of the cashier. A screenshot taken on a Mac shows Option + 1 where a Windows machine shows Alt + 1. It is one shortcut with two names, not two settings.
Each shortcut can be used only once. Assigning a combination that is already taken means the other action gives it up, so check what you are overwriting.
Letters are worth considering over numbers. Alt + C for Customers is easier to remember than Alt + 2, and a cashier who remembers a shortcut actually uses it.
Unassigned removes a shortcut entirely, which is the right answer for a screen your staff never open.
Step 4: Turn shortcuts off
Section titled “Step 4: Turn shortcuts off”Set Keyboard Shortcuts to Disabled.
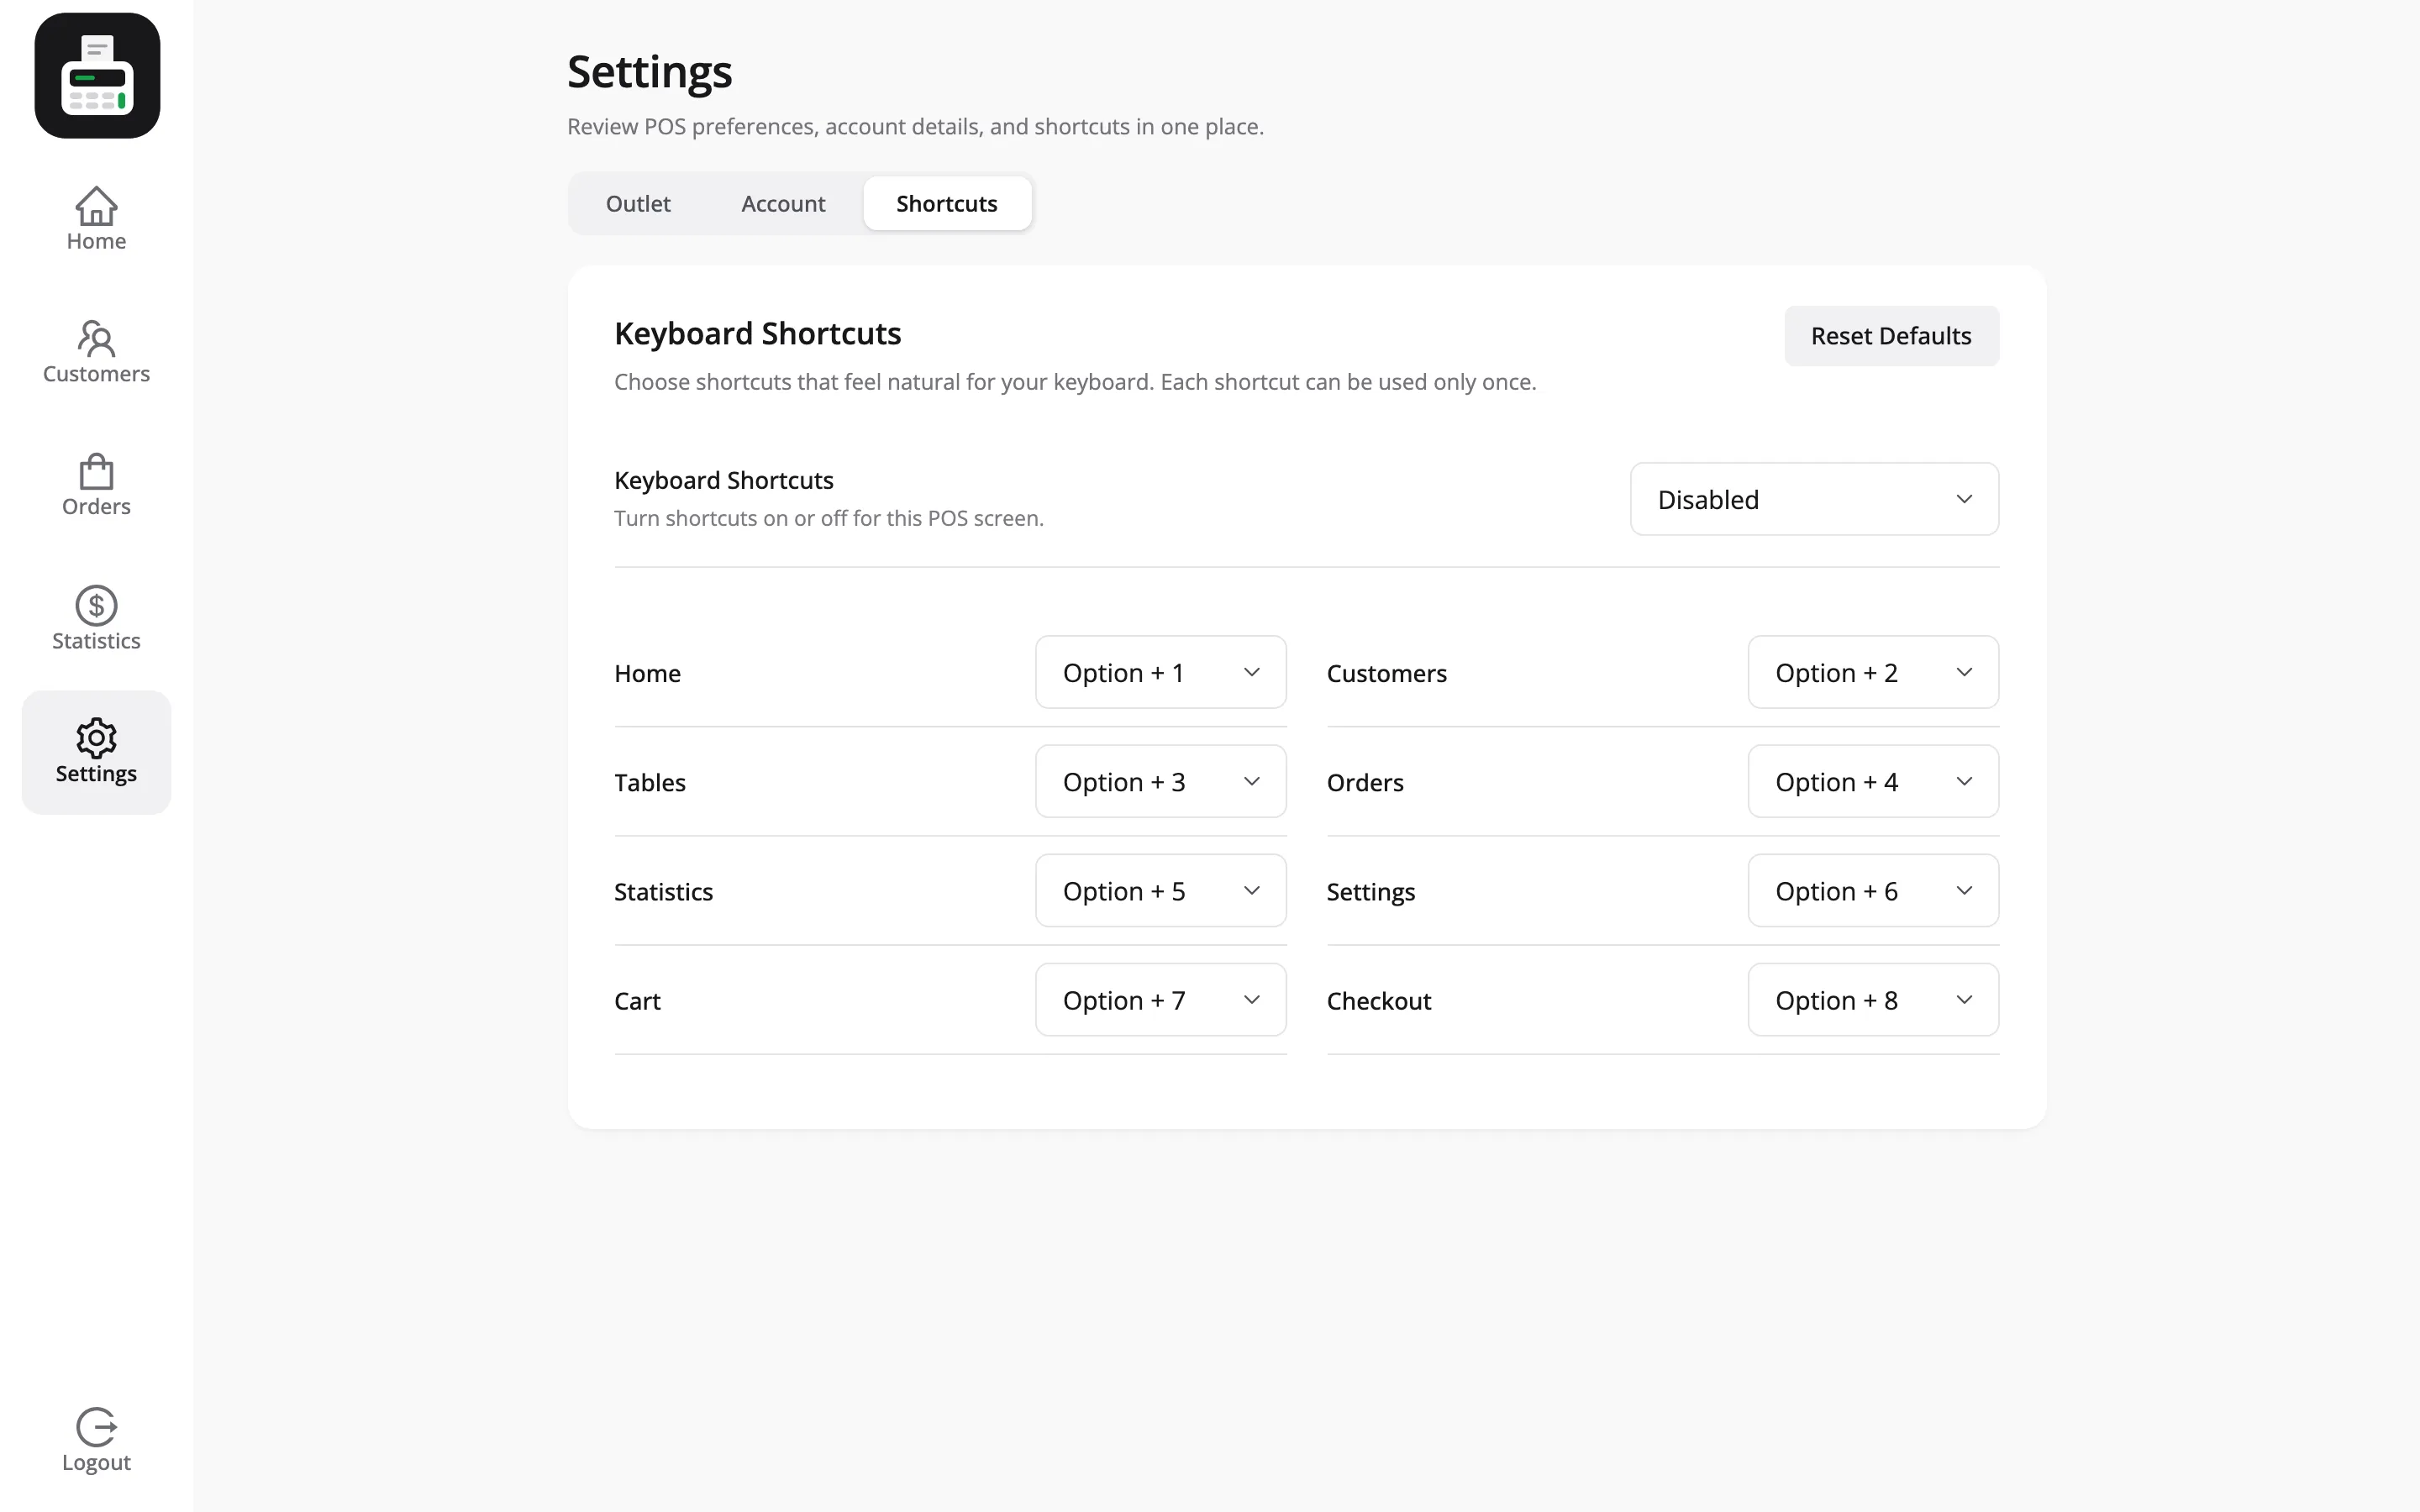
Do this on a tablet with no keyboard, where the shortcuts do nothing but can still fire from a Bluetooth scanner that sends modifier keys.
The list of actions stays on screen either way. Disabled stops them firing; it does not hide the mapping, so you can still see what is set.
Set it back to Enabled to bring them all back.
Step 5: Reset to defaults
Section titled “Step 5: Reset to defaults”Reset Defaults at the top of the section puts all eight back to Alt + 1 through Alt + 8.
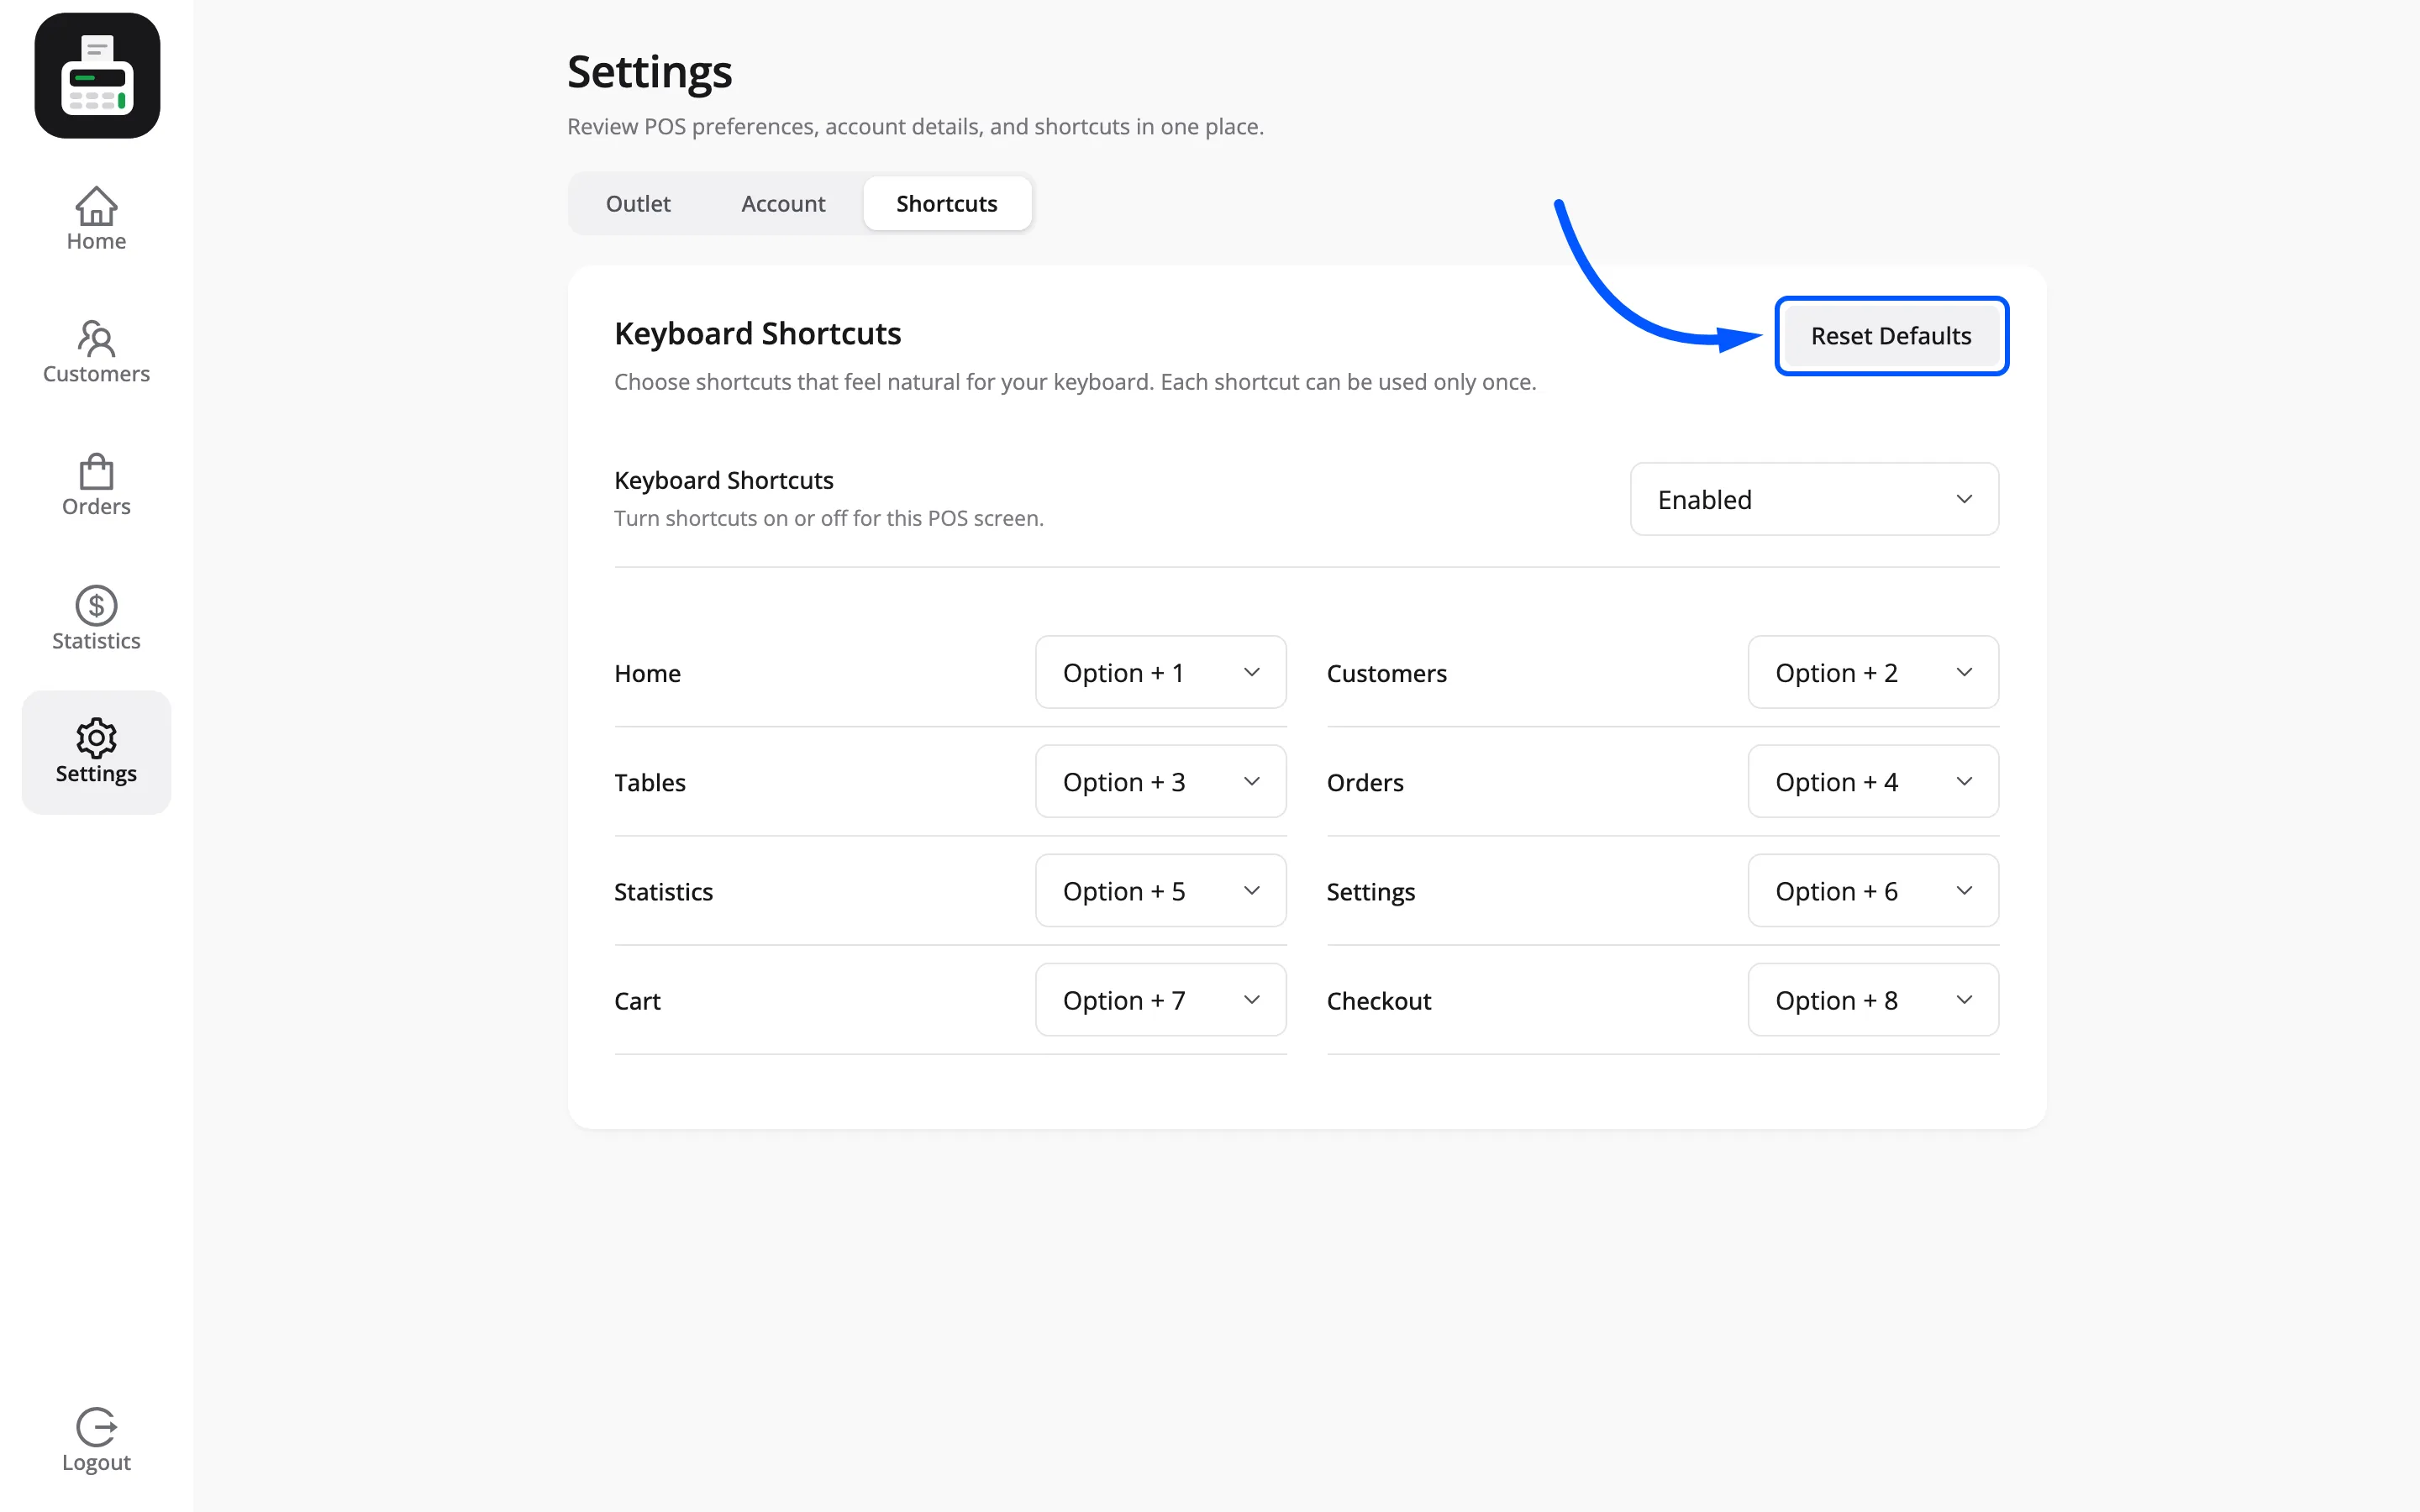
Use it after an experiment that made things worse, which is most experiments with shortcuts.
Shortcuts do not fire while you are typing
Section titled “Shortcuts do not fire while you are typing”A shortcut is ignored when the focus is inside a text box, a dropdown or a text area.
That is deliberate and it matters more than it sounds. A cashier typing a customer’s name would otherwise be thrown to another screen mid-word. A barcode scanner typing into the search box would trigger something random.
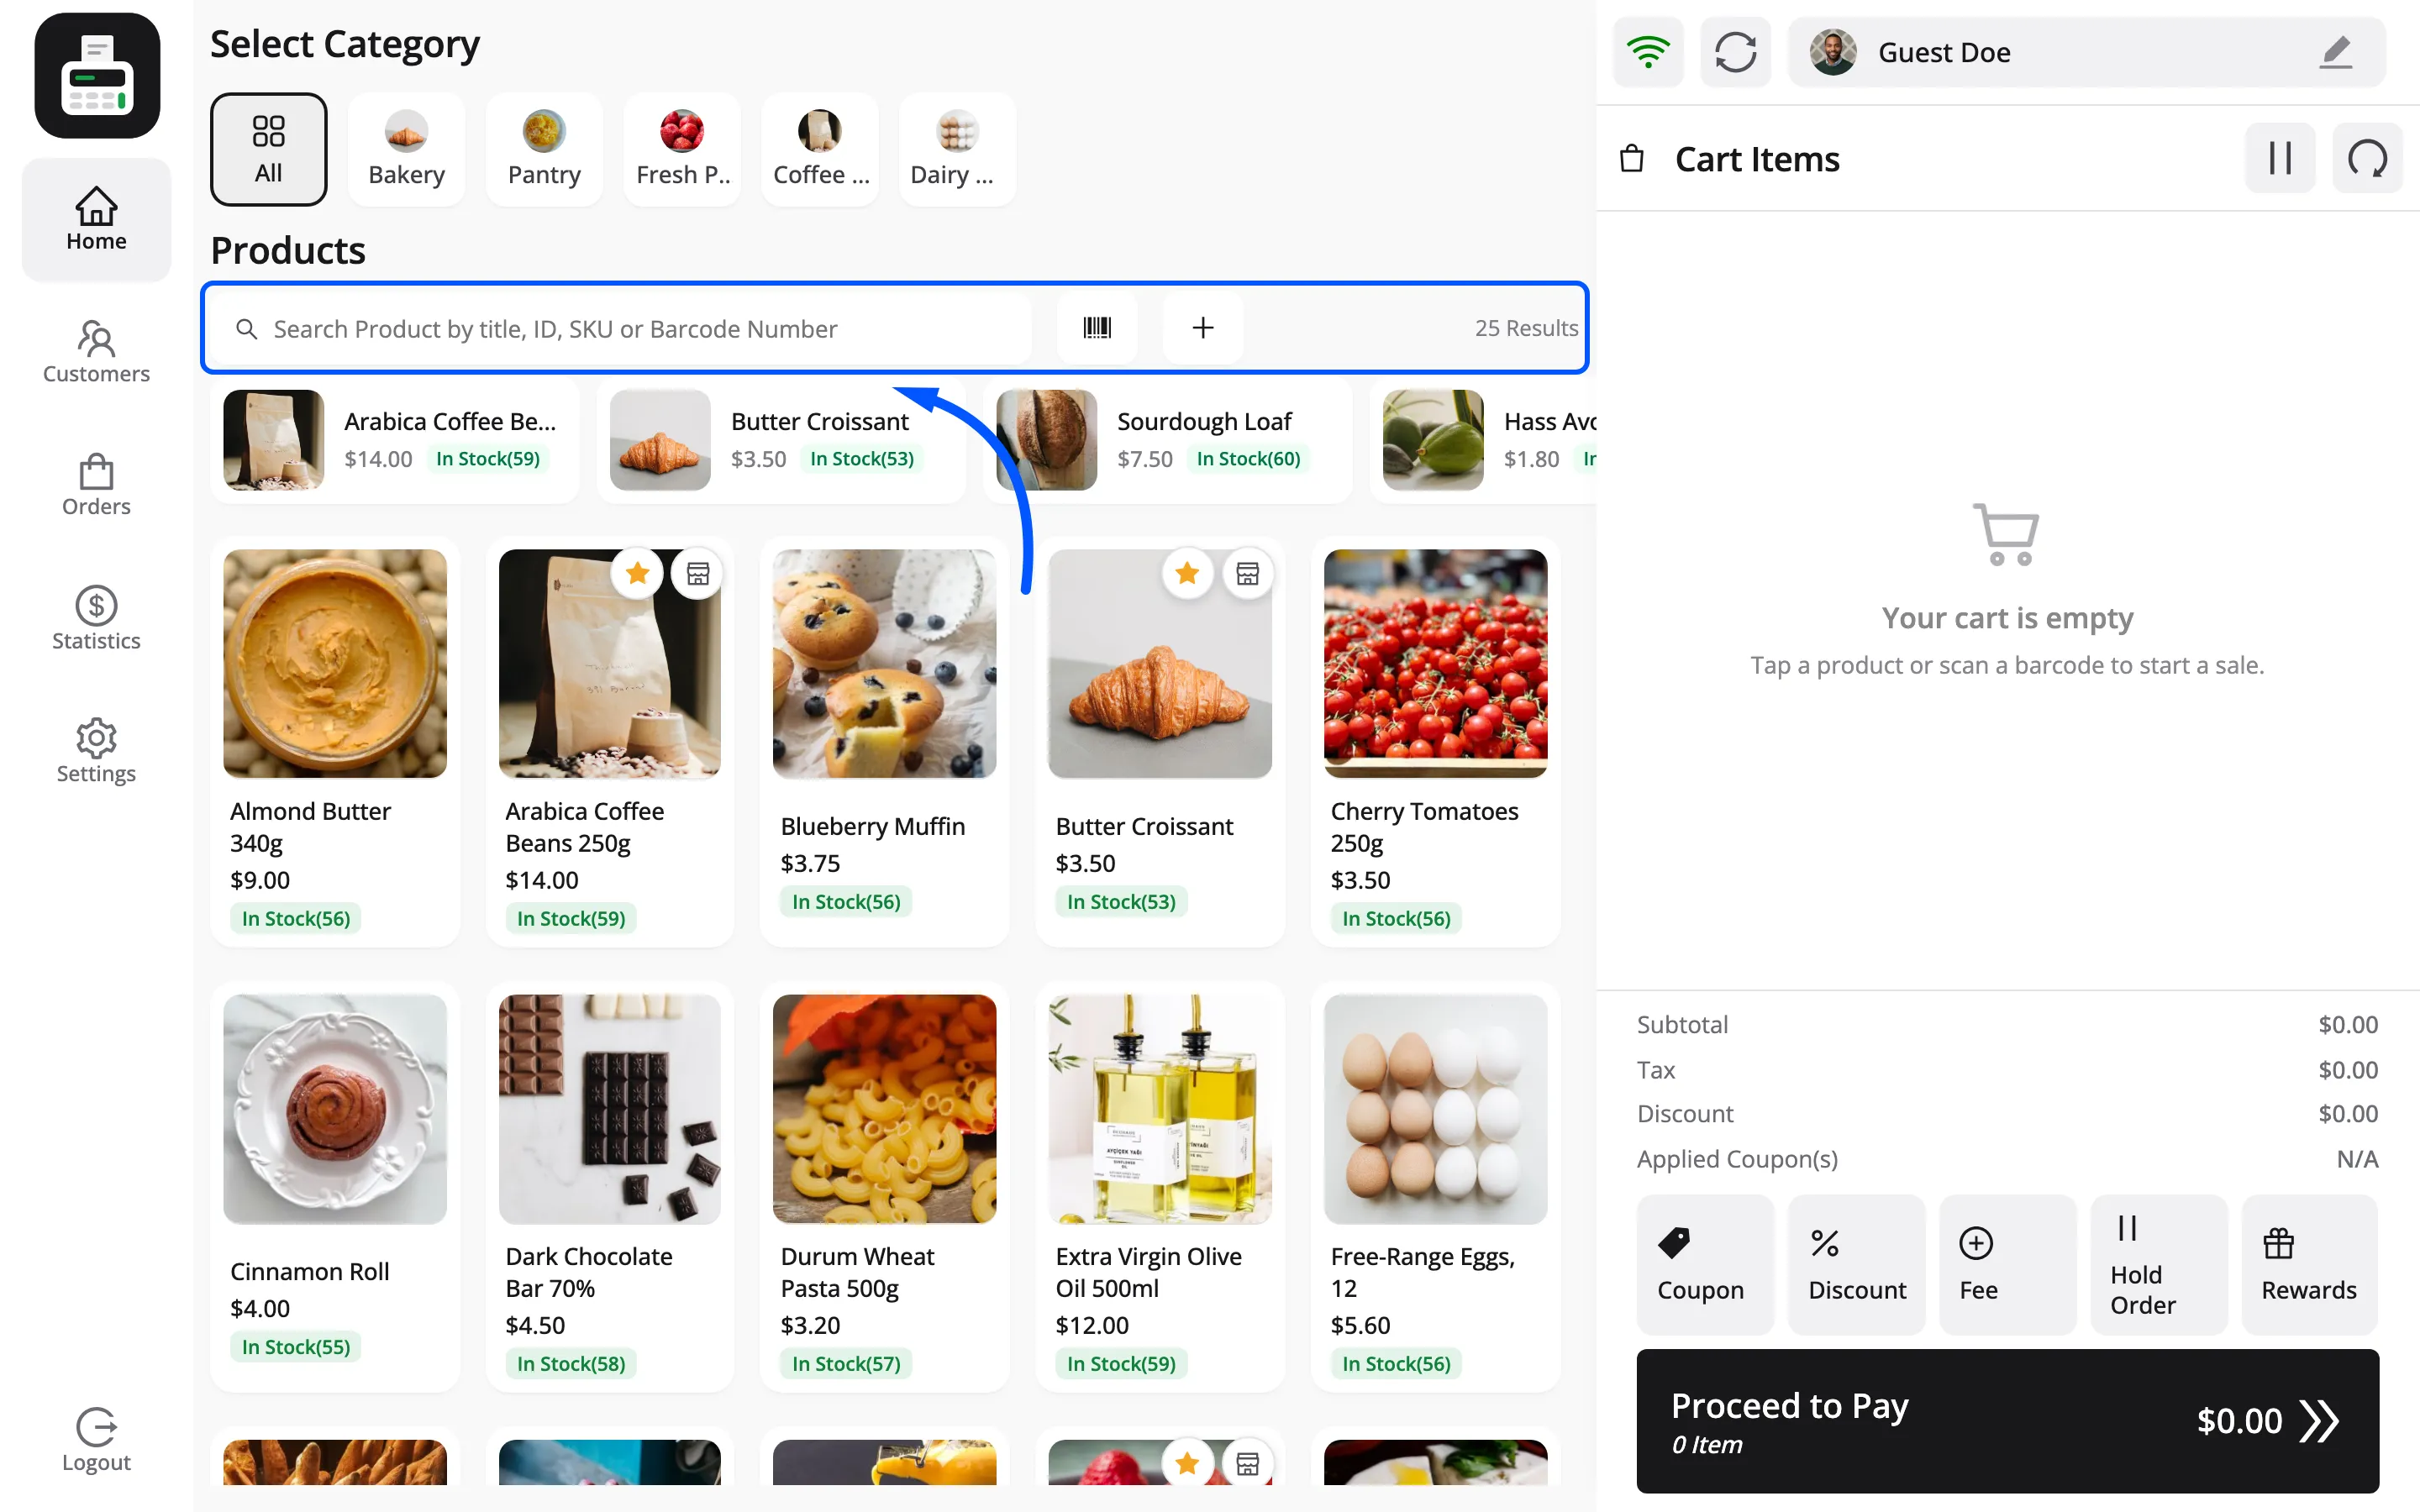
Click out of a field before pressing a shortcut.
They are per-cashier
Section titled “They are per-cashier”Each cashier sets their own, in their own browser. Nothing here is a site-wide setting.
Two consequences worth knowing:
- A cashier who moves to a different terminal starts on the defaults, because the settings live in the browser rather than on the account.
- Retraining is per person. If you change a convention, tell everyone; there is no way to push a layout to every terminal.
What else Settings → Outlet carries
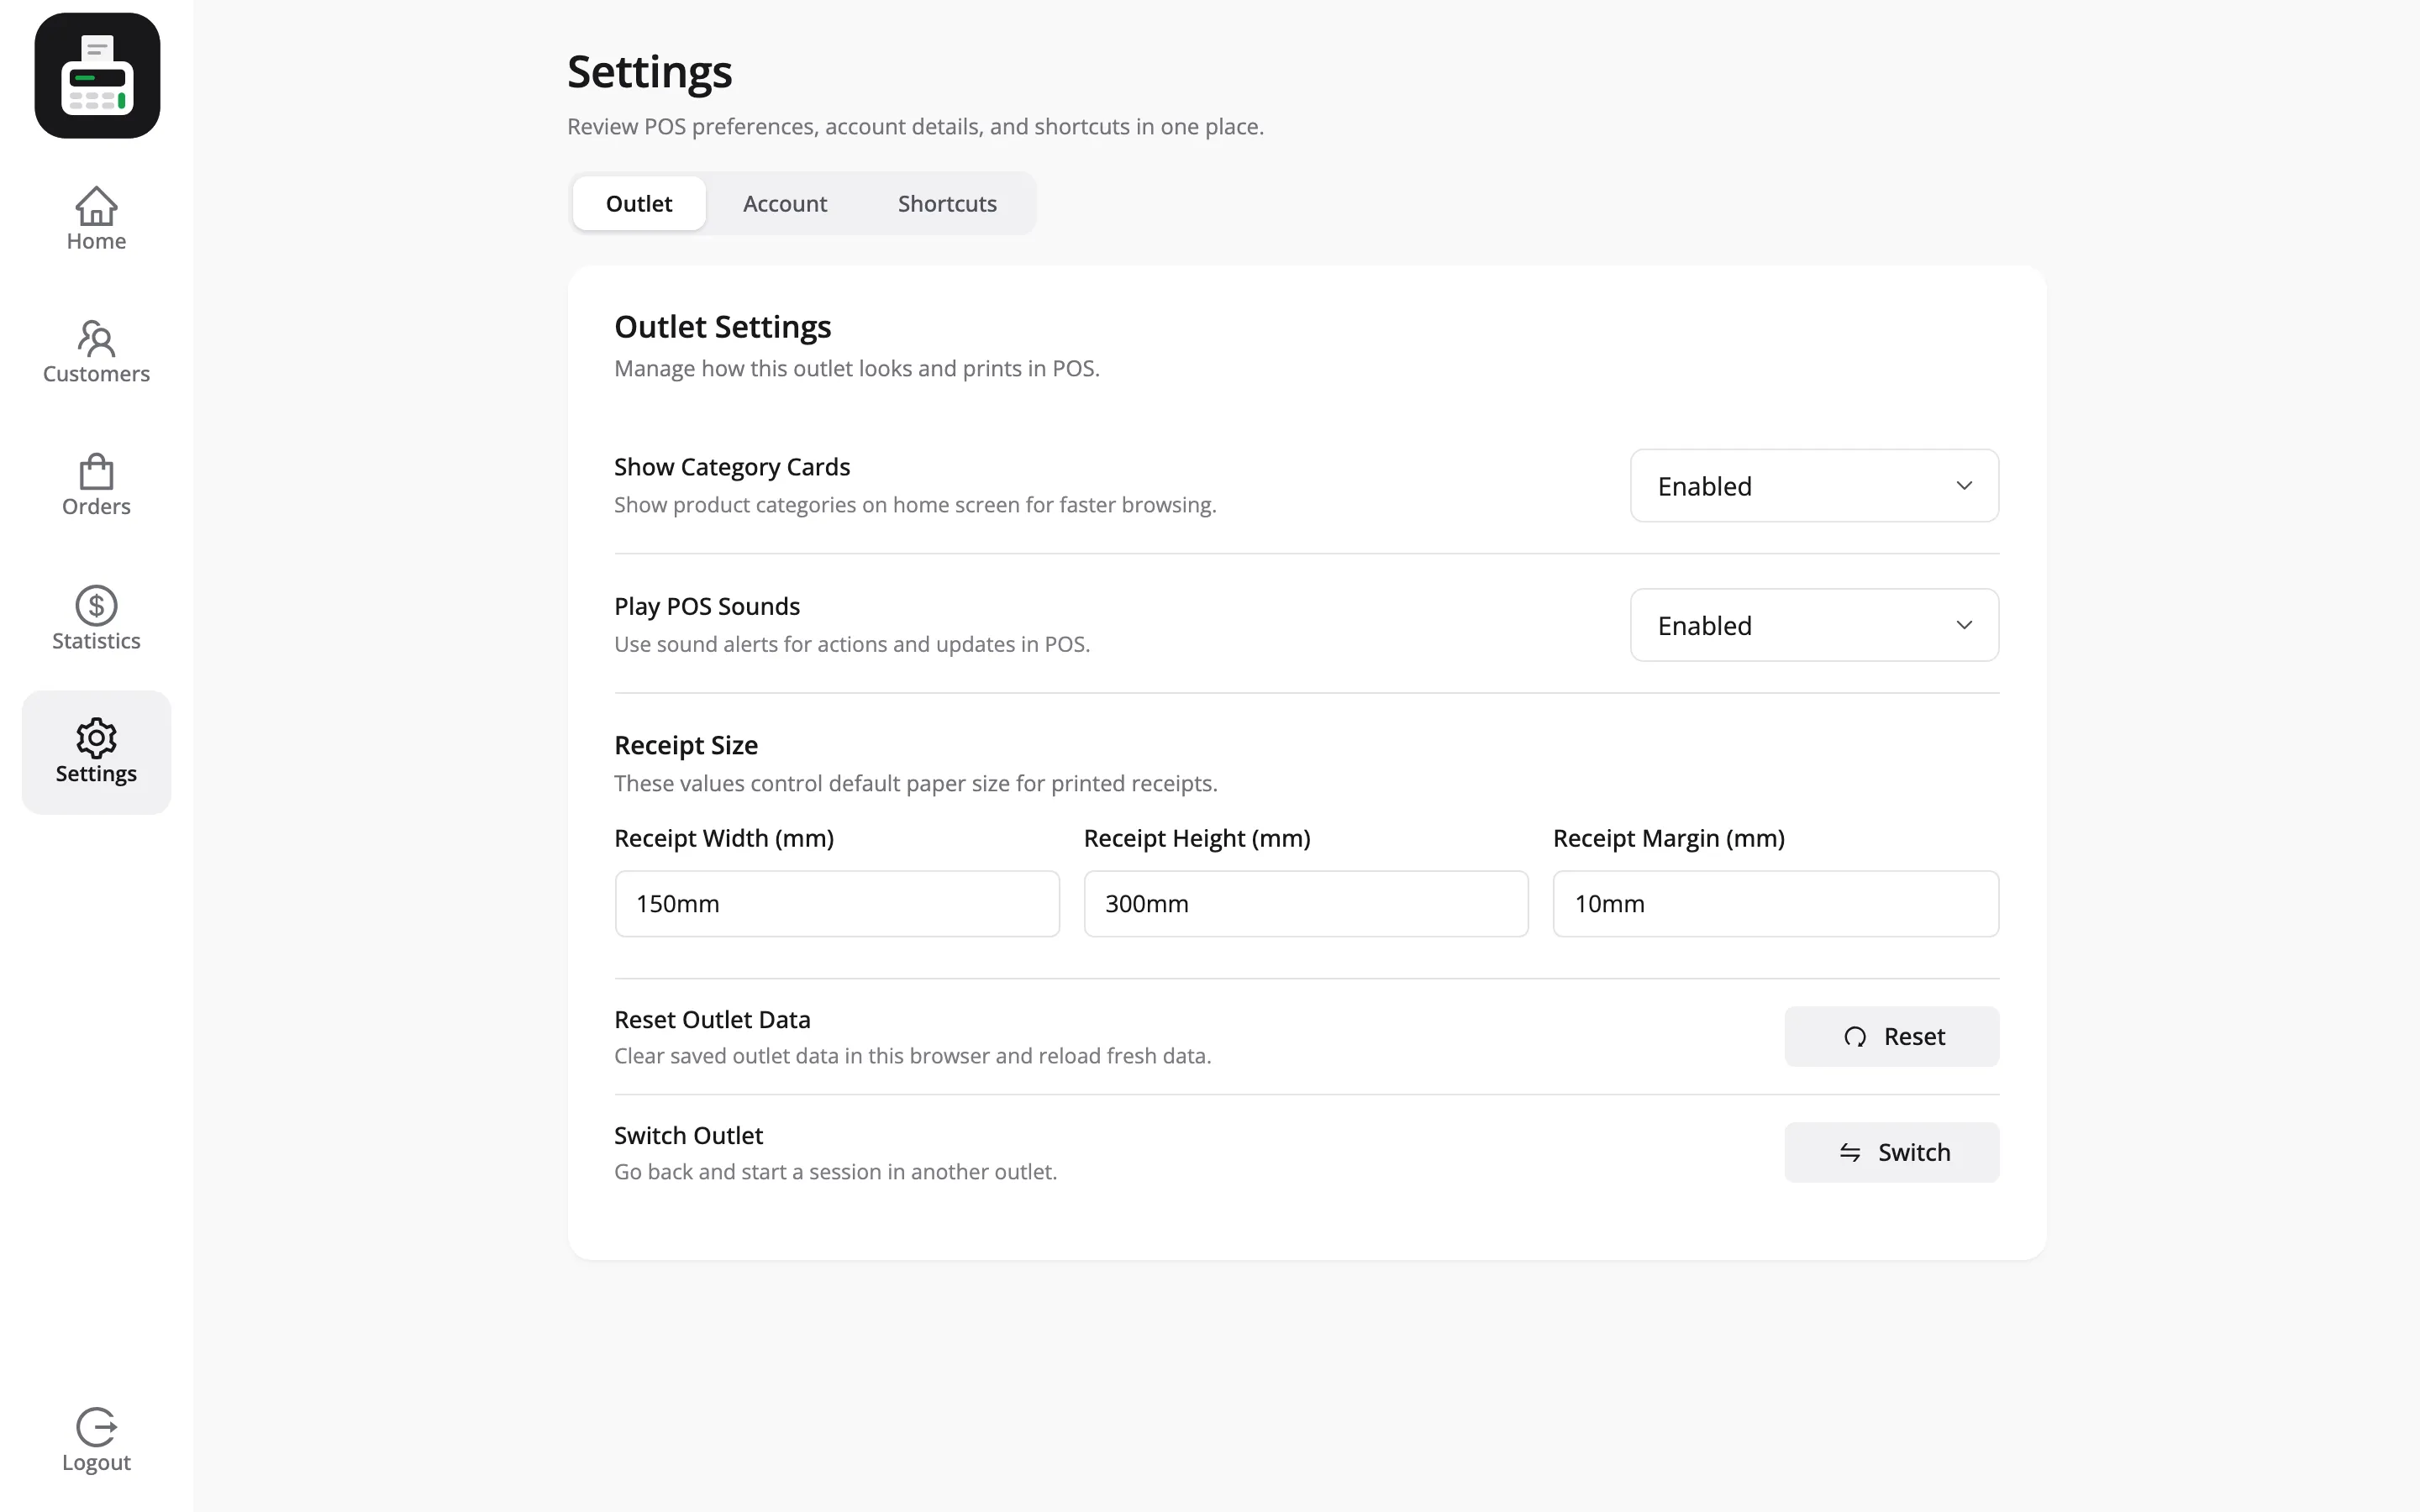
Section titled “What else Settings → Outlet carries”Shortcuts are one of three sections on that screen. The others are worth knowing, because they are per-browser too and nobody thinks to look for them.
Two display preferences
Section titled “Two display preferences”- Show Category Cards hides the category row for a store that has no useful categories, giving the product grid more room.
- Play POS Sounds turns off the audio feedback. That is what you want in a quiet showroom, and the opposite of what you want in a loud cafe.
Receipt Size
Section titled “Receipt Size”Three measurements in millimetres set the paper this terminal prints on.
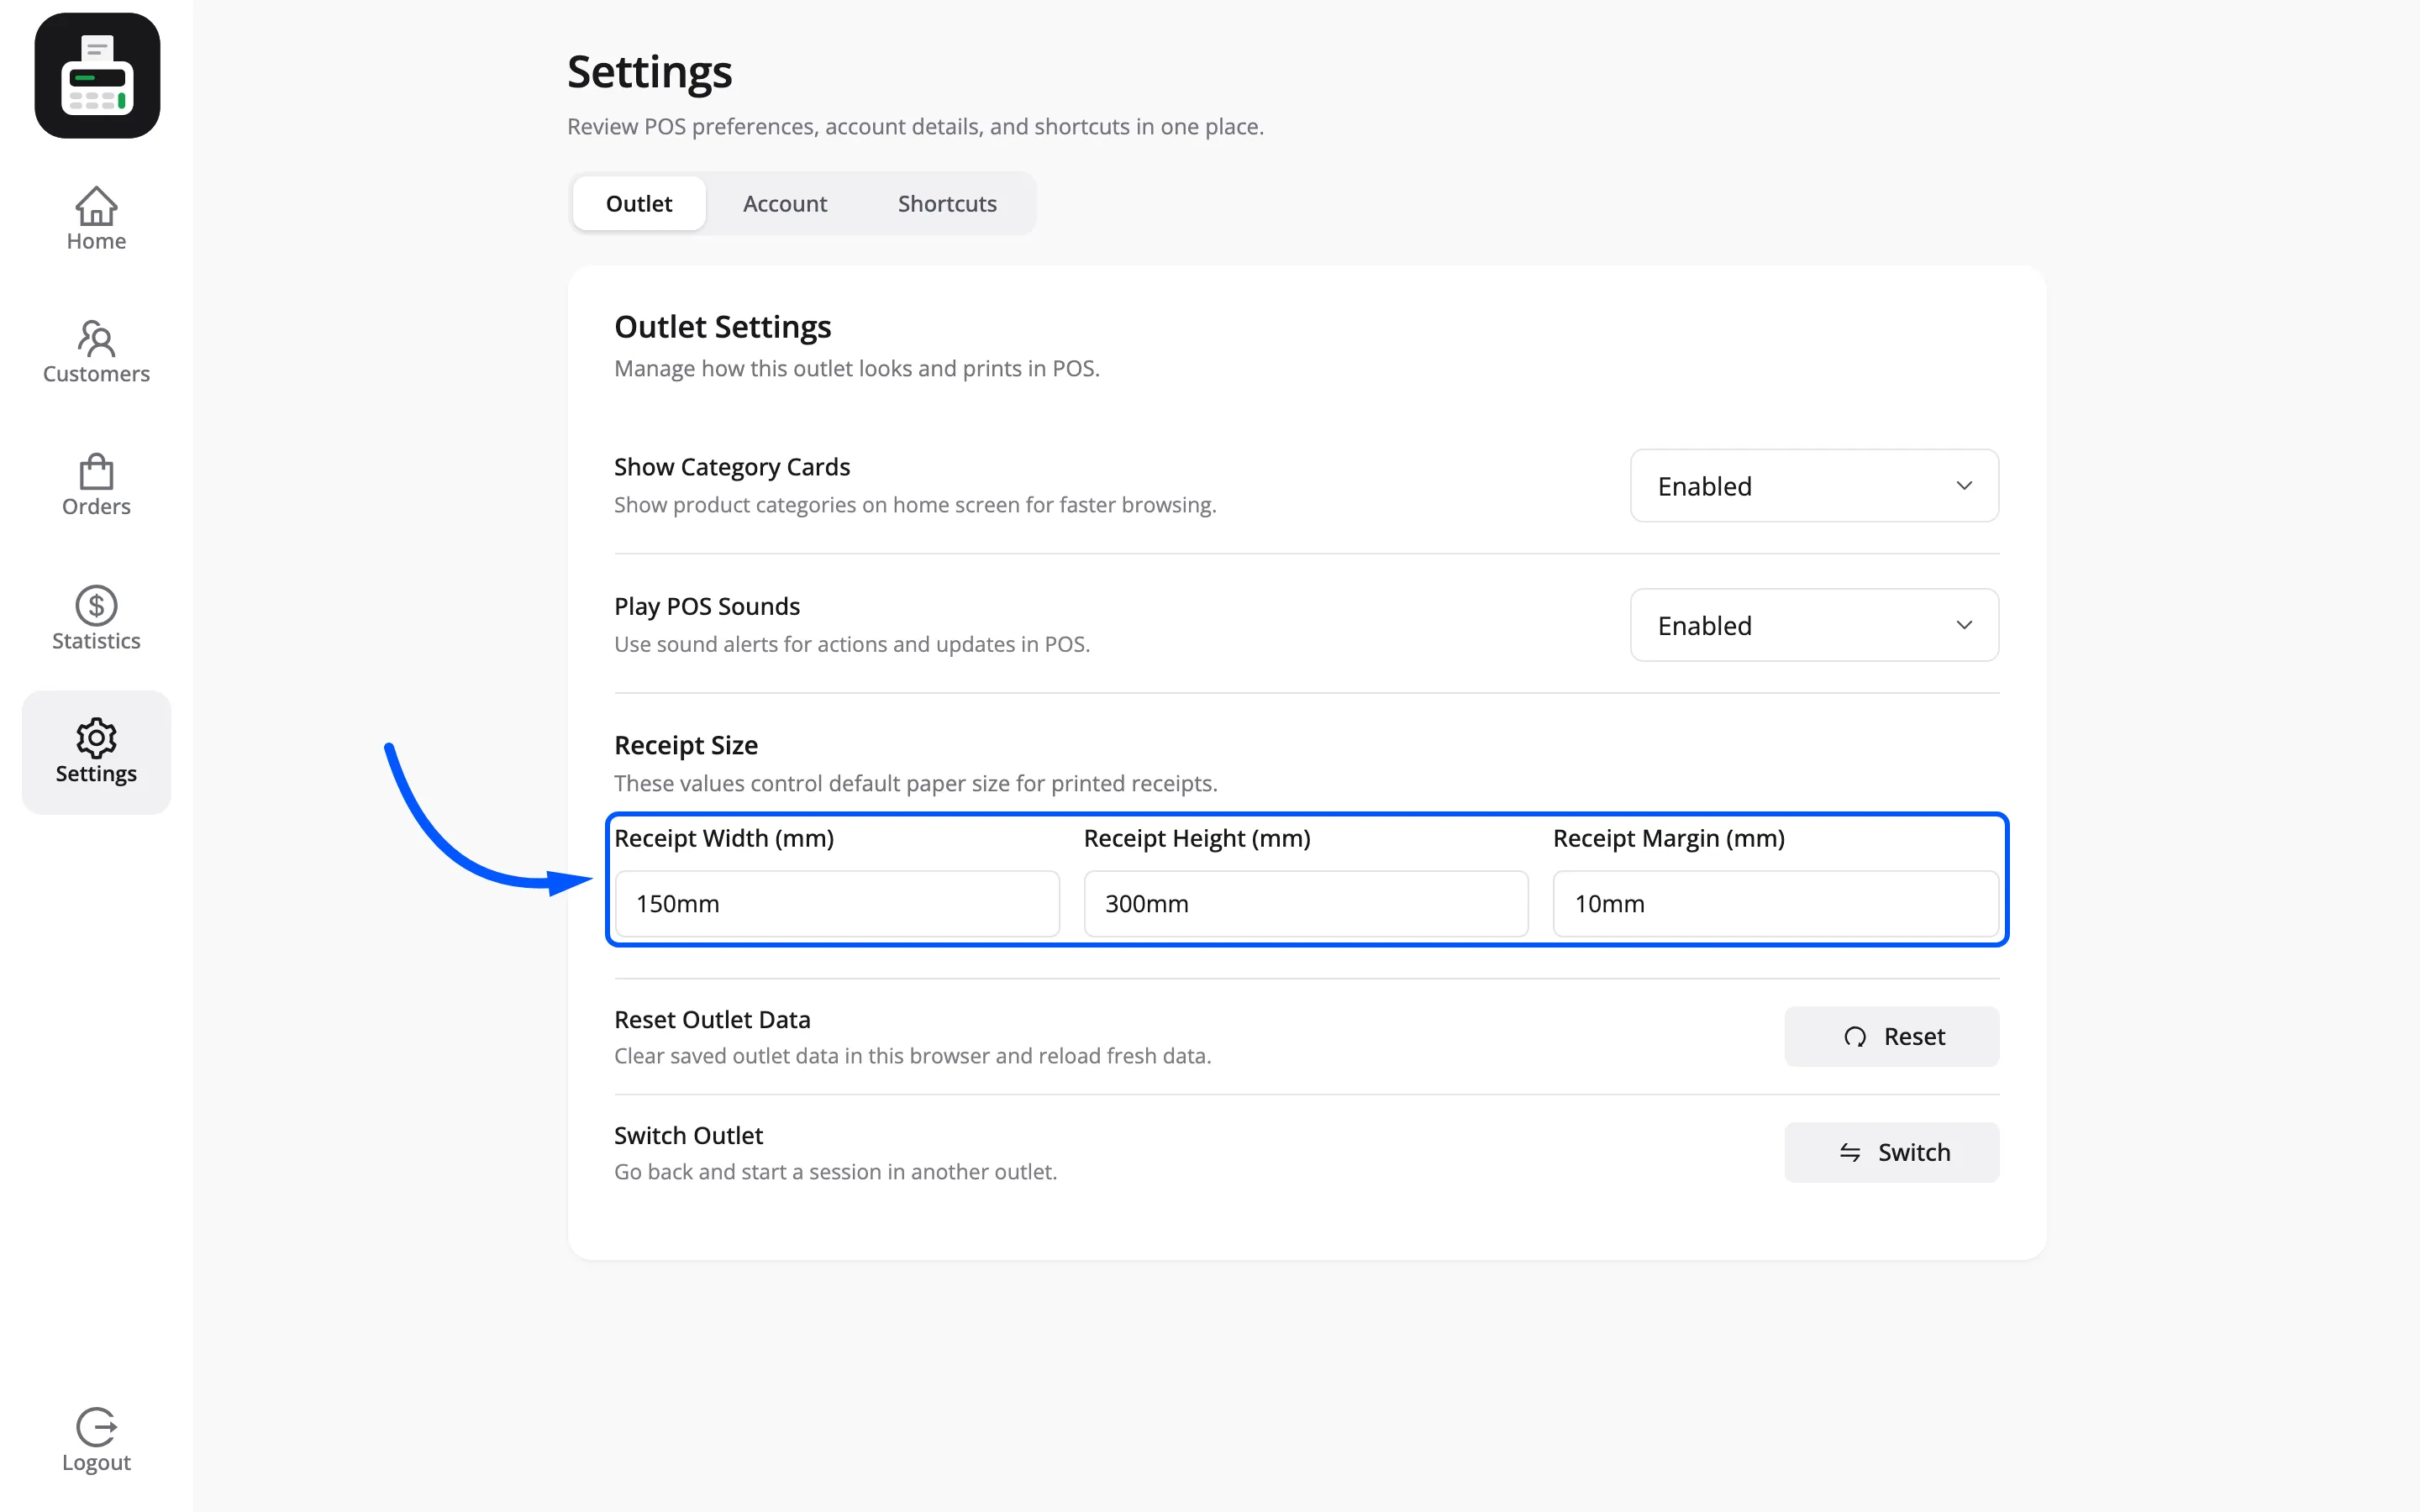
| Field | What it is for |
|---|---|
| Receipt Width (mm) | Your roll width, usually 80 or 58 |
| Receipt Height (mm) | Leave empty to let the receipt run to its own length |
| Receipt Margin (mm) | Keeps text from being clipped at the paper edge |
These are the per-terminal version of Configuration → Printer in the admin. Set the site default there; use these when one terminal has a different printer from the rest.
Reset Outlet Data and Switch Outlet
Section titled “Reset Outlet Data and Switch Outlet”Two actions at the foot of the screen.
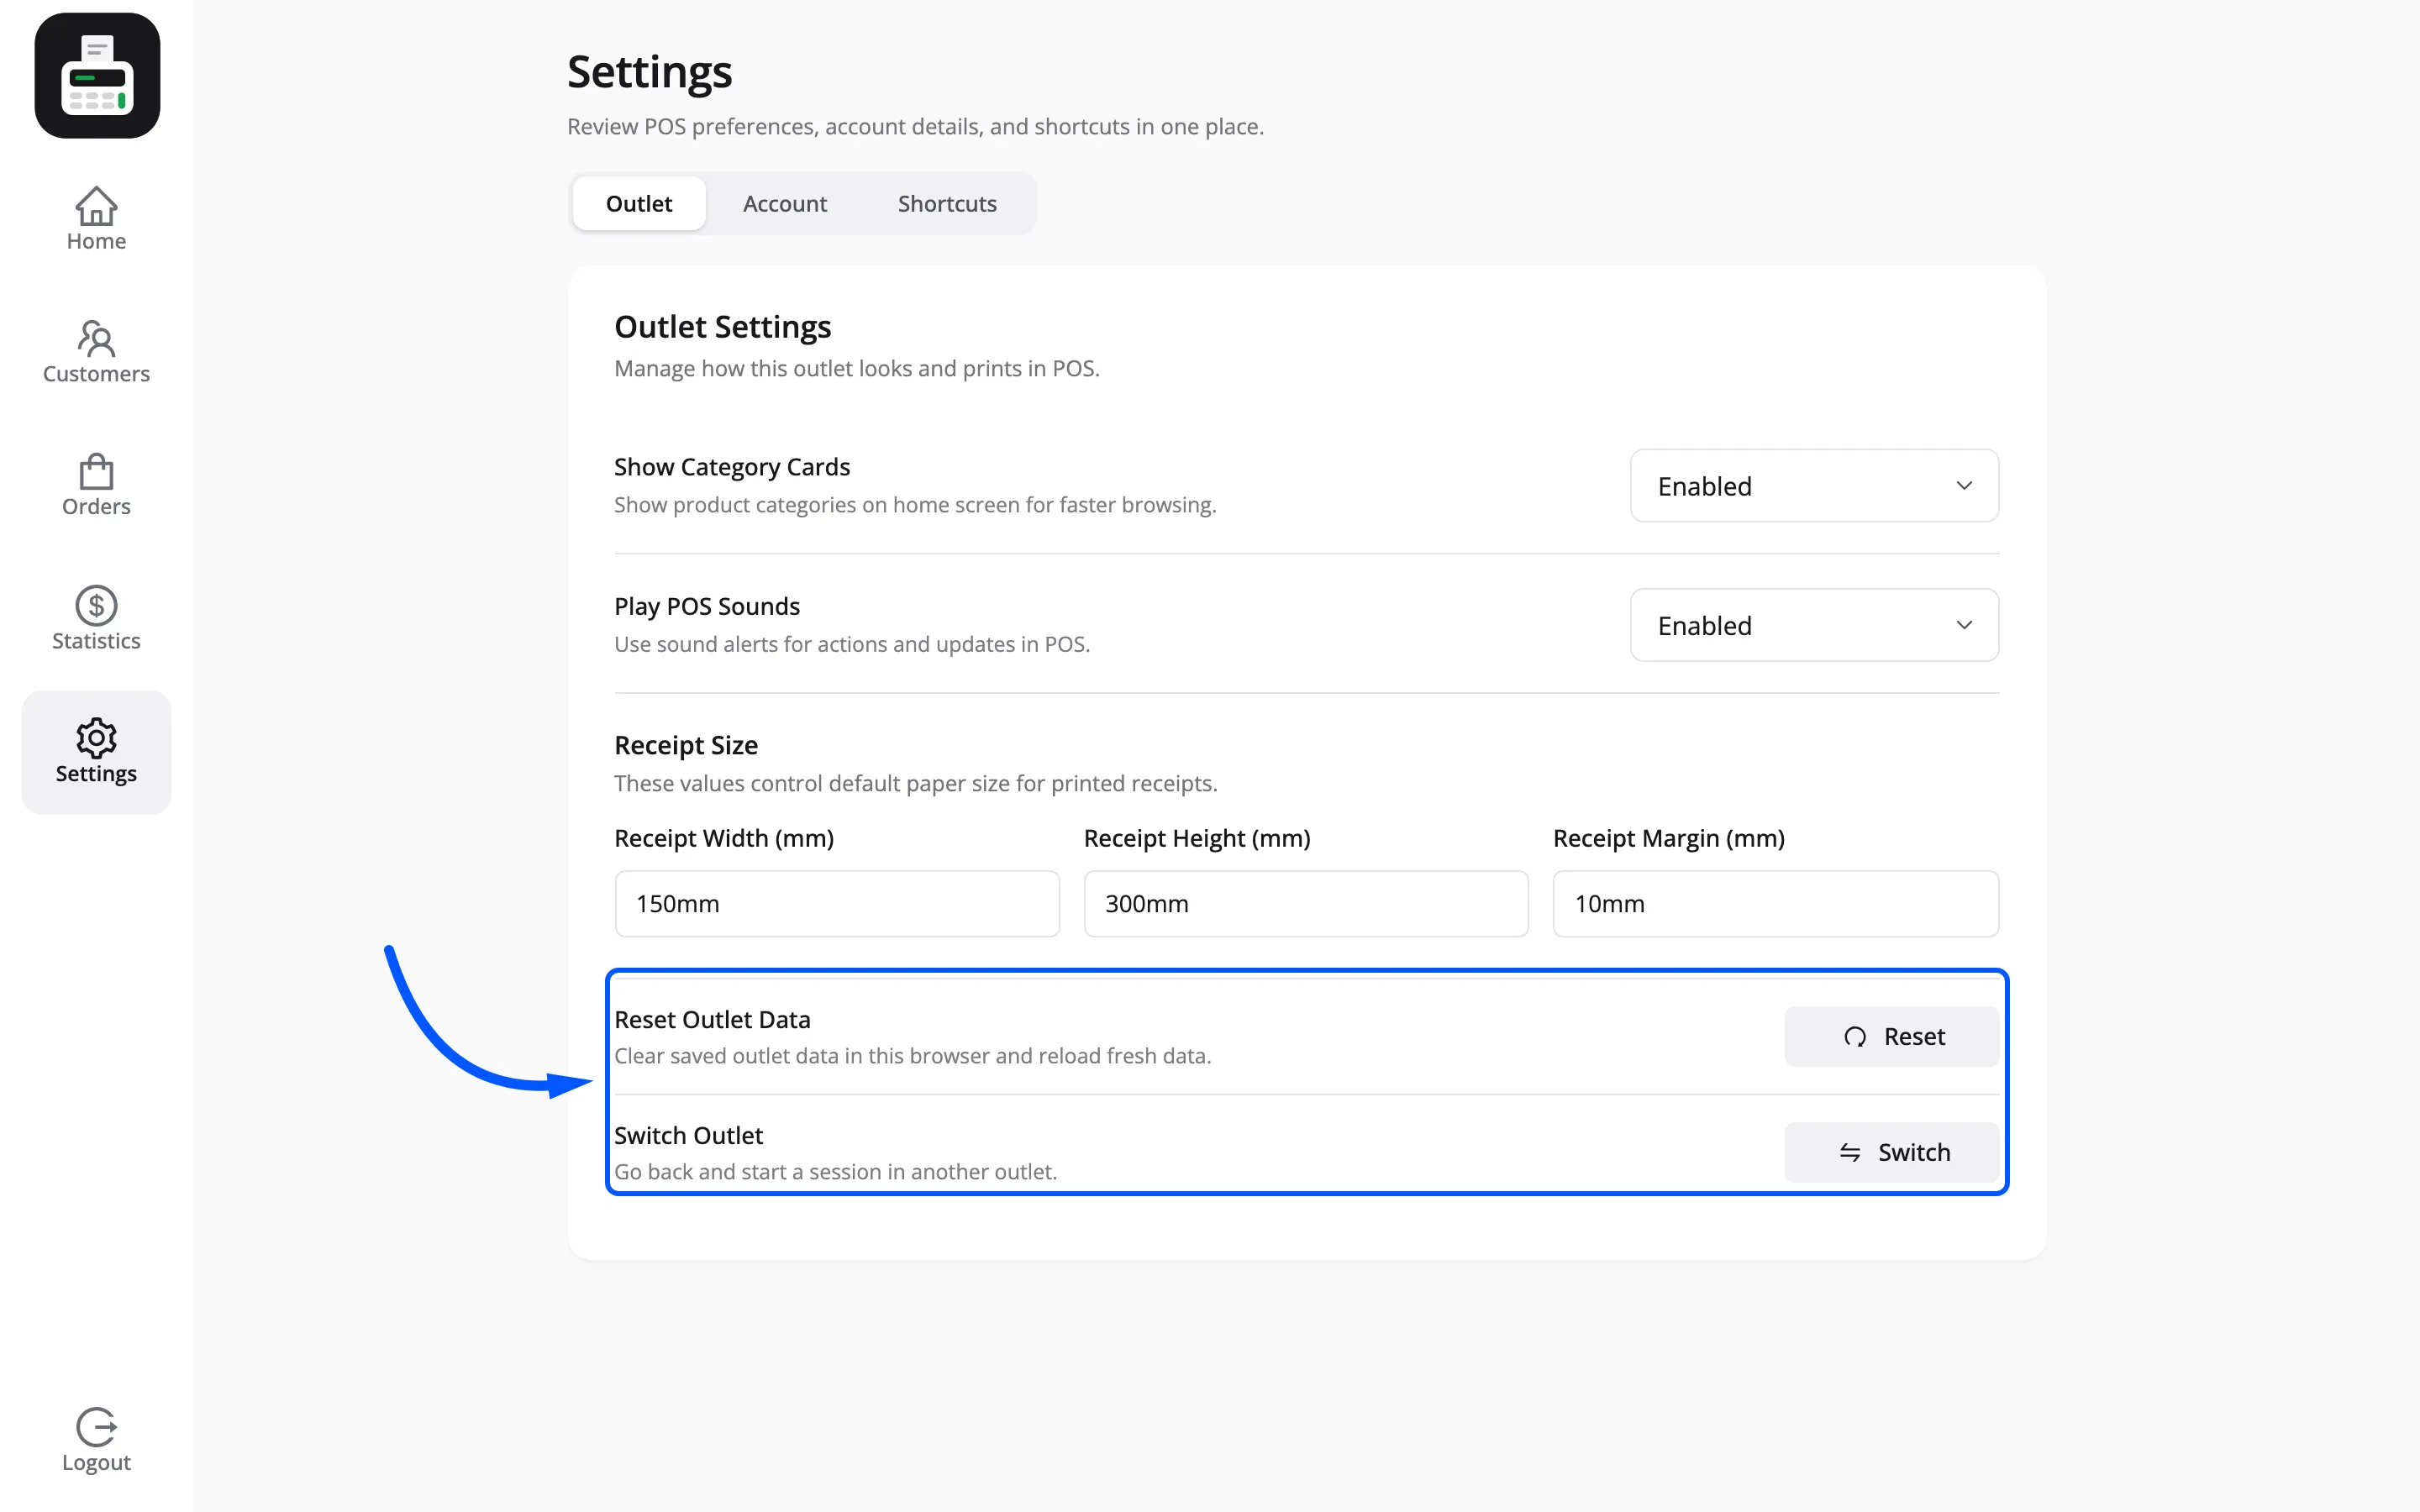
- Reset clears this browser’s saved copy of the outlet and reloads it fresh. Use it when a product, price or setting changed in the admin and the terminal is still showing the old one.
- Switch returns to the outlet picker so this terminal can open a different outlet. Use it on a device that covers two counters, or after an outlet is renamed.
Both need a connection, and both say so if there is not one:
You need to be online to switch outlets.
Both clear the held carts on this terminal, and neither warns you first. Reset and Switch empty the browser’s cart table, so a table order or a held sale is gone. Close or resume anything held before you press either.
Queued offline orders do survive both, which is the one piece of good news here. They are kept deliberately, so a Reset while the line is down cannot throw away a sale. Sync them anyway before you walk away from the terminal.