

How to Run a Restaurant with Tables
Restaurant mode adds three things to the POS: a floor plan, a table picker in the cart, and a Dine in / Take Away choice. Everything else works the same.
All of it is in the free version.
Step 1: Define your tables
Section titled “Step 1: Define your tables”Go to DevDiggers Plugins → MultiPOS → Configuration → Tables.
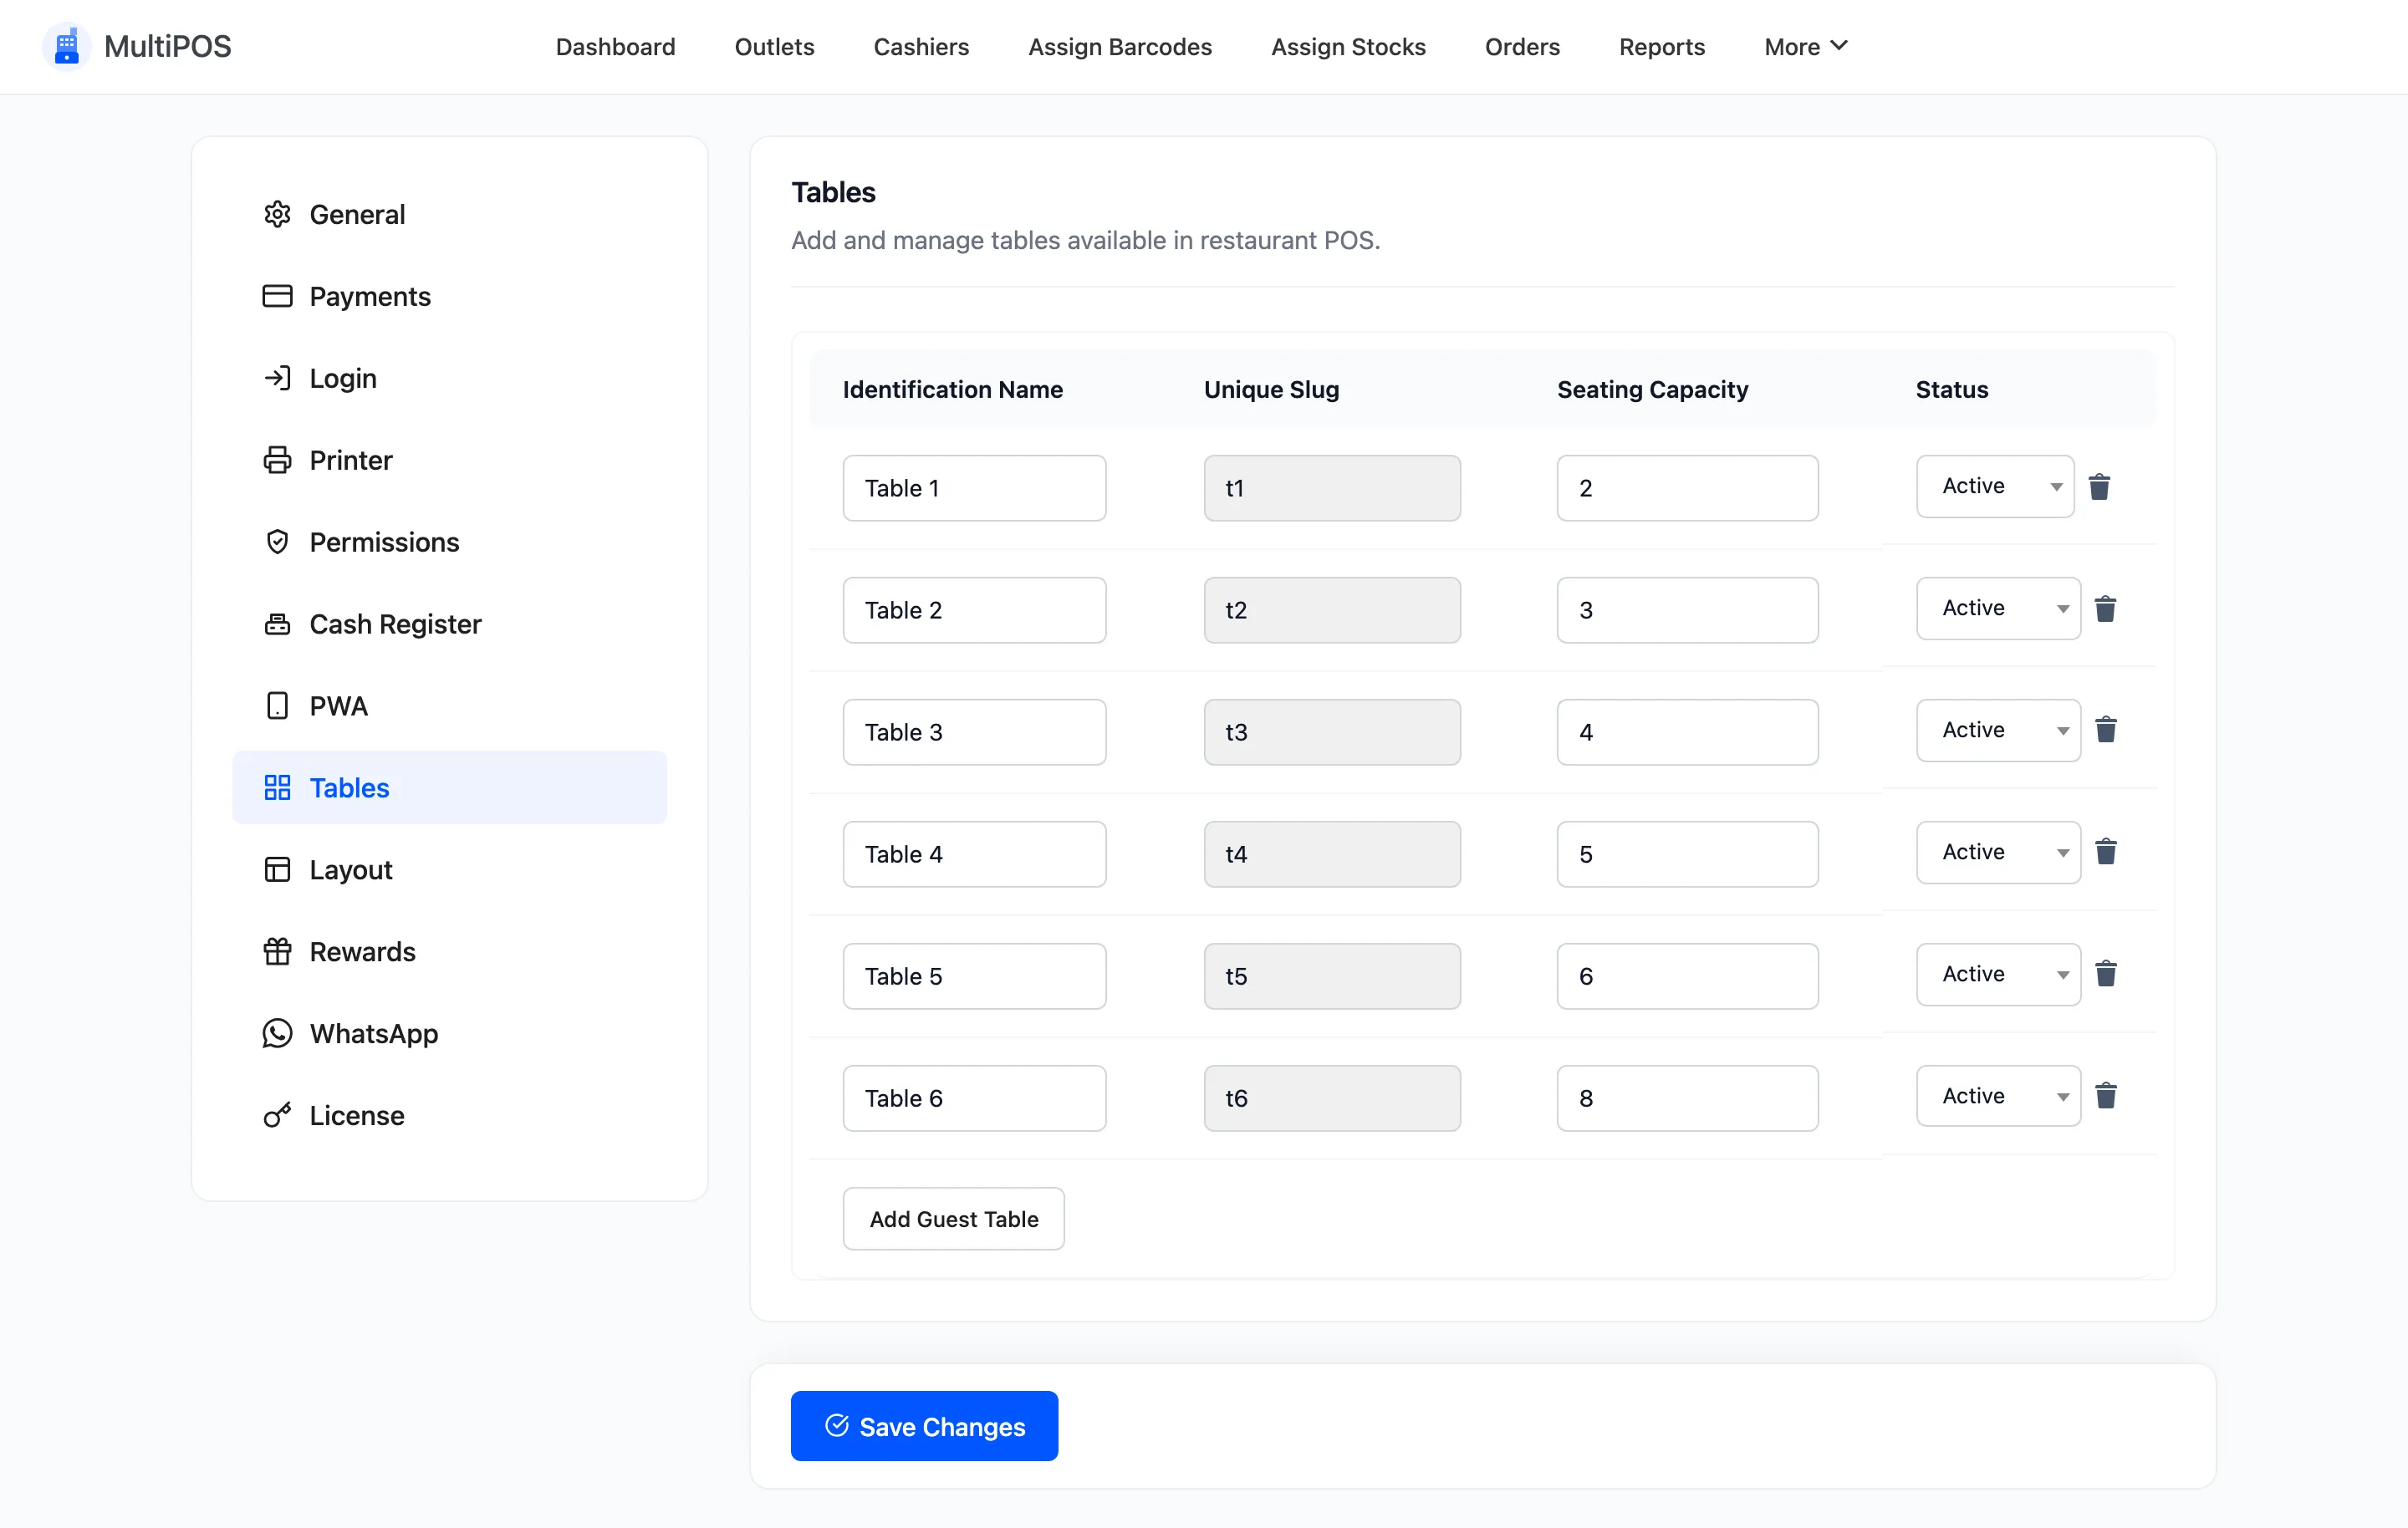
The list is empty on a new install. Click Add Guest Table for each one.
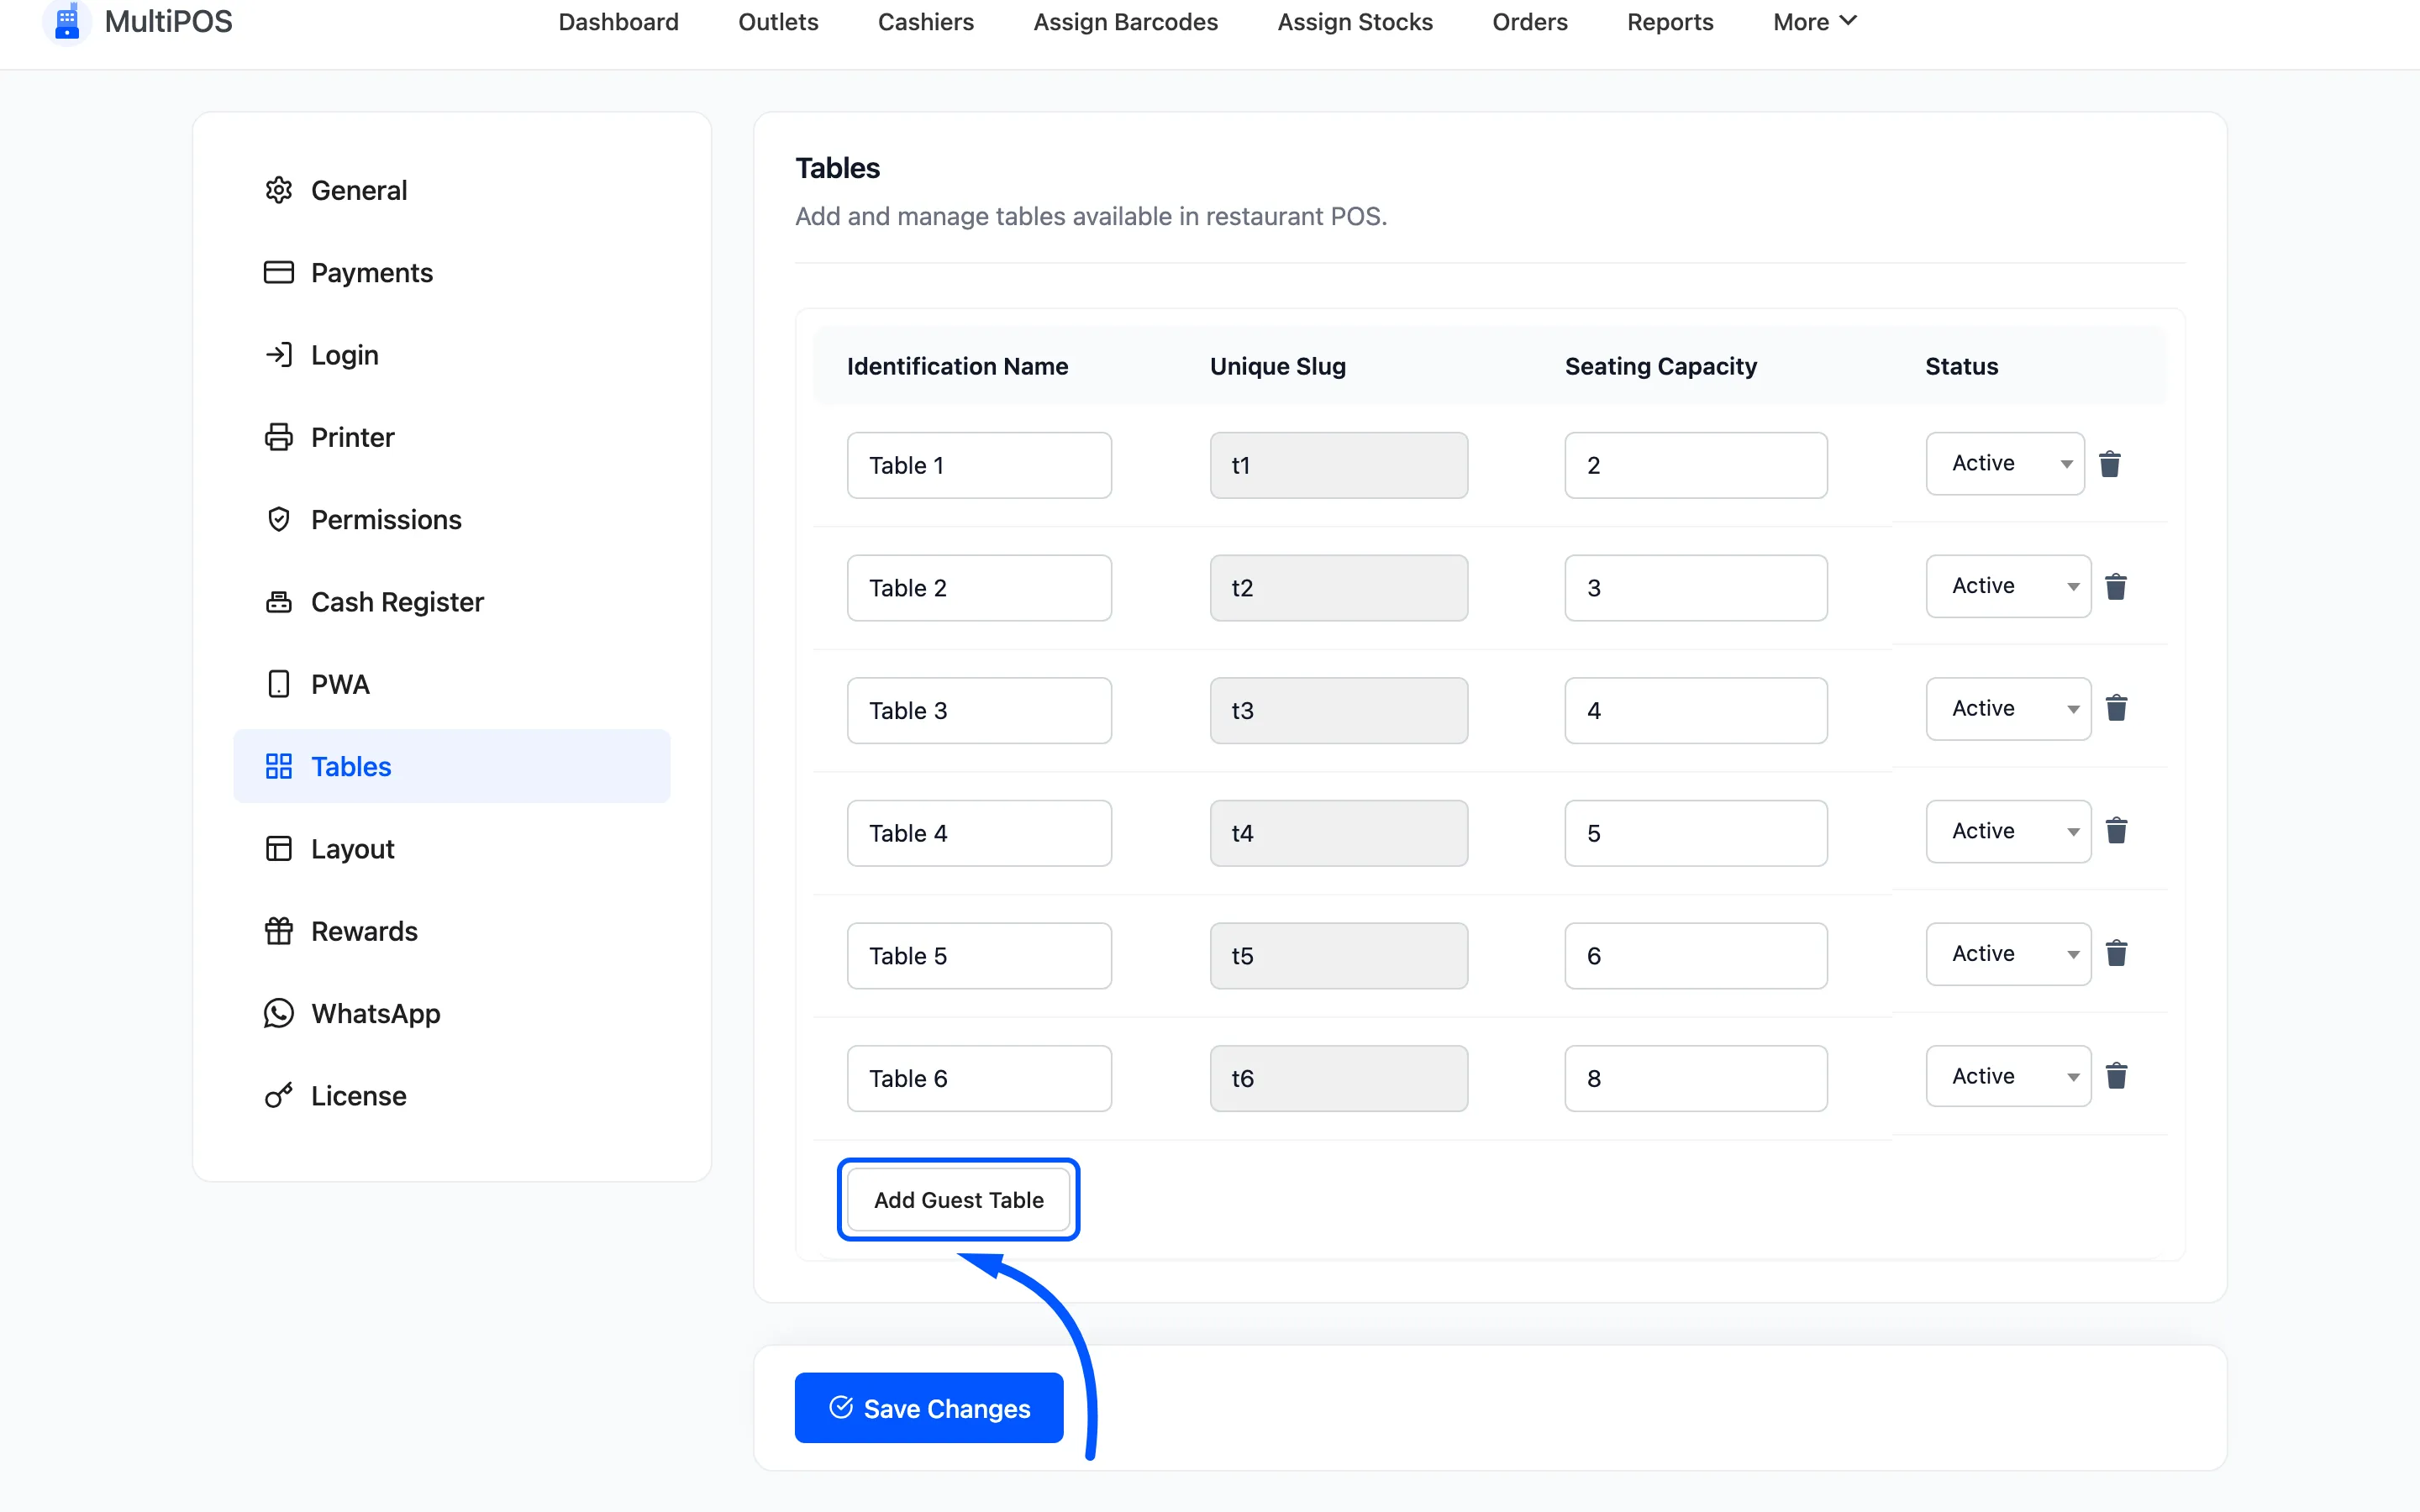
Give each a name, a seat count and a status of Active.
Name them the way your staff already say them. If the team calls it “the corner booth”, call it that here. A table numbered 07 that nobody calls 07 slows service down every shift.
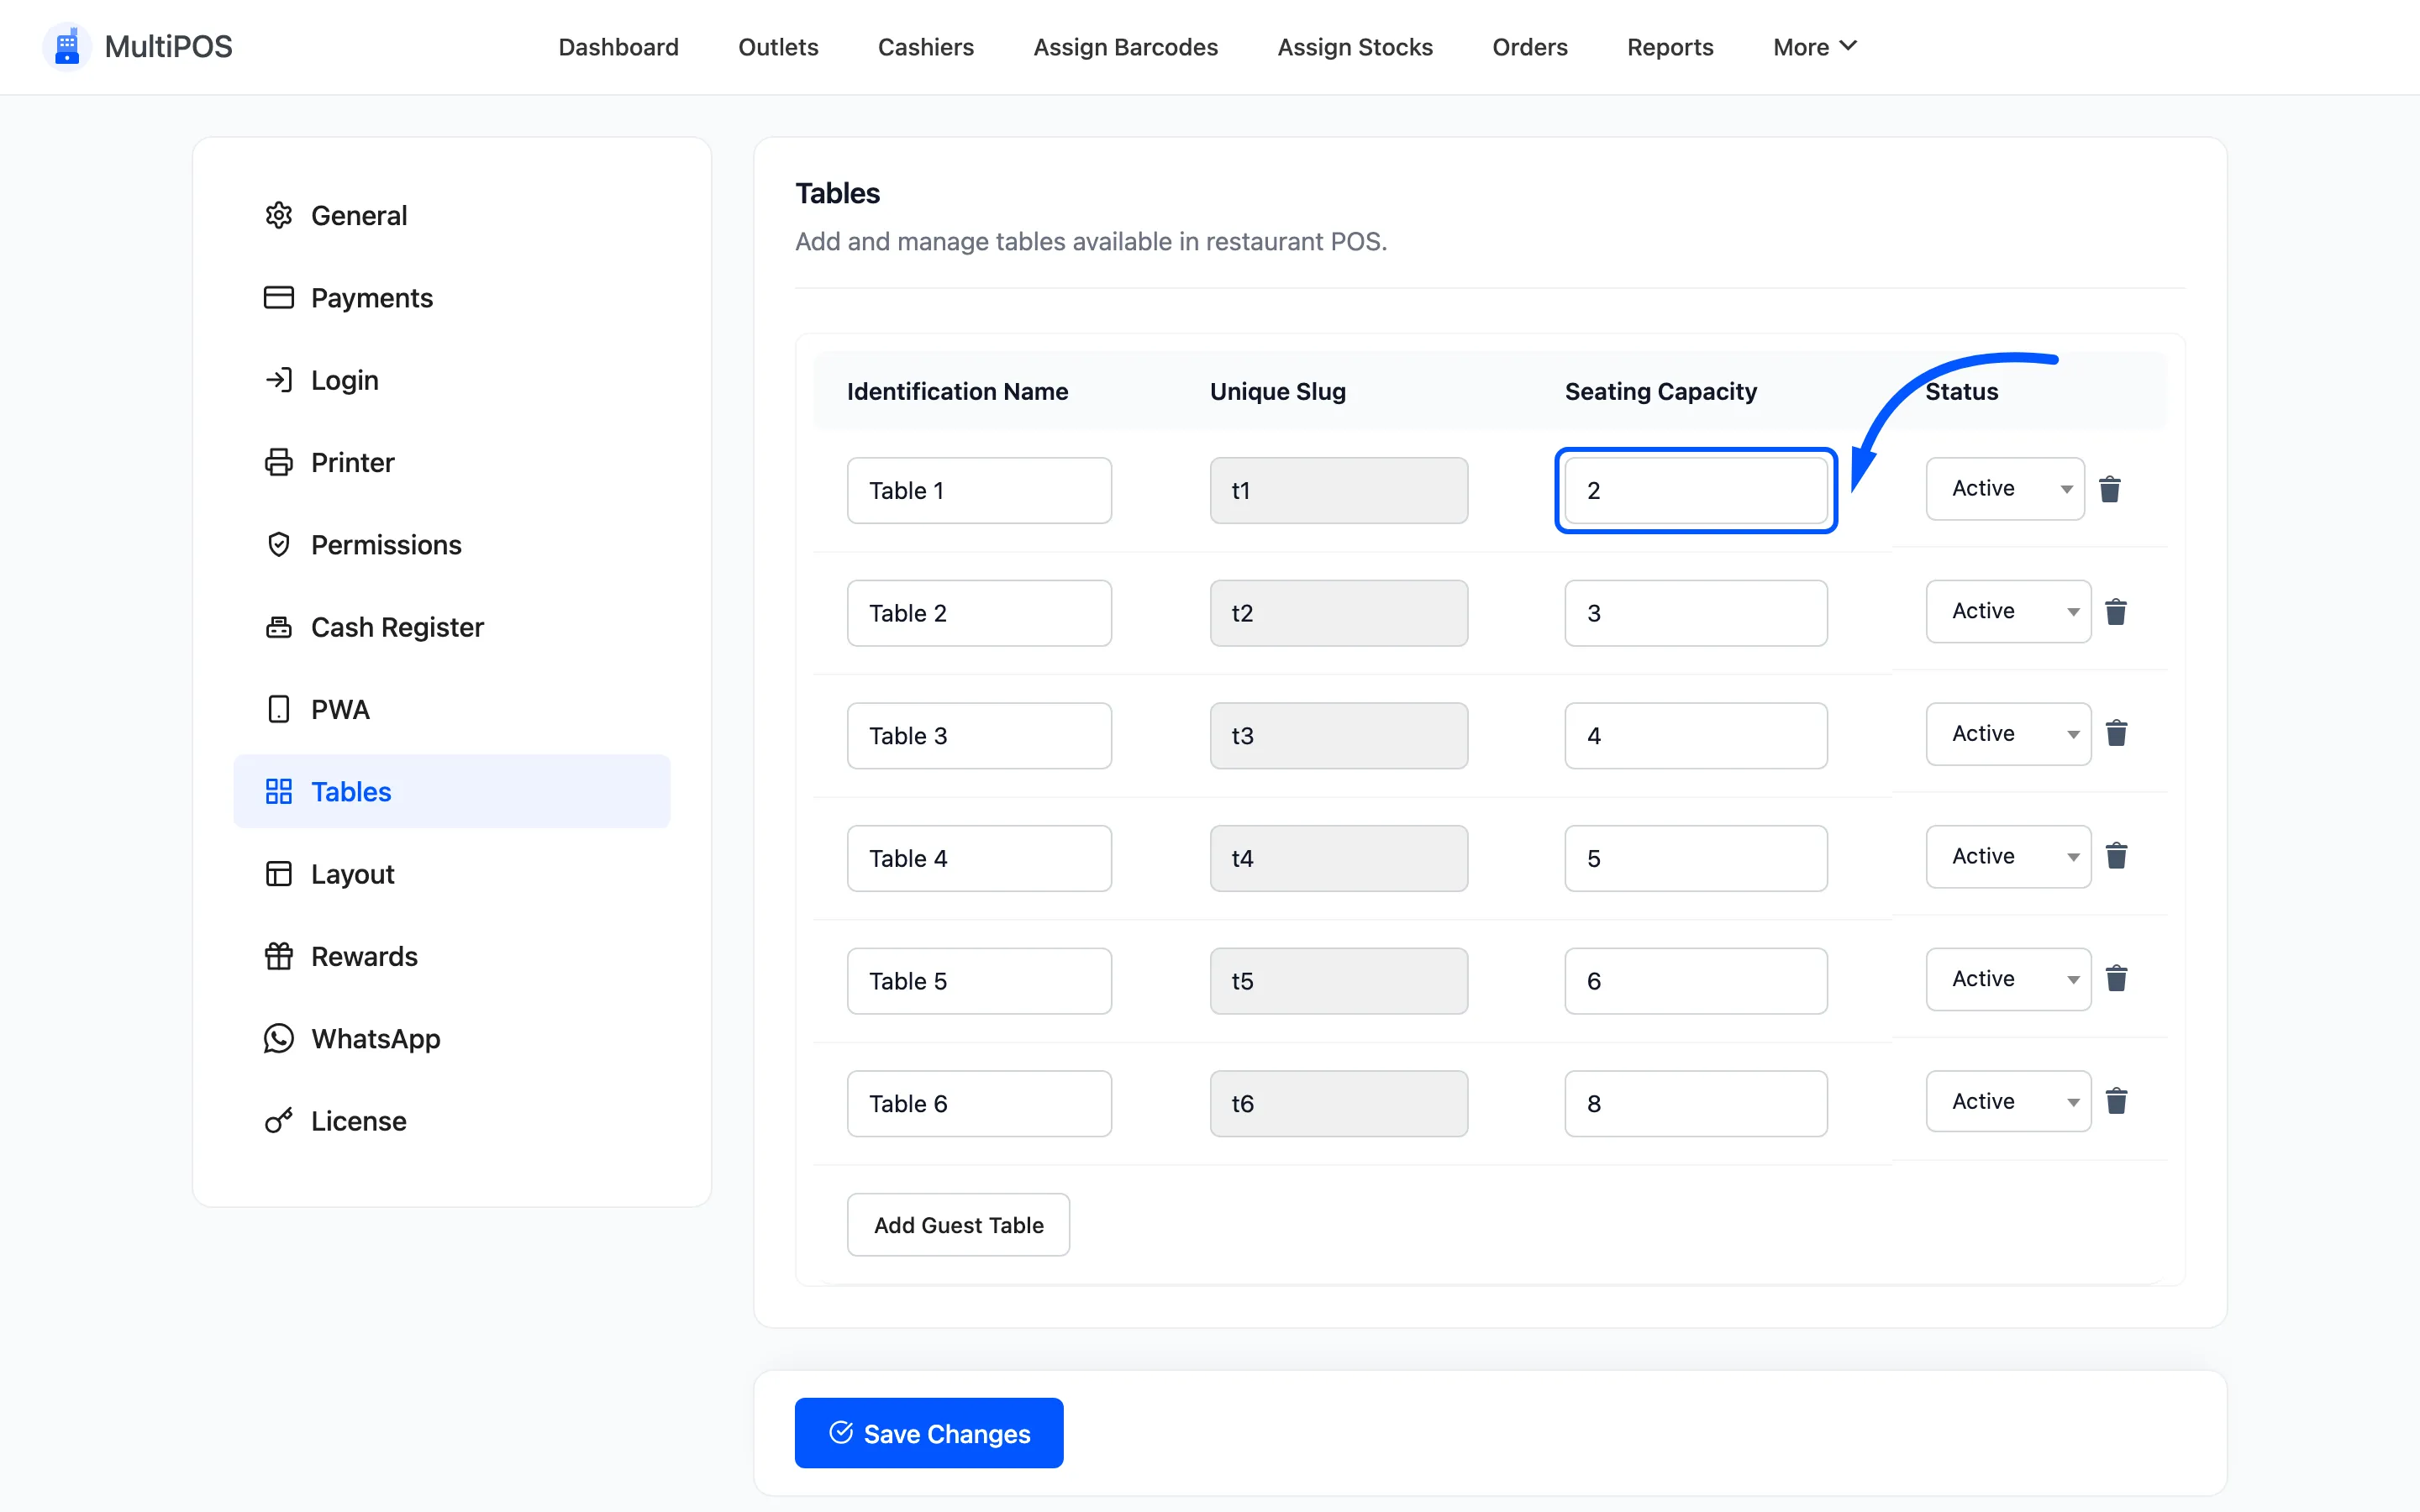
Seating Capacity is what the terminal’s table search matches on. A cashier types 4 and gets
every four-seat table, which is how you seat a party without walking the floor. Enter it honestly: a
six-seat table entered as four never shows up for the party it could take.
Click Save Changes.
Step 2: Switch the outlet to restaurant mode
Section titled “Step 2: Switch the outlet to restaurant mode”Go to MultiPOS → Outlet and set Operation Mode to Restaurant/Cafe.
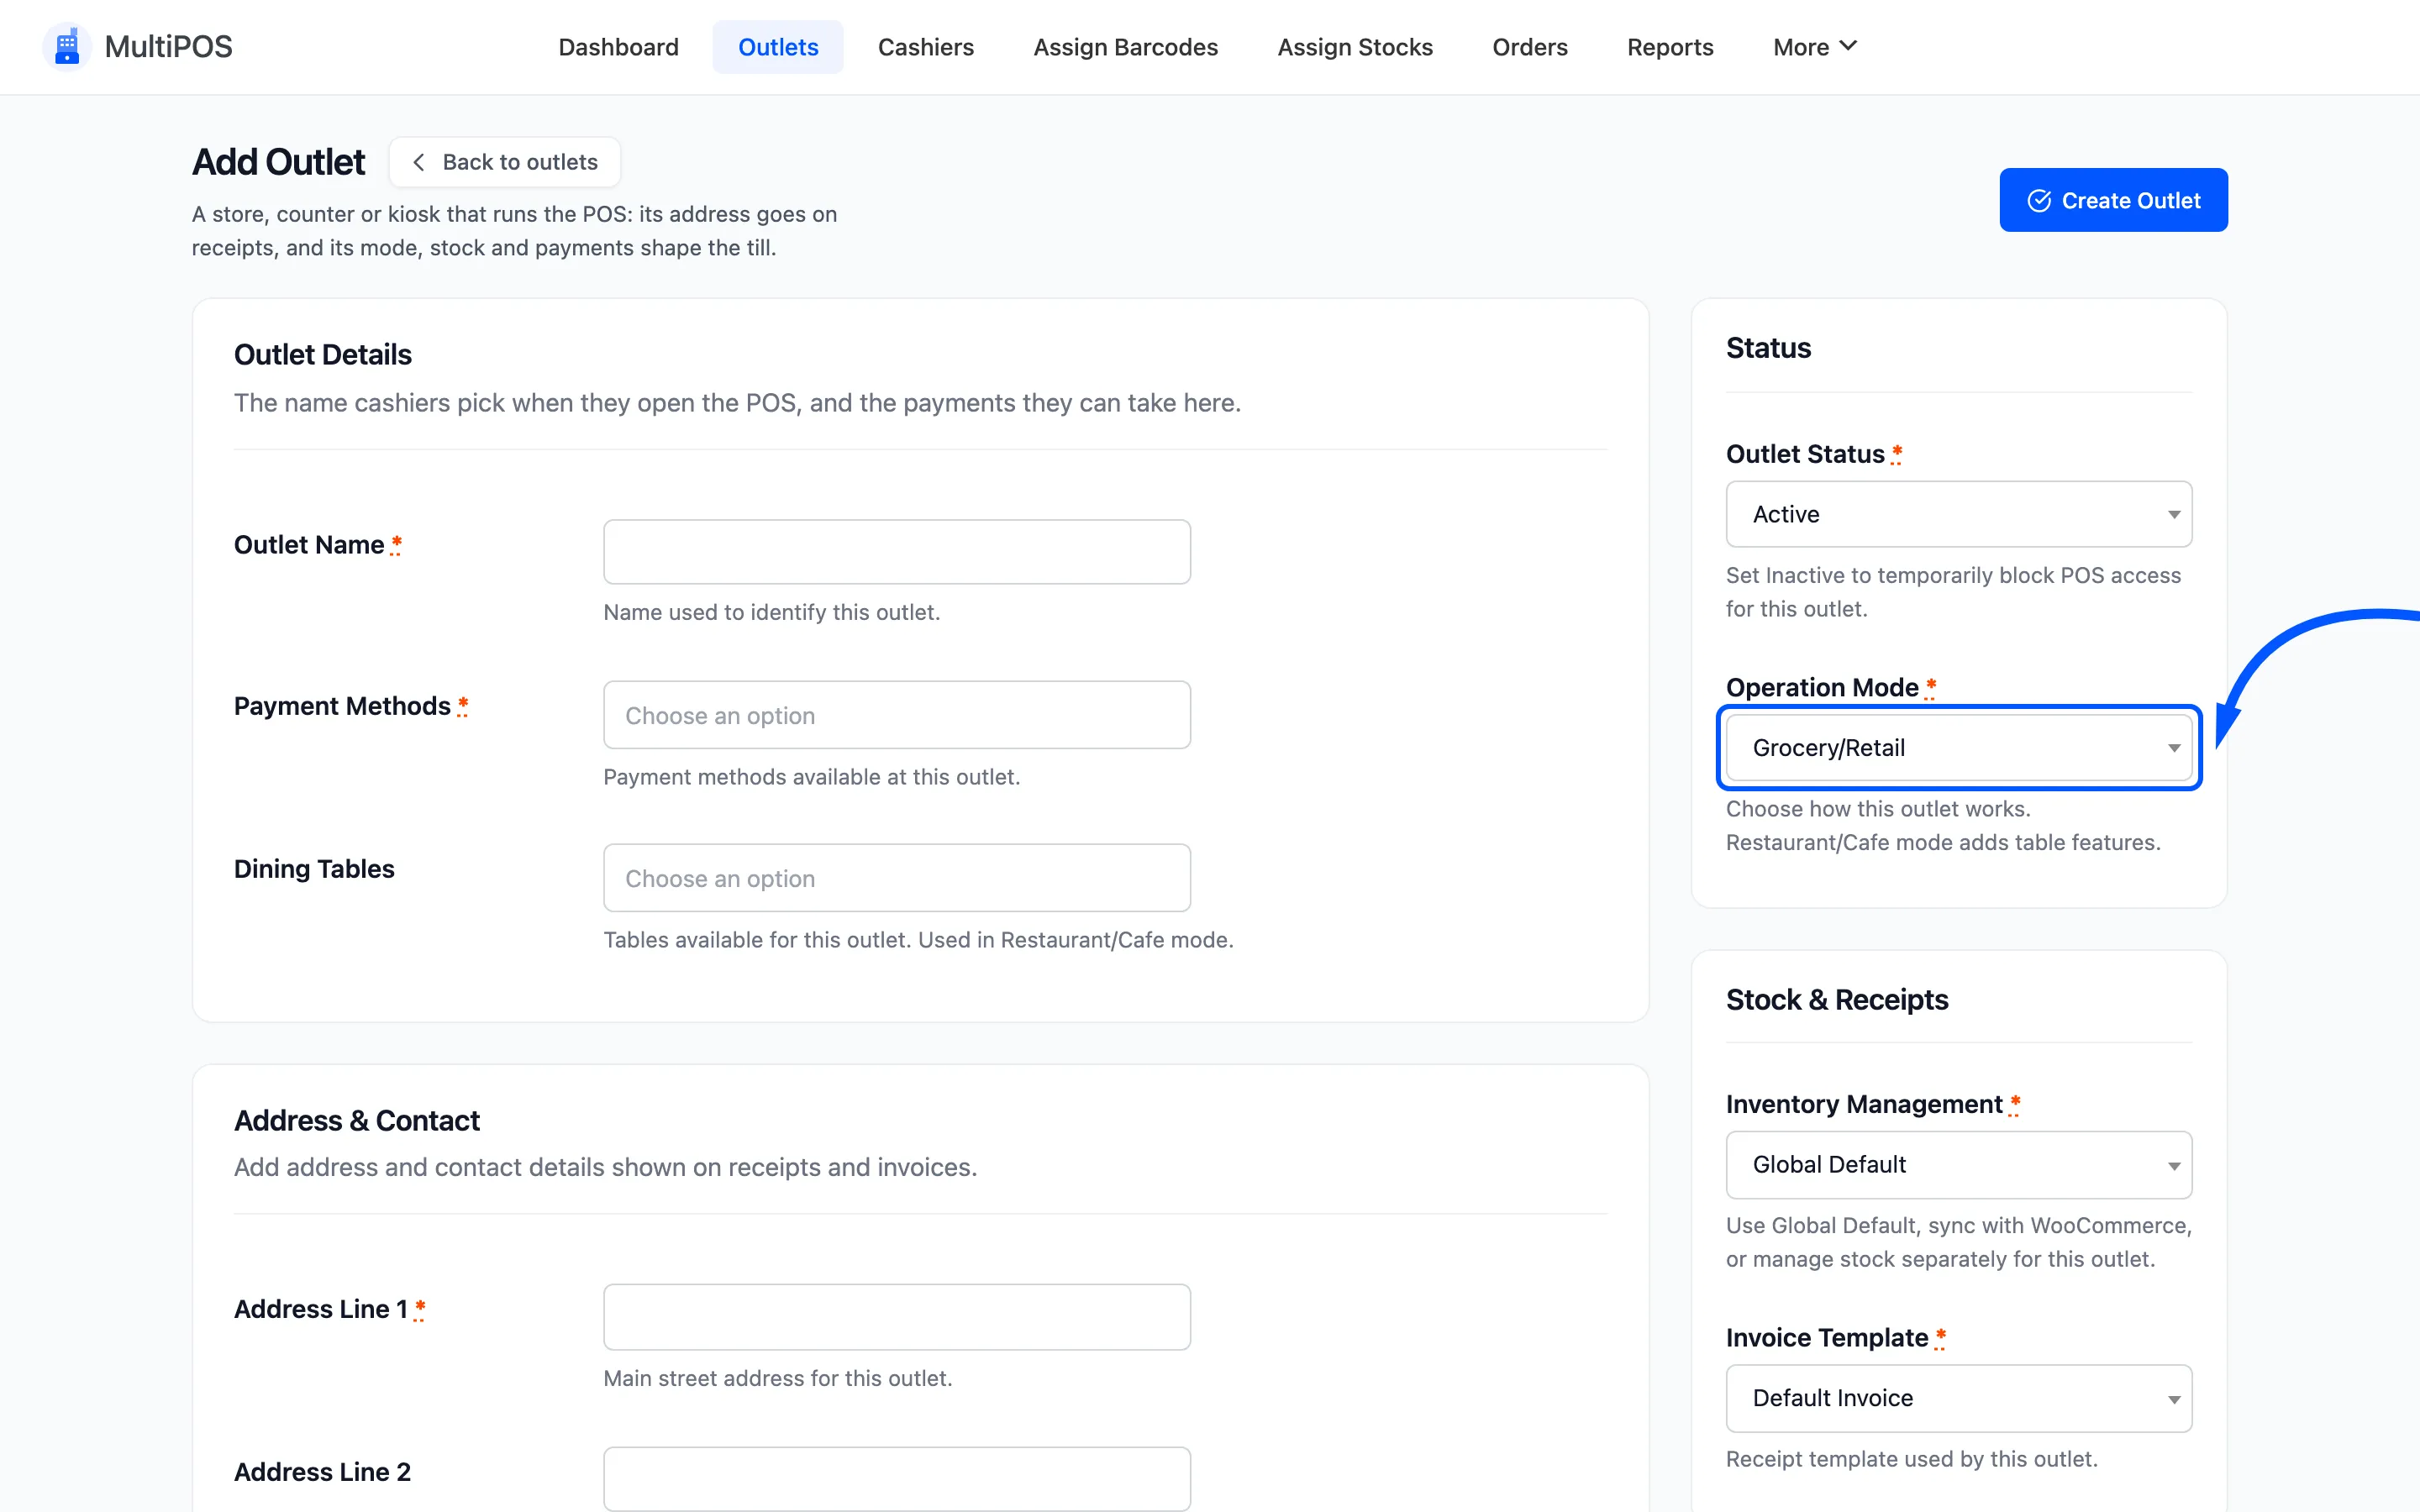
This is the switch that makes the rest appear. In Retail/Grocery Store mode the tables field is ignored entirely and the floor plan never renders.
Step 3: Assign the tables to the outlet
Section titled “Step 3: Assign the tables to the outlet”In the same form, pick your tables in Dining Tables.
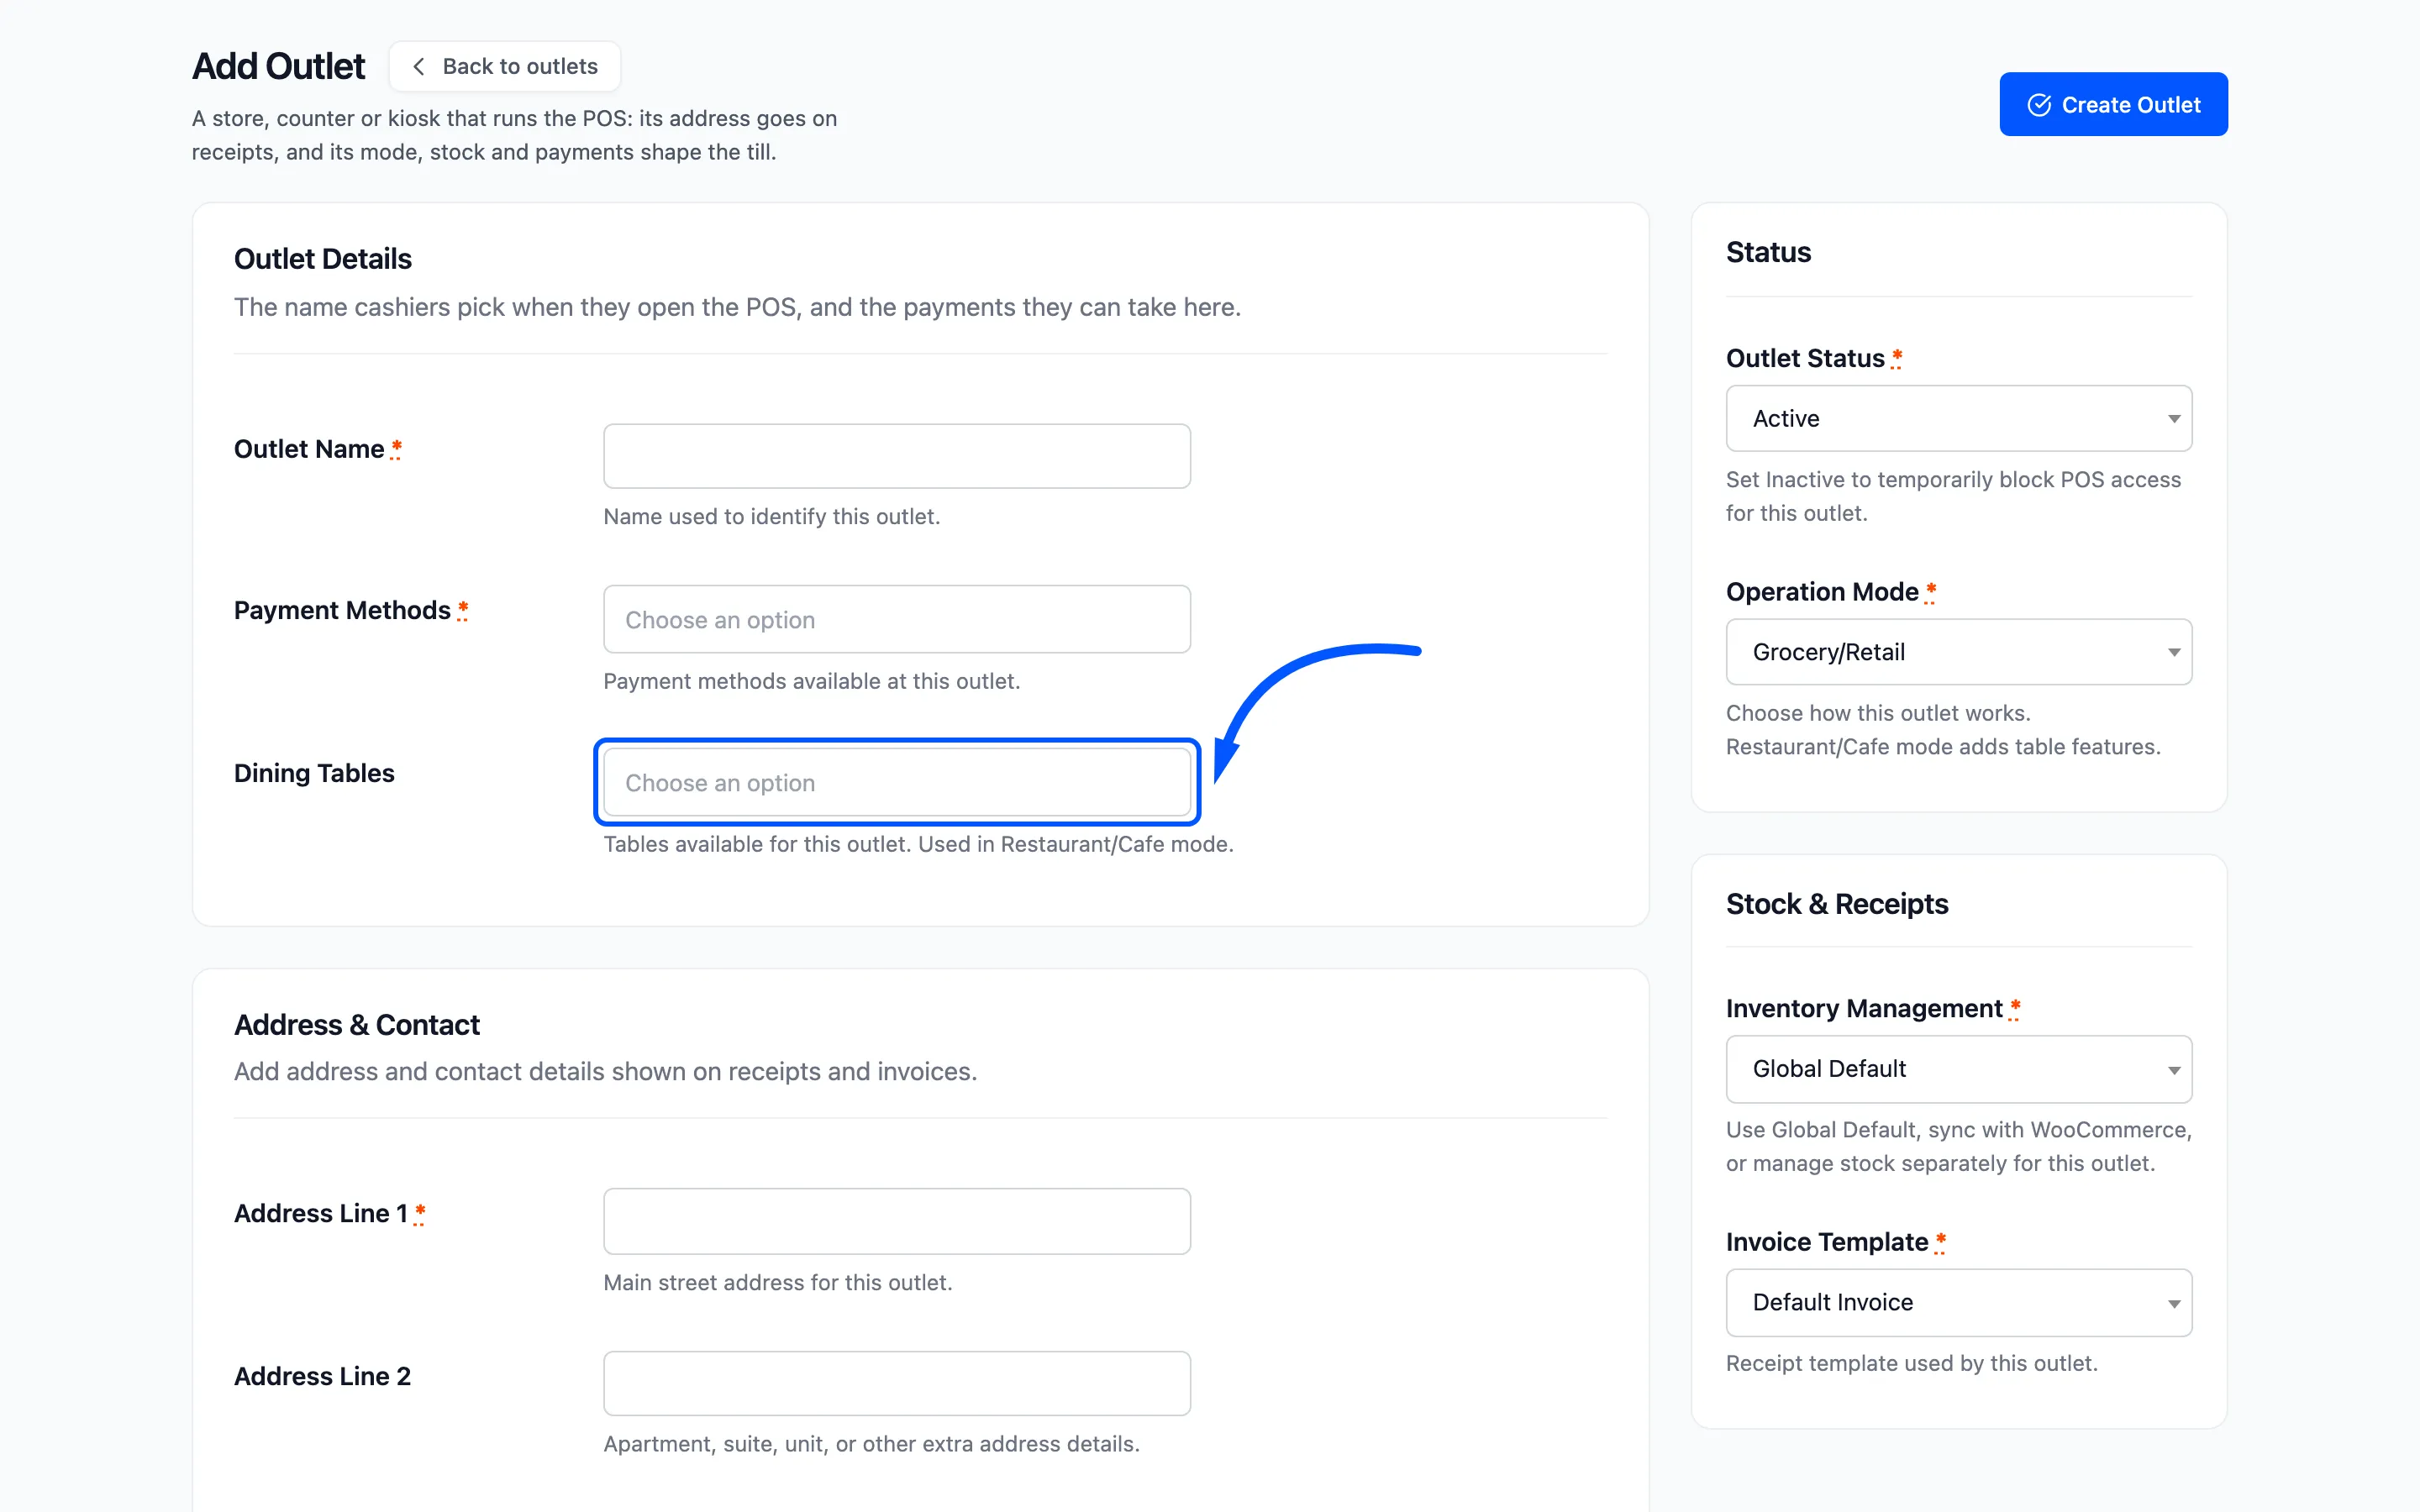
Only Active tables can be selected. Adding a table under Configuration does not put it on the floor plan until it is assigned here.
Click Save Outlet.
Step 4: Open the floor plan
Section titled “Step 4: Open the floor plan”Open the terminal. A Tables icon has appeared in the sidebar.
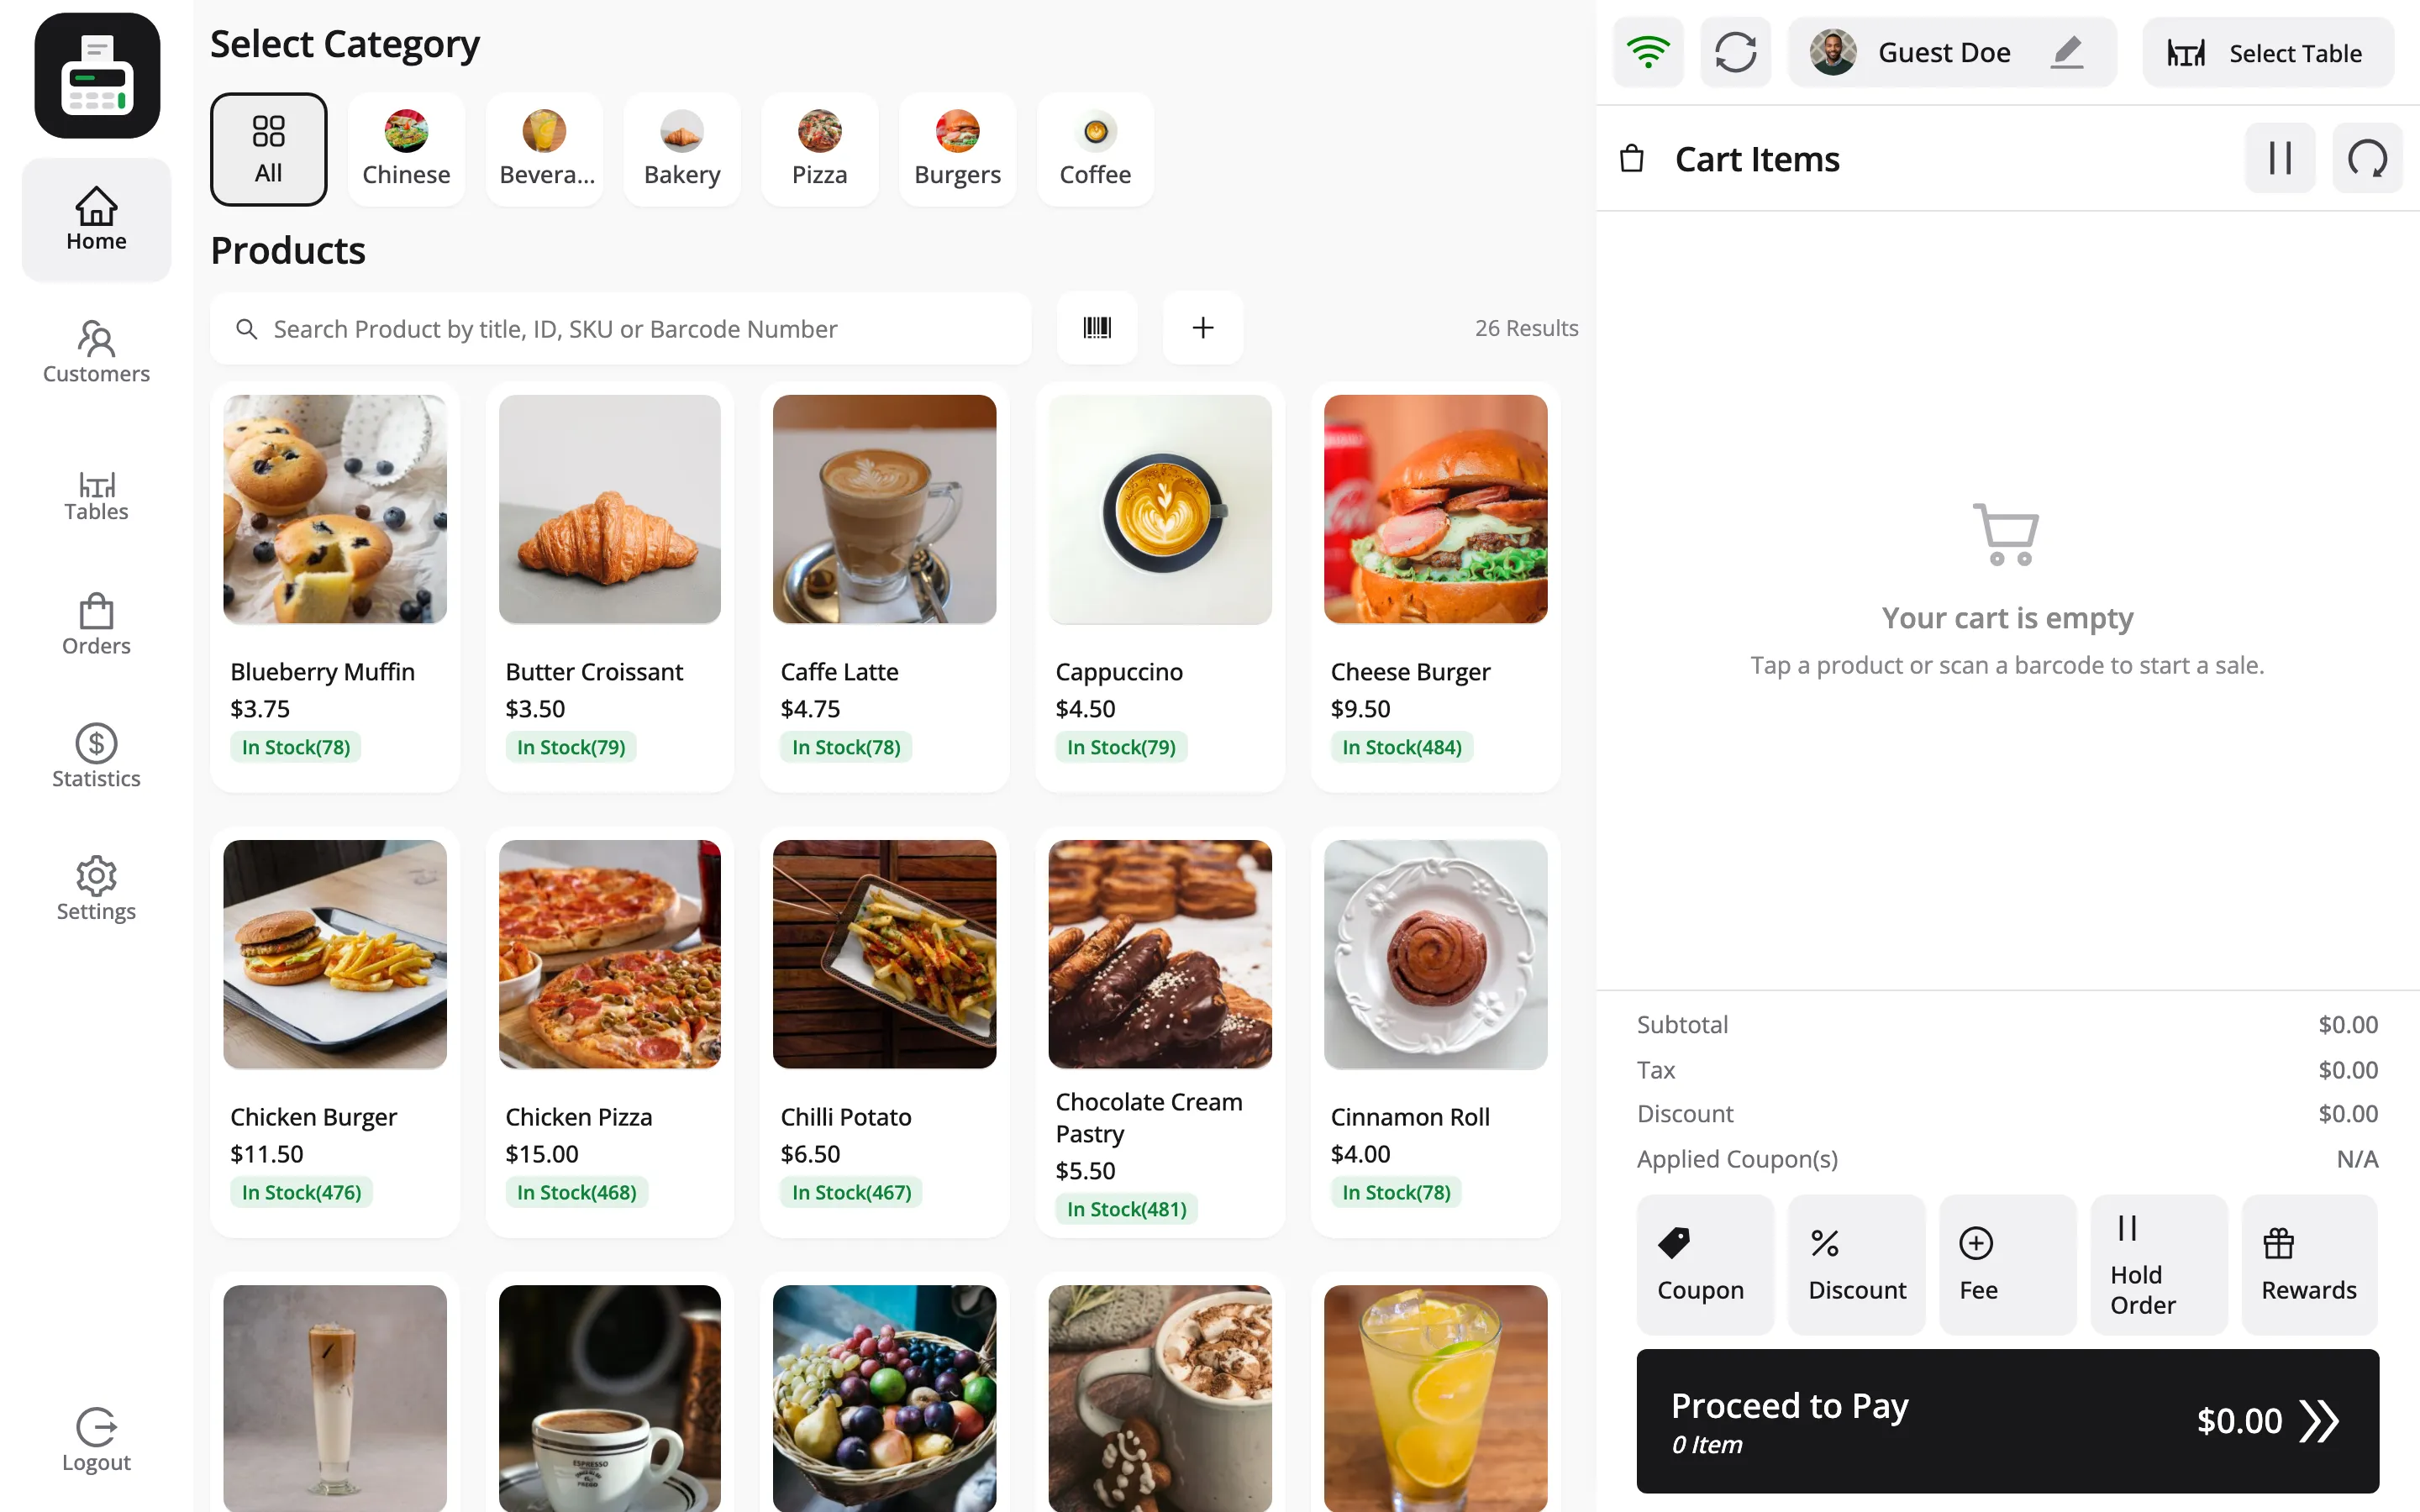
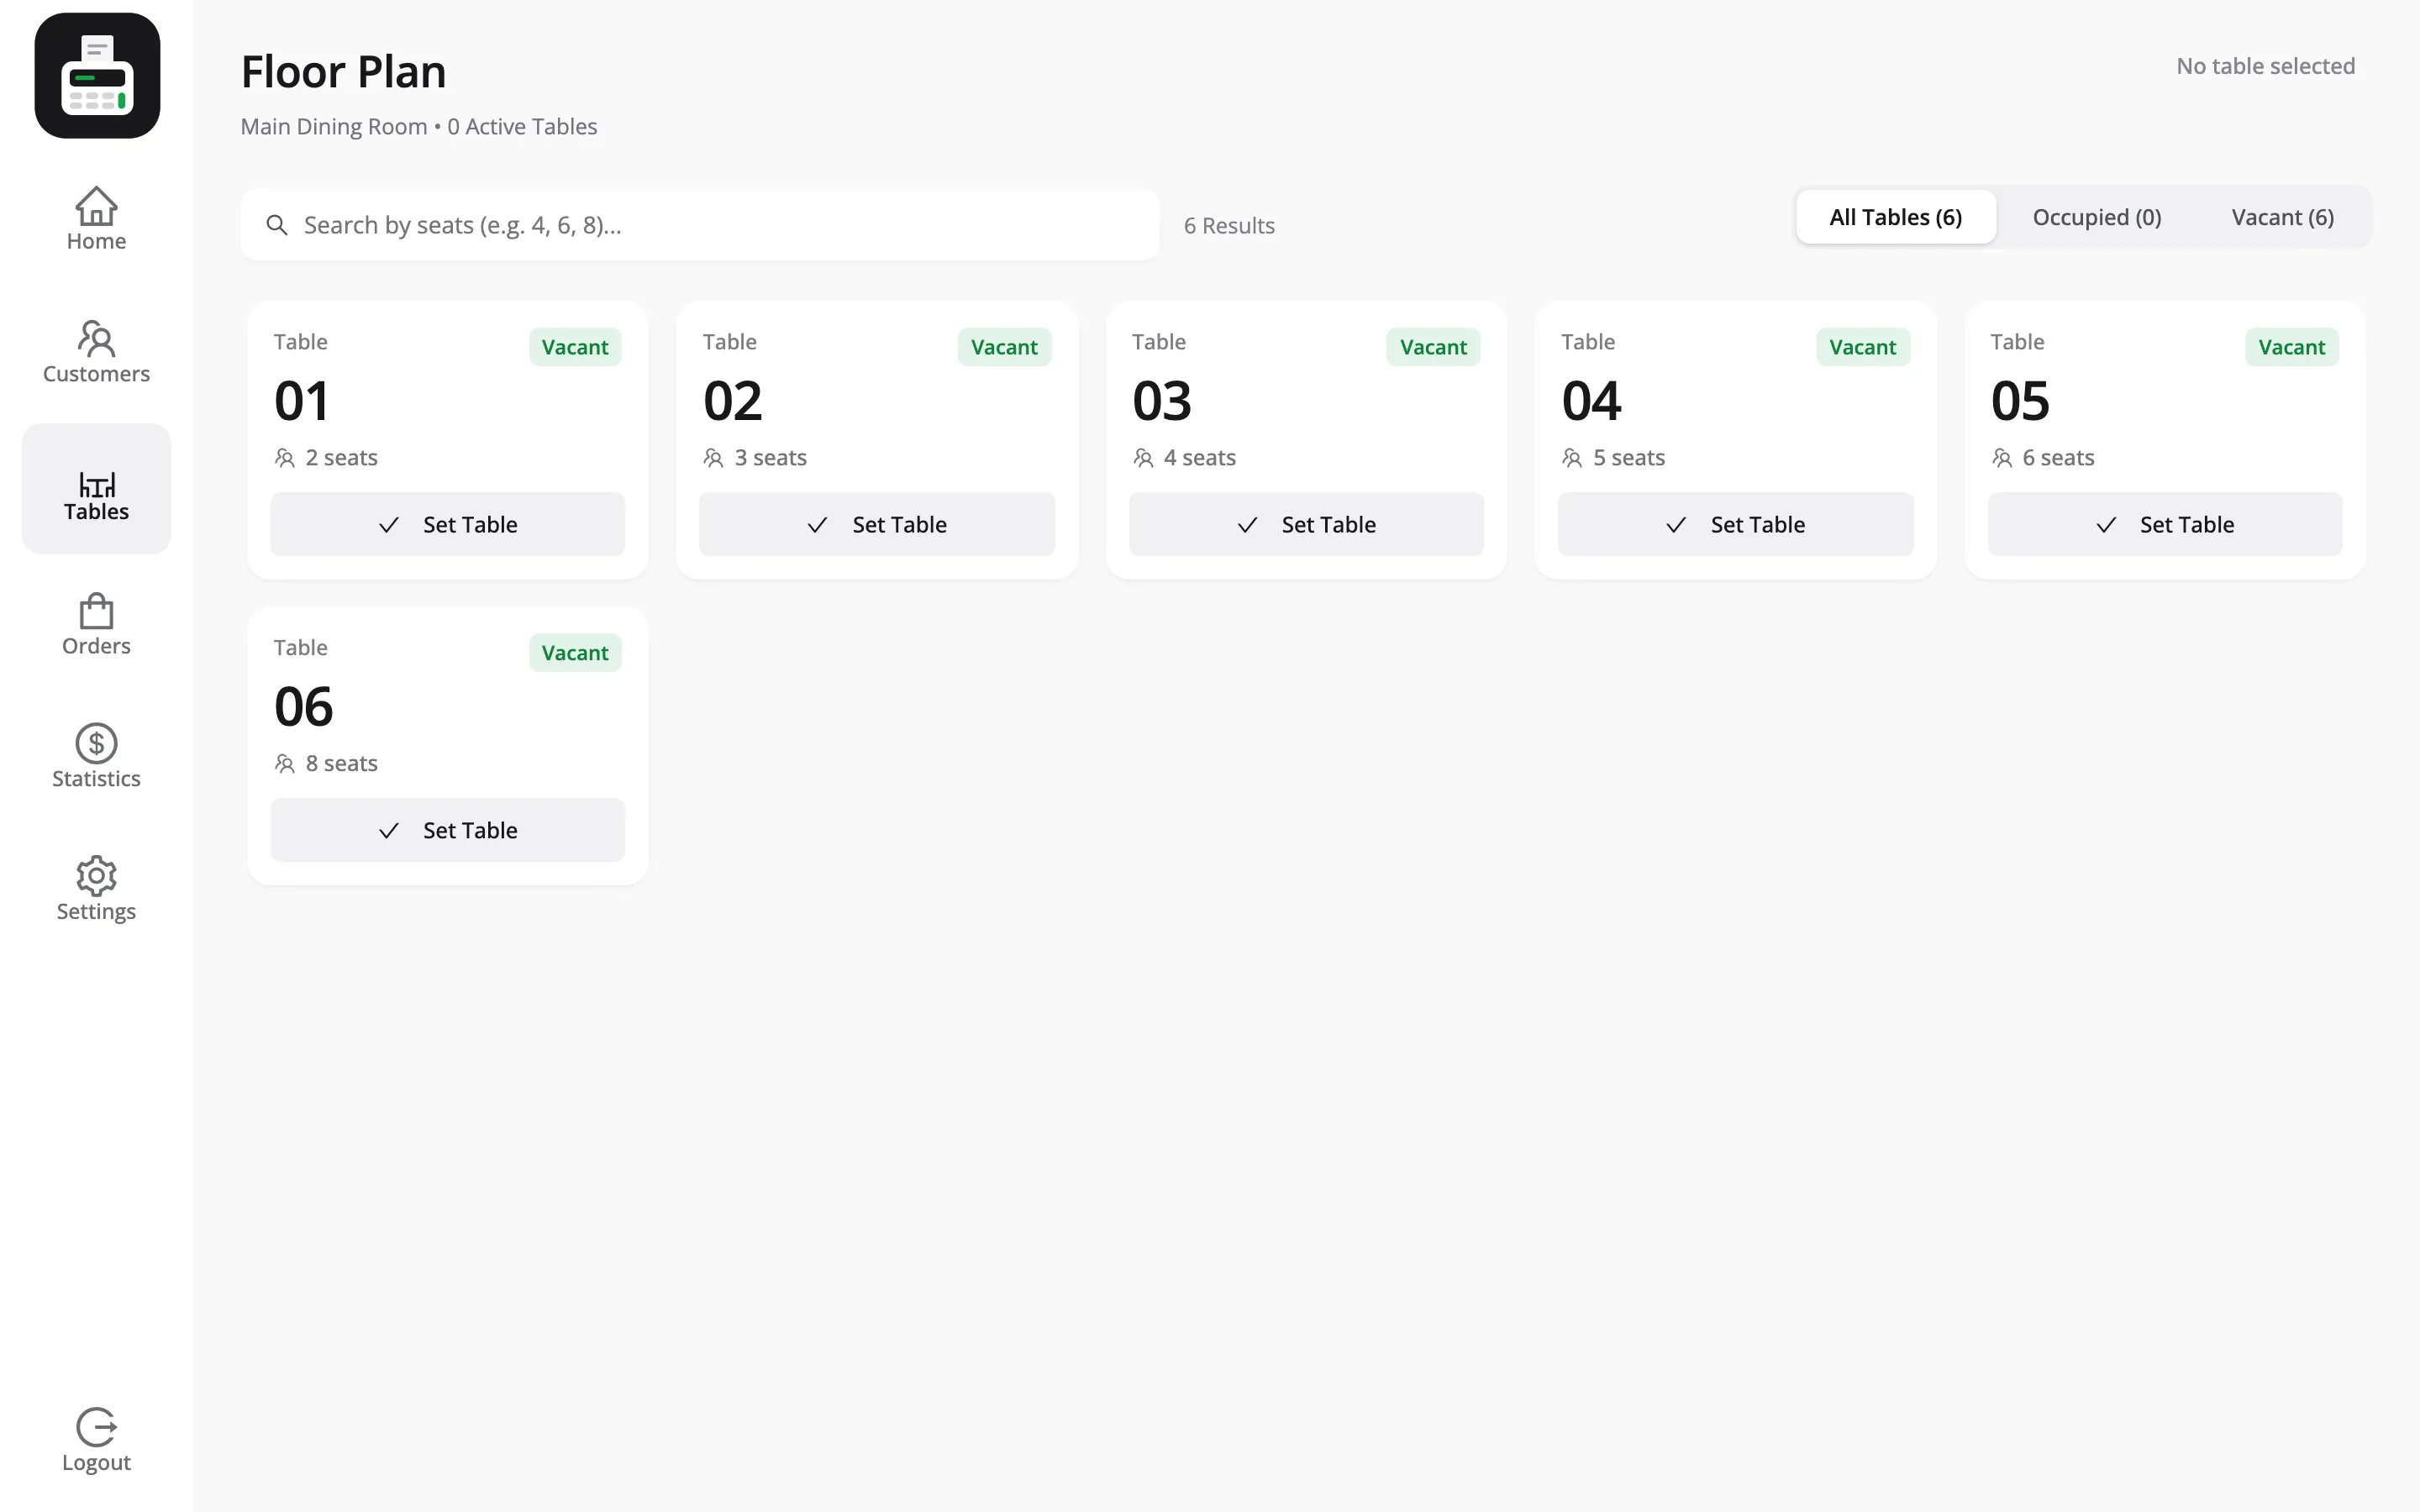
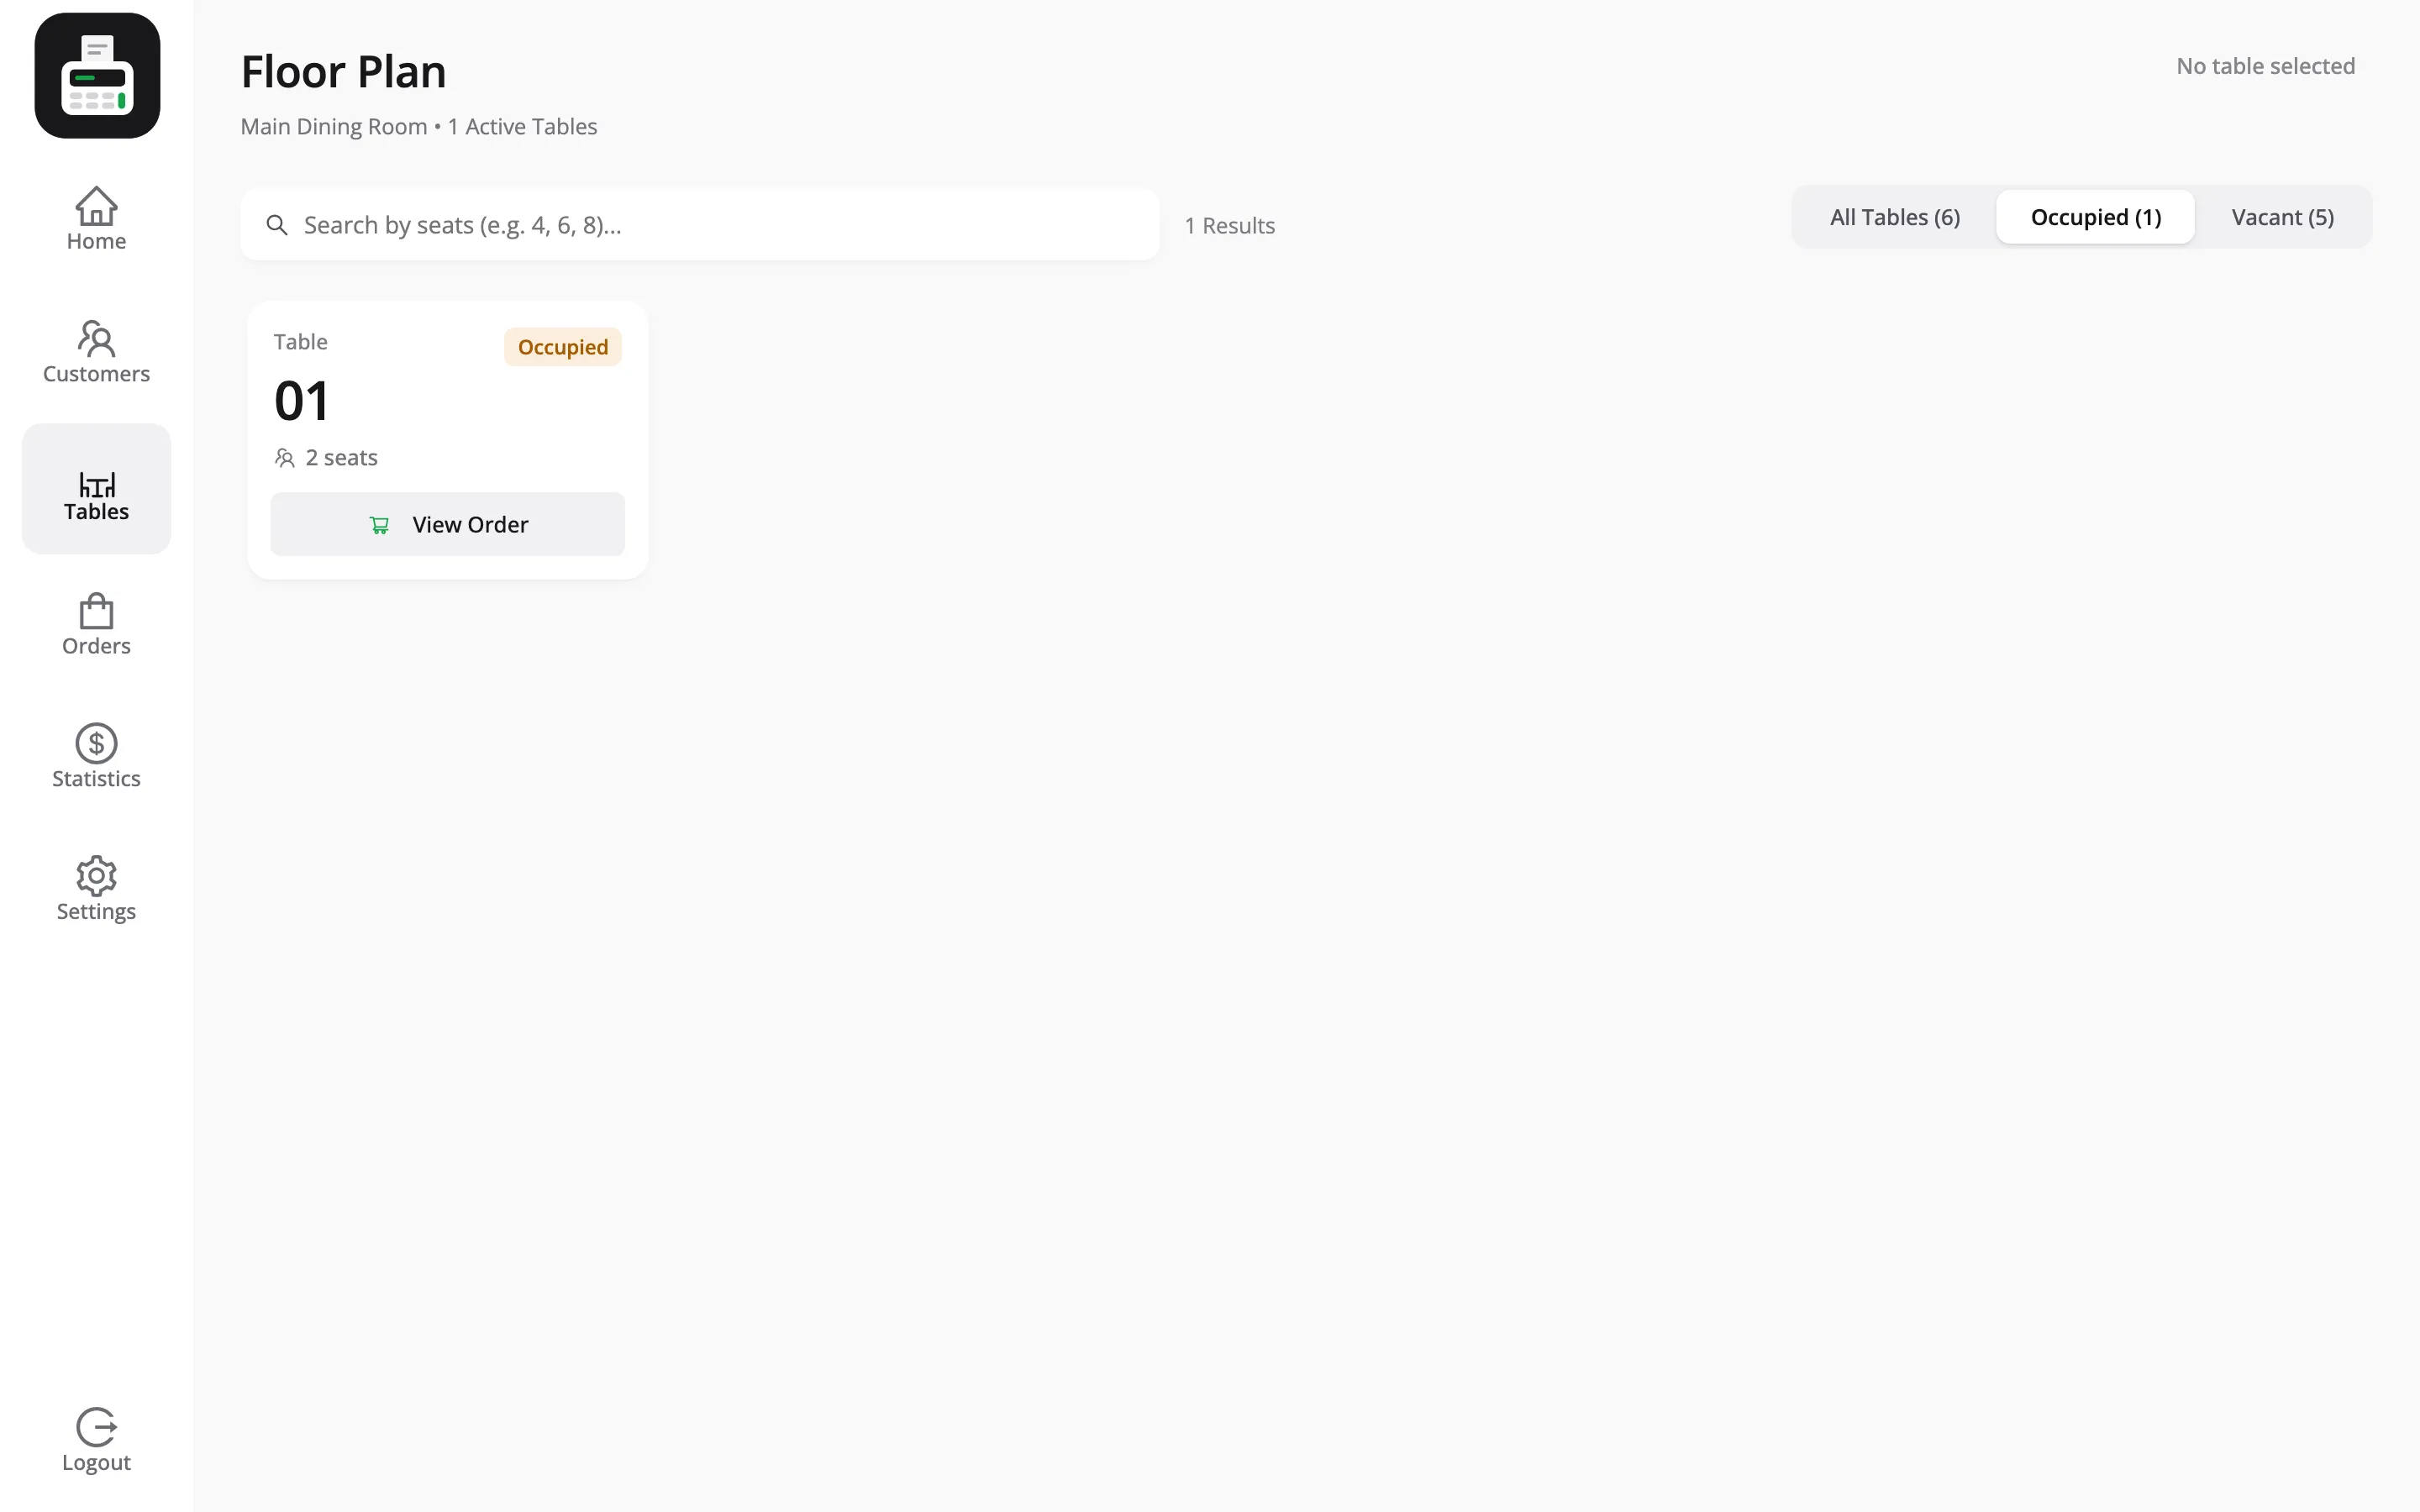
Each card shows the table and whether it is Vacant or Occupied. An occupied table shows its running amount, so a manager can see what is on each table without asking.
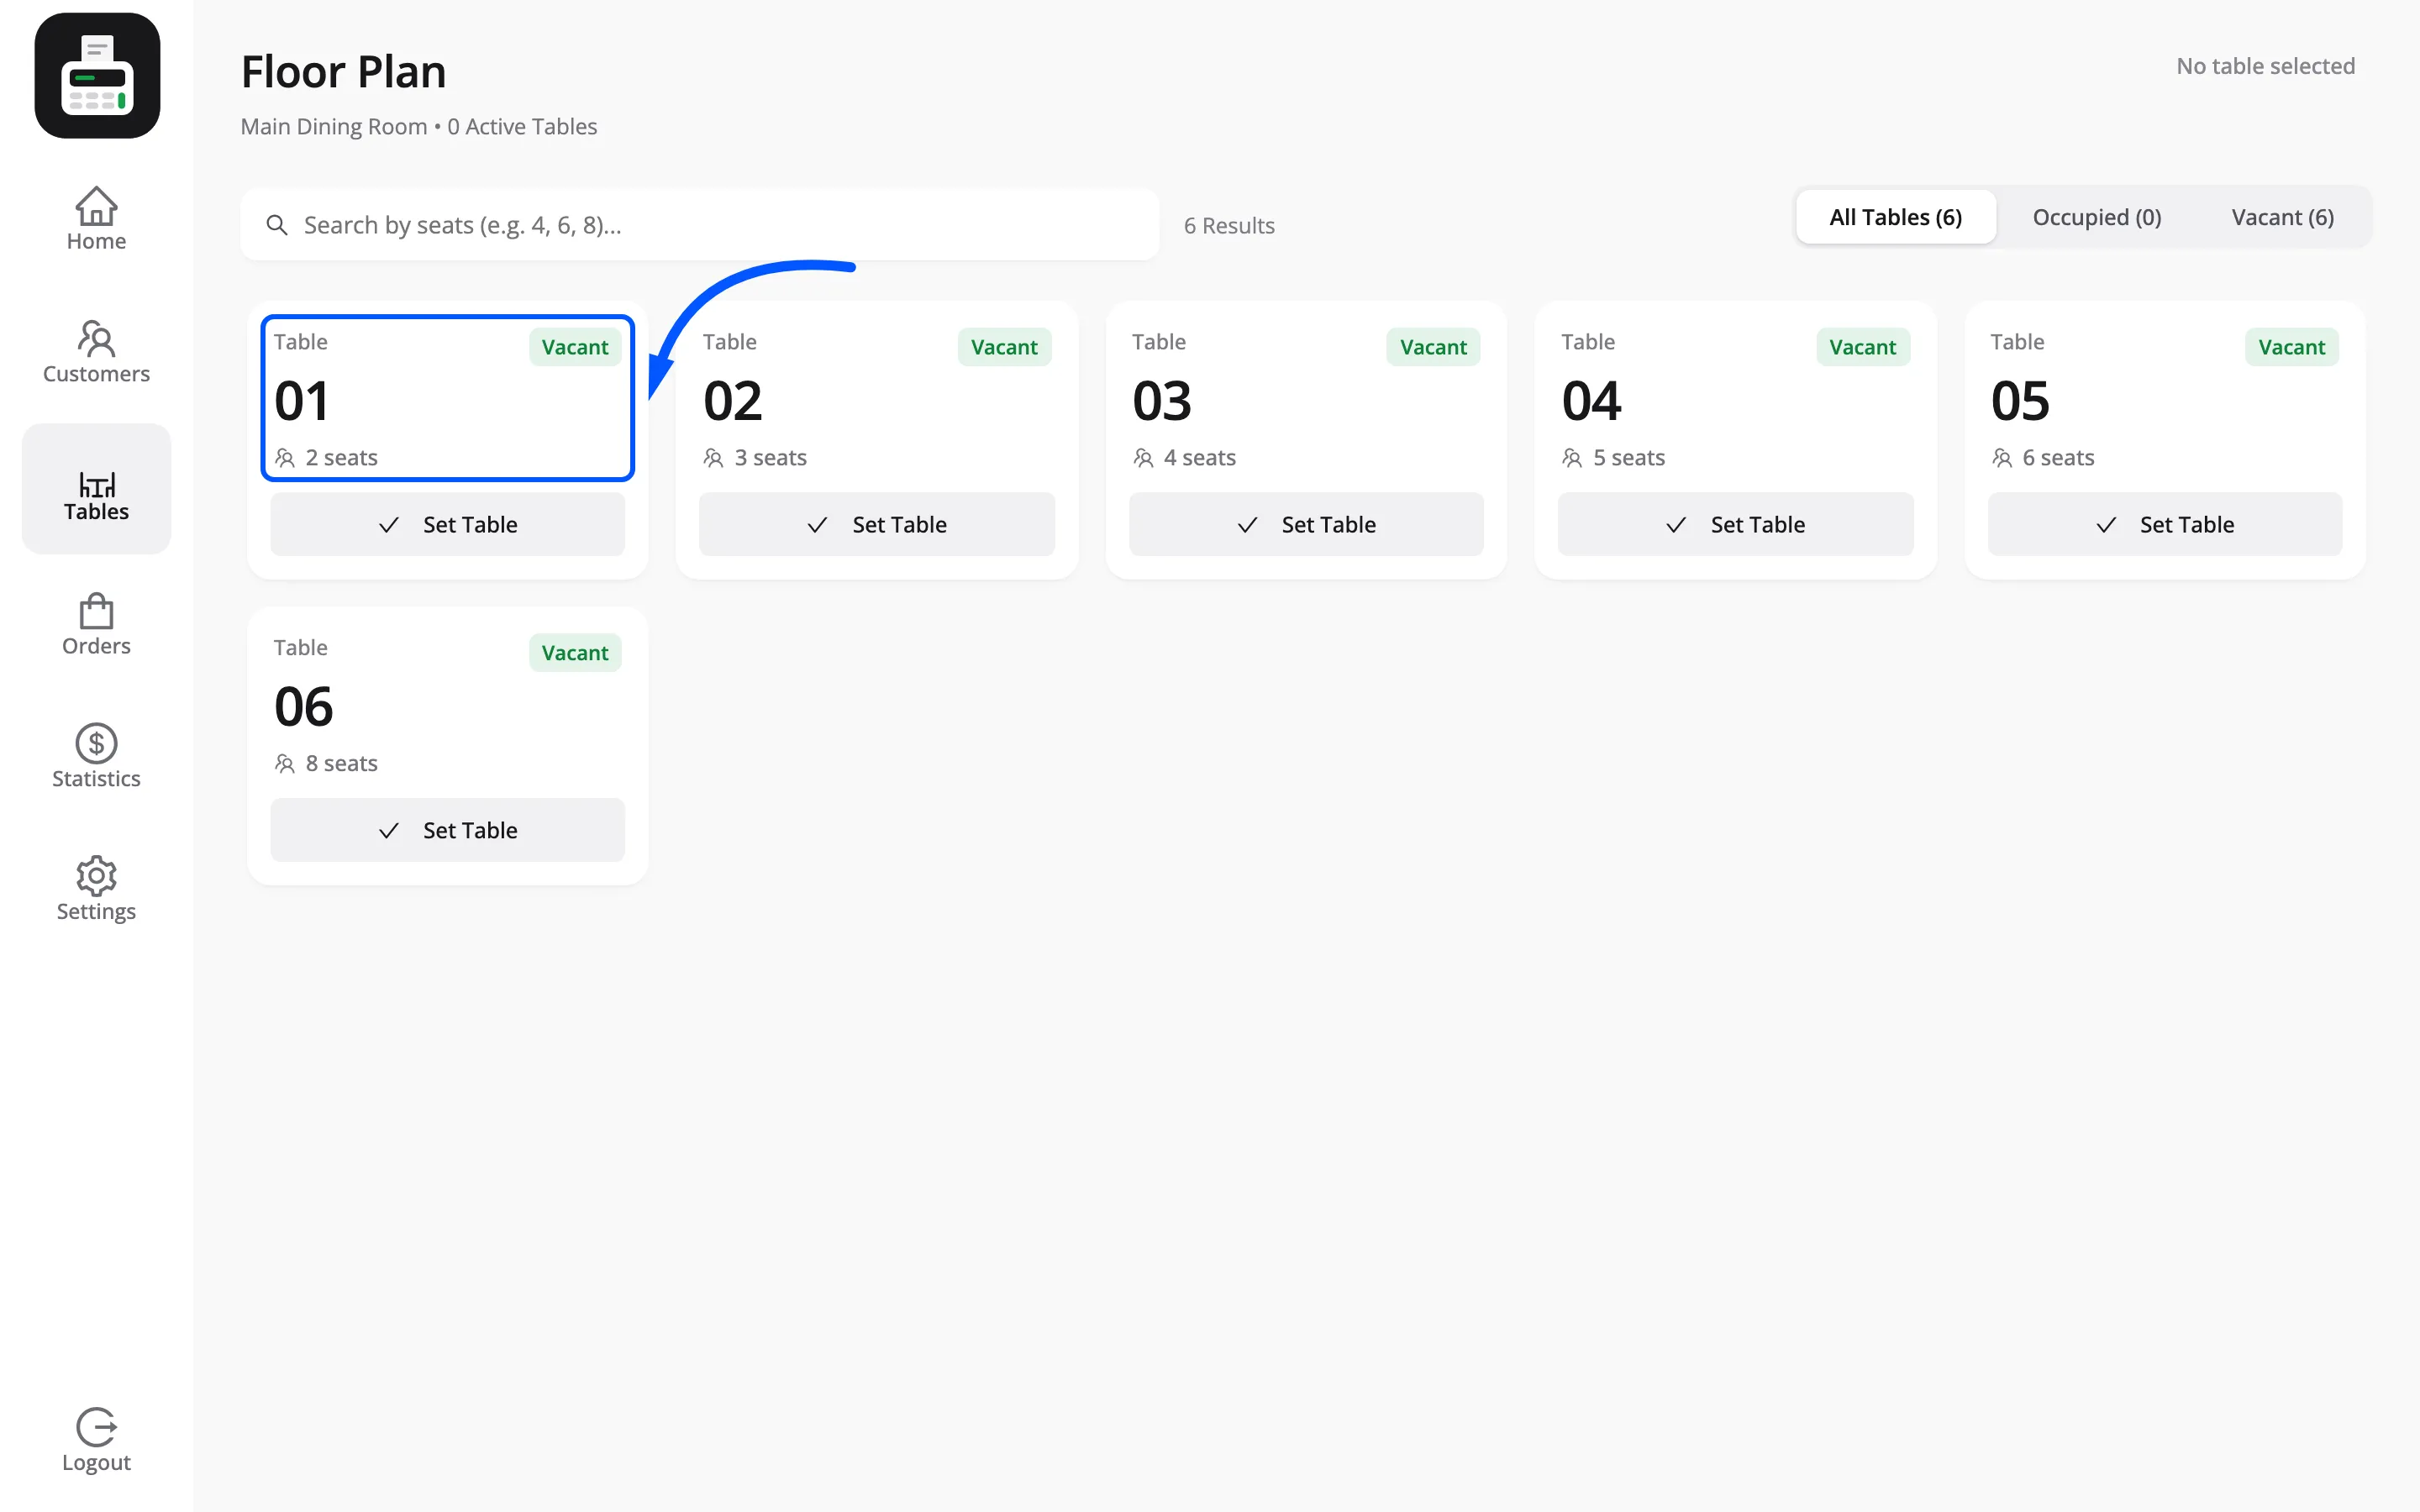
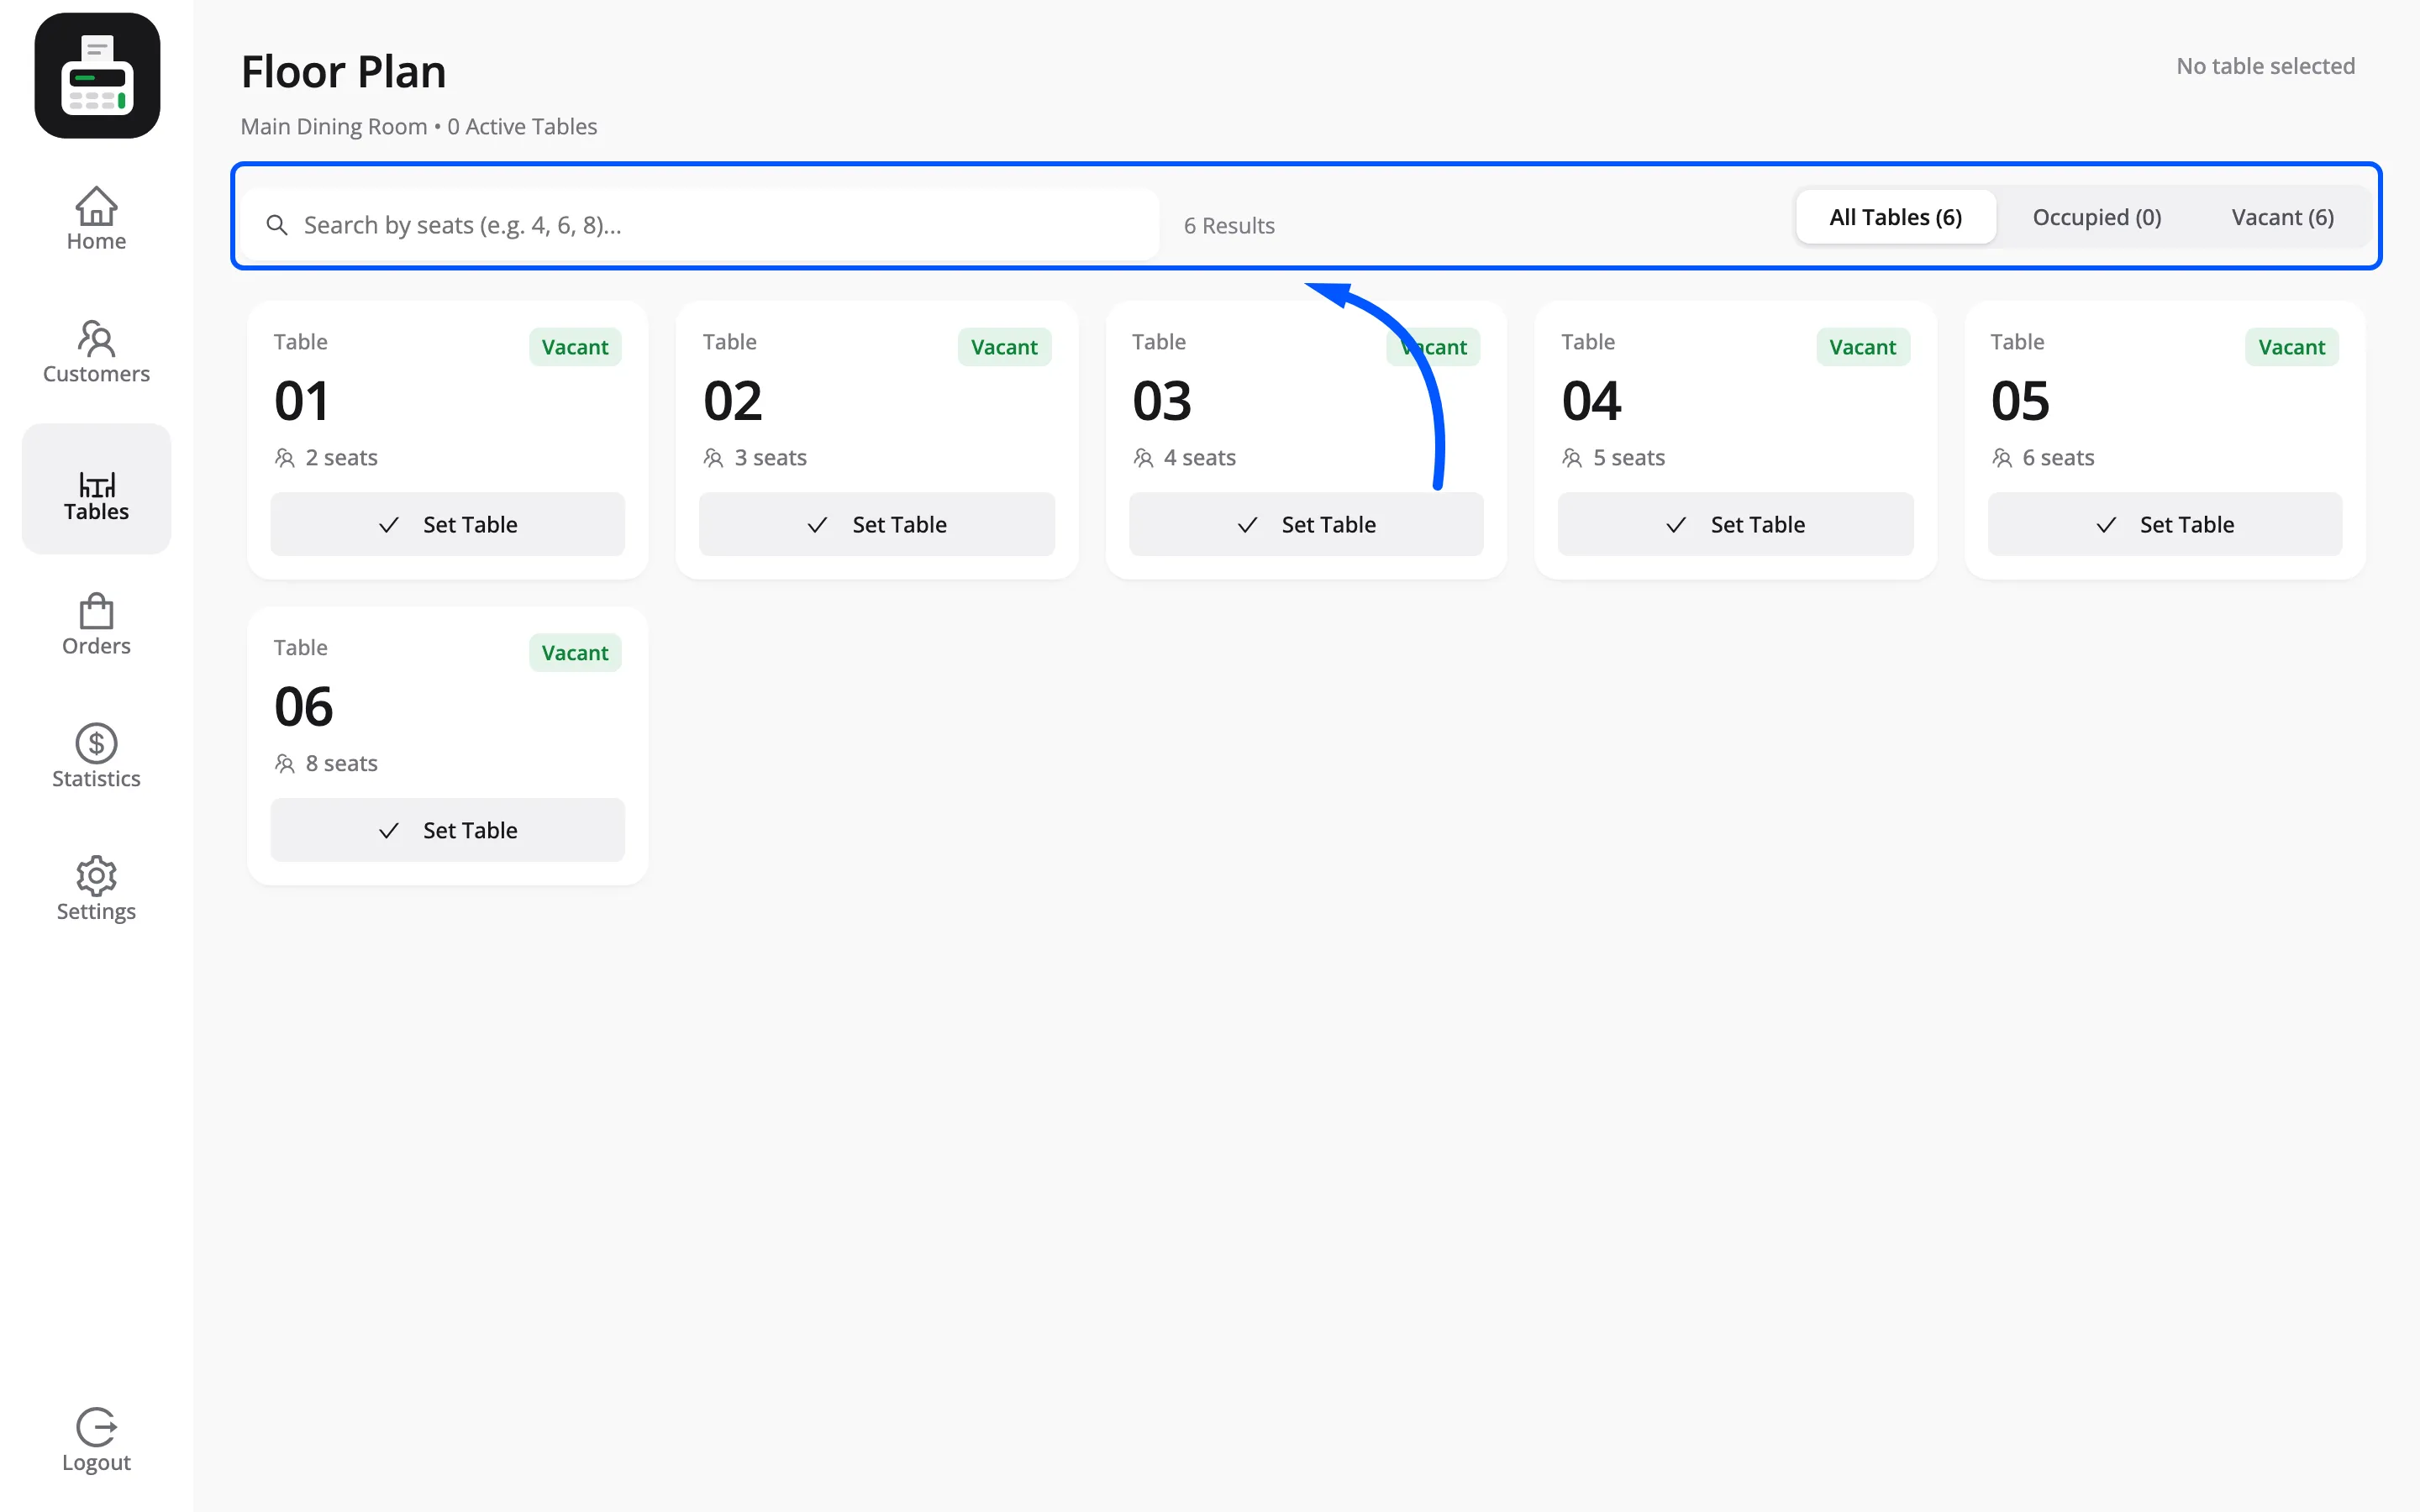
Three filters run across the top with live counts: All Tables, Occupied and Vacant.
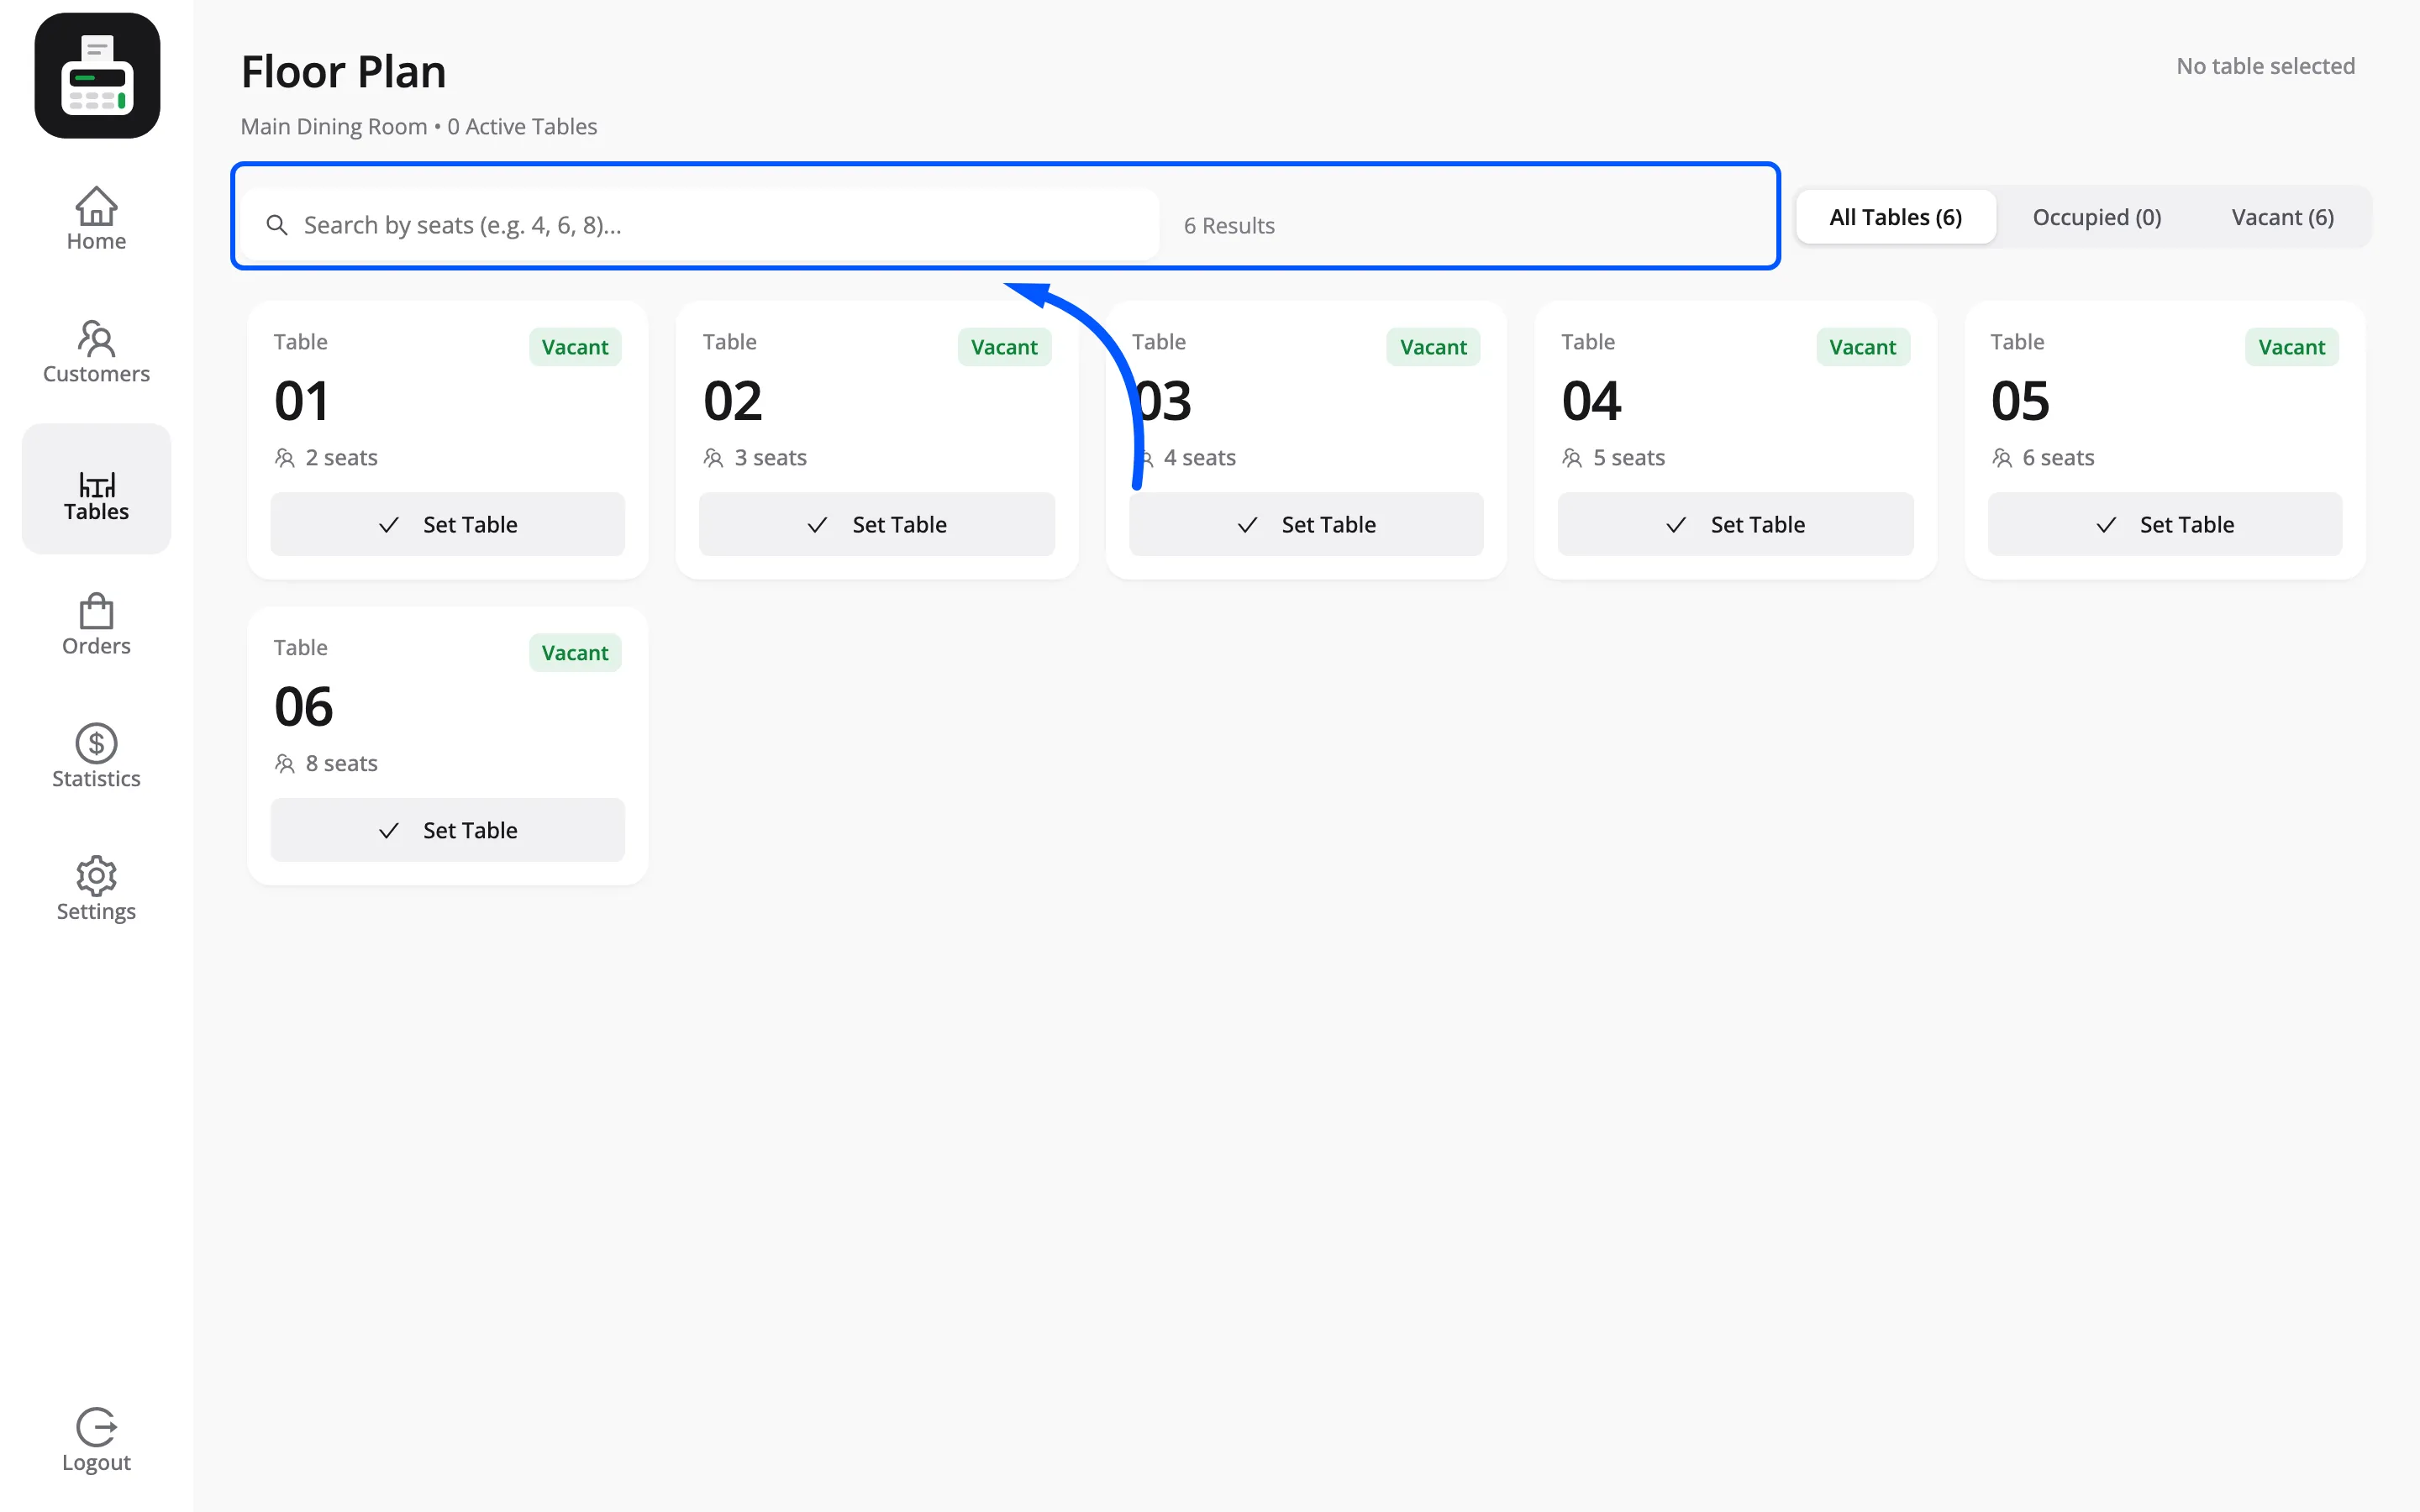
The toolbar beside them carries the search box, which matches on seats.
Occupied is the shift view. It is every table with money on it and nothing else.
Step 5: Take a table order
Section titled “Step 5: Take a table order”Press Set Table on a vacant table’s card. The green table button in the cart header now shows it.
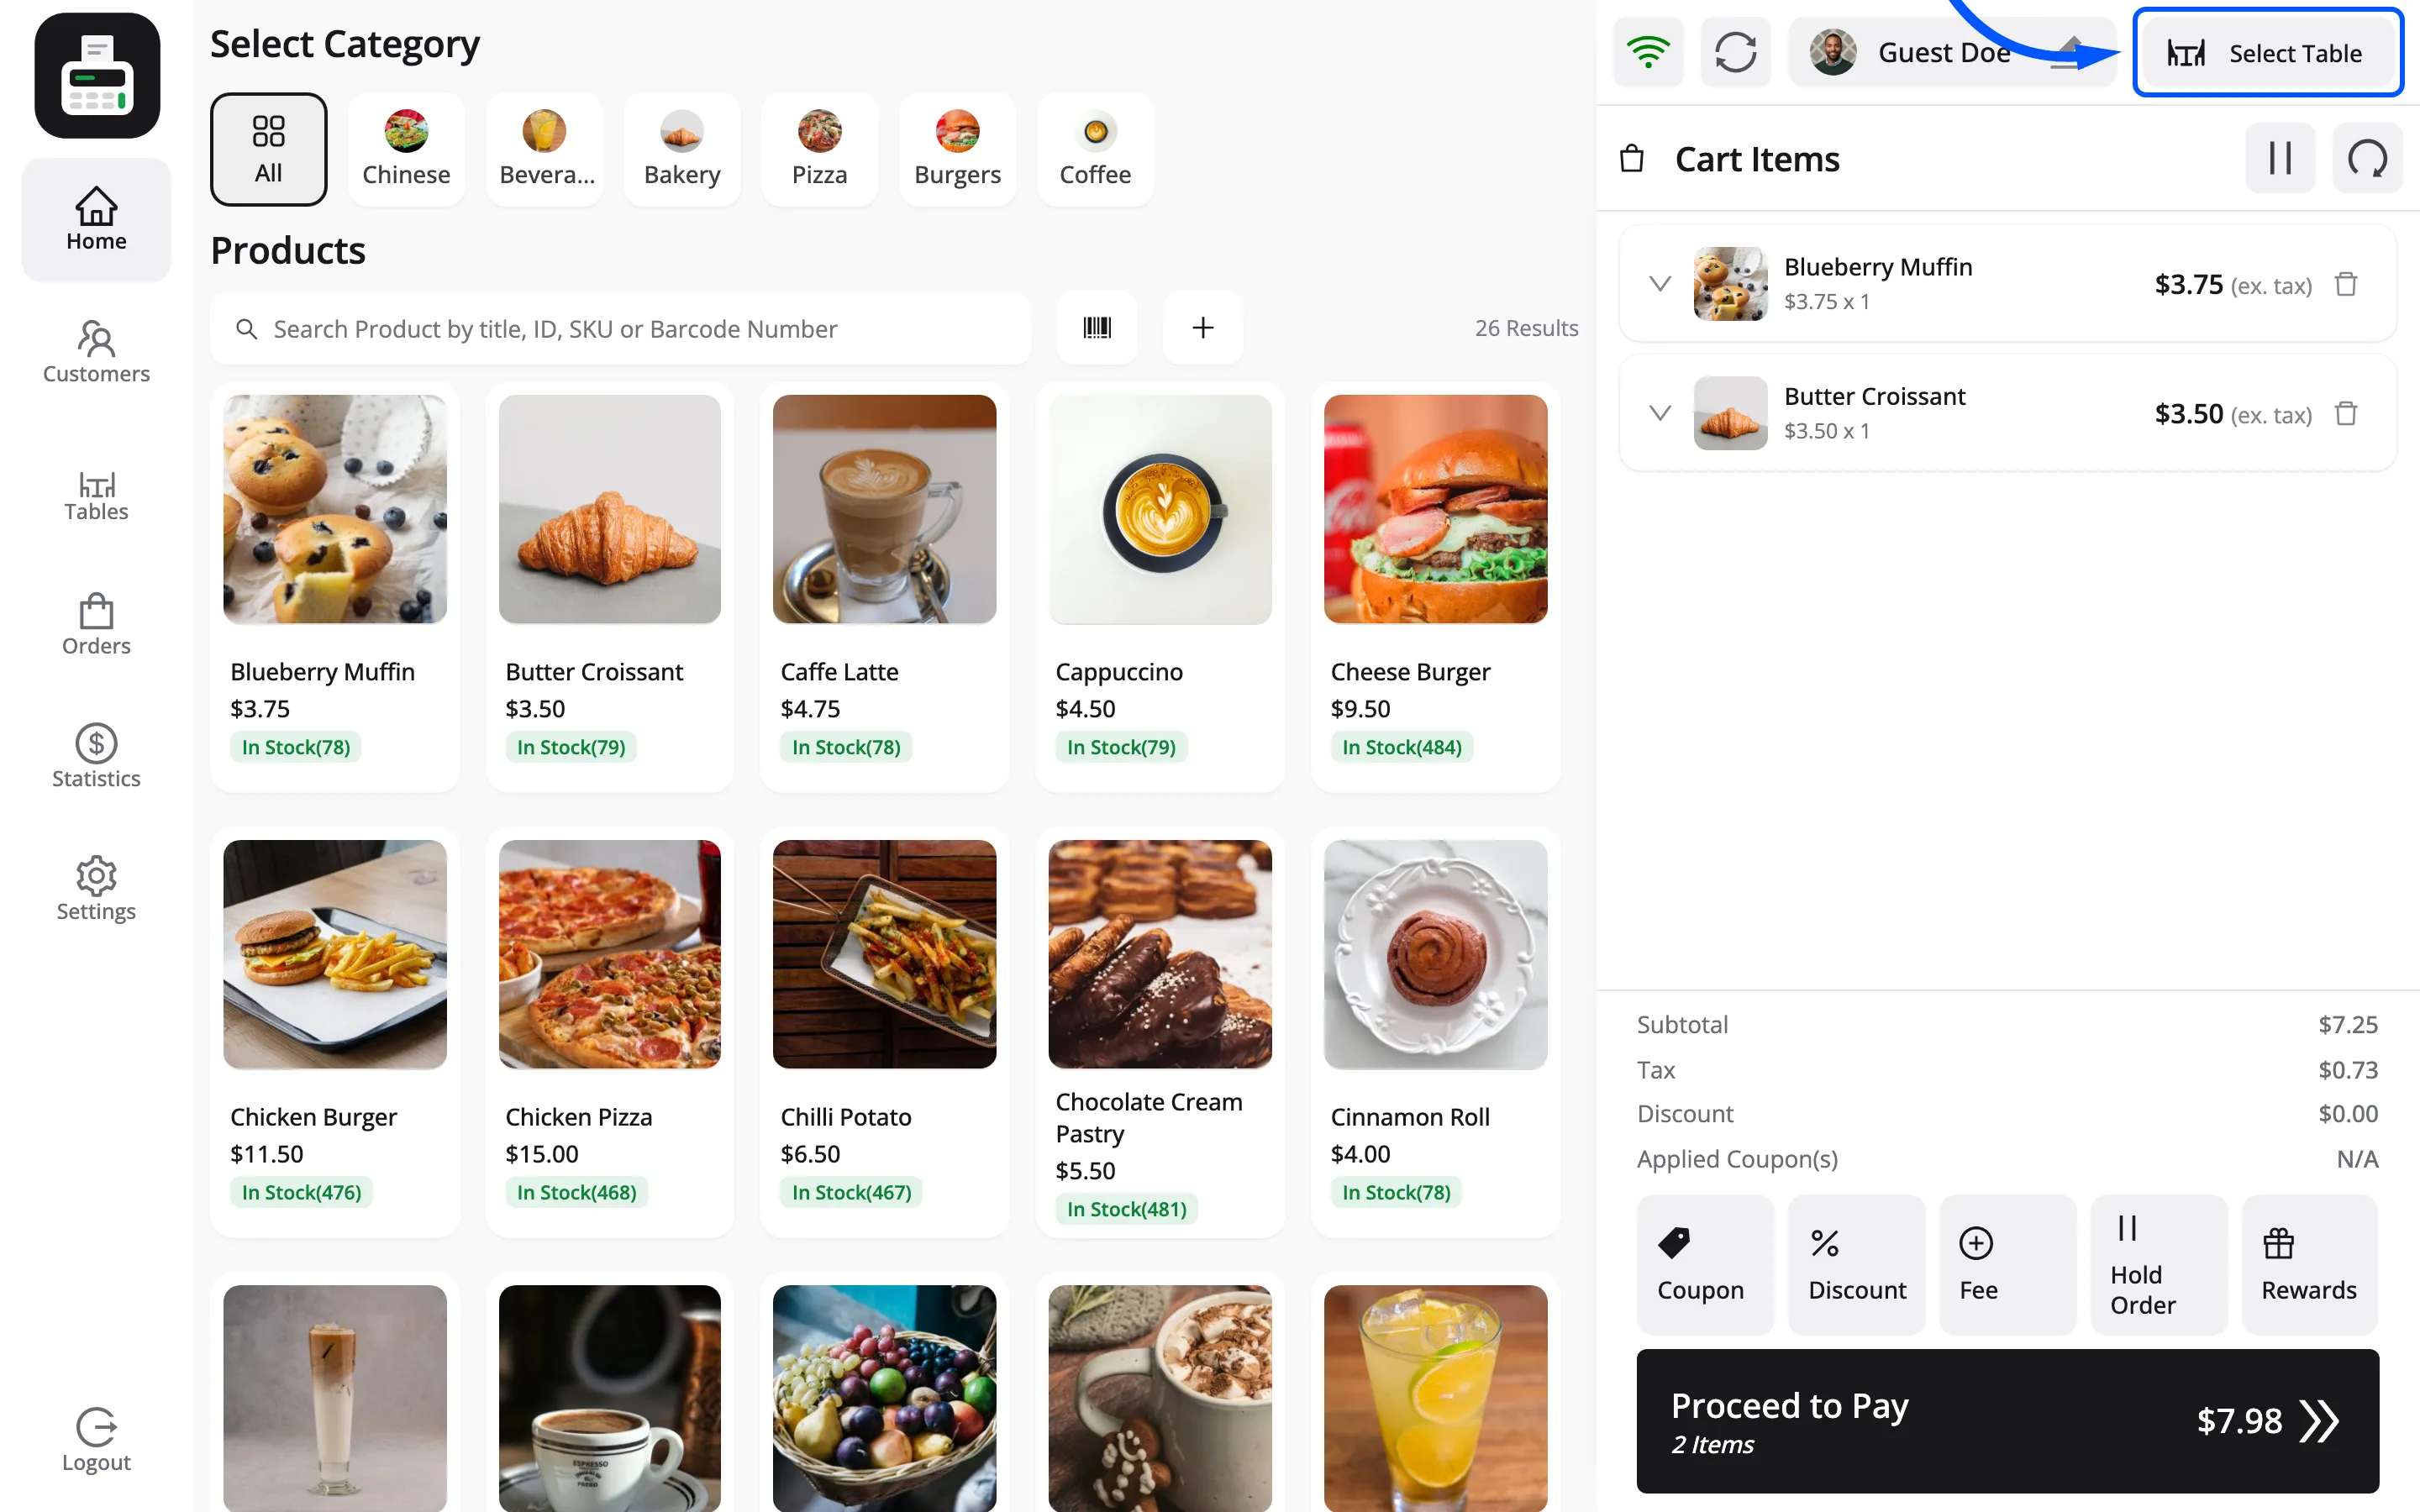
That button is also how you choose the service type. Press it and a Select Mode box offers Dine in and Take Away.
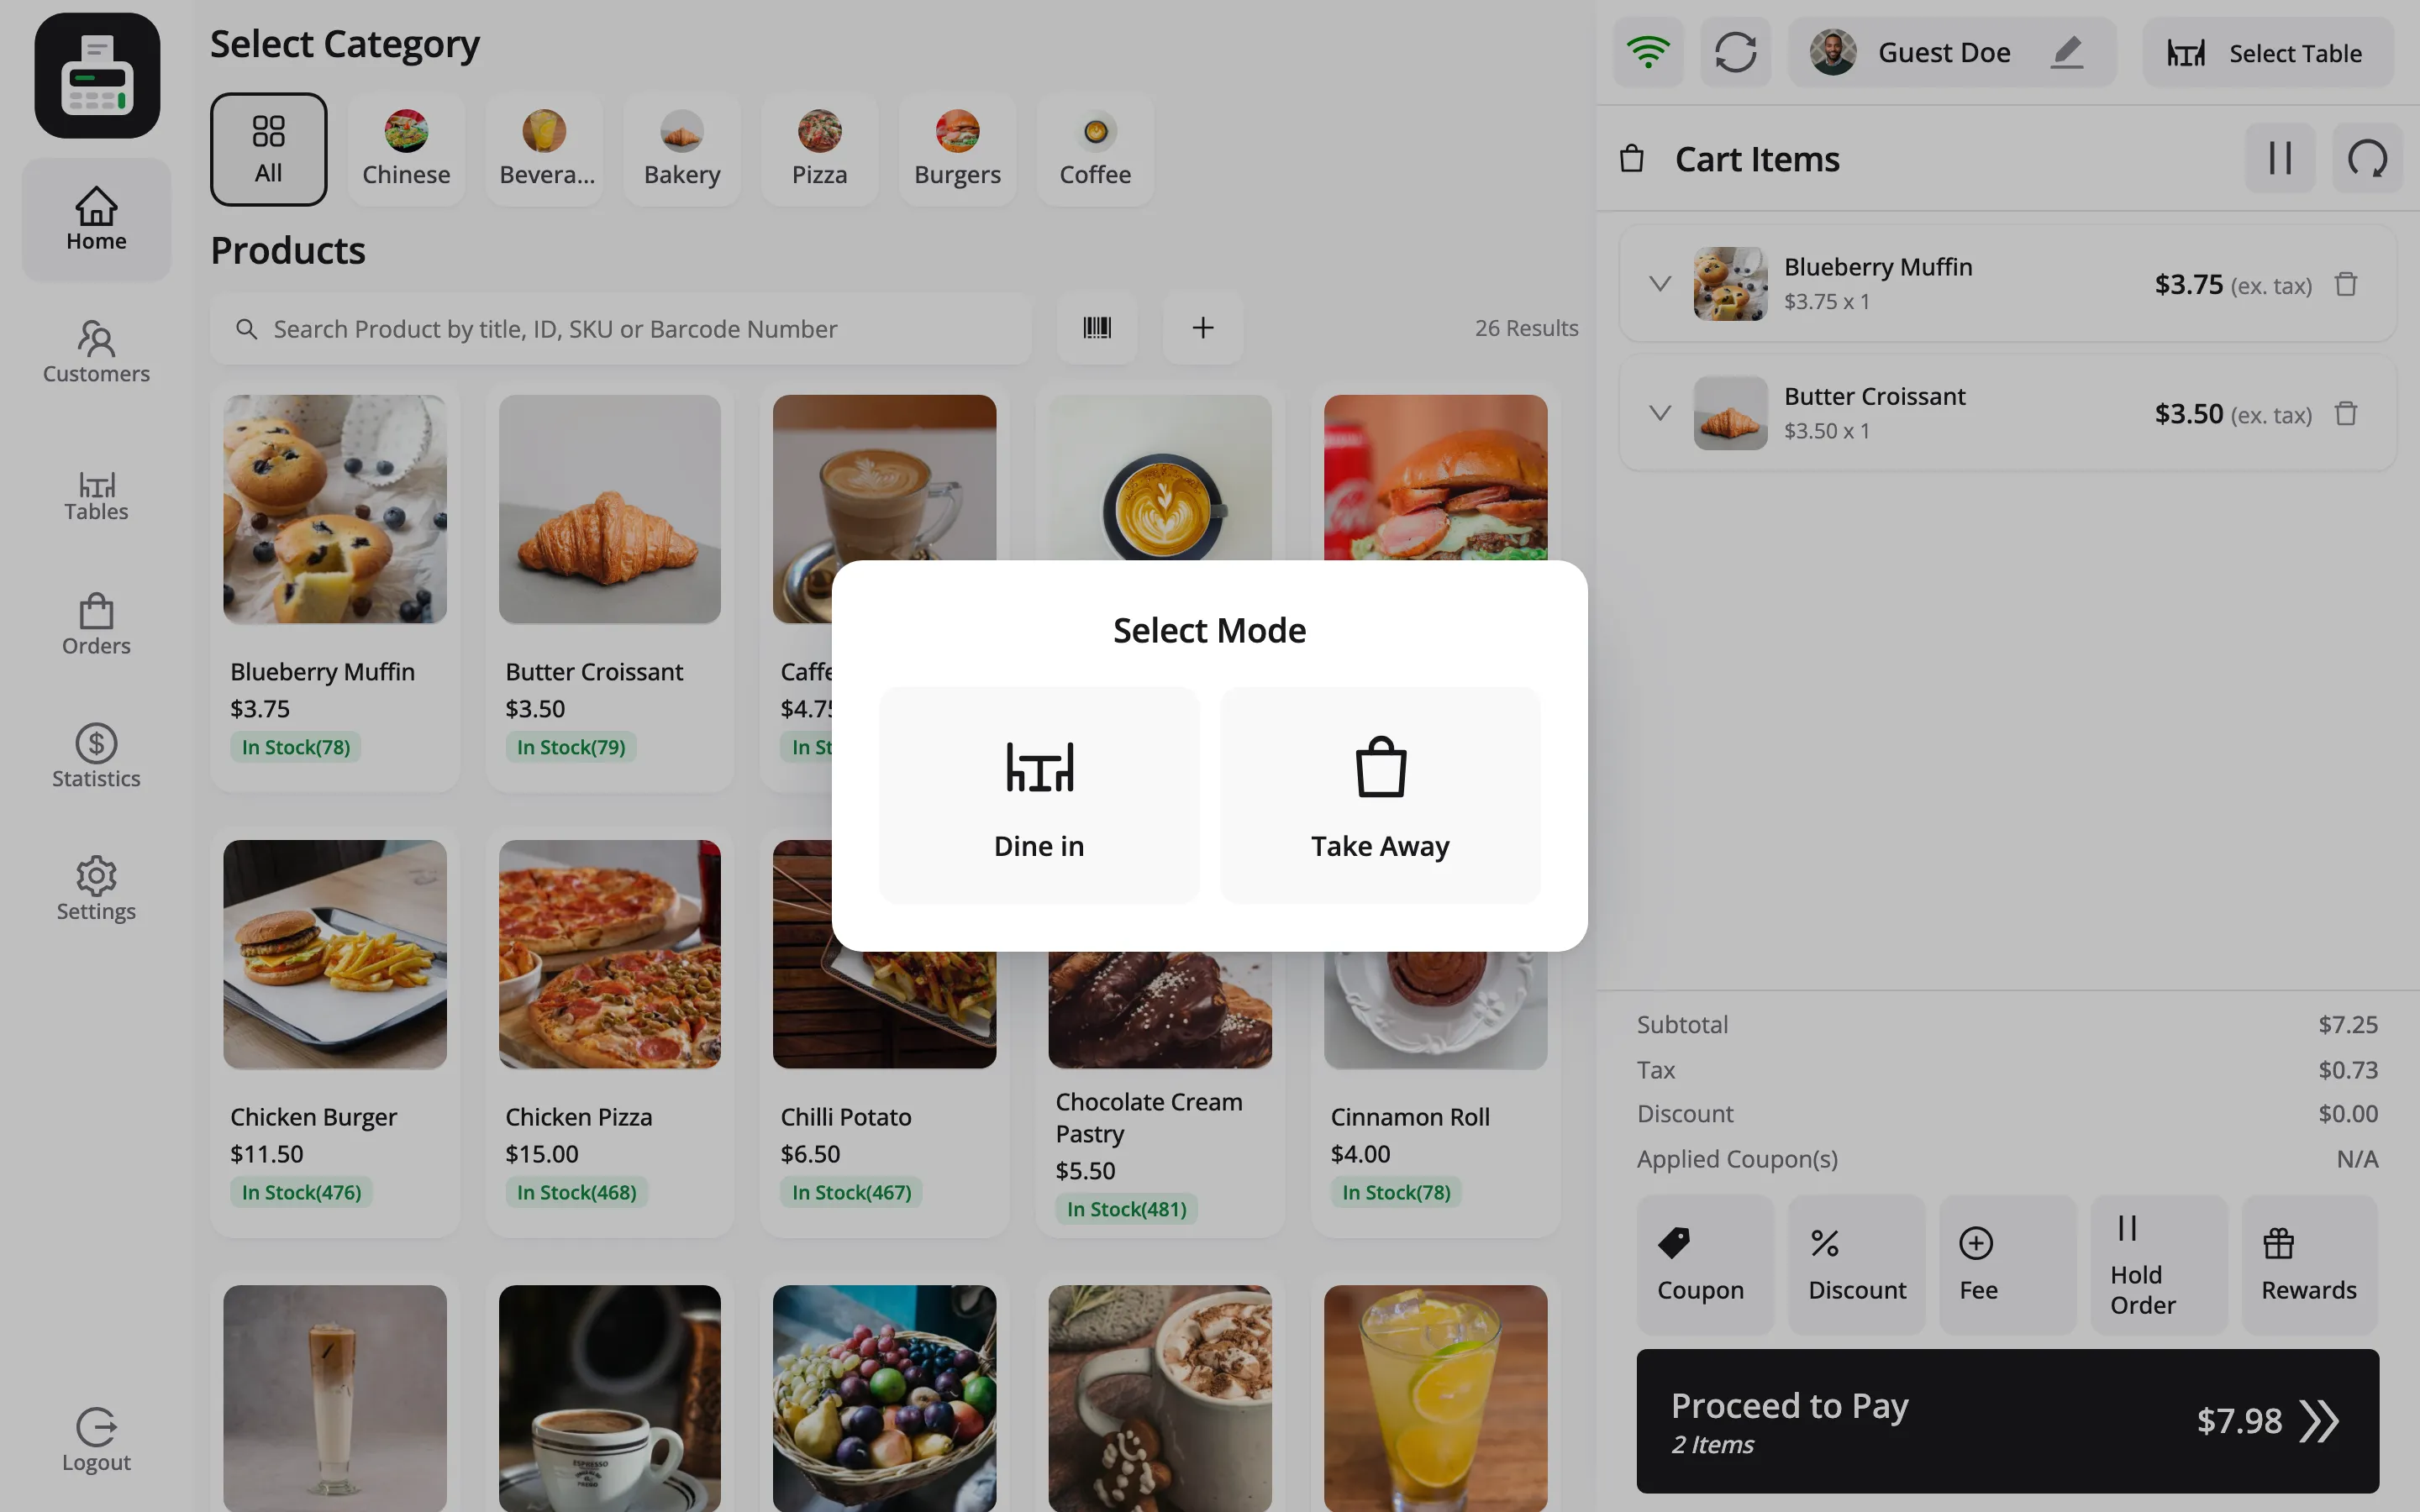
The choice is stored on the order, which is what your reports read later when you want to know the split.
Build the cart as normal.
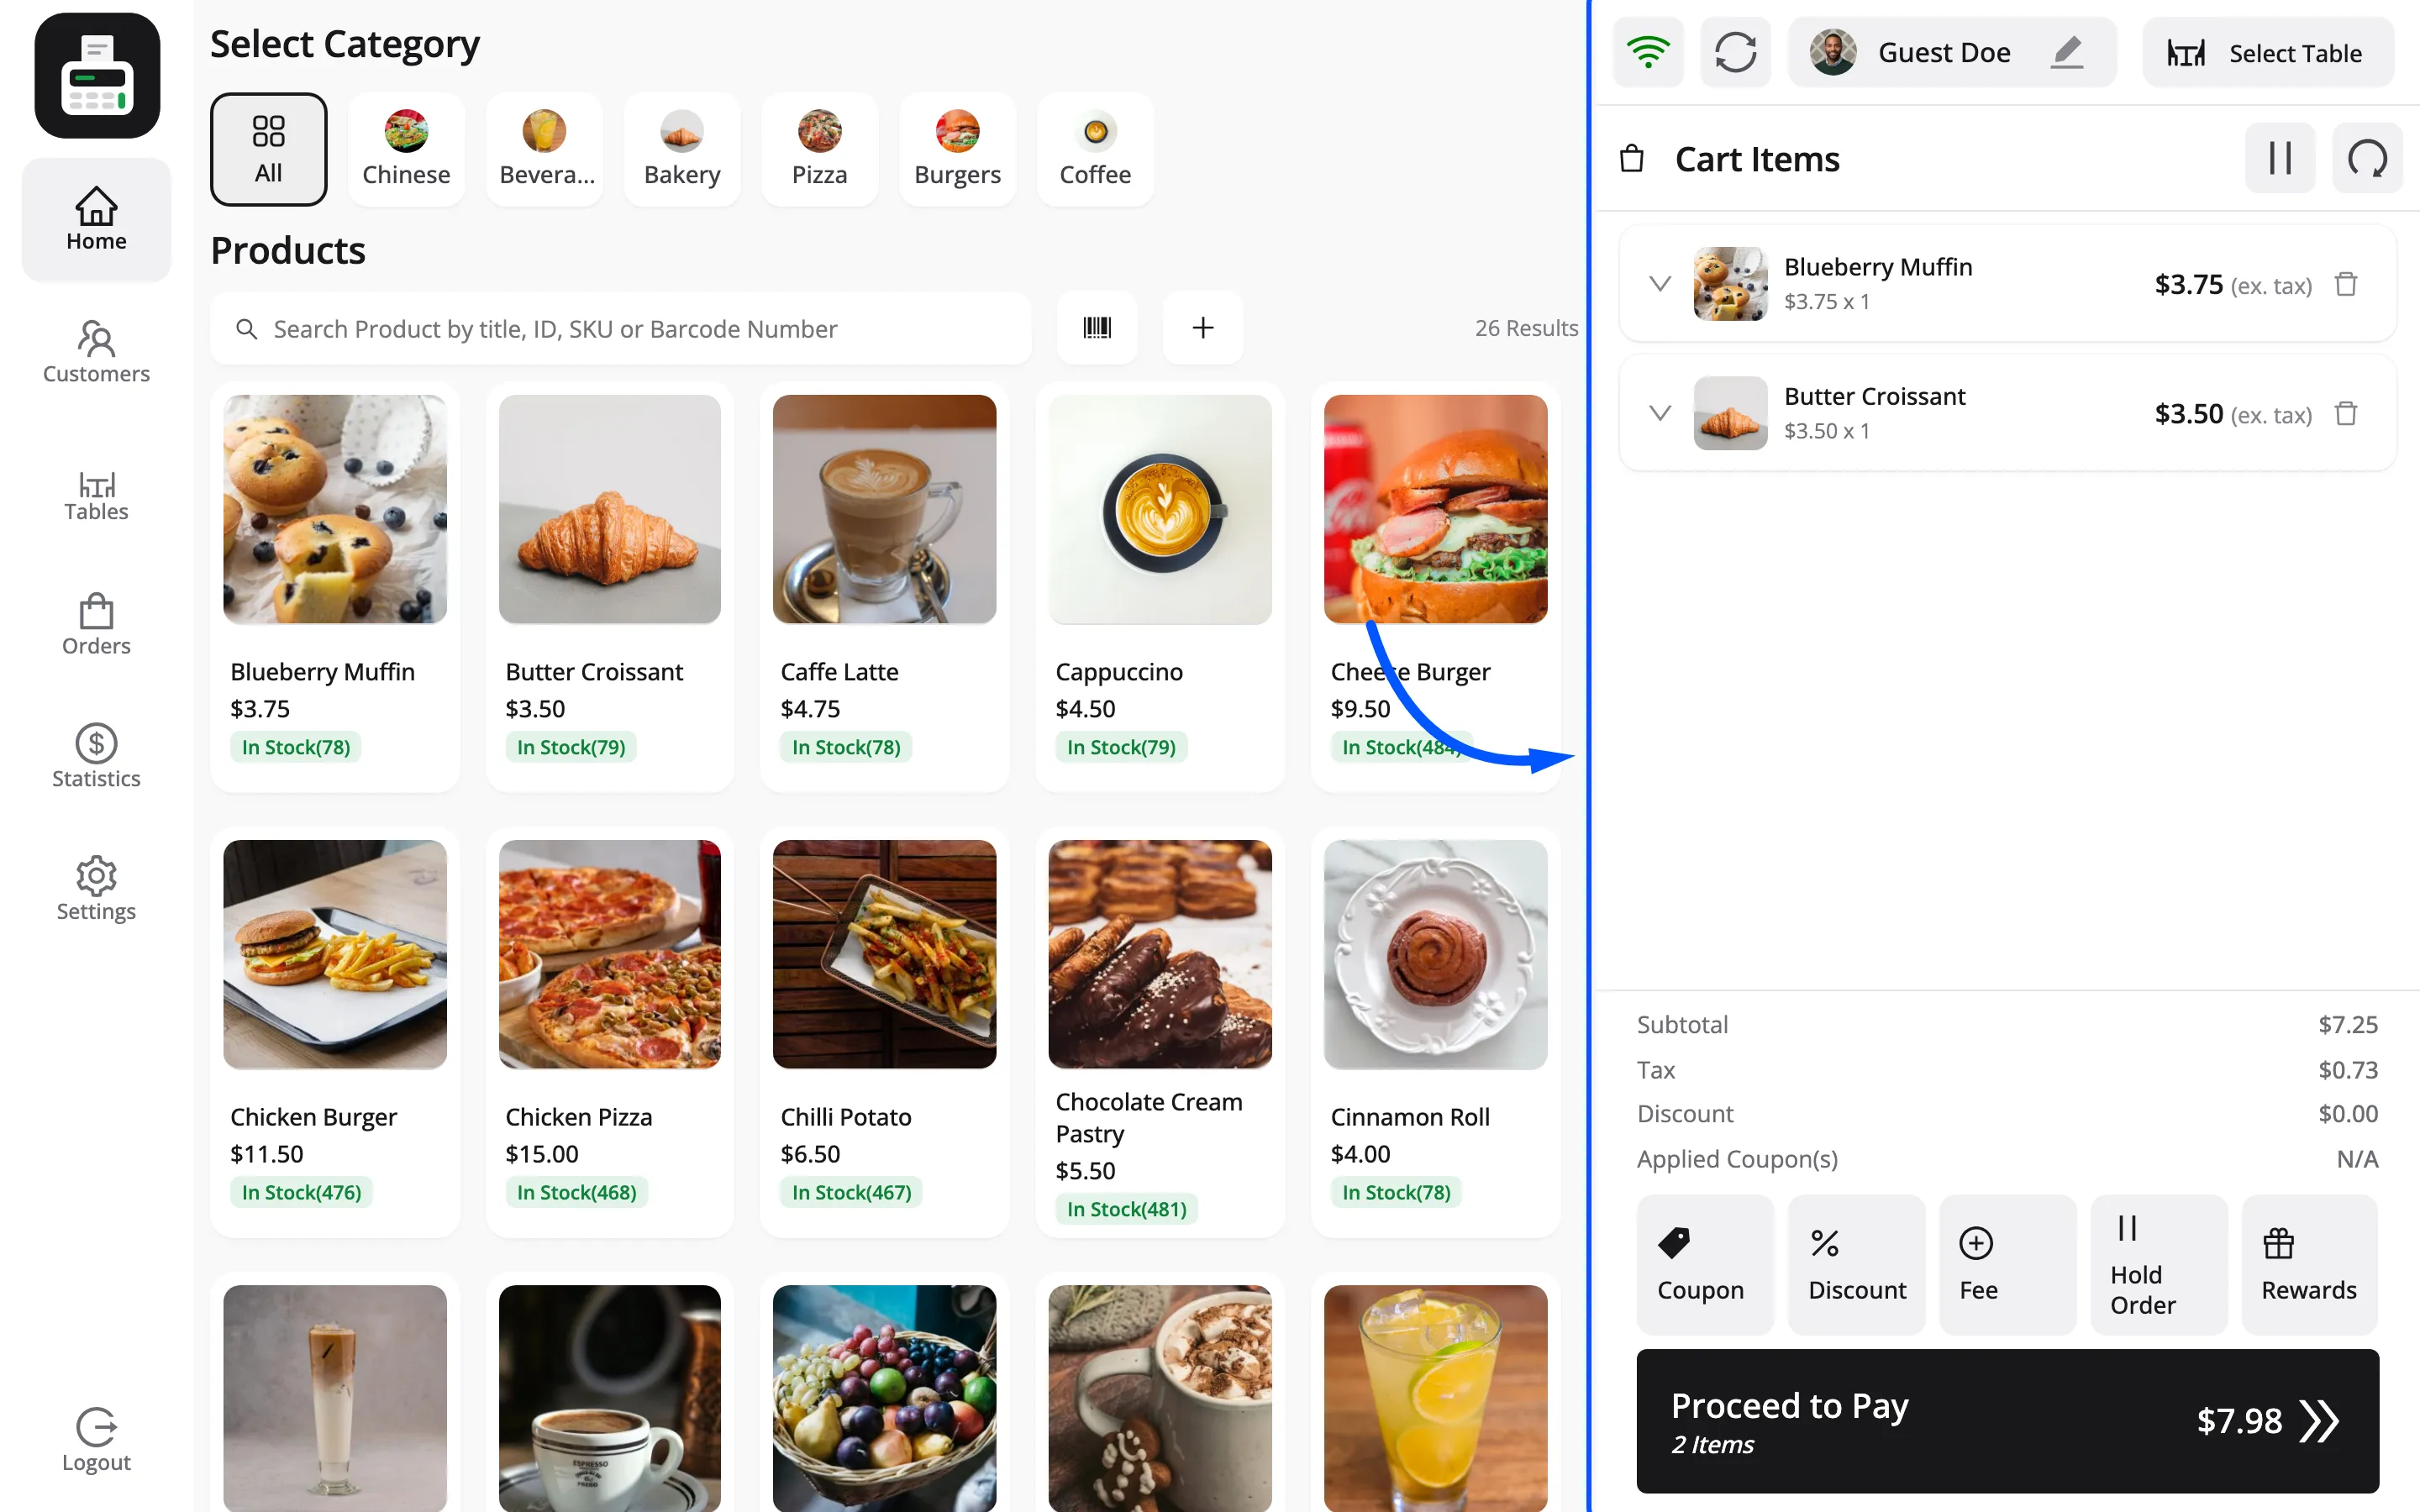
Then press Hold Order rather than taking payment. That is the table order: it stays open while the party eats.
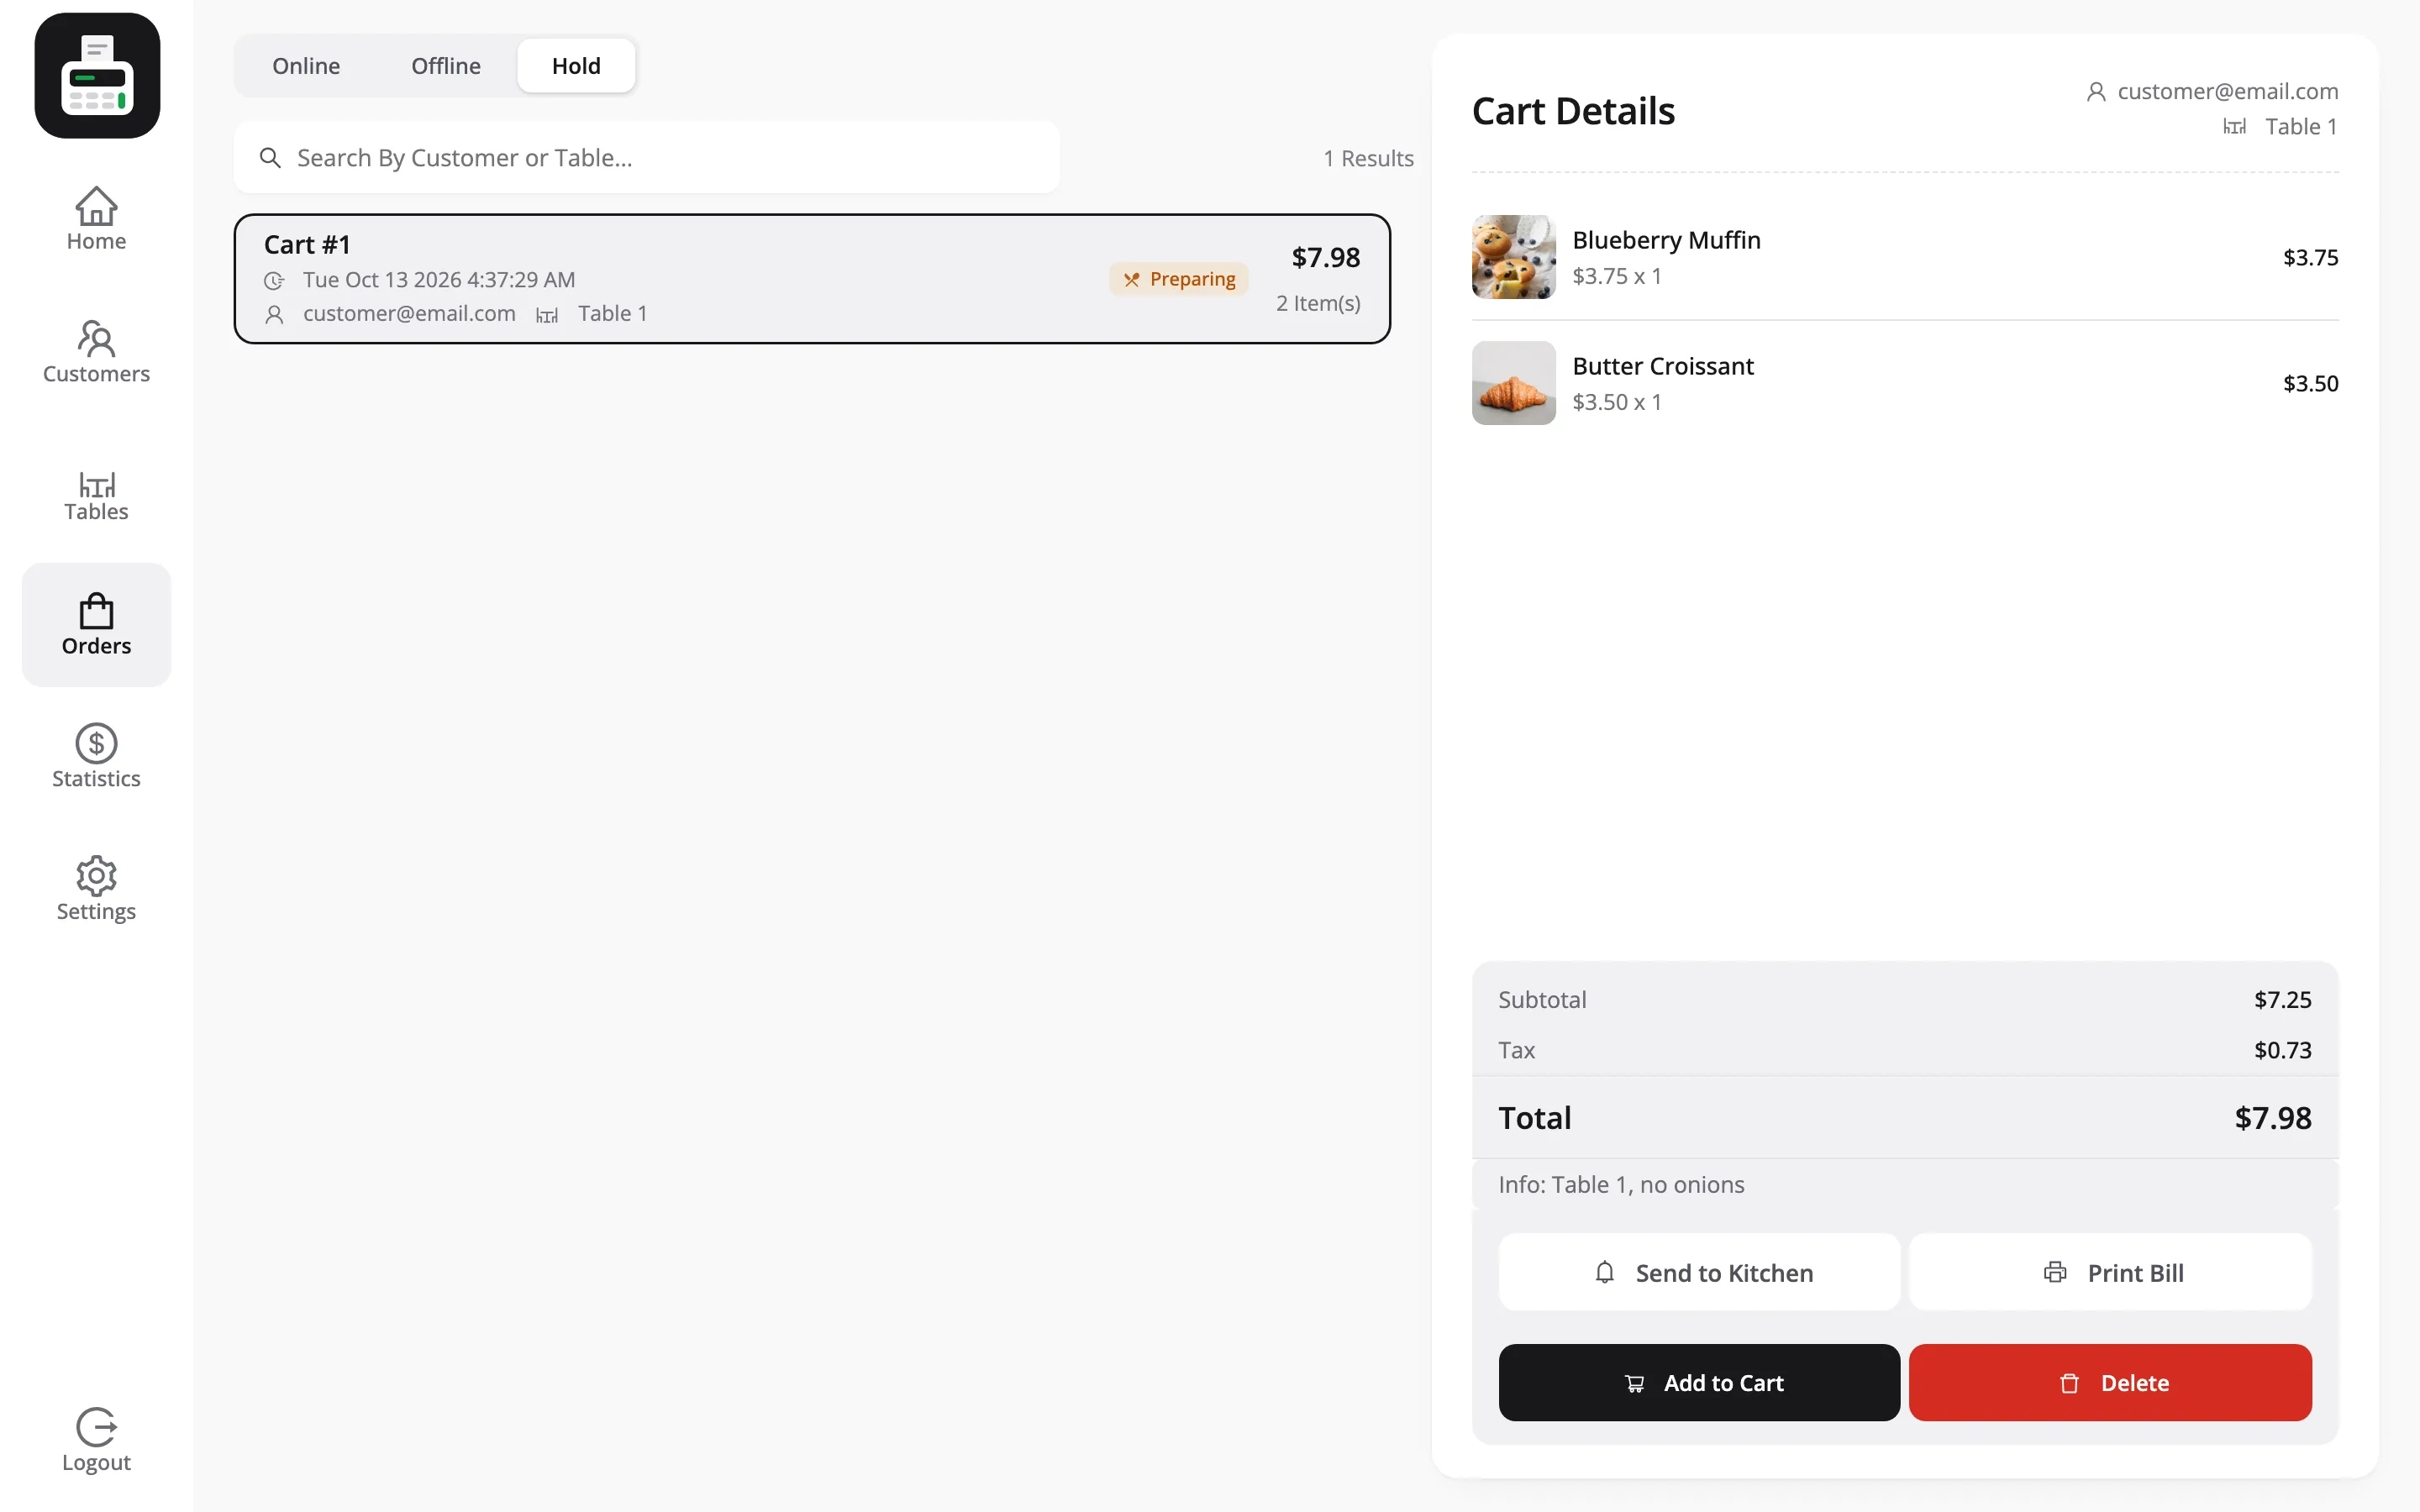
The table’s card changes. It now carries the running total instead of VACANT, and its button changes from Set Table to View Order.
Step 6: Add more to a table
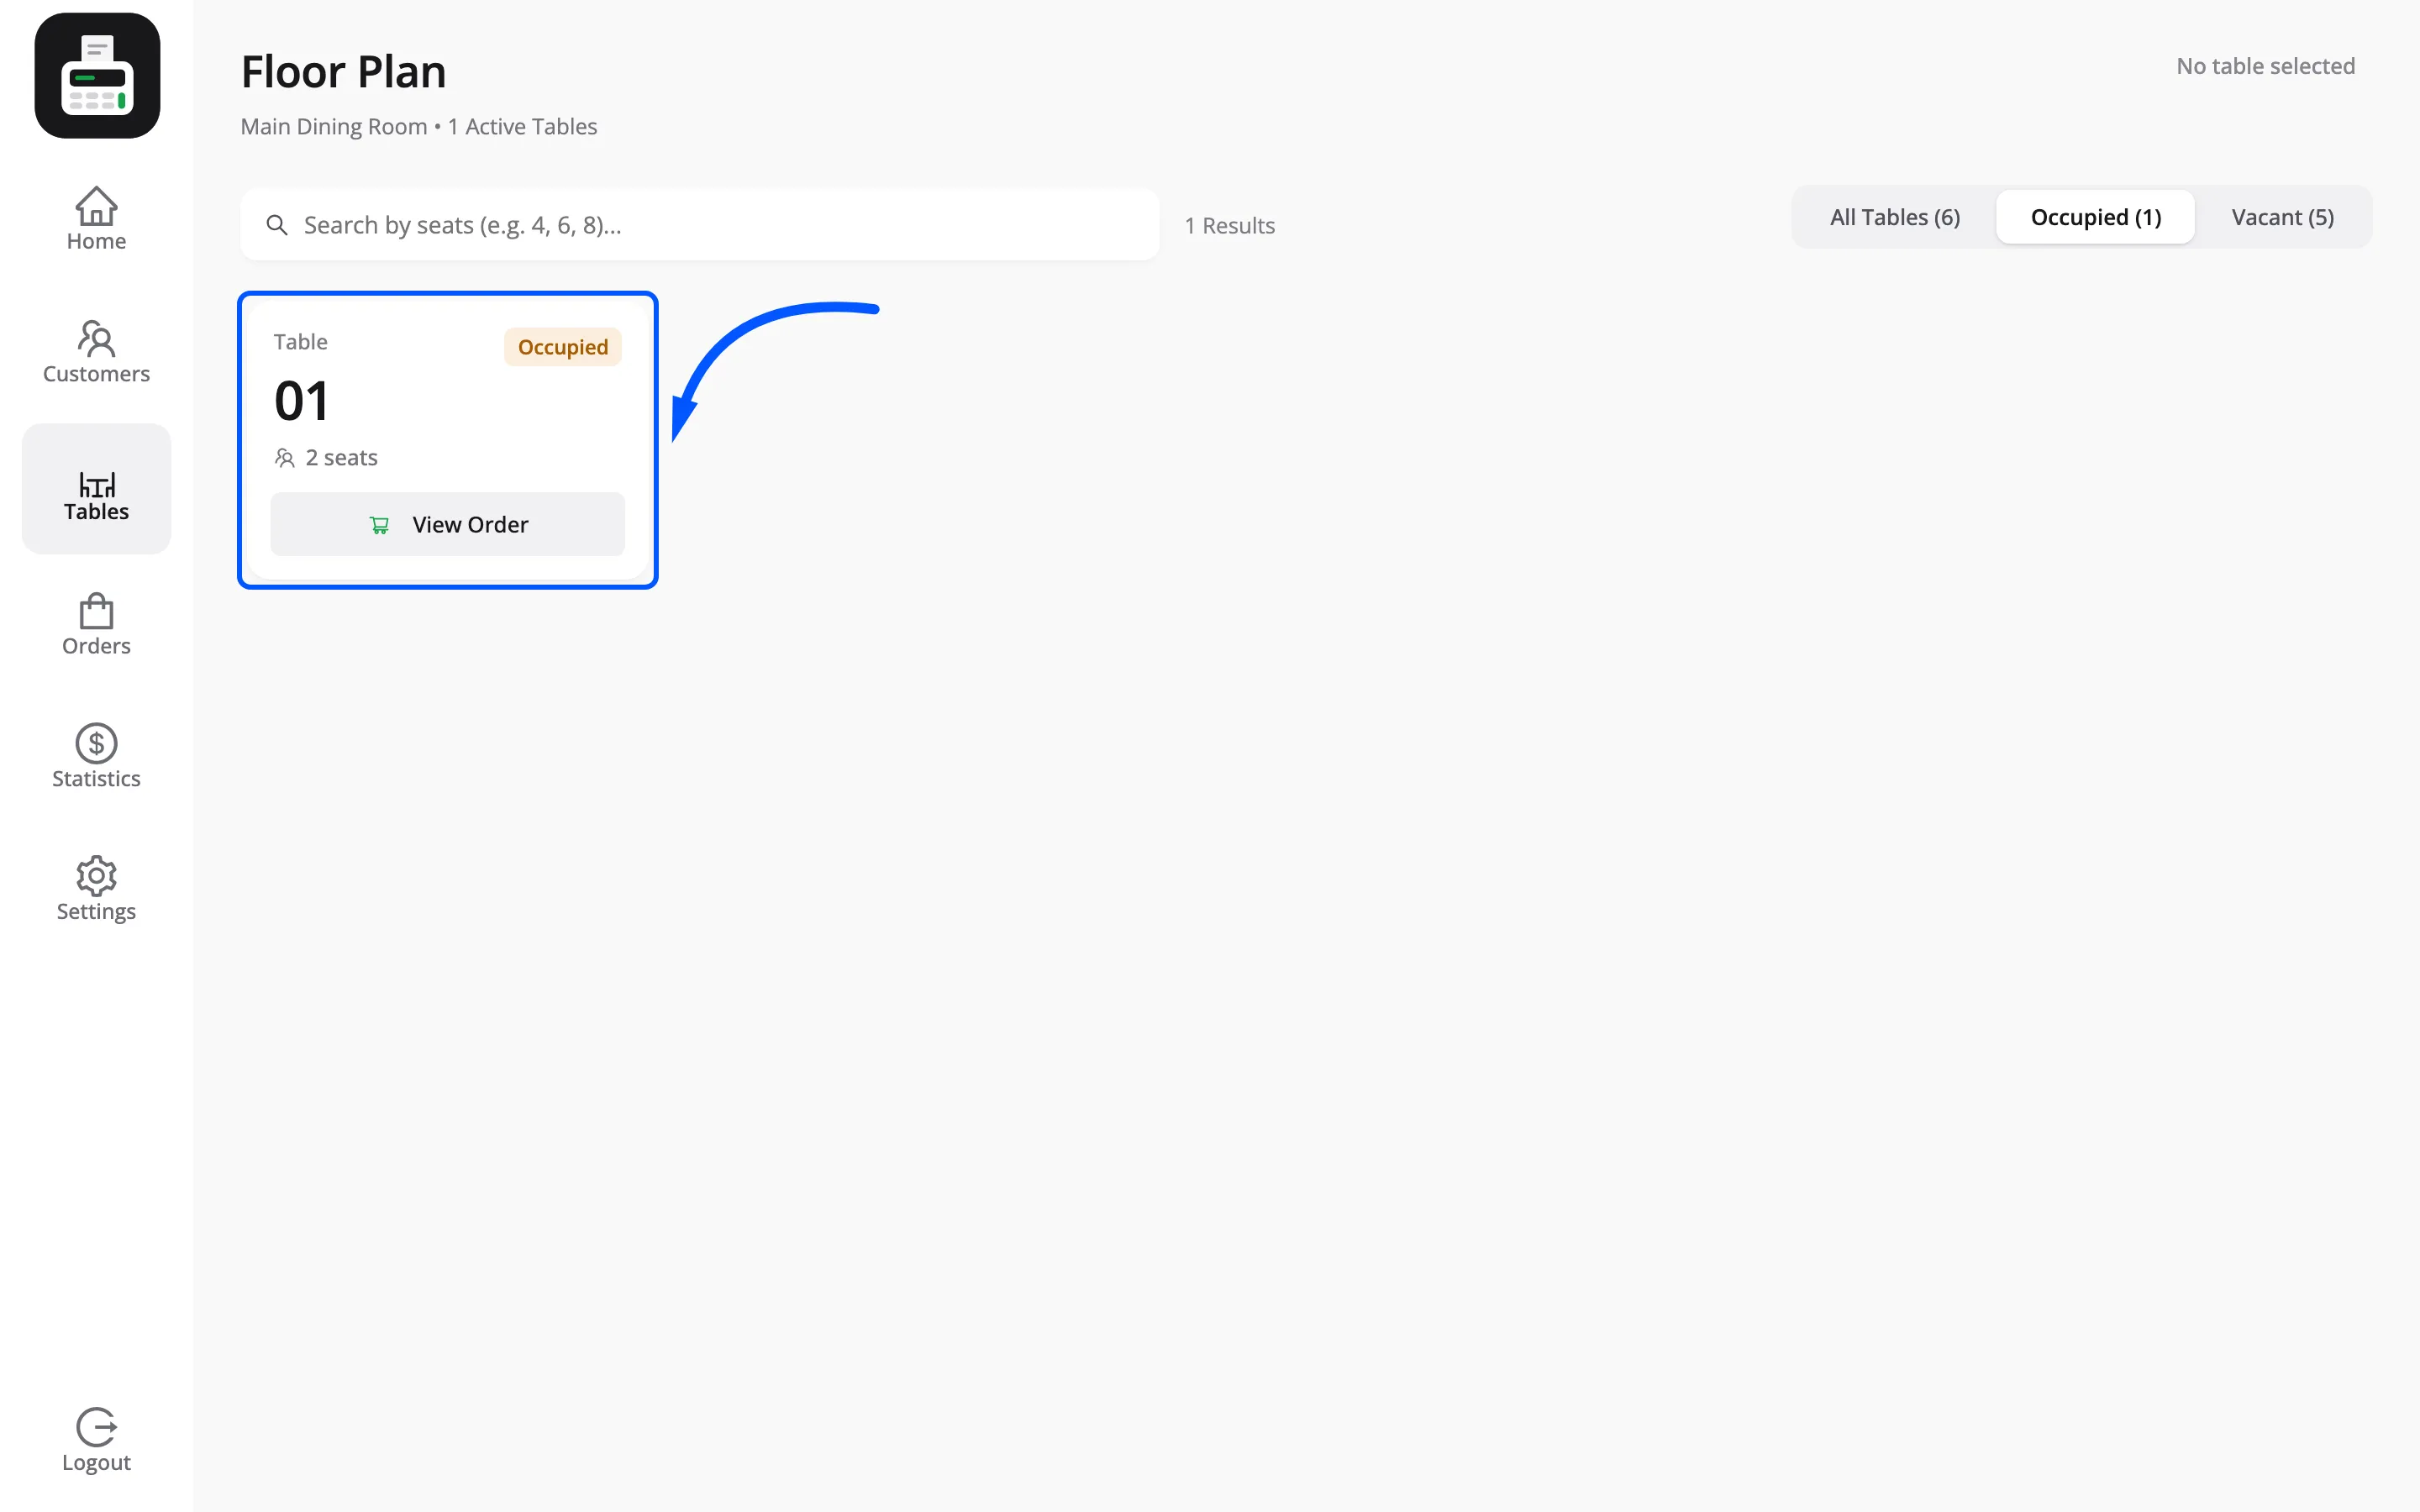
Section titled “Step 6: Add more to a table”Press View Order on that card. A Table Order panel opens with the items on the table, the totals, the Info line the cashier typed, and four buttons.
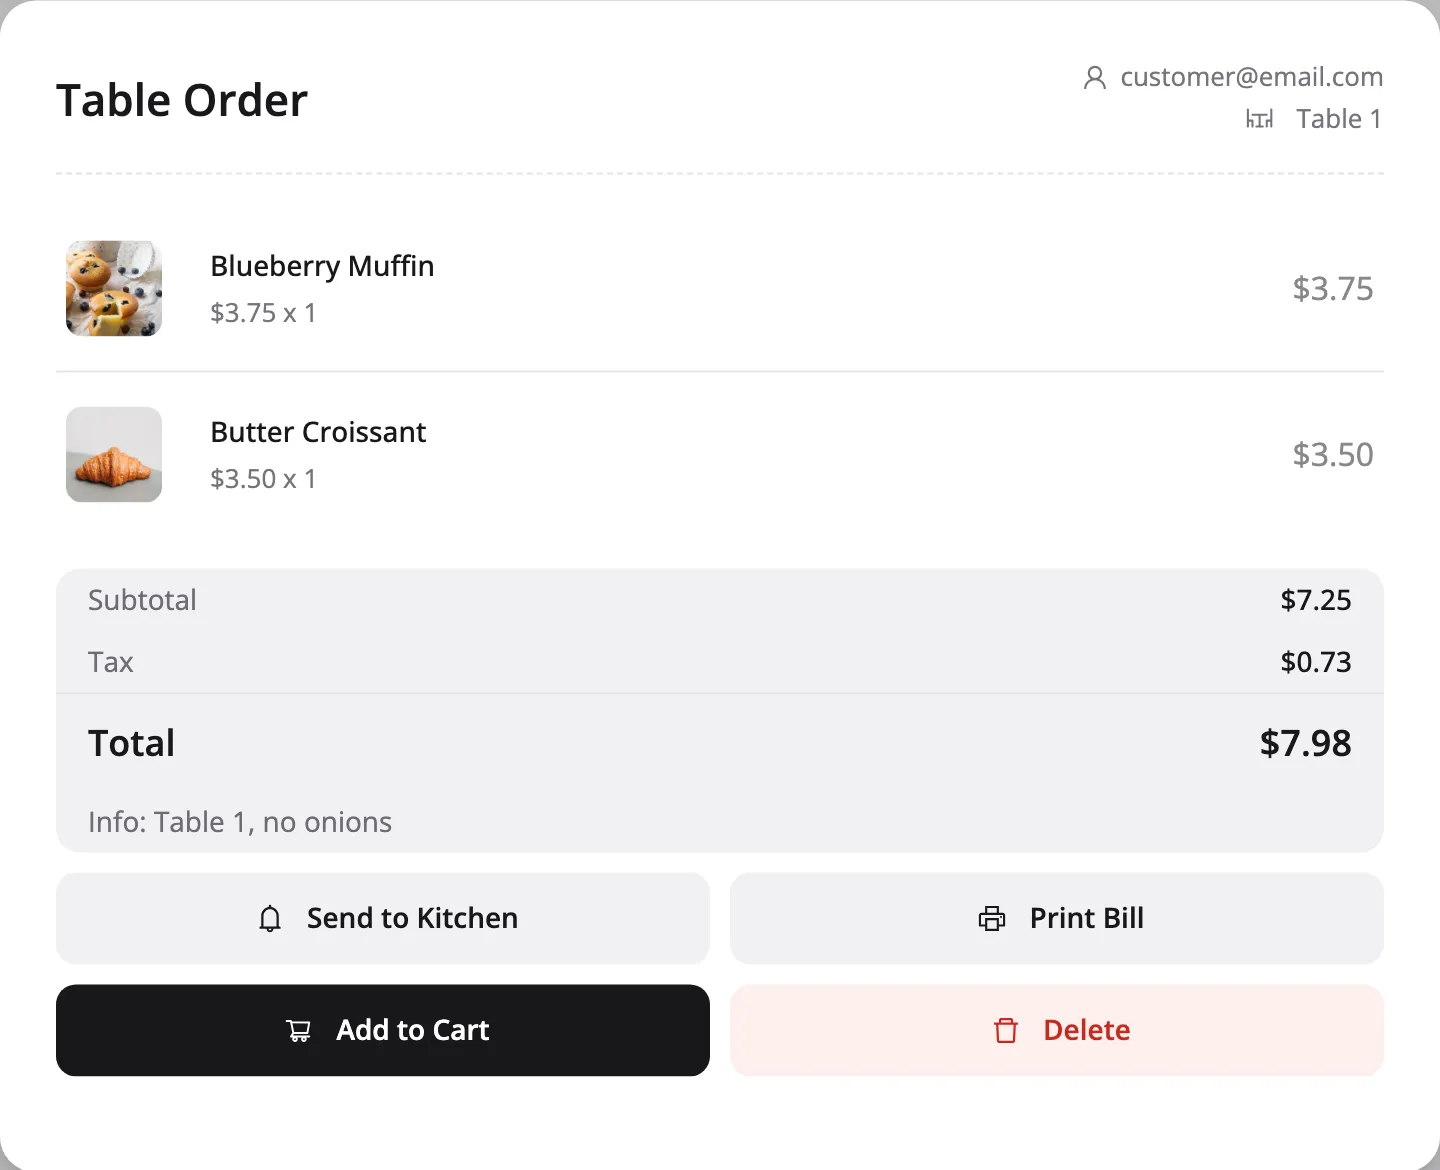
| Button | What it does |
|---|---|
| Send to Kitchen | Puts the ticket on the Kitchen Display (Pro) |
| Print Bill | Prints the current total for the table, unpaid |
| Add to Cart | Brings the order back into the cart so you can add to it |
| Delete | Discards the table order |
Press Add to Cart, add the extra items, then press Hold Order again. That is how a second round of drinks lands on the same bill.
Step 7: Close the table
Section titled “Step 7: Close the table”When the party asks for the bill:
- Press View Order on the table’s card.
- Press Print Bill if they want to see it first.
- Press Add to Cart to bring the order back.
- Press Proceed to Pay and take payment.
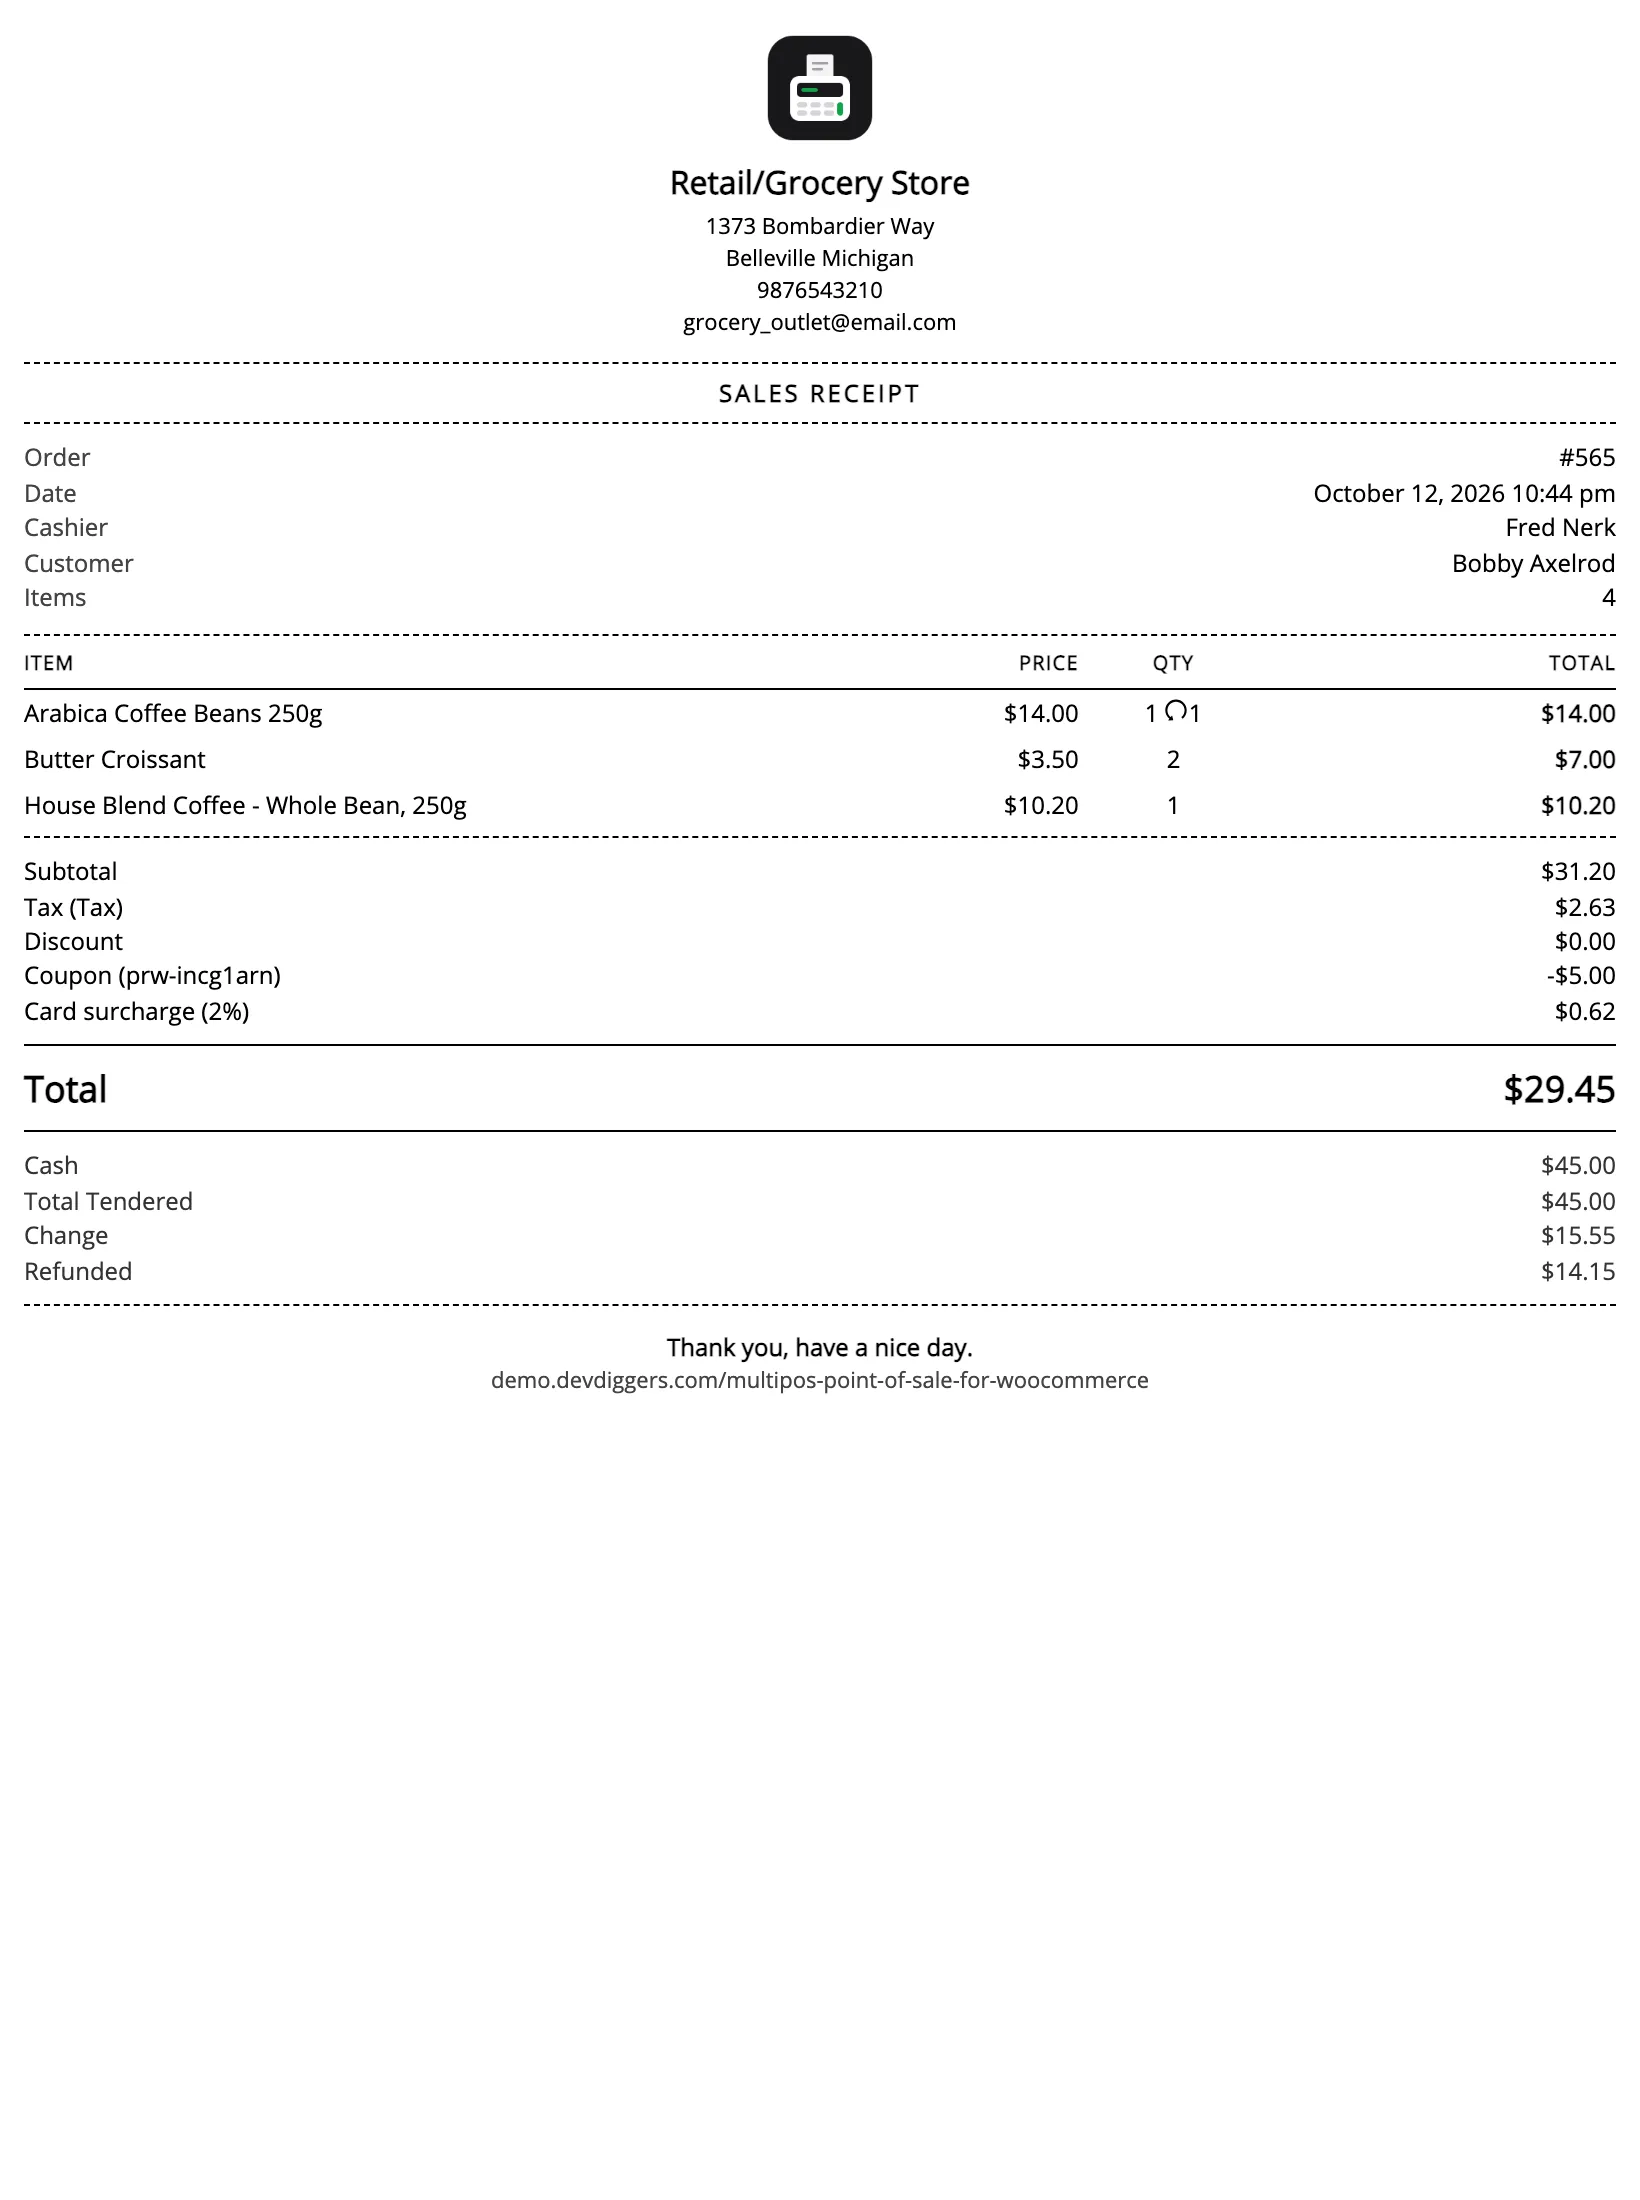
The order is created, the receipt prints, and the table returns to VACANT on the floor plan.
Delete is the other ending. Use it for a table that walked out, or an order put on the wrong table. It discards the order without creating a sale.
The rest of the POS is unchanged
Section titled “The rest of the POS is unchanged”Barcodes, customers, coupons, statistics and receipts all work exactly as they do in retail mode. A cafe that also sells beans over the counter uses the same screen for both.
Take Away orders skip the table entirely: choose Take Away, build the cart, take payment.
Where to go next
Section titled “Where to go next”- Tables for the field reference.
- How to Send Orders to the Kitchen
- How to Hold and Resume an Order
- How to Set Up Your Outlet