

How to Refund an Order (Pro)
A return is two things: the money back and the stock back. MultiPOS does both from one panel, and records the refund where your drawer count will find it.
Step 1: Find the order
Section titled “Step 1: Find the order”In the POS, press Orders in the menu. The Online tab lists every synced sale, newest first, and selecting one opens its details on the right.
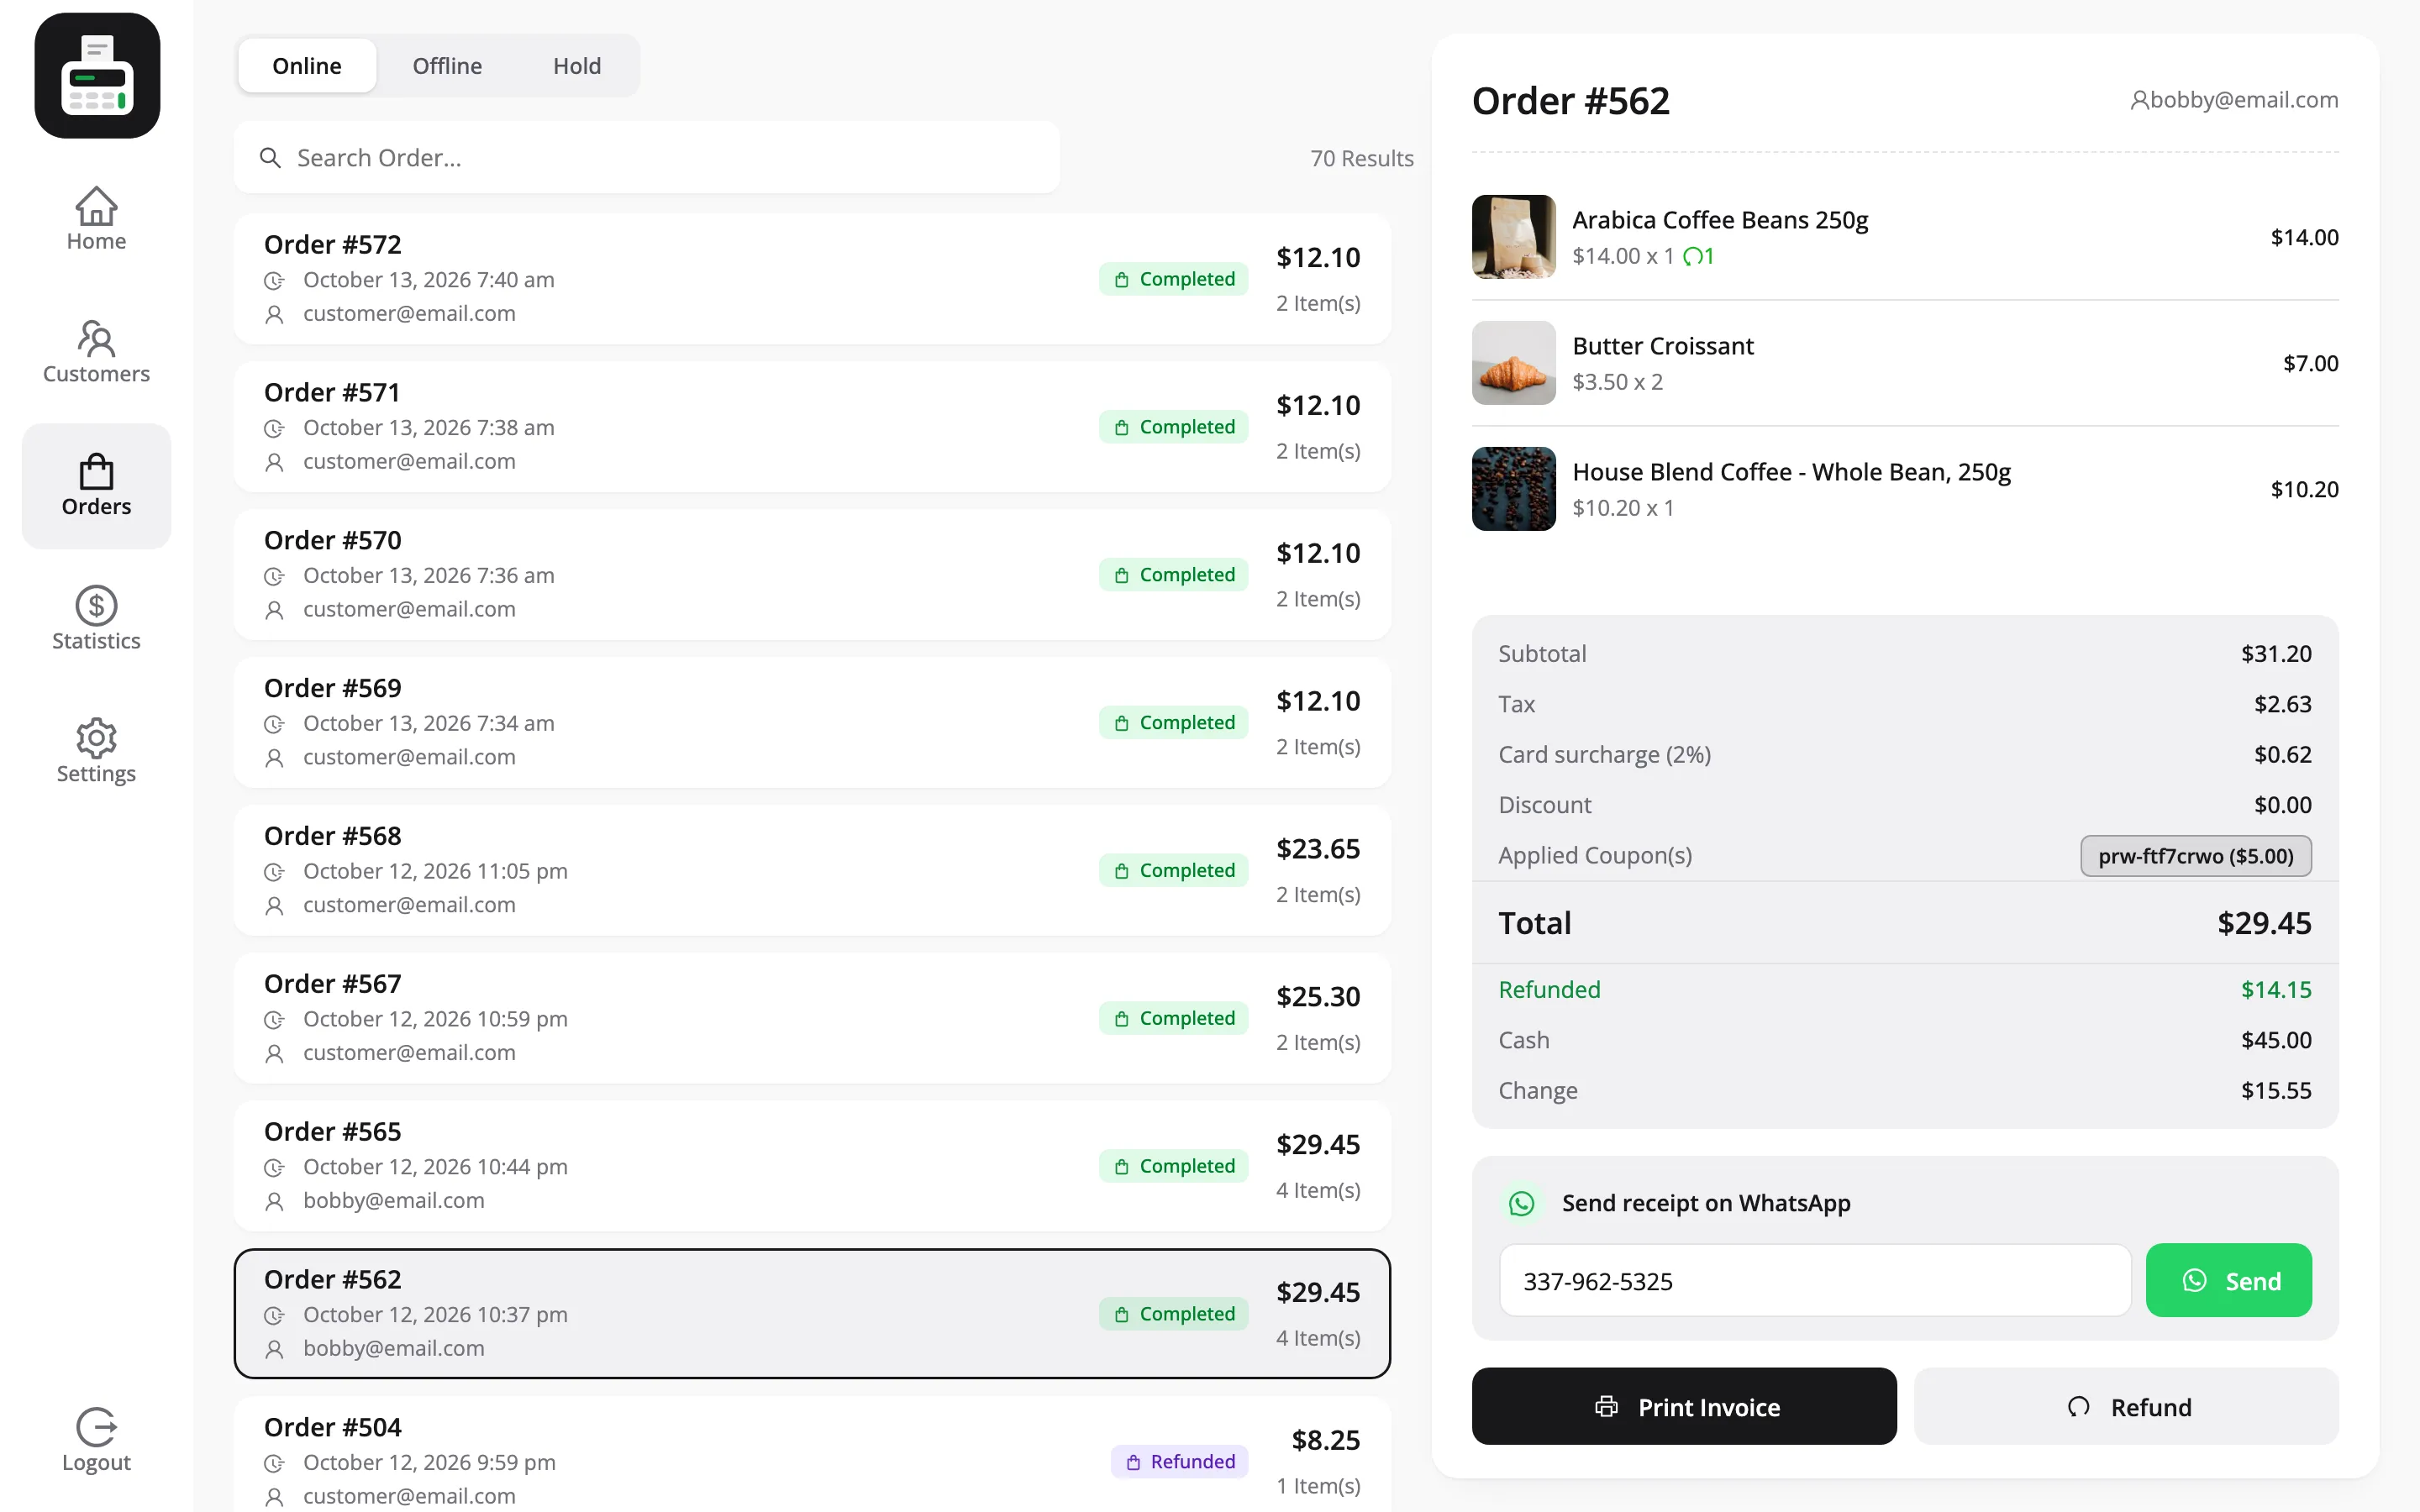
Search by order number, phone, email or customer name if the list is long.
Step 2: Press Refund
Section titled “Step 2: Press Refund”Refund is the button at the foot of the order details panel, under Print Invoice. It is greyed out once an order is fully refunded.
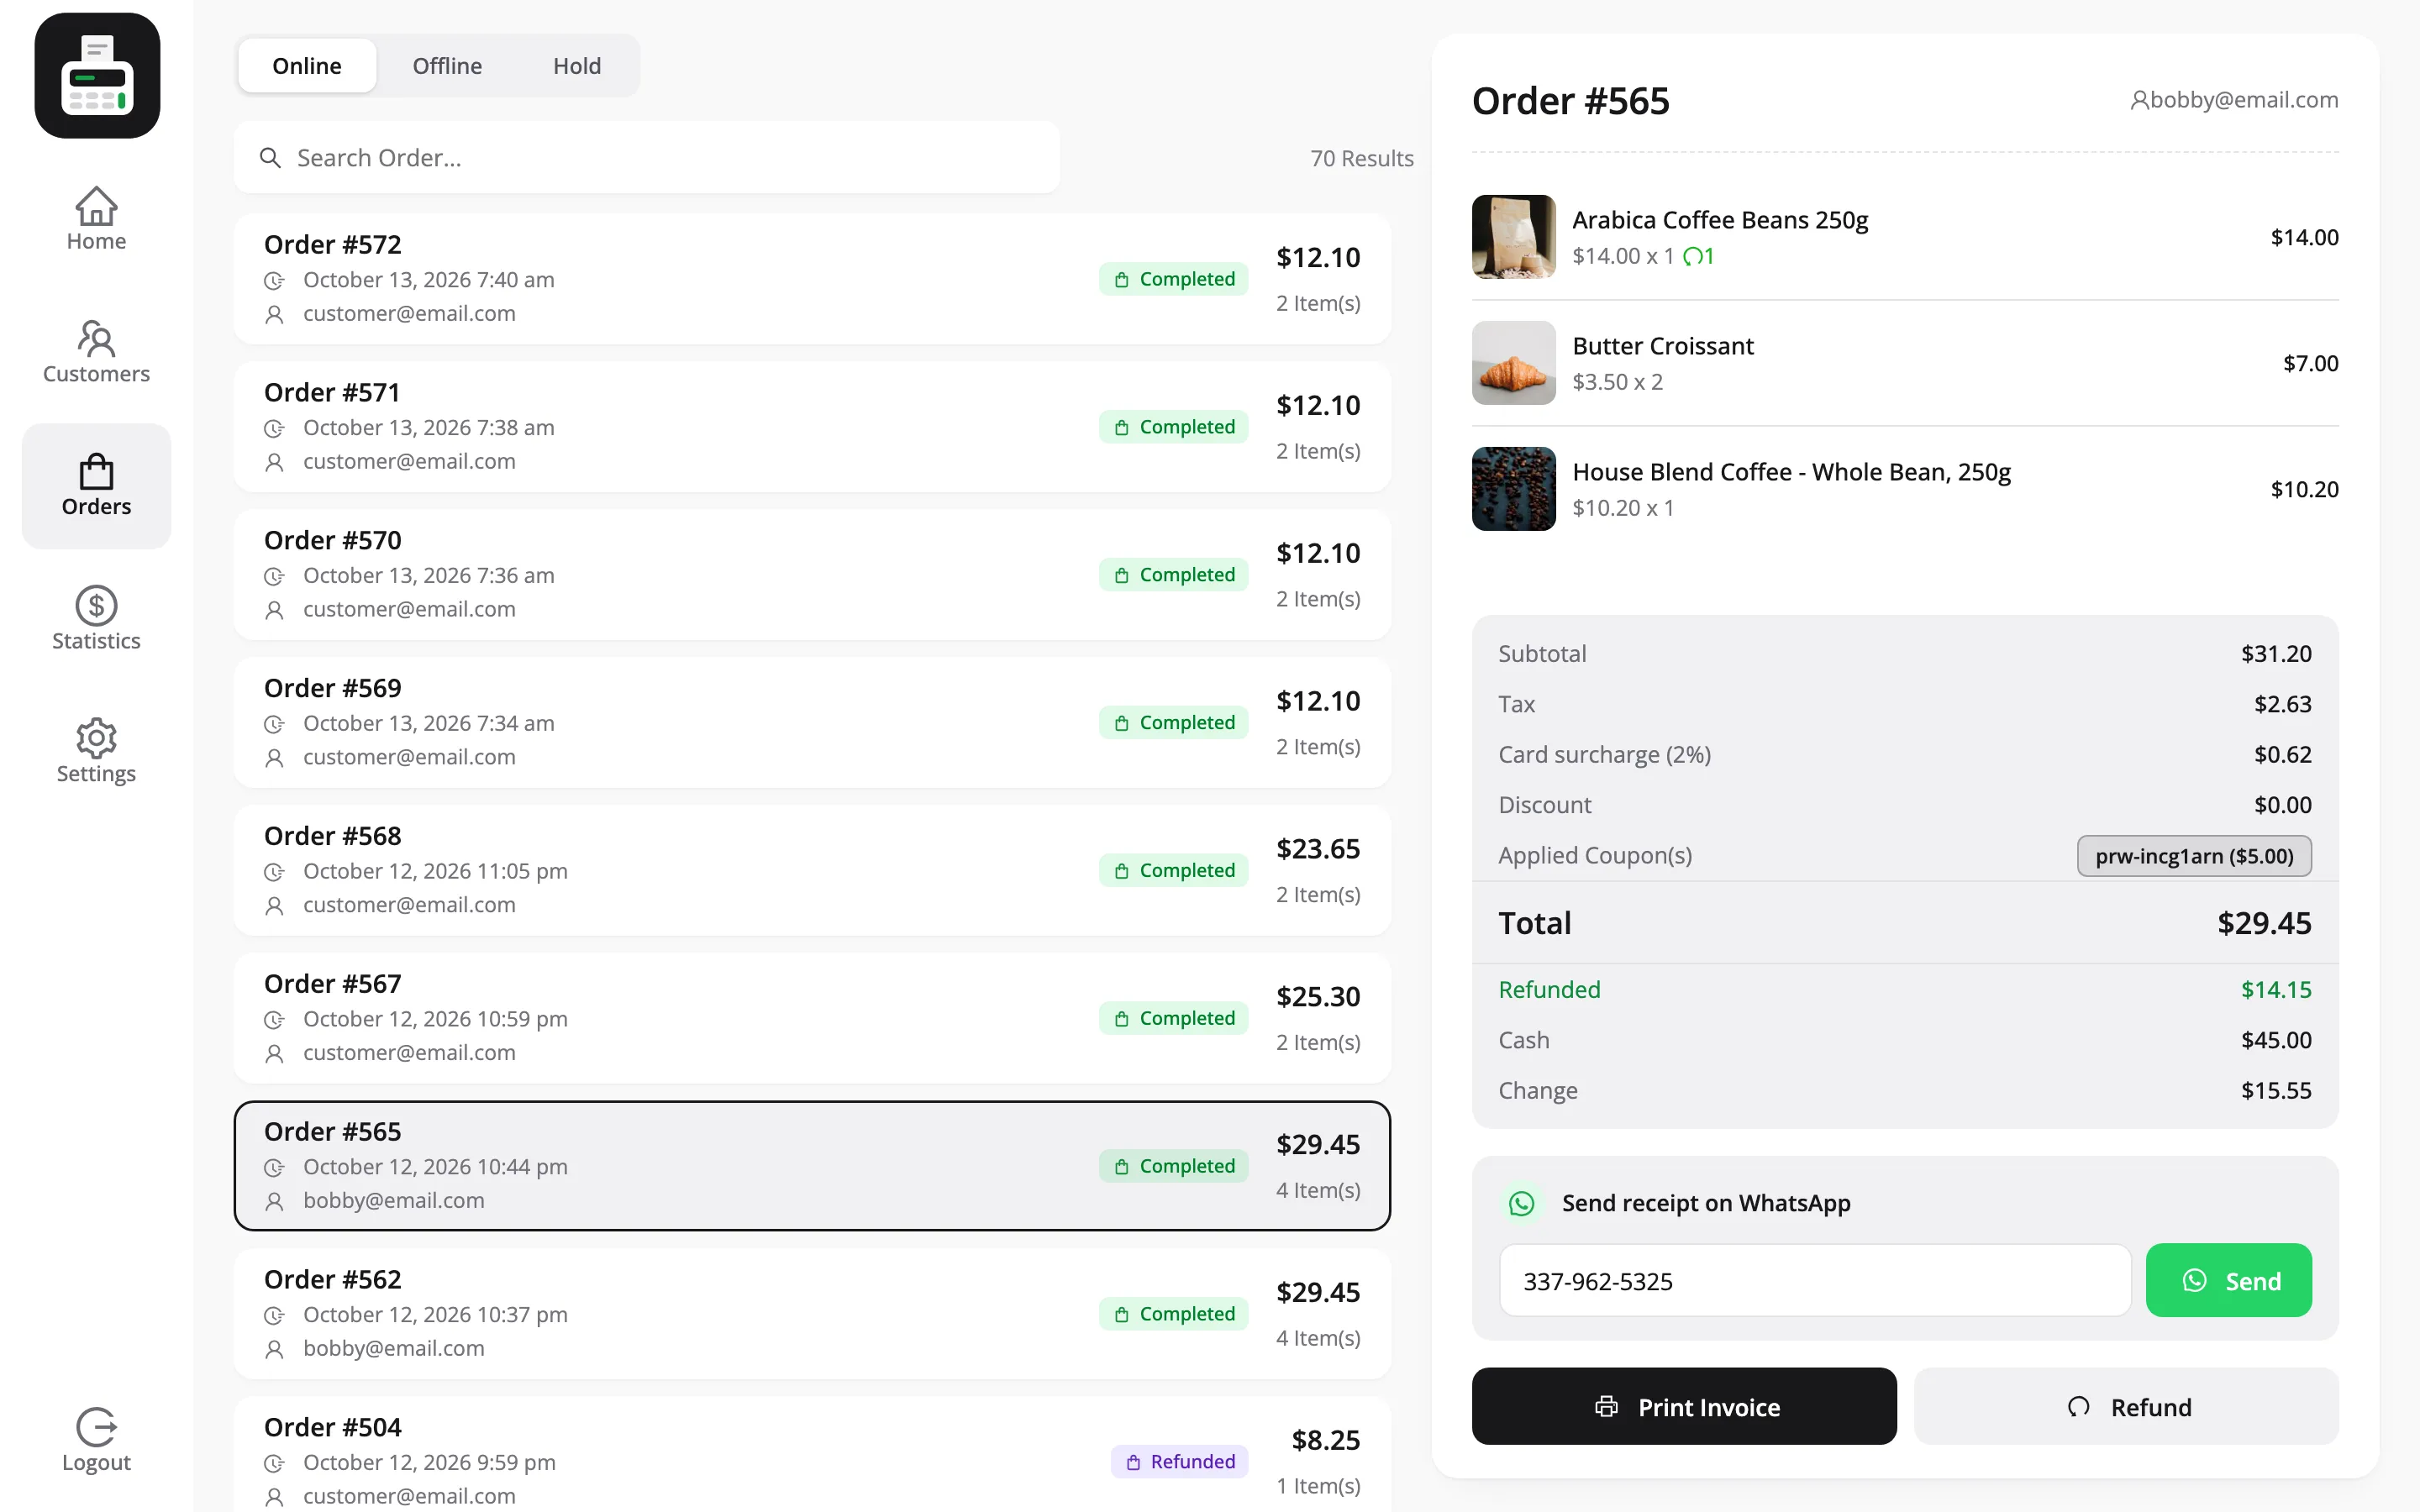
Above it, in the totals, sits the Refunded row. It reads $0.00 on an untouched order and carries the running total once anything has gone back, which is how you avoid refunding the same order twice on a busy afternoon.
Step 3: Choose how many of each item
Section titled “Step 3: Choose how many of each item”Available Items for Refund lists the order line by line, each with a quantity stepper starting at zero.
Step the quantity up on the lines coming back. Leave the rest at zero.
This is how a partial refund is entered. There is no box to type an amount into. You say what is coming back and the POS works out what that is worth.
The stepper will not go past what was sold, and it will not go past what is still refundable. Two of three units already returned leaves a ceiling of one, so the same unit cannot be refunded twice.
Step 4: Decide about the stock
Section titled “Step 4: Decide about the stock”Restock Items sits at the bottom left, and it is ticked by default.
Ticked, the goods go back into stock and back on sale, on the website as well as at the counter. That is right for an unopened return.
Untick it when the goods are not going back on the shelf: damaged, opened, a warranty replacement. Leaving it ticked there tells your website it has something to sell that it does not have.
Step 5: Check the amount and press Refund
Section titled “Step 5: Check the amount and press Refund”Refund Amount to the right of the checkbox updates as you change the quantities.
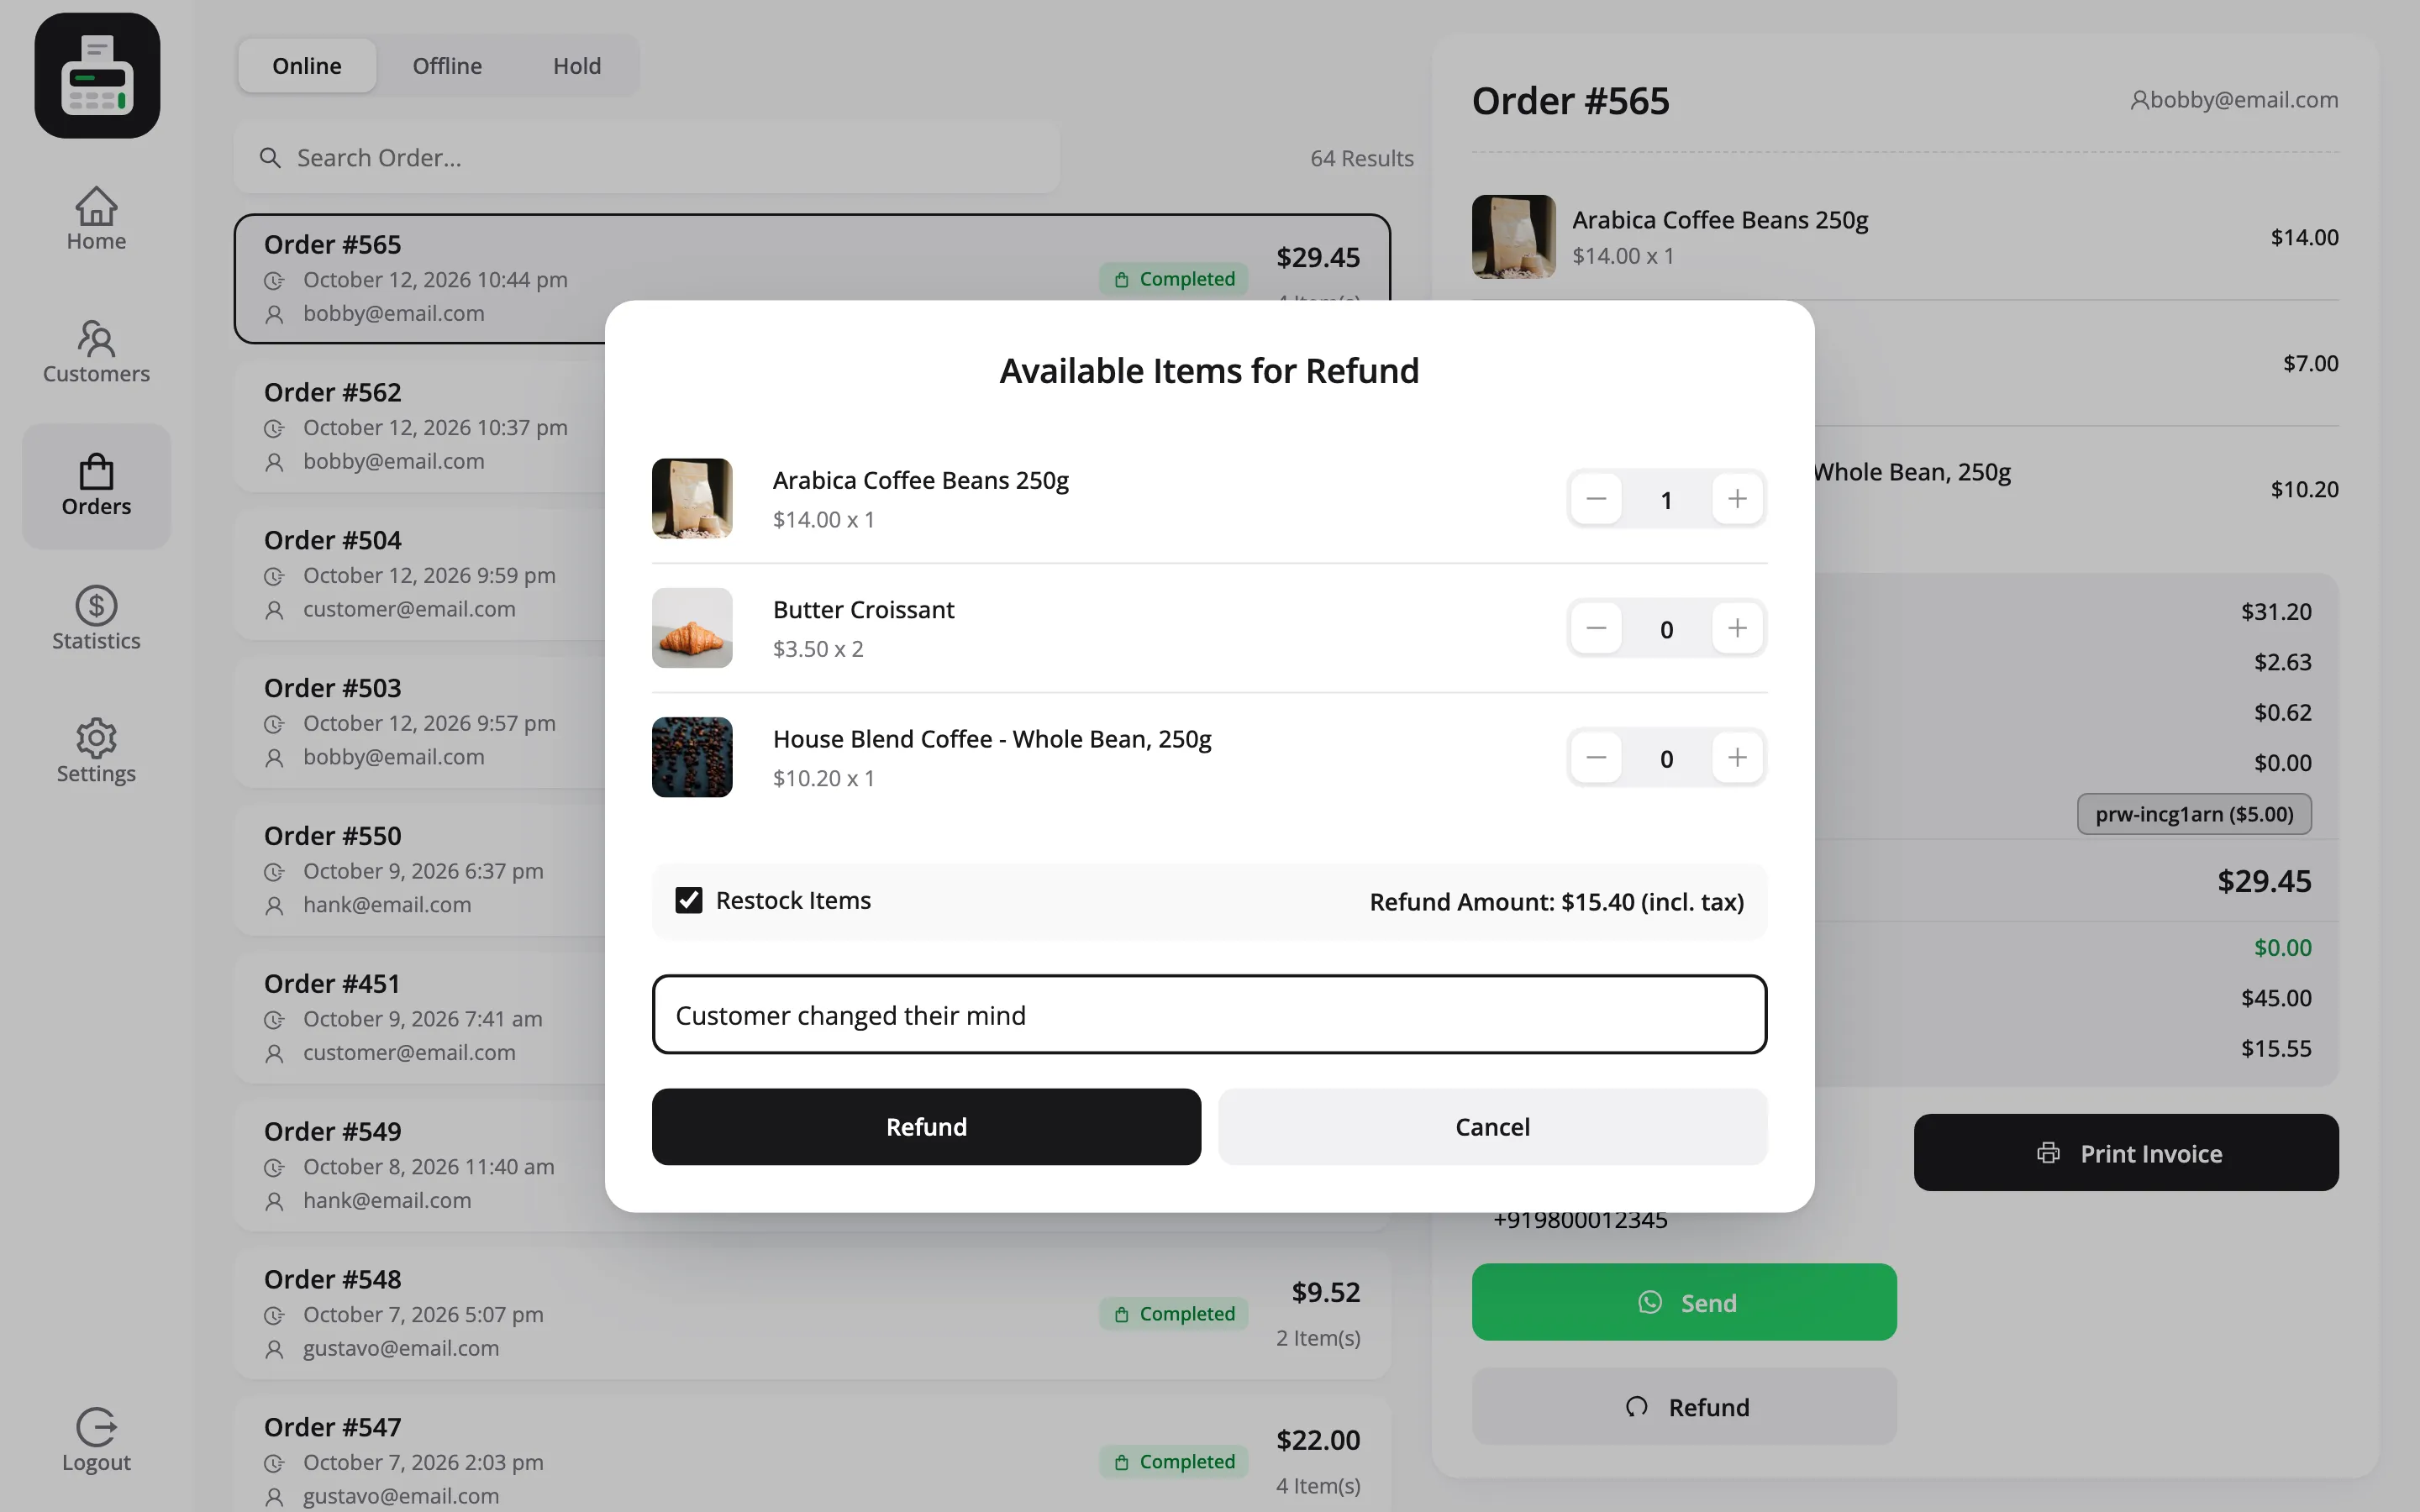
It is the figure including tax, labelled as such. One $14.00 bag on a 10% tax rate shows $15.40.
When the sale used a coupon or a LoyaltyX reward, the amount actually refunded is lower than the popup shows, because the coupon’s share of that item comes off. The demo’s sale had a $5.00 reward, so the bag refunded $14.15. The refund note on the order always carries the exact figure.
Enter Reason (Optional) is a free-text line. It is optional and it is worth typing anyway: it lands on the WooCommerce refund and it is the only explanation anyone gets in three months’ time.
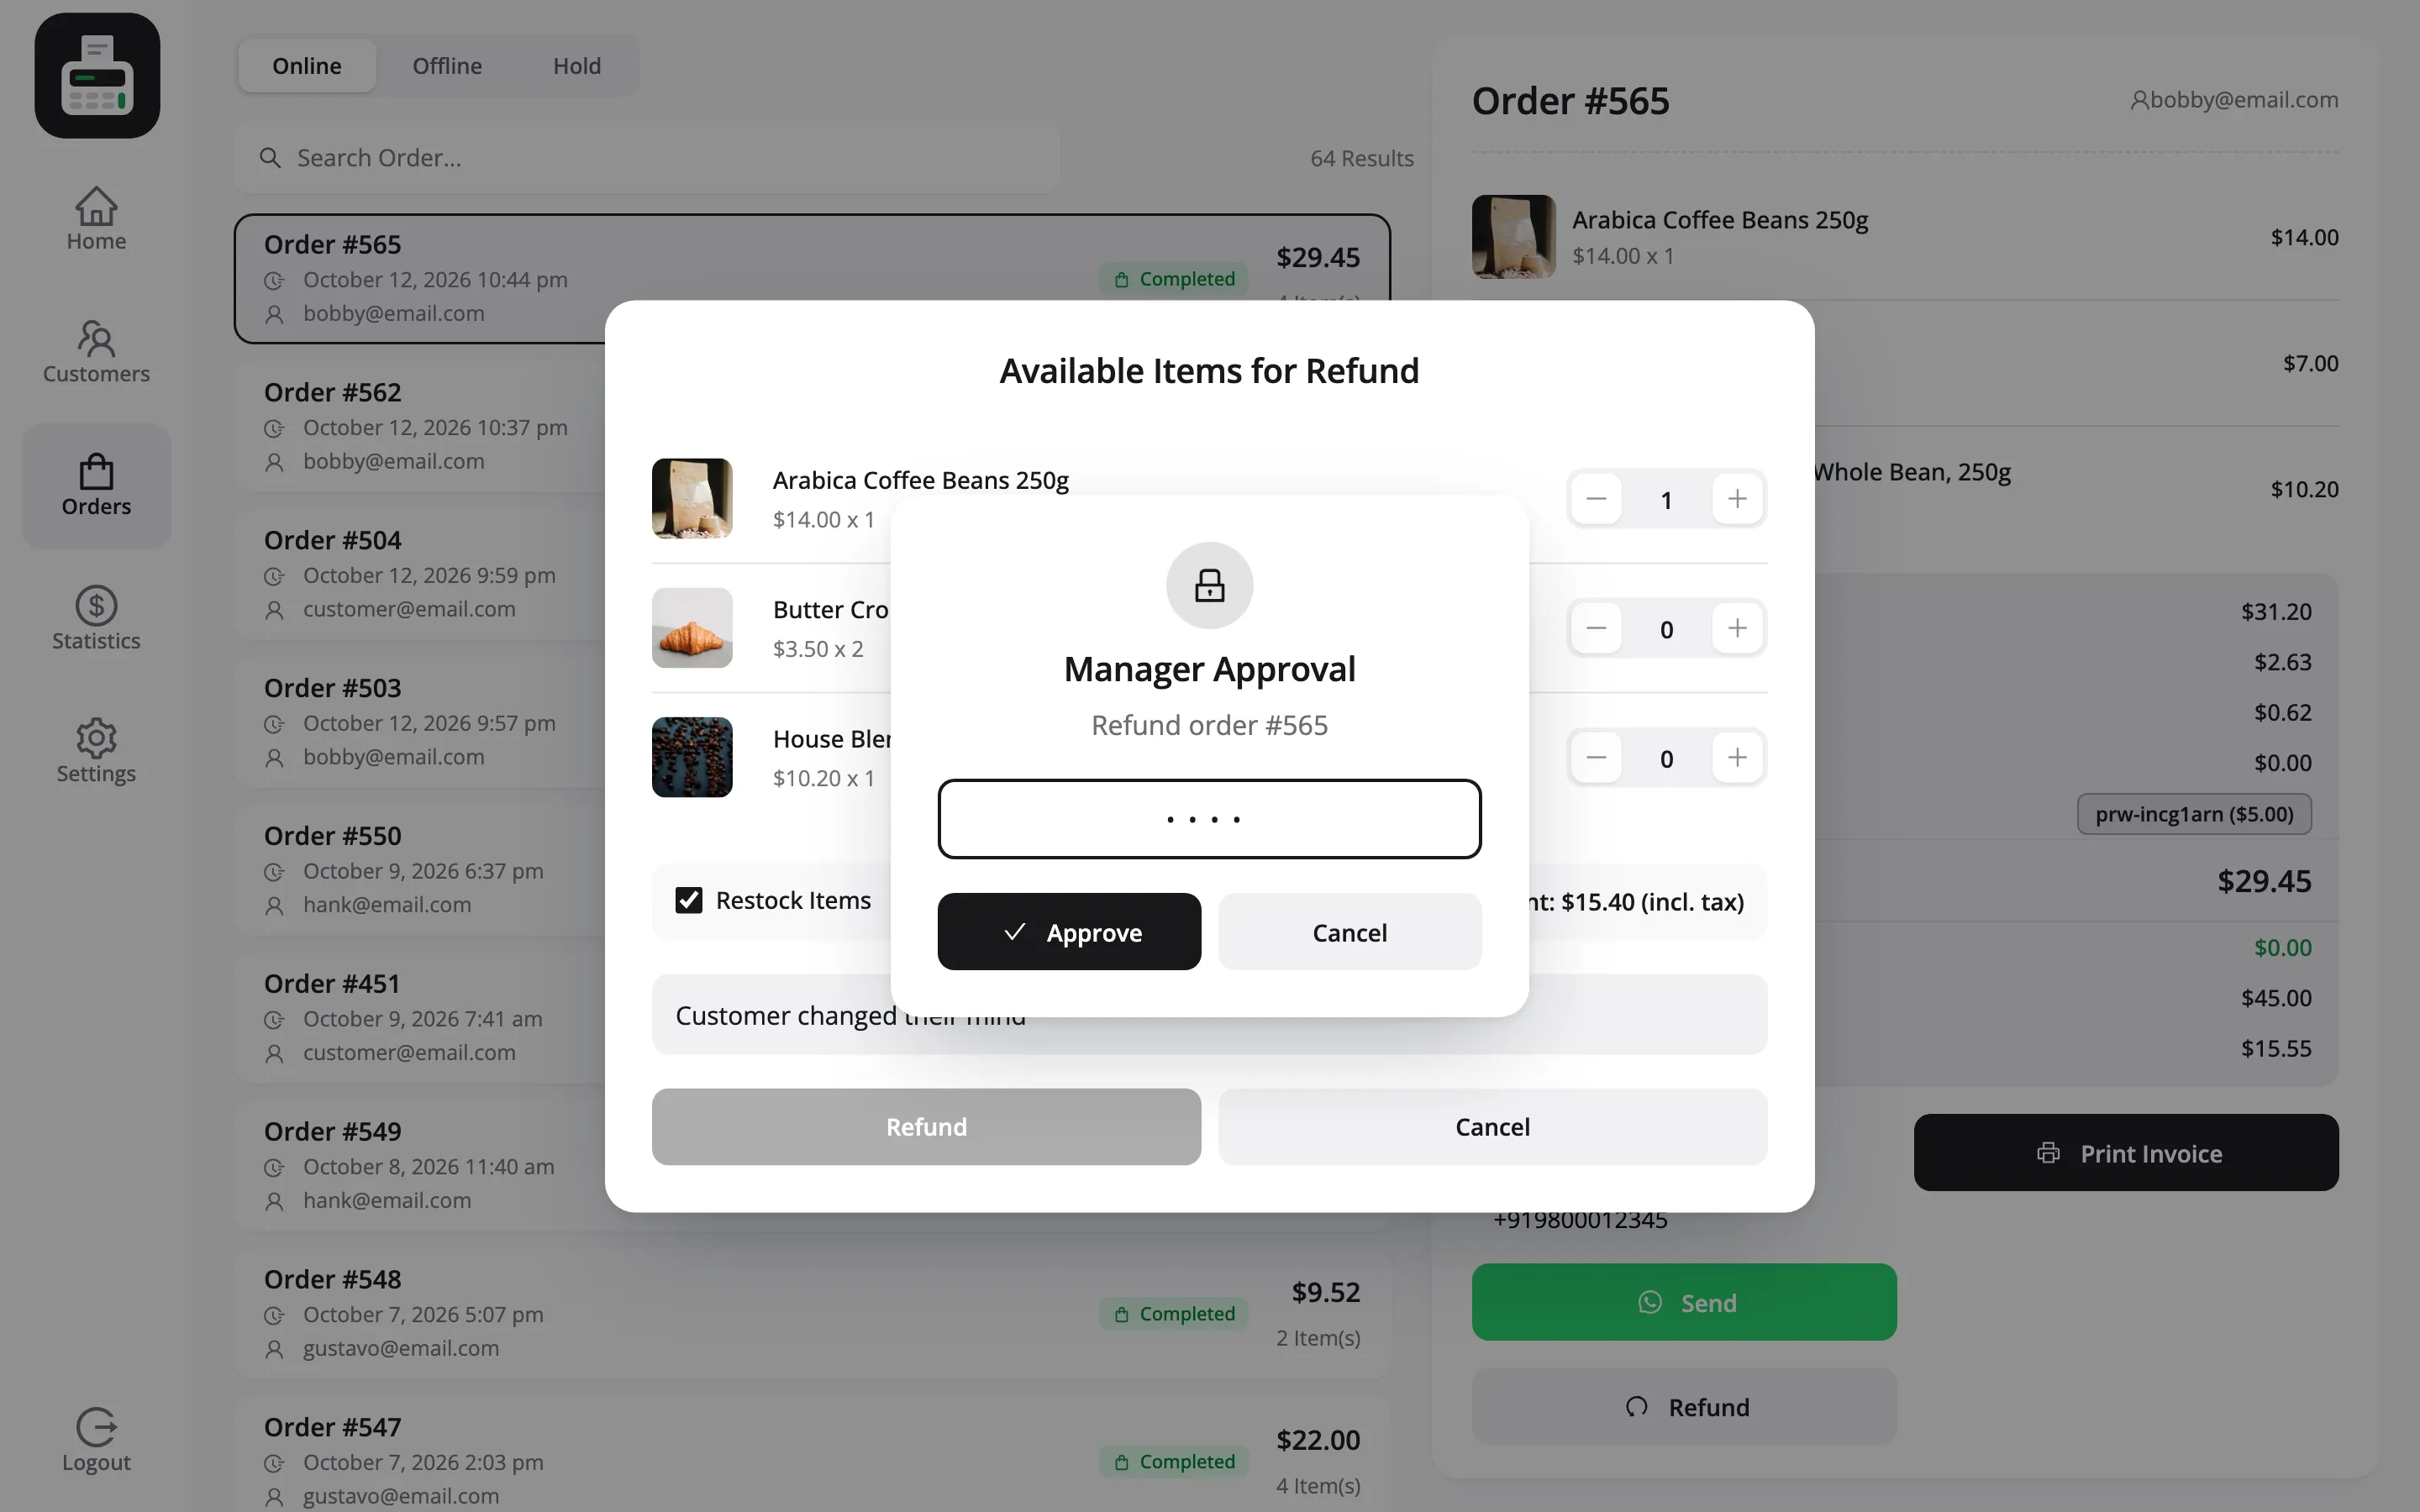
Press Refund. If cashiers may not refund alone, Manager Approval opens with the reason Refund order #565, and a supervisor types their PIN.
The POS confirms with Refund Success, and Approved by Jordan Belfort. when a PIN was used. The Refunded row now carries the amount, and the item line shows the refunded quantity.
Who may refund alone is set under Permissions. A cashier can only ever refund orders placed at an outlet they are assigned to.
Refund is disabled until at least one quantity is above zero, so an empty press does nothing.
Then hand the money over. Which brings us to the part that catches people out.
The POS does not move the money
Section titled “The POS does not move the money”What actually happens is this:
- The refund is written against the order in WooCommerce.
- The stock goes back, if Restock Items was ticked.
- A transaction row is written with the amount in the Out column. A card sale’s refund is written as Refund (not cash), so it does not lower the cash expected in the drawer.
- A note on the order names the refund, and the manager who approved it.
- You hand over the cash, or refund the card on the card machine.
Step five is a human step and there is nothing in the software to remind anyone of it. A refund recorded and not paid leaves an unhappy customer; a refund paid and not recorded leaves your drawer short with no explanation. Do both, in that order.
Where the refund shows up afterwards
Section titled “Where the refund shows up afterwards”In Today’s Transactions on the Statistics screen, as a row with the amount under Out and Refund as its type.
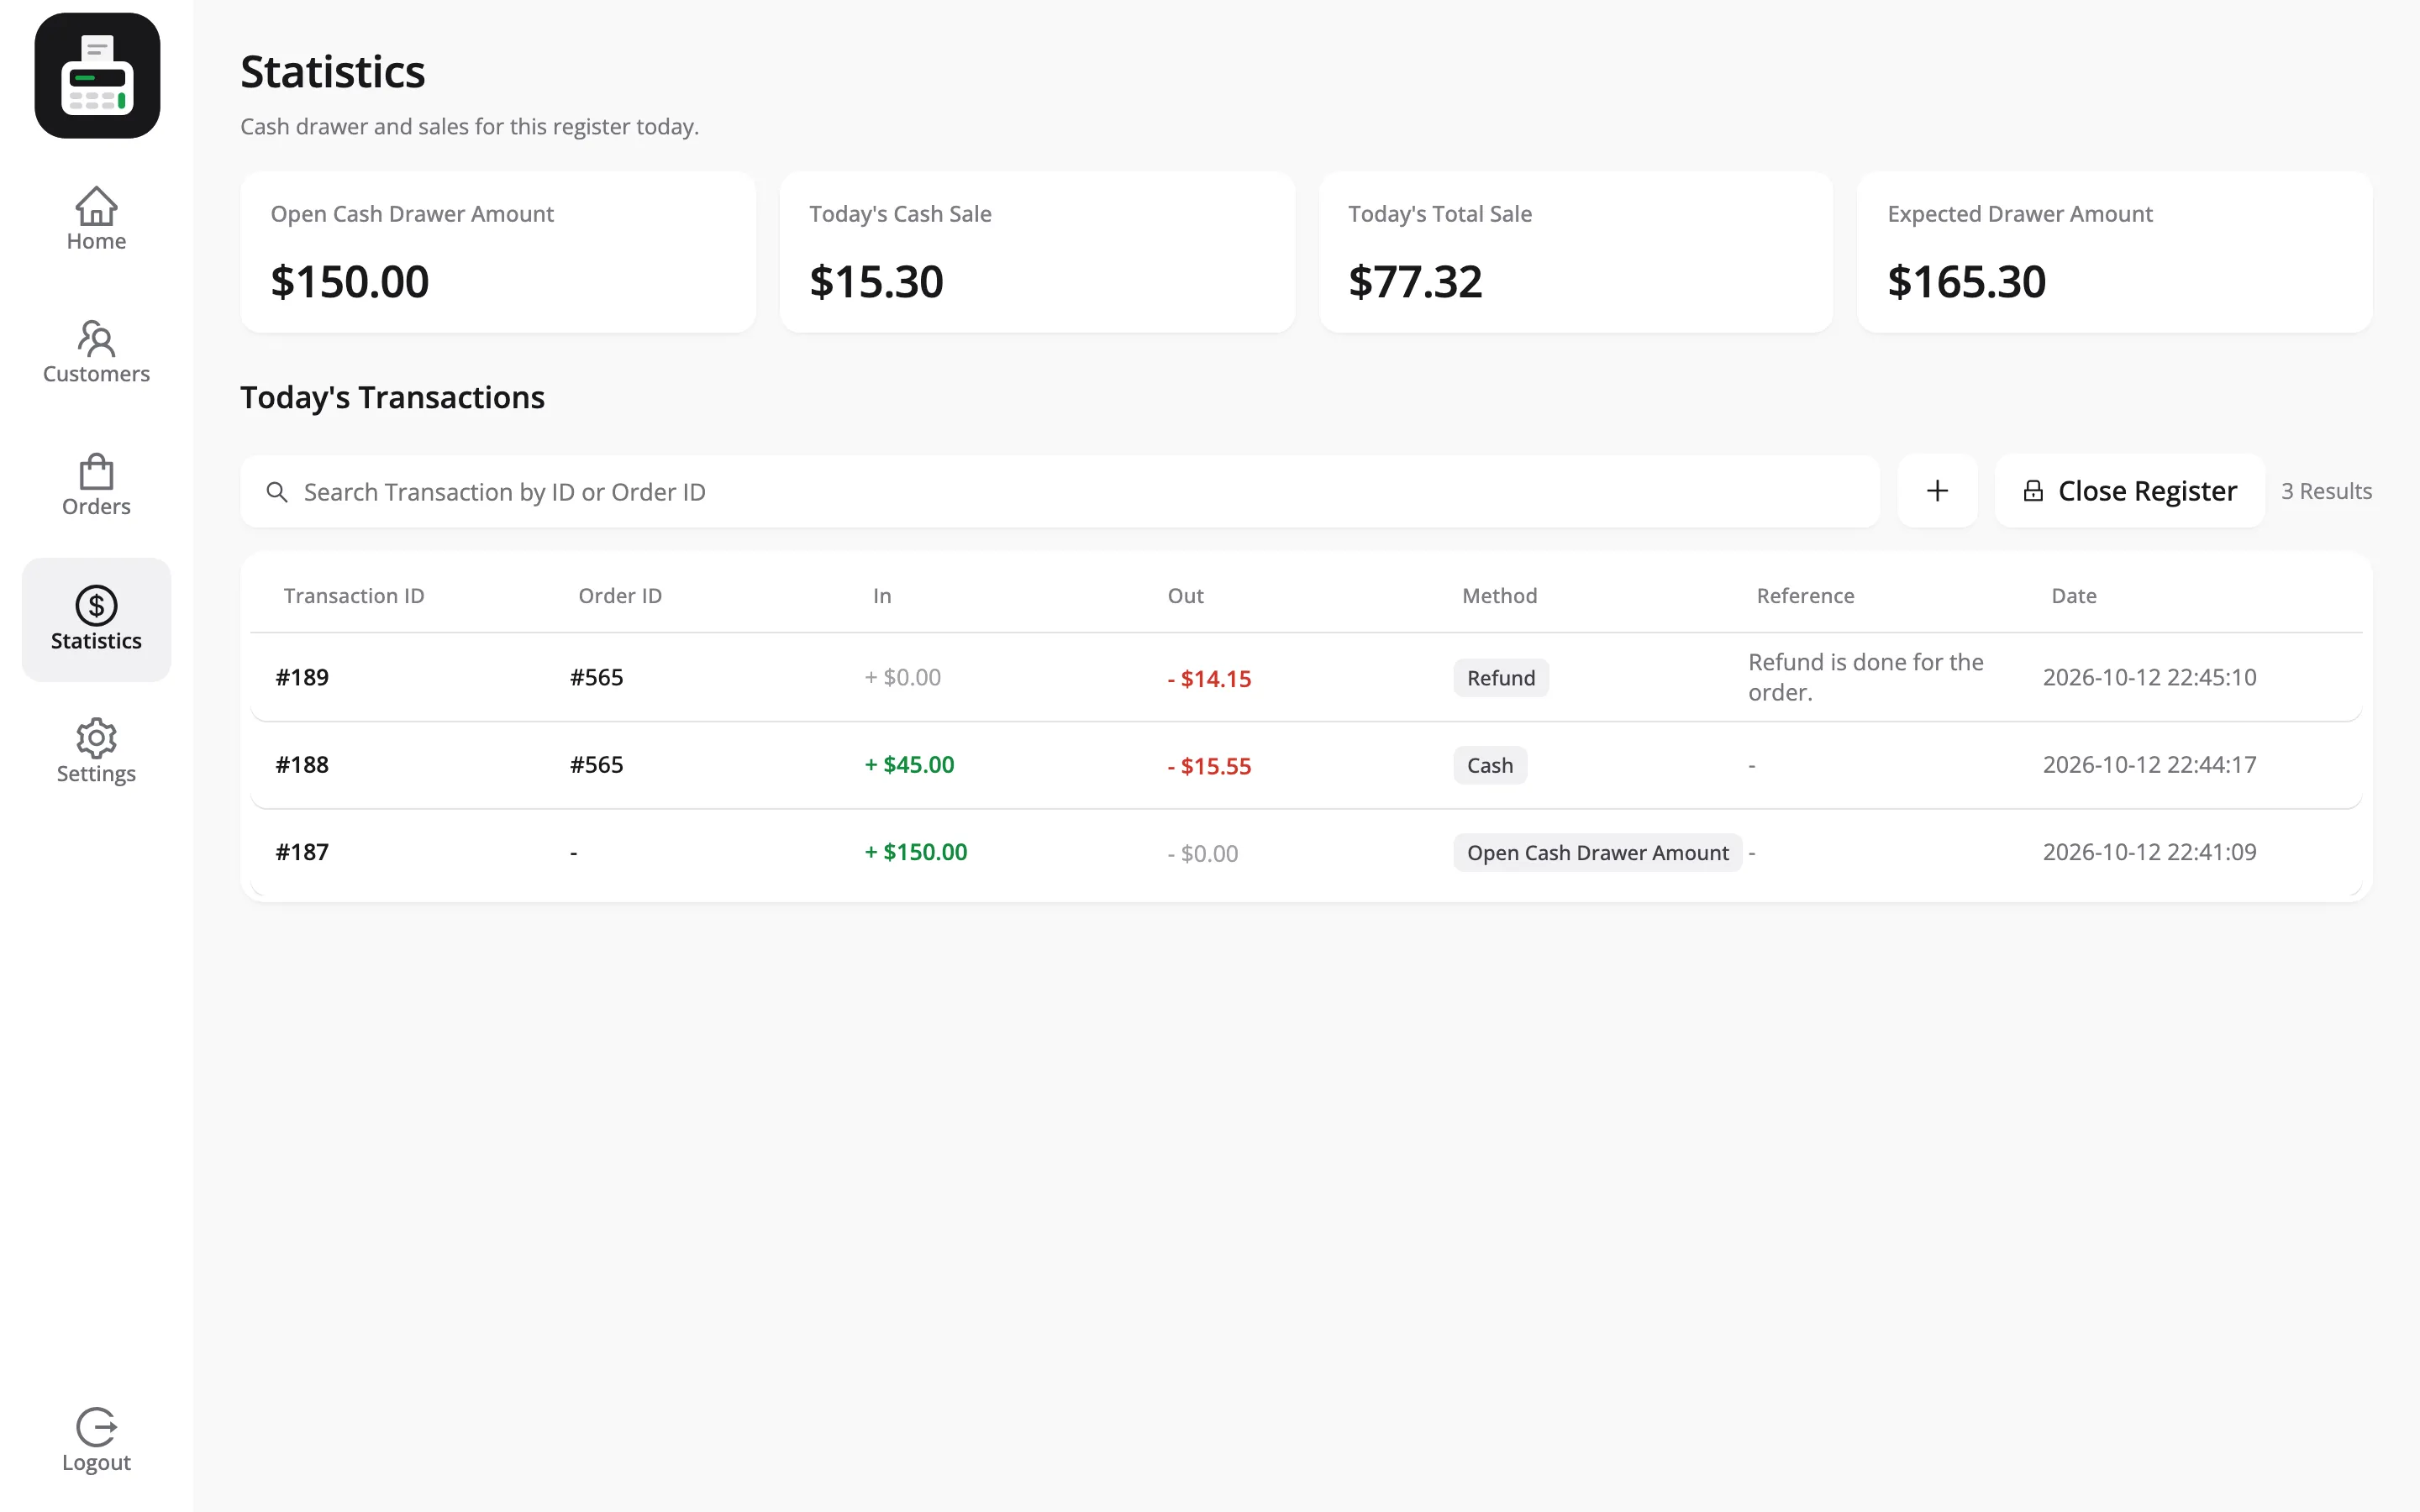
That row is the reason your drawer count still balances after a cash refund. Expected Drawer Amount takes the refund off, exactly as if the money had left, because it has. Today’s Cash Sale is net of cash refunds too, and the Z-report lists refunds on their own line.
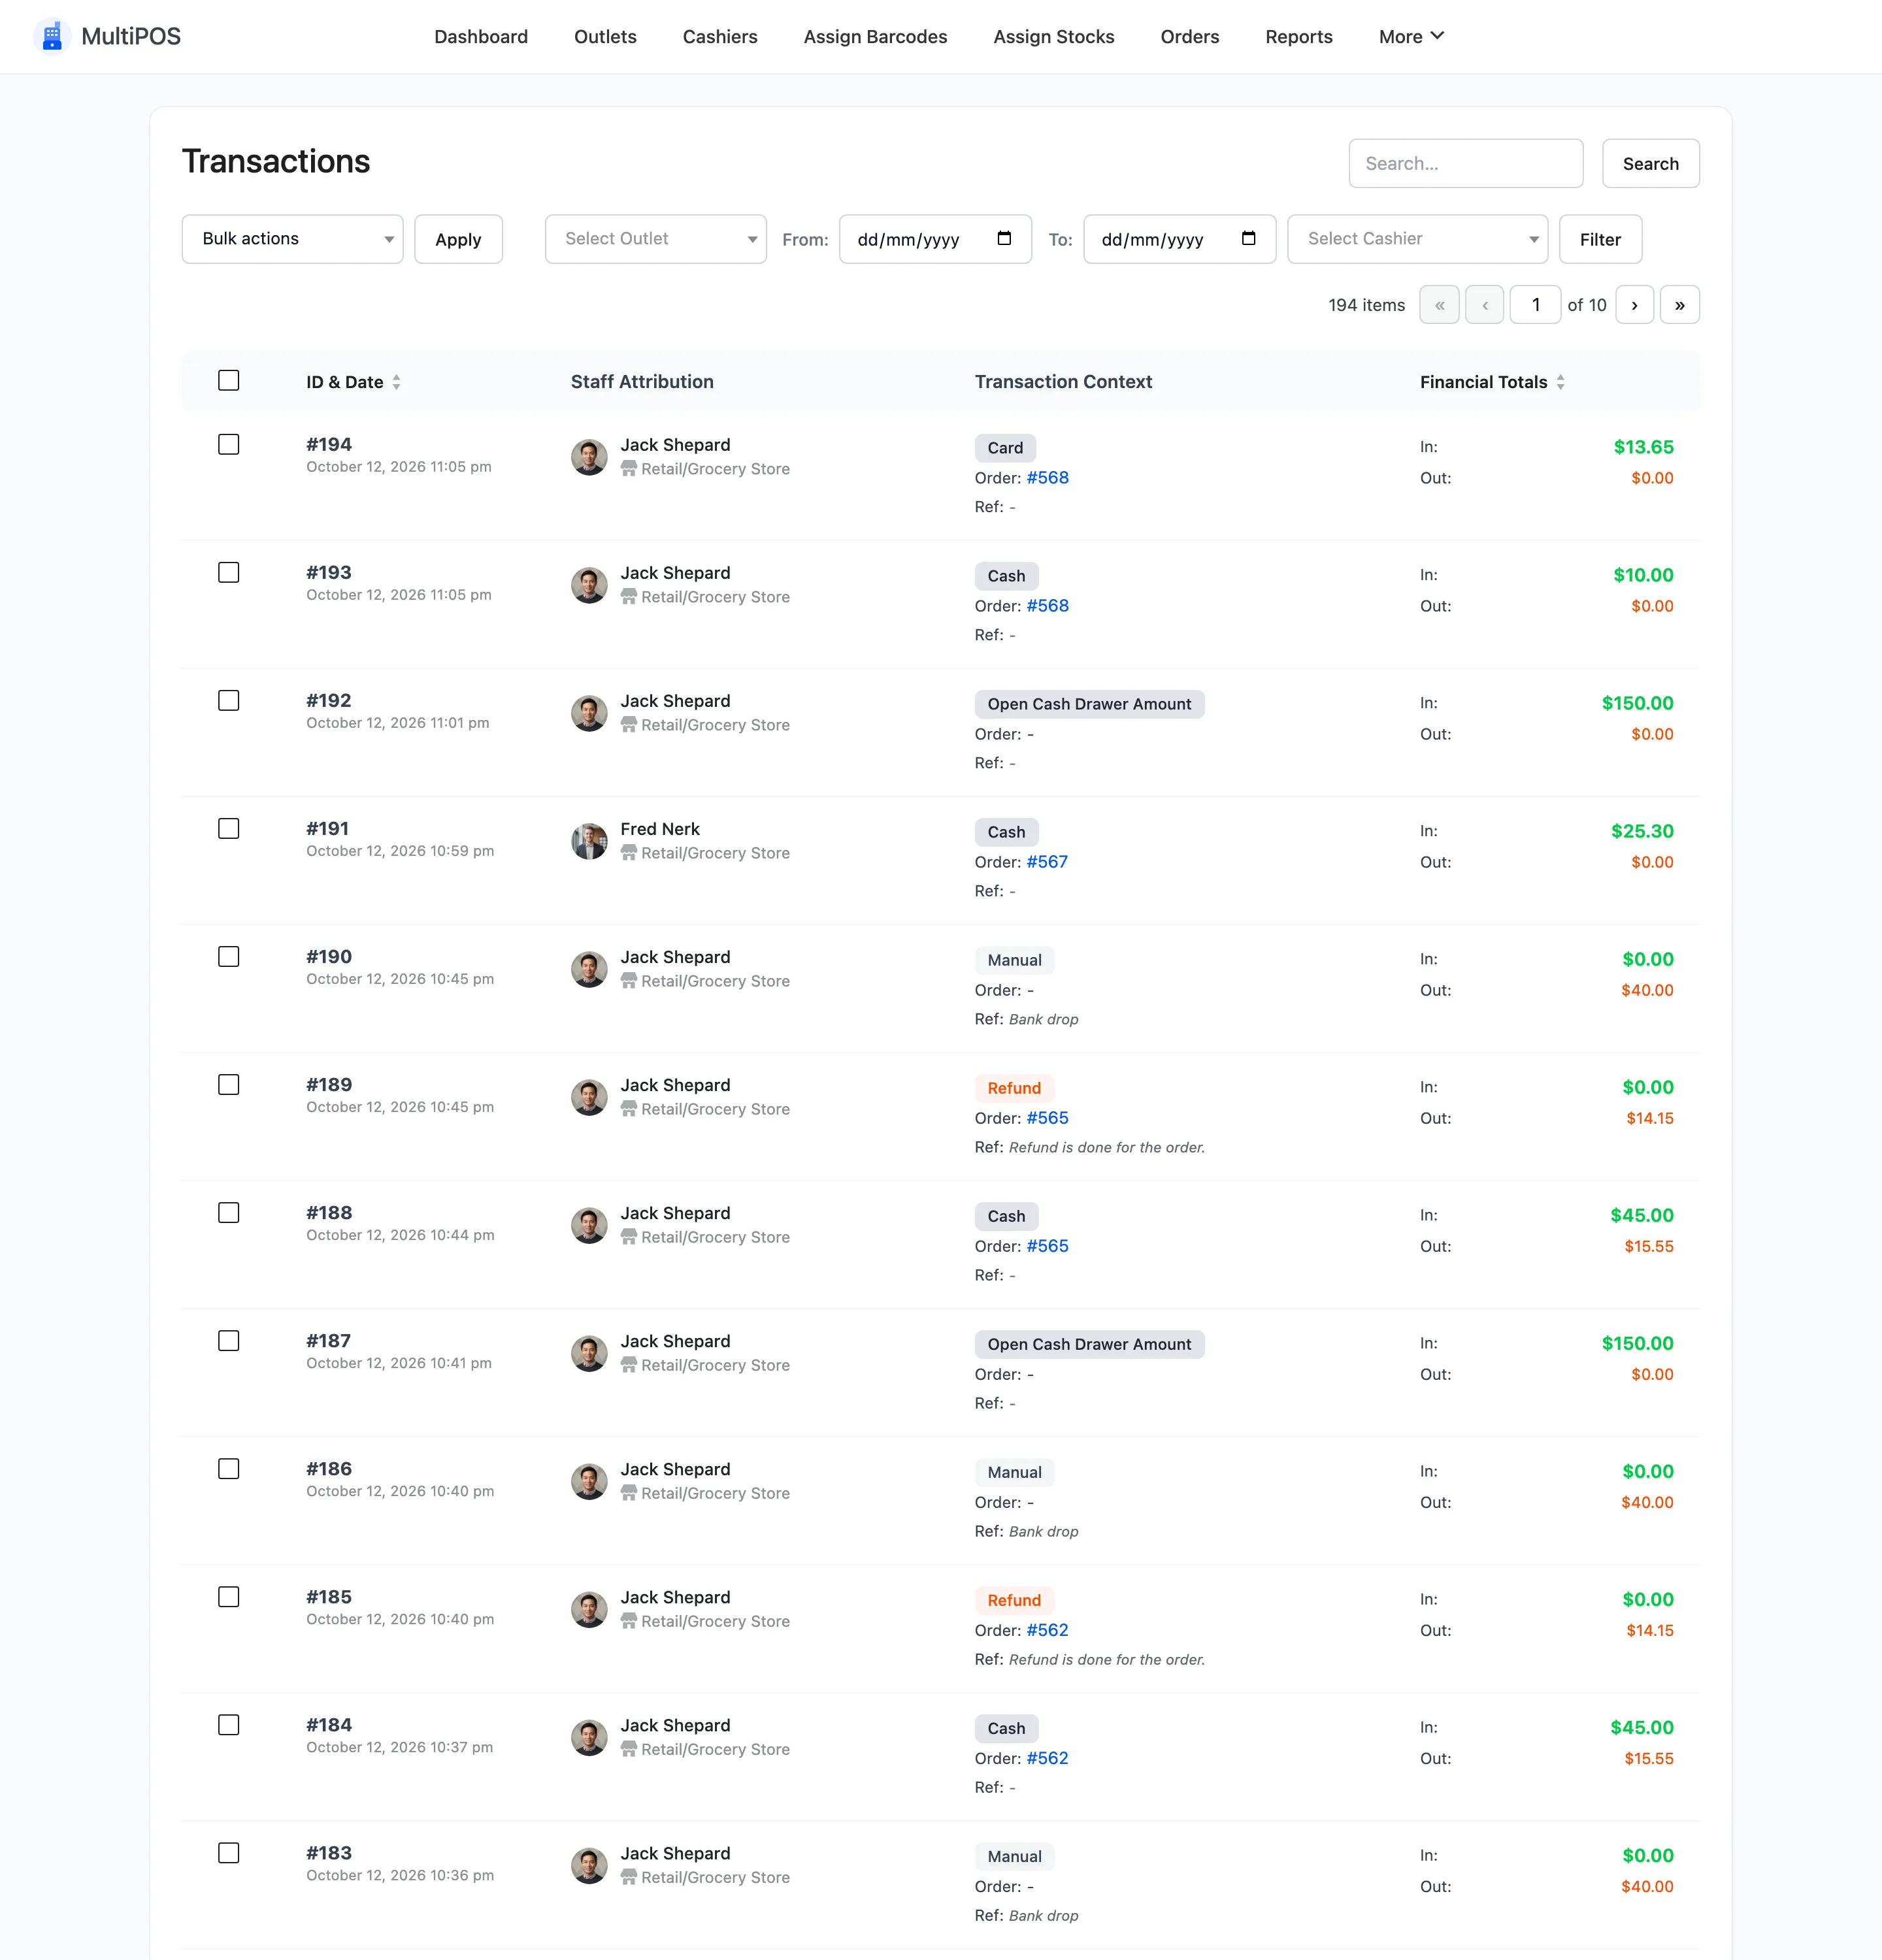
In the admin transactions list, filterable by date and cashier.
On the WooCommerce order, as a refund line under the items with the reason you typed, plus a Refunded total and a Net Payment figure.
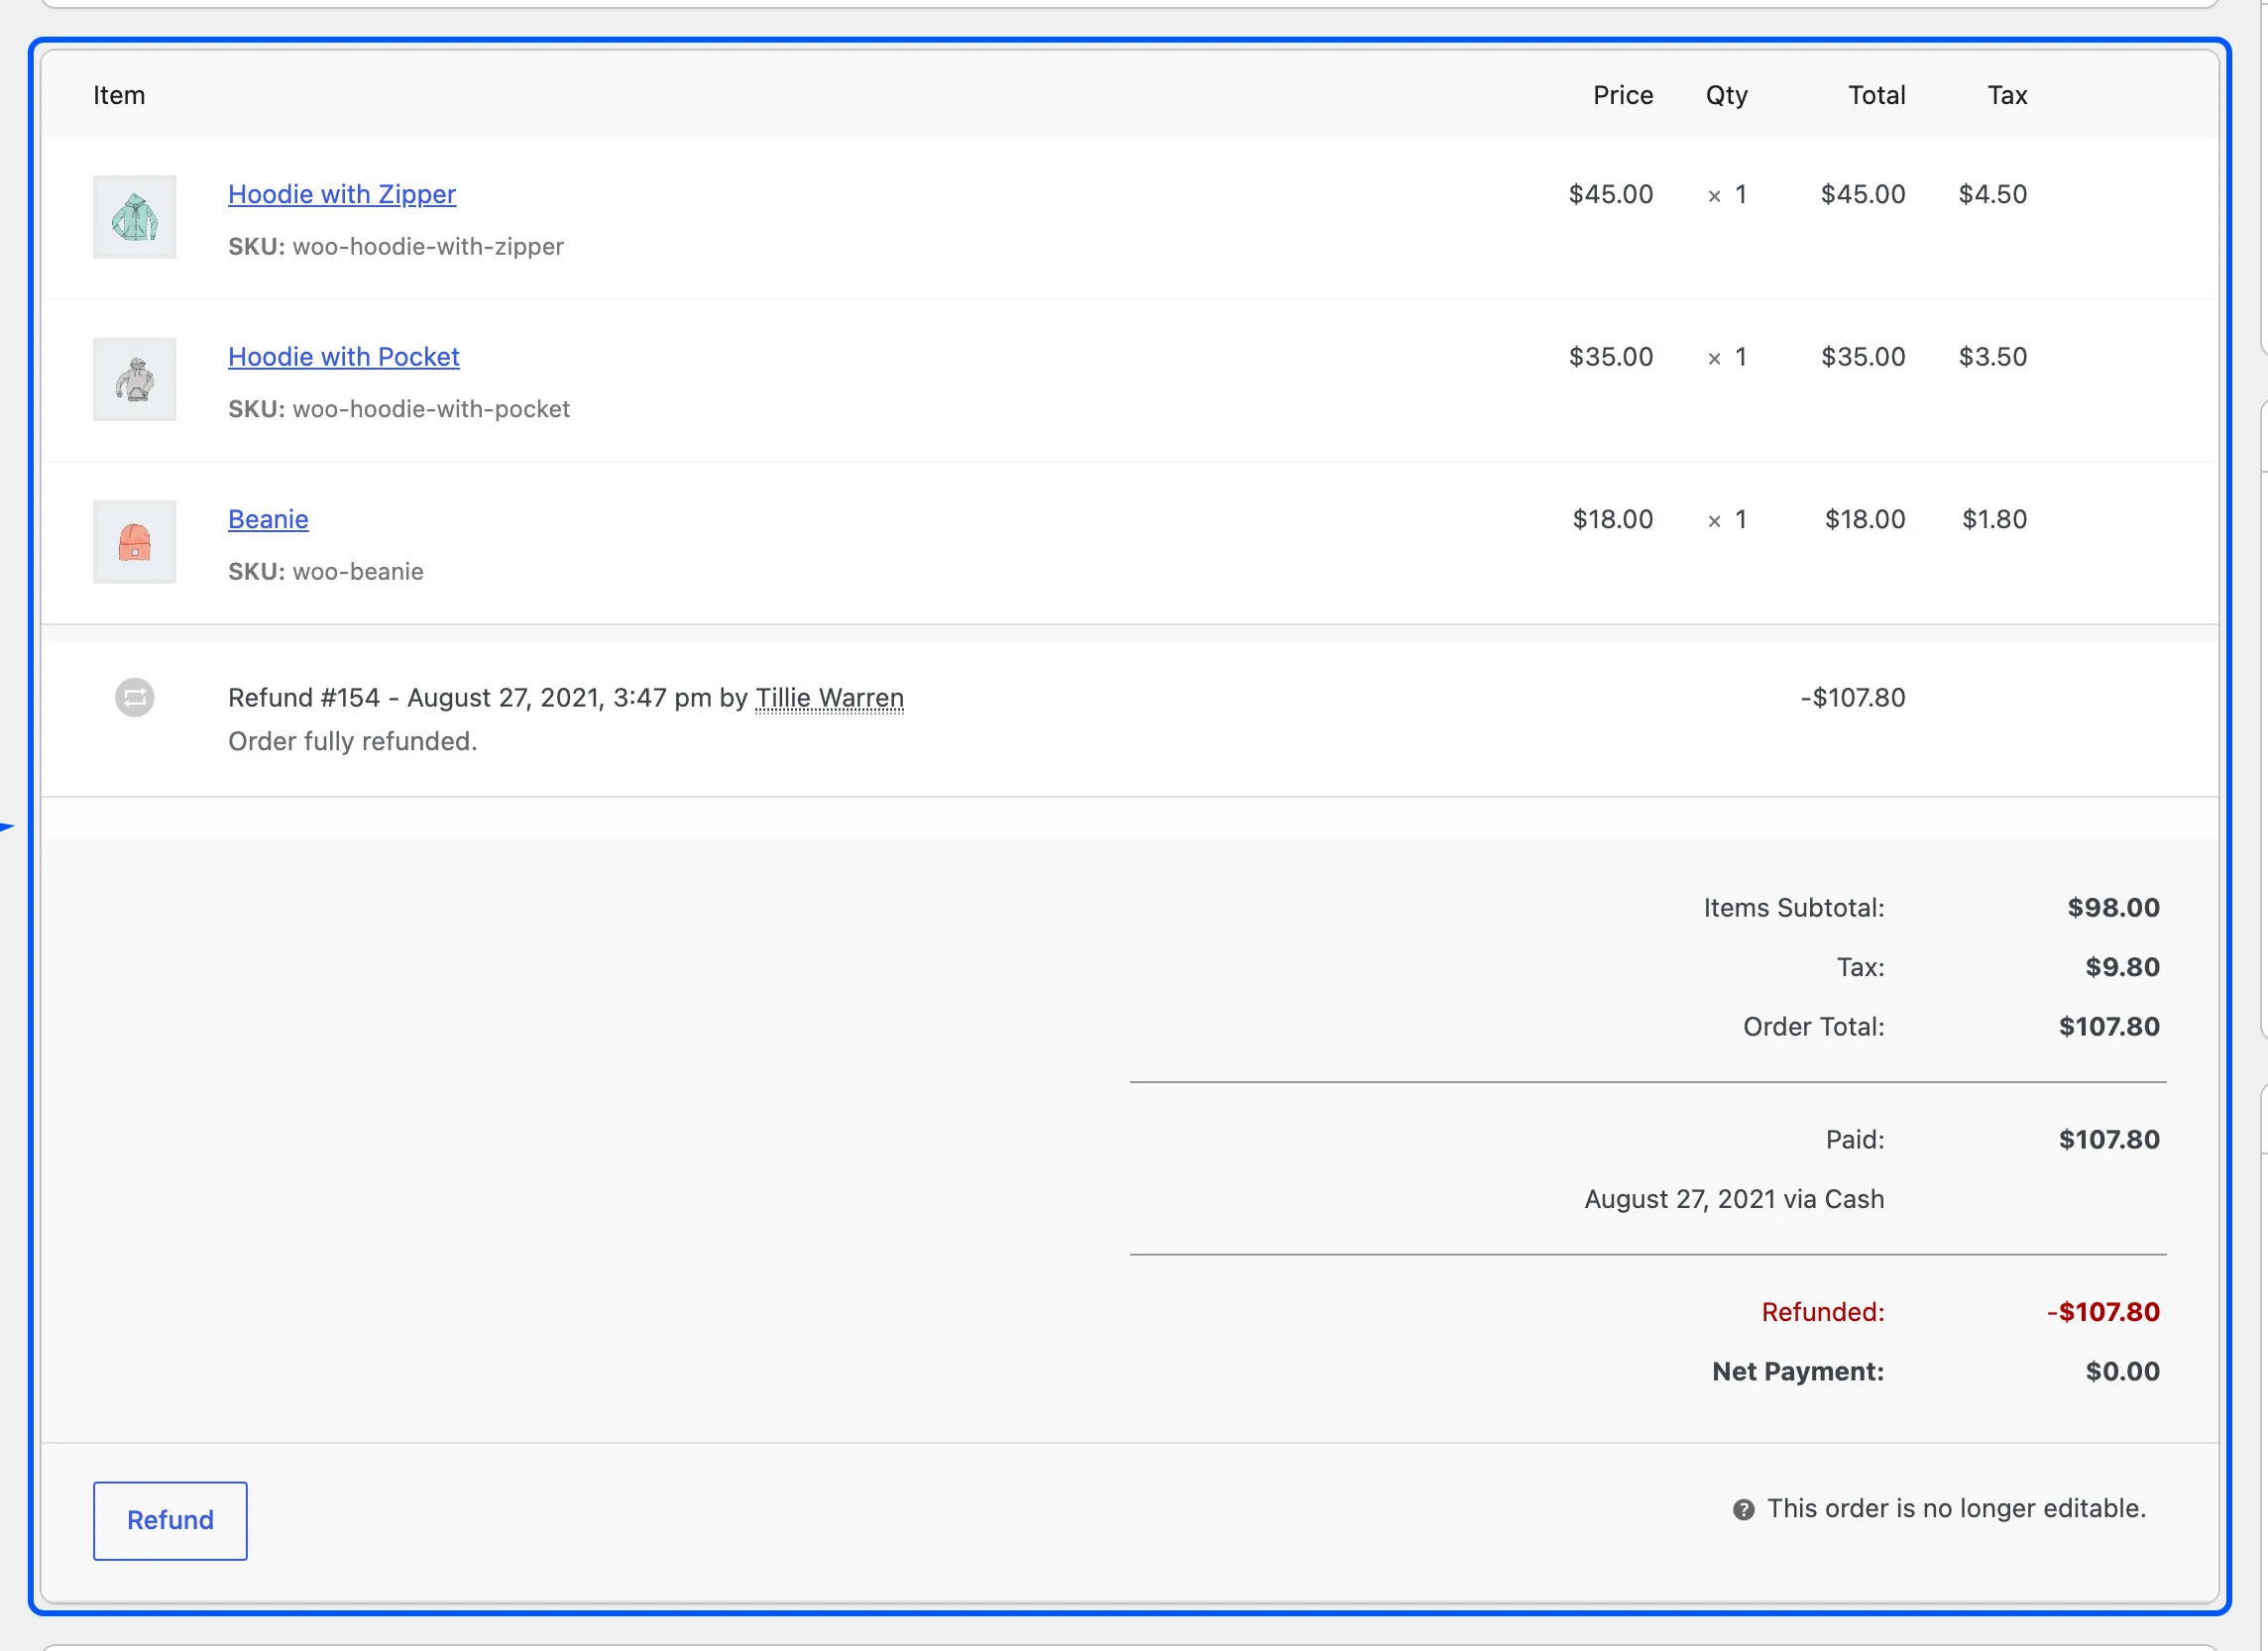
A fully refunded order also moves to the Refunded status, which is what makes it easy to find later.
Refunding needs a connection
Section titled “Refunding needs a connection”There is no offline refund. Creating the refund, writing the transaction and putting the stock back all need the server.
If the connection drops, the POS shows Refund Failed with the reason, and nothing is recorded. Check the connection icon in the cart header.
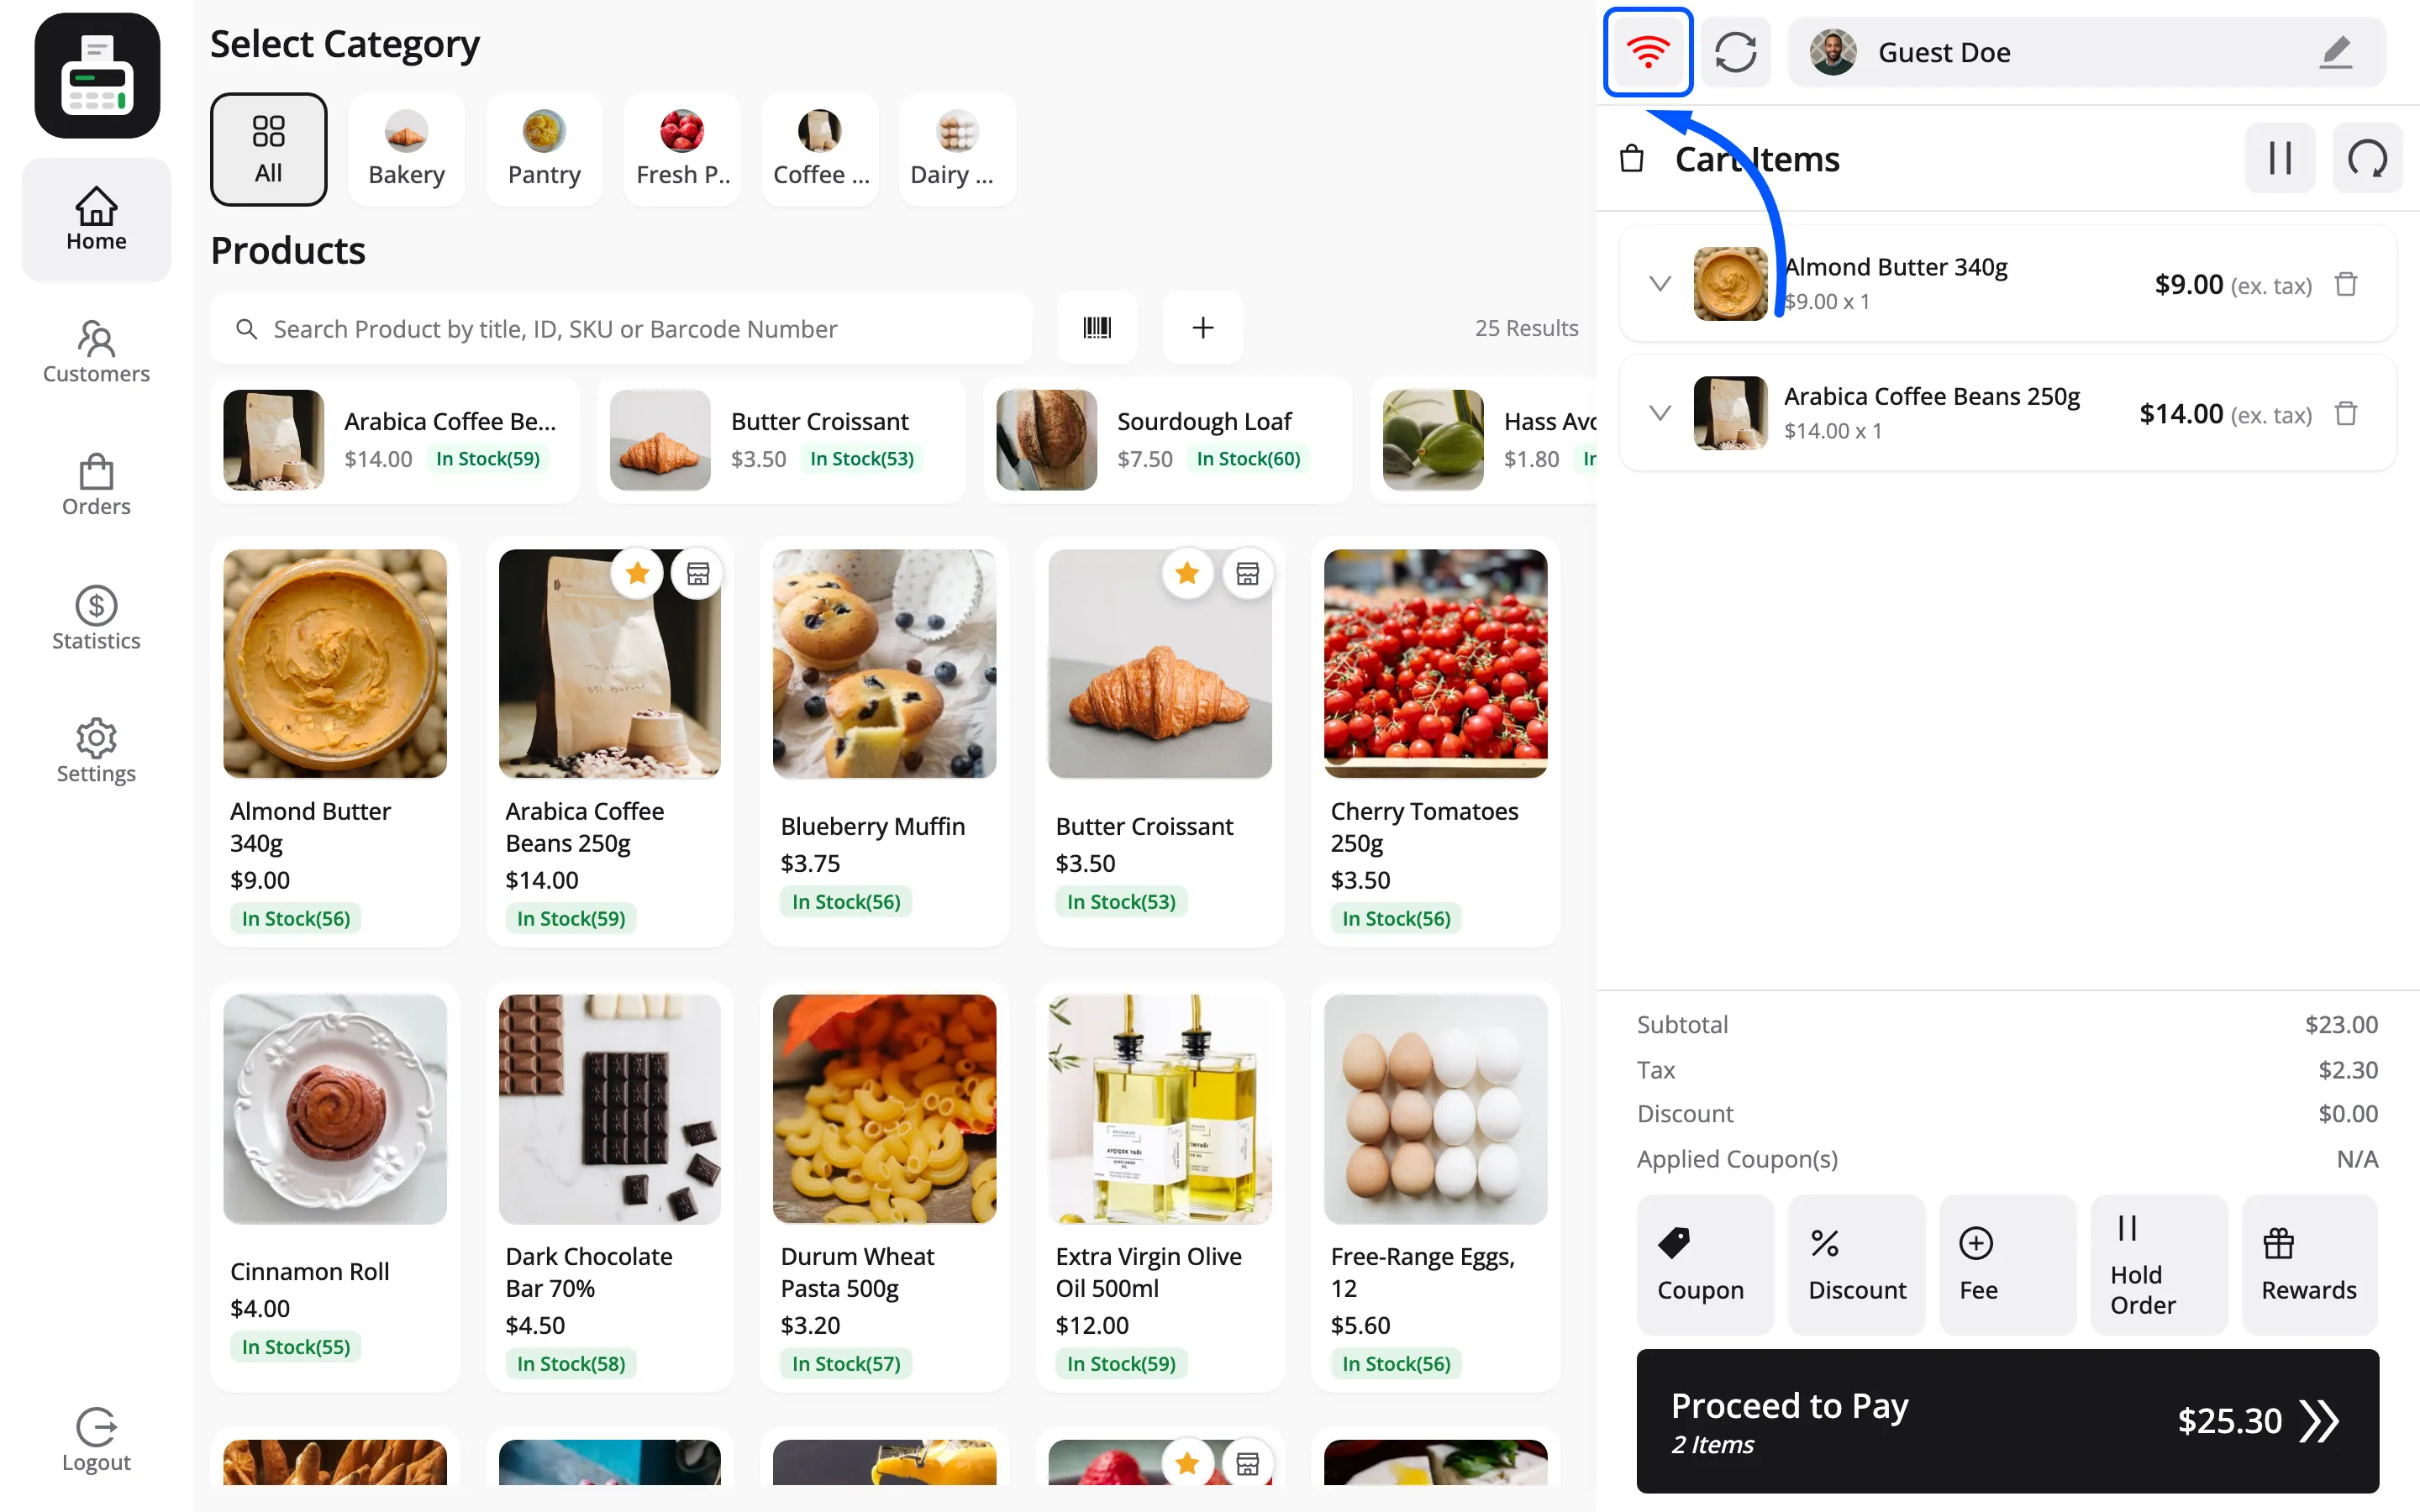
Take the customer’s details and do it when the connection is back, or refund from the admin later.
Partial refunds, in practice
Section titled “Partial refunds, in practice”Three habits worth teaching:
- Refund the line, not the total. Picking the item is what keeps stock, tax and reports right. A staff member who wants to refund “about twenty pounds” is asking for a number the screen cannot take.
- Do it once. Two half refunds on the same order are legitimate, and the ceiling stops you overdoing it. The Refunded row is the only running total, so check it first.
- Say why. The reason field is thirty seconds now against ten minutes of guessing later.
Where to go next
Section titled “Where to go next”- Orders for the order screen reference.
- Transactions for the money side.
- How to Close the Register (Pro)
- How to Record Cash In and Cash Out