

How to Manage Customers in the POS
Most counter sales need no customer at all. The ones that do are the ones you want to sell to again, which is what makes this worth setting up properly.
Step 1: Set a default guest account
Section titled “Step 1: Set a default guest account”Go to DevDiggers Plugins → MultiPOS → Configuration → General and find Customers.
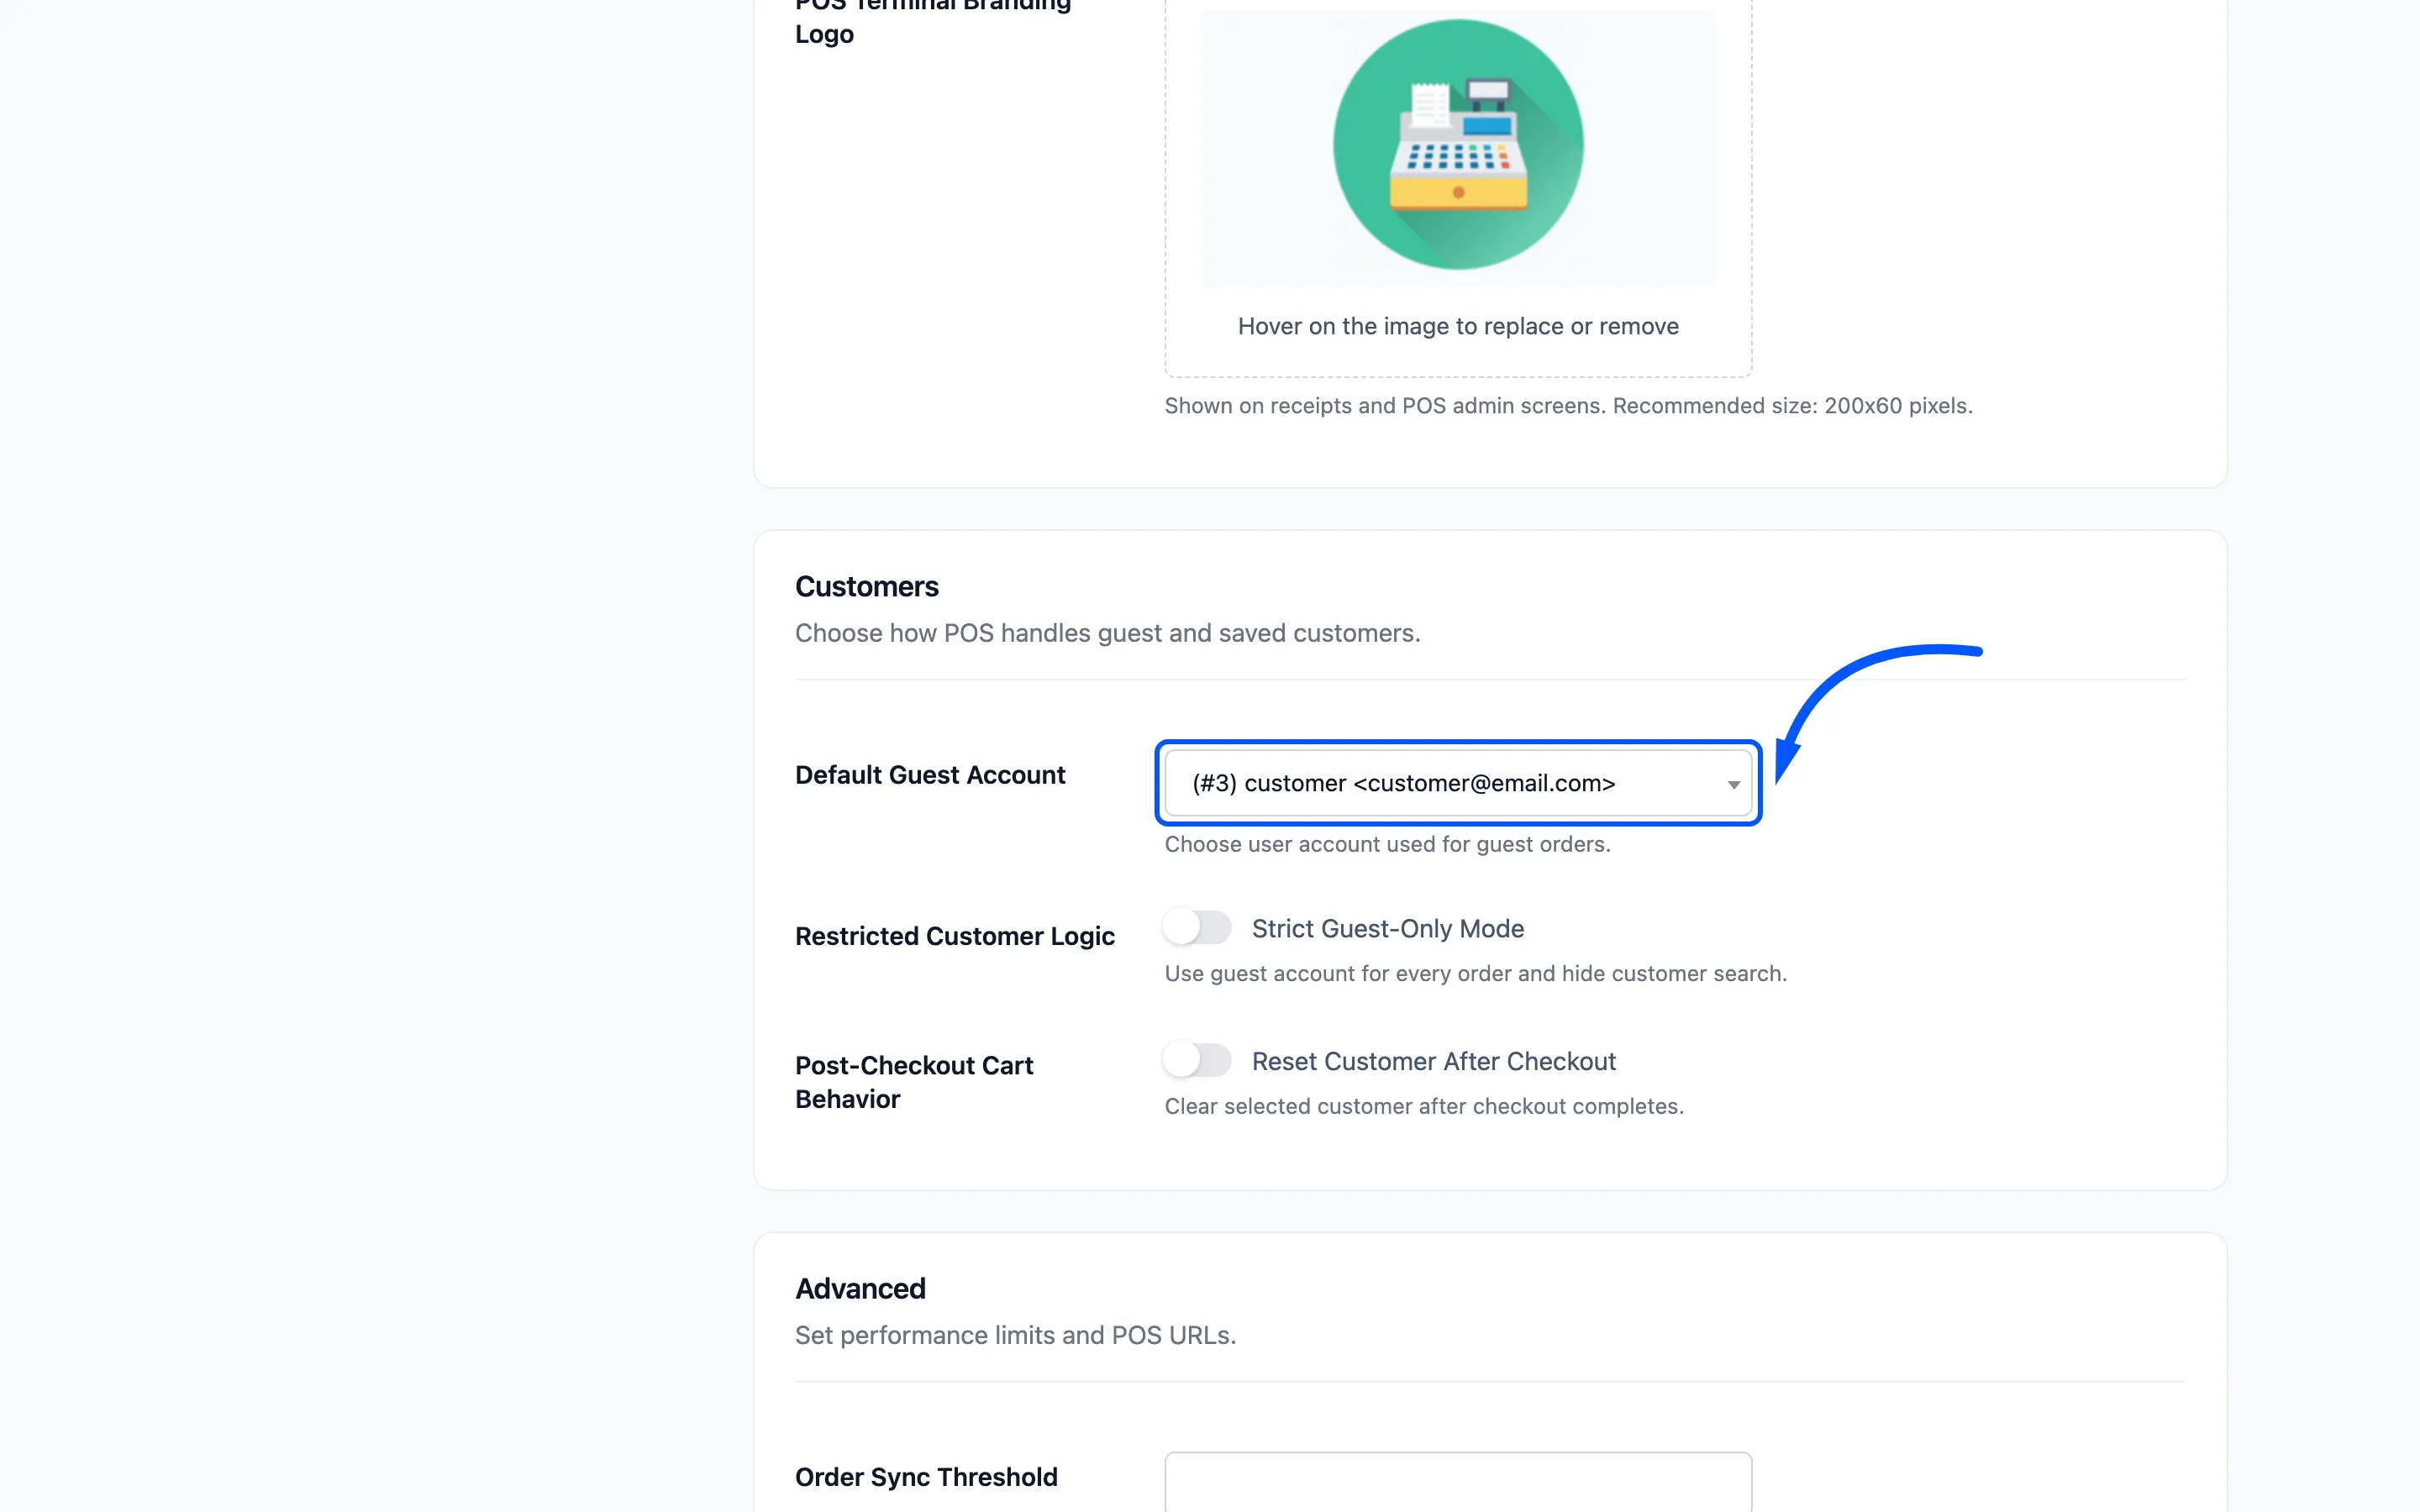
Default Guest Account is the WordPress user every walk-in sale is billed to when the cashier does not pick anyone.
Create one WooCommerce customer called something like “Walk-in Customer” and select it here. Without it, every anonymous sale needs a customer chosen by hand, which is a step nobody has time for at a counter.
Click Save Changes.
Step 2: Open the Customers screen
Section titled “Step 2: Open the Customers screen”In the terminal, click Customers in the sidebar.
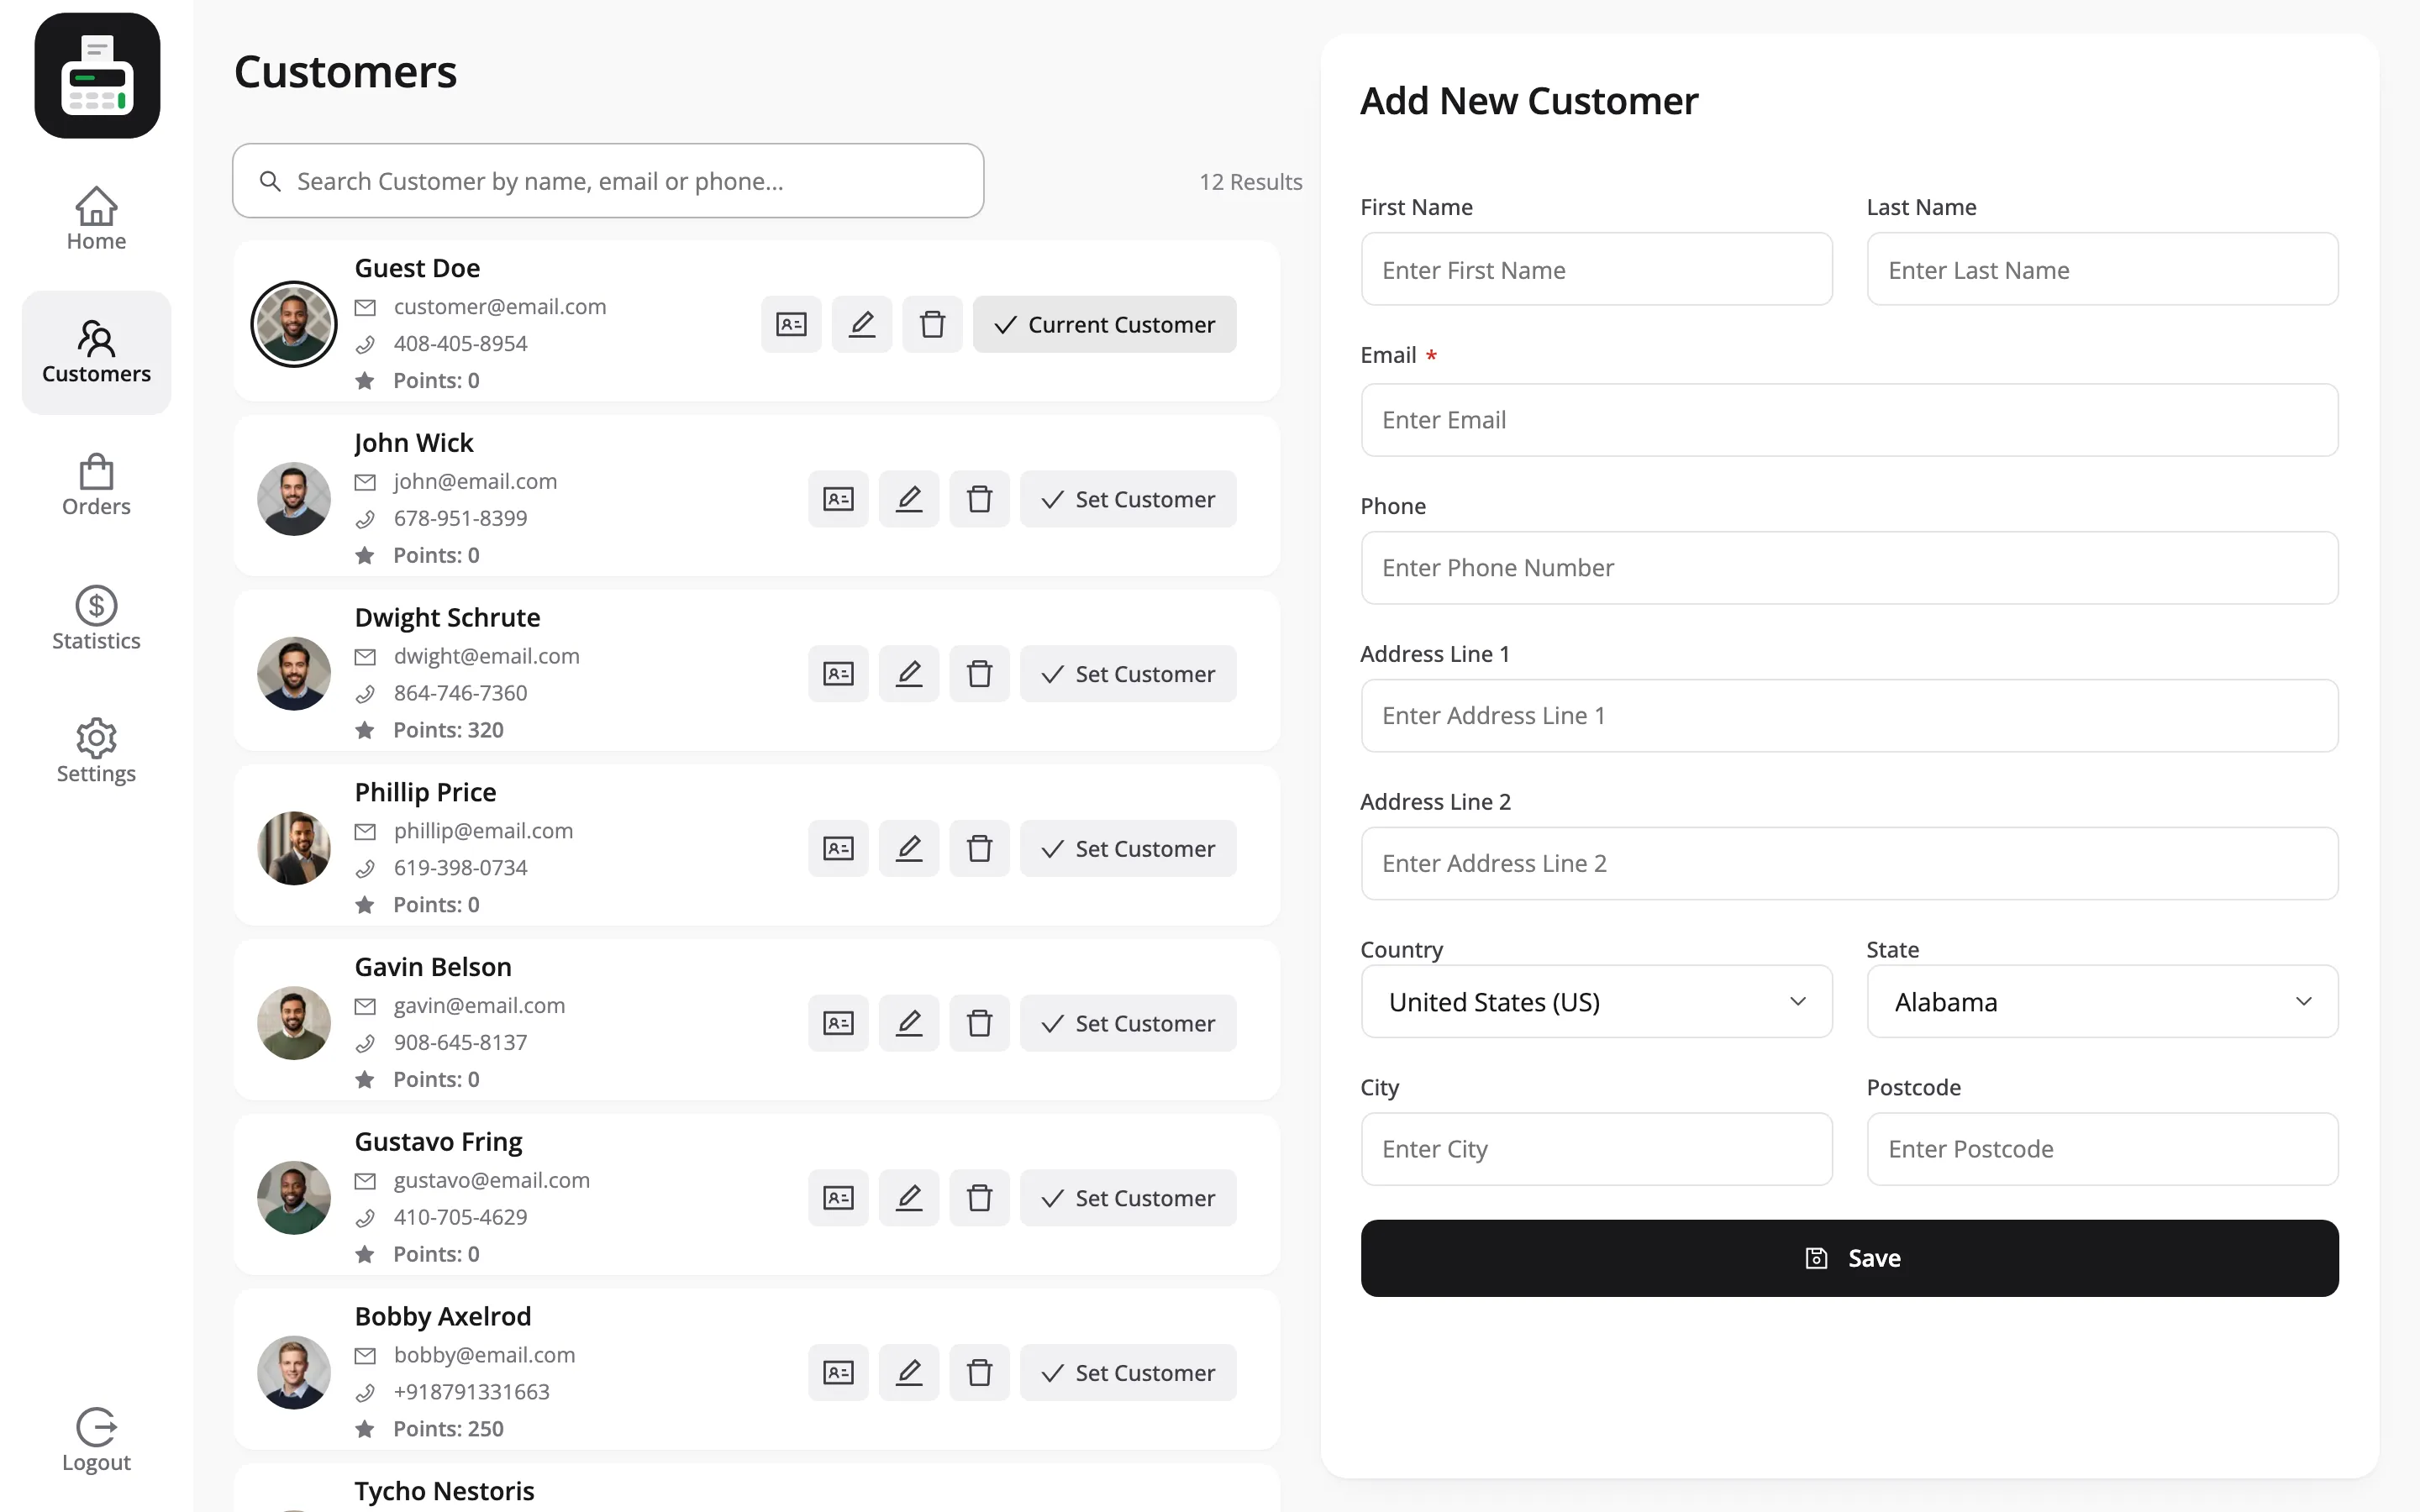
The list is your WooCommerce customers, and the form on the right adds or edits one.
Step 3: Find an existing customer
Section titled “Step 3: Find an existing customer”The search box matches name, email and phone.
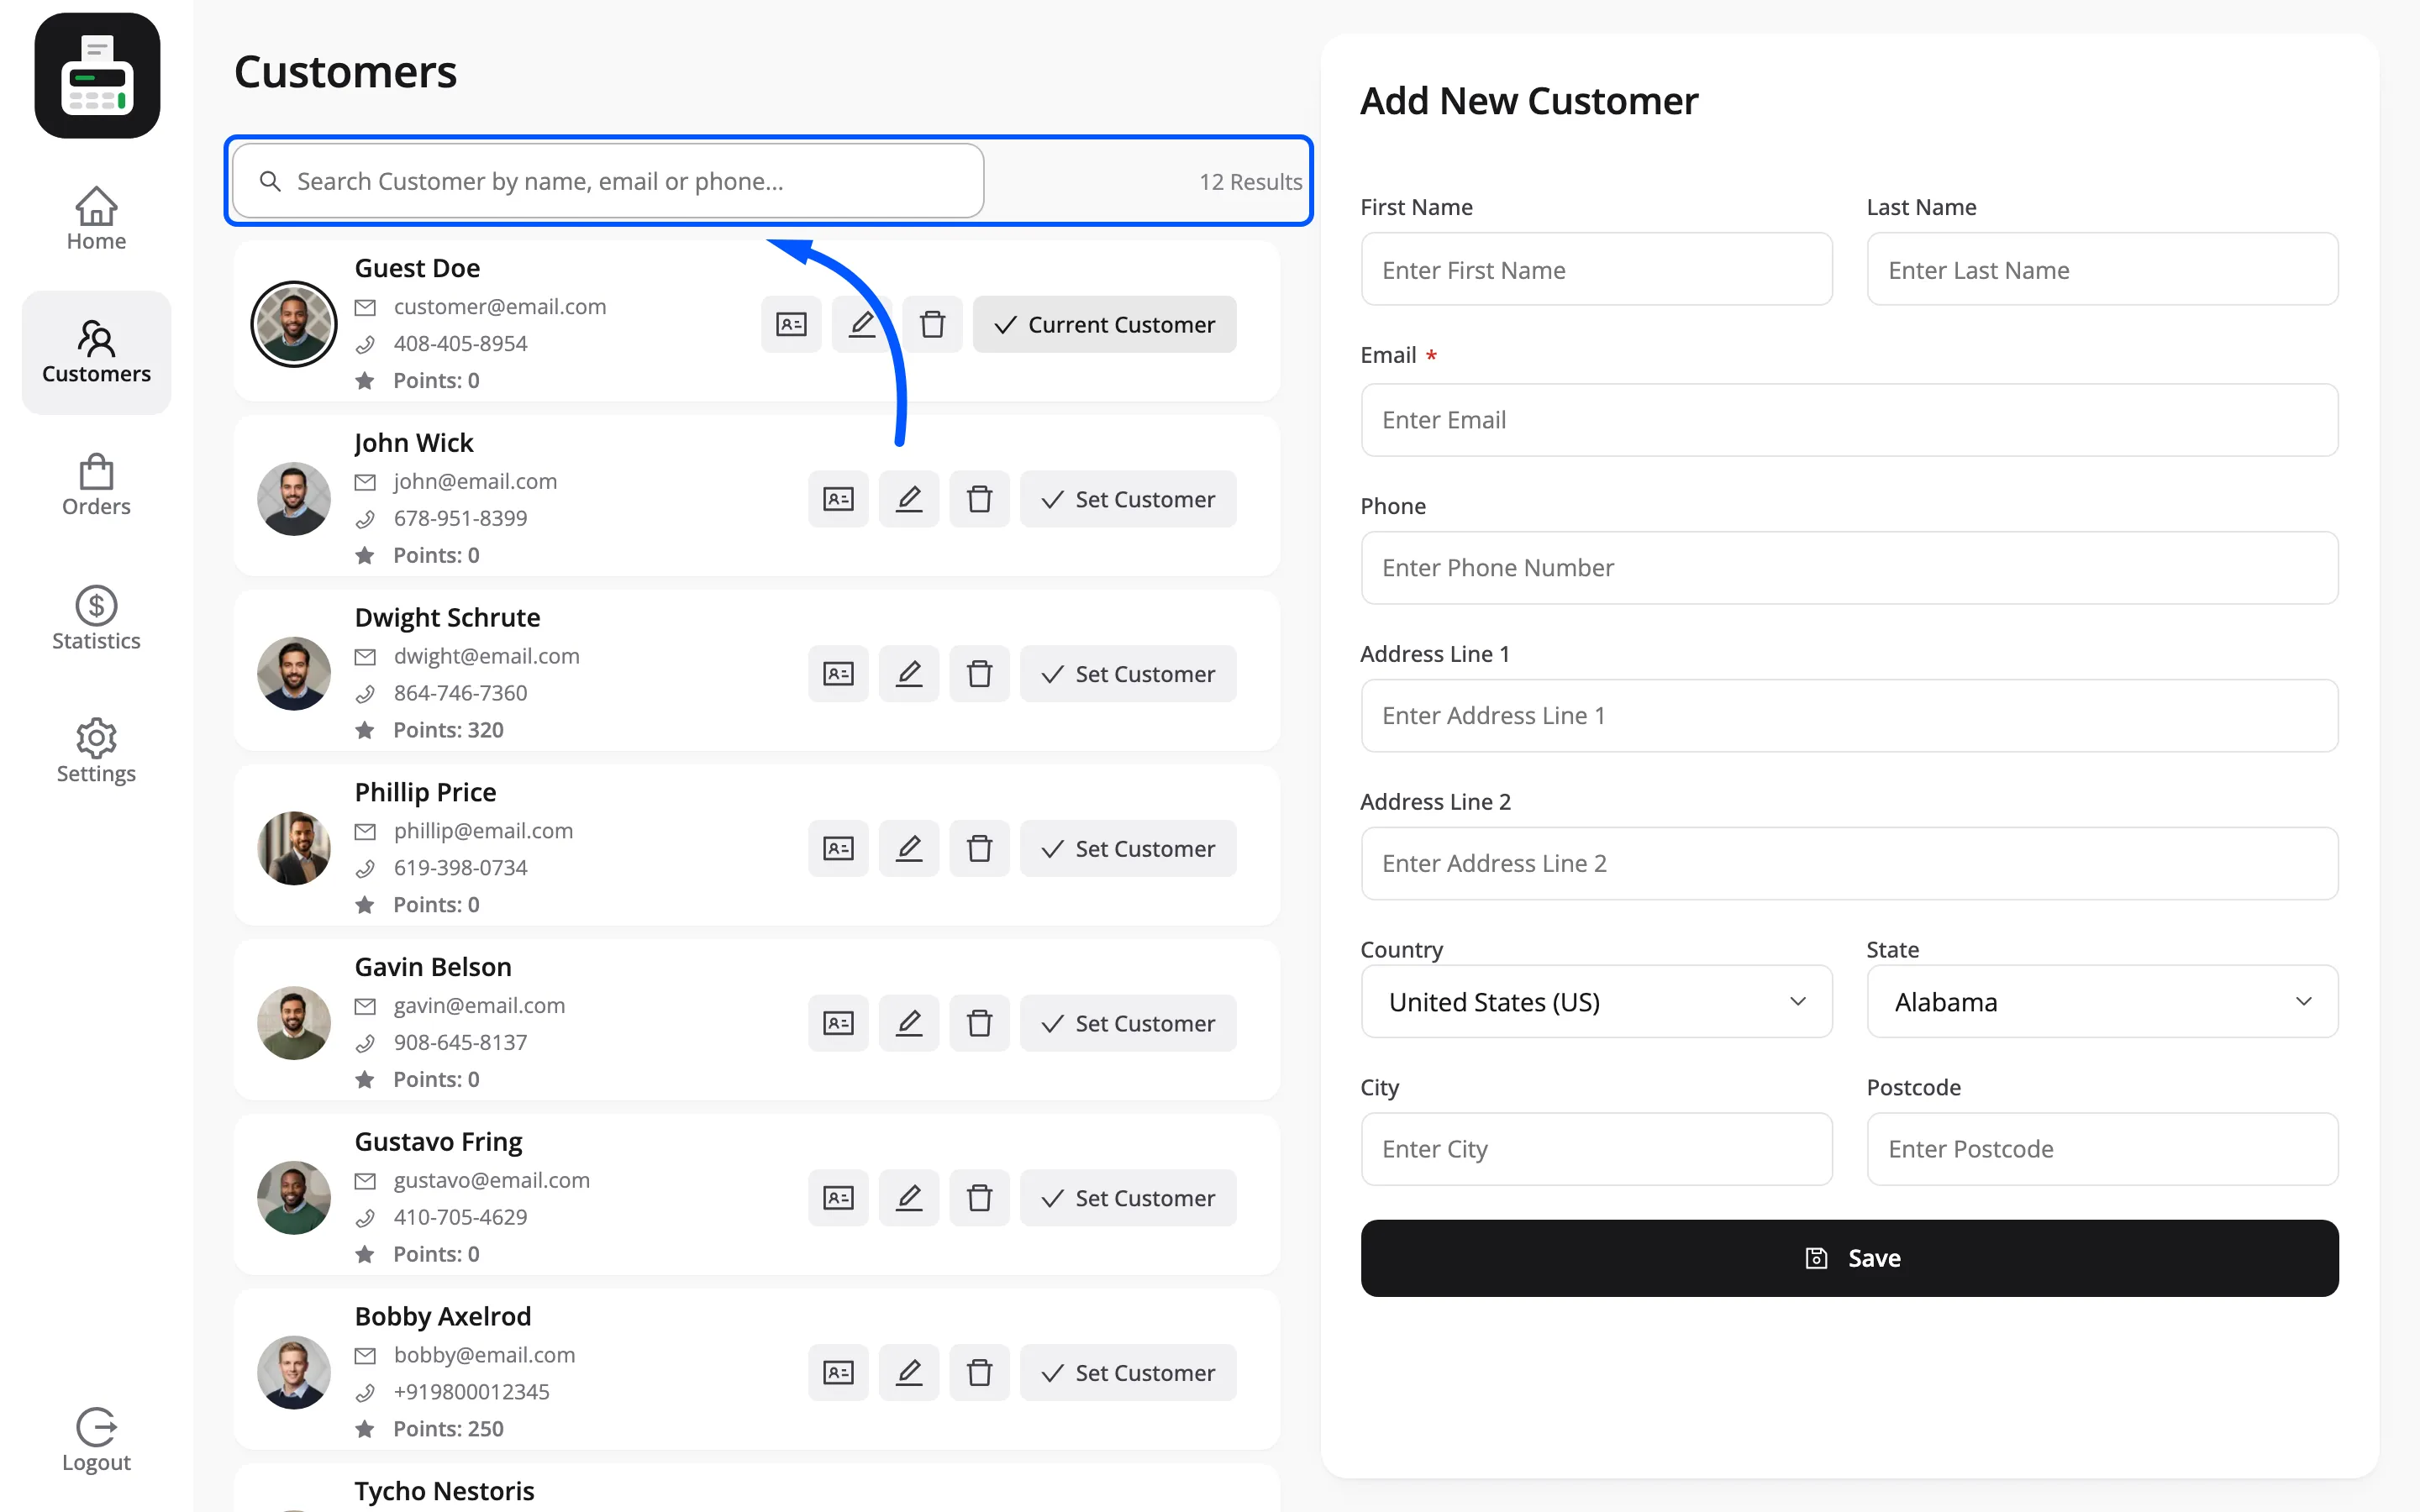
Phone is the useful one at a counter. A customer will read out a number faster than they will spell an email address.
Press Set Customer on their row and the cart header switches to their name. The next sale is billed to them.
Step 4: Add a new customer
Section titled “Step 4: Add a new customer”Press Add New and fill in the form.
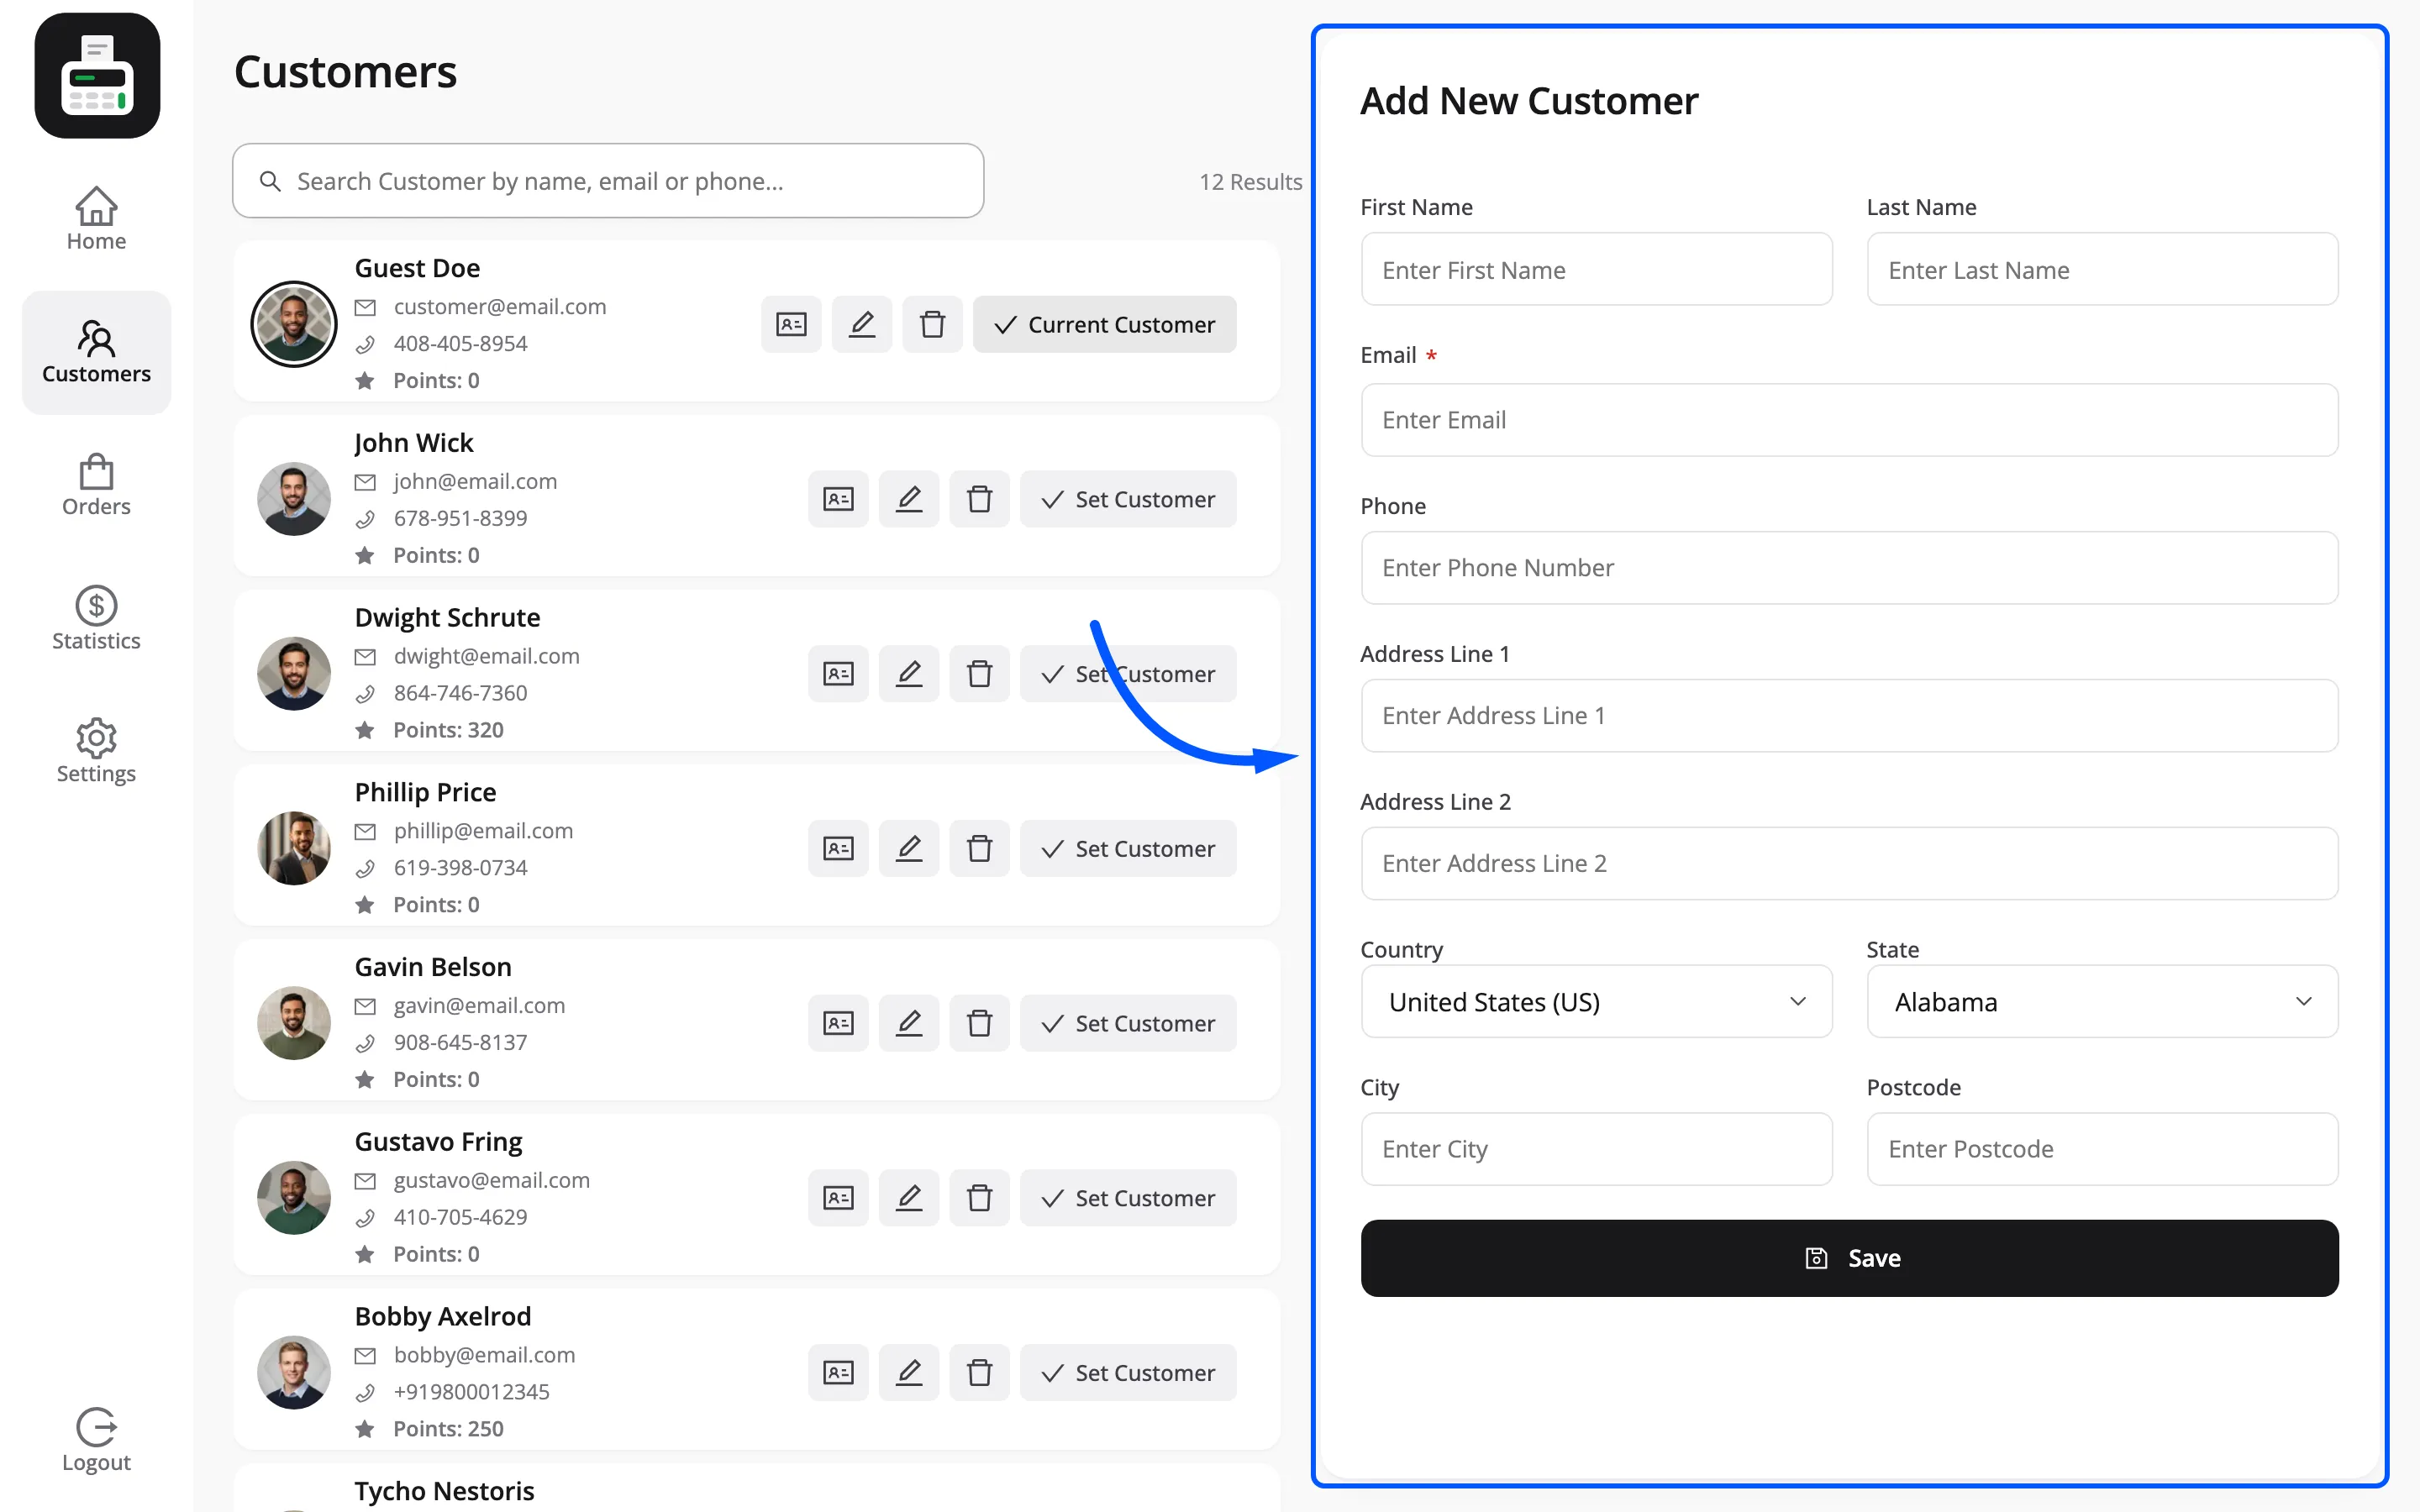
First name, last name, email, phone and a full address. Only the mandatory fields have to be filled in, and the POS says which if you miss one.
This creates a real WooCommerce customer. Their next website order lands on the same account, which is the whole reason to bother.
Take the email even when you take nothing else. It is the field that makes the account findable later, and the one an order confirmation needs.
Step 5: Edit or remove a customer
Section titled “Step 5: Edit or remove a customer”Each row carries an edit control and a delete control. The pencil loads that customer into the panel on the right, which now reads Edit Customer and comes pre-filled.
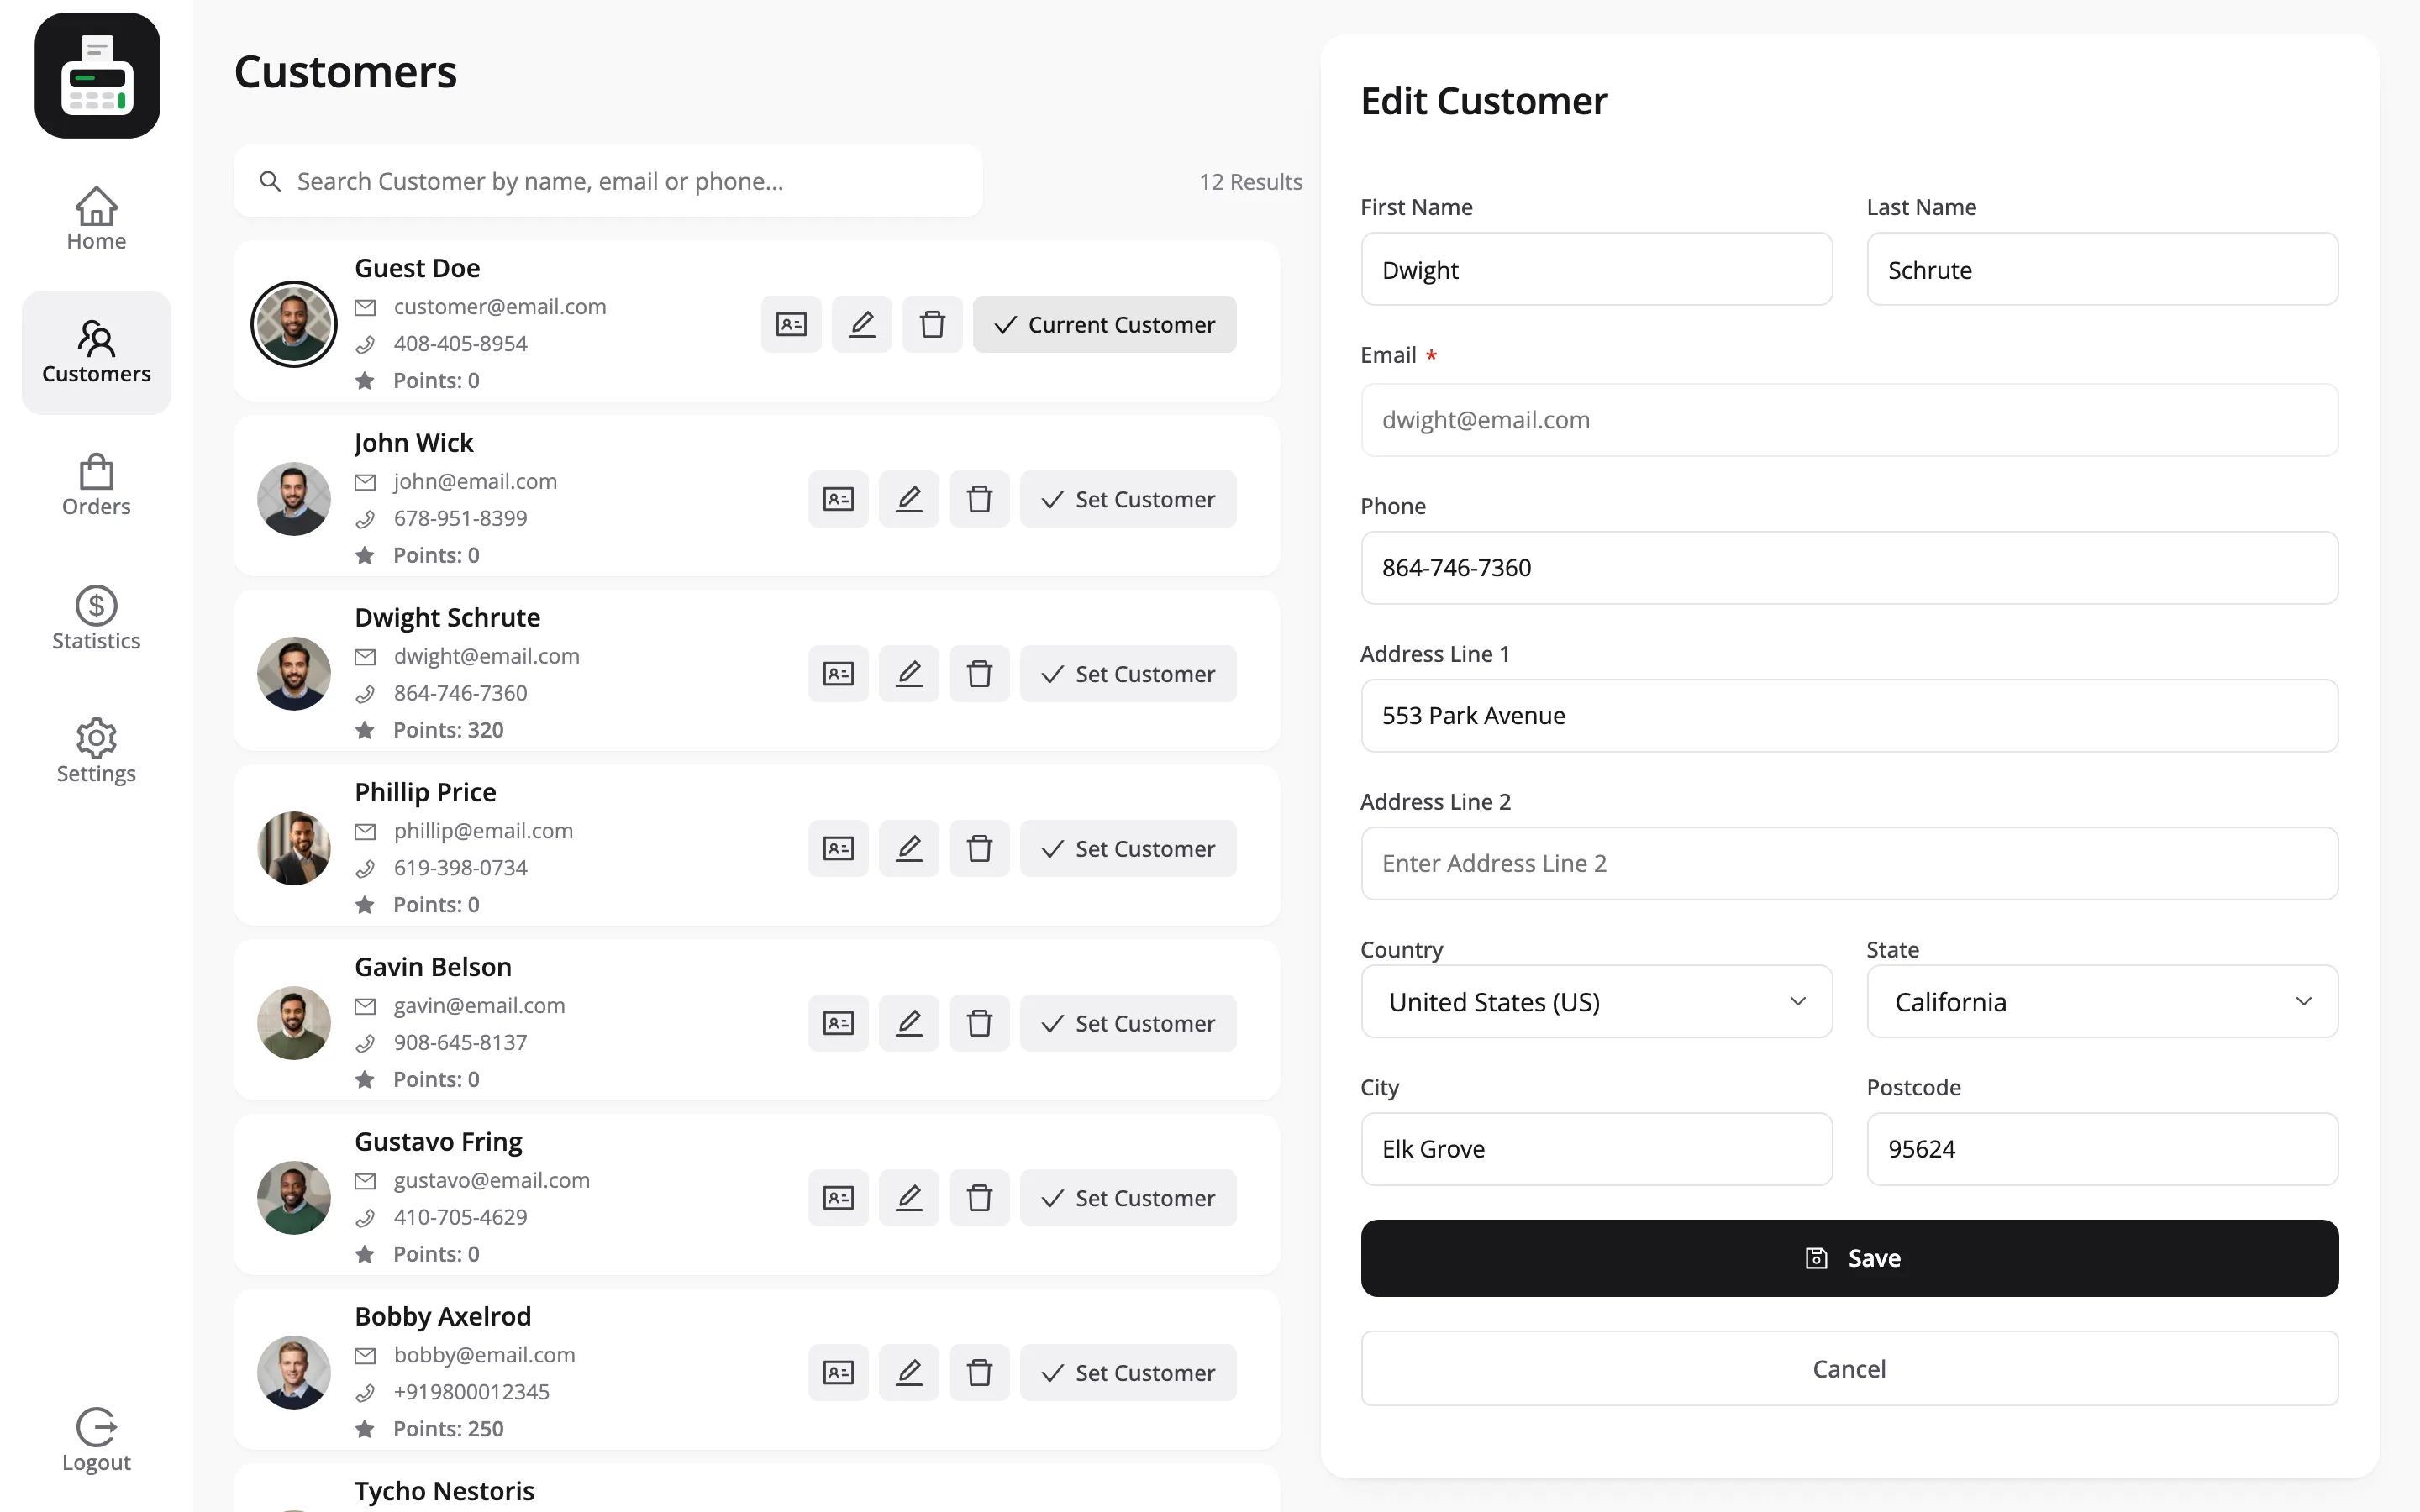
Change what you need and press the button at the foot of the panel. Cancel below it drops the edit and empties the form.
Edit fixes a typo in a name or a phone number. Email cannot be changed once a customer exists, so a wrong address needs a WordPress user edit rather than a fix here.
Delete removes the WooCommerce customer. The browser asks Are you sure you want to delete this customer? first, because it cannot be undone.
Their past orders survive, but the account they were placed under does not.
Step 6: Check the sale is attached
Section titled “Step 6: Check the sale is attached”Take a sale with a customer set, then open the order in WooCommerce → Orders.
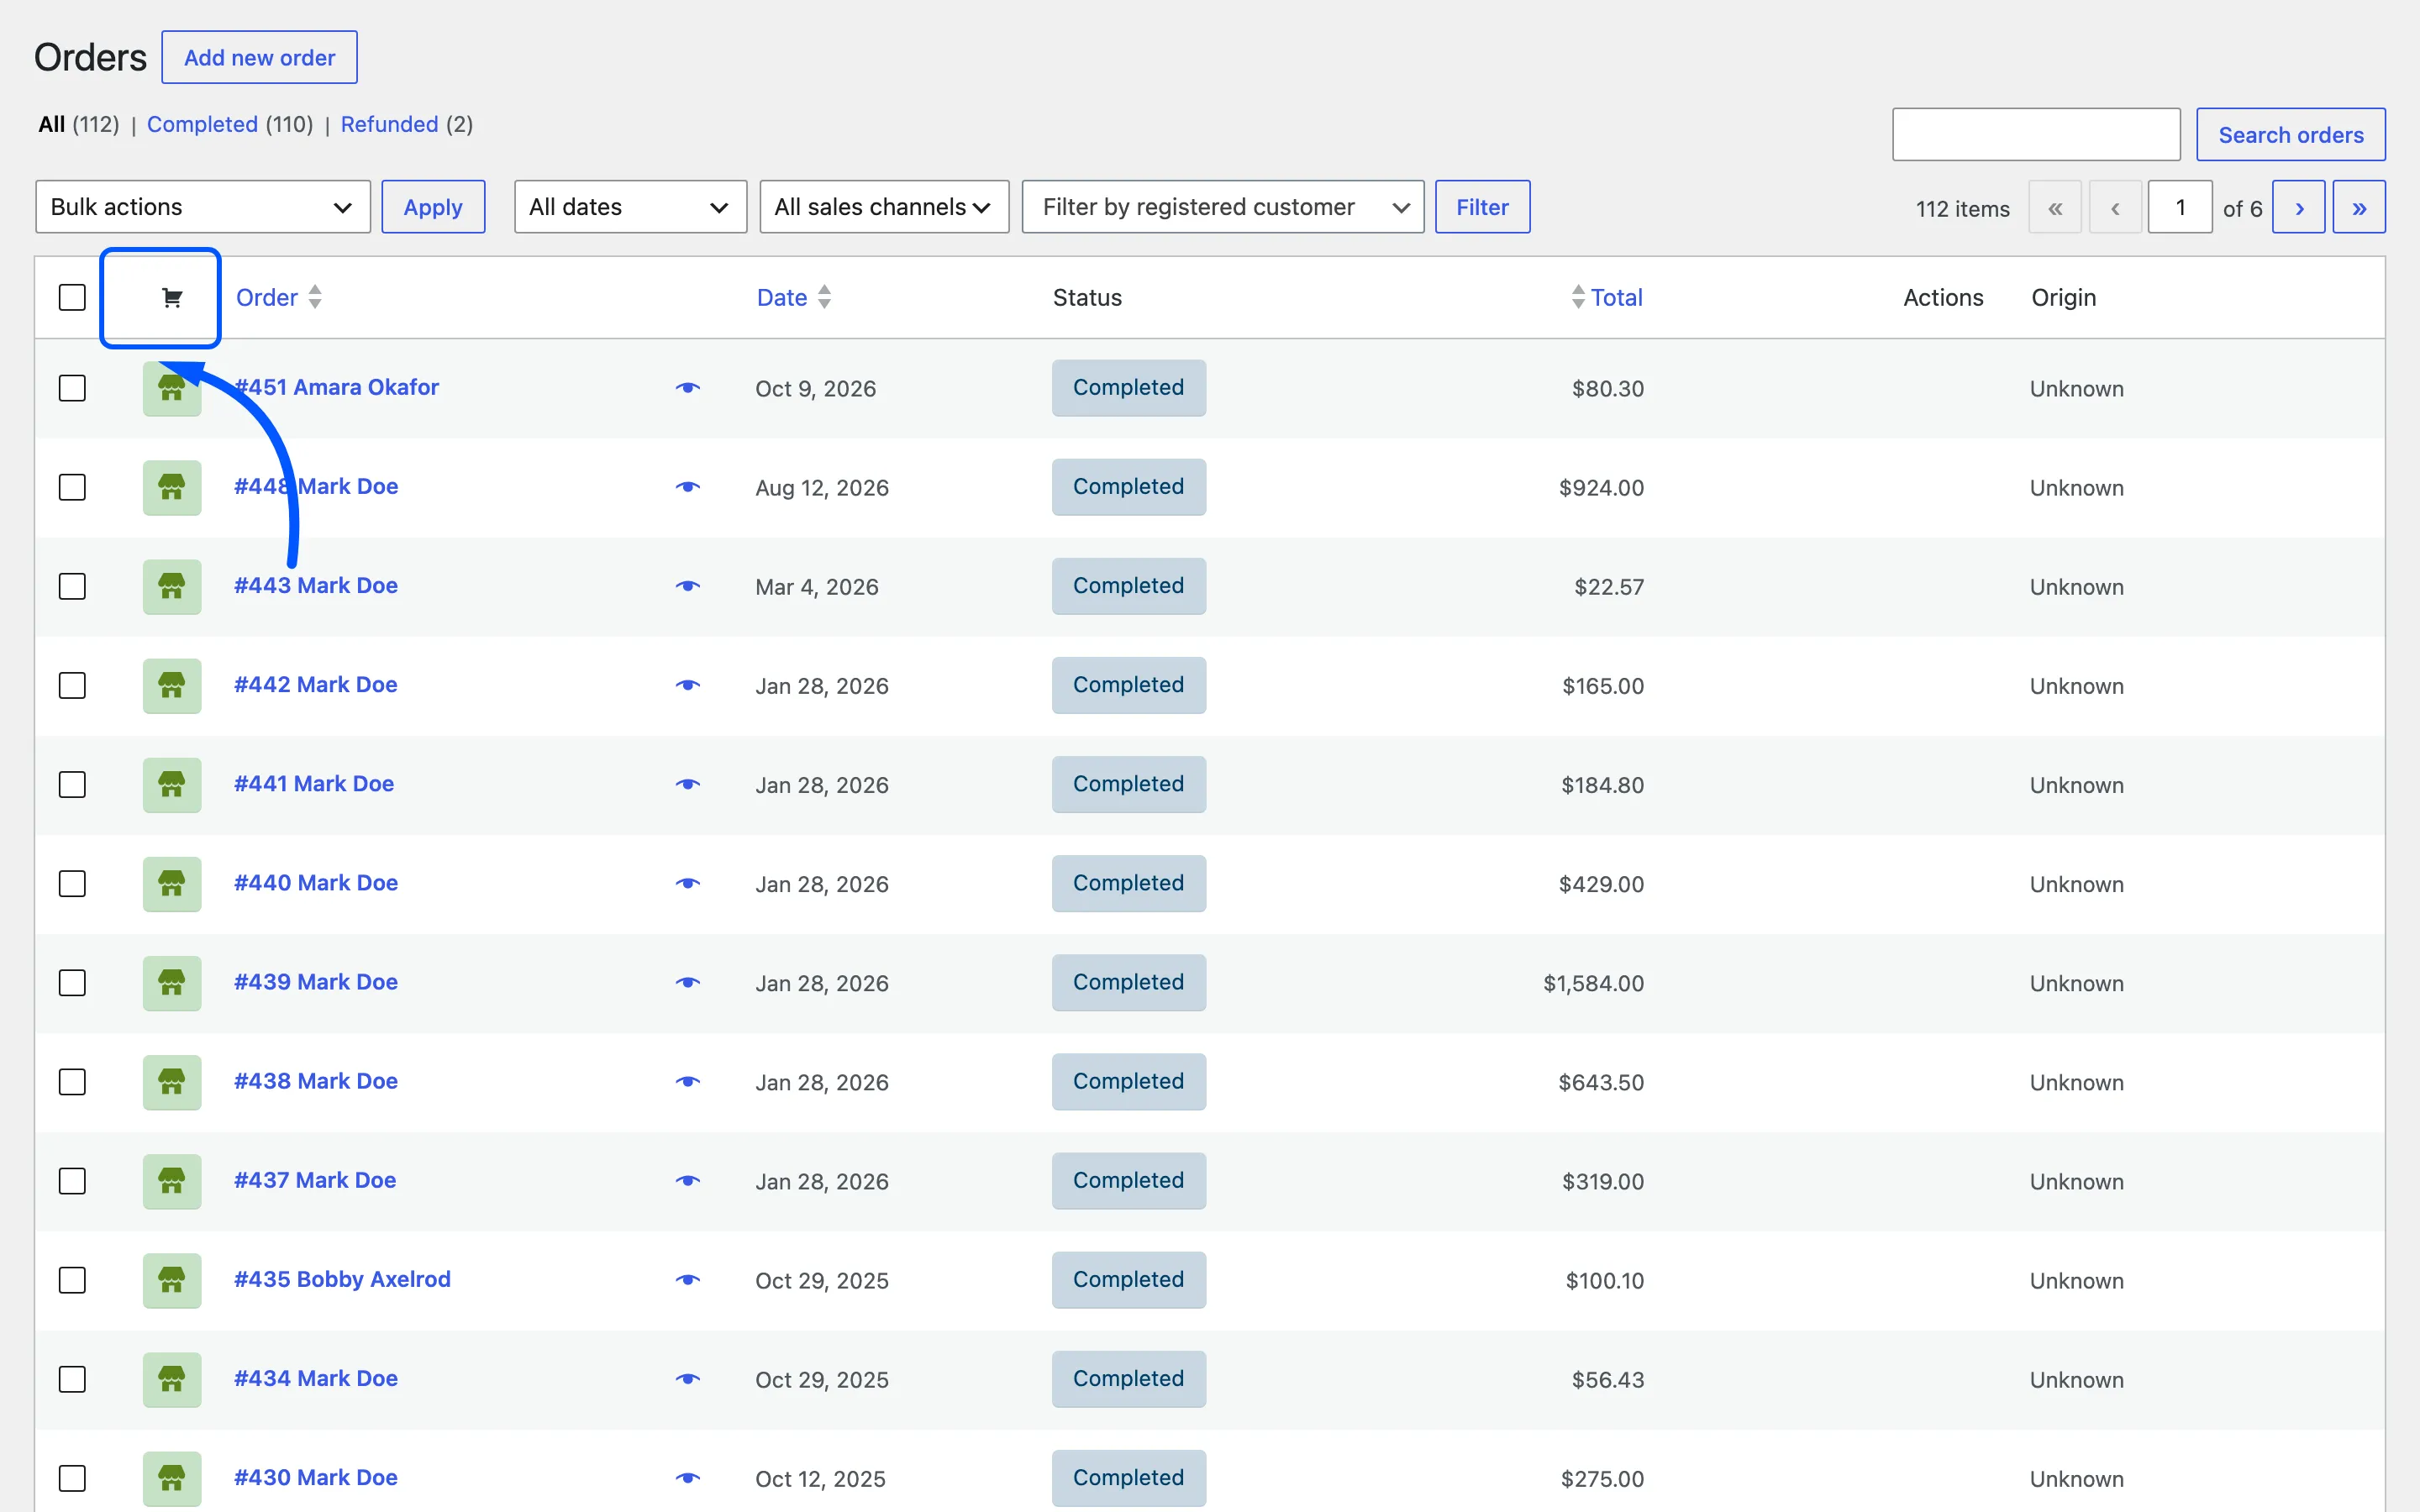
The customer’s name is on the order. Their address is not: a POS order is billed to the outlet’s address, because the sale happened in the shop and tax follows the shop.
That is deliberate, and it is worth knowing before you go looking for a bug.
Offline
Section titled “Offline”Customers cannot be saved or deleted while the terminal is offline. The POS says so rather than losing the entry.
Existing customers are still searchable, because they are already loaded.
Two Pro options worth knowing
Section titled “Two Pro options worth knowing”In the free version, remind cashiers to set the customer back to the guest account after a named sale.
Where to go next
Section titled “Where to go next”- How to Take Your First Sale
- General Settings for the guest account field.
- The Cashier Experience