

How a POS Sale Works
A POS sale touches five things: the terminal, the cart, a WooCommerce order, your stock and a transaction row. This is that chain in order, so the settings docs make sense when you read them.
1. The cashier opens the terminal
Section titled “1. The cashier opens the terminal”The POS lives at the path set in Configuration → General → POS Terminal URL Path, which
defaults to yoursite.com/pos.
Who can open it is fixed. A logged-in user must hold one of three roles: POS Cashier, Administrator or Shop manager. Anyone else who visits the URL is redirected to My Account.
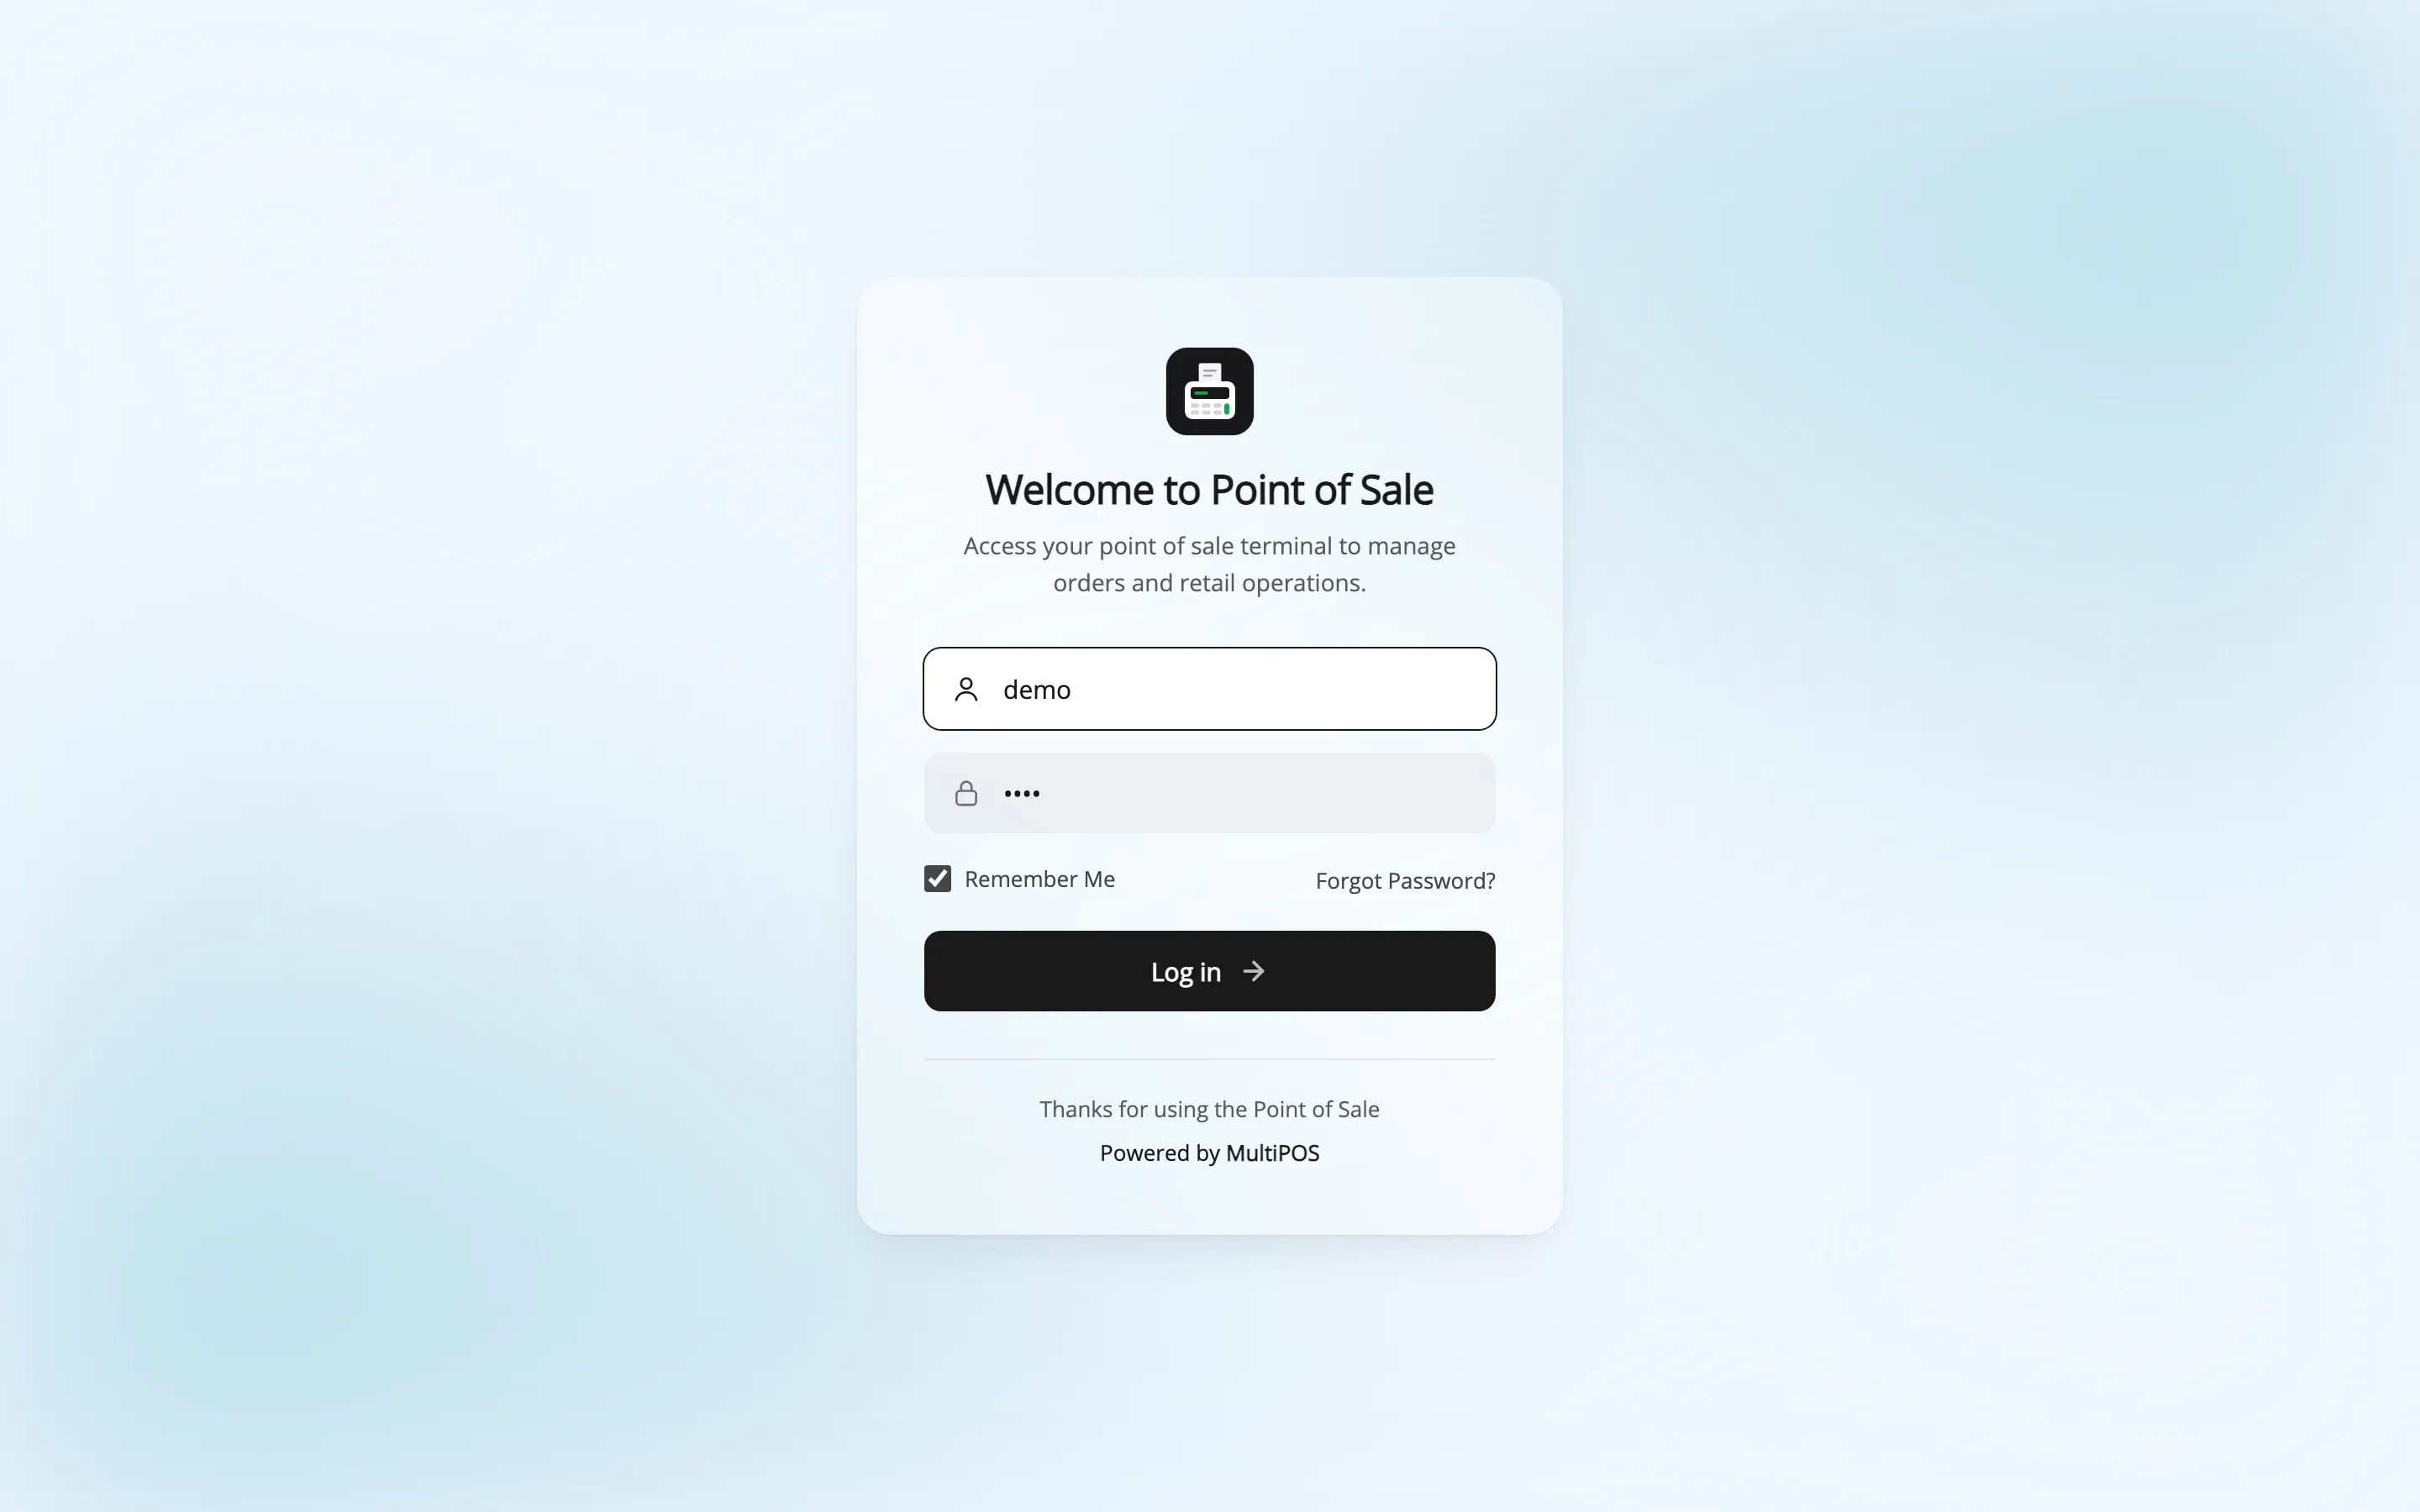
A visitor who is not logged in gets the POS login screen. It is a separate screen from
wp-login.php, styled under
Configuration → Login.
2. The cashier picks an outlet
Section titled “2. The cashier picks an outlet”After signing in, the terminal asks which outlet to open.
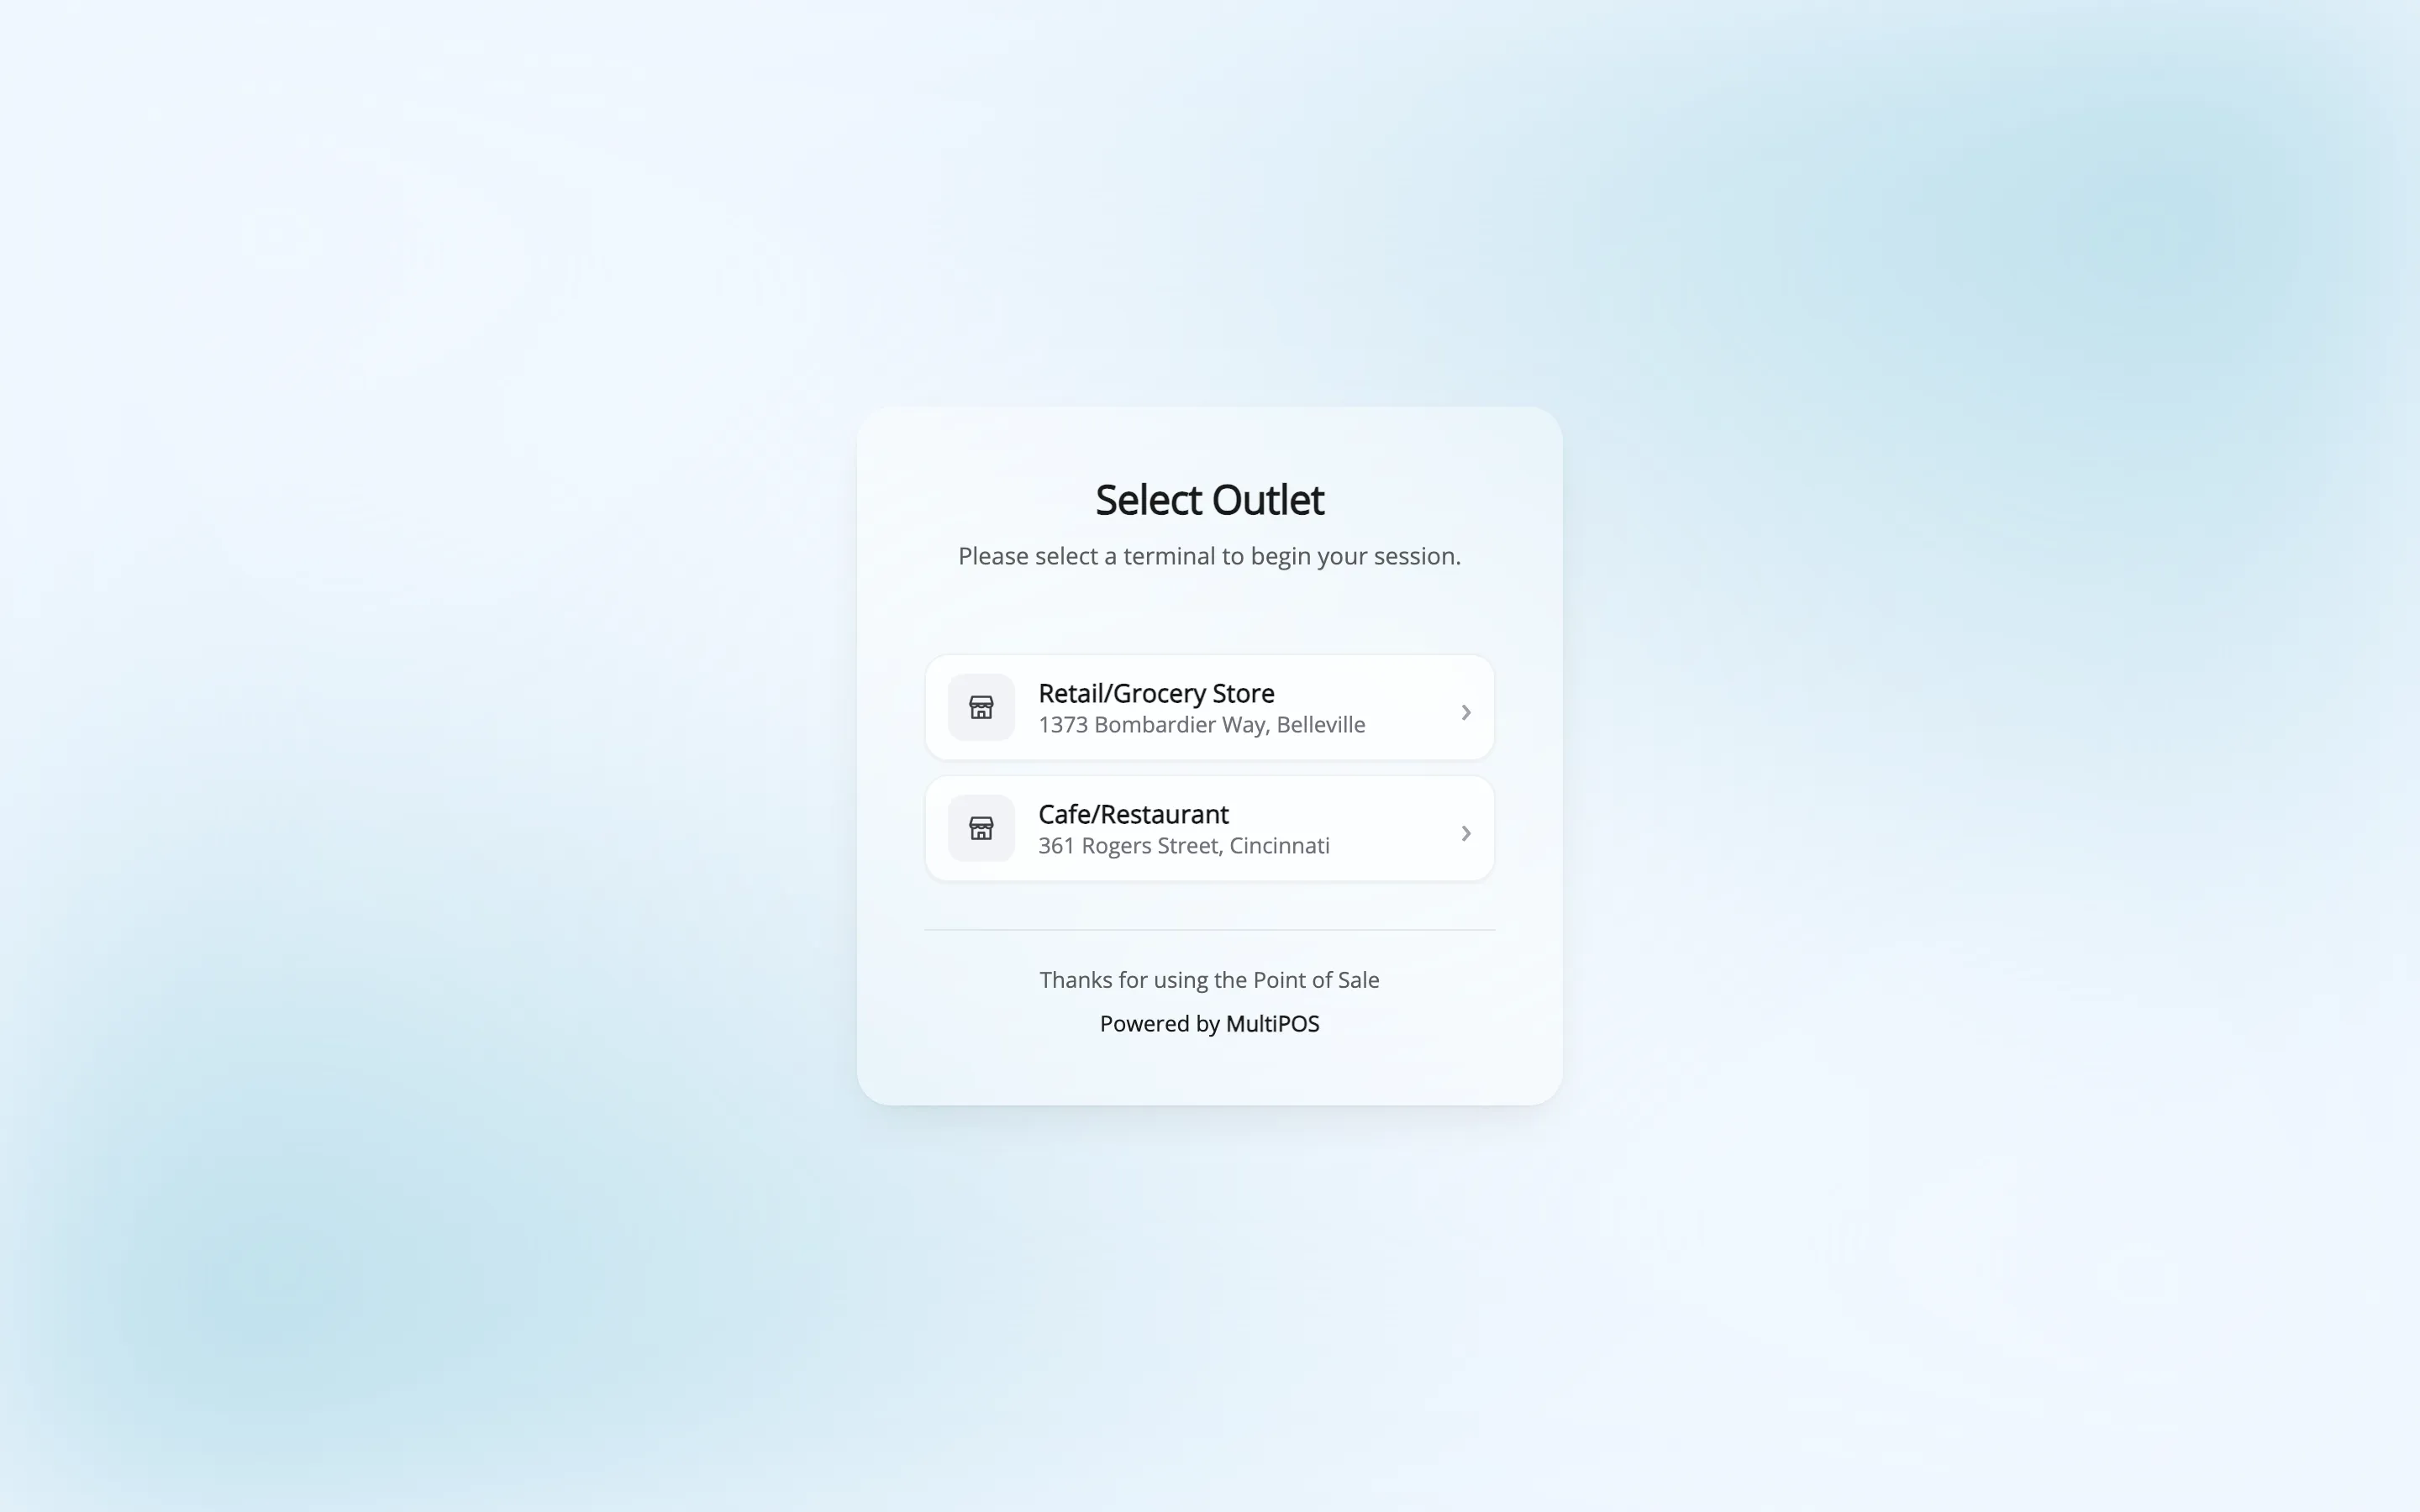
The outlet decides three things that matter for the rest of the sale. Which payment methods the cashier can take, which dining tables exist, and which address the order is billed to.
The choice is cached in the browser, so the cashier only sees this screen once per device. Clearing it is a button under Settings → Outlet → Reset Outlet Data in the terminal.
The free version has one outlet, so the screen shows one card. It still appears.
3. Products go into the cart
Section titled “3. Products go into the cart”Three ways, and cashiers use all three in a shift.
- Tap a product card. The grid shows every published product the outlet can sell.
- Scan a barcode. A USB scanner types into the search field. The product drops into the cart on Enter.
- Search: The search box matches product title, ID, SKU and barcode number.
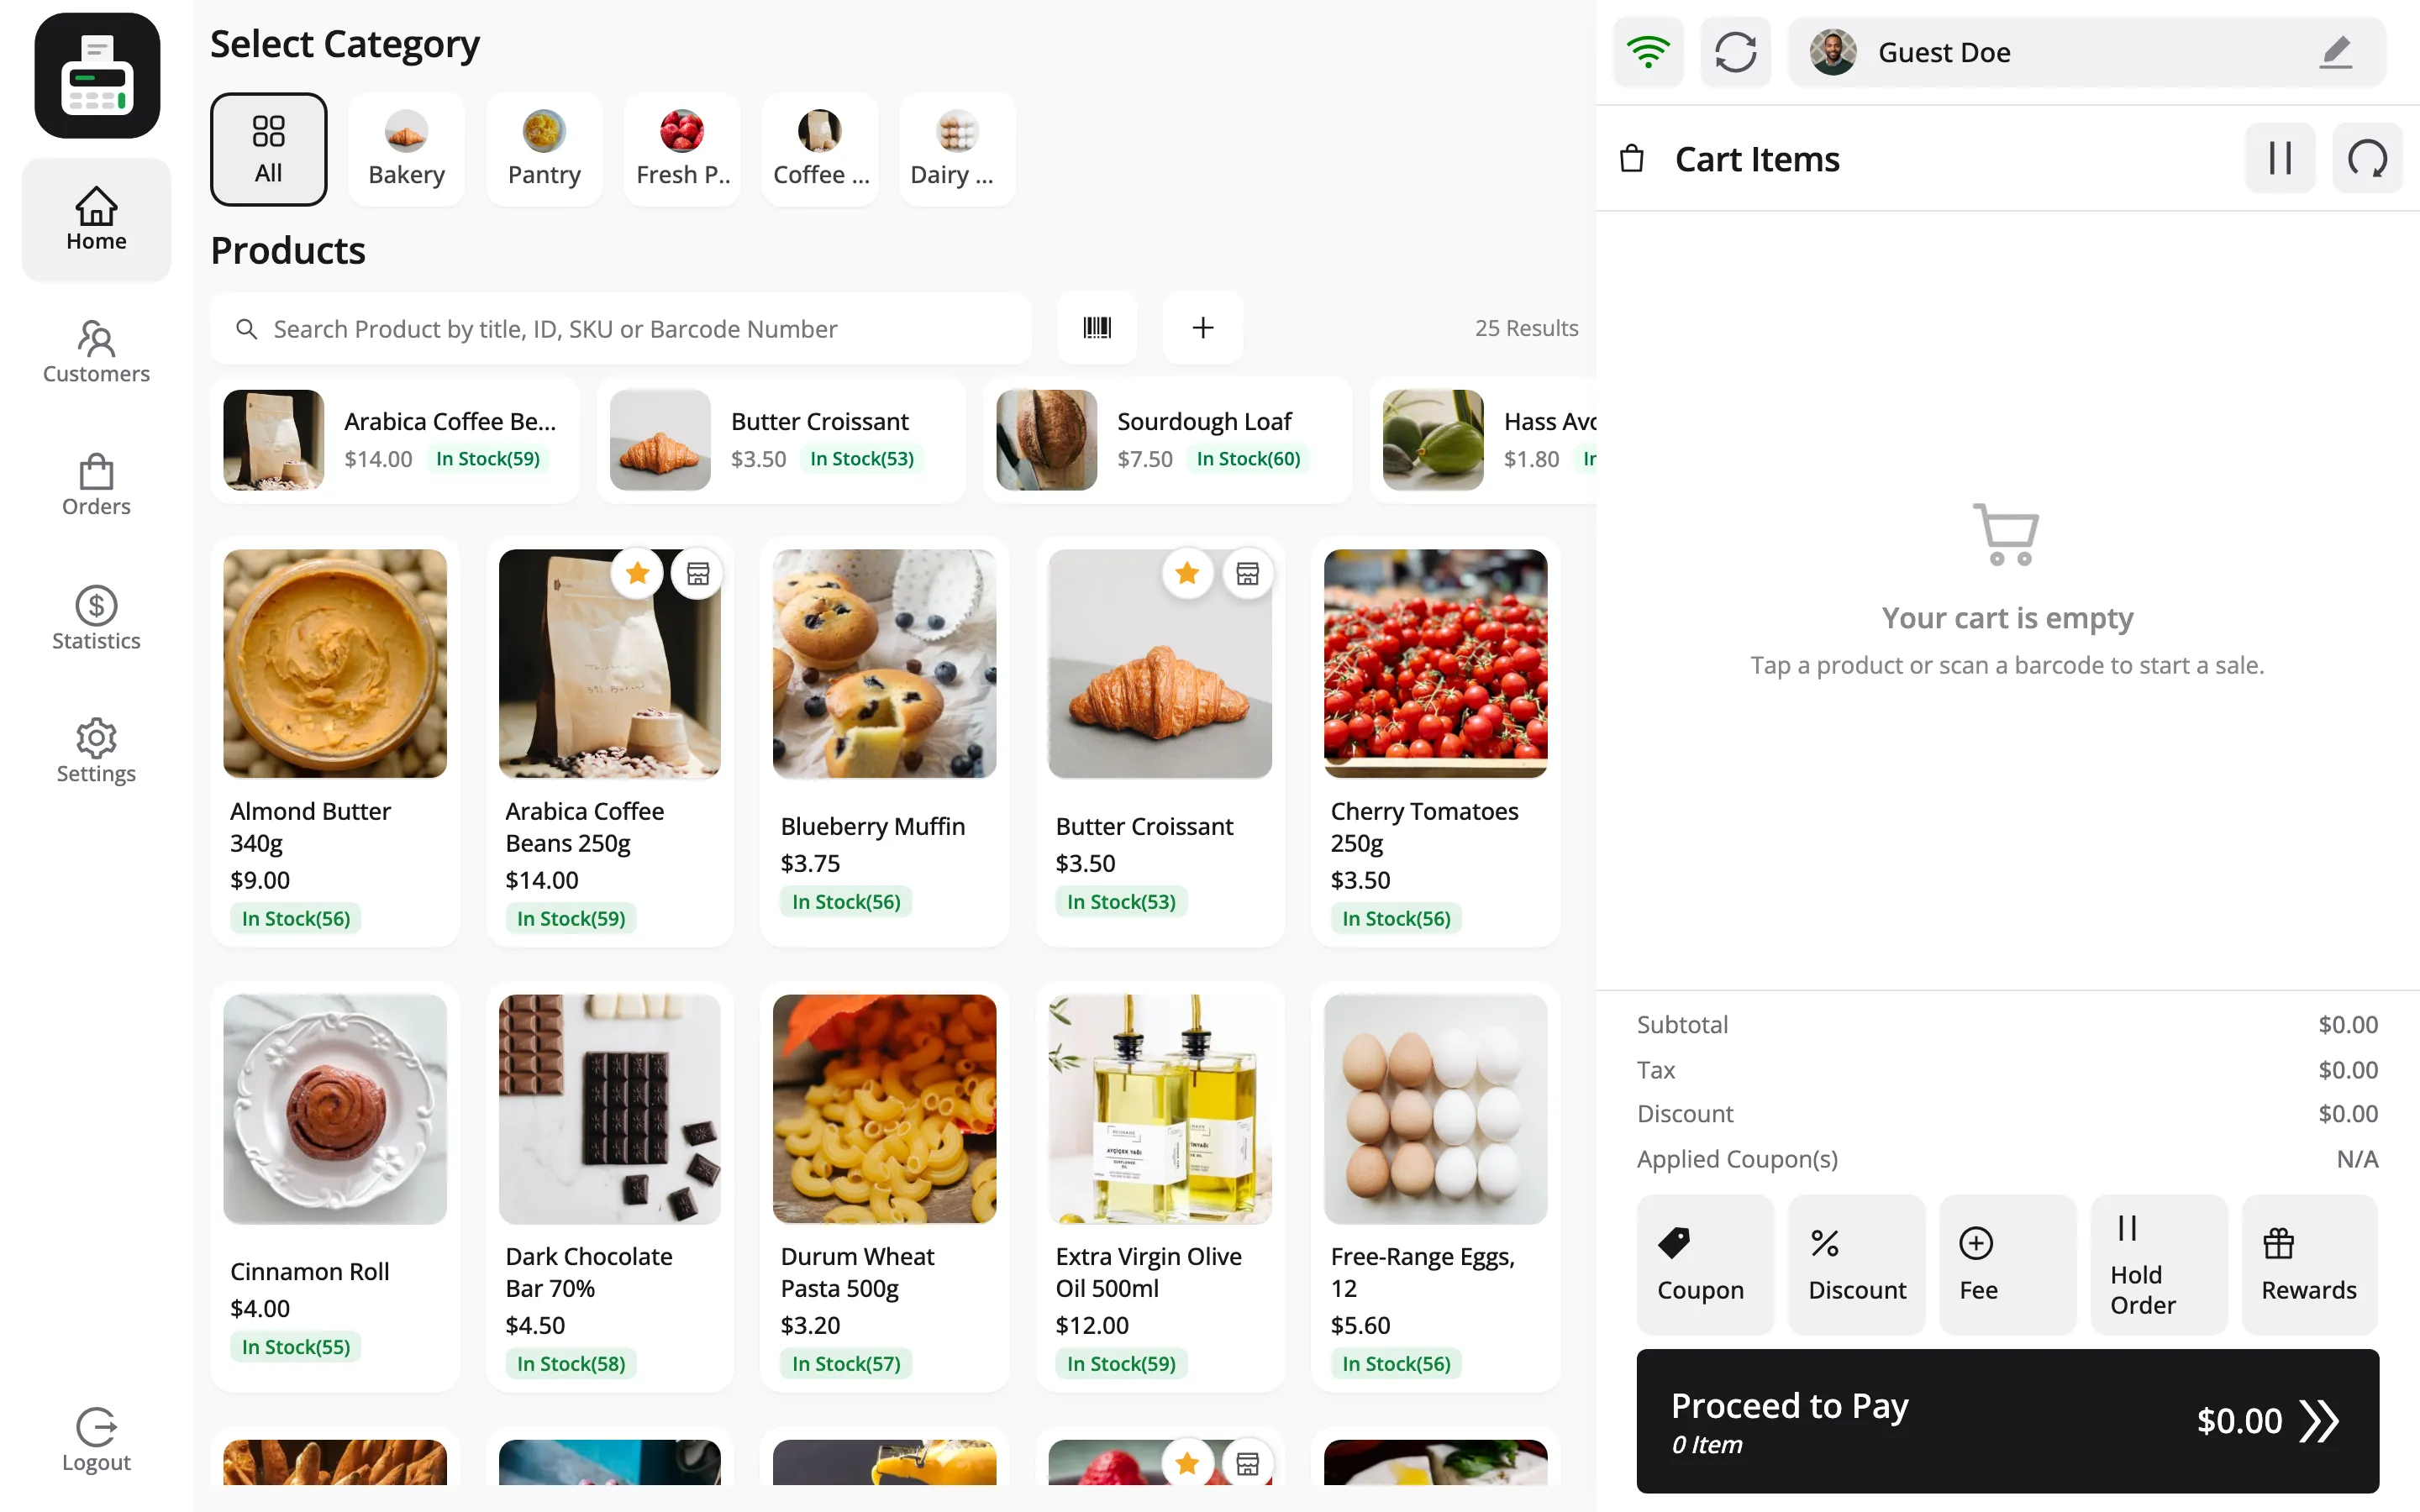
Each addition updates the cart panel on the right: line total, subtotal, tax and the running total.
4. The cart is adjusted
Section titled “4. The cart is adjusted”The cart is where everything except payment happens.
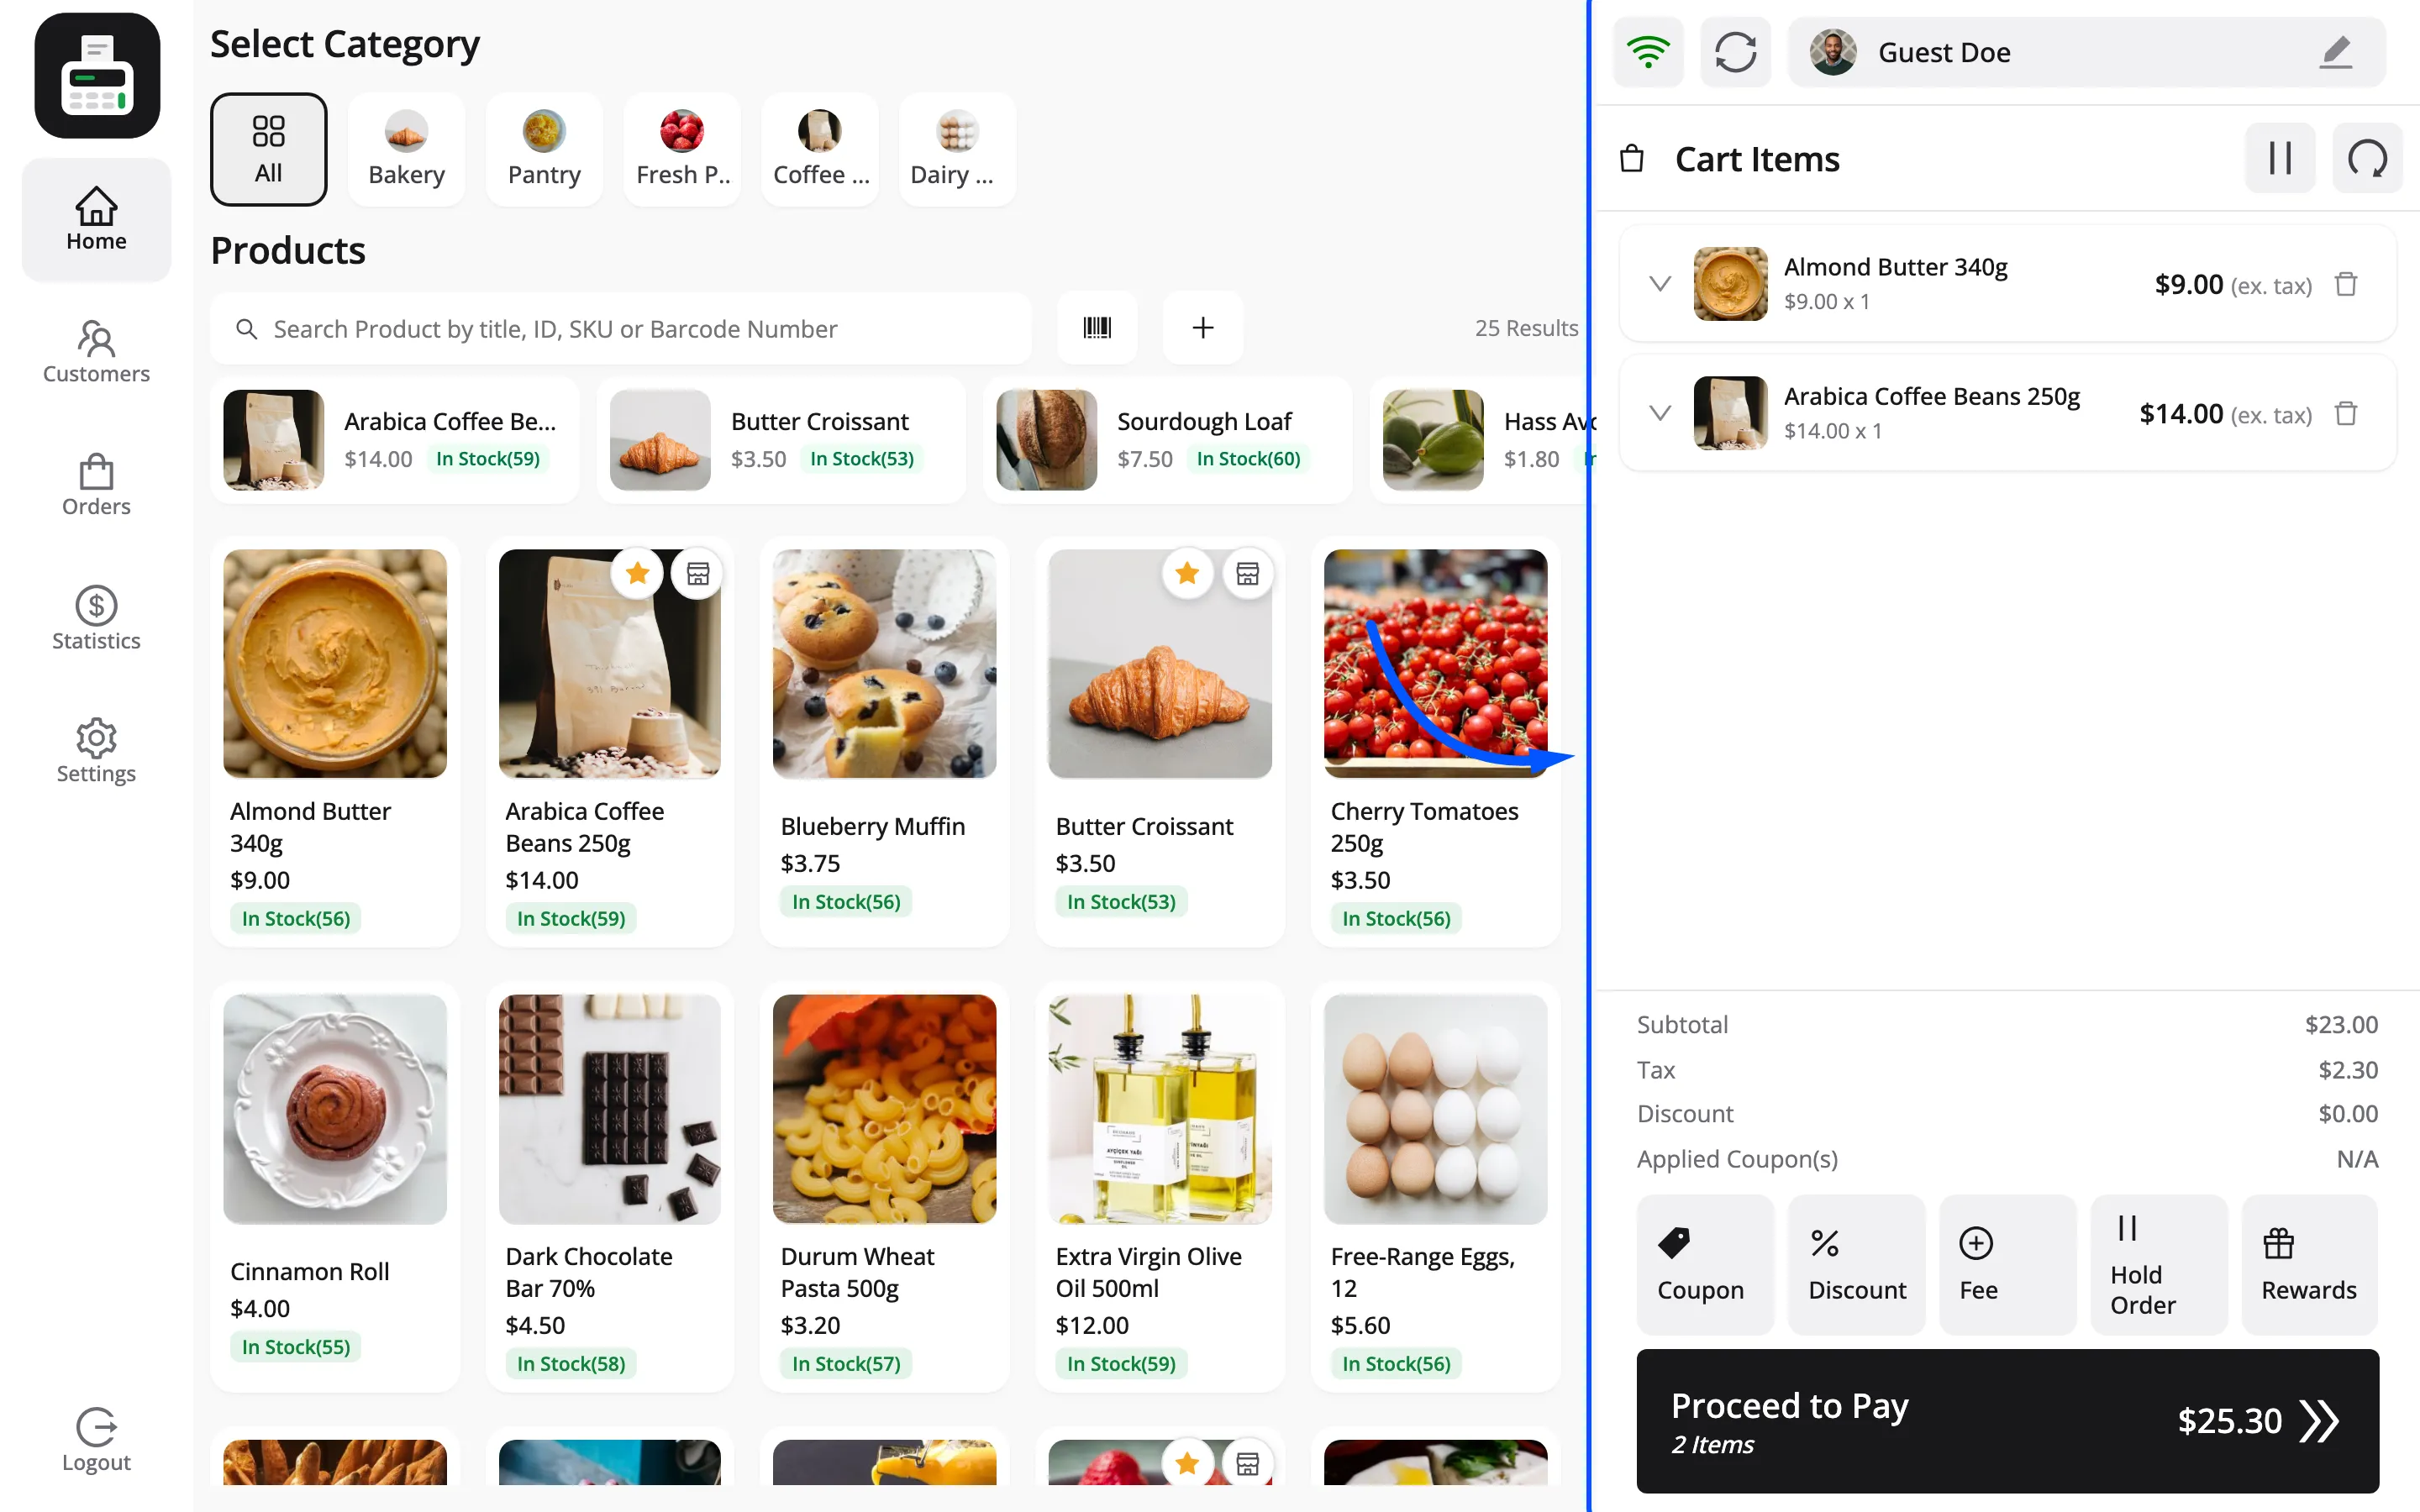
- Select Customer attaches a real customer to the sale. Leave it and the order is billed to the Default Guest Account.
- Coupon applies a WooCommerce coupon code. Pro adds a manual Discount button beside it.
- Hold Order holds the cart under a label so the cashier can serve someone else.
- Reset Cart empties it.
- Select Table attaches a dining table, in restaurant mode.
5. Payment is taken
Section titled “5. Payment is taken”Proceed to Pay opens the payment screen: Total Due, a payment method list, a numeric keypad and quick-amount buttons.
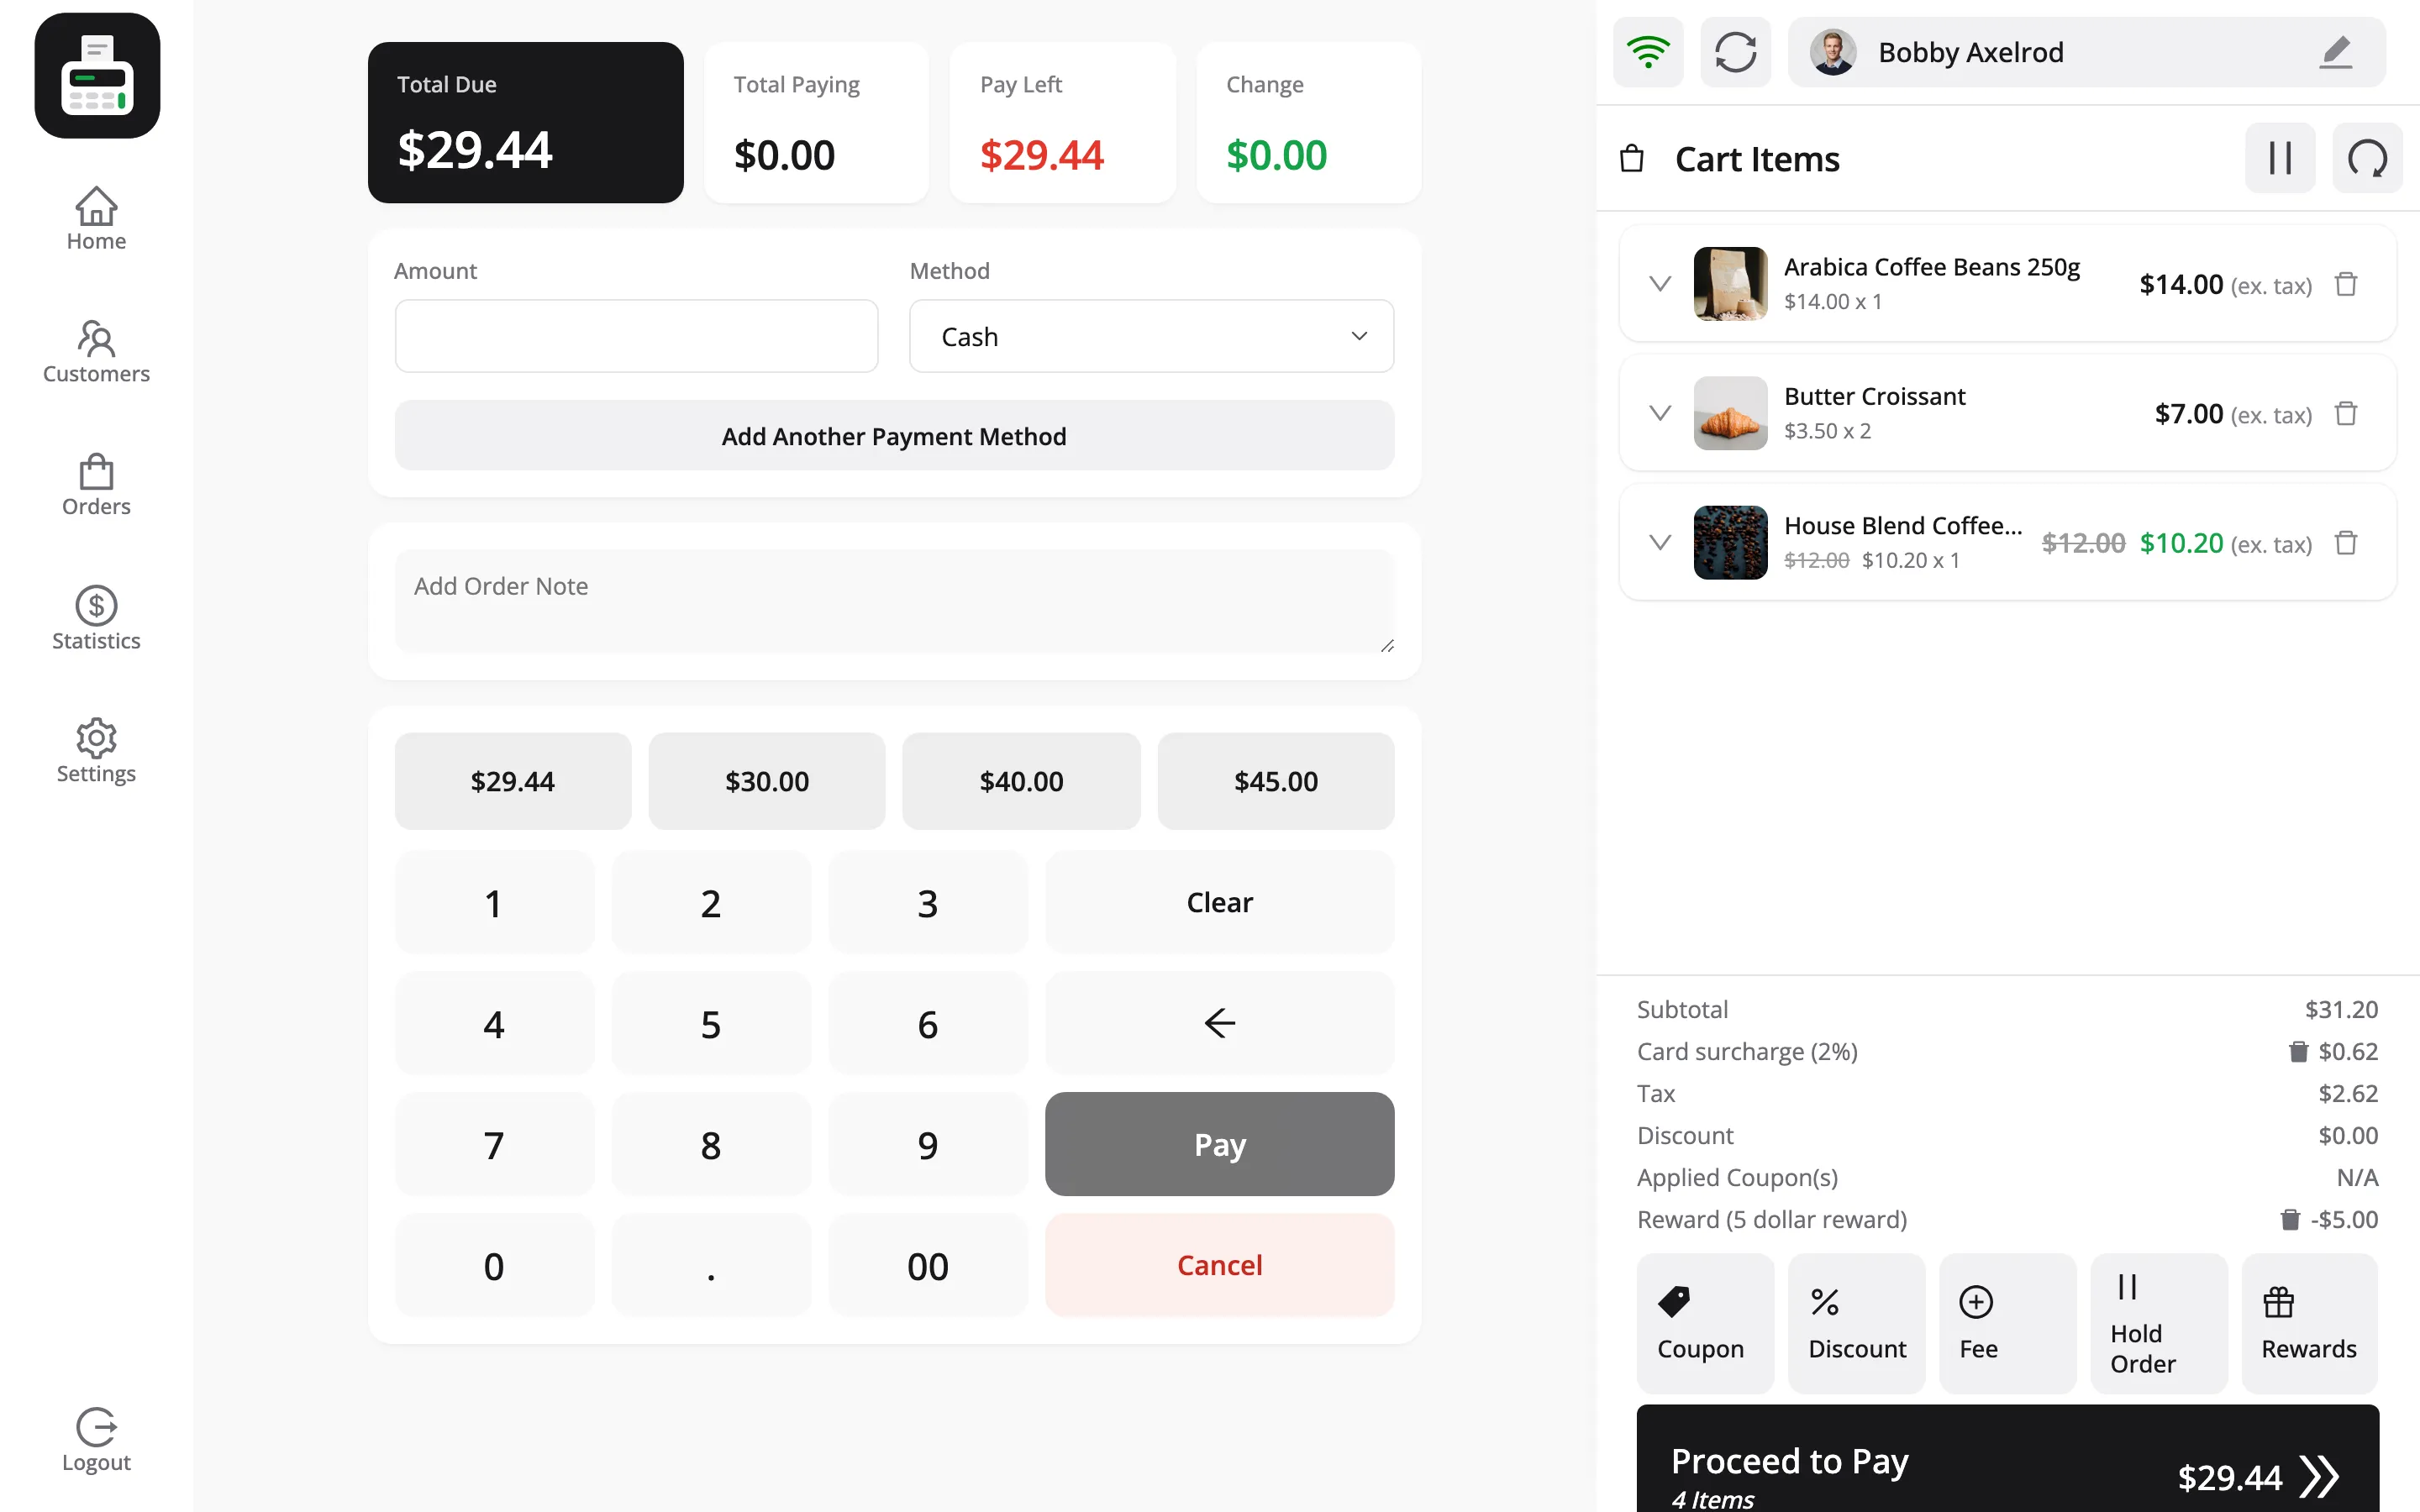
The cashier picks a method, enters what the customer handed over, and presses Pay. Change is the difference between the amount handed over and the total due.
6. A WooCommerce order is created
Section titled “6. A WooCommerce order is created”This is the moment the sale becomes real, and several things happen at once.
- The order is created against a customer. The one the cashier chose, or the Default Guest Account.
- The address comes from the outlet, not the customer. Both the billing and the shipping address on a POS order are the outlet’s street, city, state, postcode and country. That is deliberate. A counter sale is made at the shop, so the shop’s address is the one tax should be worked out from.
- Tax is calculated against the outlet’s location. The plugin matches your WooCommerce tax rates to the outlet’s country, state, city and postcode.
- The payment method is recorded by its name and slug, along with the amount handed over and any table.
- Stock is reduced through WooCommerce, the same way a website order reduces it.
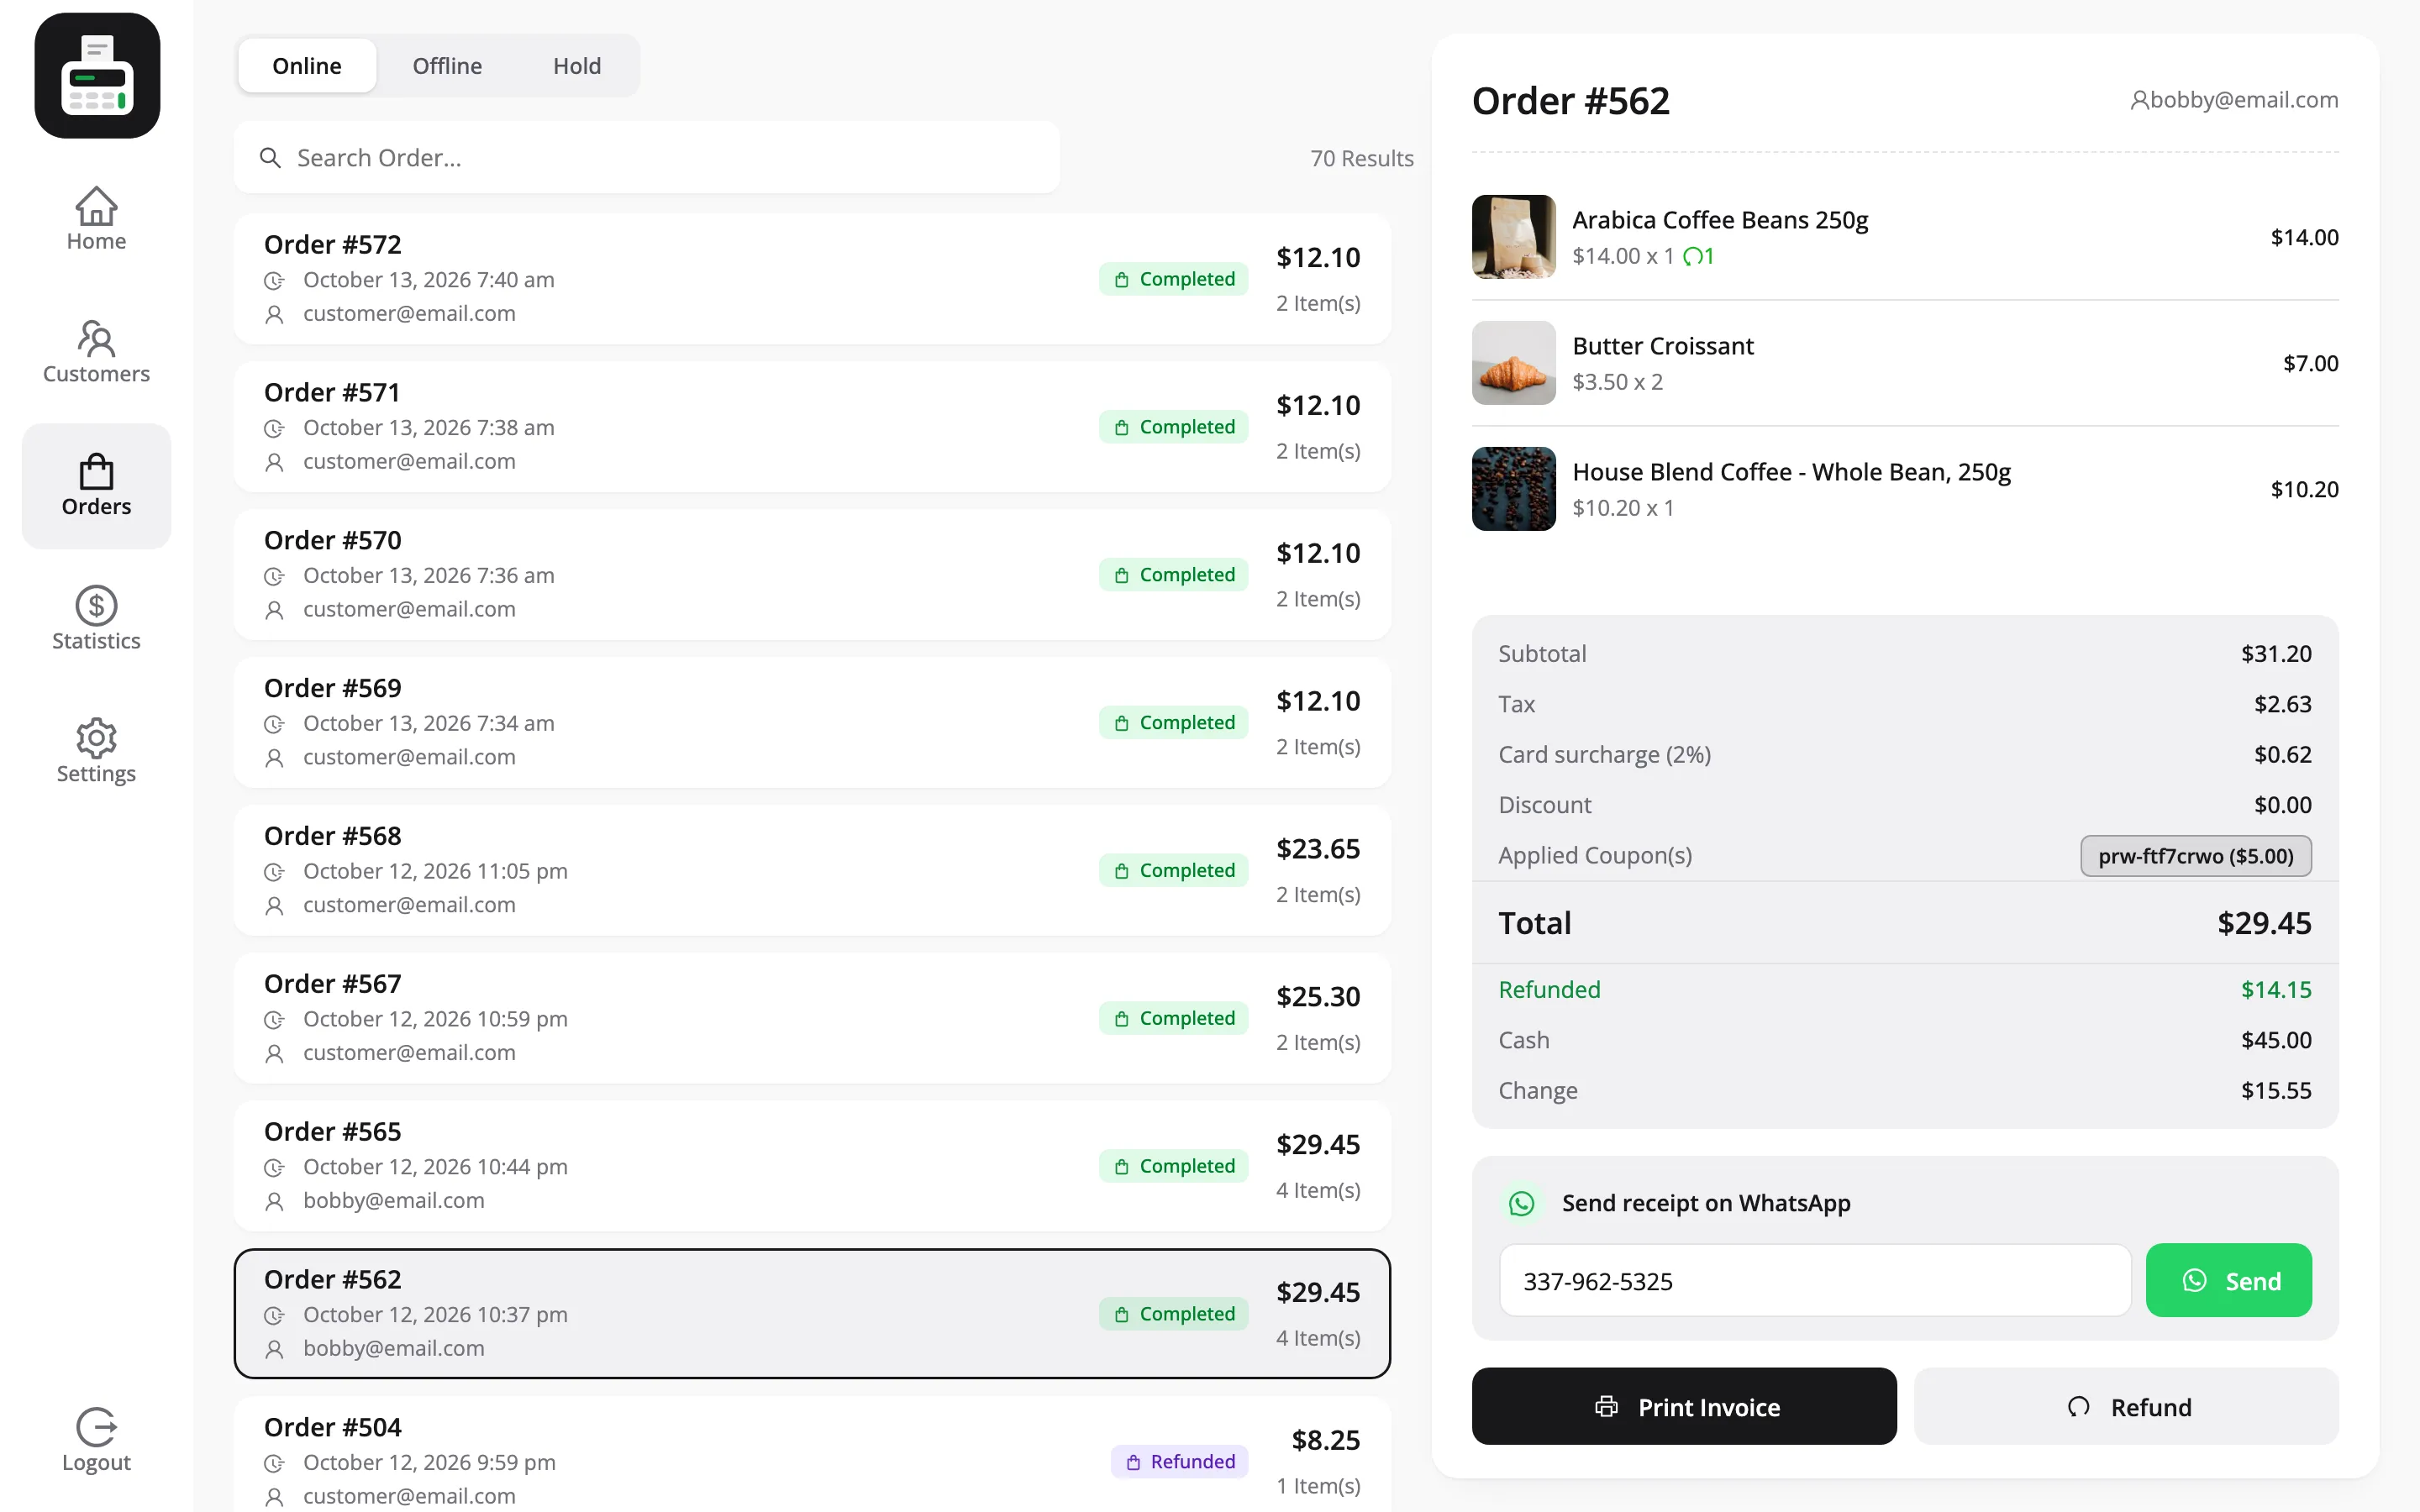
- The status is set to whatever Initial Order Status says under Configuration → General. That ships as Completed.
The finished order carries the outlet and the cashier who took it. That is what the Orders screen reads to fill its Staff Attribution column.
7. A transaction row is written
Section titled “7. A transaction row is written”Separately from the order, MultiPOS writes one transaction row per payment method used.
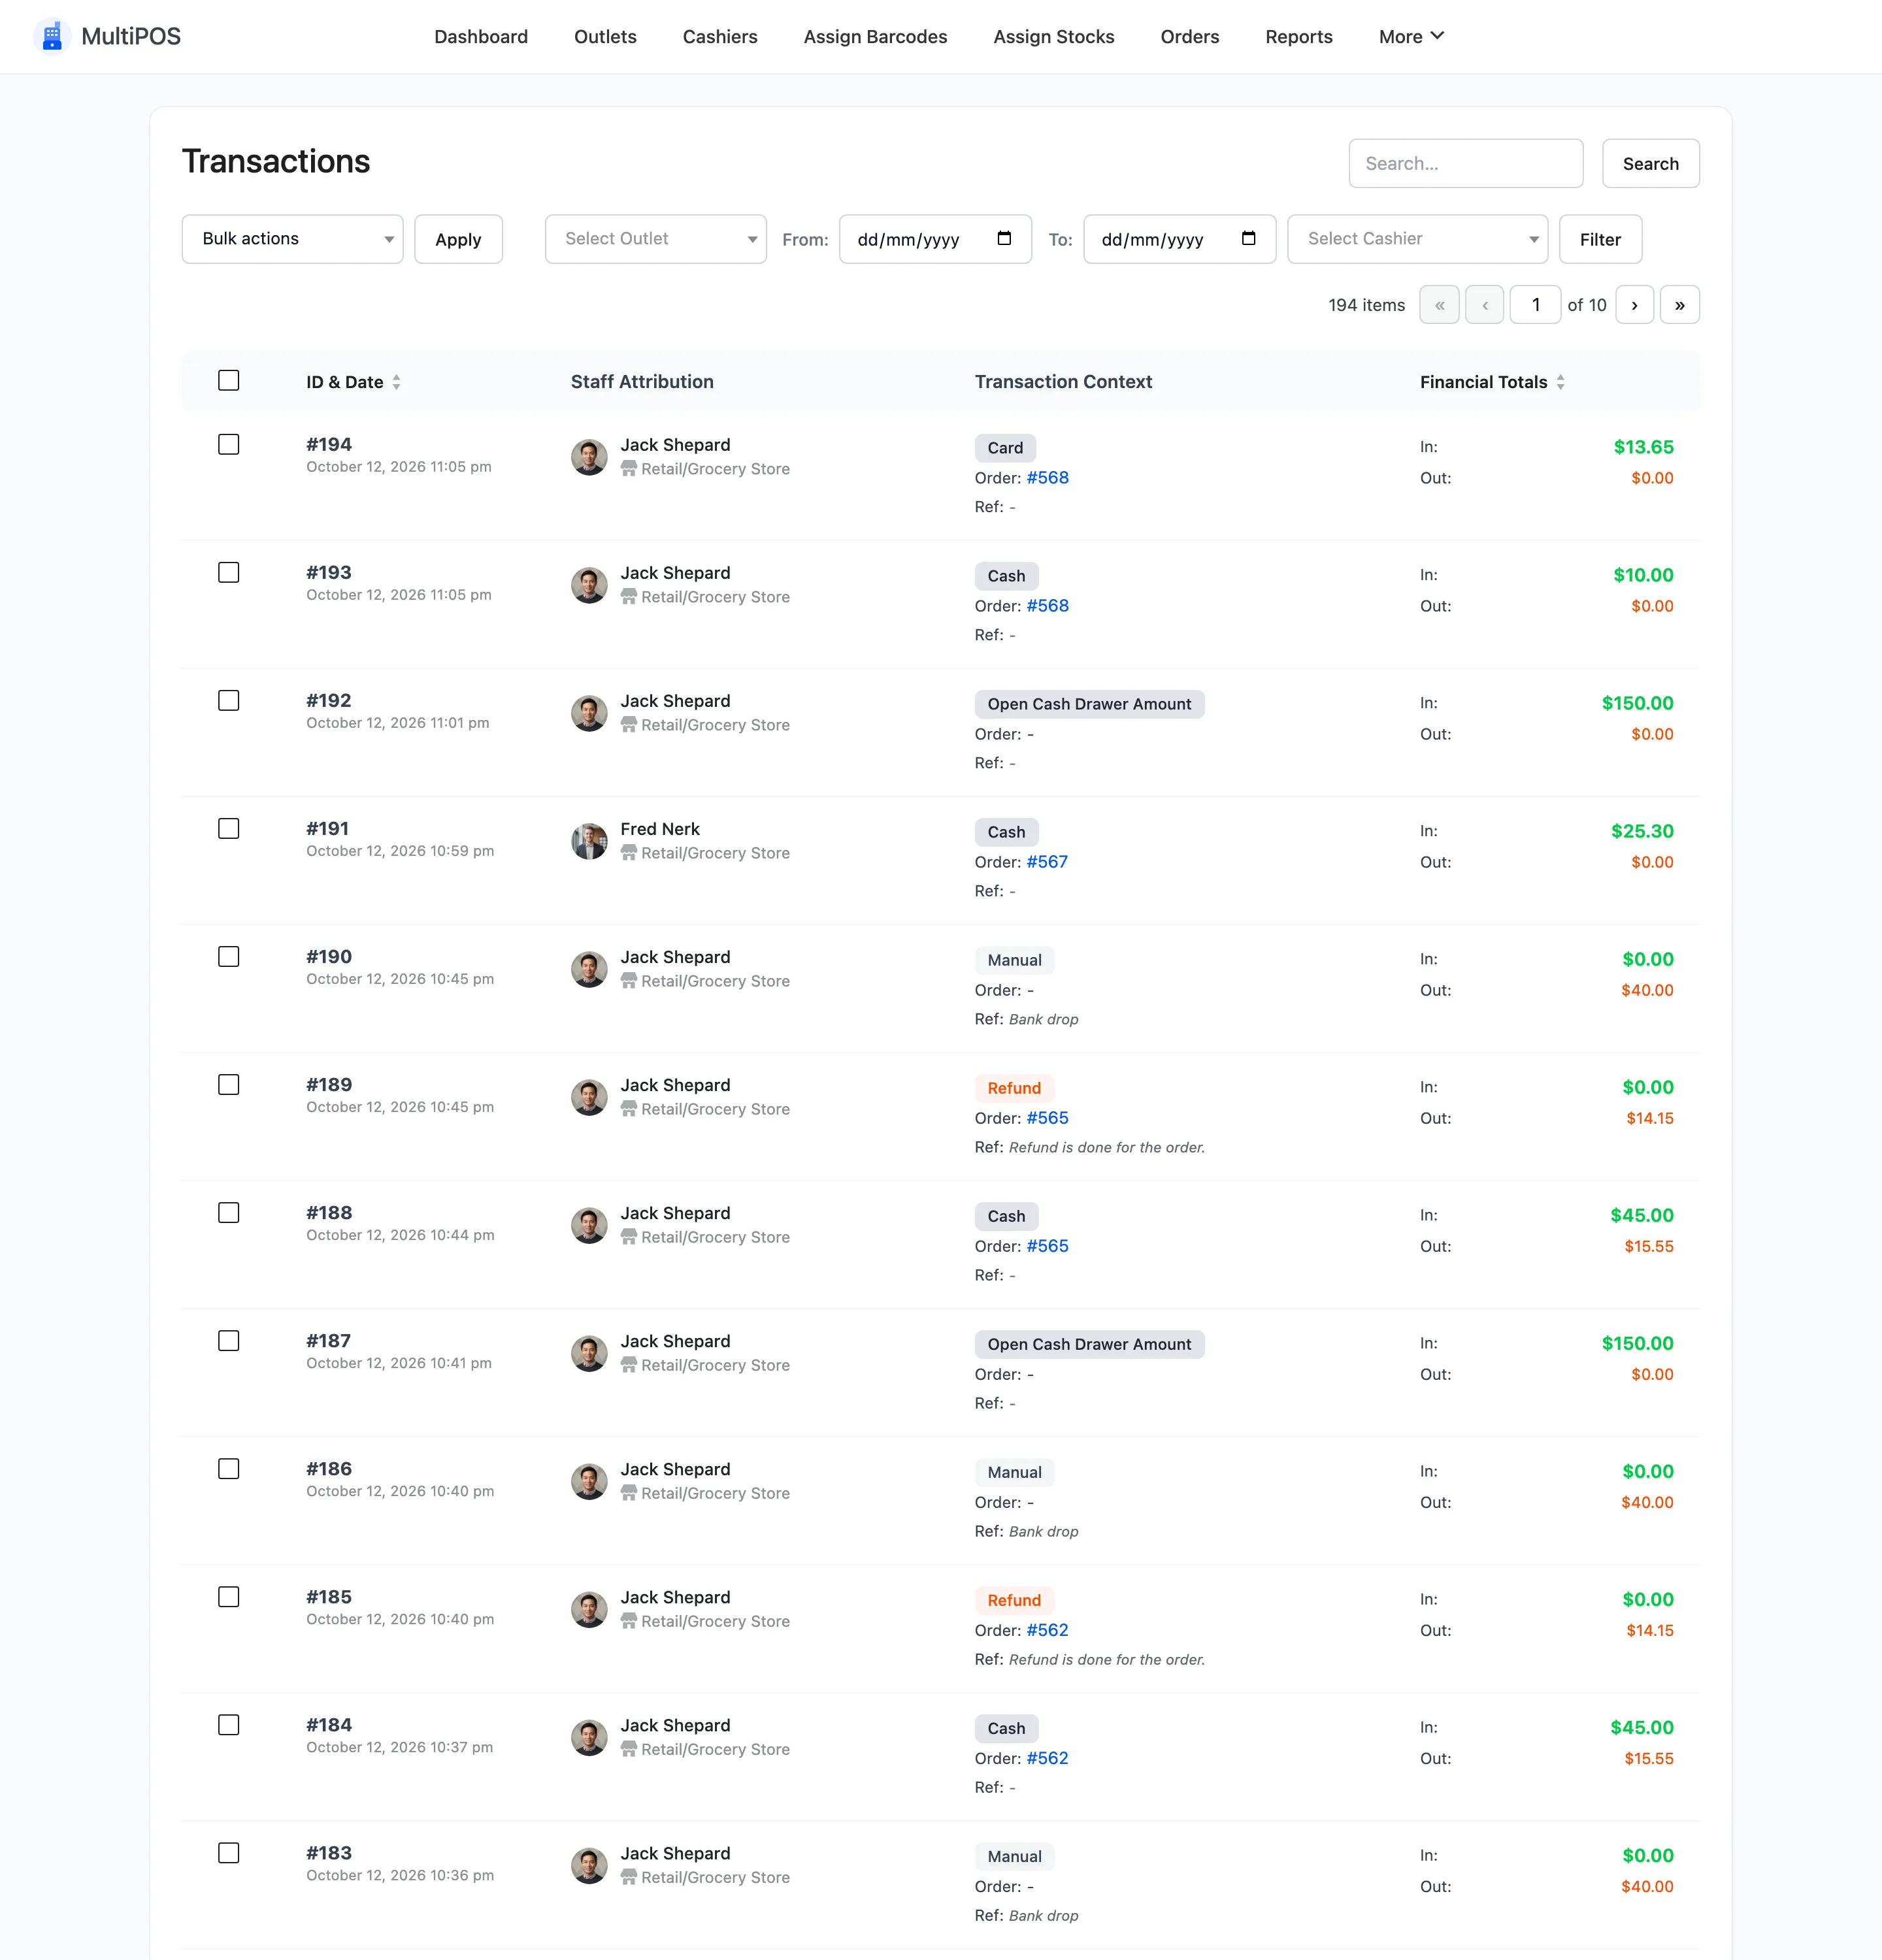
Each row records the cashier, the outlet, the order, the method, the date, and two figures:
- In is the amount the customer handed over.
- Out is the change given back.
Out is only ever filled in for cash, and only when the payment method’s slug is exactly cash.
Card and transfer payments are recorded with Out at zero, because no change leaves the drawer.
That pair is what makes the drawer easy to check. Cash in, minus cash out, is what should be sitting in the POS.
8. The receipt prints
Section titled “8. The receipt prints”A Print Receipt prompt appears with the order number and its status.
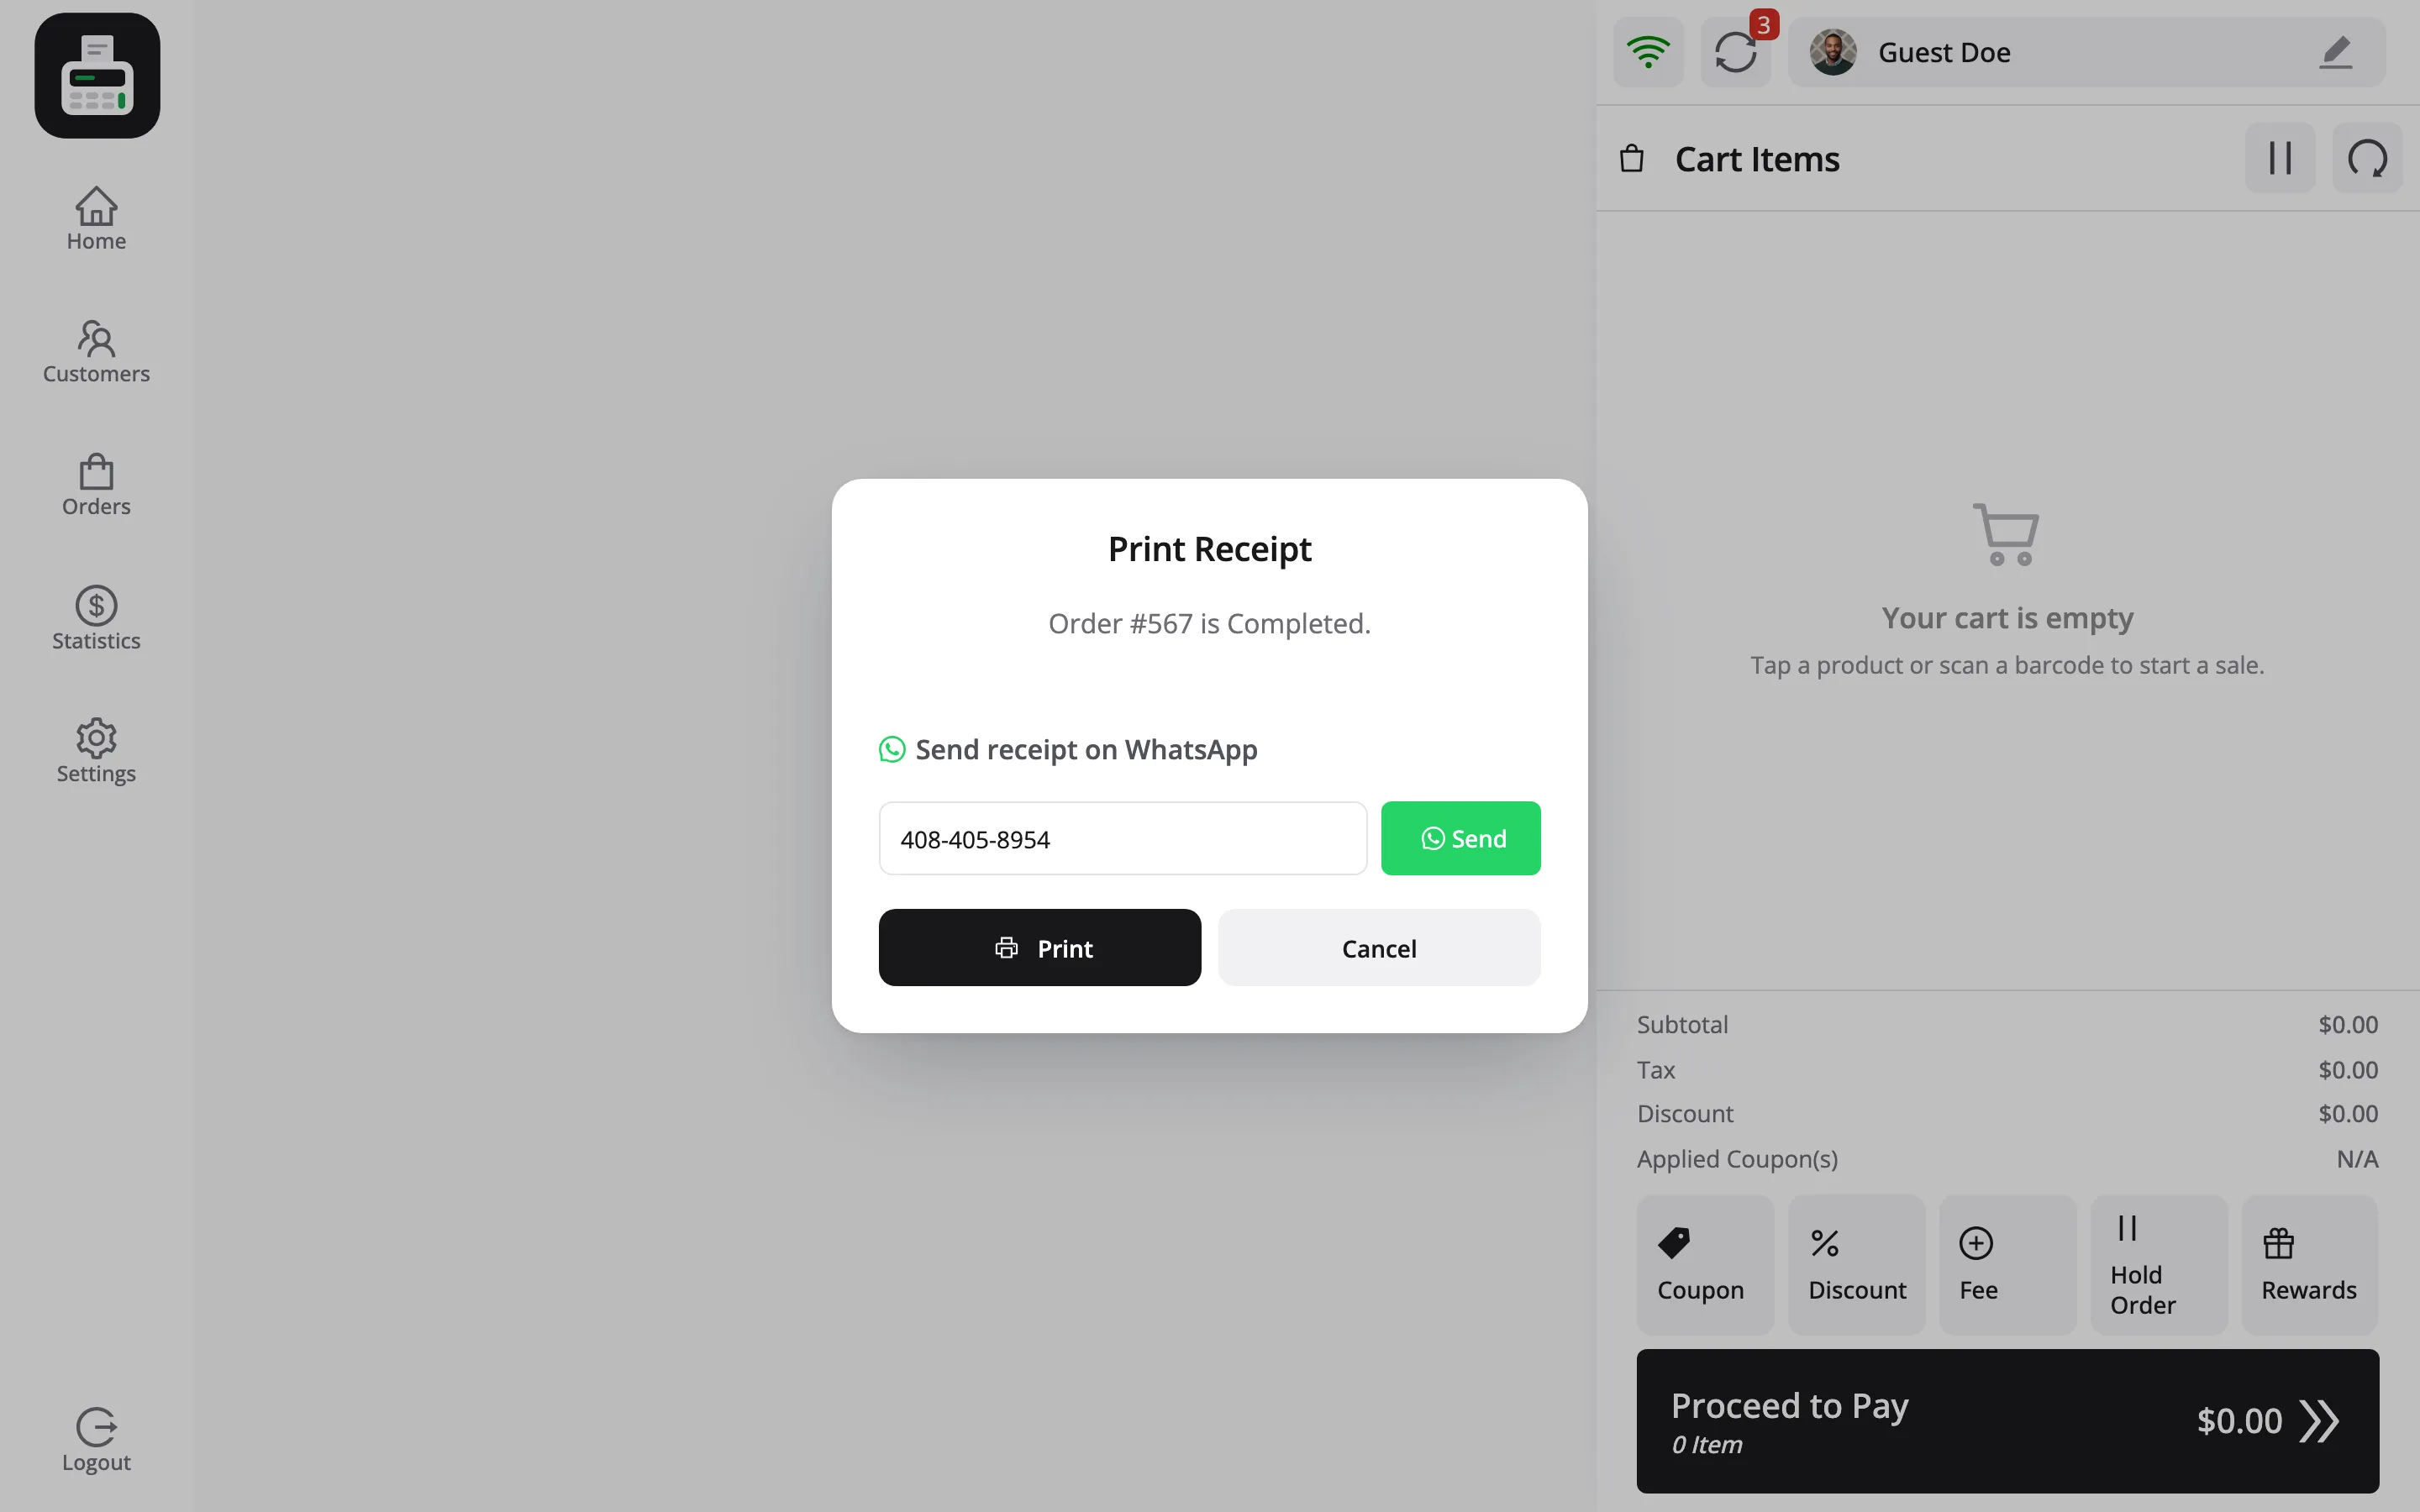
Its Print button sends the receipt to the printer at the size set under Configuration → Printer.
Closing the prompt without printing does not undo the sale. The order already exists.
9. The order appears in WooCommerce
Section titled “9. The order appears in WooCommerce”Open WooCommerce → Orders and the sale is there with everything else. MultiPOS adds an Order Type column so you can tell at a glance which orders came from the counter and which from the website.
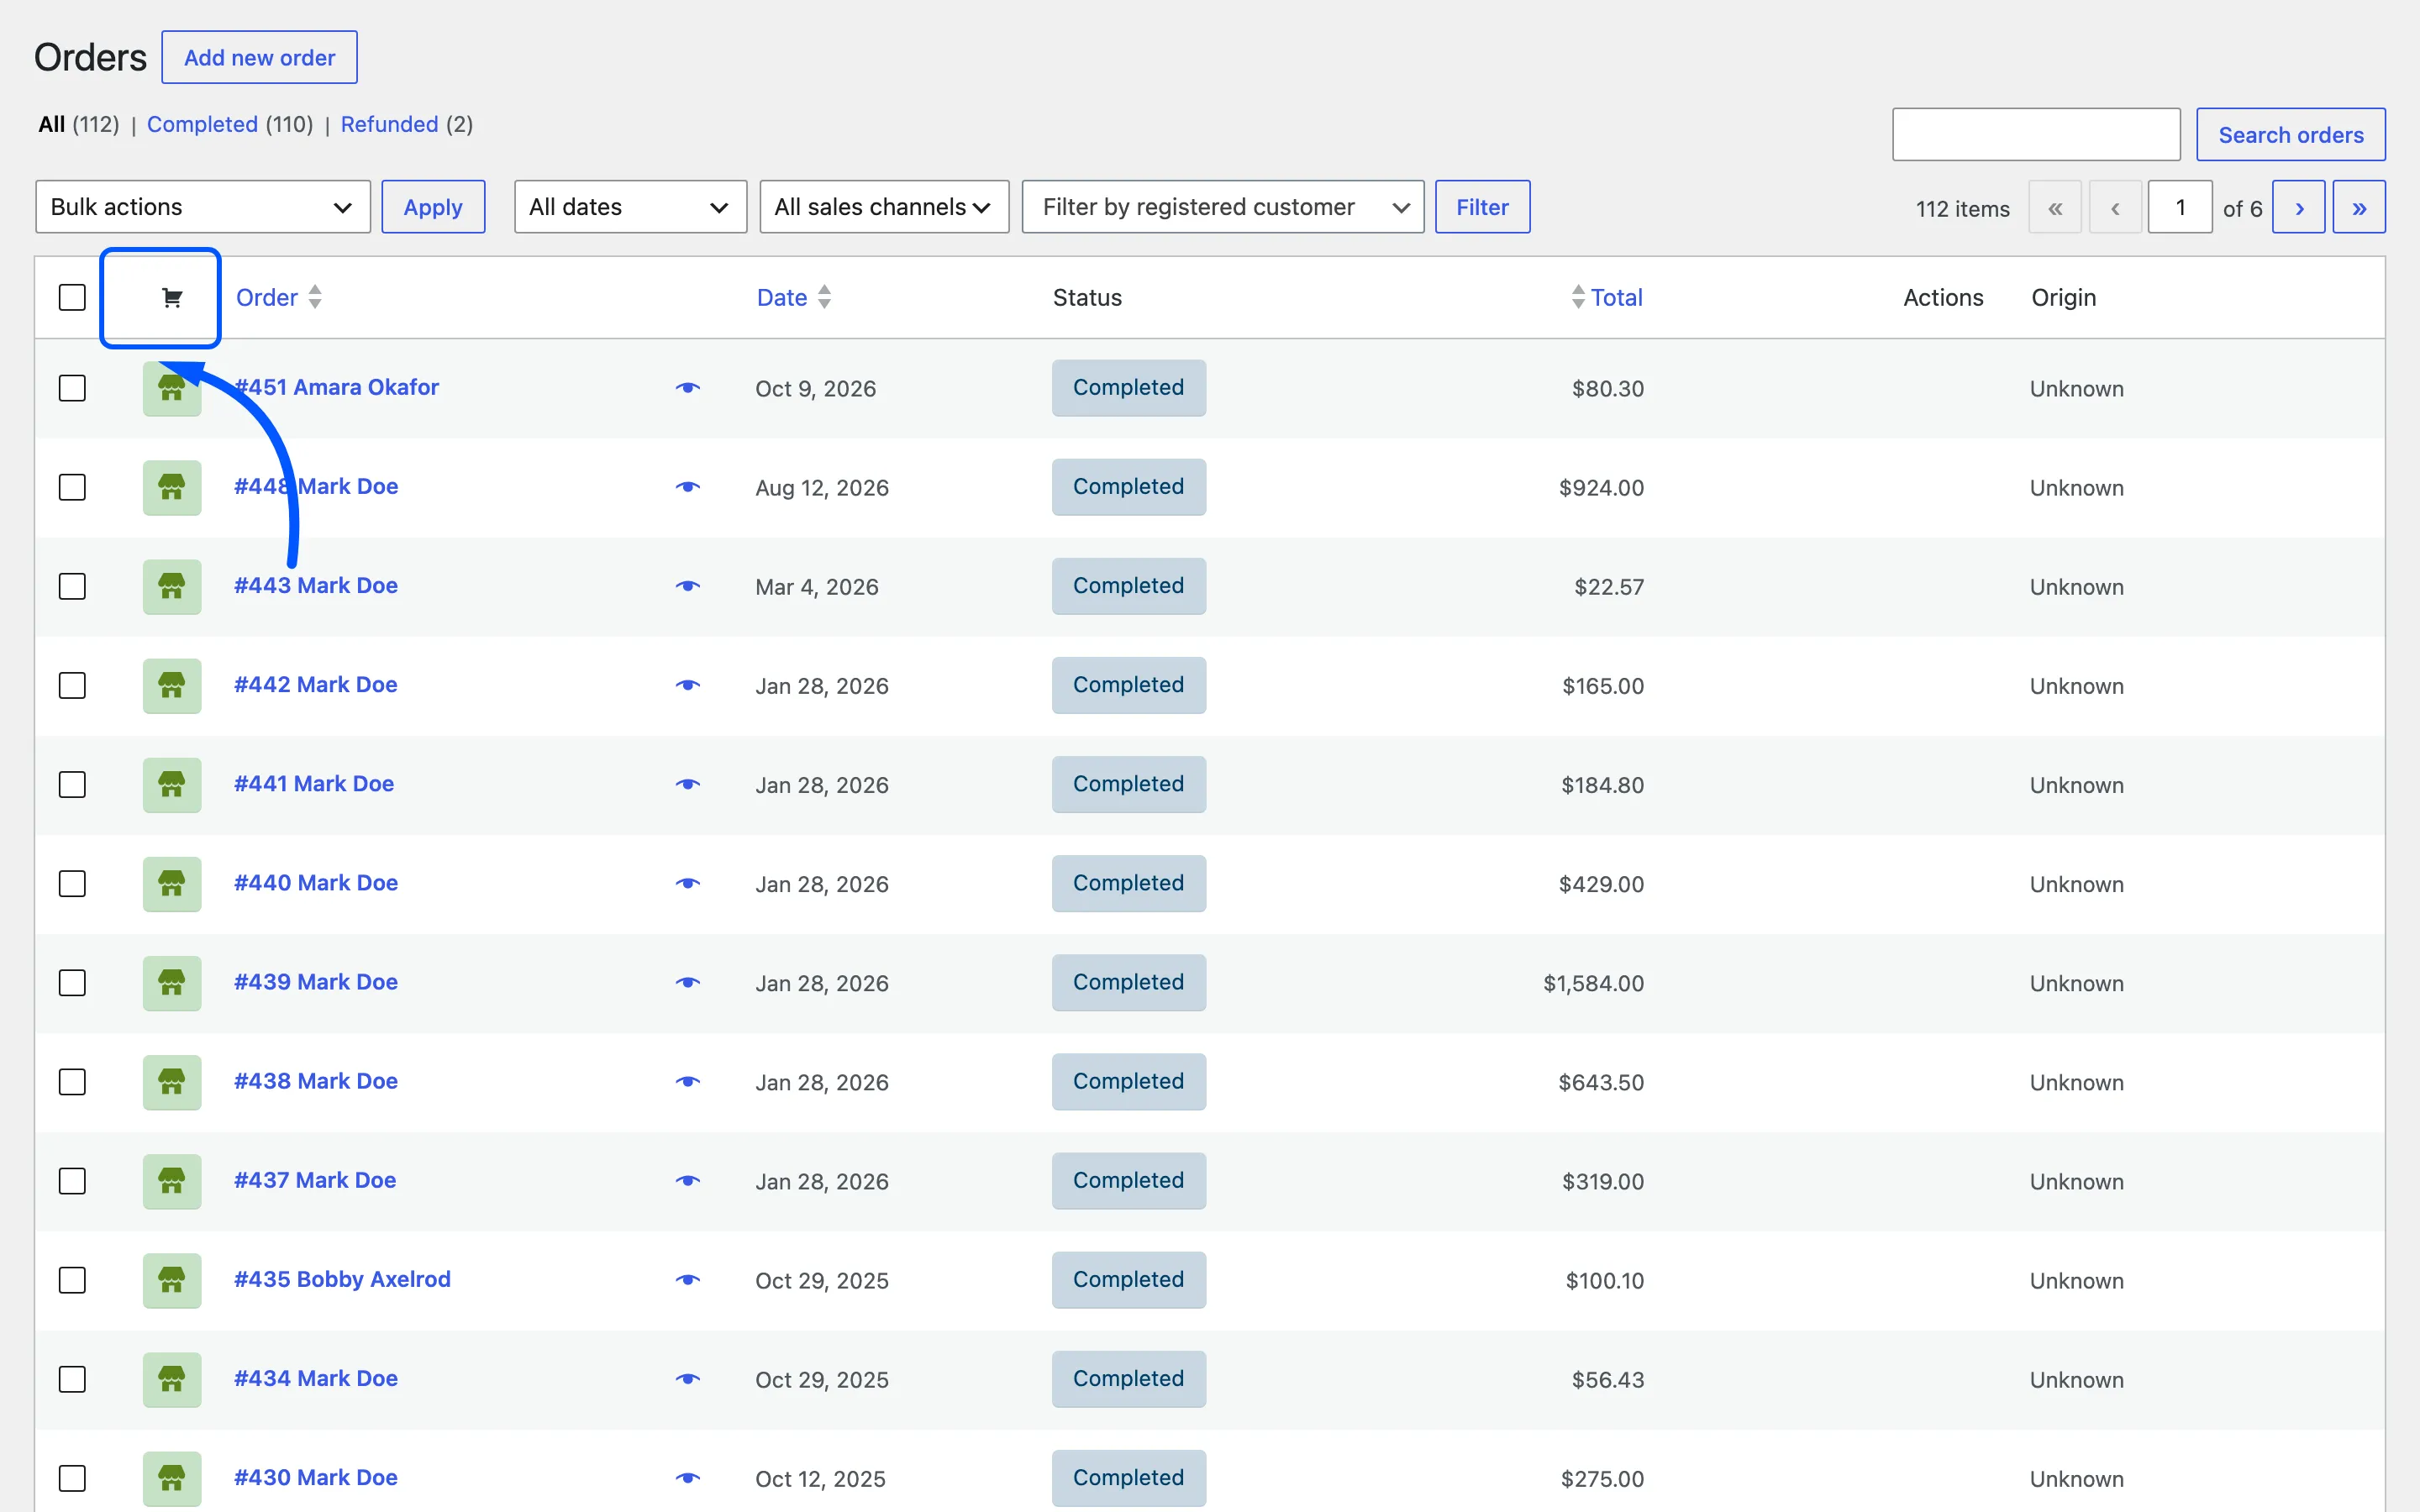
Refunds, notes and emails all work as they do on any WooCommerce order. MultiPOS does not take over the order once it exists.
Where to go next
Section titled “Where to go next”- The Cashier Experience for a screen-by-screen tour of the terminal.
- How to Take Your First Sale to do it yourself.
- Transactions for the transactions side.