

The Cashier Experience
Everything in this article is what your staff see. It is worth reading before you train anyone, because the terminal is a separate interface from WordPress and nothing in it looks like wp-admin.
Signing in
Section titled “Signing in”The terminal is a URL. The cashier opens yoursite.com/pos on a laptop, tablet or phone and gets
the login screen.
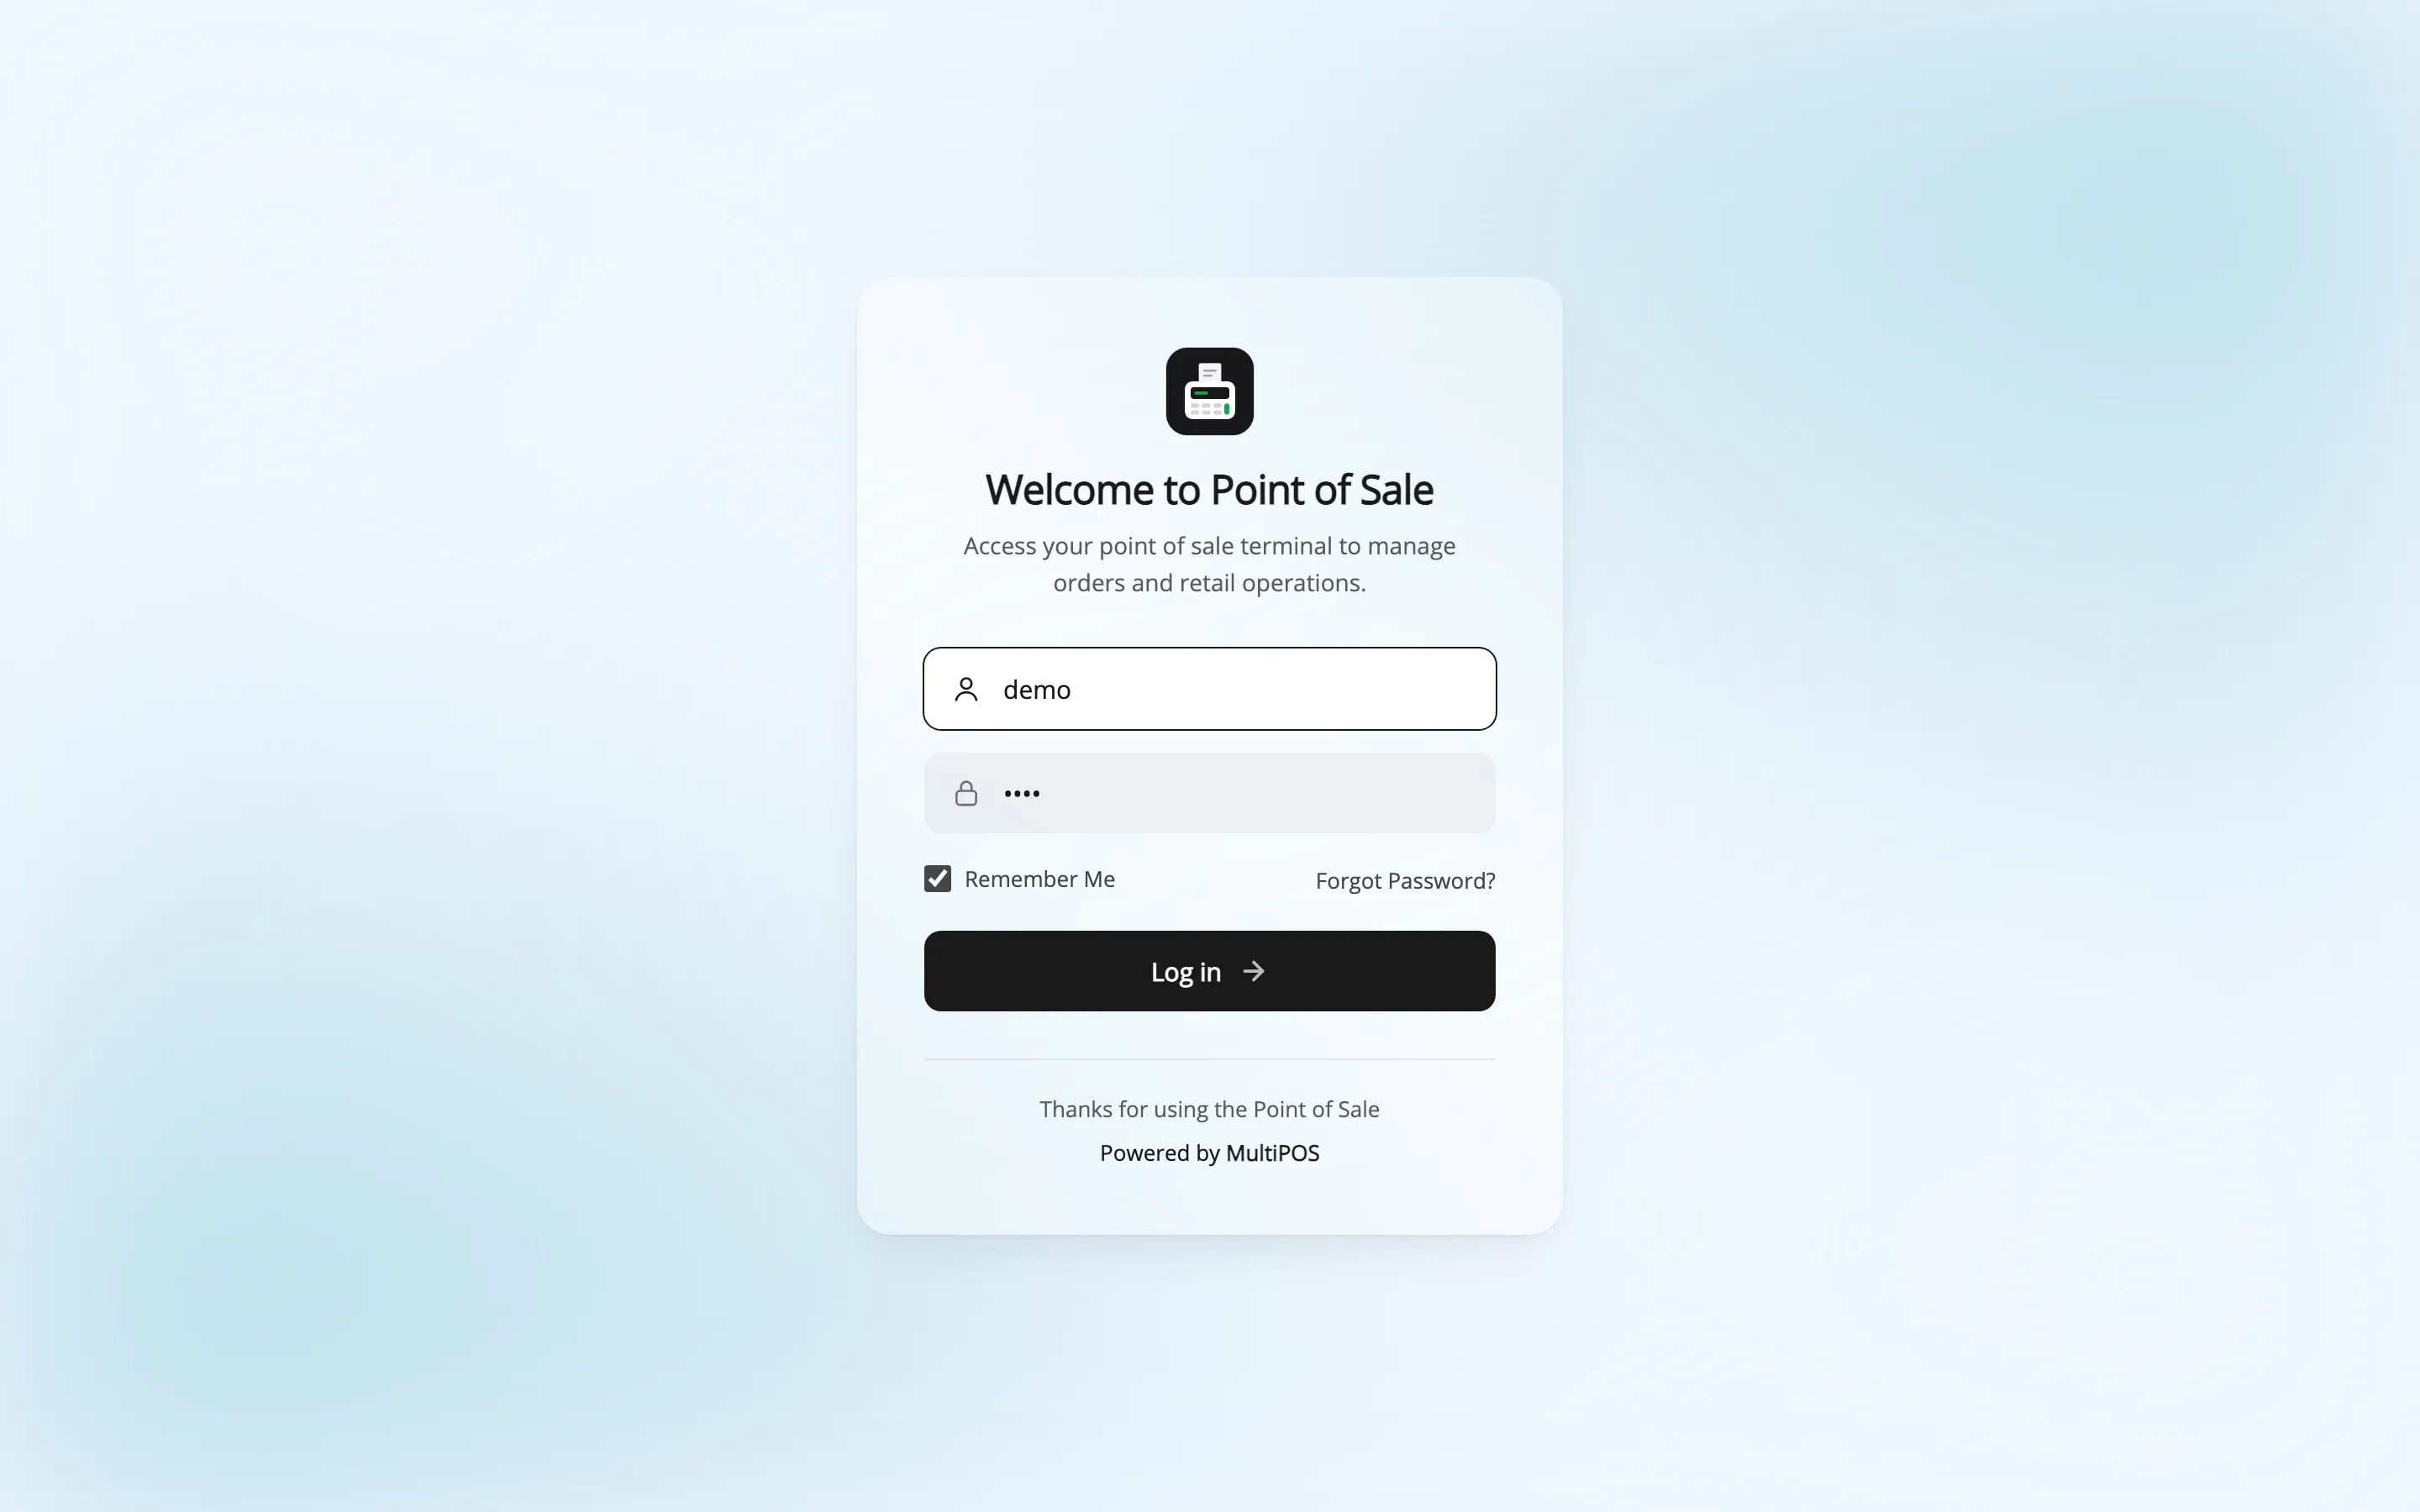
The heading, the subtitle, the footer line, the button label and the colours are all yours to change under Configuration → Login. So are Remember Me and Forgot Password, both off by default.
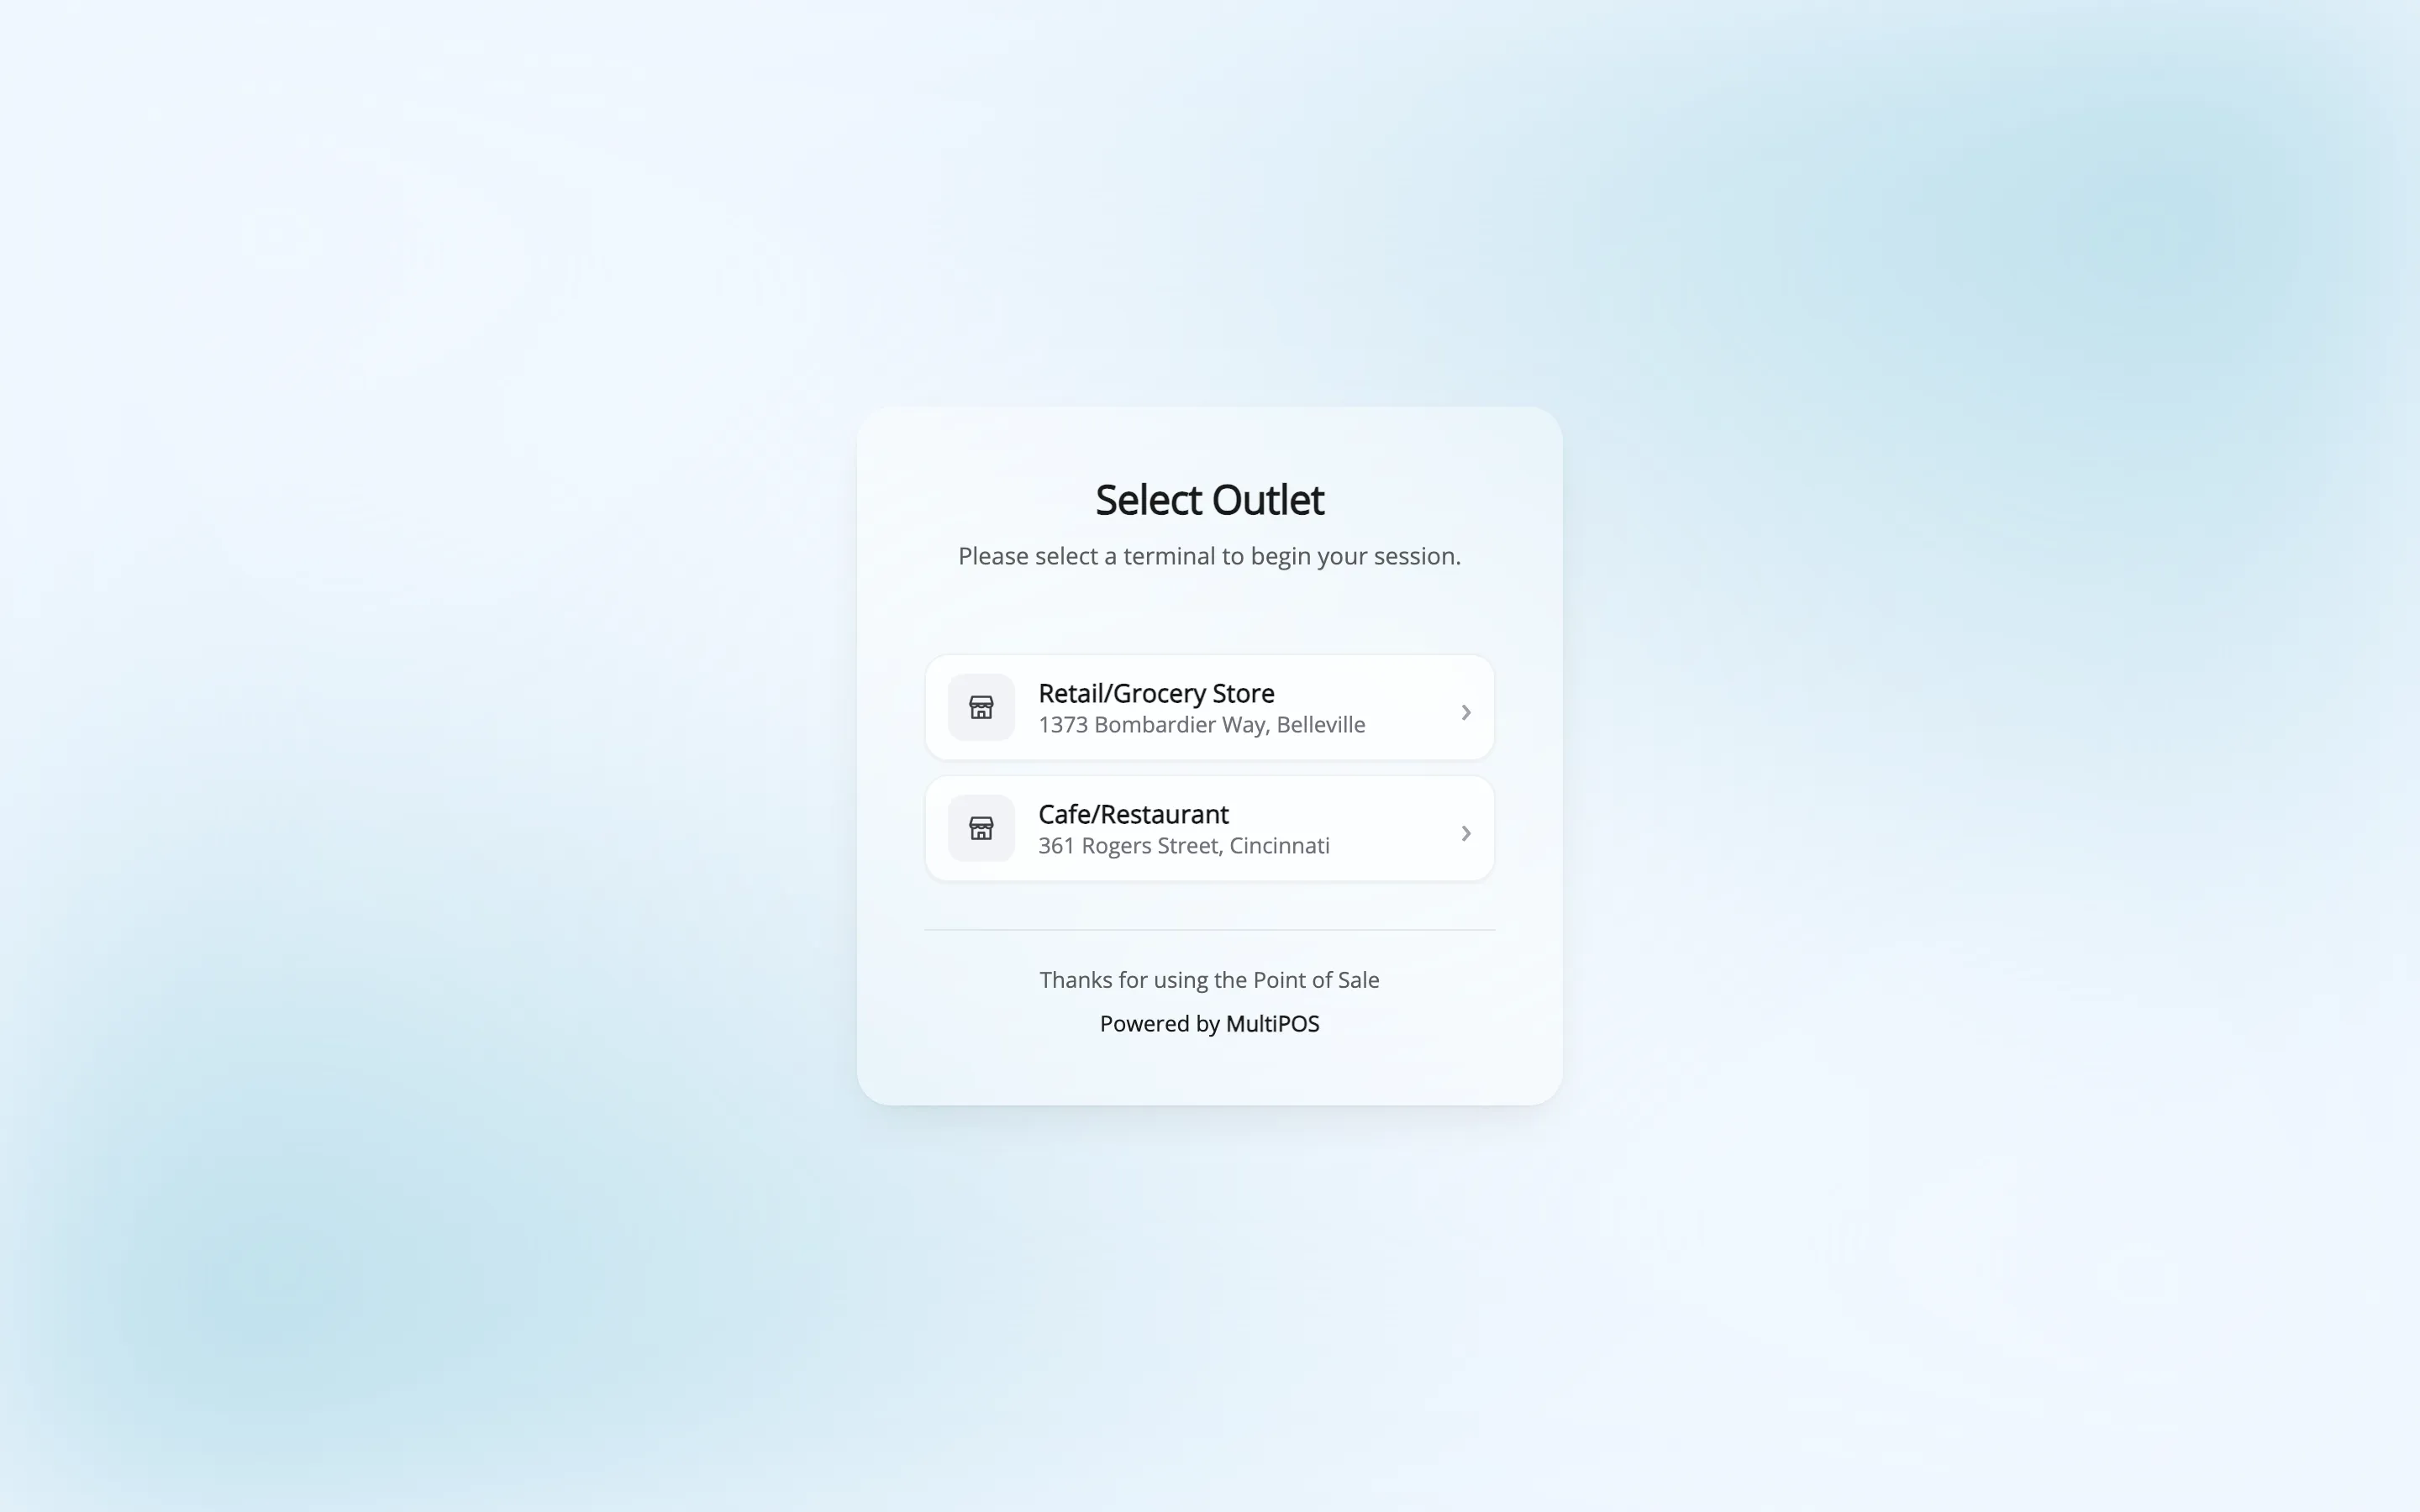
Then the terminal asks which outlet to open.
The sidebar
Section titled “The sidebar”A narrow icon rail runs down the left of every screen. It is the whole navigation.
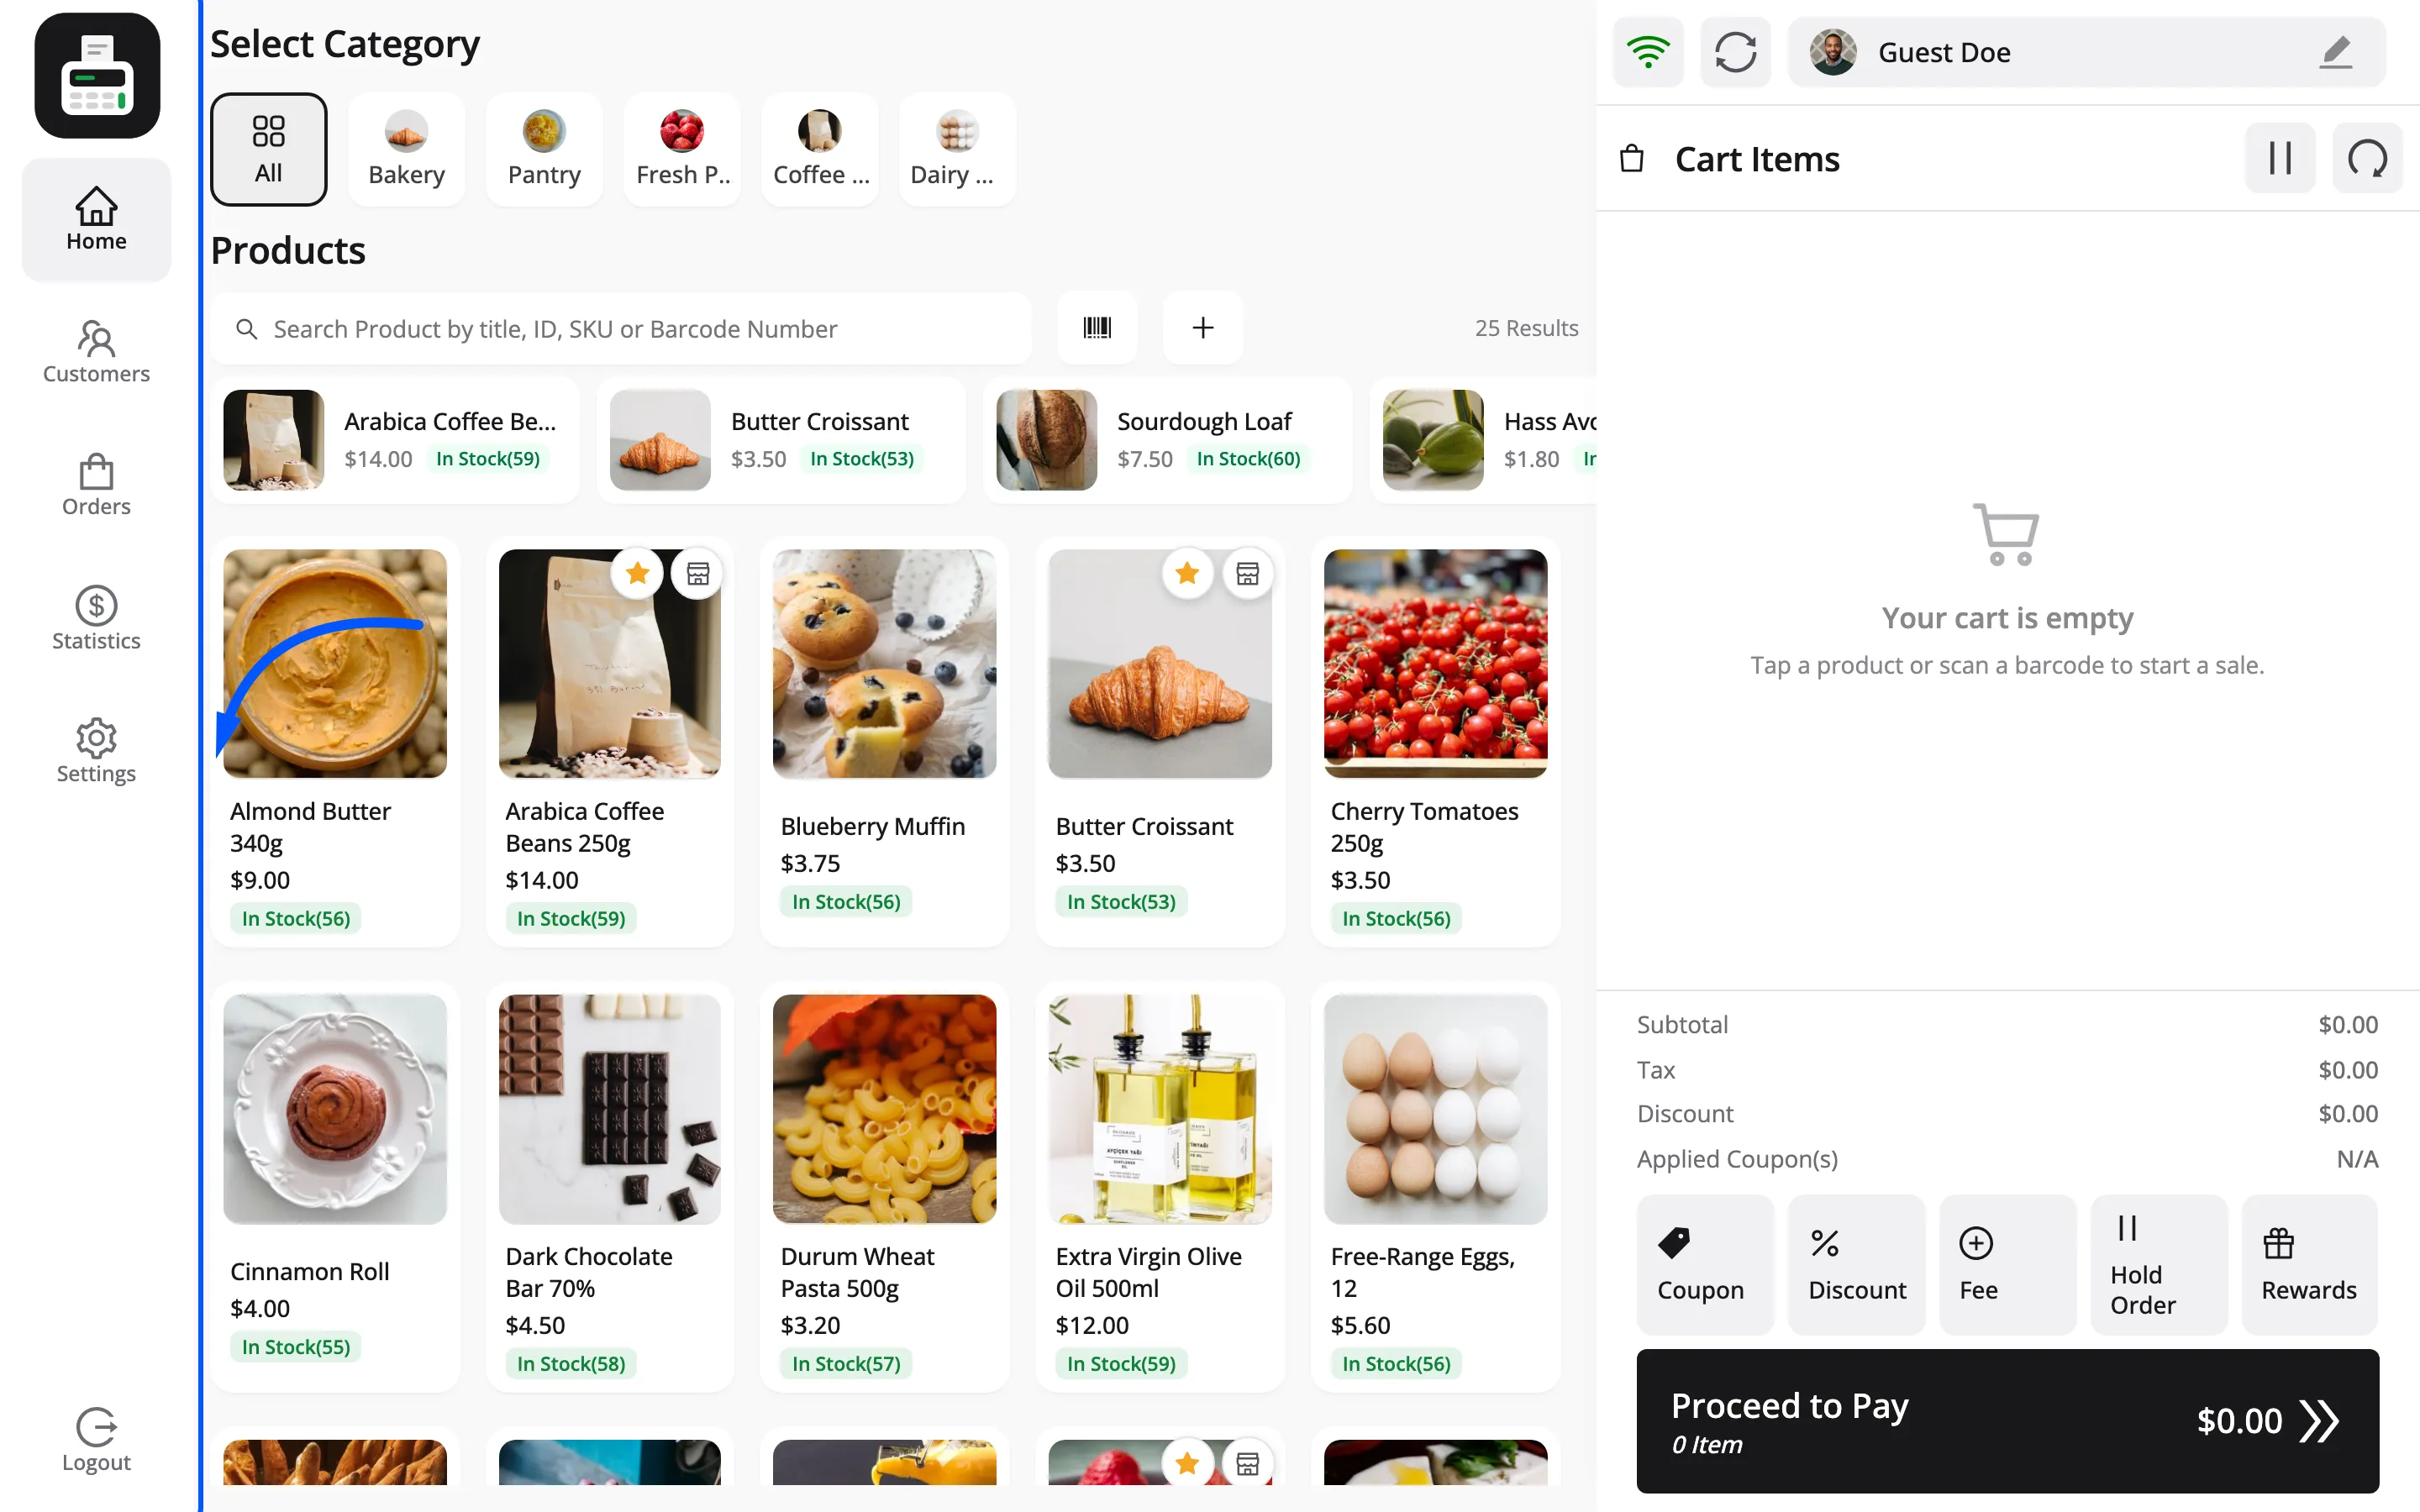
| Icon | Screen |
|---|---|
| Home | The product grid |
| Cart | The current cart, on phones and tablets |
| Customers | Find, add and edit customers |
| Tables | The floor plan, in restaurant mode only |
| Orders | Past orders and held carts |
| Statistics | Today’s sales and transactions |
| Settings | Terminal, account and shortcut options |
| Logout | End the session |
On a desktop the cart sits permanently on the right, so the Cart icon is hidden. It appears on narrow screens where there is no room for both.
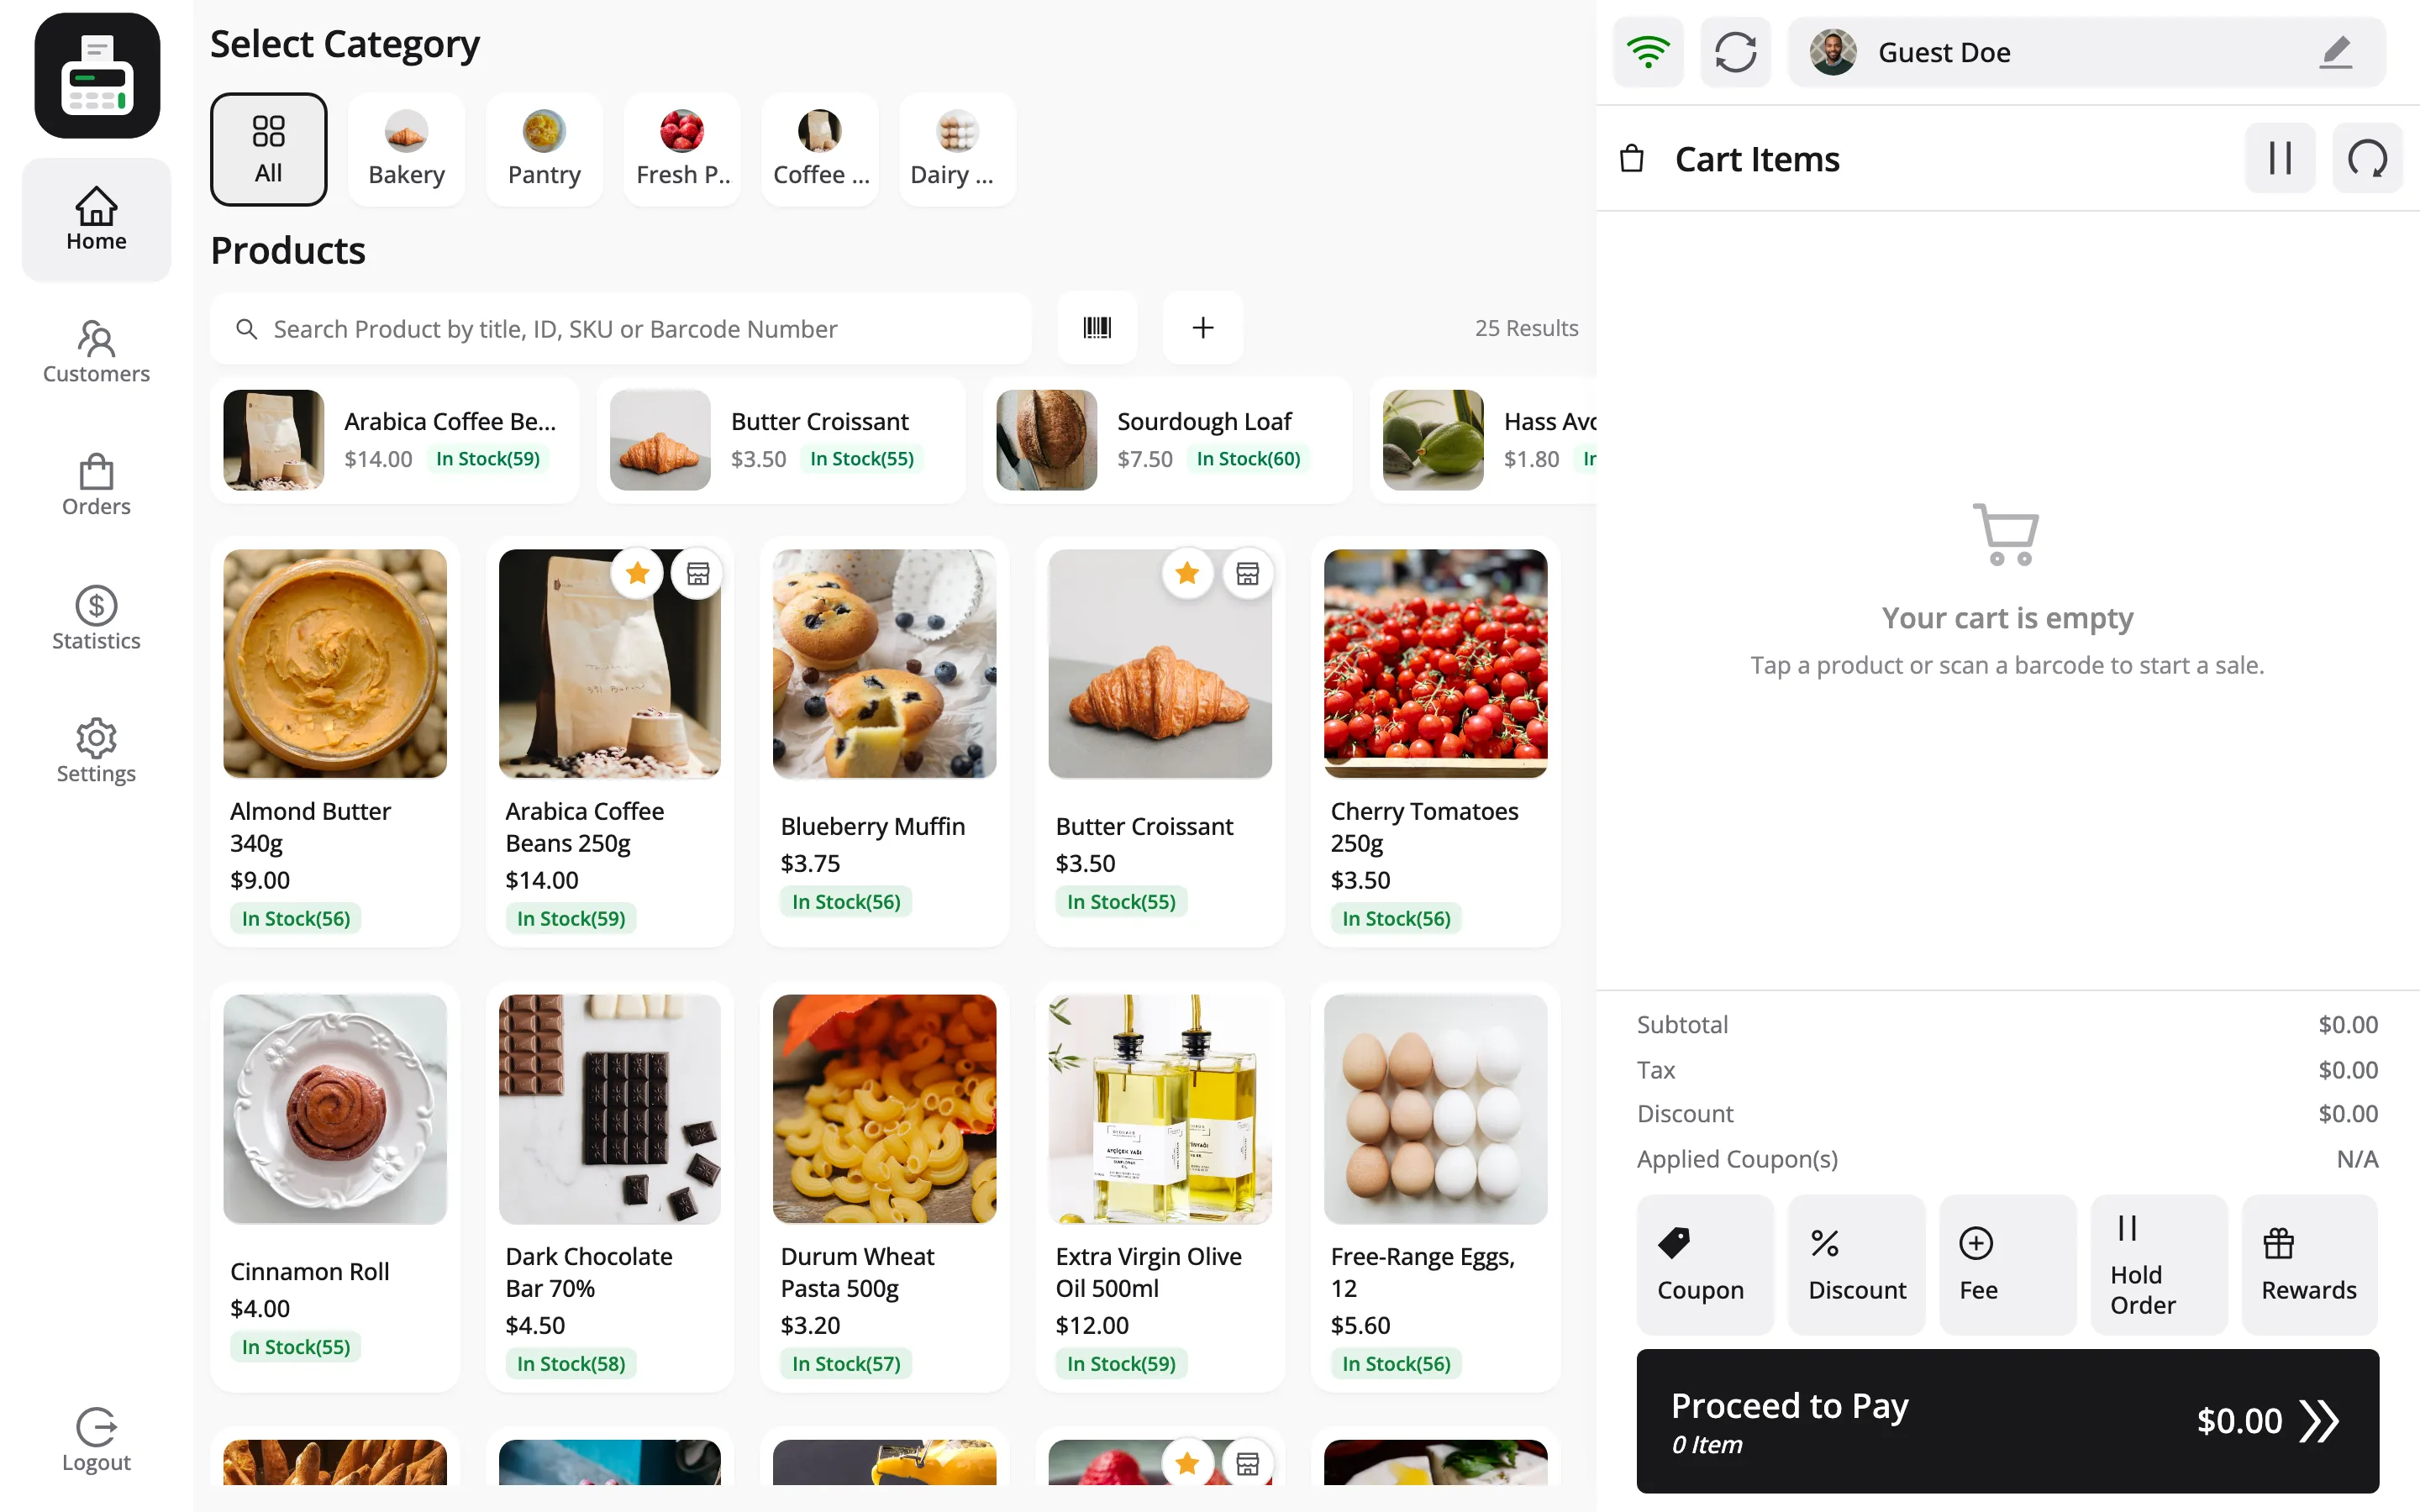
The selling screen. A category row across the top, a search box under it, and the product grid.
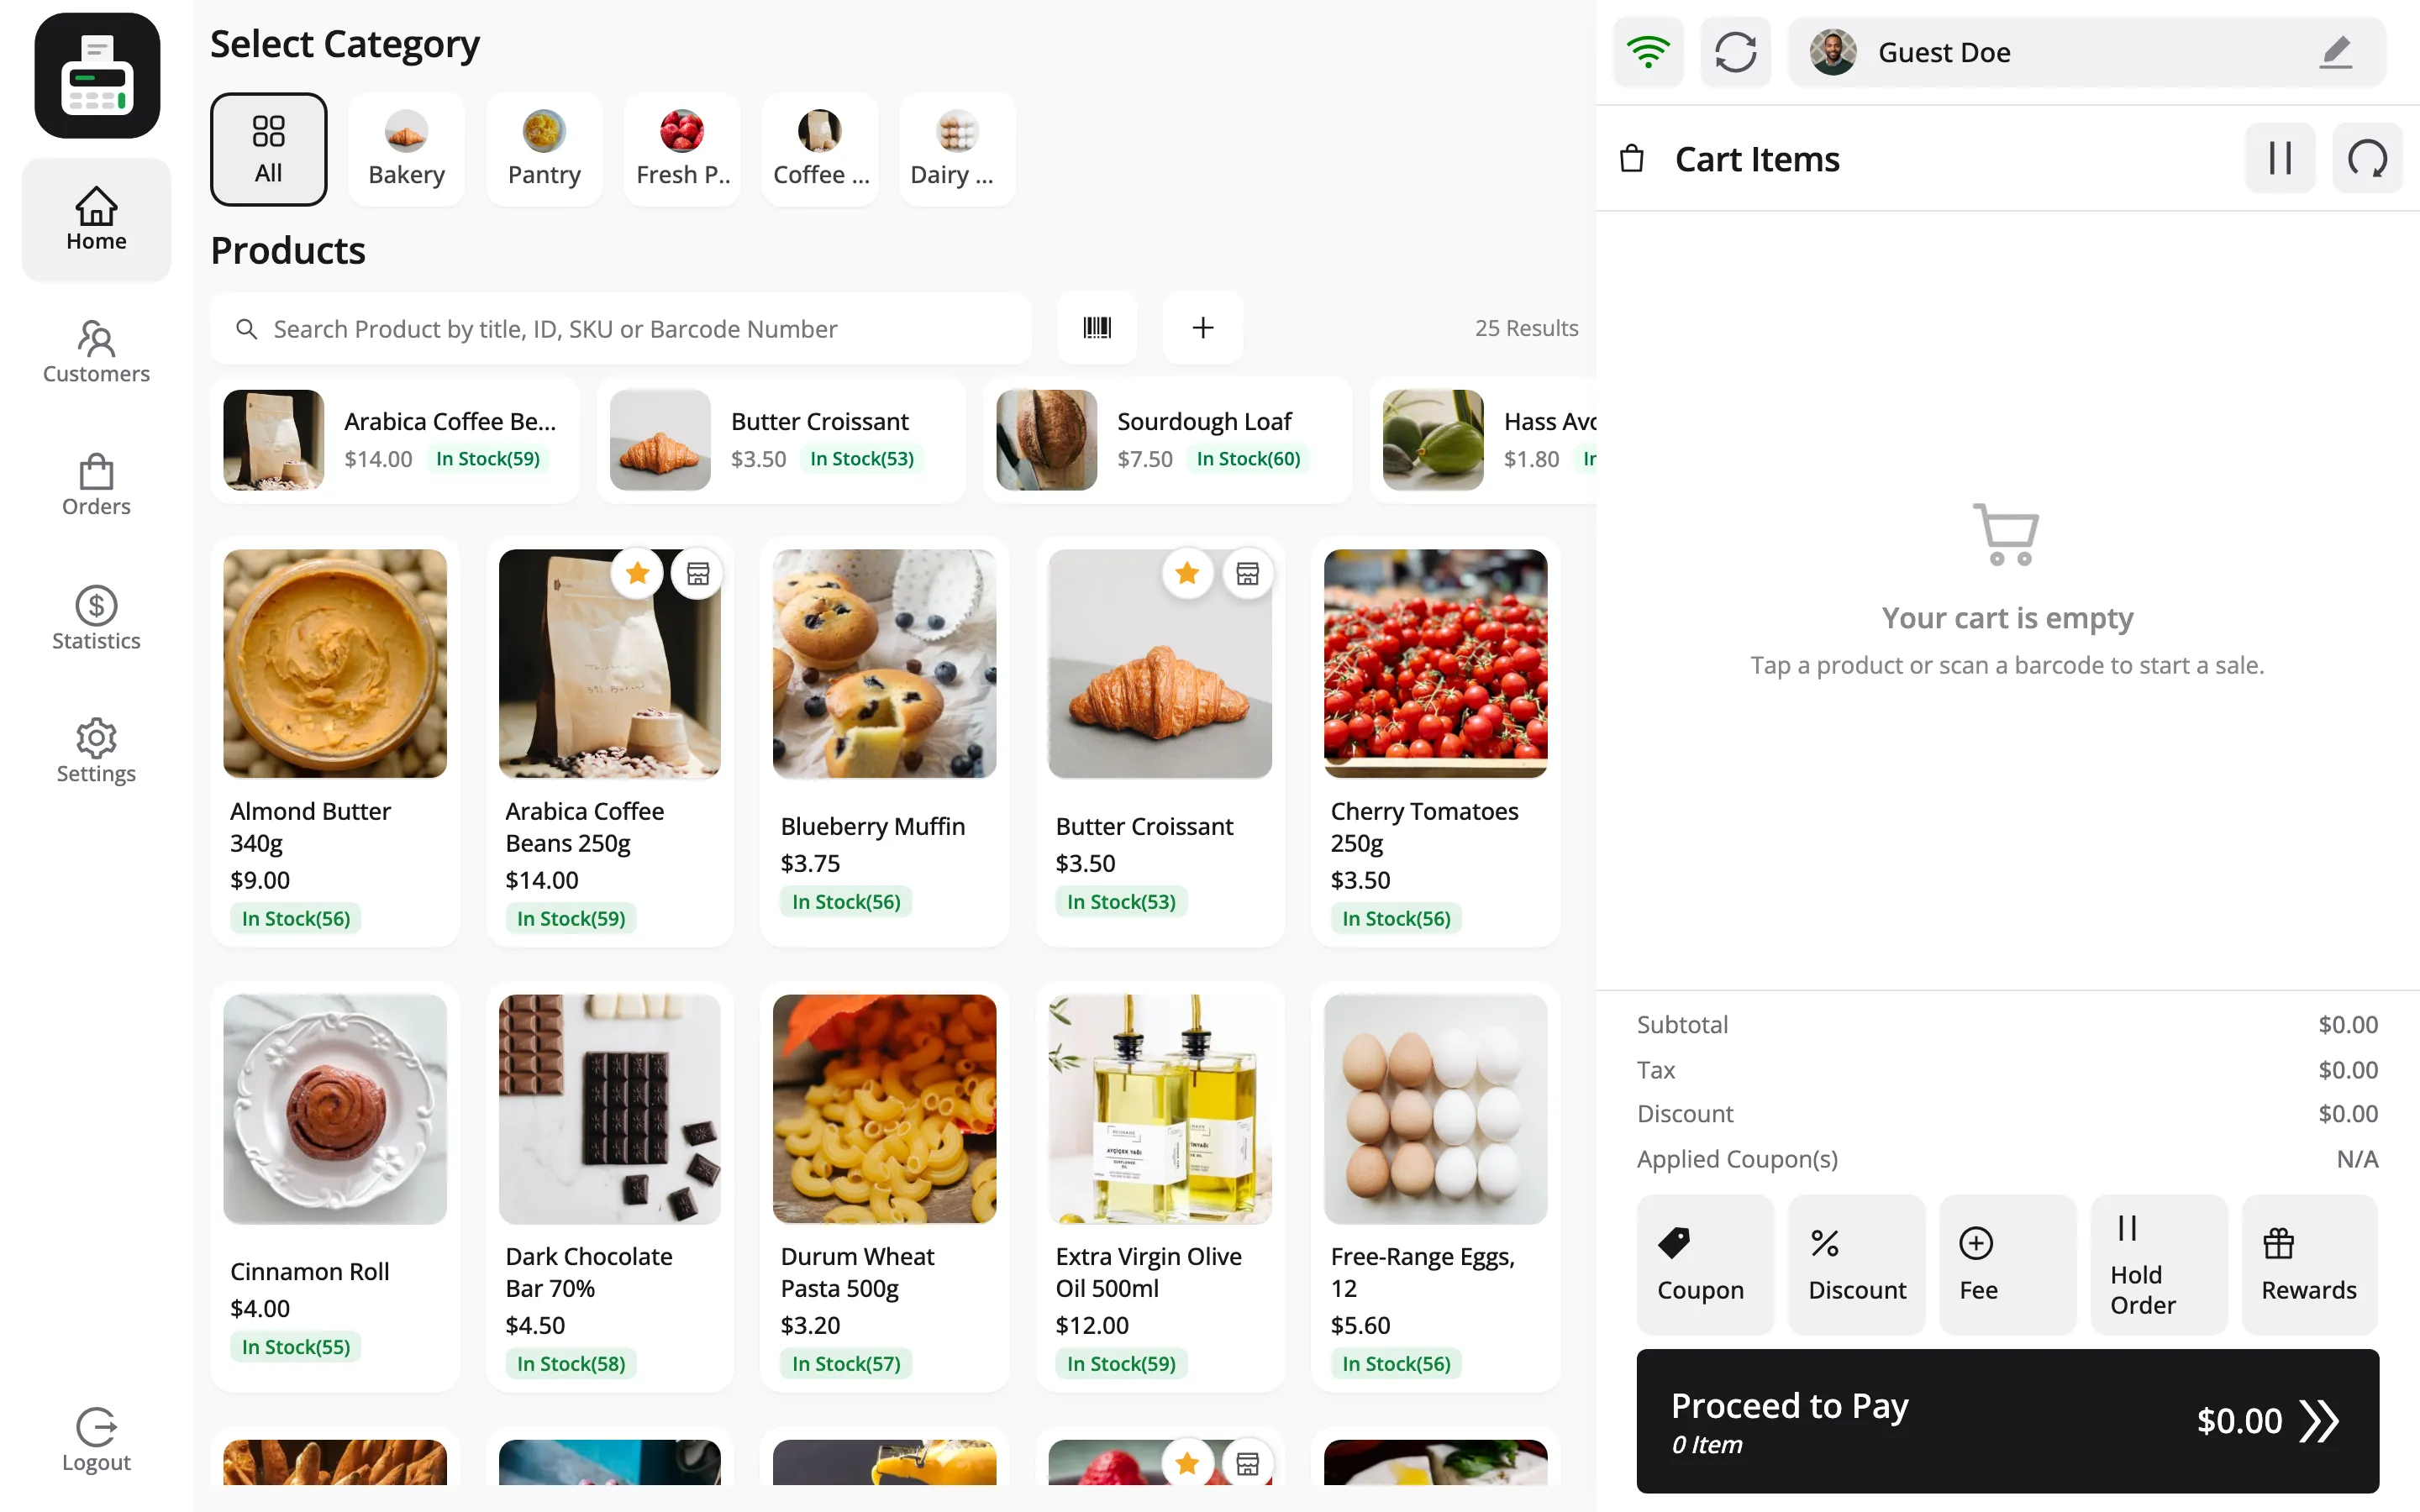
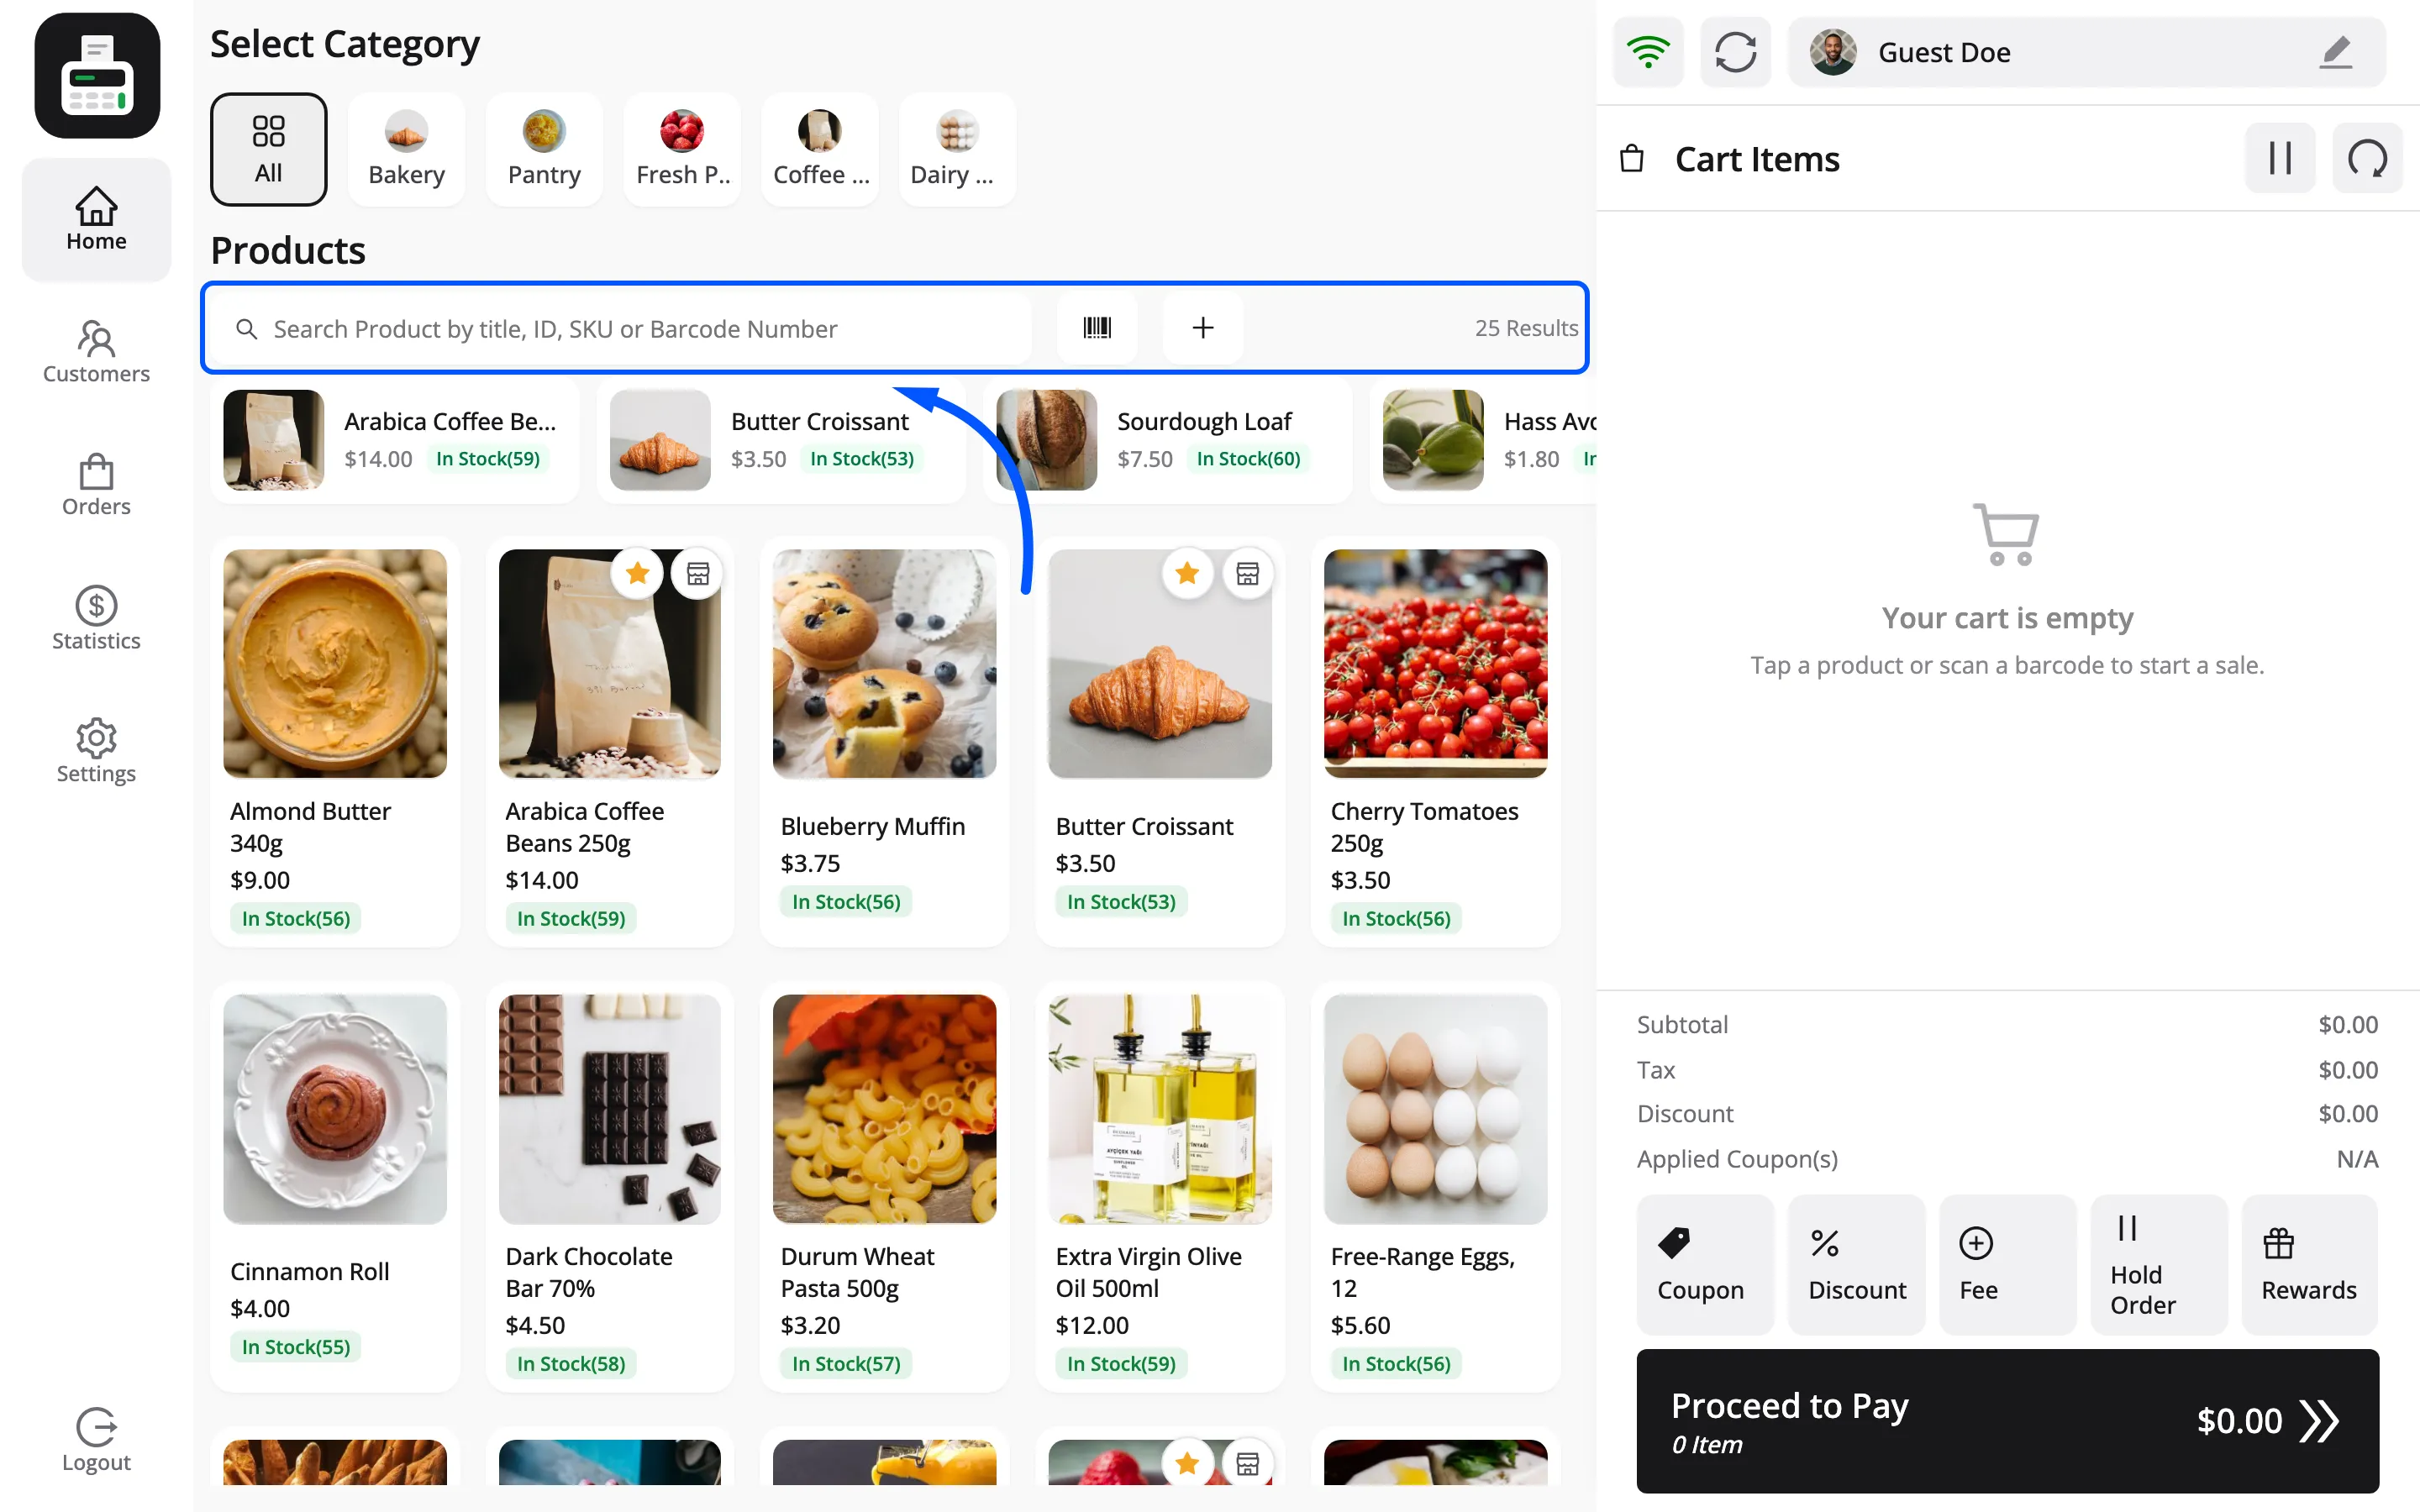
The search box matches product title, ID, SKU or barcode number, so a cashier who half-remembers a name still finds it.
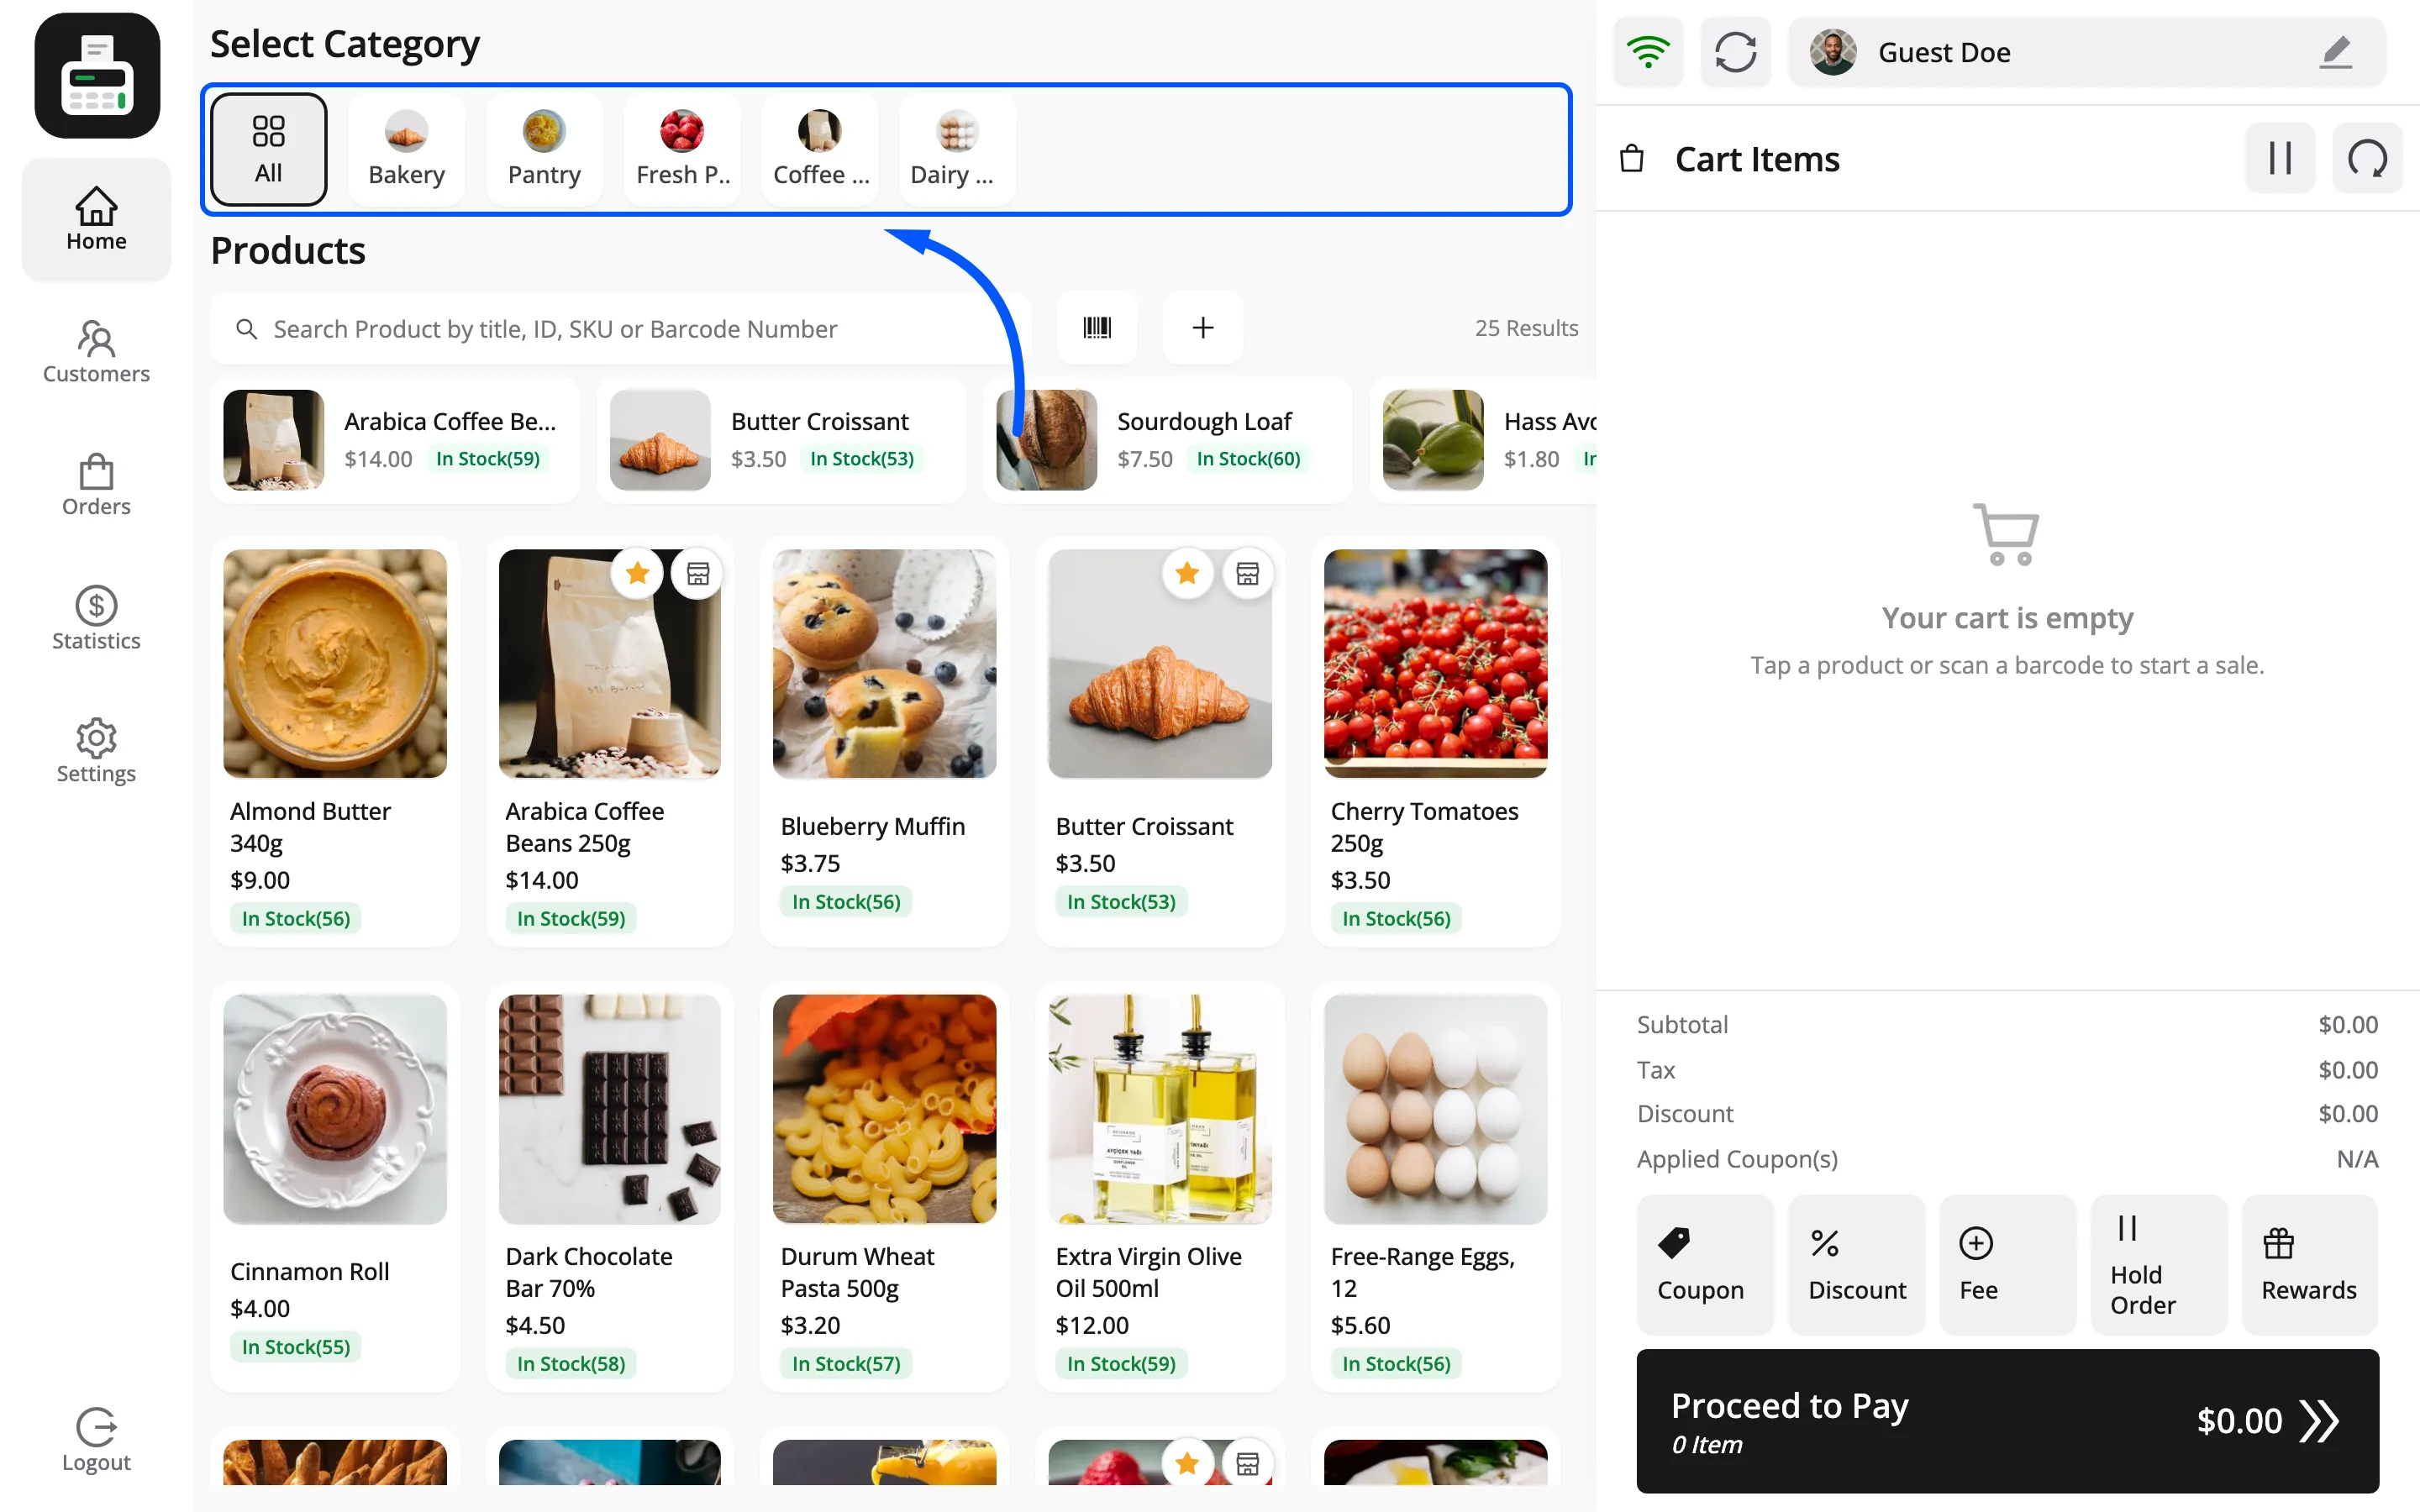
Categories filter the grid. All brings everything back.
Each product card shows its image, name, price and stock count.
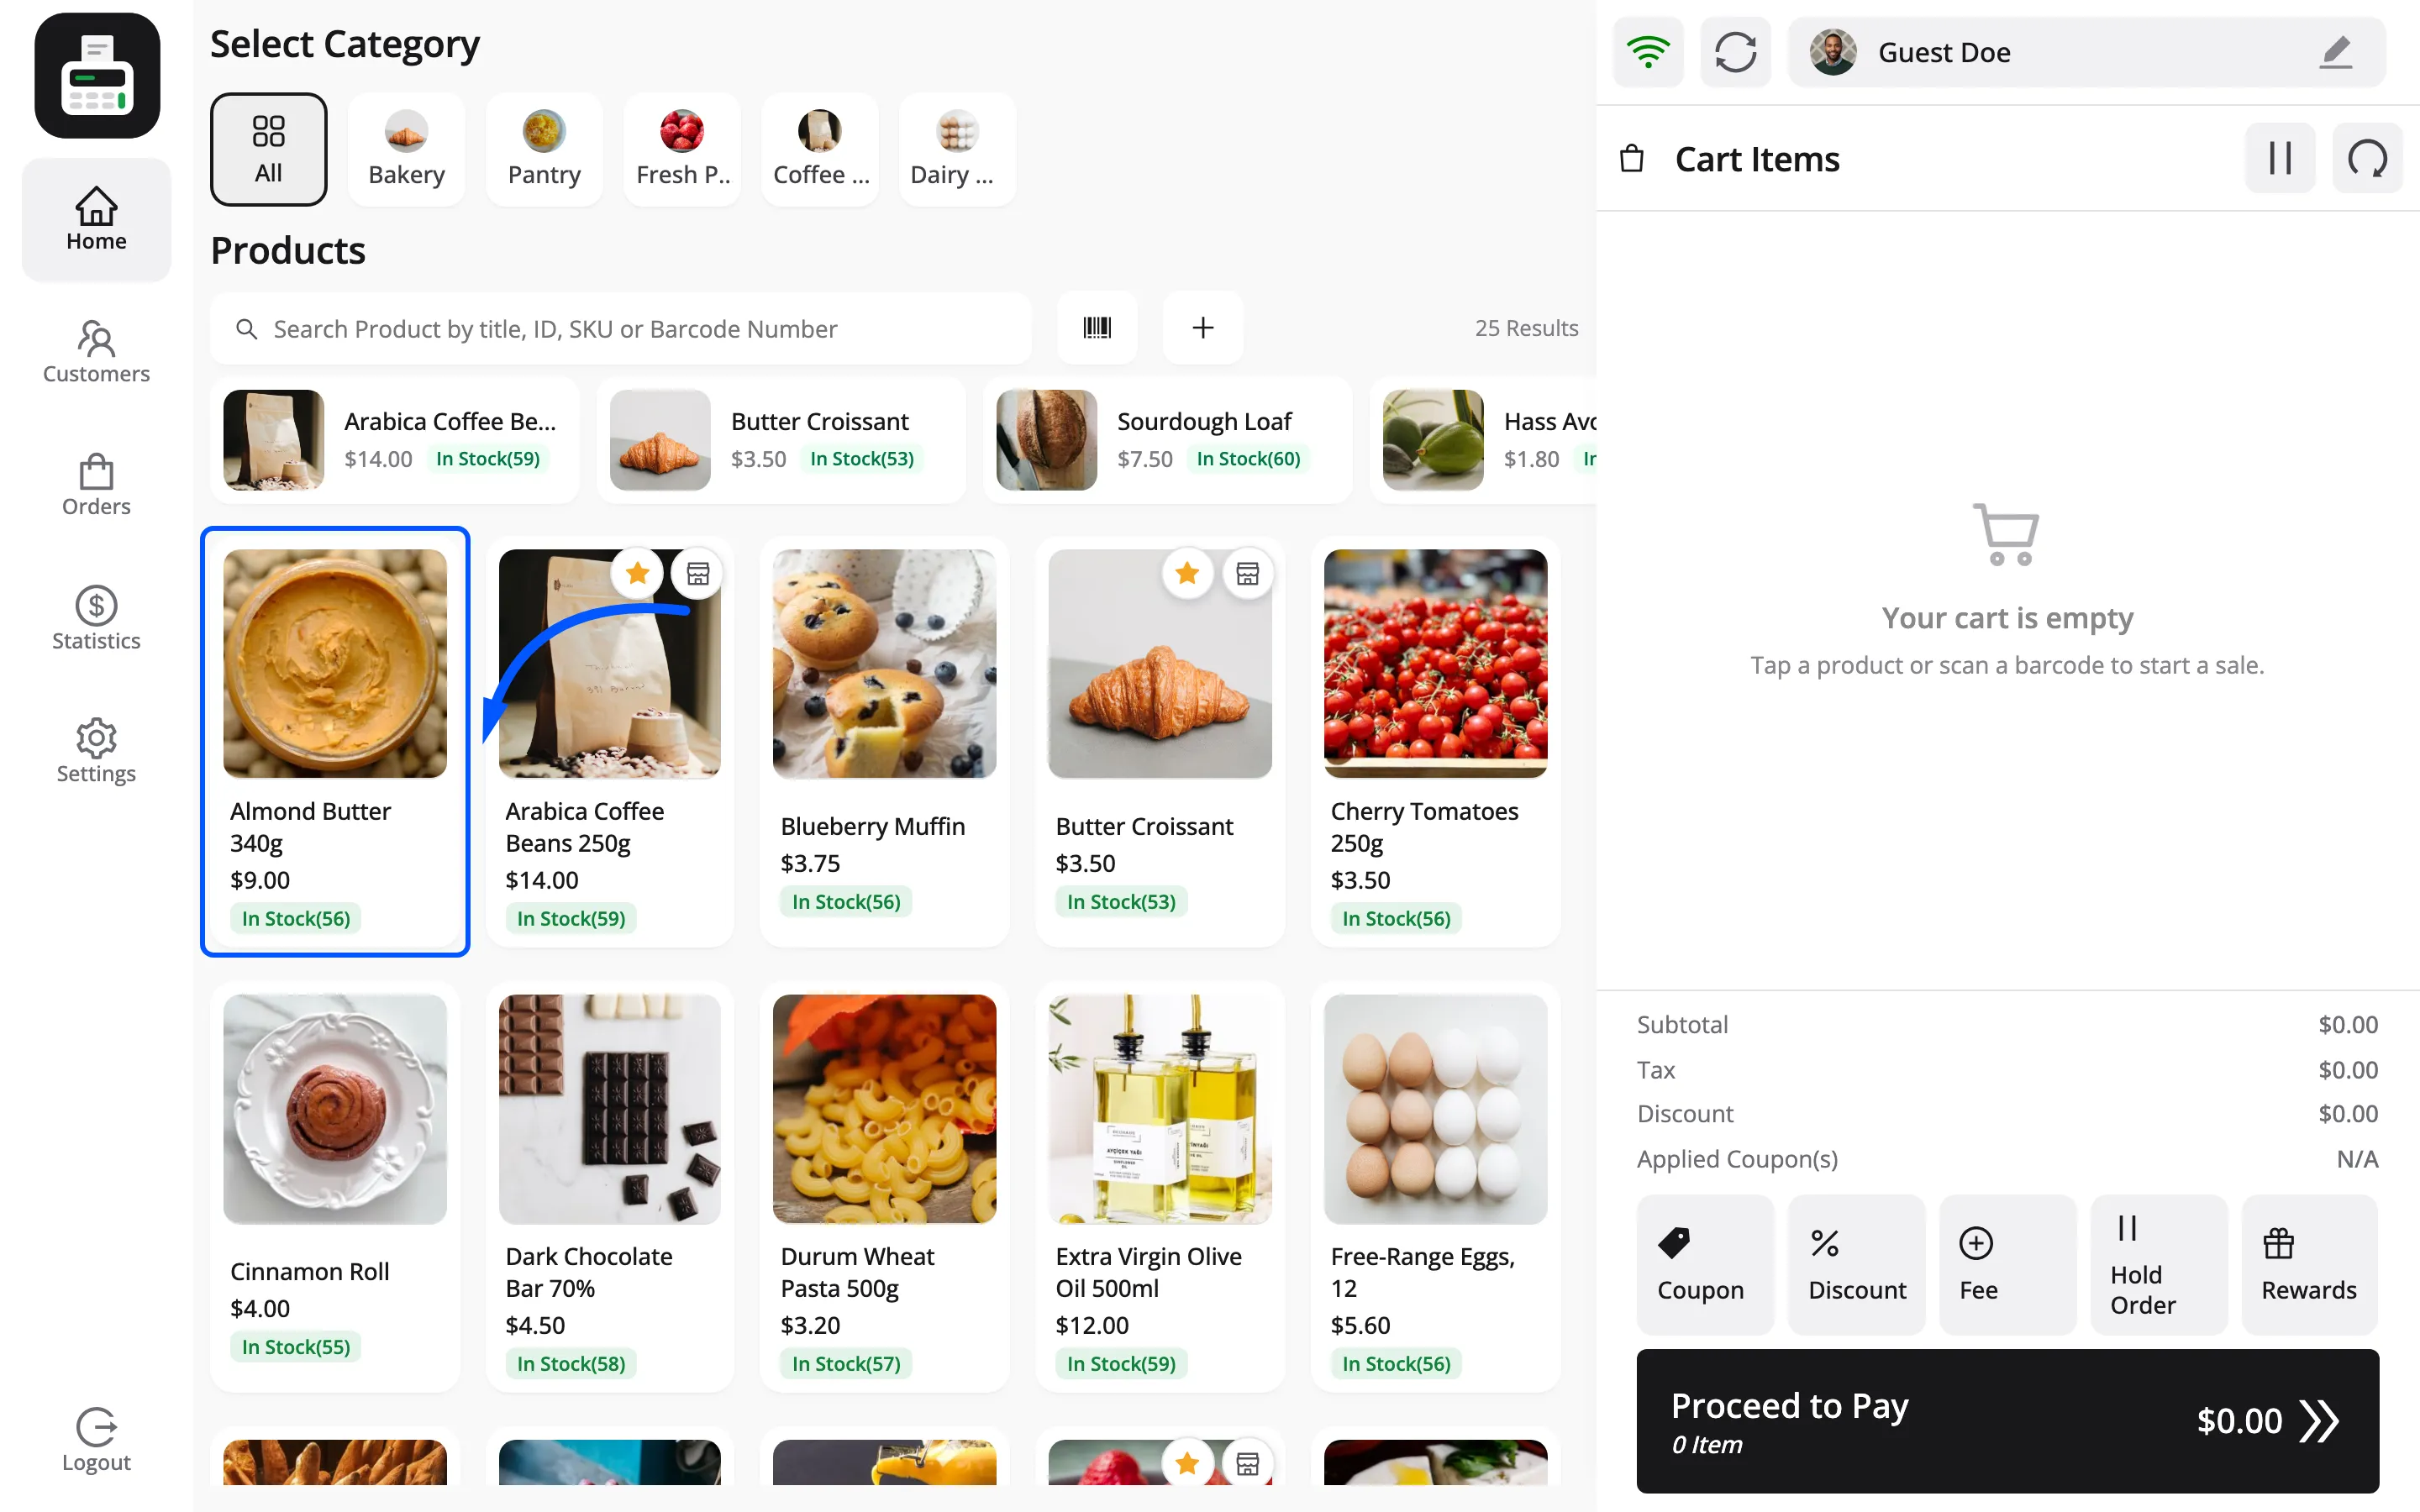
Tap the card and it goes into the cart. The stock count is on by default and can be turned off under Configuration → Layout.
Scanning a barcode
Section titled “Scanning a barcode”The barcode icon beside the search box opens an Enter/Scan Barcode box.
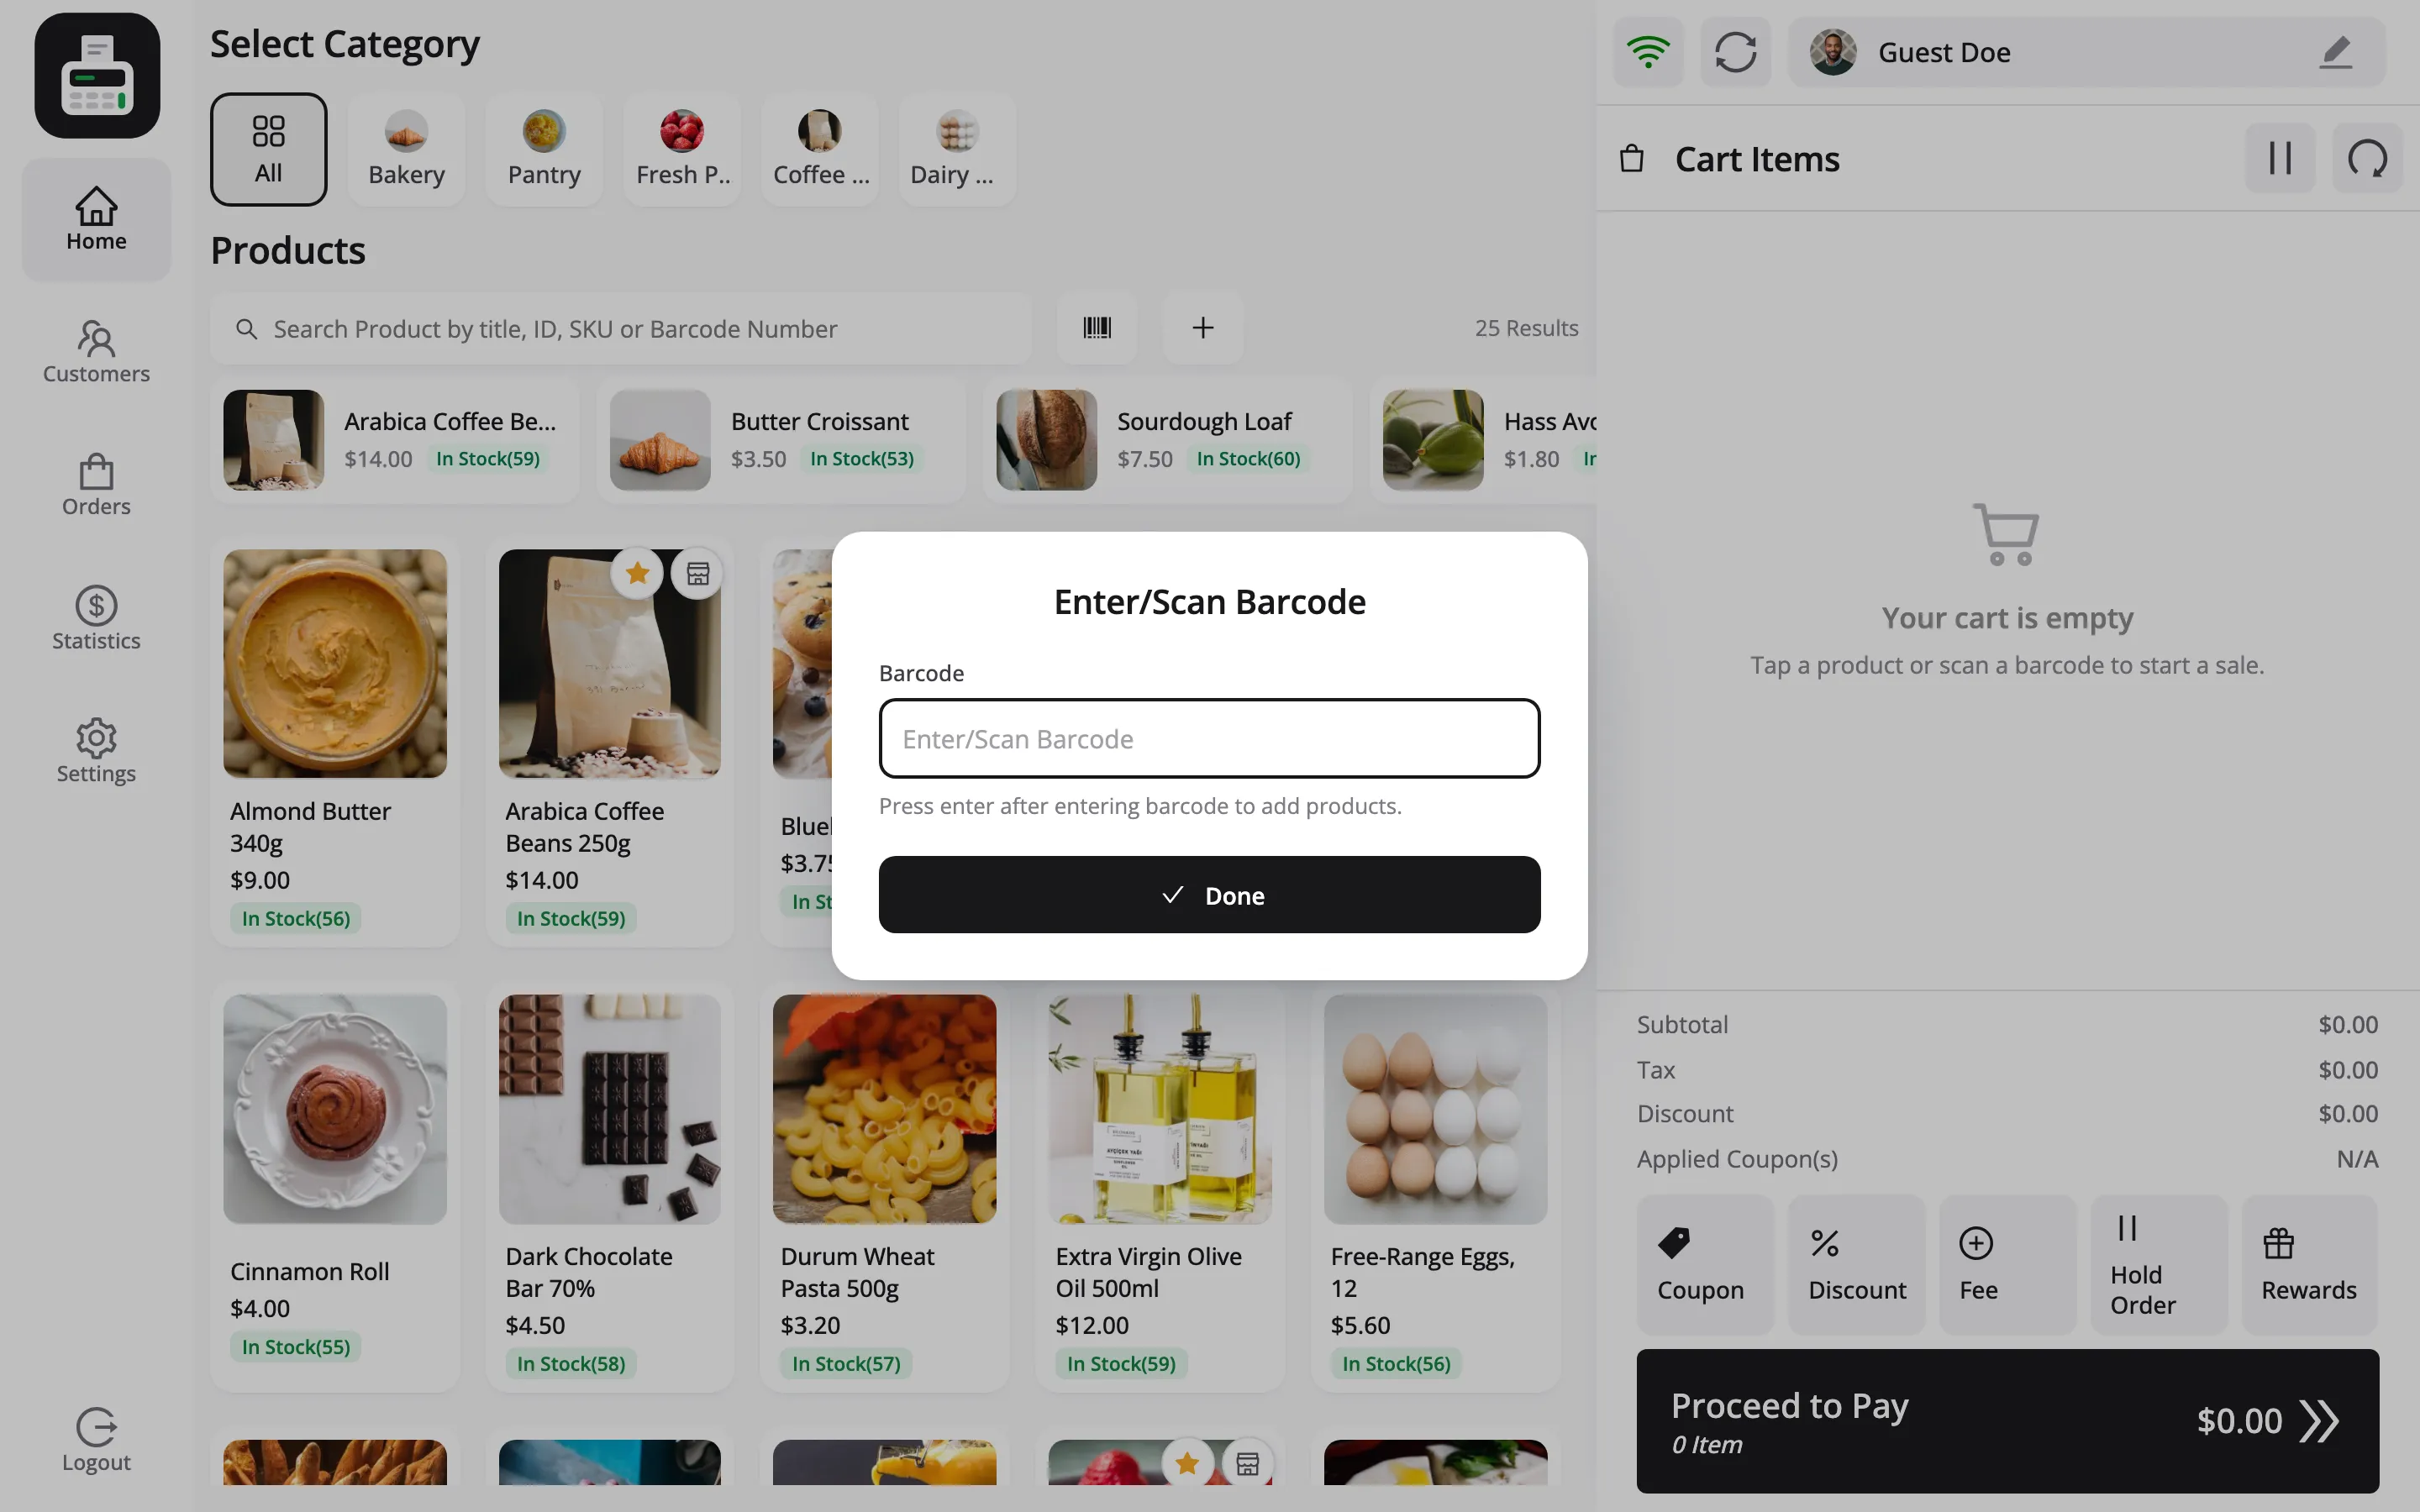
A USB scanner behaves like a keyboard: it types the code and presses Enter, and the product lands in the cart. Type a code by hand and press Enter for the same result.
An unknown code raises a Barcode Error naming the code that was scanned, so the cashier can read it back to you.
The cart
Section titled “The cart”The right-hand panel on desktop, its own screen on a phone. It stays on screen while the cashier works the product grid, so nothing has to be opened to see the running total.
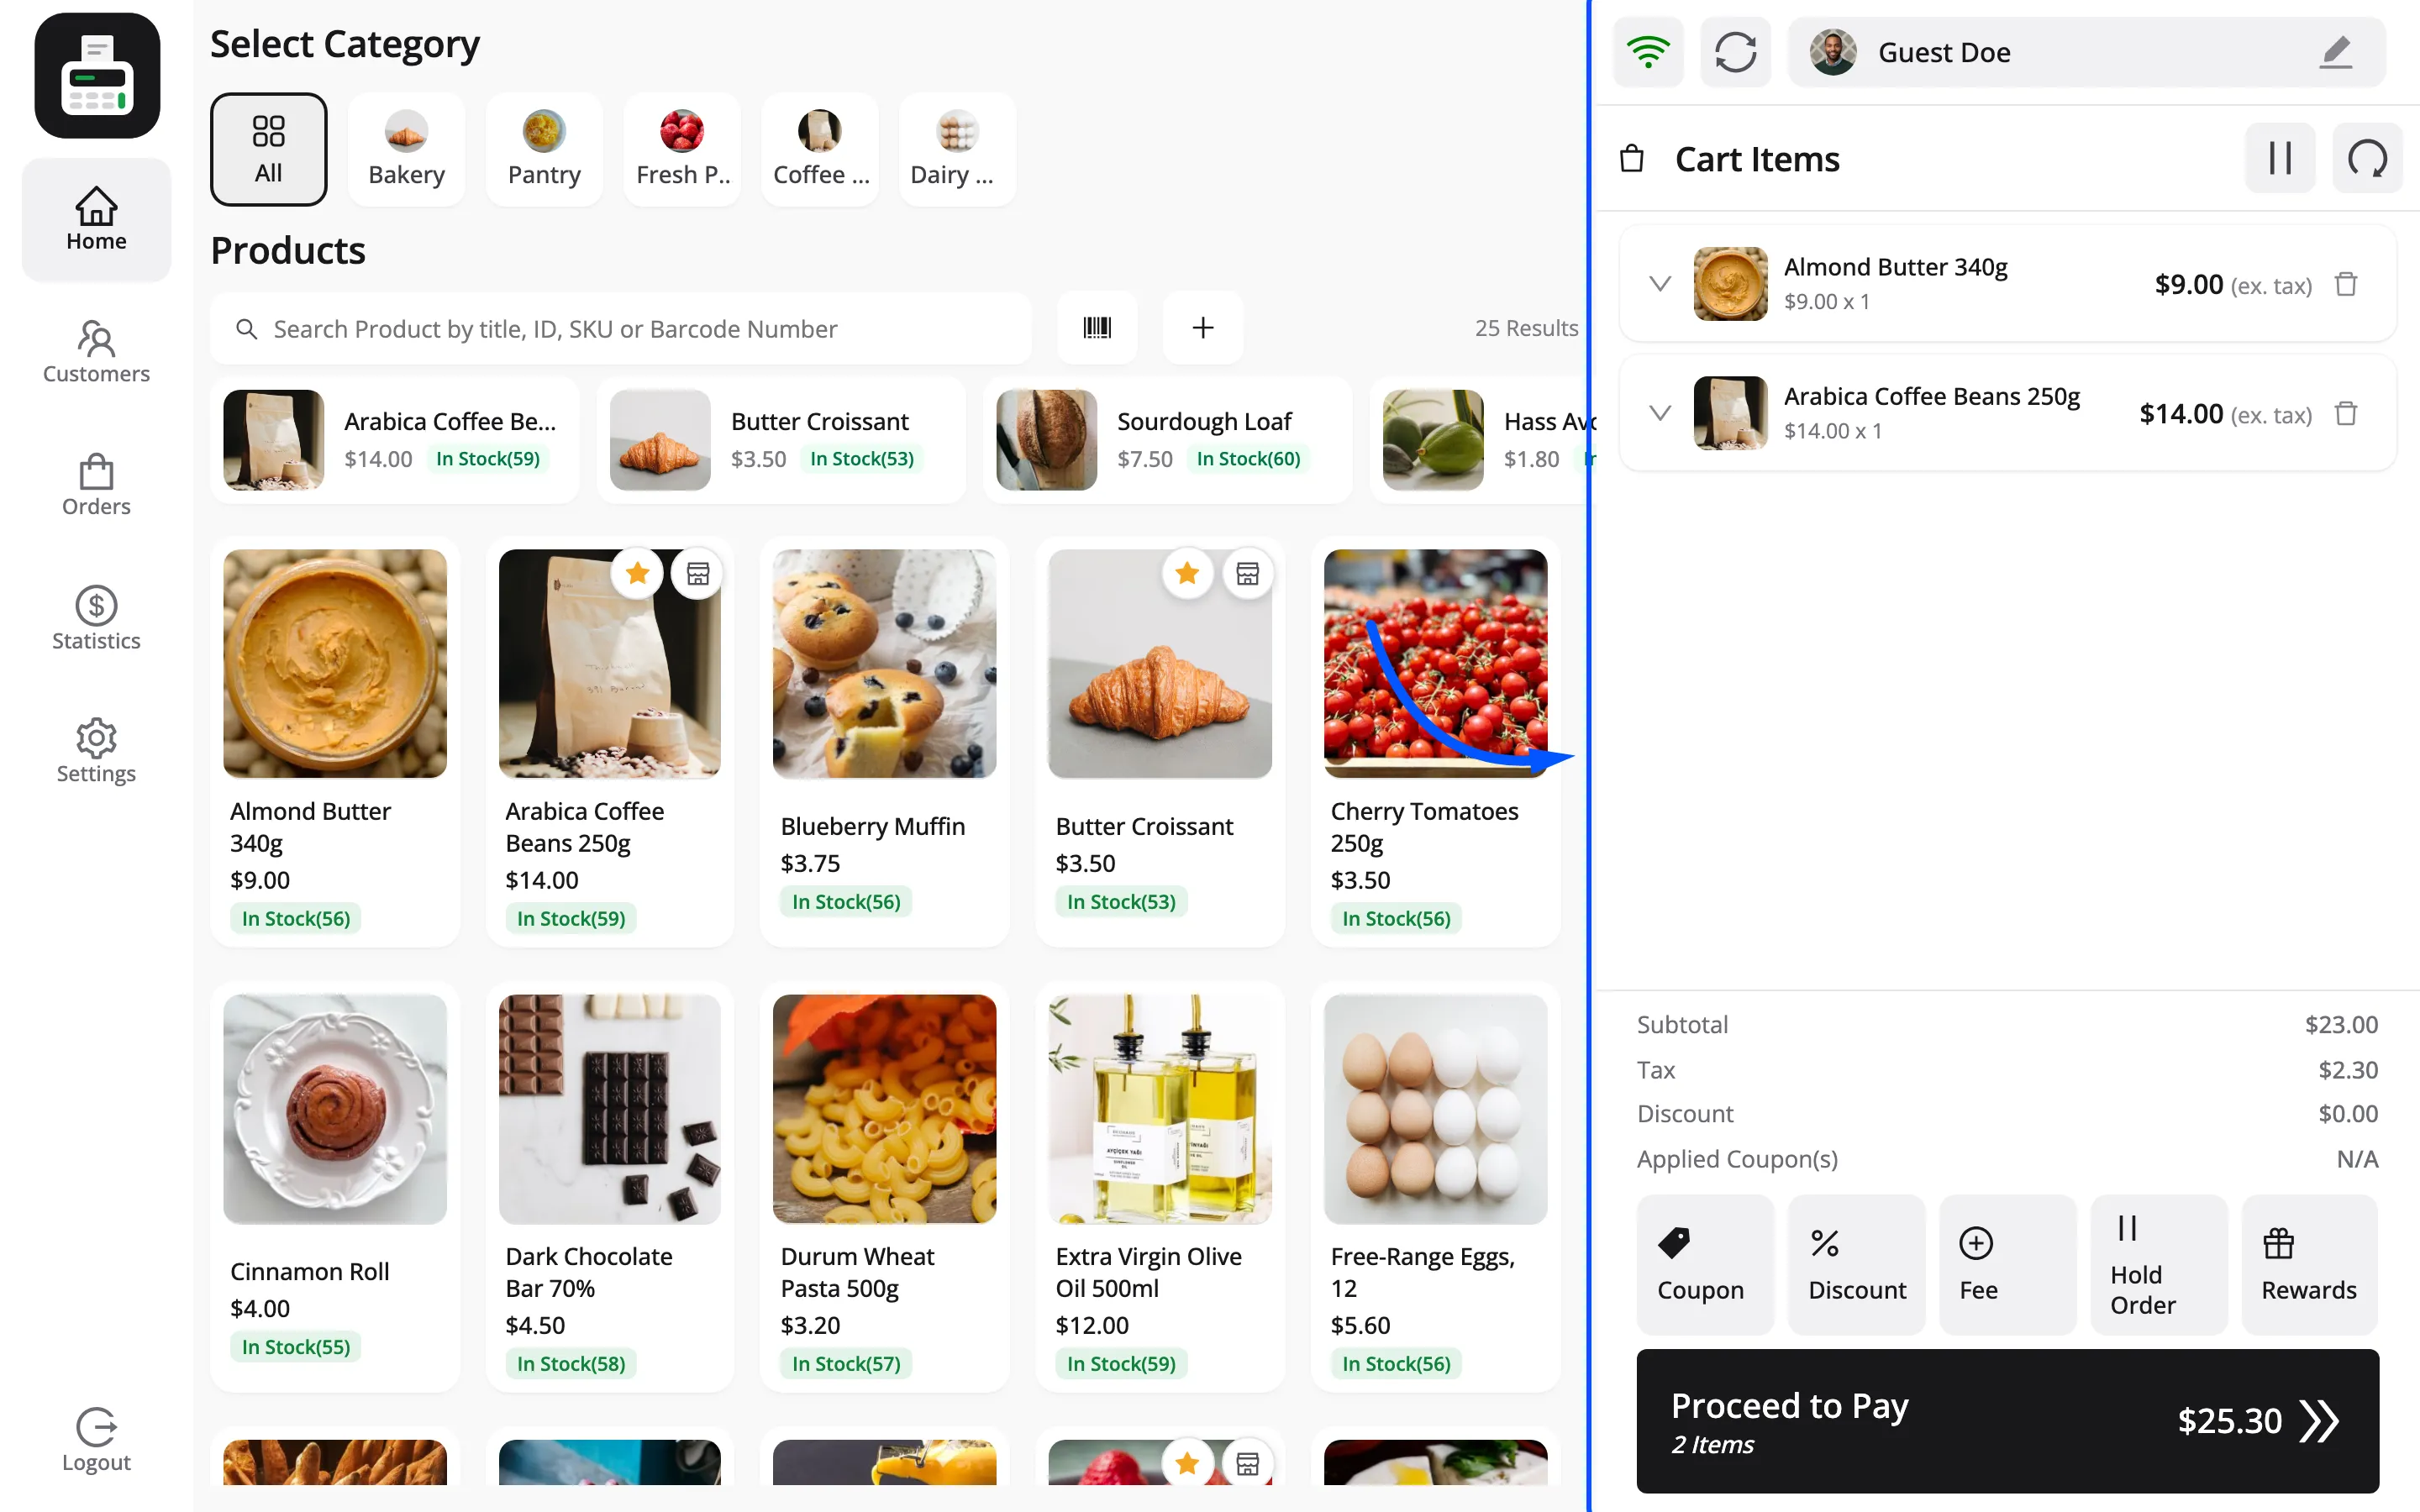
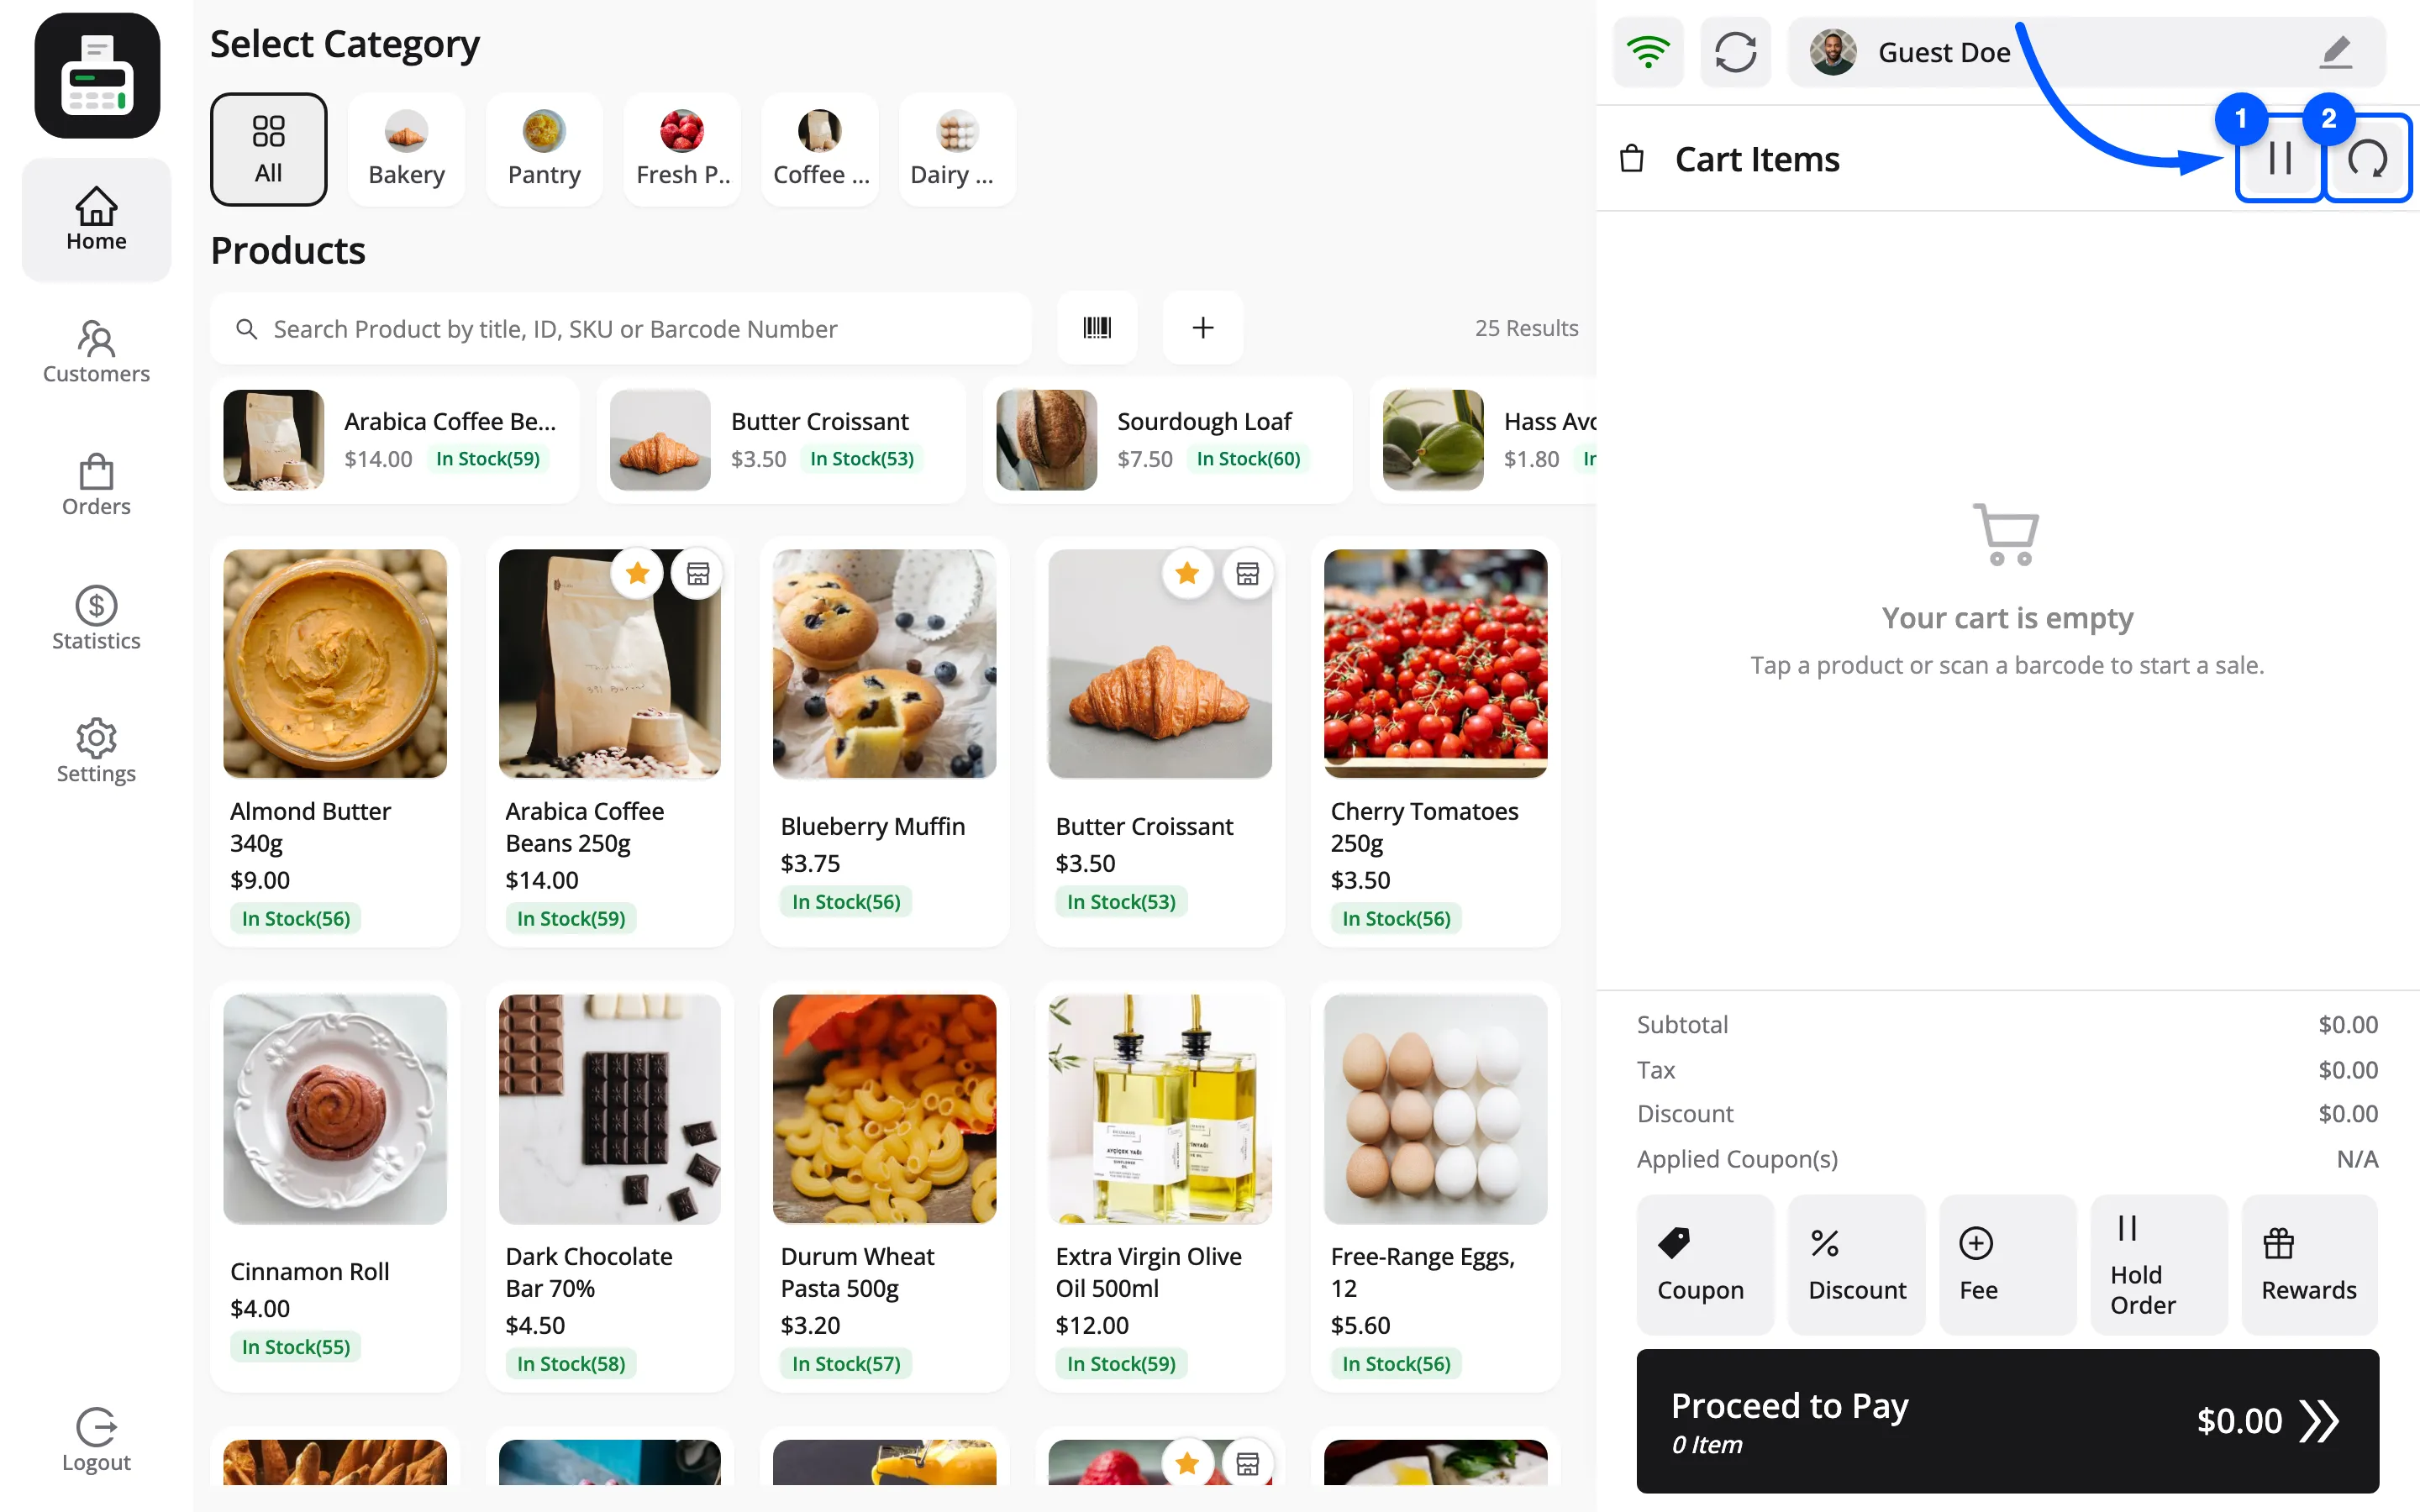
Its own header carries two icons. A pause icon holds the cart and lists the ones already held. A circular arrow empties it.
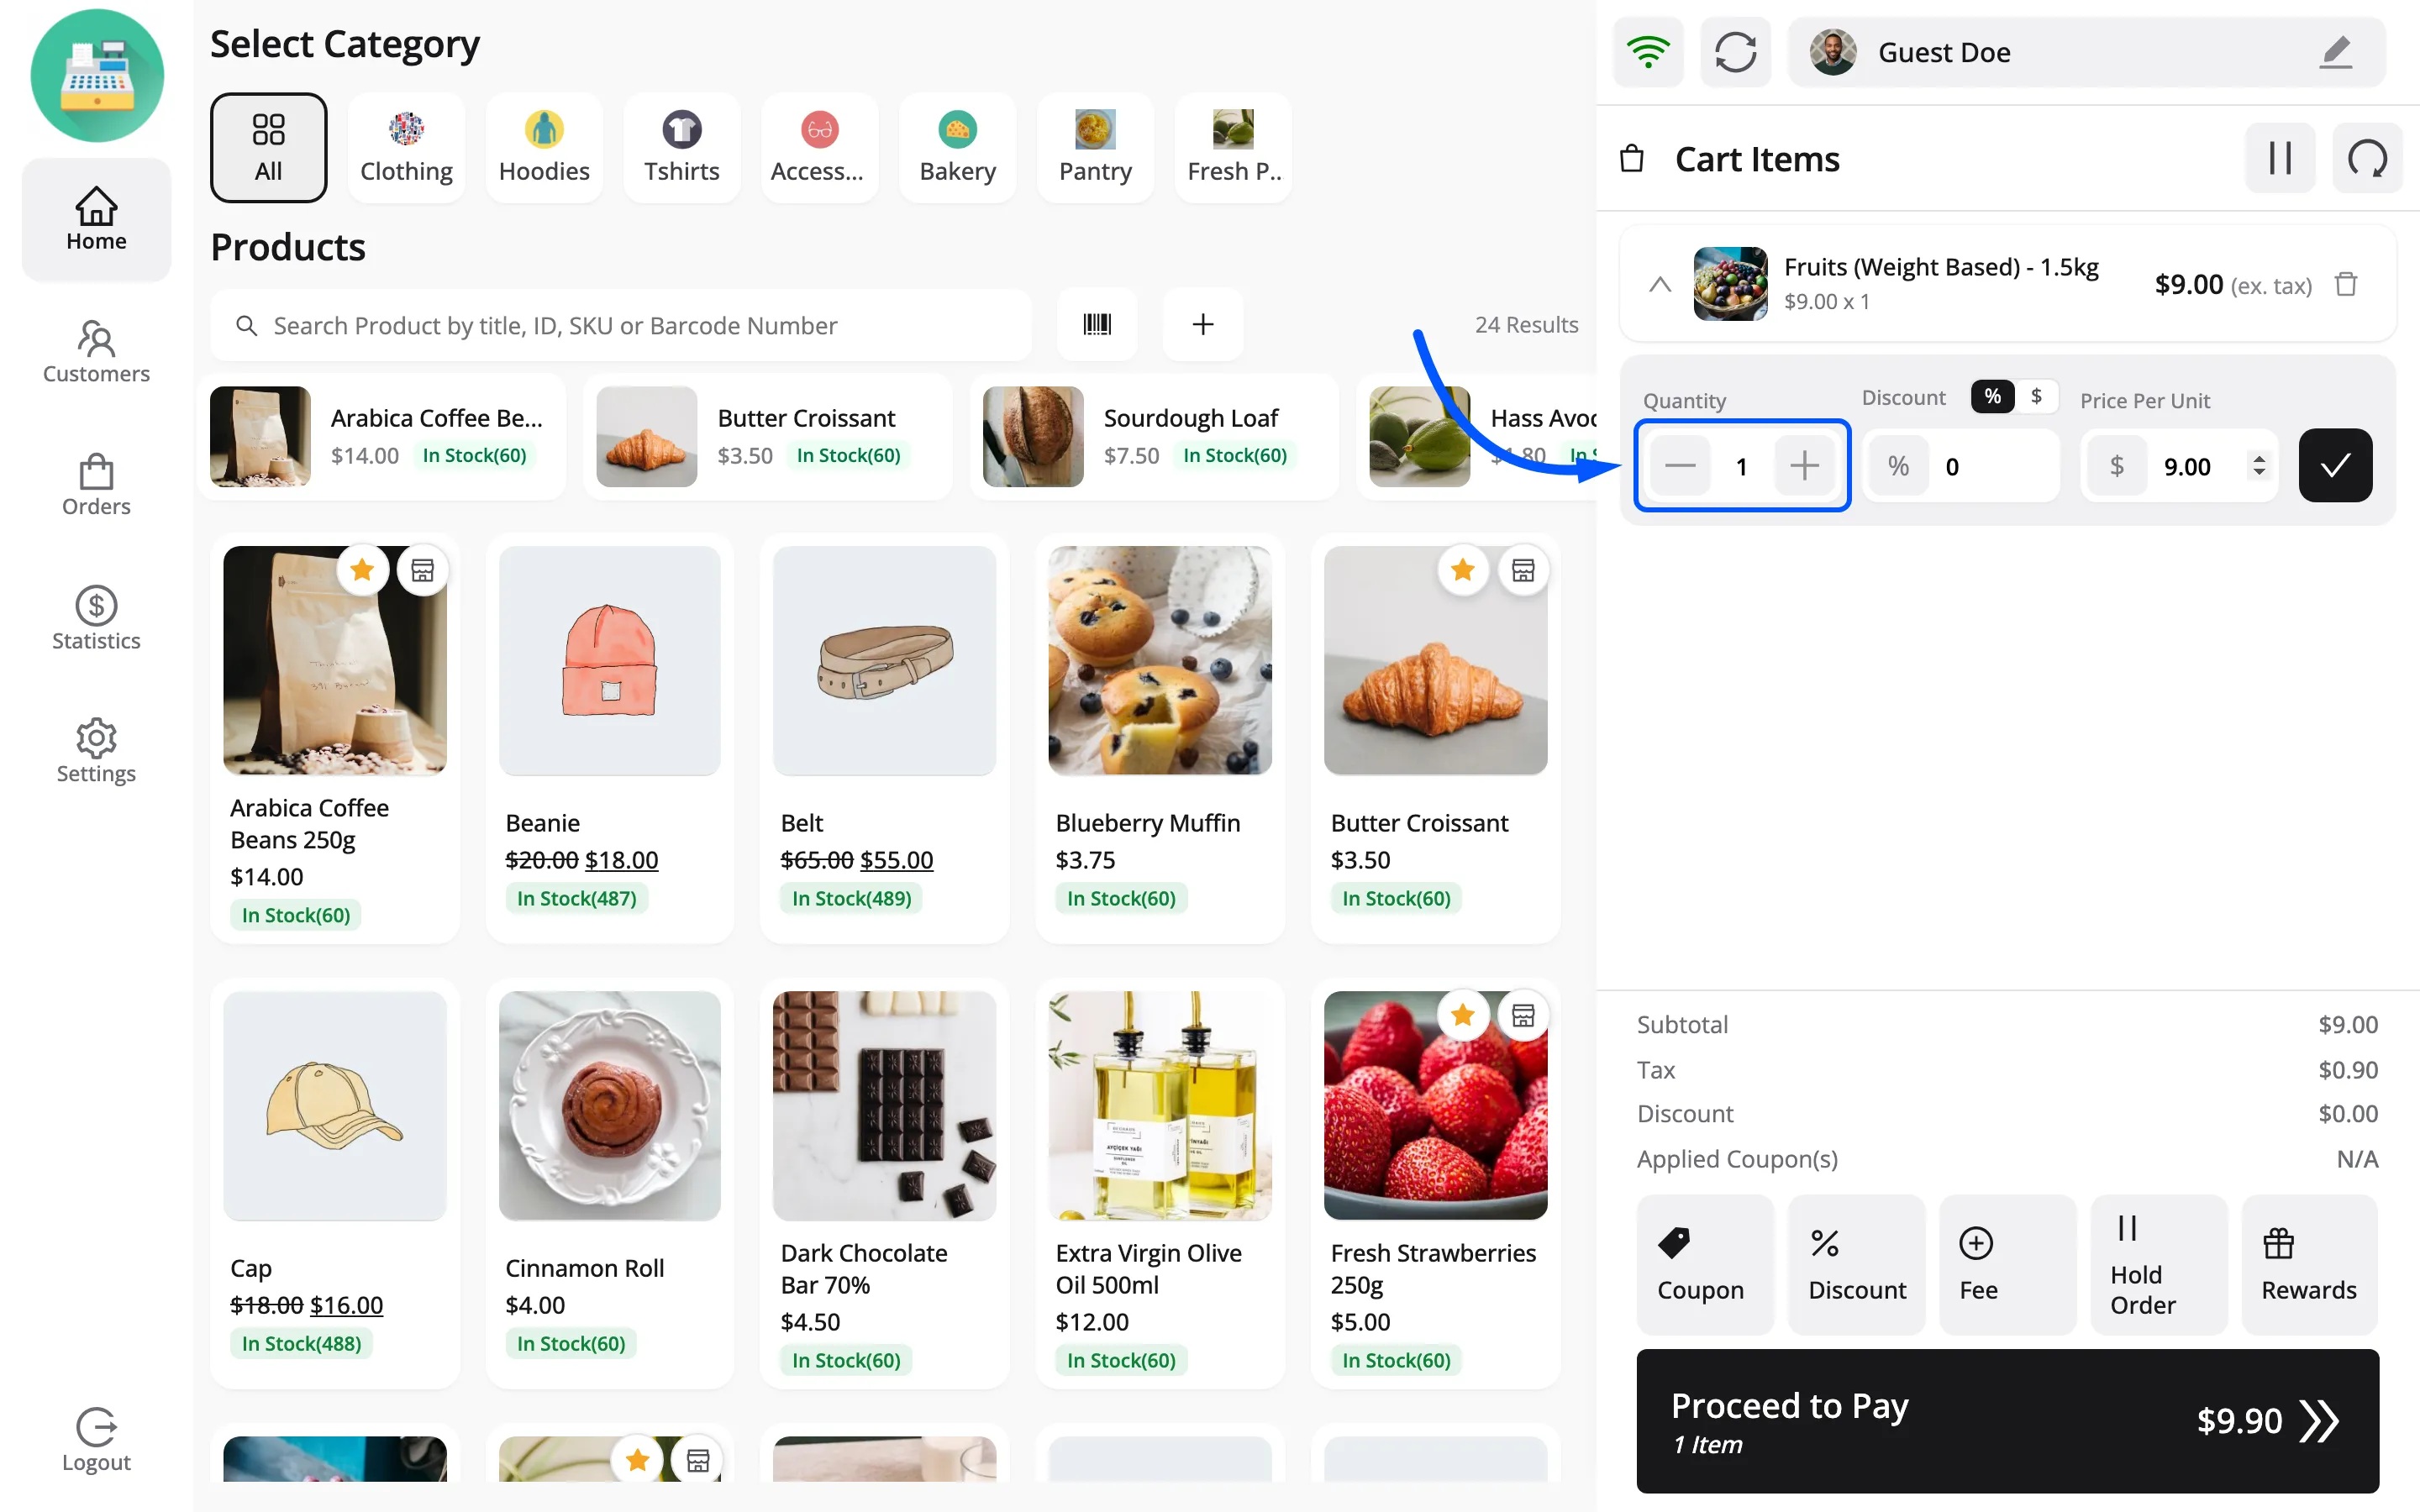
The chevron on the left of a line expands it. Quantity appears with a minus and plus stepper and a tick to apply the change.
Under the lines sit the totals: Subtotal, Tax and Applied Coupon(s).
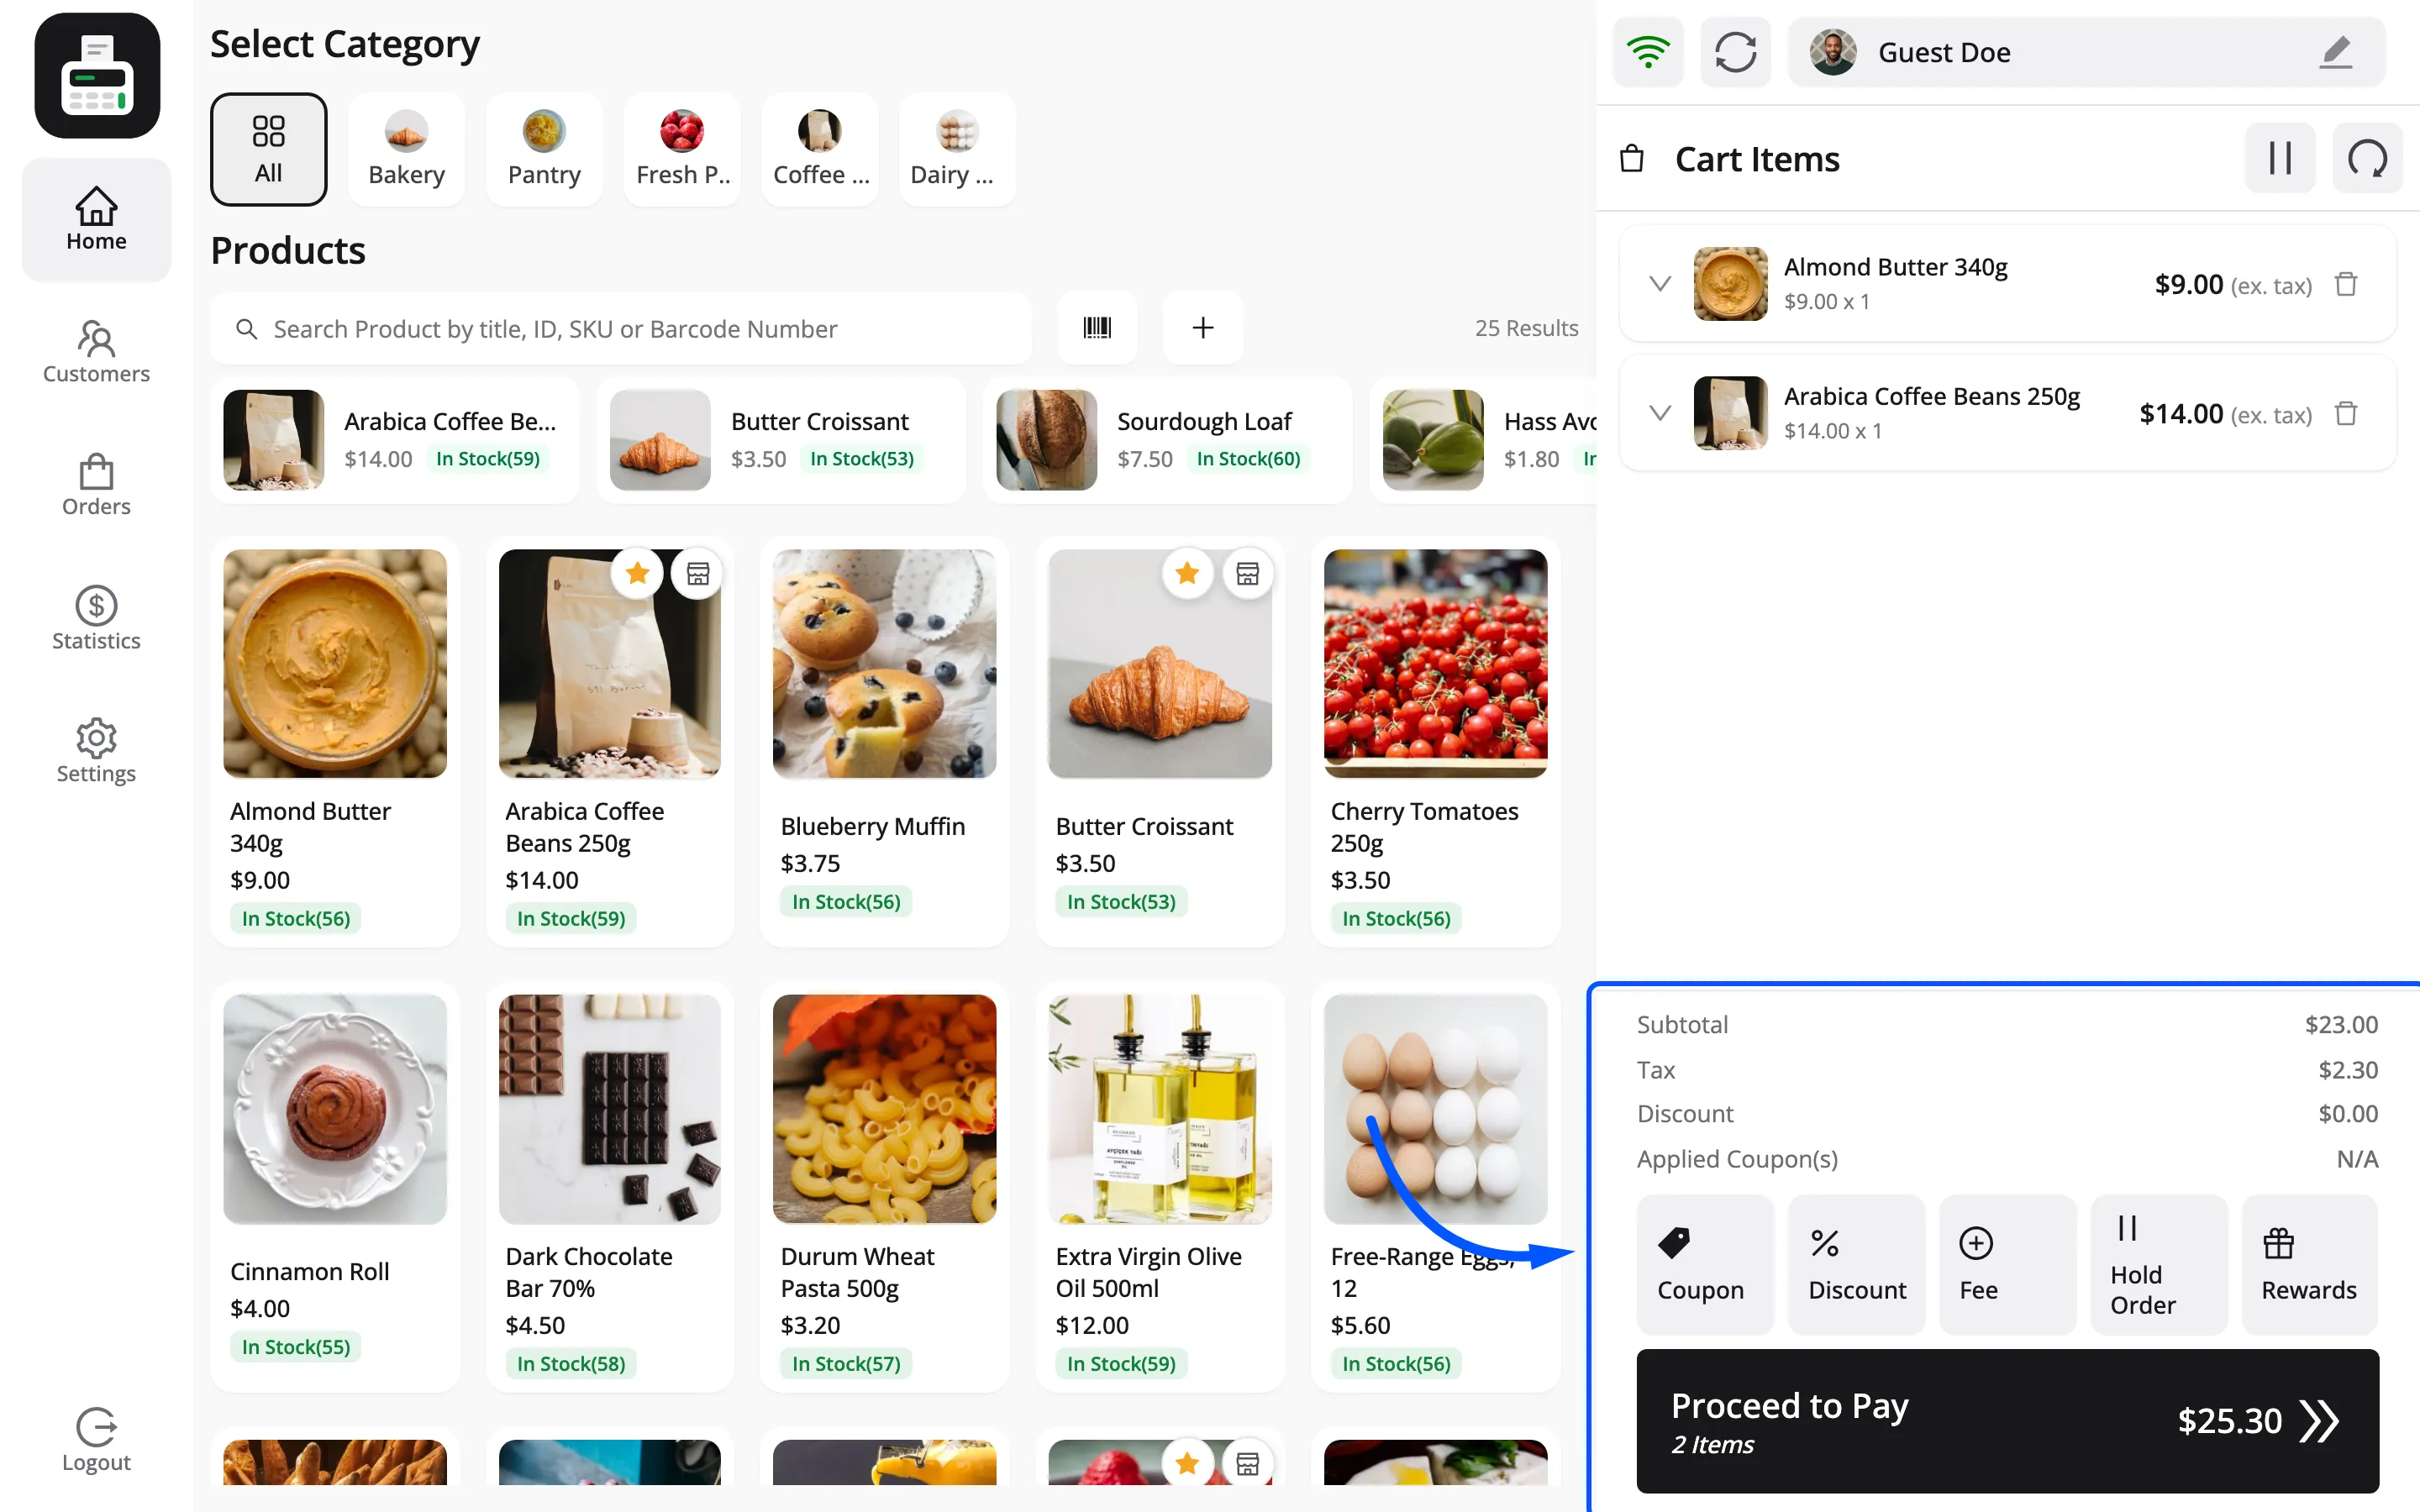
And under those, the actions.
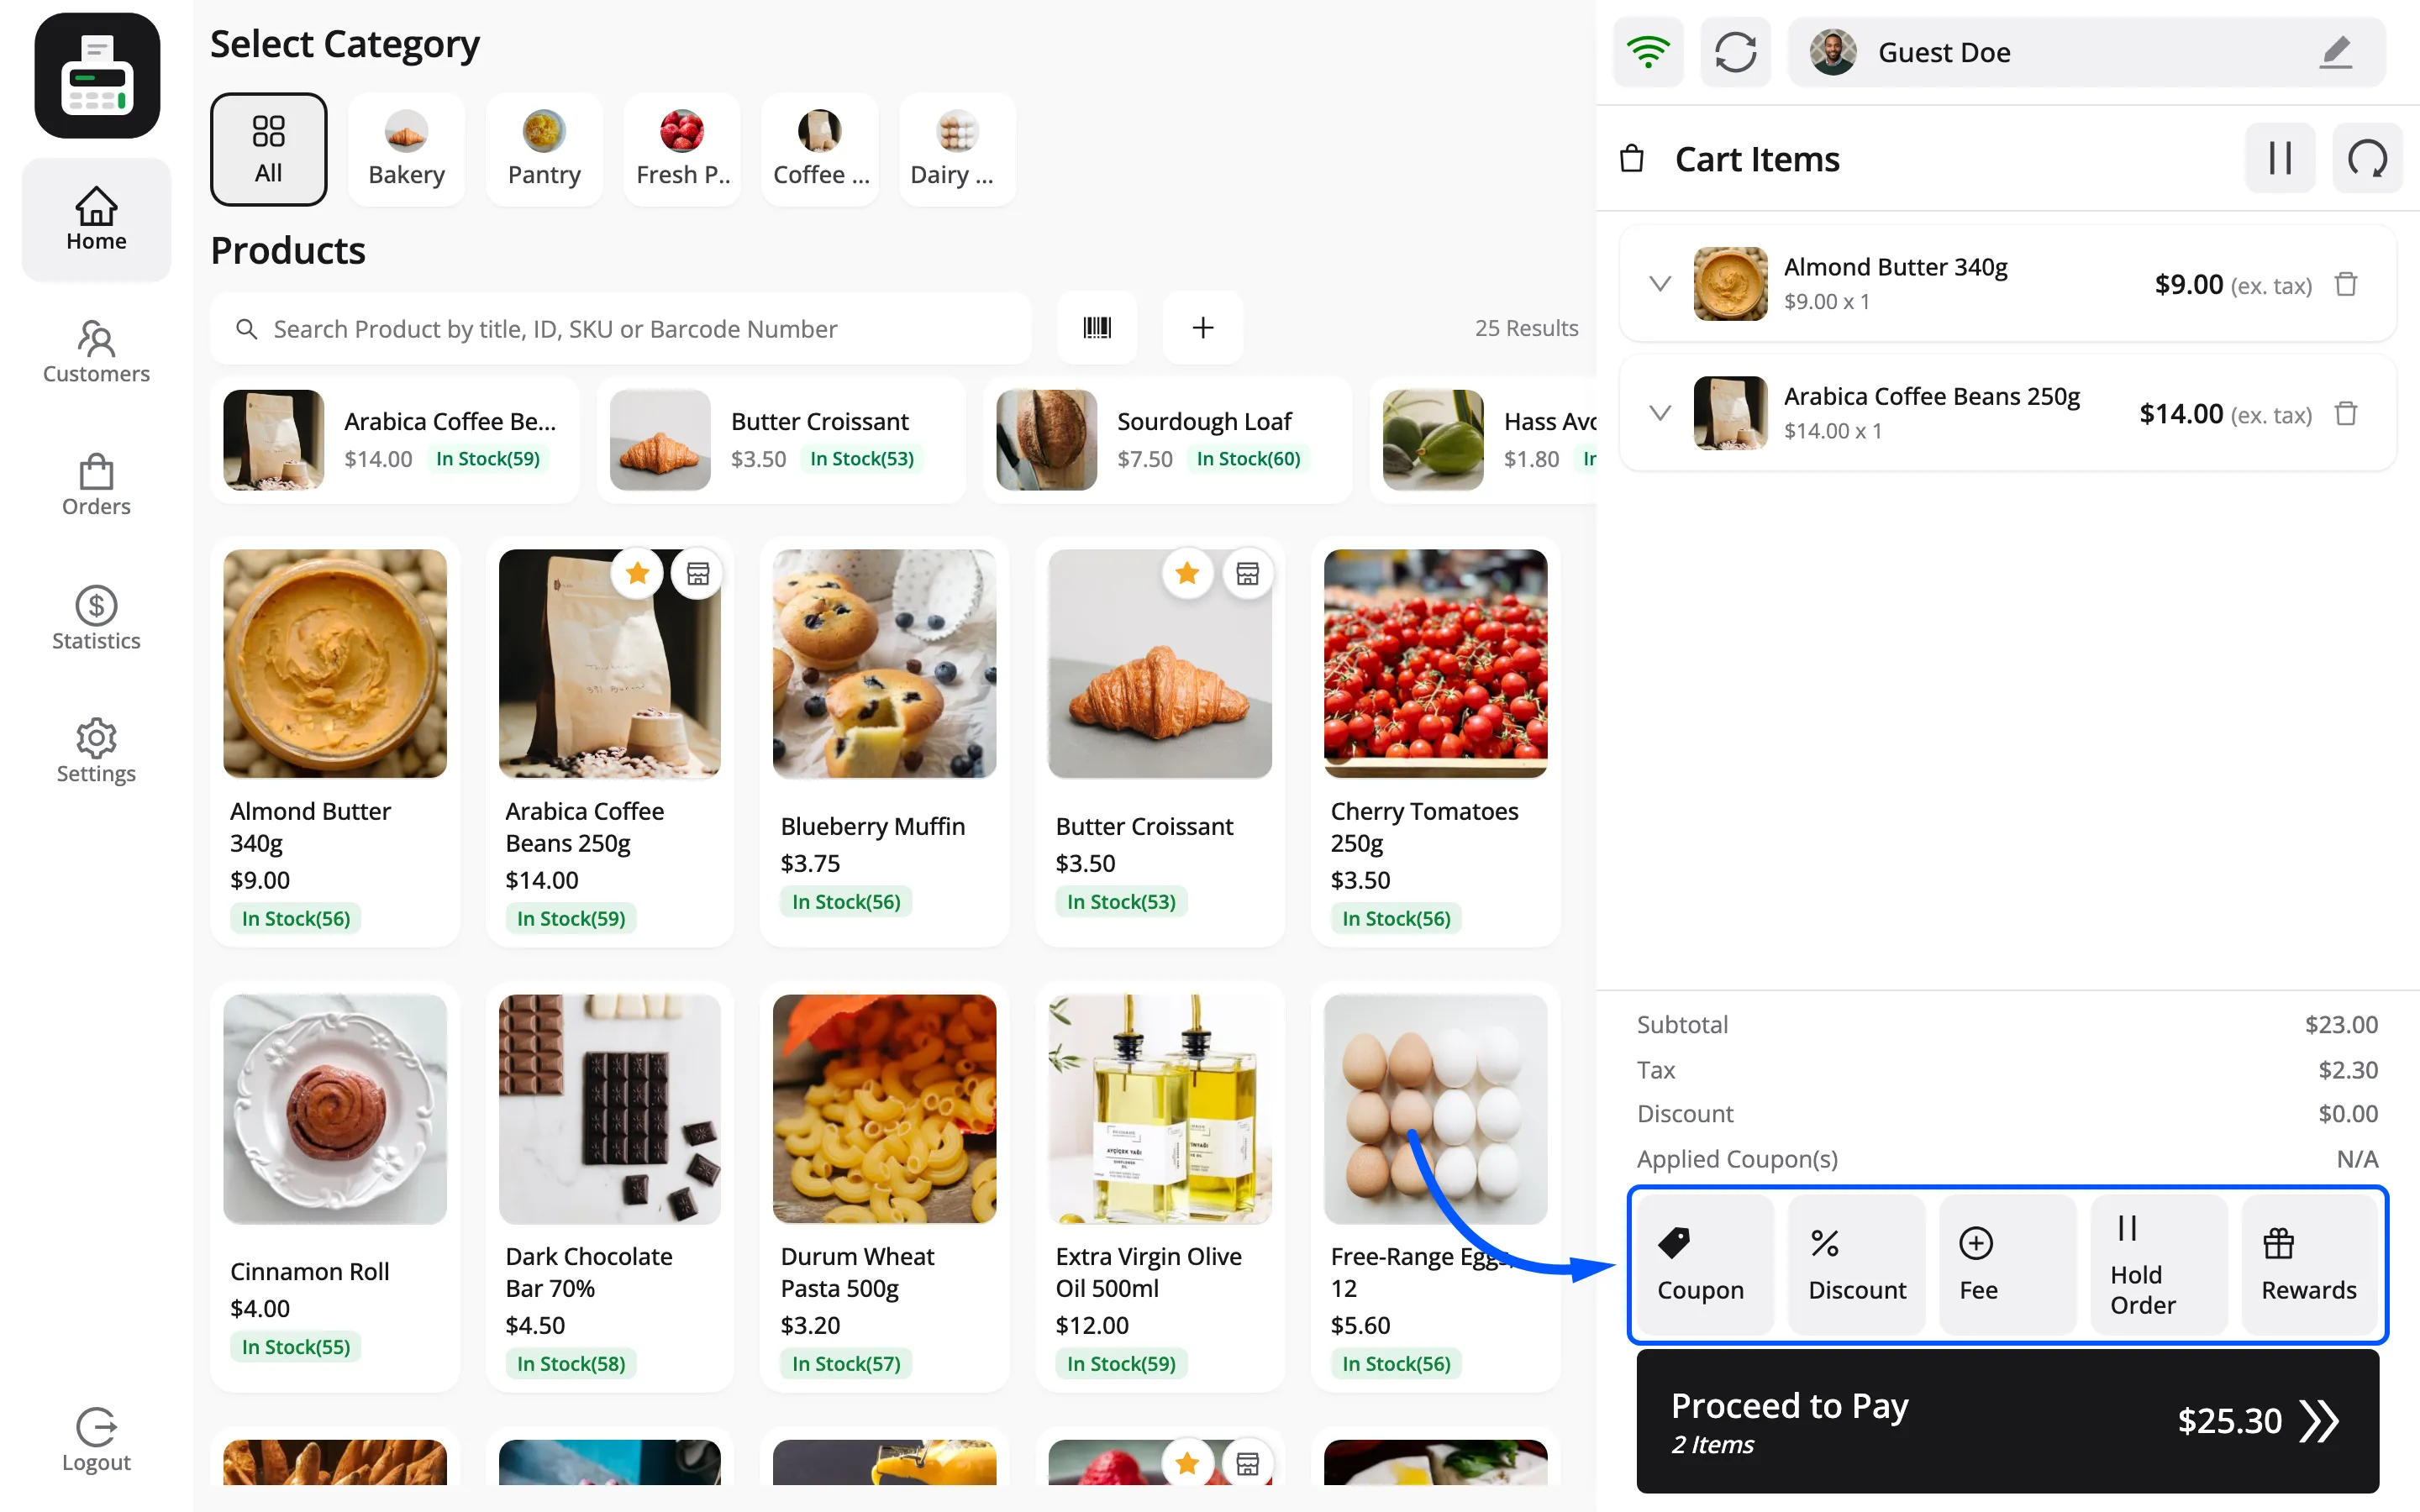
Coupon applies a WooCommerce coupon code. Hold Order holds the cart under a label. Proceed to Pay goes to payment.
Above the panel sits a bar with the online indicator, an offline-sync button and the customer picker. On a Restaurant/Cafe outlet a green table button joins them.
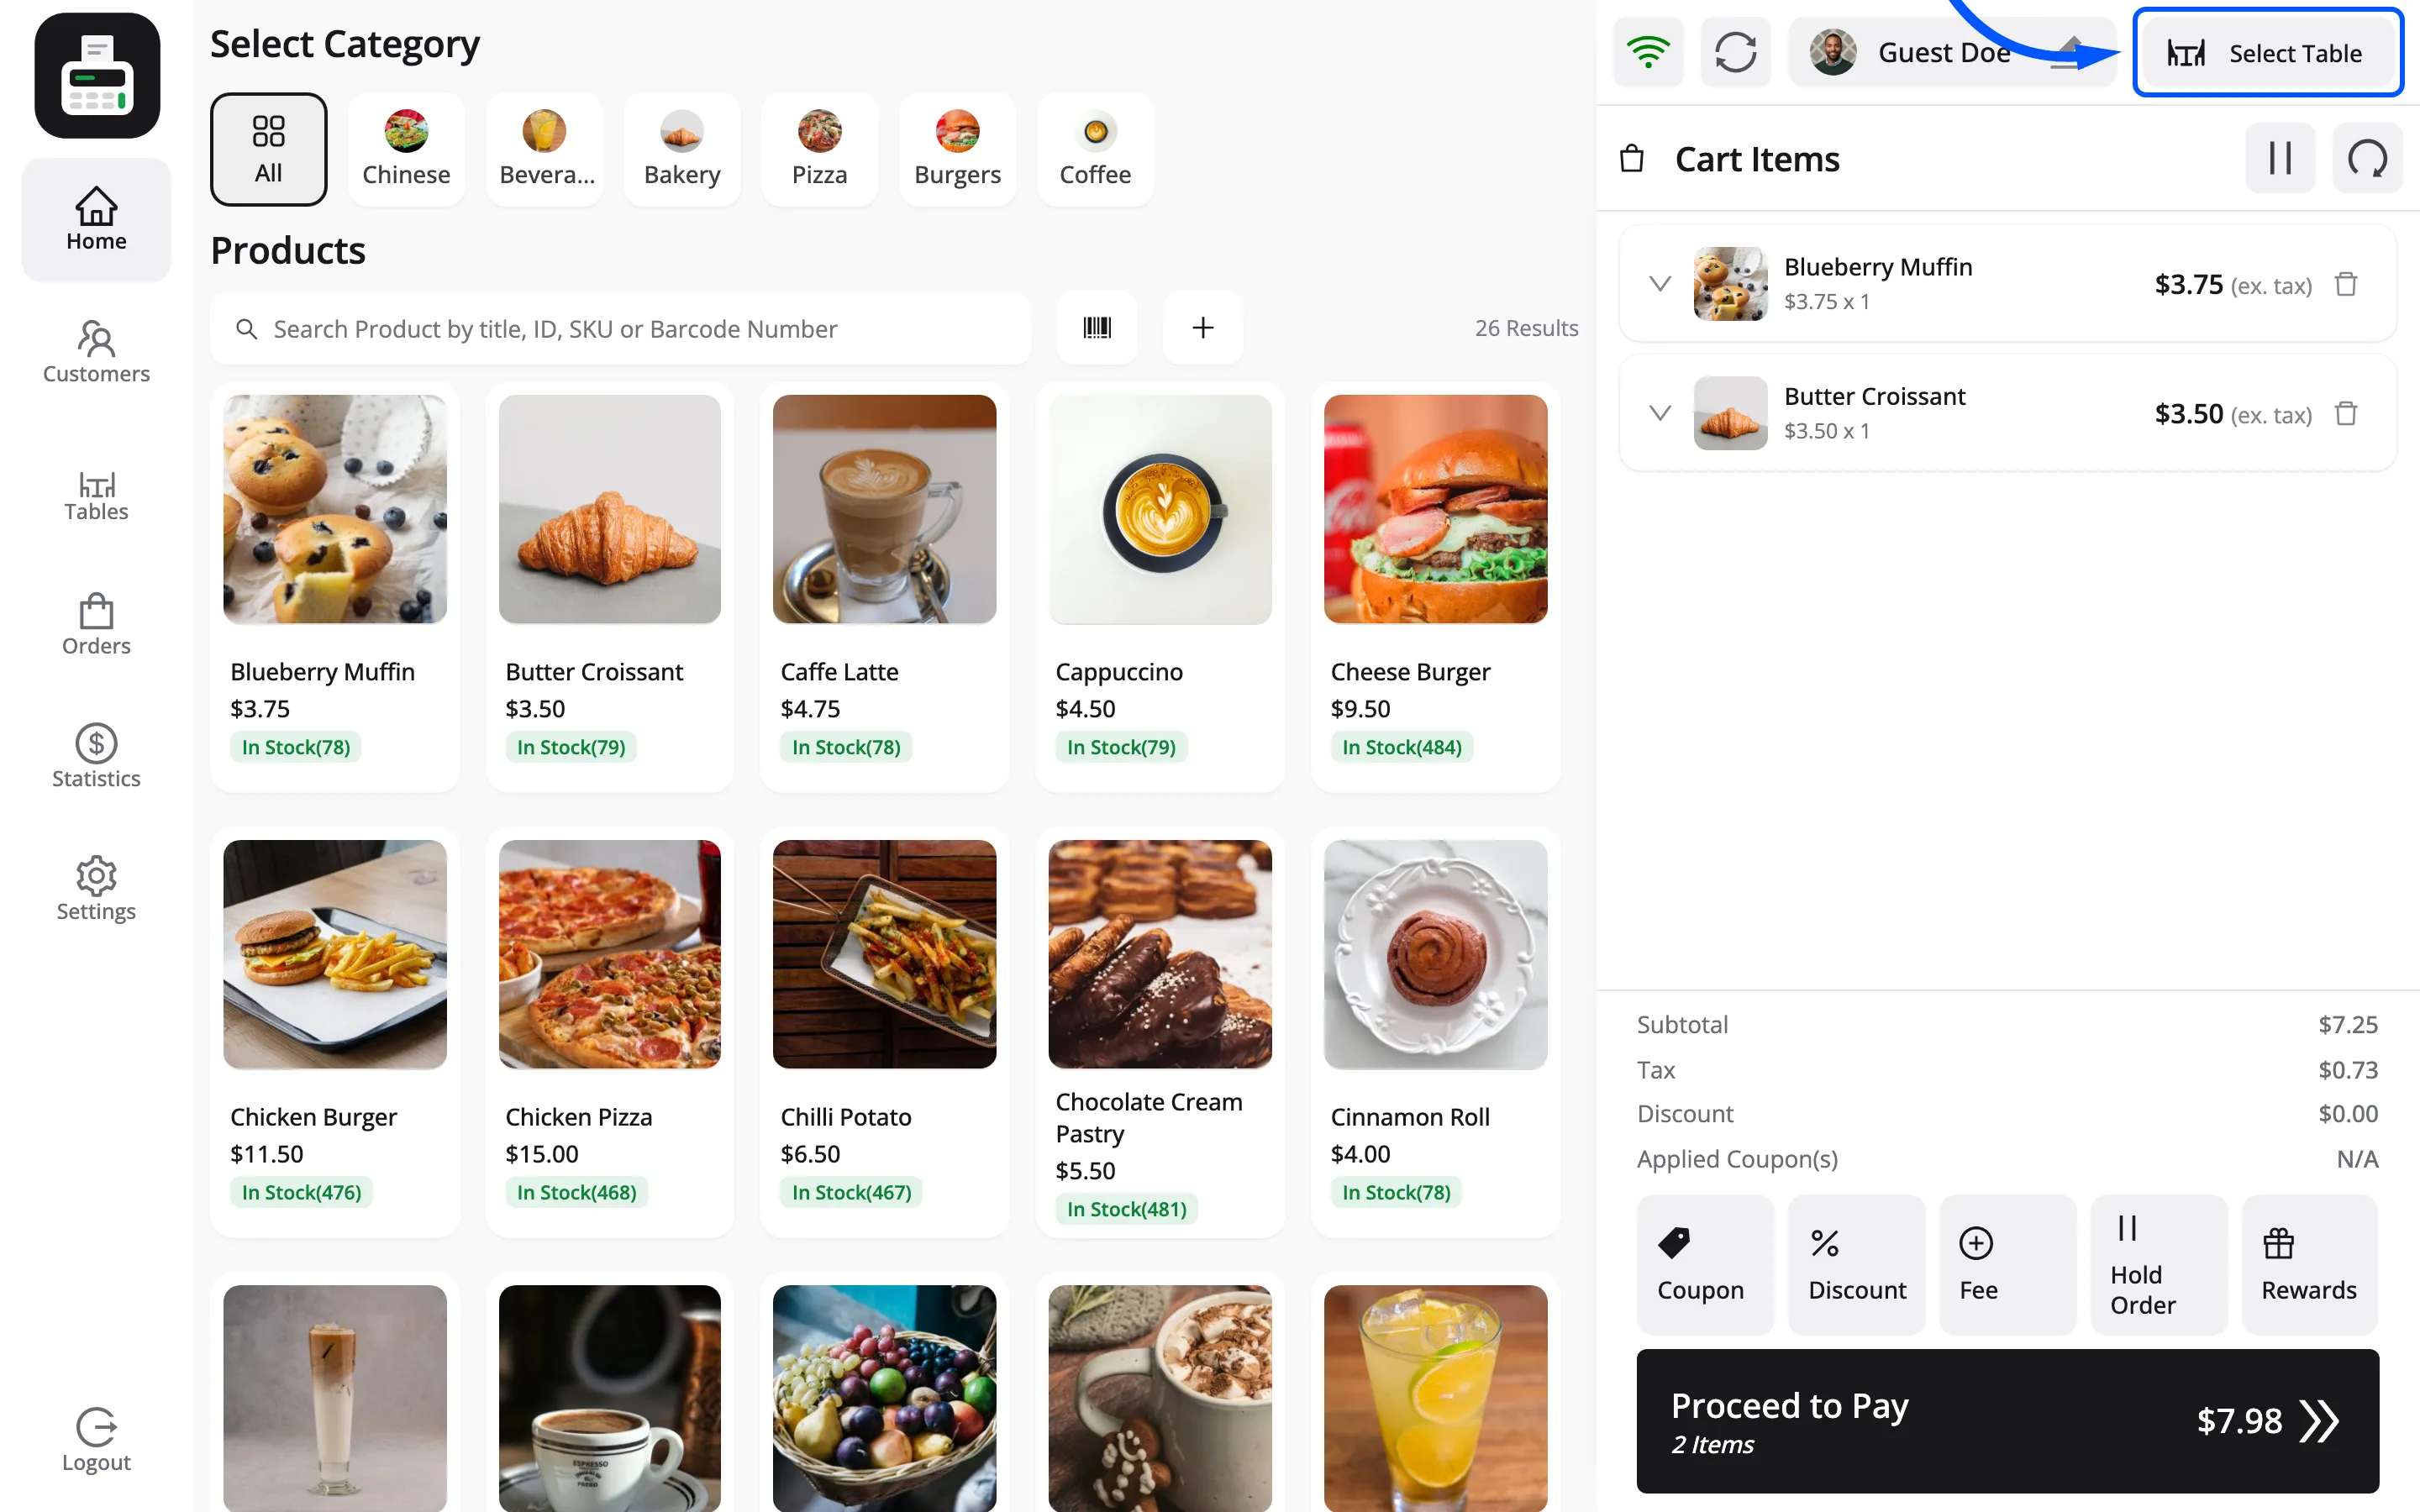
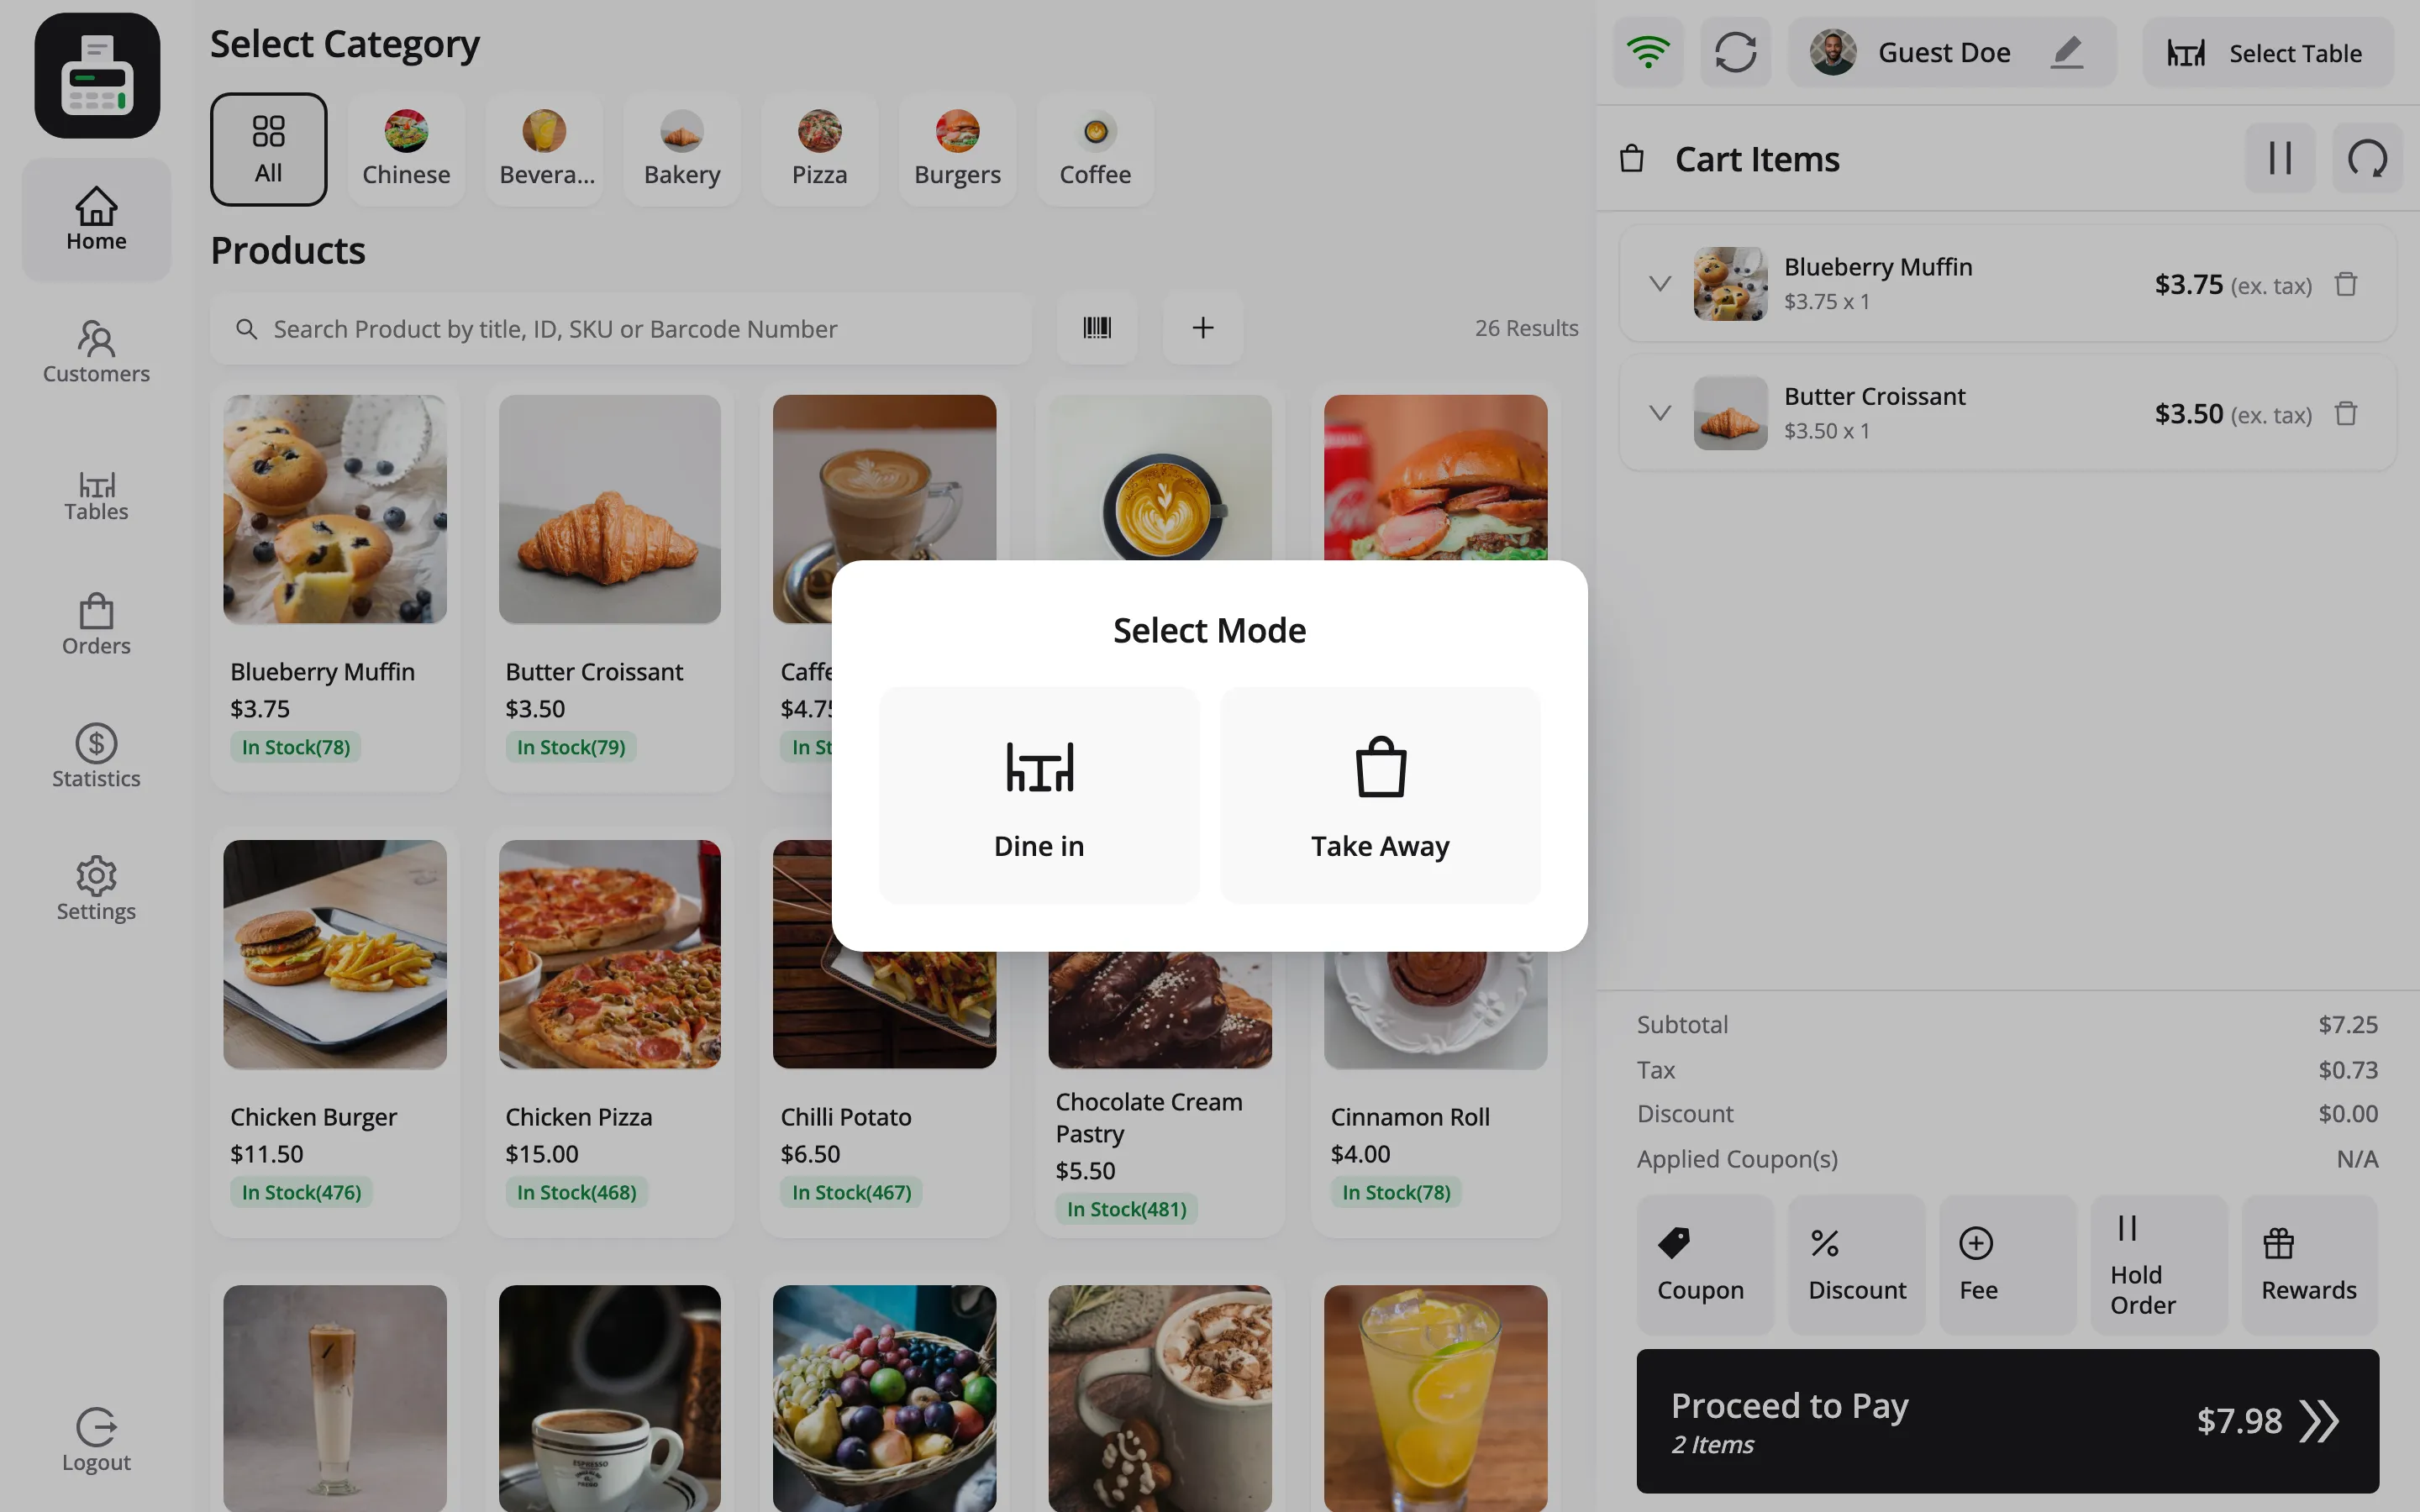
That button does two jobs. It sets the table, and it is also where the cashier picks Dine in or Take Away.
Payment
Section titled “Payment”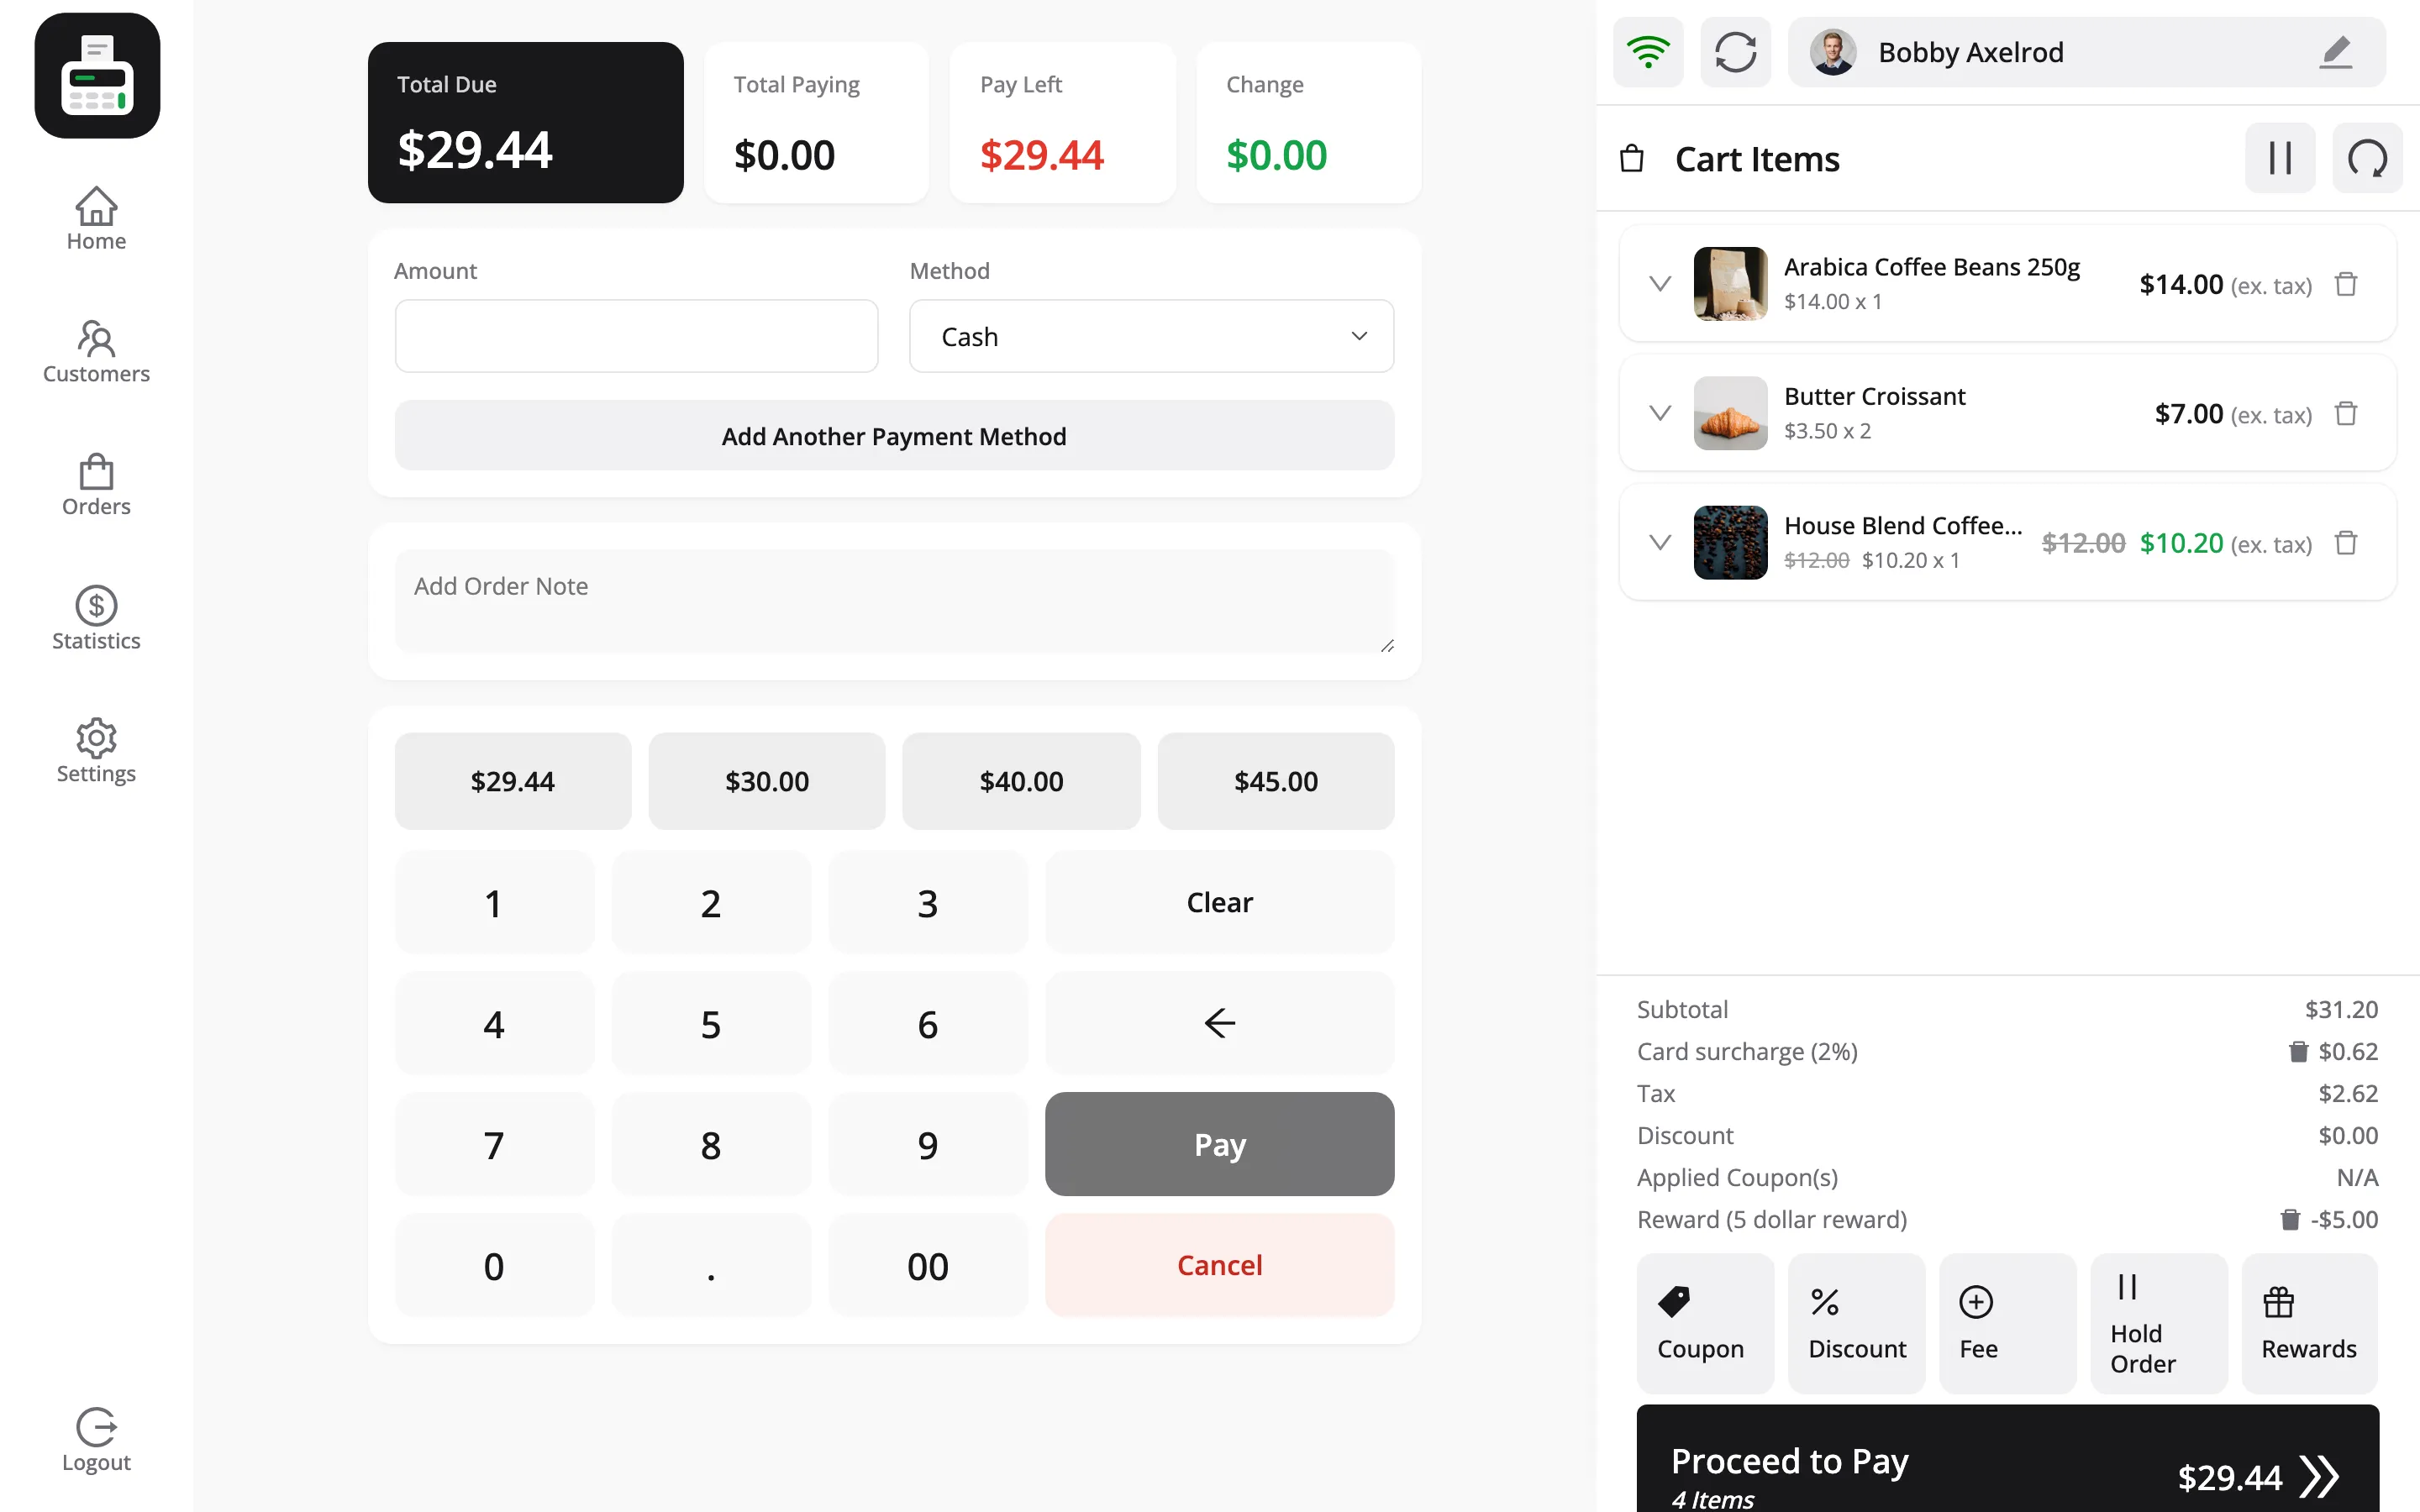
Four figures across the top: Total Due, Total Paying, Pay Left and Change.
The method list is the payment methods you enabled for this outlet. The keypad and the quick-amount buttons enter what the customer handed over. Pay finishes the sale, Cancel clears the entry.
A Print Receipt prompt appears when the order is created.
More at the counter (Pro)
Section titled “More at the counter (Pro)”Version 7 added a set of counter tools, each with its own tutorial.
- Quick Keys: A row of pinned best sellers above the grid, one tap each. How to Pin Best Sellers as Quick Keys (Pro)
- Variable products: The grid turns into a step-by-step picker, one attribute at a time. How to Sell a Variable Product (Pro)
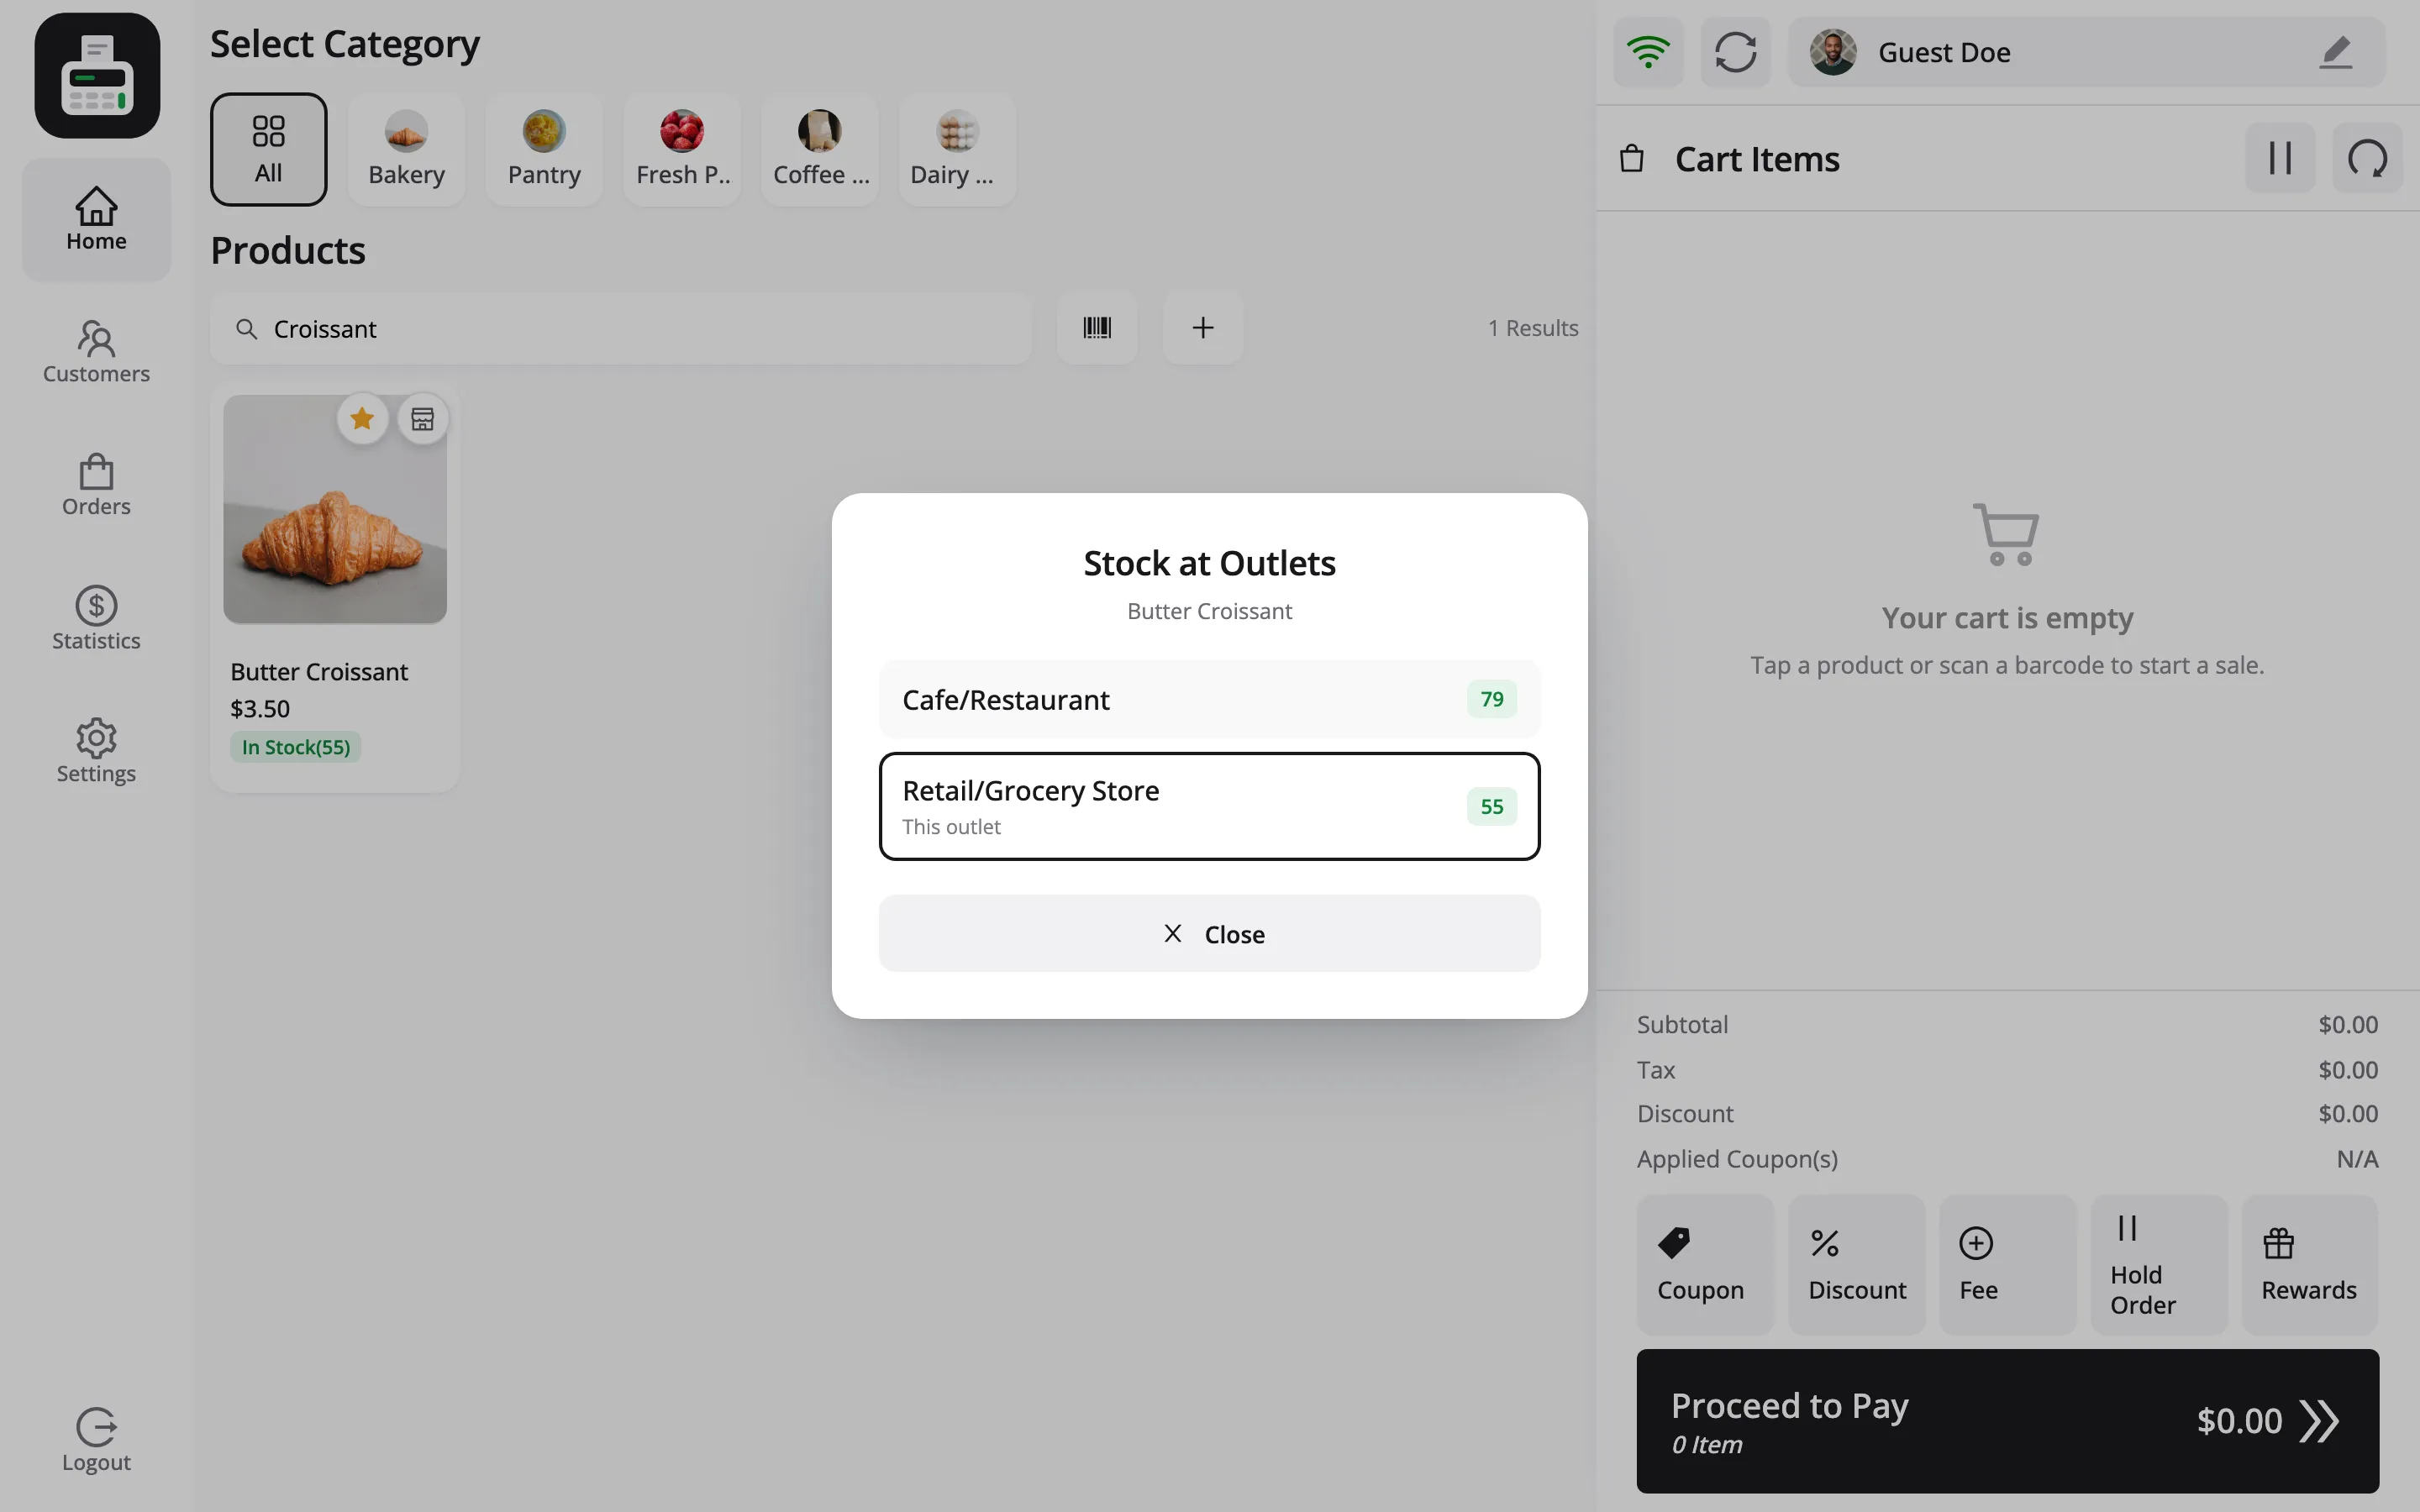
- Stock at other outlets: A button on the product shows what every other outlet holds. How to Check Stock at Other Outlets (Pro)
- Fees: A fixed or percentage surcharge on the cart. How to Add a Fee or Surcharge (Pro)
- Customer profile: Past orders, spend and LoyaltyX points for the customer on the cart. How to View a Customer Profile at the POS (Pro)
- LoyaltyX rewards: Redeem points at the counter. How to Redeem LoyaltyX Rewards at the POS (Pro)
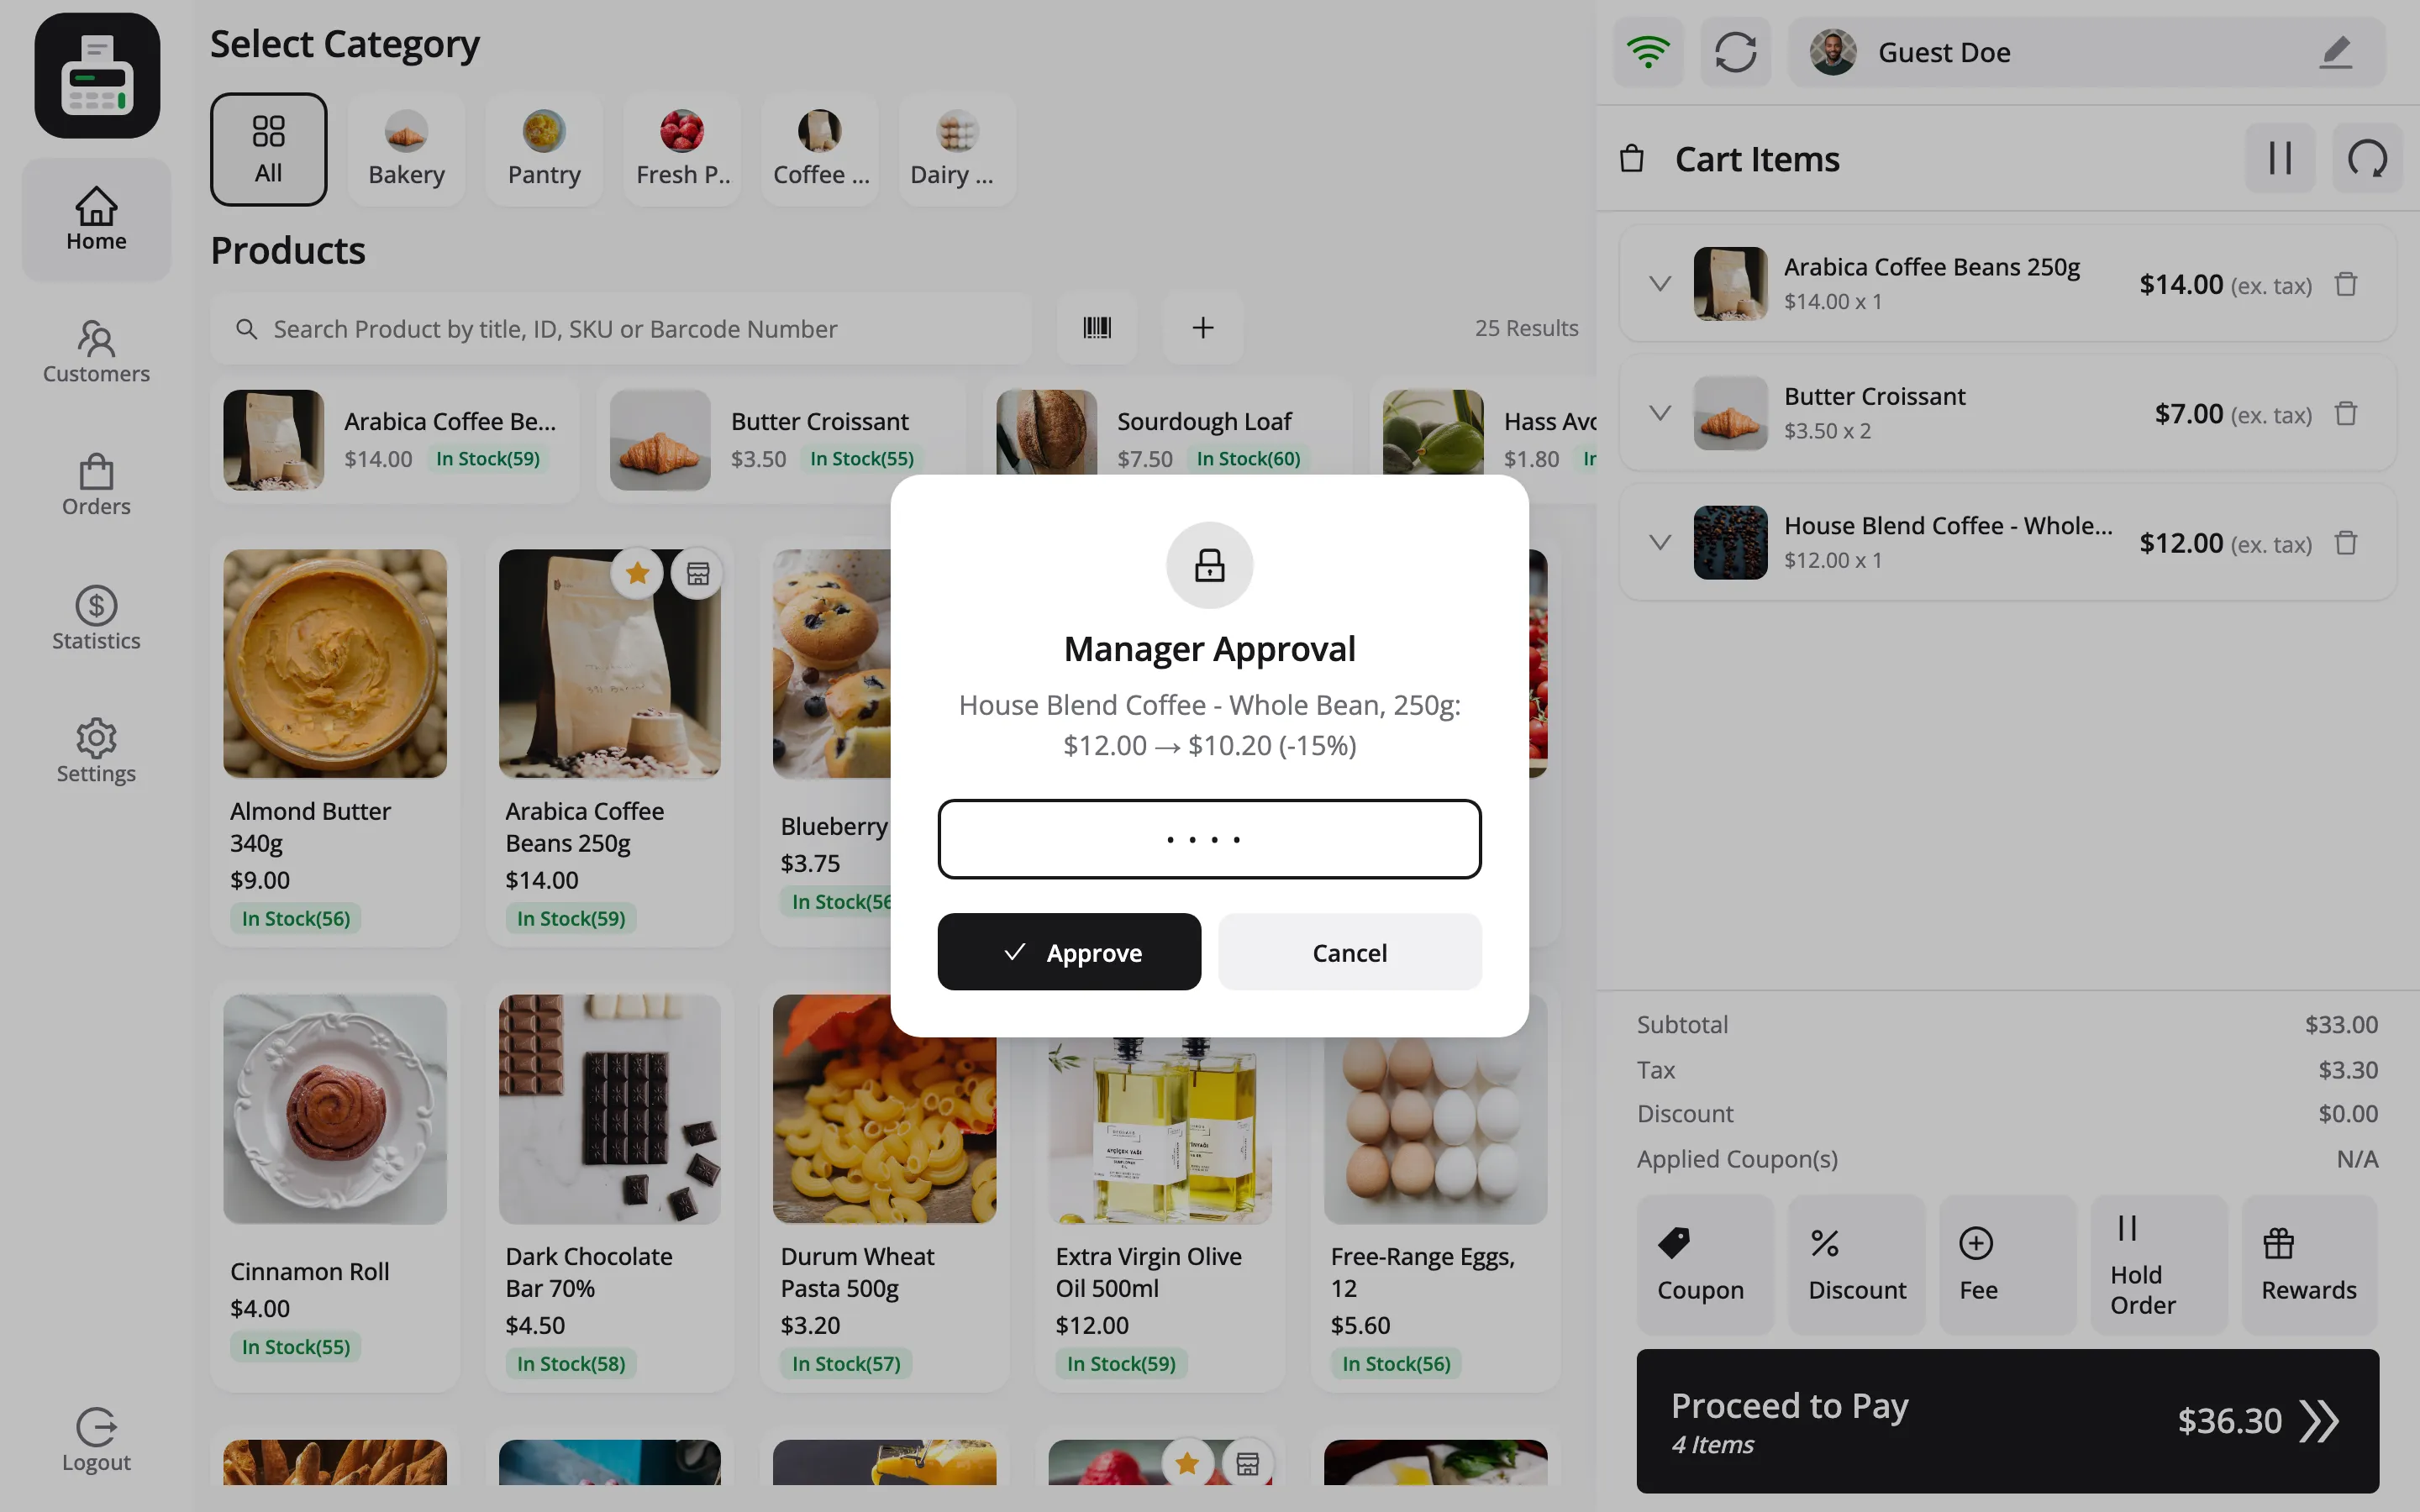
- Manager PIN: A discount, refund or cash movement a cashier may not do alone asks a supervisor for their PIN. How to Approve Actions with a Manager PIN (Pro)
- WhatsApp receipts: Send the receipt to the customer’s chat. How to Send Receipts on WhatsApp (Pro)
Customers
Section titled “Customers”Search by name, email or phone. Set the current customer for the cart, edit one, or add a new one.
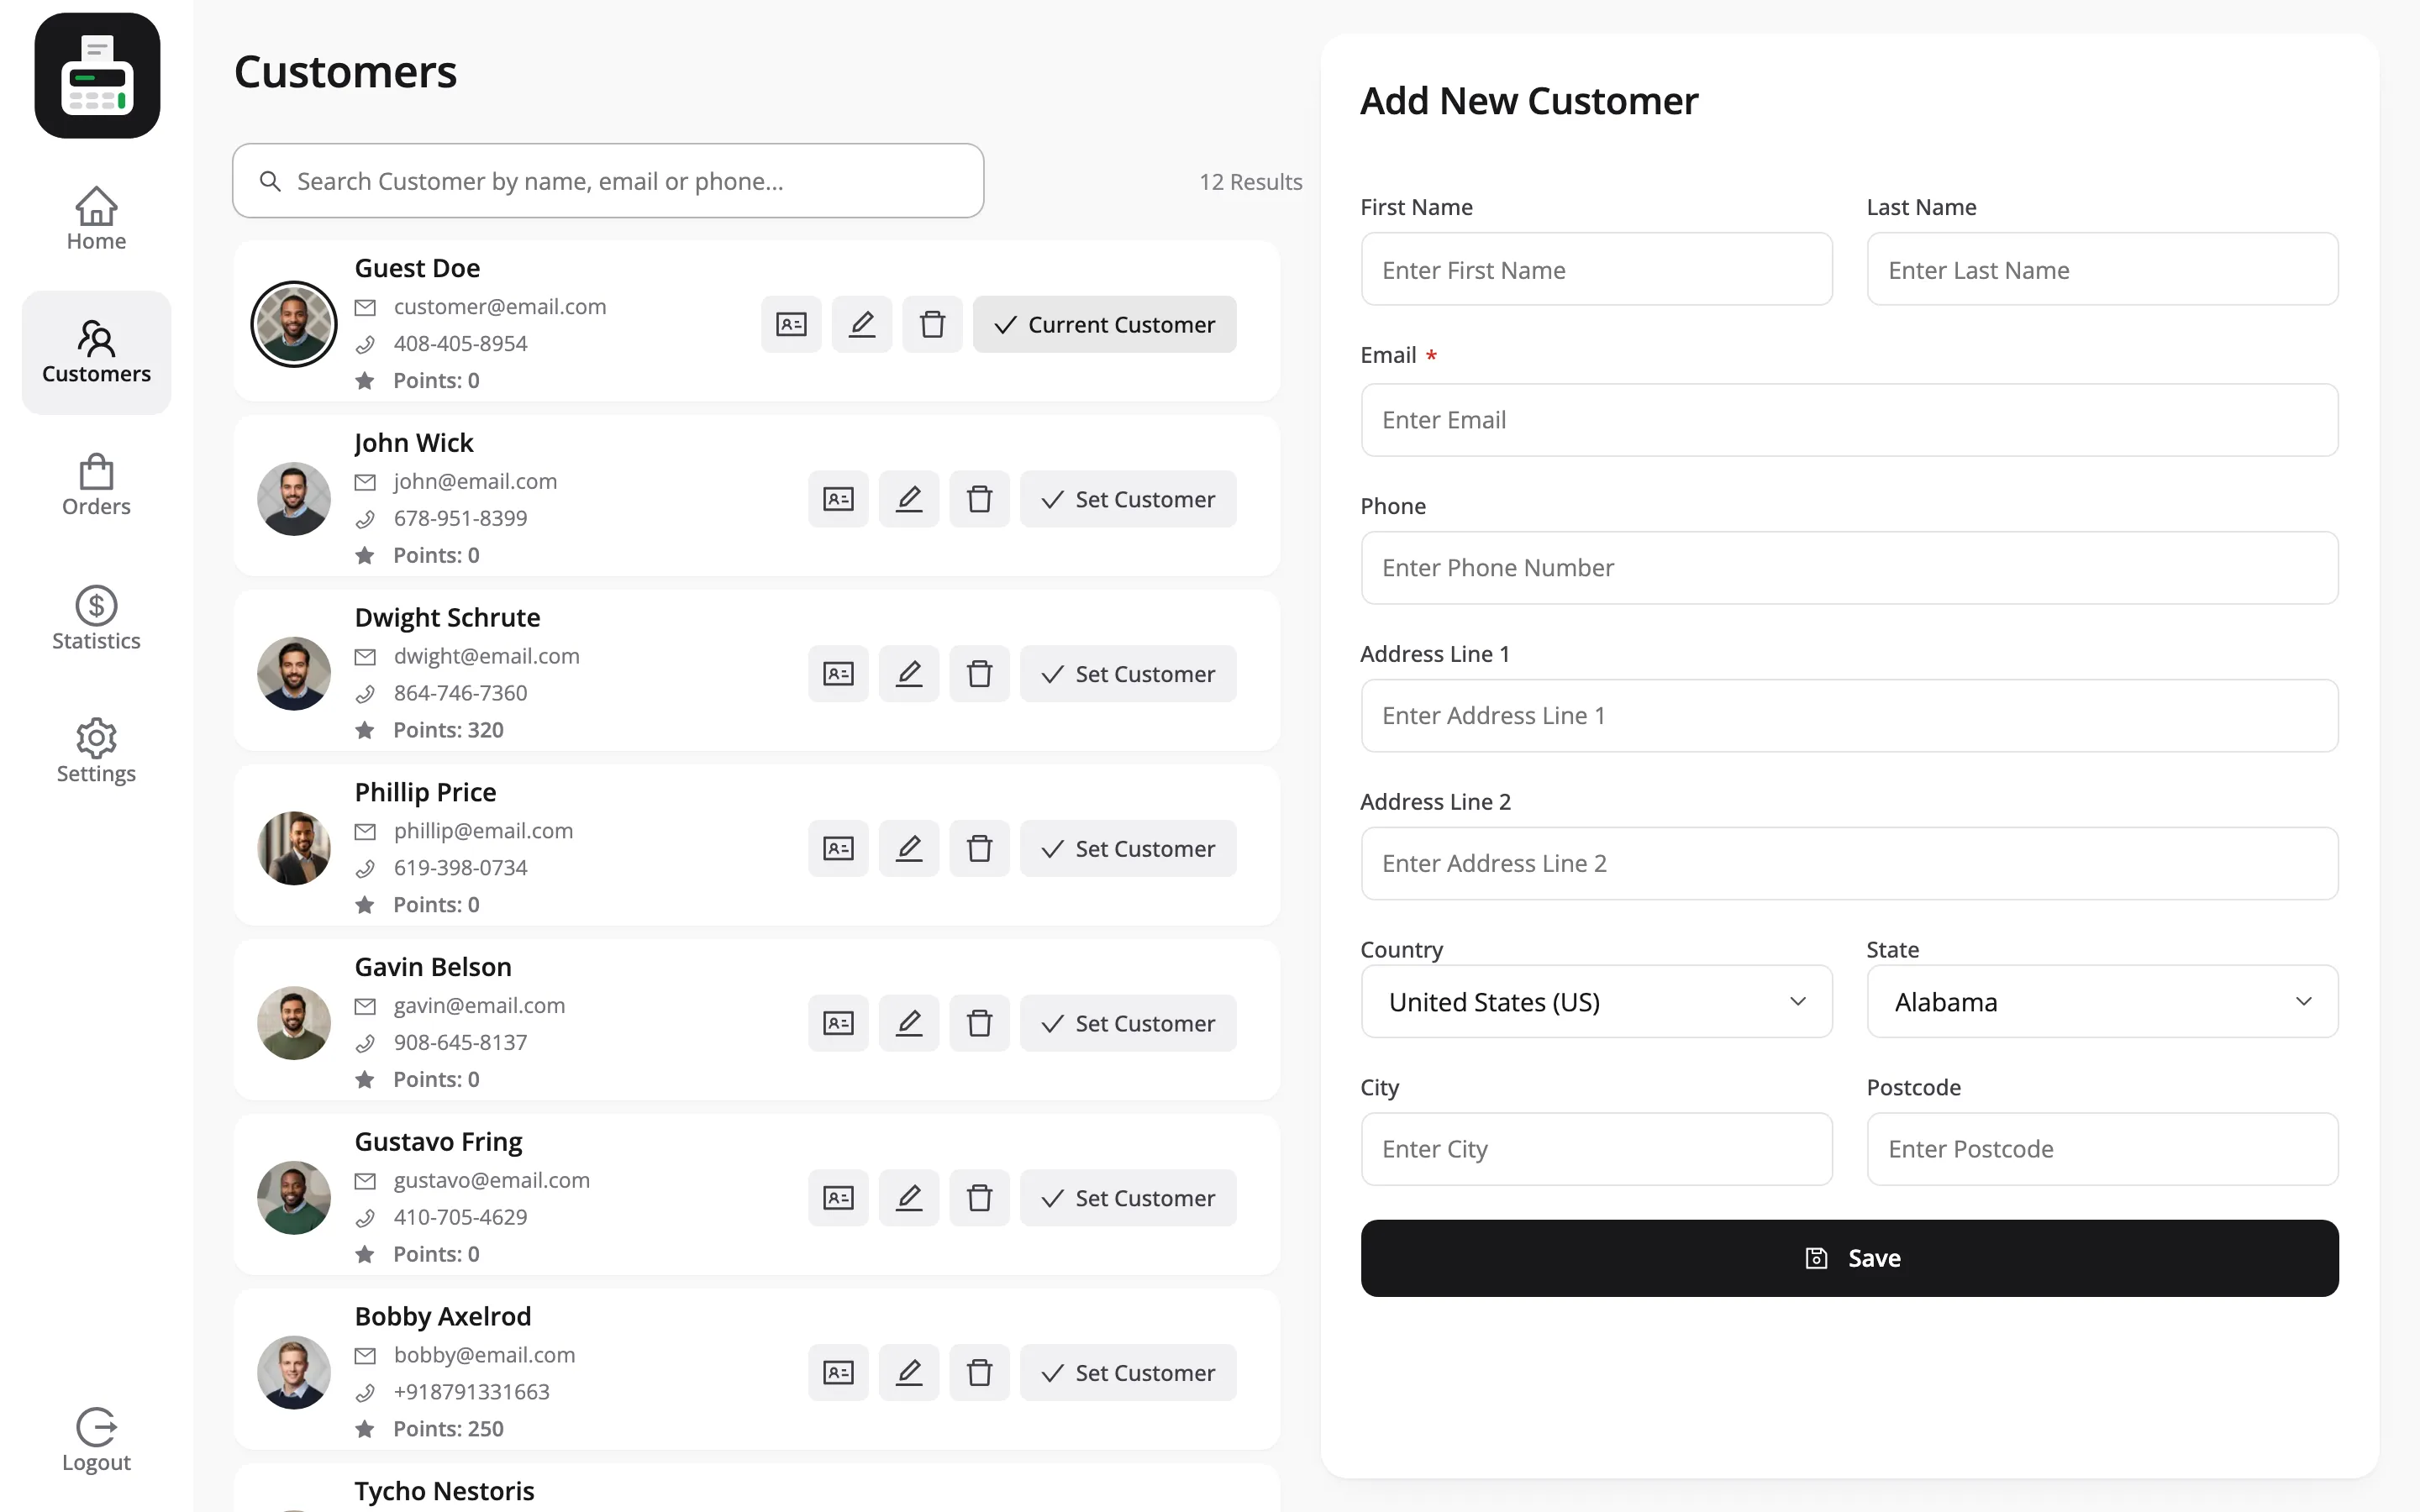
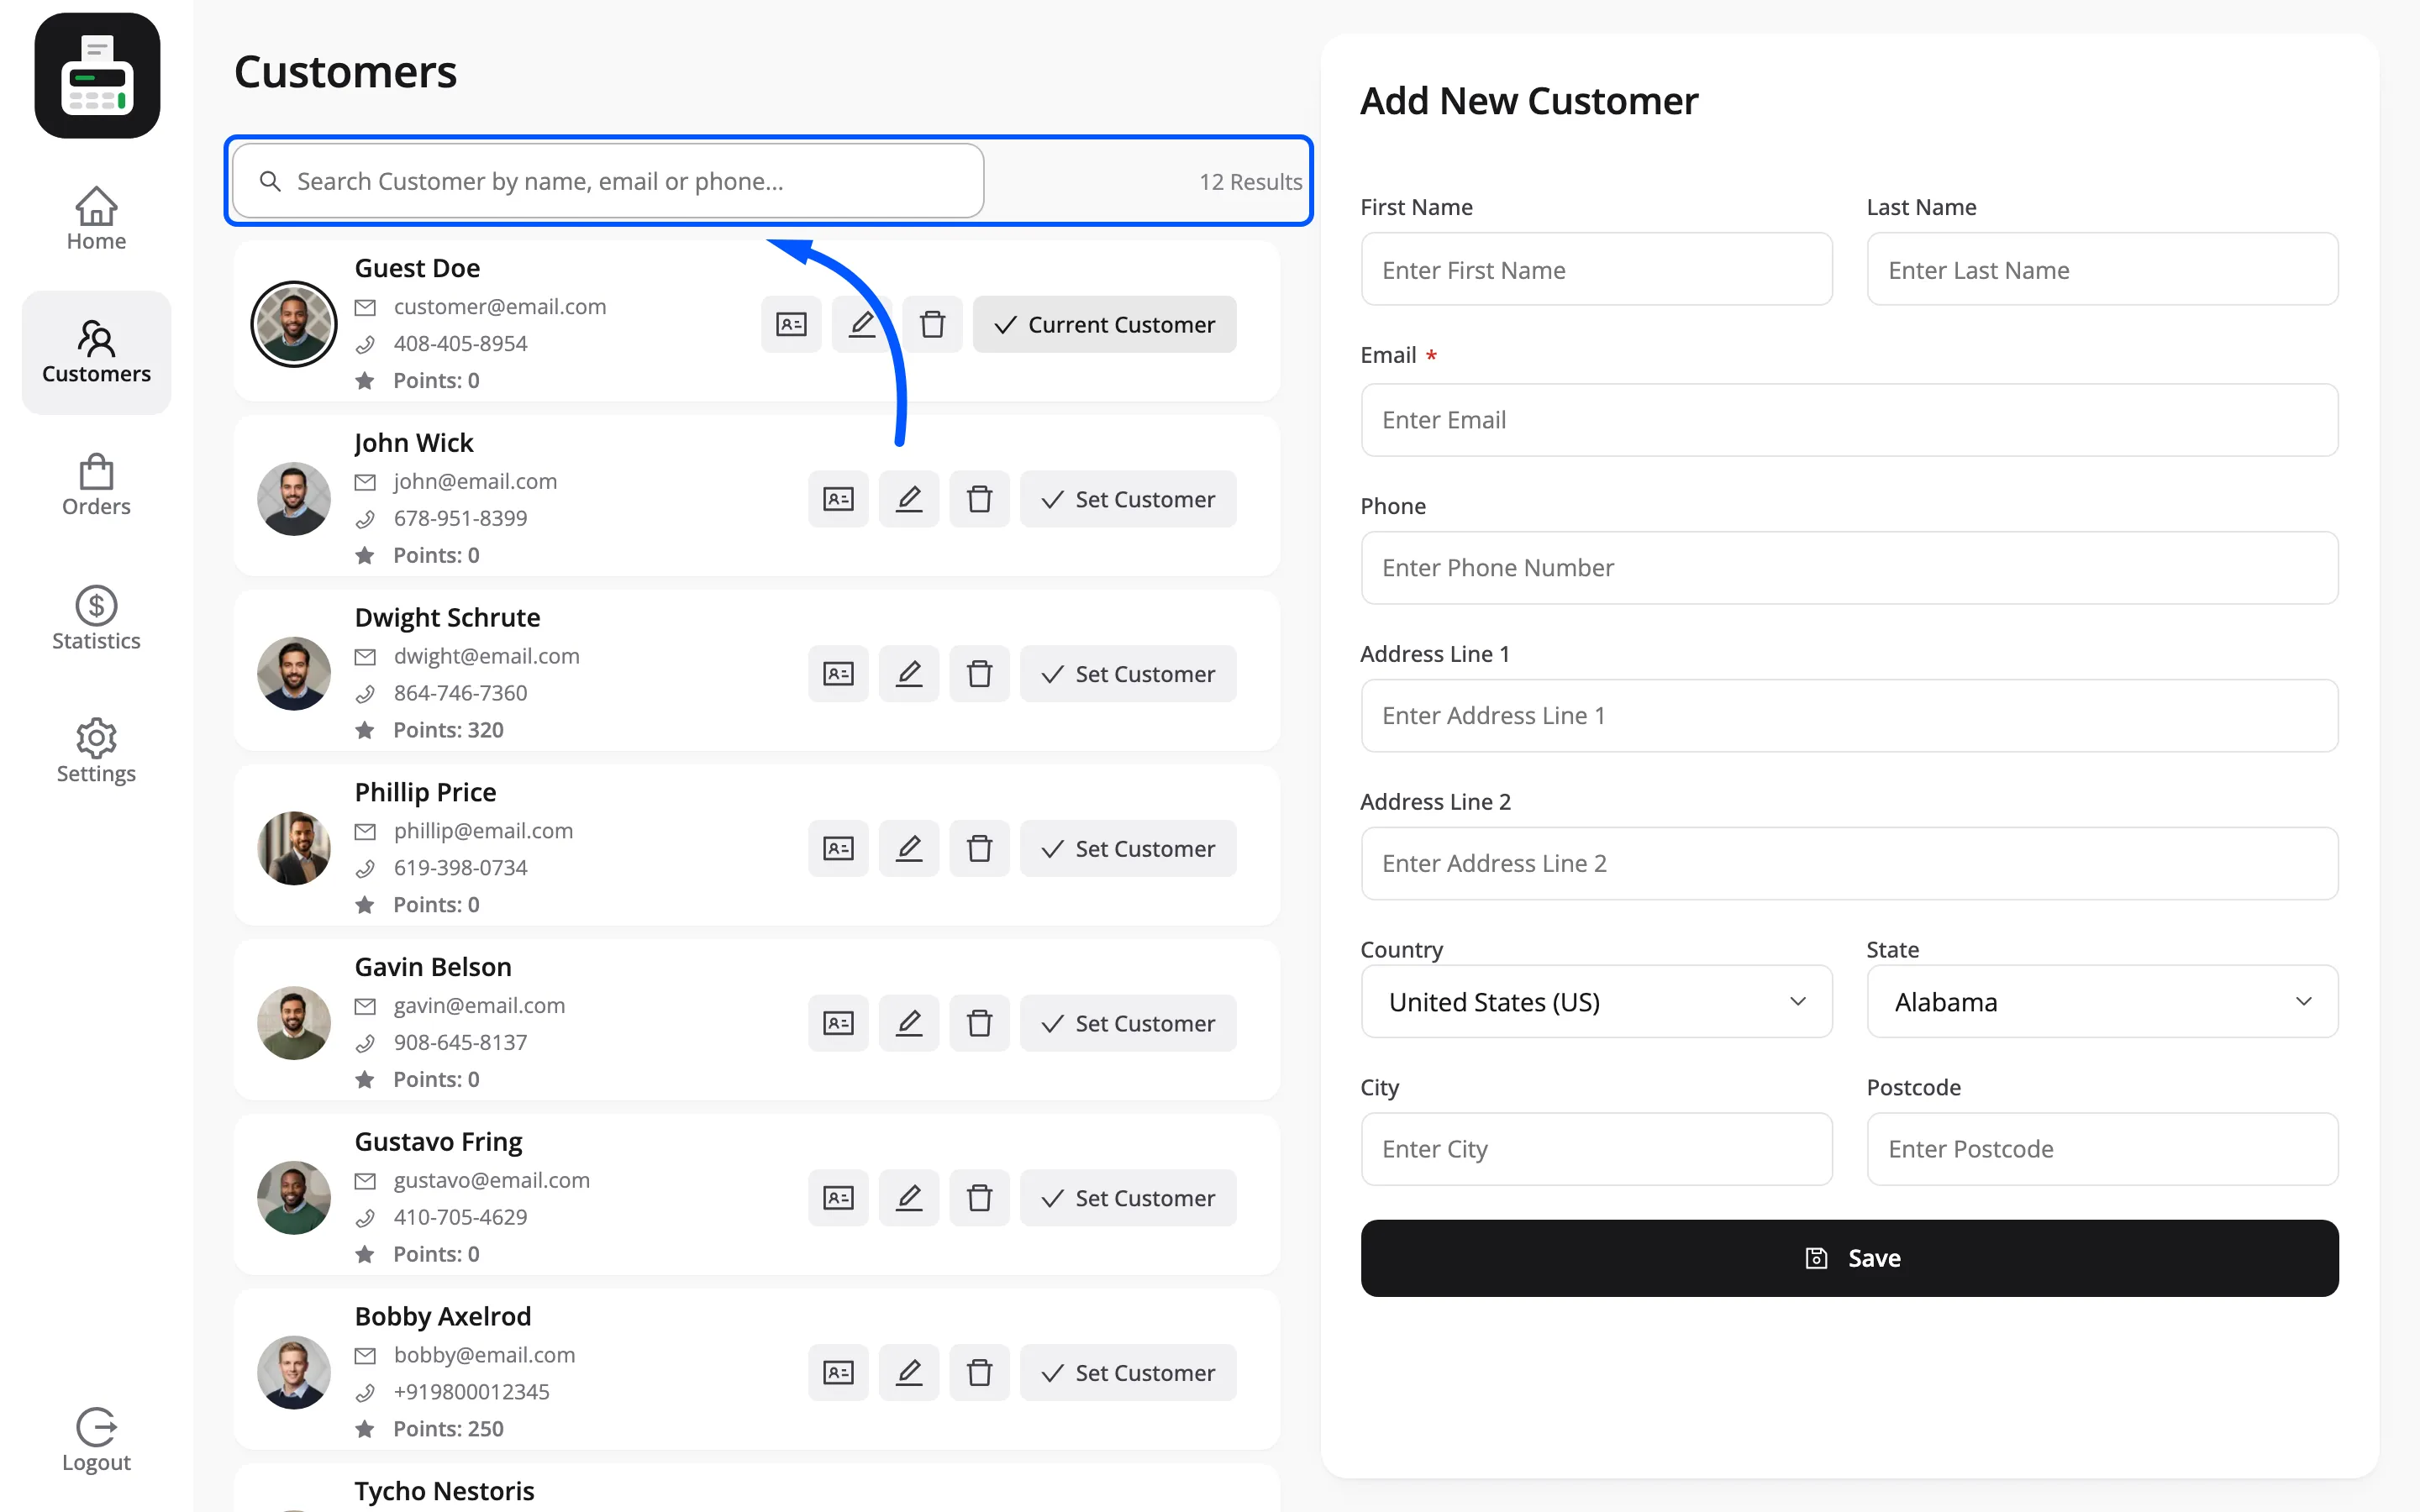
The form on the right takes first and last name, email, phone and a full address.
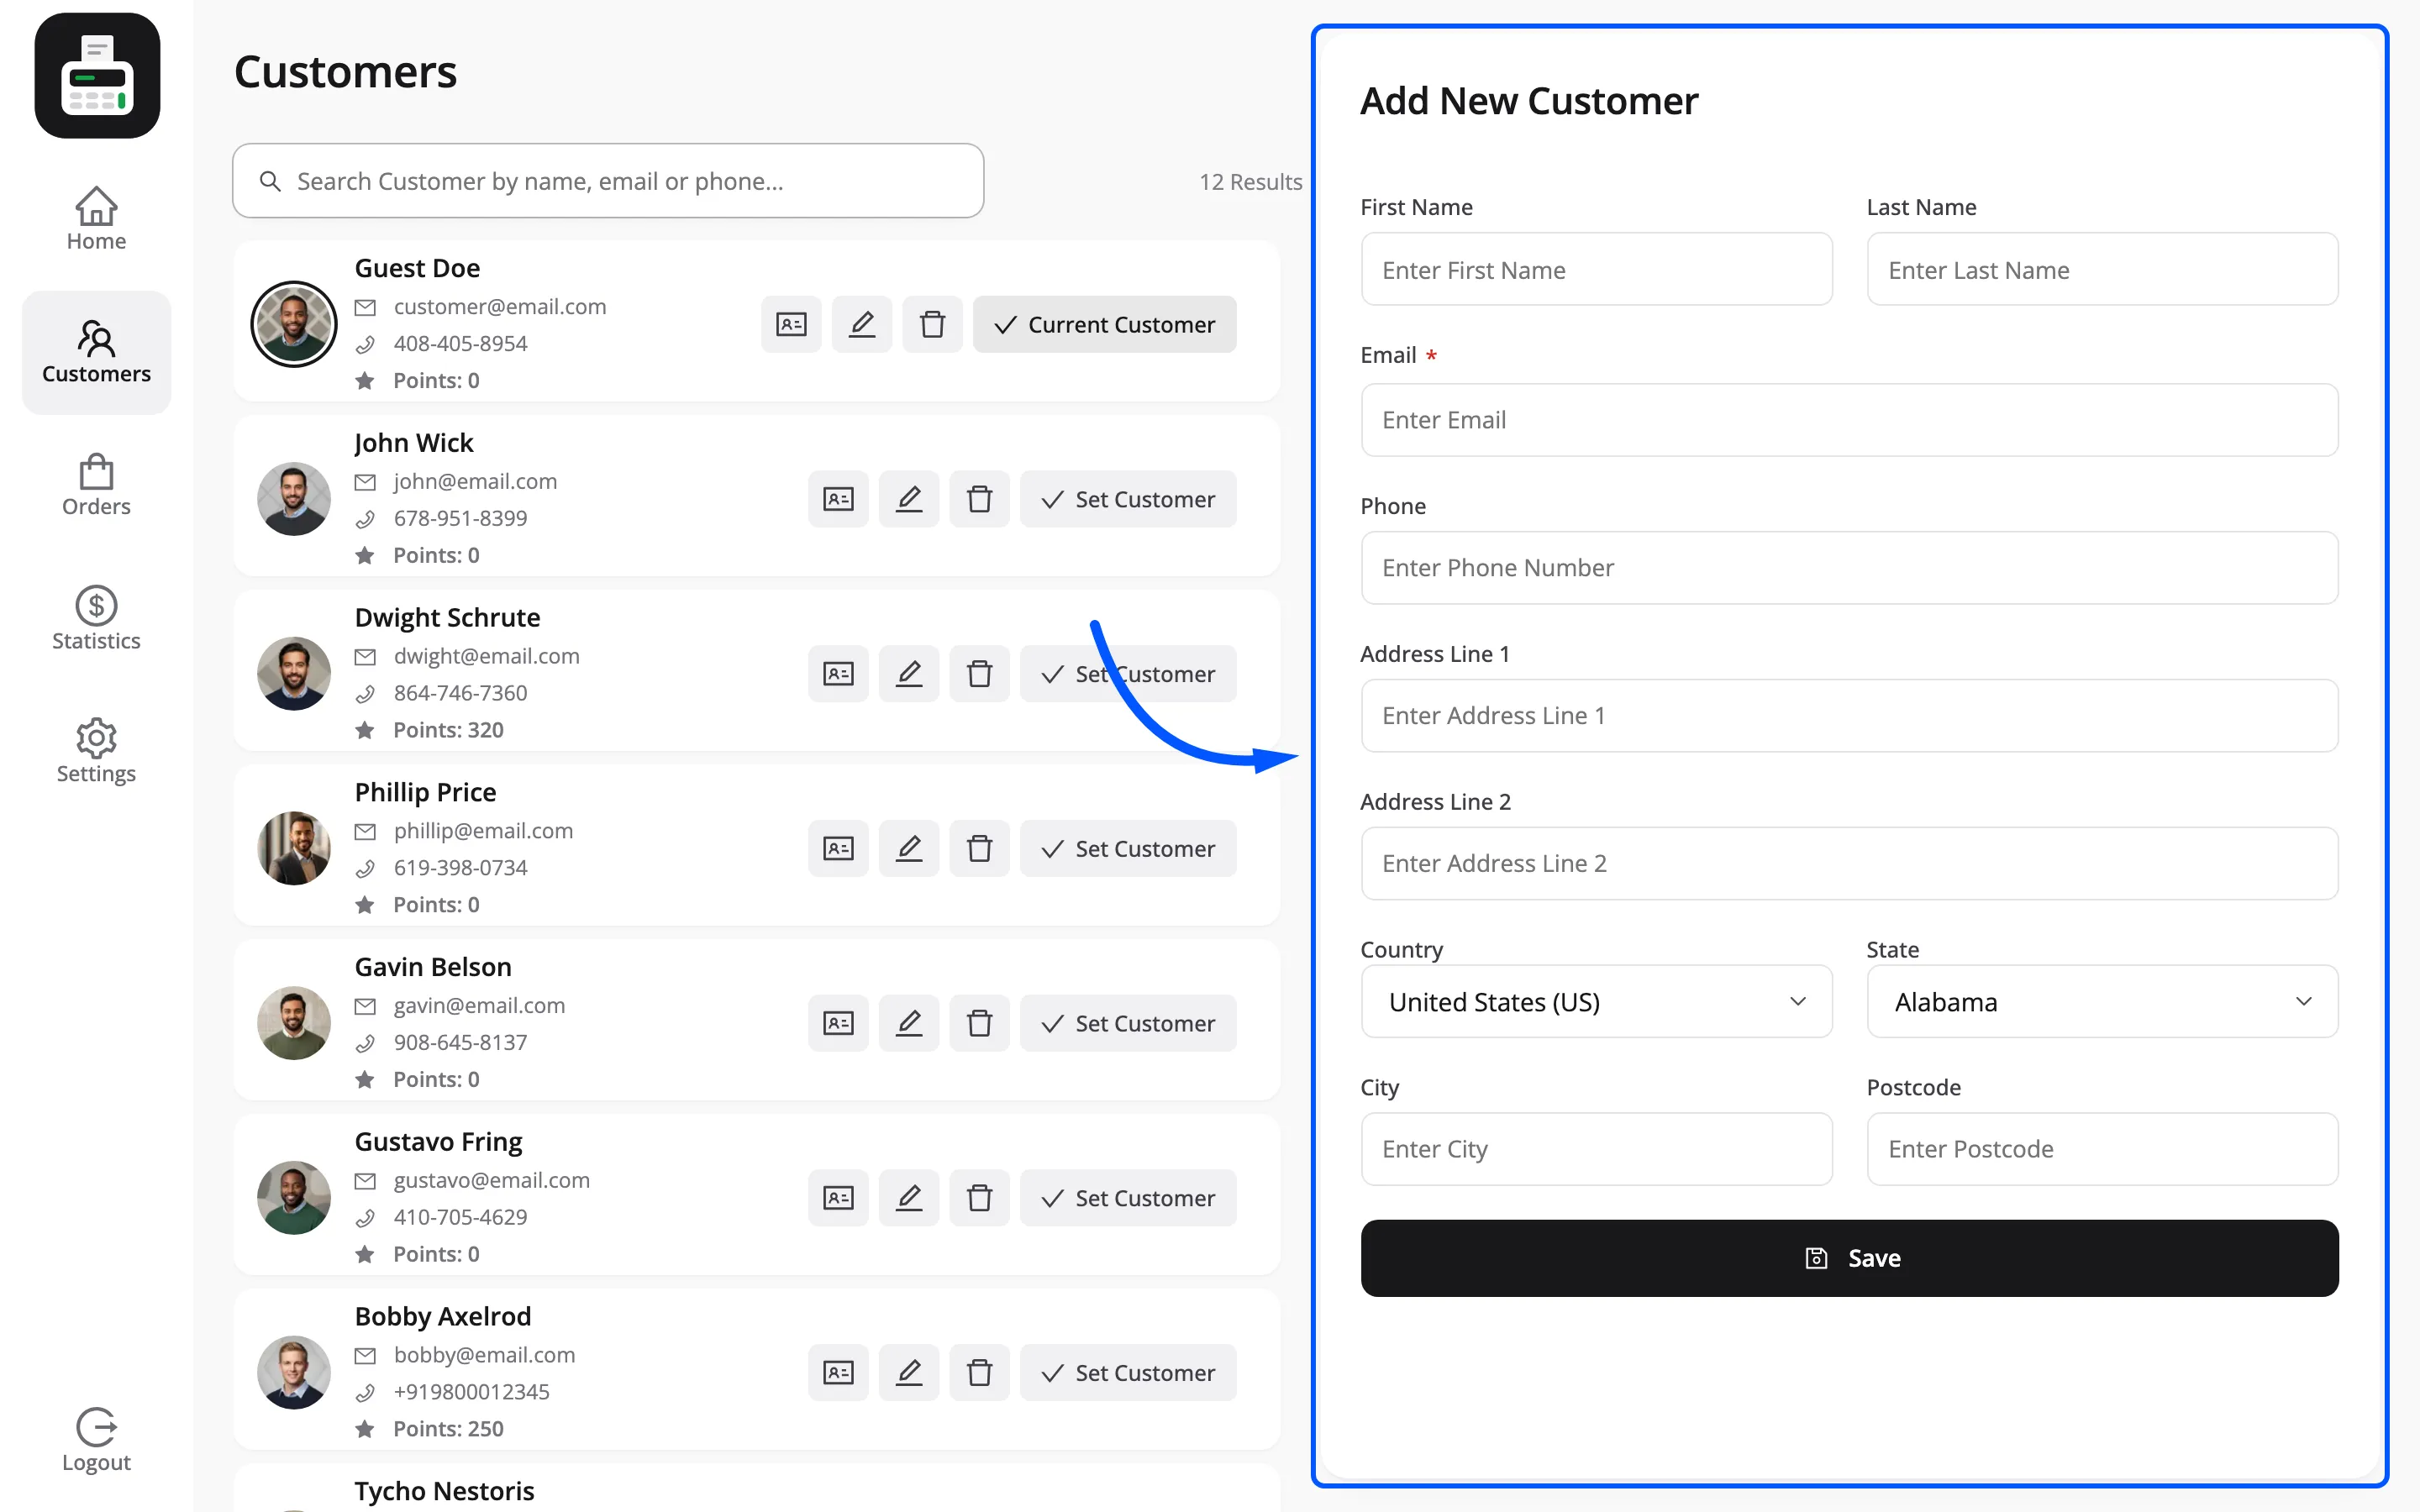
A customer created here is a real WooCommerce customer. Their next website order is on the same account.
Email cannot be changed once a customer exists, and customers cannot be saved or deleted while the terminal is offline.
Orders
Section titled “Orders”Two tabs. Online is past orders. Hold is carts held for later.
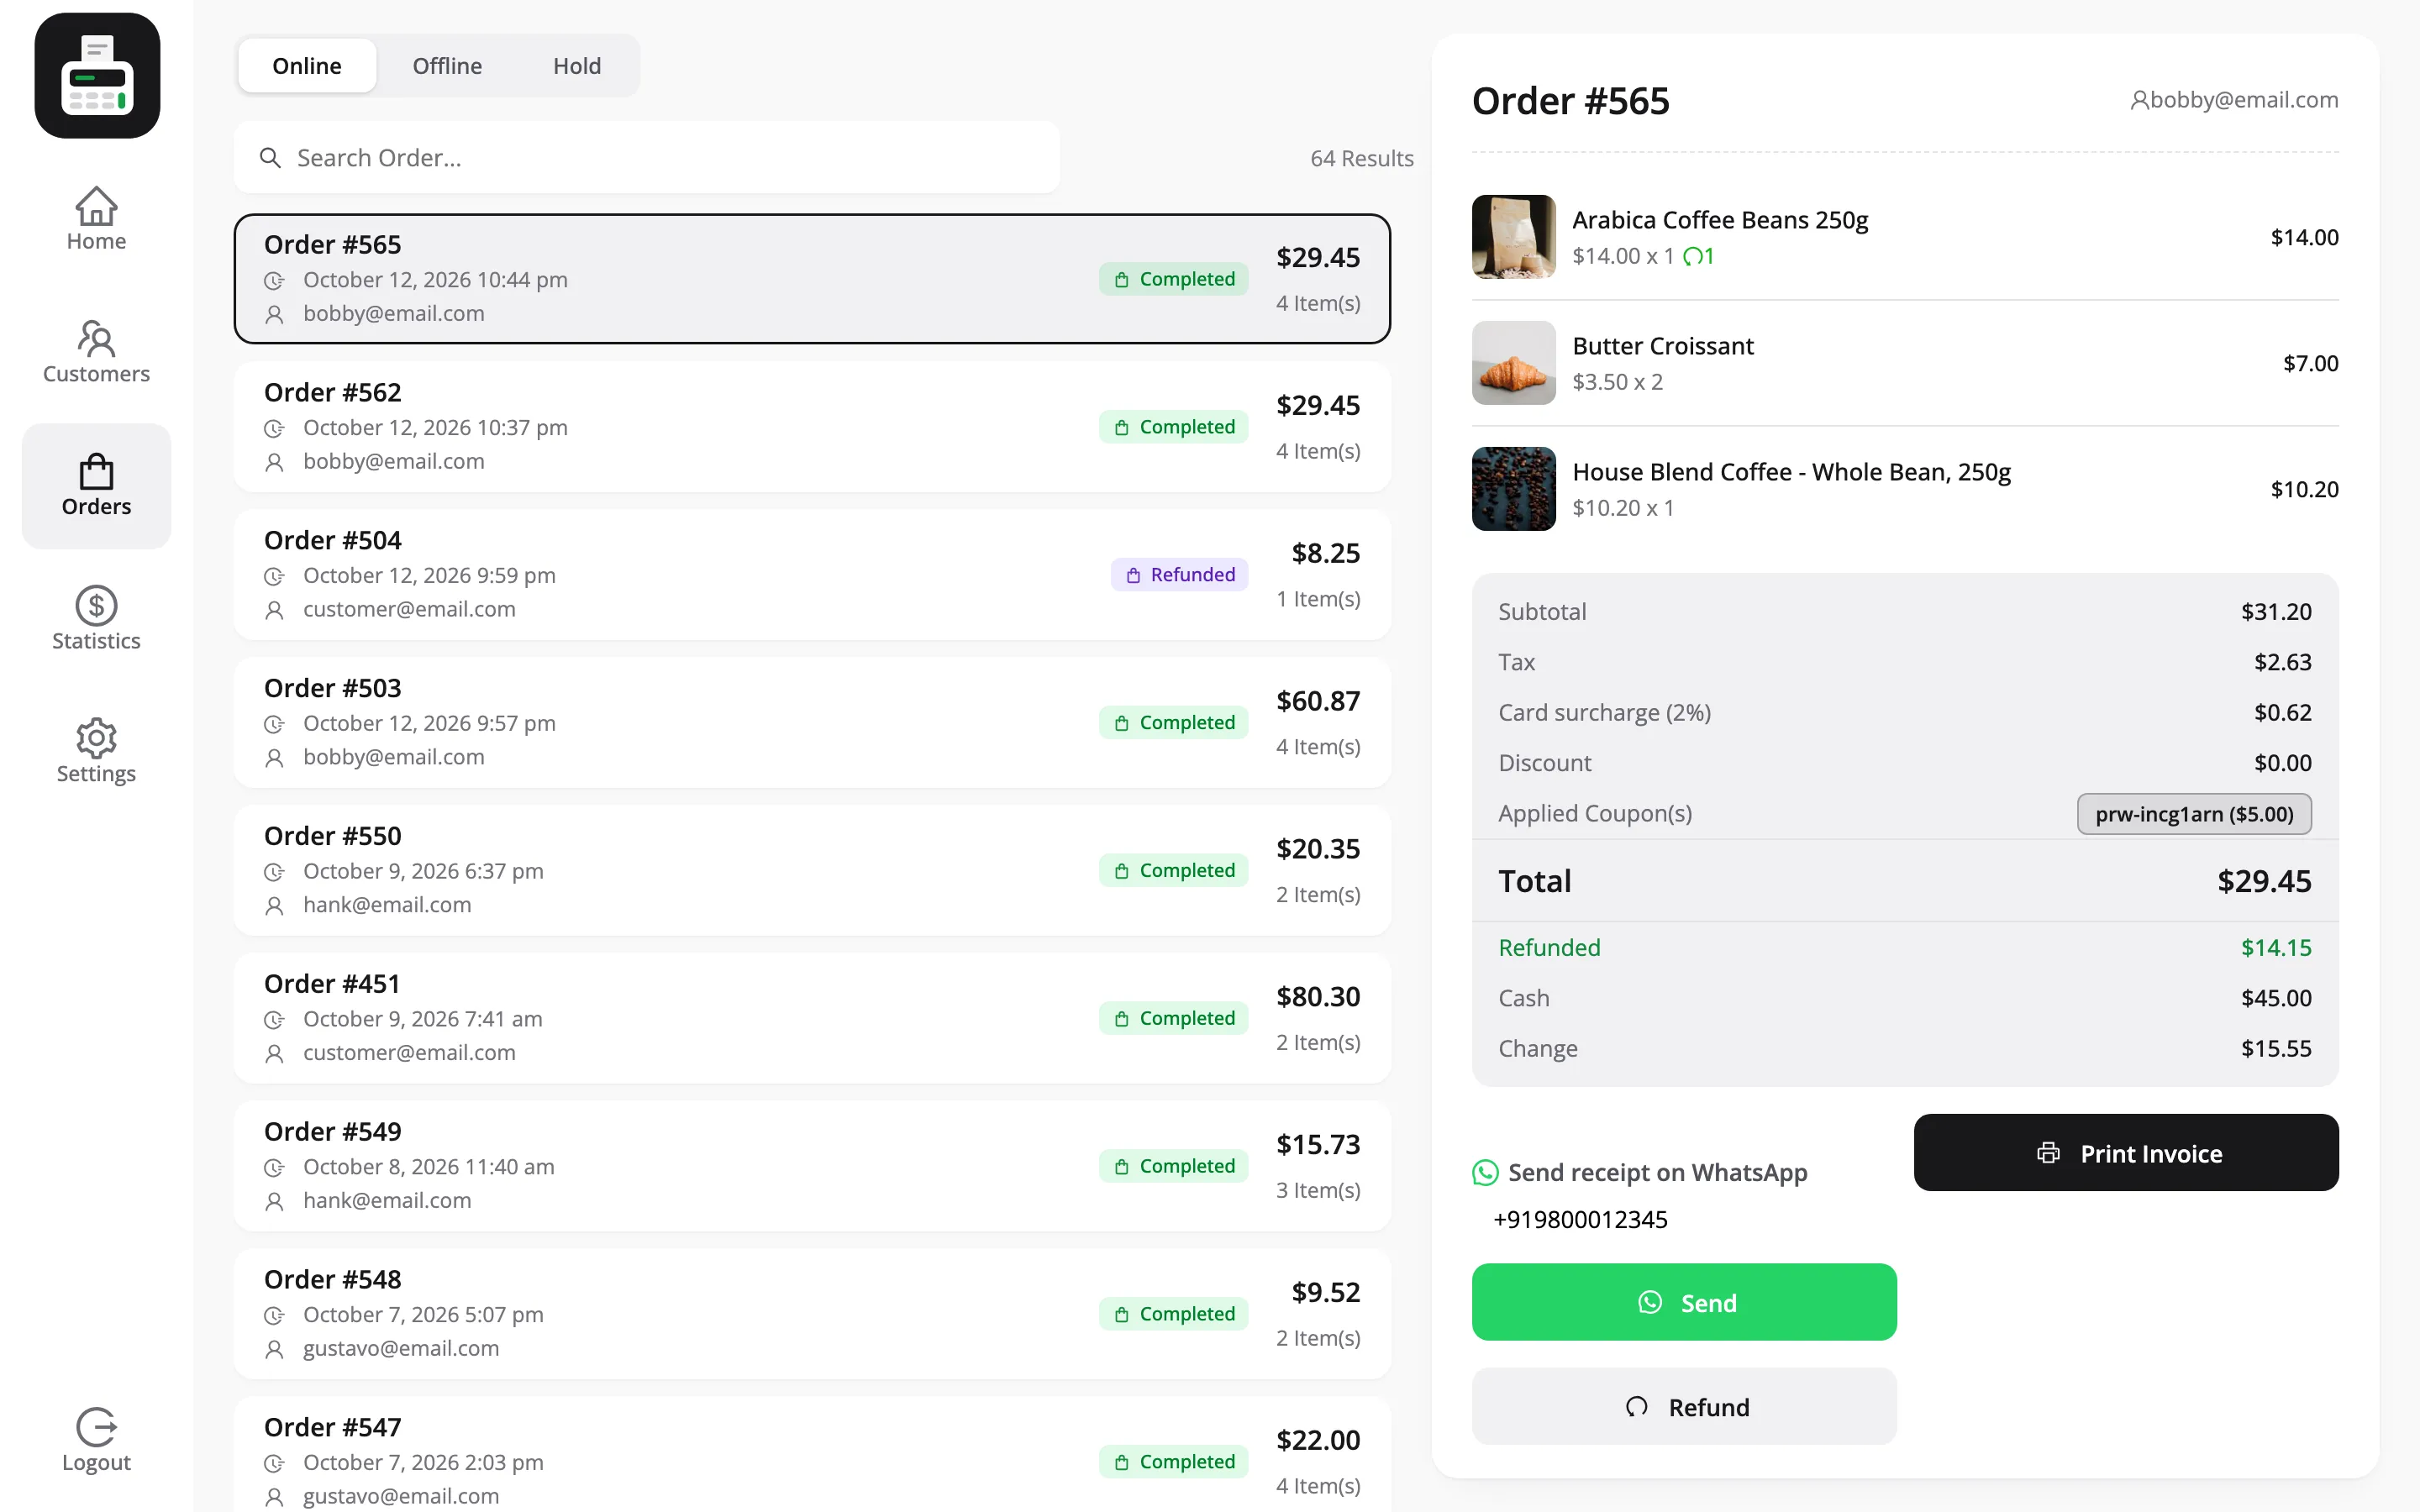
Selecting an order opens its detail panel: line items, subtotal, discount, applied coupons, total and change.
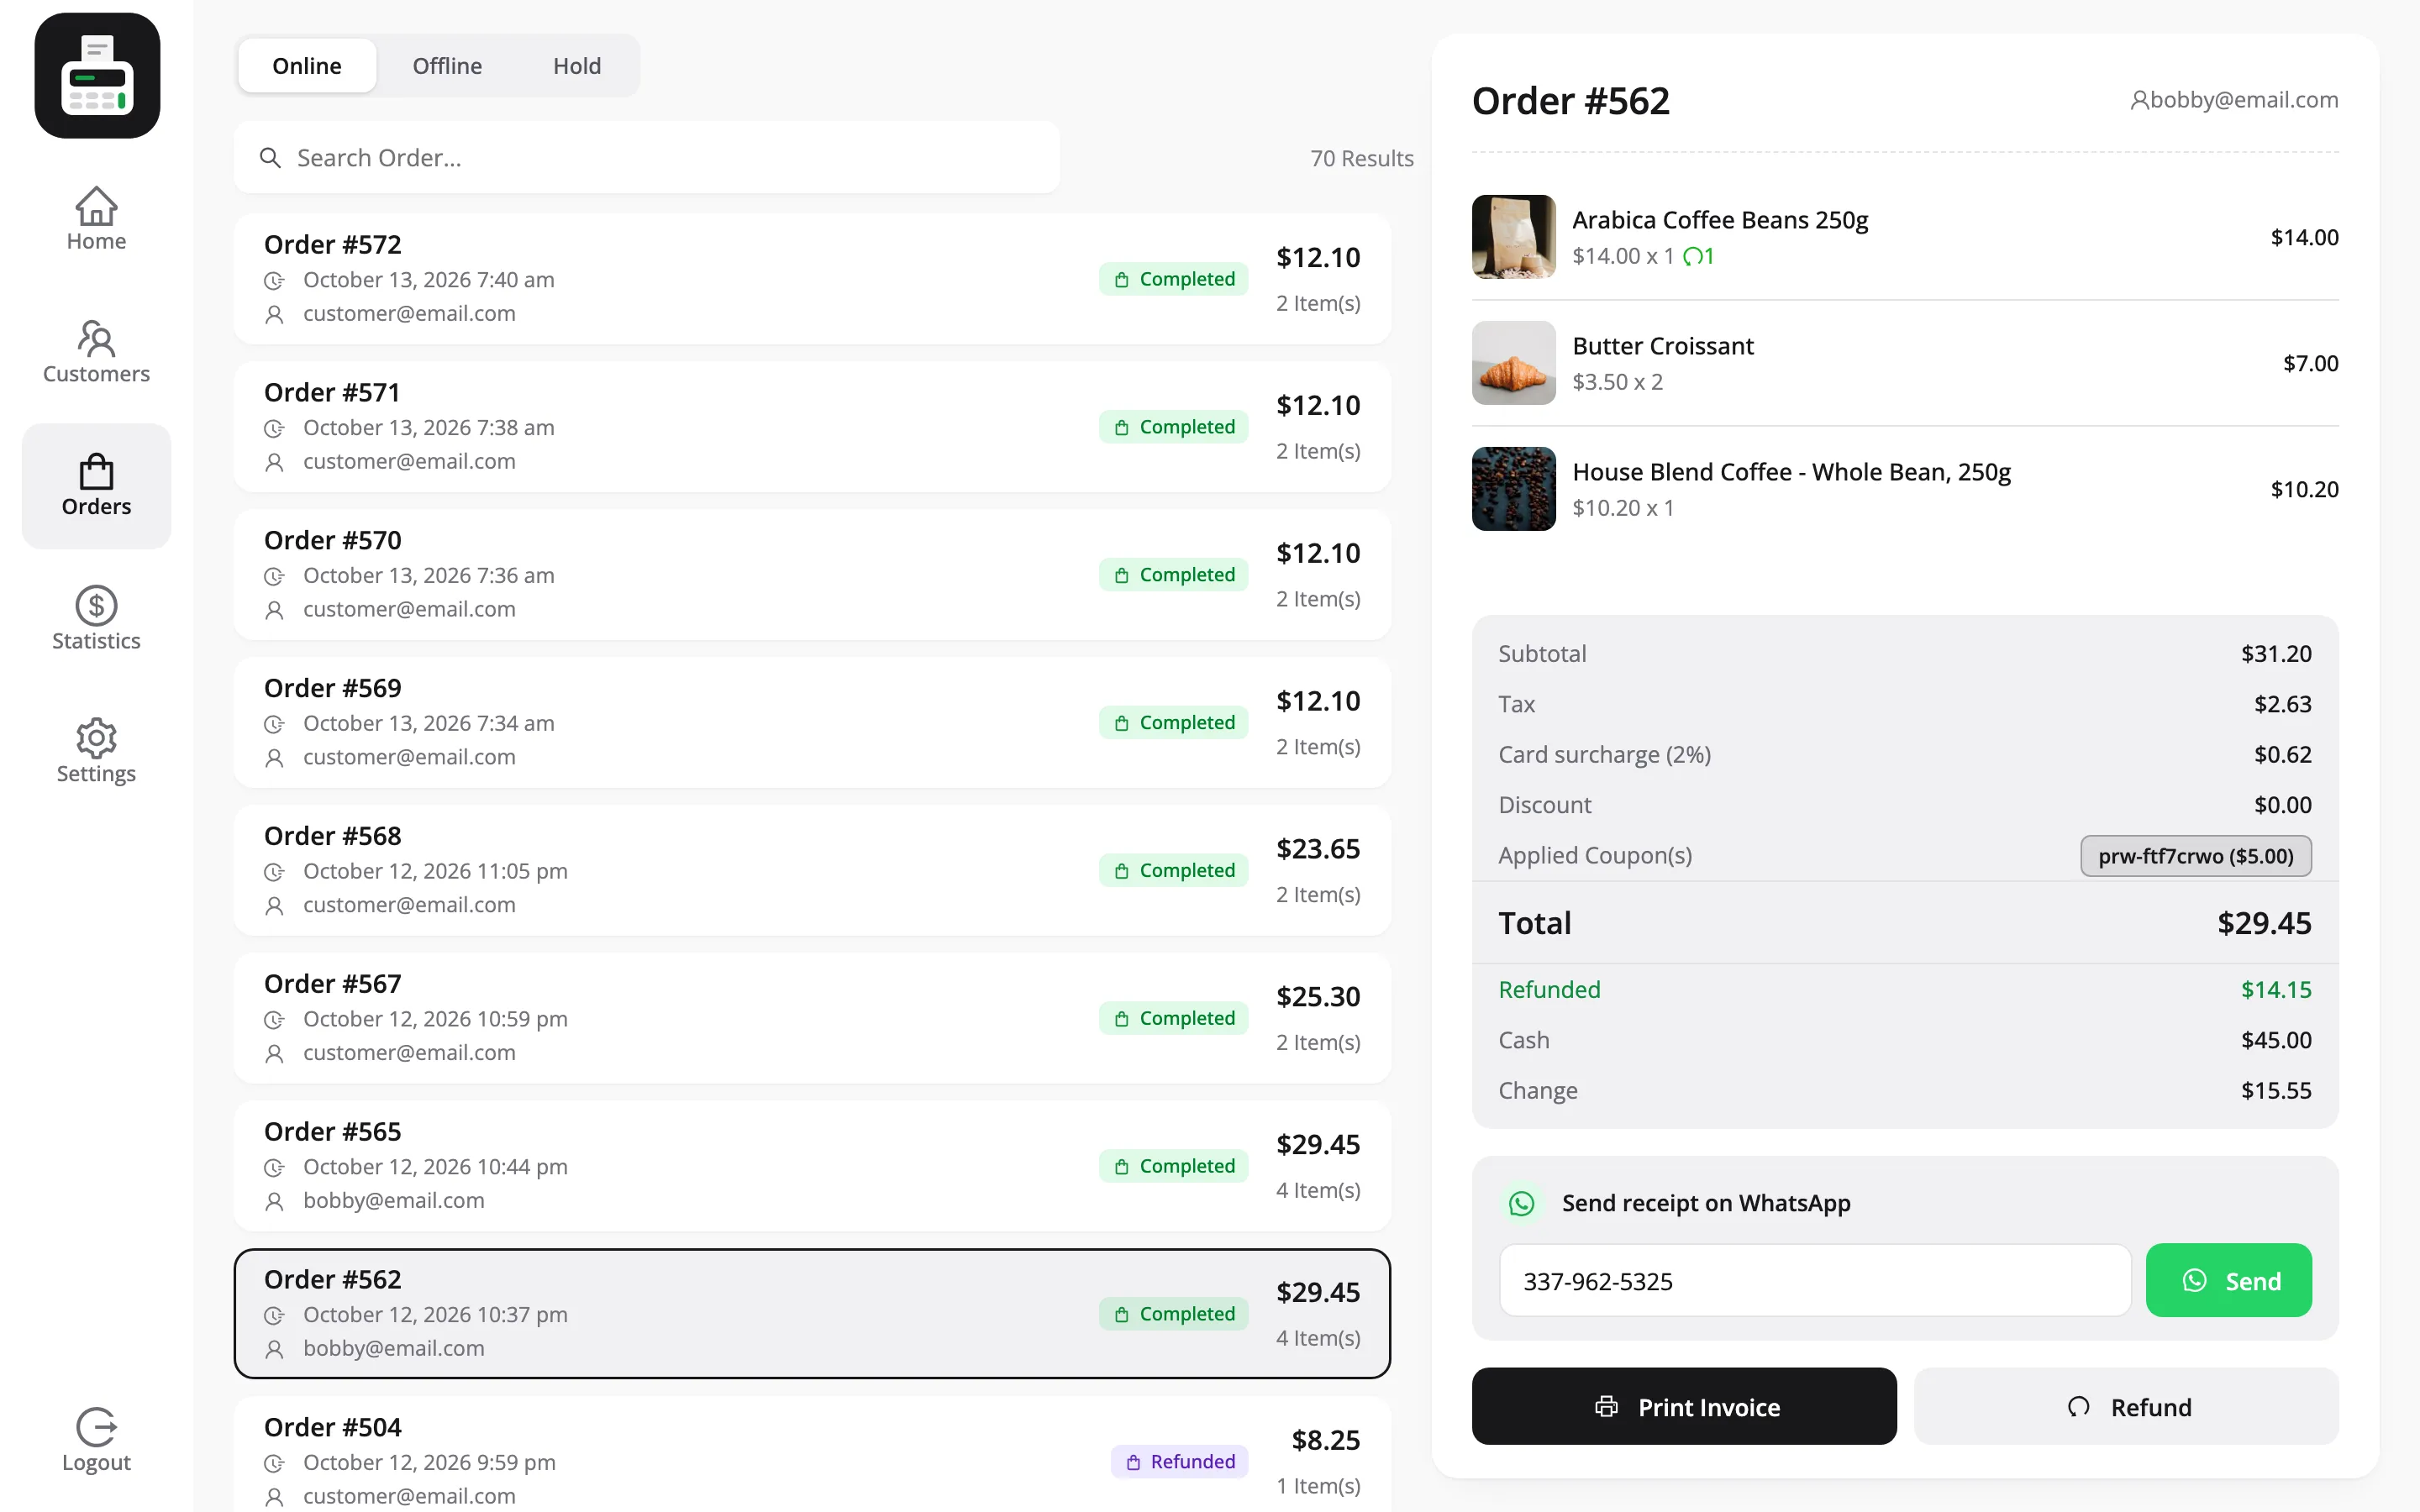
The Hold tab lists held carts by label. Add to Cart brings one back, Delete discards it.
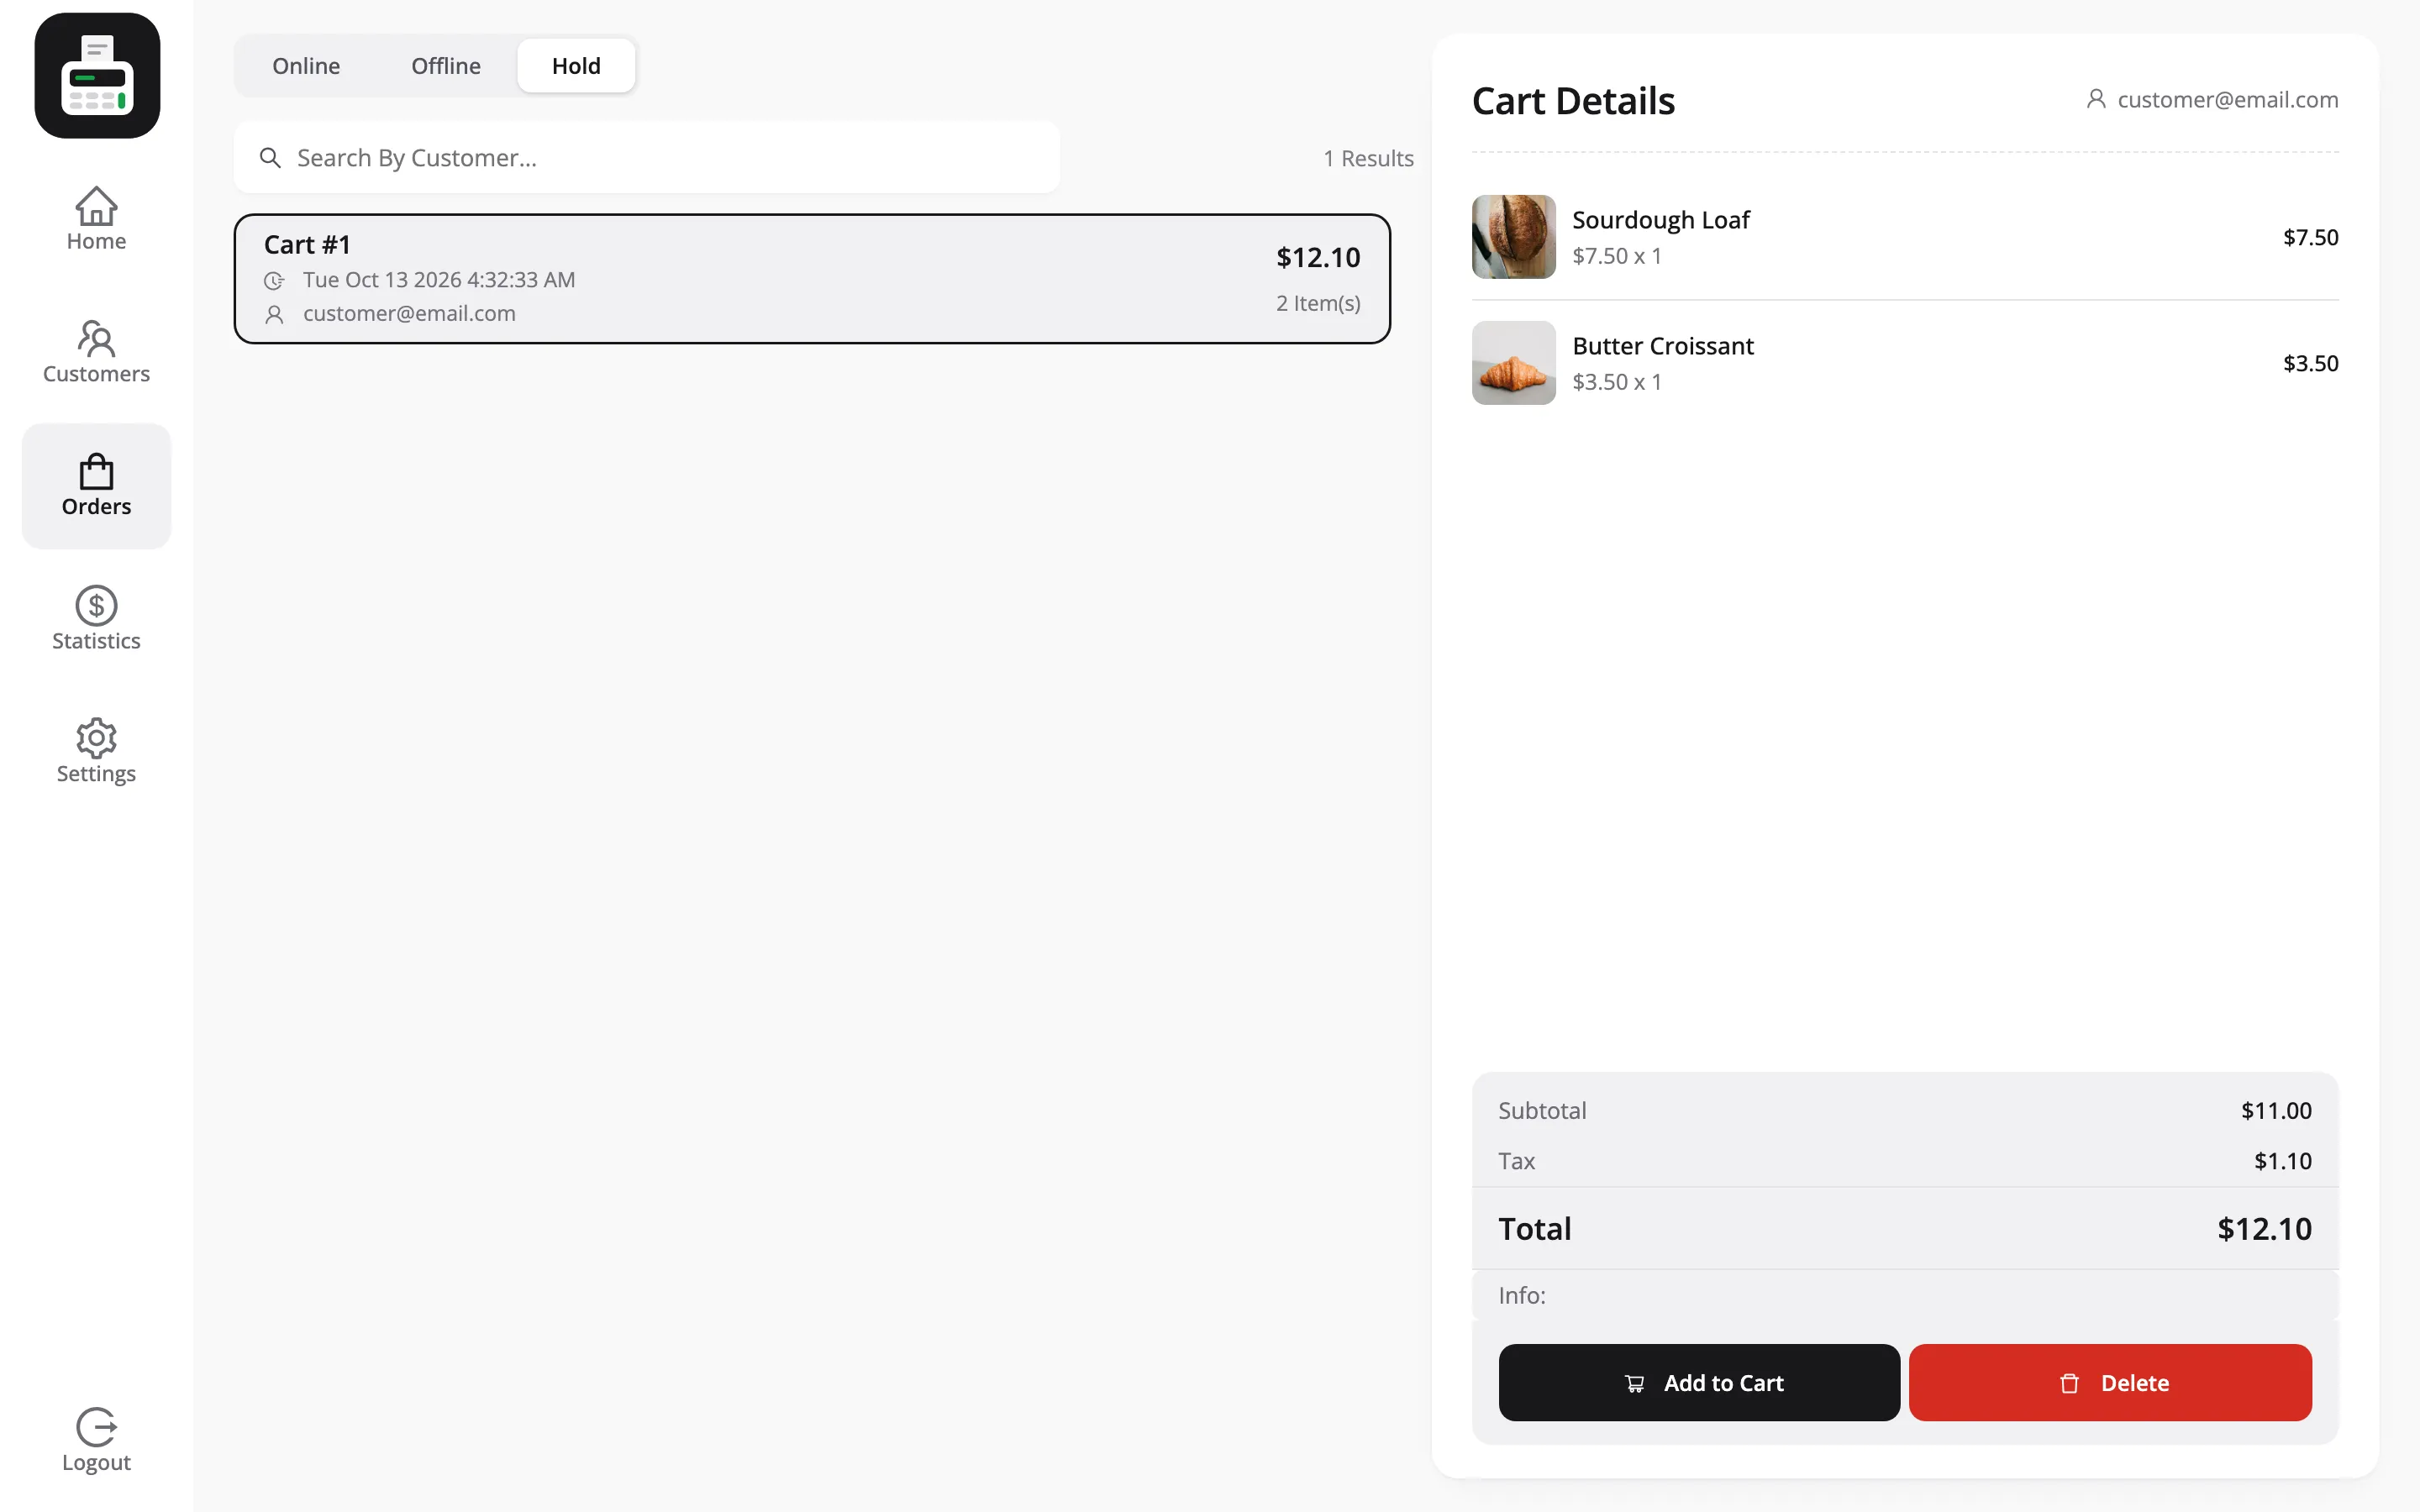
The order search matches the customer name, and the table name as well in restaurant mode.
Statistics
Section titled “Statistics”The end-of-shift screen. Cards across the top and today’s transactions under them.
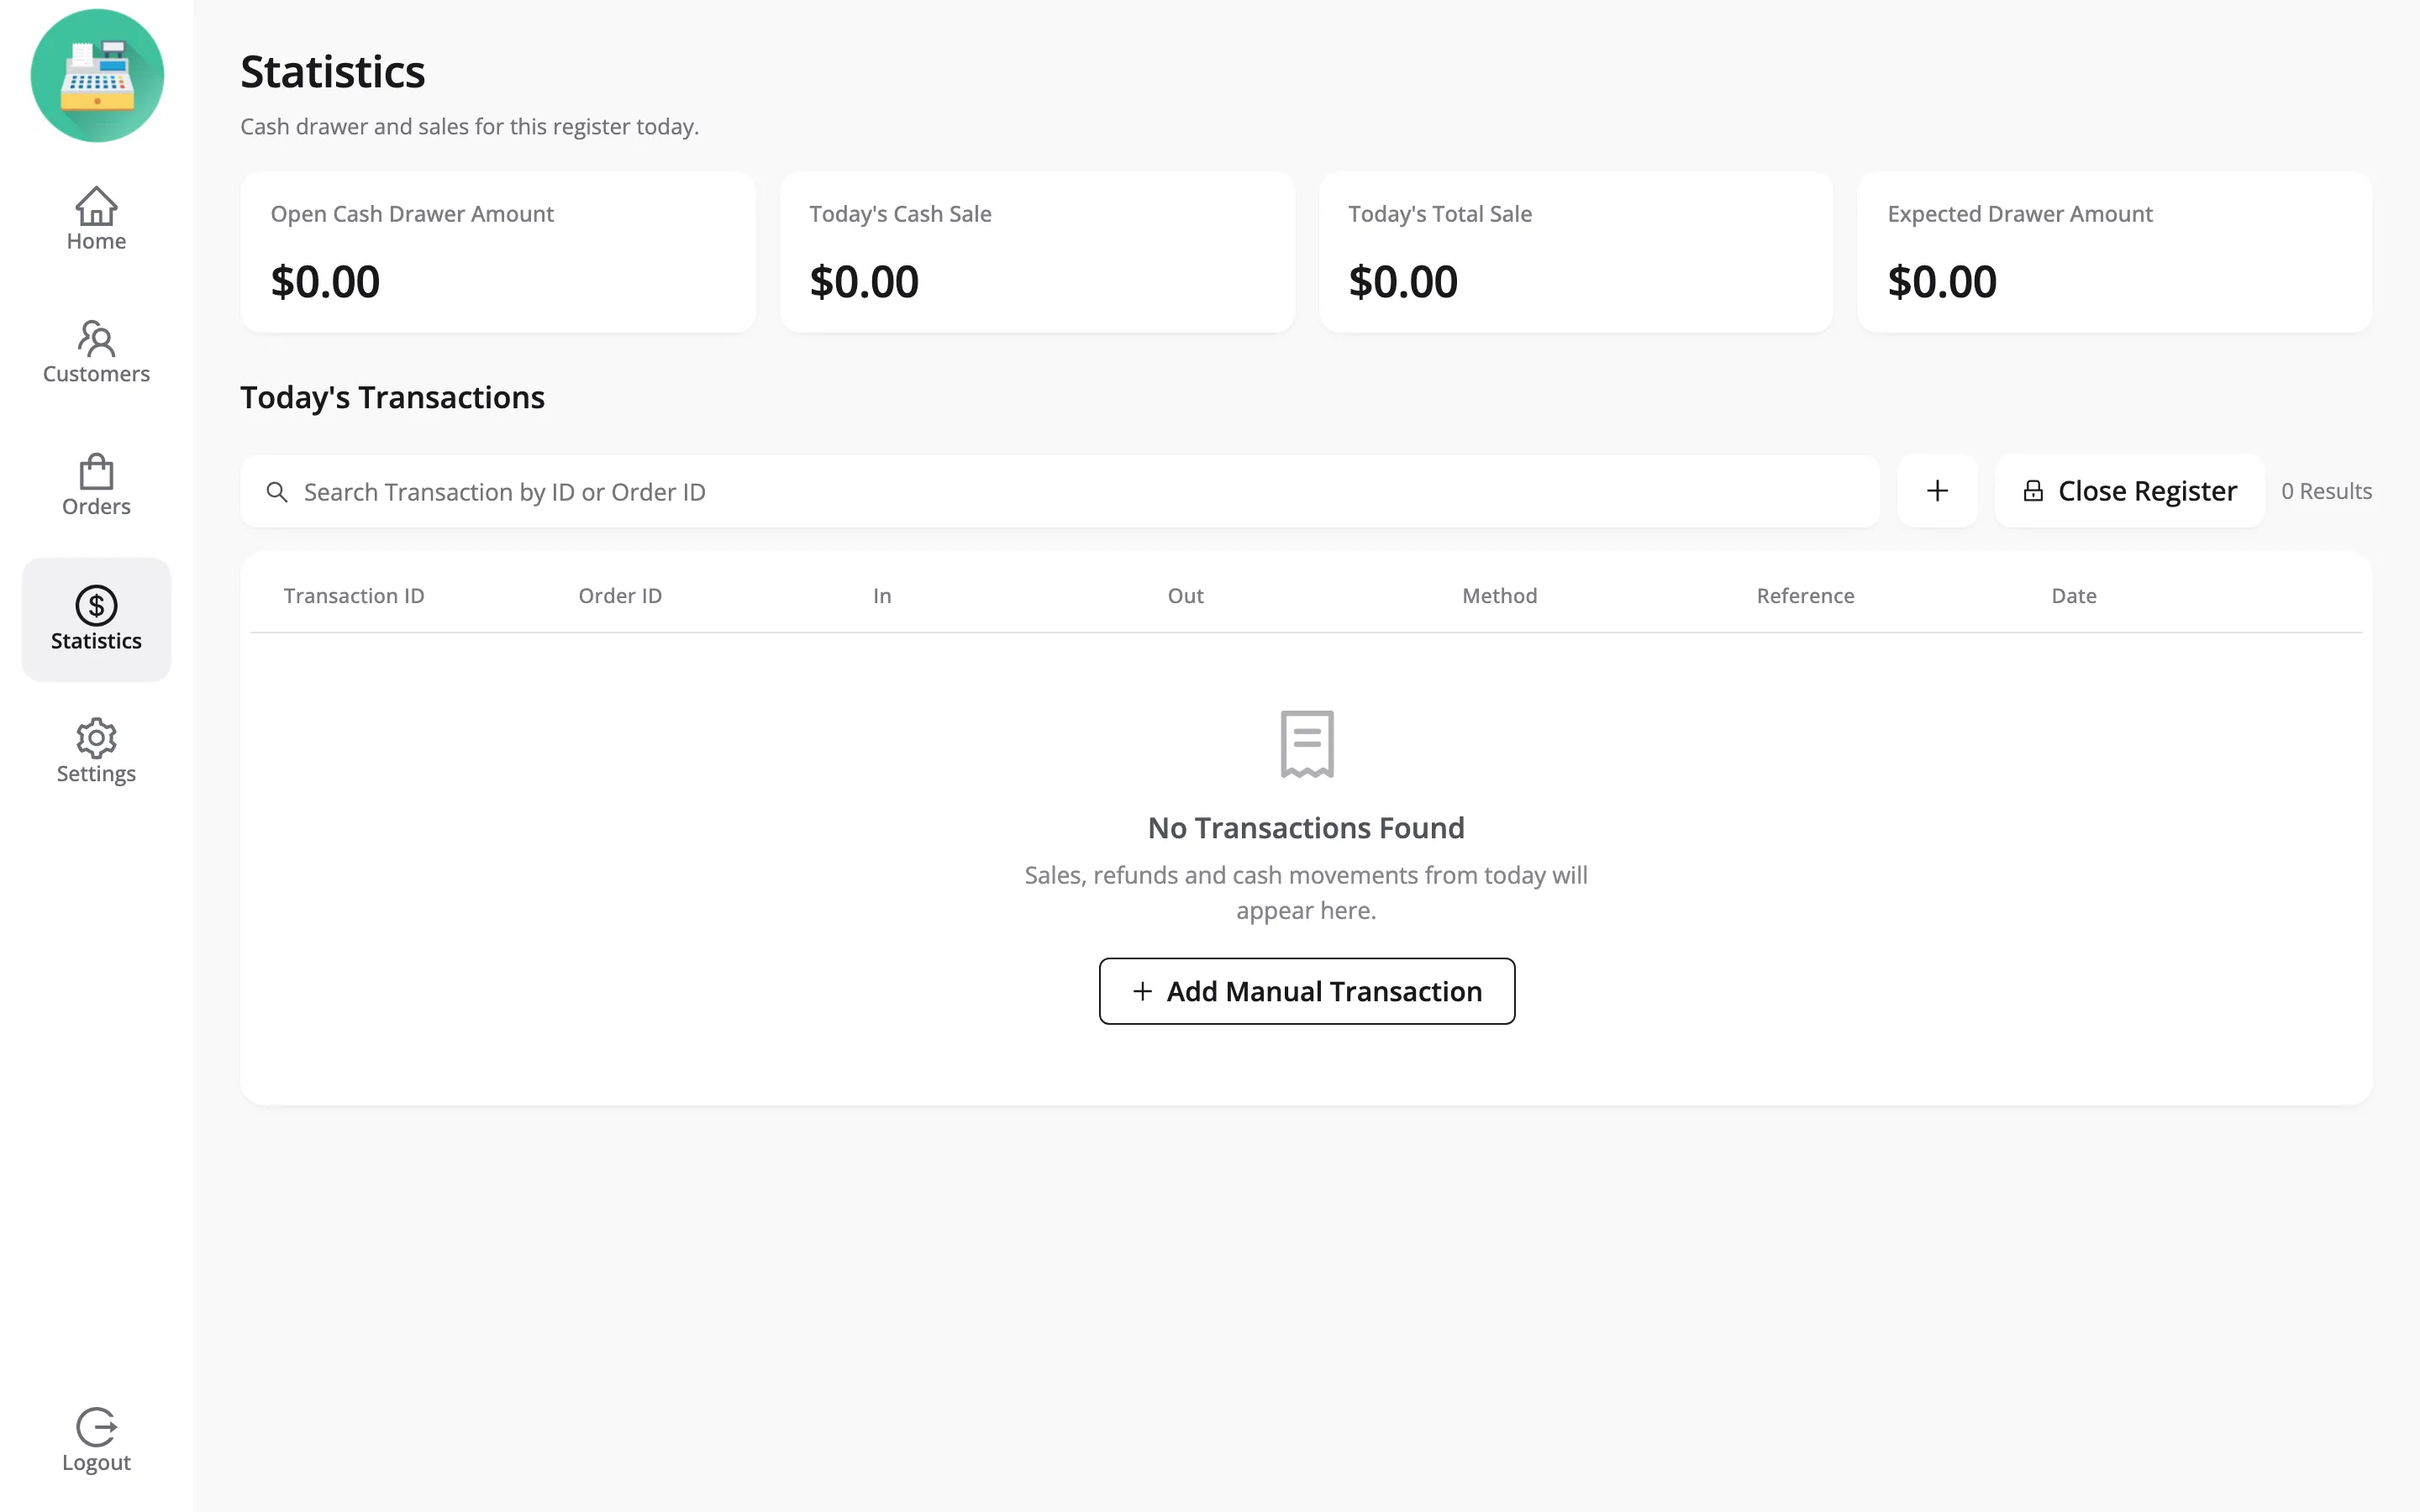
- Today’s Cash Sale is what came in as cash.
- Today’s Total Sale is everything, all methods.
- Expected Drawer Amount is what should physically be in the cash drawer.
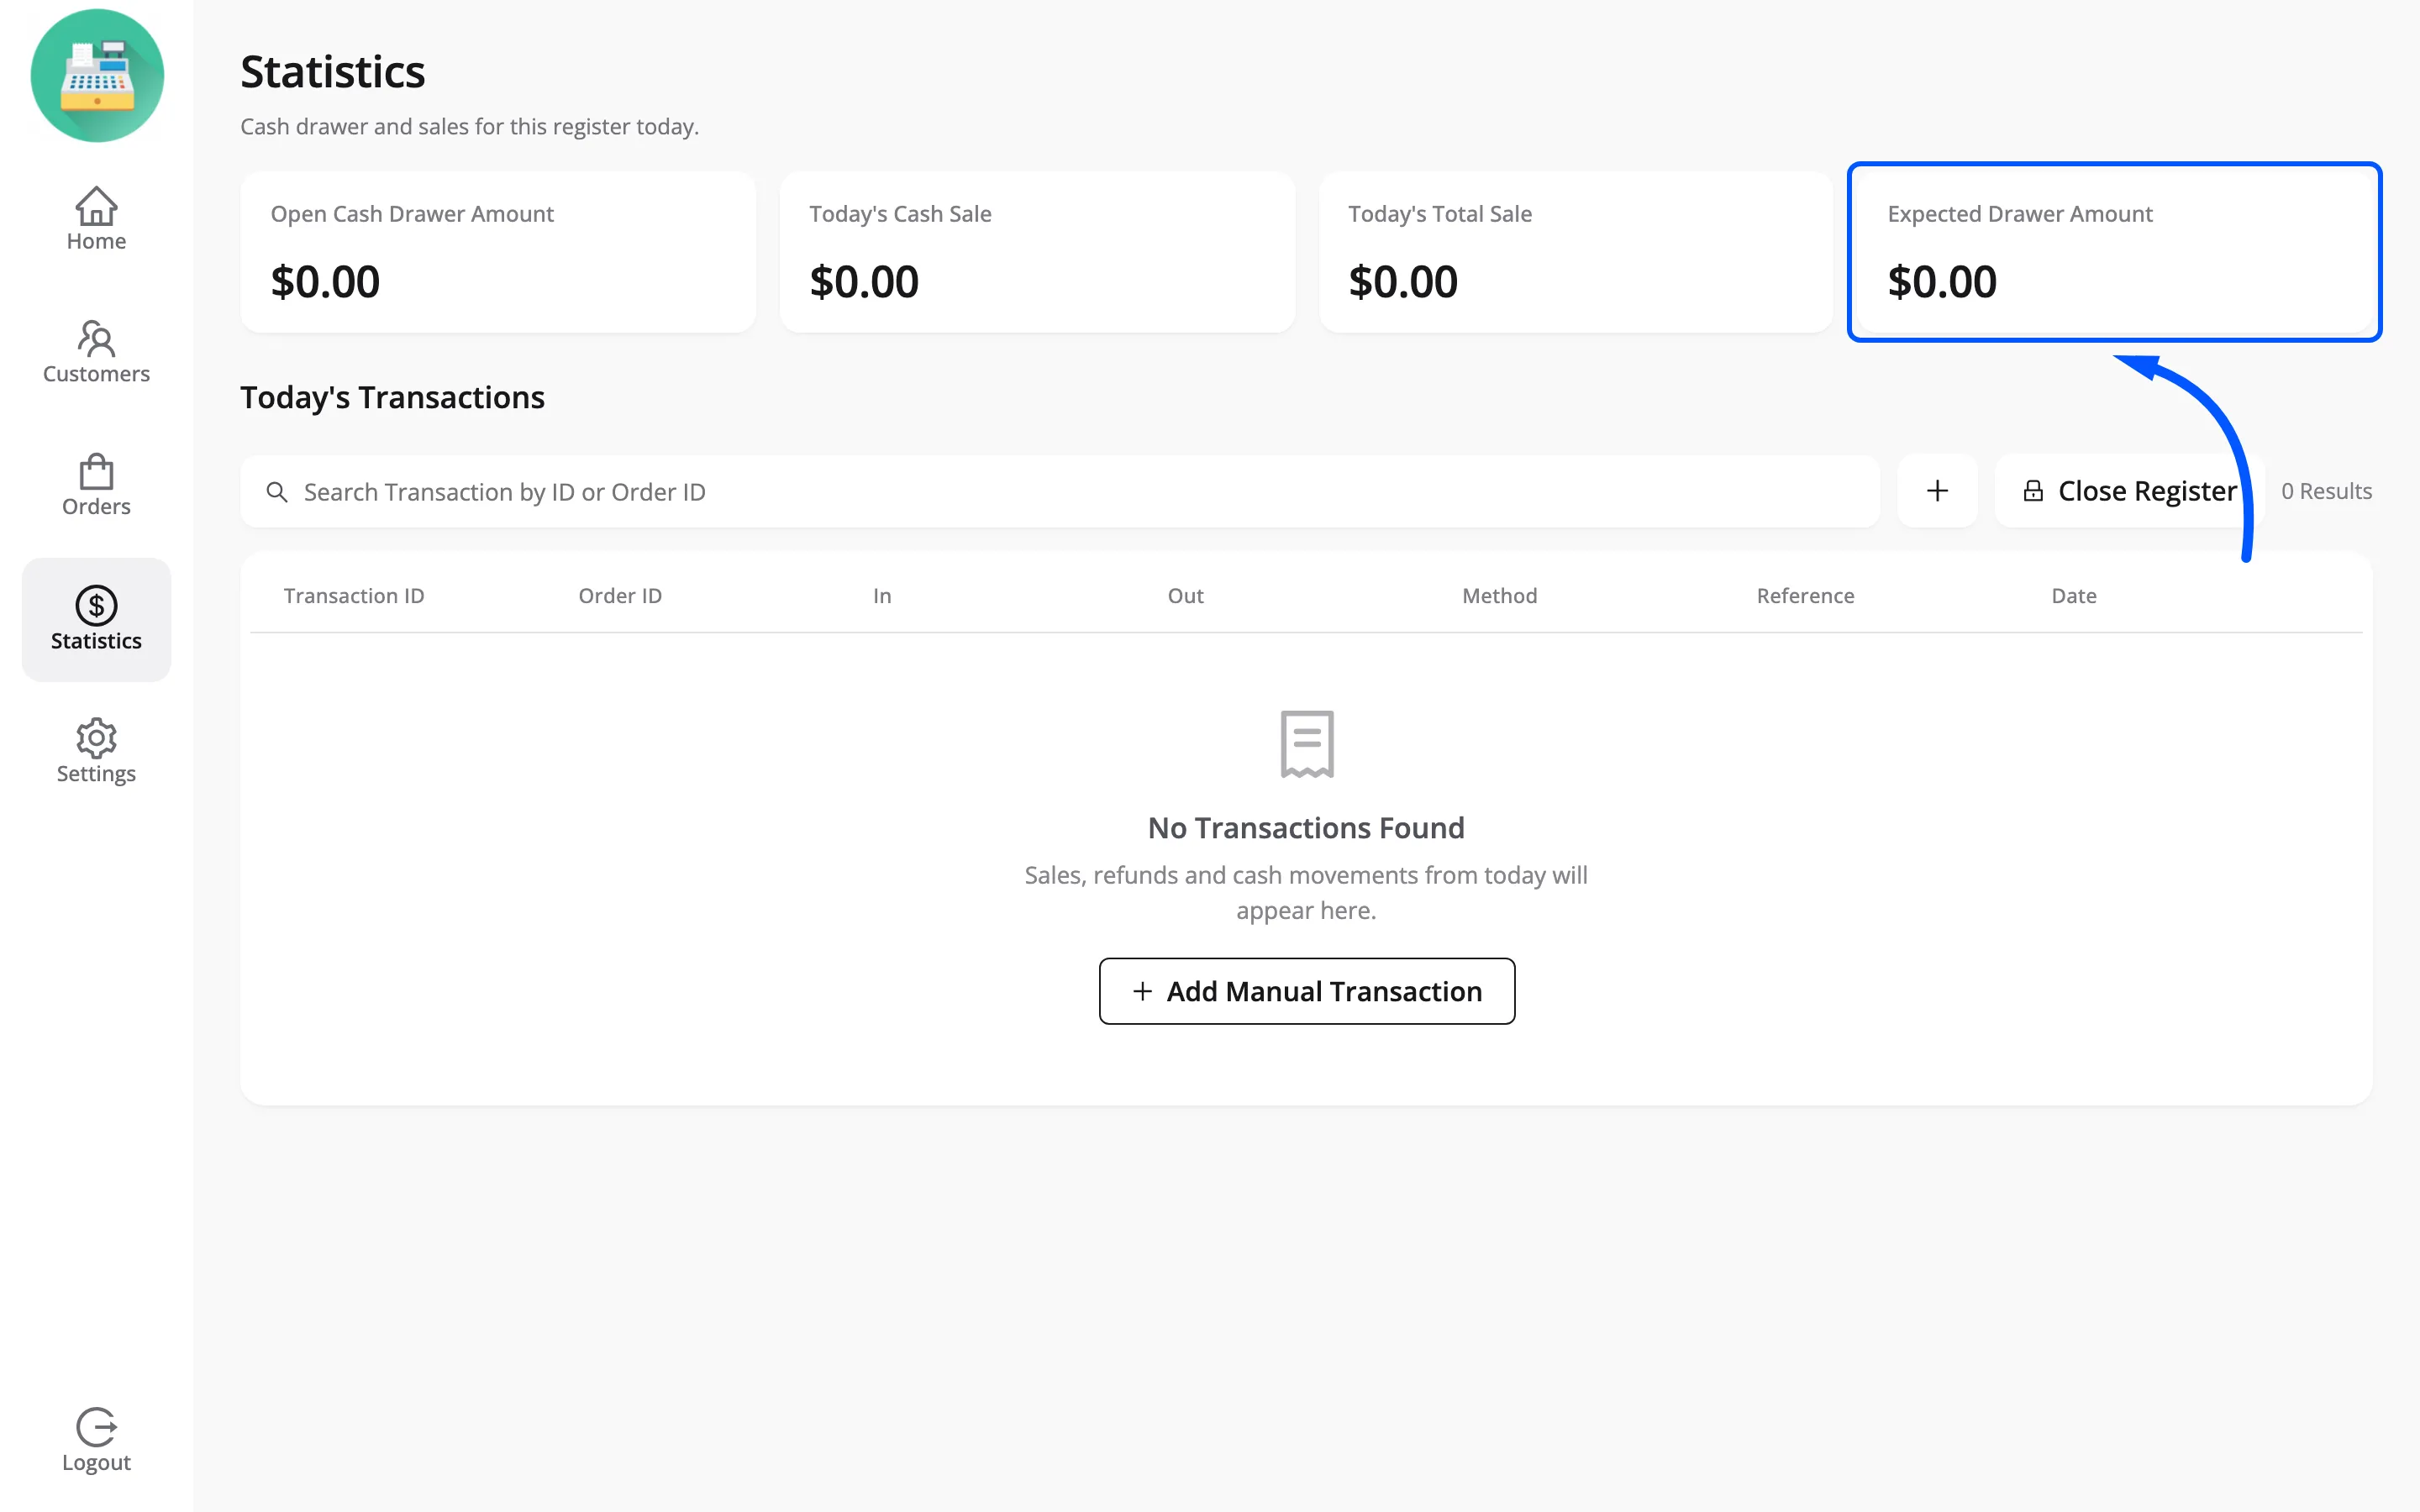
The table below lists each transaction with its ID, order ID, In, Out, method, reference and date. Count the drawer, compare, and you have your end-of-shift check.
Settings
Section titled “Settings”Three sections, and none of them touch WordPress settings.
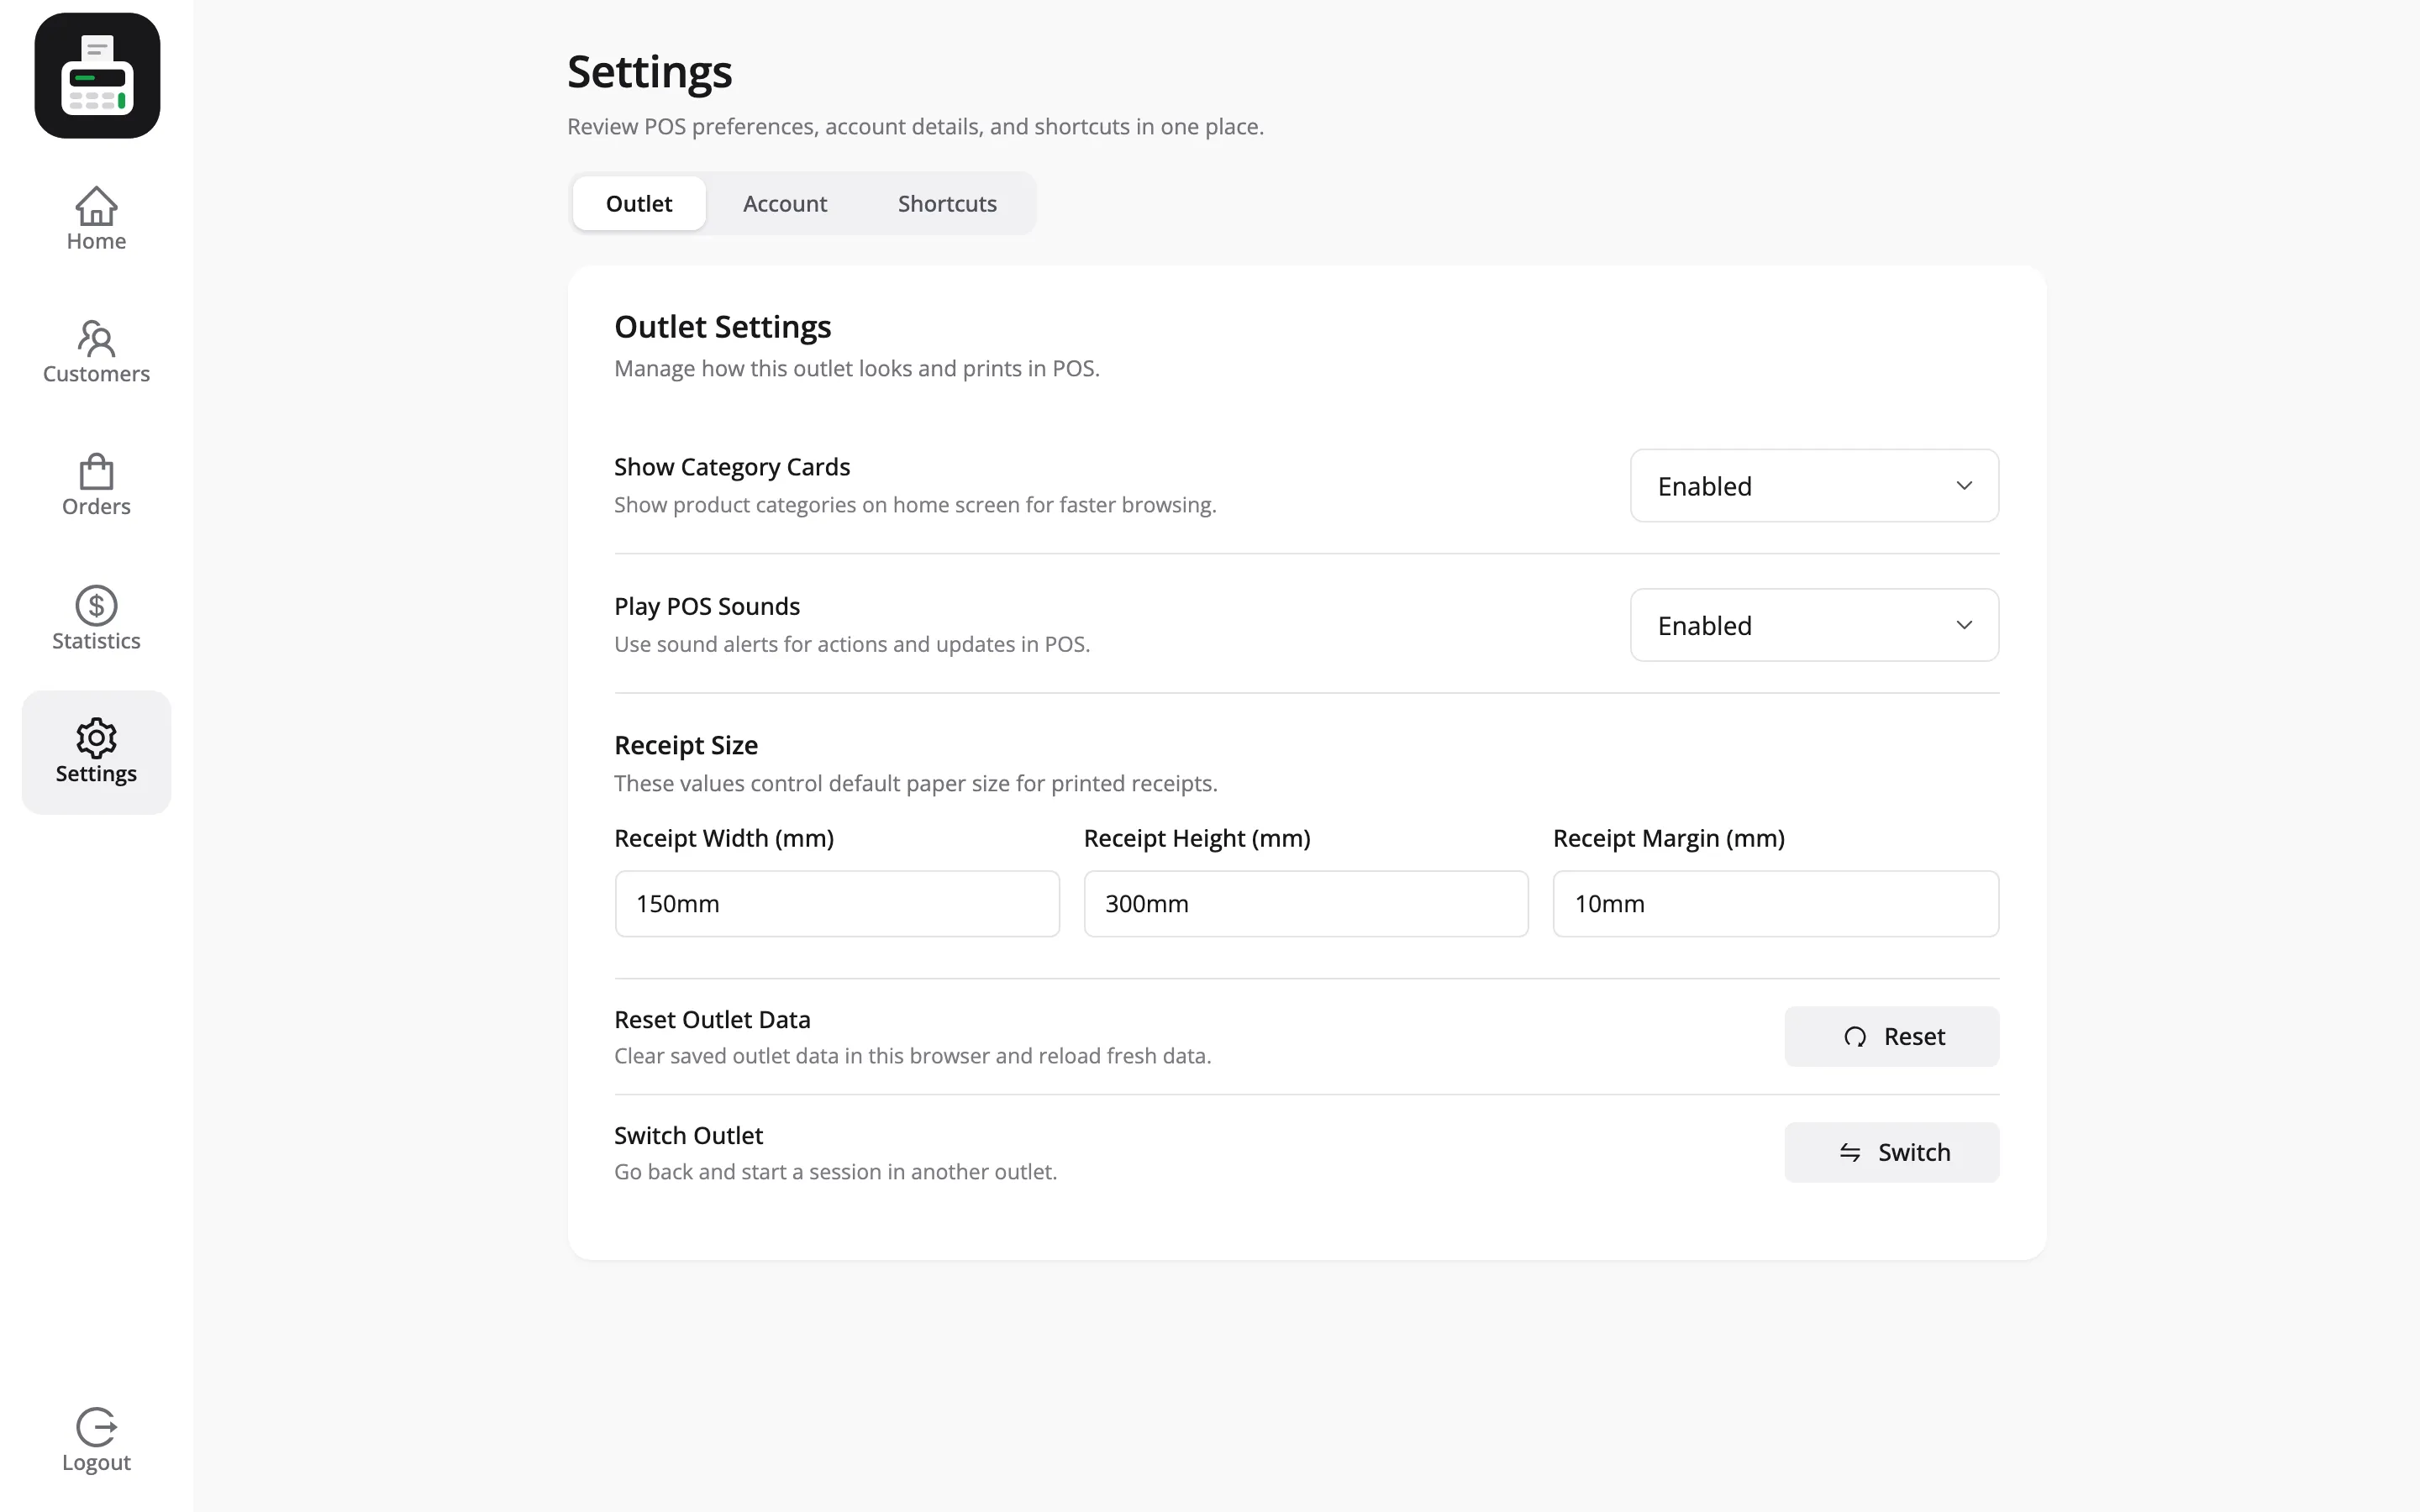
- Outlet carries Show Category Cards, Play POS Sounds and the three receipt size fields. A Reset Outlet Data button clears the cached outlet in this browser.
- Account lets the cashier fix their own name and change their password. Email is read only here.
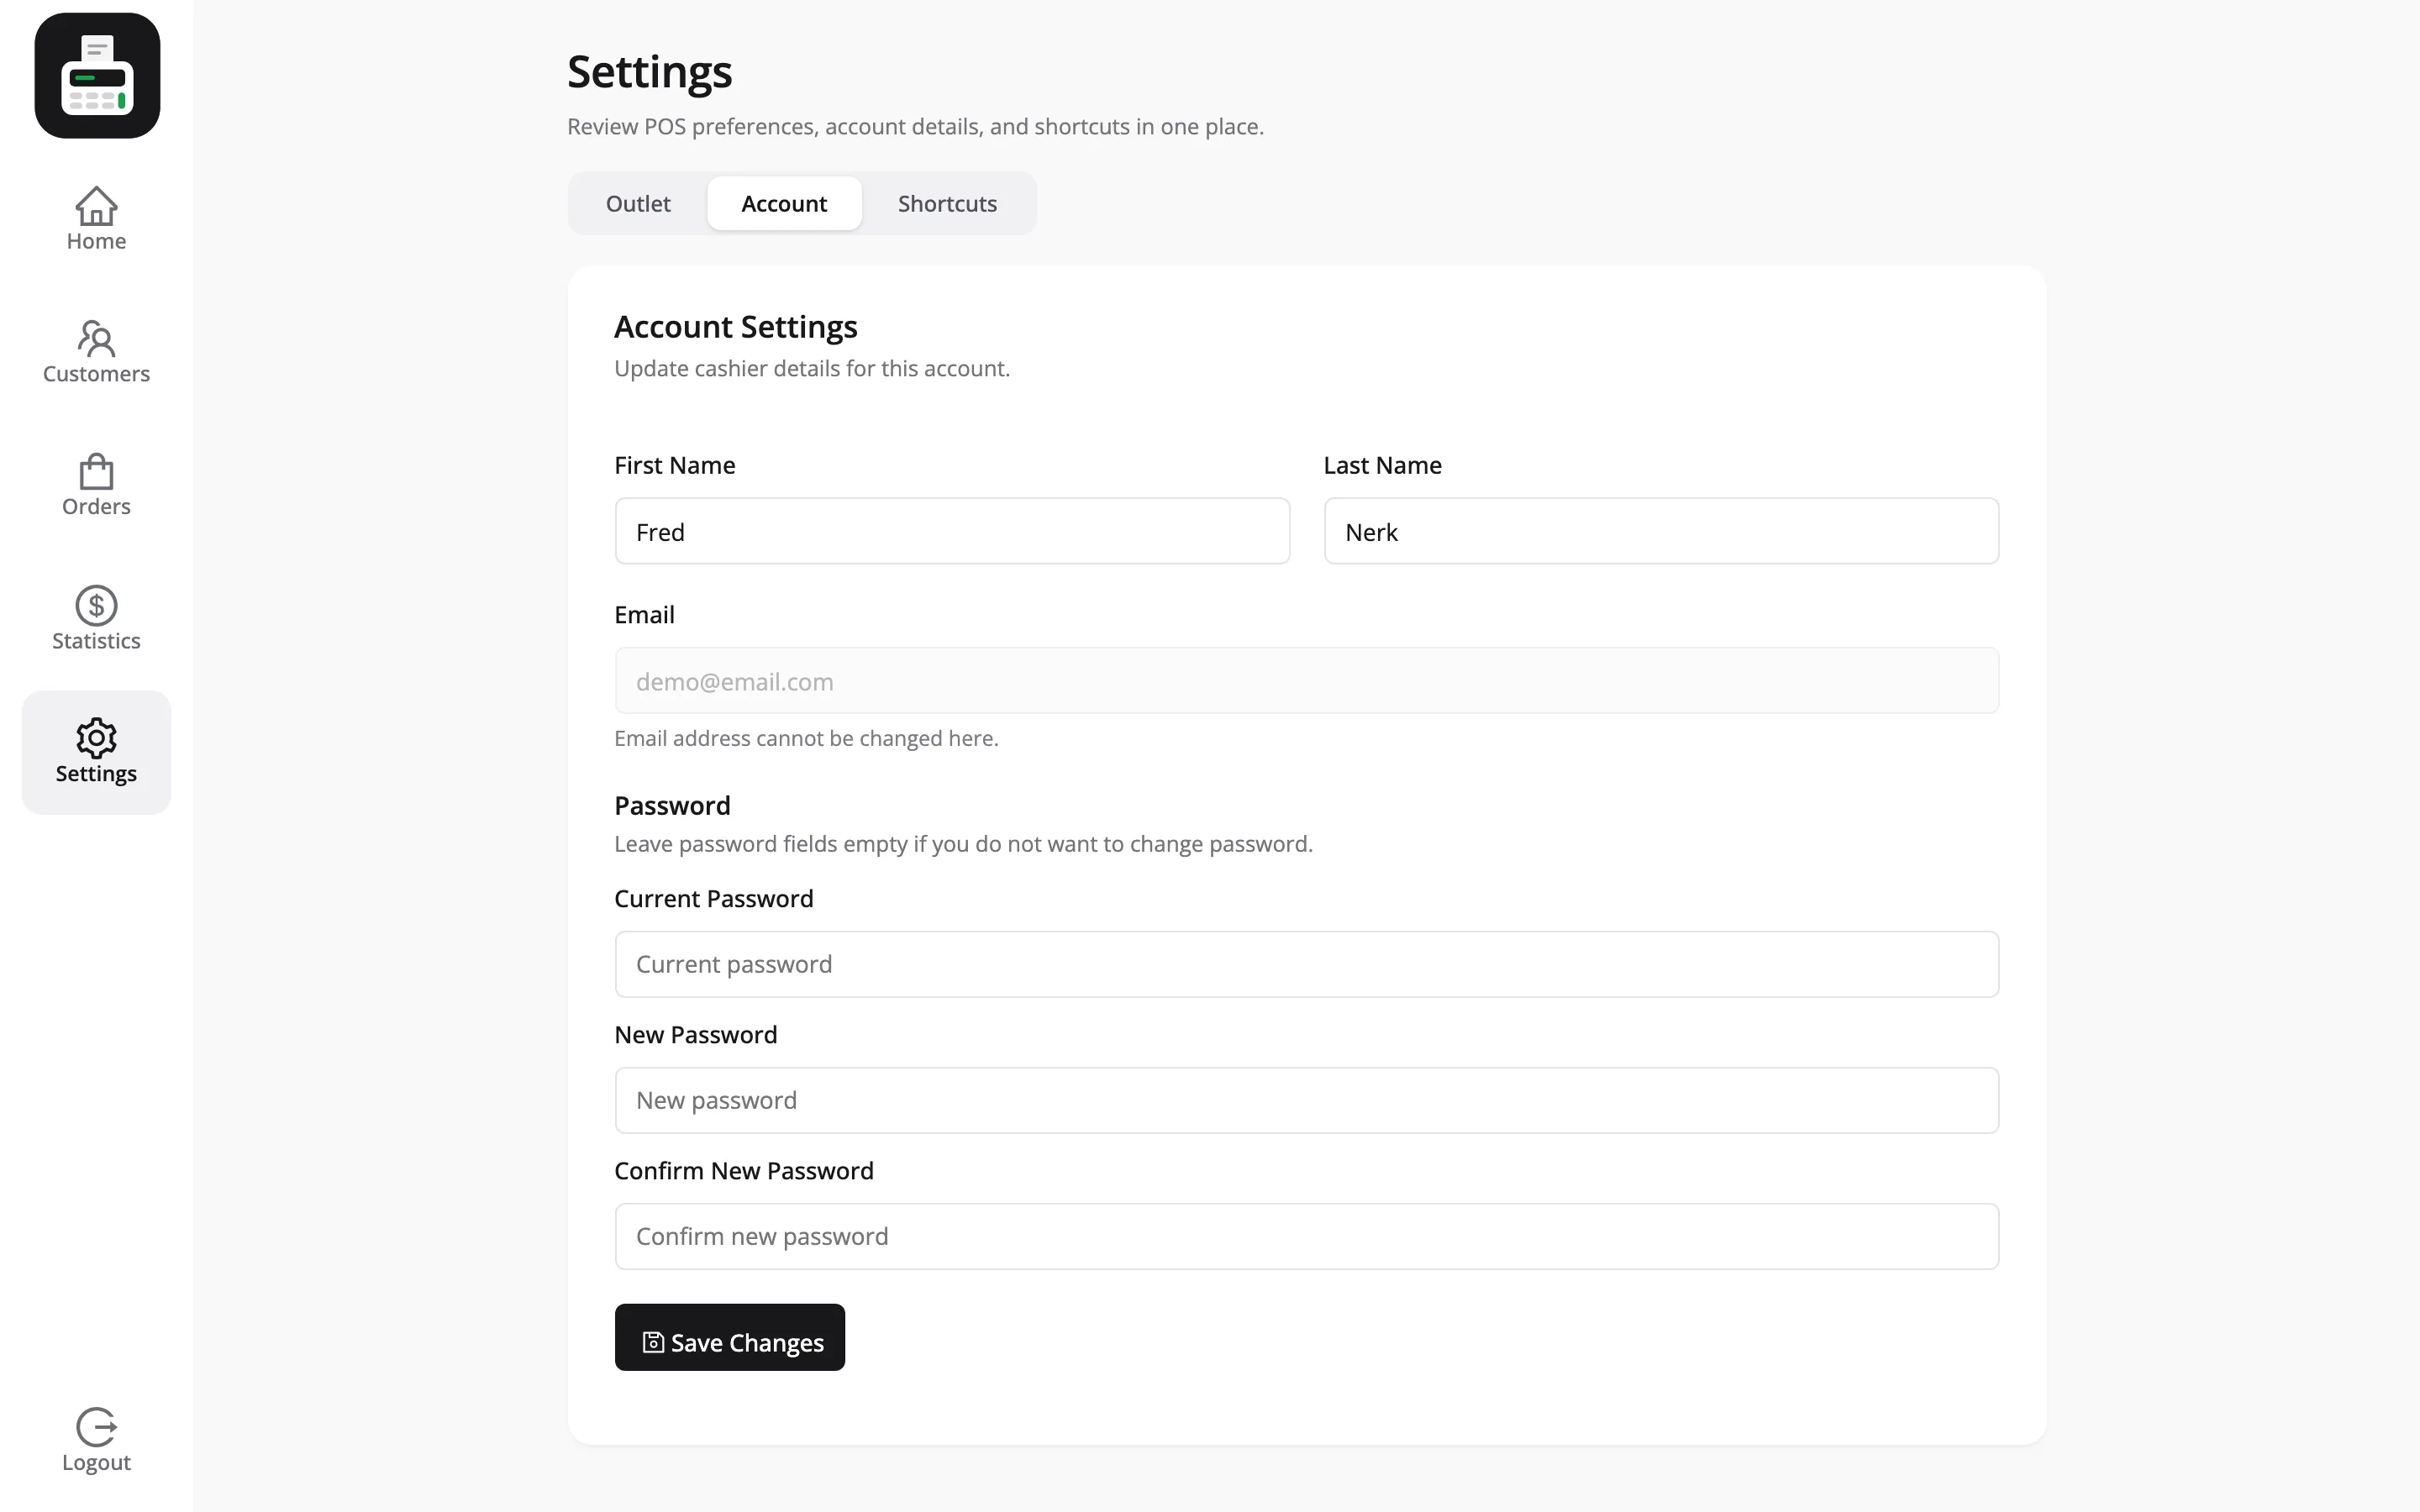
Shortcuts lists the keyboard shortcut for each screen, with a switch to turn shortcuts off and a Reset Defaults button.
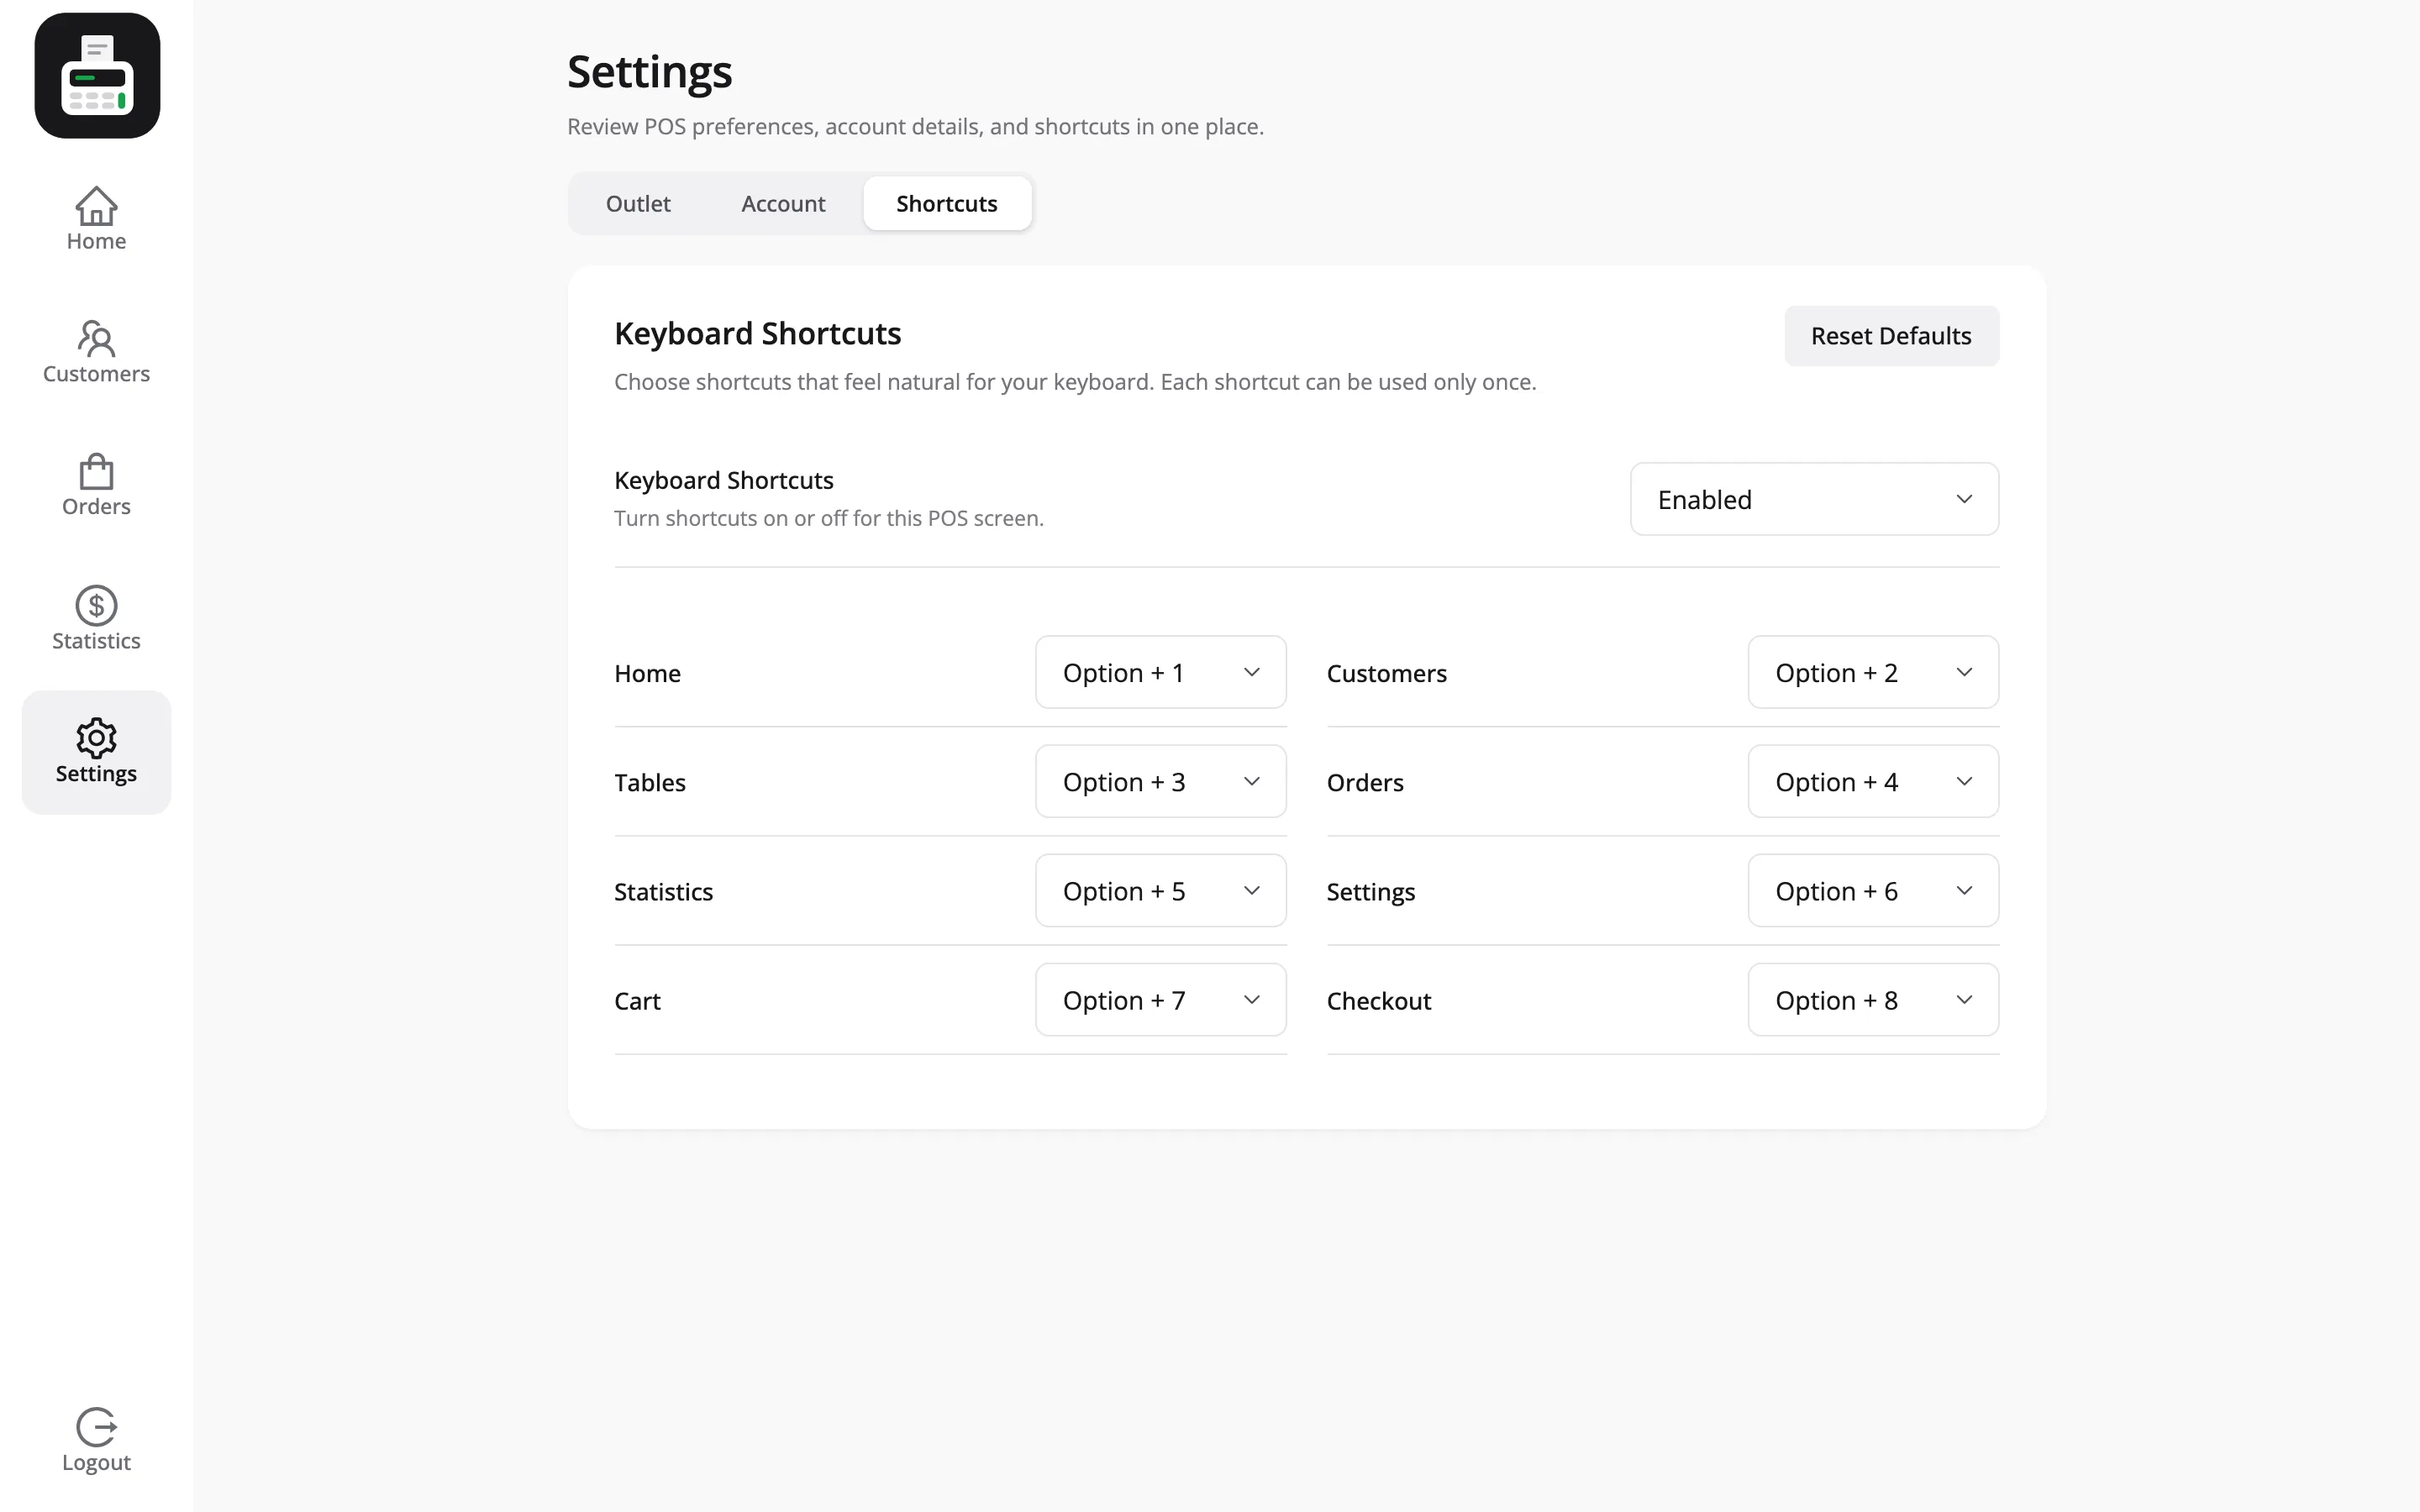
These are per-cashier and per-browser. One cashier turning sounds off does not affect the POS next to them.
Going offline
Section titled “Going offline”The cart header carries a wifi icon that switches between green Online and red Offline with the connection.
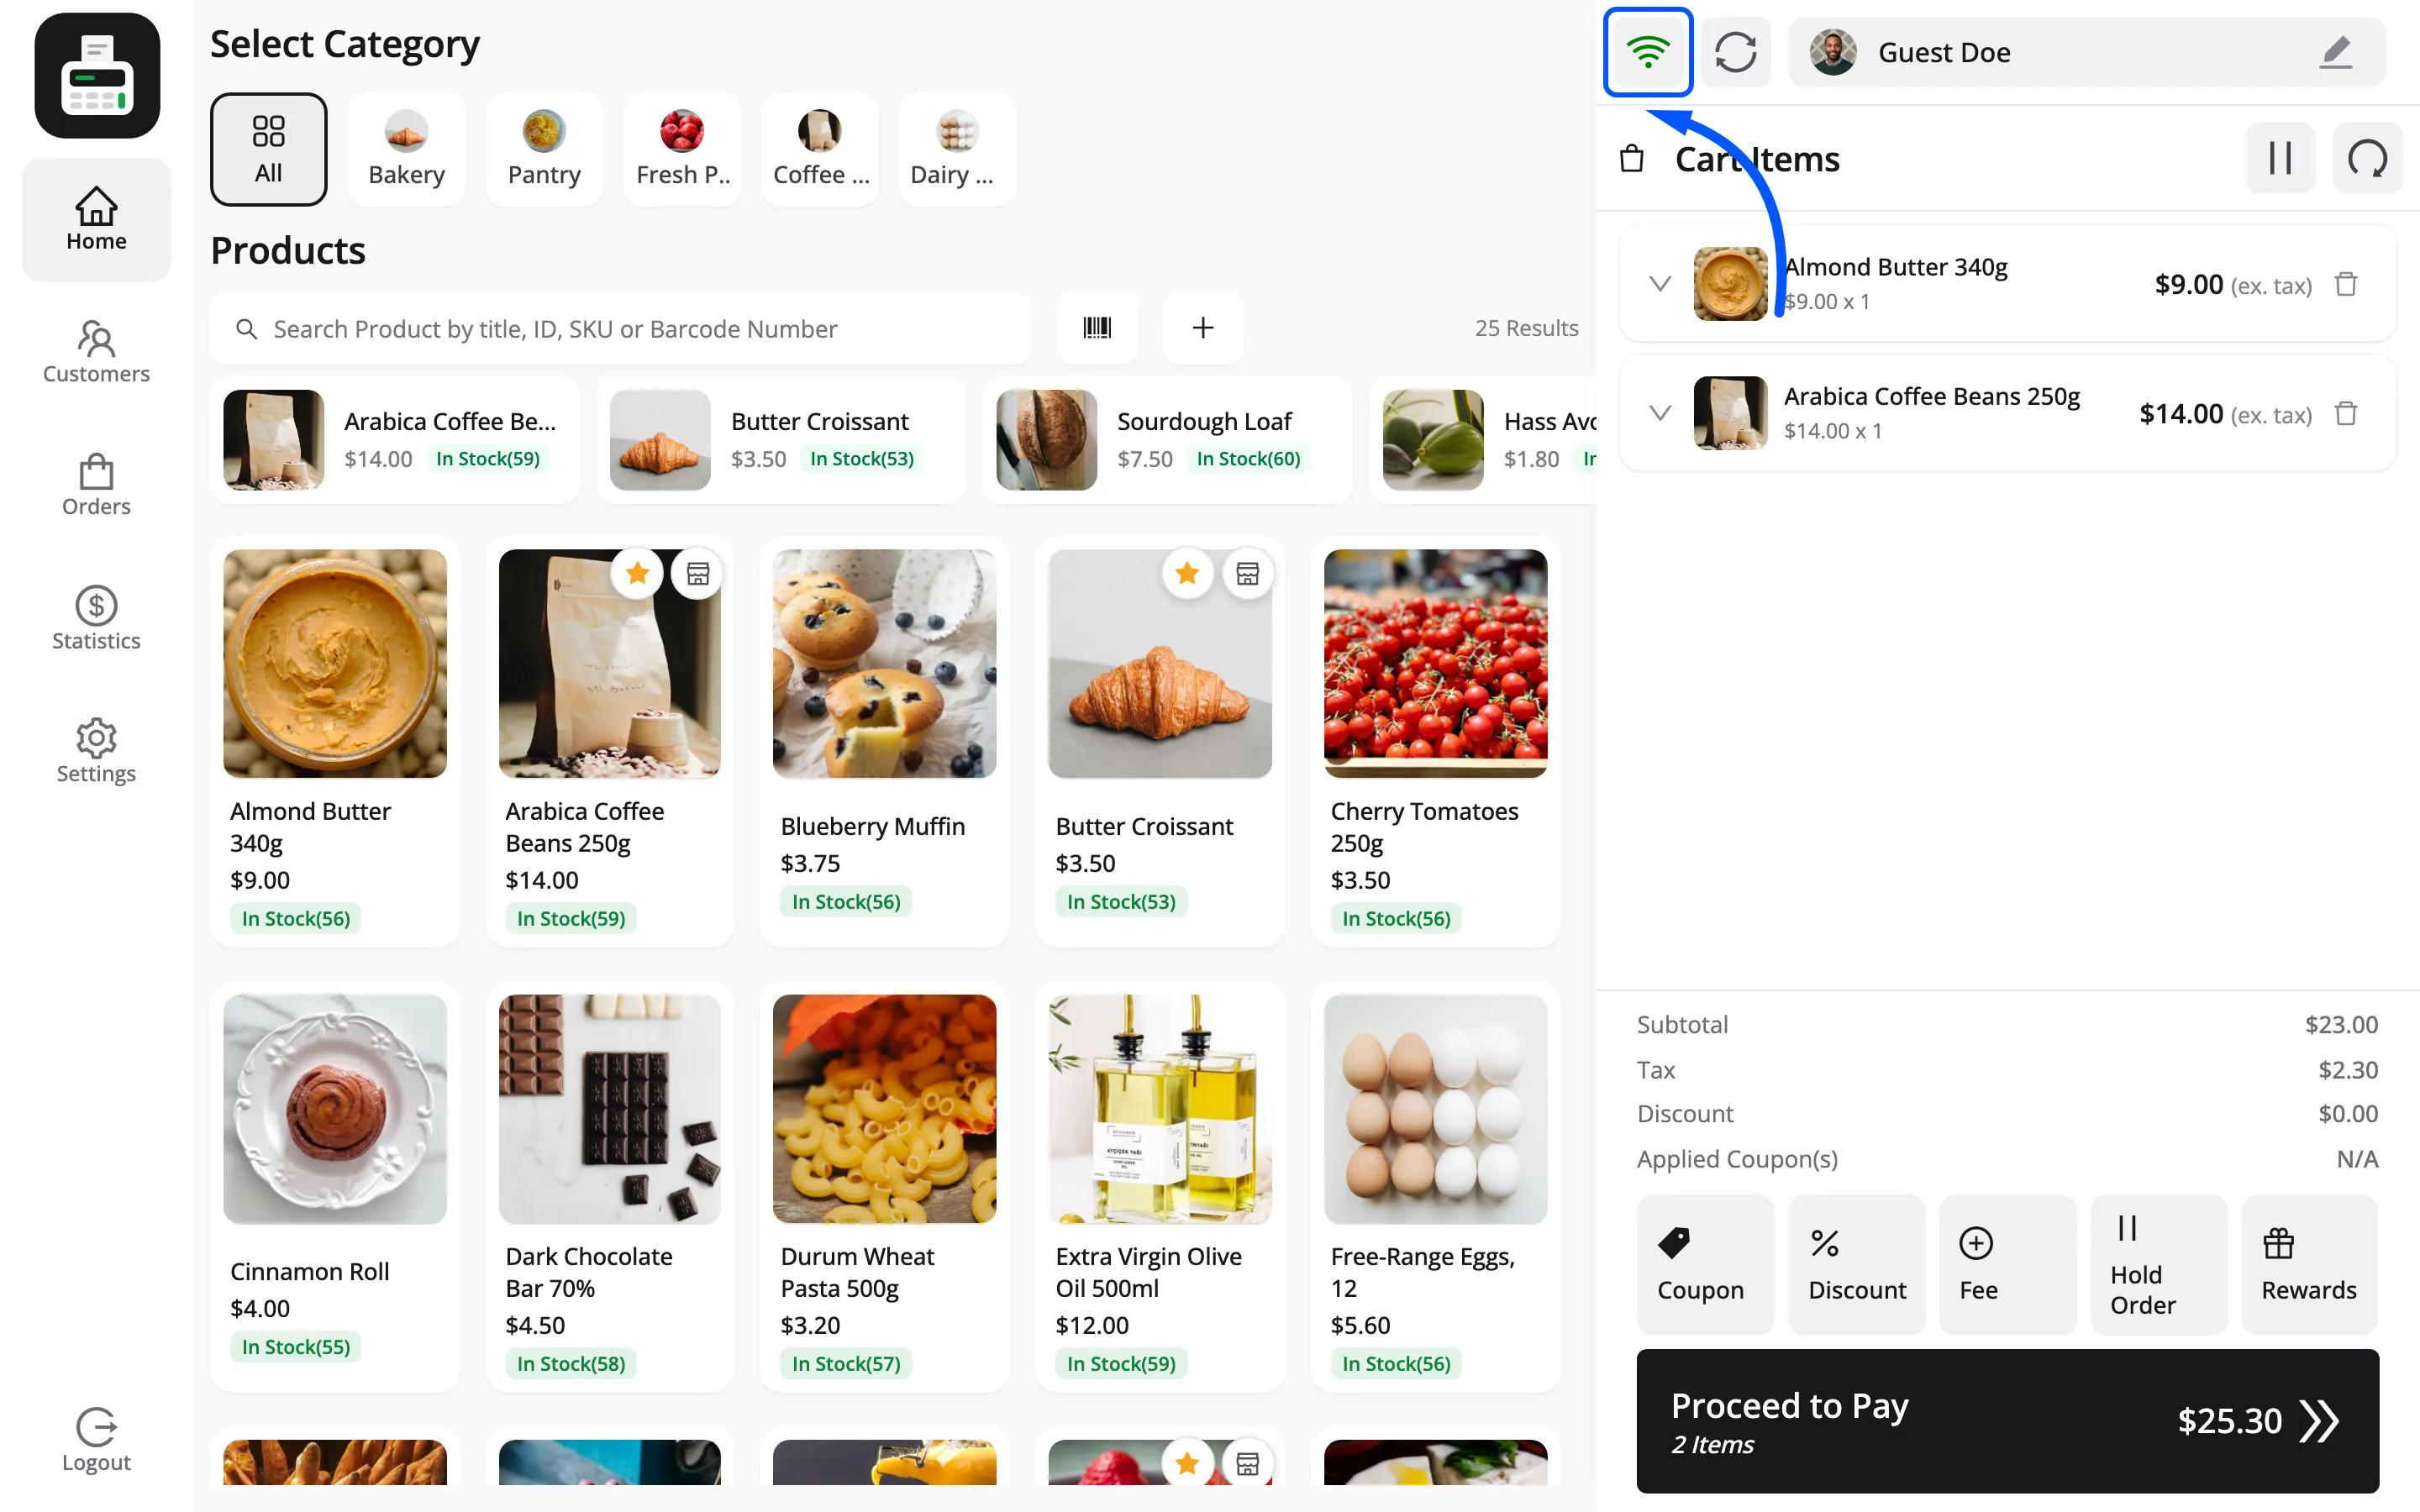
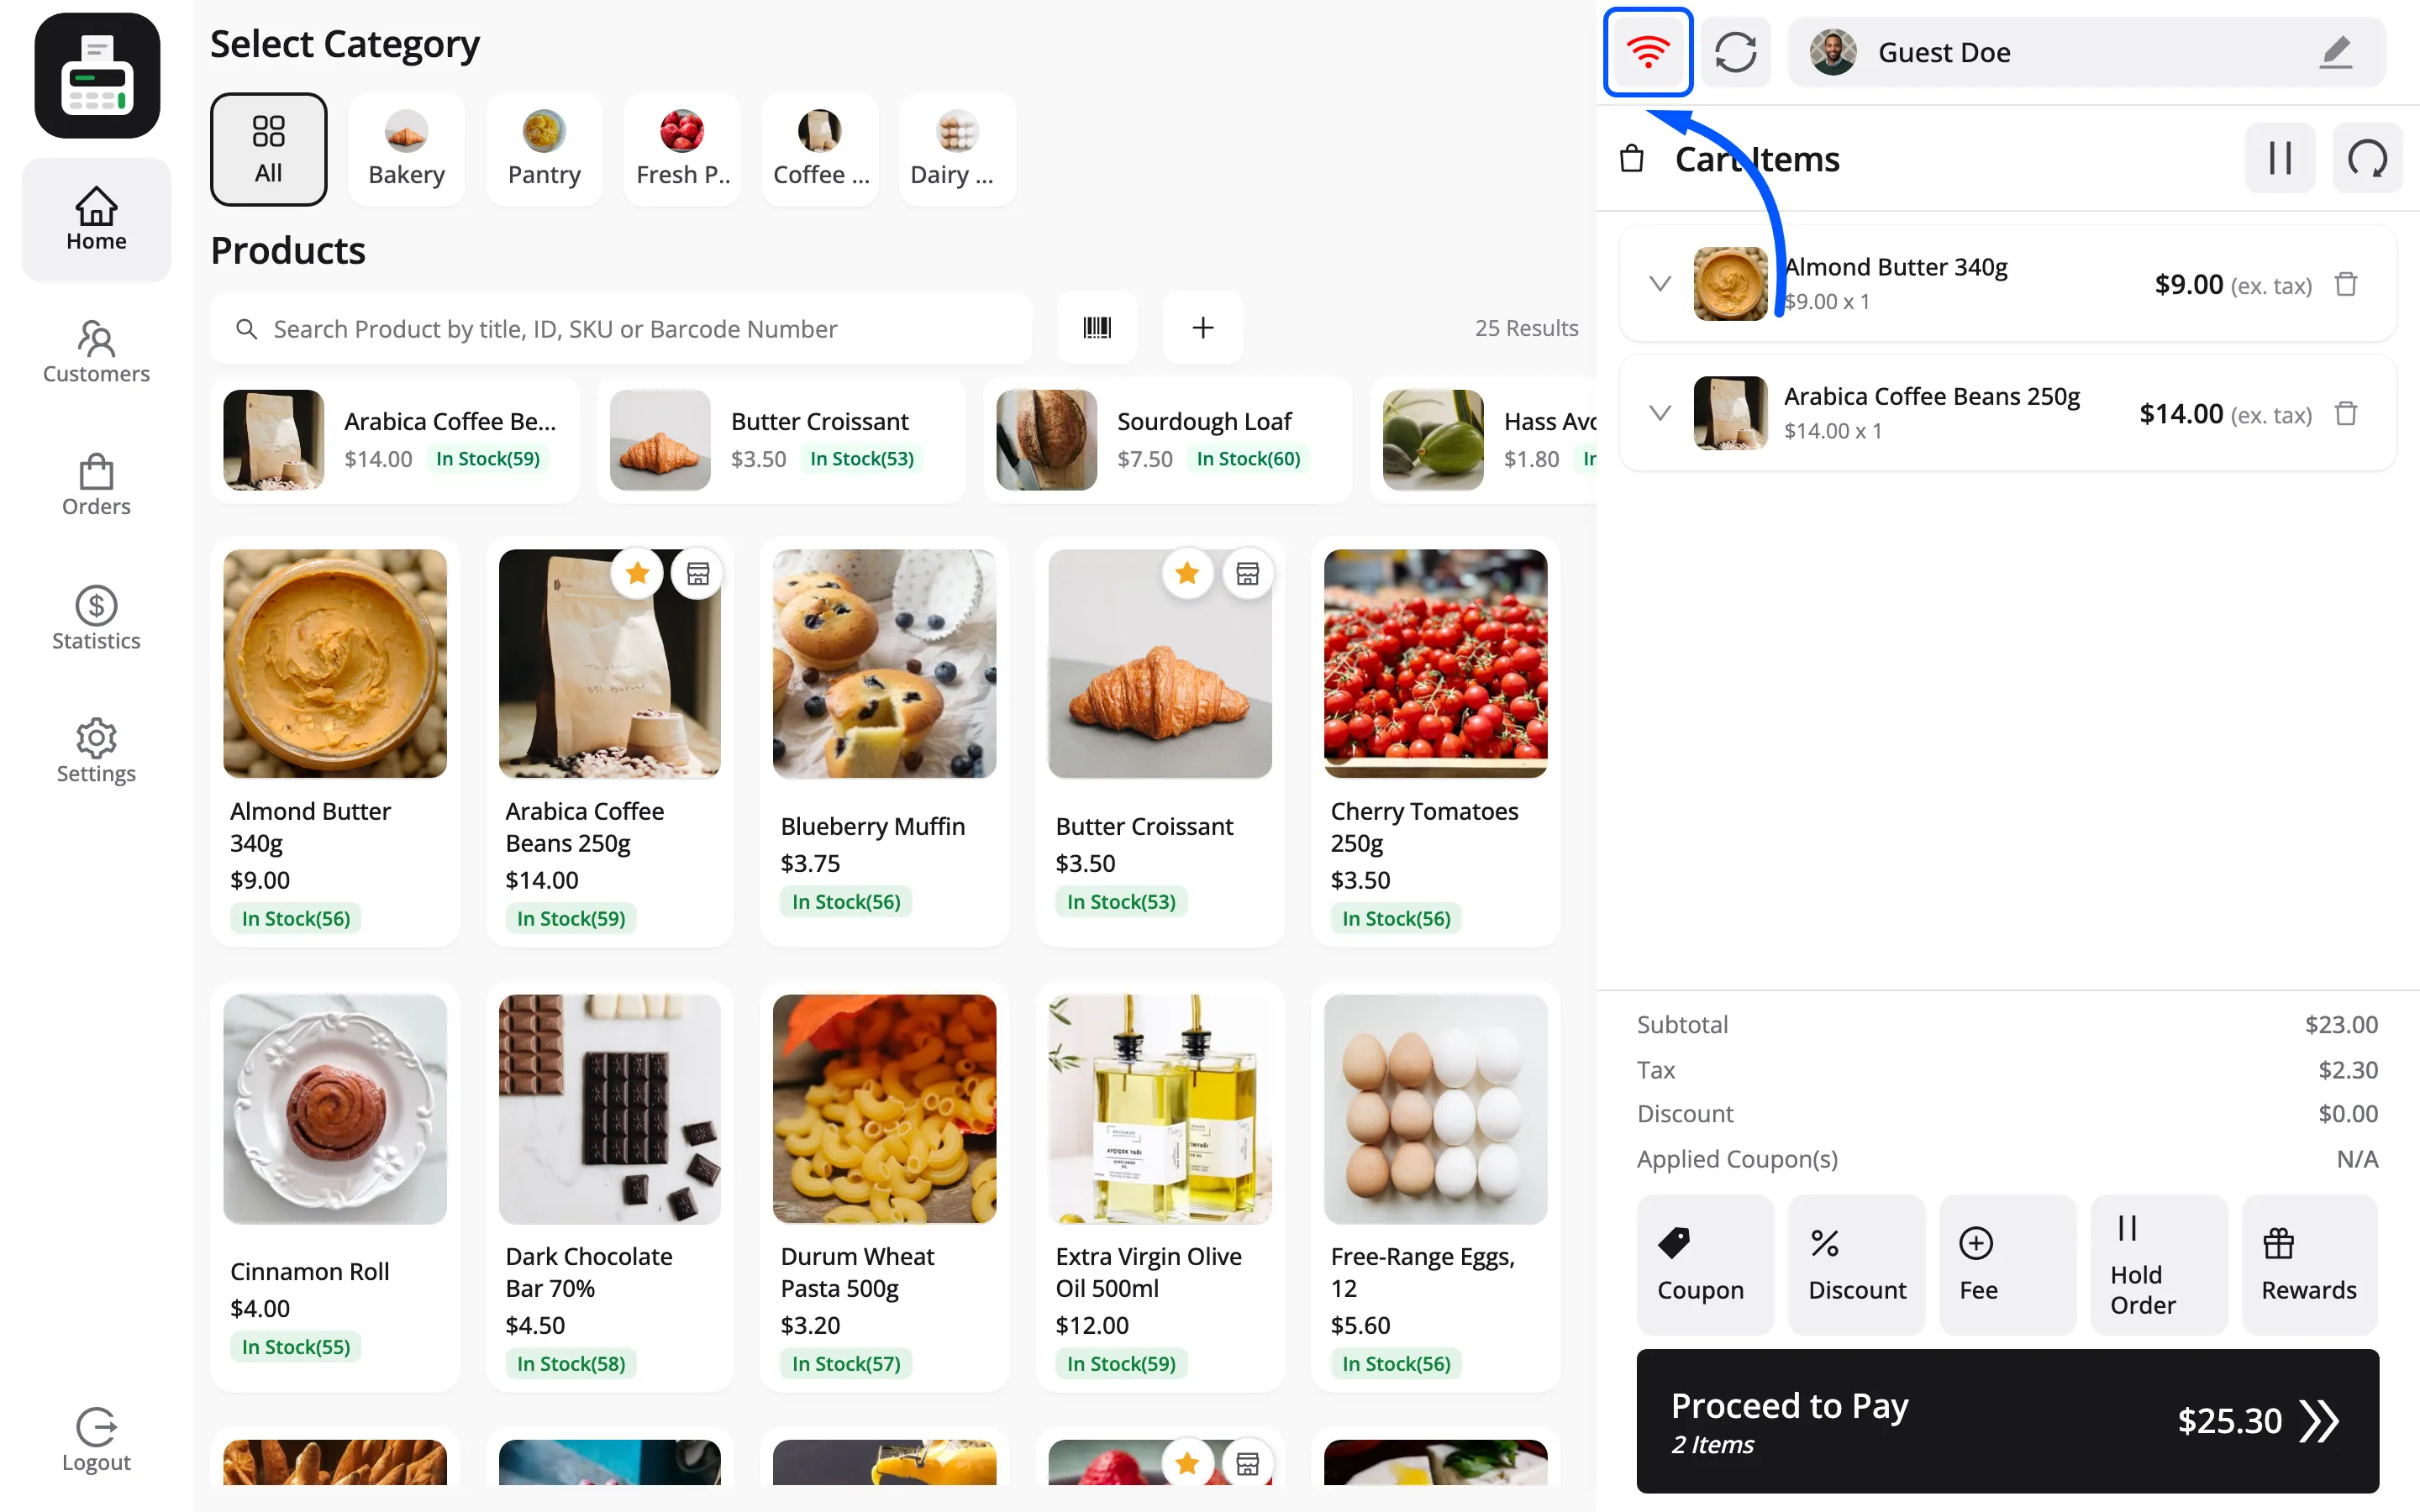
In the free version, offline is a read-only state. The cashier can still browse products and build a cart. The terminal refuses to place the order, apply a coupon or save a customer until the connection returns.