

Outlets
An outlet is a physical place you sell from. The POS will not open until one exists. The outlet decides what the cashier can take payment with and what address the order is billed to.
Open the screen
Section titled “Open the screen”Go to MultiPOS → Outlets.
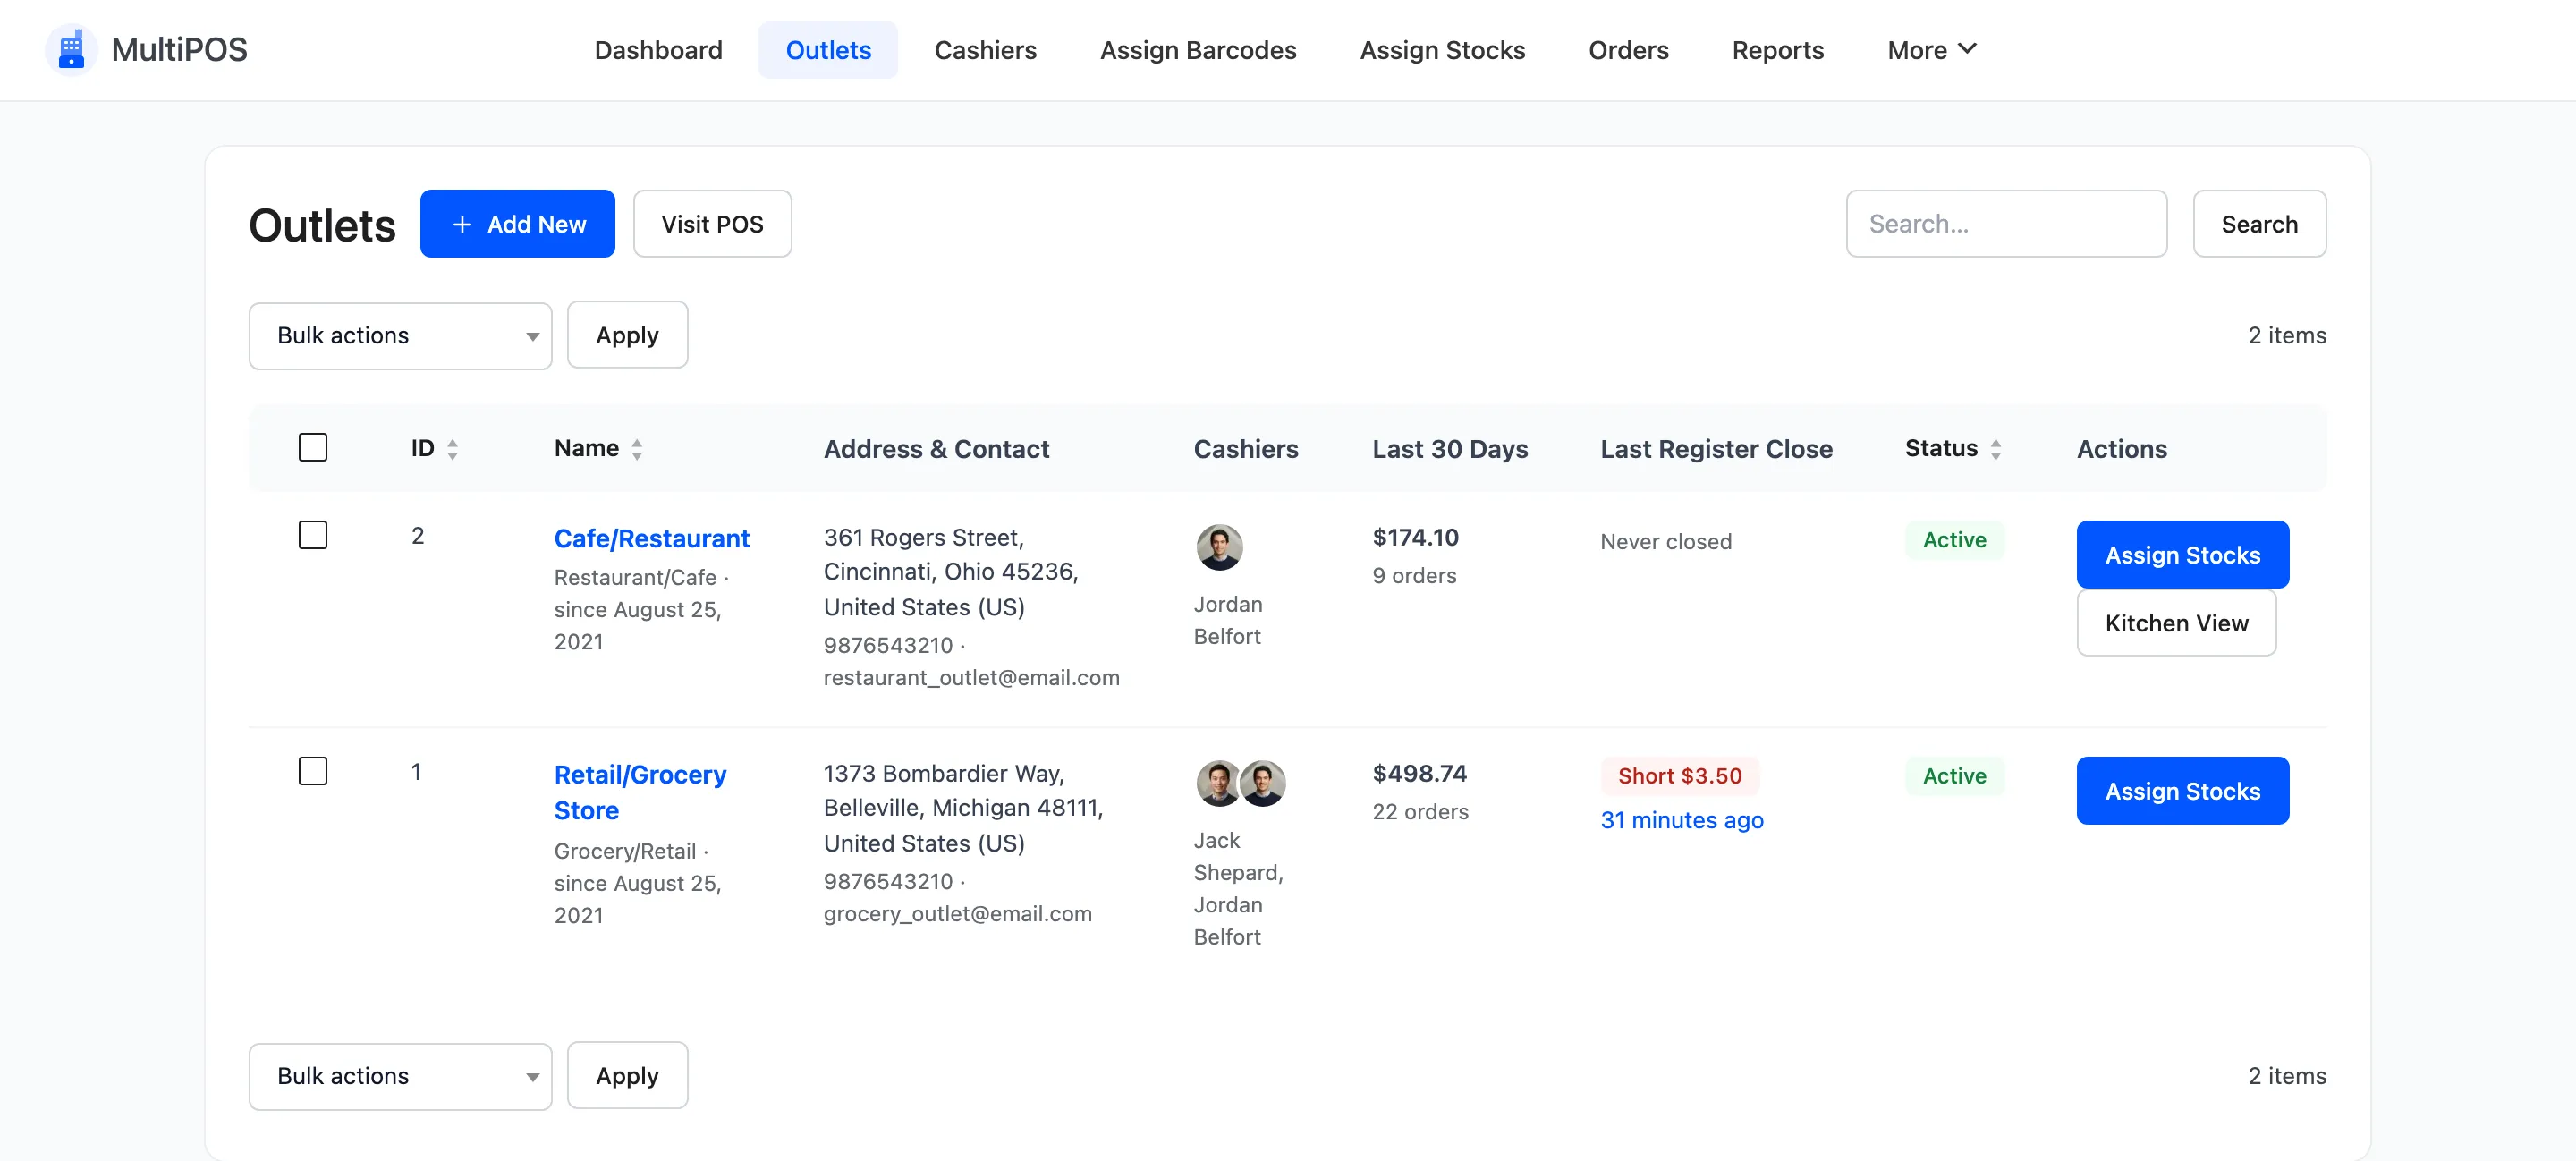
In the free version this tab opens the one outlet’s form directly, with a Save Outlet button. There is no list to browse and no Add New.
The list’s columns are ID, Name, Address & Contact, Cashiers with their photos, Last 30 Days of sales, Last Register Close with any shortfall, Status and Actions.
What an outlet decides
Section titled “What an outlet decides”Four things, and all four land on every order the outlet sells.
- The payment methods a cashier can take. Only methods assigned here appear at payment.
- The billing and shipping address on the order. A POS order is addressed to the shop, not to the customer, because a counter sale happens at the shop.
- The tax rates that apply. Worked out from the outlet’s address against your WooCommerce tax table.
- Whether tables exist. Only a Restaurant/Cafe outlet has a floor plan.
The form
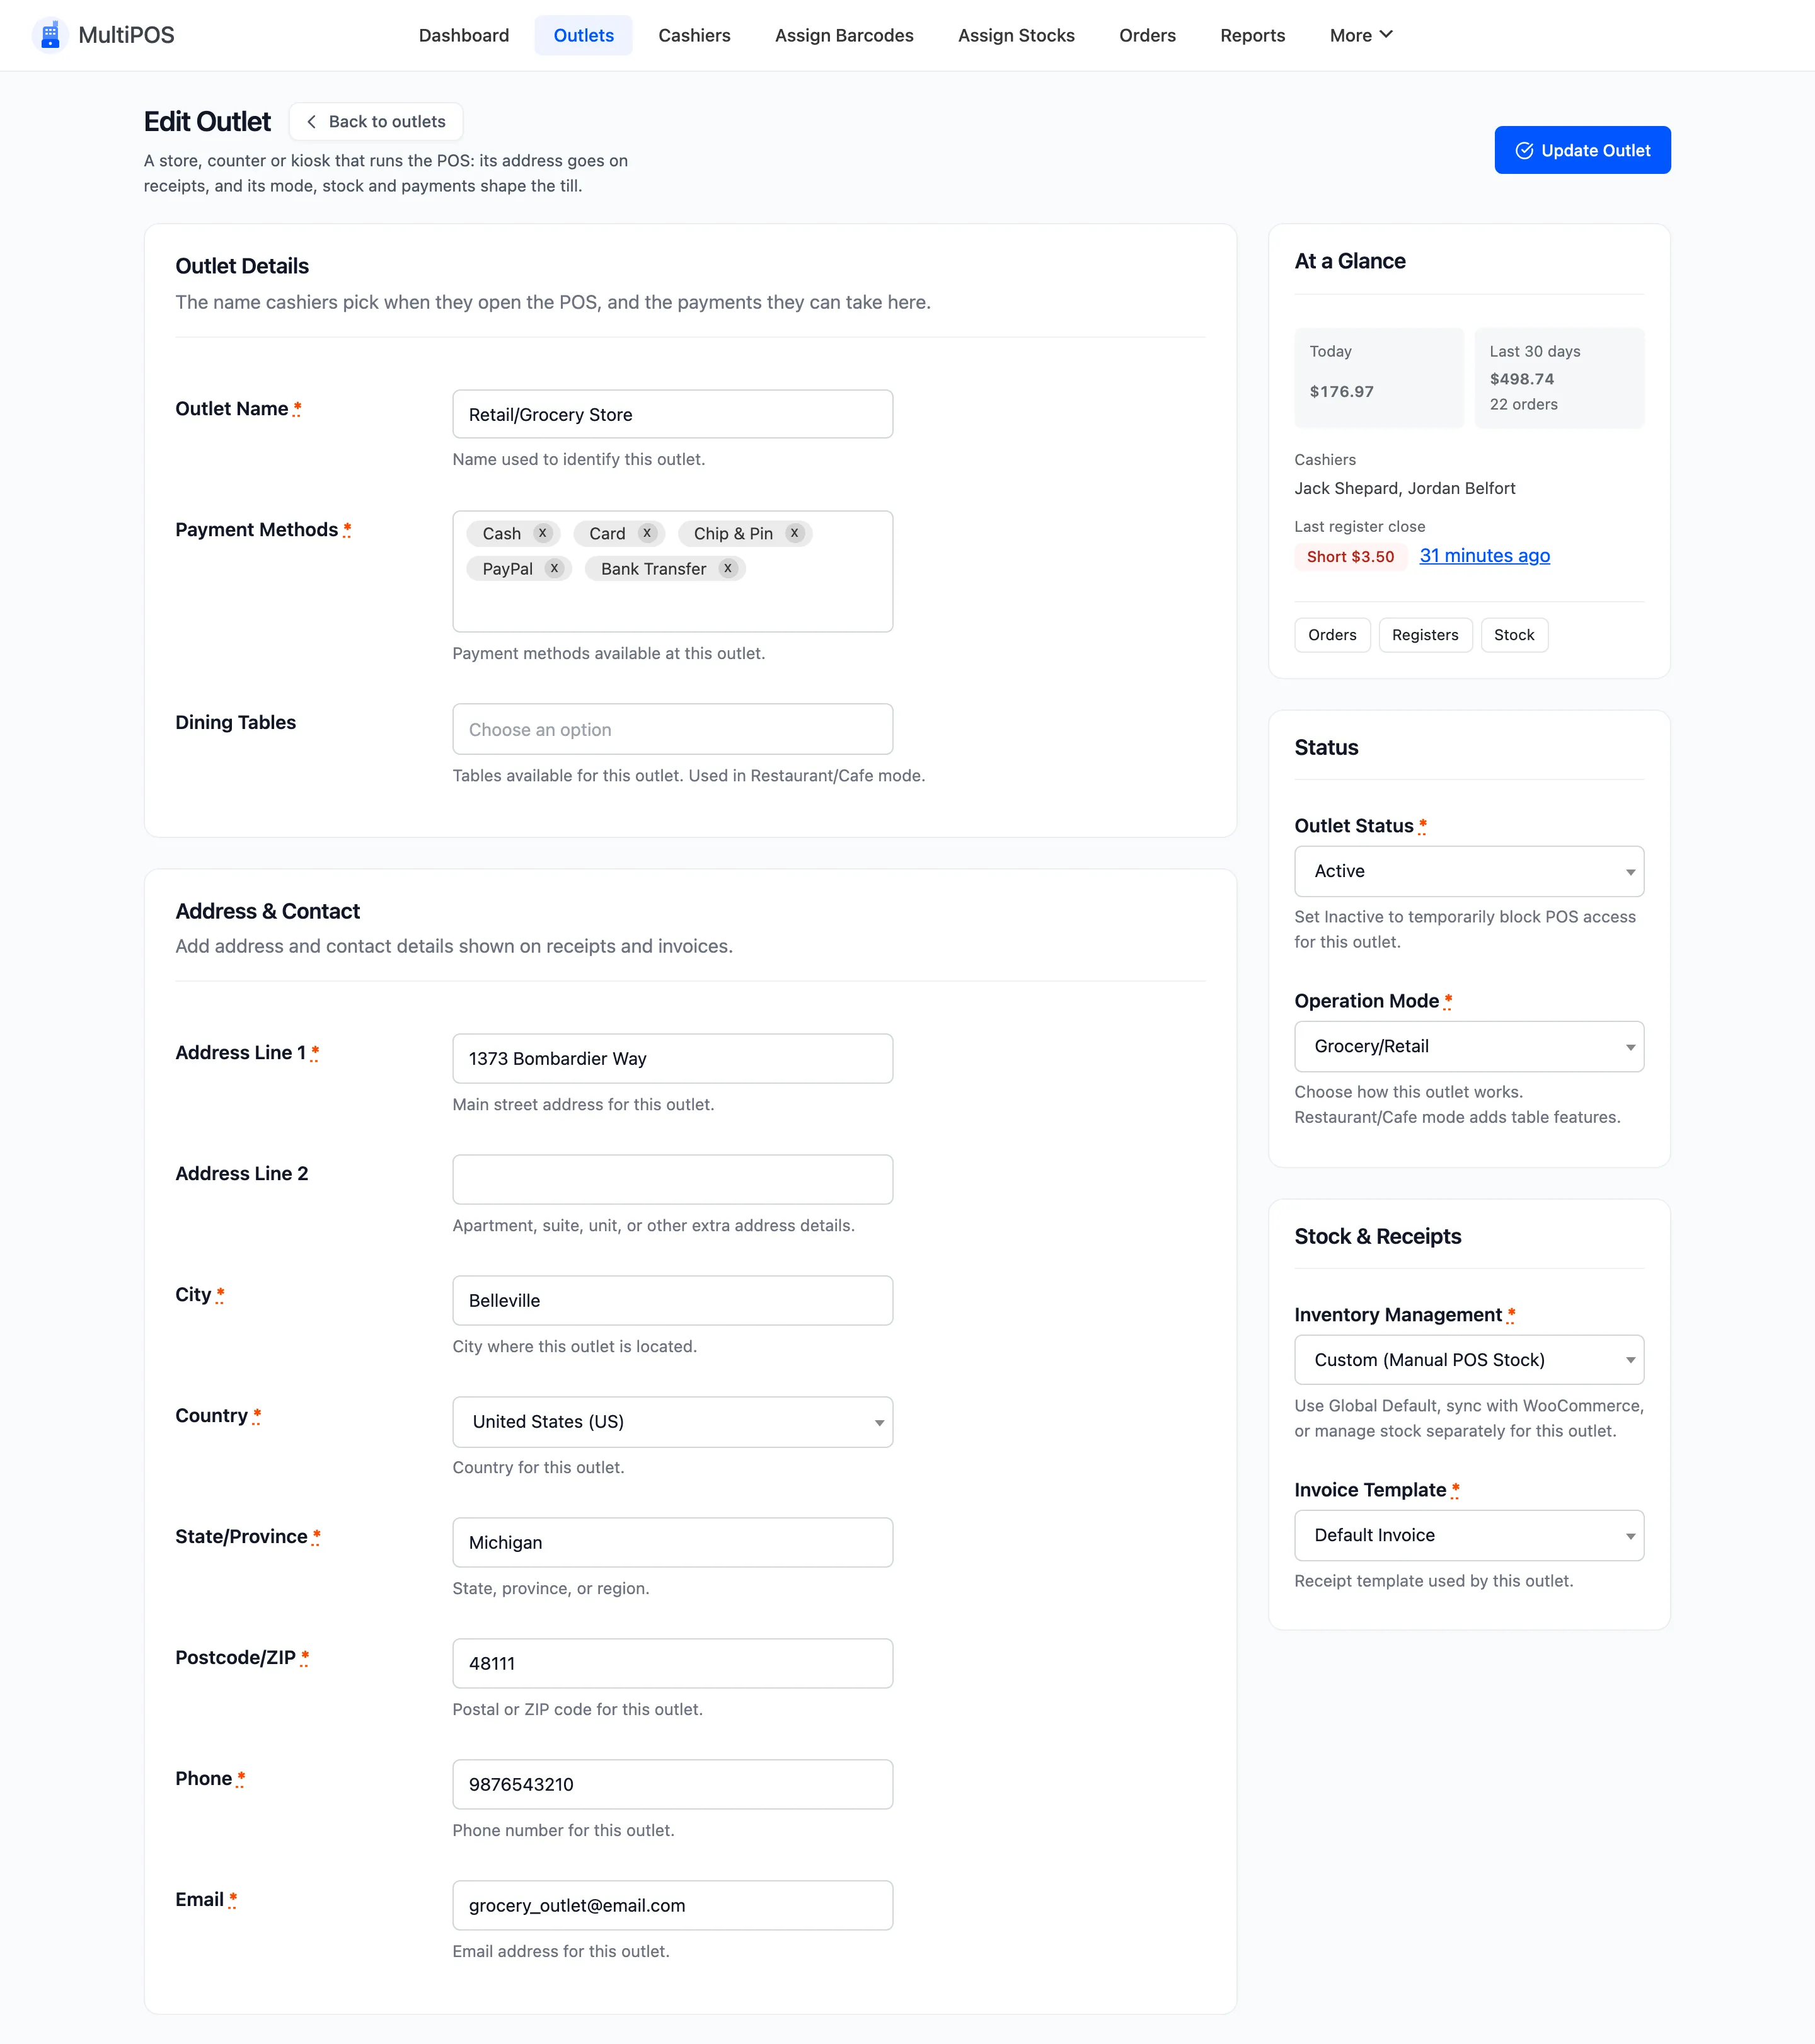
Section titled “The form”The Add Outlet and Edit Outlet screens use two columns: the outlet’s details on the left, and its status, stock and a summary on the right.
Outlet Details
Section titled “Outlet Details”- Outlet Name: A label for you, such as Downtown Branch. It appears on the outlet picker the cashier sees.
- Payment Methods: The Active methods from Configuration → Payments this outlet takes. At least one is required.
- Dining Tables: The Active tables from Configuration → Tables. Used only on a Restaurant/Cafe outlet.
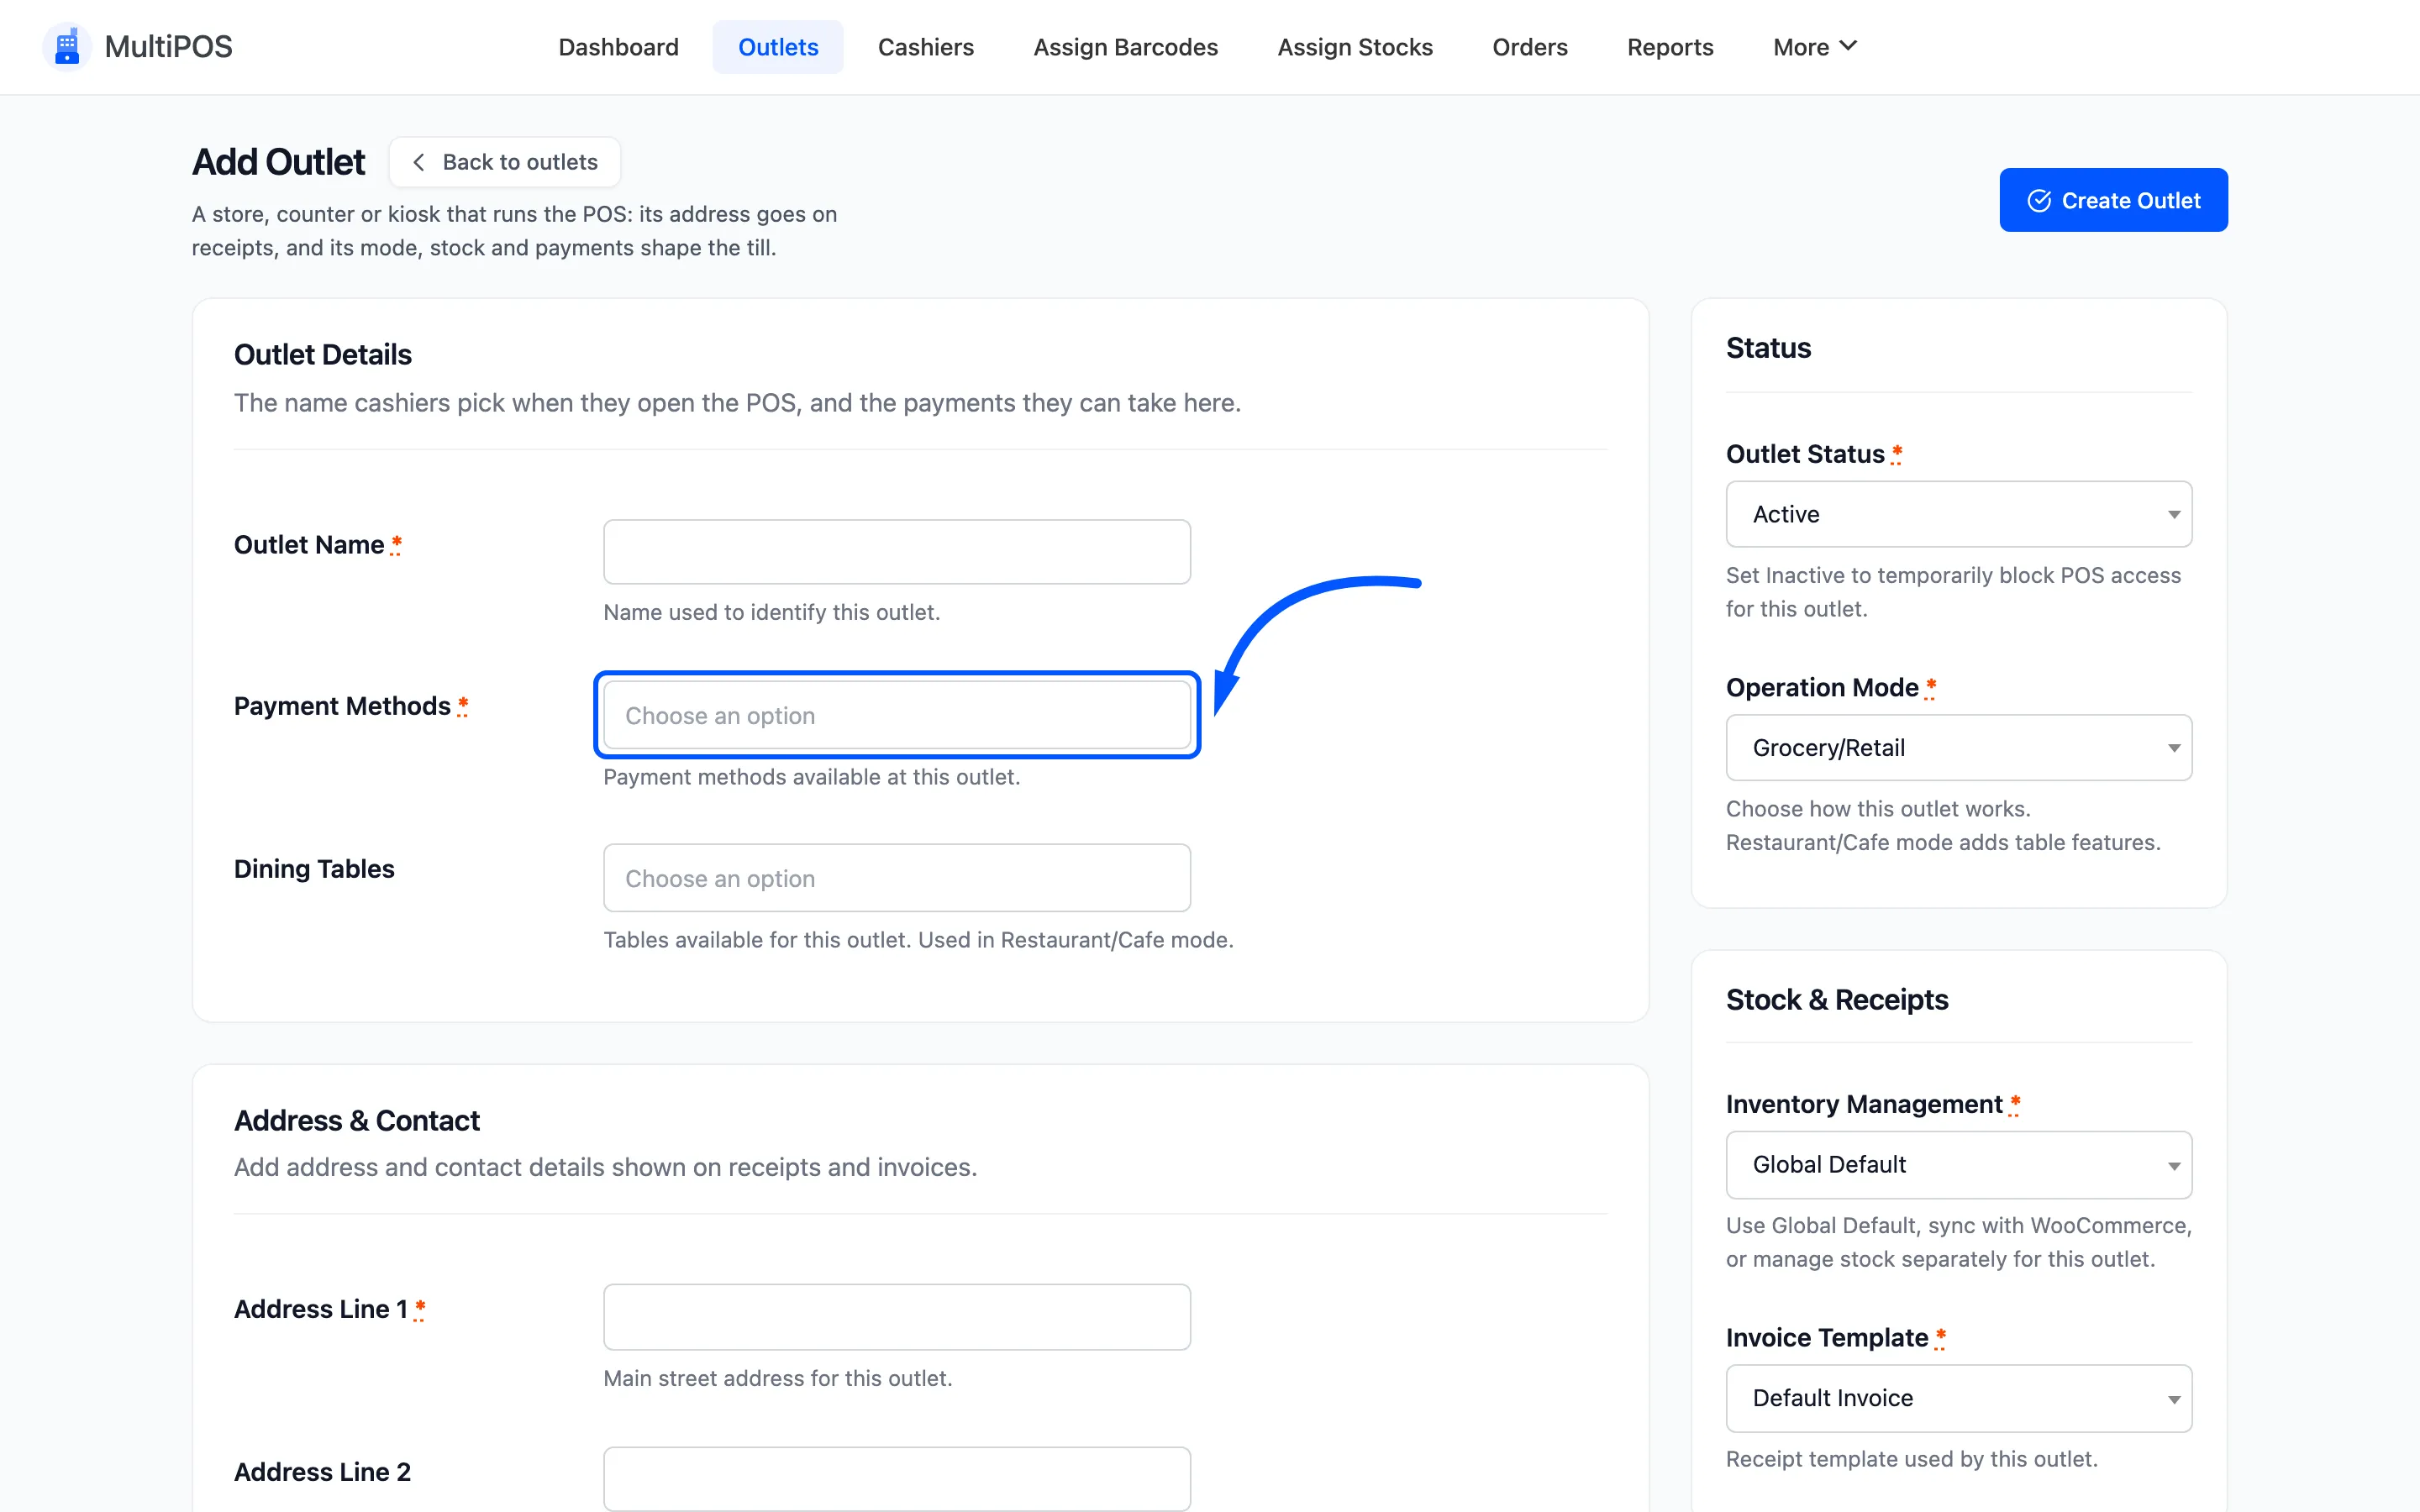
Payment Methods is the field people forget. A method that is Active but not selected here never reaches the POS.
Address & Contact
Section titled “Address & Contact”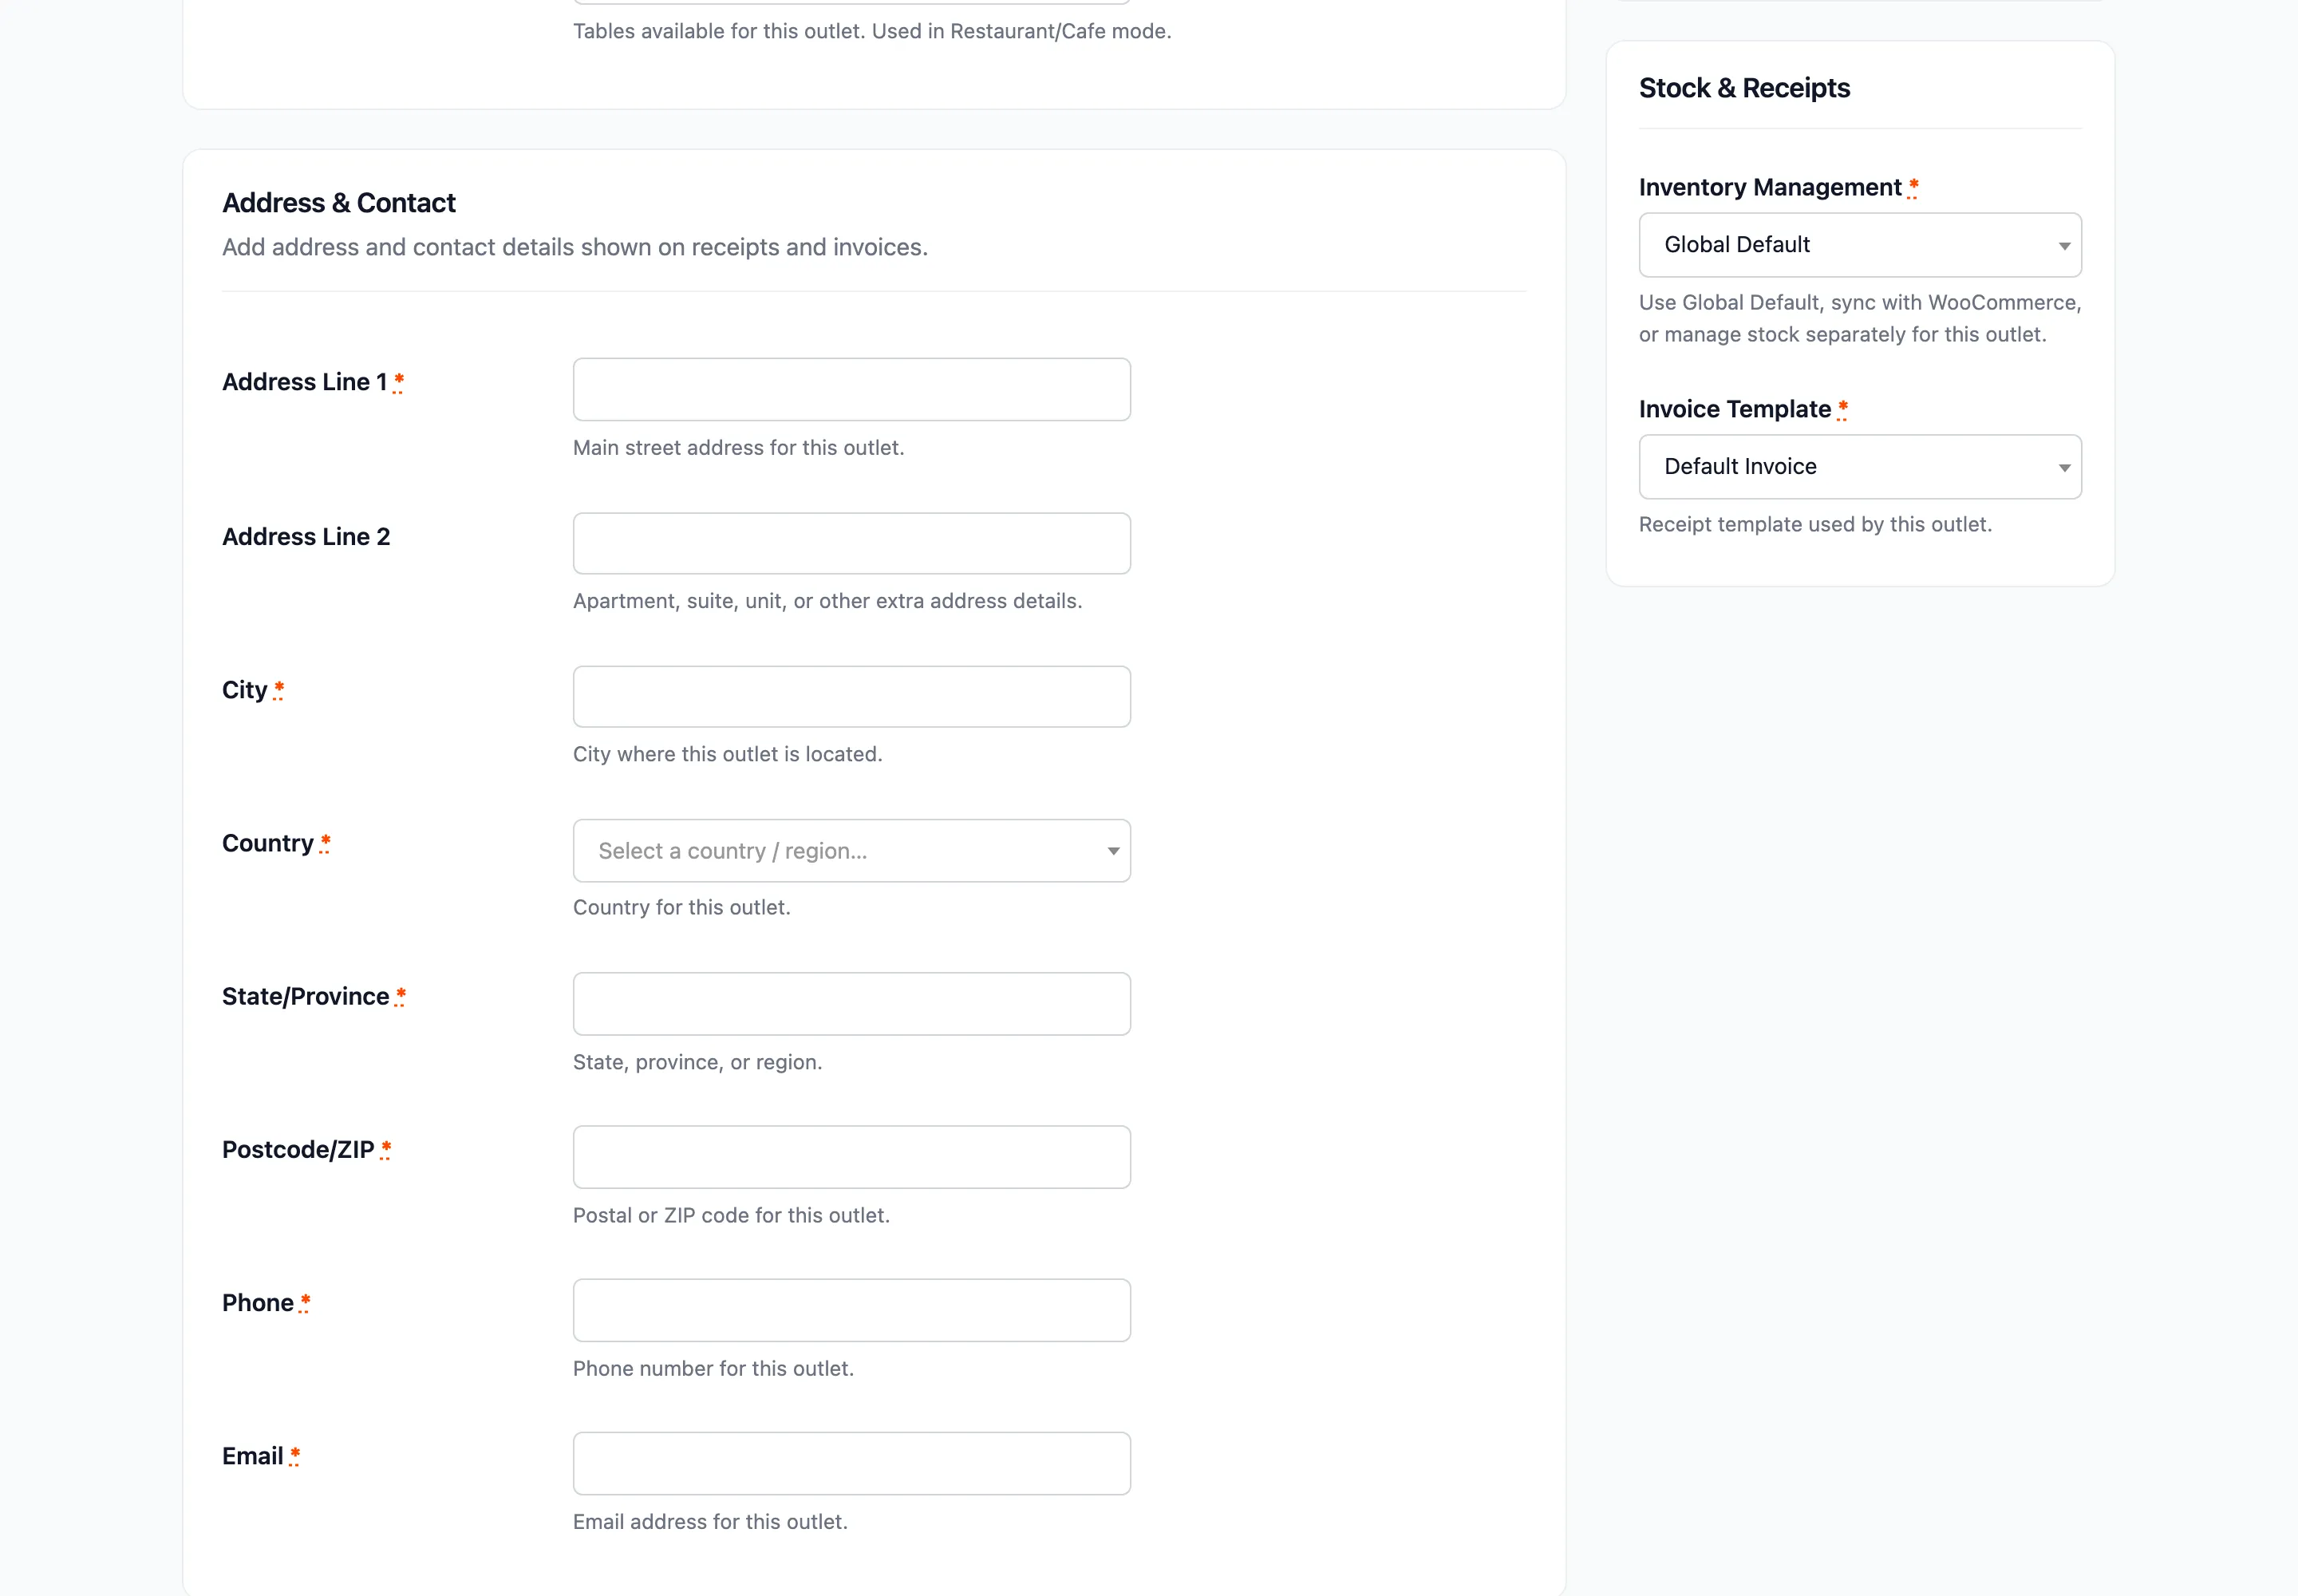
| Field | Required |
|---|---|
| Address Line 1 | Yes |
| Address Line 2 | No |
| City | Yes |
| Country | Yes |
| State/Province | Yes |
| Postcode/ZIP | Yes |
| Phone | Yes |
| Yes |
Get these right the first time. They print on every receipt and decide the tax on every sale. A wrong postcode is a wrong tax figure on hundreds of orders before anyone notices.
Status
Section titled “Status”- Outlet Status: Active or Inactive. Inactive closes an outlet for a while without deleting anything; its orders and transactions stay.
- Operation Mode: Grocery/Retail or Restaurant/Cafe.
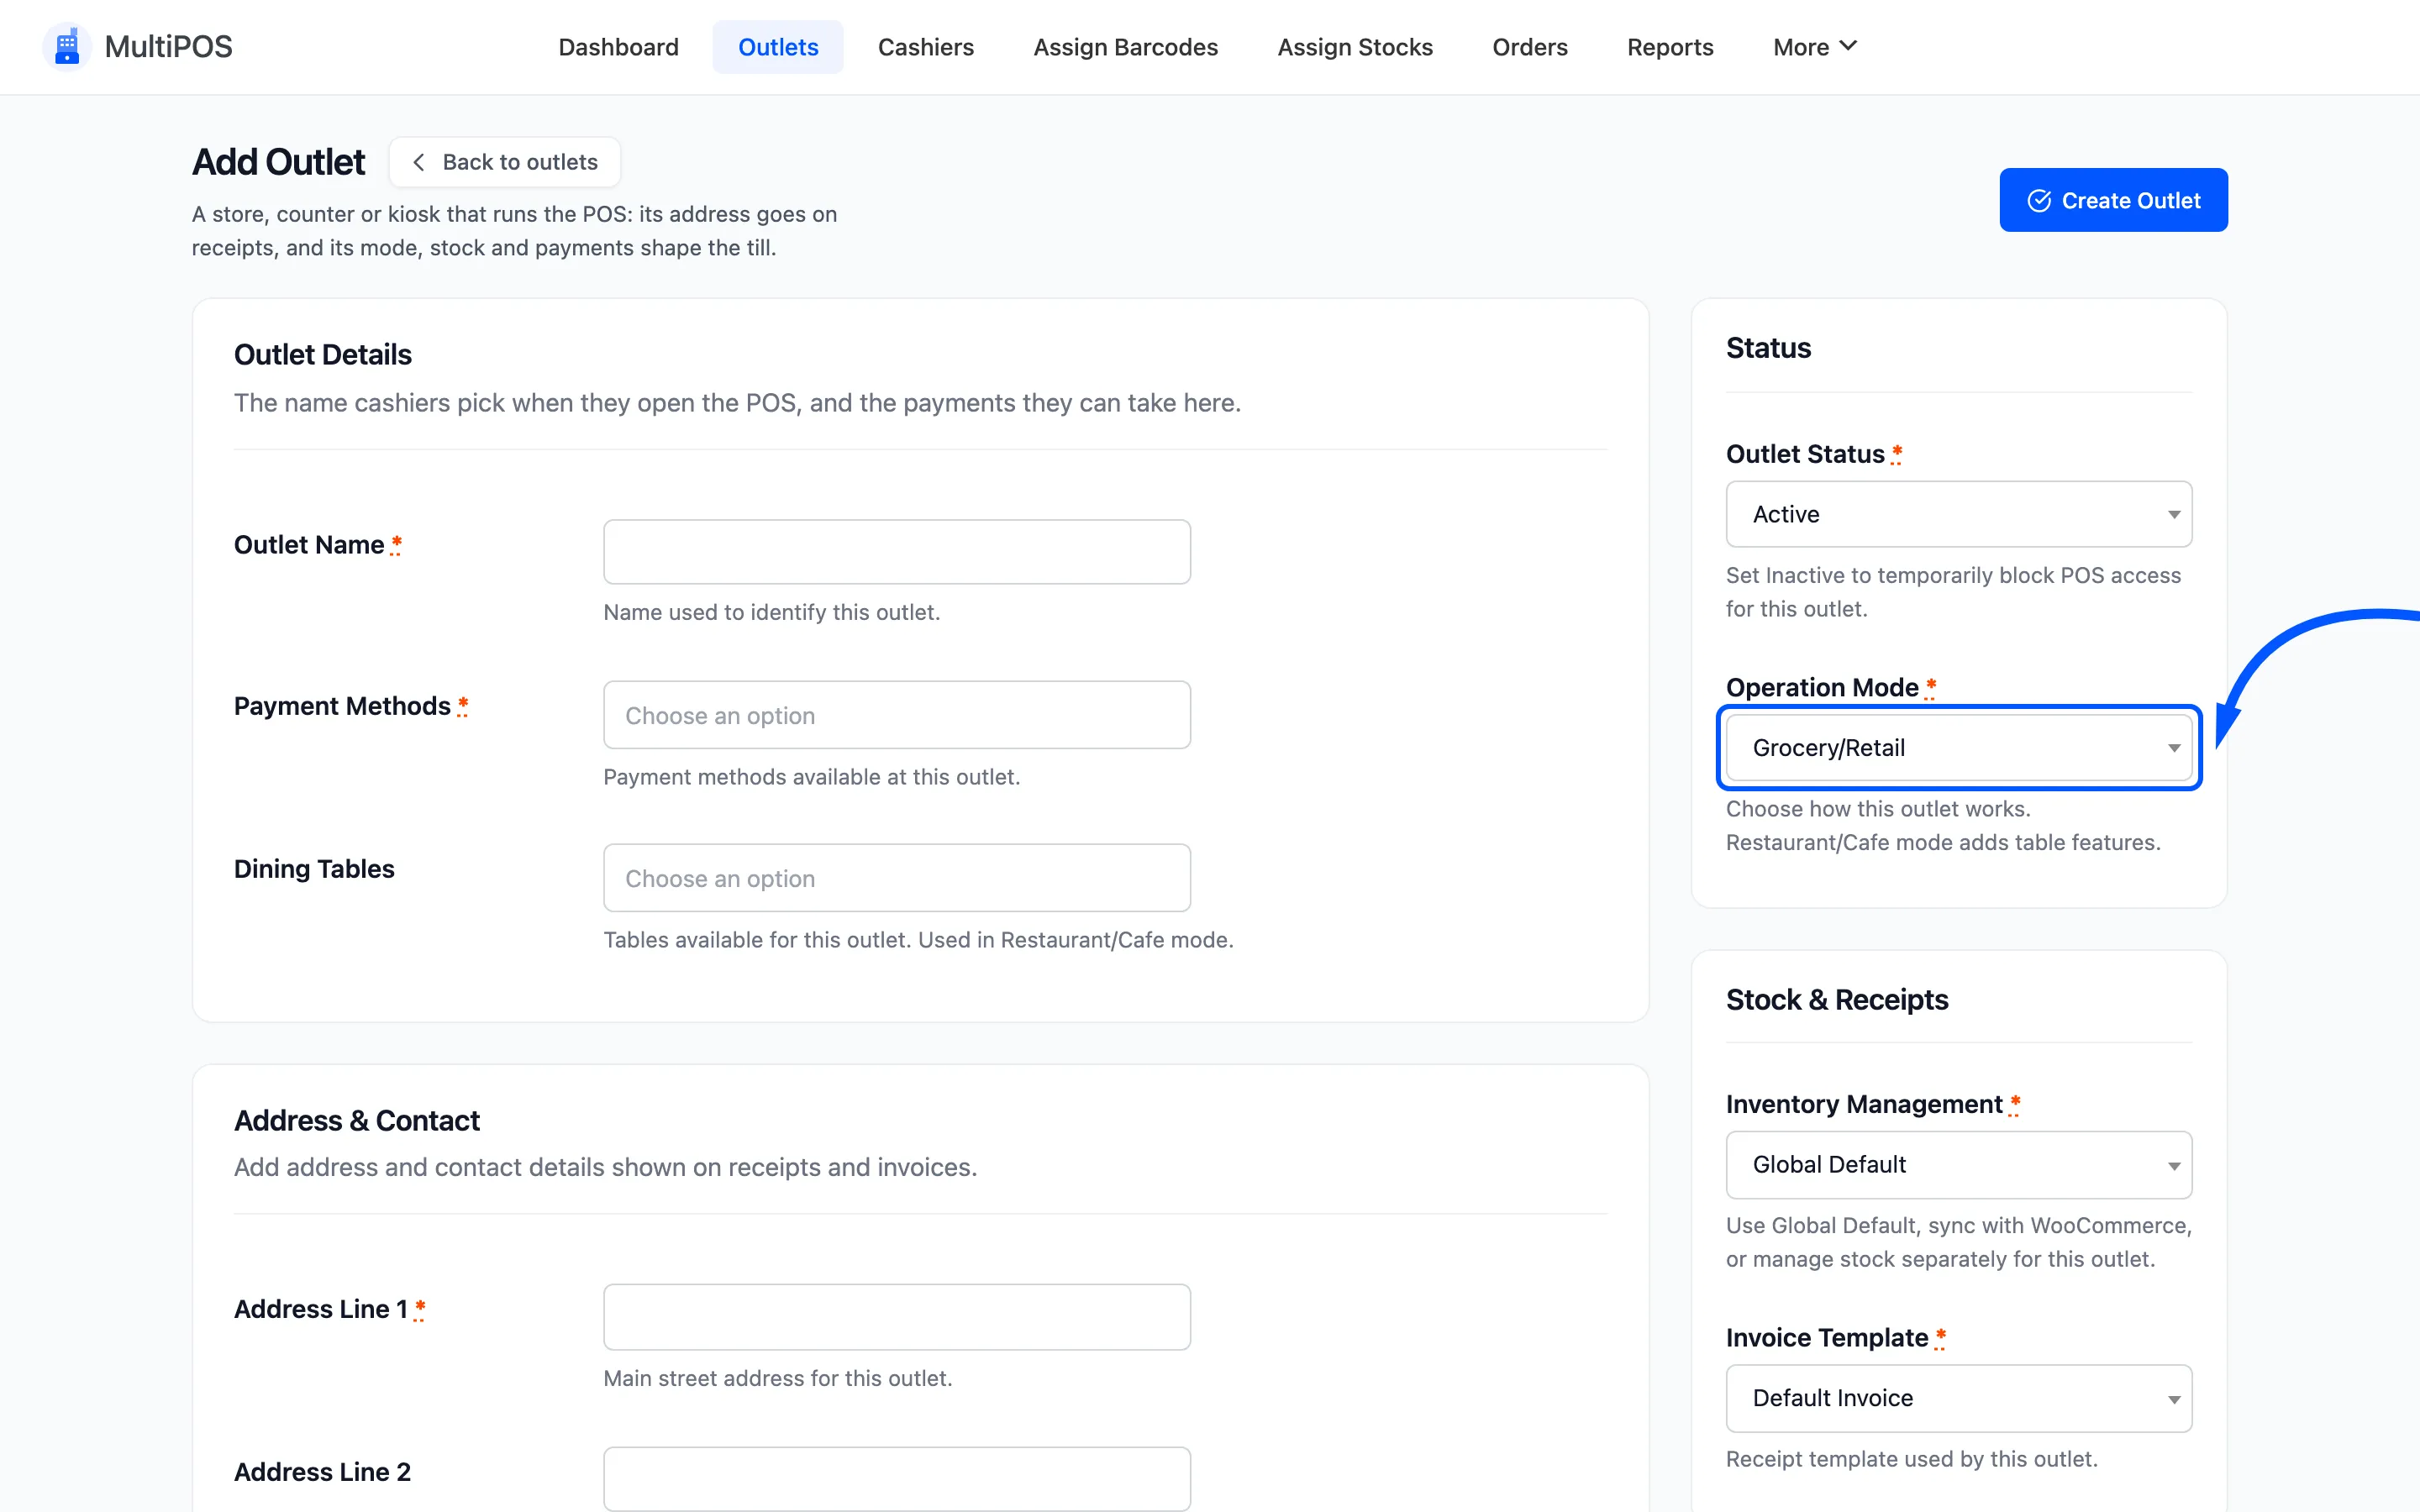
Restaurant/Cafe adds the Tables screen to the POS menu, Select Table in the cart, and the Dine in / Take Away choice. Grocery/Retail hides all three.
Stock & Receipts (Pro)
Section titled “Stock & Receipts (Pro)”- Inventory Management: Global Default follows the General tab. Centralized (WooCommerce Sync) sells from the WooCommerce stock. Custom (Manual POS Stock) keeps this outlet’s own count, set under Assign Stocks.
- Invoice Template: Which receipt template this outlet prints with.
At a Glance
Section titled “At a Glance”On an existing outlet, At a Glance shows today’s sales, the last 30 days, its cashiers and the last register close, with links to its orders, registers, stock and, for a restaurant, the kitchen view.
The header buttons
Section titled “The header buttons”The list’s header carries Visit POS, which opens the terminal in a new tab. Use it to check your work.
Kitchen View
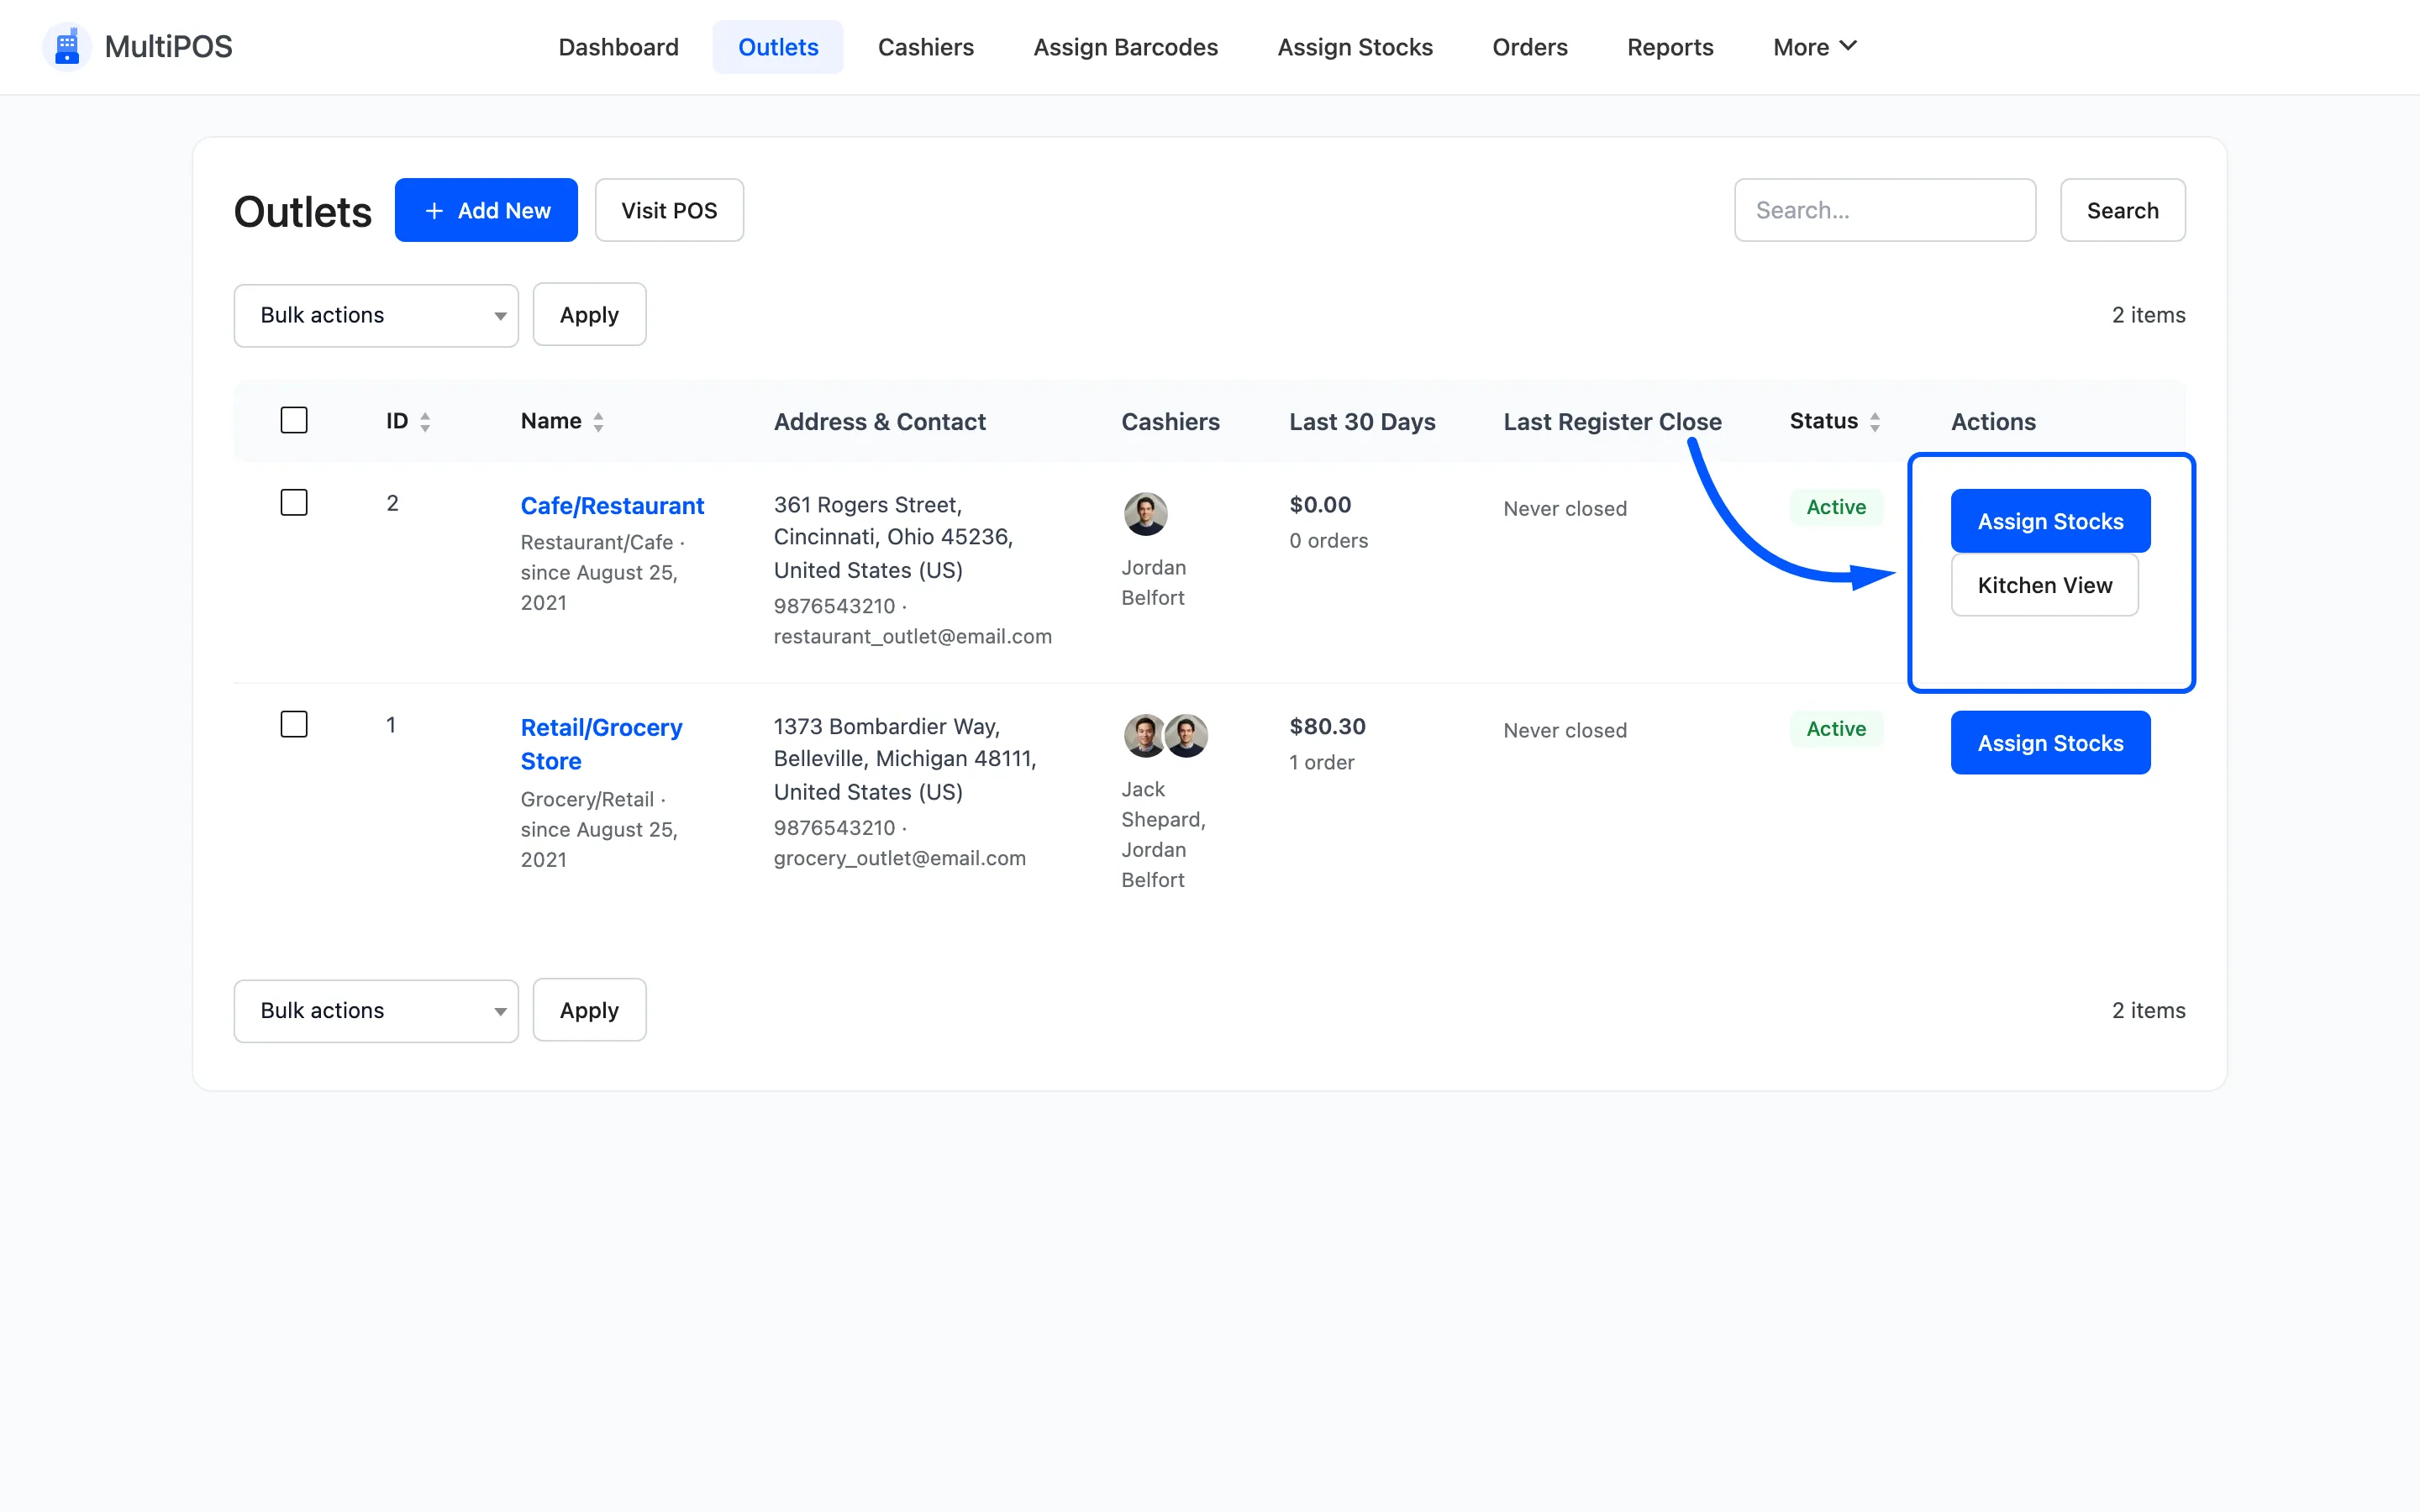
Section titled “Kitchen View”Kitchen View is a per-row action, not a header button, and it appears only on a row whose Operation Mode is Restaurant/Cafe. The Retail/Grocery row beside it has no such button.
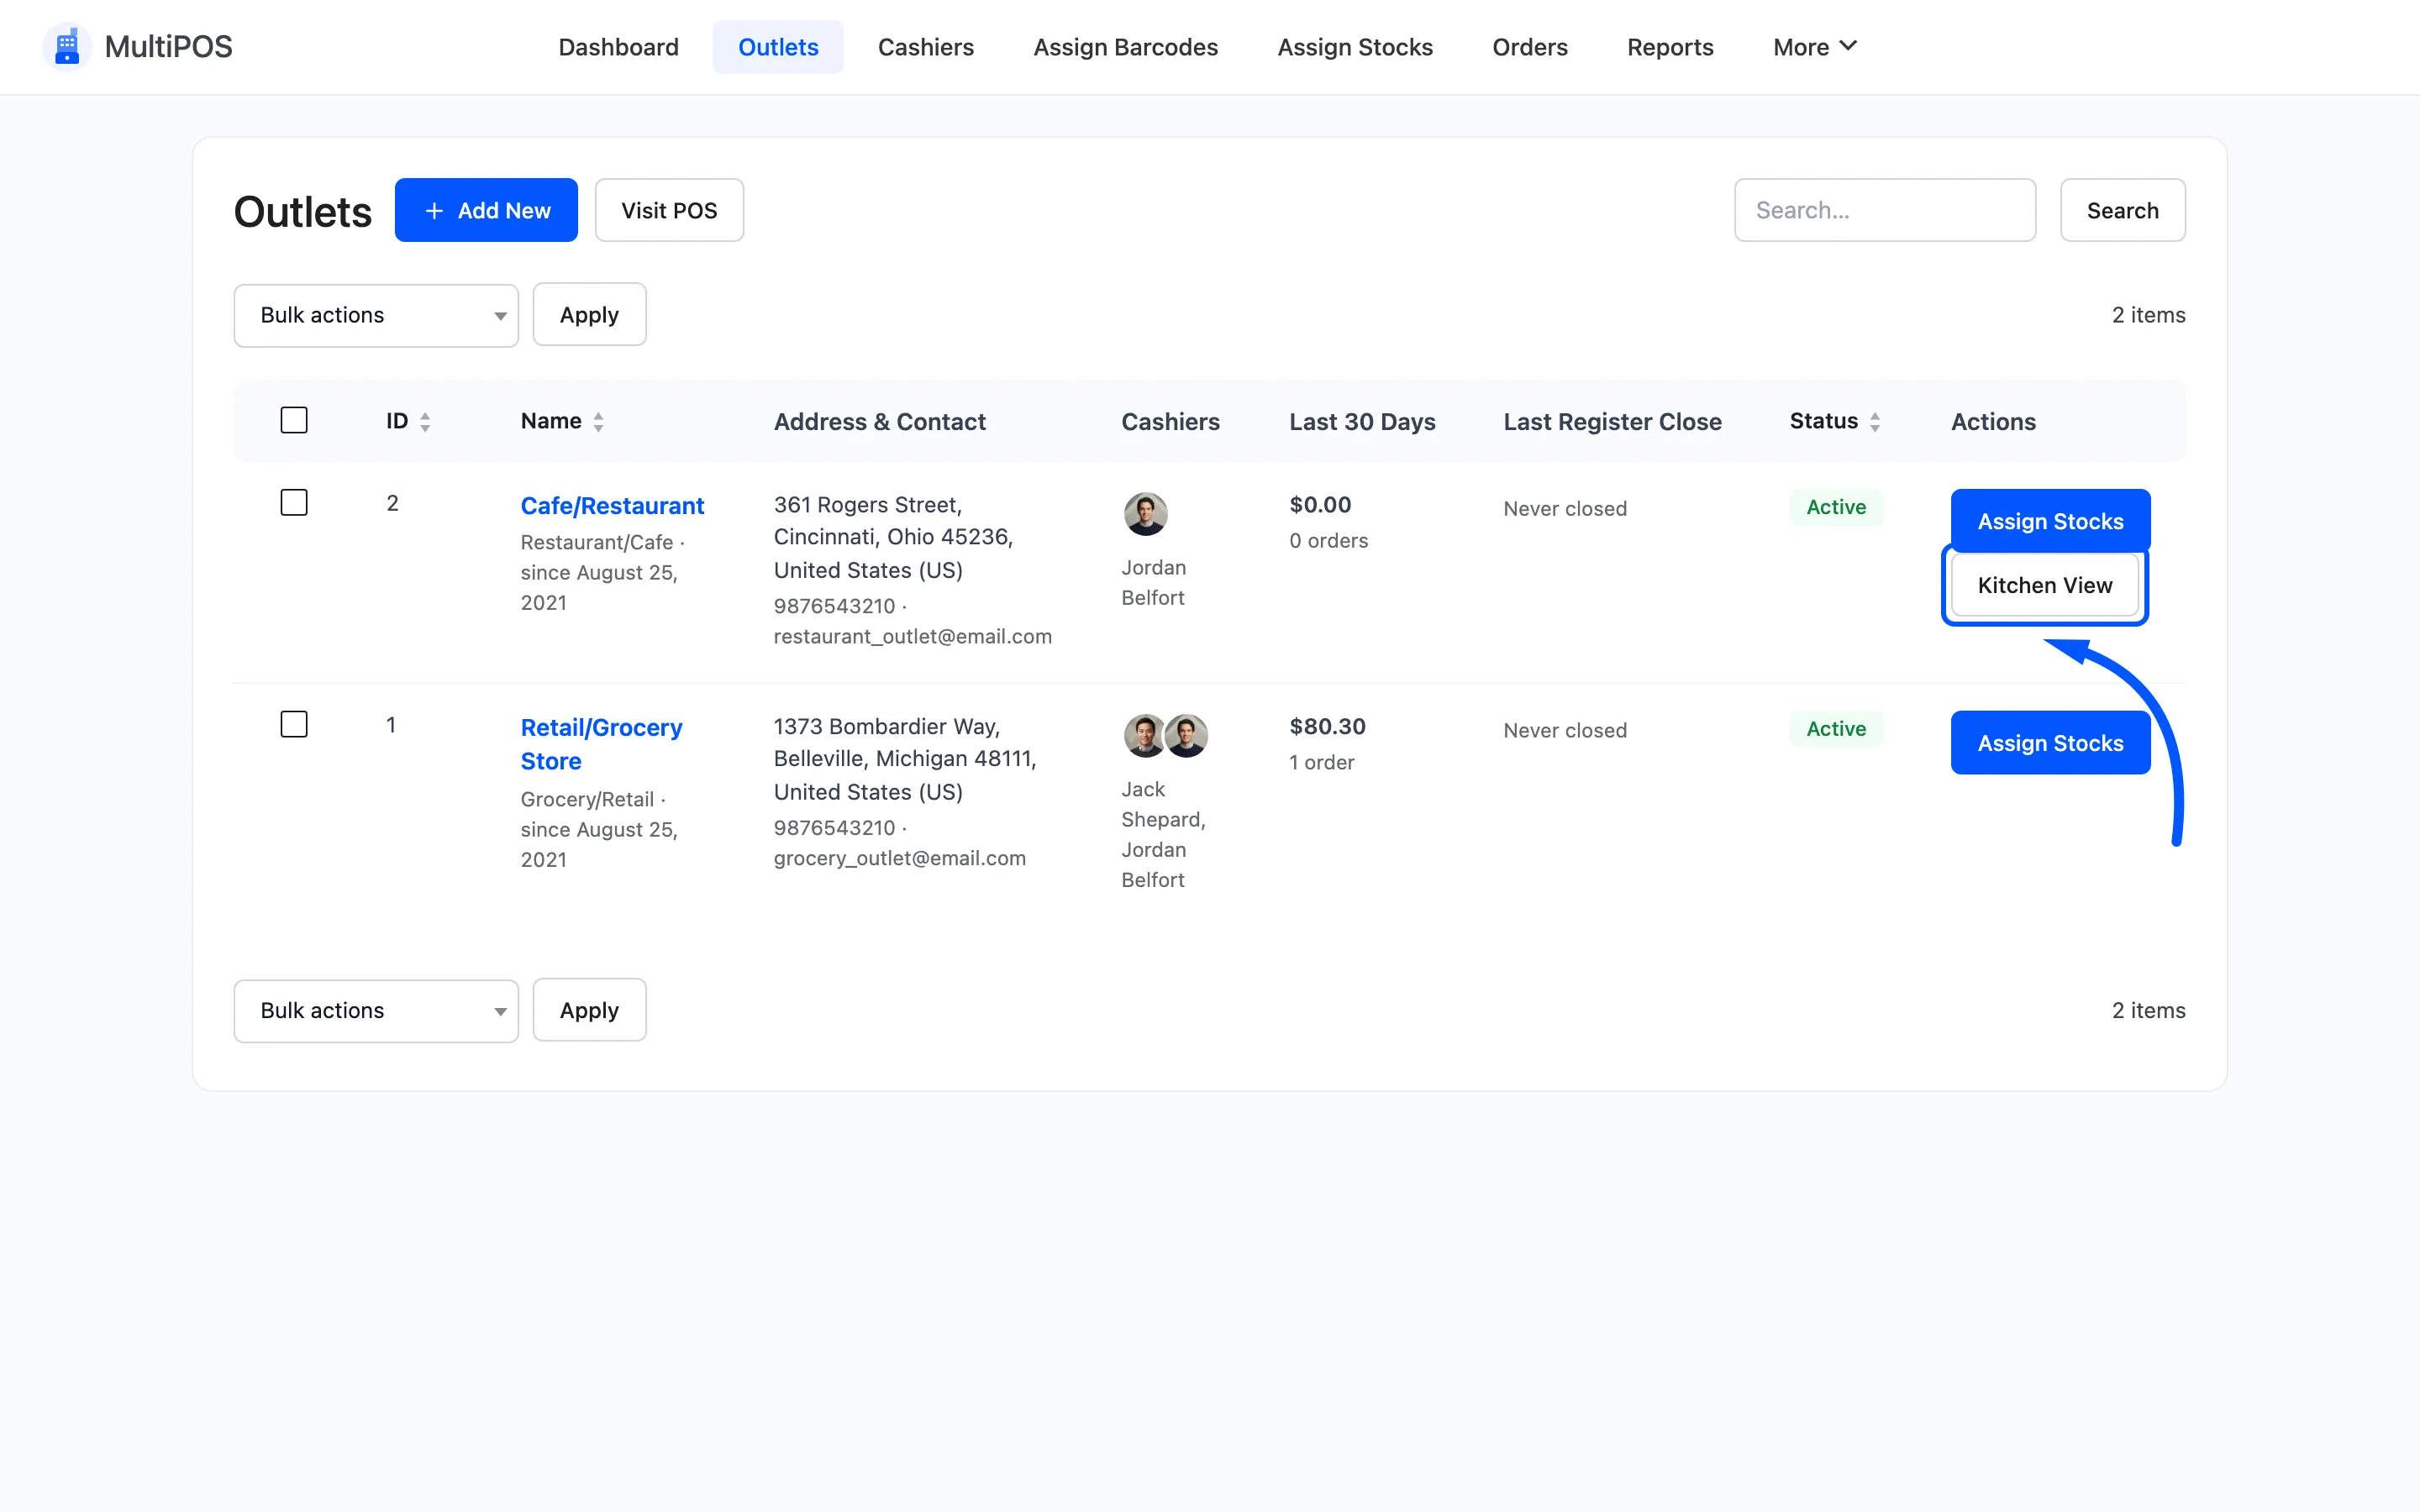
It opens that outlet’s Kitchen Display in a new tab. Each outlet has its own, so a kitchen only ever sees its own orders.
Editing later
Section titled “Editing later”Everything on the form can be changed, and changes apply to new orders only. Past orders keep the address and payment method they were created with, which is what you want for your records.
Where to go next
Section titled “Where to go next”- How to Set Up Your Outlet for a walkthrough.
- Payment Methods to define what you can assign here.
- Assign Stocks for per-outlet stock.