

How to Take Your First Sale at a Vendor's POS
This is a whole sale, start to finish, at the Daily Grind Bakery Counter: two pastries and a coffee, paid in cash.
Step 1: Open the POS
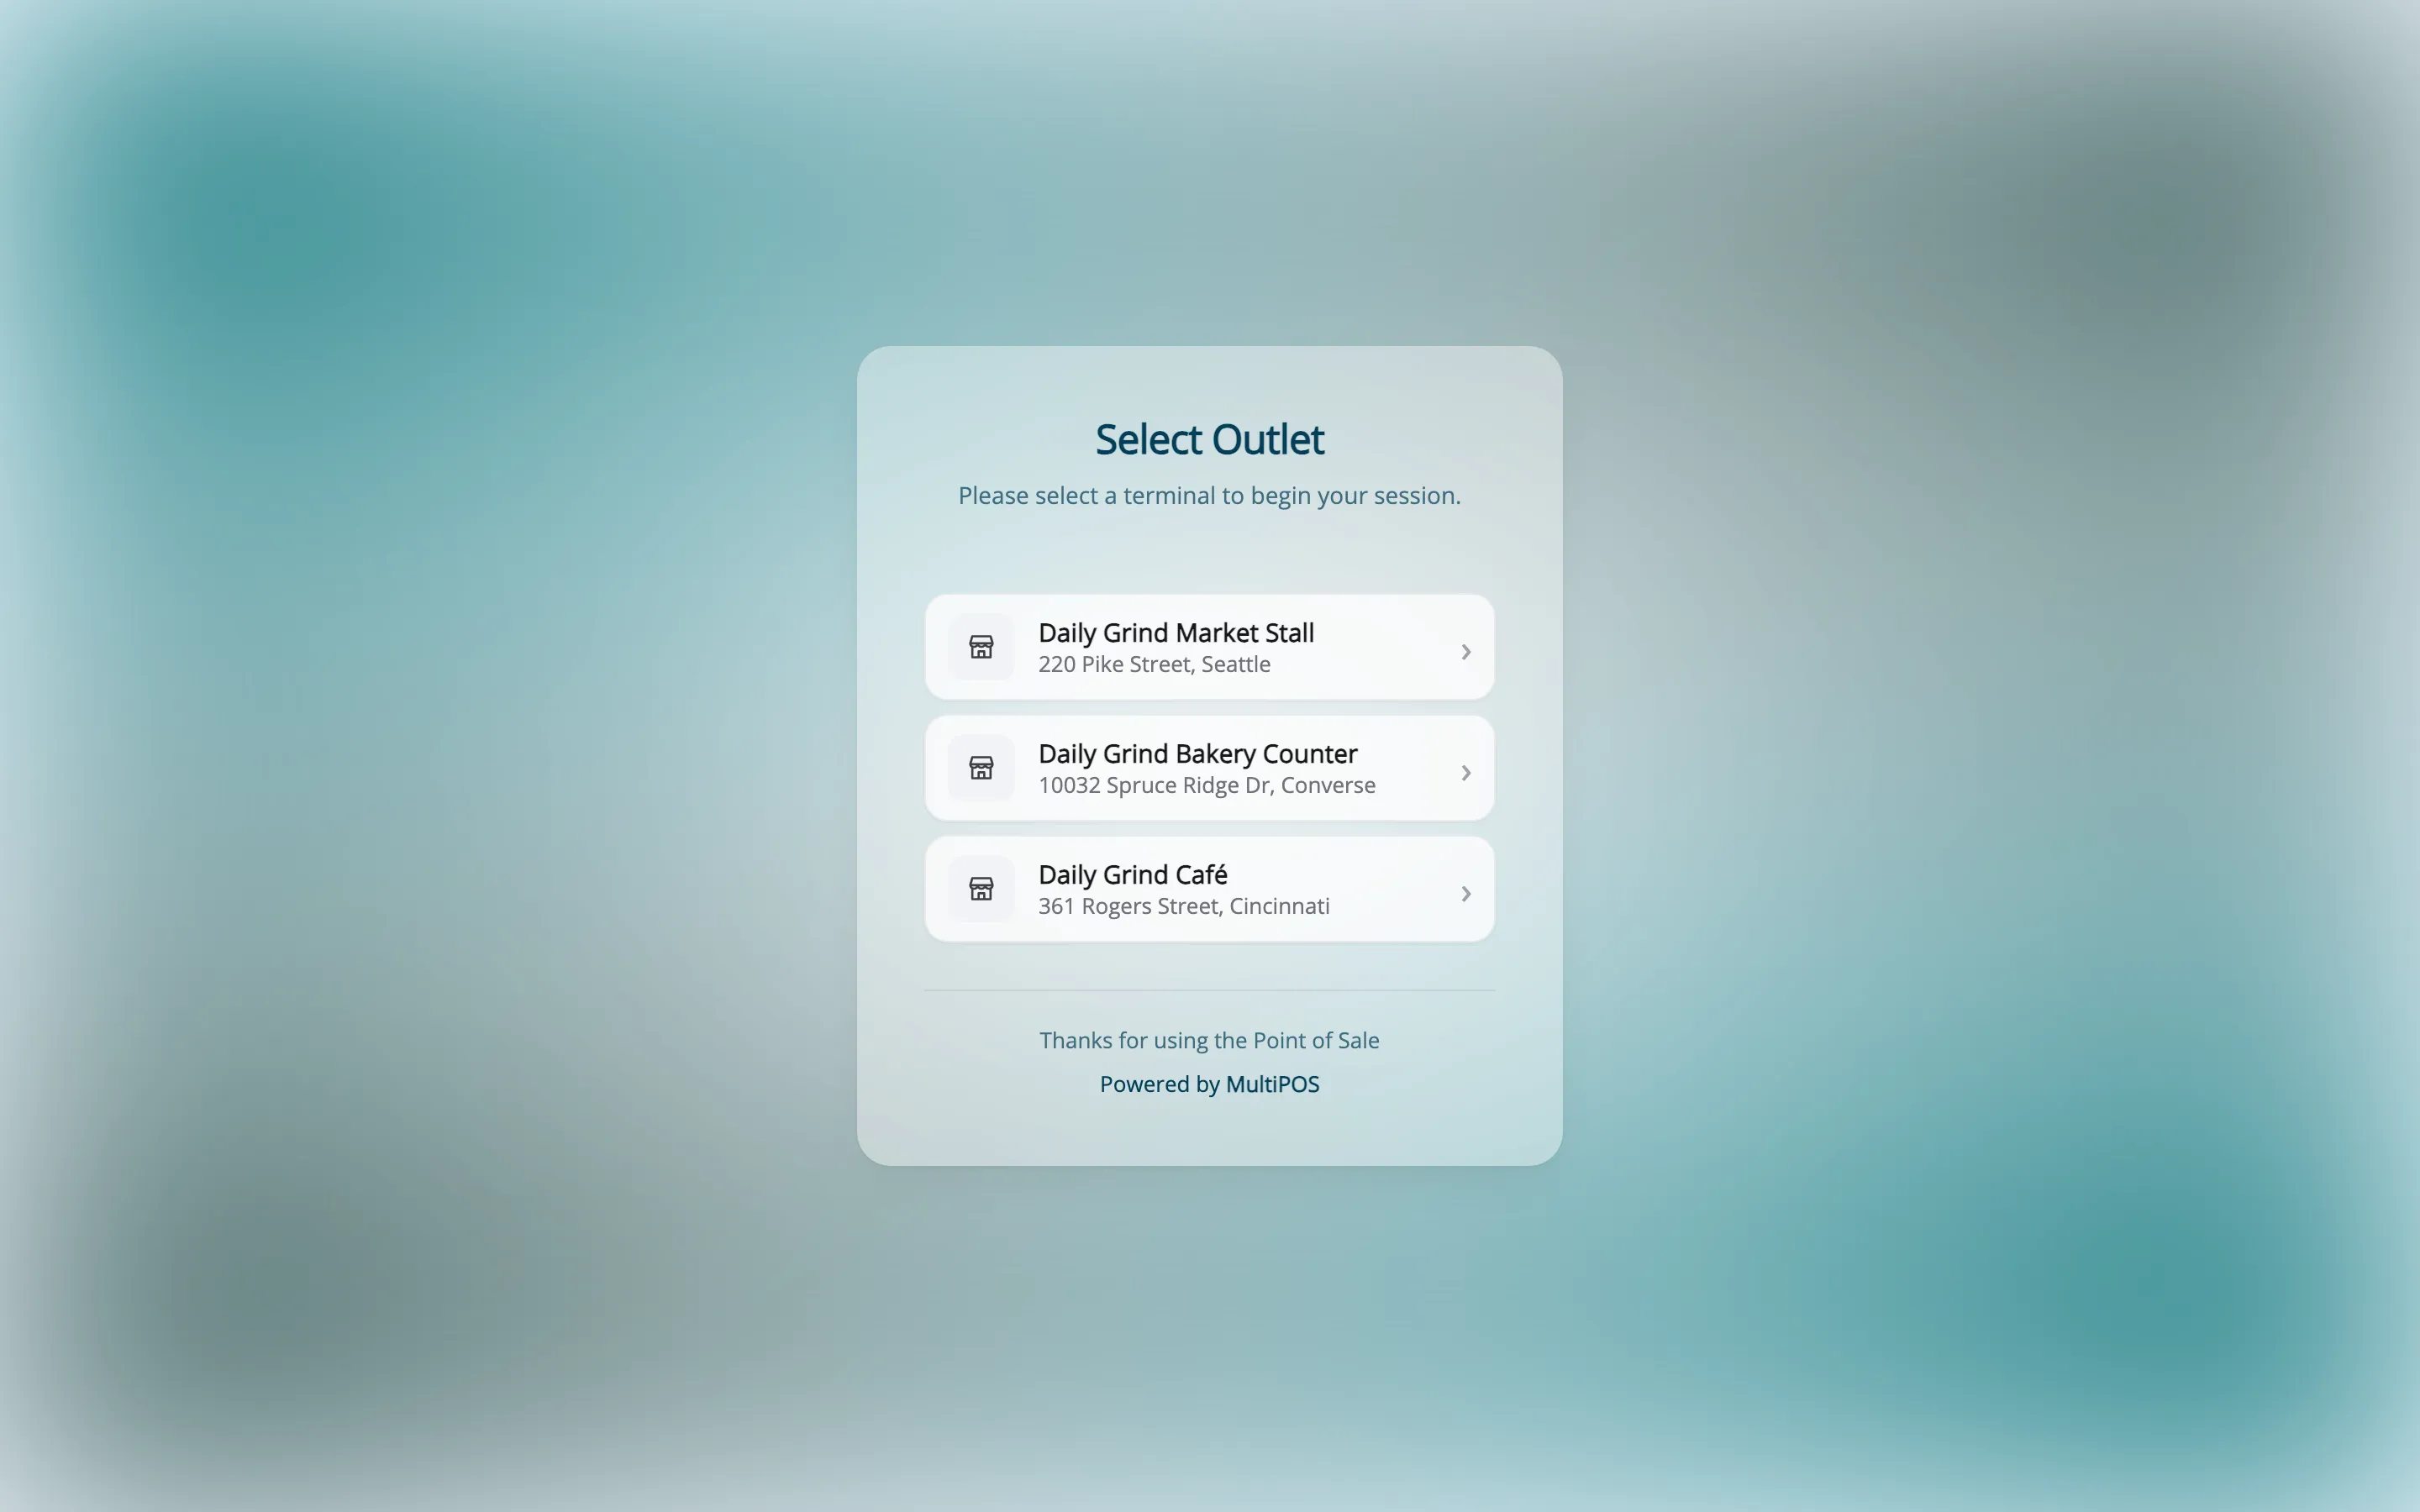
Section titled “Step 1: Open the POS”Go to yoursite.com/pos and sign in. Pick the outlet you are working at.
Step 2: Count the opening amount
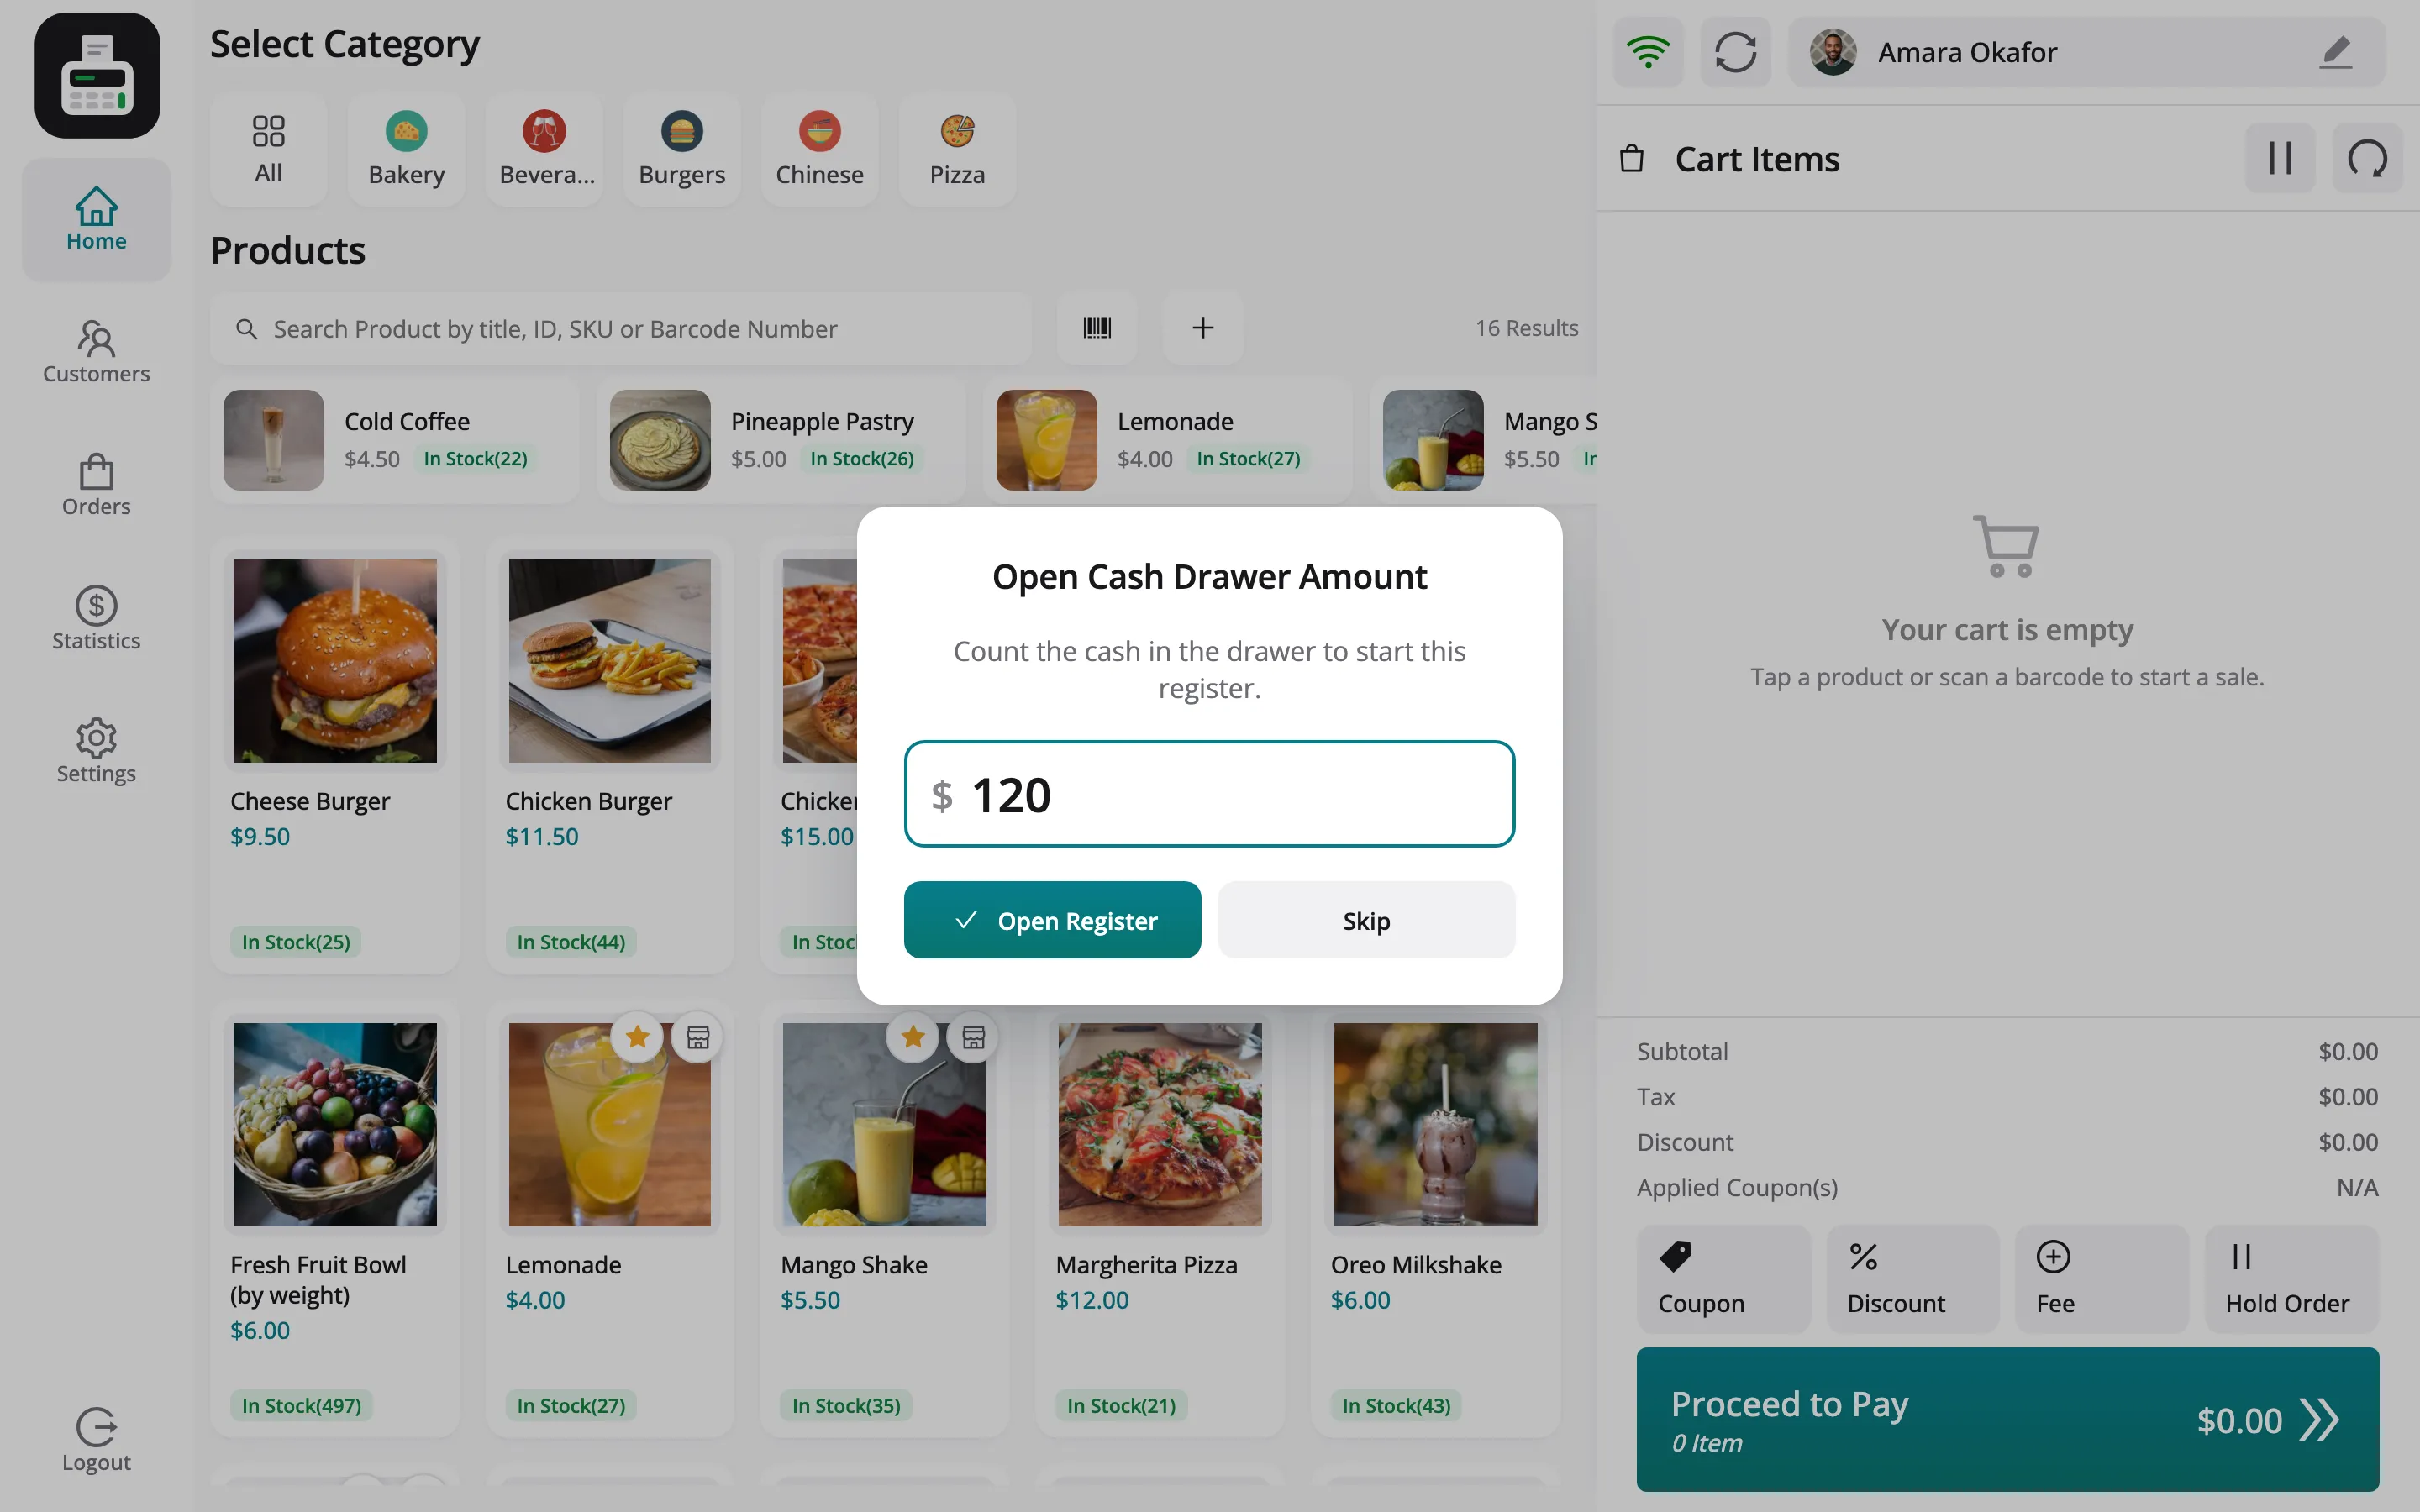
Section titled “Step 2: Count the opening amount”At the start of a shift, count the cash in the drawer, type it, and press Open Register.
Step 3: Add products
Section titled “Step 3: Add products”Tap a product card or a Quick Key, scan a barcode, or type in the search. Each tap adds one; tap again for a second.
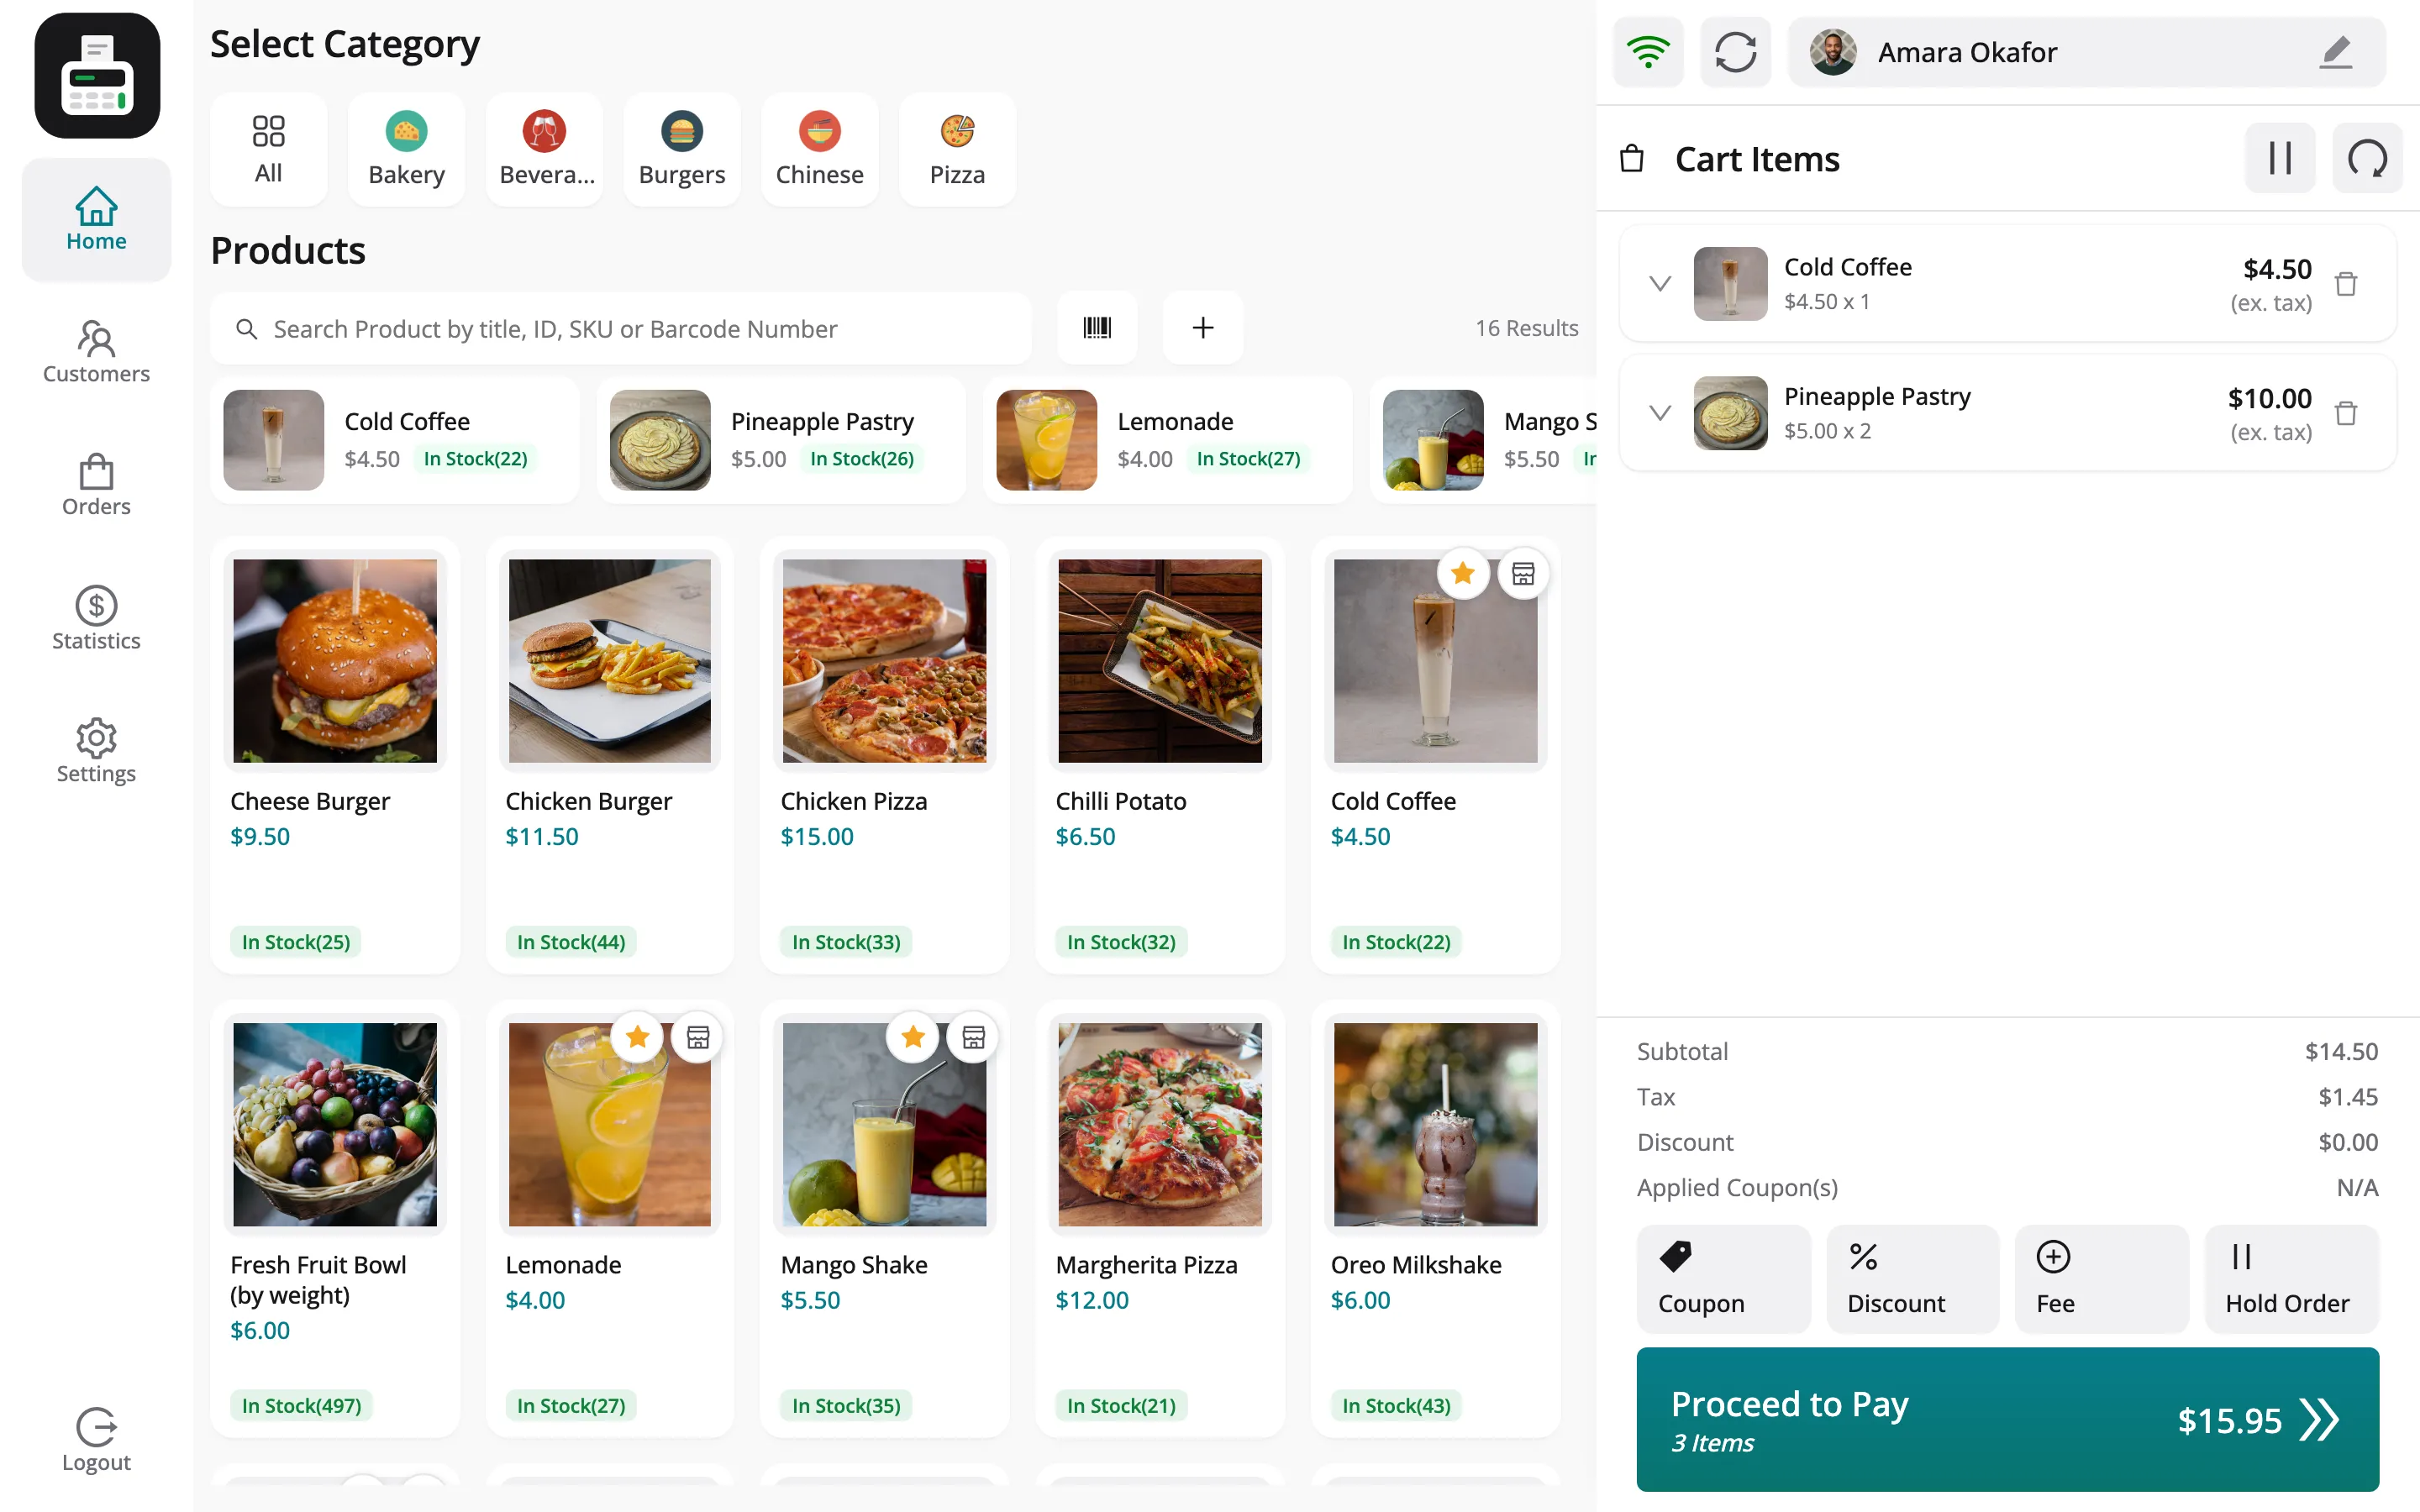
The cart shows each line, then the subtotal, tax, discount and the total on Proceed to Pay.
Step 4: Take payment
Section titled “Step 4: Take payment”Press Proceed to Pay. Pick the method, then type the amount handed over or tap a quick amount. Change shows what to give back.
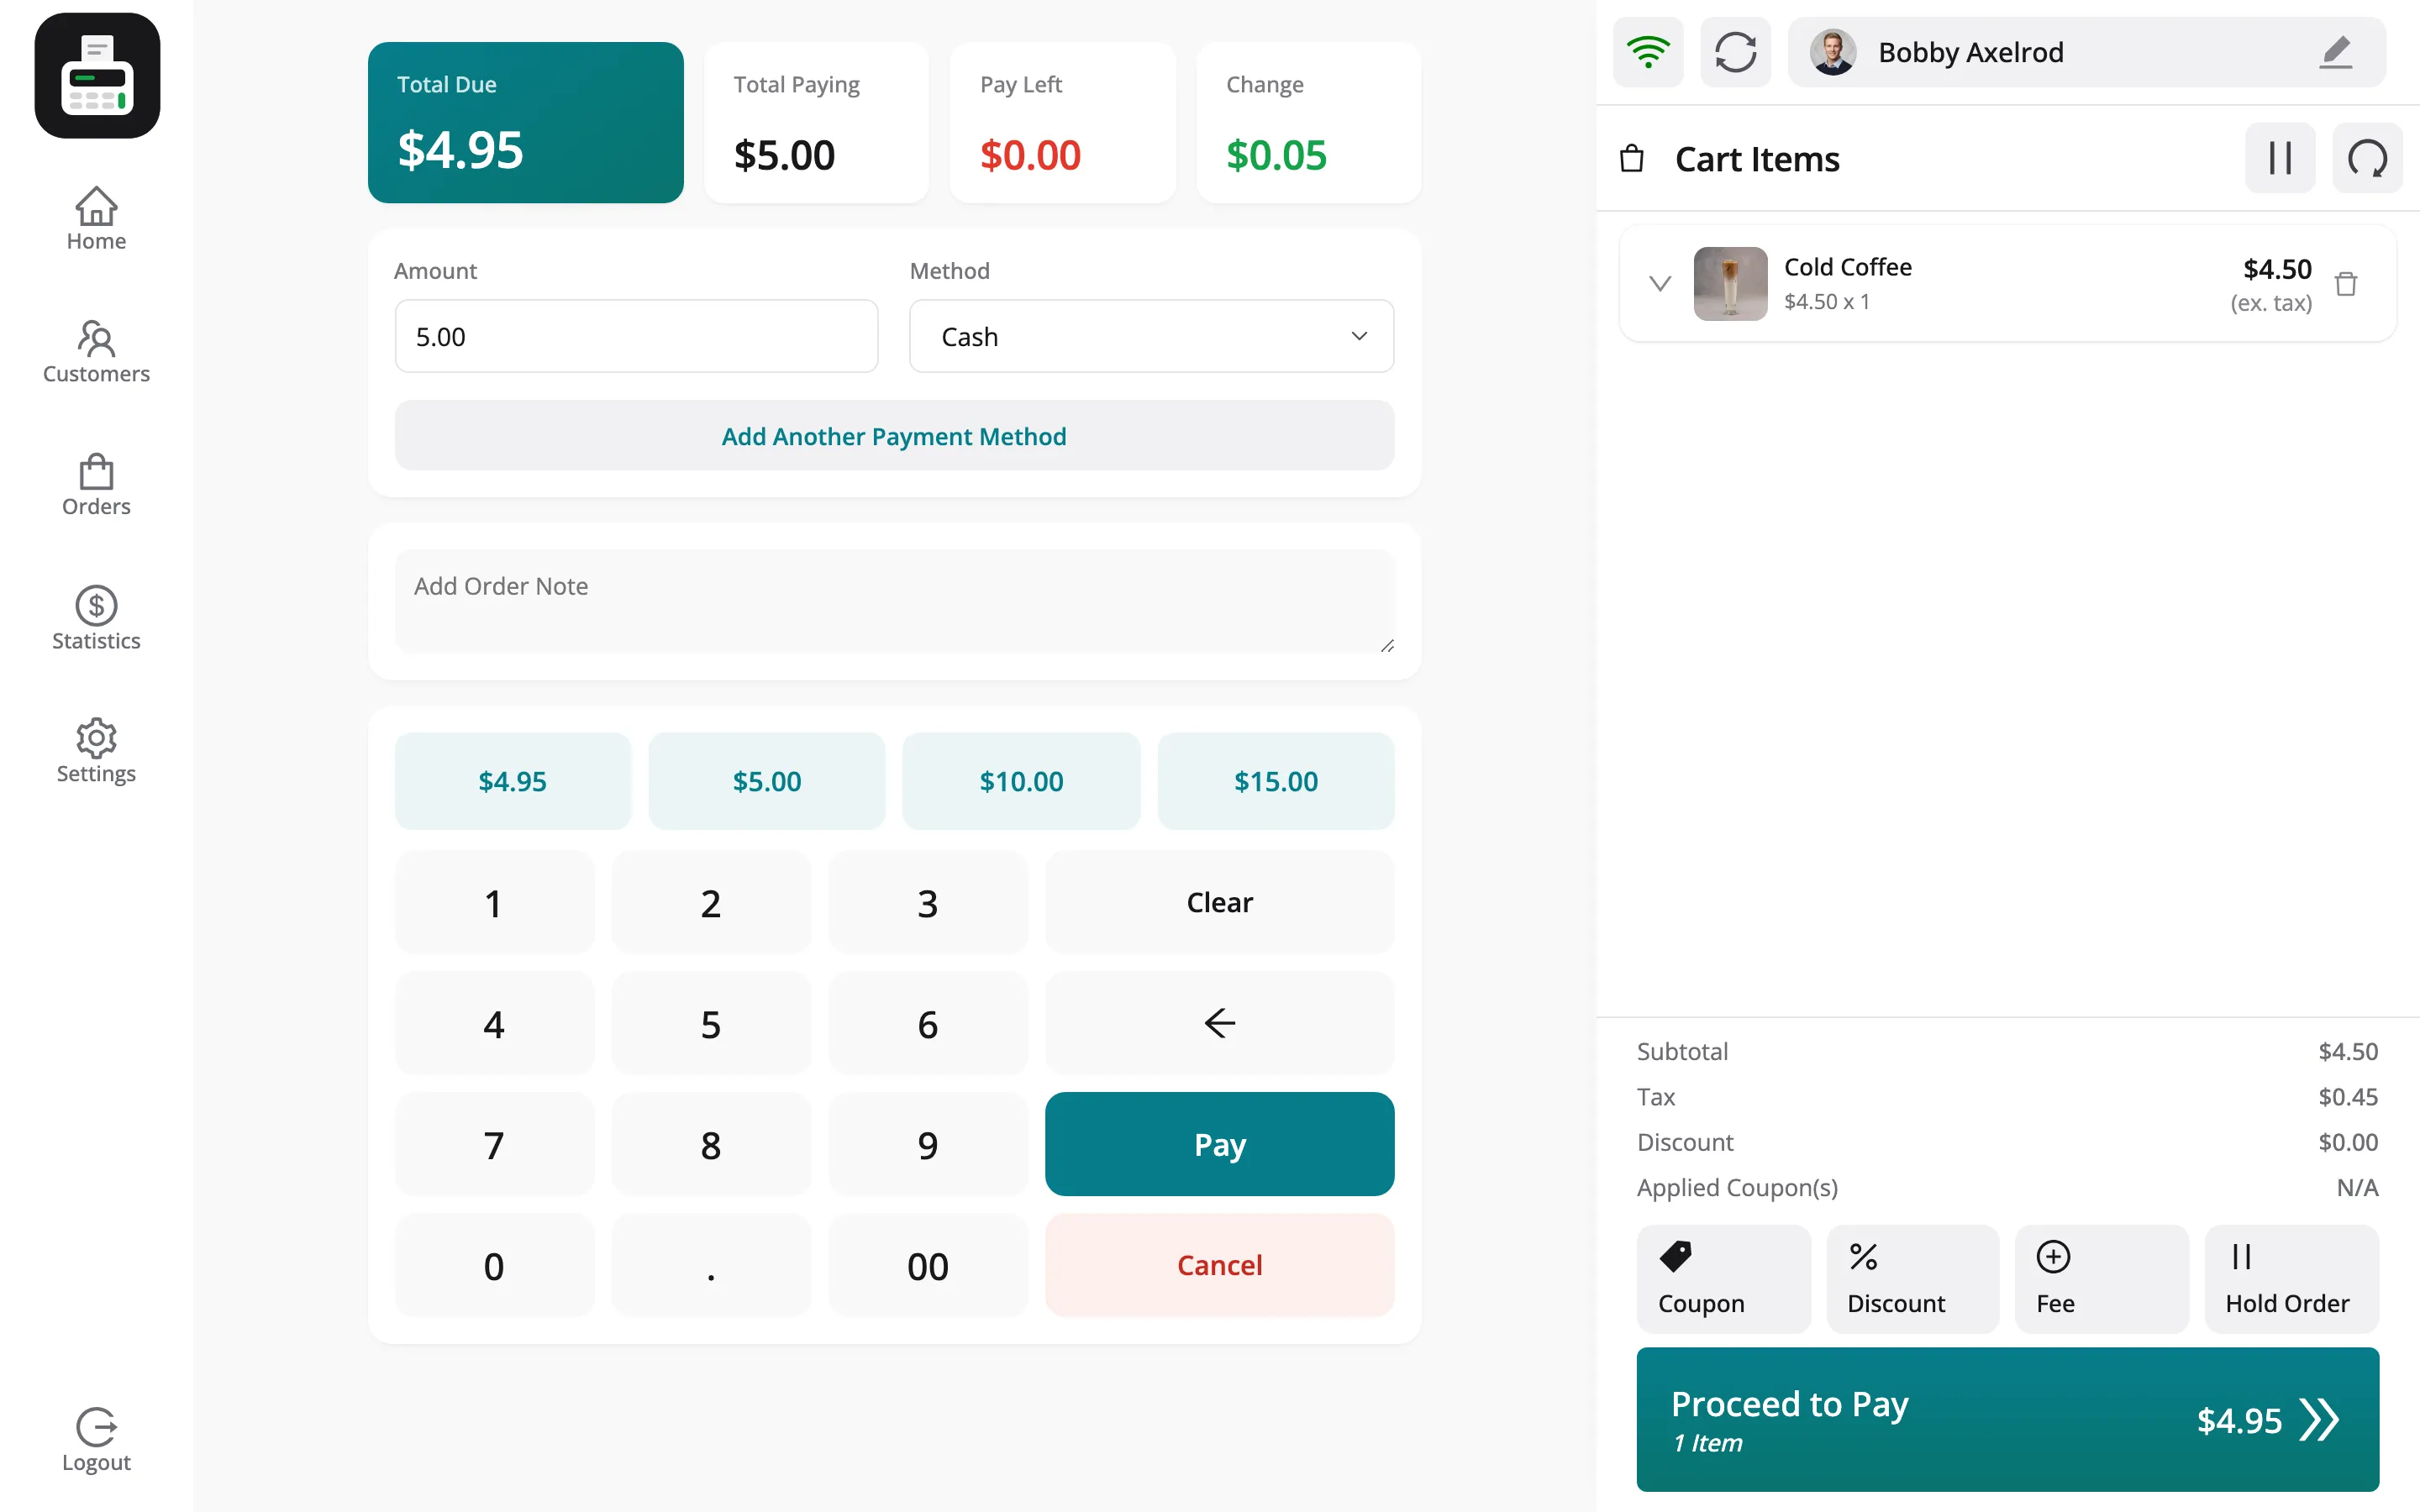
Press Pay.
Step 5: Print the receipt
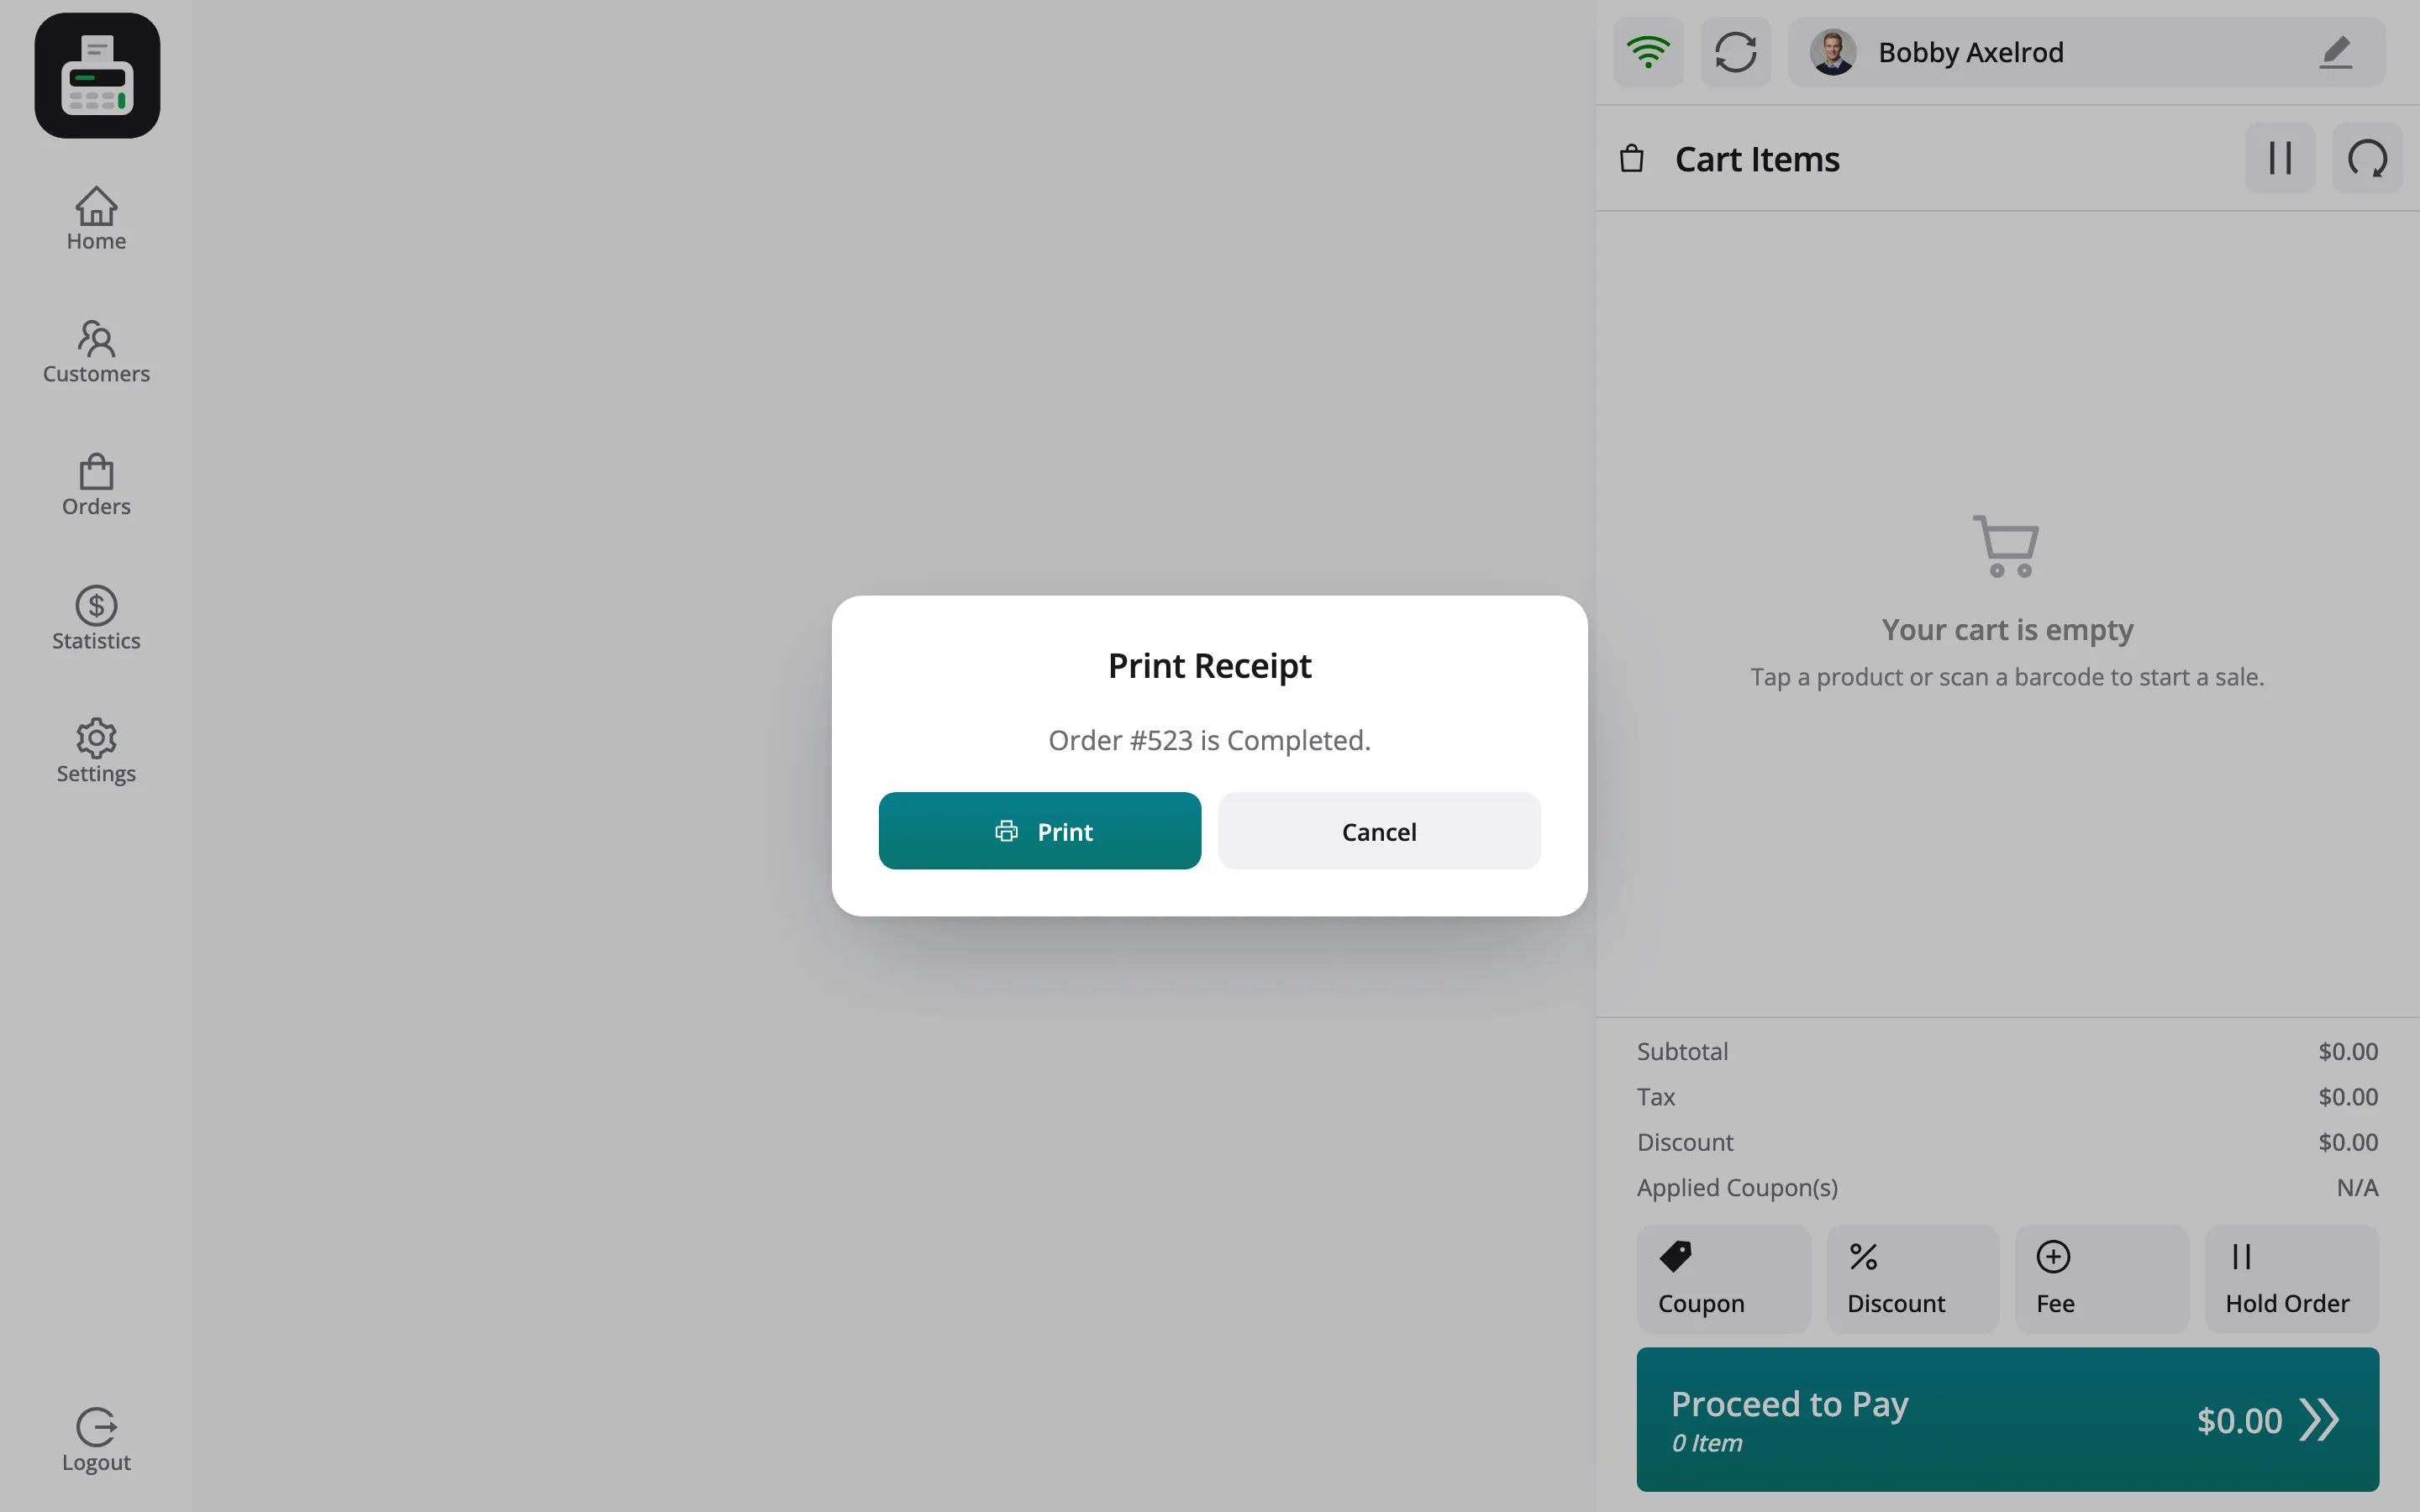
Section titled “Step 5: Print the receipt”The Print Receipt prompt names the order and its status. Press Print, or Cancel to skip. The sale is already made either way.
Step 6: Check the order
Section titled “Step 6: Check the order”Open Orders in the POS menu. The sale is at the top with its lines and totals.
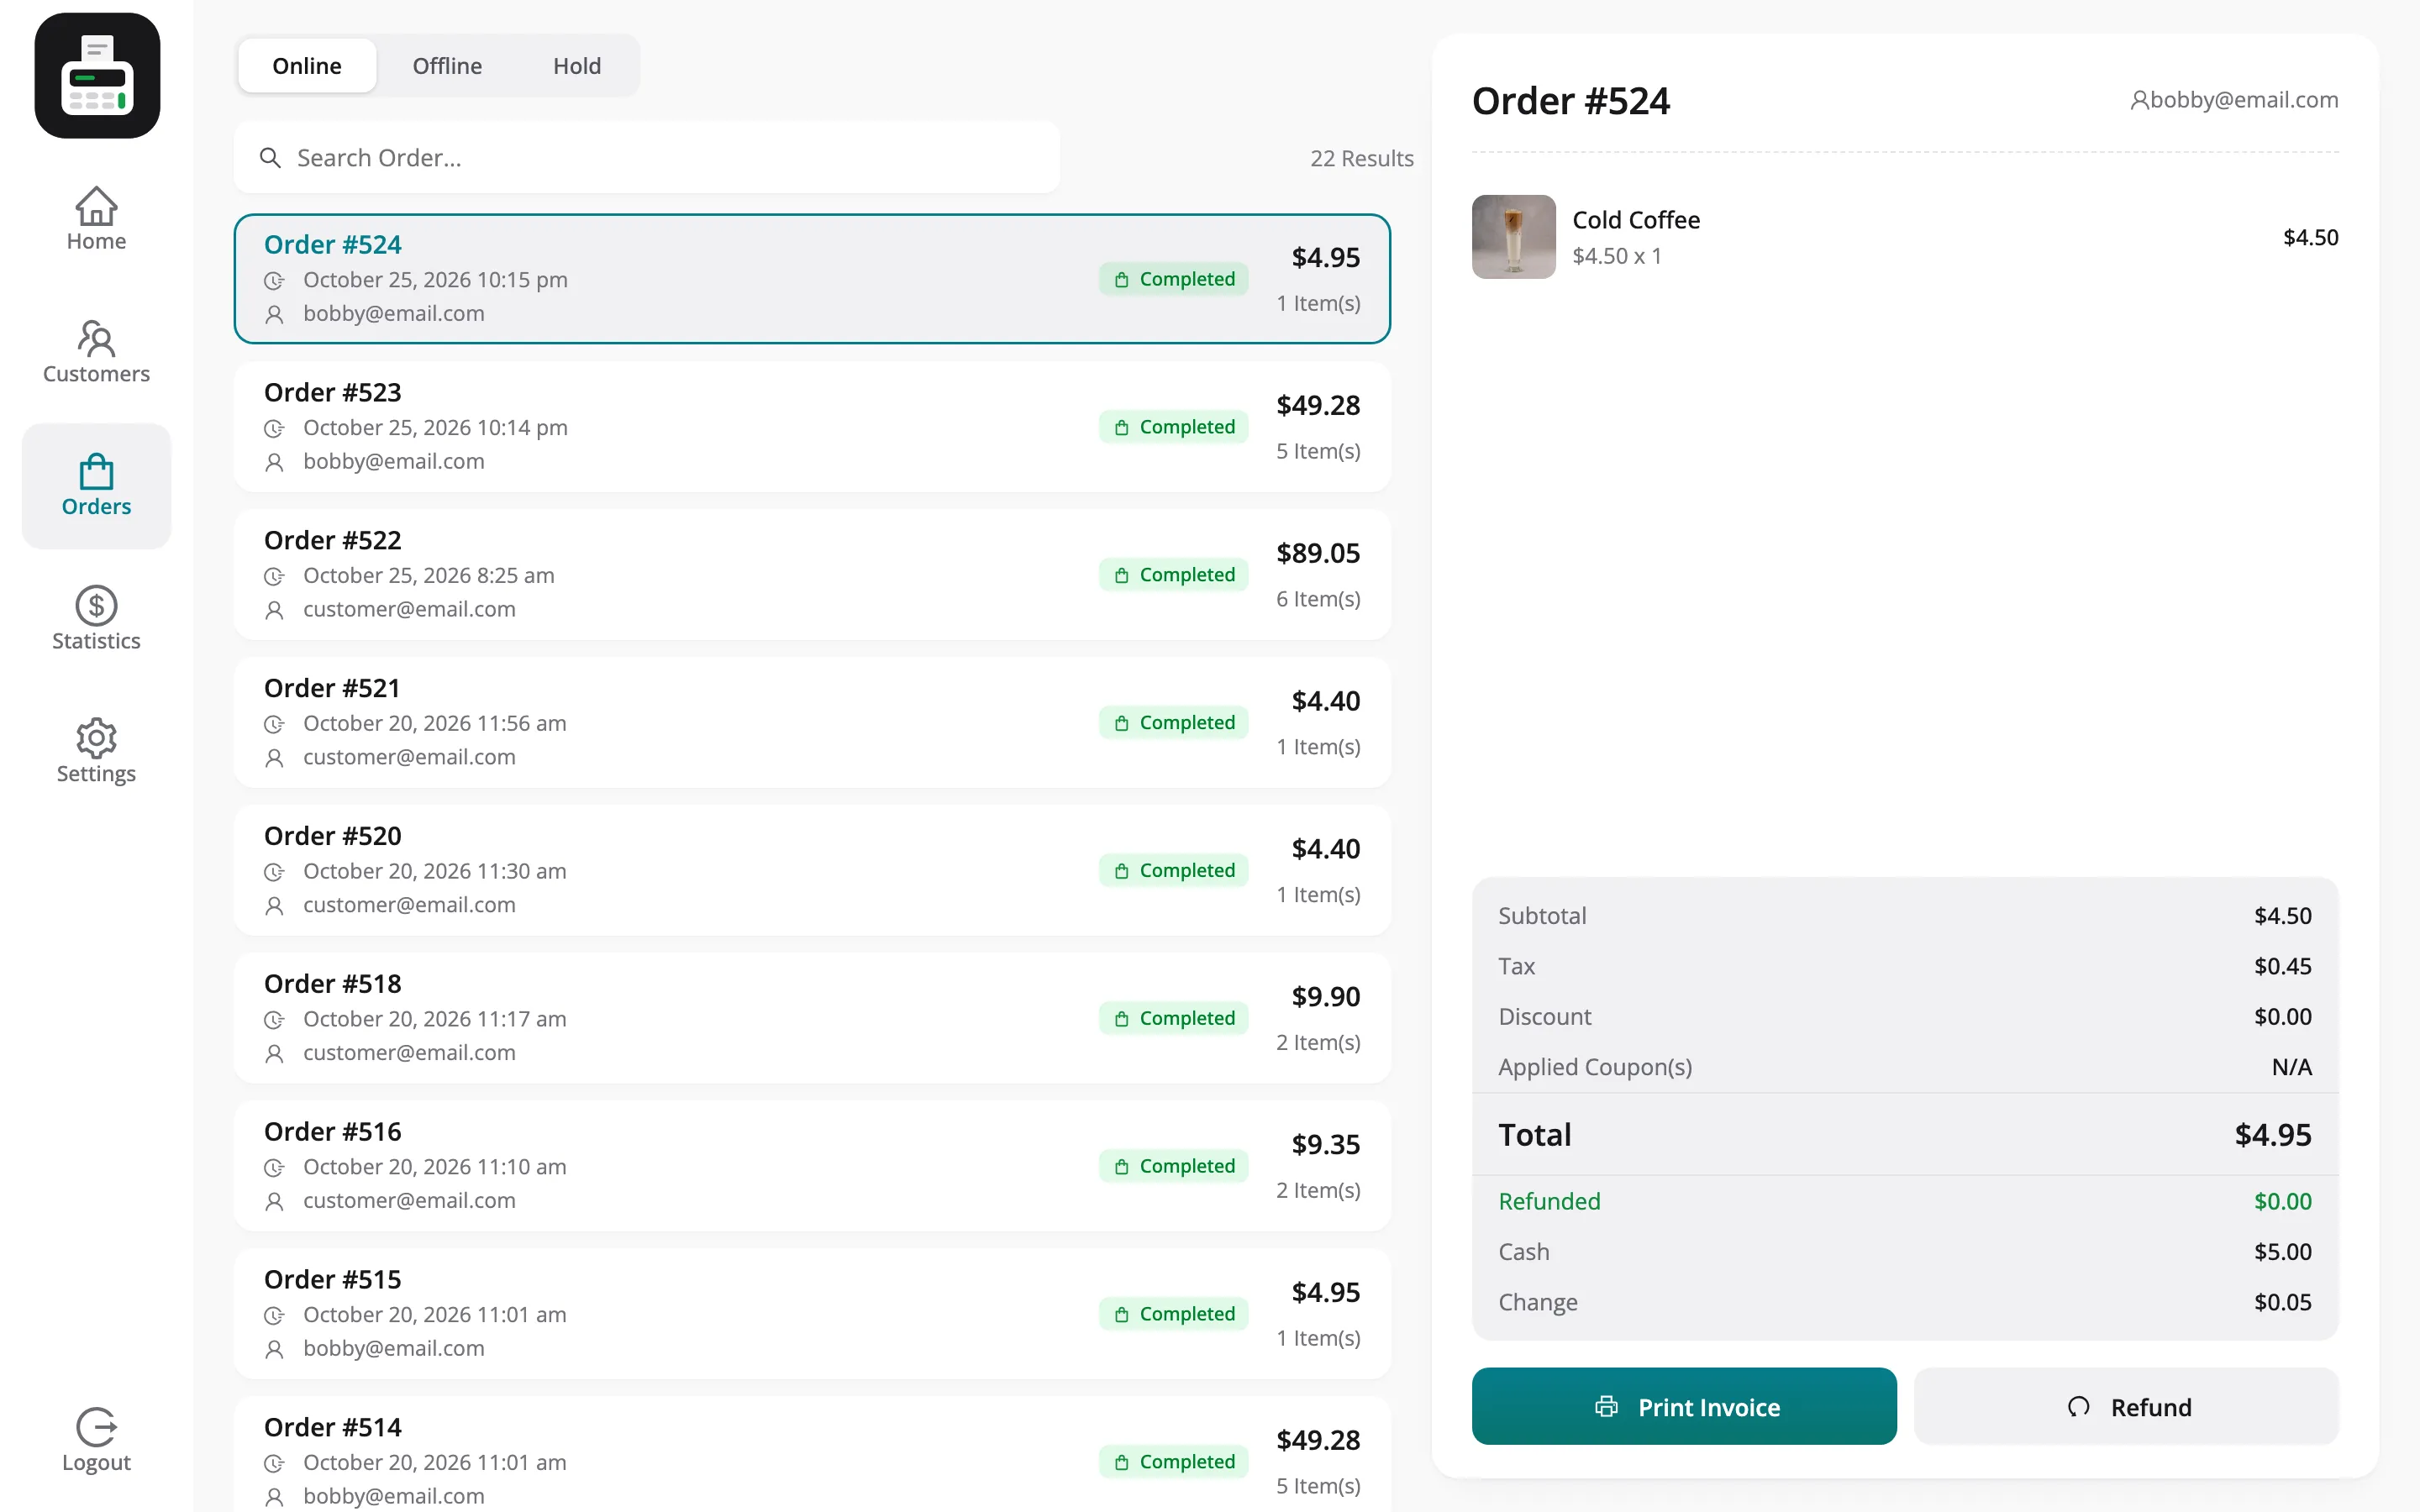
The same sale is now a WooCommerce order and a row in the vendor’s POS Orders. With Marketplace Orders on, it is also in the vendor’s WCFM Orders with its earning.