

How to Print Barcode Labels for Your Products
Labels let a cashier scan instead of search. A vendor prints labels for their own products from the store manager; the owner prints for any product.
Step 1: Choose what labels carry
Section titled “Step 1: Choose what labels carry”Go to Configuration → Printer → Barcode Label Content. Tick the Label Details to print beside the bars, and check the preview.
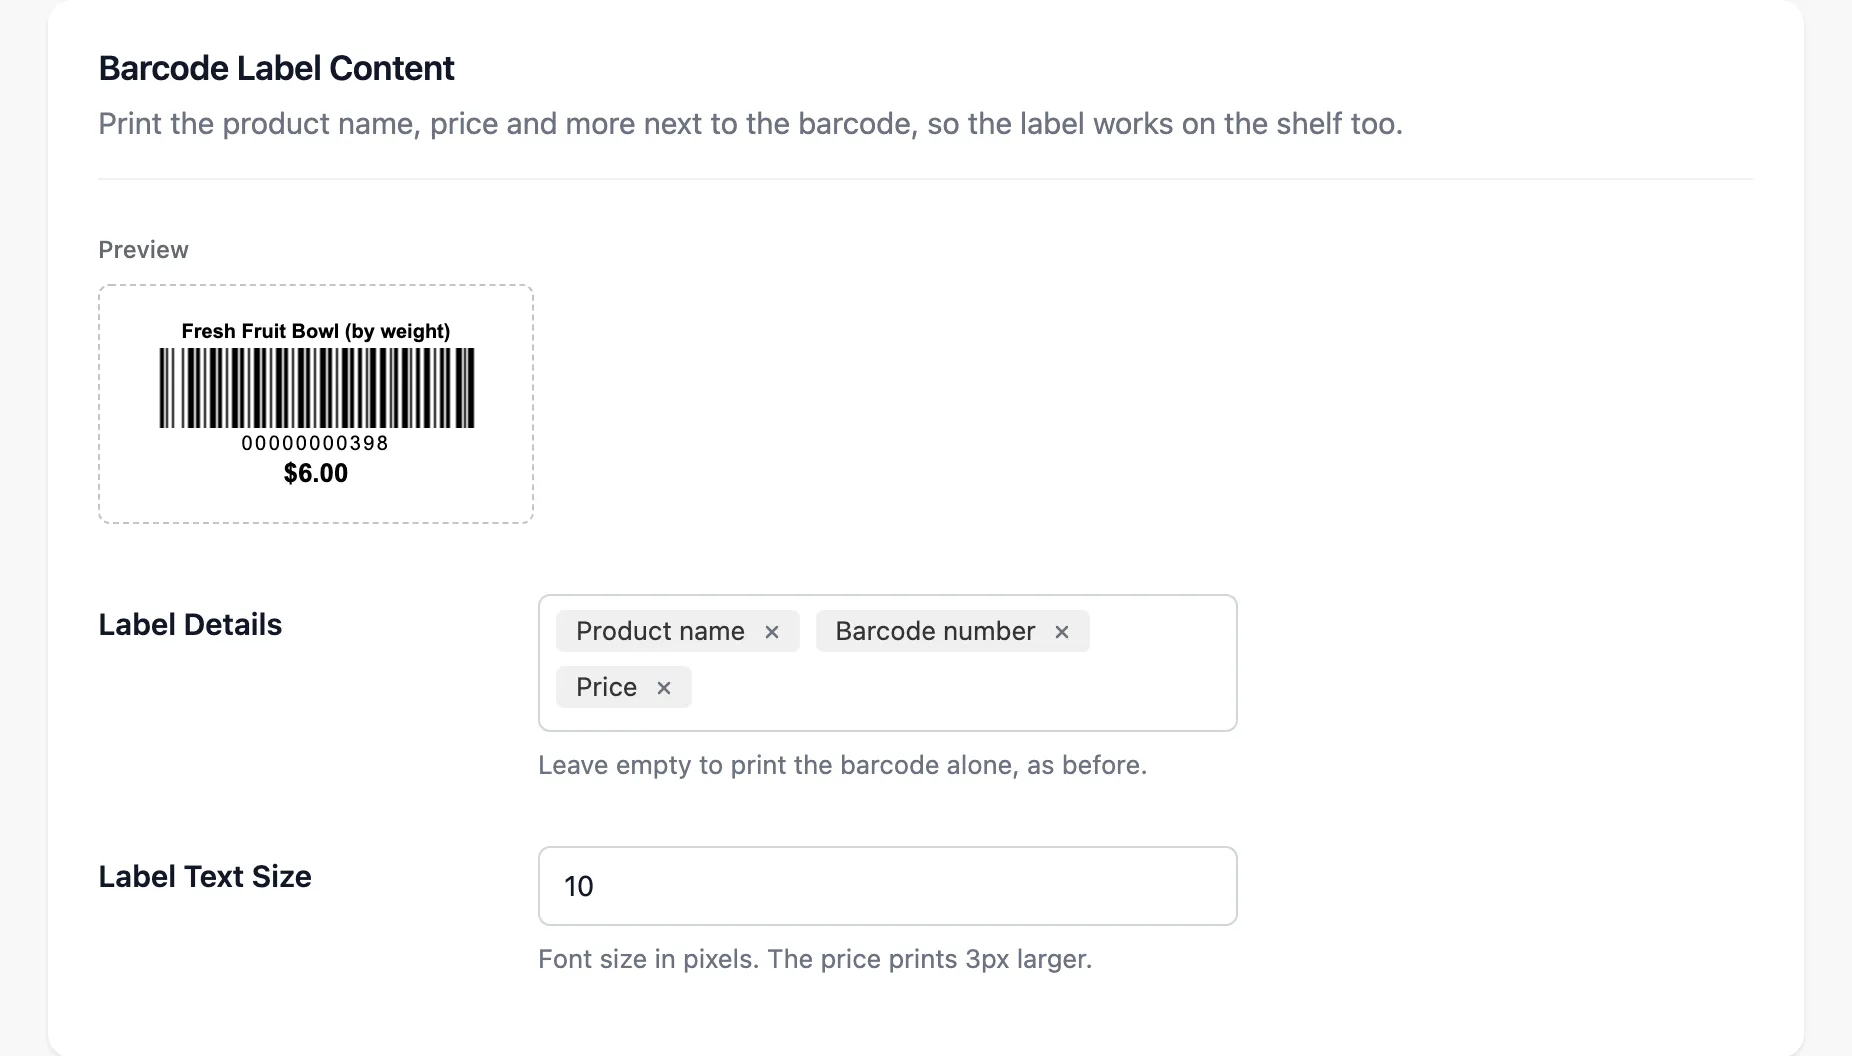
Store name prints the store that sells the product, so a vendor’s labels carry the vendor’s store name.
Step 2: Open Assign Barcodes
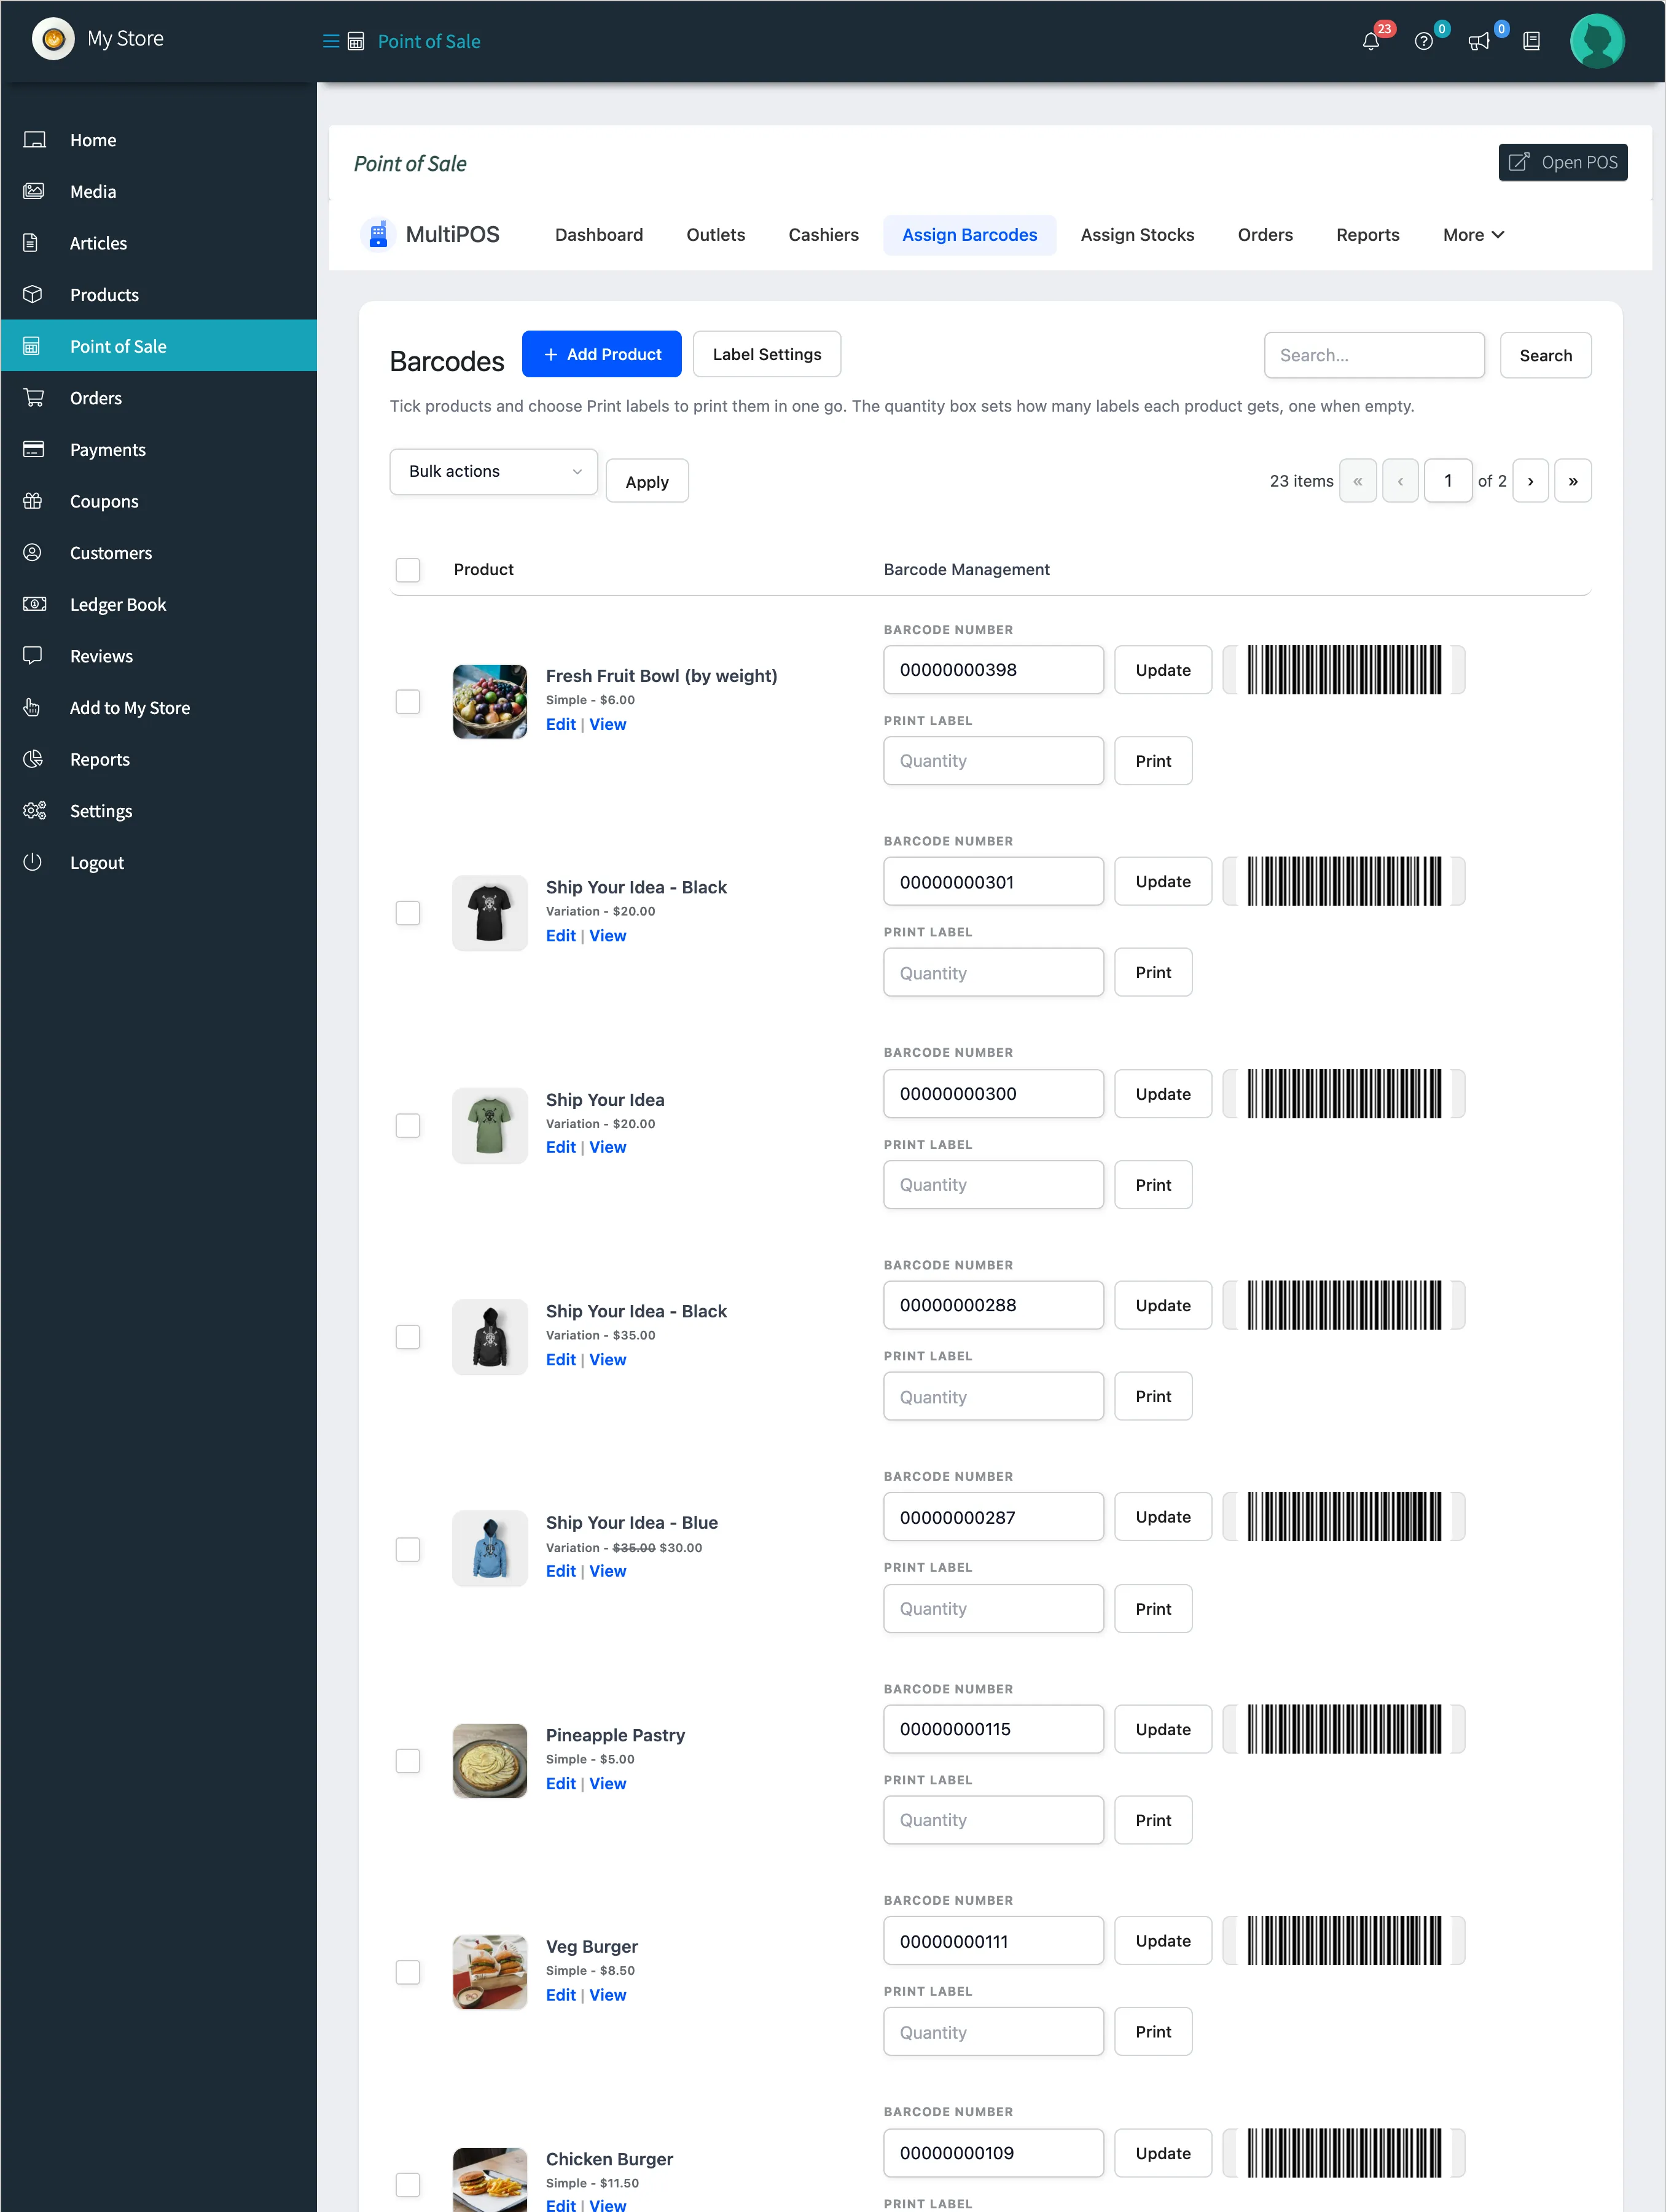
Section titled “Step 2: Open Assign Barcodes”Go to Assign Barcodes, under Point of Sale for a vendor. Search for the product.
Step 3: Set the barcode
Section titled “Step 3: Set the barcode”Type or scan the code printed on the packaging and click Update. Leave it empty to use one built from the product ID or SKU.
Step 4: Print
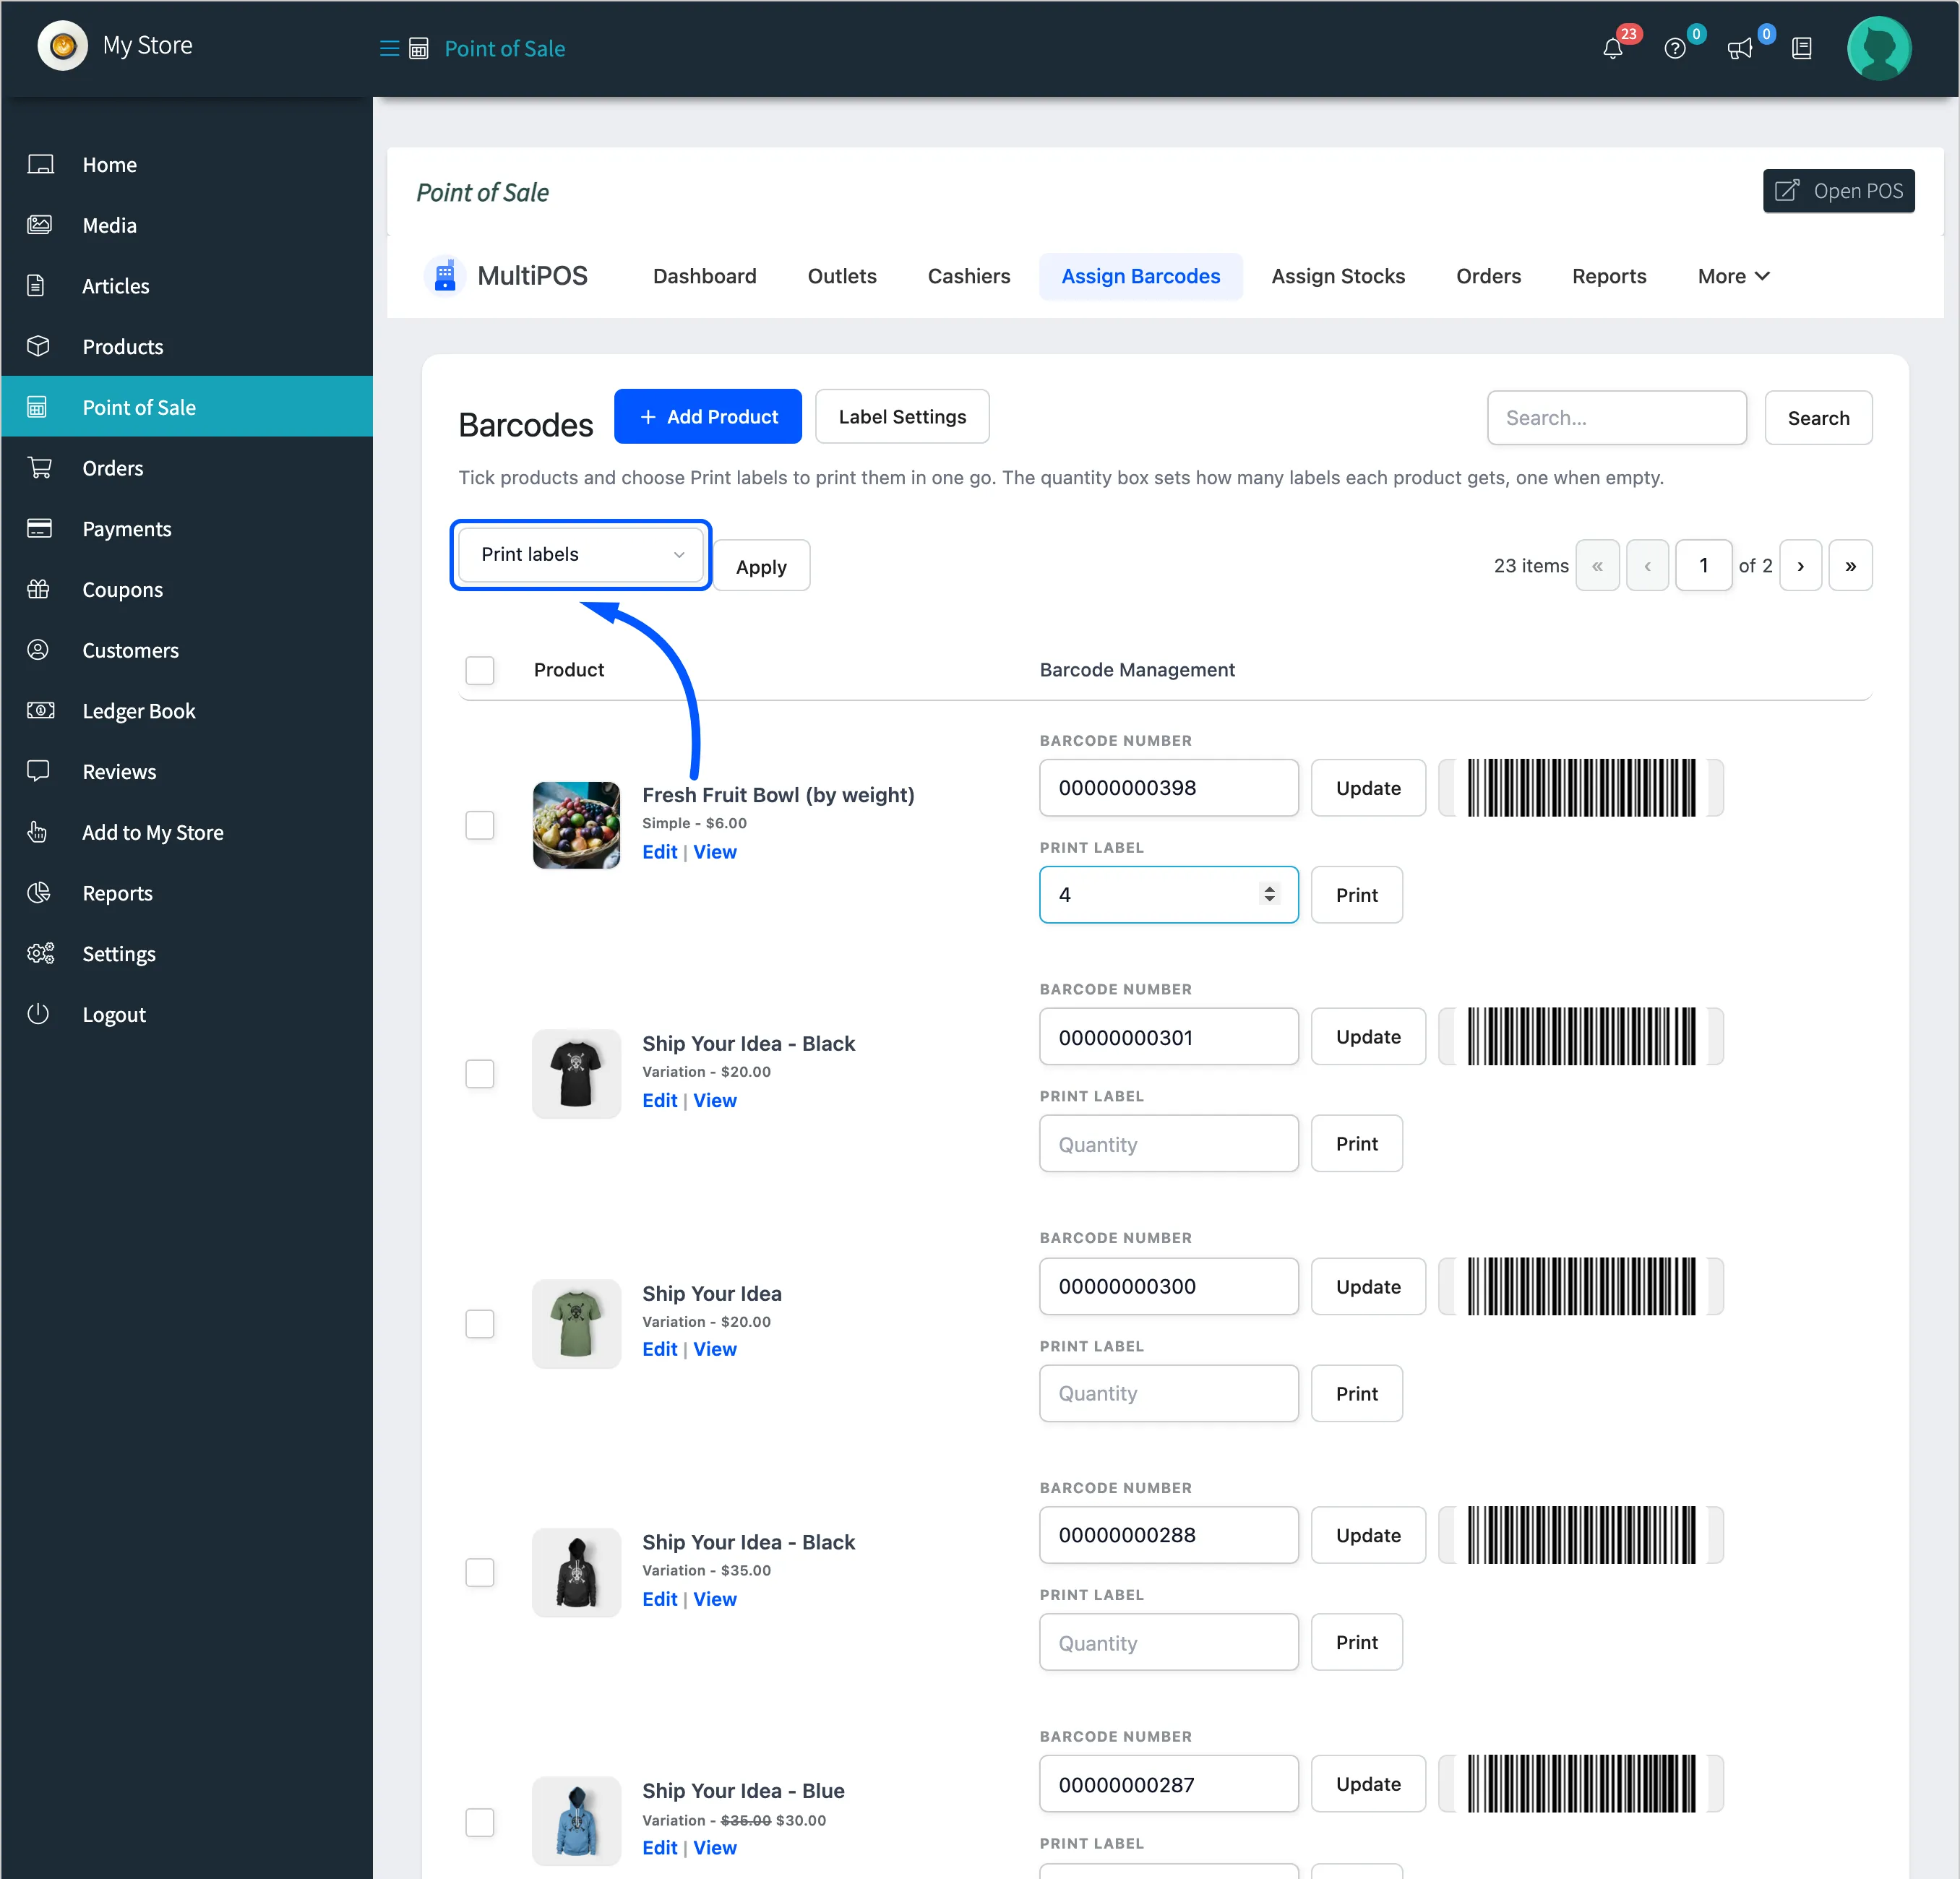
Section titled “Step 4: Print”Enter how many labels to print and click Print. The browser’s print dialog opens with the labels at the size set on the Printer tab.
For several products, tick them, choose Print labels in the bulk actions and click Apply.
Things to know
Section titled “Things to know”- Print one sheet first. Label sizes usually need one correction.
- Scanning: A scanner types into the POS search like a keyboard. See How to Scan Barcodes at Checkout.