

How to Print a Receipt at the POS
Every sale ends with an offer to print. Any past sale can be printed again.
Step 1: Print after the sale
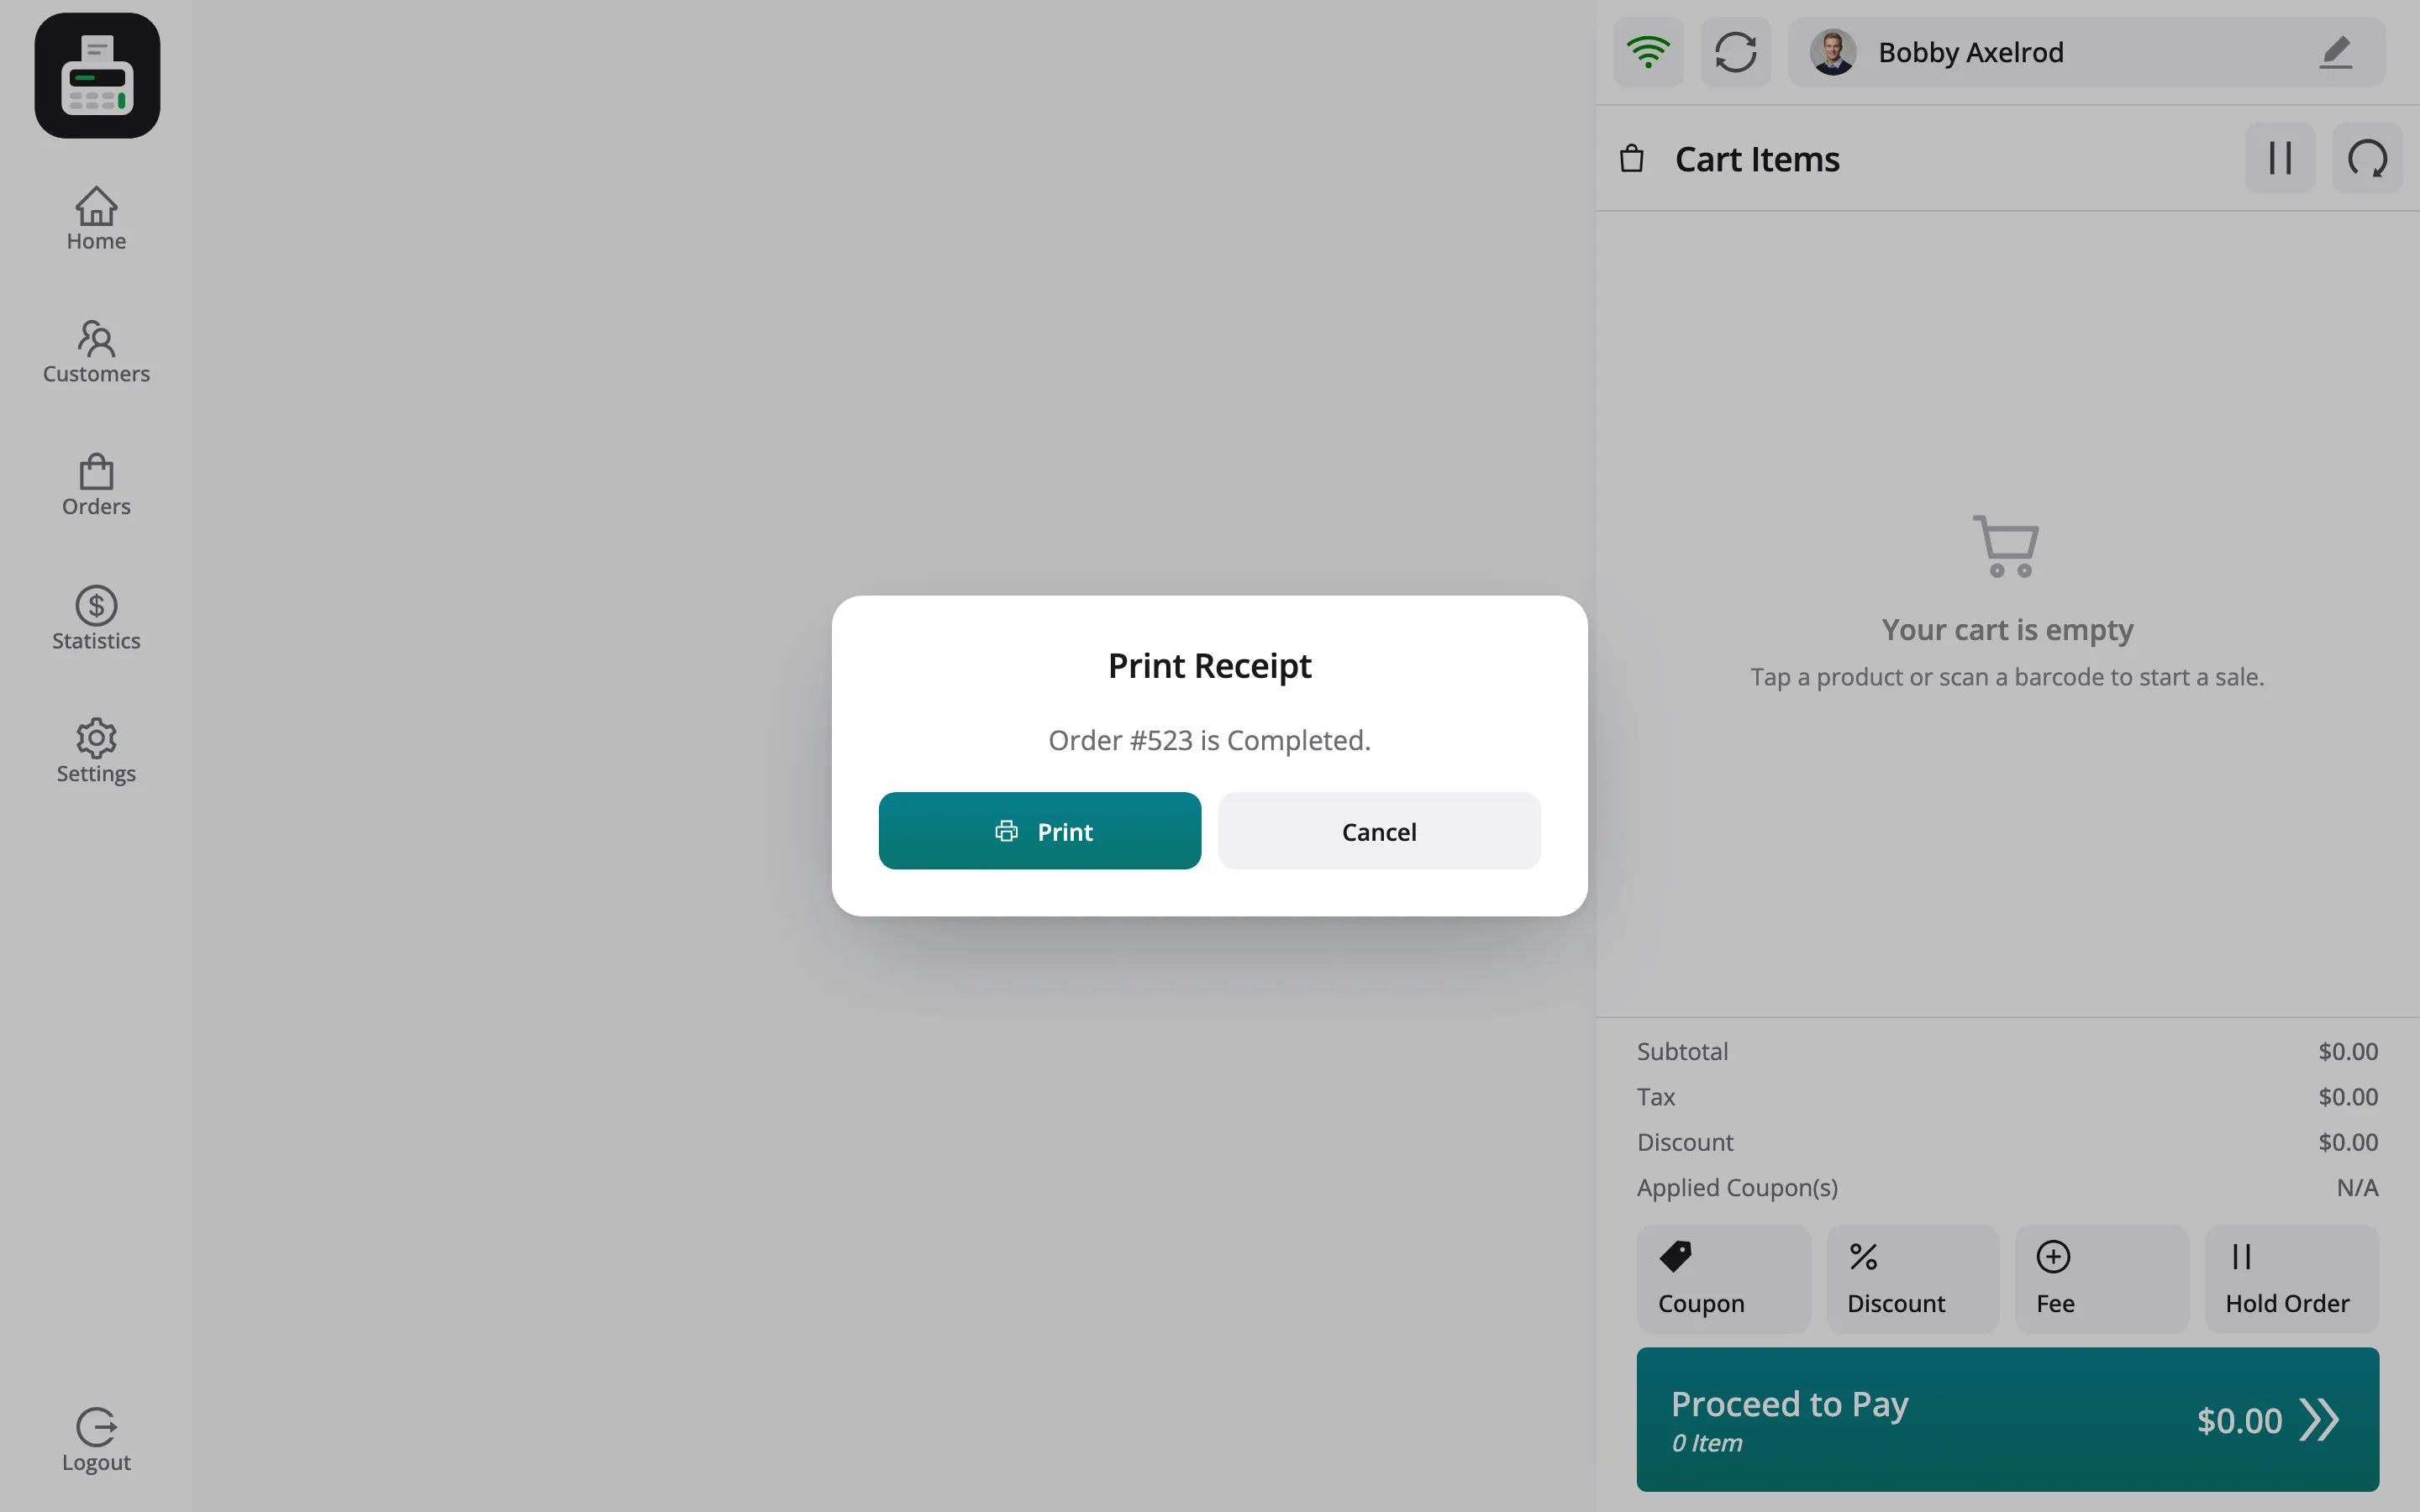
Section titled “Step 1: Print after the sale”After Pay, the Print Receipt prompt names the order. Press Print.
Step 2: Reprint from Orders
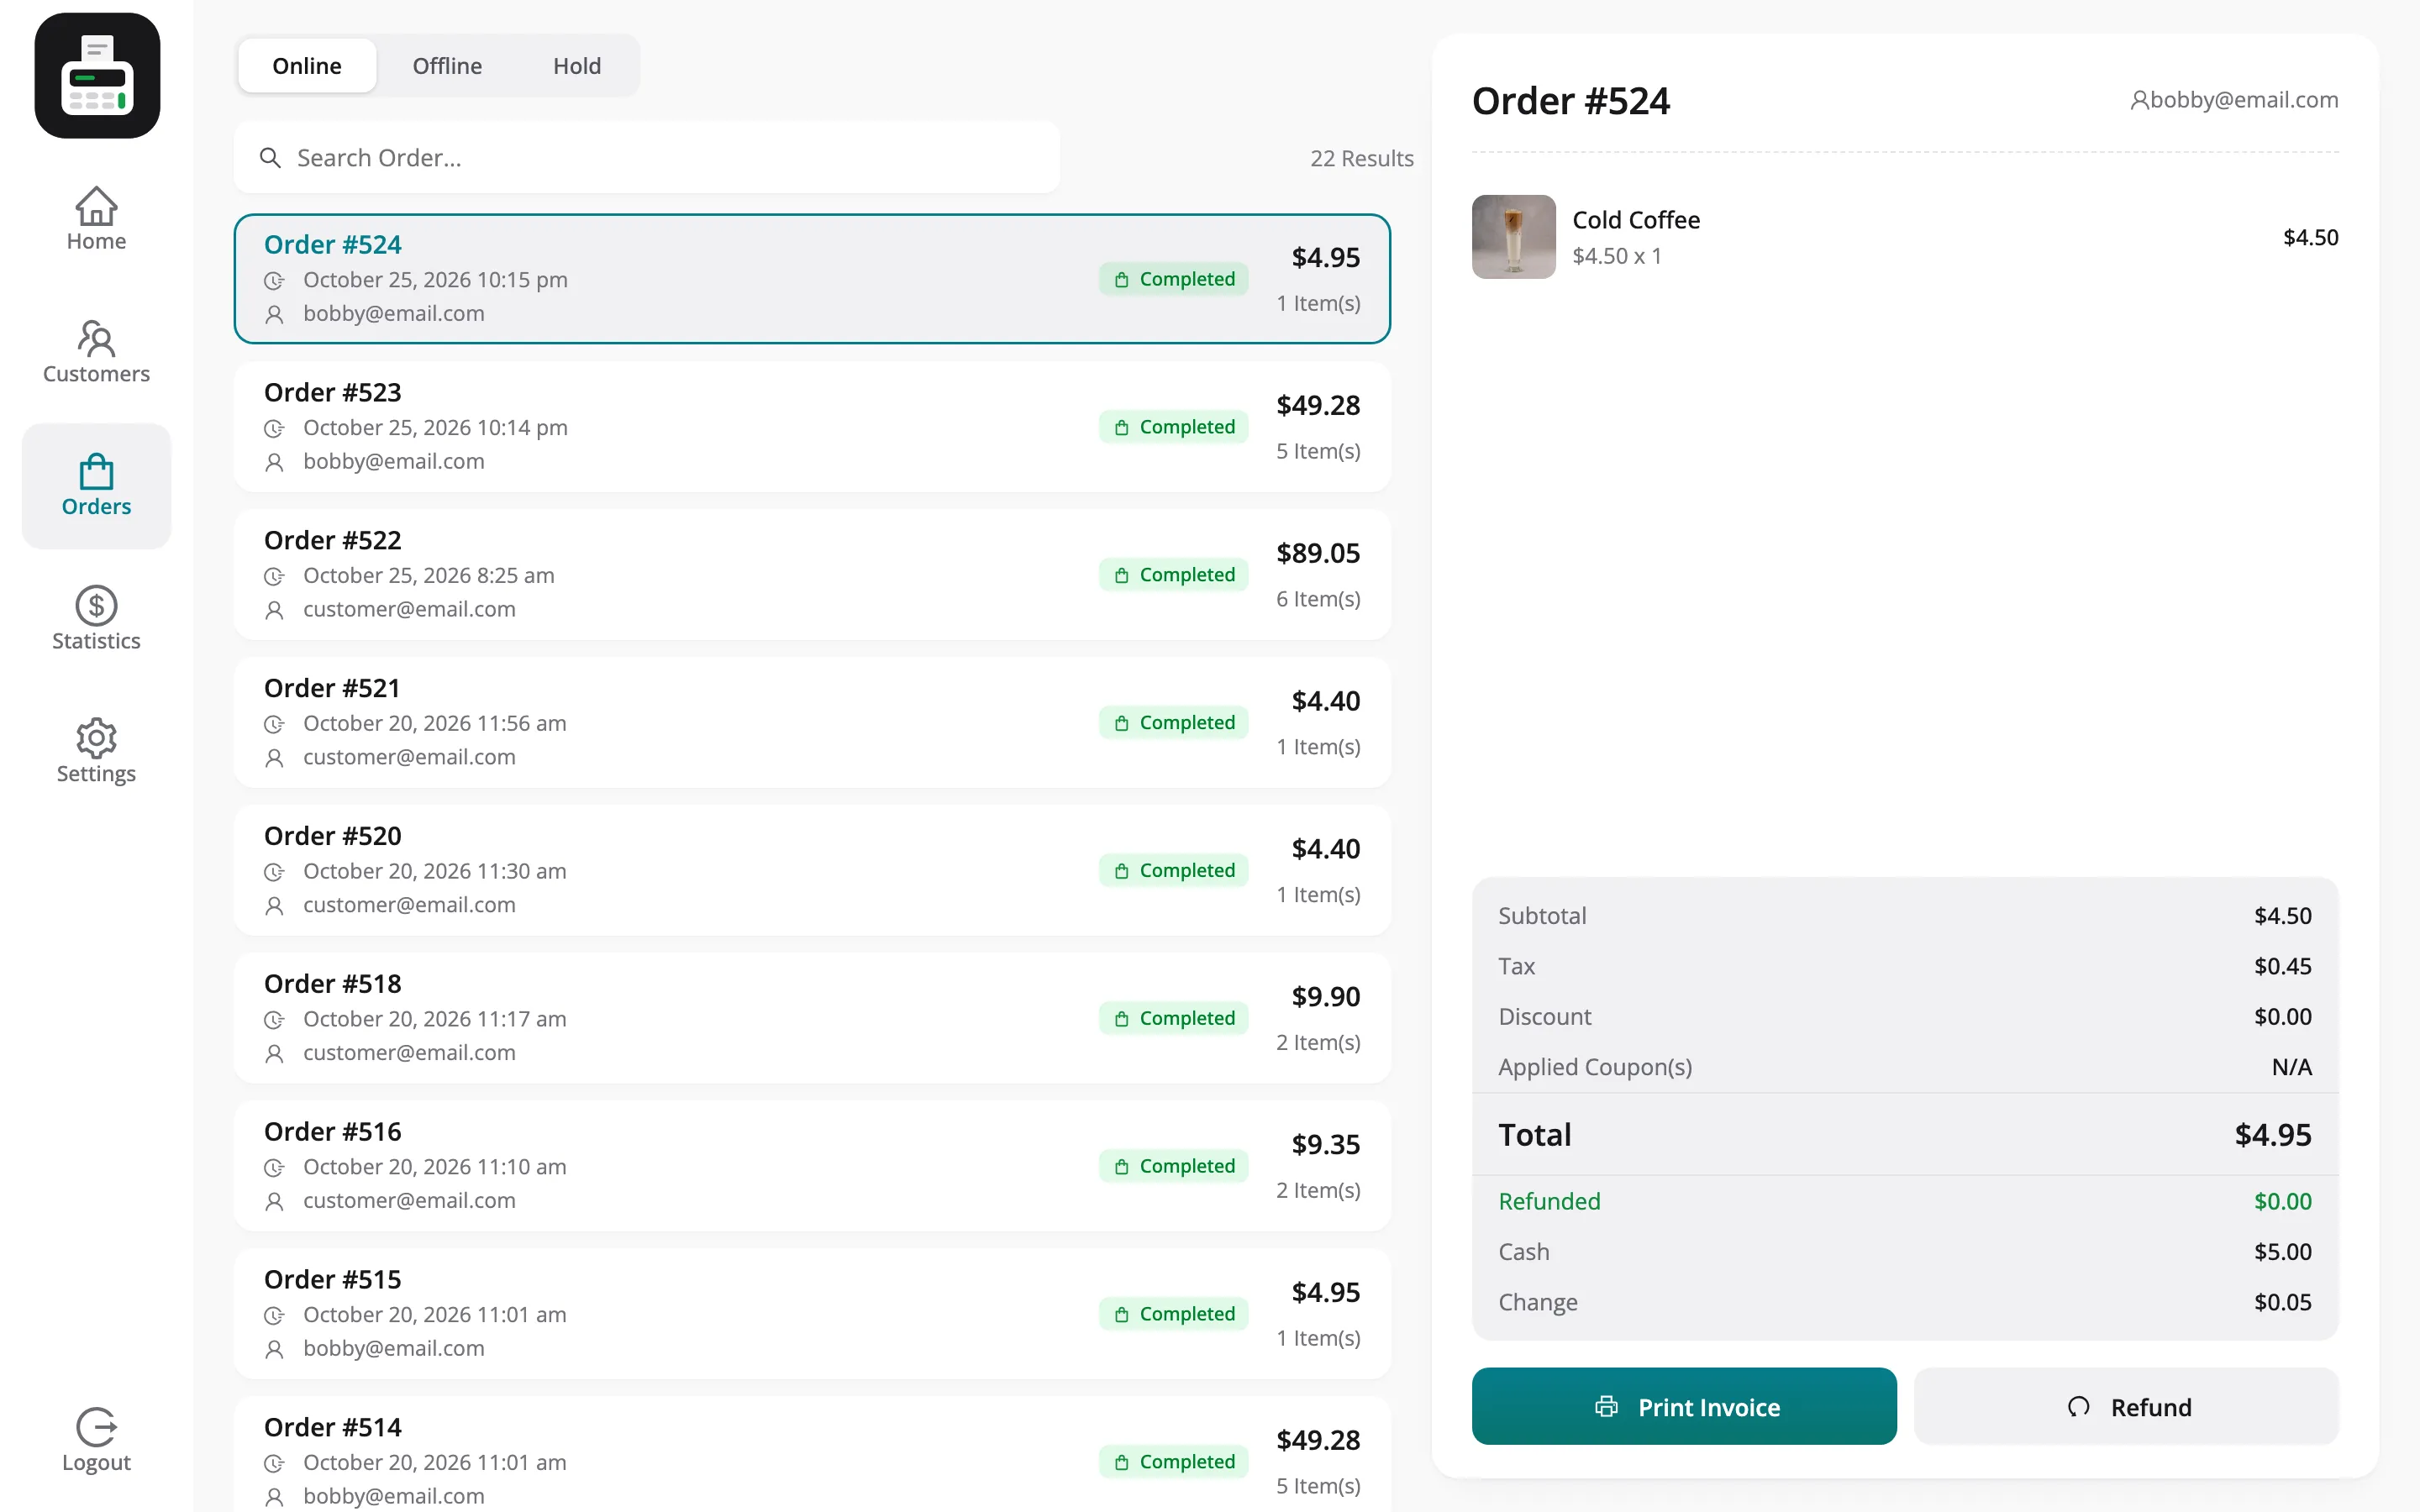
Section titled “Step 2: Reprint from Orders”Open Orders, select the sale, and click Print Invoice.
Step 3: Set the size
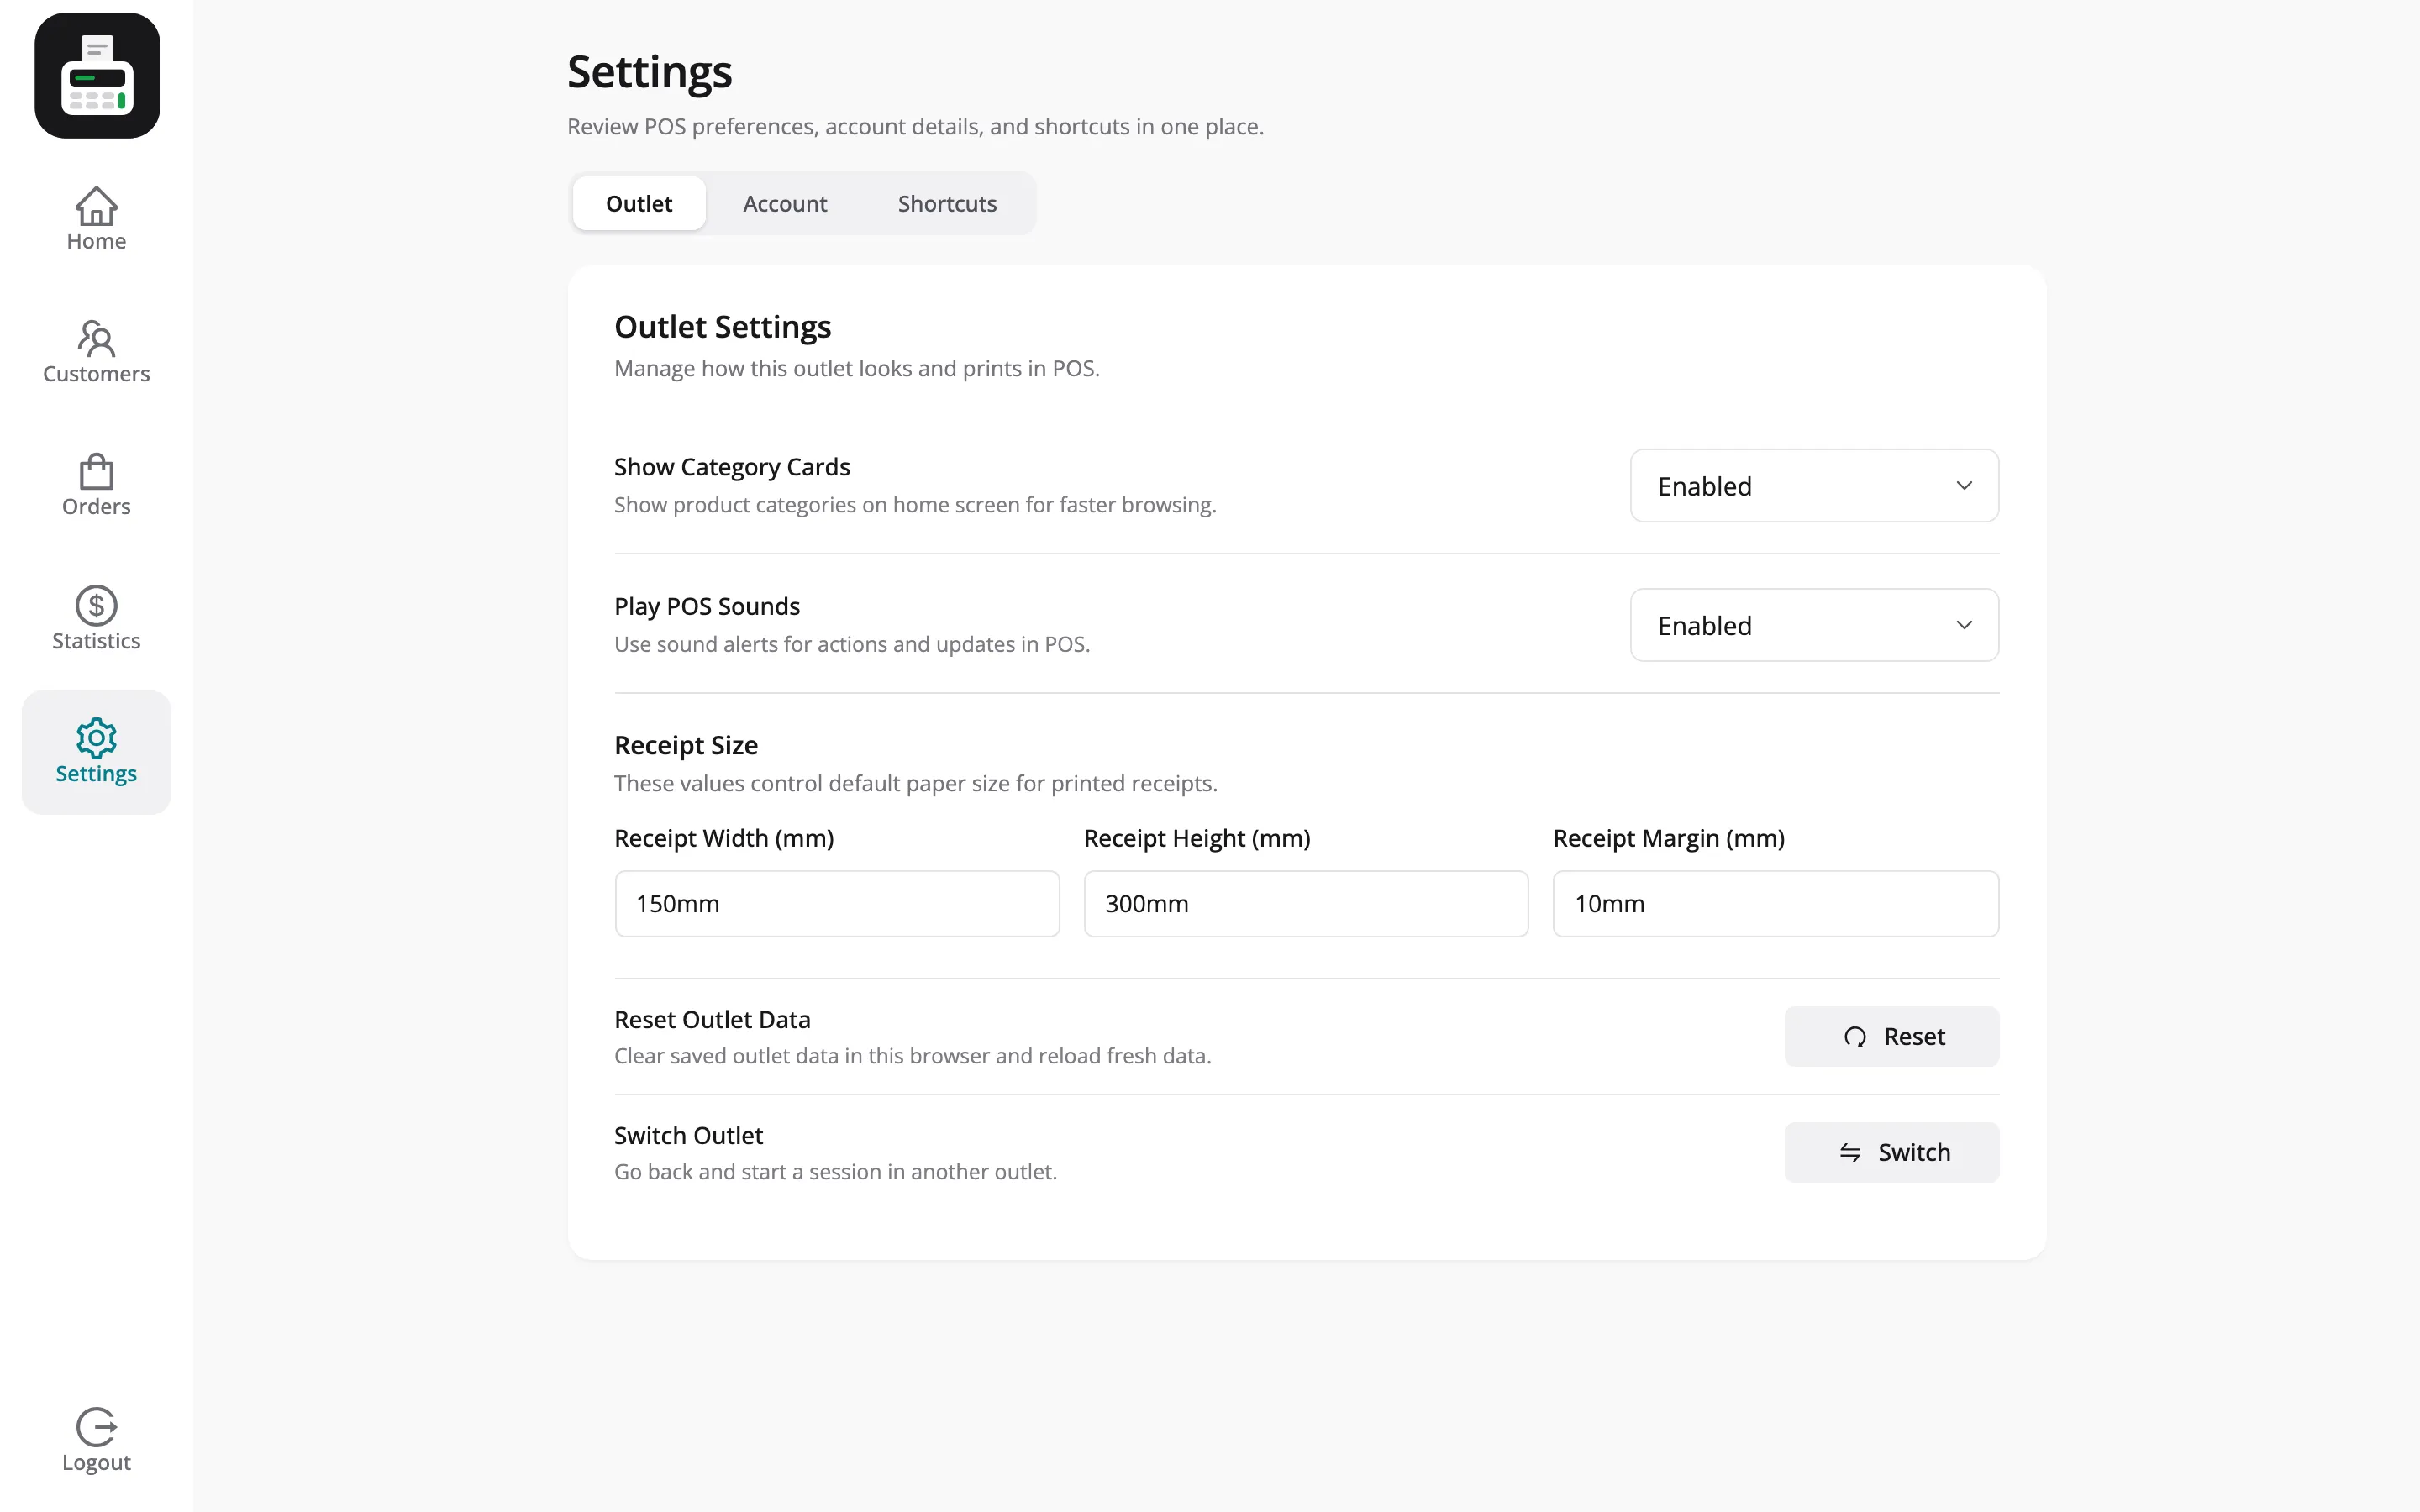
Section titled “Step 3: Set the size”The roll width, height and margins come from Configuration → Printer → Receipt Size. A cashier can override them for one POS under Settings → Outlet.
Step 4: Change the layout
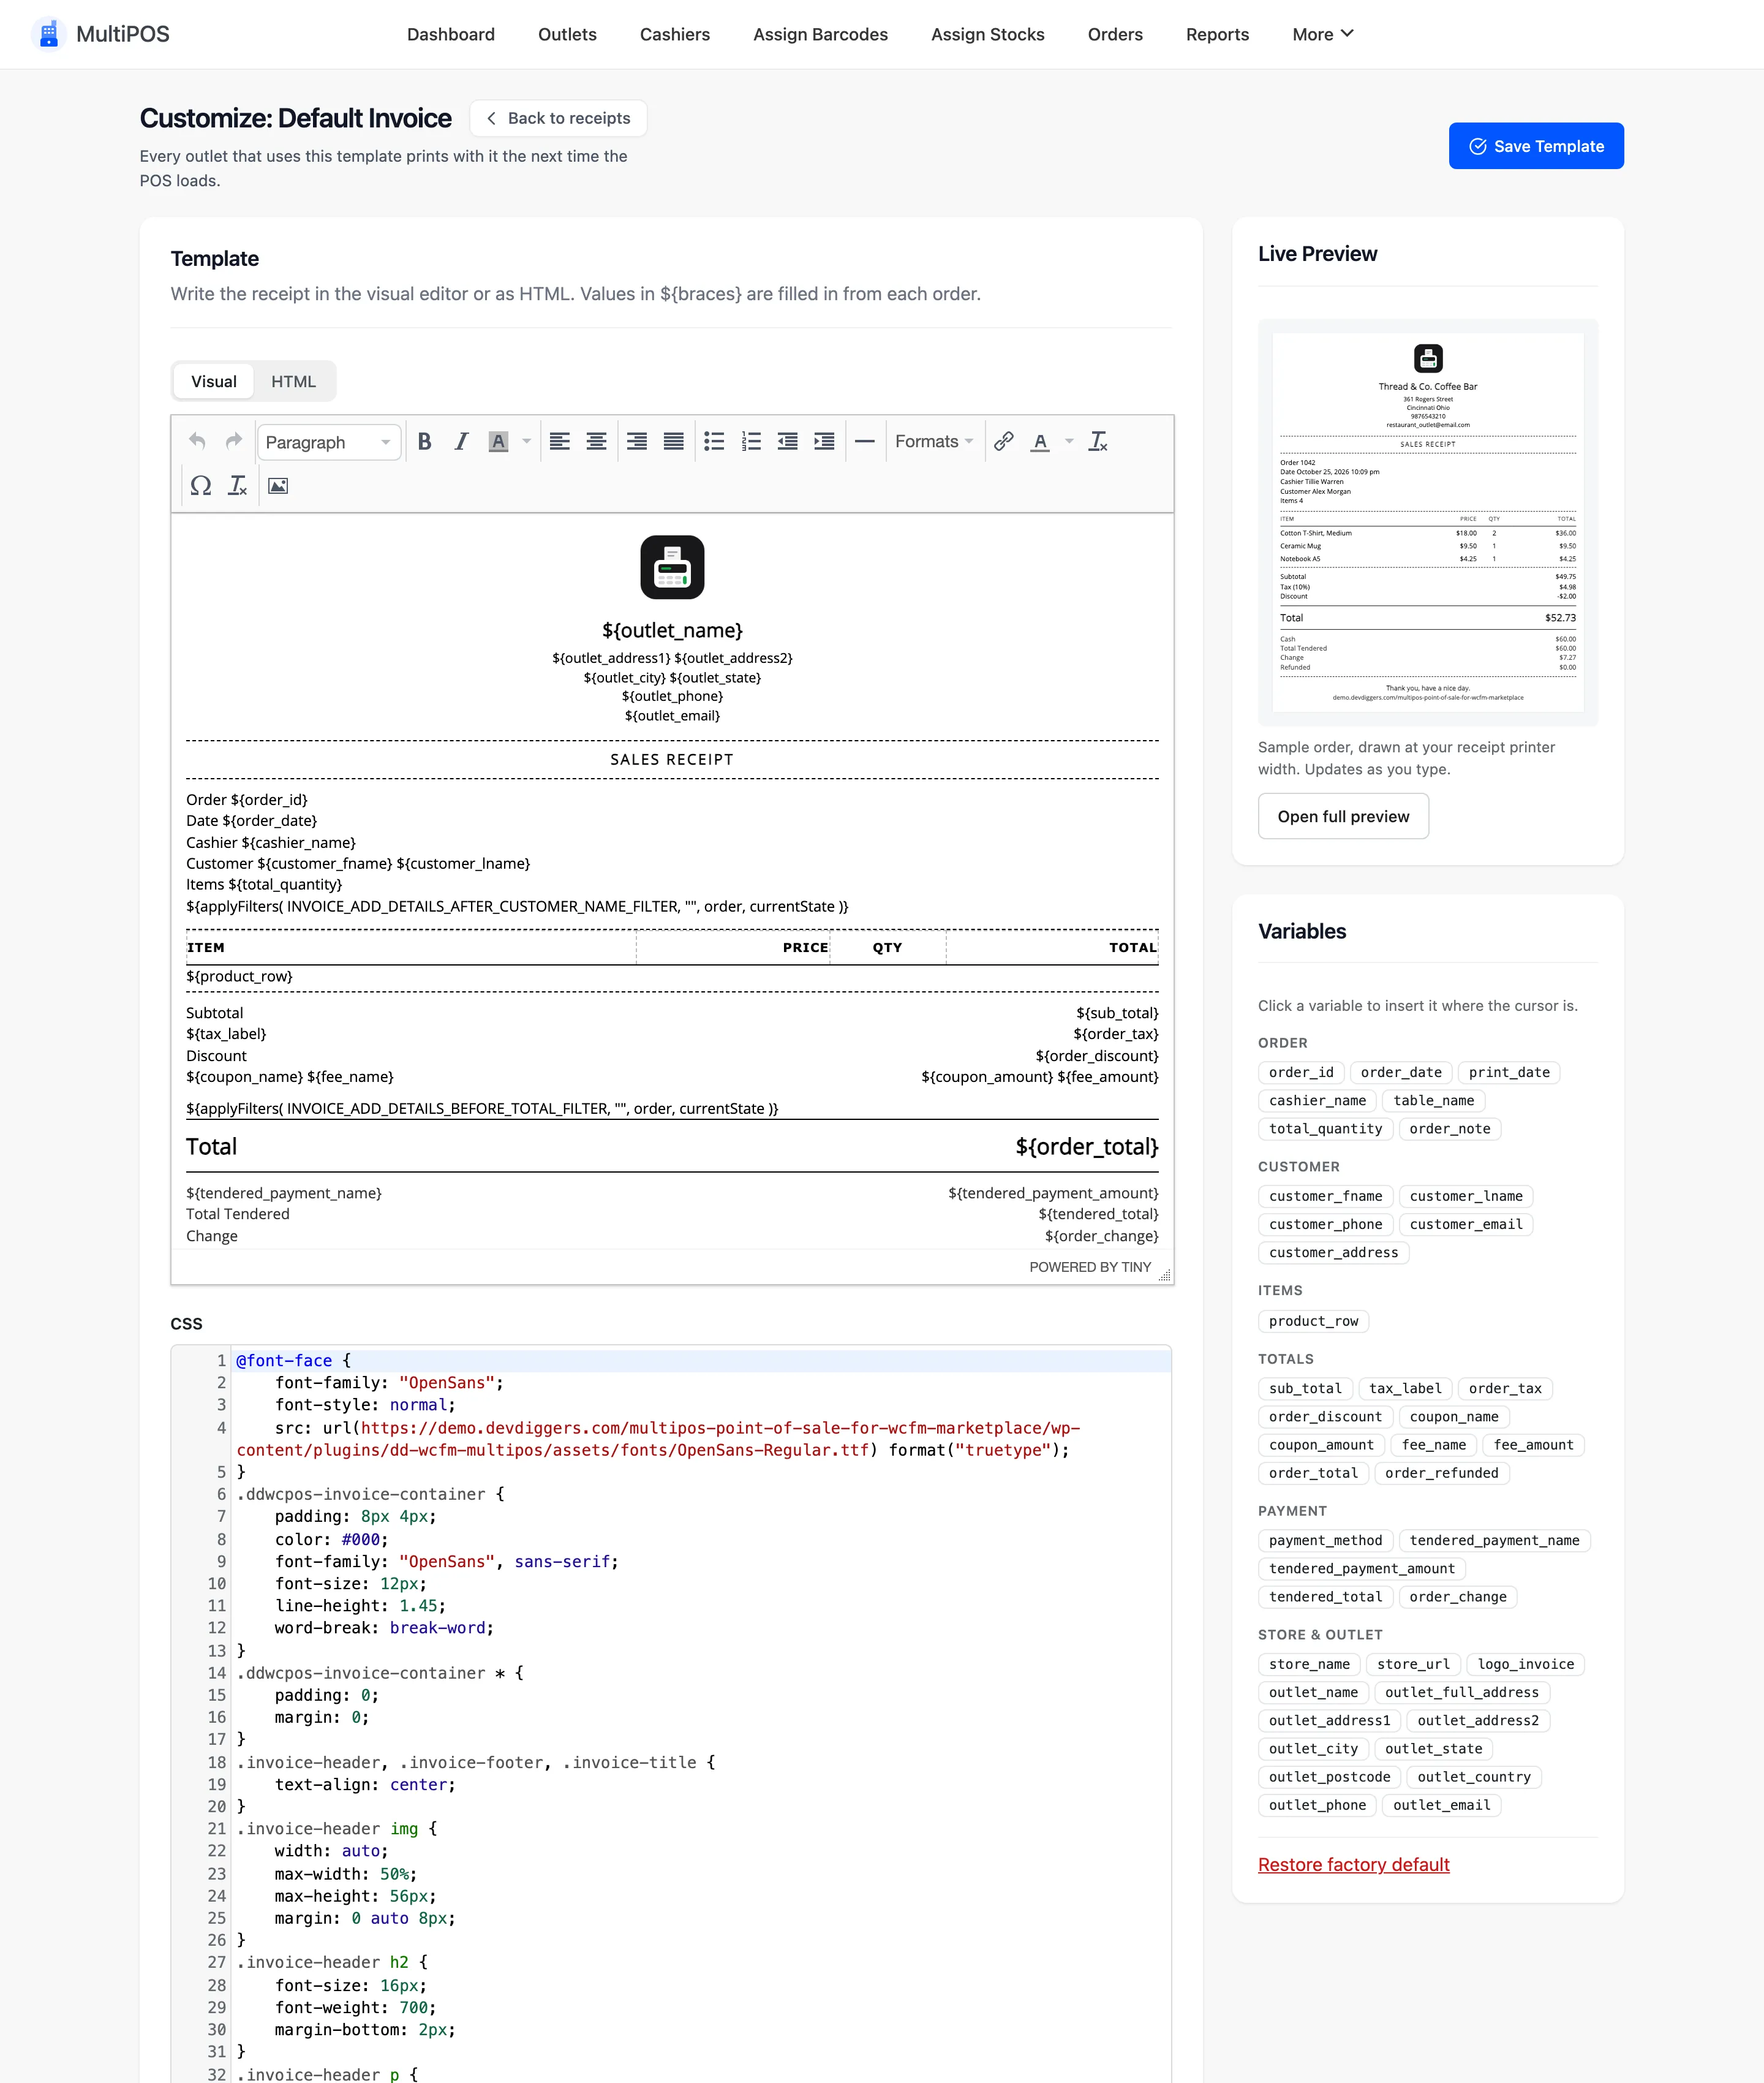
Section titled “Step 4: Change the layout”The receipt’s layout is the outlet’s Invoice Template, edited under Invoices.
Things to know
Section titled “Things to know”- A vendor’s receipt prints the vendor’s outlet address and, with
${store_name}, the vendor’s store name.