

How to Manage Customers at a Vendor's POS
Every sale has a customer: the walk-in guest account, or a real customer. A vendor’s POS only sees the vendor’s own customers.
Which customers a vendor’s POS shows
Section titled “Which customers a vendor’s POS shows”- The walk-in account, shared by every POS in the marketplace.
- Customers the vendor added at their POS.
- Customers who have bought from the vendor, online or at the counter.
Marketplace customers who have never bought from the vendor do not appear.
Step 1: Open Customers
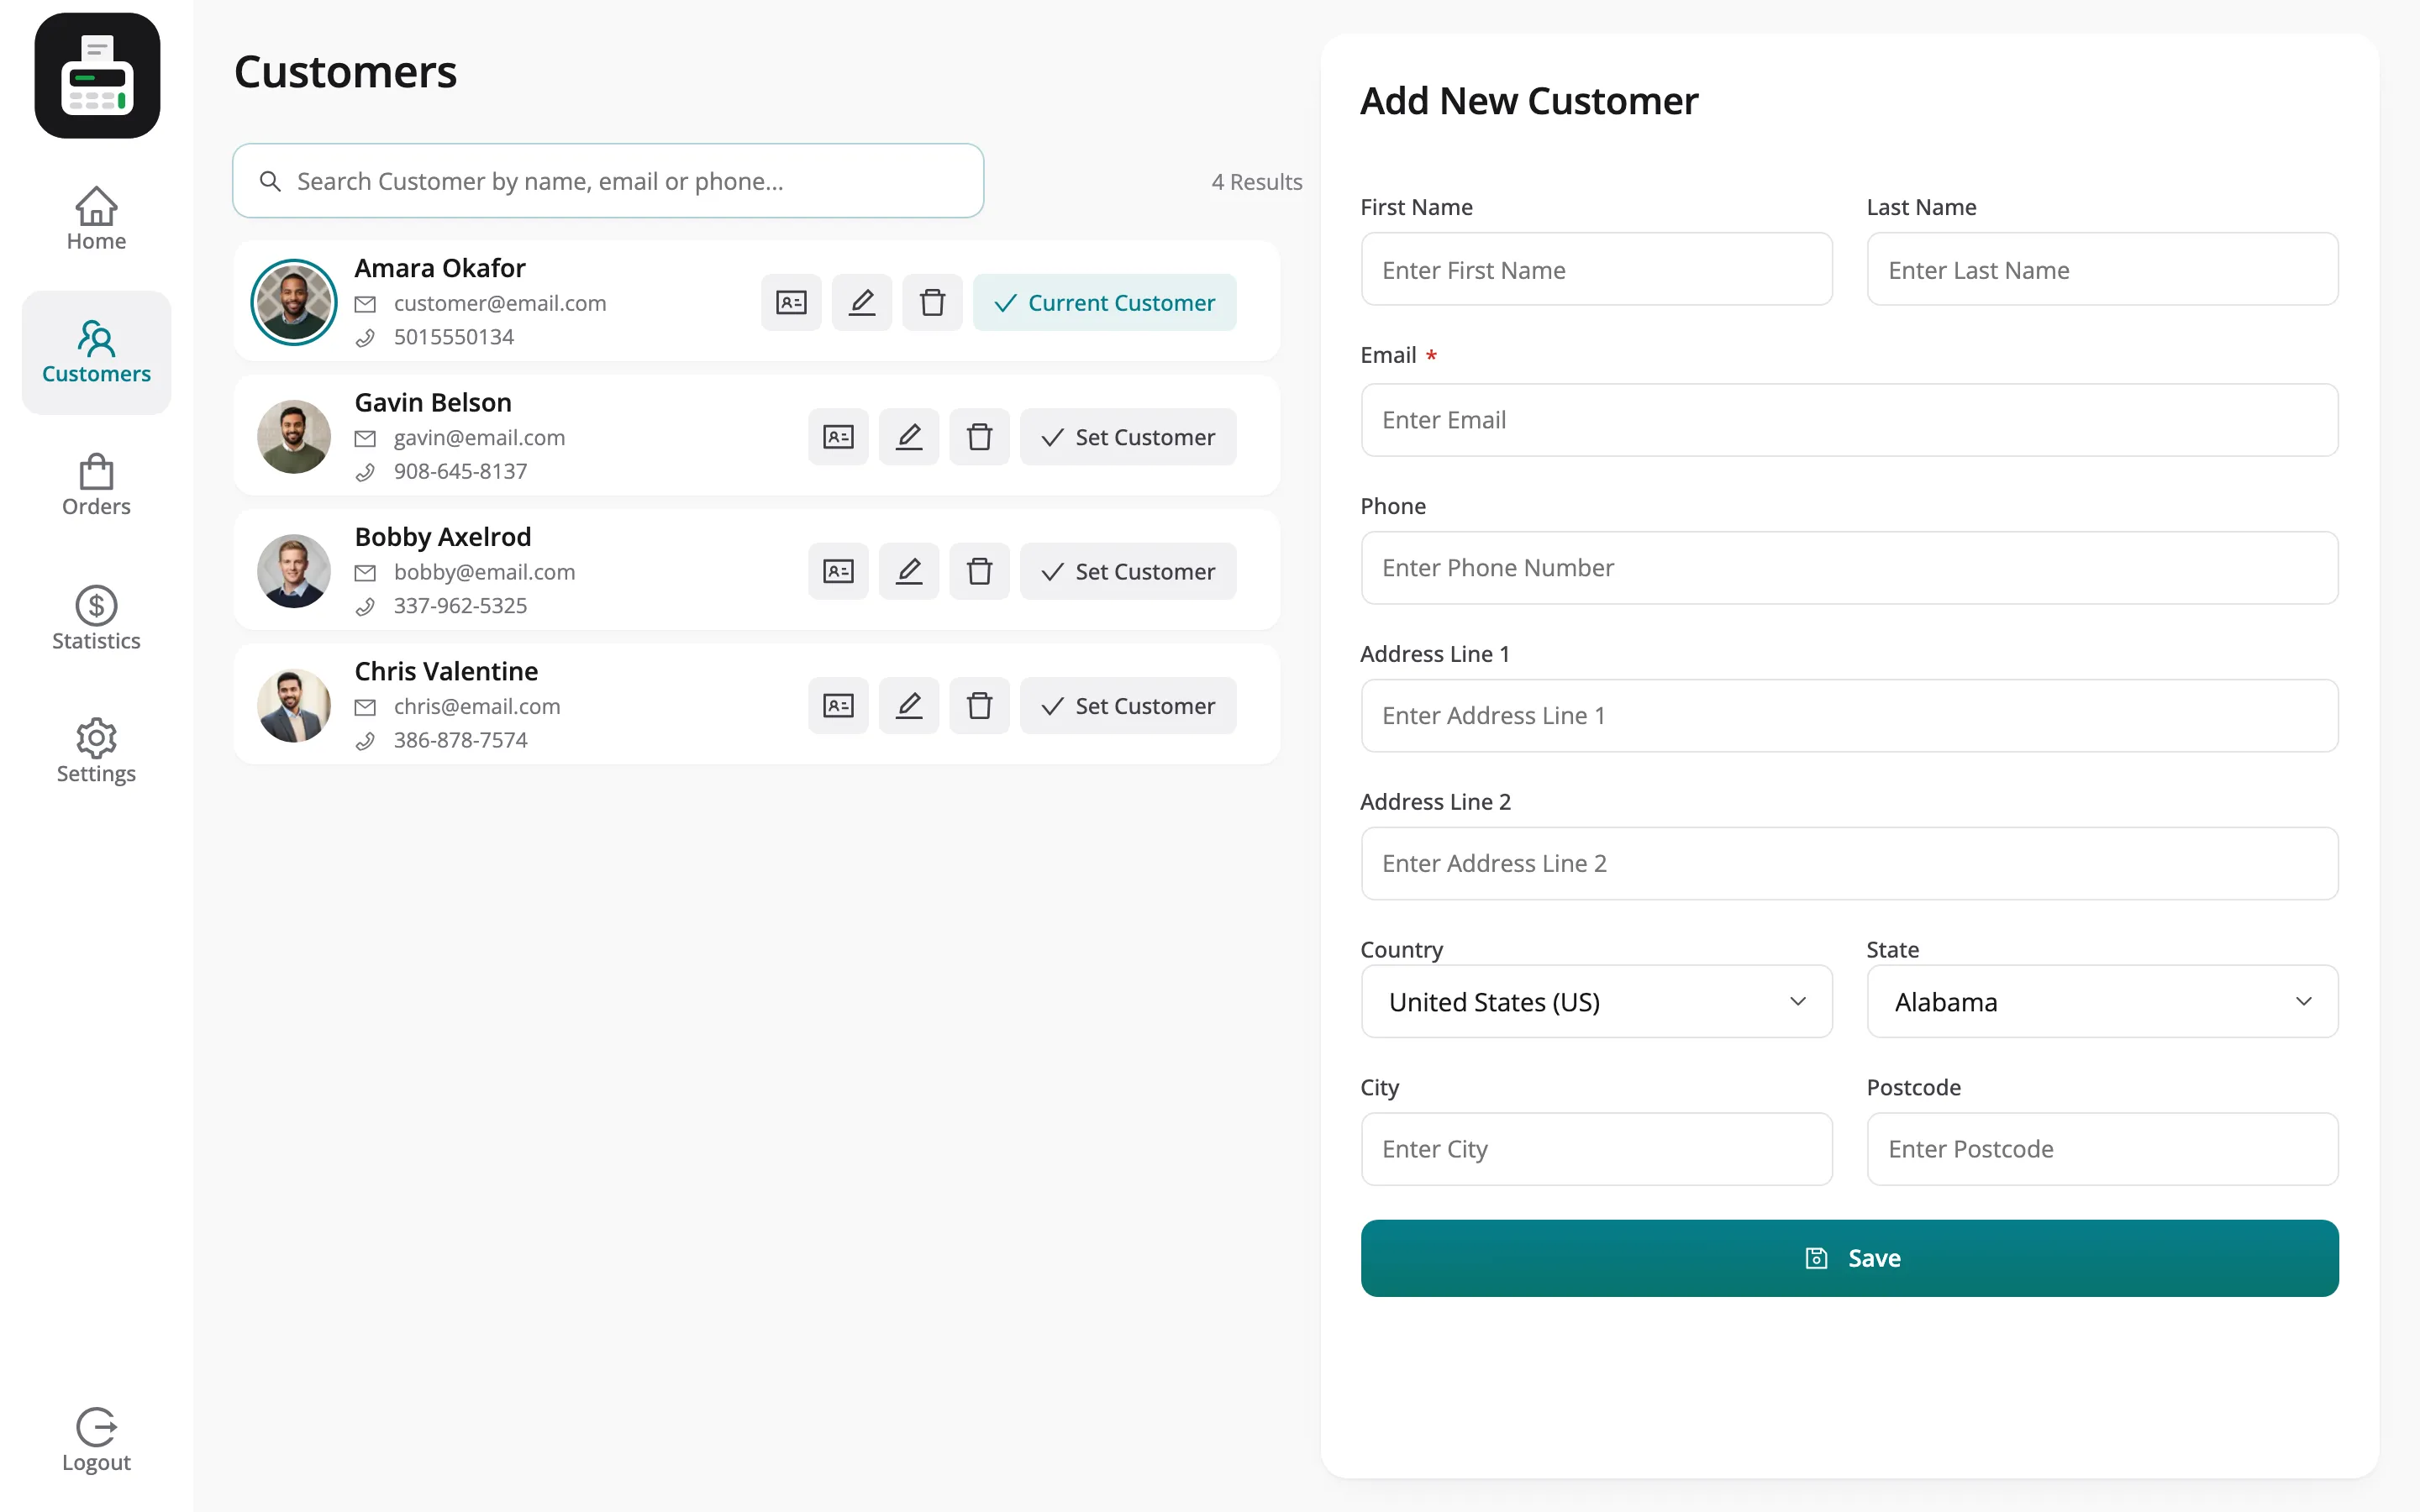
Section titled “Step 1: Open Customers”Tap the customer name at the top of the cart, or Customers in the menu.
Step 2: Find the customer
Section titled “Step 2: Find the customer”Search by name, email or phone.
Step 3: Read the profile
Section titled “Step 3: Read the profile”Customer Profile shows lifetime spend, orders, average order, last visit, recent orders and a Staff note every cashier of the store can read.
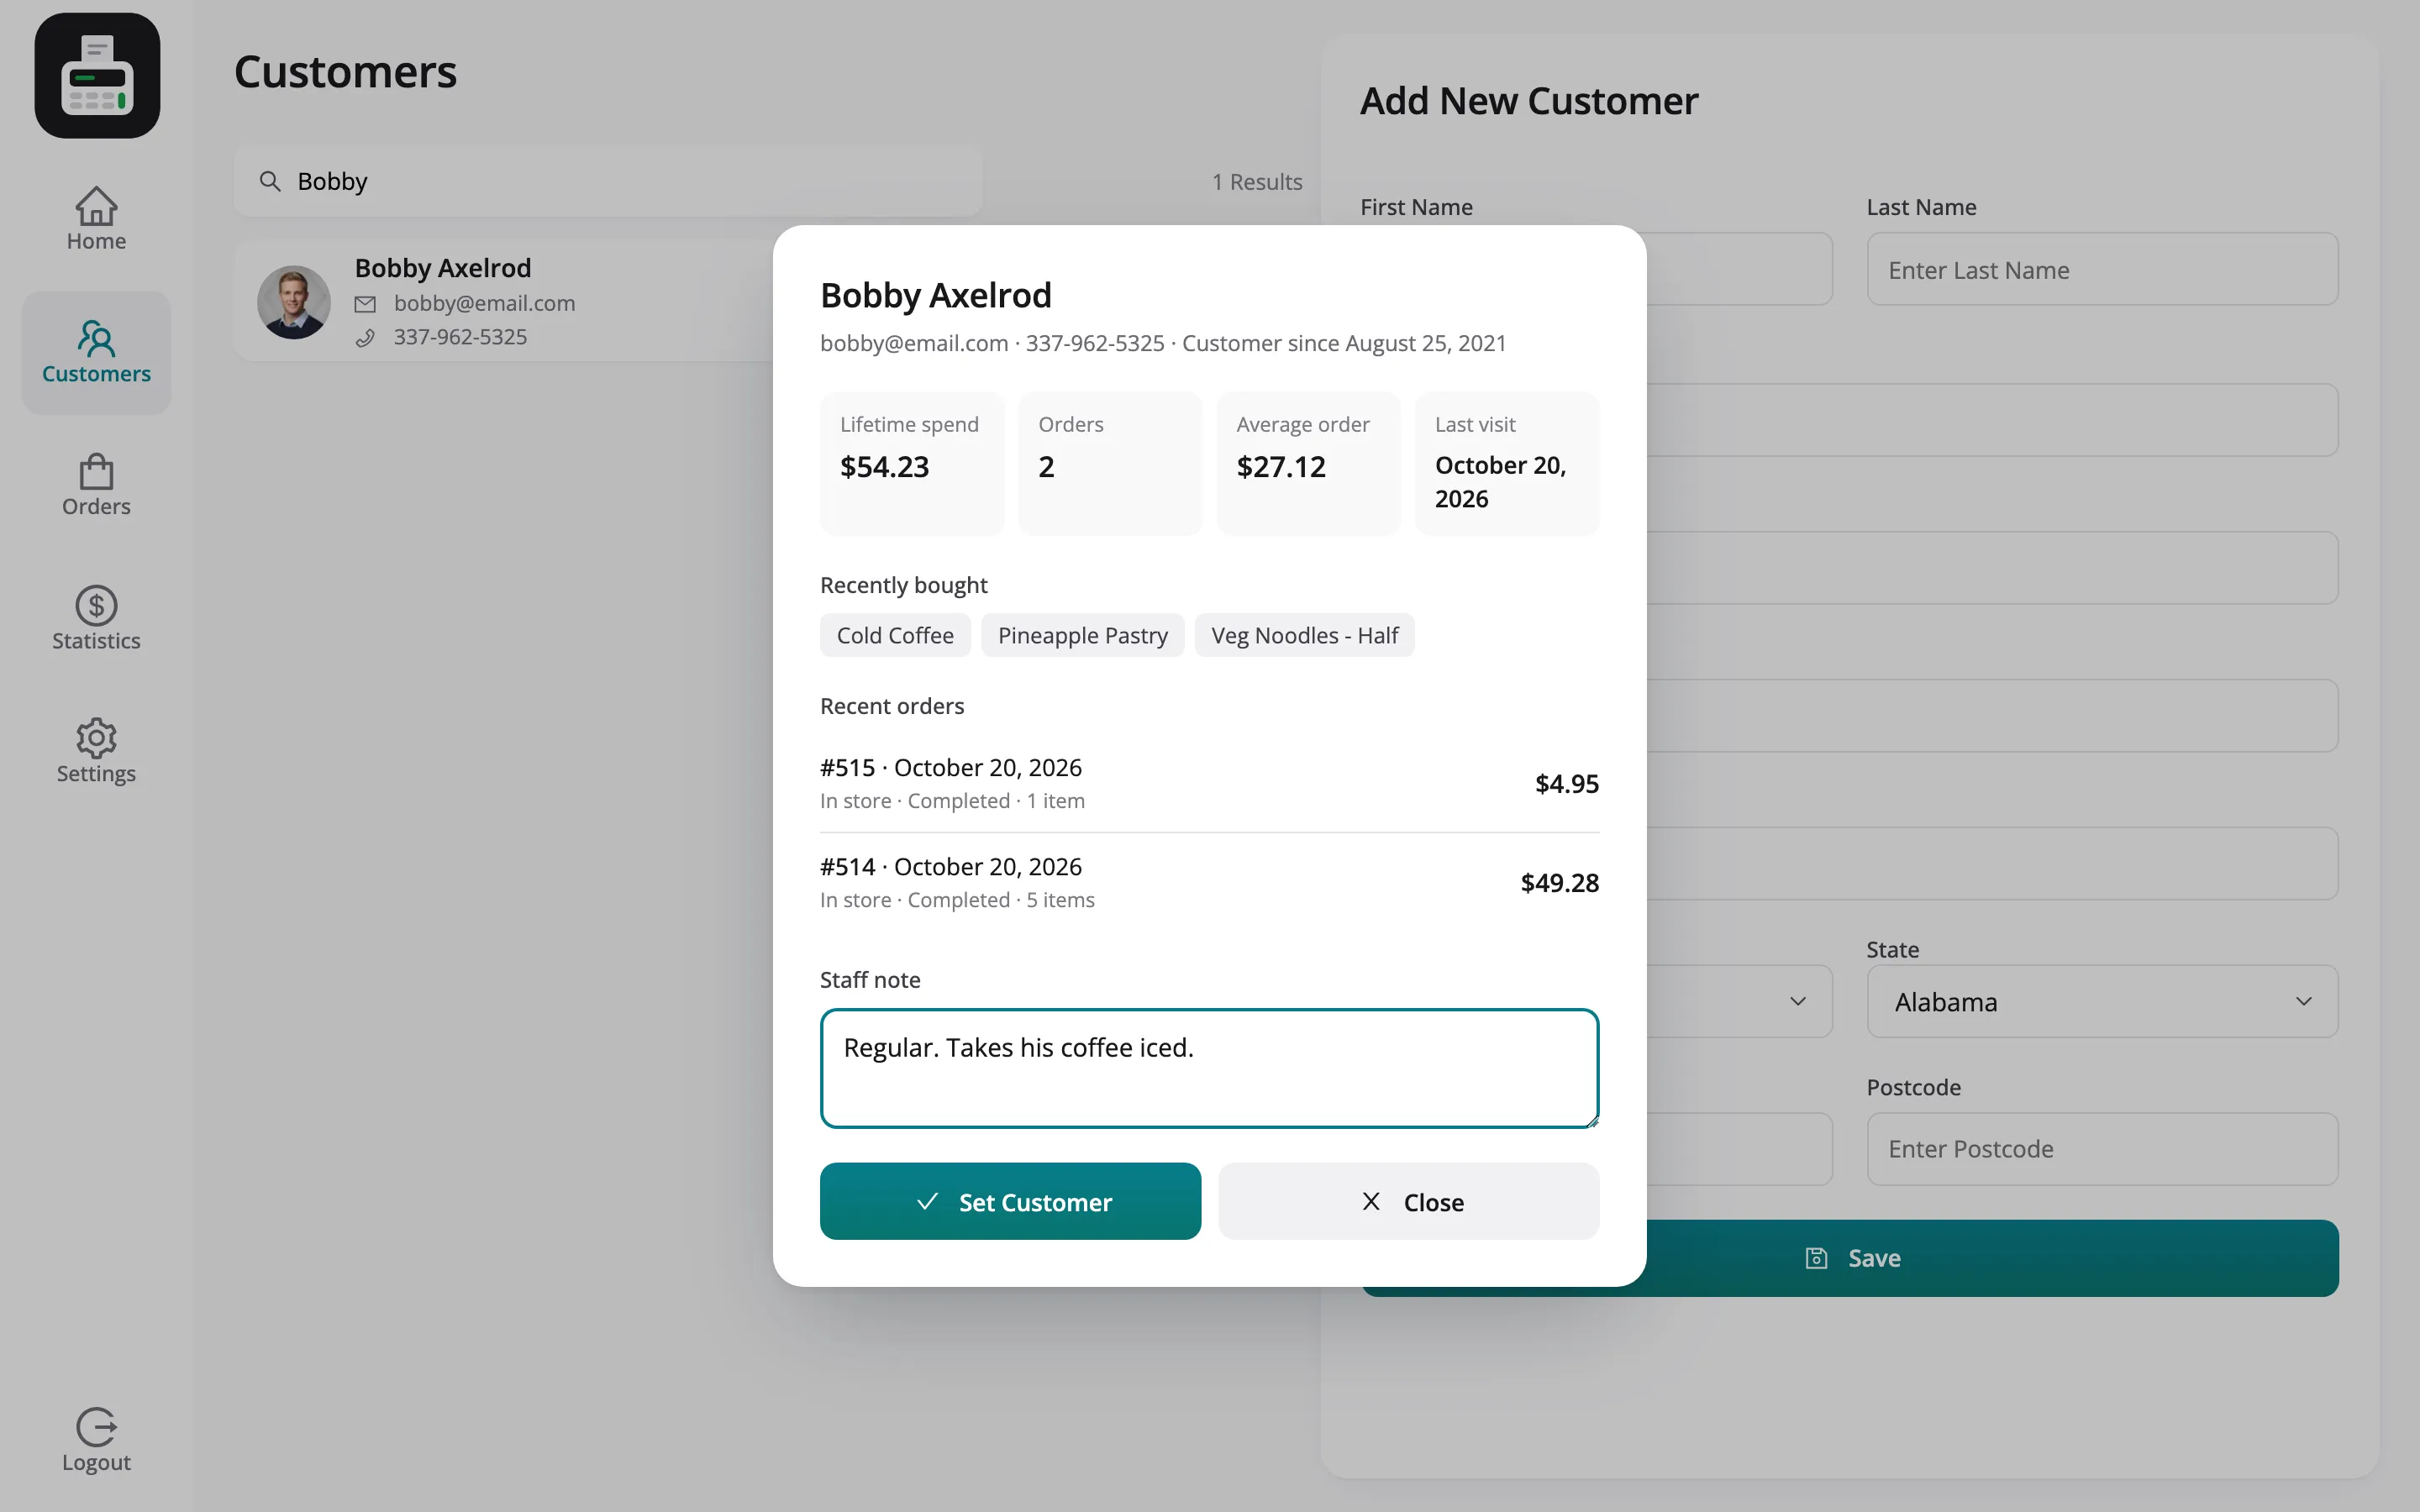
At a vendor’s POS these figures count that vendor’s sales only, and the staff note is the vendor’s own. Another store keeps its own note on the same customer.
Step 4: Set the customer on the sale
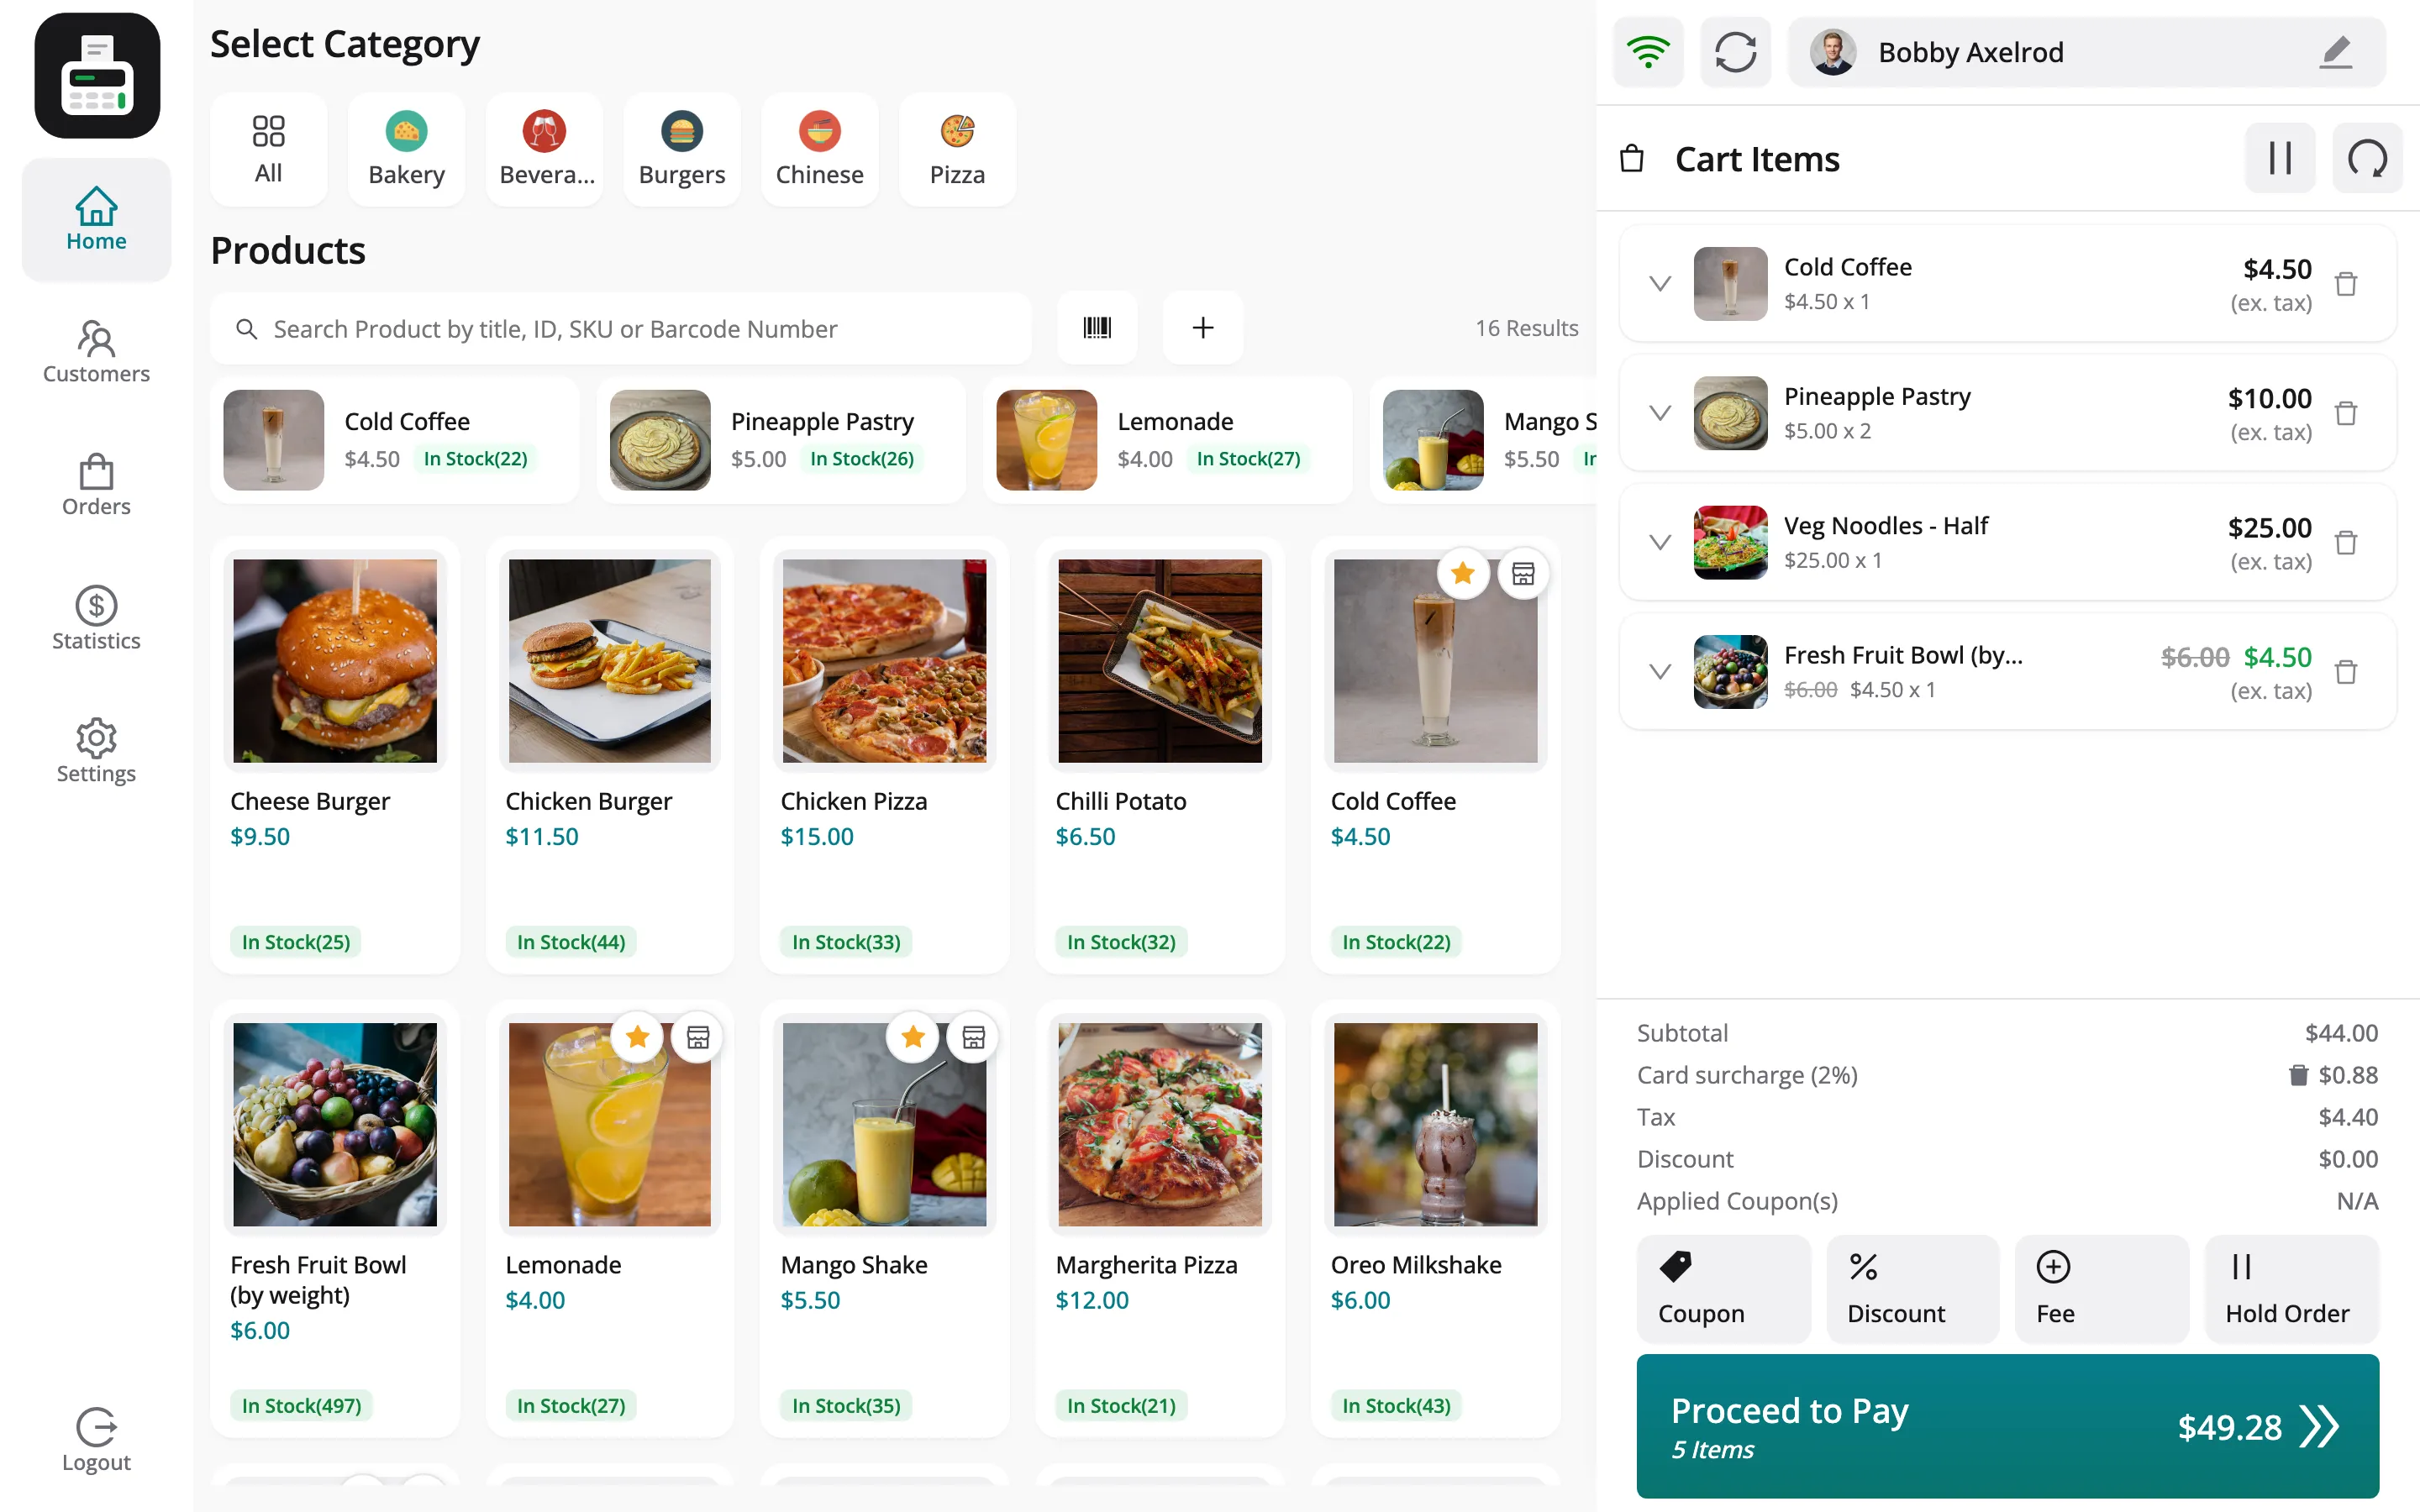
Section titled “Step 4: Set the customer on the sale”Click Set Customer. The name moves to the top of the cart.
Step 5: Add a new customer
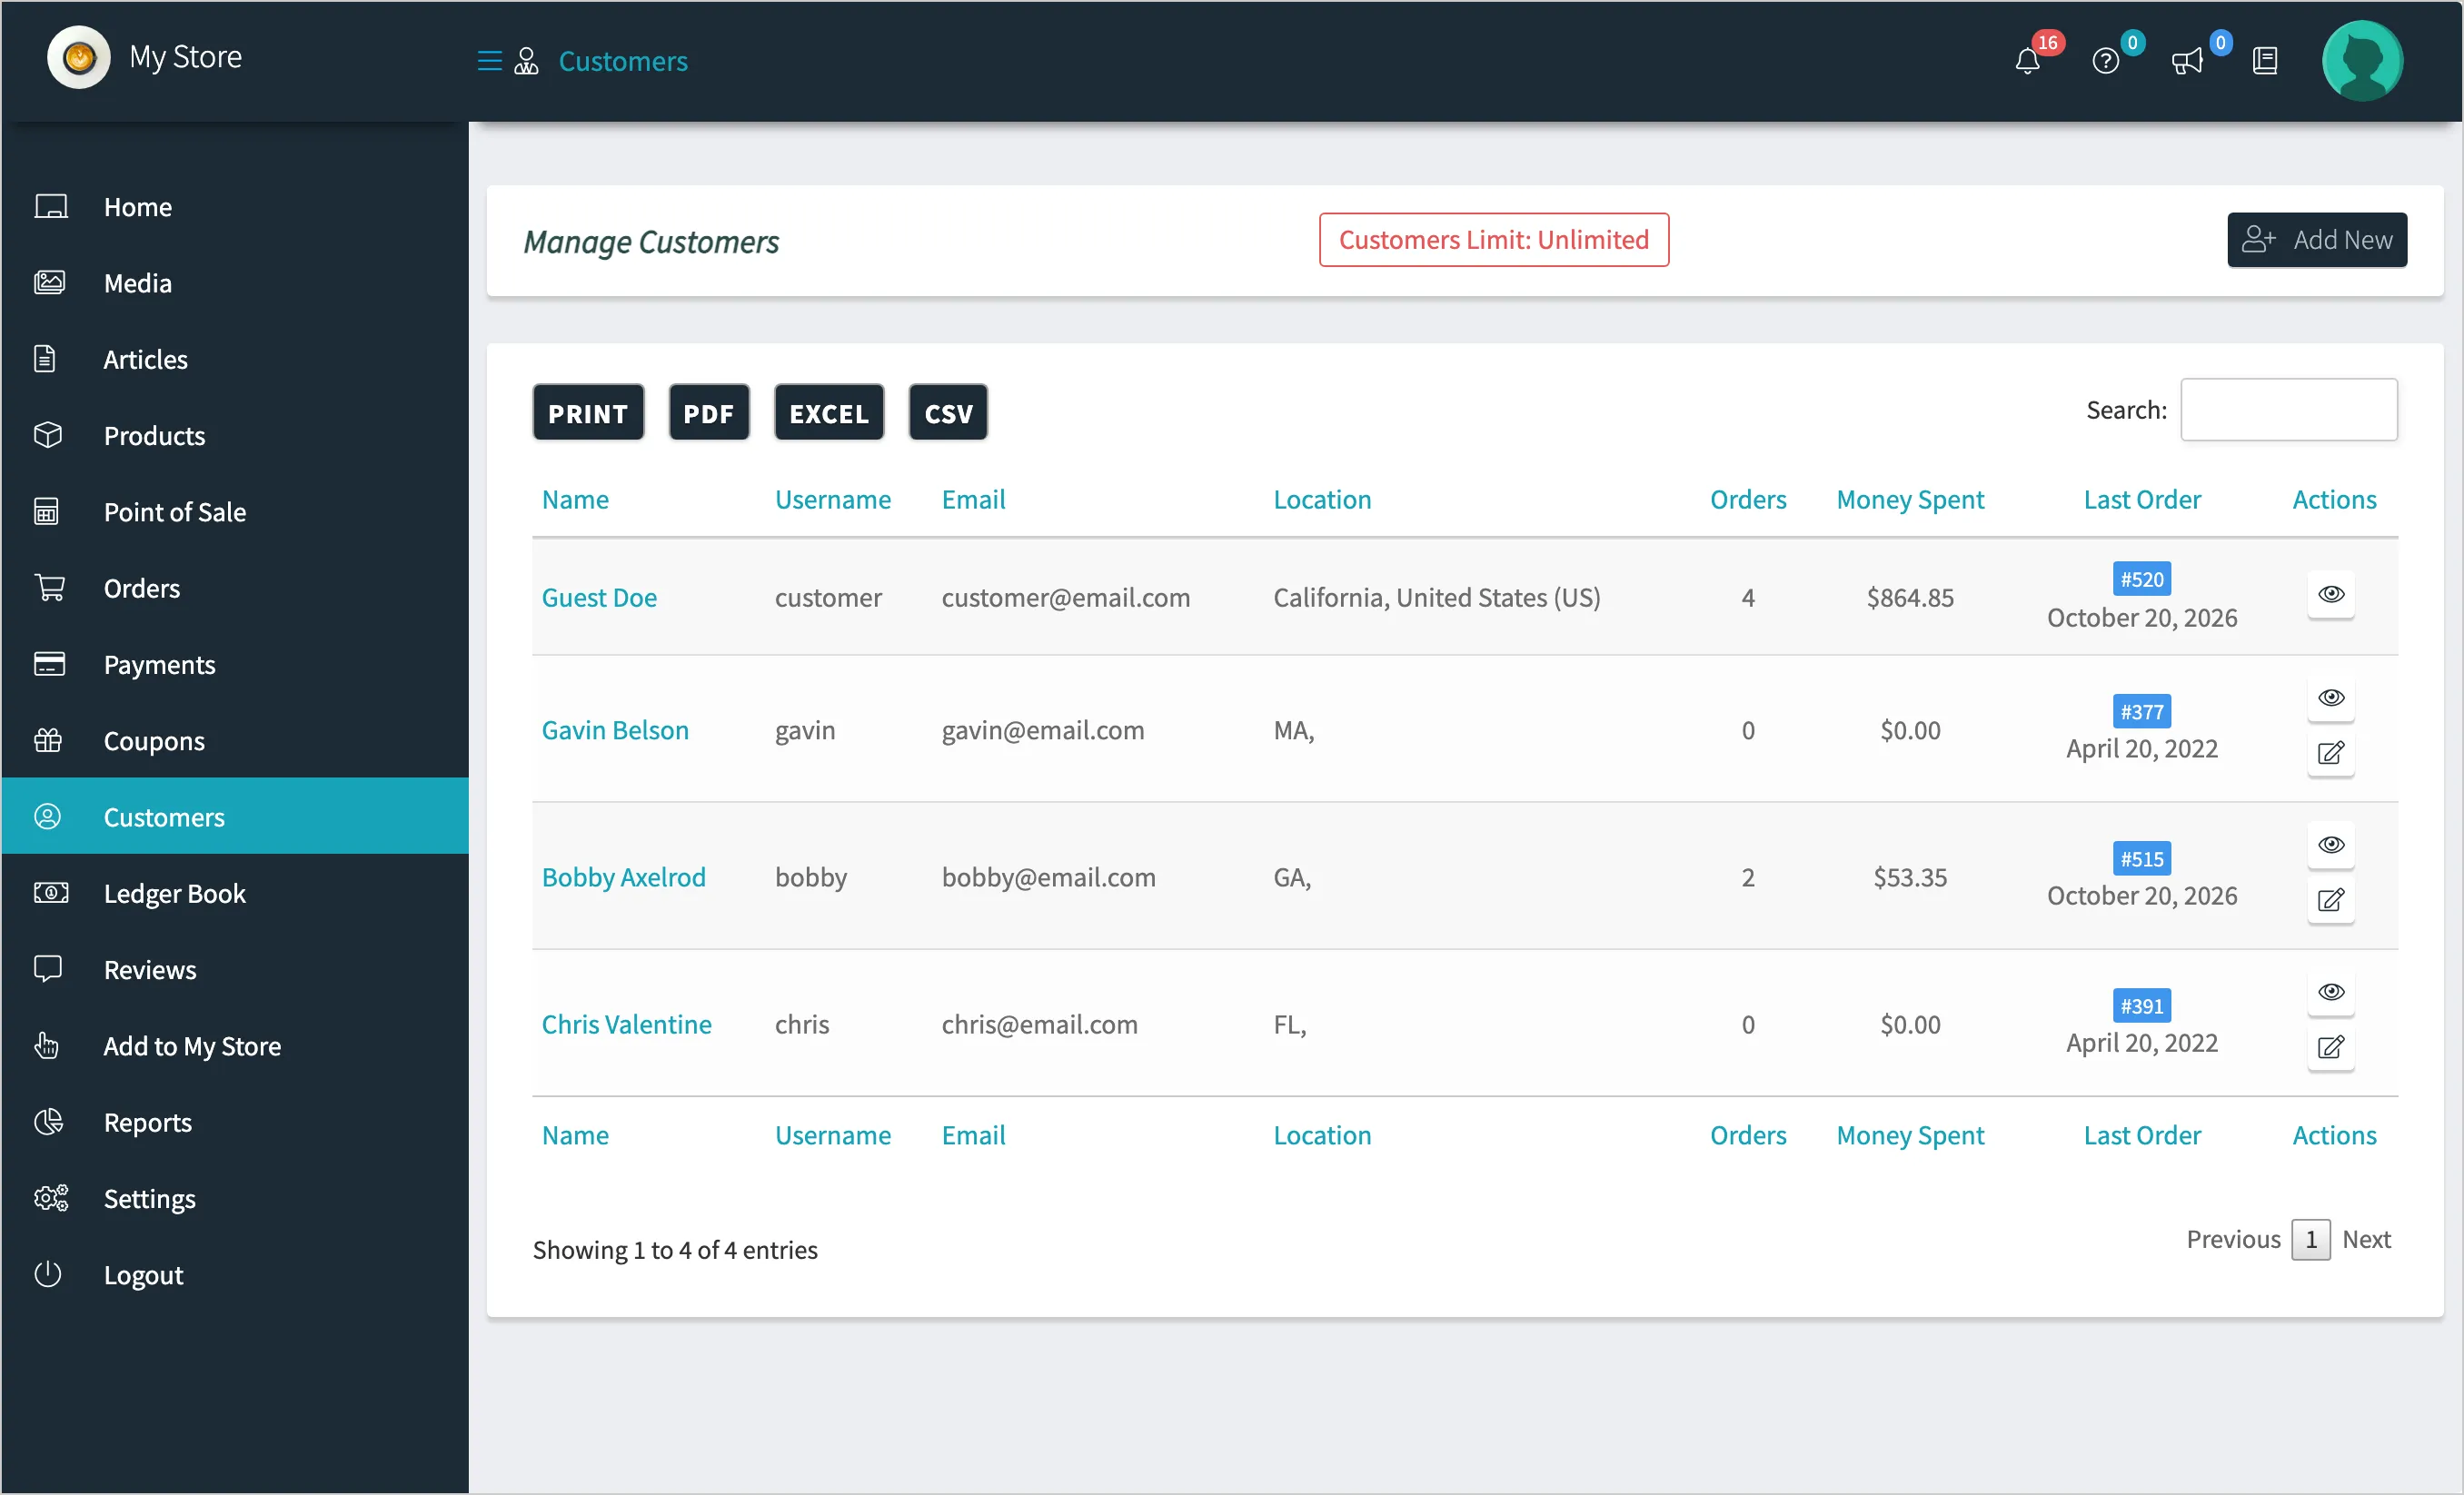
Section titled “Step 5: Add a new customer”Fill in Add New Customer on the right and click Save. A customer added at a vendor’s POS becomes that vendor’s customer, and appears under Customers in the vendor’s store manager too.
What a vendor’s POS cannot change
Section titled “What a vendor’s POS cannot change”A vendor’s POS edits and deletes only the customers that vendor added. The walk-in account, staff accounts, and online shoppers who also bought from the vendor are read-only there. A customer with orders can never be deleted from a POS.