

How to Manage Stock Across Outlets
An outlet can sell from WooCommerce stock, shared with the website, or keep a count of its own. This walkthrough gives Daily Grind Bakery Counter its own counts.
Step 1: Choose the outlet’s stock mode
Section titled “Step 1: Choose the outlet’s stock mode”Inventory Management on the outlet chooses:
- Global Default: whatever the store’s General tab says.
- Centralized: WooCommerce stock, shared with the website and every Centralized outlet.
- Custom: this outlet’s own count.
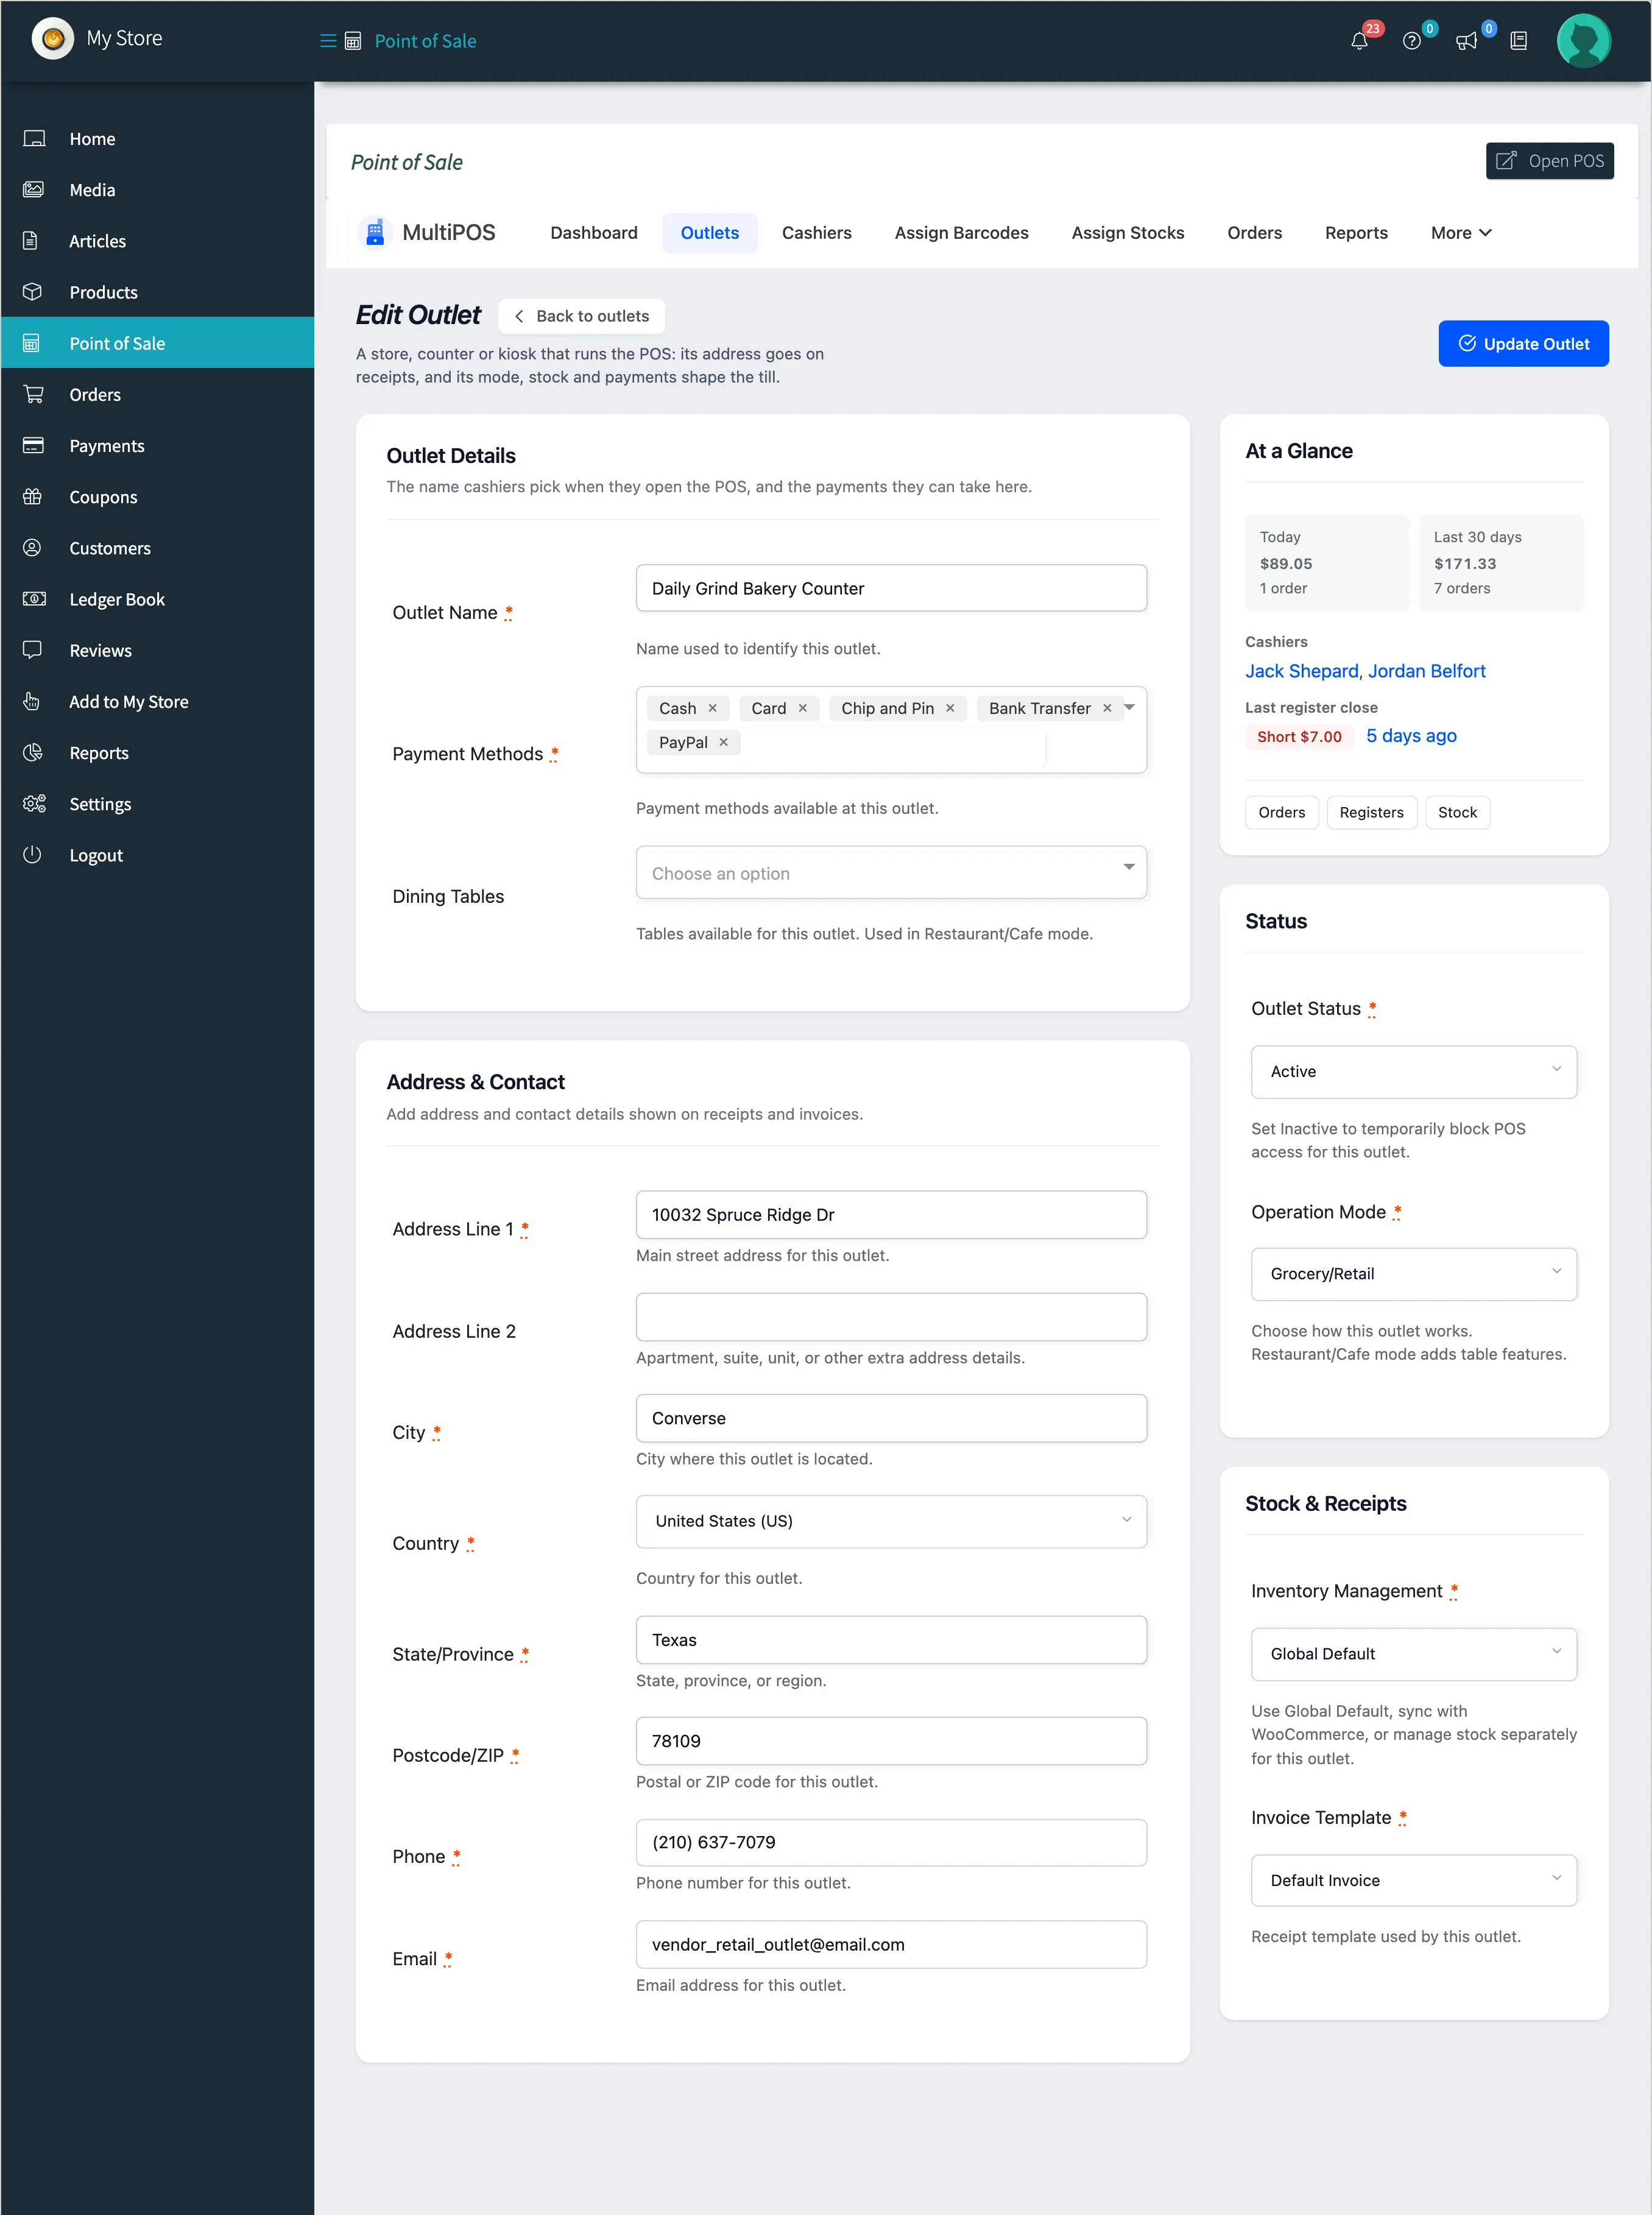
On the demo, the vendor’s General tab is set to Custom, so the Bakery Counter keeps its own count.
Step 2: Open Assign Stocks
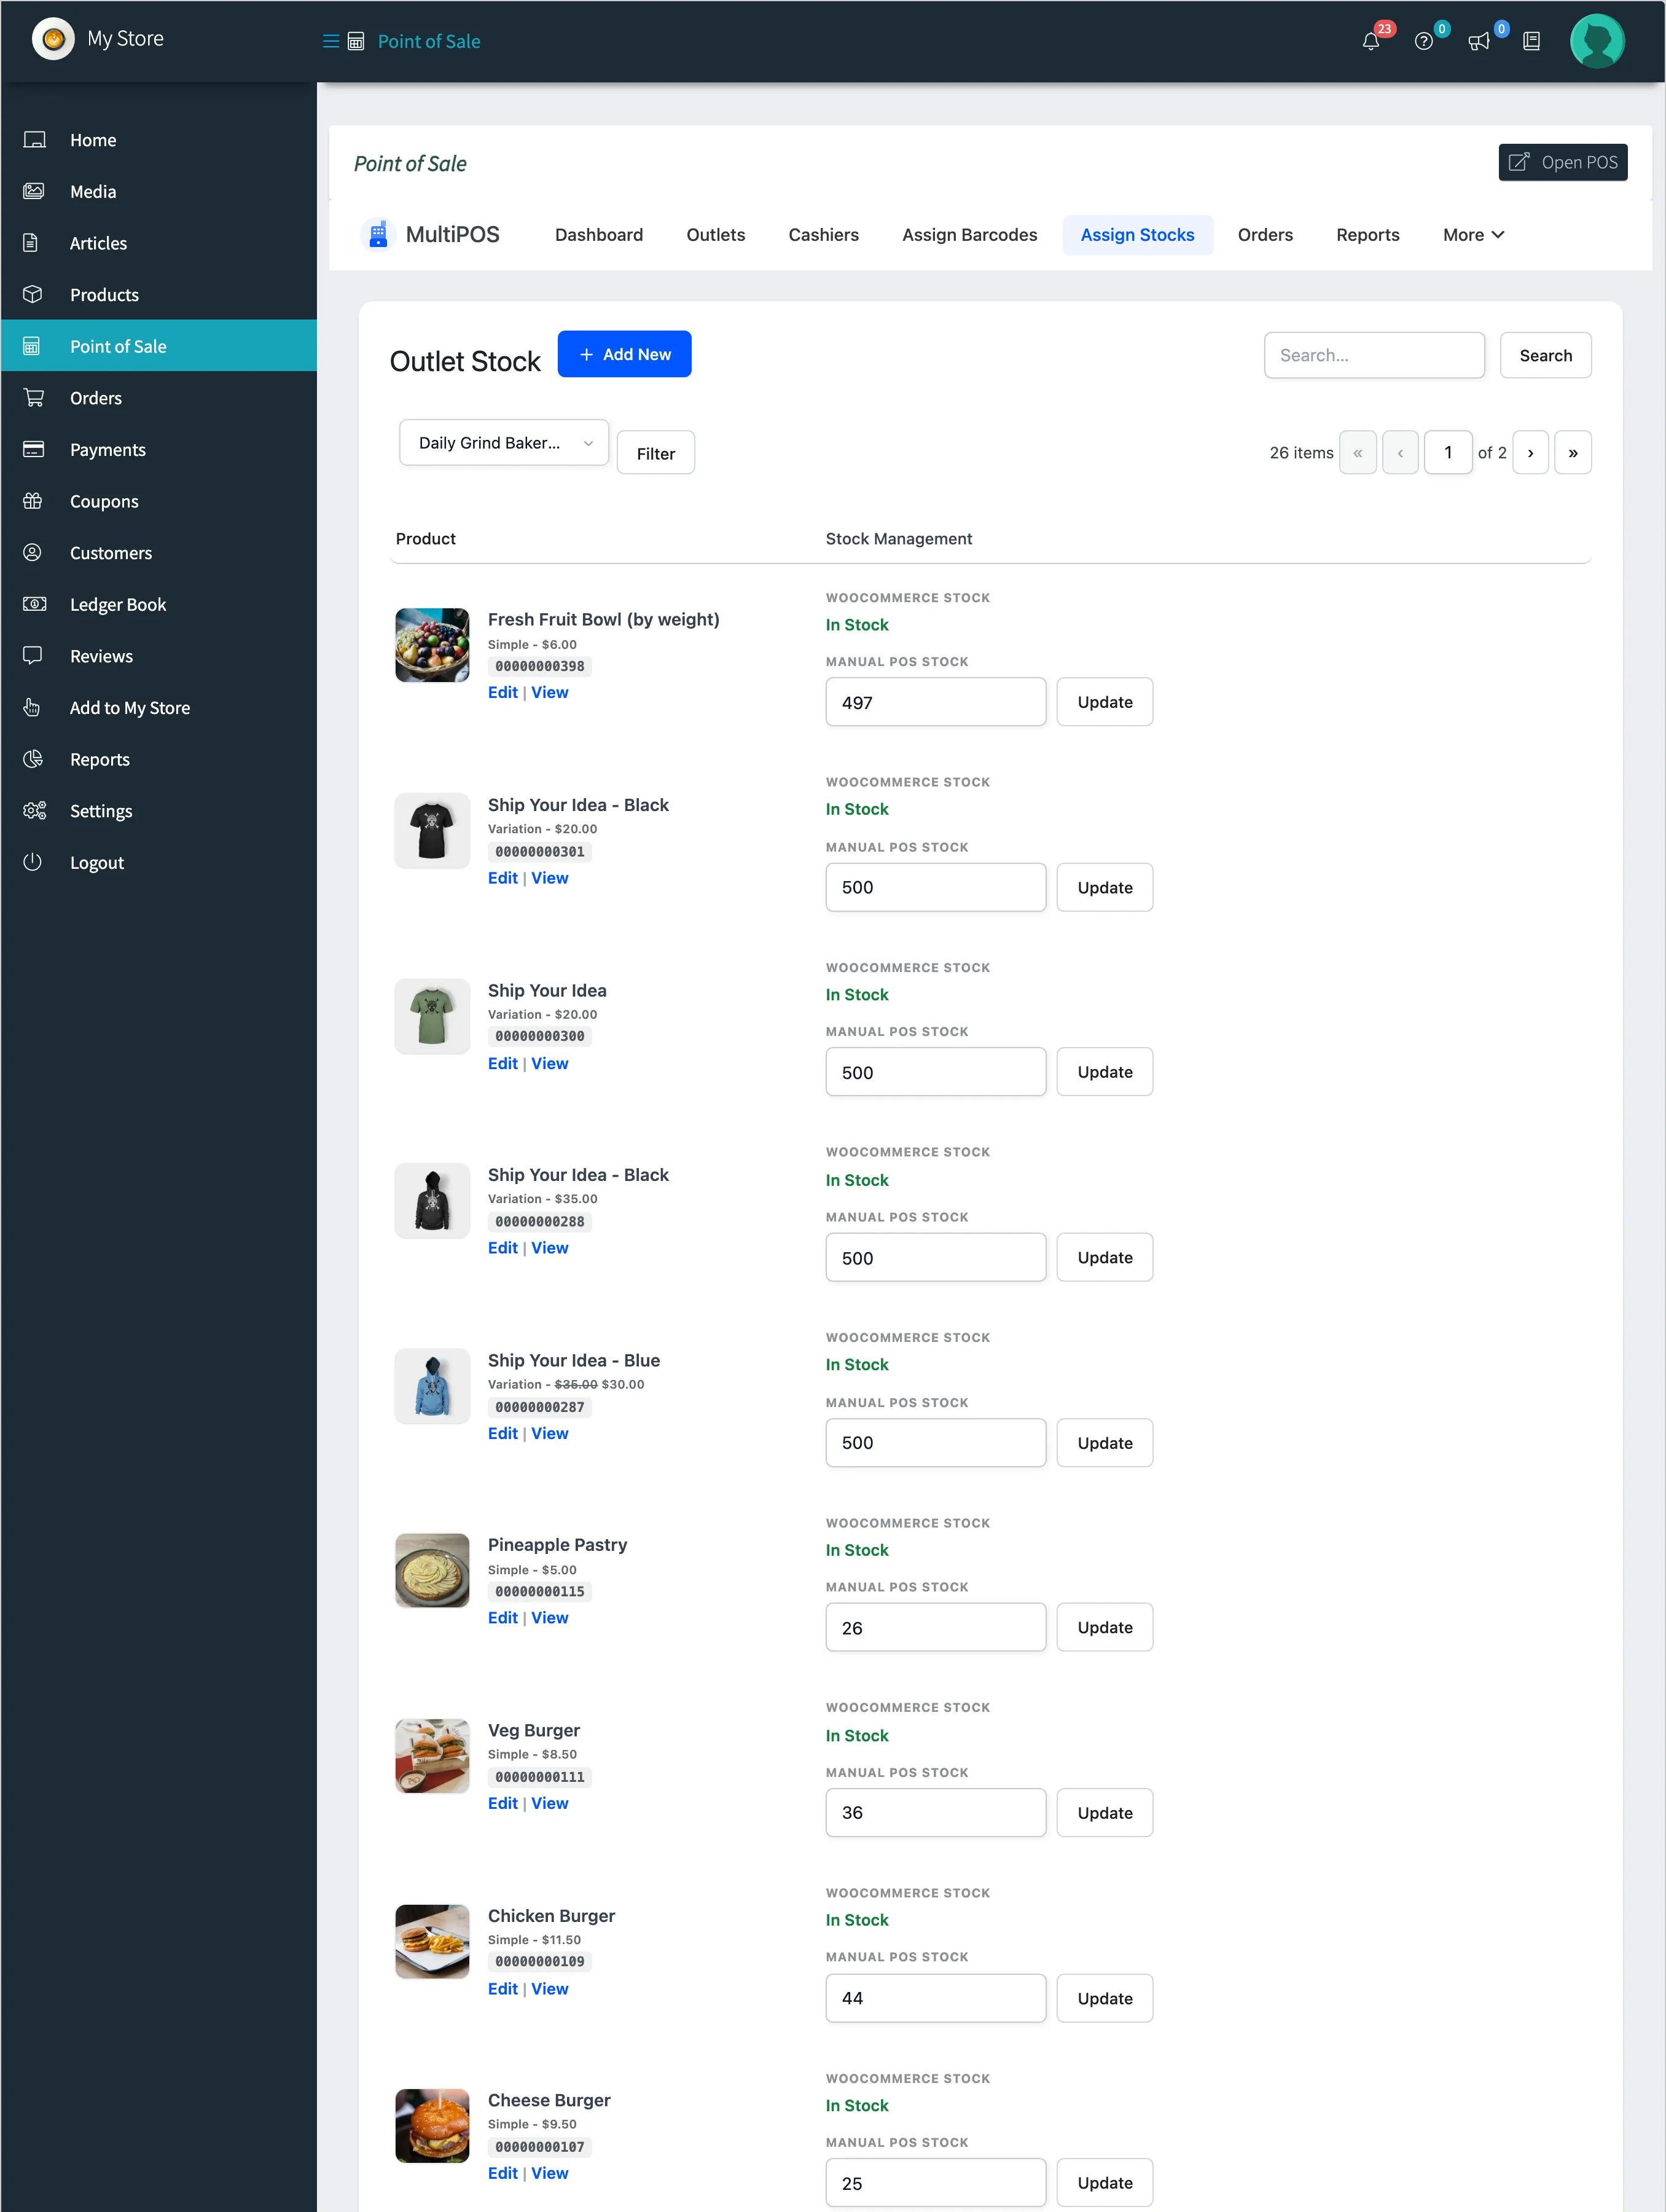
Section titled “Step 2: Open Assign Stocks”Click Assign Stocks on the outlet’s row, or open Assign Stocks and choose the outlet. Each row shows the WooCommerce stock beside the outlet’s count.
Step 3: Set each count
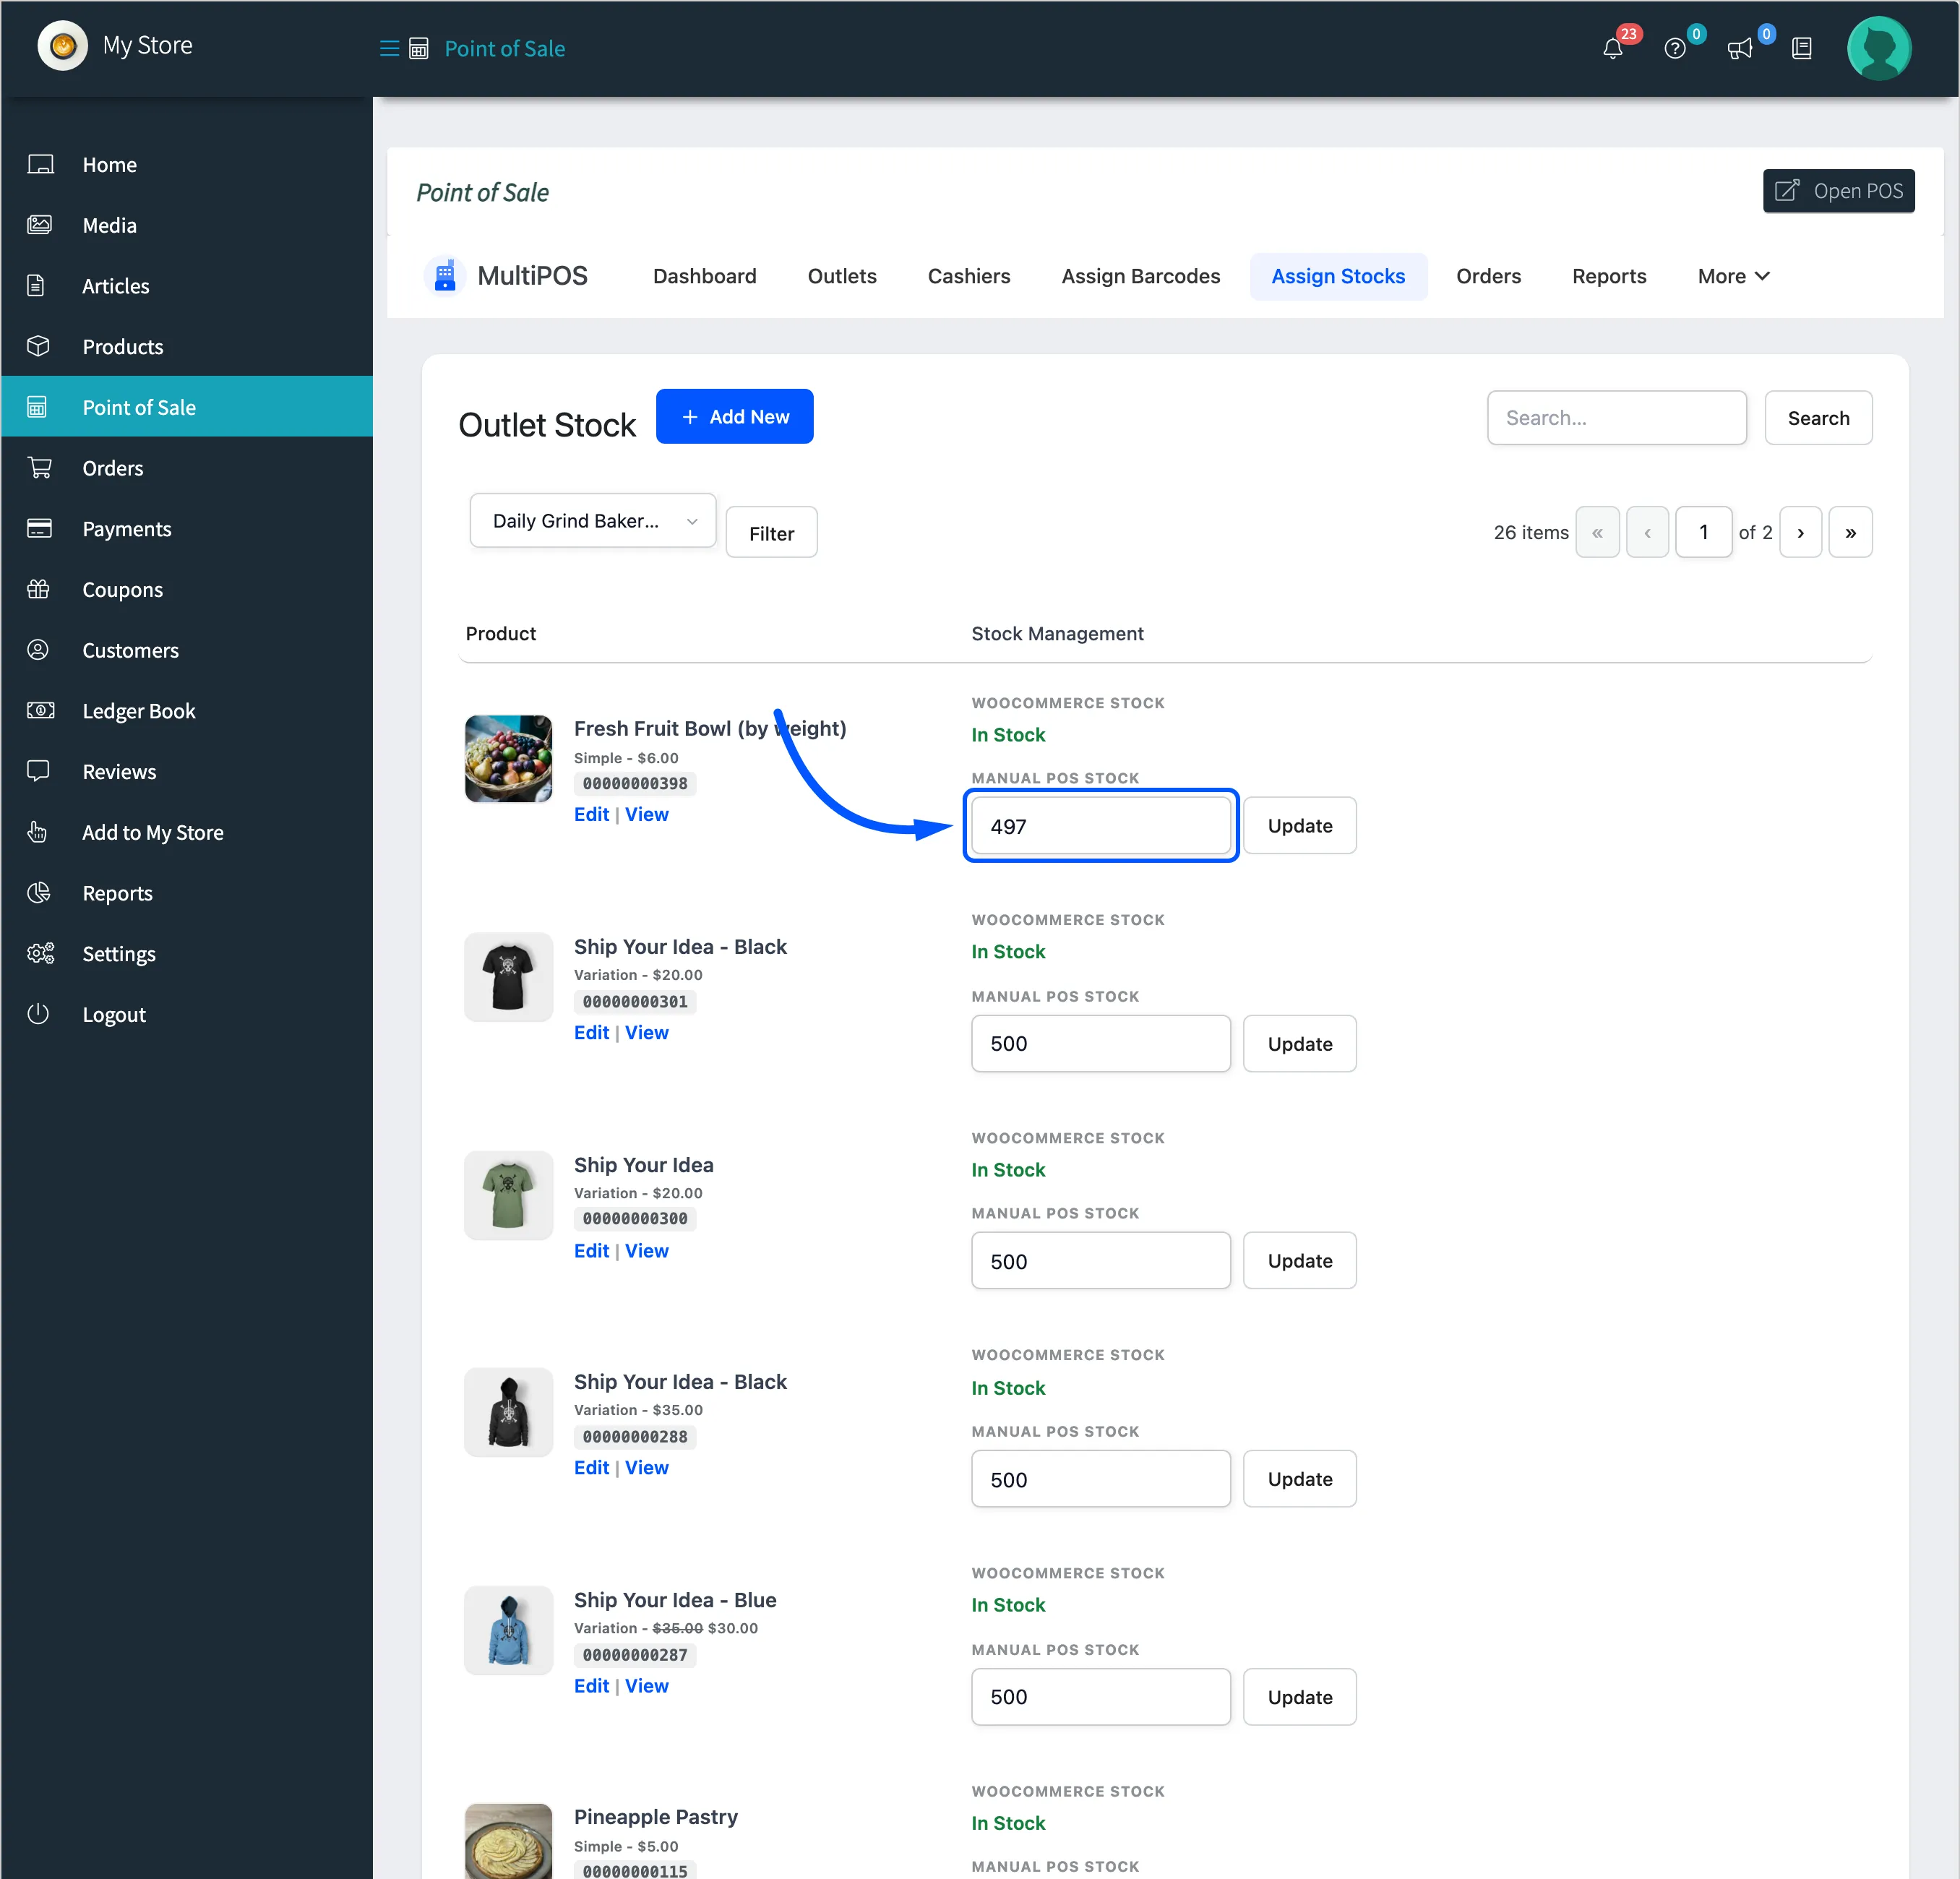
Section titled “Step 3: Set each count”Type the count and click Update on the row. It saves straight away. Variations have a row each.
Step 4: Check the POS
Section titled “Step 4: Check the POS”Open the outlet at the POS. Every product with a count appears, showing the outlet’s stock.
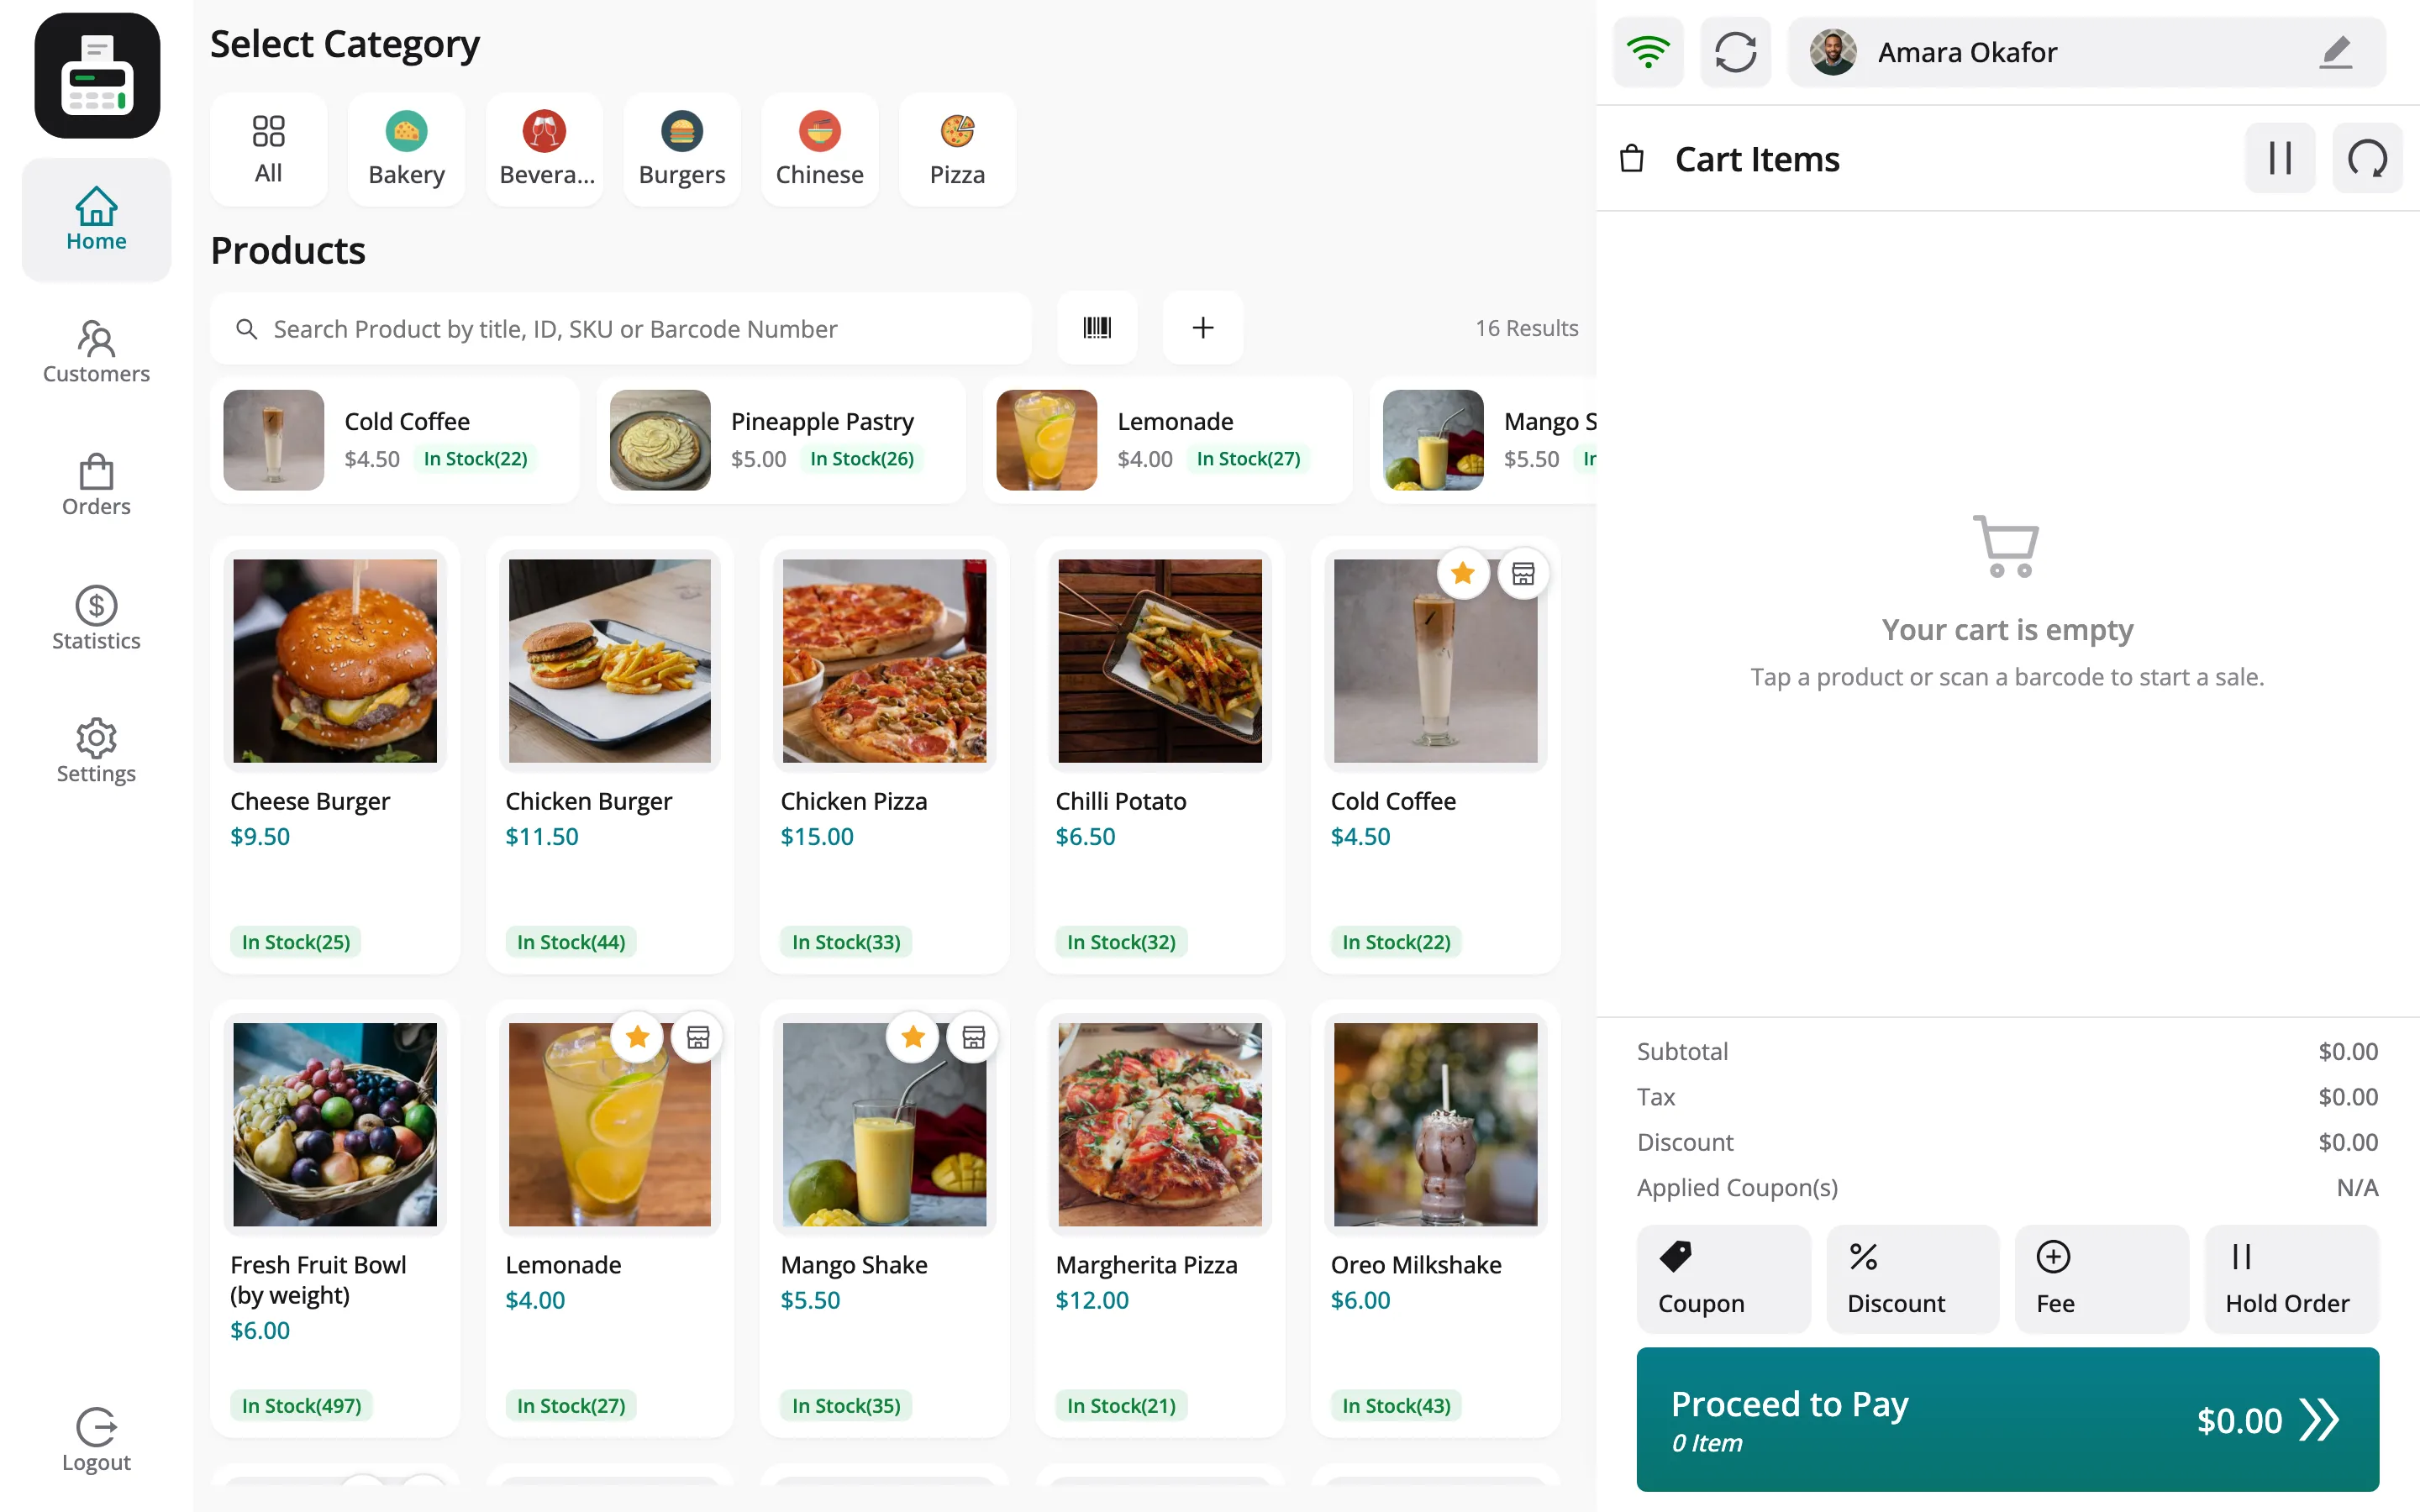
Before the counts were set, the same POS listed one product, because a product with no count for a Custom outlet does not appear.
Things to know
Section titled “Things to know”- Sales draw the outlet’s count down, not WooCommerce’s.