

How to Onboard a New Affiliate
Approving someone is the easy half. The half that decides whether they ever send you traffic is what happens next, and most of it is telling them where things are.
This walkthrough covers what a new partner sees, in the order they will see it, so you can write one welcome email that actually works.
Before you start
Section titled “Before you start”Your program needs to be live and reachable. Work through How to Launch Your Affiliate Program first if you have not already.
Step 1: Approve the application
Section titled “Step 1: Approve the application”Go to DevDiggers Plugins → Affiliates → Affiliates, tick the new row and choose Approve Affiliate.
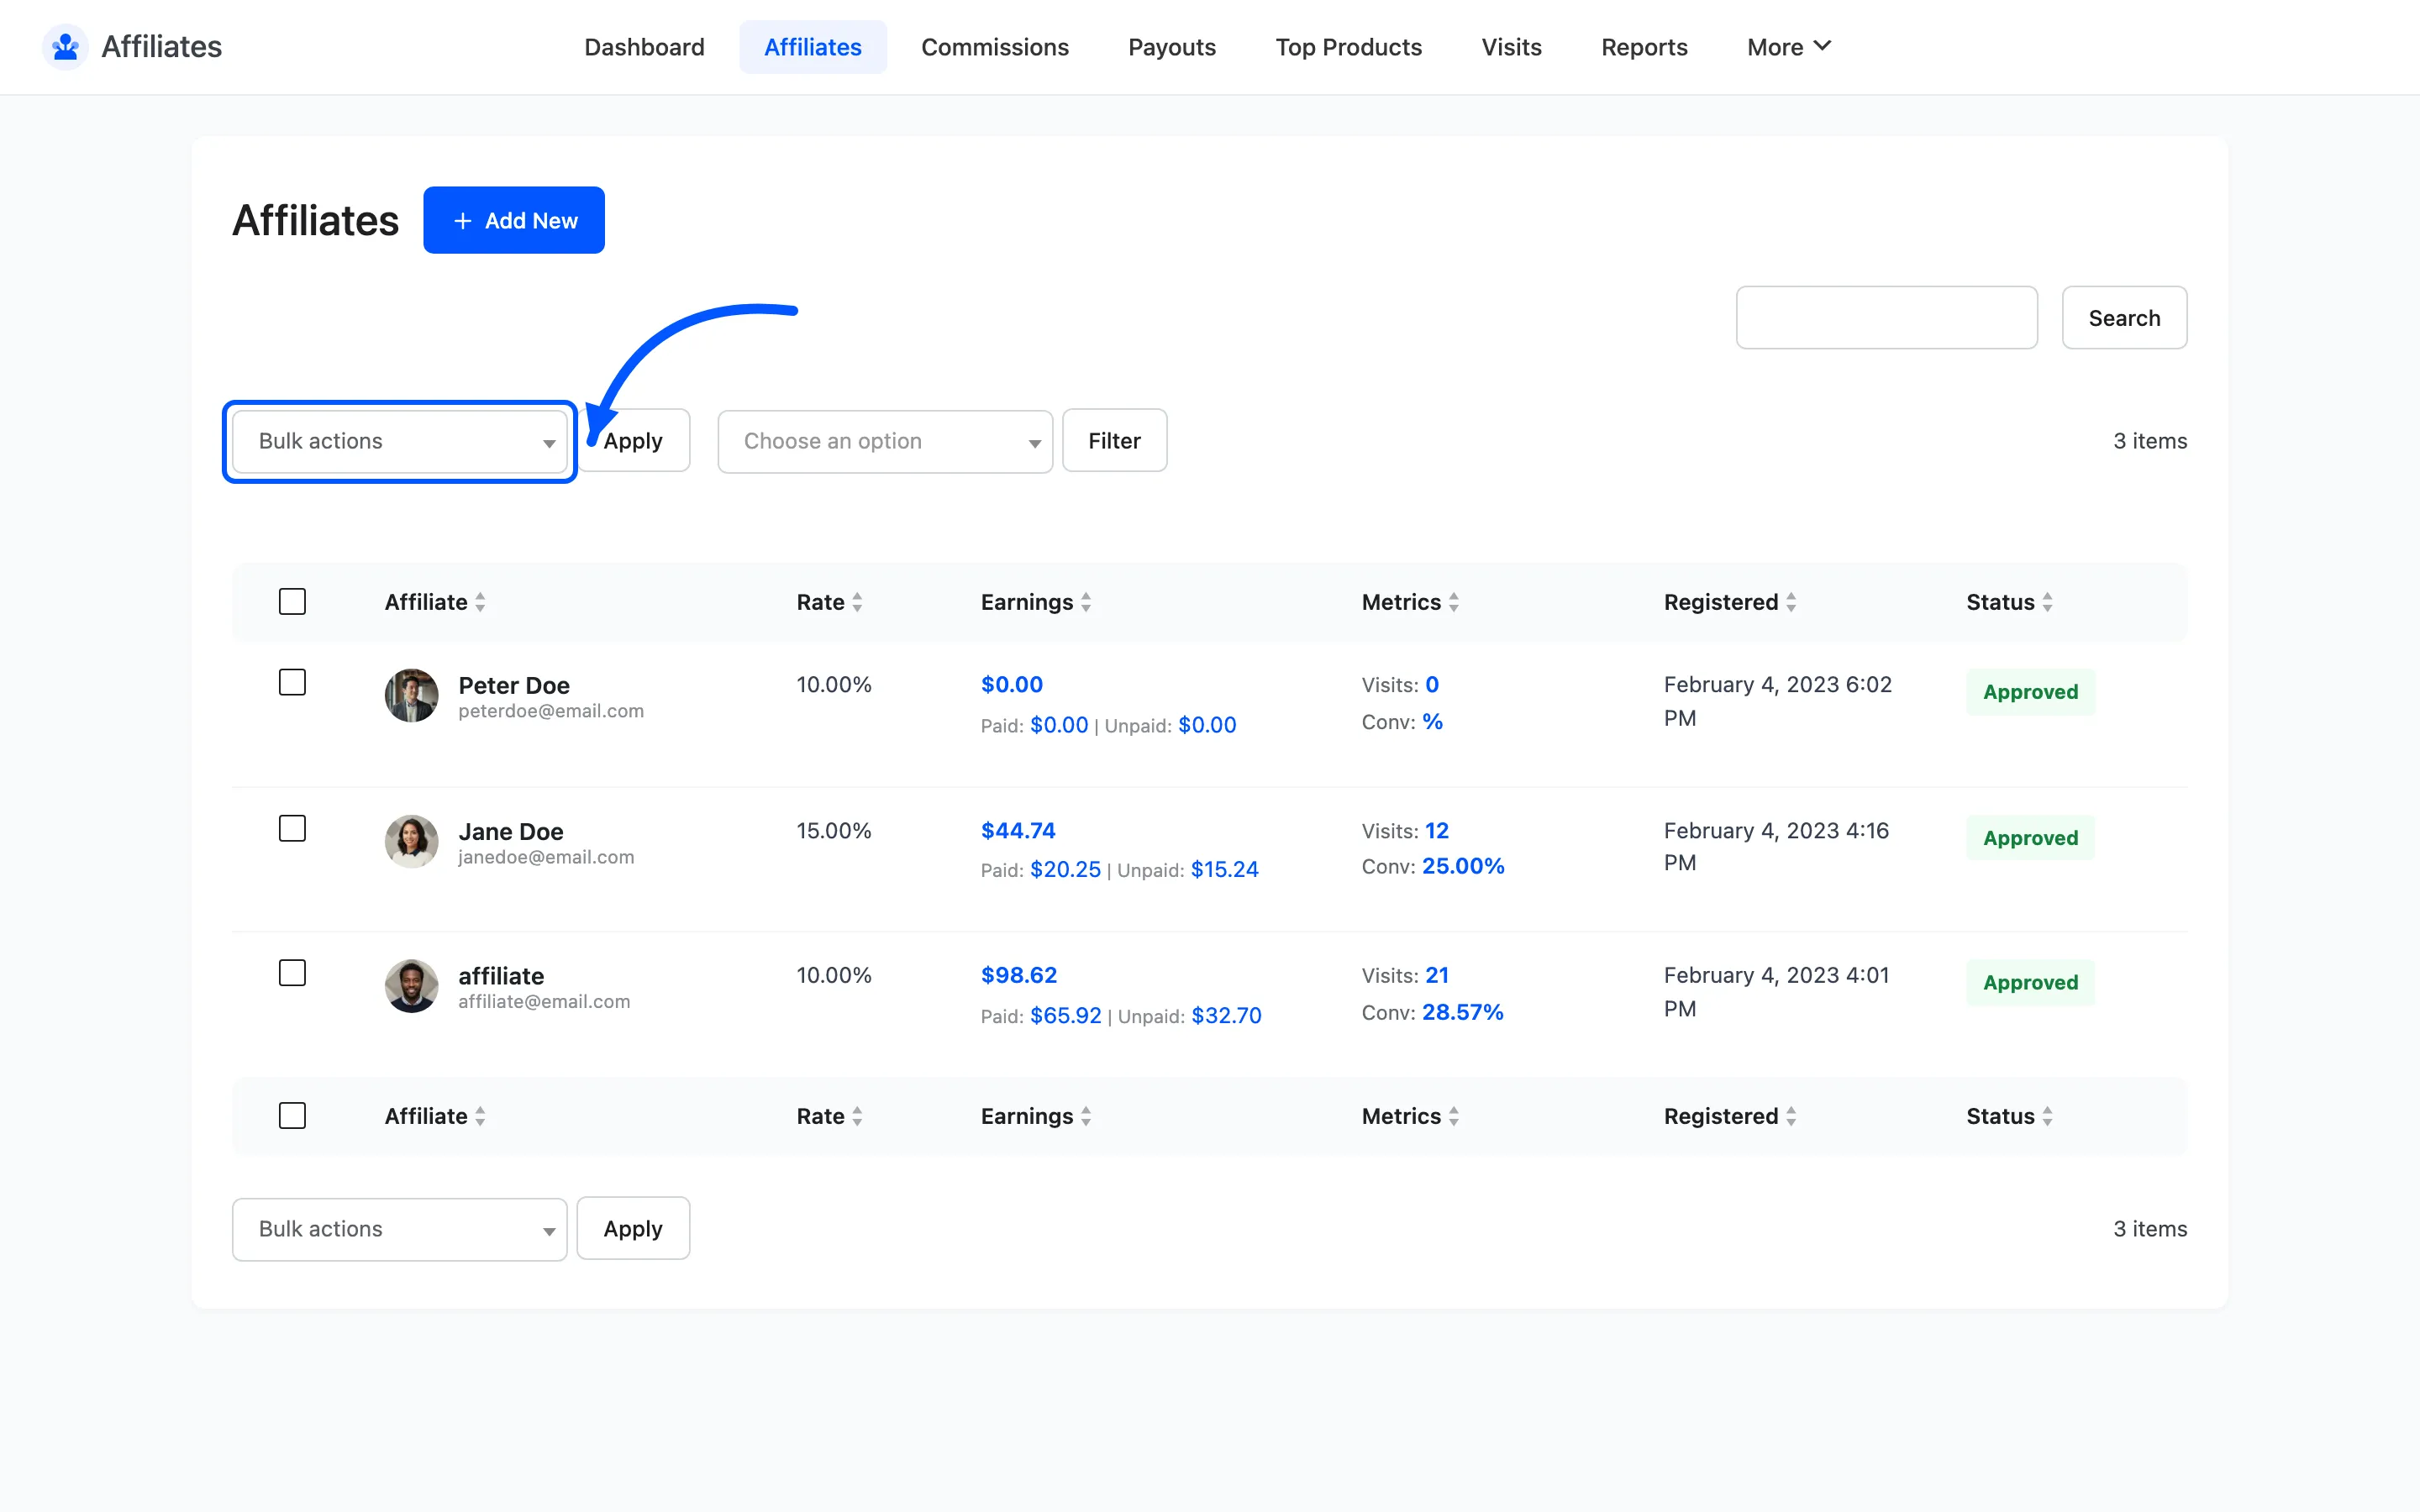
Nothing works before this. A pending affiliate’s link sets no cookie, so a partner who starts sharing early gets credited for none of it.
Step 2: Send them to their dashboard
Section titled “Step 2: Send them to their dashboard”There are two doors to the same screen, and it is worth naming both in your email.
The first is the page you set under Affiliate Dashboard Page. Send that URL directly.
The second is WooCommerce My Account, which grows an extra menu item for affiliates.
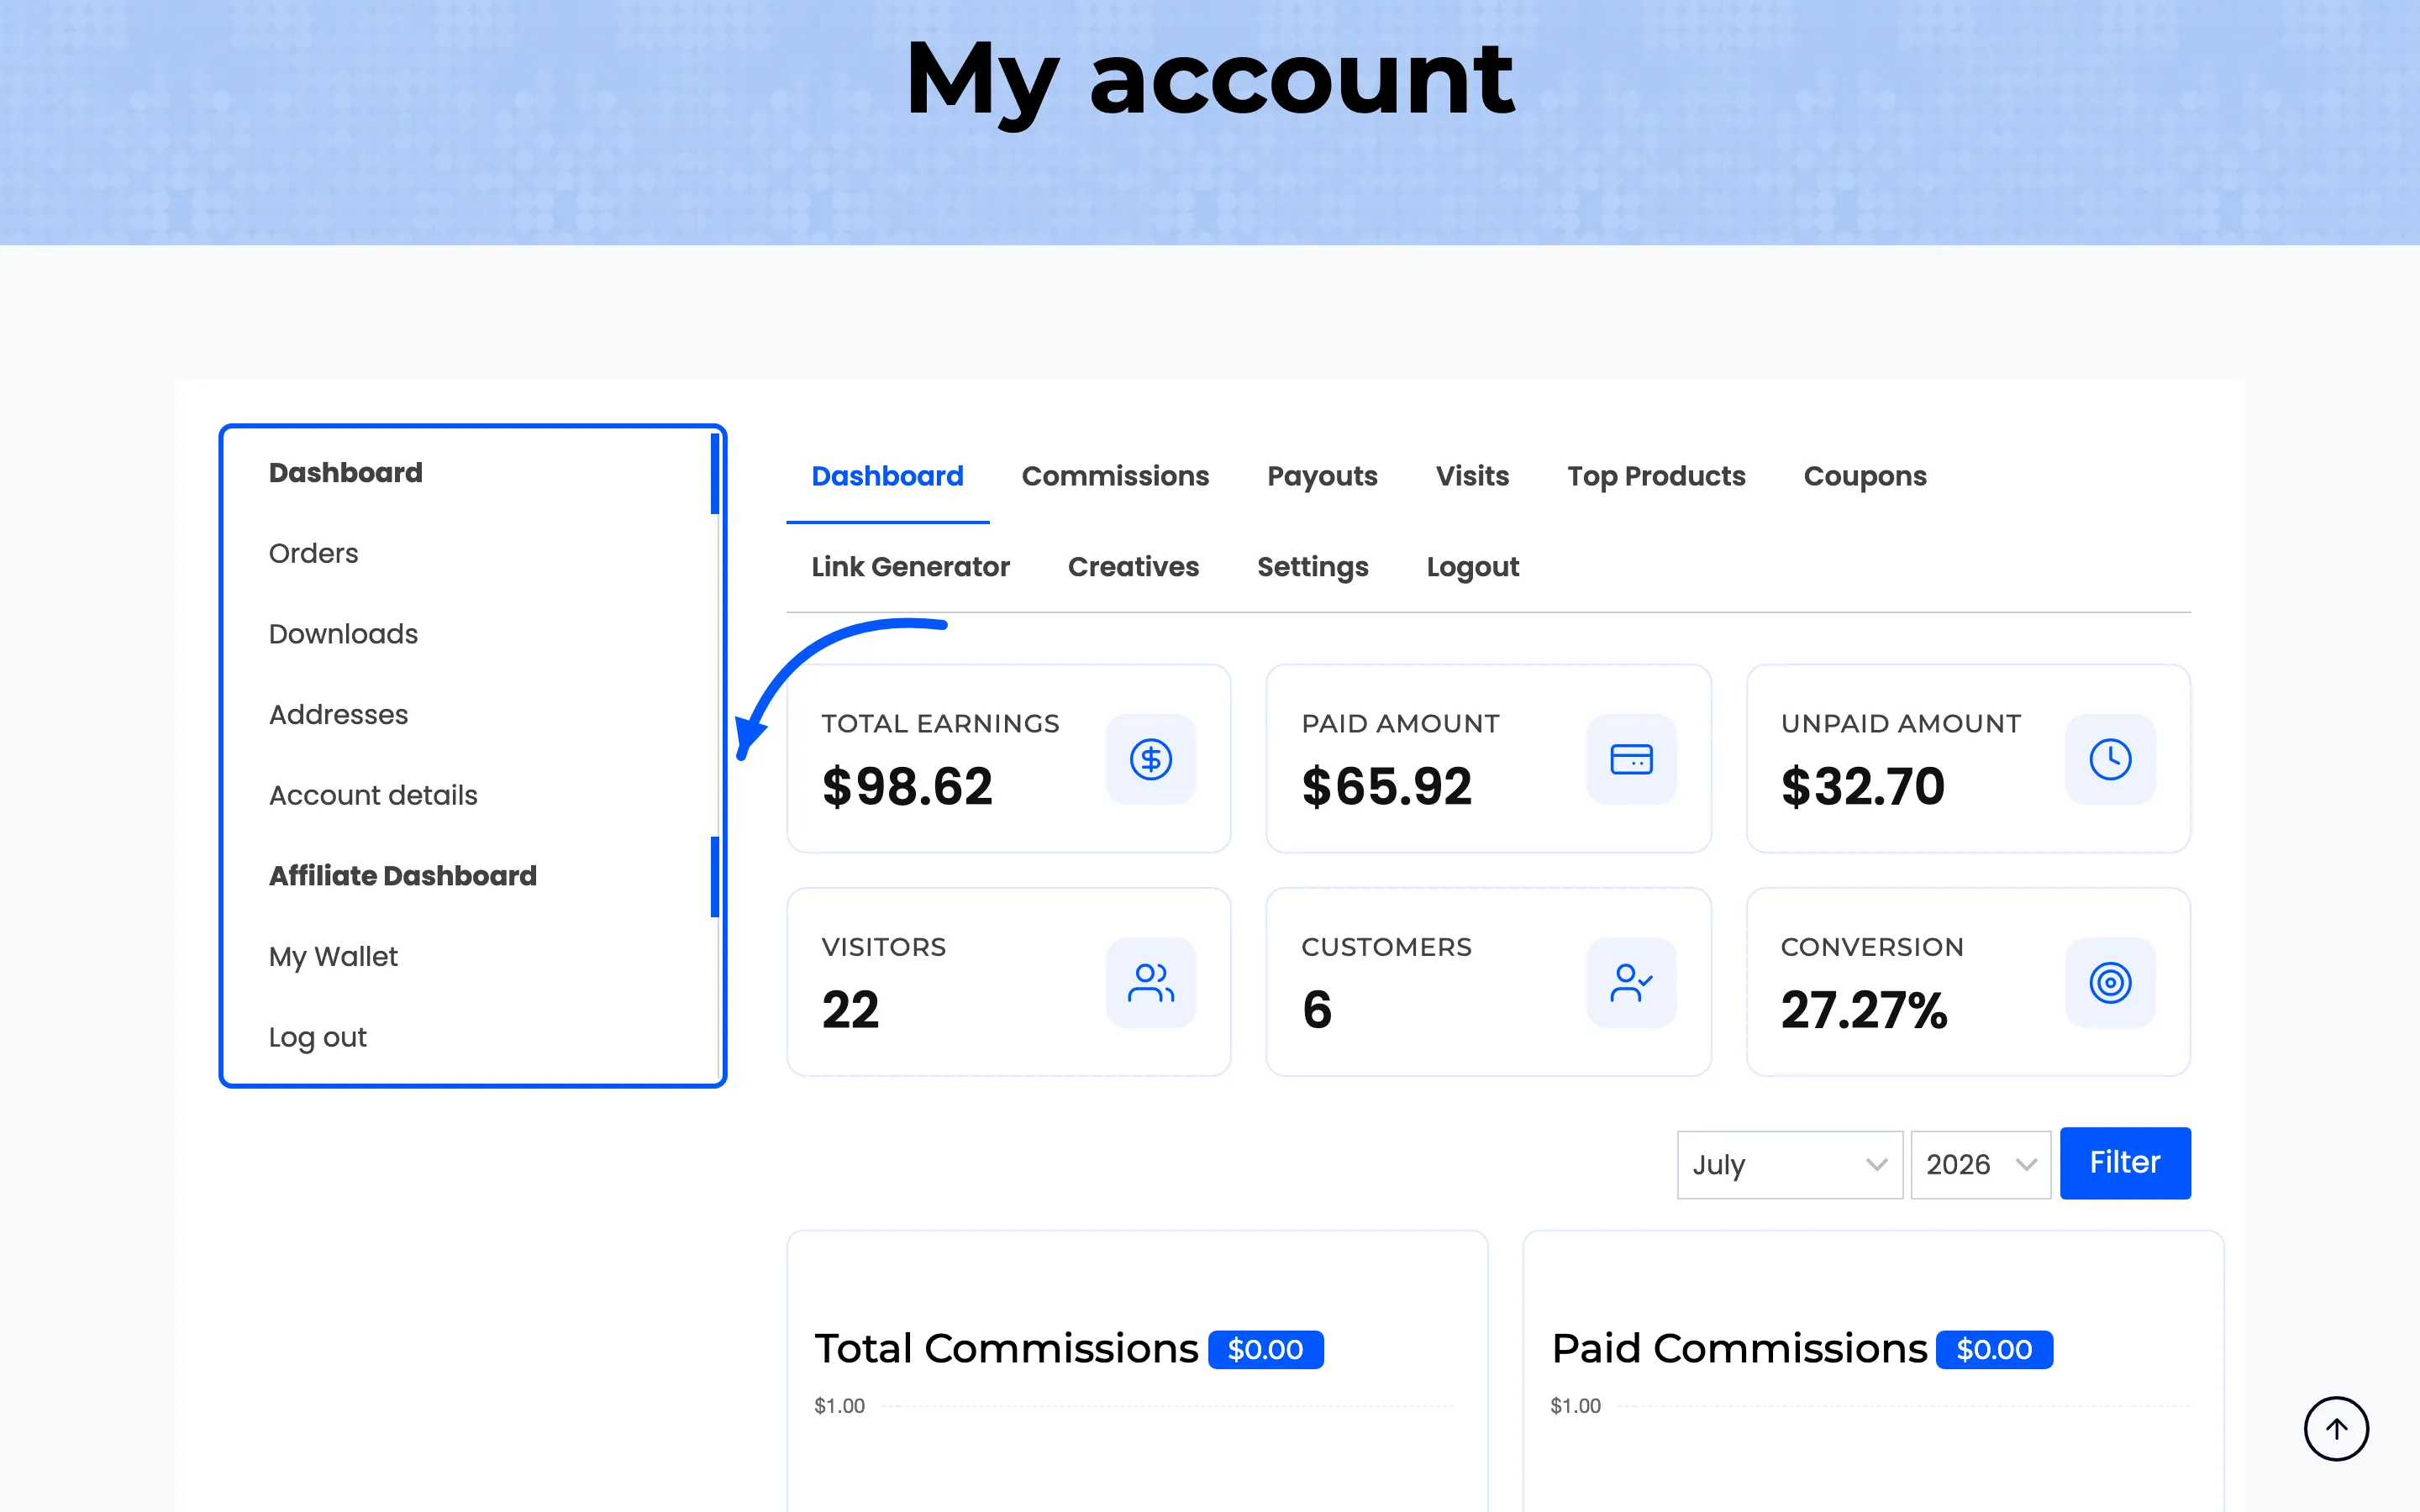
Most partners who are also customers will look in My Account first, so leaving that menu on saves you a support message.
Step 3: Walk them through the dashboard
Section titled “Step 3: Walk them through the dashboard”The landing screen is six summary cards and a set of charts. The cards are all-time totals, and the charts below them are filtered by the month selector.
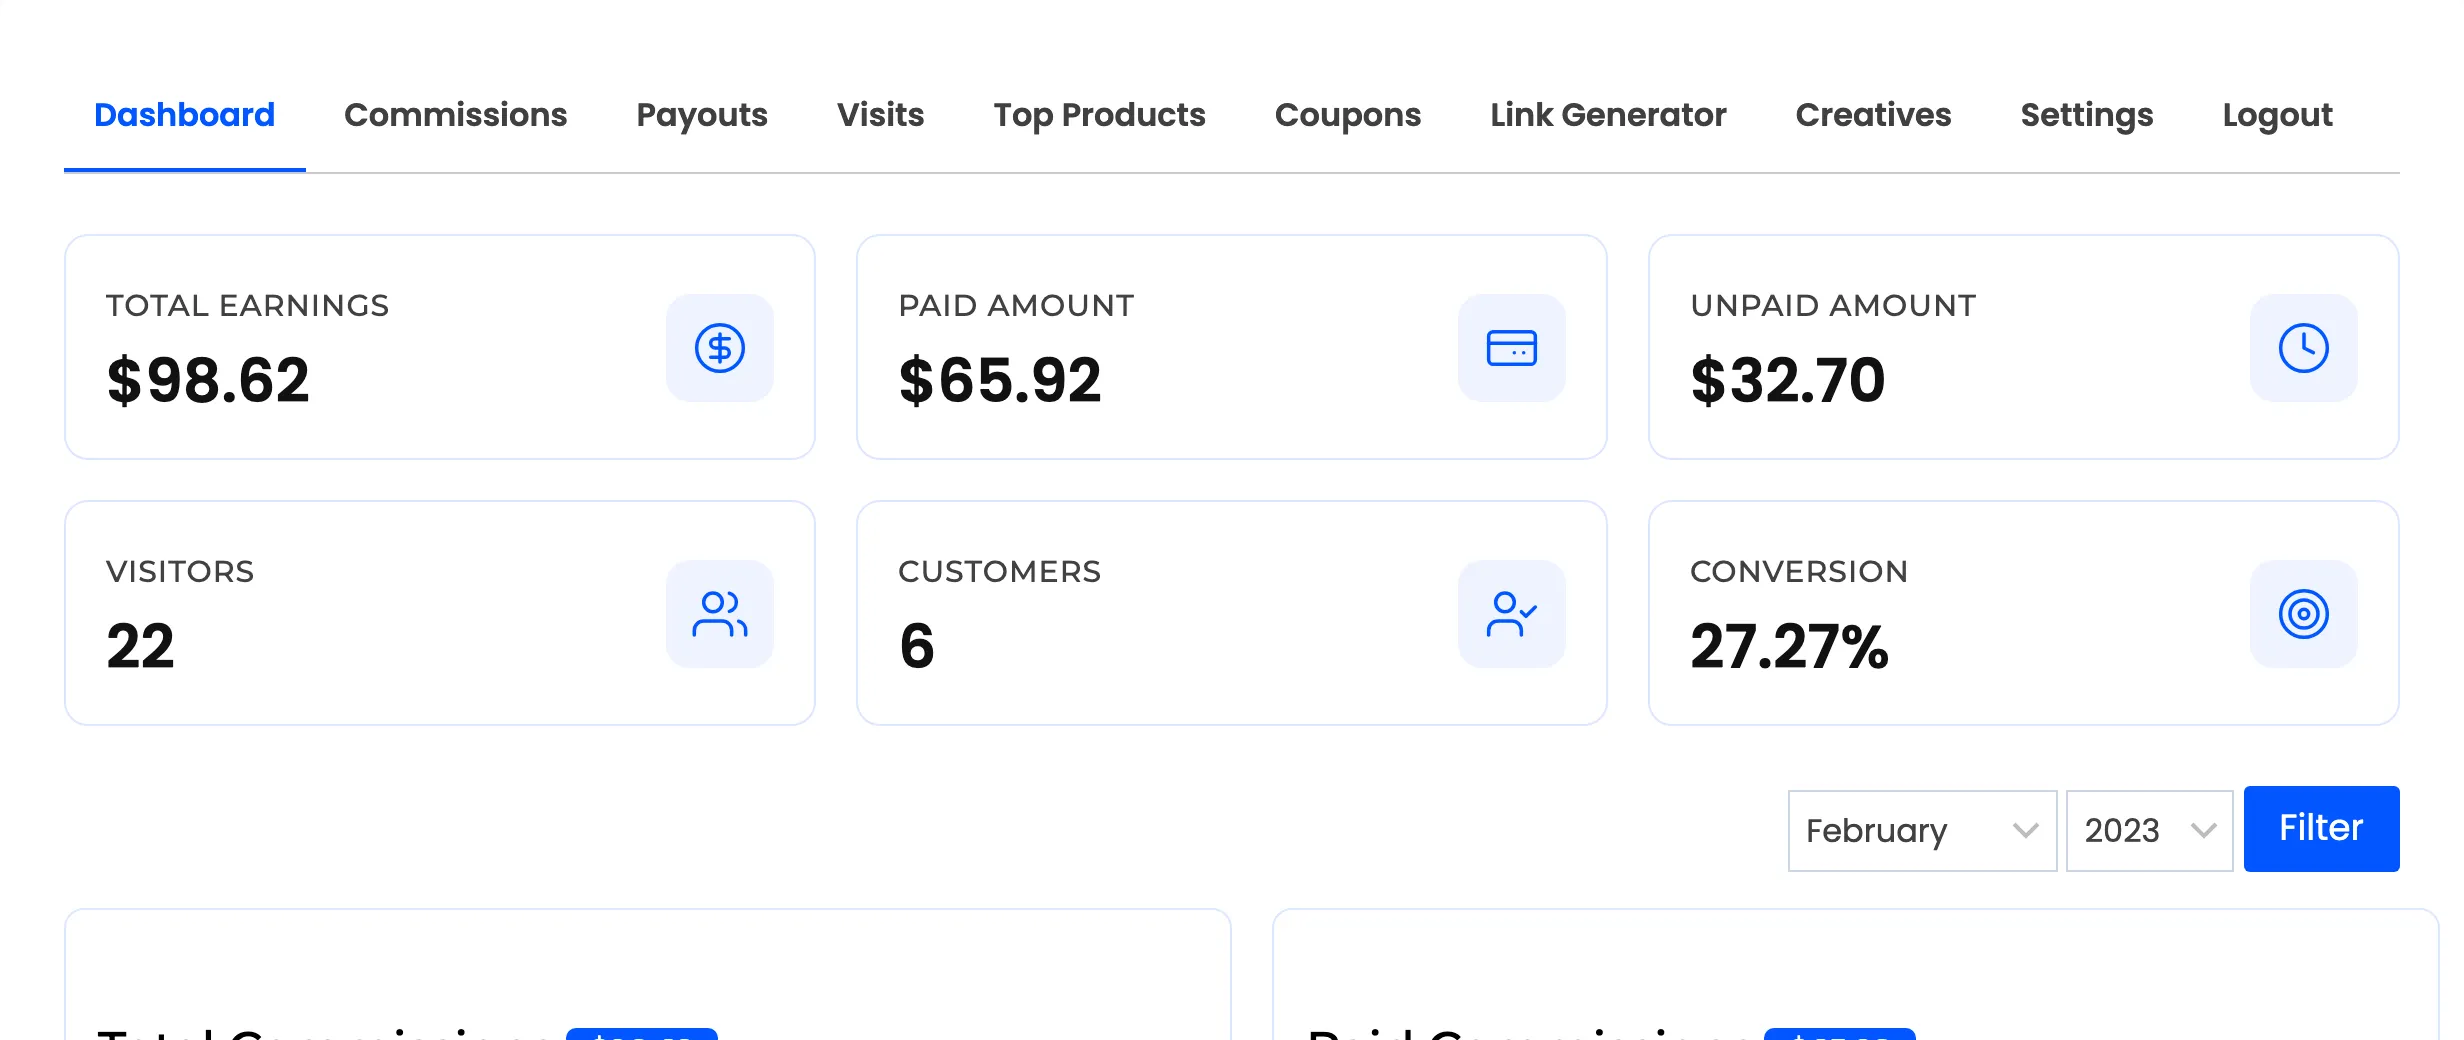
That month selector catches people out. A new affiliate opening the page mid-month sees flat charts and assumes tracking is broken, when the data is simply in another month.
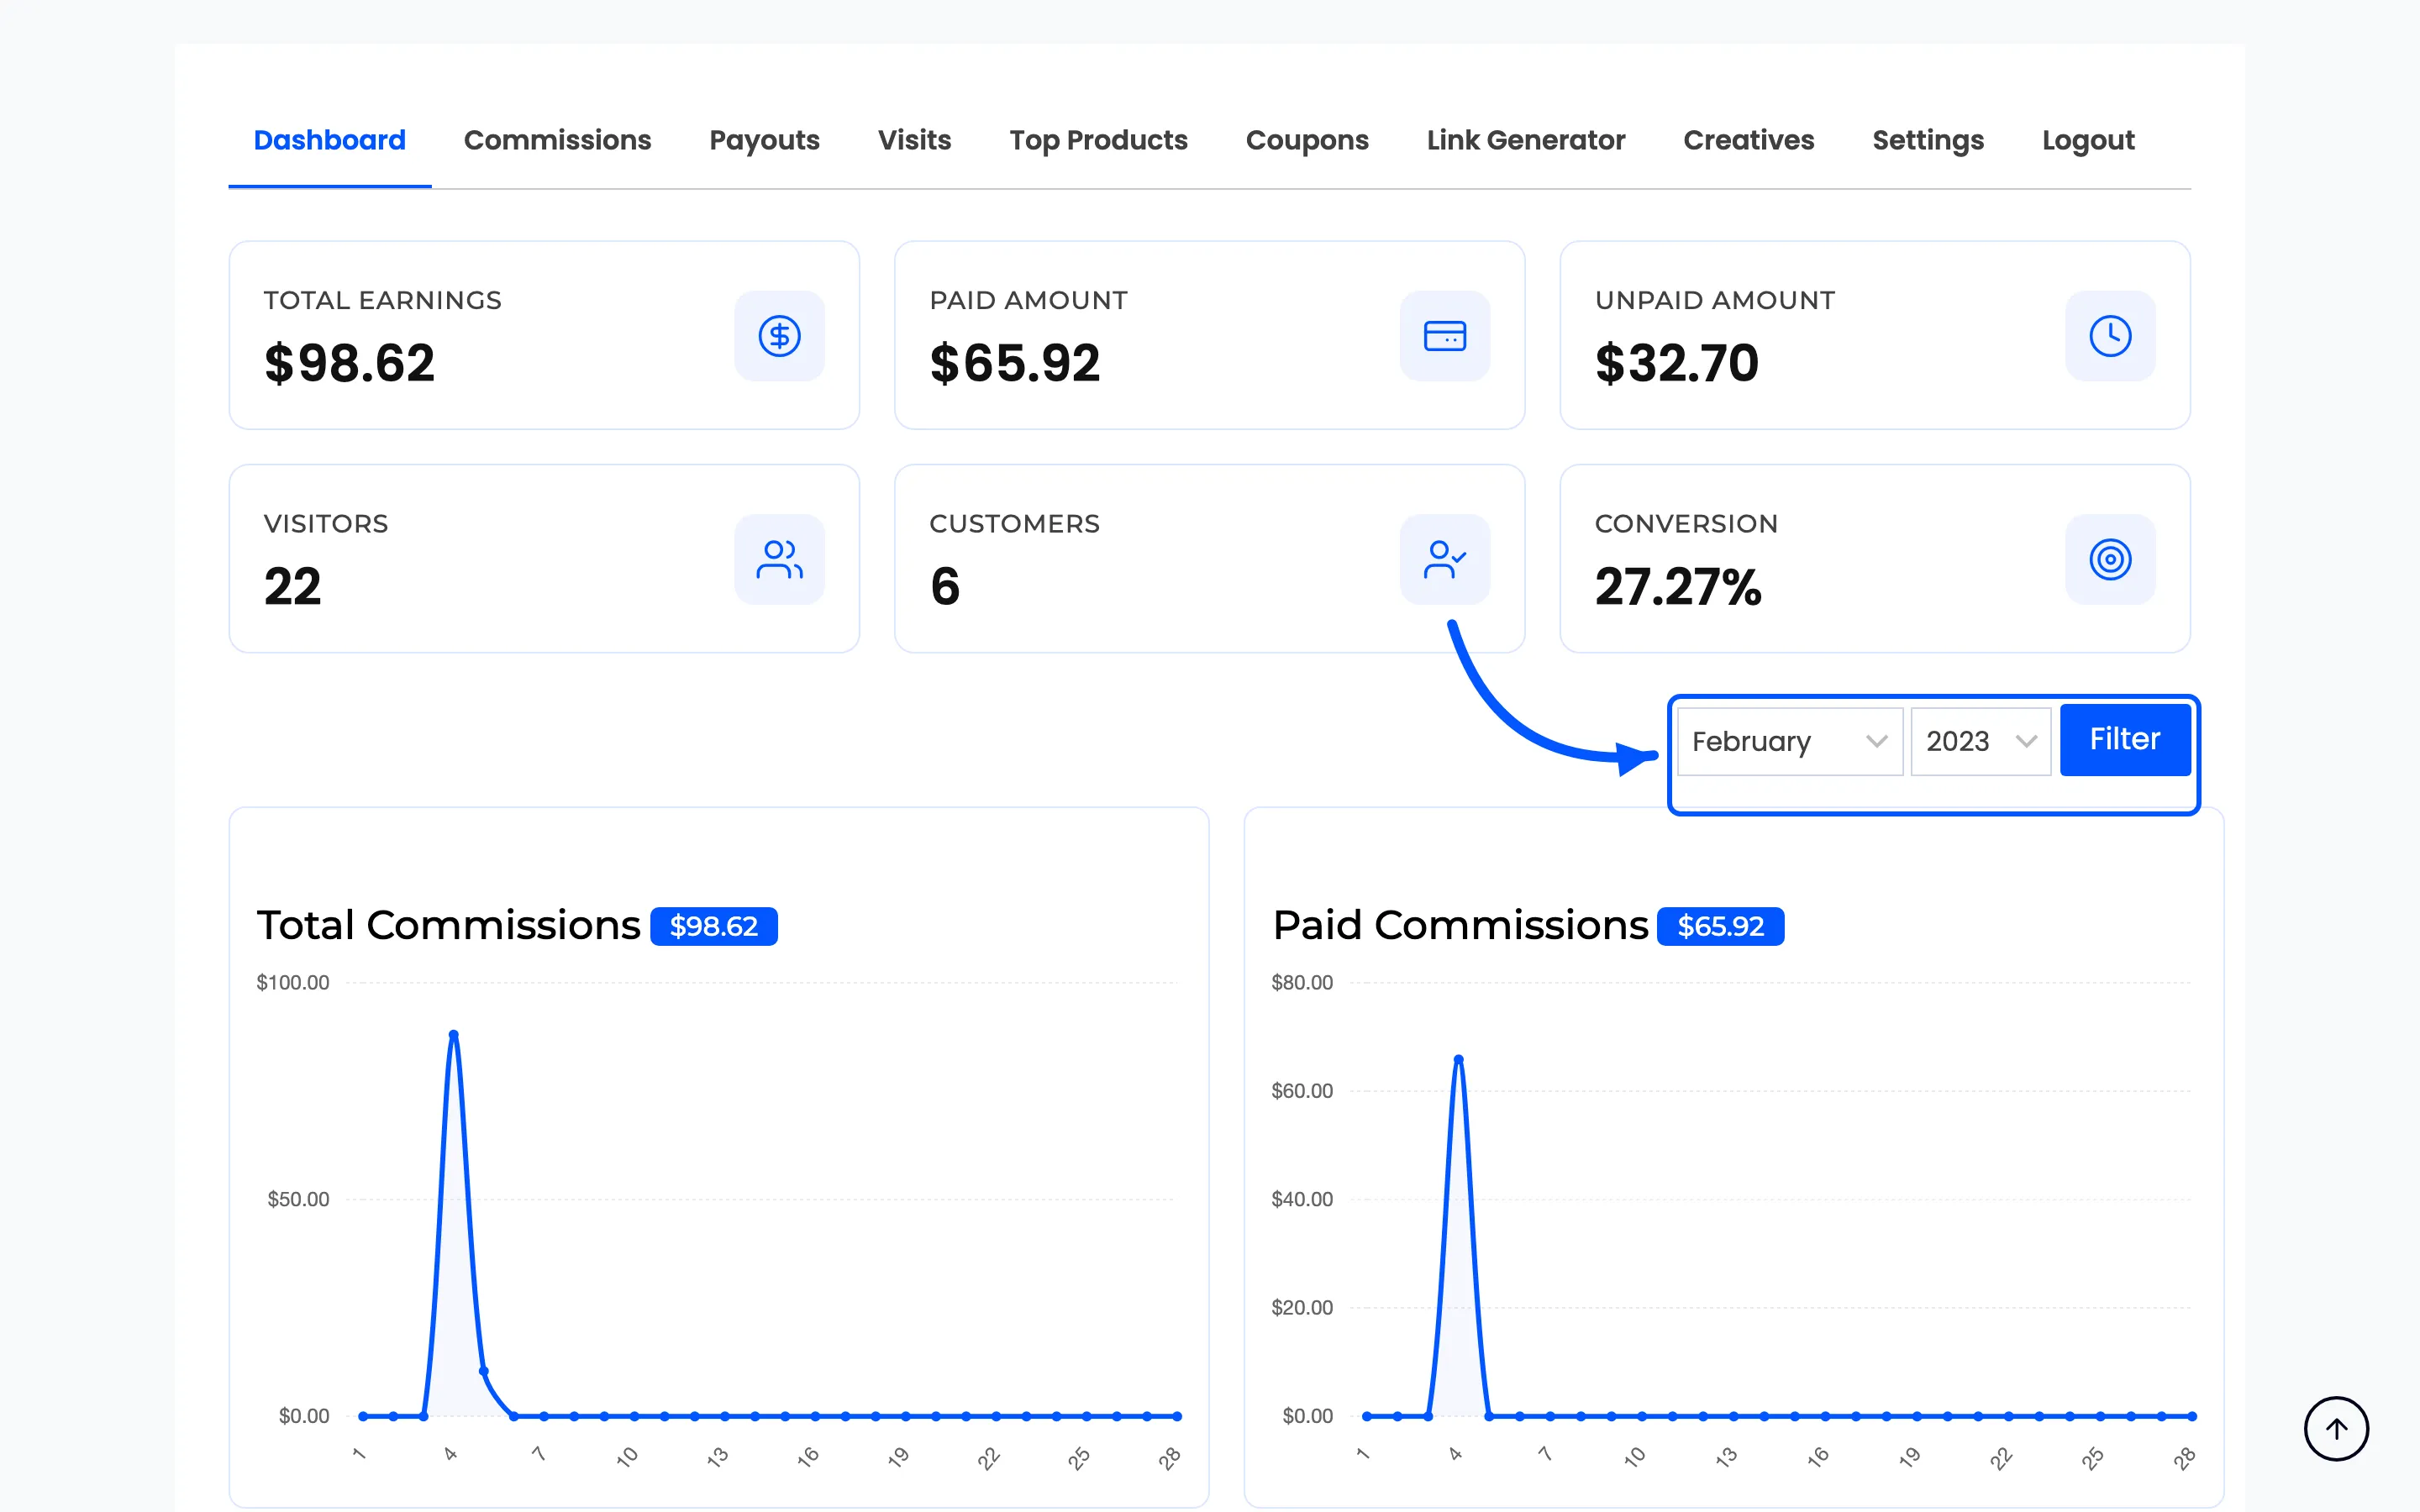
Tell them to change the month before they conclude anything.
Step 4: Show them the Link Generator
Section titled “Step 4: Show them the Link Generator”This is the screen that matters most. Everything else is reporting.
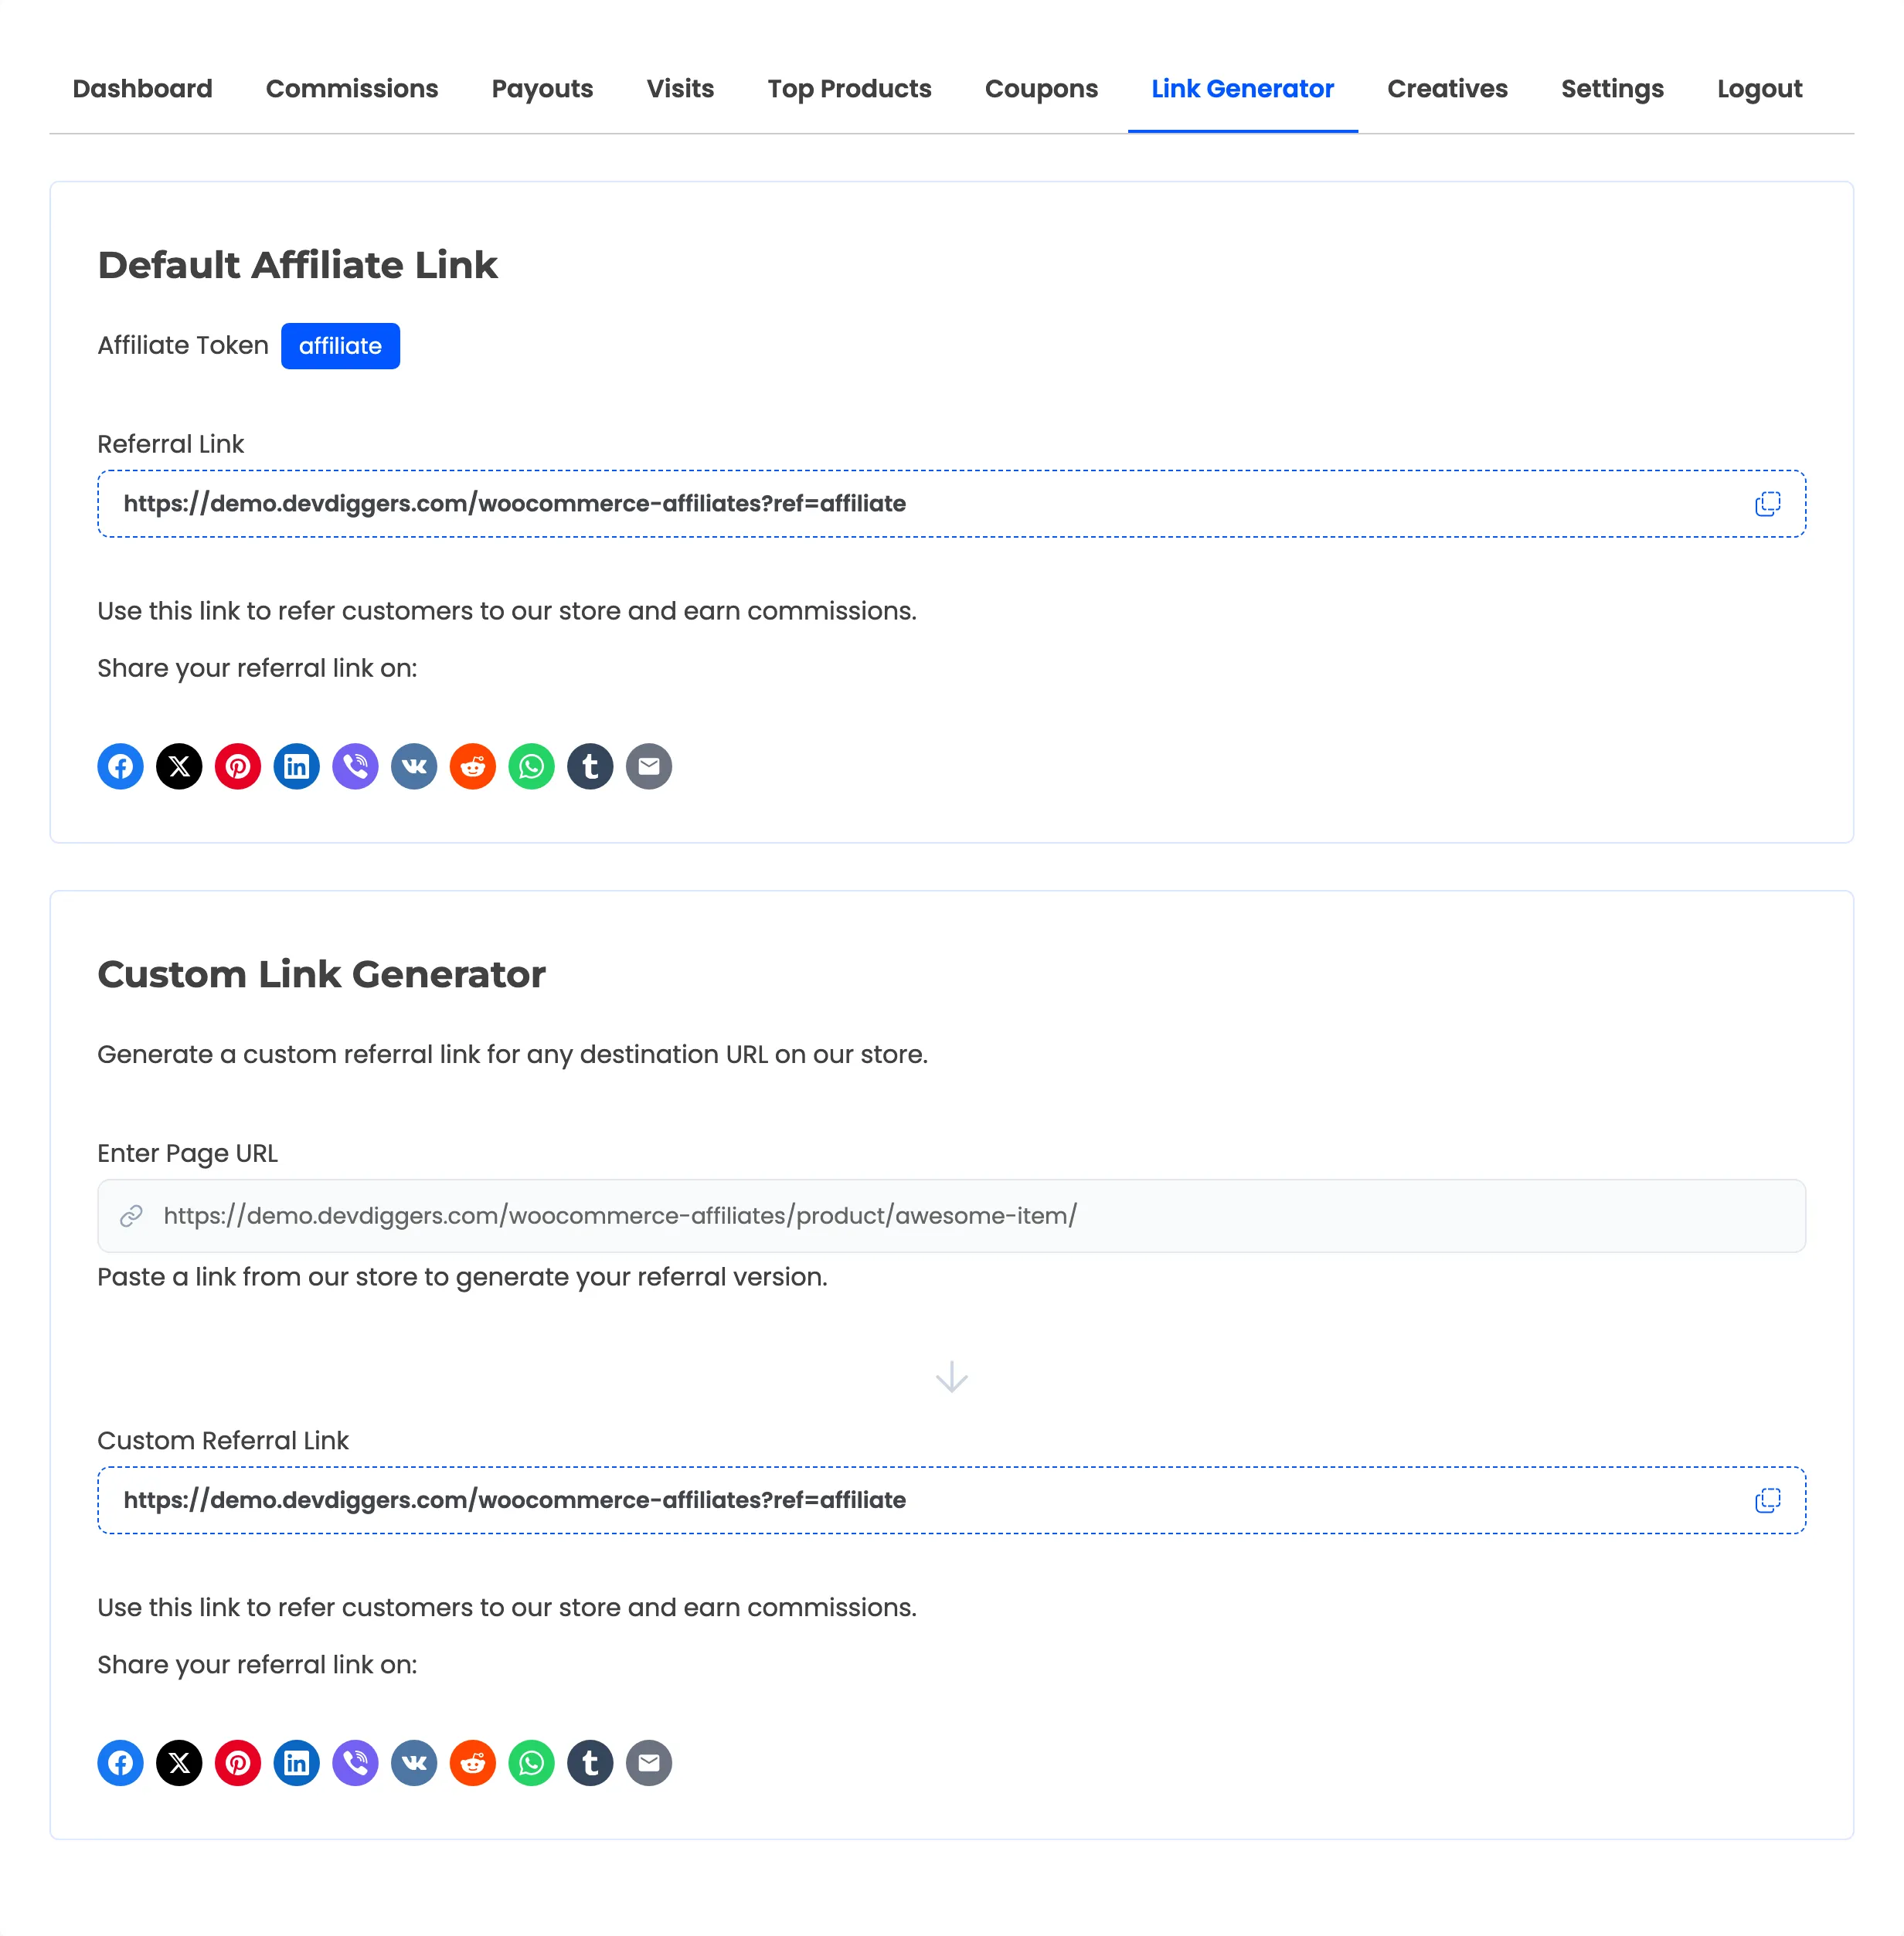
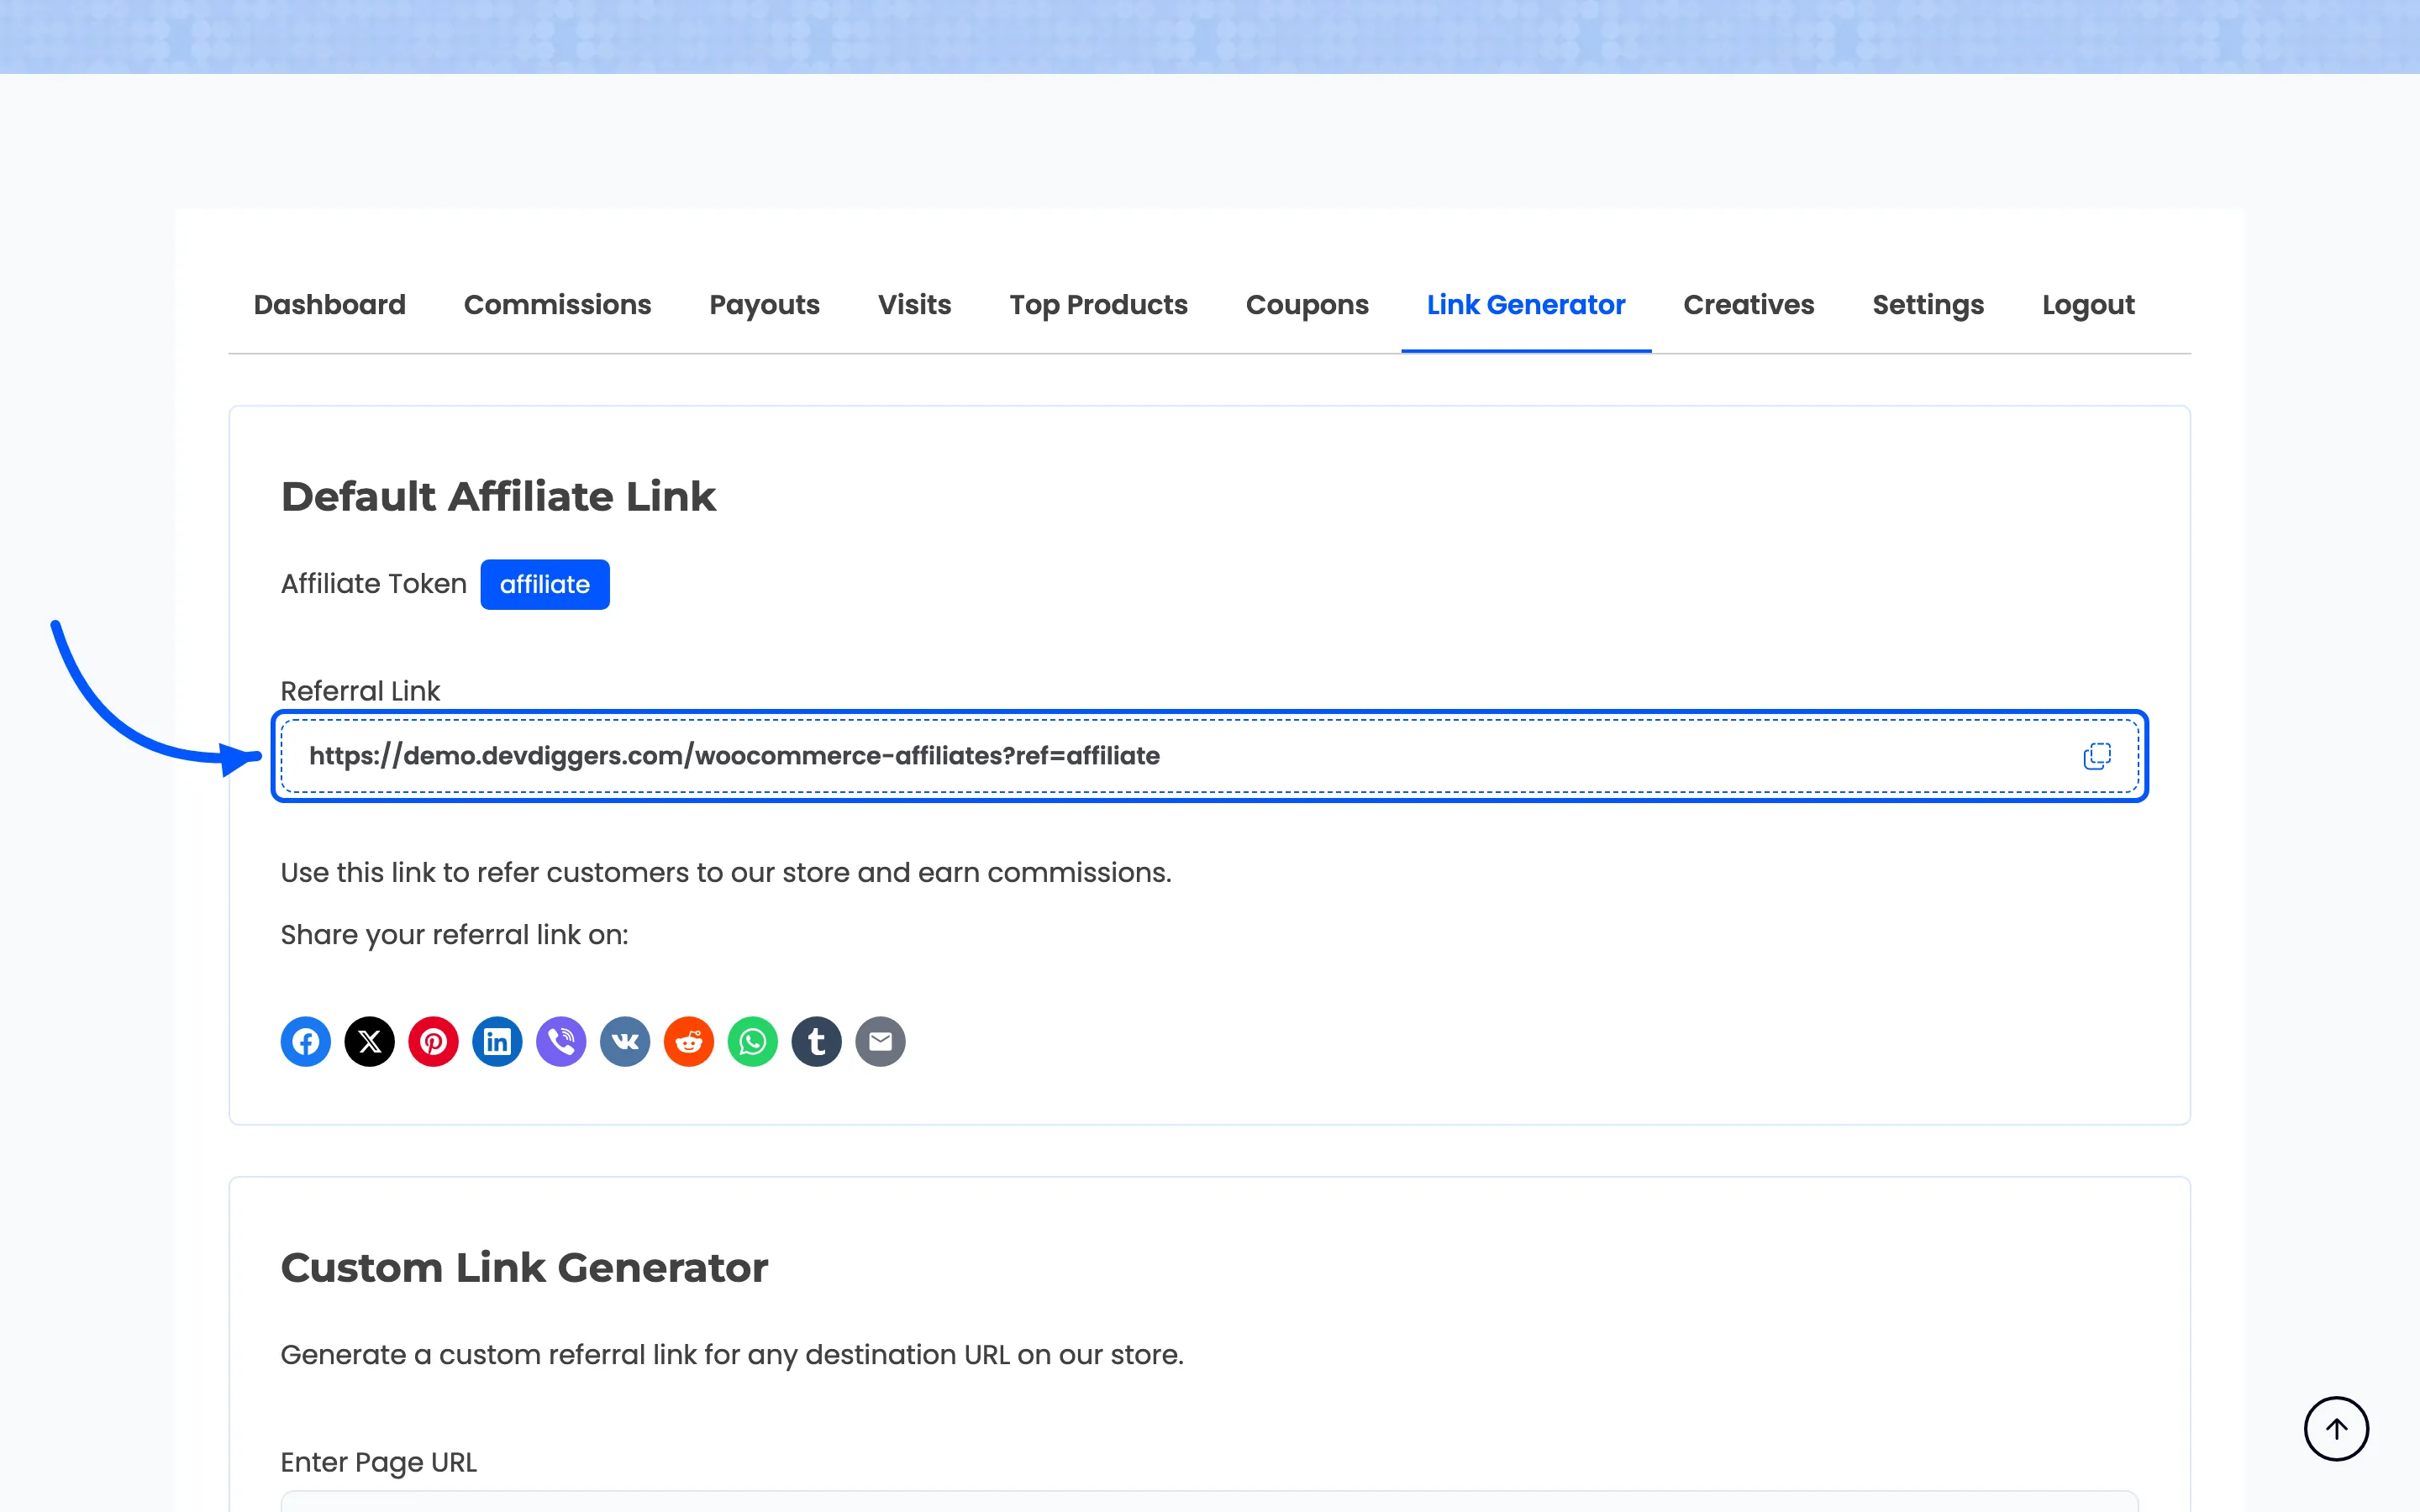
Default Affiliate Link is their store-wide link, with a copy button beside it.
Custom Link Generator turns any URL on your store into a referral link. A partner reviewing one product should send traffic to that product, not to your home page.
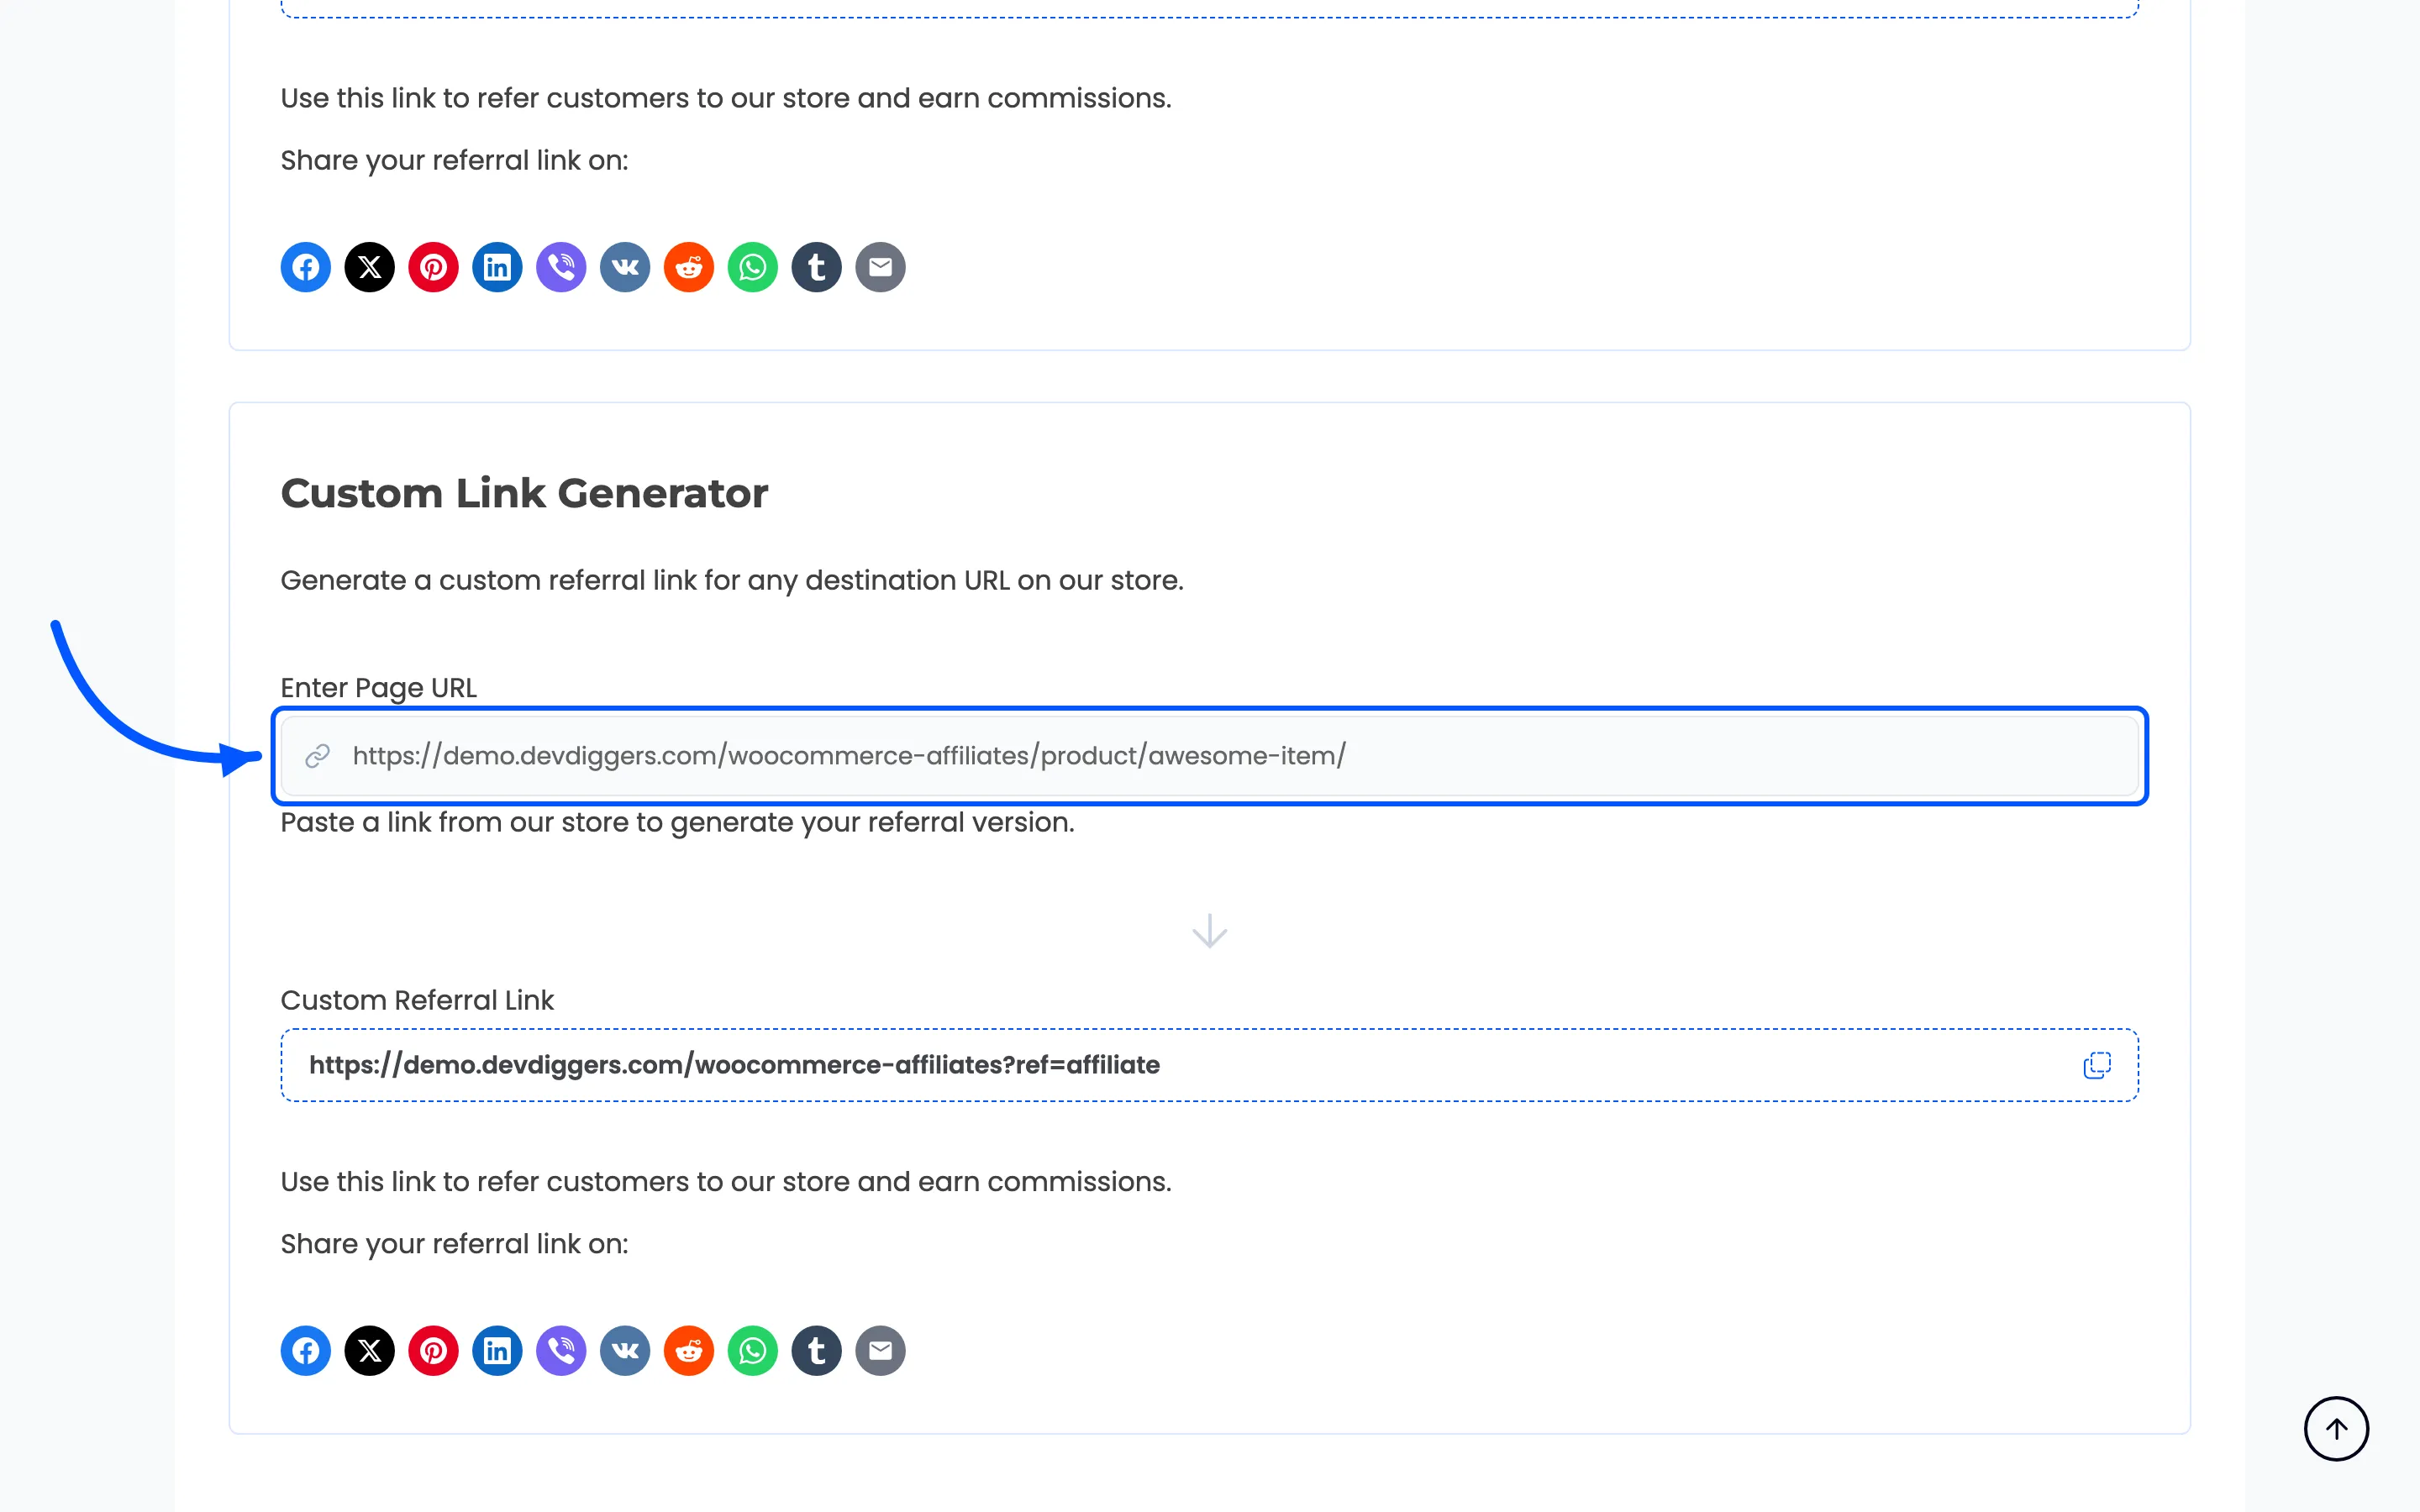
They paste a store URL, and the referral version appears below with its own copy button.
Step 5: Point out social sharing
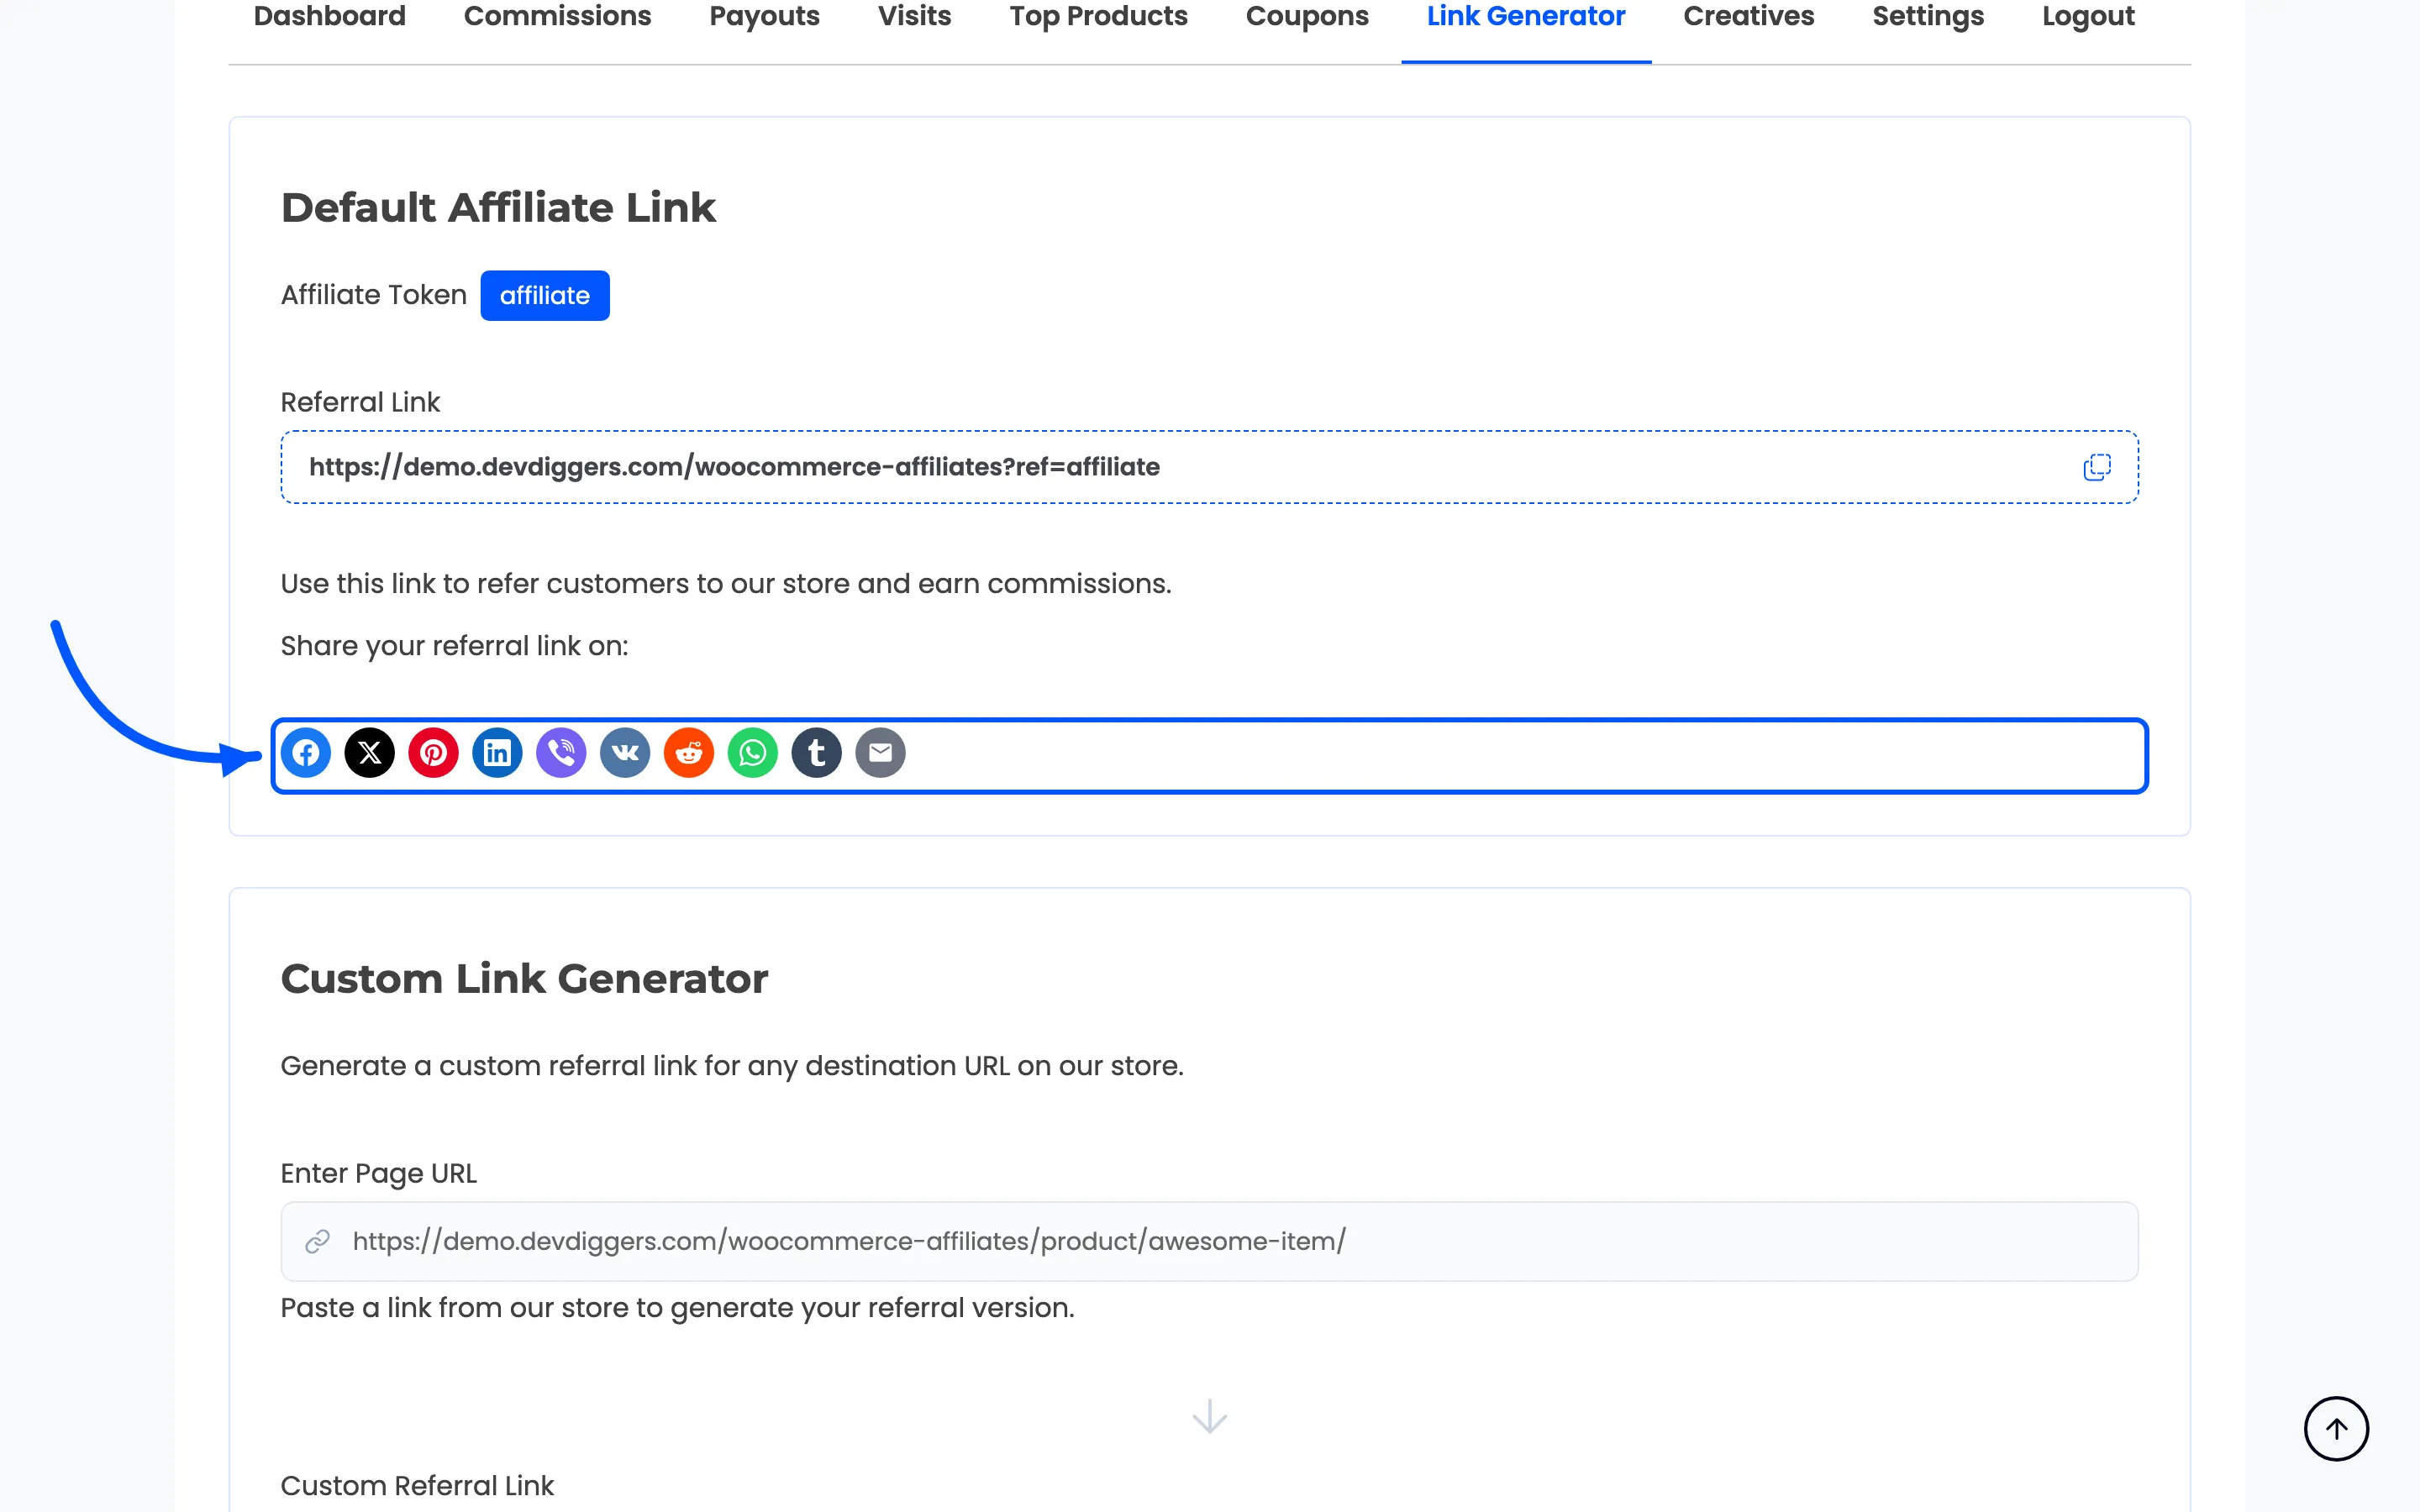
Section titled “Step 5: Point out social sharing”Under each generated link sits a row of share buttons, one per network you enabled.
Step 6: Ask for payout details
Section titled “Step 6: Ask for payout details”A payout cannot be sent to someone who has not told you where to send it. Their Settings section is where they do that.
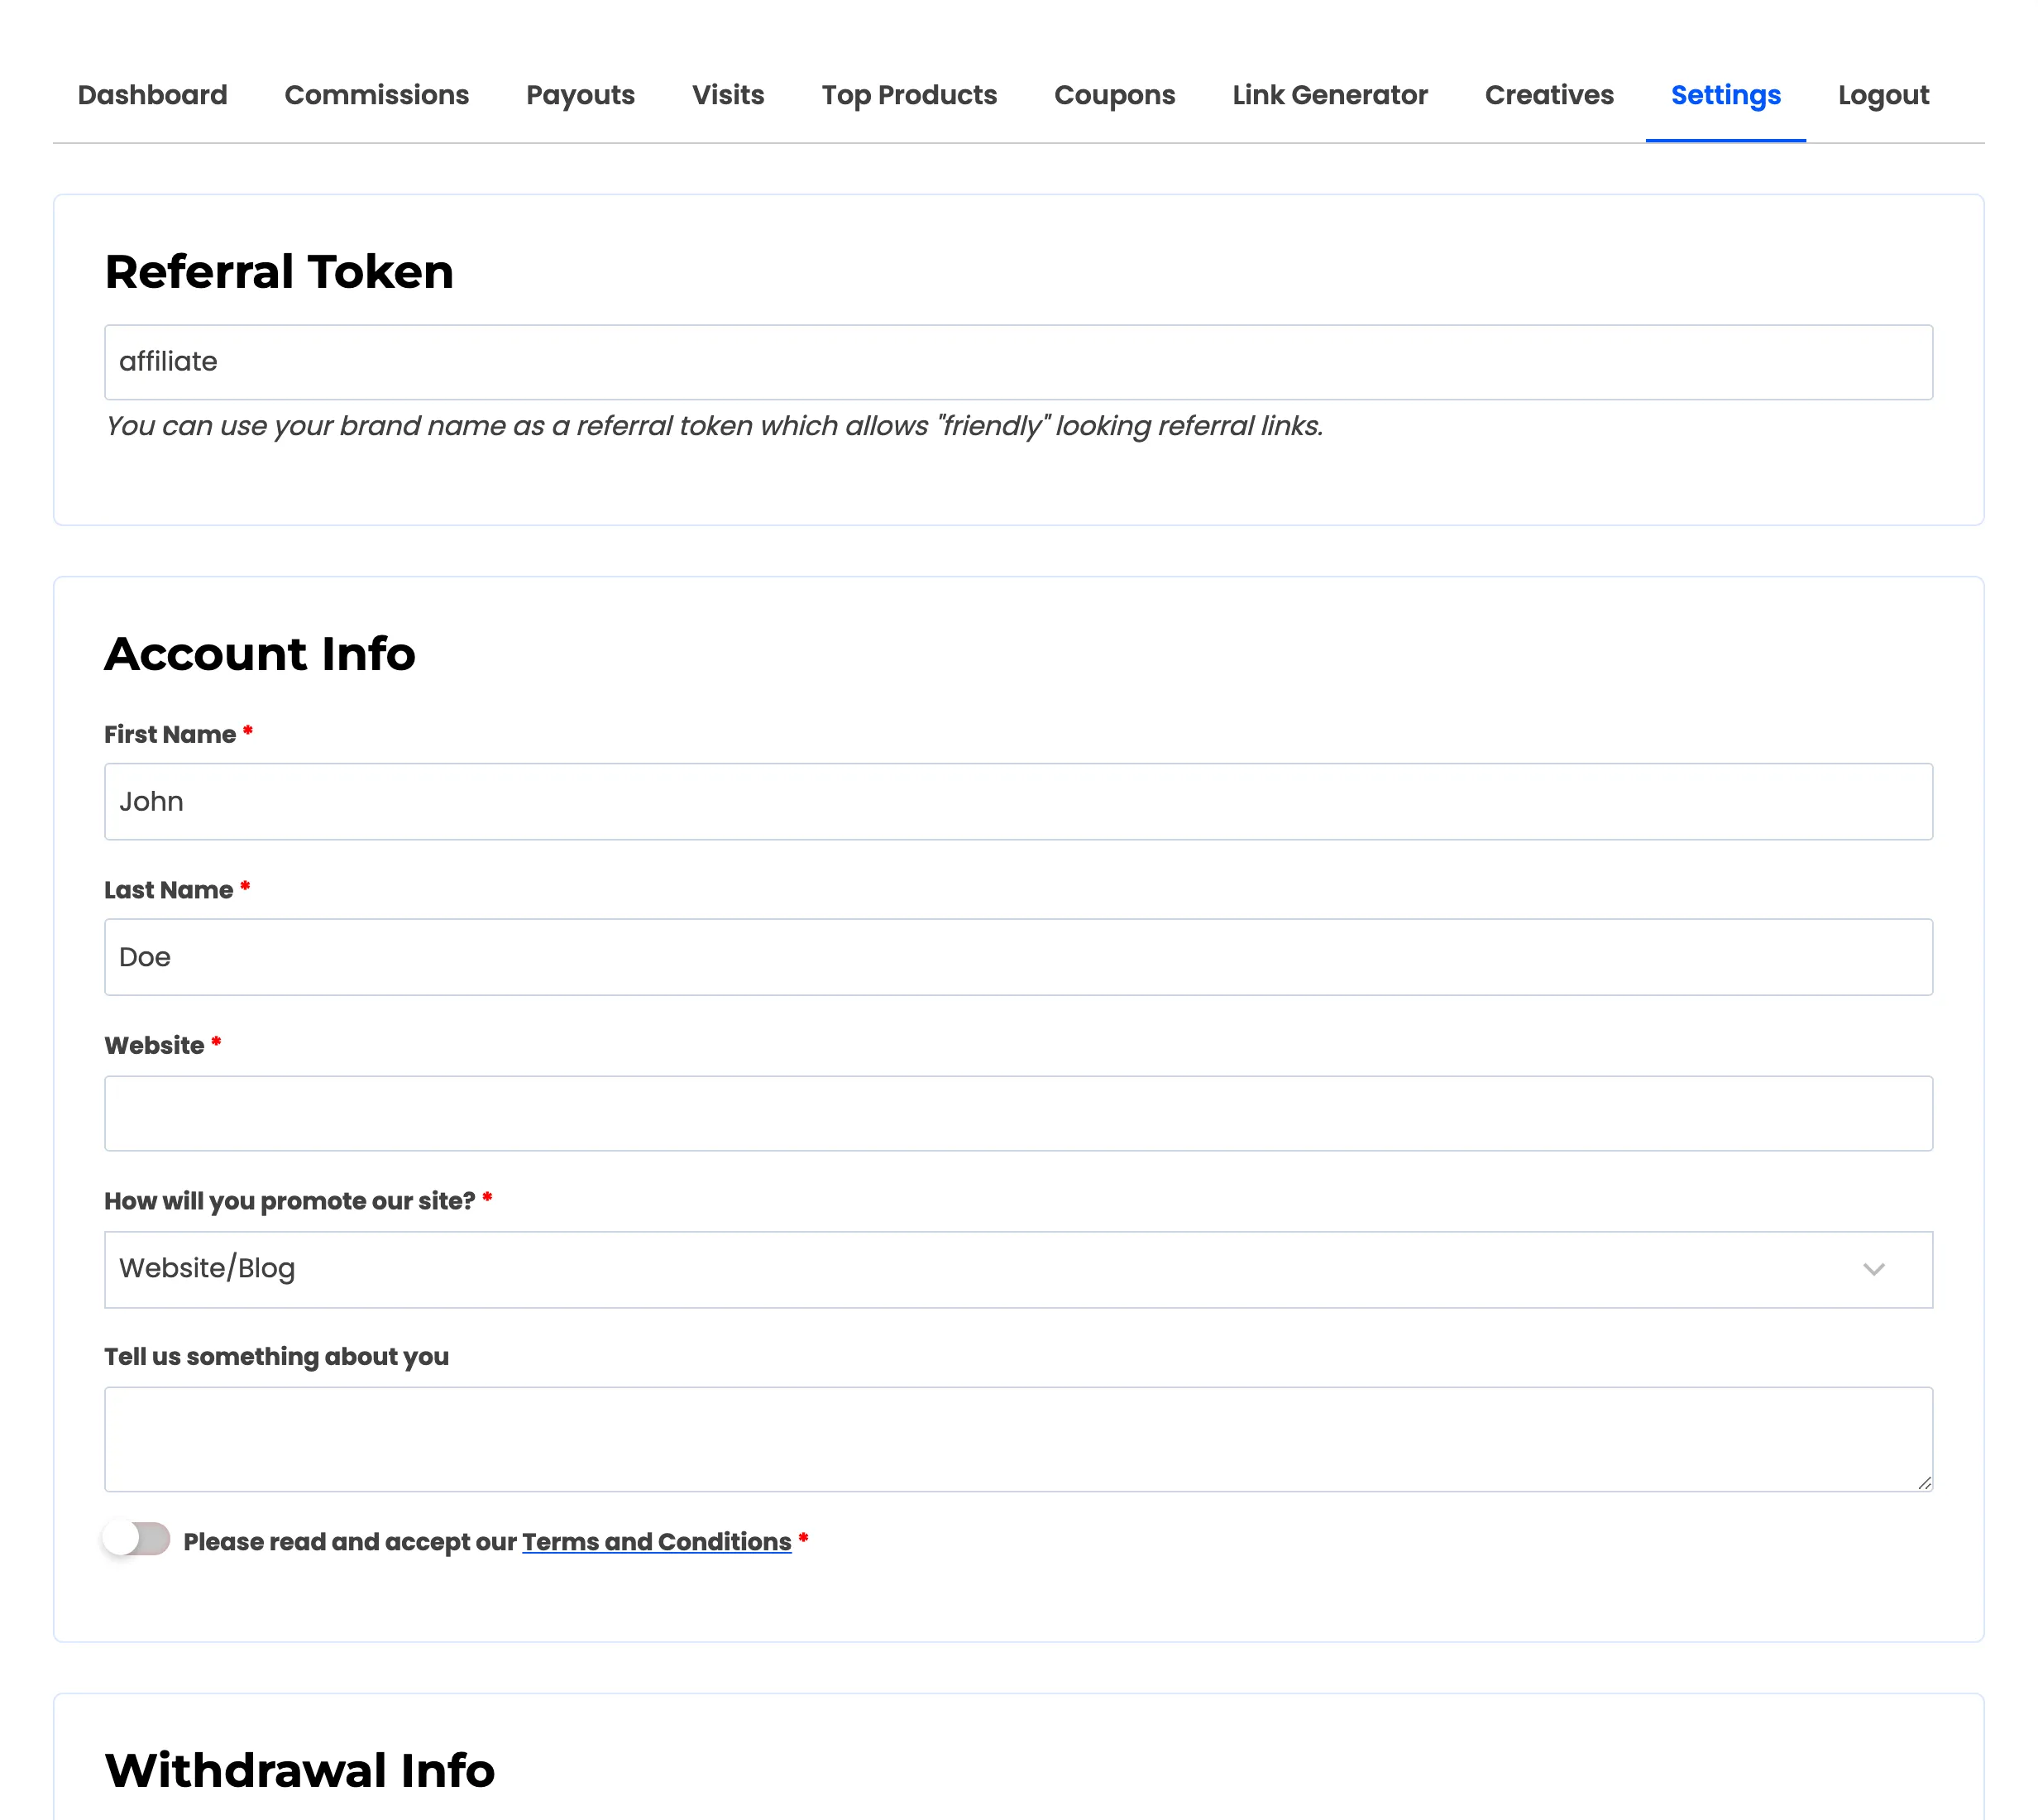
Under Withdrawal Info they pick a method and fill in the matching fields. Bank transfer asks for an account name, IBAN and SWIFT code, and PayPal asks for an email address.
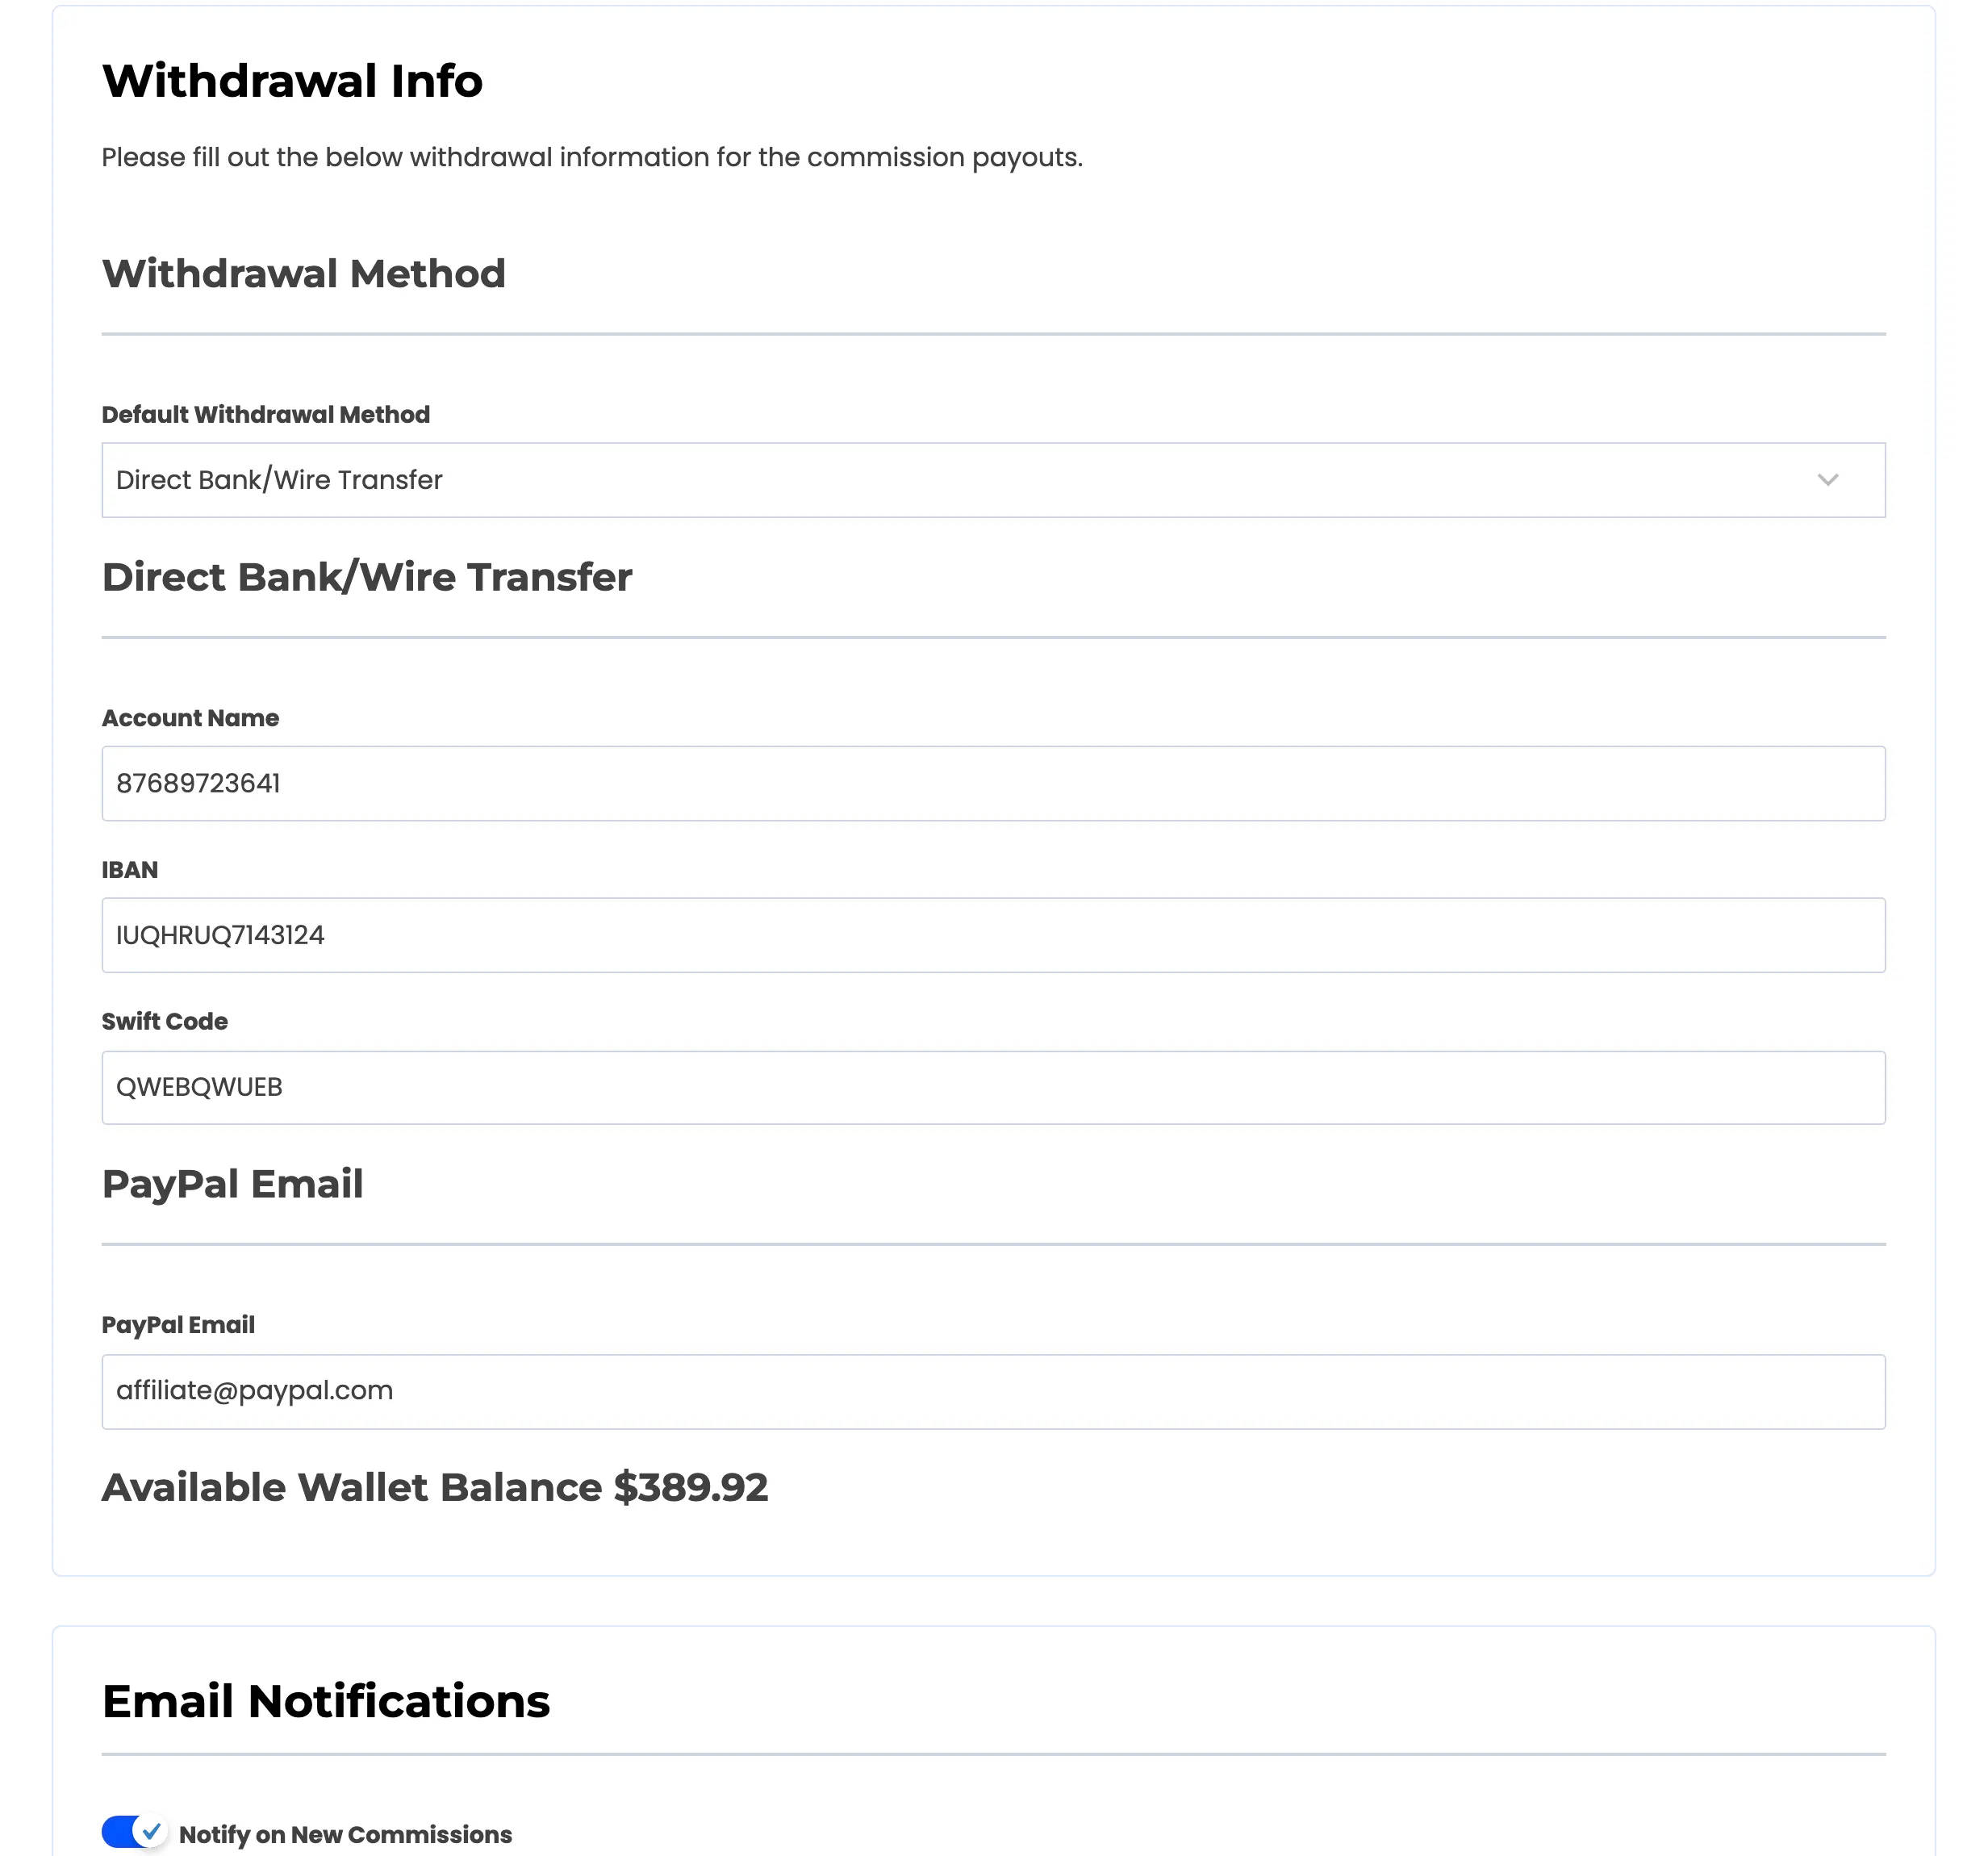
Make this an explicit ask in your welcome email. Chasing it later, at the moment you want to pay someone, is the slowest possible time to discover it is missing.
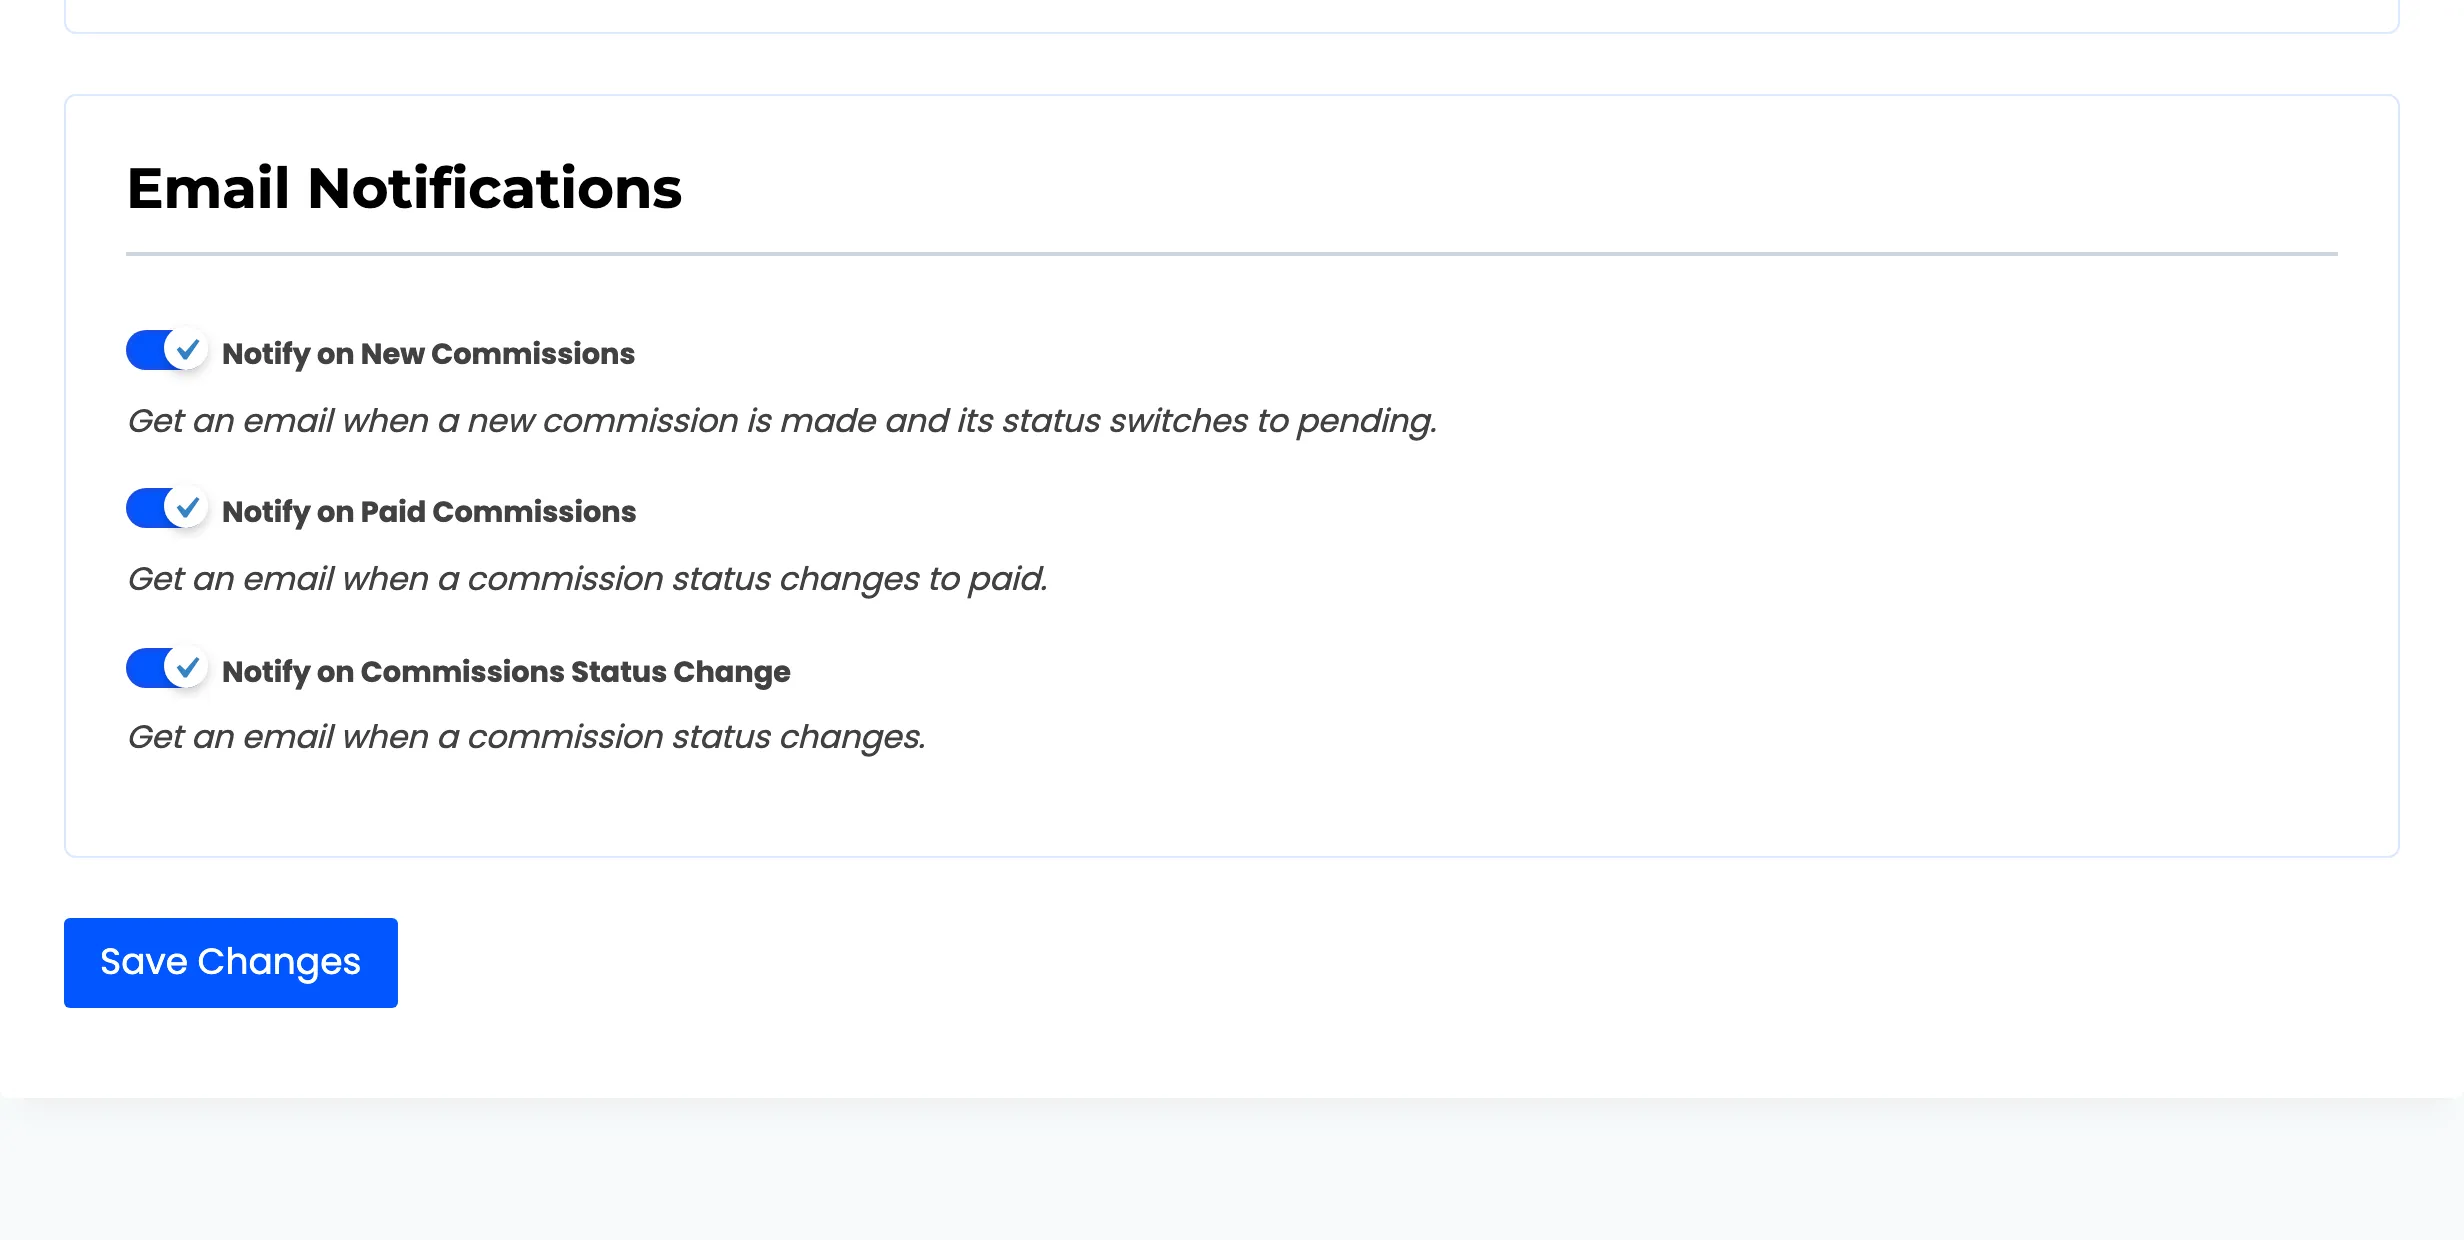
They can also choose which emails they receive.
Step 7: Give them something to post
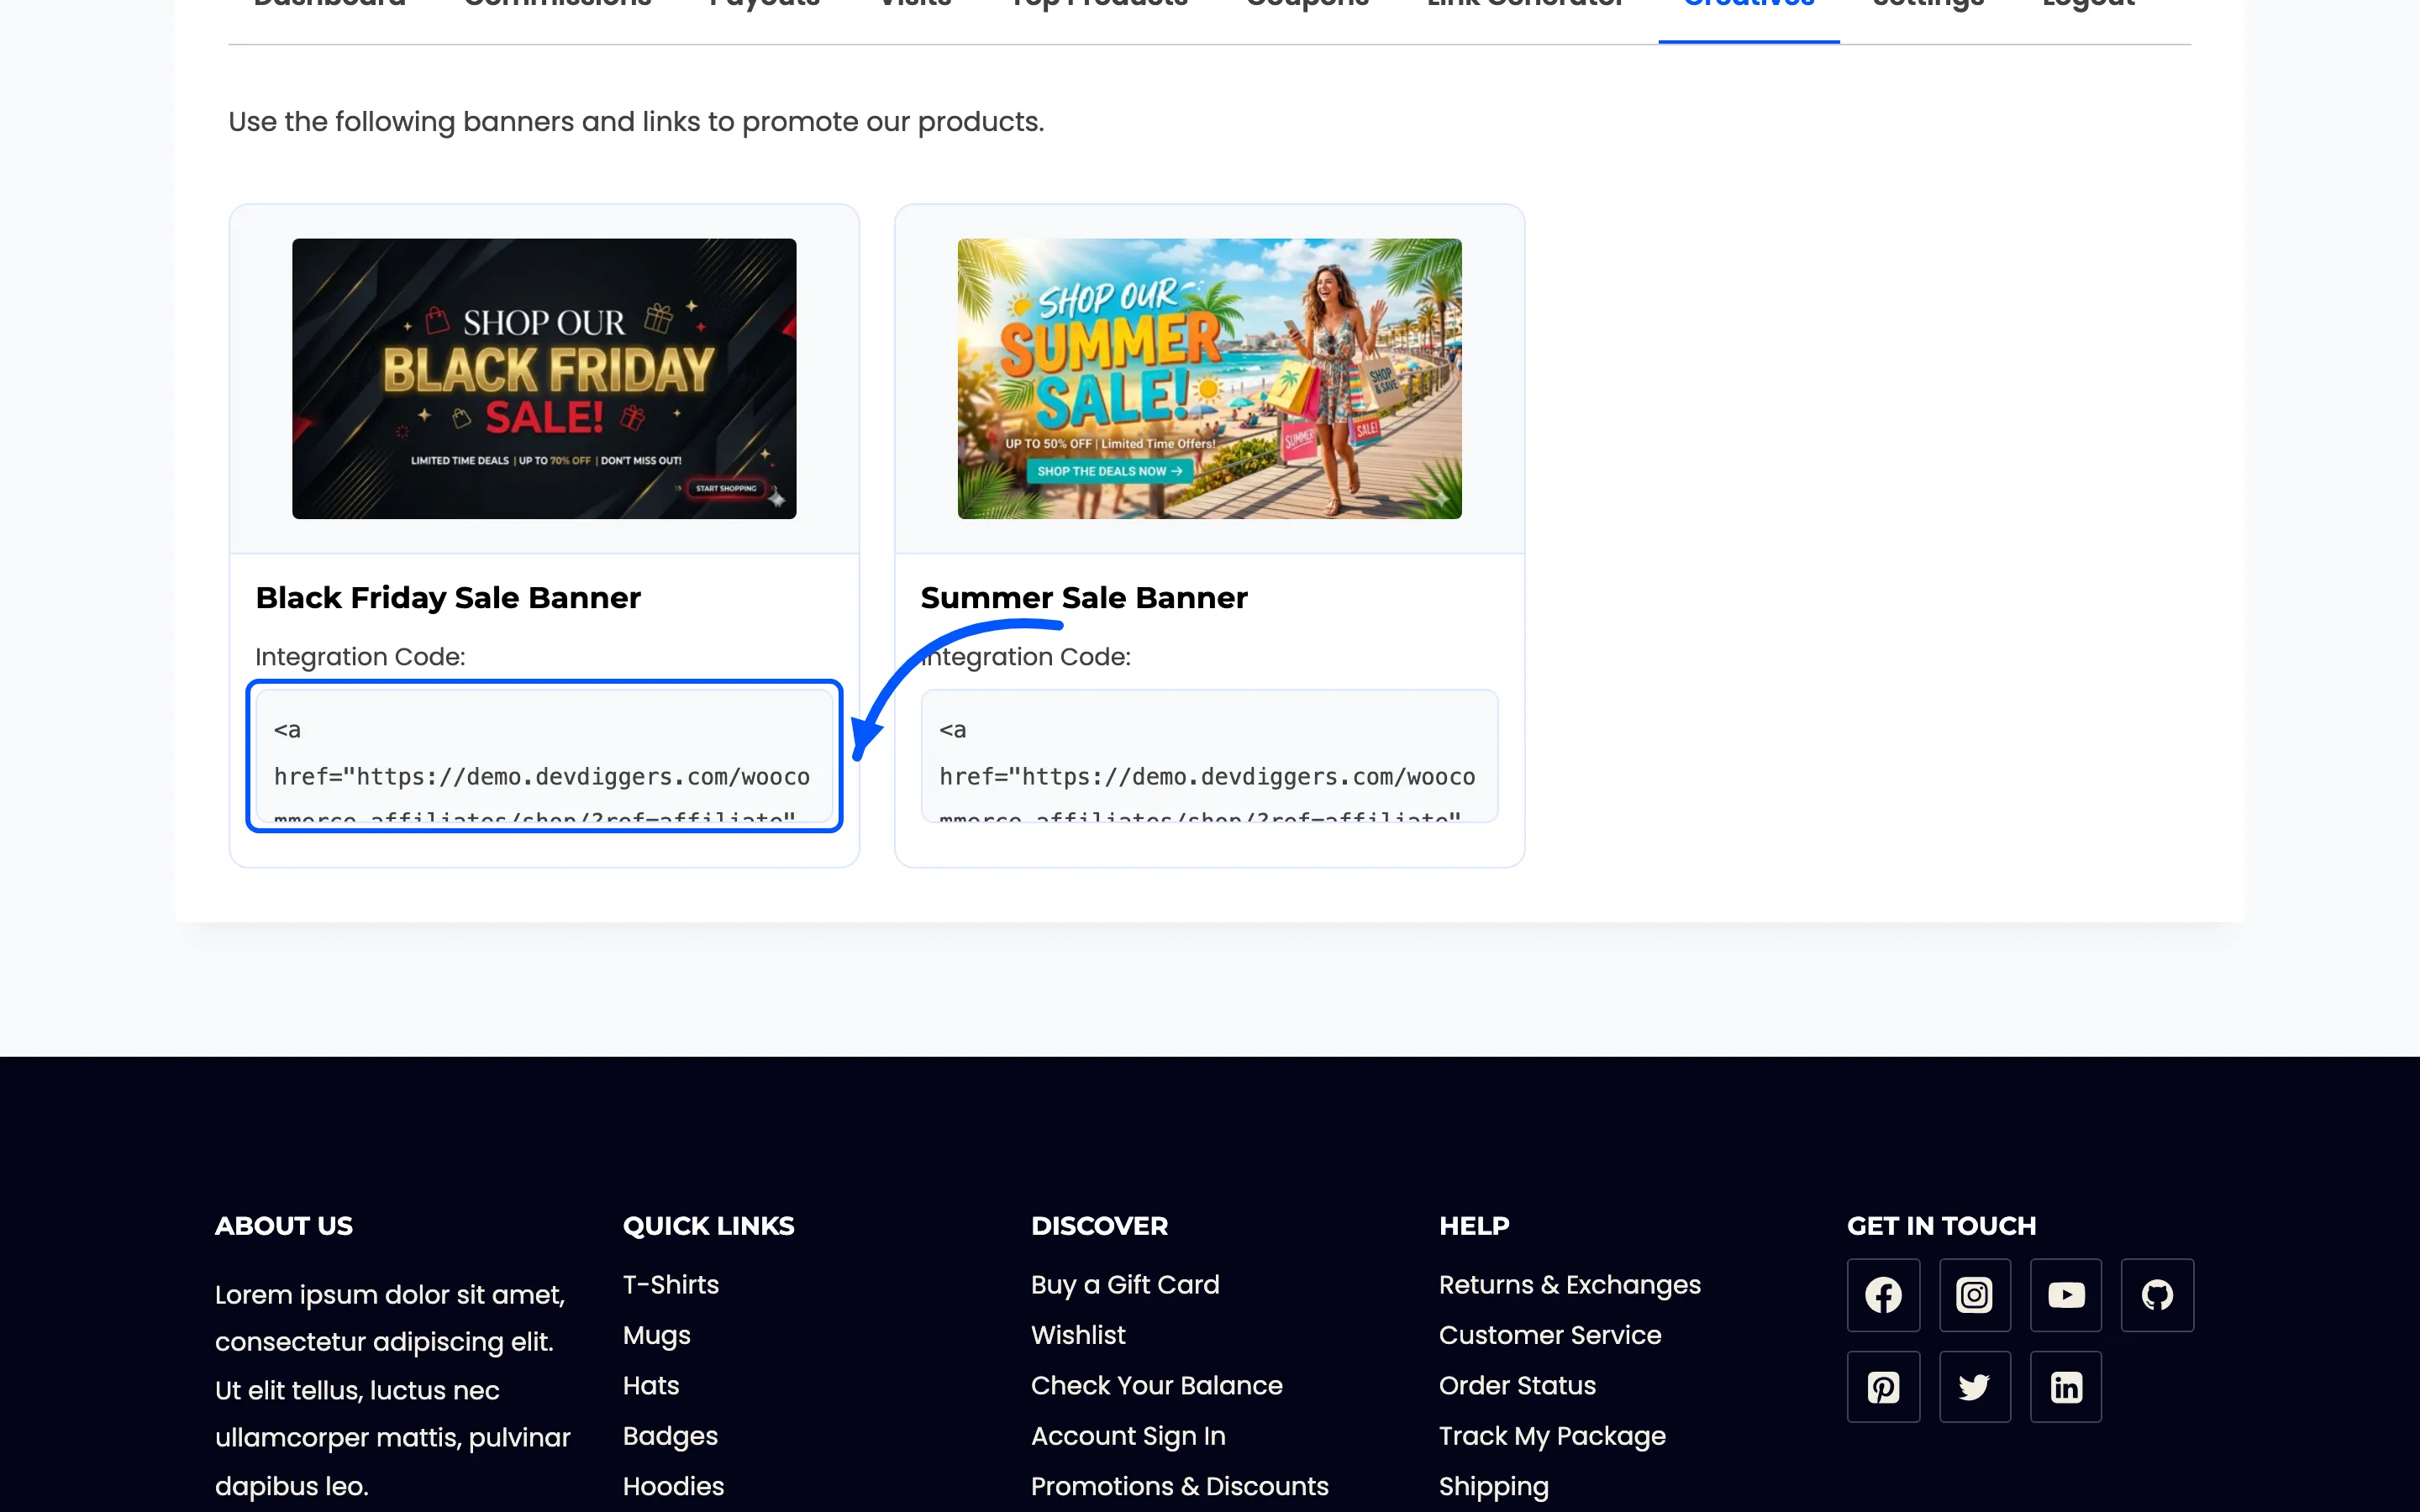
Section titled “Step 7: Give them something to post”An affiliate with a link and no assets tends to post nothing. Ready-made banners remove that excuse.
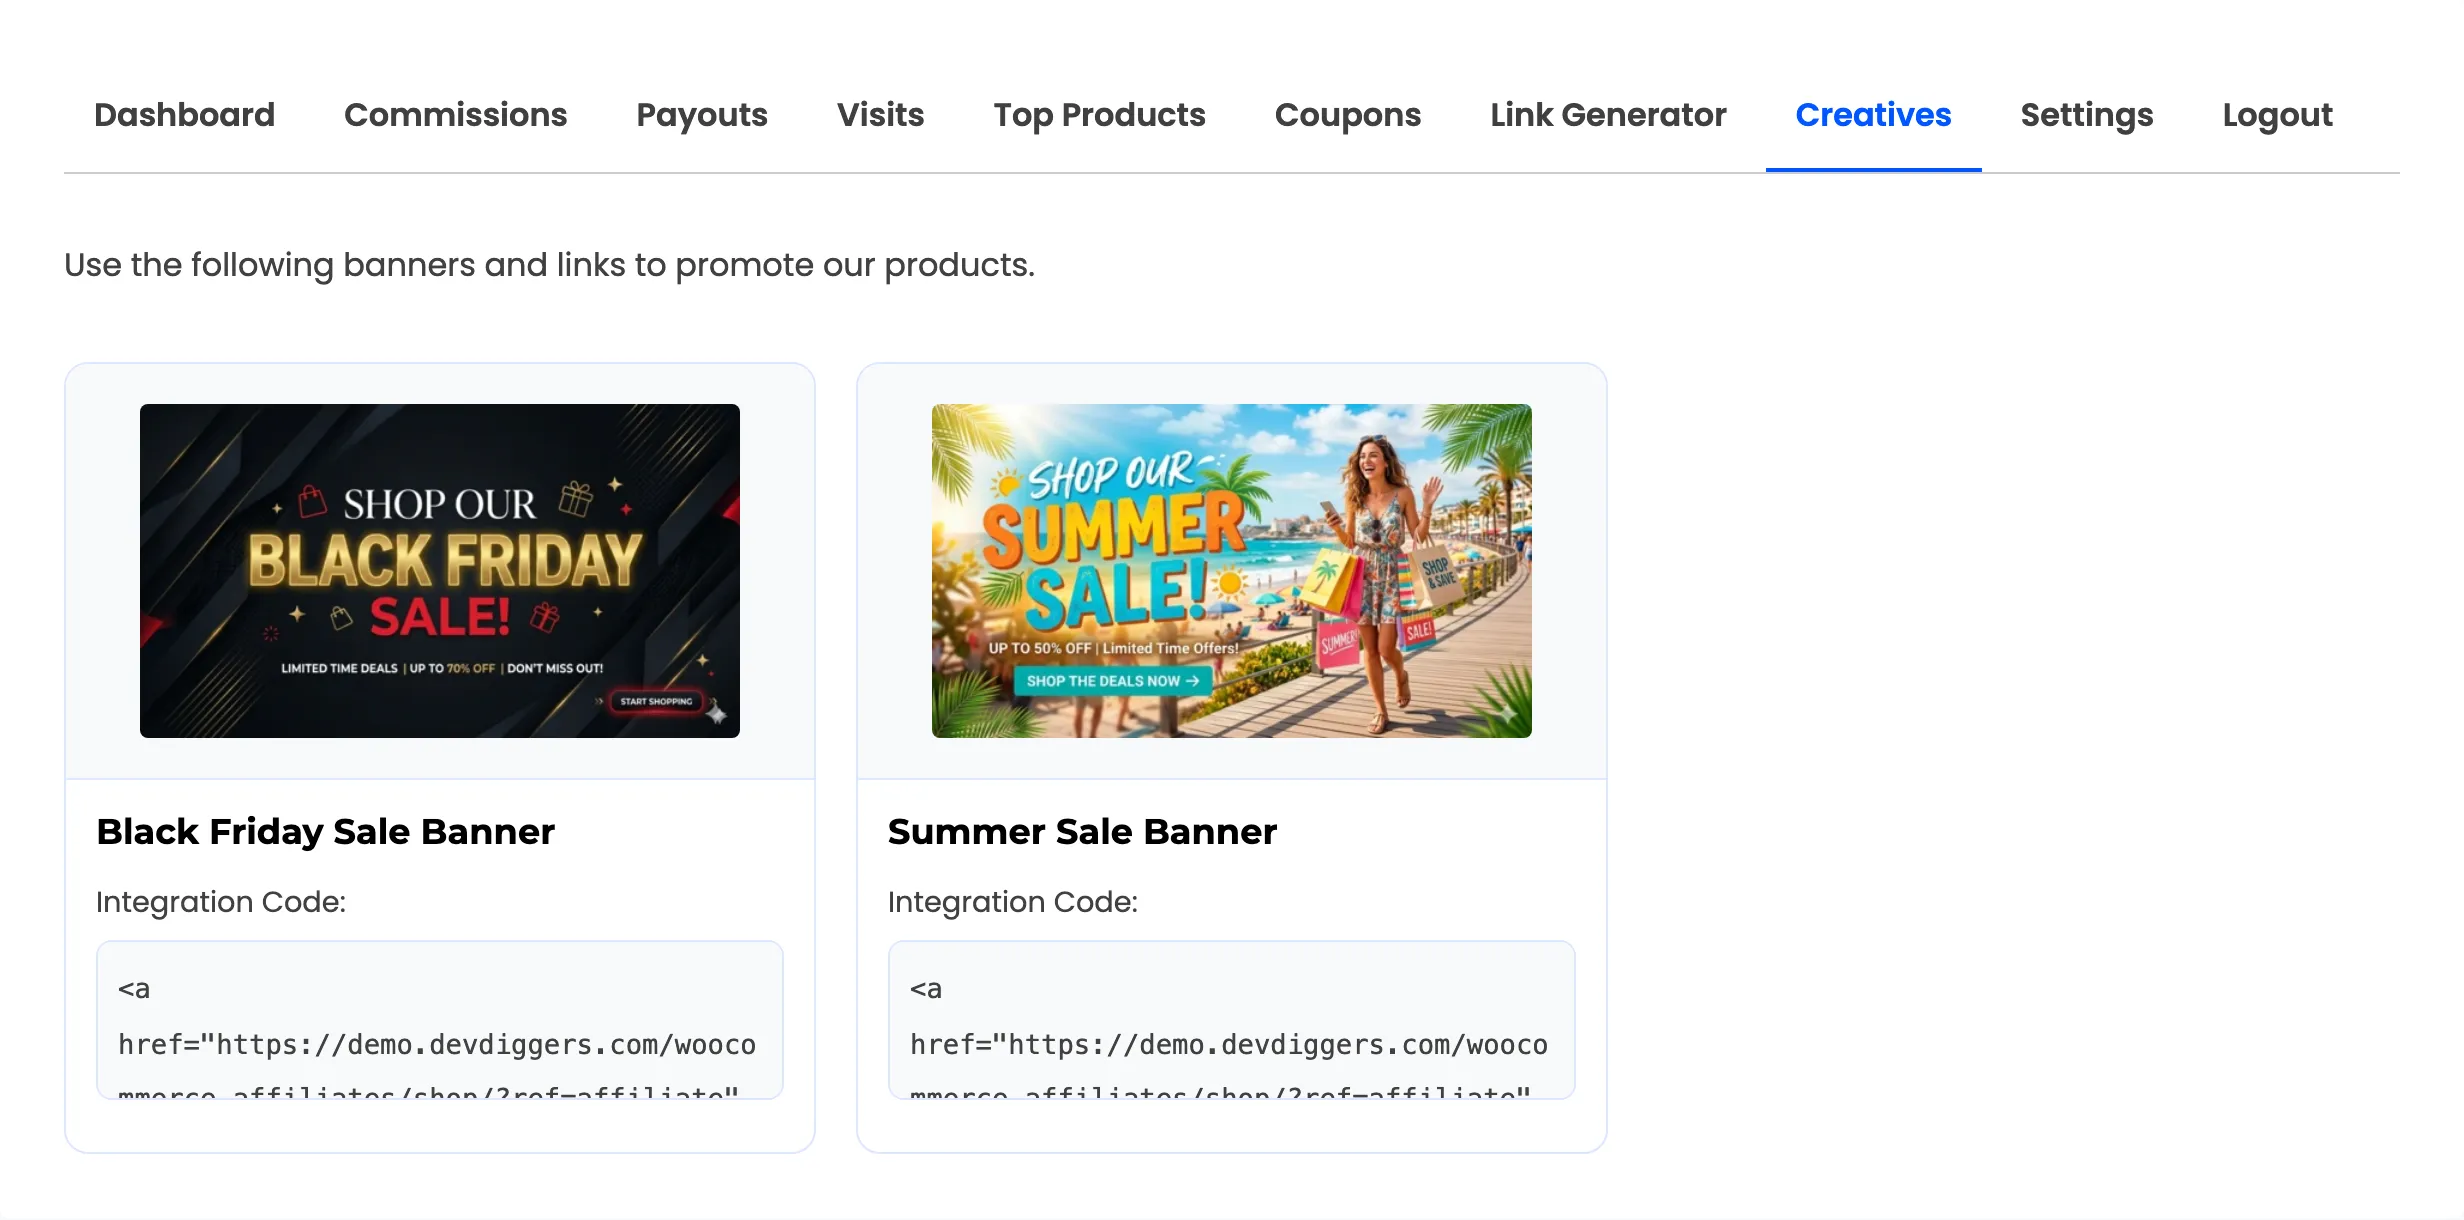
Each creative carries an integration code with their token already in it, so they paste one block of HTML and the tracking is correct.
Step 8: Confirm tracking end to end
Section titled “Step 8: Confirm tracking end to end”Do this once per new partner and you will never wonder whether their setup took.
- Copy their referral link from Affiliates → the affiliate → Referral URL.
- Open a private browsing window. An administrator’s click is ignored on purpose.
- Visit the link.
- Check Affiliates → Visits. A new row should be there.
If the visit appears, the chain works. If it does not, check that the affiliate is Approved and that Enable Affiliate System is on.
What to put in the welcome email
Section titled “What to put in the welcome email”Five things, and nothing else.
- The dashboard URL, and a note that My Account also works.
- Their commission rate, in a sentence.
- A reminder to add payout details before their first commission.
- A link to the creatives, if you have any.
- One line on what you will not pay for, such as coupon sites or paid search on your brand name.
Where to go next
Section titled “Where to go next”- Affiliate Statuses for what each state shows a partner.
- How to Set Commission Rates to give a strong partner a better rate.
- How to Pay Your Affiliates when the first commissions come due.