

How to Create the Affiliate Signup Page
The signup page is where a program either recruits partners or does not. The form itself takes two minutes. The text above it is the part that matters.
Before you start
Section titled “Before you start”Decide whether this page will also serve as the affiliate dashboard.
- One page for both: The dashboard shortcode renders the signup form for anyone who is not an affiliate yet, and the dashboard for anyone who is. Activation already created a page like this.
- Two separate pages: A public signup page with the registration shortcode, and a private dashboard page. This is cleaner if you want a marketing page with its own headline and layout.
This guide builds the second, since the first already exists after activation.
Step 1: Review what the form asks
Section titled “Step 1: Review what the form asks”Go to DevDiggers Plugins → Affiliates → Registration Fields.
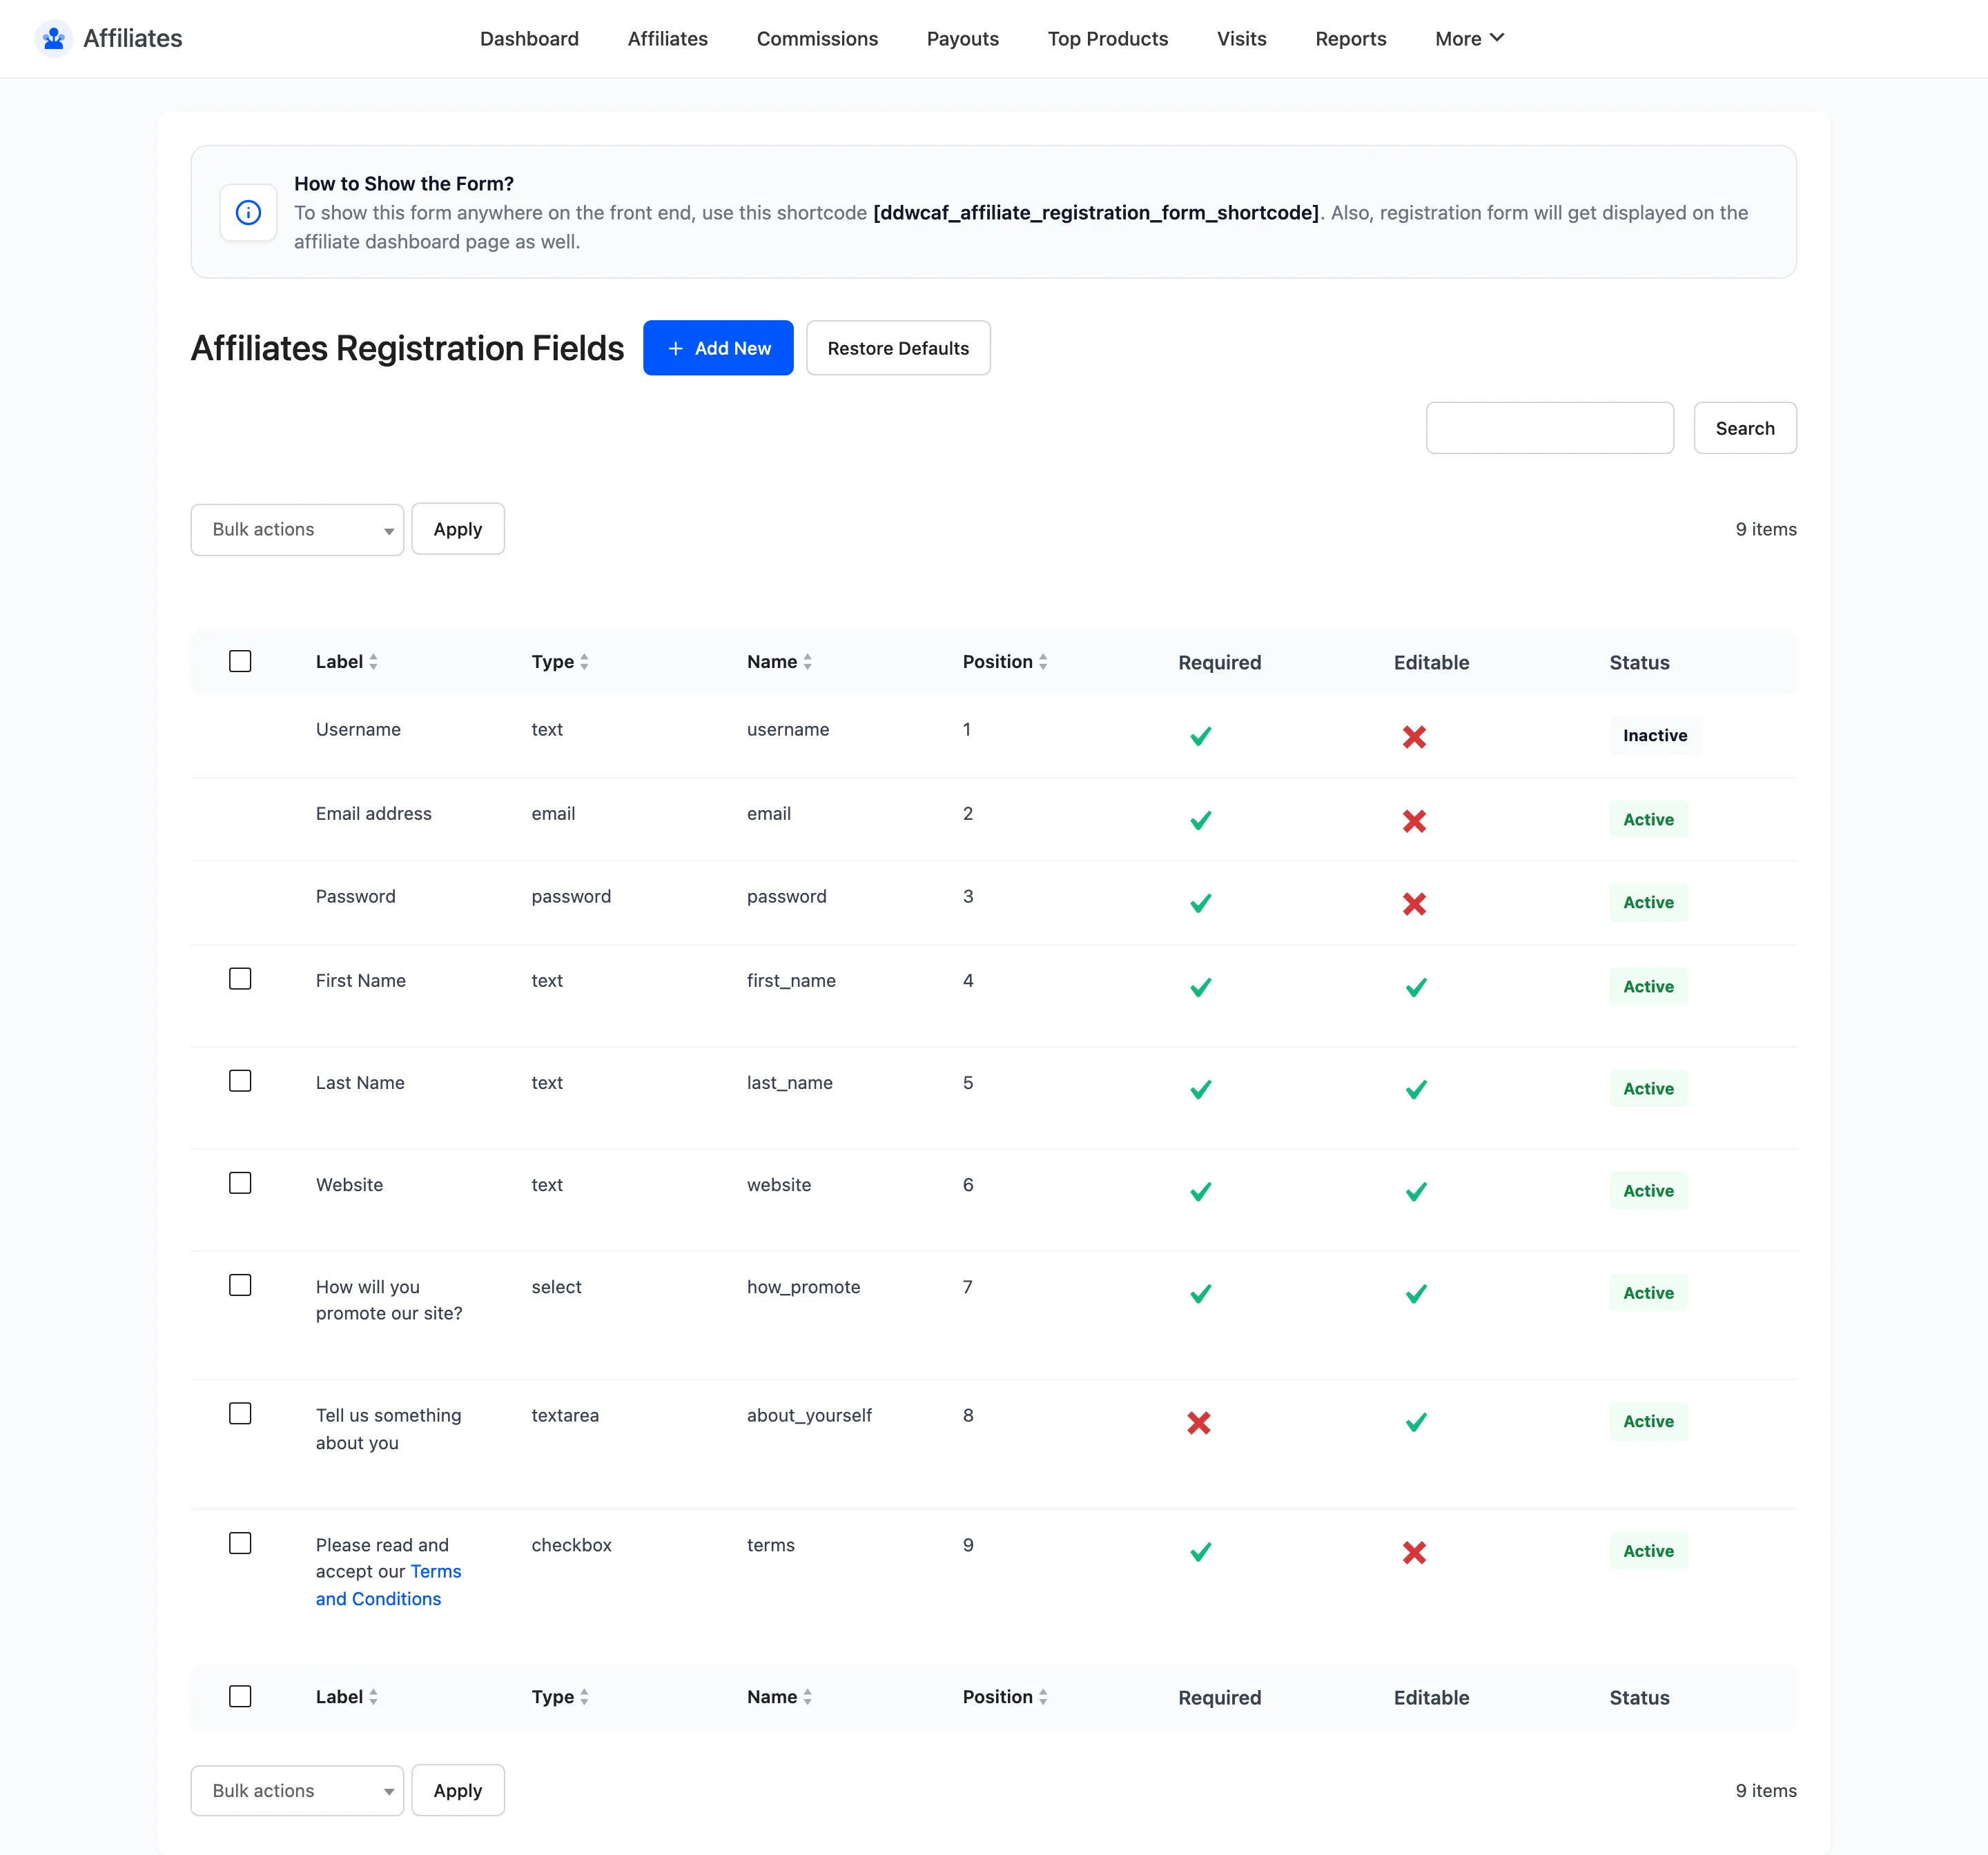
Seven fields ship by default: username, email address, password, first name, last name, How will you promote our site? and a terms checkbox.
Two of those behave on their own. Username and Password are only active when WooCommerce is set to let customers choose them. If WooCommerce generates both automatically, the two fields are inactive here and do not render.
Use the Change to Inactive bulk action on anything you do not need. Every field you remove raises the number of people who finish the form.
Keep How will you promote our site?. Its answer is what you read before approving someone, and without it you are approving strangers.
Step 2: Choose what the page shows
Section titled “Step 2: Choose what the page shows”Go to Configuration → Shortcodes.
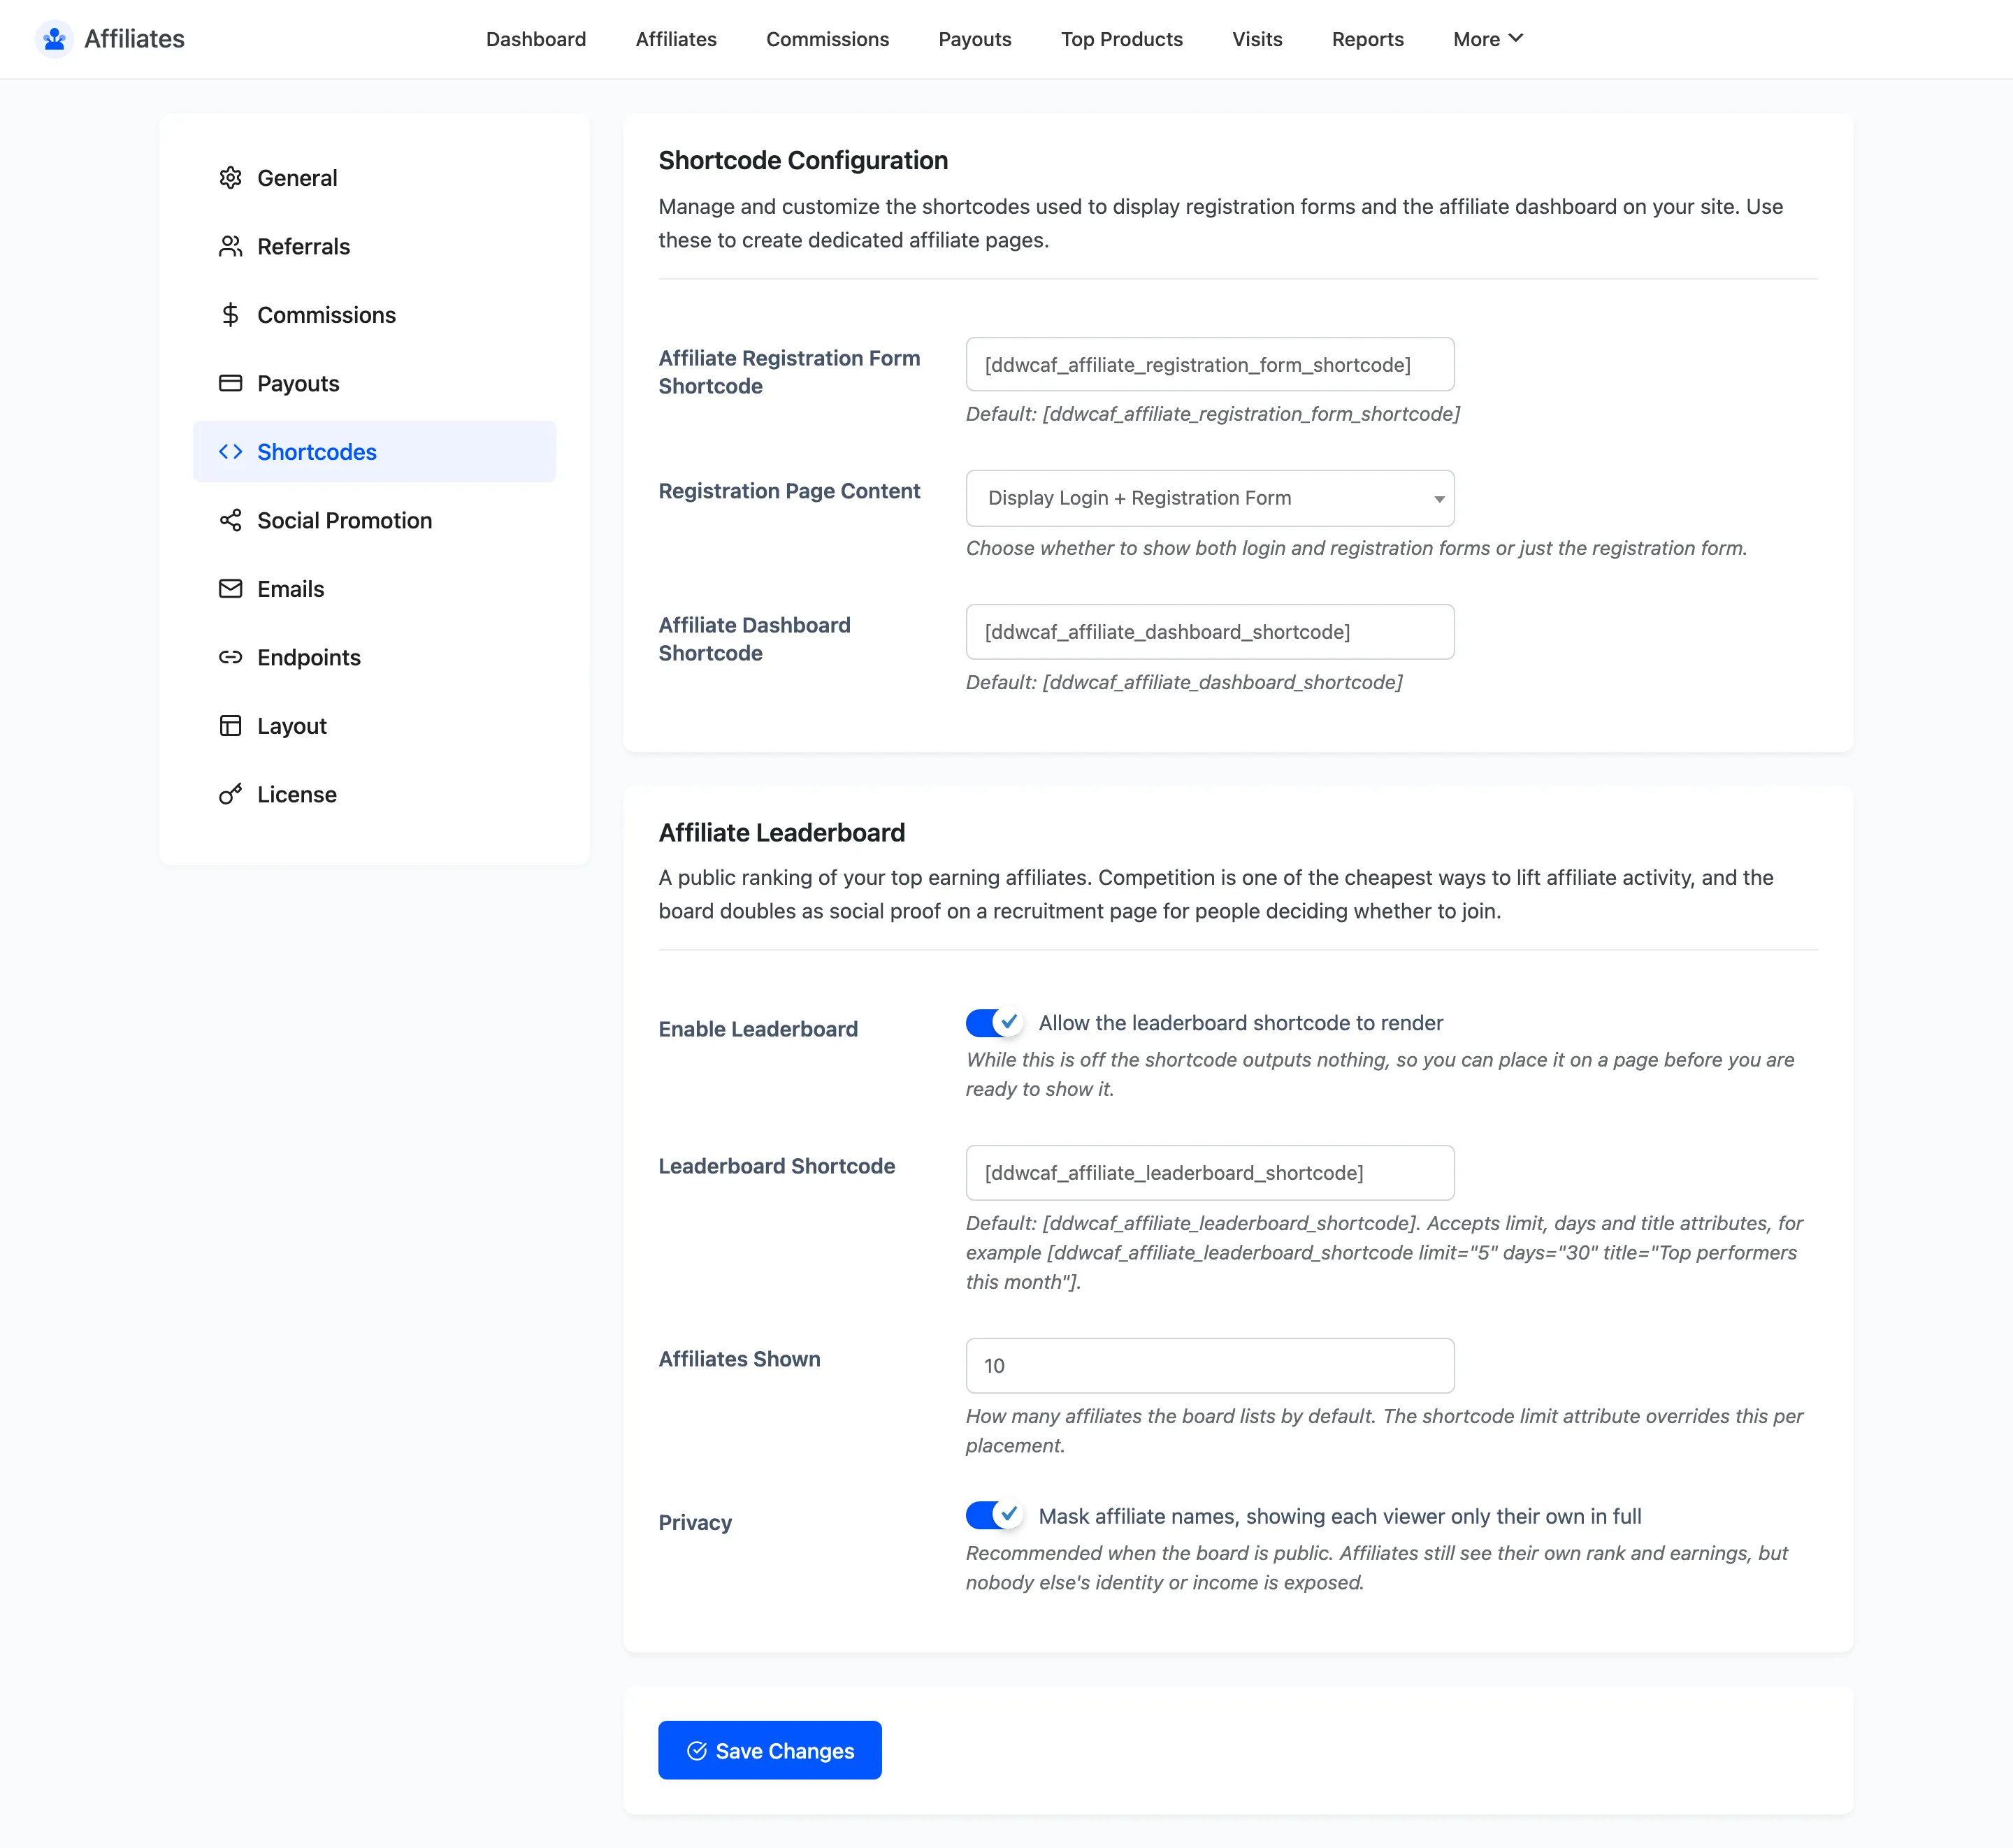
Registration Page Content has two options.
- Display Login + Registration Form shows both side by side. Pick this if the page is the only affiliate entry point on your site, so returning affiliates have somewhere to log in.
- Display Registration Form Only shows the signup form alone. Pick this if you already link to a separate login somewhere obvious.
The setting only affects logged-out visitors. A logged-in customer always sees the short join form that asks only for the affiliate fields.
Step 3: Copy the shortcode
Section titled “Step 3: Copy the shortcode”The registration shortcode is on the same tab. The default is
[ddwcaf_affiliate_registration_form_shortcode].
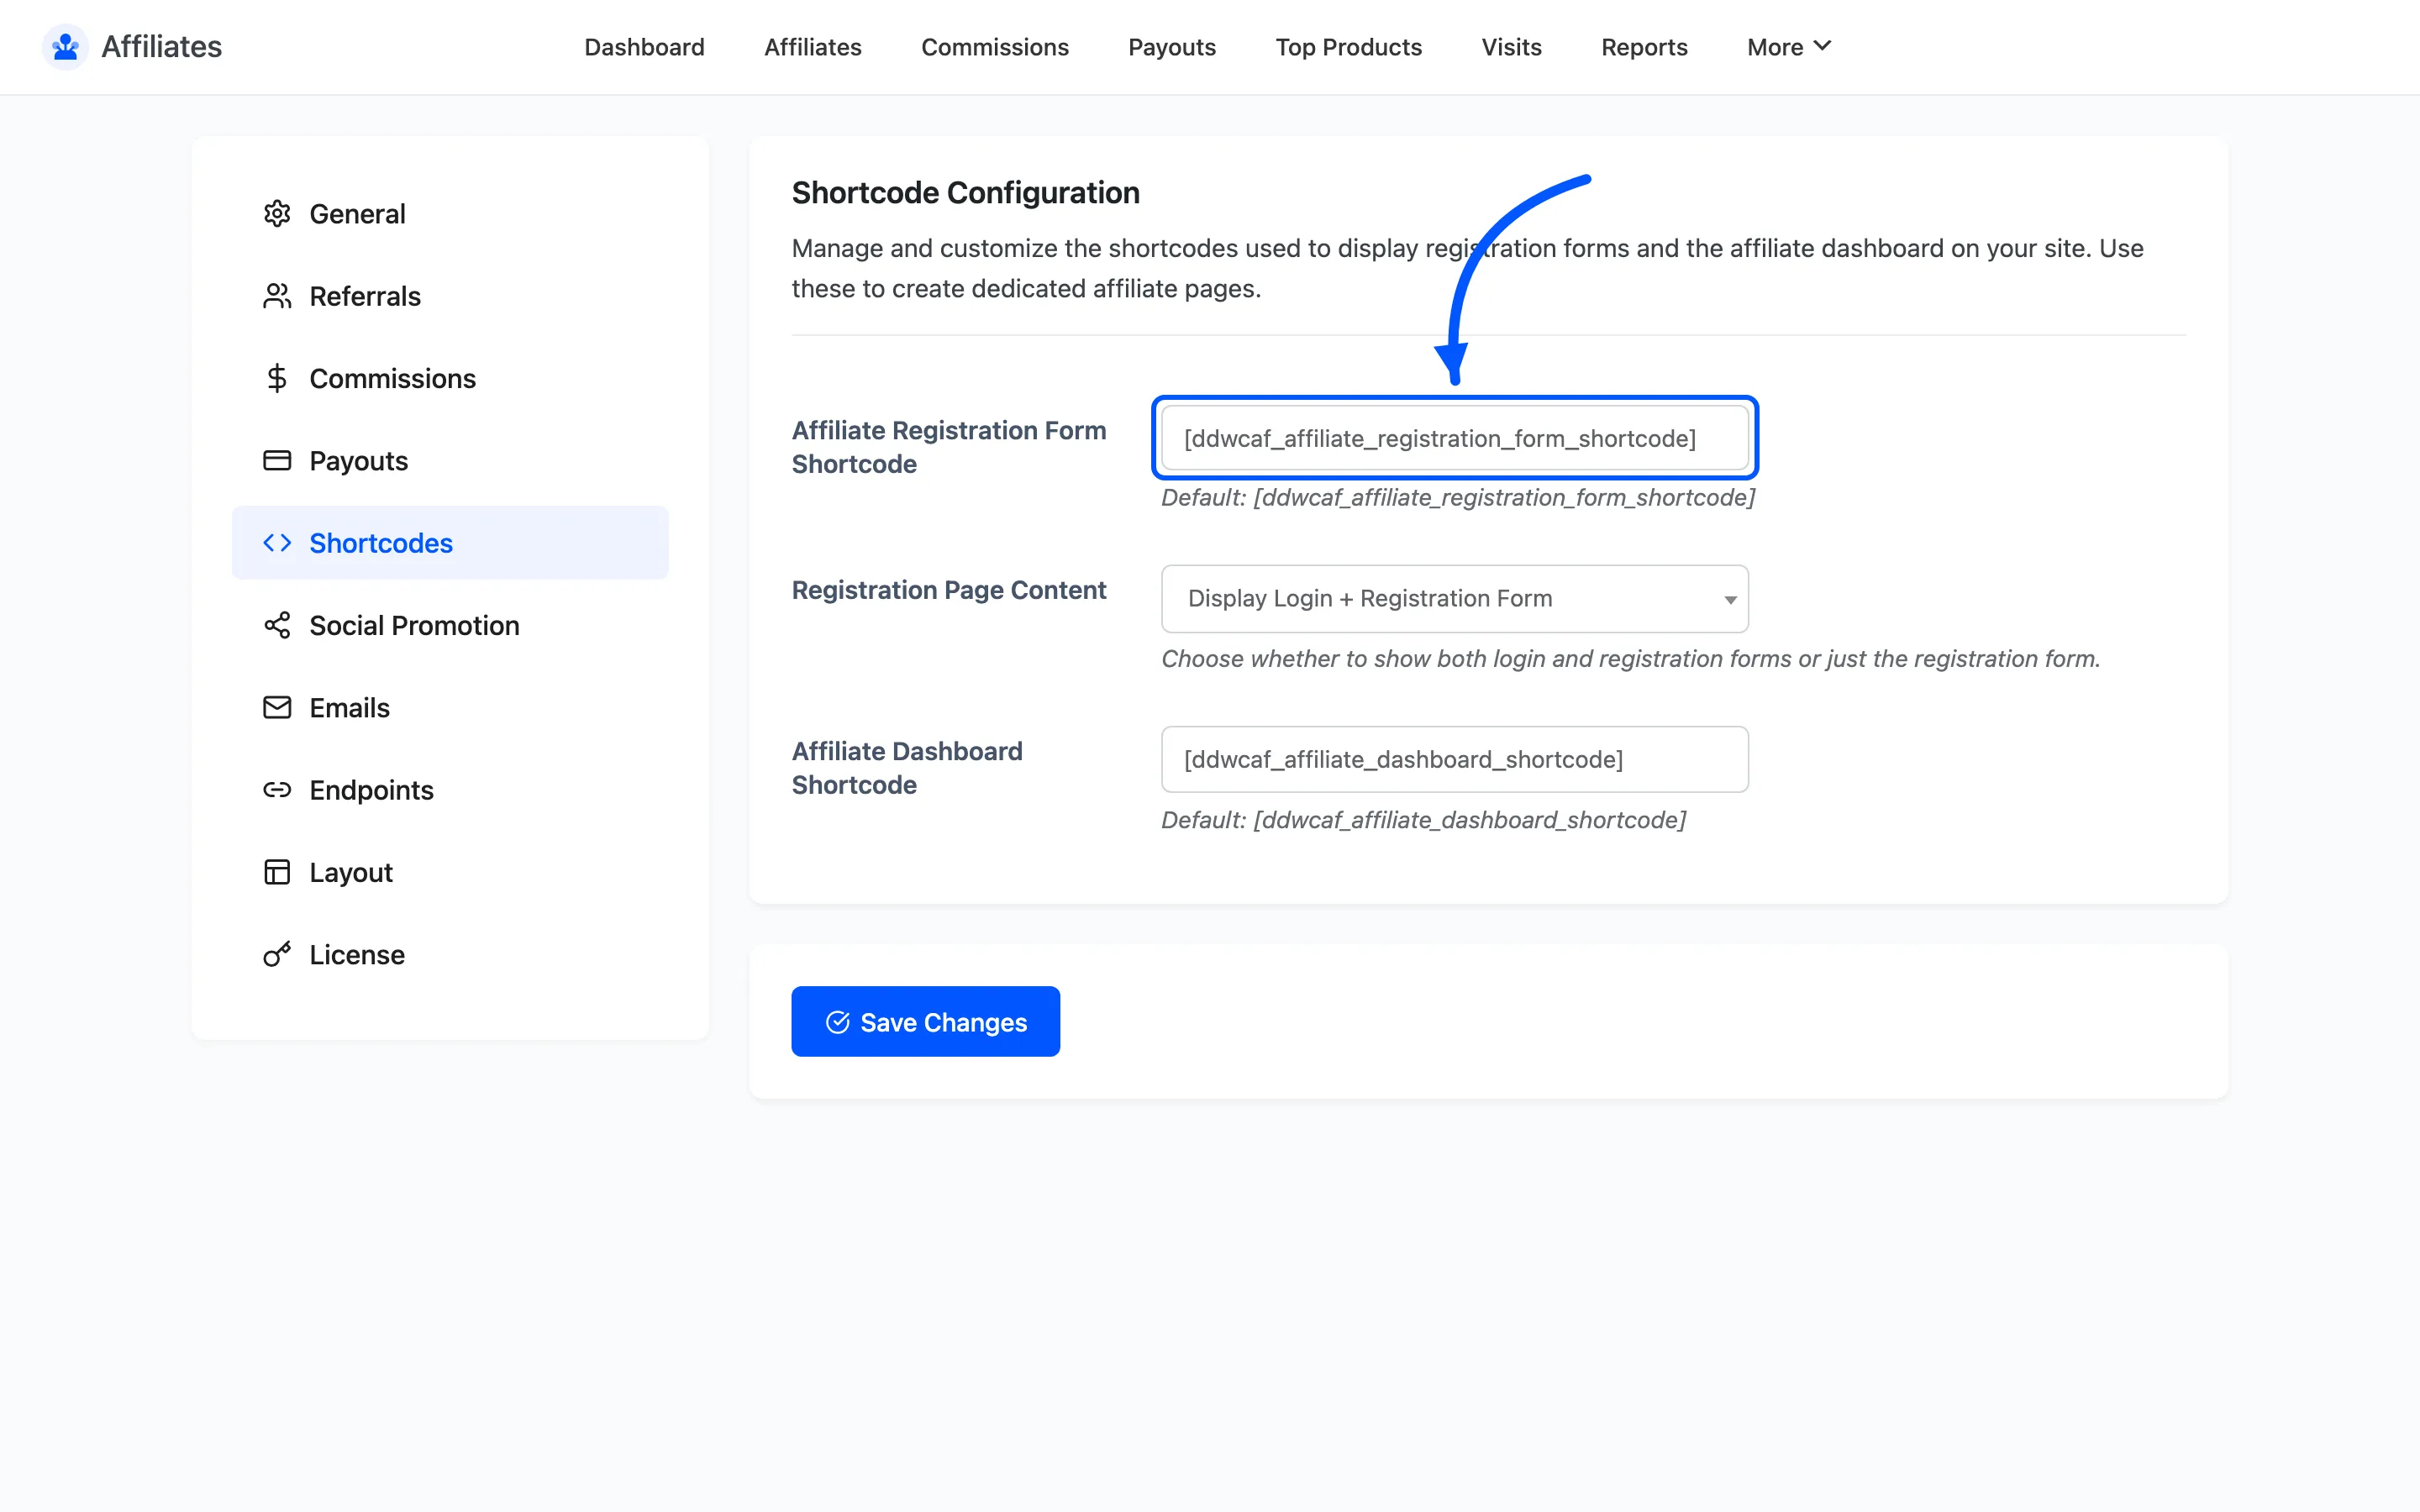
Leave the name alone unless it clashes with another plugin. Renaming it does not update pages already using the old name.
Step 4: Create the page
Section titled “Step 4: Create the page”Go to Pages → Add New.
- Title it plainly:
Affiliate Program, orPartner With Us. - Add your pitch as normal blocks.
- Add a shortcode block and paste the registration shortcode.
- Publish.
Step 5: Write the pitch
Section titled “Step 5: Write the pitch”Four things belong above the form. Anyone deciding whether to promote you needs all four, and a form with none of them converts badly.
- The rate: Say the number. “10% of every order you refer” beats “generous commissions”.
- The window: “Your link earns for 7 days after someone clicks it.” This is the question experienced affiliates ask first.
- What you sell and to whom. An affiliate is judging whether their audience will buy. Help them.
- How you pay. Method and rough timing. “Bank transfer or PayPal, paid monthly.”
Skip the marketing adjectives. The audience for this page is people who do this for a living, and they are reading for numbers.
Step 6: Link to the page
Section titled “Step 6: Link to the page”A signup page nobody can find recruits nobody. Add a Affiliate Program link to your footer, where affiliates already look on every store they consider.
Two more placements worth doing:
- A line in your post-purchase order email. A happy customer is your best recruit.
- The About page, if you have one that gets traffic.
Step 7: Test the form
Section titled “Step 7: Test the form”Open the page in a private browsing window. You should see whatever you chose in step 2.
Fill it in with a throwaway email and submit. Then check DevDiggers Plugins → Affiliates → Affiliates. The signup should be there on Pending.
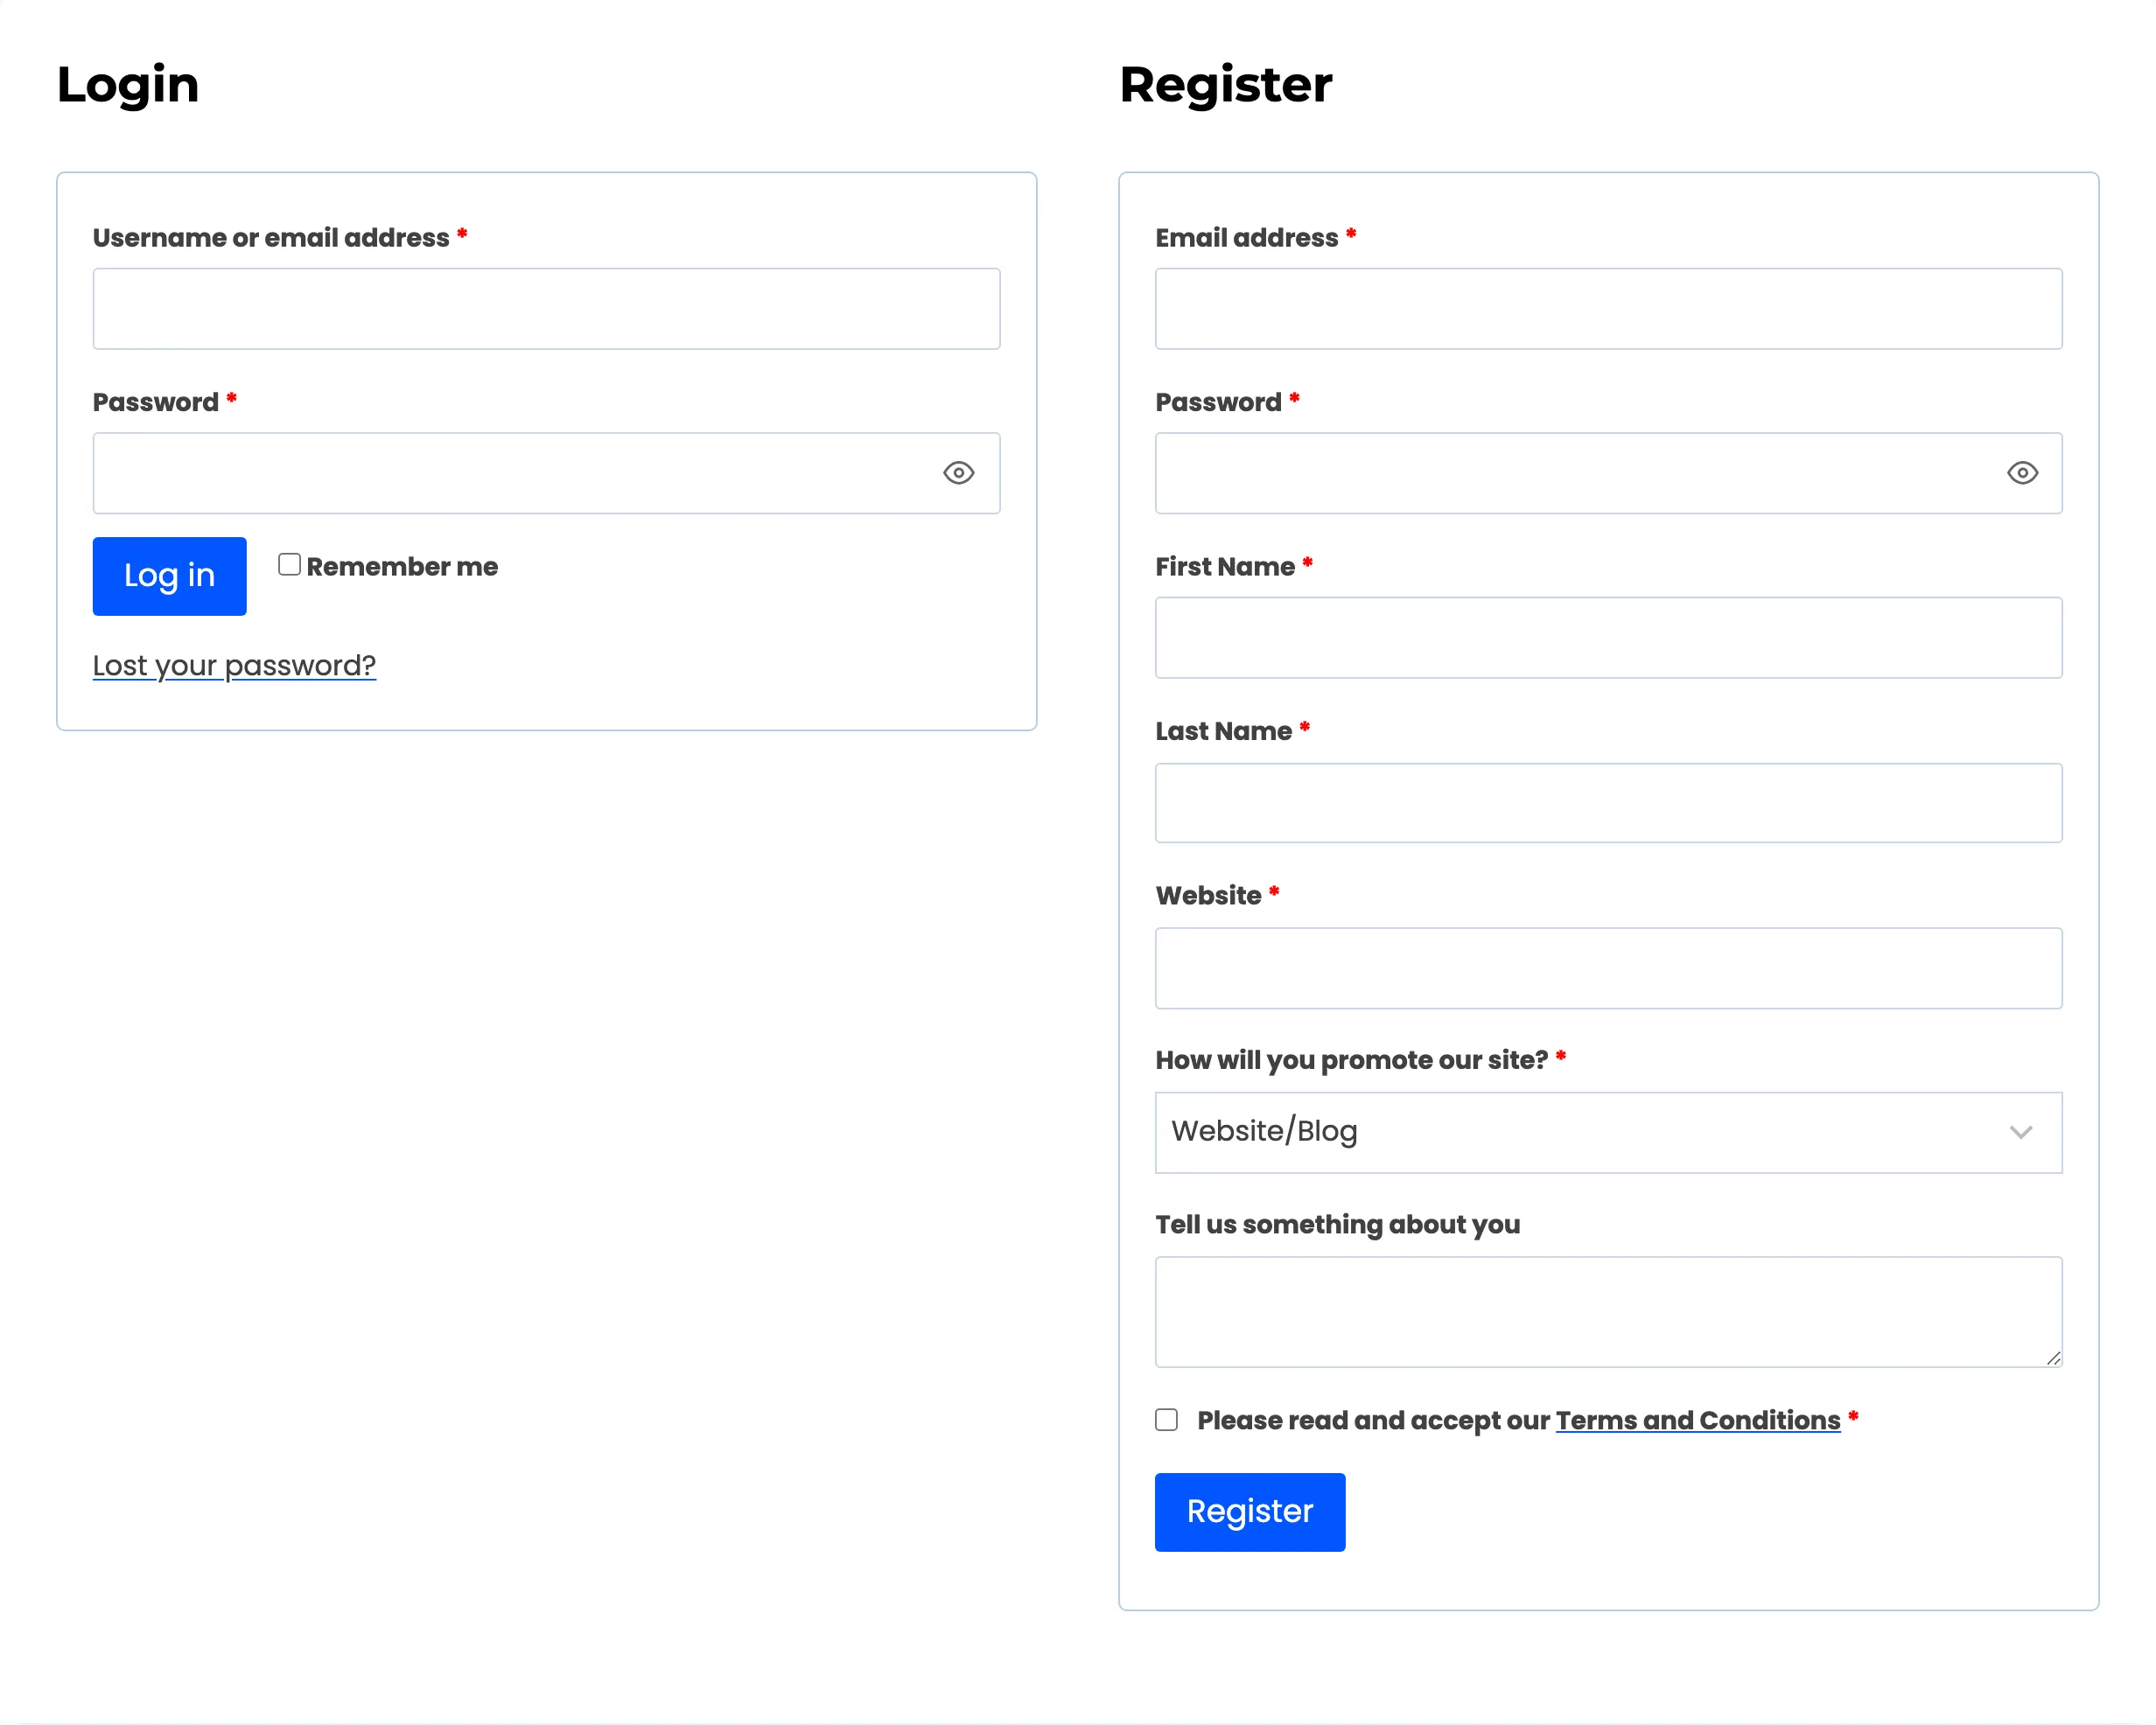
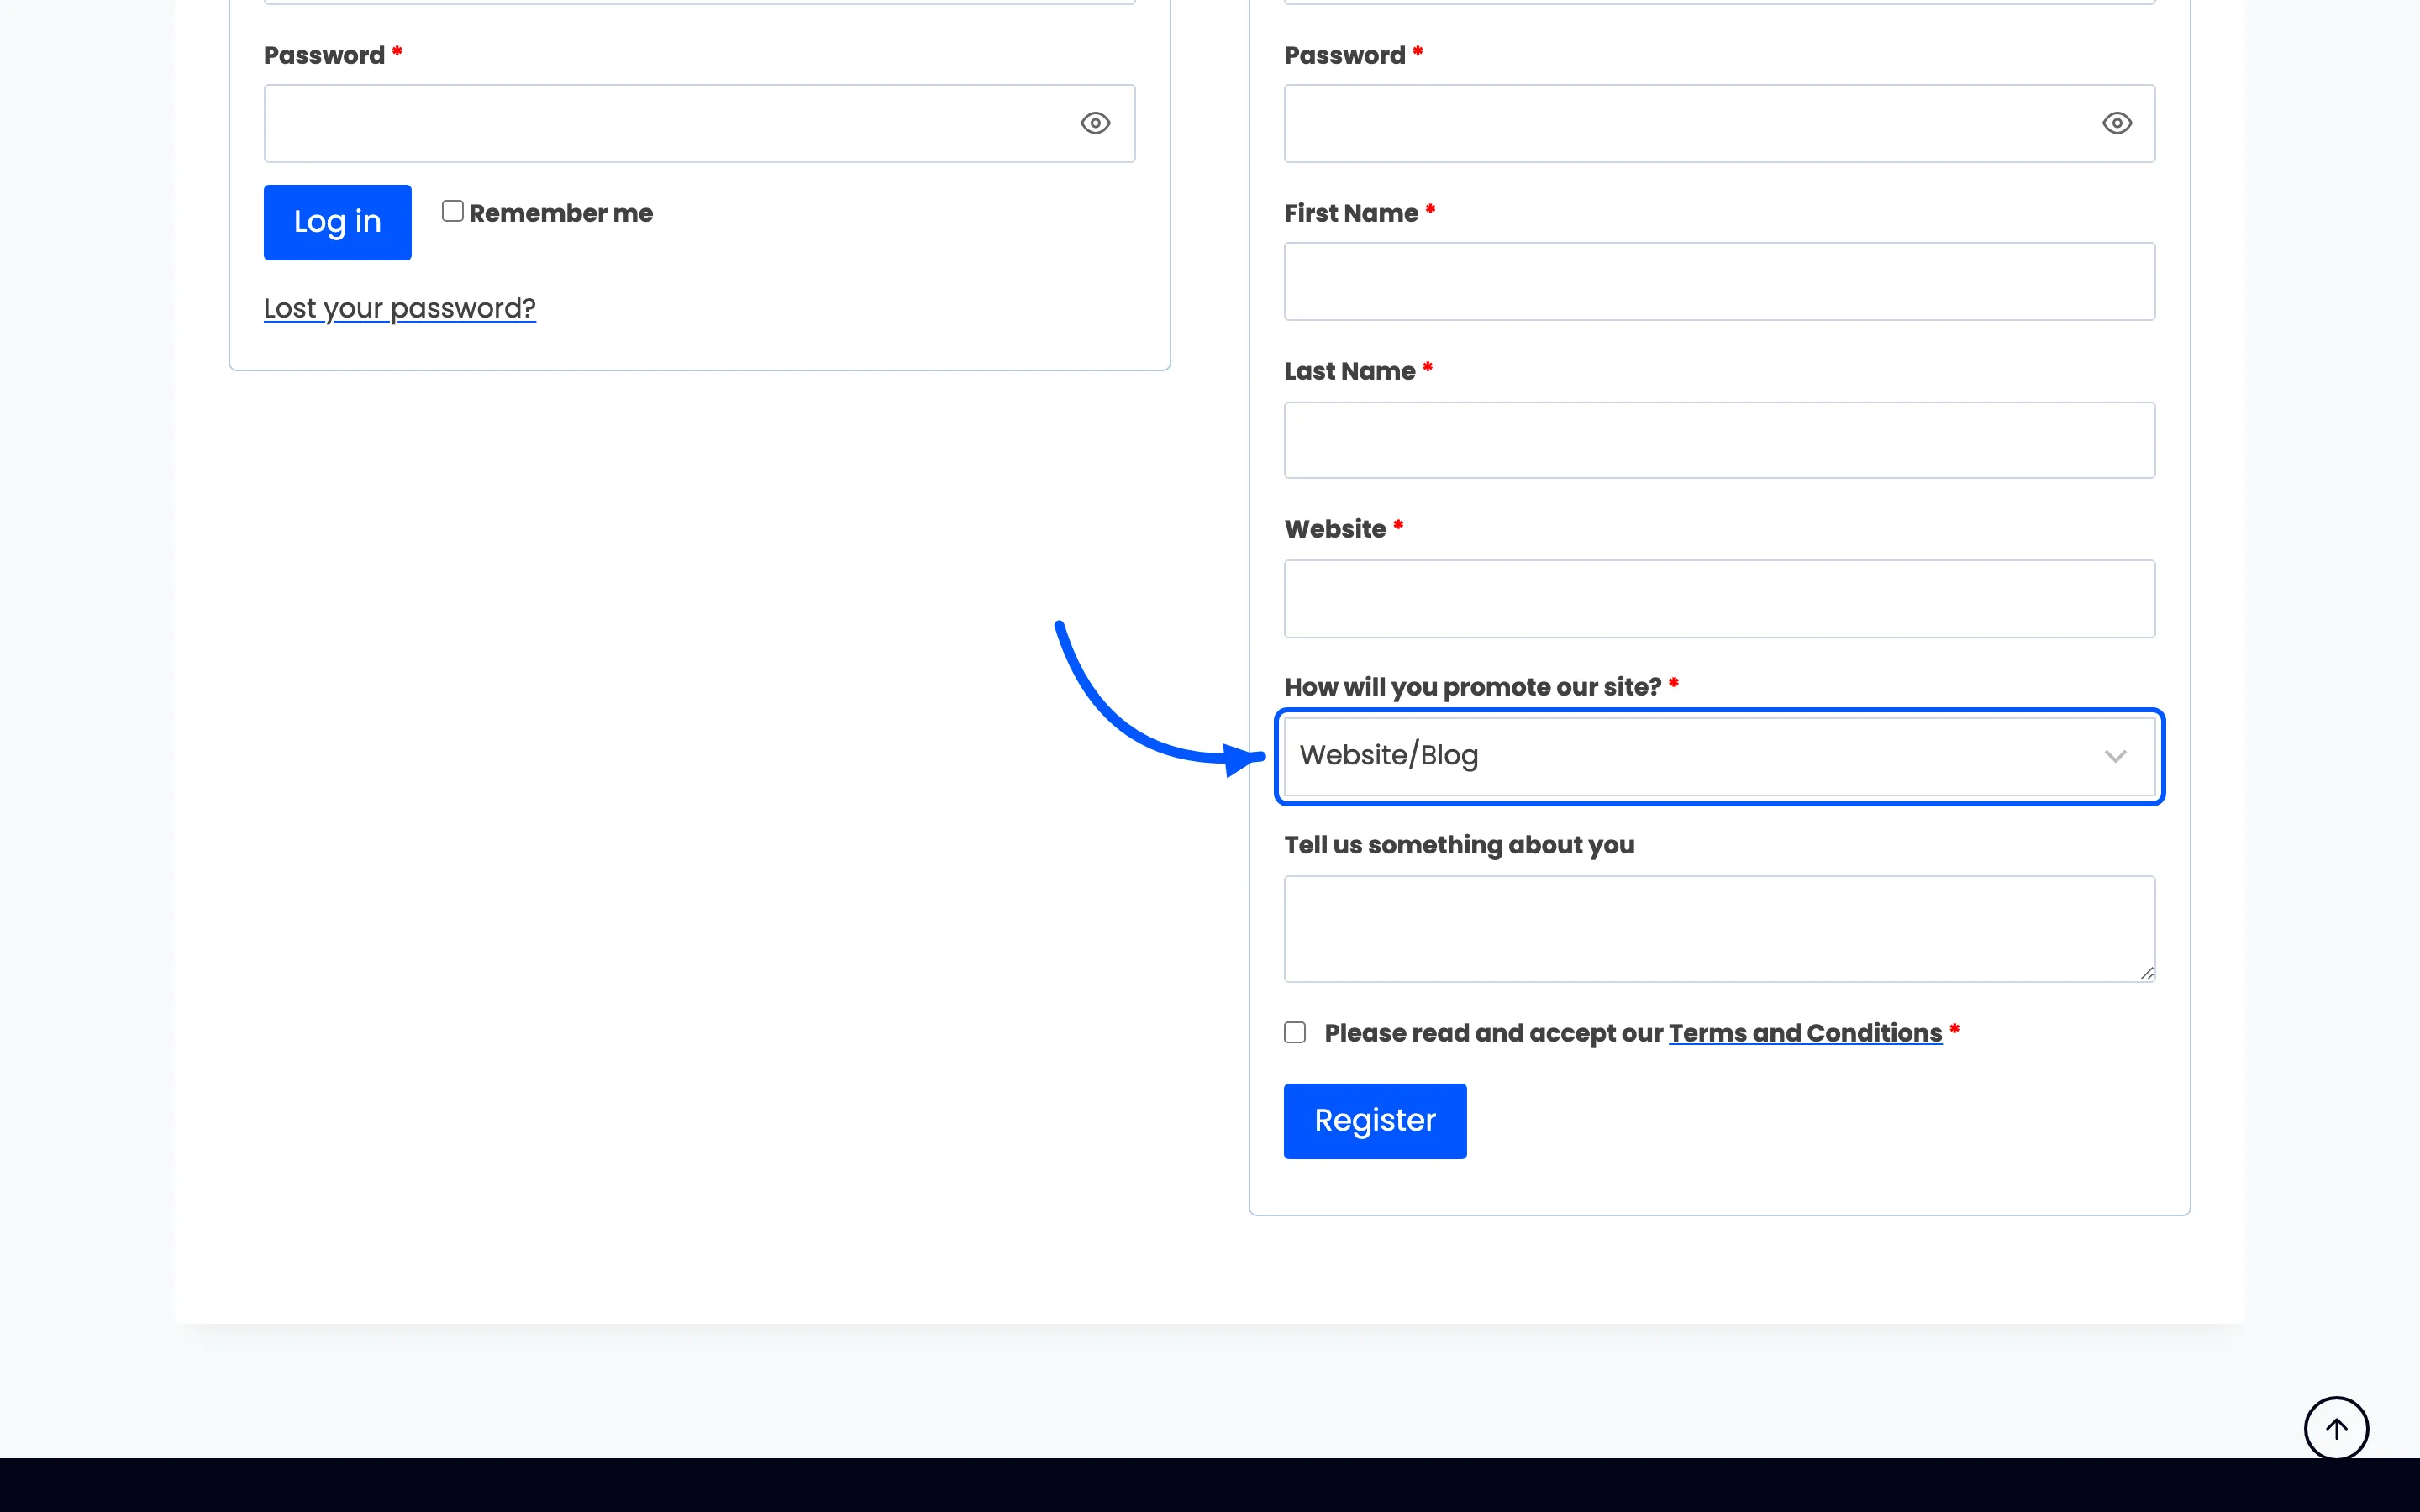
Check the promotion dropdown renders your options, since it is the field you will actually read before approving anyone.
Delete the test signup afterwards with the Delete bulk action.
Step 8: Decide about the WooCommerce registration form
Section titled “Step 8: Decide about the WooCommerce registration form”There is a second route into the program, and it is one setting.
WooCommerce Registration Integration on the General tab adds your affiliate fields to the standard WooCommerce account registration form. Every new customer is then asked to opt in while creating their account.
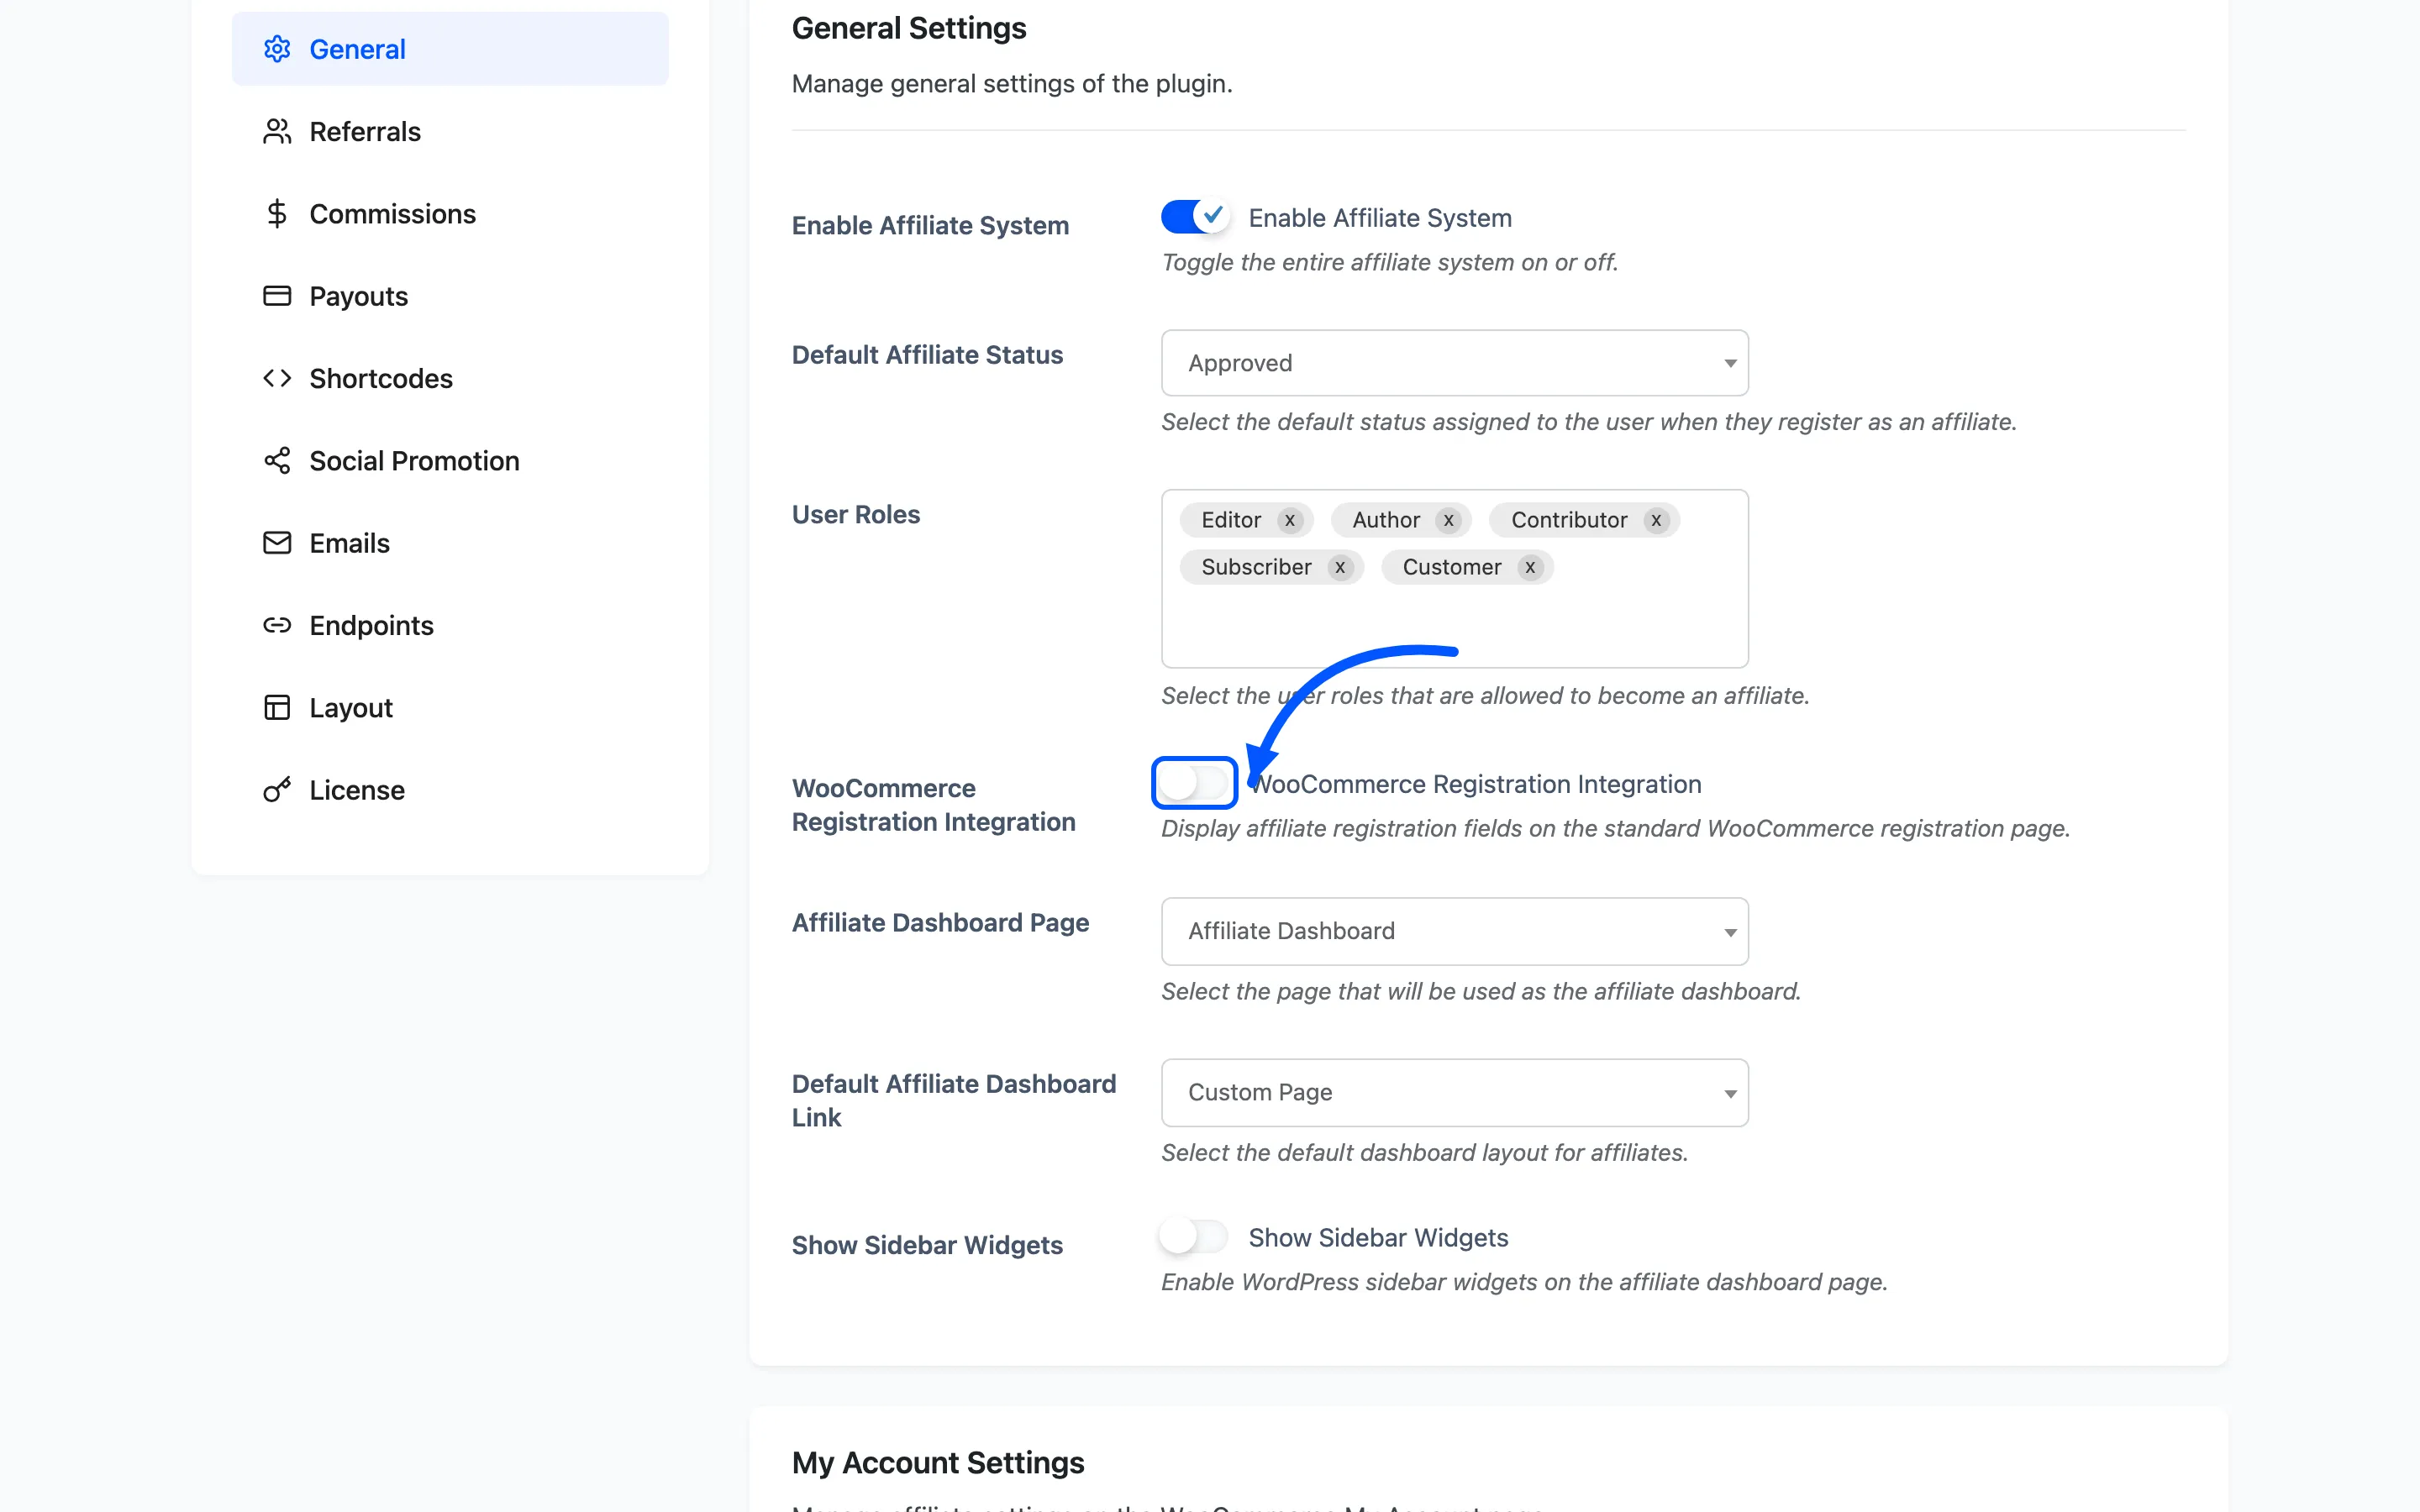
Weigh it carefully. It recruits more affiliates. It also makes every customer fill in fields that have nothing to do with buying, which costs you conversions on the checkout path.
Leave it off if your signup page is doing its job. Turn it on only for a store whose customers are genuinely the target partners, such as a trade or reseller catalogue.
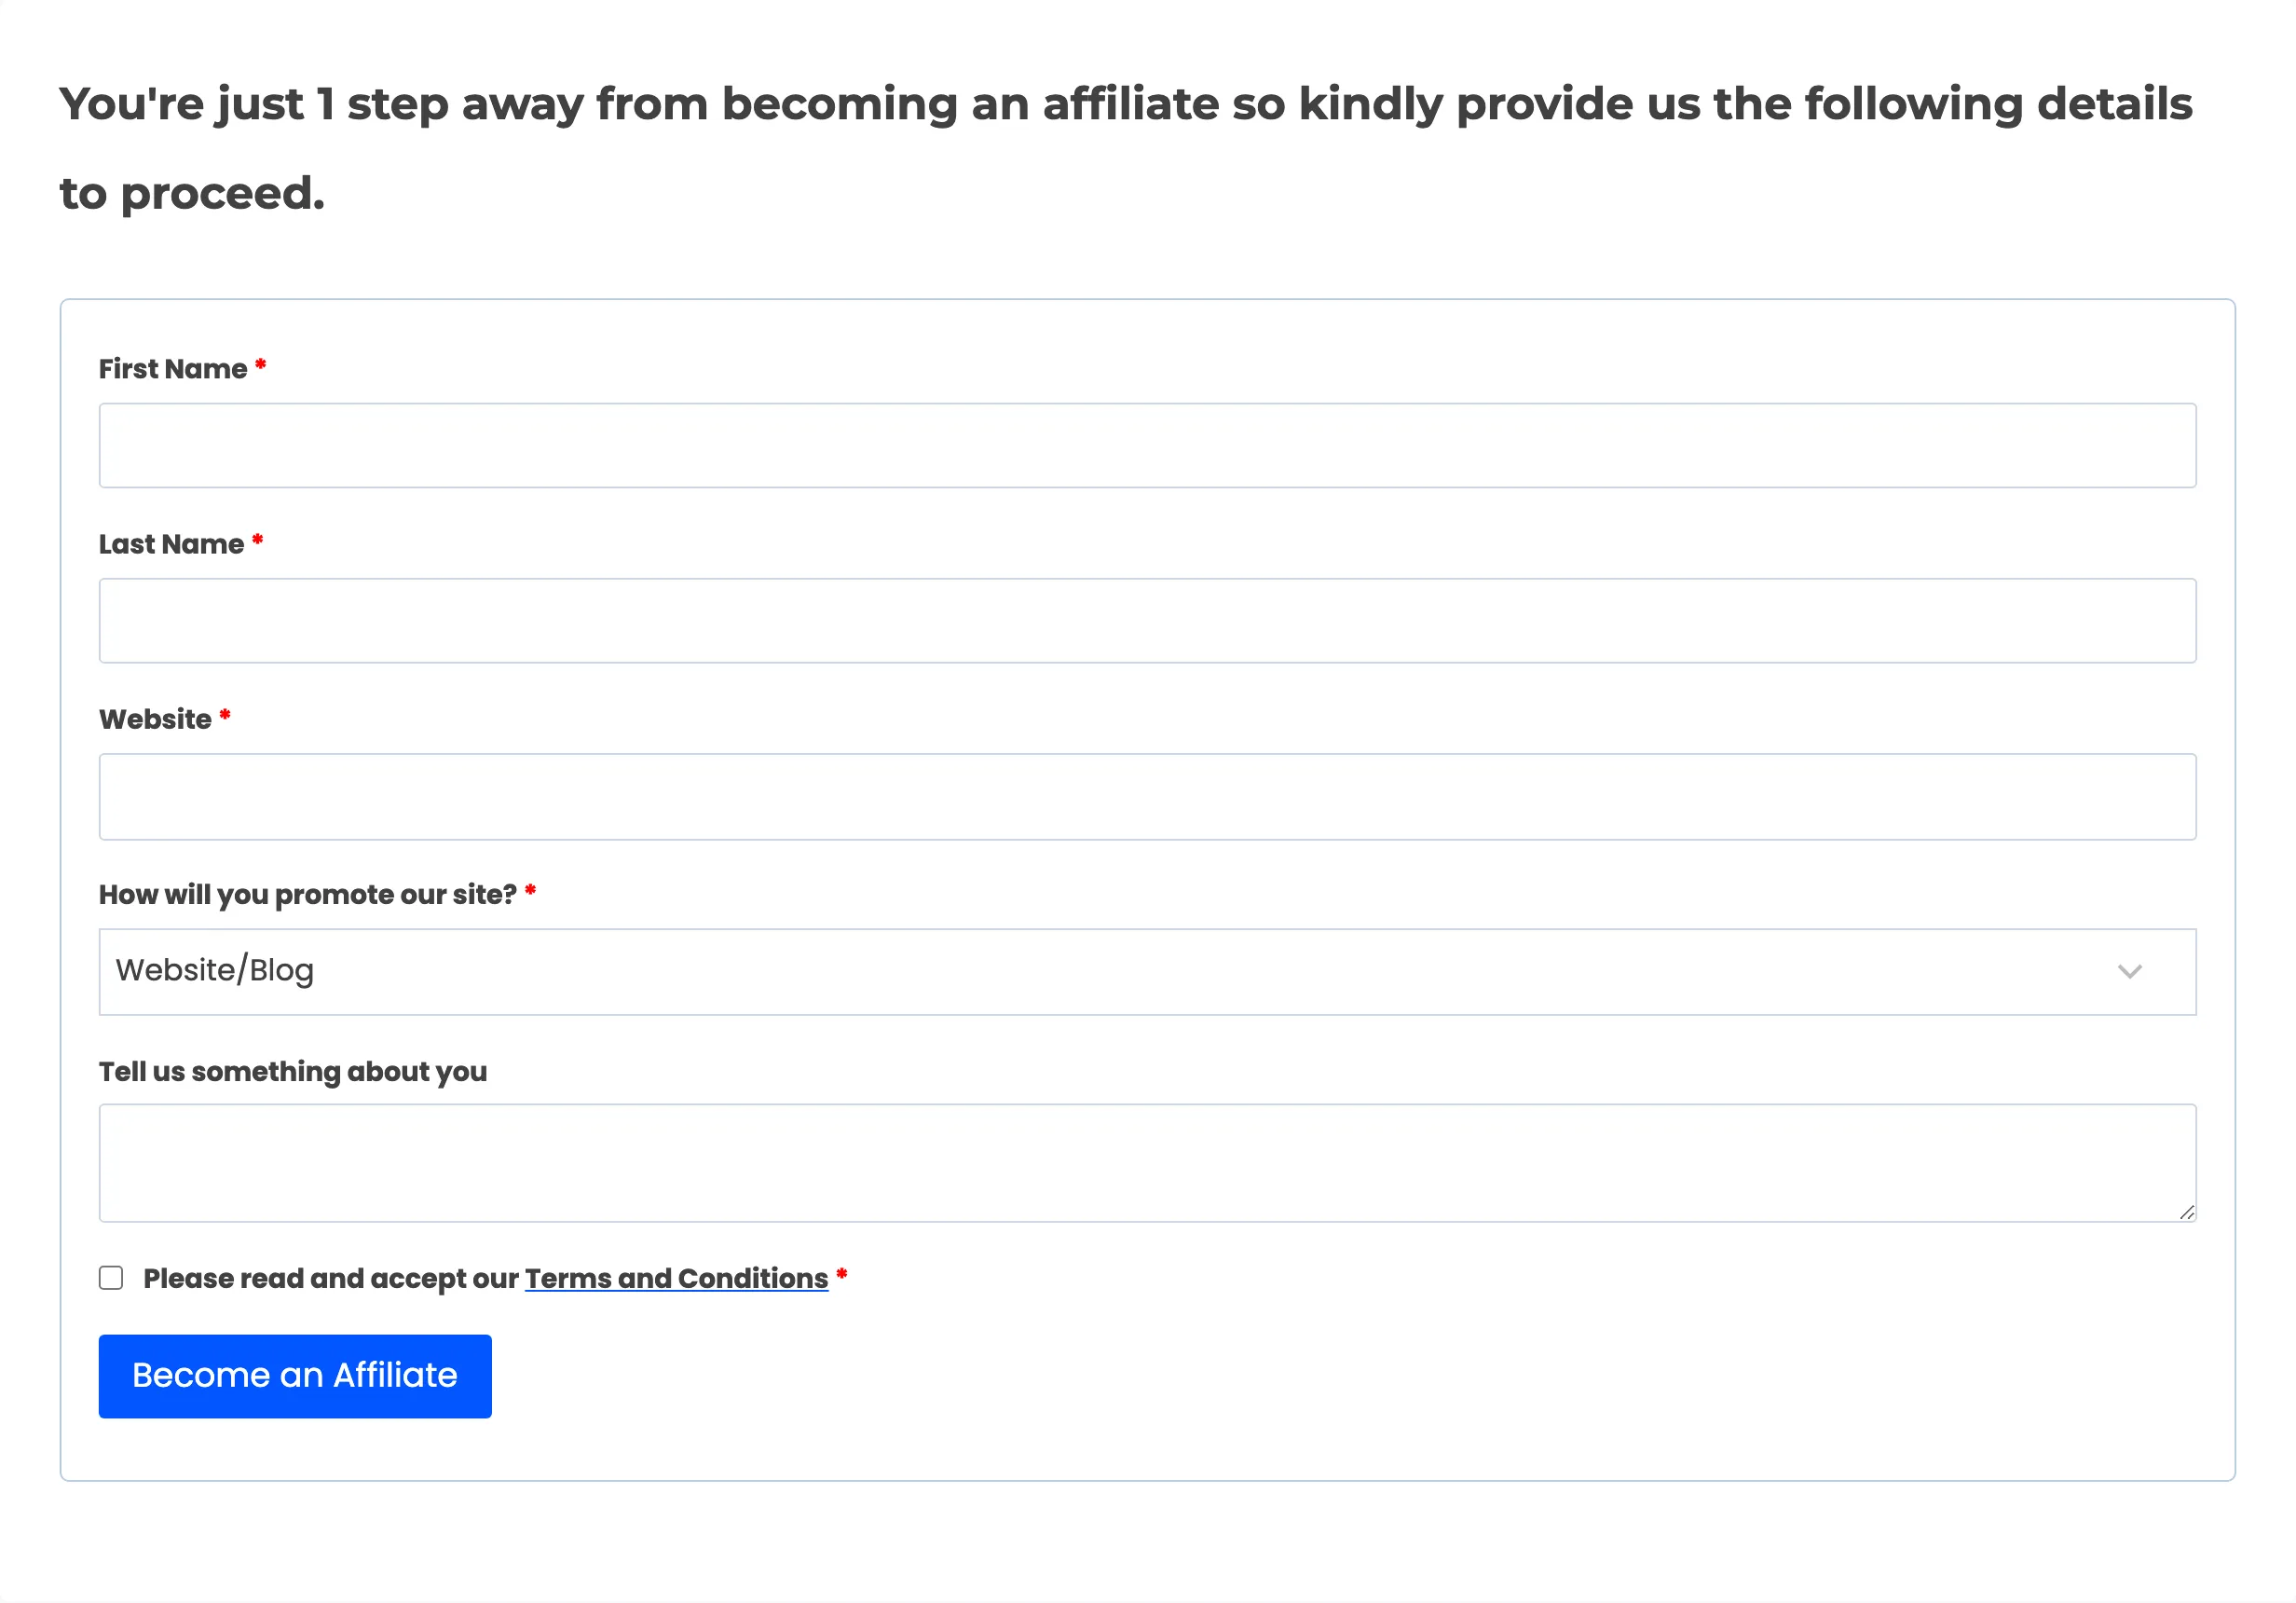
A logged-in customer who did not opt in can still join later. The dashboard page shows them a short join form asking only for the affiliate fields.
What happens after someone applies
Section titled “What happens after someone applies”The new affiliate lands on Pending. Their referral token resolves to nothing, so a link they share earns nothing until you approve them.
Where to go next
Section titled “Where to go next”- How to Approve and Manage Affiliates for what to do with the applications.
- Registration Fields for the full field reference.