

How to Launch Your Affiliate Program
This is the whole path, from a fresh install to a commission in the list. Work through it in order. Every step matters, and skipping the last one is how a program runs for a month before anyone notices tracking was off.
Before you start
Section titled “Before you start”Install and activate the plugin first. See Installing and Activating Affiliates.
Decide two things before you touch a setting.
- What you will pay. A percentage of the order line. Ten percent is the plugin’s default and a reasonable starting point for physical products.
- How long a click counts for. Seven days is the default. Longer windows credit affiliates for more orders, including some they arguably did not cause.
Step 1: Enable the affiliate system
Section titled “Step 1: Enable the affiliate system”Go to DevDiggers Plugins → Affiliates → Configuration → General and turn on Enable Affiliate System.
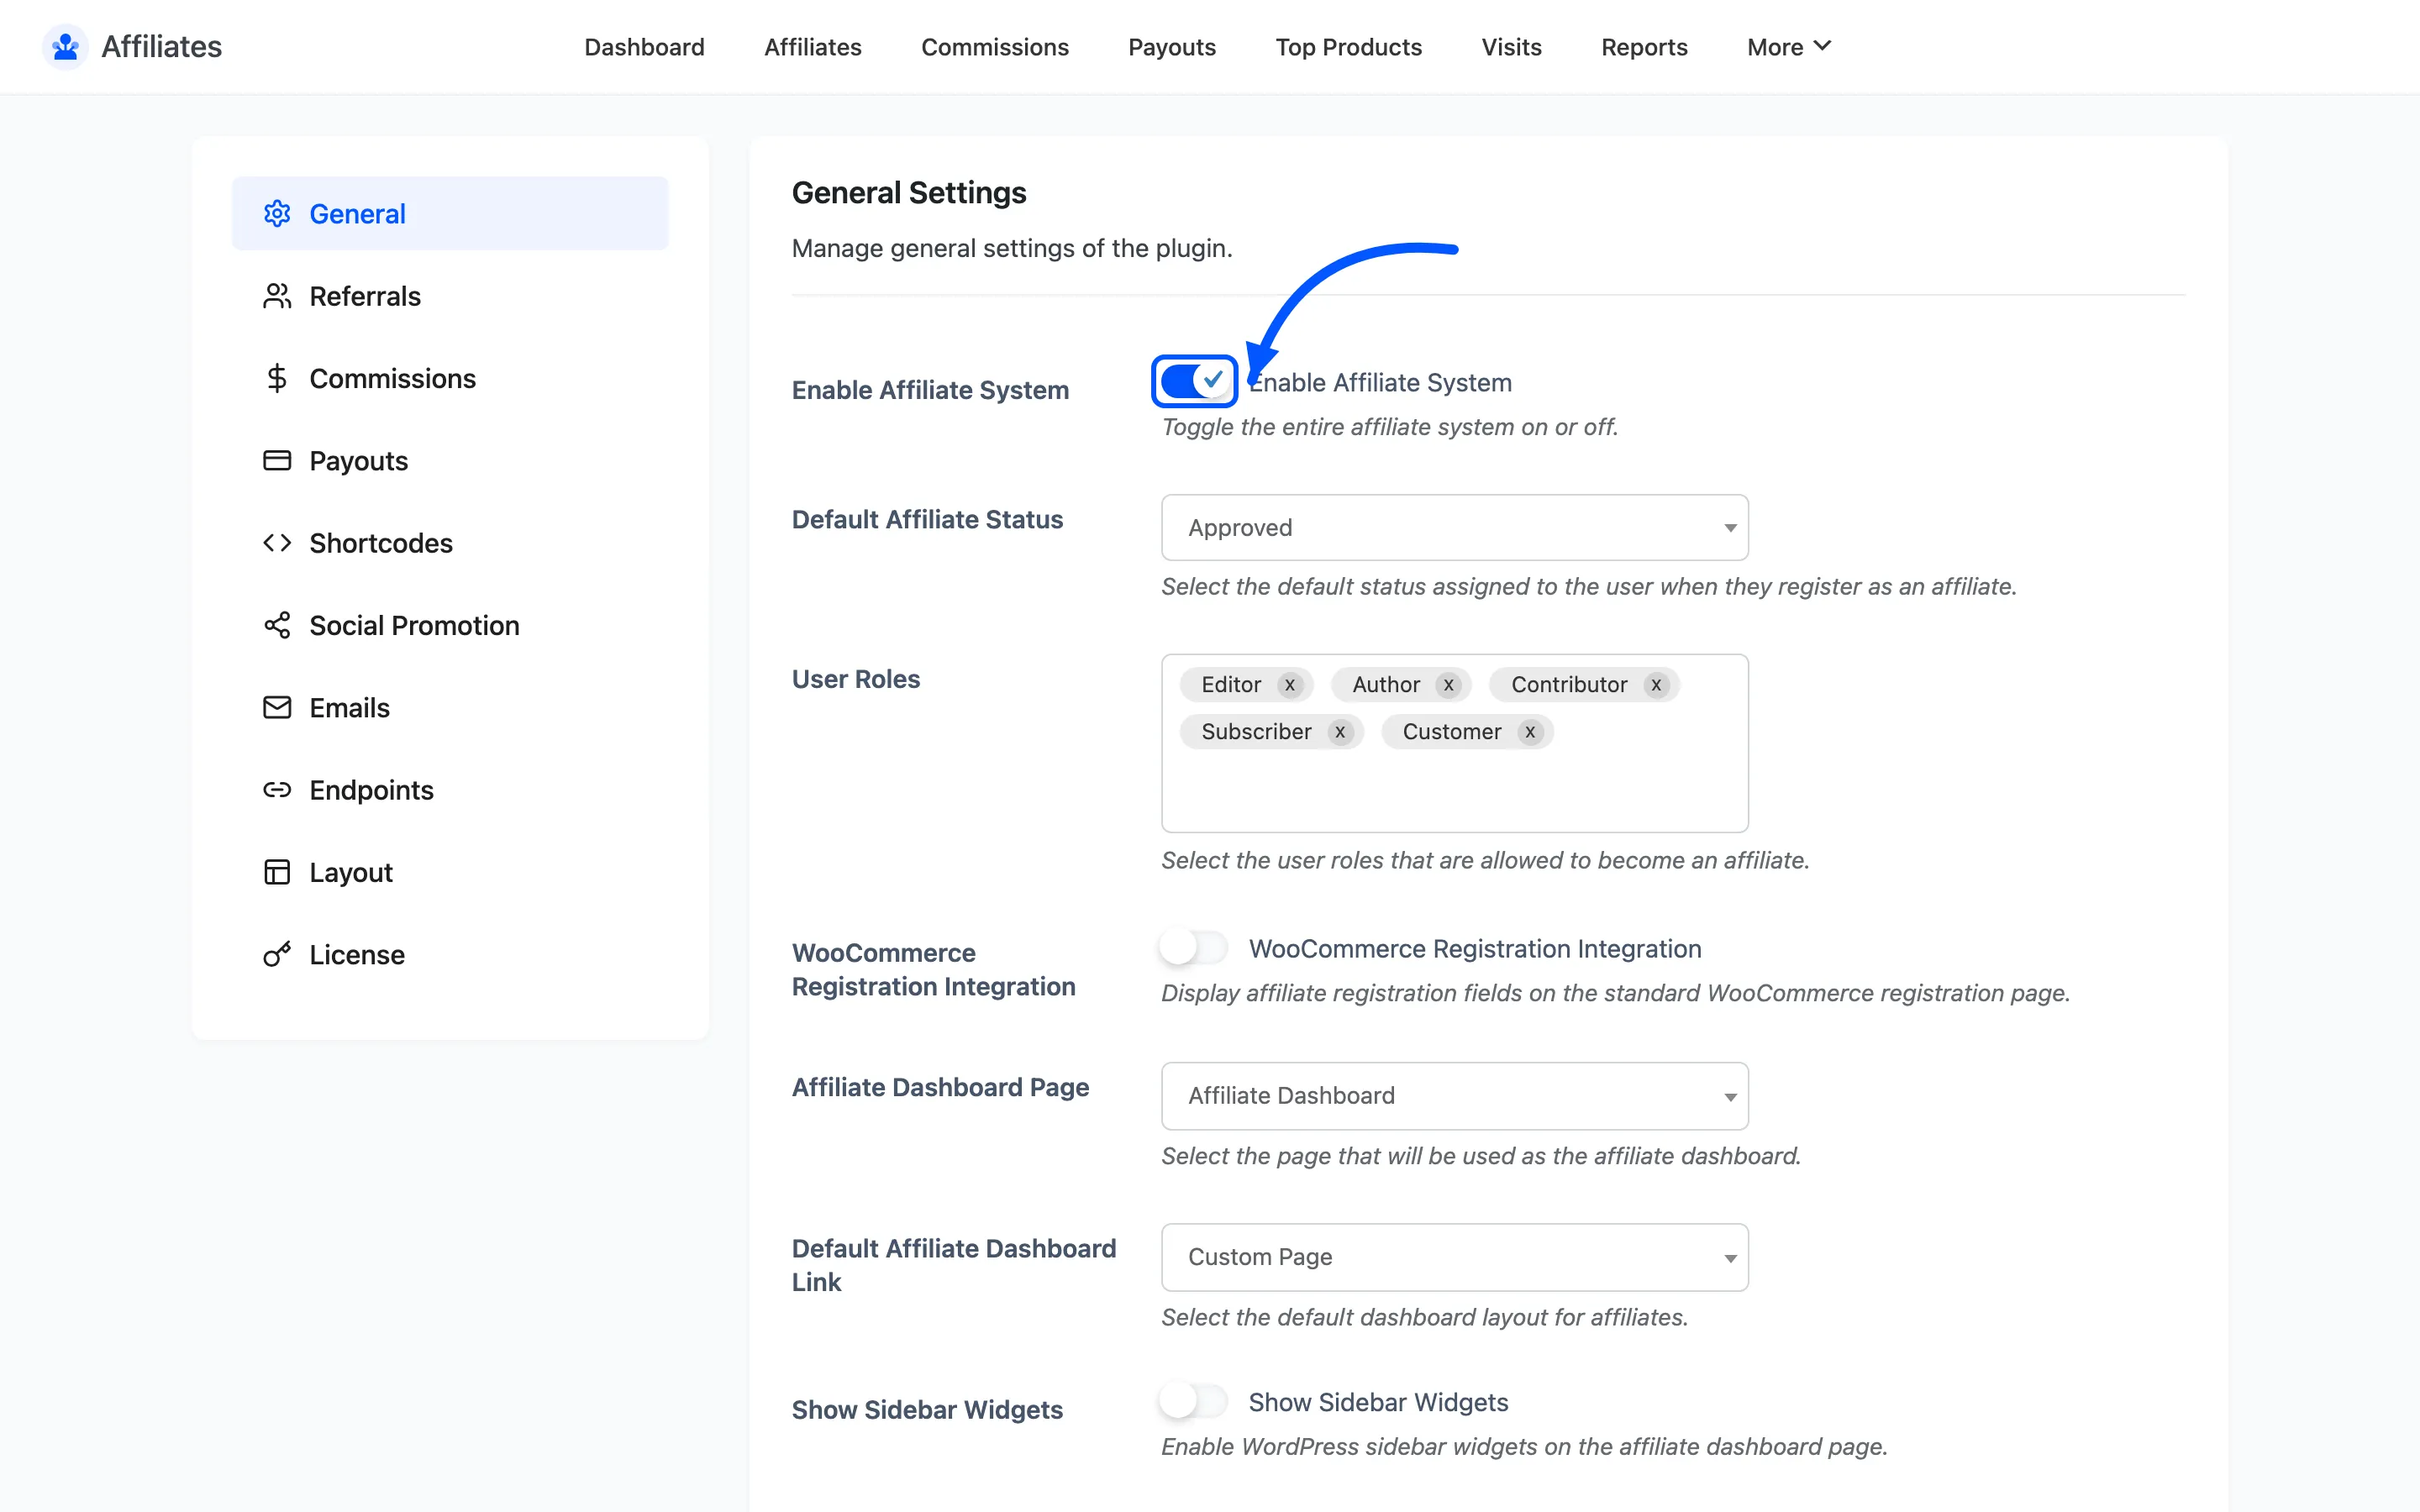
With this off, referral links set no cookie, no visit is logged and no commission is created. It is the first thing to check whenever the program appears dead.
Step 2: Point the plugin at a dashboard page
Section titled “Step 2: Point the plugin at a dashboard page”Still on General, set Affiliate Dashboard Page.
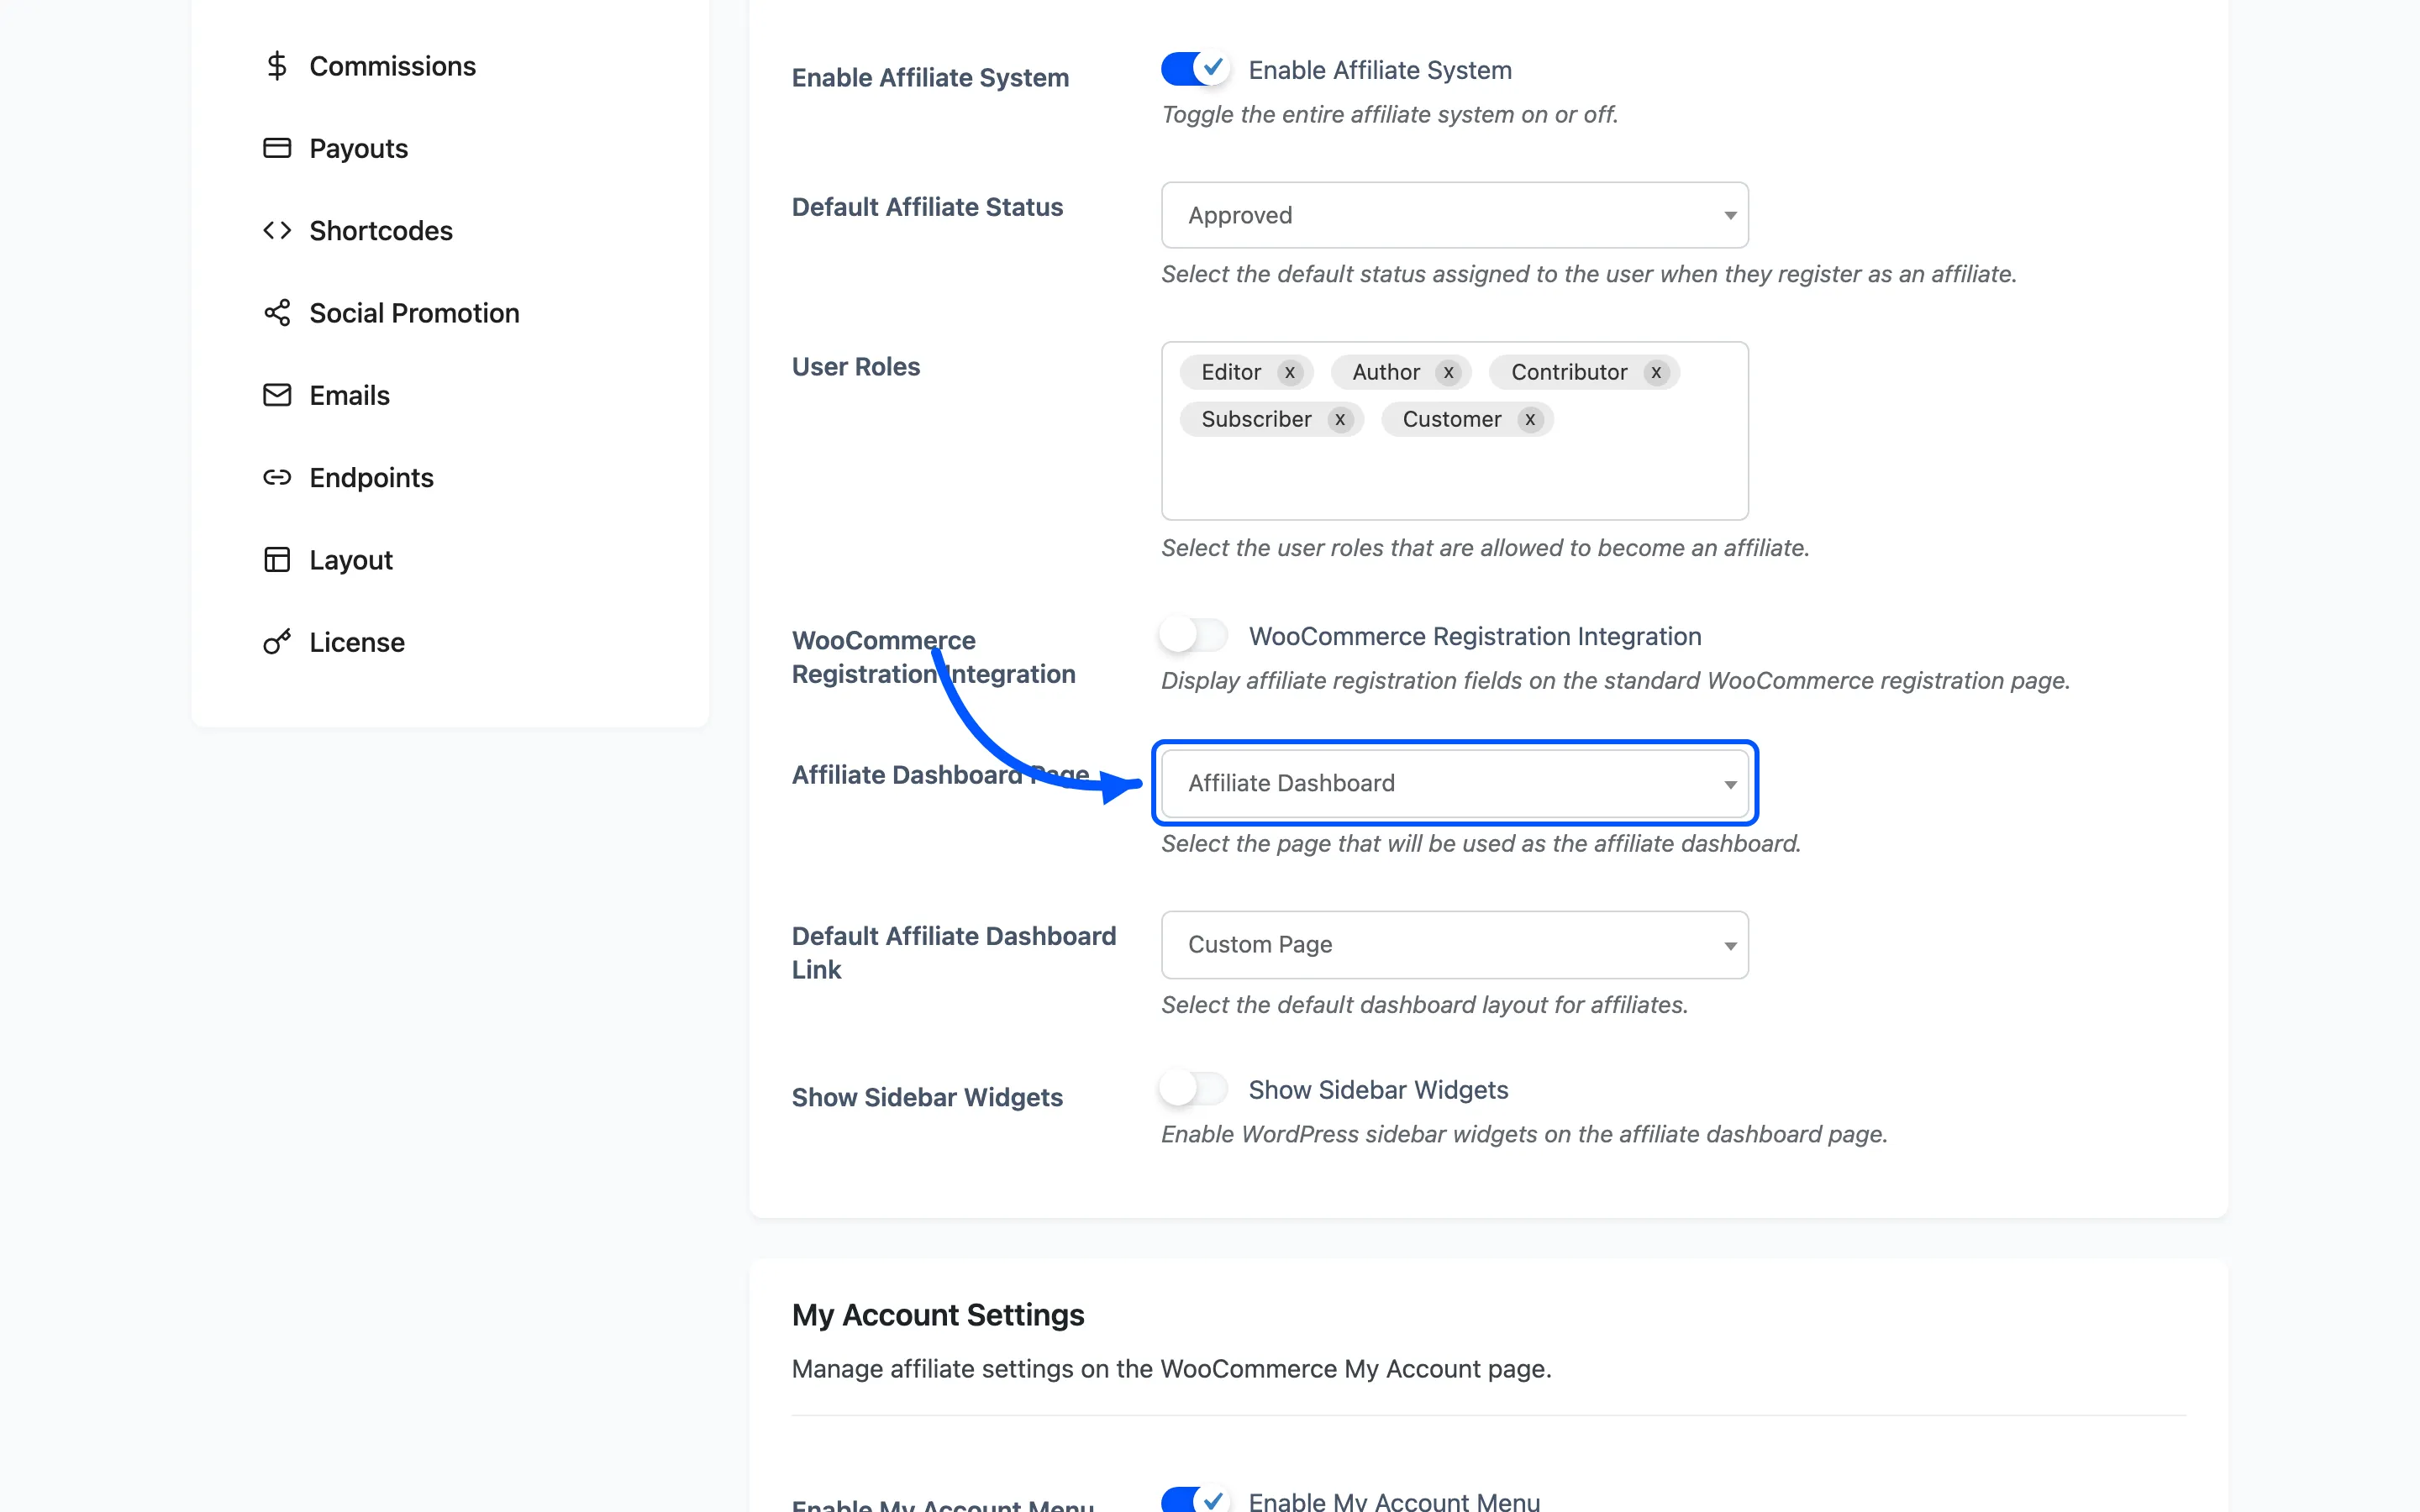
Activation created a page called Affiliate Dashboard with the dashboard shortcode already in it. Pick that one. This is where affiliates are sent after they log in.
Leave Enable My Account Menu on. It adds an Affiliate Dashboard tab to WooCommerce My Account, which is where affiliates who are also customers will look first.
Click Save Changes.
Step 3: Set up referral tracking
Section titled “Step 3: Set up referral tracking”Go to Configuration → Referrals.
URL Parameter is the query string in a referral link. The default ref produces
https://yourstore.com/?ref=12.
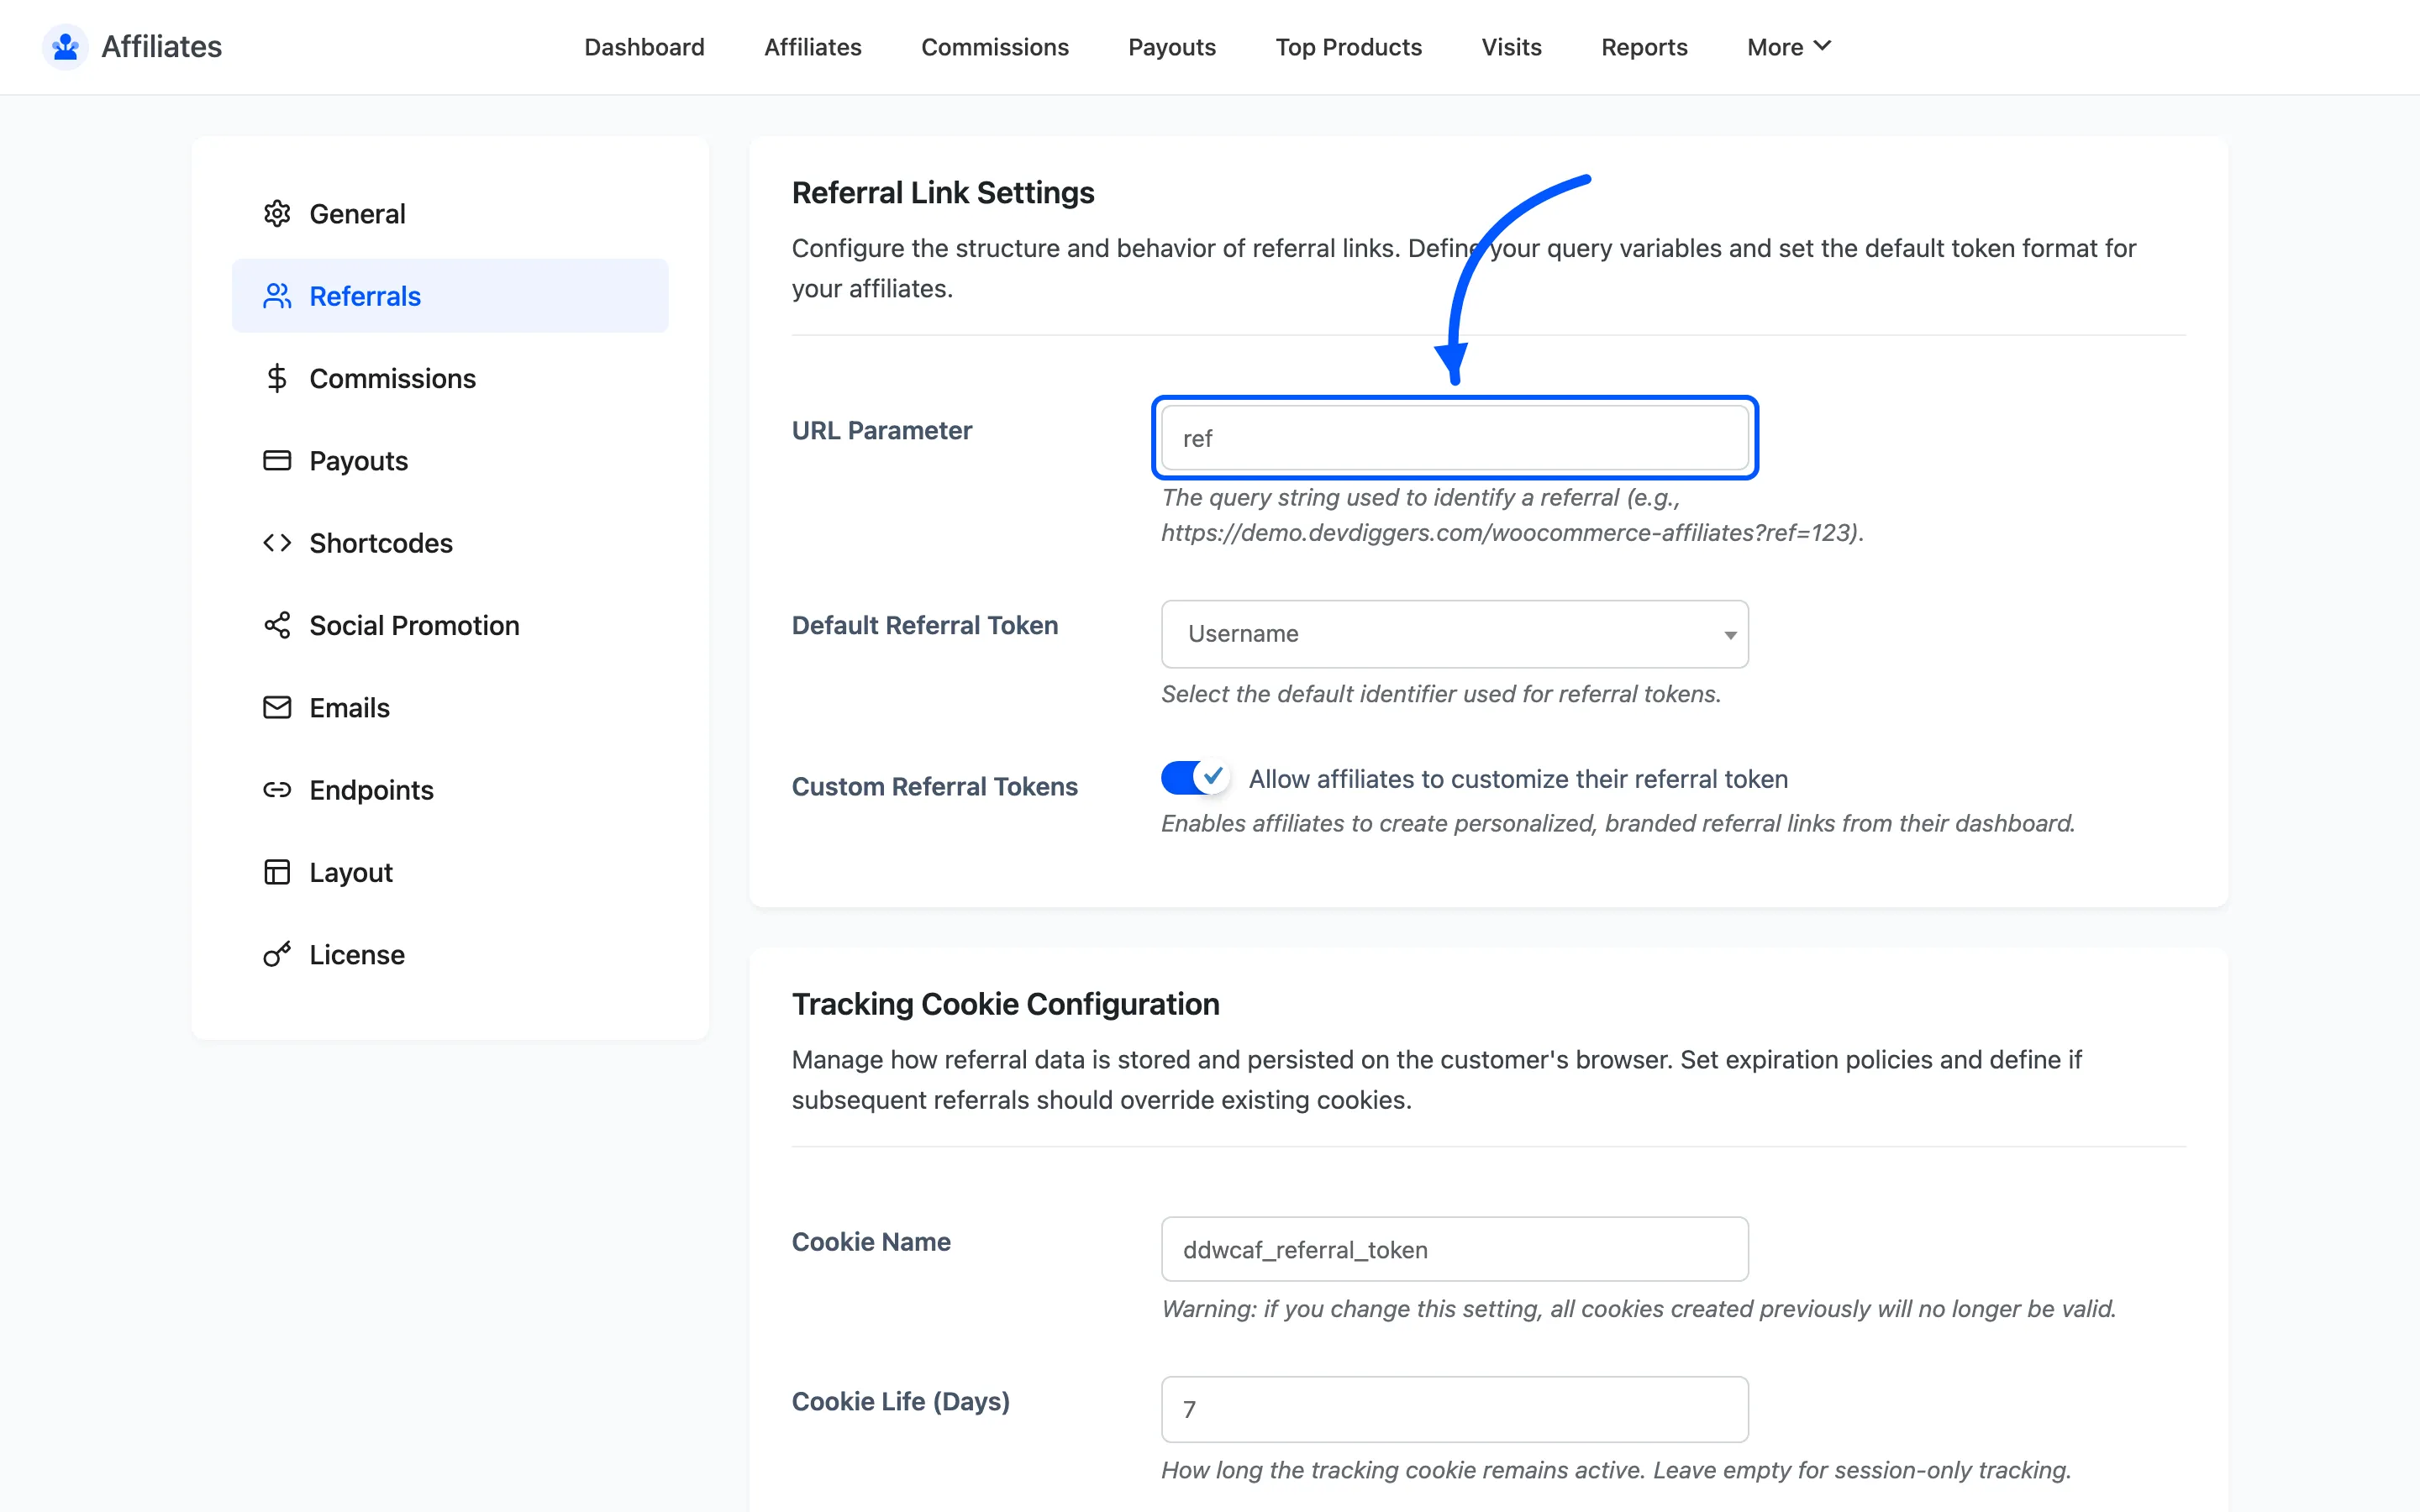
Cookie Life (Days) is the attribution window. The default is 7.
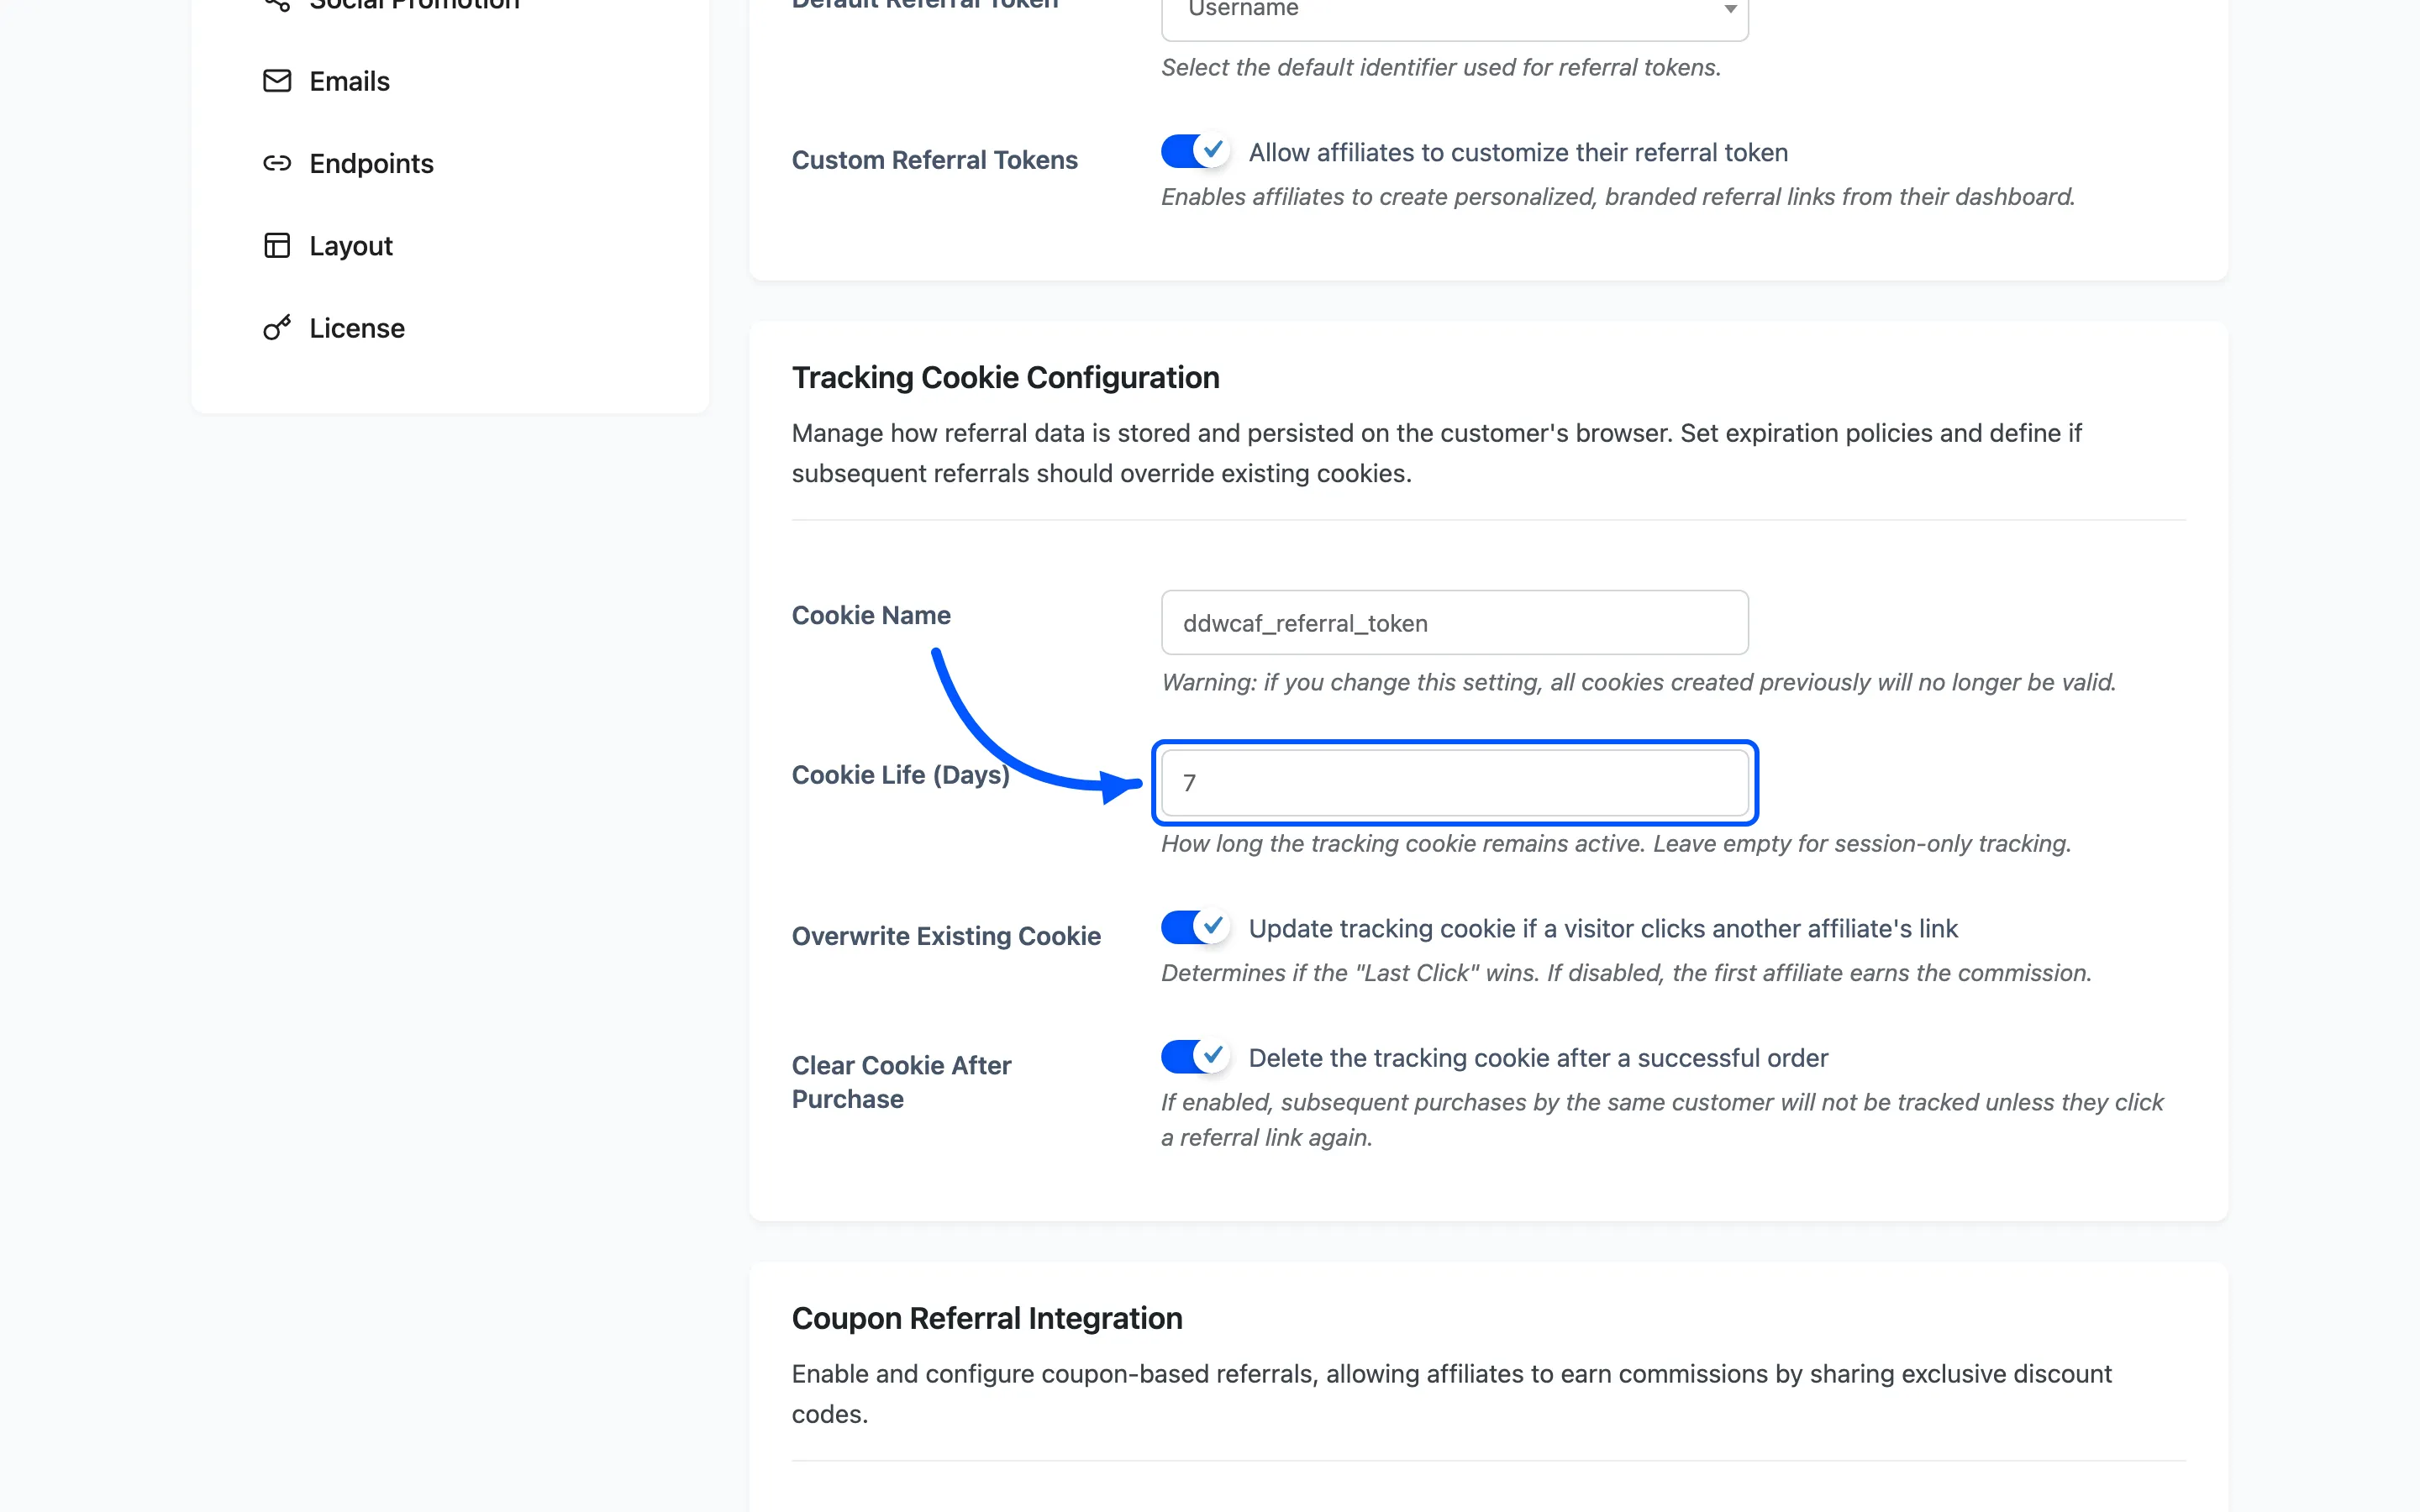
Do not leave Cookie Life empty. The field suggests that makes tracking session-only, but an empty value actually sets the cookie fifteen years out. Enter a real number.
Leave Track All Clicks on. Without it you get commissions but no visit history. You also lose the ability to tell a partner who sends no traffic from one whose traffic does not convert.
Click Save Changes.
Step 4: Set the commission rate
Section titled “Step 4: Set the commission rate”Go to Configuration → Commissions and set Default Commission (%).
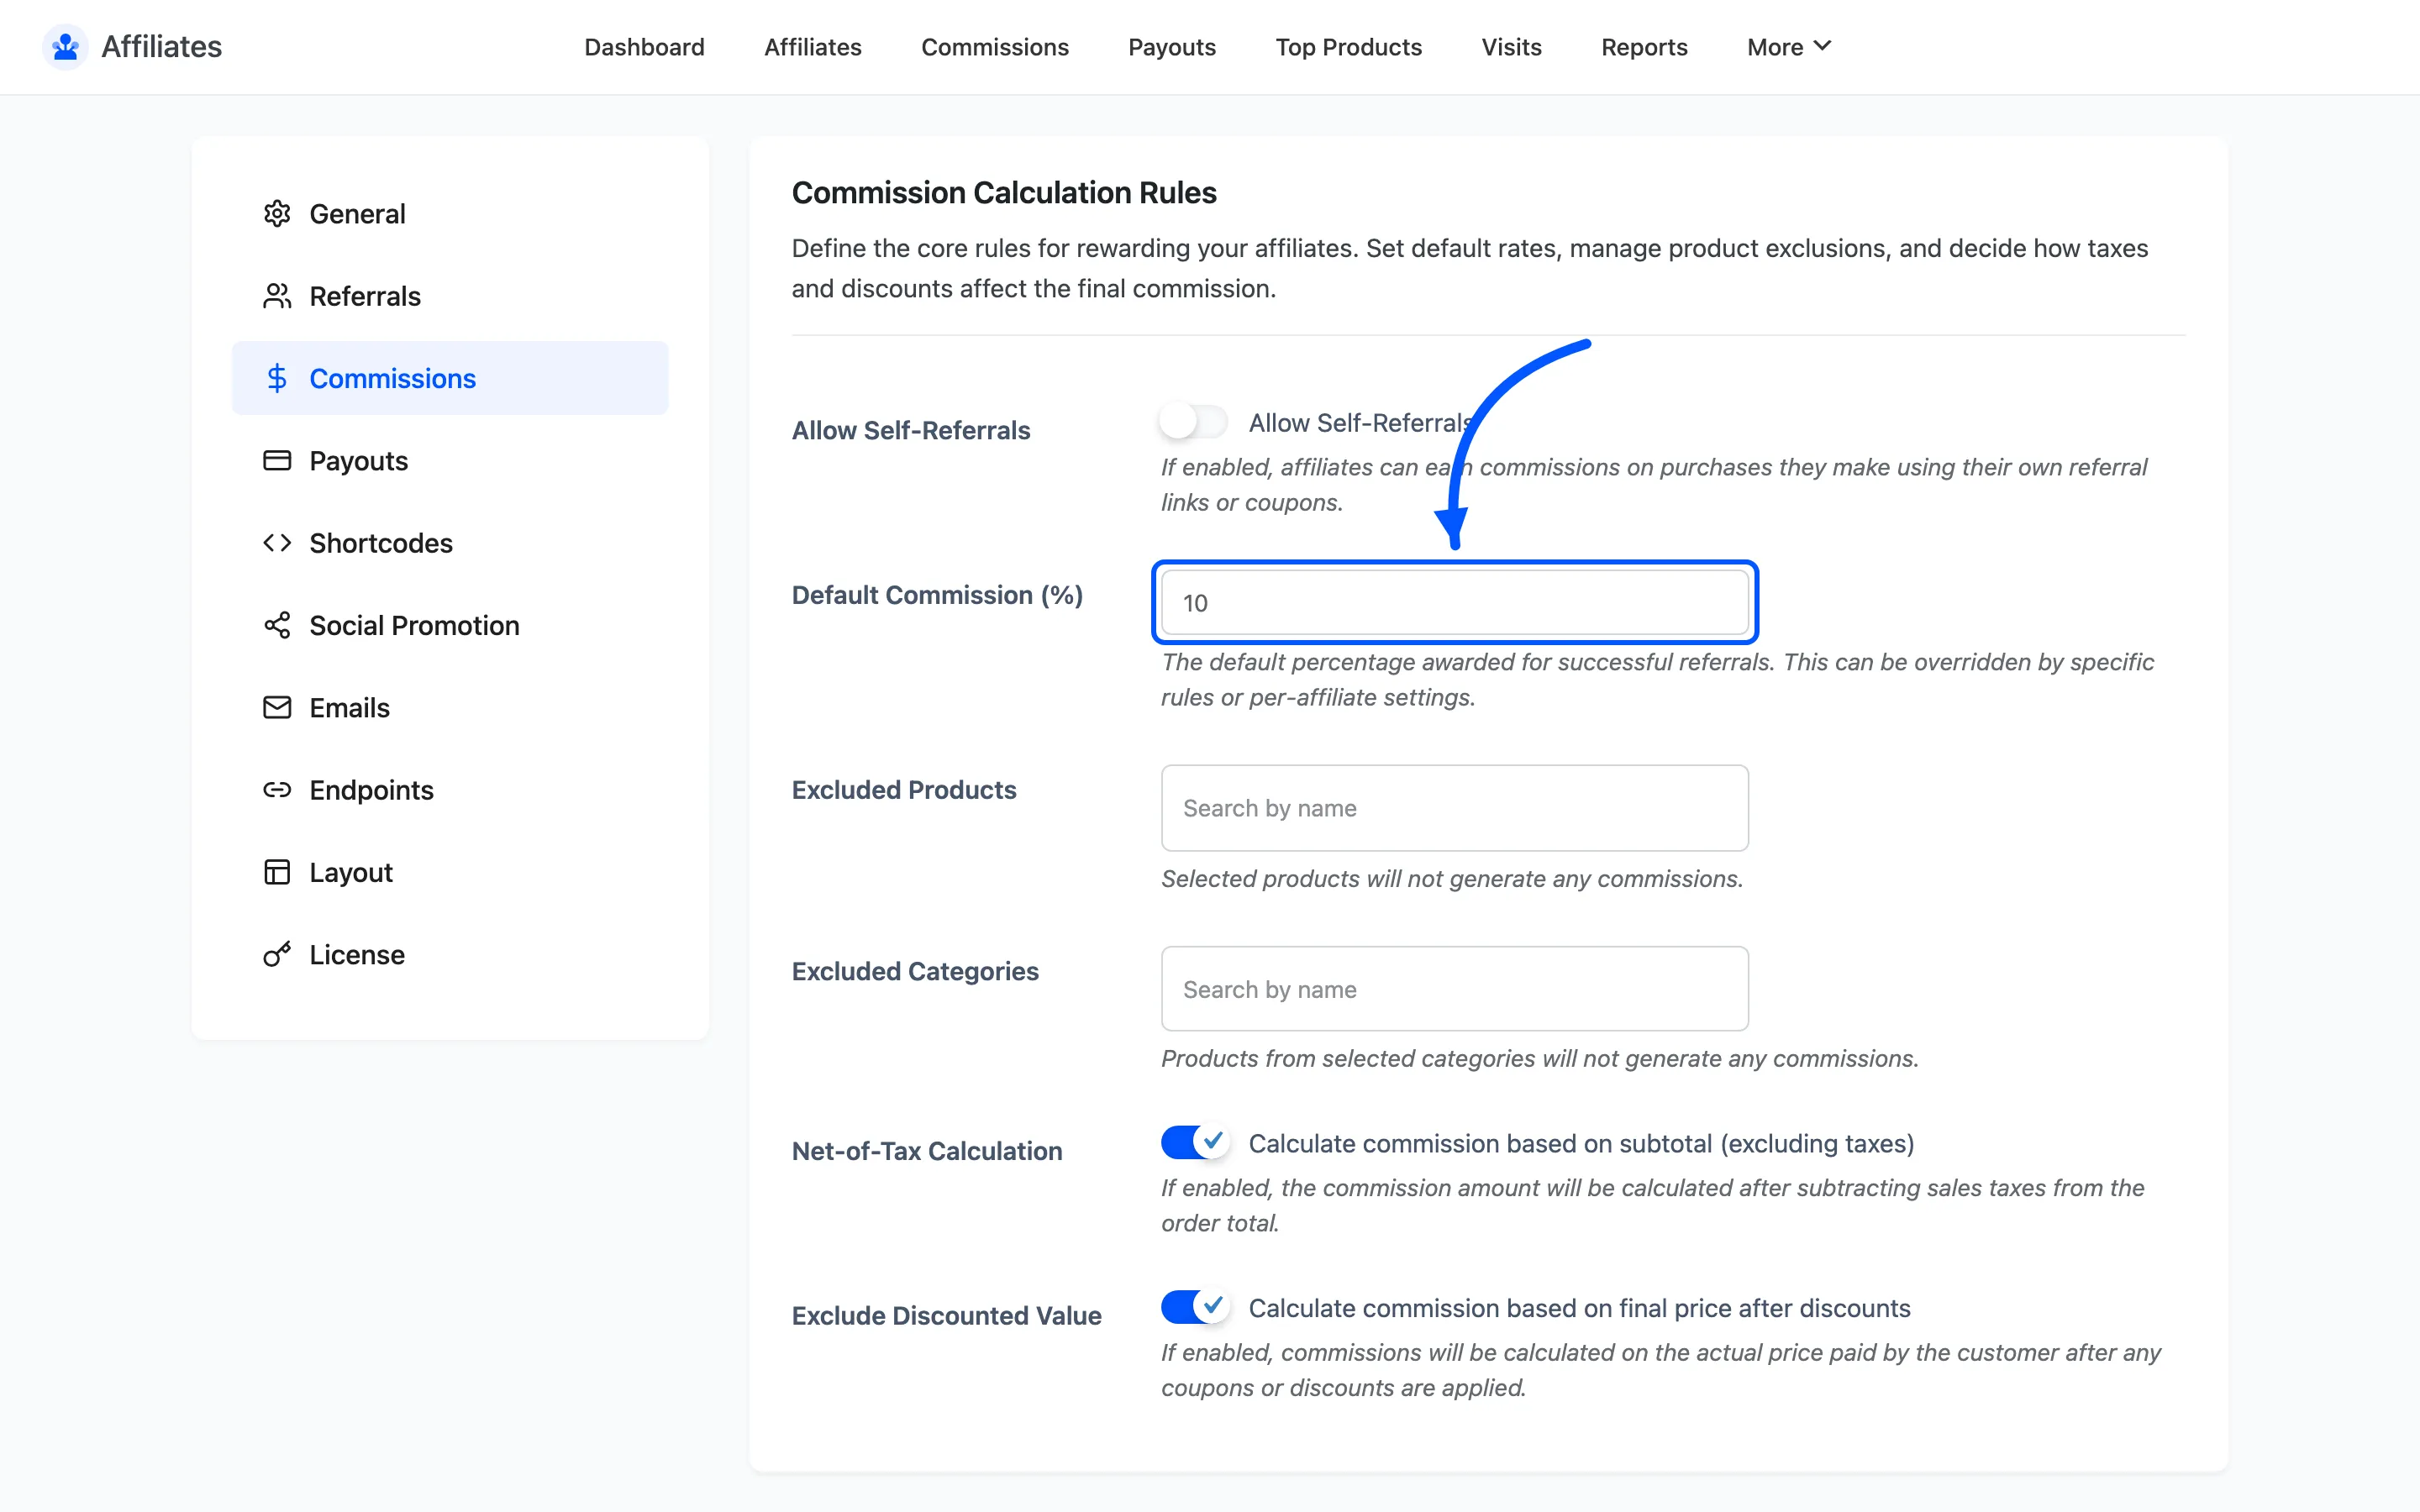
Two settings underneath decide what the percentage is taken from, and both are on by default.
- Net-of-Tax Calculation excludes sales tax, so you are not paying commission on money that goes to the tax authority.
- Exclude Discounted Value calculates on what the customer actually paid, after any coupon.
Leave both on unless you have a reason not to. Turning off Exclude Discounted Value means a half-price order still pays full-price commission.
Click Save Changes.
Step 5: Choose how you will pay
Section titled “Step 5: Choose how you will pay”Go to Configuration → Payouts and tick the Status box on each withdrawal method you support. Bank transfer and PayPal are both available in the free version.
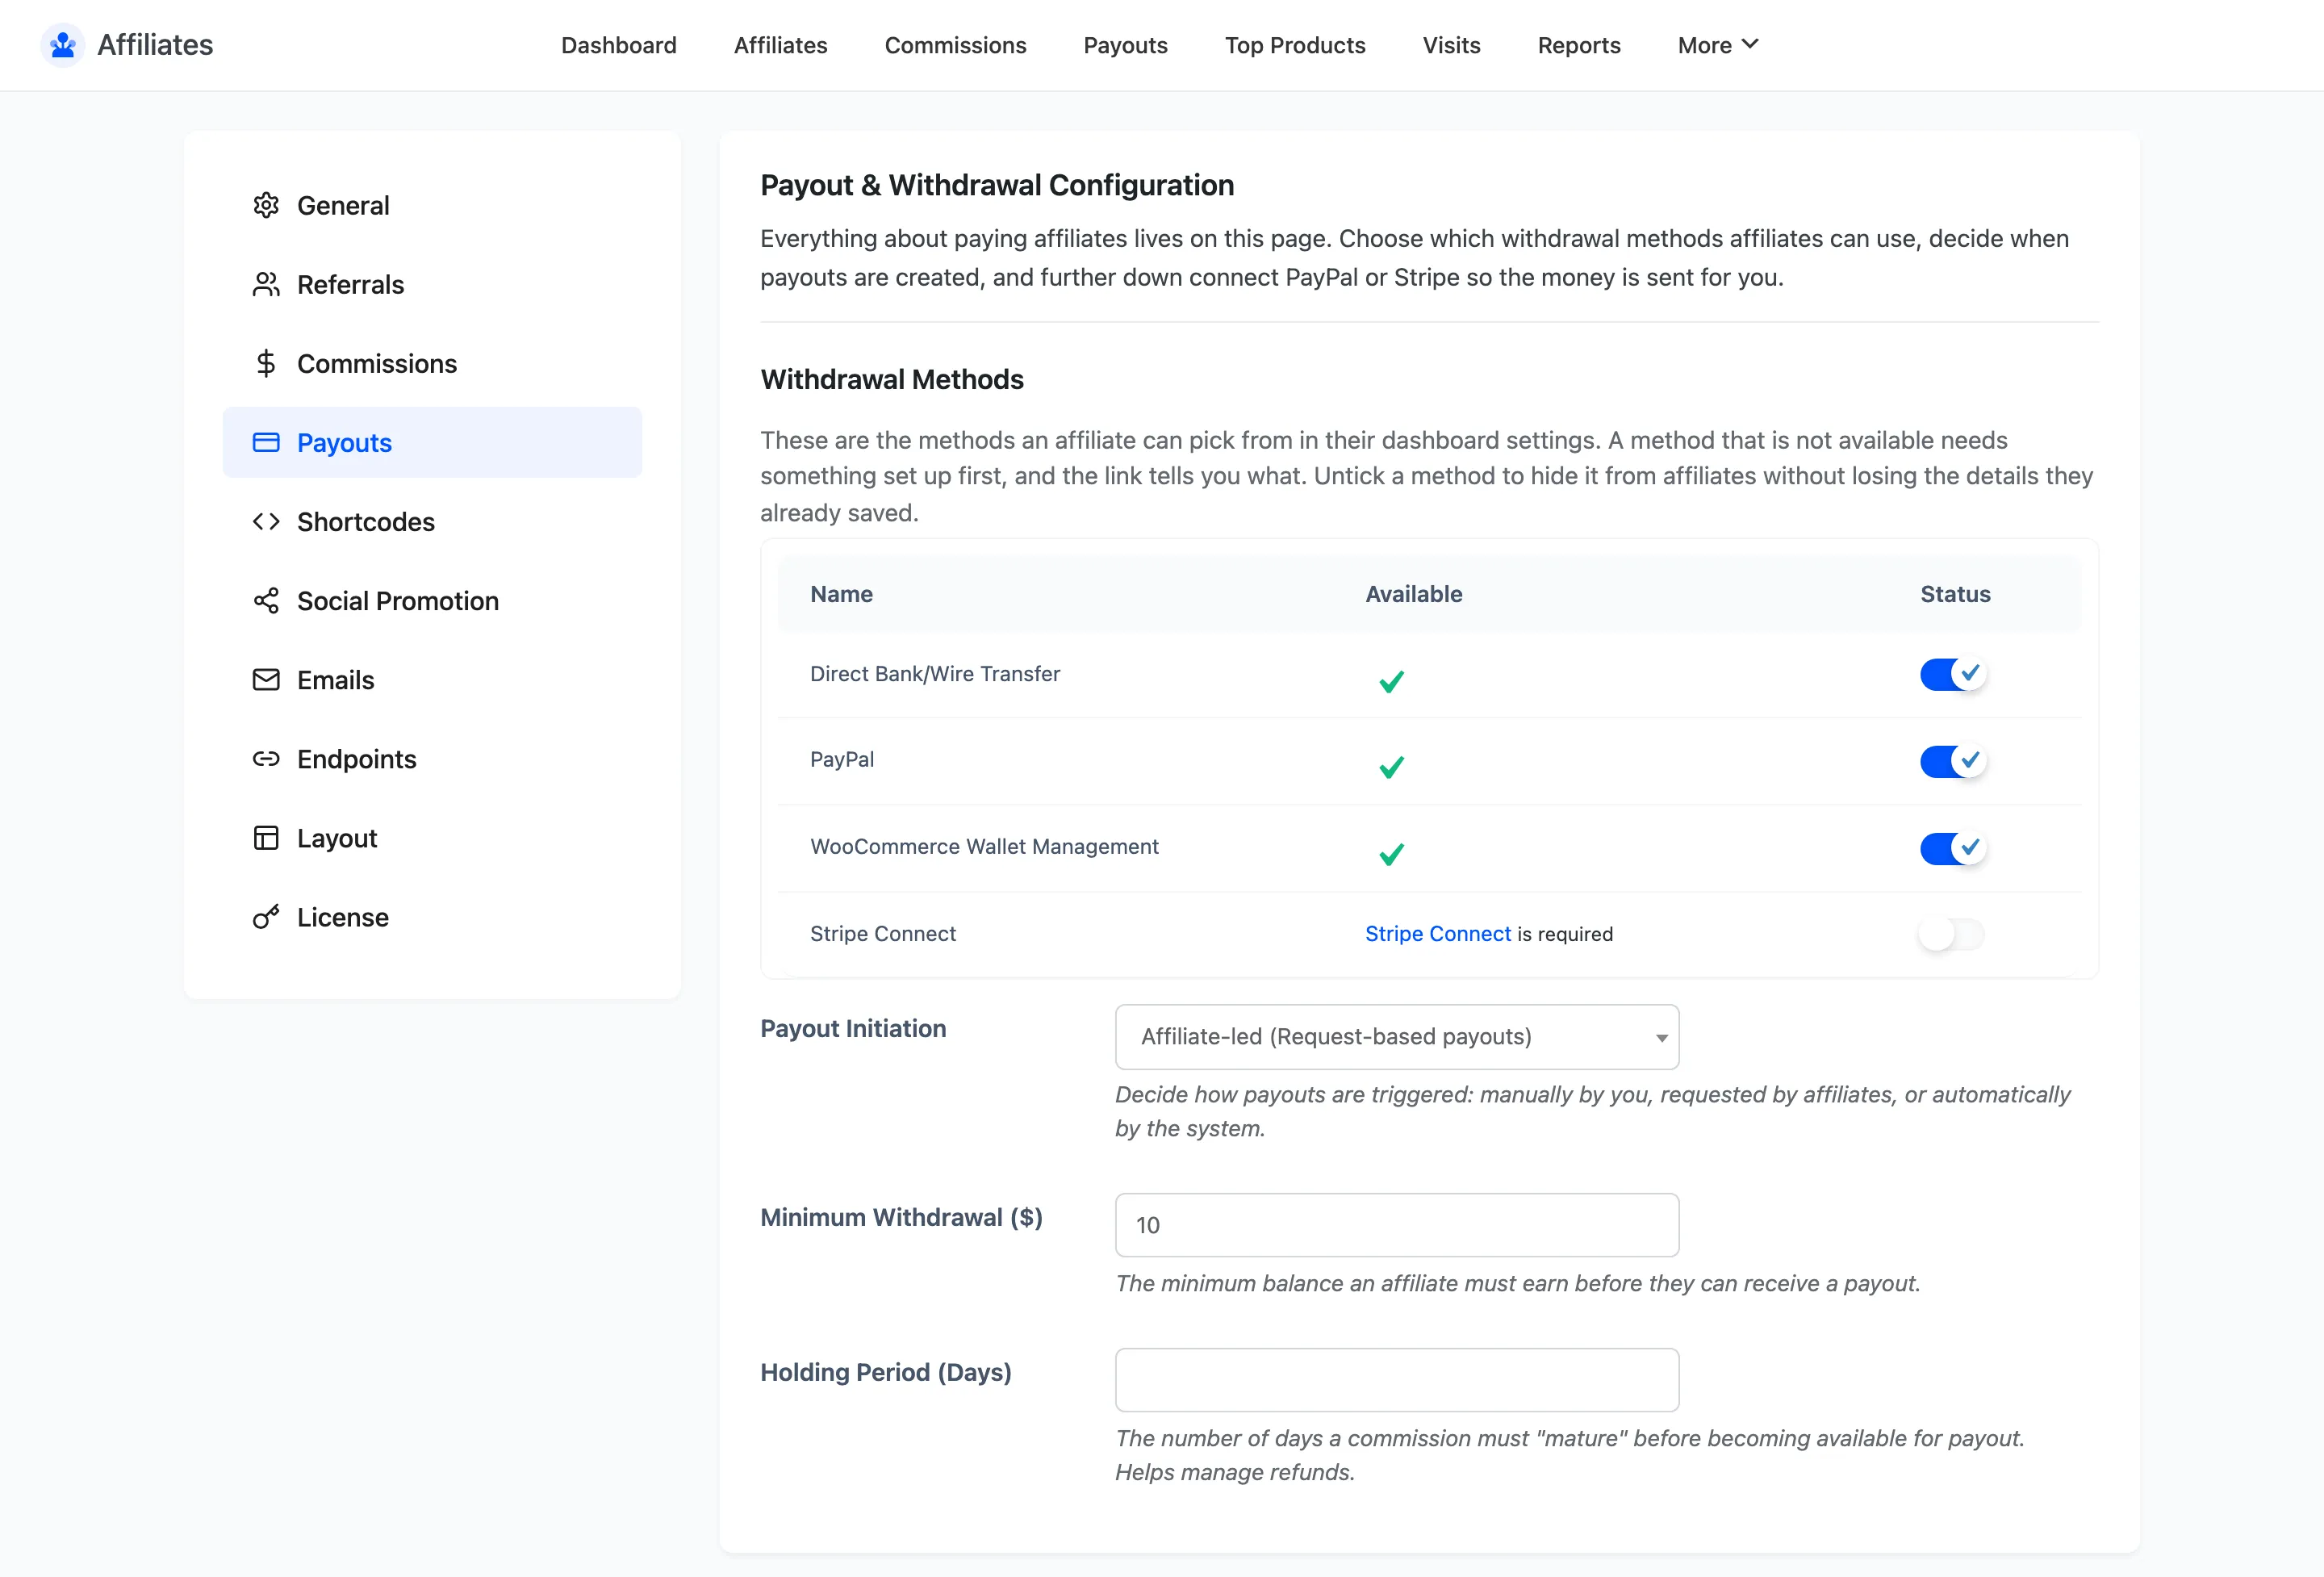
Affiliates fill in their own details for whichever method they choose, and a payout cannot be sent until they have.
Step 6: Publish the signup page
Section titled “Step 6: Publish the signup page”Affiliates need a page to apply on.
- Go to Pages → Add New.
- Title it something plain, like
Affiliate Program. - Paste
[ddwcaf_affiliate_registration_form_shortcode]into the content. - Above the shortcode, write a few lines covering what you pay, what you sell and what you expect. People decide whether to apply on that text, not on the form.
- Publish it, then link to it from your footer.
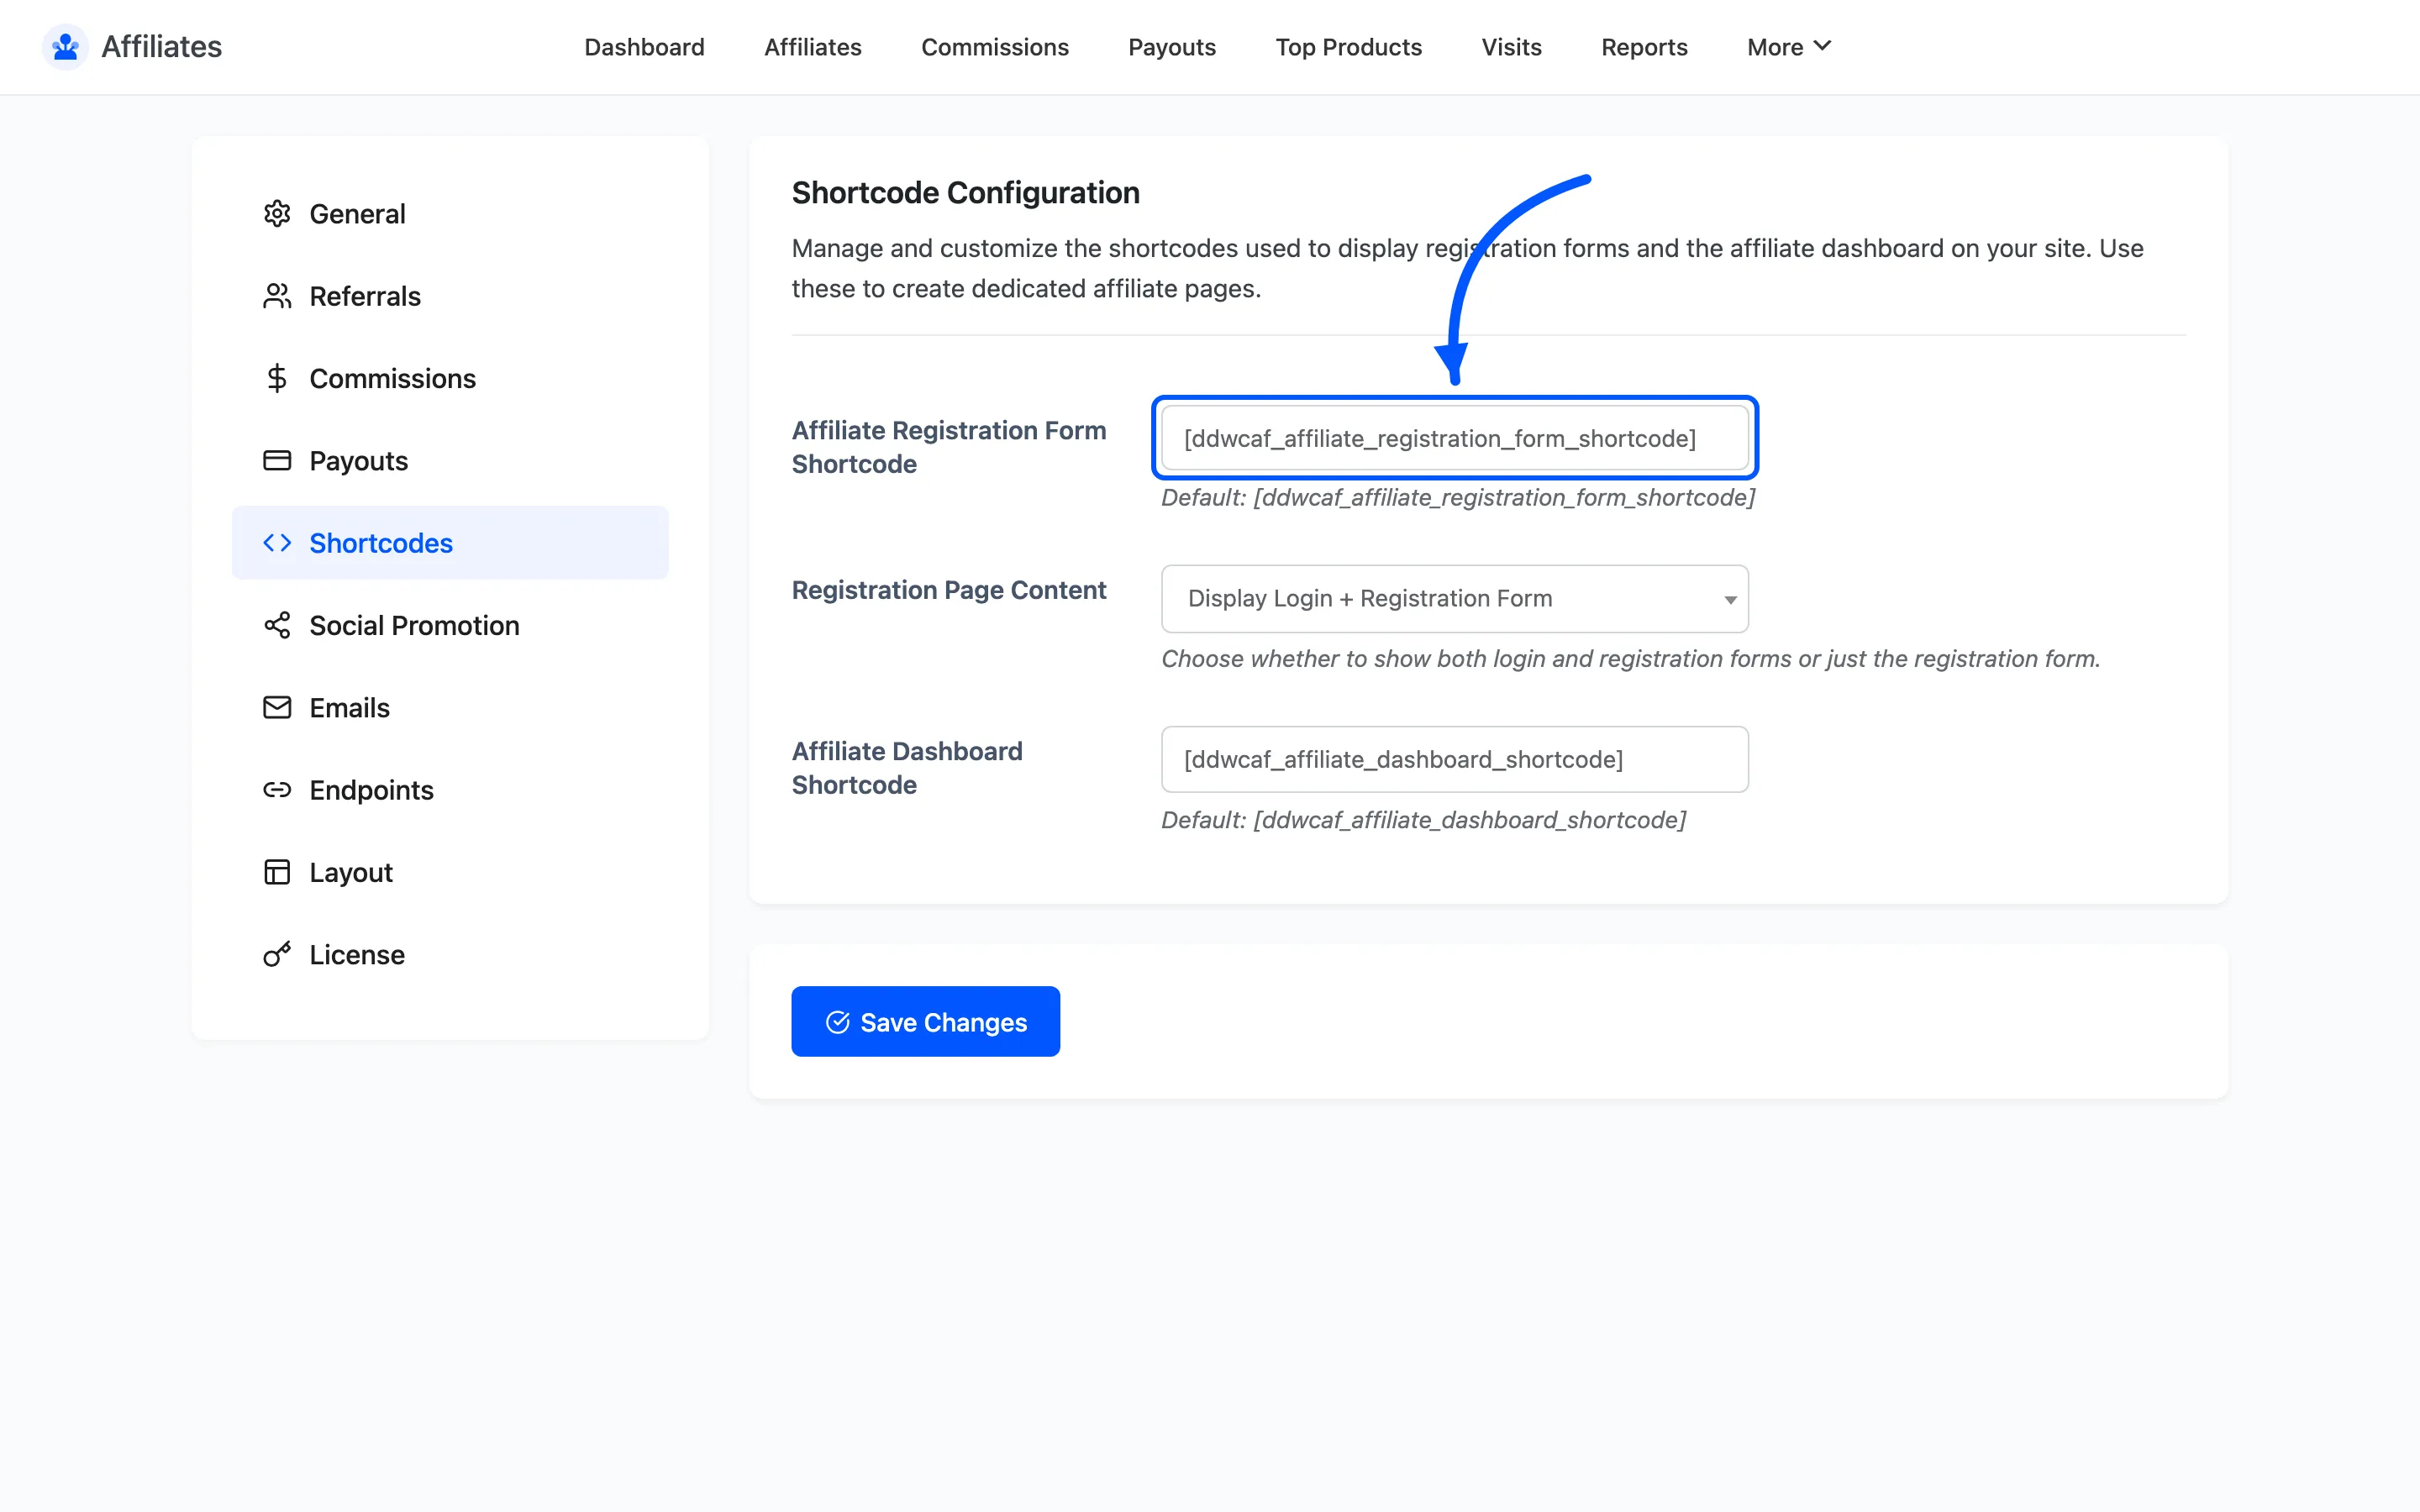
Before you publish, look at what the form asks. Go to Affiliates → Registration Fields and switch off anything you do not need. Seven fields is already at the edge of what people will fill in.
For the full build, see How to Create the Affiliate Signup Page.
Step 7: Approve your first affiliate
Section titled “Step 7: Approve your first affiliate”Signups land on Pending and cannot earn. Go to DevDiggers Plugins → Affiliates → Affiliates, tick the new row and choose Approve Affiliate from the bulk actions.
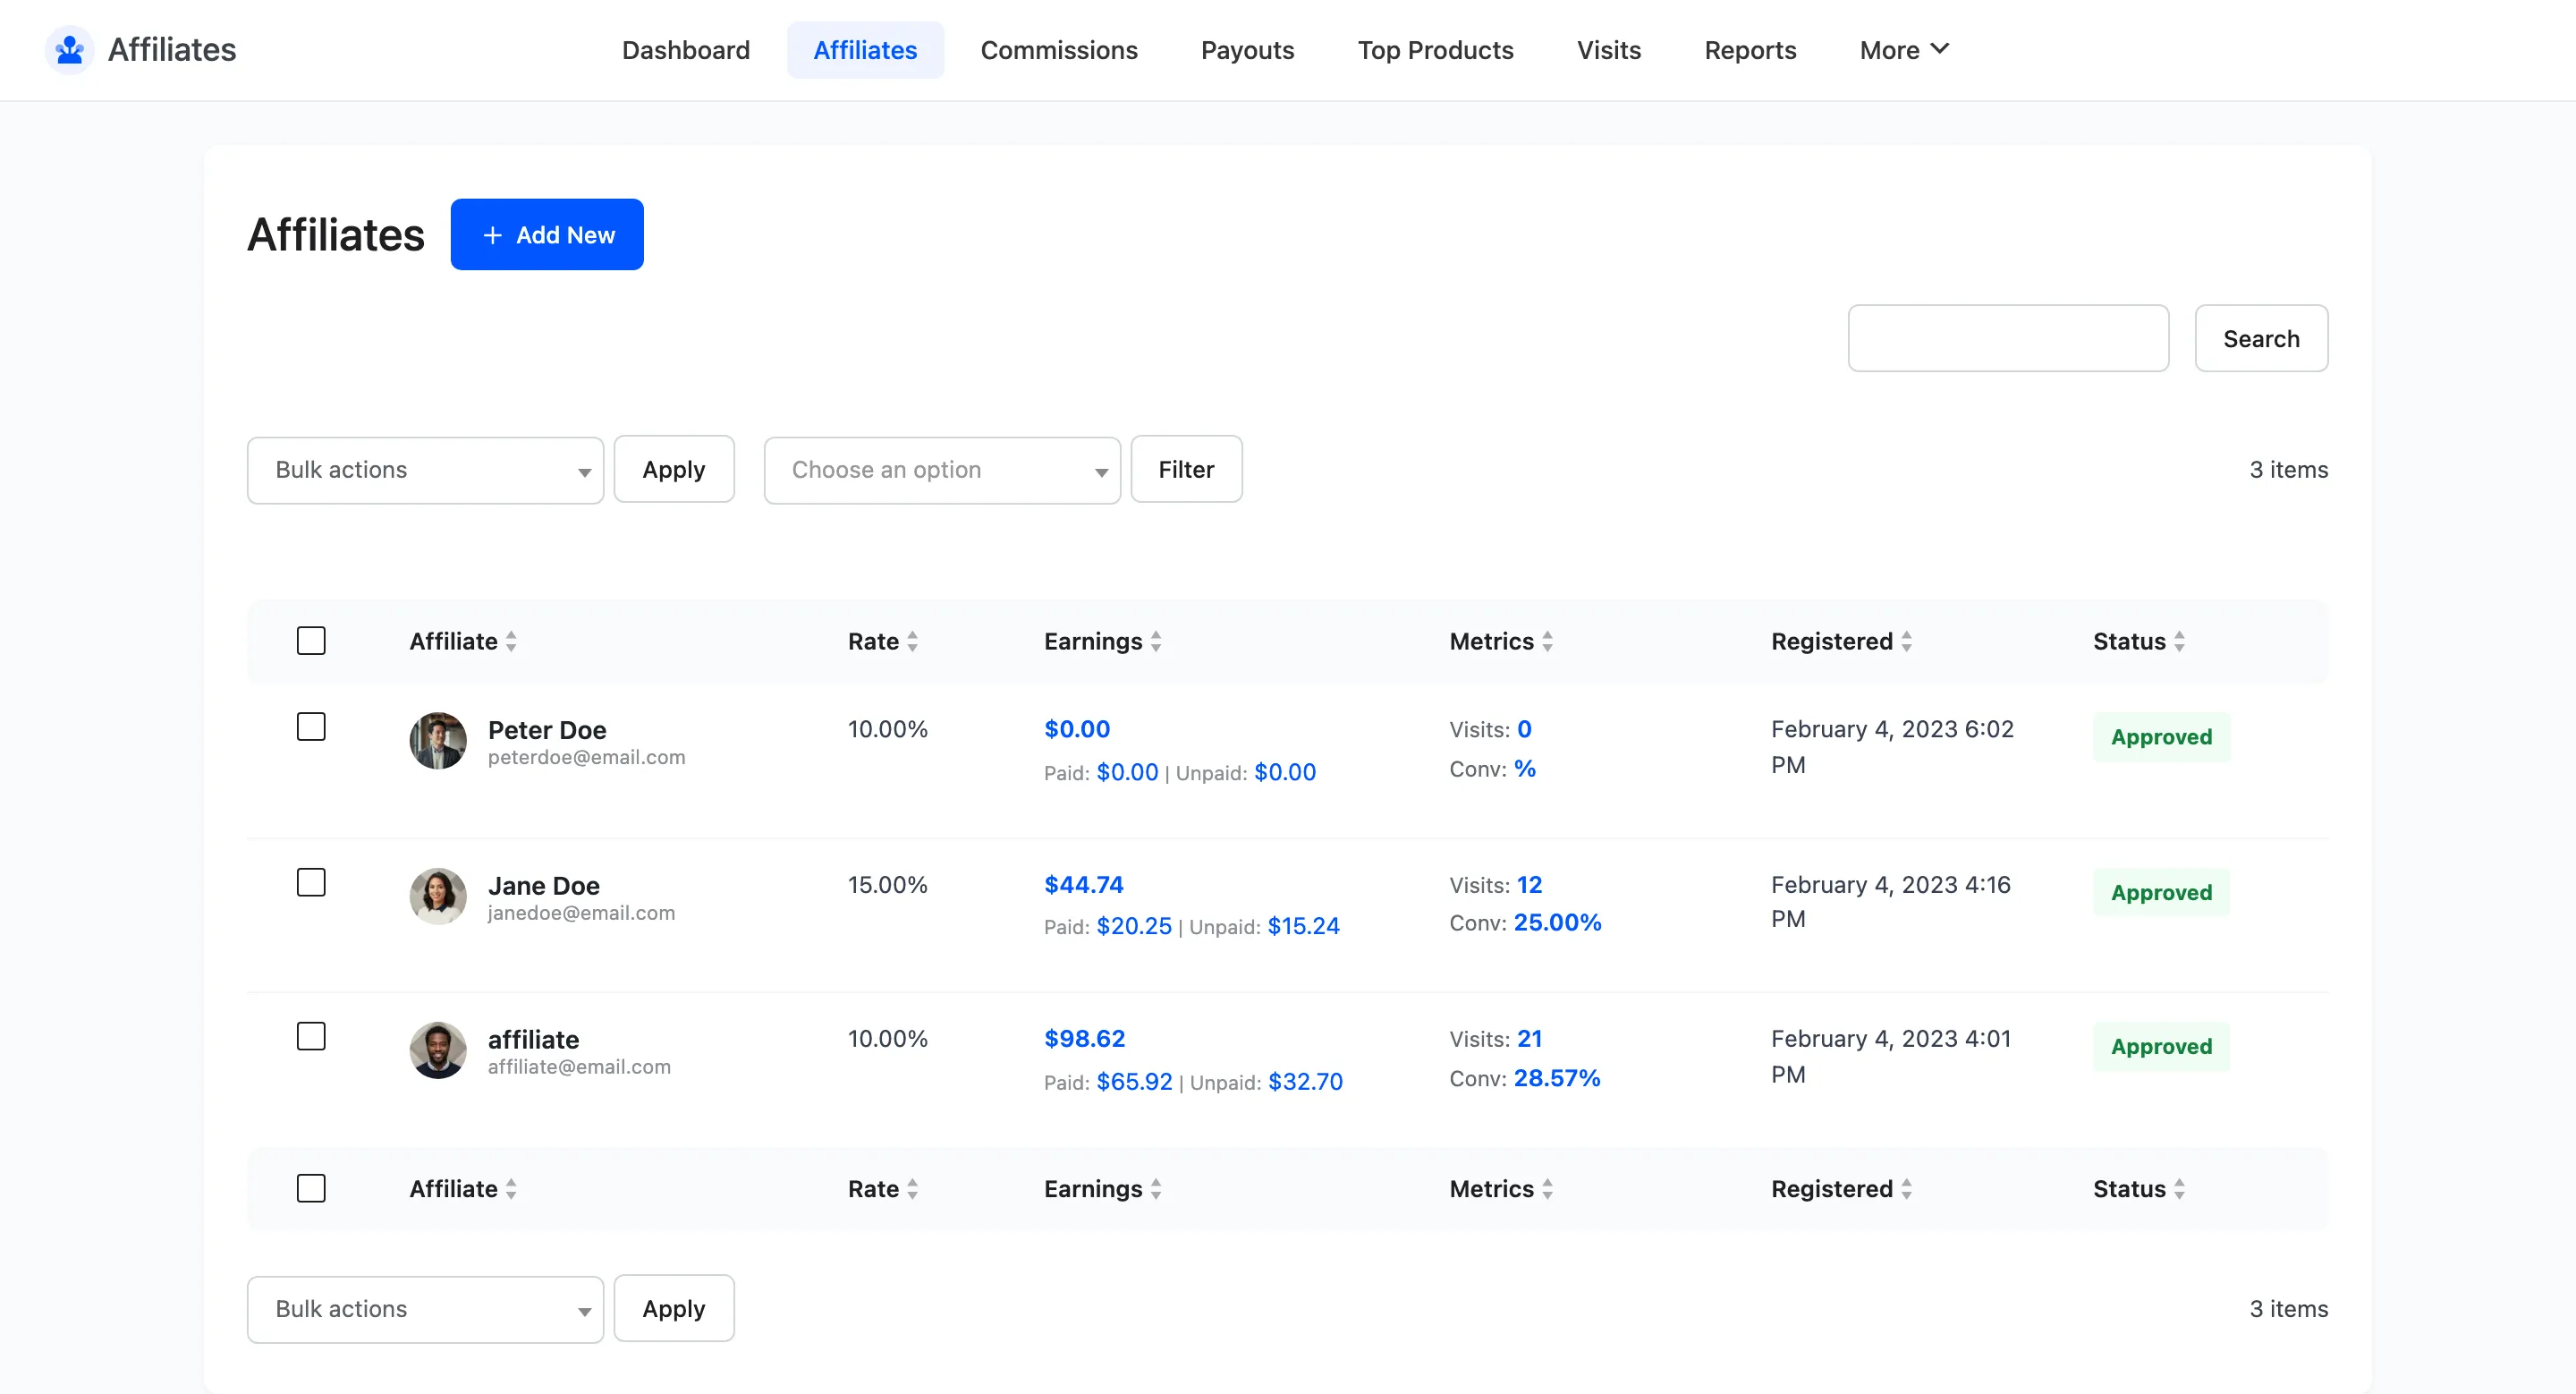
Read their How will you promote our site? answer first. Open the affiliate to see it, along with whatever else your form asked.
Step 8: Test the whole chain
Section titled “Step 8: Test the whole chain”This is the step people skip. Do it once and you will know the program works rather than hoping.
- Get the affiliate’s link. Open their detail screen, or log in as them and copy it from Link Generator.
- Open a private browsing window. Not a normal tab: an administrator’s click is ignored on purpose, so testing from your admin session records nothing at all.
- Visit the referral link.
- Check Affiliates → Visits. A new row should be there with the referral URL.
- Place a test order in that same private window.
- Check Affiliates → Commissions. There should be one row per line item in the order, on Pending, once the order reaches Processing or Completed.
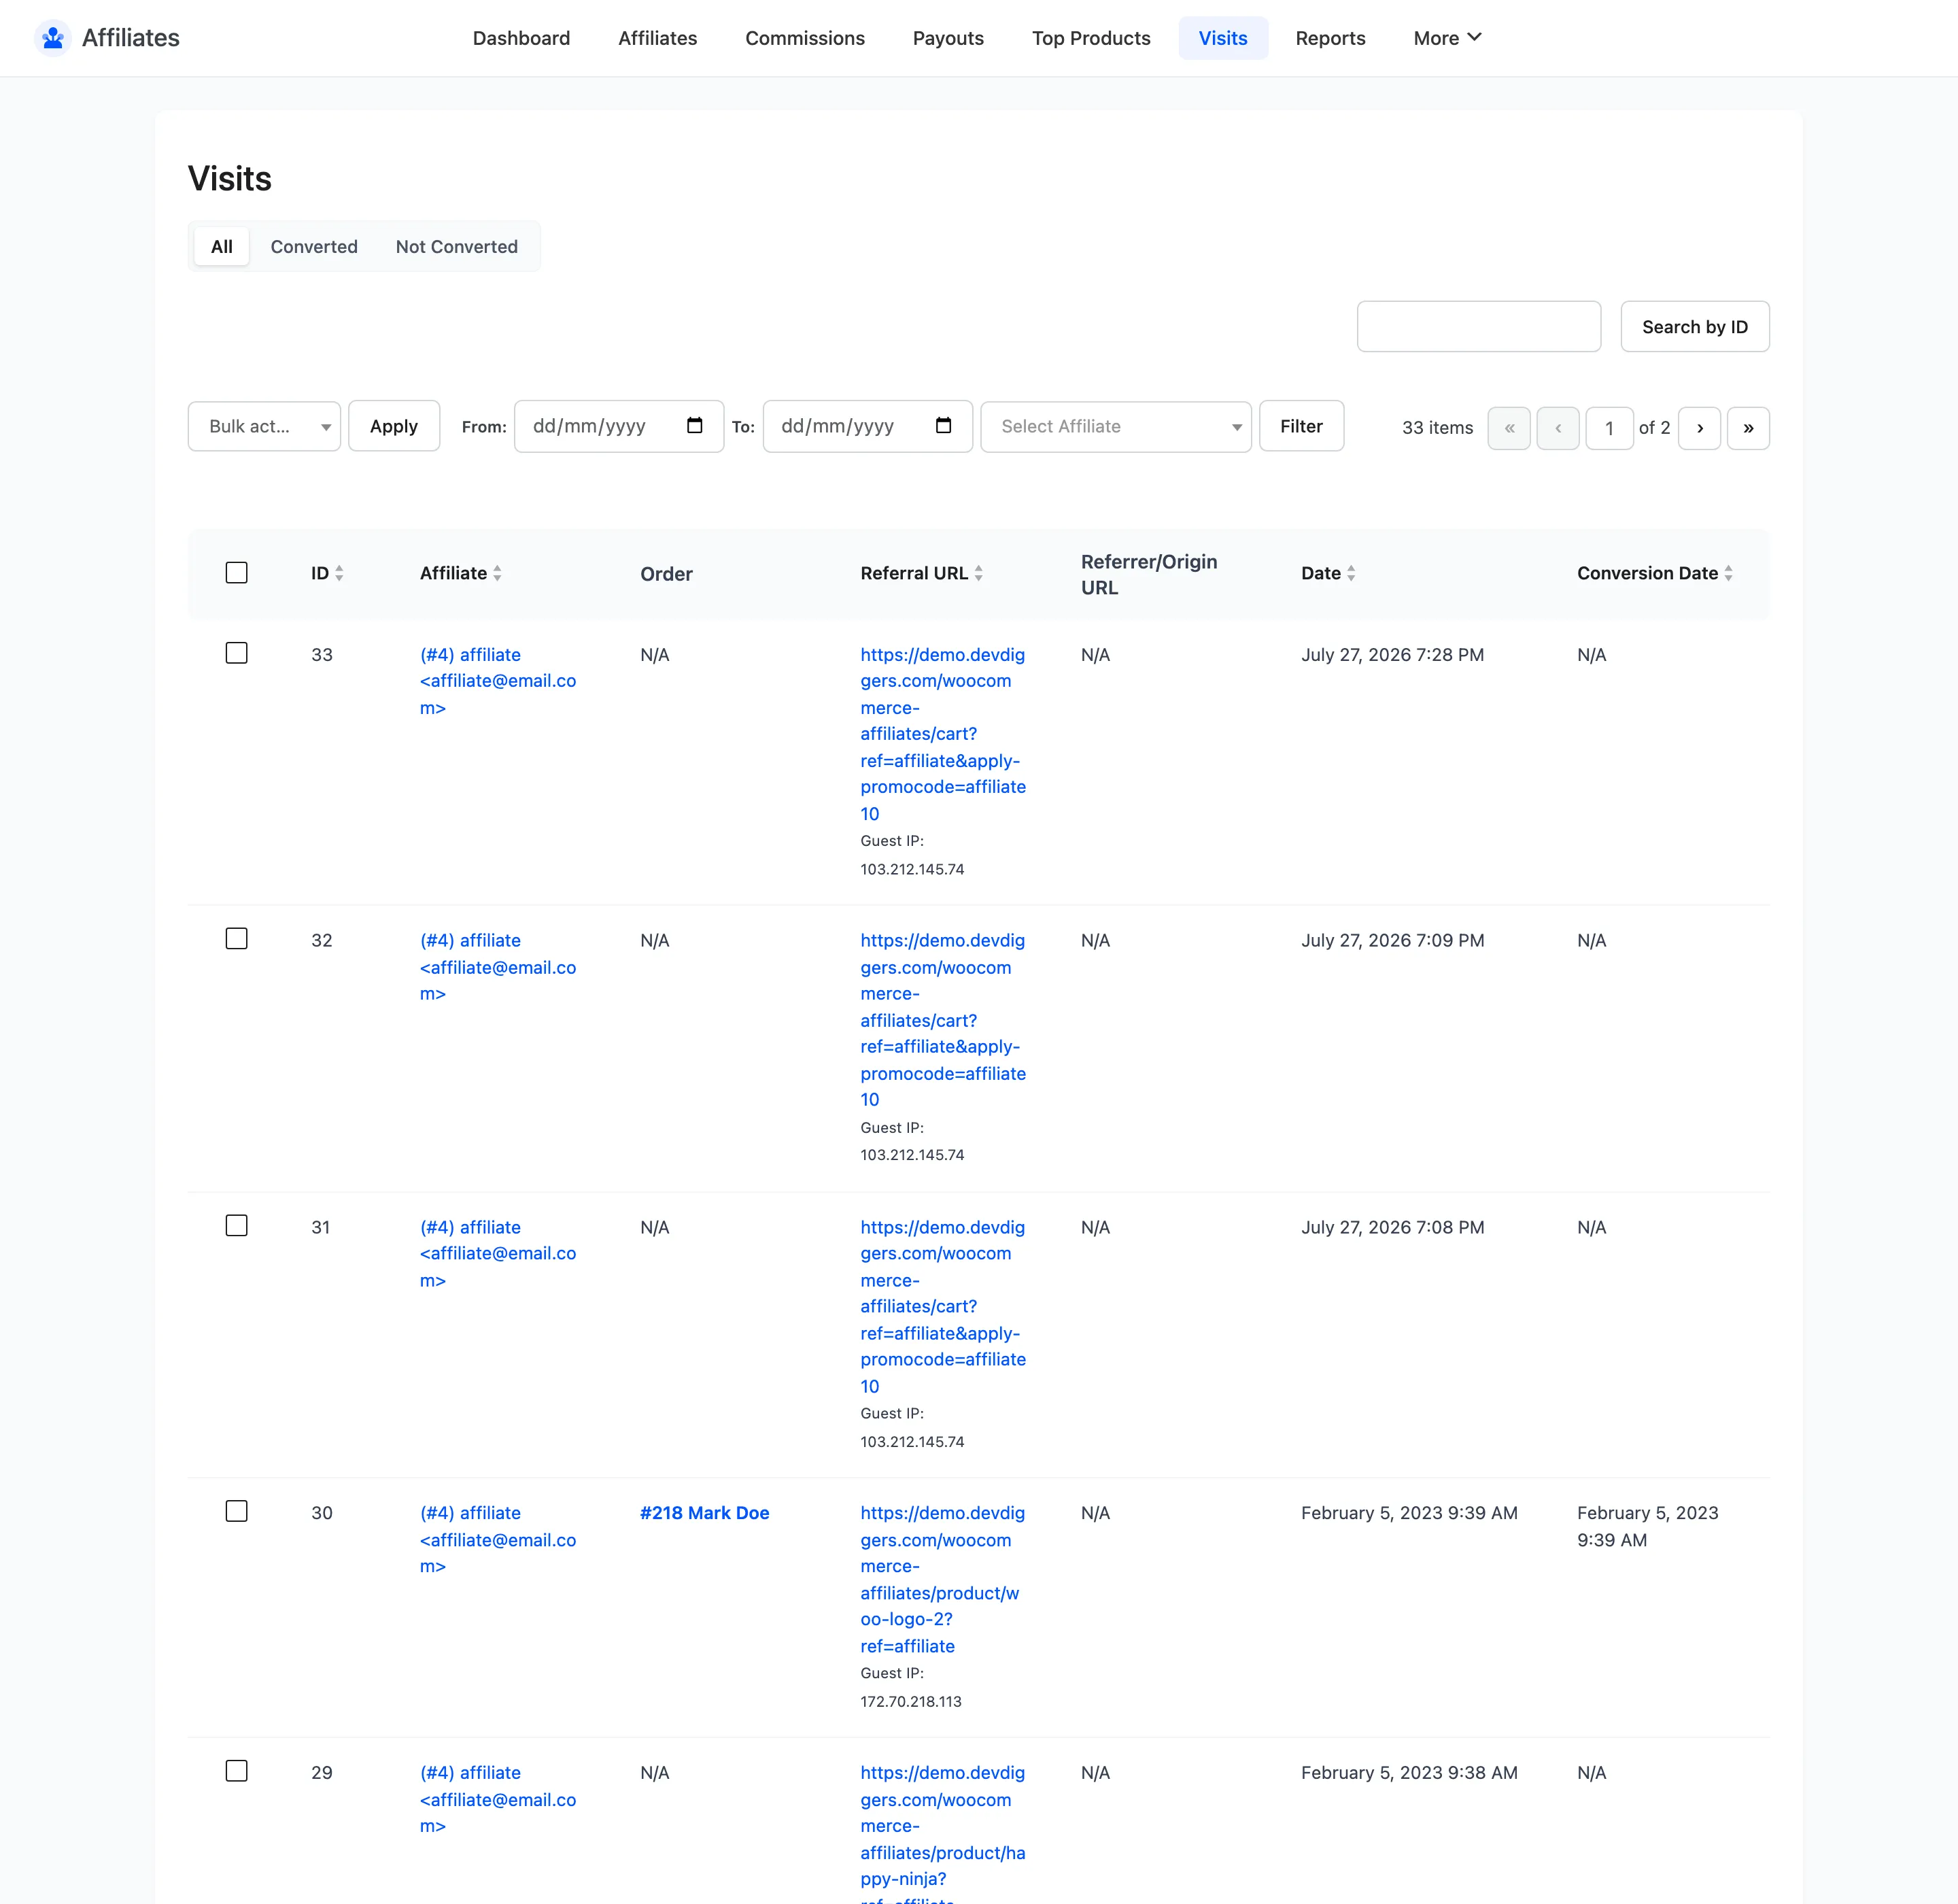
If the visit appeared but no commission did, the order has probably not reached a qualifying status yet. An order sitting on Pending payment or On hold creates commissions on Not Confirmed.
Step 9: Watch the first weeks
Section titled “Step 9: Watch the first weeks”Two screens tell you whether it is working.
- Dashboard for the totals. Widen the date selector past This Month or a new program looks empty.
- Visits, filtered to Not Converted, for traffic that is arriving and not buying. That is a landing page problem, not an affiliate problem.
Where to go next
Section titled “Where to go next”- How to Set Commission Rates to reward your best partners.
- How to Pay Your Affiliates when the first commissions come due.