

Registration Fields
The signup form is built from a list of fields you control. This screen is that list.
Open the registration fields list
Section titled “Open the registration fields list”Go to DevDiggers Plugins → Affiliates → Registration Fields.
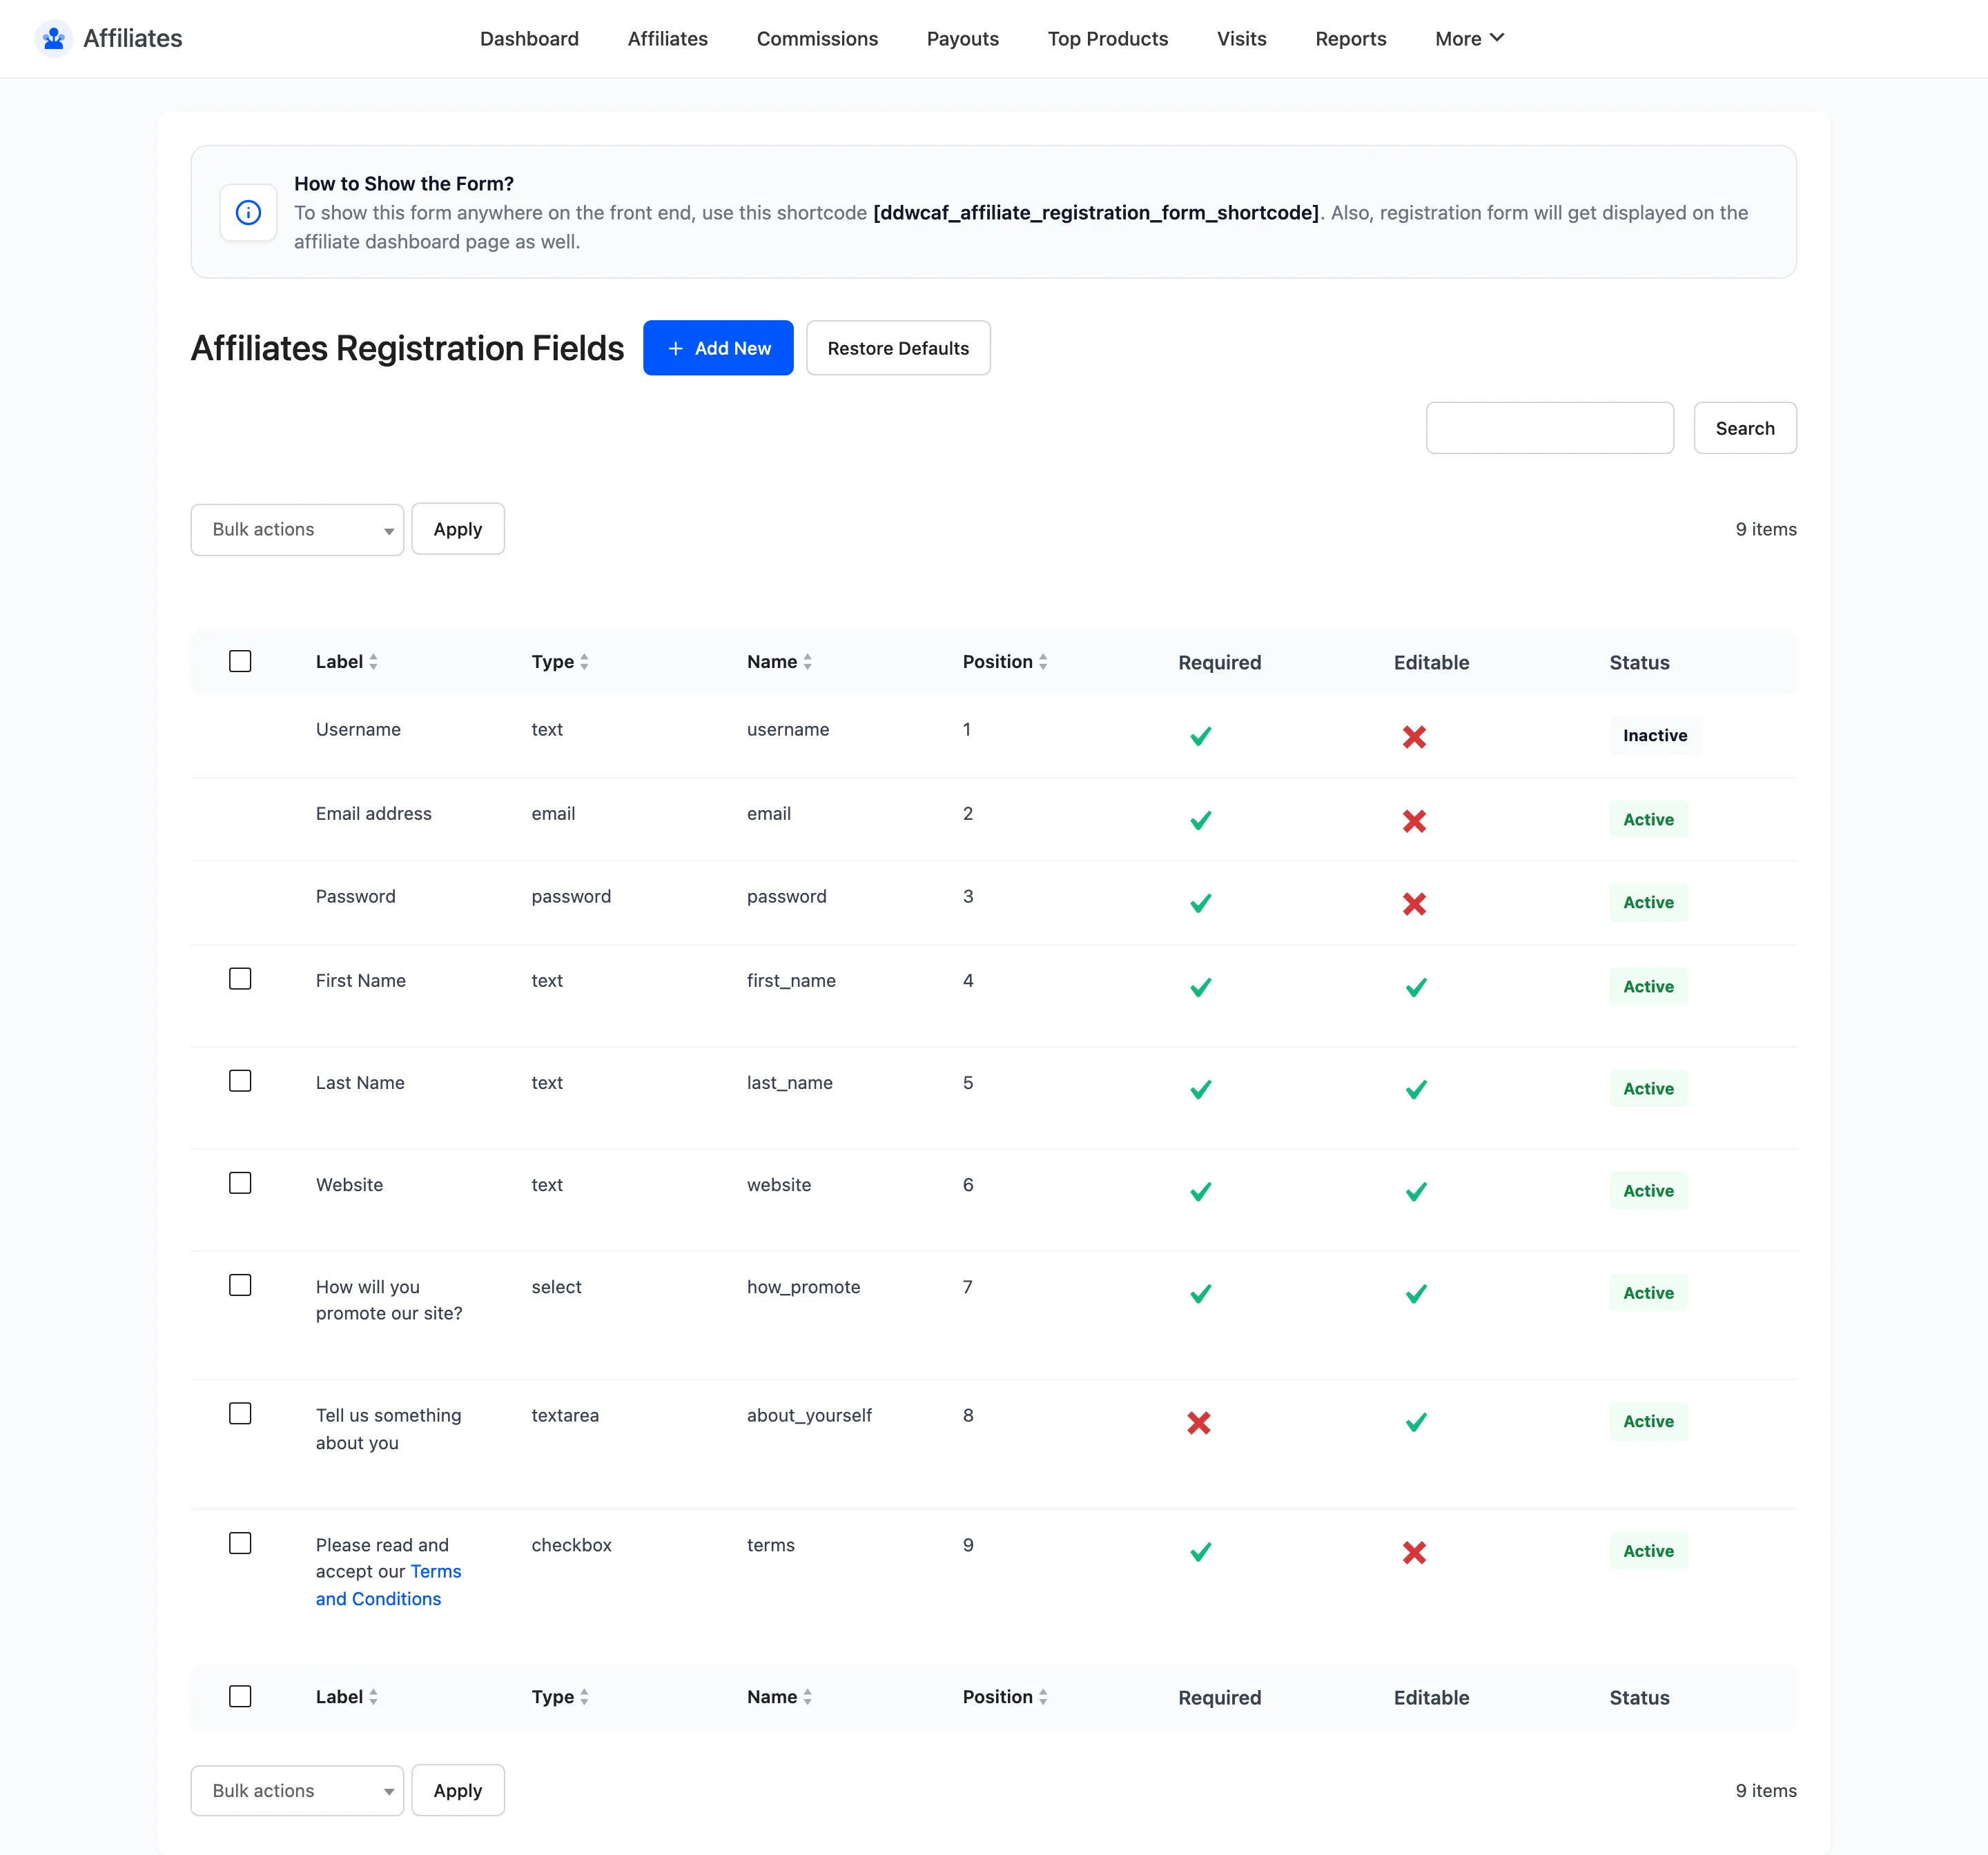
A notice at the top of the screen repeats the registration shortcode, so you can copy it without opening the Shortcodes tab.
The seven default fields
Section titled “The seven default fields”| Label | Type | Required |
|---|---|---|
| Username | Text | Yes |
| Email address | Yes | |
| Password | Password | Yes |
| First Name | Text | Yes |
| Last Name | Text | Yes |
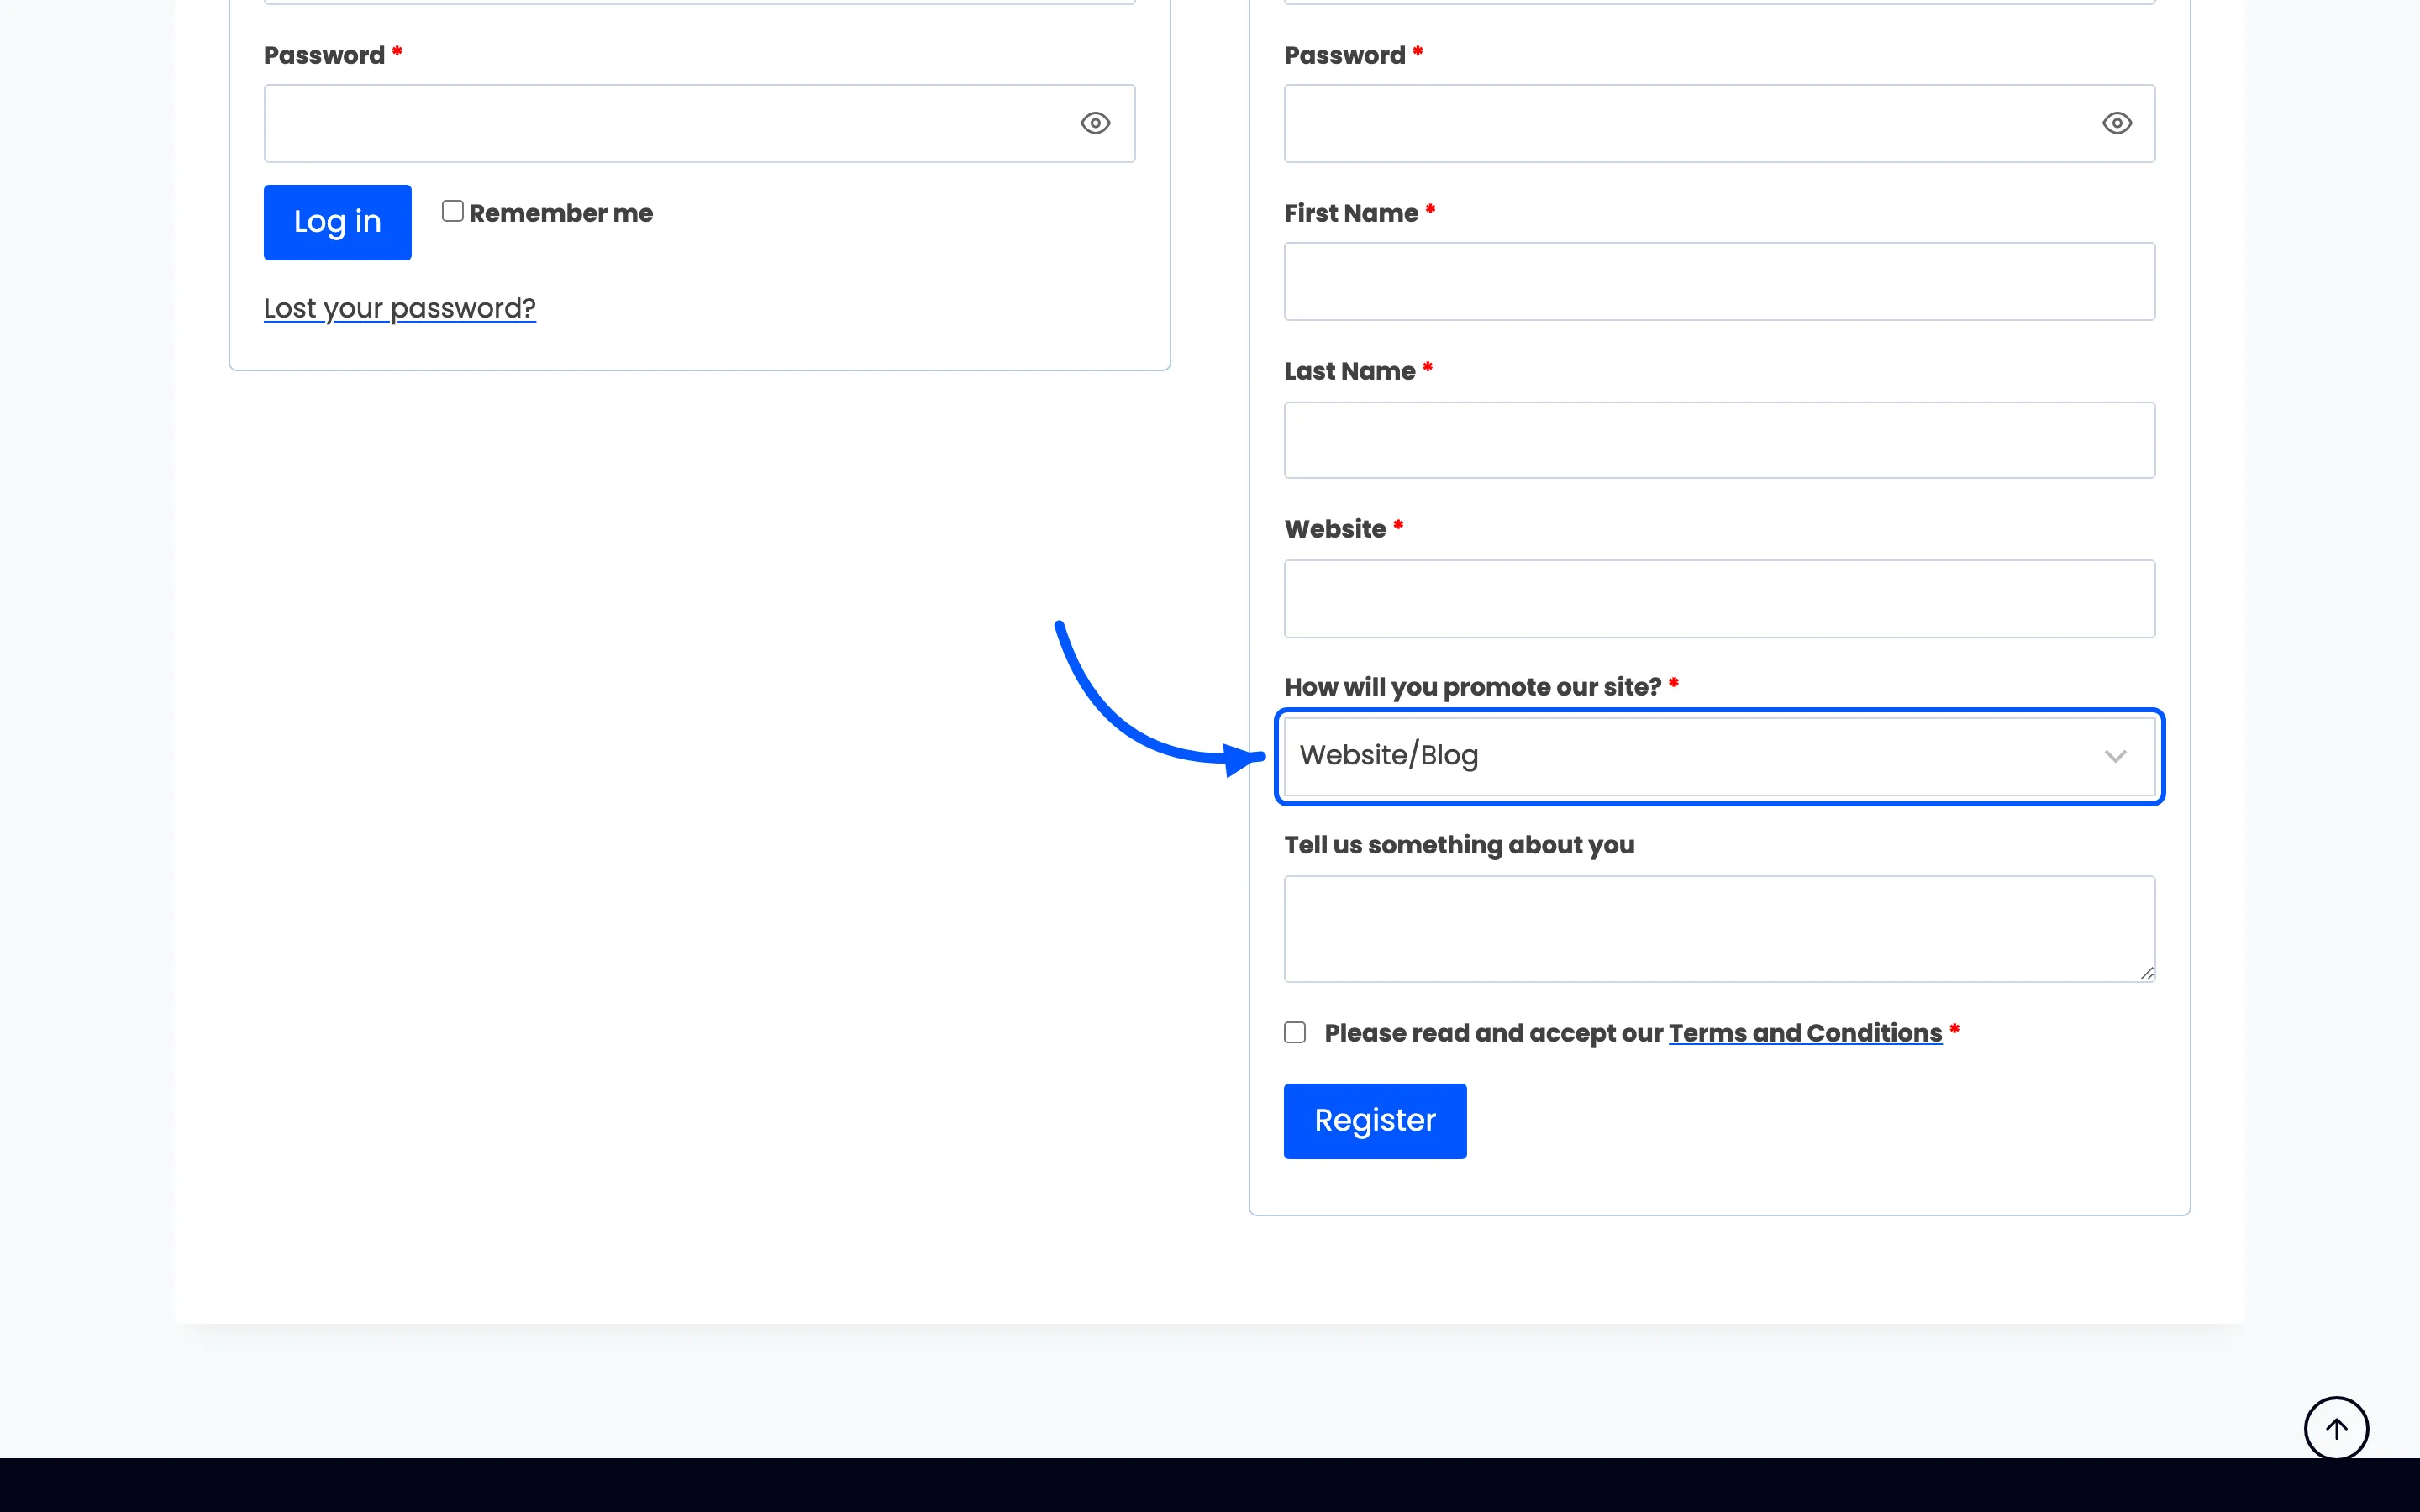
| How will you promote our site? | Select | Yes |
| Please read and accept our Terms and Conditions | Checkbox | Yes |
- Username and Password are special. Their status follows your WooCommerce account settings. If WooCommerce generates usernames or passwords automatically, those two fields are inactive here and do not render on the form. Change the WooCommerce setting and they come back on their own.
- How will you promote our site? ships with five options: Website/Blog, Newsletter/Email Marketing, Social Media, YouTube and Others. It is the single most useful field on the form, because the answer is what you read before approving someone.
The columns
Section titled “The columns”| Column | What it shows |
|---|---|
| Label | The text above the field on the form |
| Type | Text, email, password, select, checkbox, textarea, radio, number, date, country or state |
| Name | The internal key the value is saved under |
| Position | Sort order on the form, low to high |
| Required | Whether signup fails without it |
| Editable | Whether the affiliate can change it later from their dashboard |
| Status | Active fields render, inactive fields do not |
What you can do in the free version
Section titled “What you can do in the free version”- Change to Active and Change to Inactive as bulk actions, to switch a field on or off
- Restore Defaults, which resets the whole list back to the seven fields above
That covers turning off a field you do not want. It does not cover adding one.
Add or edit a field
Section titled “Add or edit a field”Click Add New, or the Edit row action on an existing field.
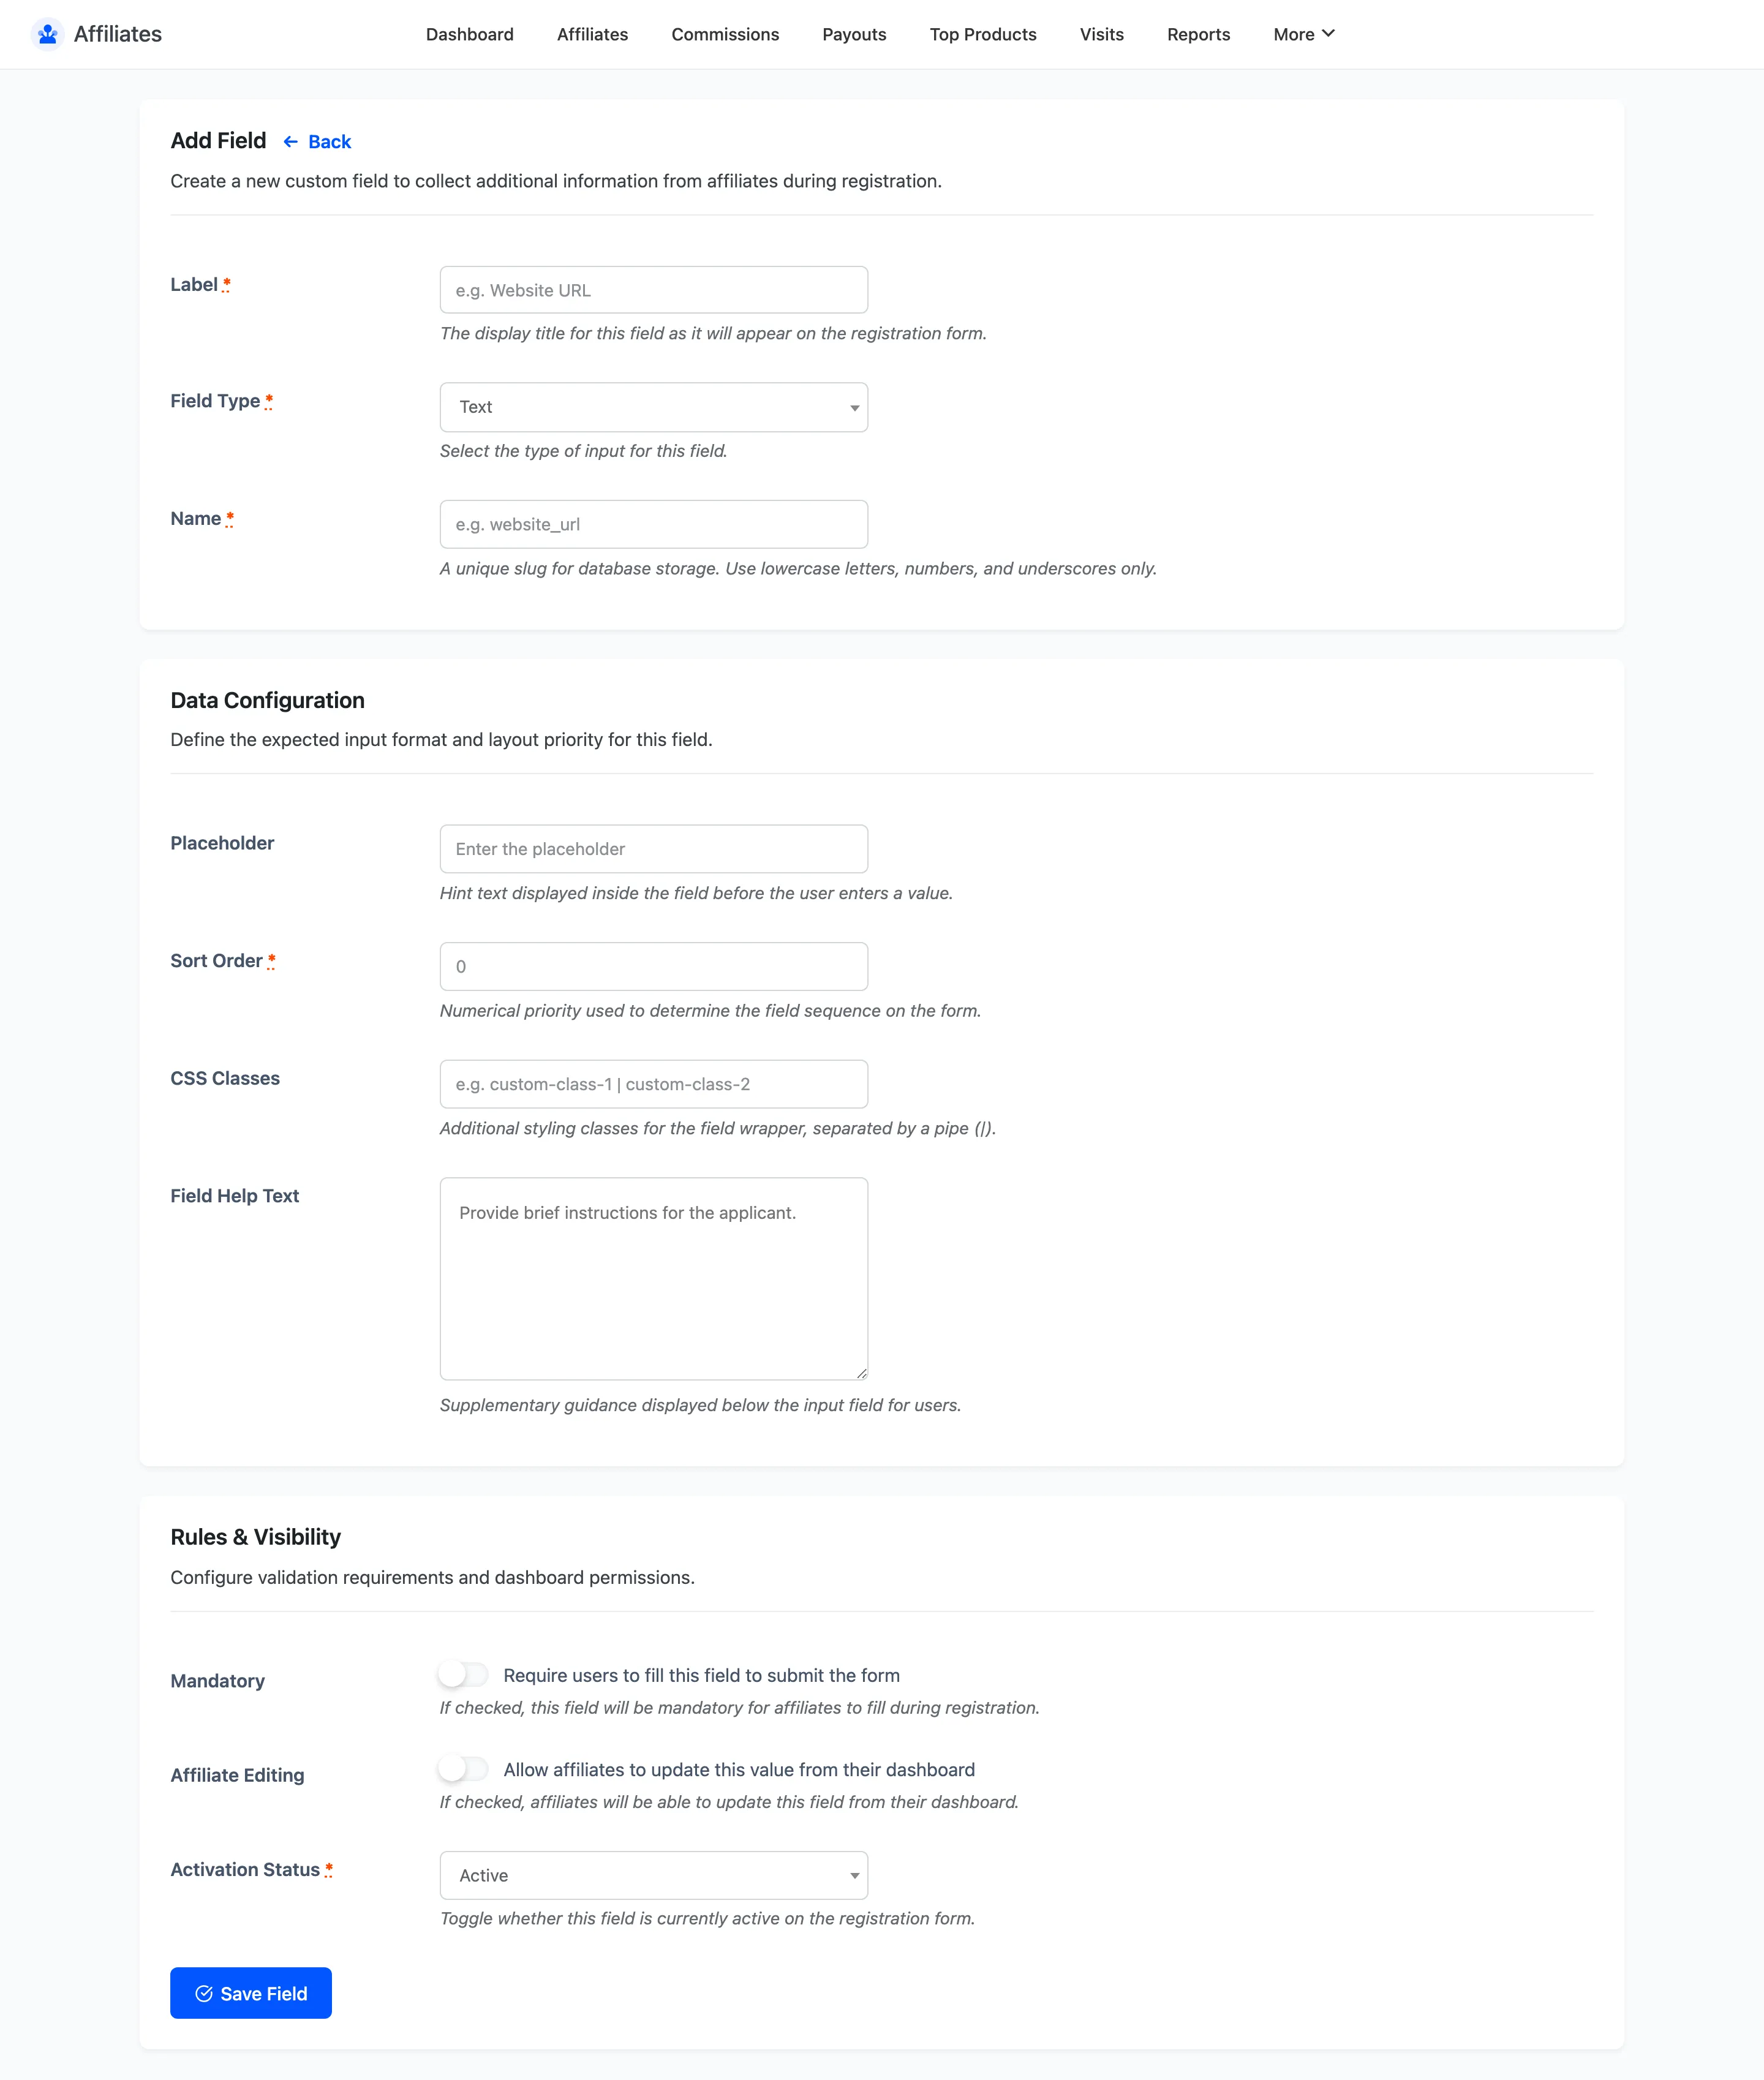
The form has two sections.
Data Configuration
- Label is what the affiliate sees.
- Field Type picks from eleven types: text, email, password, select, checkbox, textarea, radio button, number, date, country and state.
- Name is the key the answer is saved under. Use lowercase and underscores.
- Placeholder, Options, Sort Order, CSS Classes and Description fill in the rest. Options is only used by select and radio fields, separated with a pipe character.
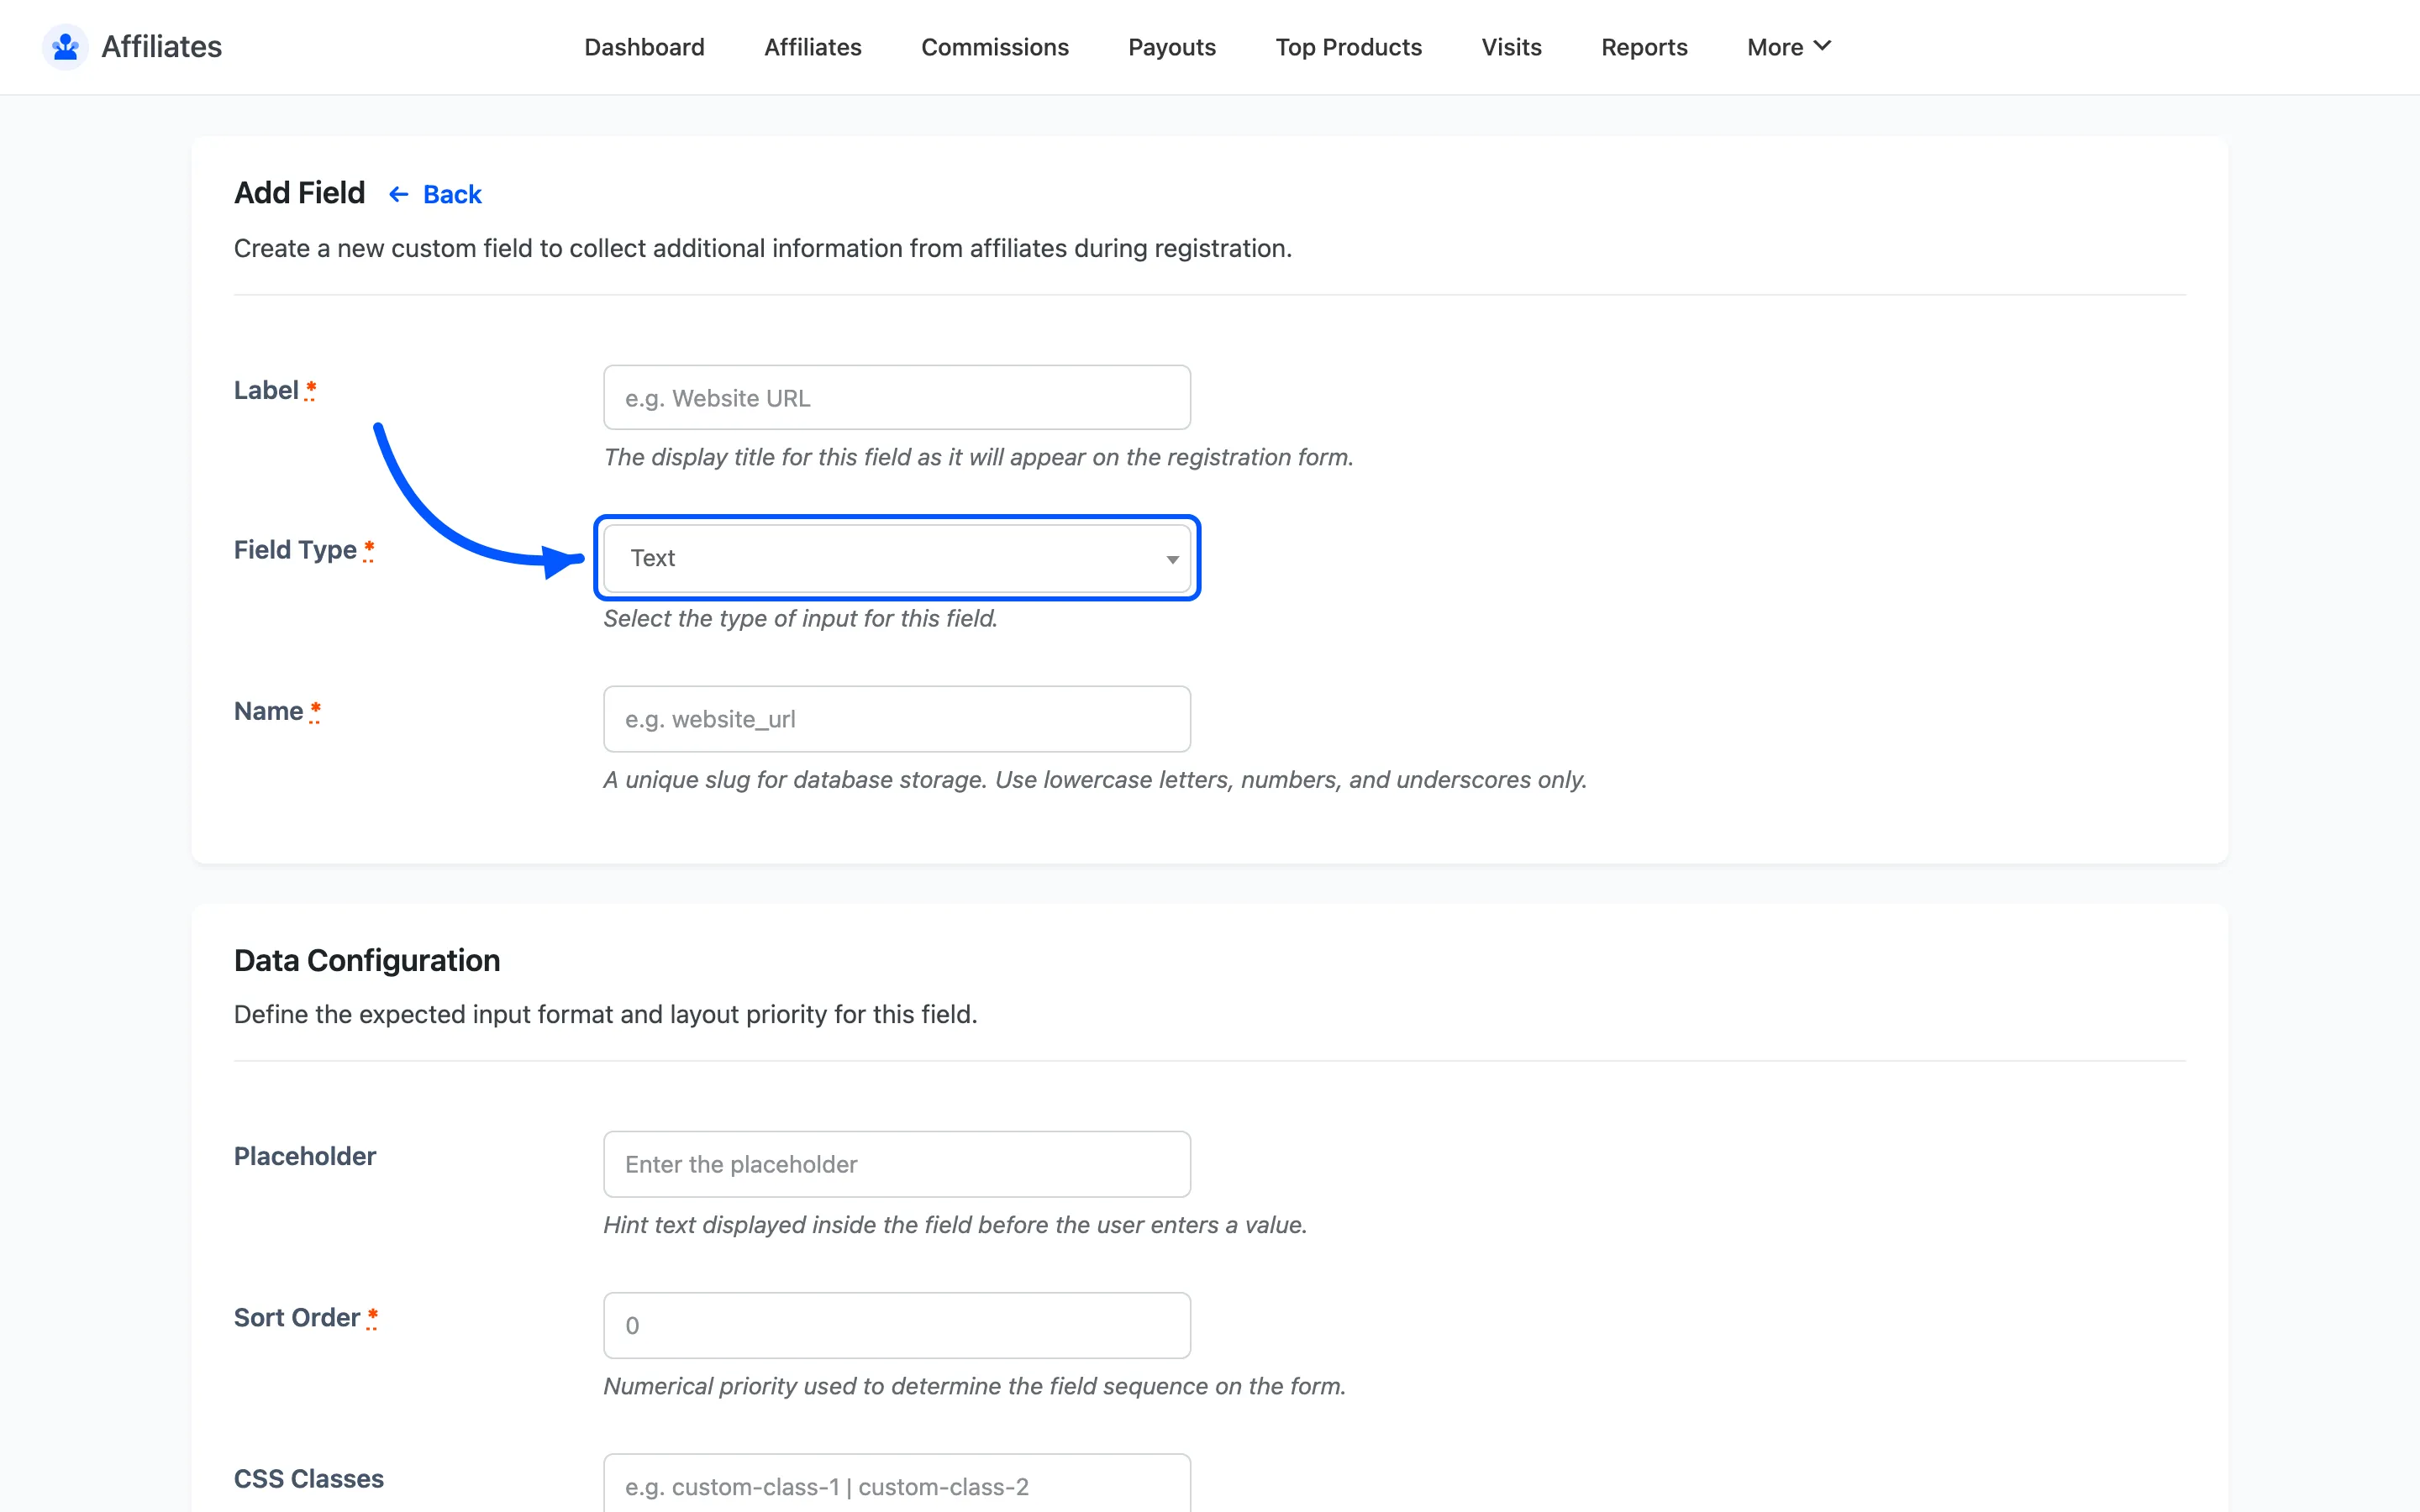
Rules & Visibility
- Required blocks signup until the field is filled in.
- Editable lets the affiliate change the value later from their dashboard settings.
- Status is Active or Inactive.
Keep the form short
Section titled “Keep the form short”Every field you add is a reason to abandon the signup. Ask for what you need to make an approval decision and collect the rest later, once someone is actually promoting for you.
Where to go next
Section titled “Where to go next”- How to Create the Affiliate Signup Page to publish the form.
- Shortcodes to decide whether the page shows a login form as well.