

Payout Settings
The Payouts tab covers how money leaves your store. It sets the methods affiliates can be paid through, the rules for when a payout is allowed, and the gateway that sends the money.
Open Payout settings
Section titled “Open Payout settings”Go to DevDiggers Plugins → Affiliates → Configuration → Payouts.
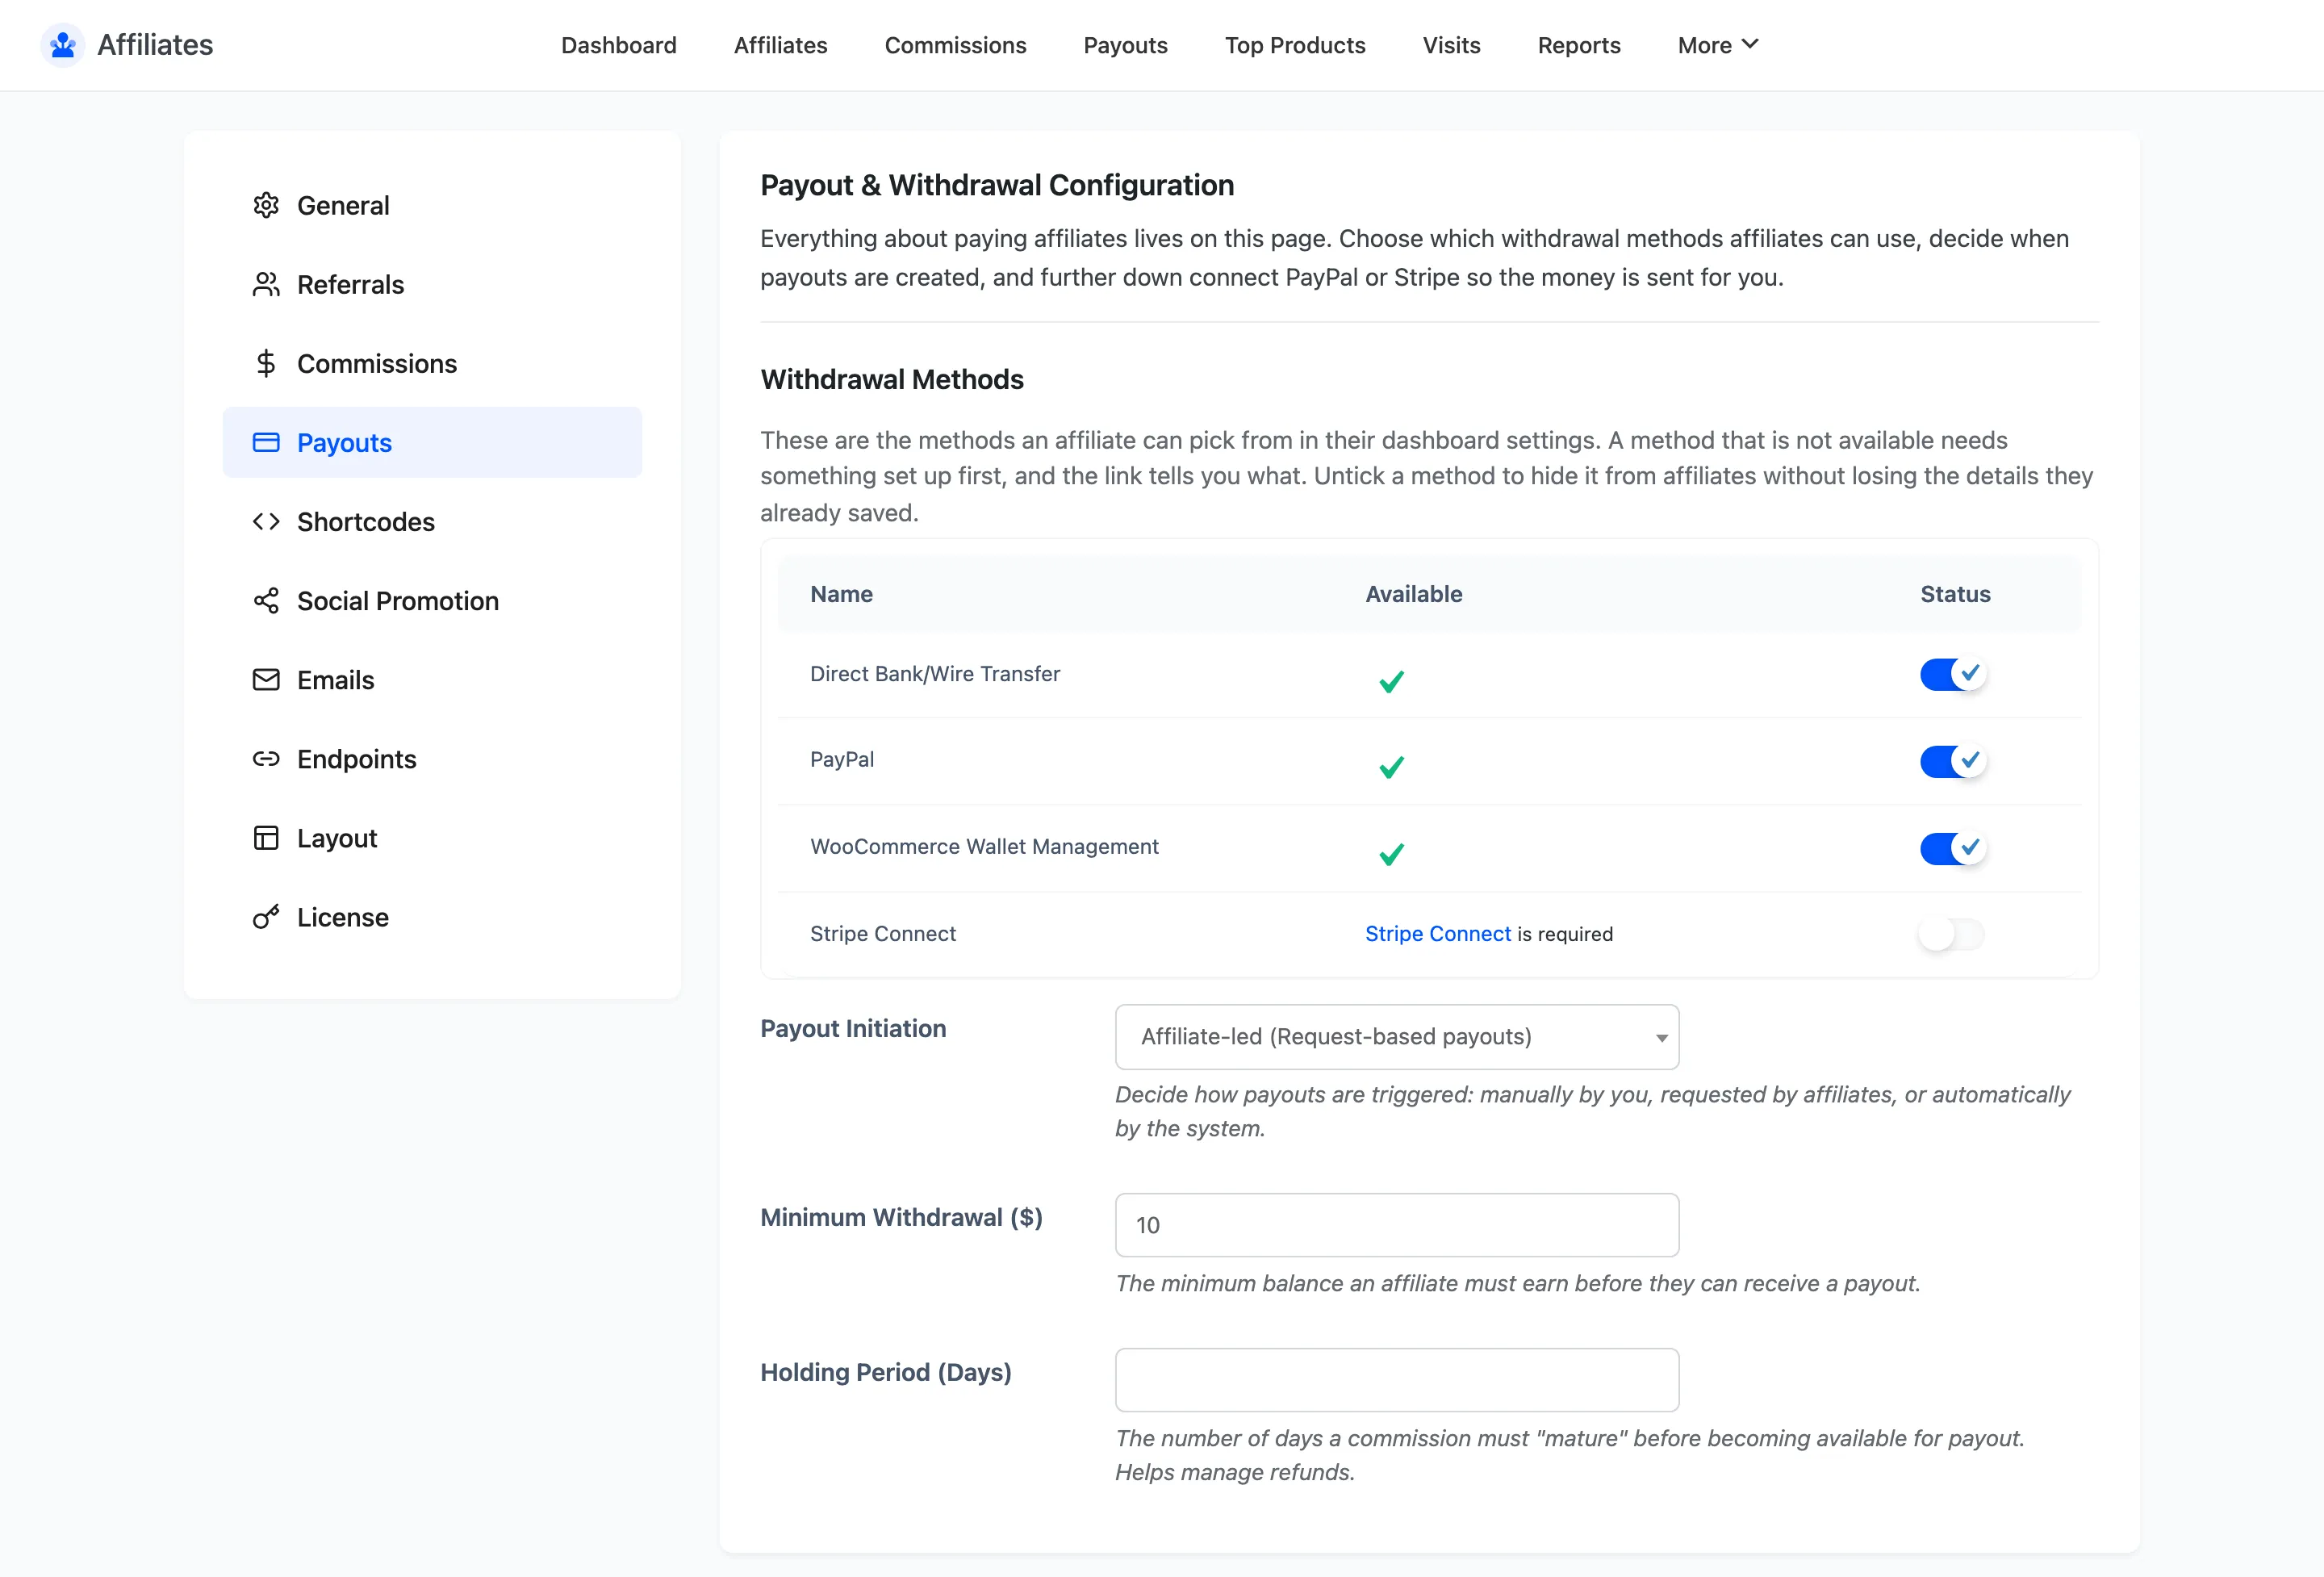
Withdrawal Methods
Section titled “Withdrawal Methods”A three-column table lists every method the plugin knows about.
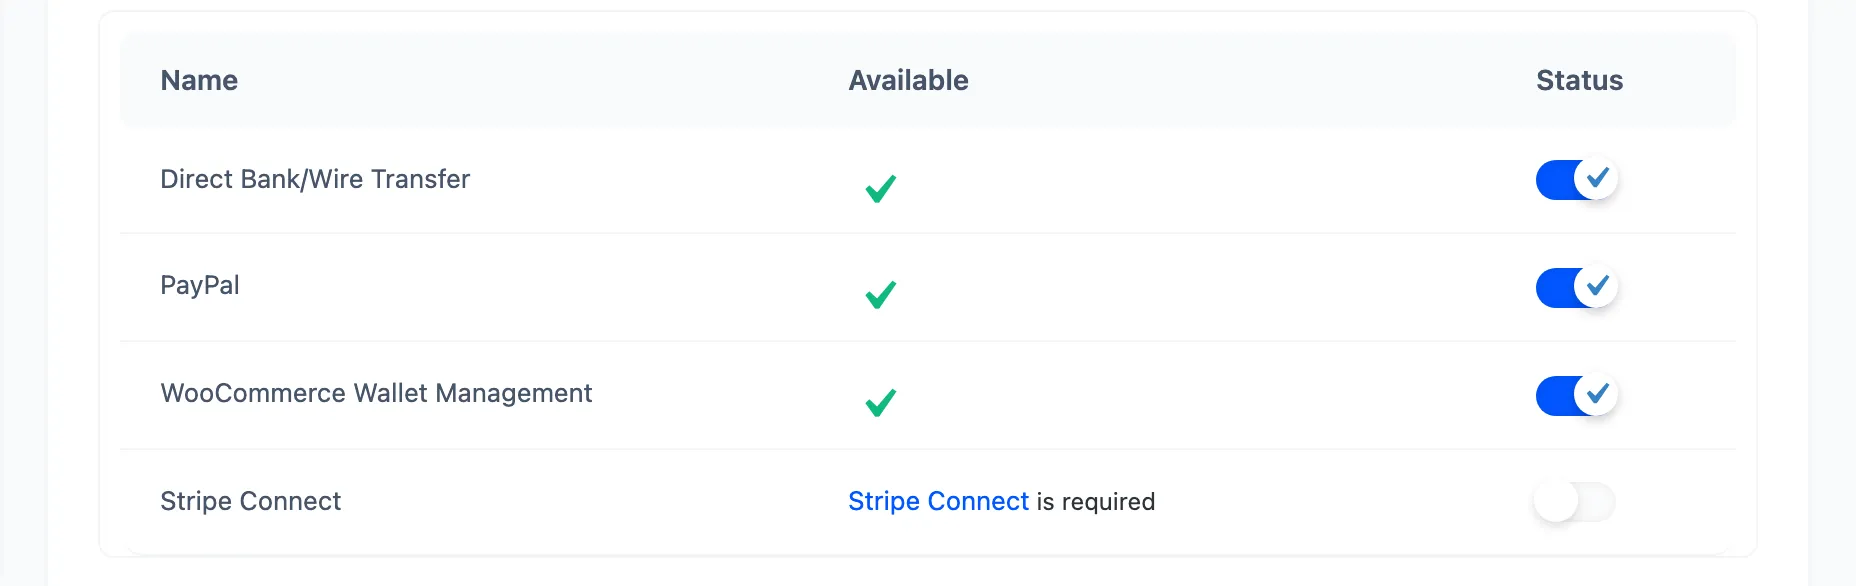
| Method | What the affiliate provides |
|---|---|
| Direct Bank/Wire Transfer | Account name, IBAN and swift code |
| PayPal | A PayPal email address |
| WooCommerce Wallet Management | Nothing, the balance is credited in the store |
| Stripe Connect | A connected Stripe account, set up once from their dashboard |
- Available shows whether the method can be used at all. Bank transfer and PayPal are always available. Wallet requires the WooCommerce Wallet Management plugin, and Stripe Connect requires your Stripe secret key further down the page. Each row links to whatever it is waiting for.
- Status is the checkbox that turns a method on for your affiliates. A method with Available unticked cannot be enabled.
Unticking a method hides it from affiliates without deleting the details they already saved, so you can withdraw a method and put it back later without anyone re-entering their bank account.
Only enabled methods appear in the affiliate’s Settings → Withdrawal Info section and in the payout bulk actions on the Commissions screen.
Payout & Withdrawal Configuration
Section titled “Payout & Withdrawal Configuration”Payout Initiation decides who starts a payout.
- Administrator-led (Manual processing) means you create every payout yourself, from the Commissions or Payouts screen.
- Affiliate-led (Request-based payouts) lets affiliates request a withdrawal from their dashboard once they meet the minimum.
- System-led (Automated monthly schedule) creates payouts automatically on a day you pick.
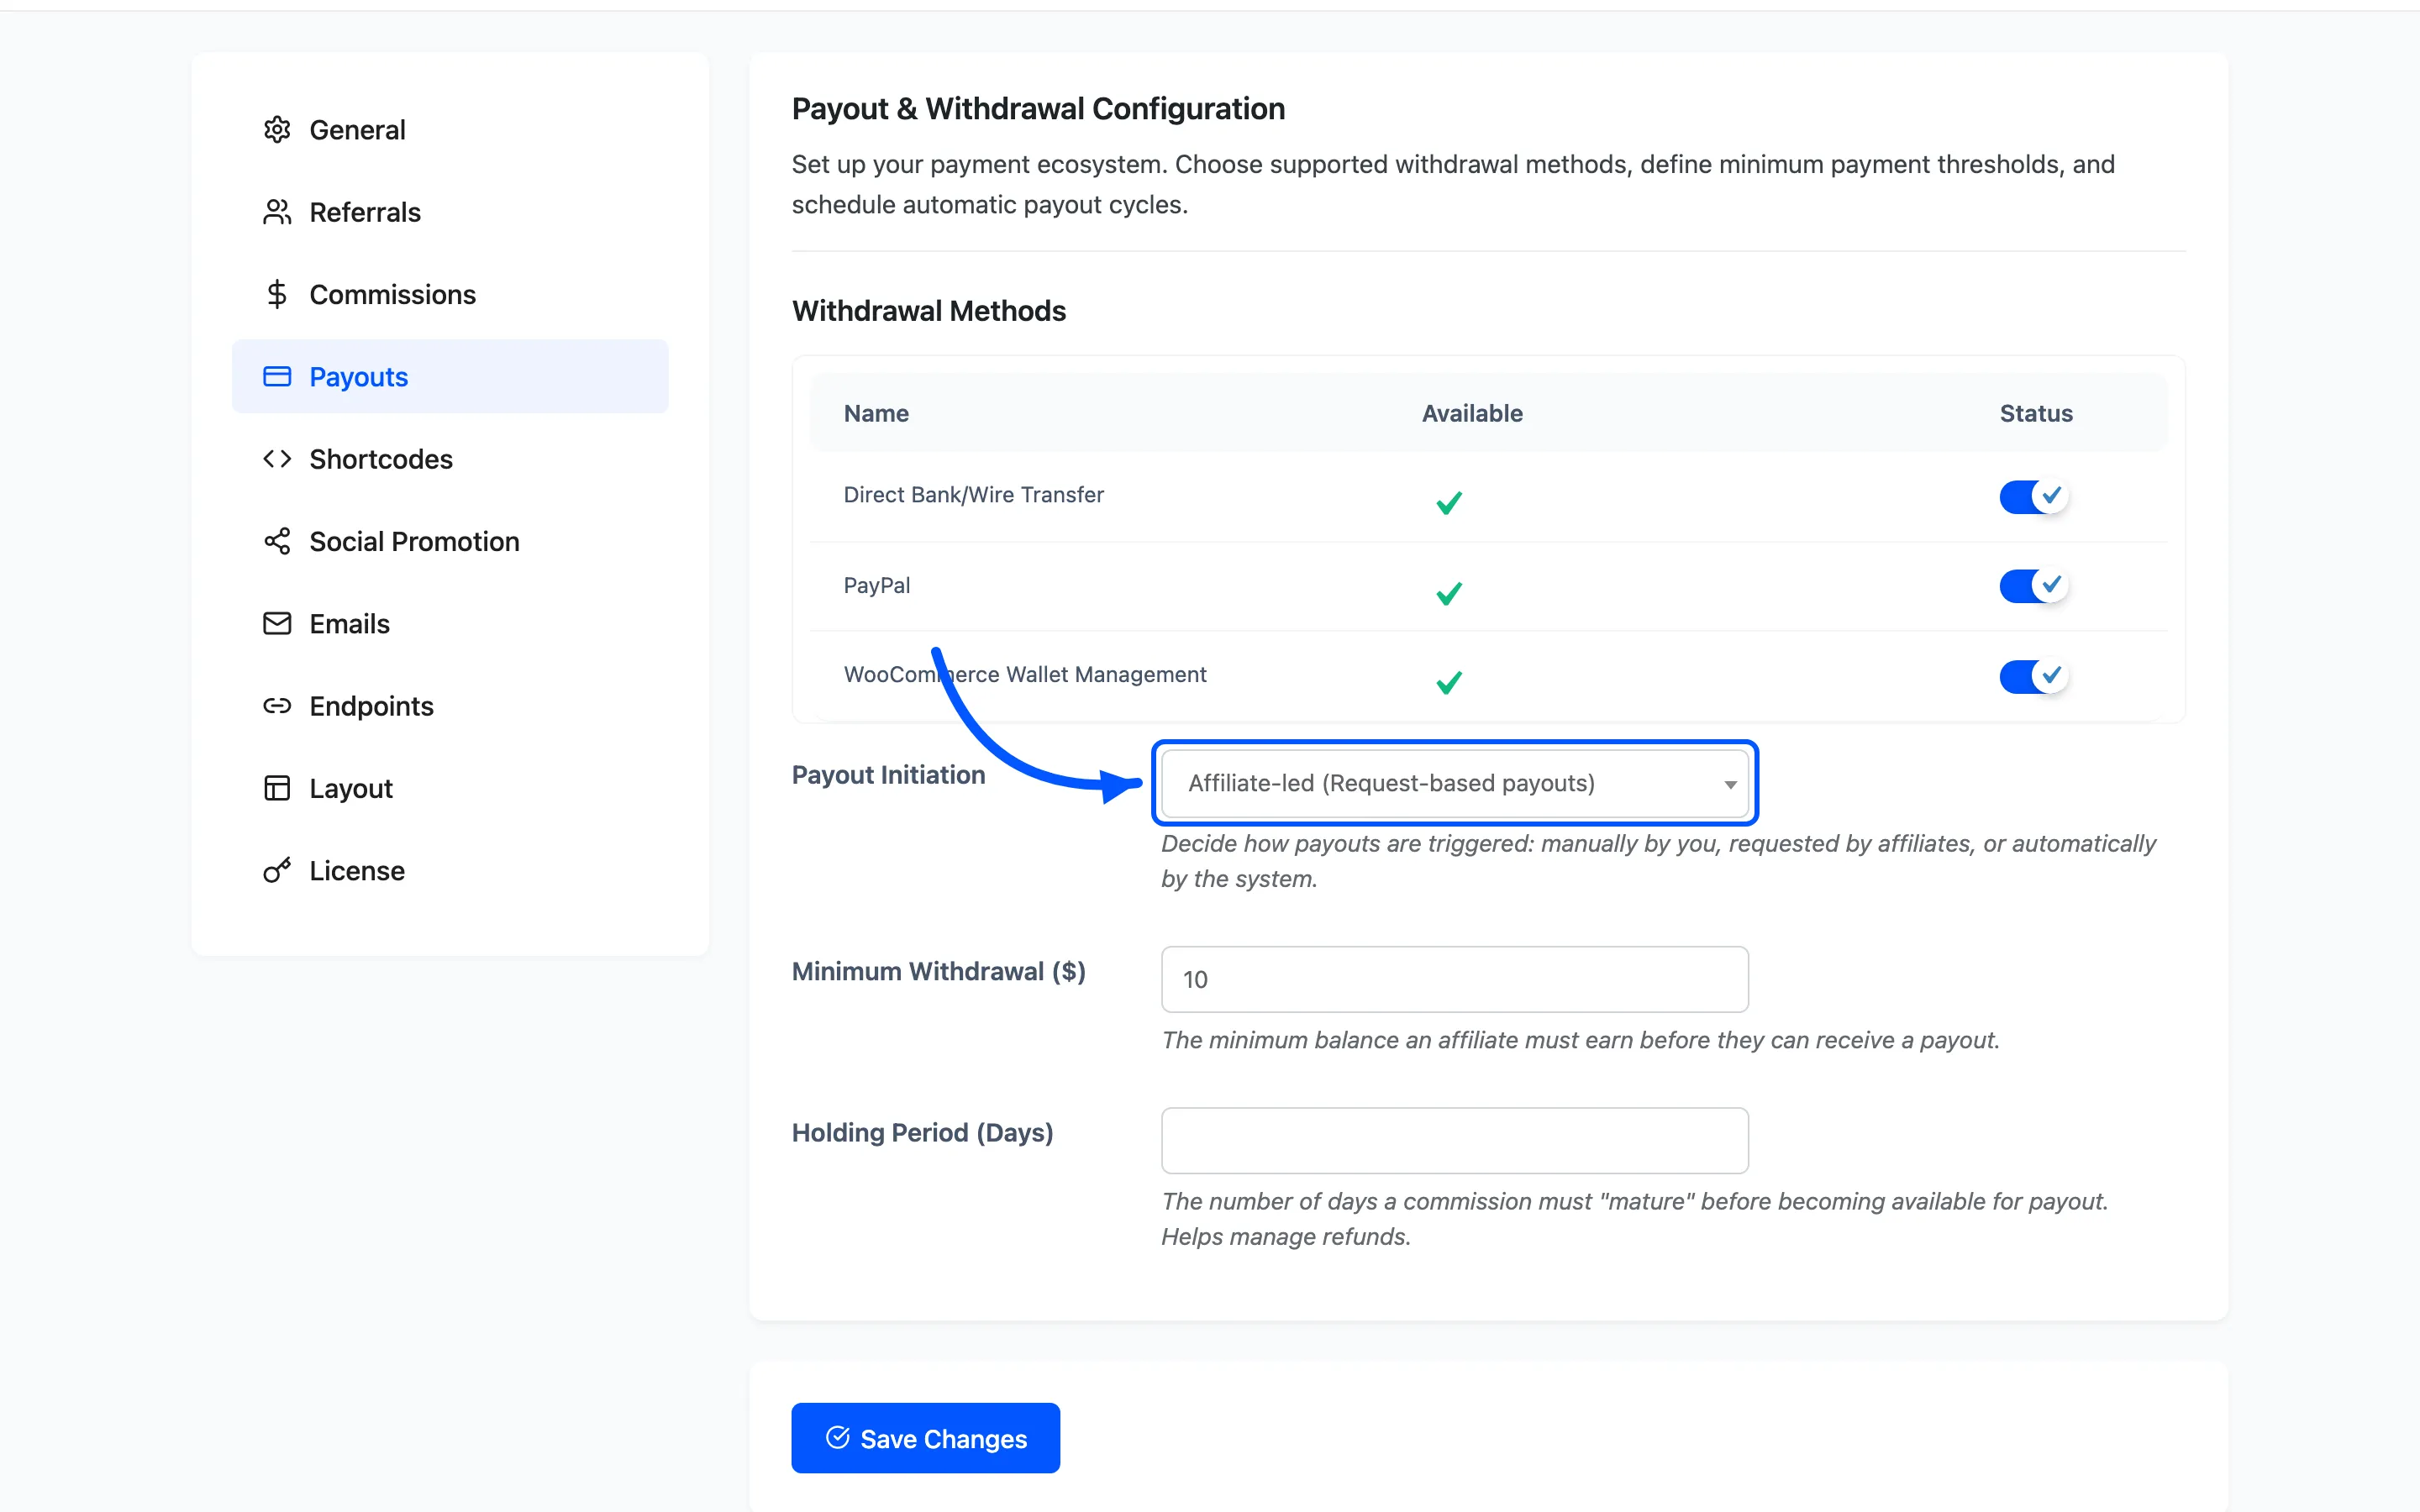
Scheduled Payout Day appears only when you pick the automated schedule. It takes a day of the month from 1 to 28. The ceiling is 28 so the schedule never skips a February.
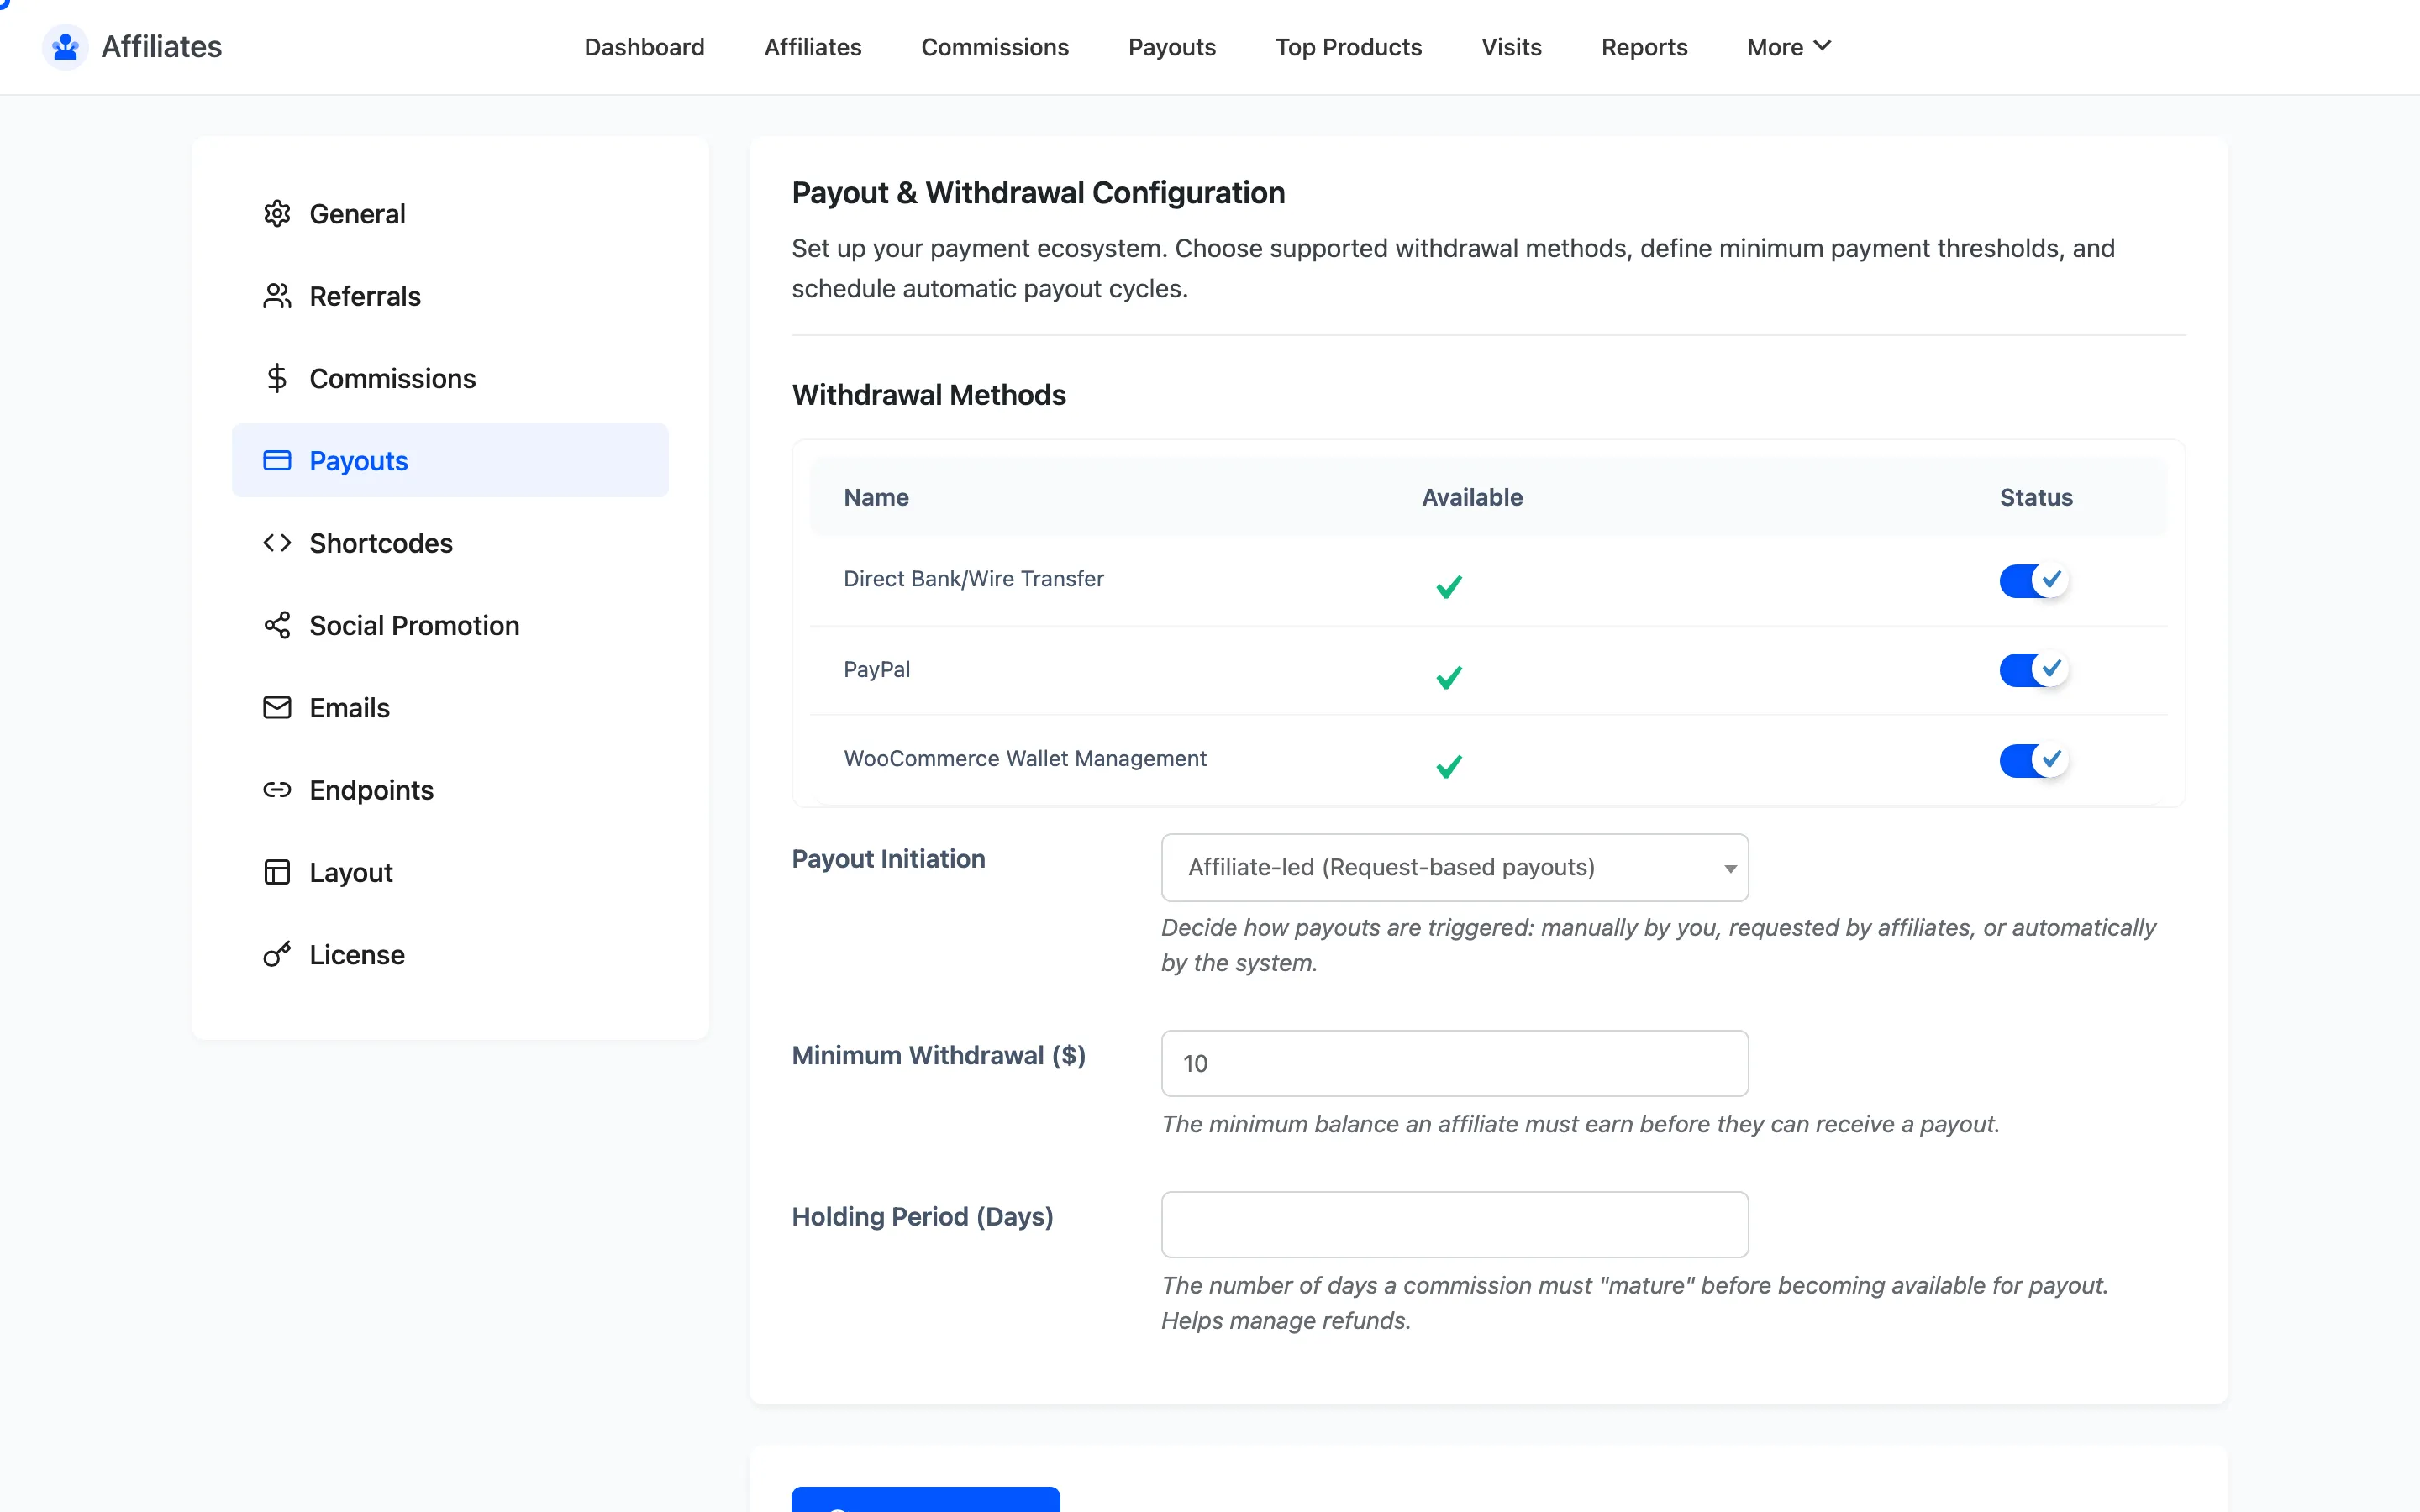
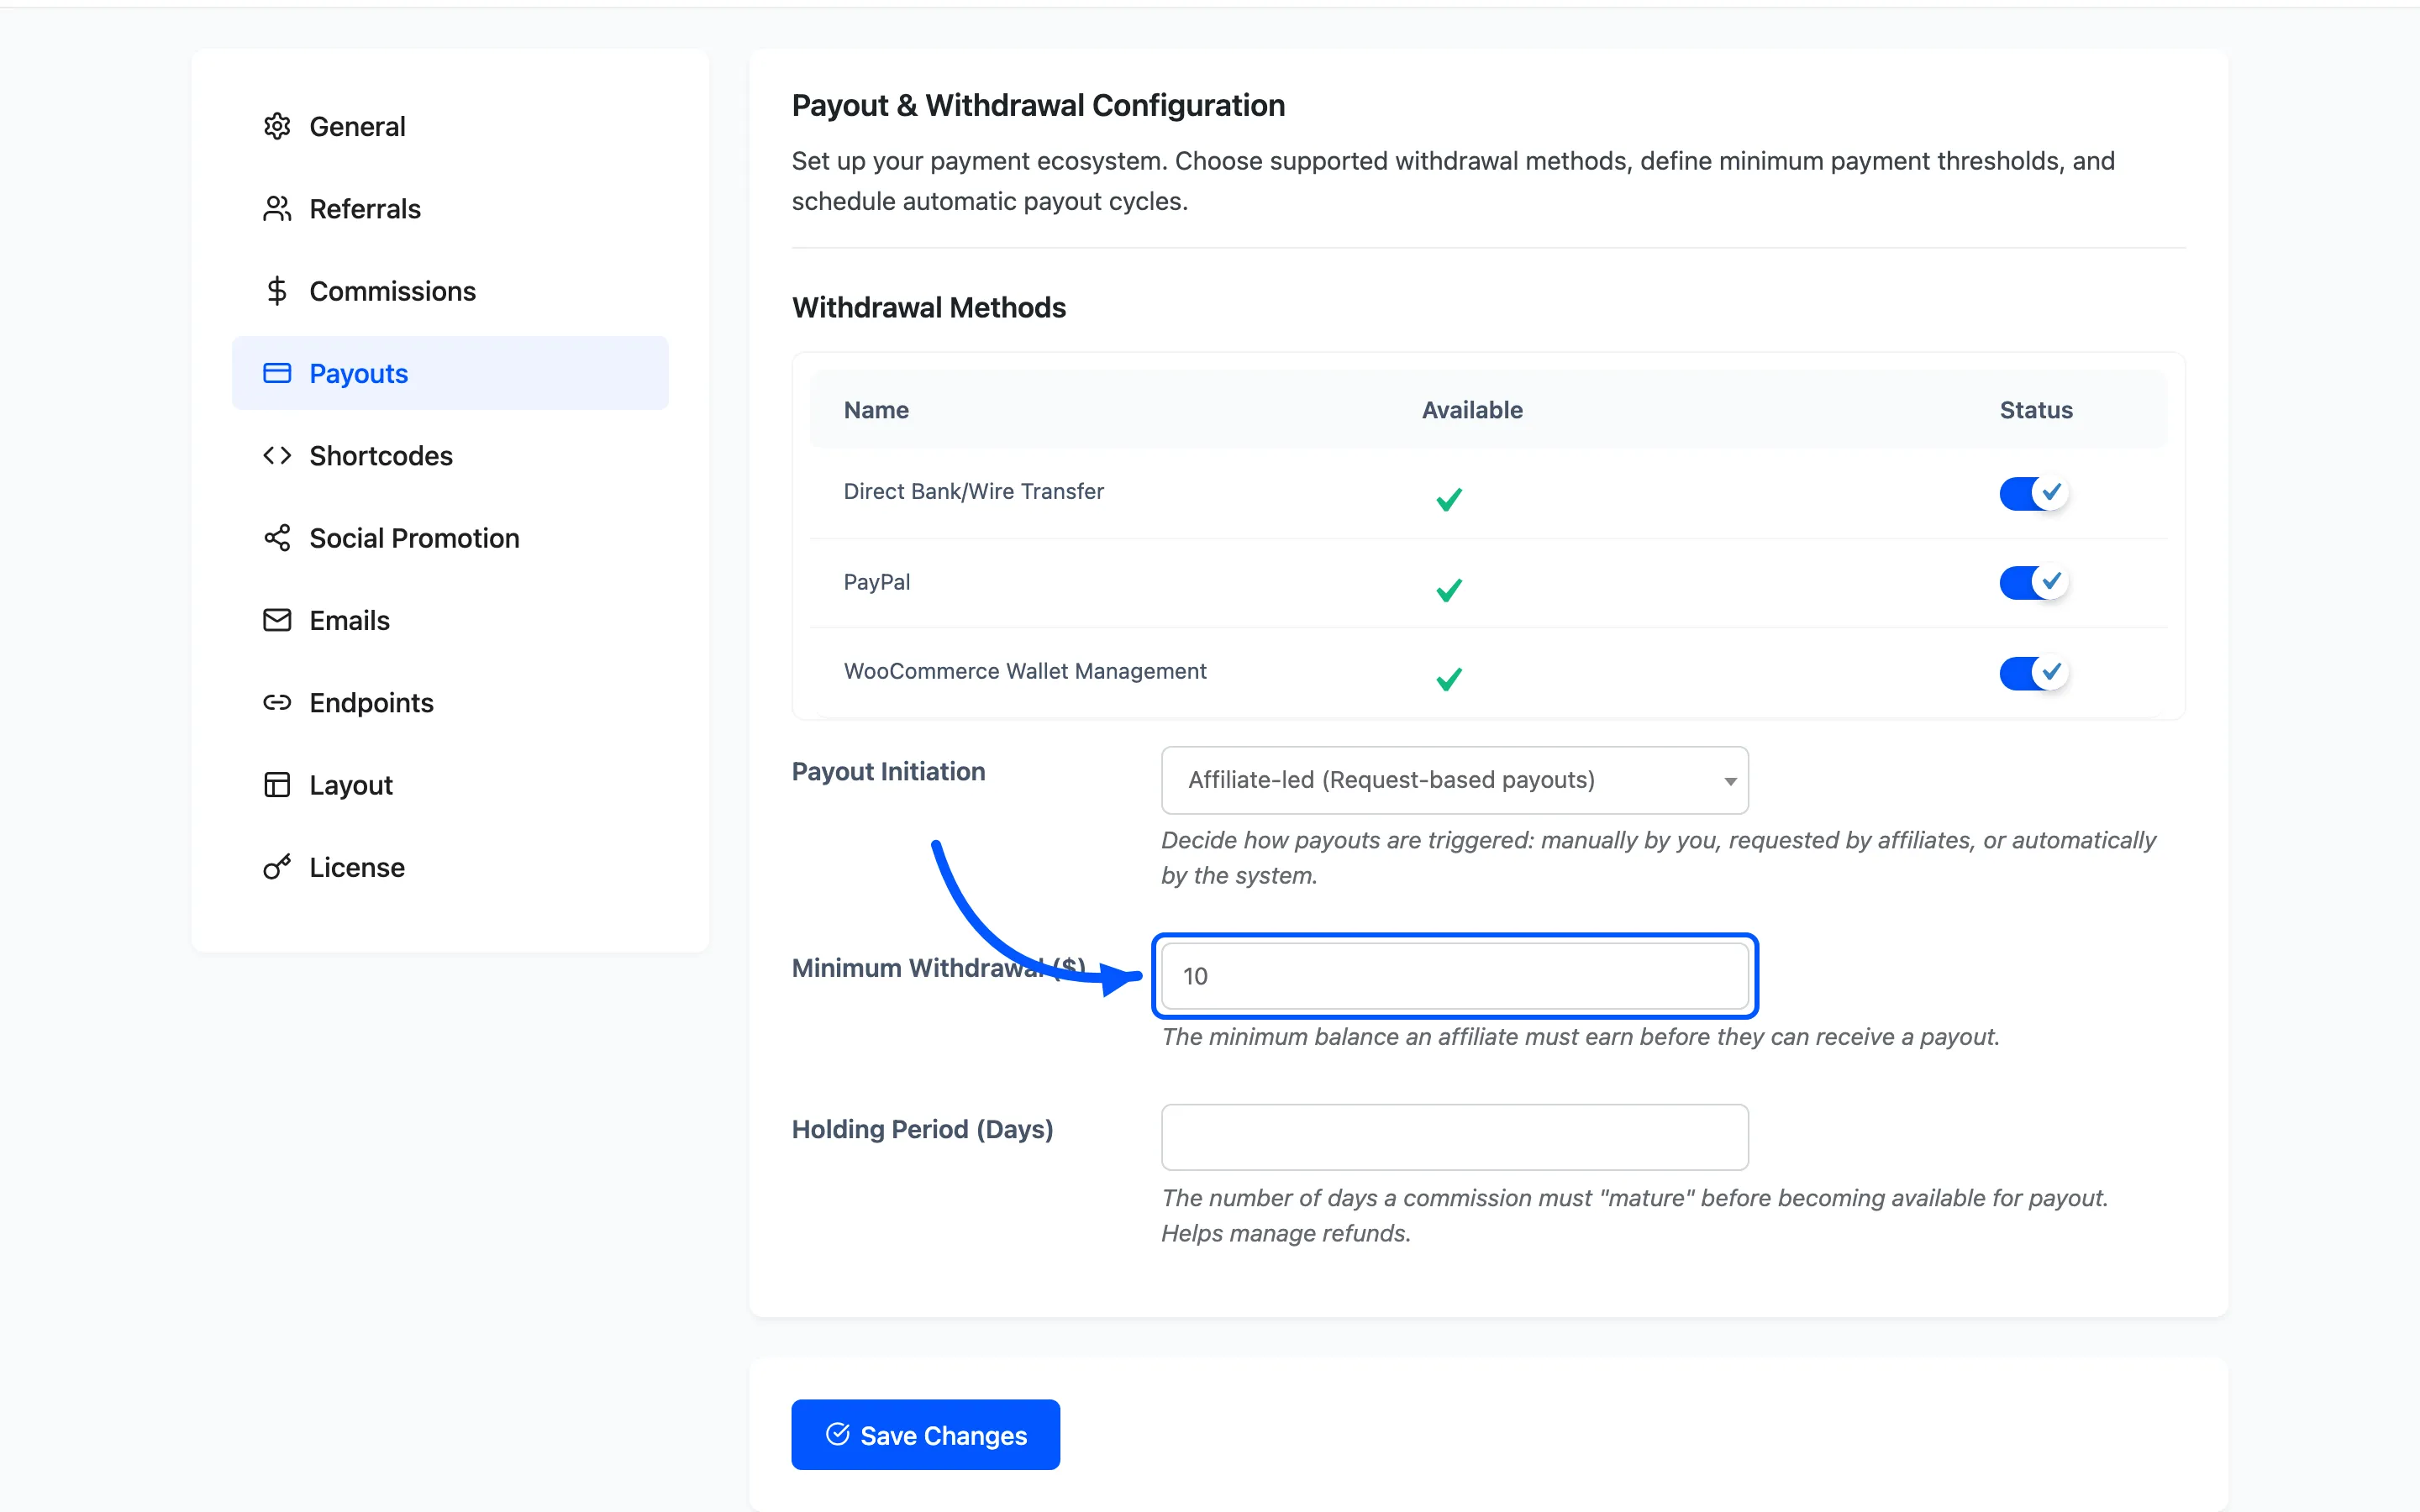
Minimum Withdrawal is the balance an affiliate must reach before a payout can run for them. The field shows your store currency symbol. Set it to 0 to allow any amount.
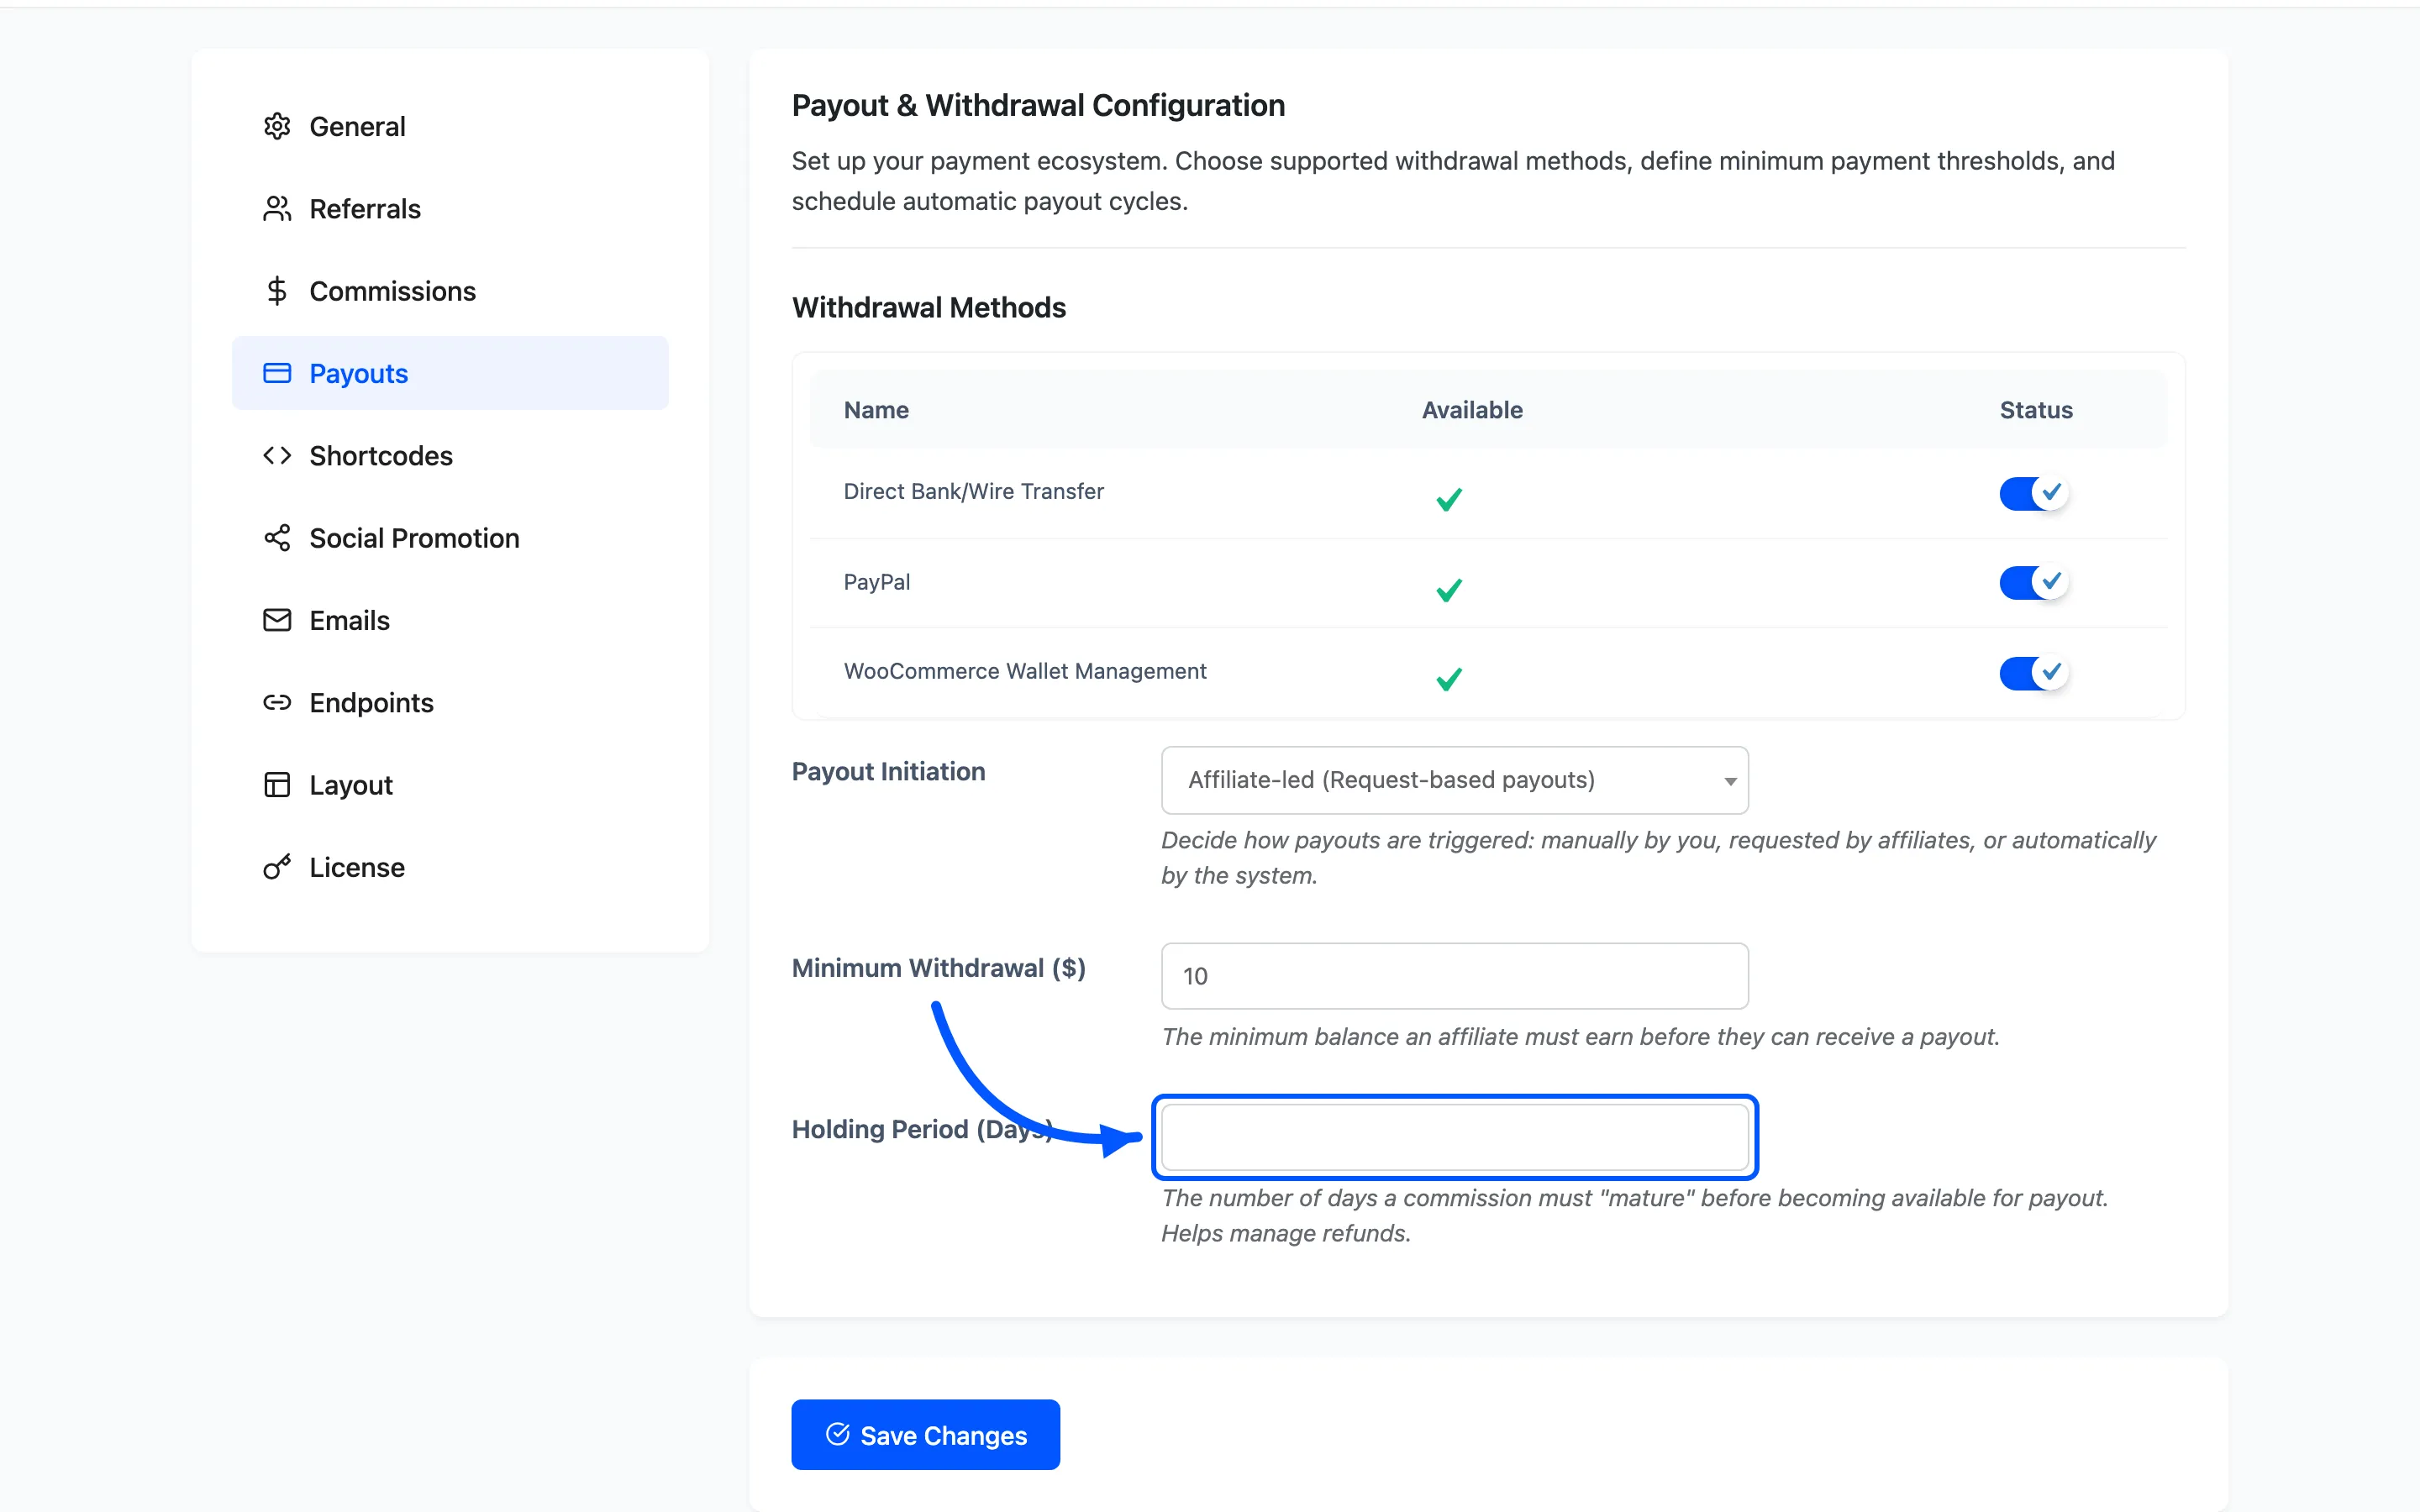
Holding Period (Days) is how long a commission has to age before it is eligible for payout. It defaults to 15. This is your refund buffer: a customer who returns an order inside the period does so before you have paid out on it.
Automatic Payouts
Section titled “Automatic Payouts”Everything above decides when a payout is created. This section decides whether the plugin also sends the money.
Once a payout reaches Completed, it is handed to the gateway that matches that affiliate’s own withdrawal method. That is true however the payout was created, whether you completed it yourself, an affiliate requested it, or the scheduled run produced it. Bank transfer and wallet payouts are never touched and stay manual.
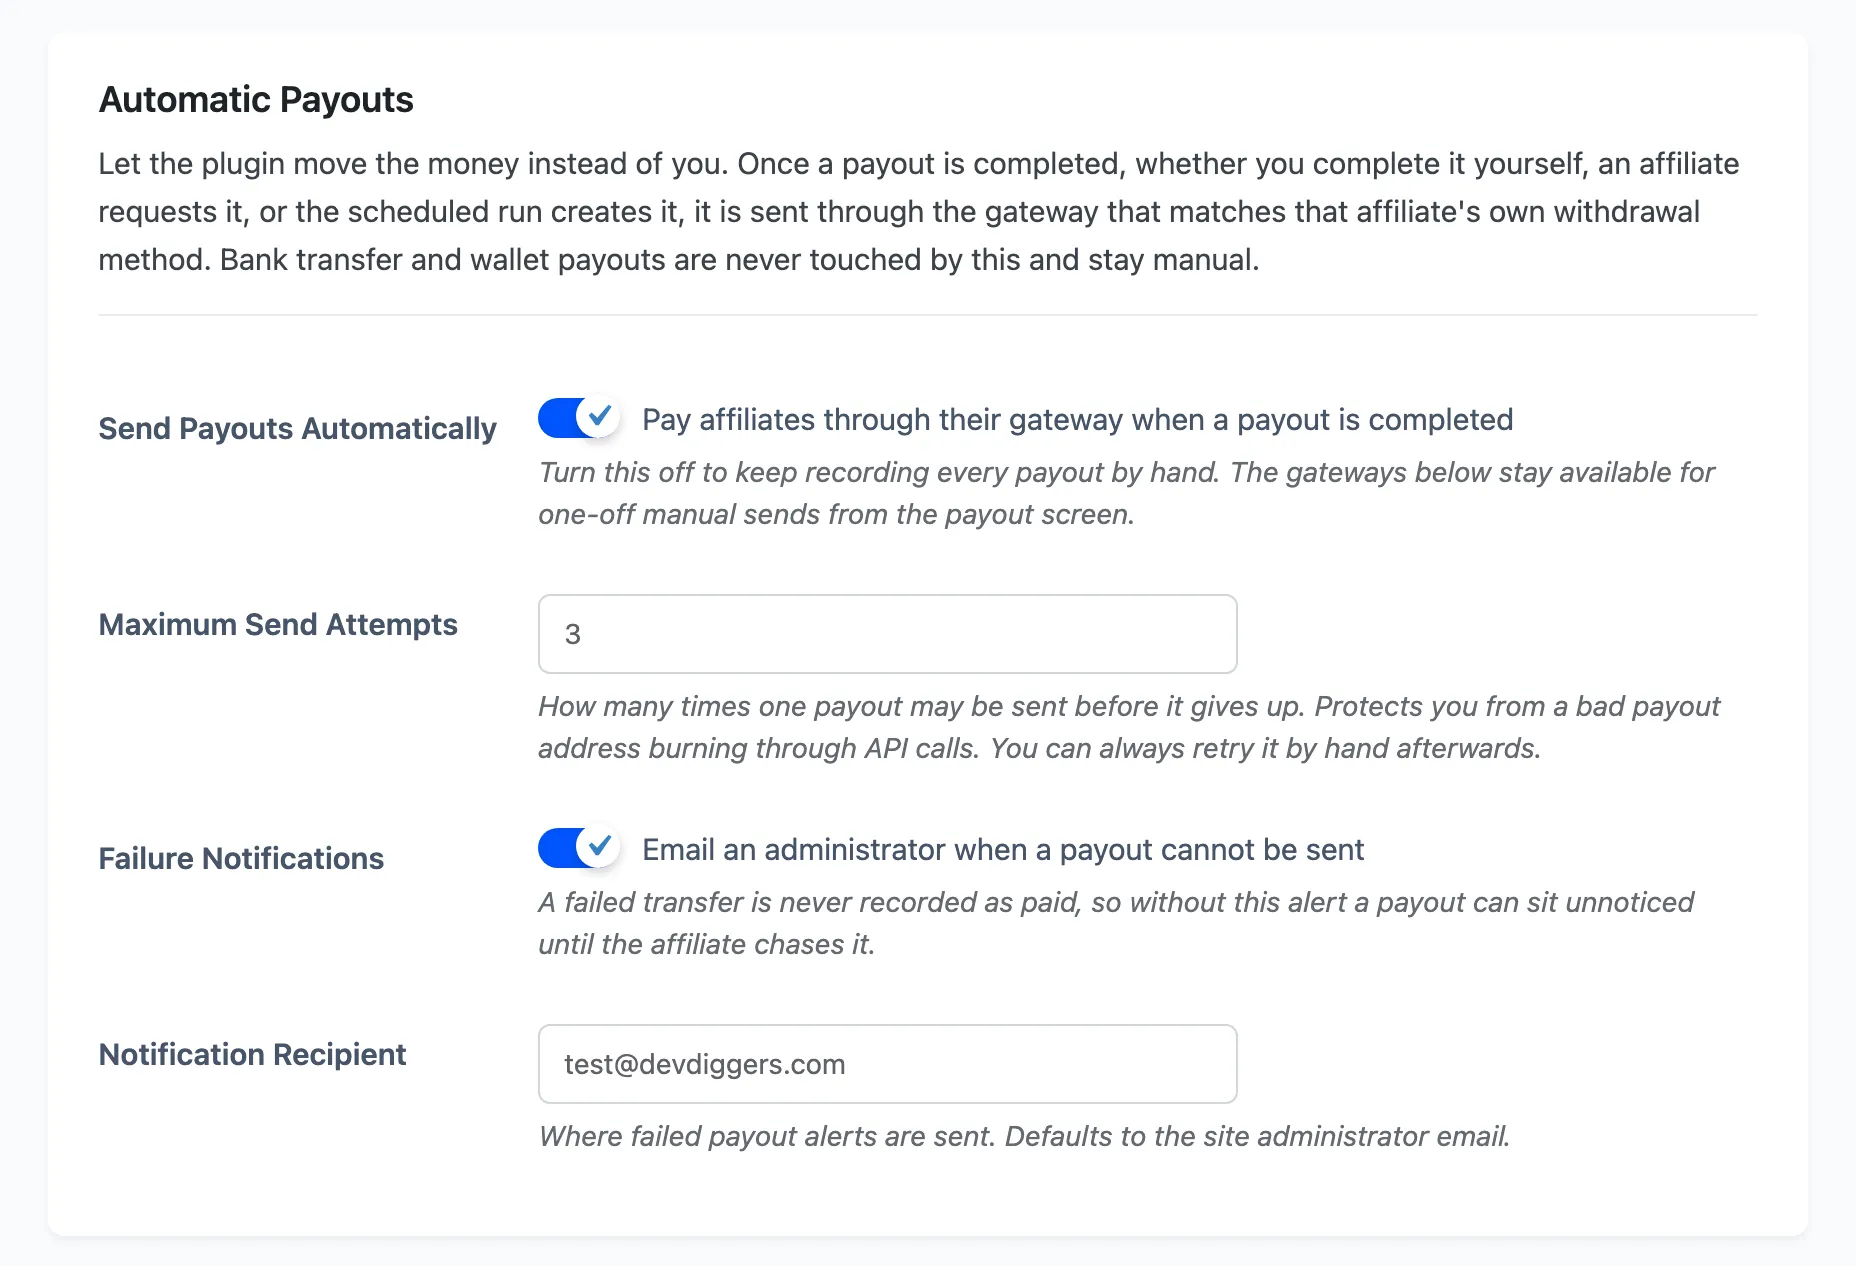
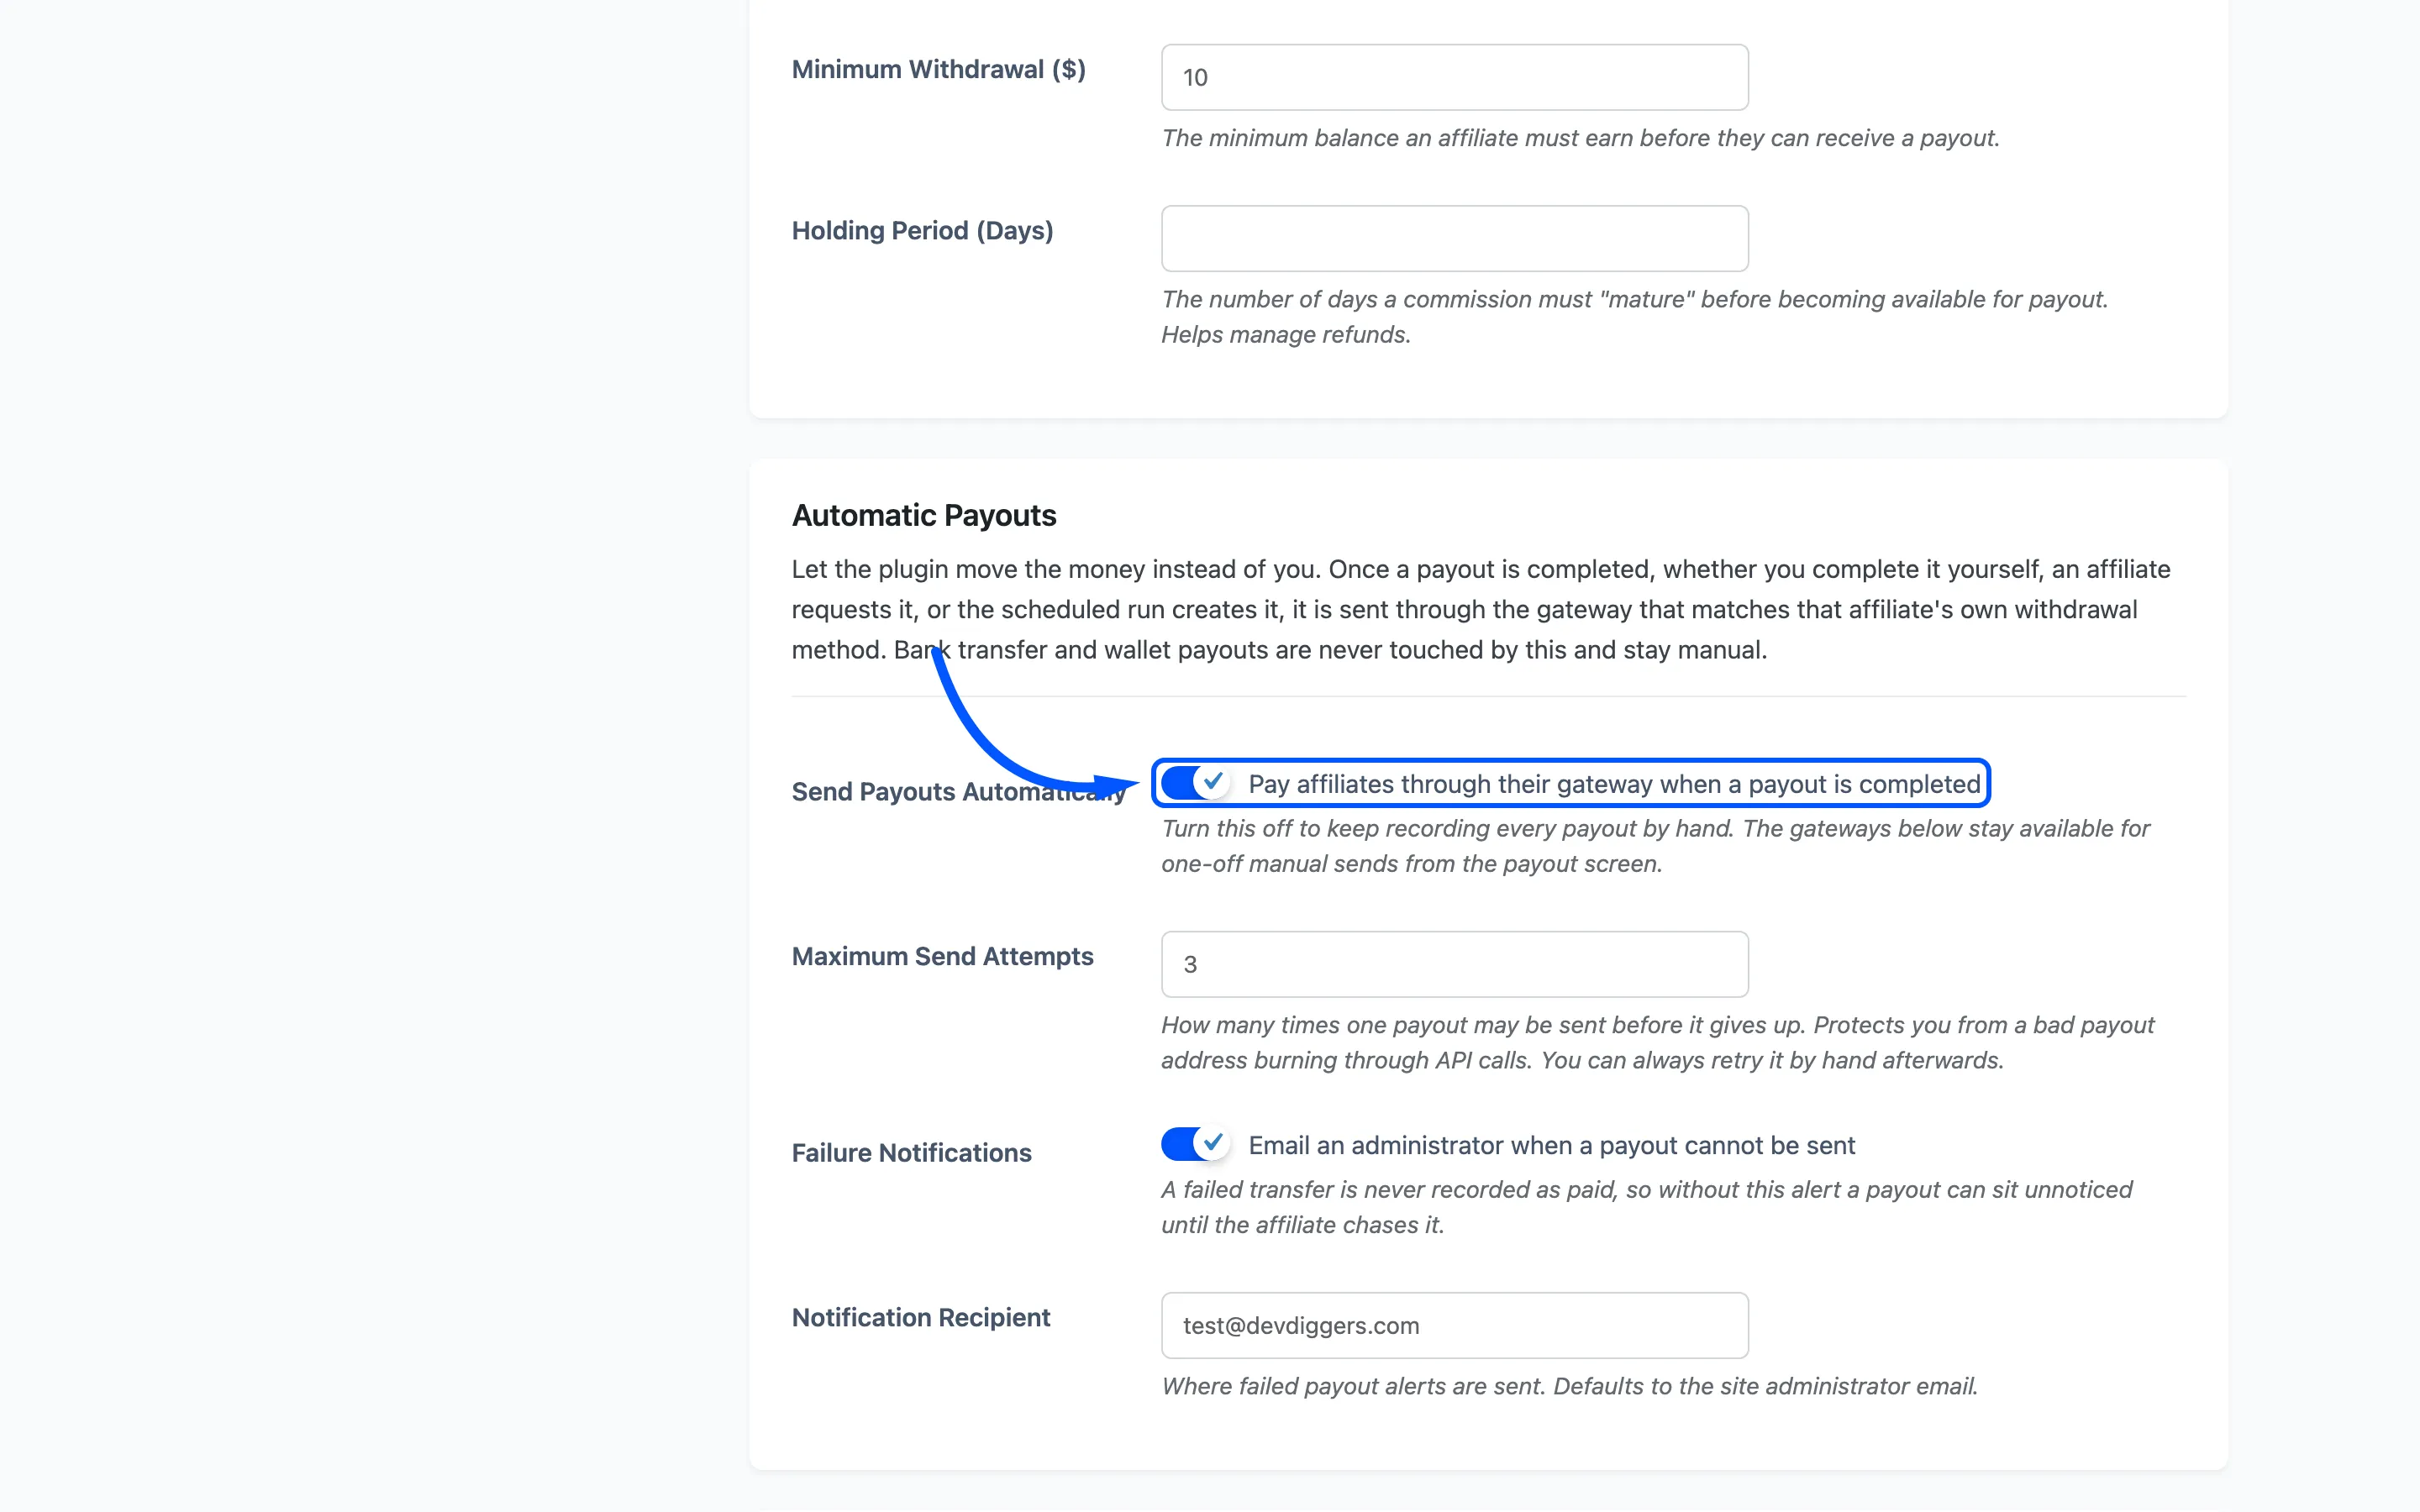
Send Payouts Automatically is the master switch, on by default. Turn it off to keep recording every payout by hand. The gateways below stay connected, so you can still send a single payout from the payout screen.
Maximum Send Attempts caps how many times one payout may be sent before it gives up. It defaults to 3 and accepts 1 to 10. The cap exists so a wrong payout address cannot burn through API calls forever. You can always retry by hand afterwards, and a hand retry ignores the cap.
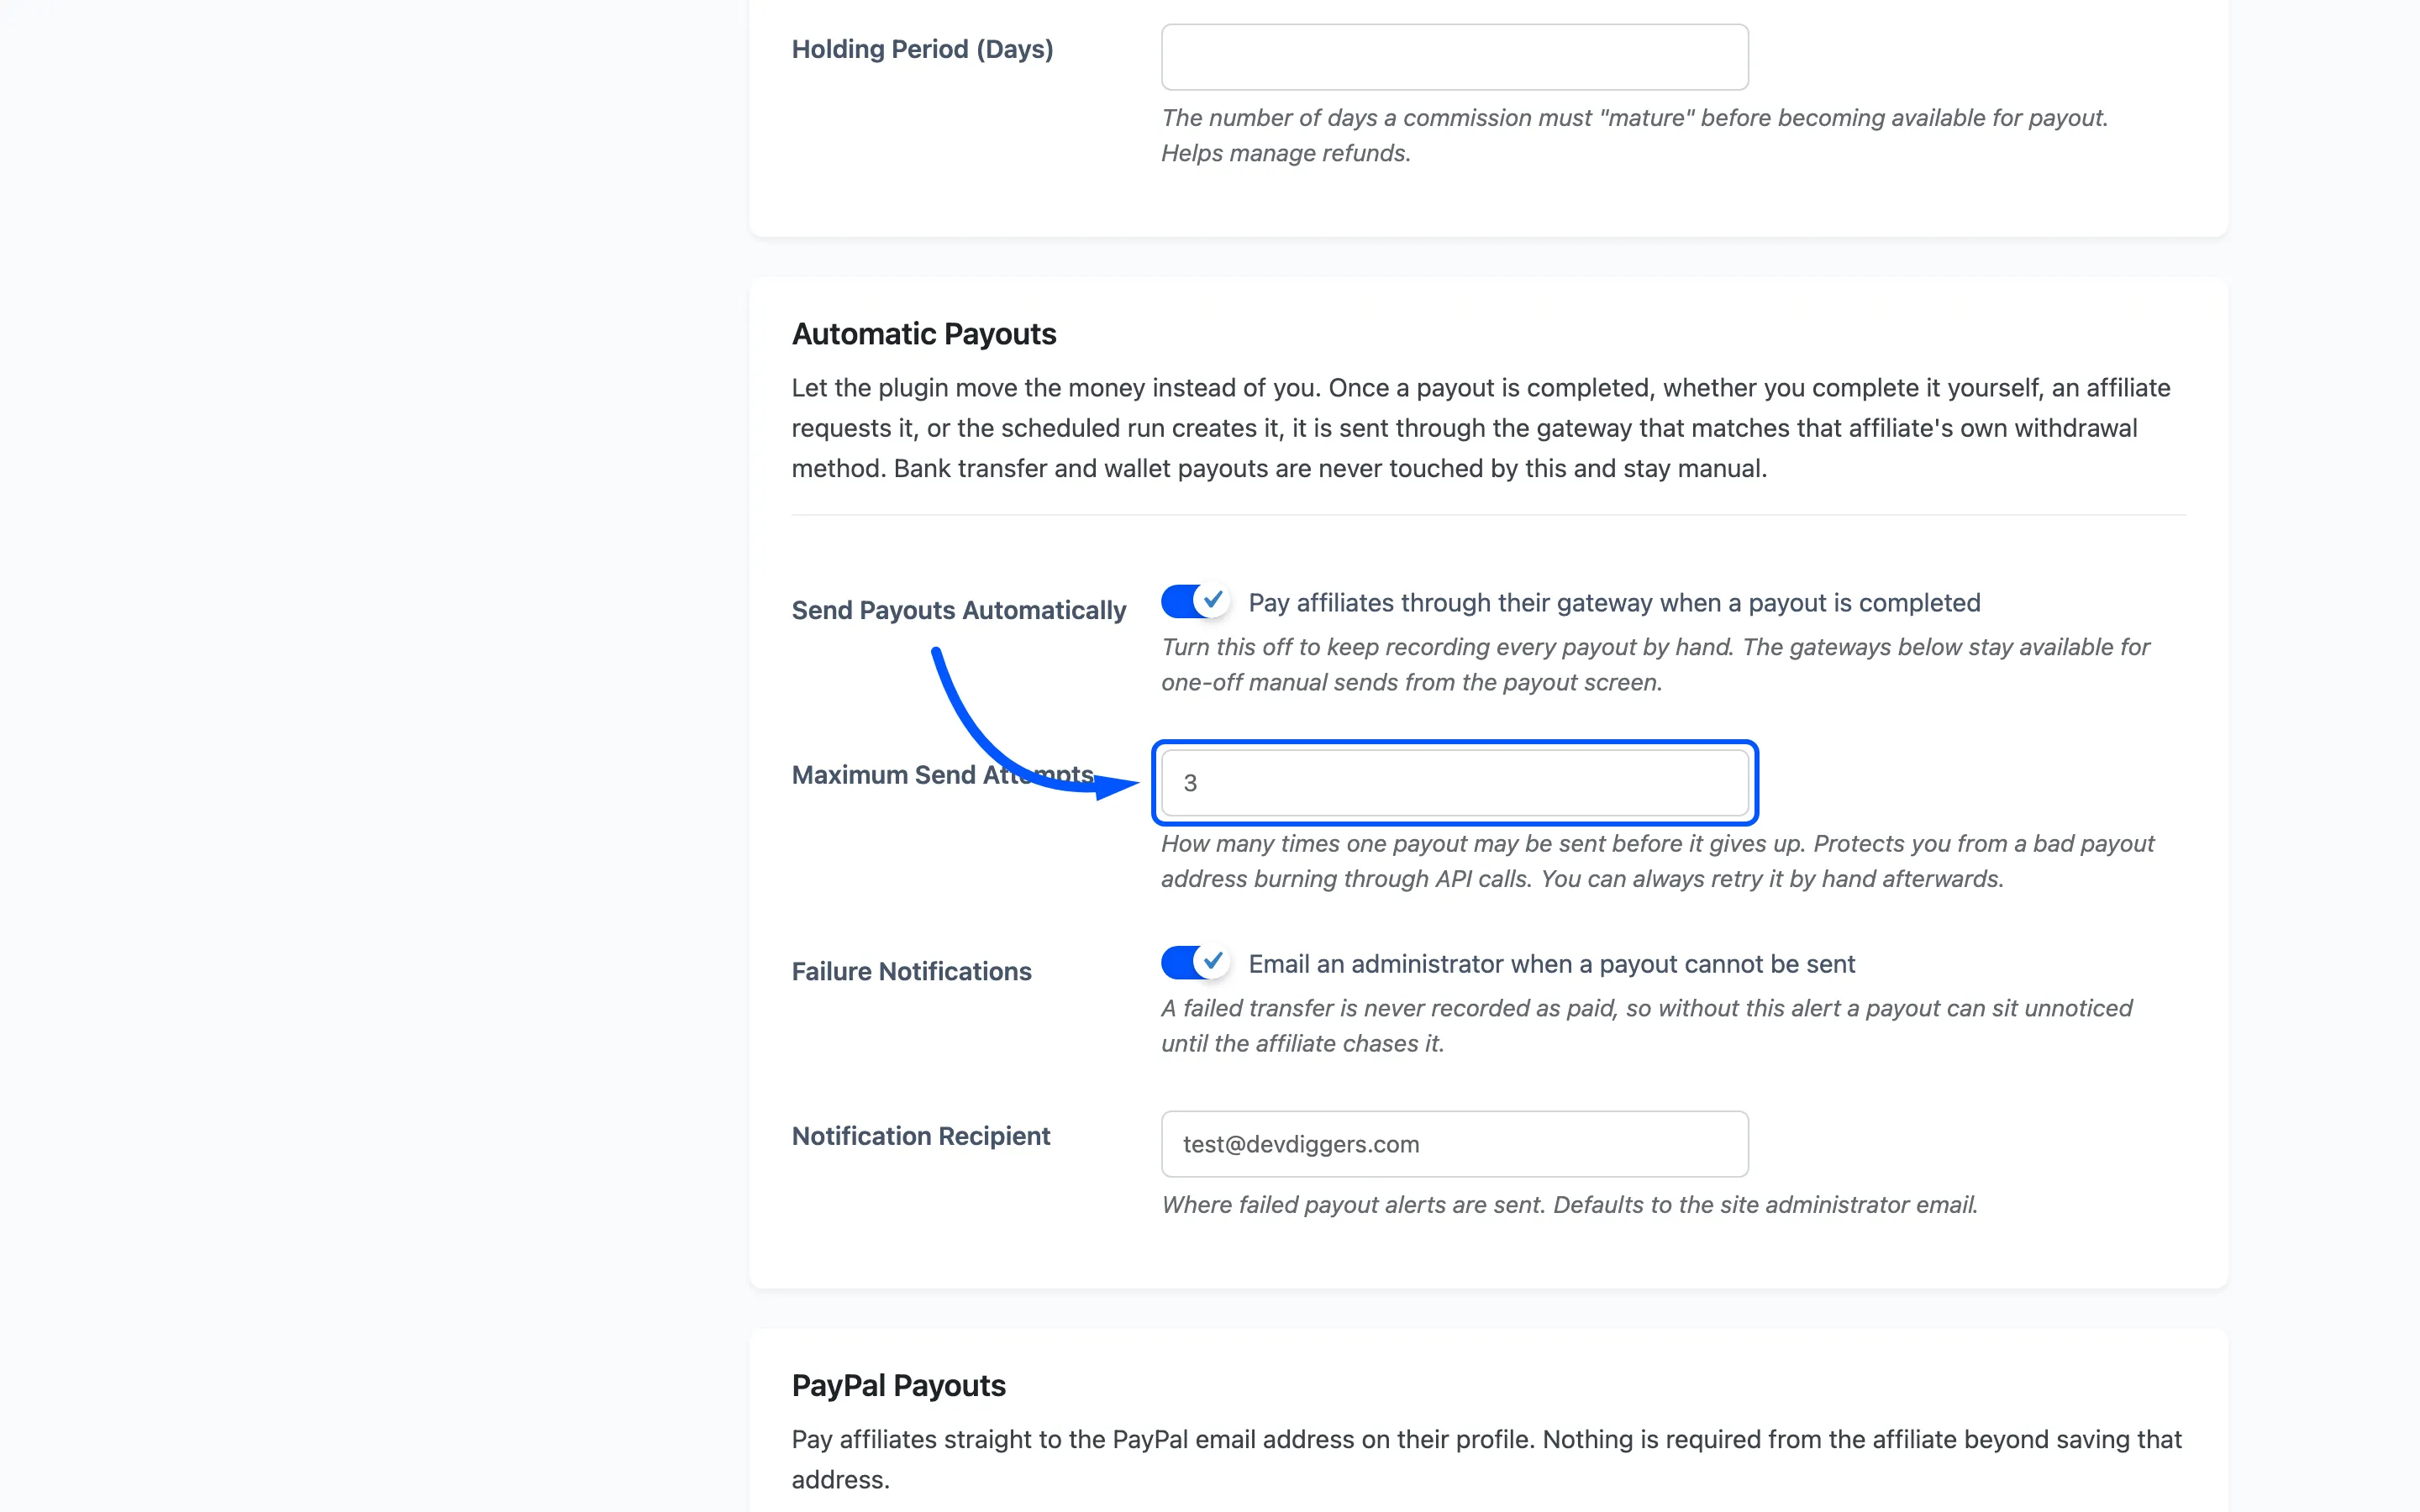
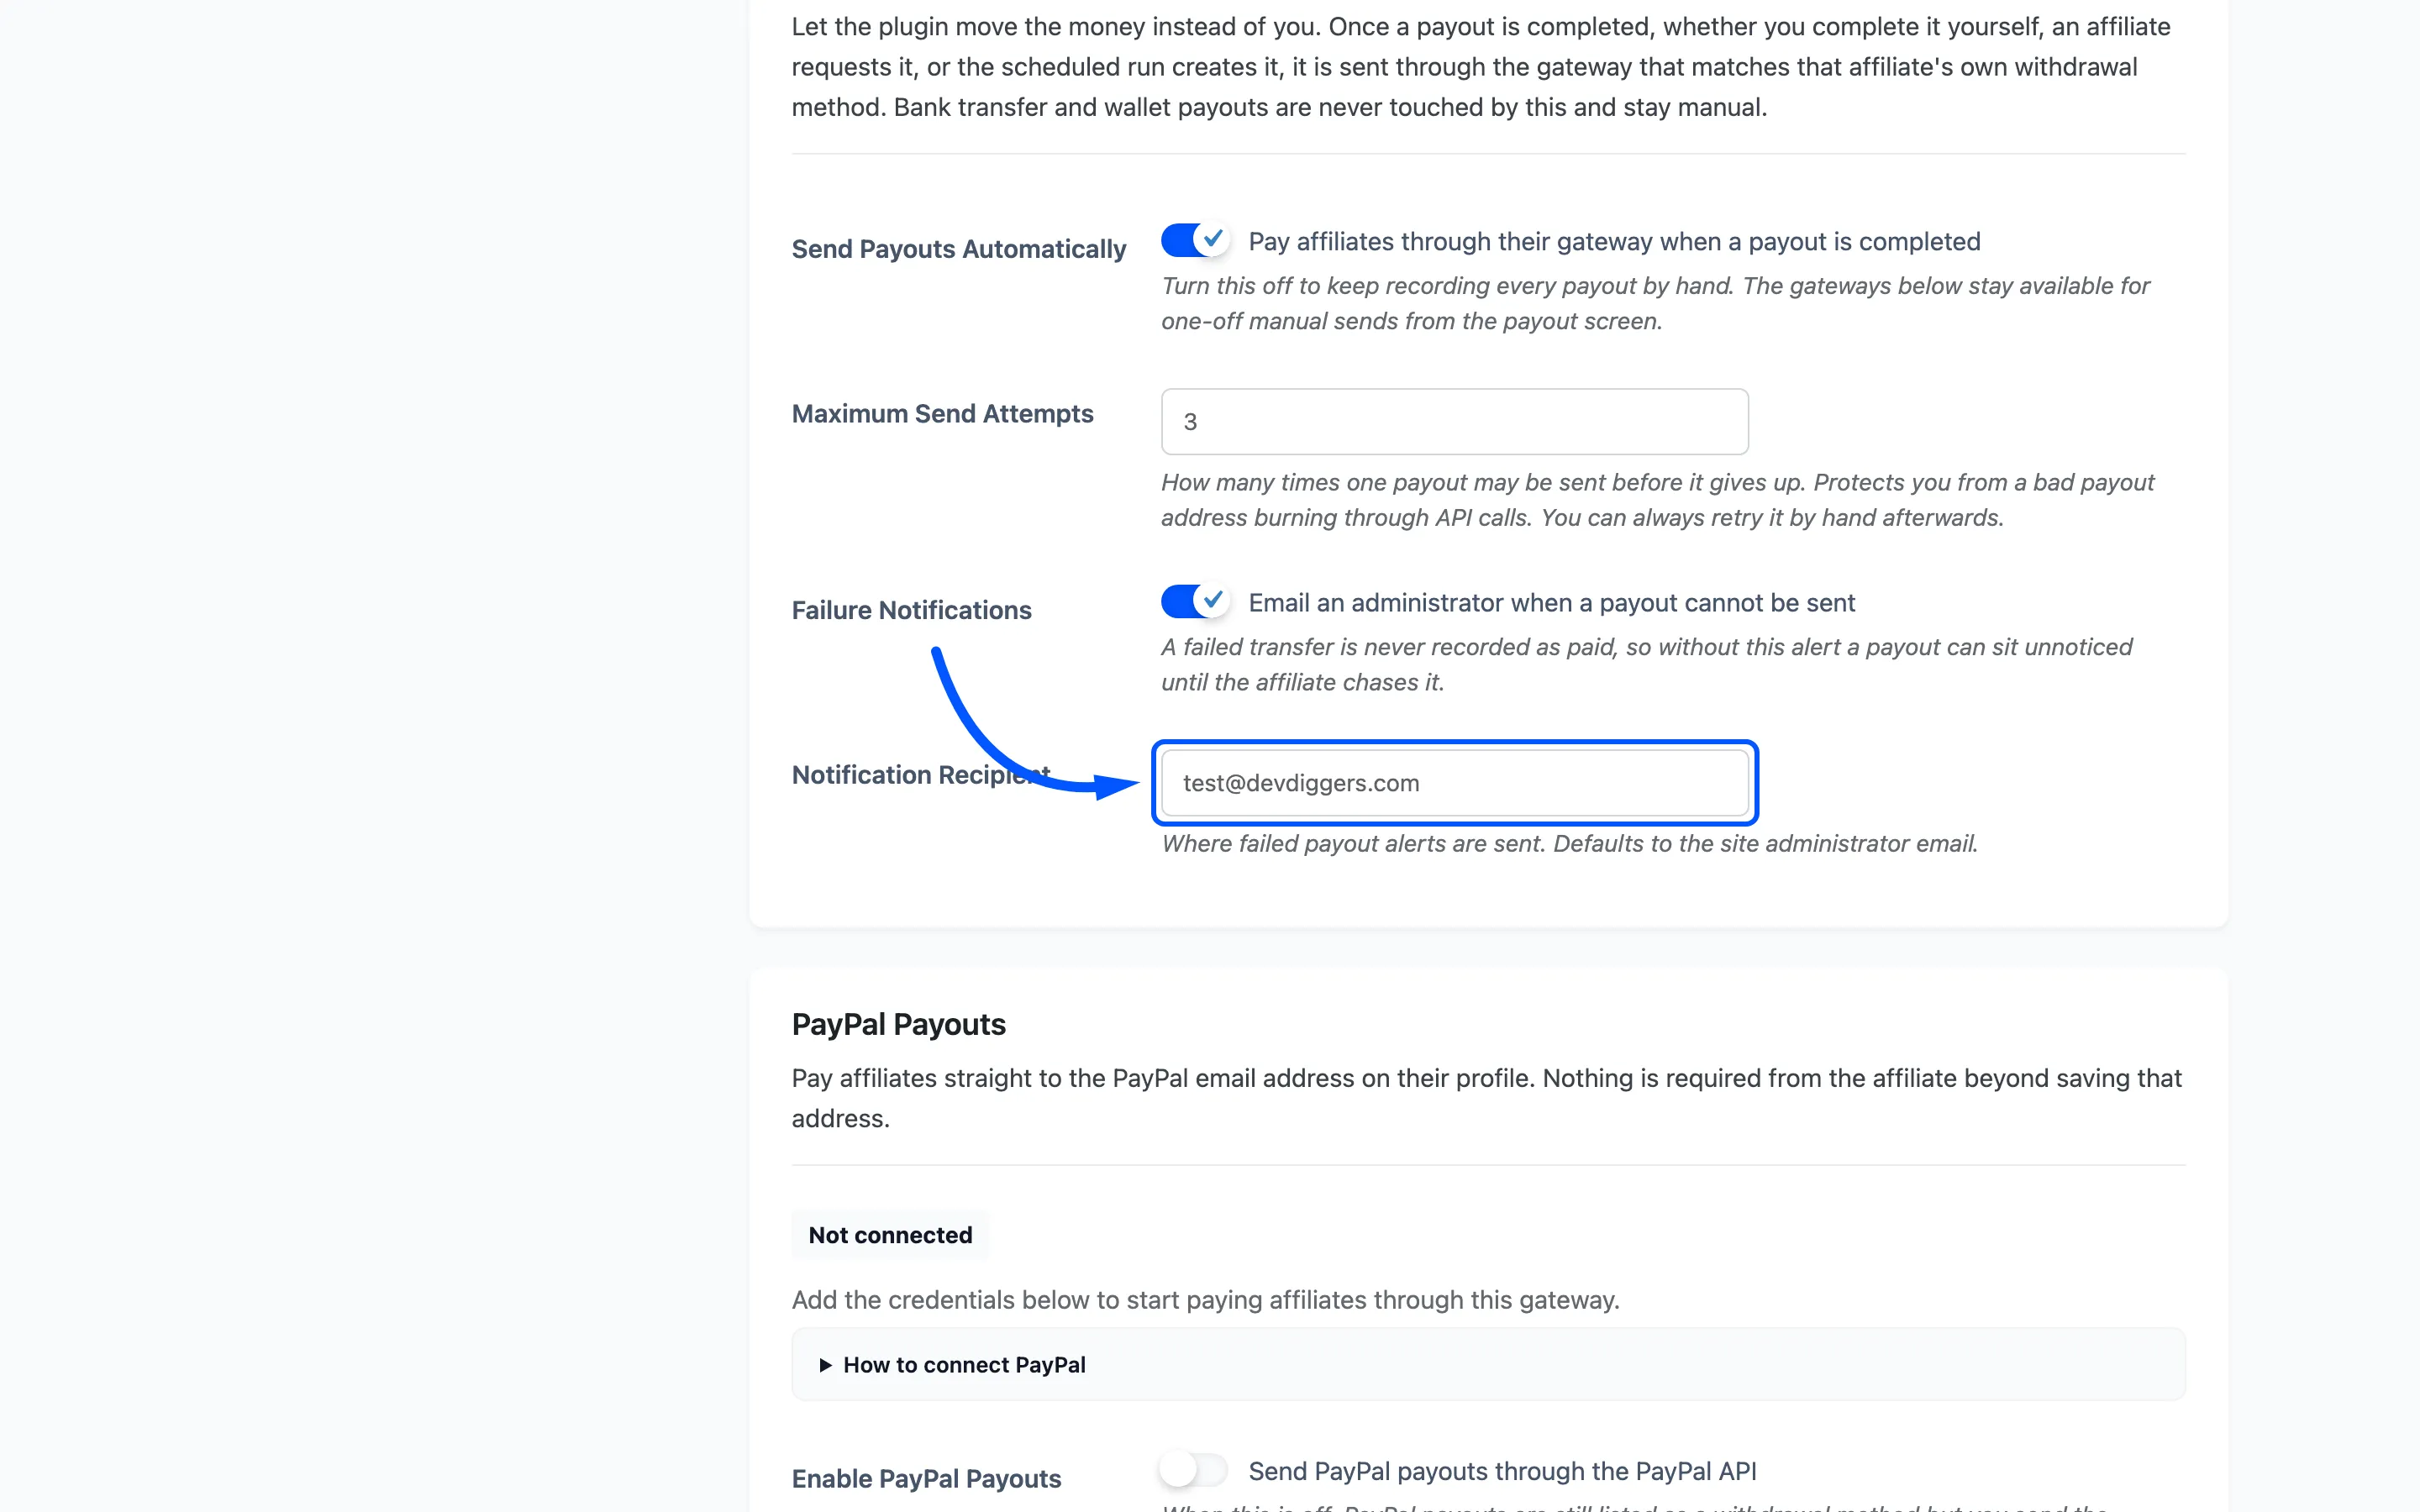
Failure Notifications emails an administrator when a payout cannot be sent, on by default. A refused transfer is never recorded as paid, so without the alert a payout can sit unnoticed until the affiliate chases it.
Notification Recipient is where those alerts go. It defaults to the site administrator email and only appears while the alert is on.
PayPal Payouts
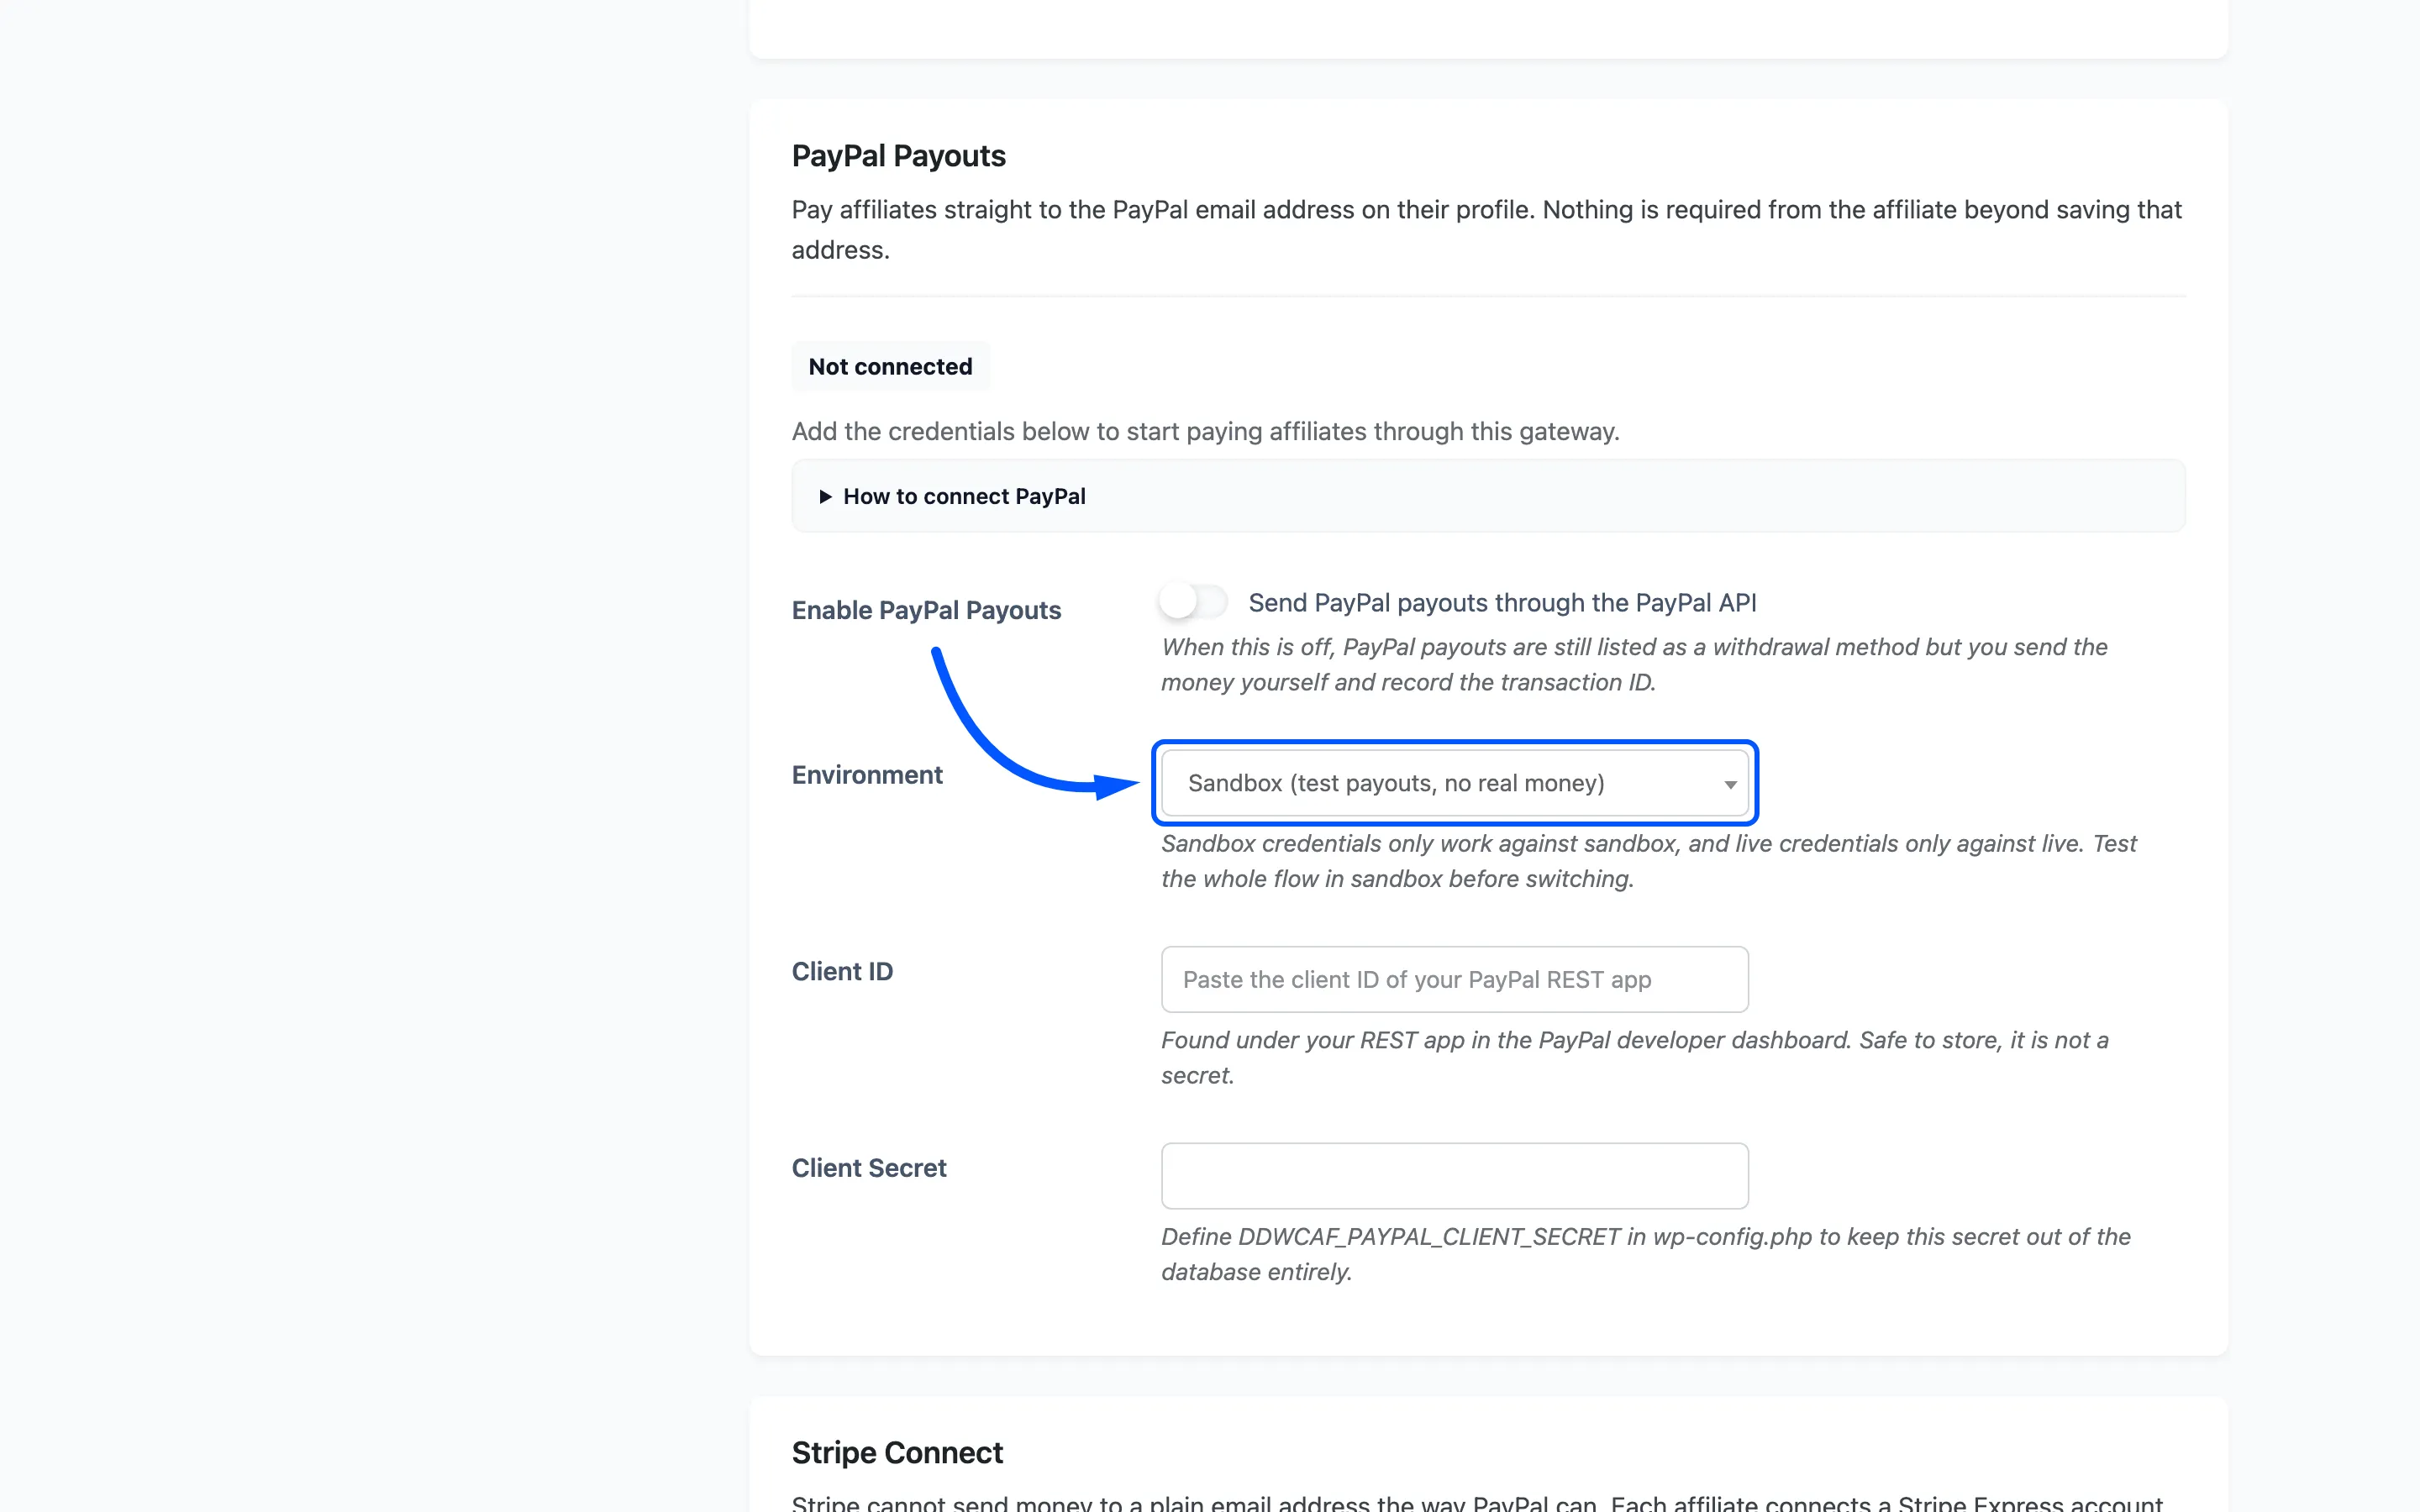
Section titled “PayPal Payouts”PayPal pays straight to the email address on the affiliate’s profile. Nothing is required from the affiliate beyond saving that address.
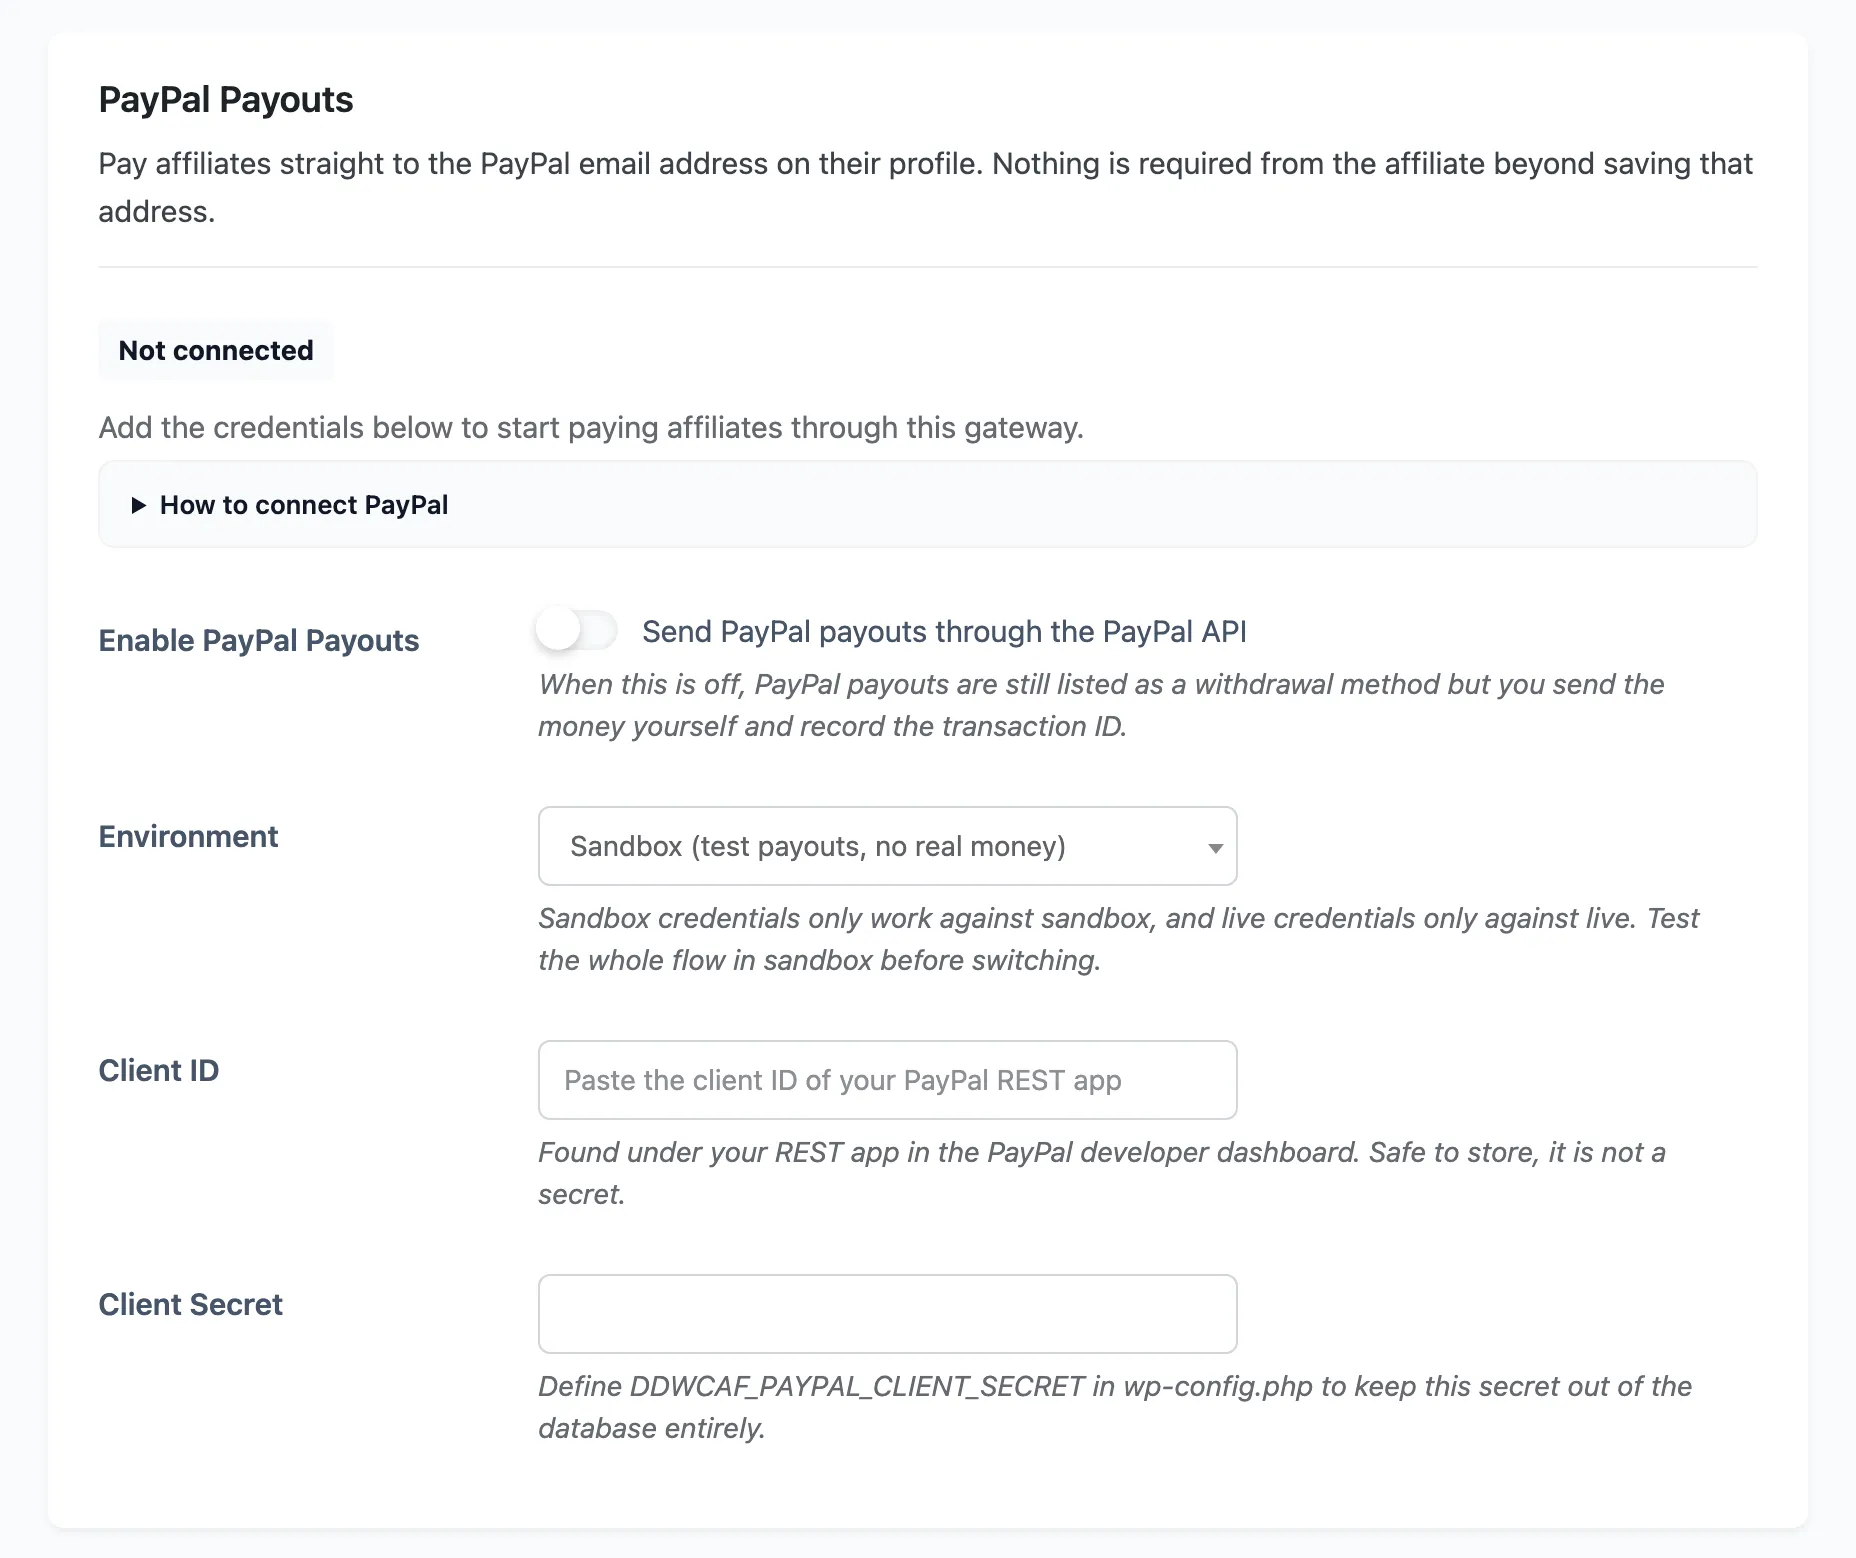
A status line sits above the fields and tells you exactly where the gateway stands.
| Status | What it means |
|---|---|
| Not connected | No credentials saved yet |
| Credentials saved, gateway switched off | The keys work, the toggle is off |
| Connected in test mode | Working, against the provider test environment, no real money |
| Connected and paying live | Real money leaves your account |
Once credentials are saved, a Test connection button appears next to the status. It asks the provider for a token and reports the answer, so you find out about a wrong key here rather than on the first payout.
How to connect PayPal is a collapsible walkthrough with the four steps and the links you need.
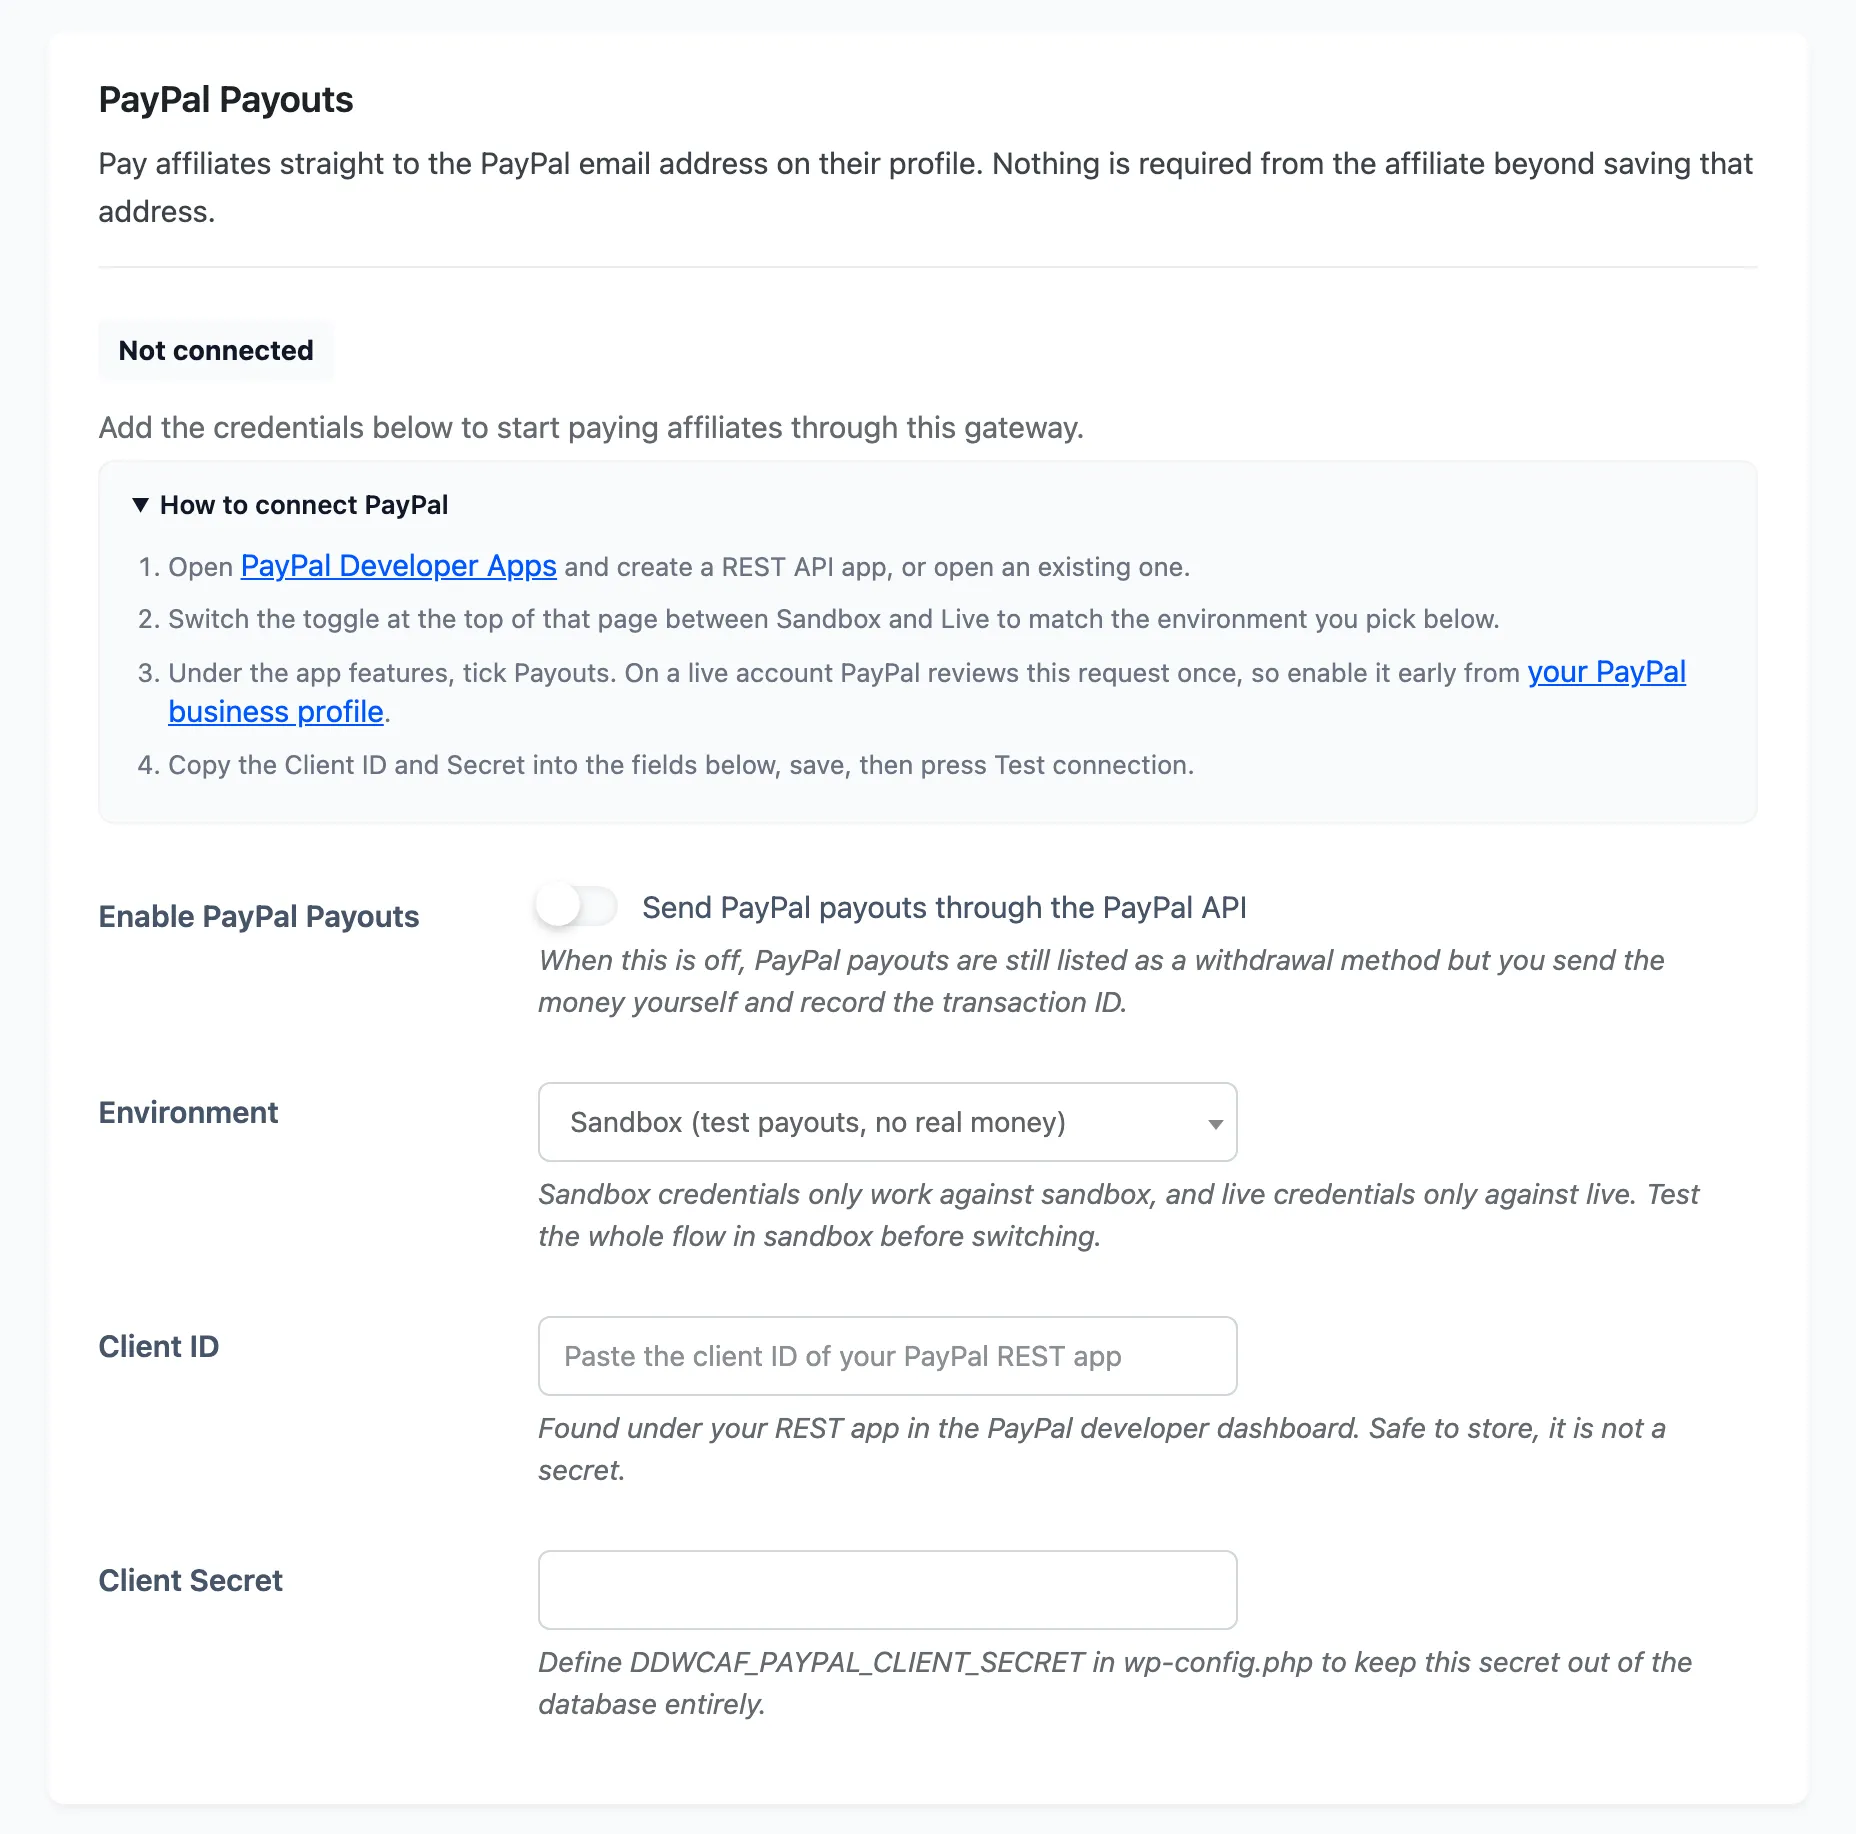
The fields:
- Enable PayPal Payouts: send PayPal payouts through the PayPal API. With this off, PayPal stays a withdrawal method but you send the money yourself and record the transaction ID.
- Environment: Sandbox for test payouts with no real money, or Live. Defaults to Sandbox. Sandbox credentials only work against sandbox and live credentials only against live.
- Client ID: the client ID of your PayPal REST app. It is not a secret and is safe to store.
- Client Secret: the matching secret. Define
DDWCAF_PAYPAL_CLIENT_SECRETinwp-config.phpto keep it out of the database entirely, and the field turns read-only.
Stripe Connect
Section titled “Stripe Connect”Stripe cannot send money to a plain email address the way PayPal can. Each affiliate connects a Stripe Express account once from their own dashboard, in a hosted flow where Stripe collects their identity and bank details directly, and payouts are transferred to that account afterwards.
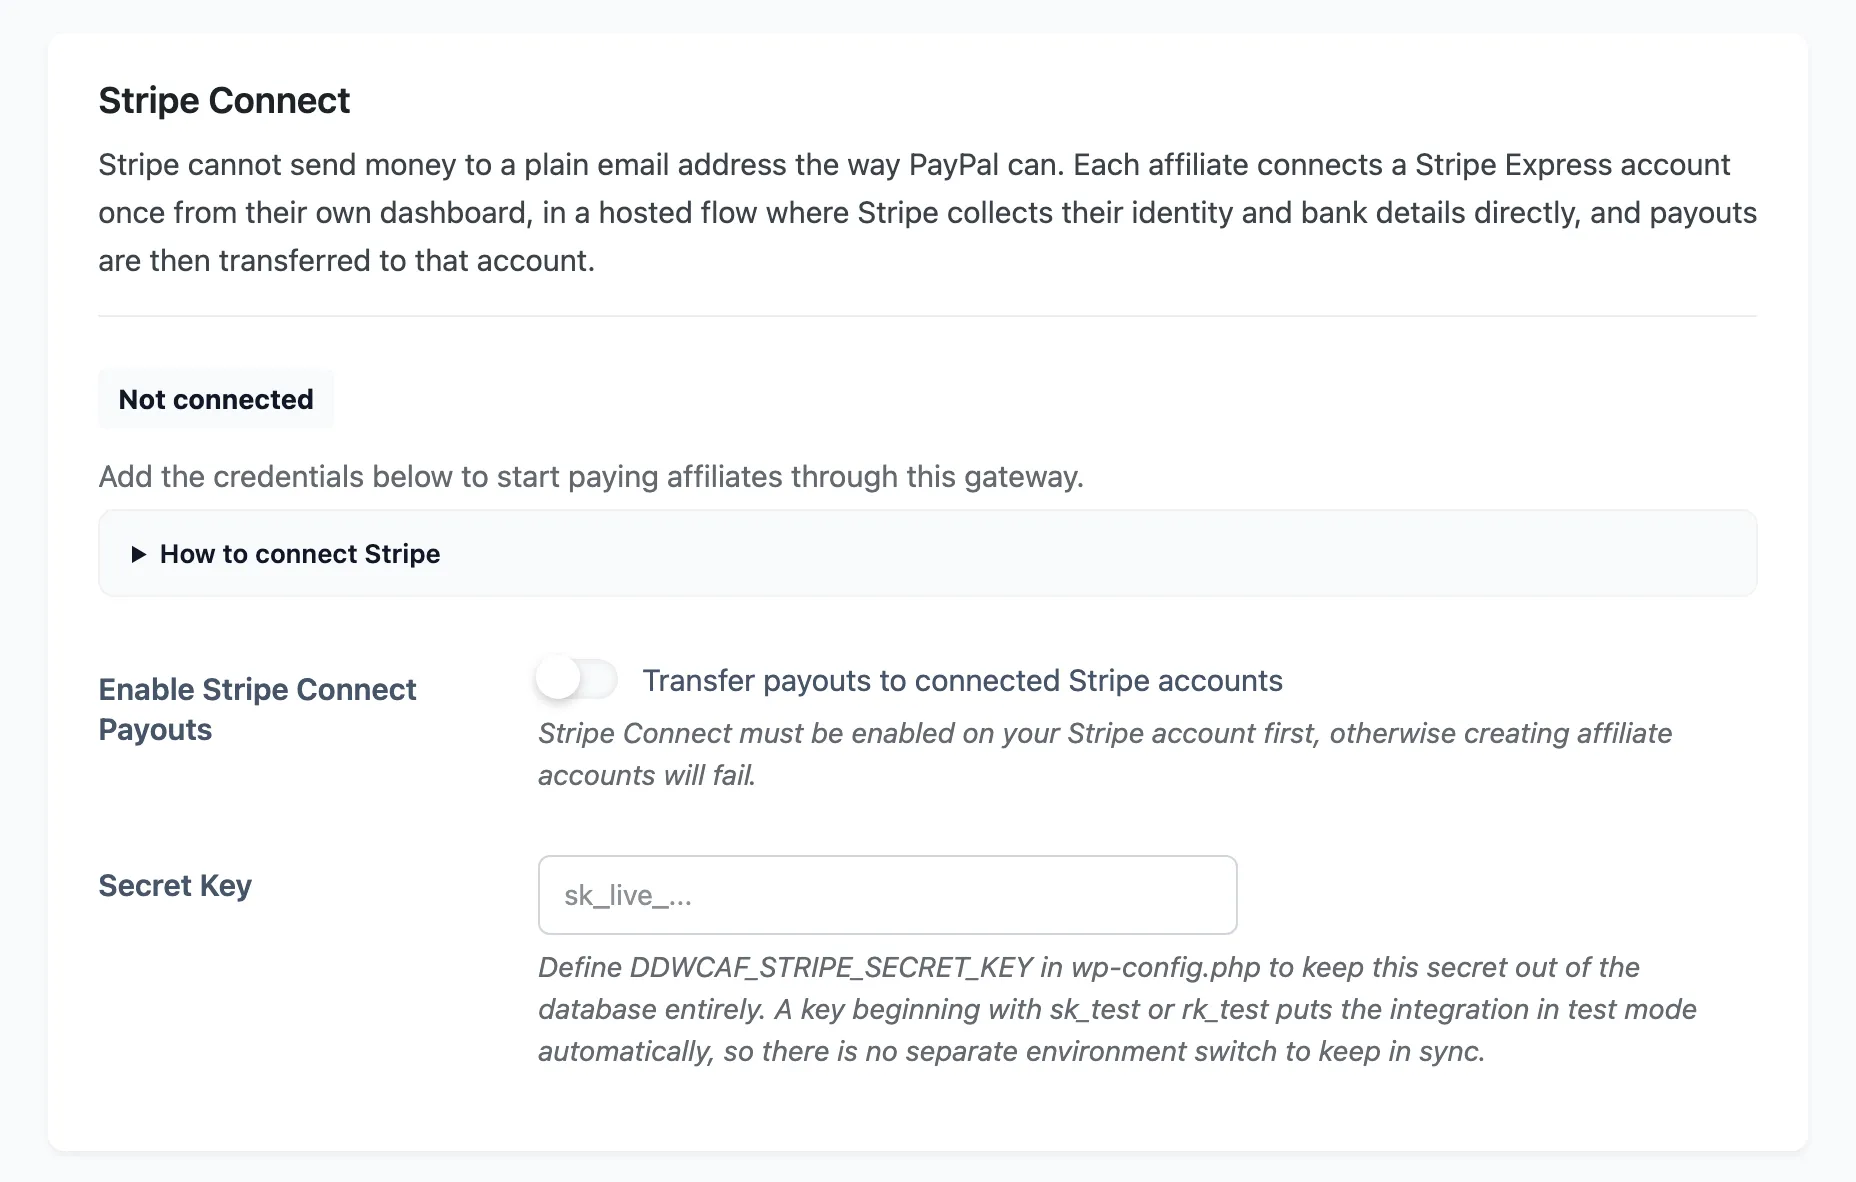
It carries the same status line and Test connection button as PayPal.
How to connect Stripe holds five steps. Step two is the one that catches people out: your Connect platform profile has to be completed and saved before Stripe will create any affiliate account, and skipping it leaves you with a connection that tests fine and affiliates who cannot connect.
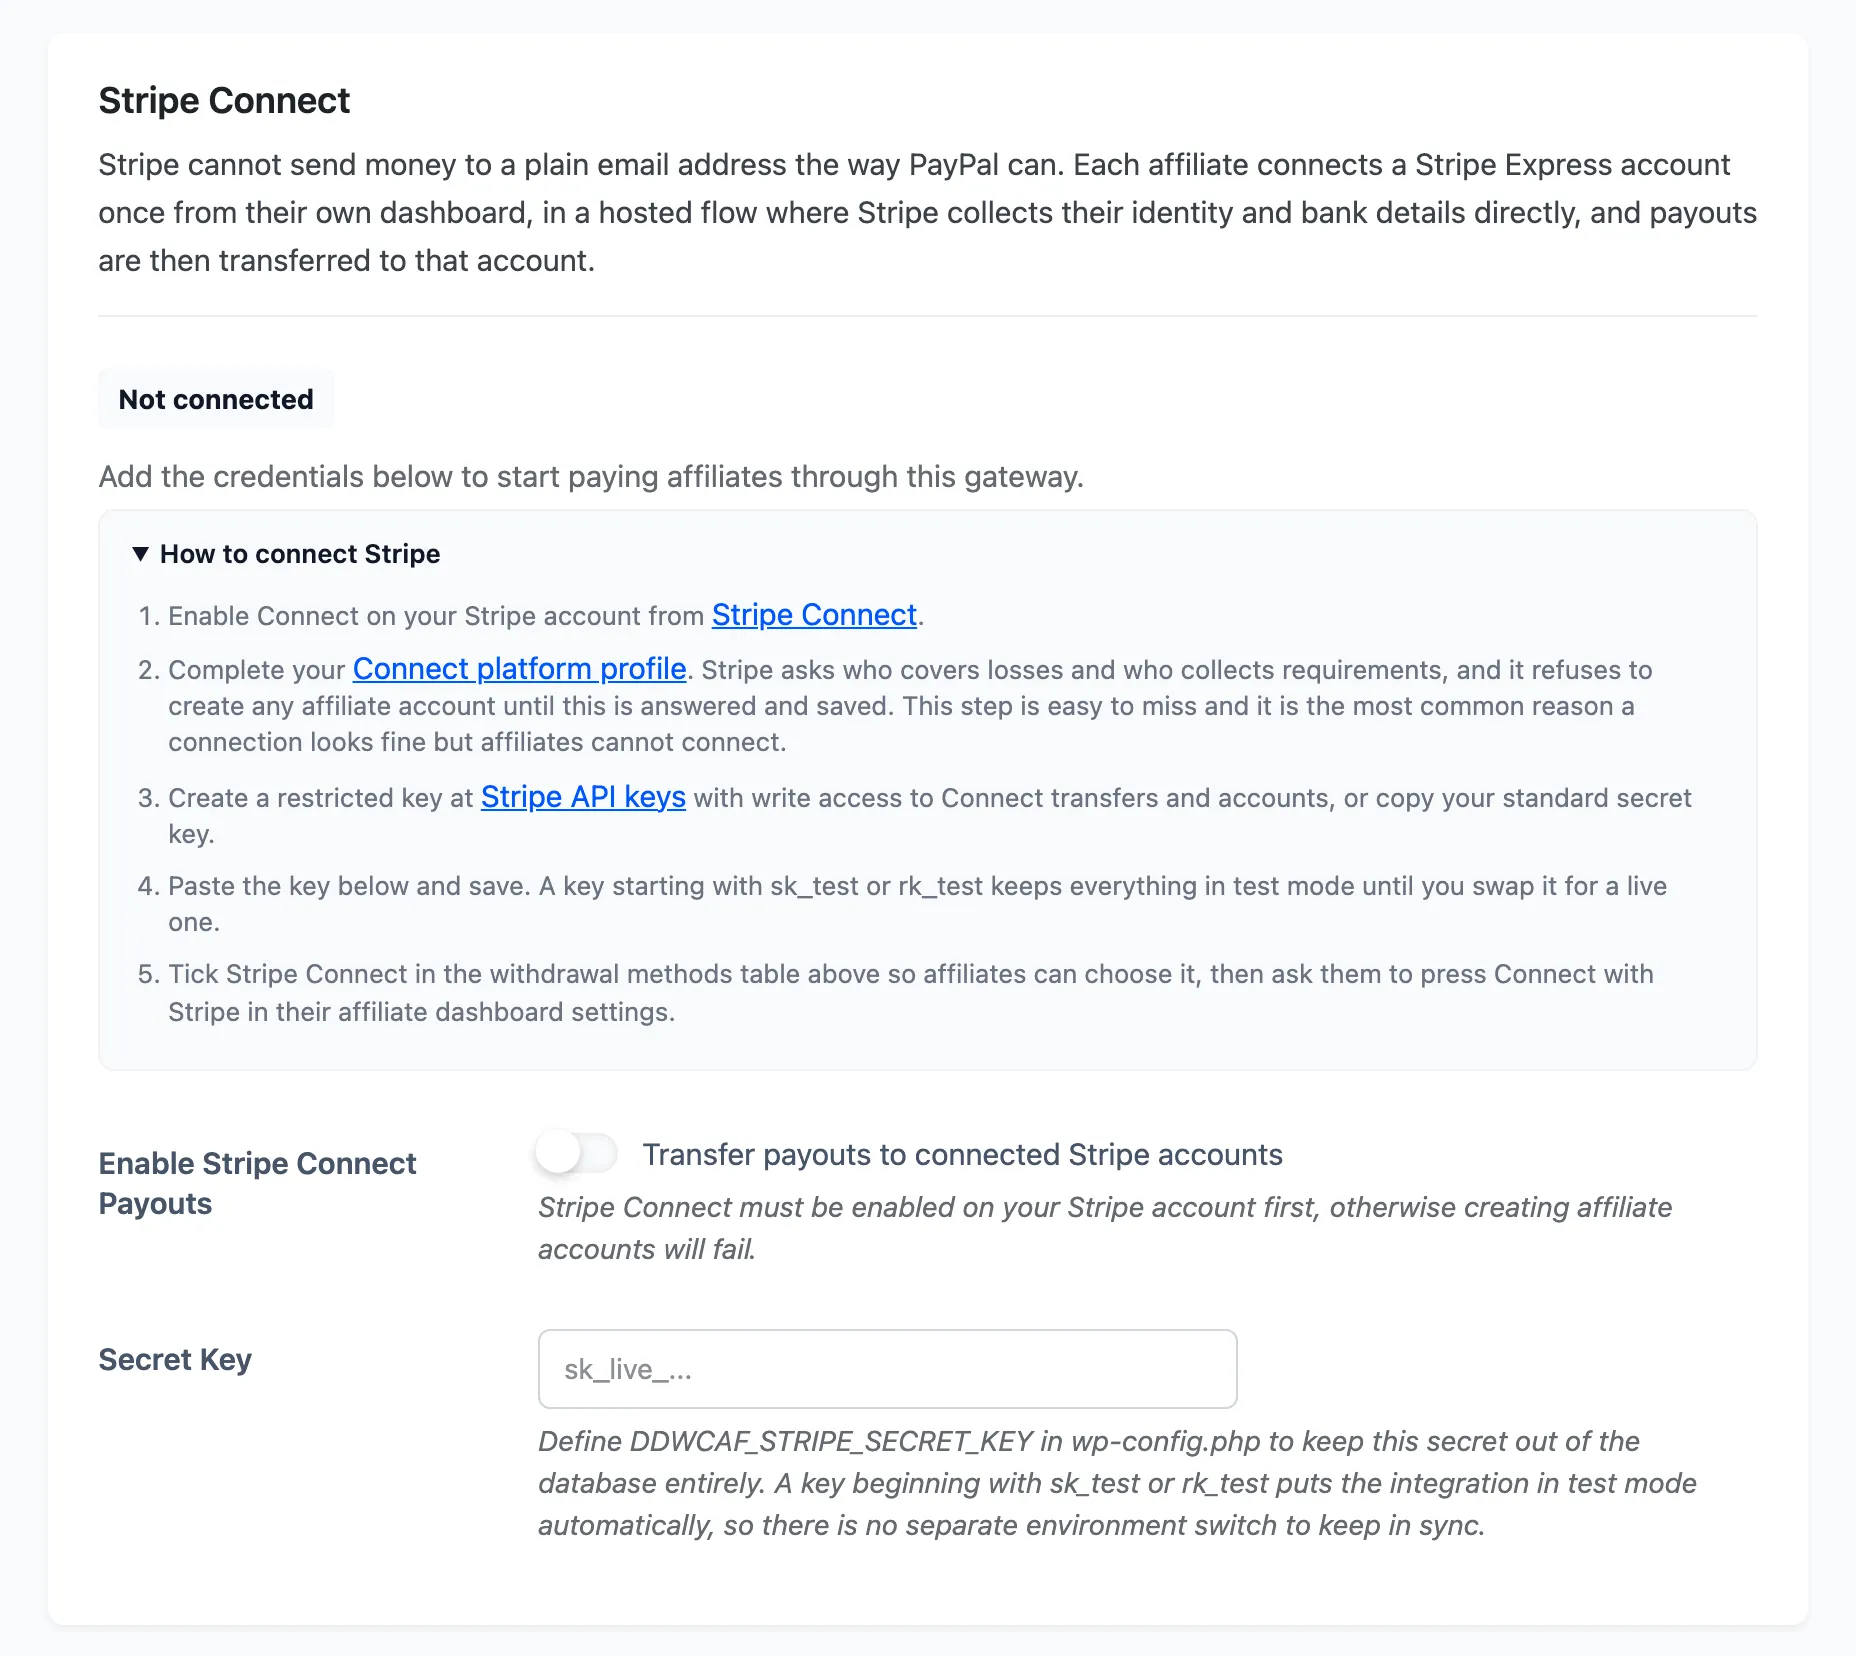
The fields:
- Enable Stripe Connect Payouts: transfer payouts to connected Stripe accounts. Connect must be enabled on your Stripe account first.
- Secret Key: your standard secret key, or a restricted key with write access to Connect
transfers and accounts. A key beginning
sk_testorrk_testputs the whole integration in test mode, so there is no separate environment switch to keep in sync.DDWCAF_STRIPE_SECRET_KEYinwp-config.phpworks here too.
How a payout is recorded
Section titled “How a payout is recorded”Whichever route creates it, a payout stores the affiliate, the method, the amount, a reference, a status and a transaction ID. Every commission it covers moves to Pending Payment, then to Paid when you mark the payout Completed.
A commission that is already Pending Payment or Paid is never touched again by an order status change. That protects a payment you have already sent from being reversed by a later edit to the order.
Where to go next
Section titled “Where to go next”- How Automatic Payouts Work for the journey from a completed payout to money in an affiliate’s account.
- Payouts to work the payout list.
- How to Pay Your Affiliates for the full process, start to finish.