

The Affiliate Experience
Everything your affiliates touch happens on the front end. They never see your admin. This walks the whole journey, in the order a partner meets it.
1. Signing up
Section titled “1. Signing up”An affiliate lands on the page holding the registration shortcode. Logged out, that page shows a login form on the left and a signup form on the right.
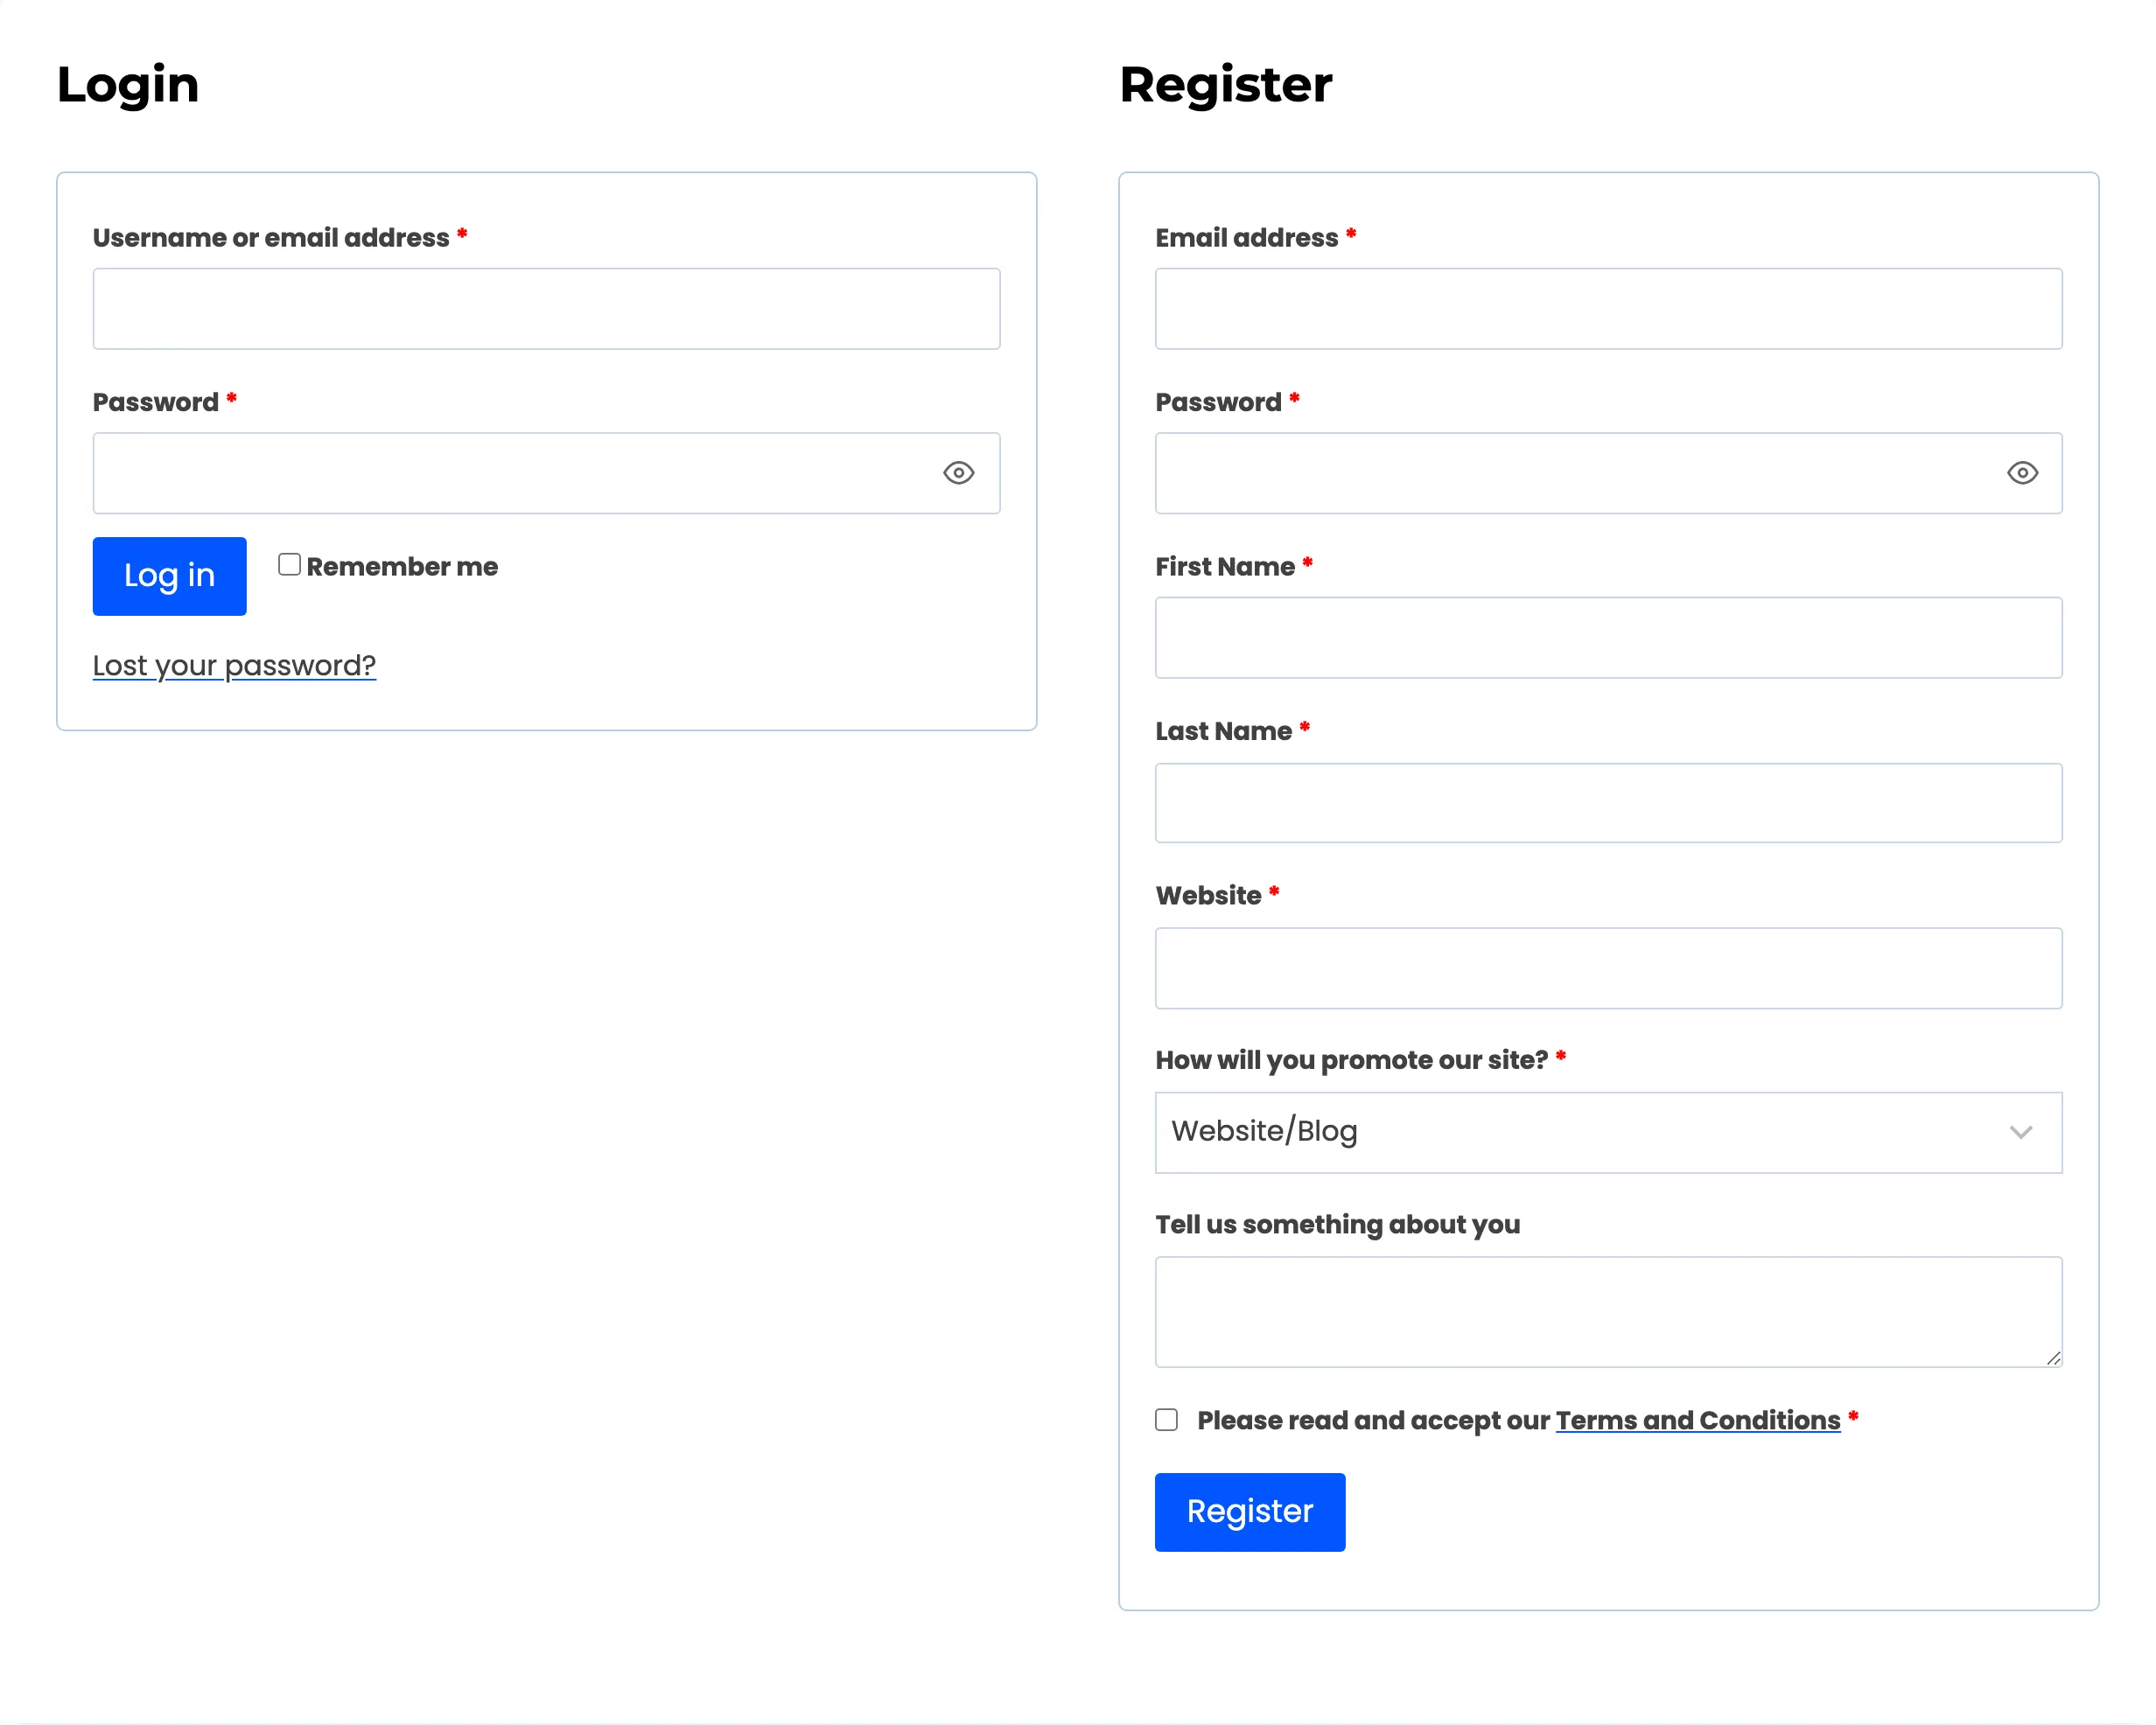
The signup form ships with seven fields: username, email address, password, first name, last name, How will you promote our site? and a terms checkbox. Username and password only appear if WooCommerce is set to let customers choose their own.
You can show the login form beside the signup form, or the signup form on its own. That is the Registration Page Content setting under Shortcodes.
An existing customer who is already logged in sees a shorter form instead, asking only for the extra affiliate fields. Submitting it converts their account to the Affiliate role.
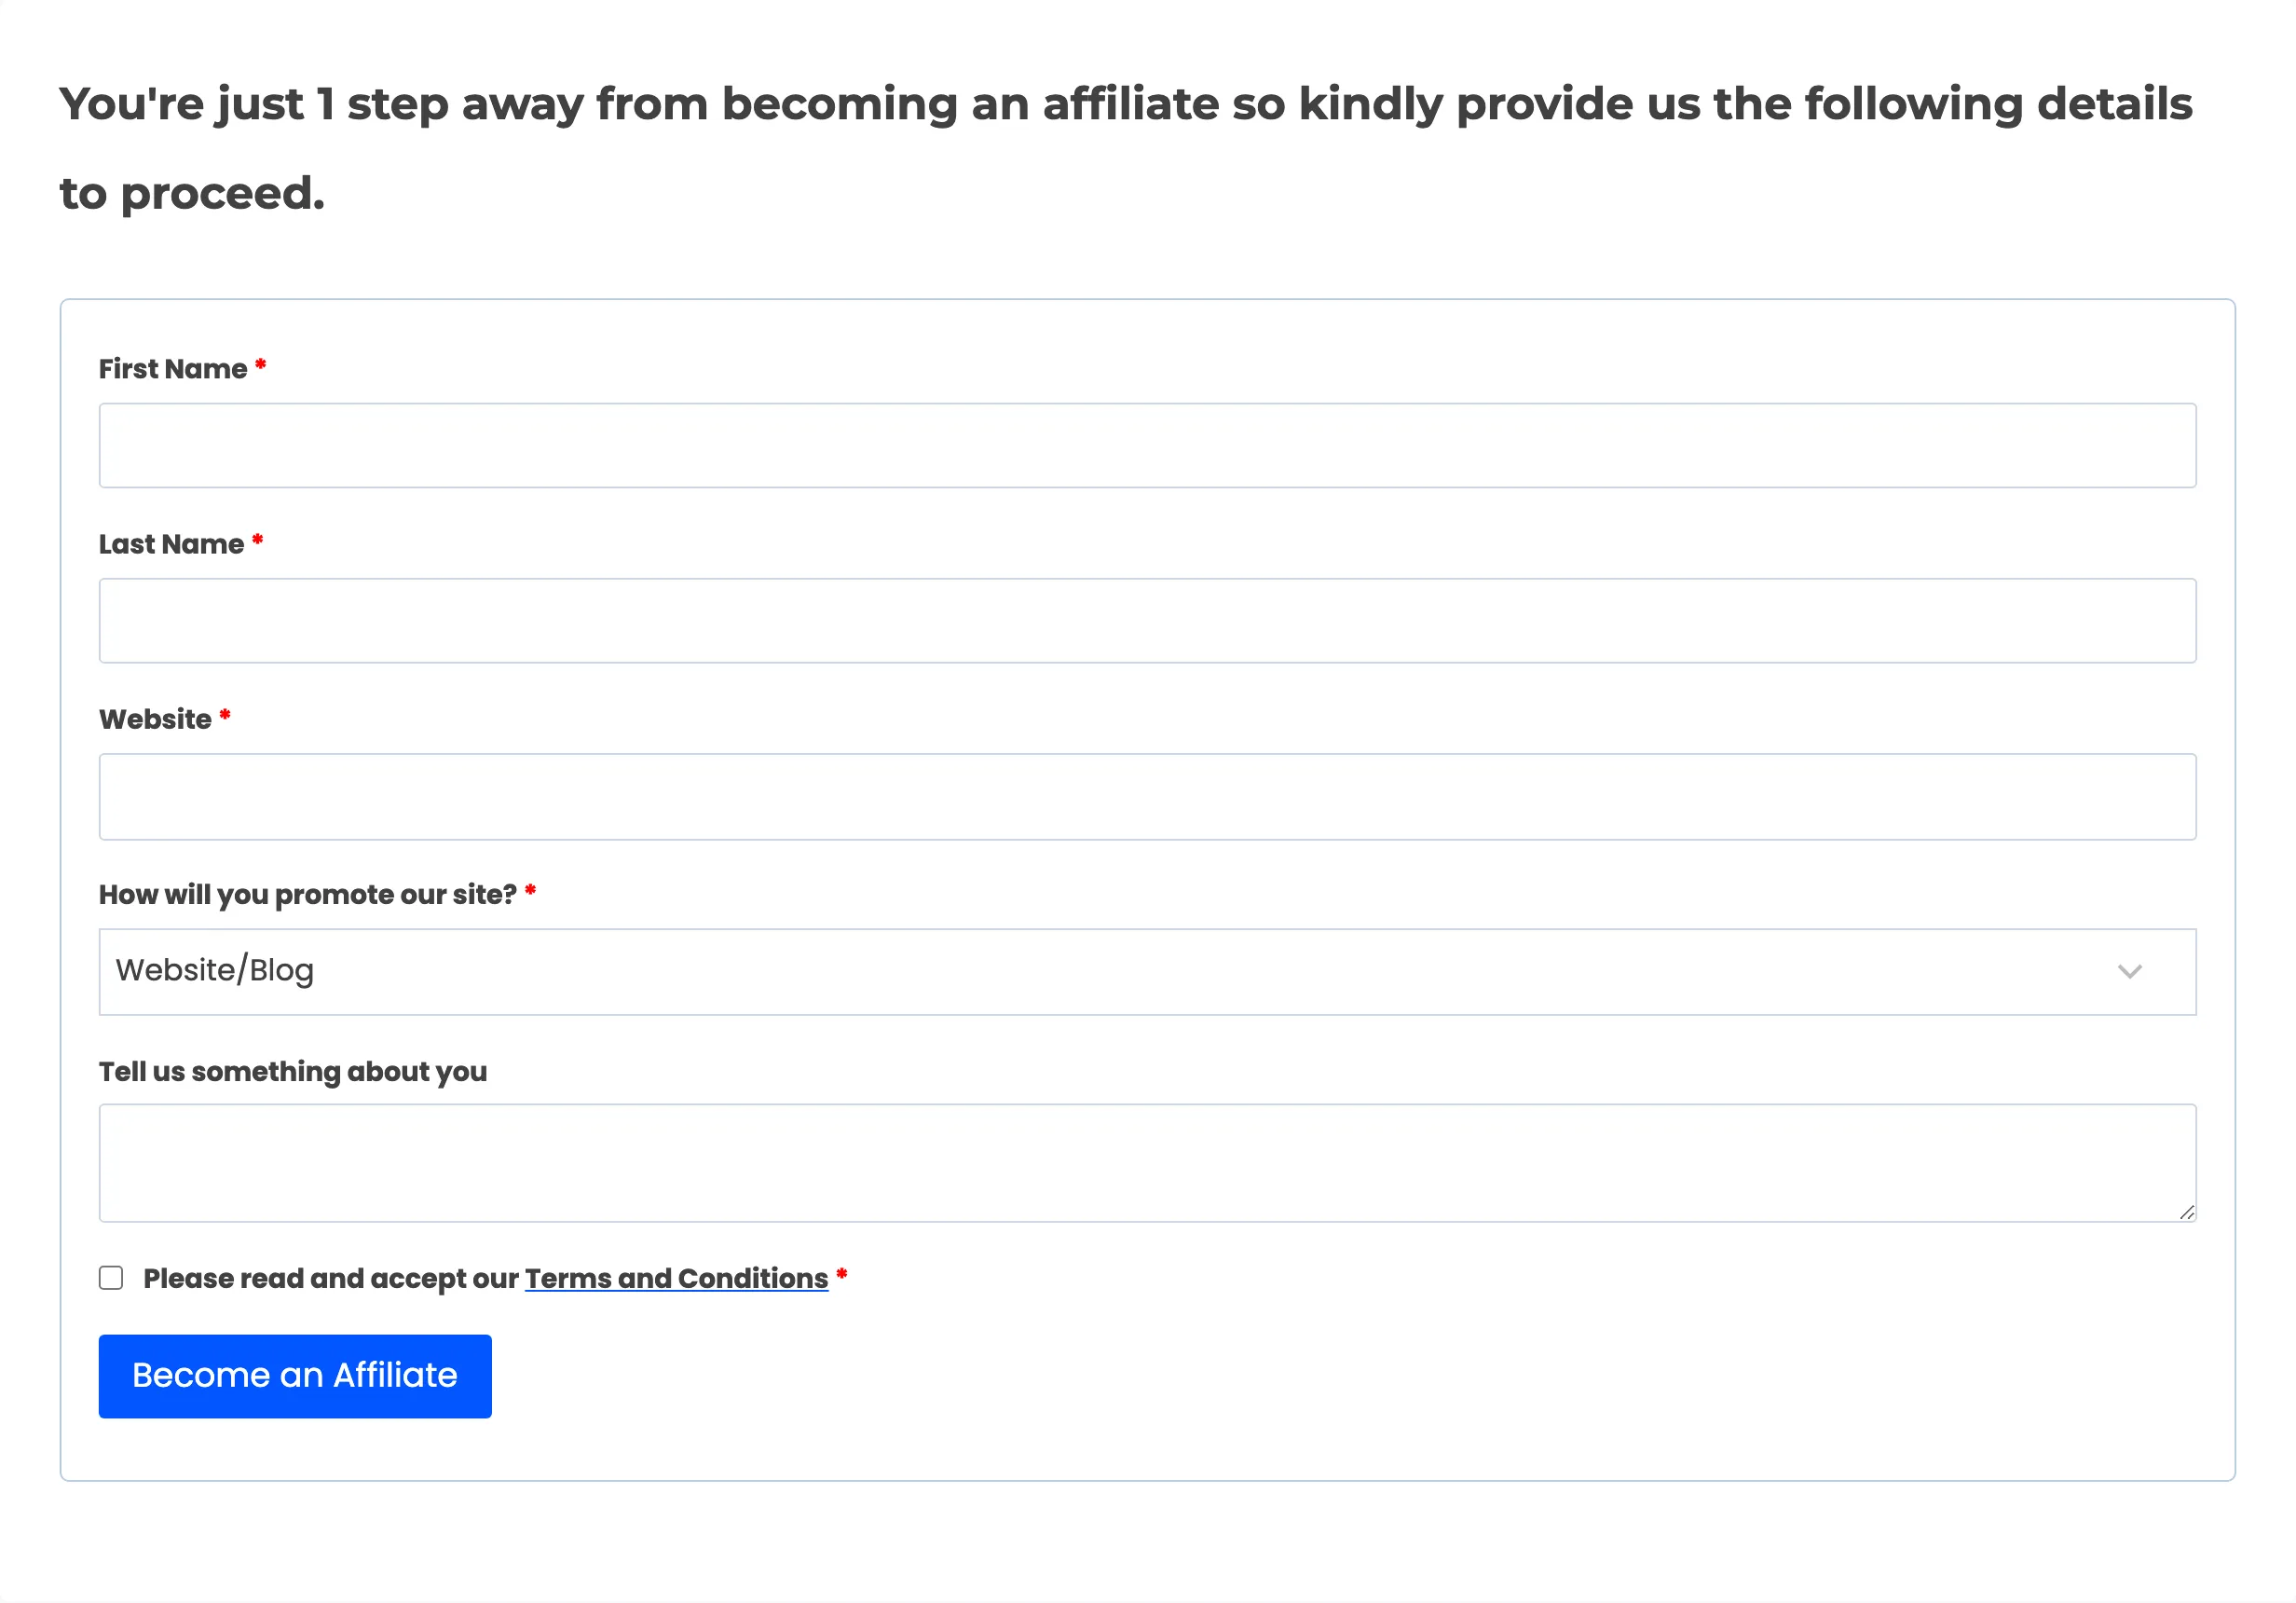
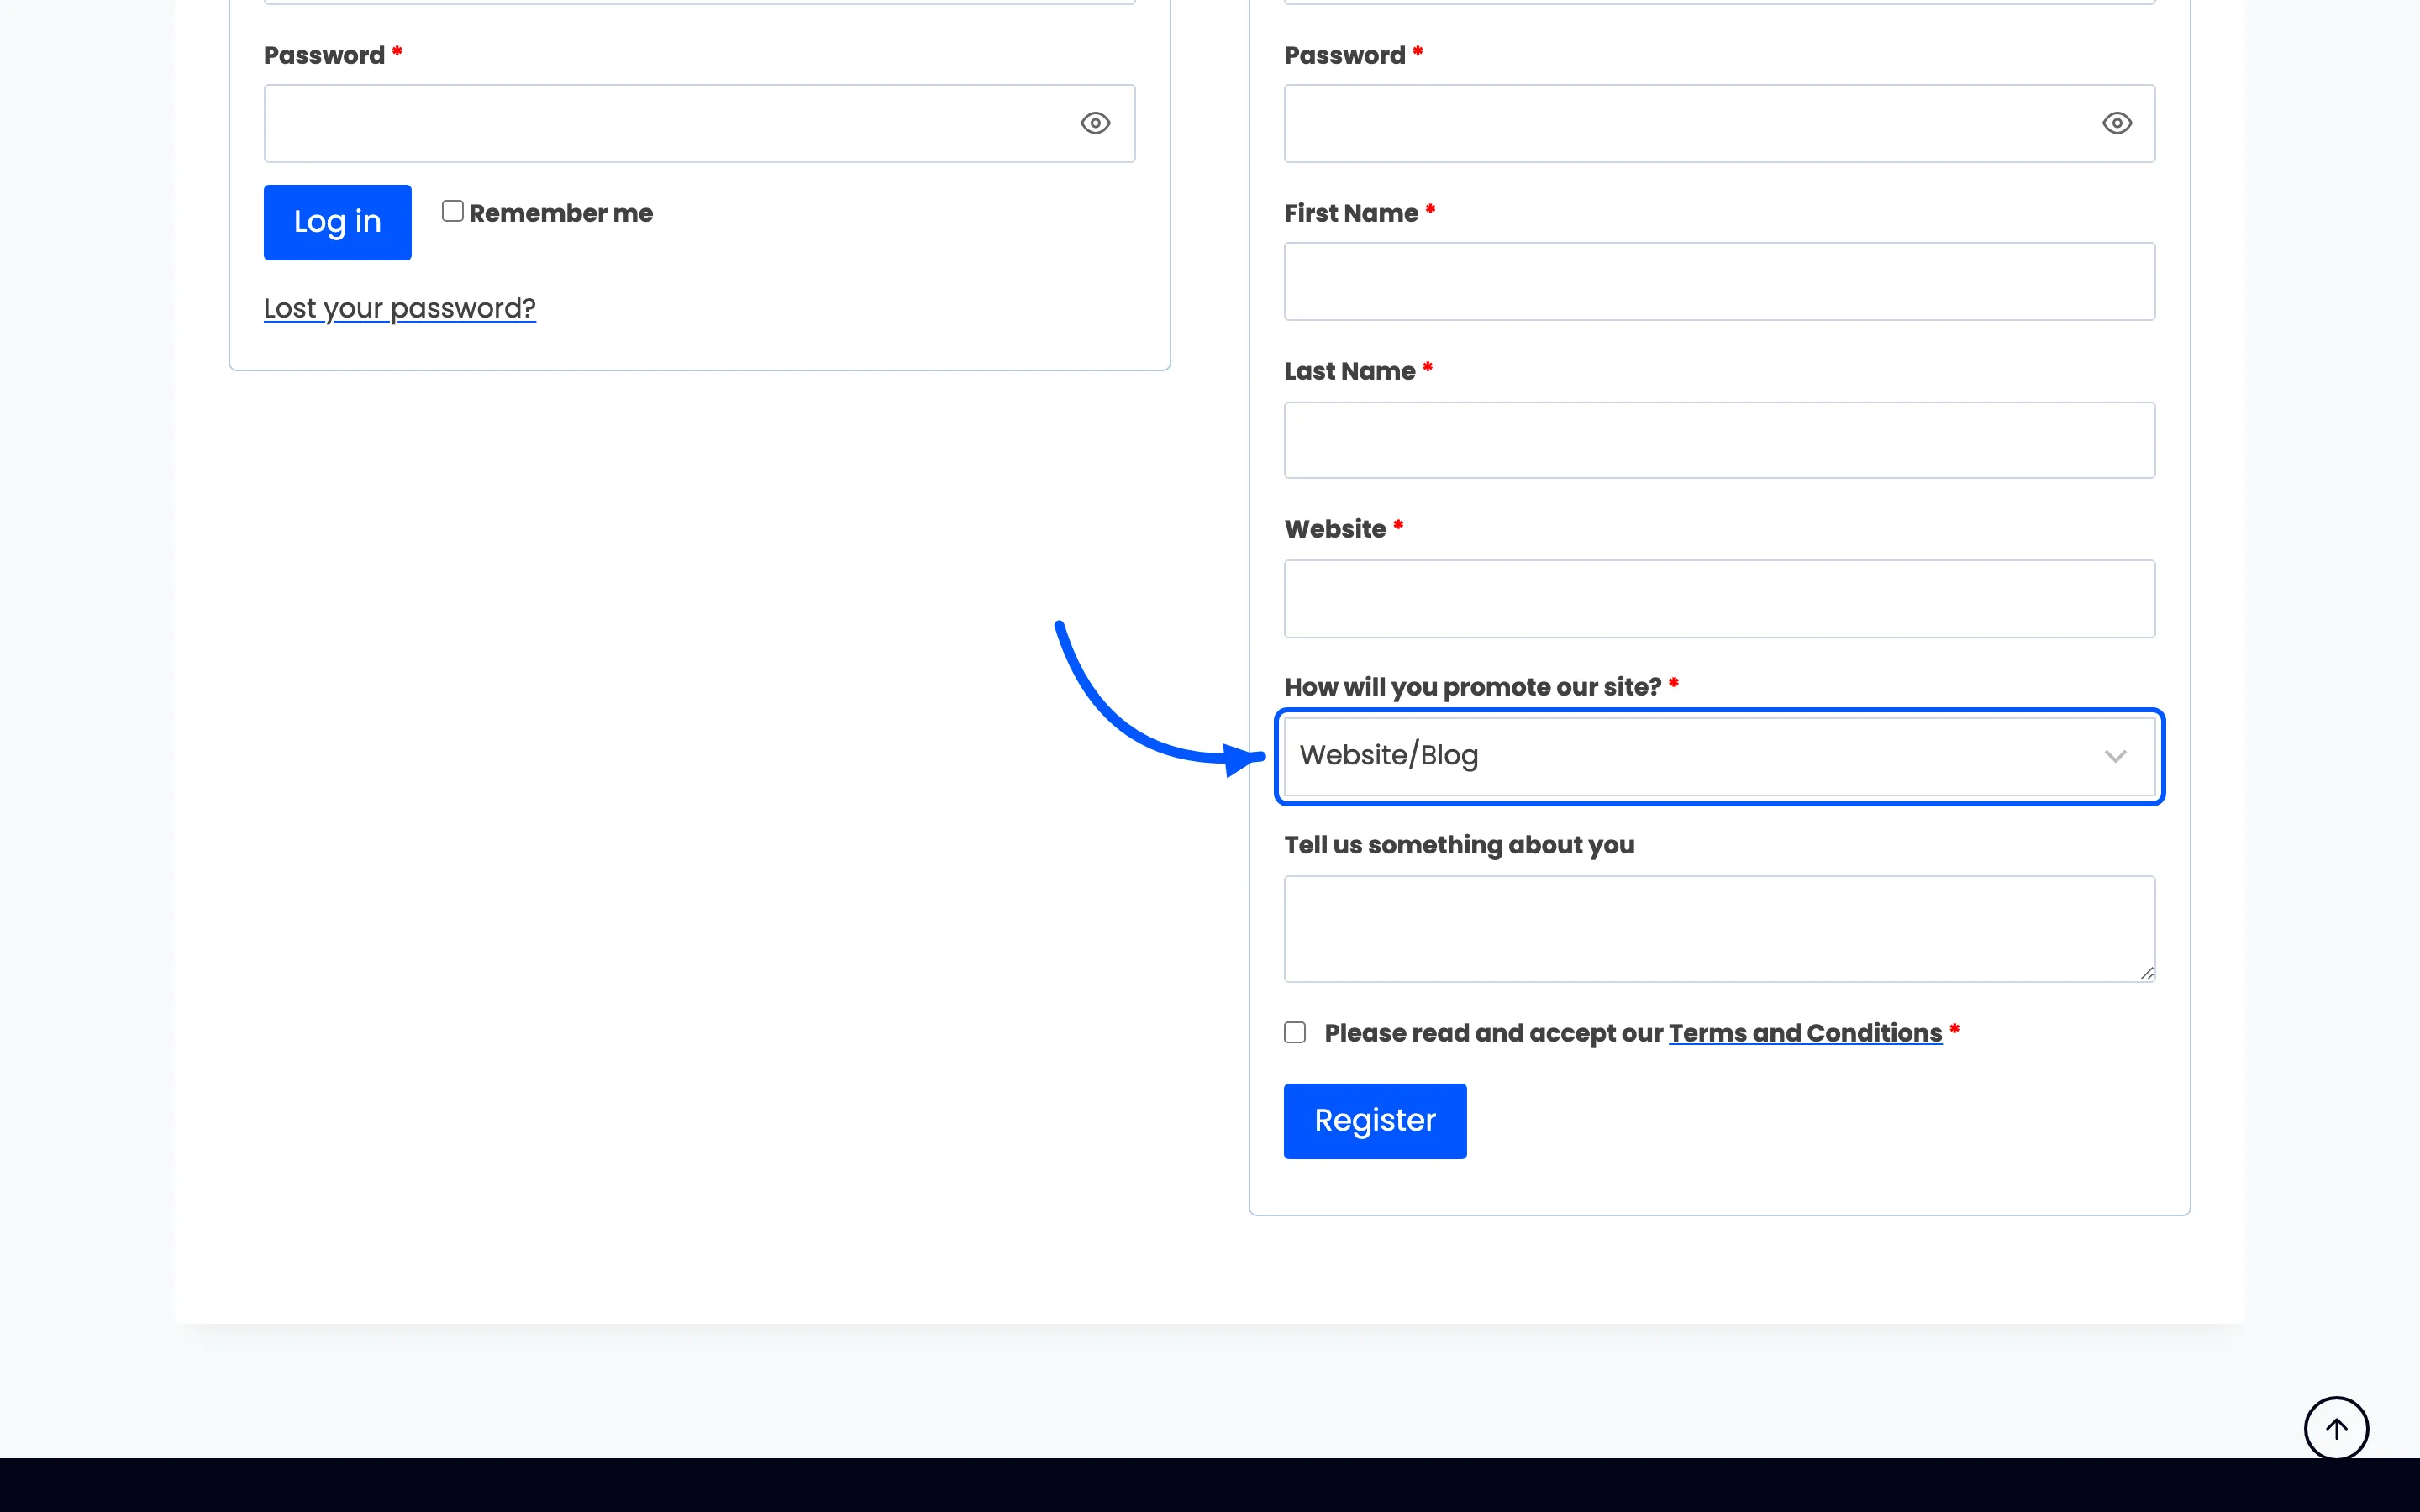
The dropdown asking how they will promote you is the field worth reading before you approve anyone.
2. Waiting for approval
Section titled “2. Waiting for approval”A new signup lands on Pending and cannot earn yet. Their referral token resolves to nothing, so a link they share sets no cookie and logs no visit.
3. The dashboard
Section titled “3. The dashboard”Once approved, logging in lands the affiliate on the dashboard page. The plugin redirects any affiliate to it after login, so they never have to find it.
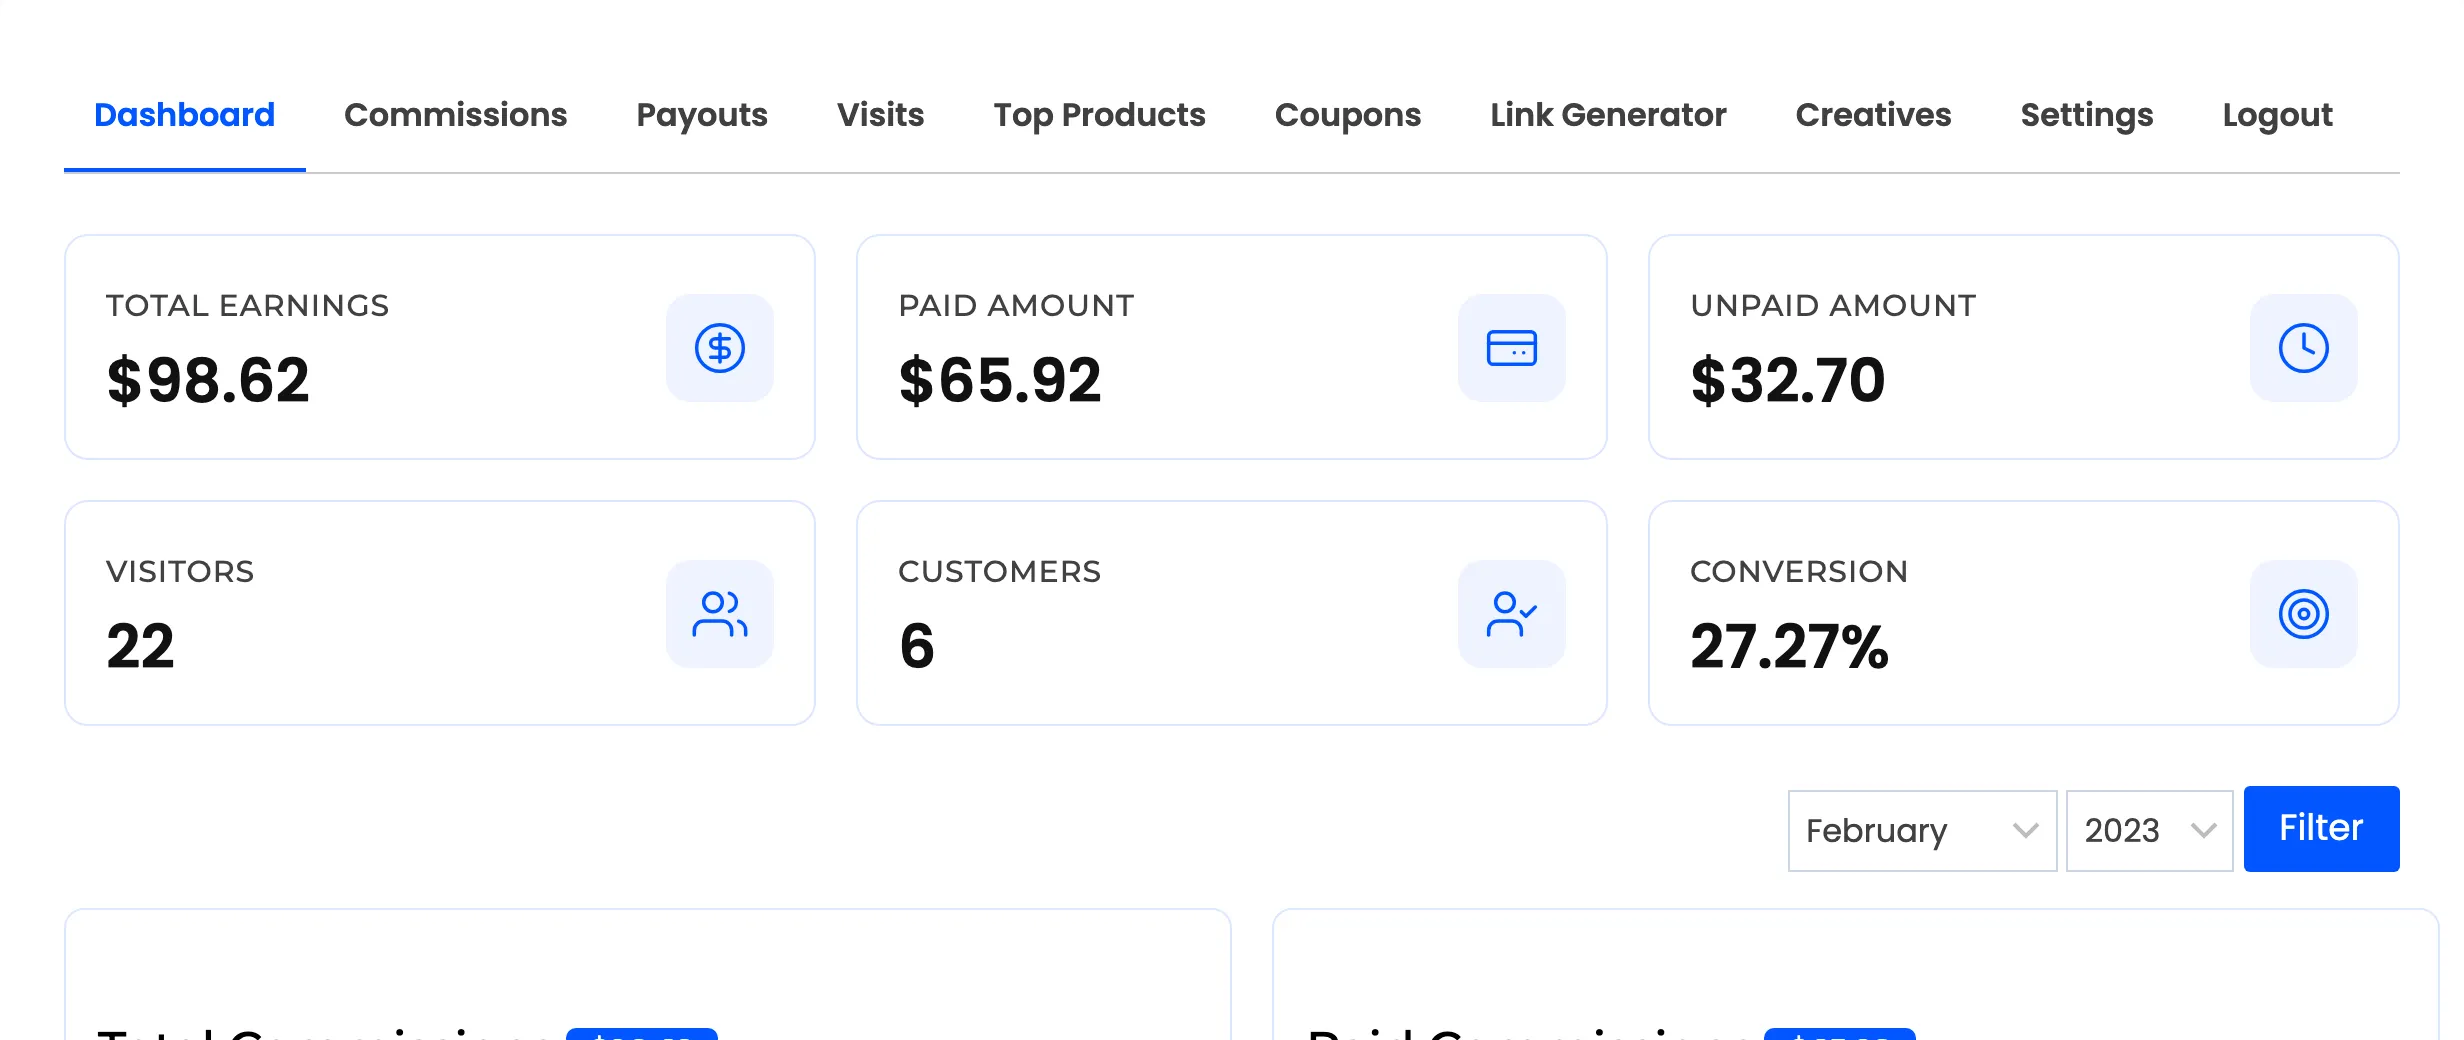
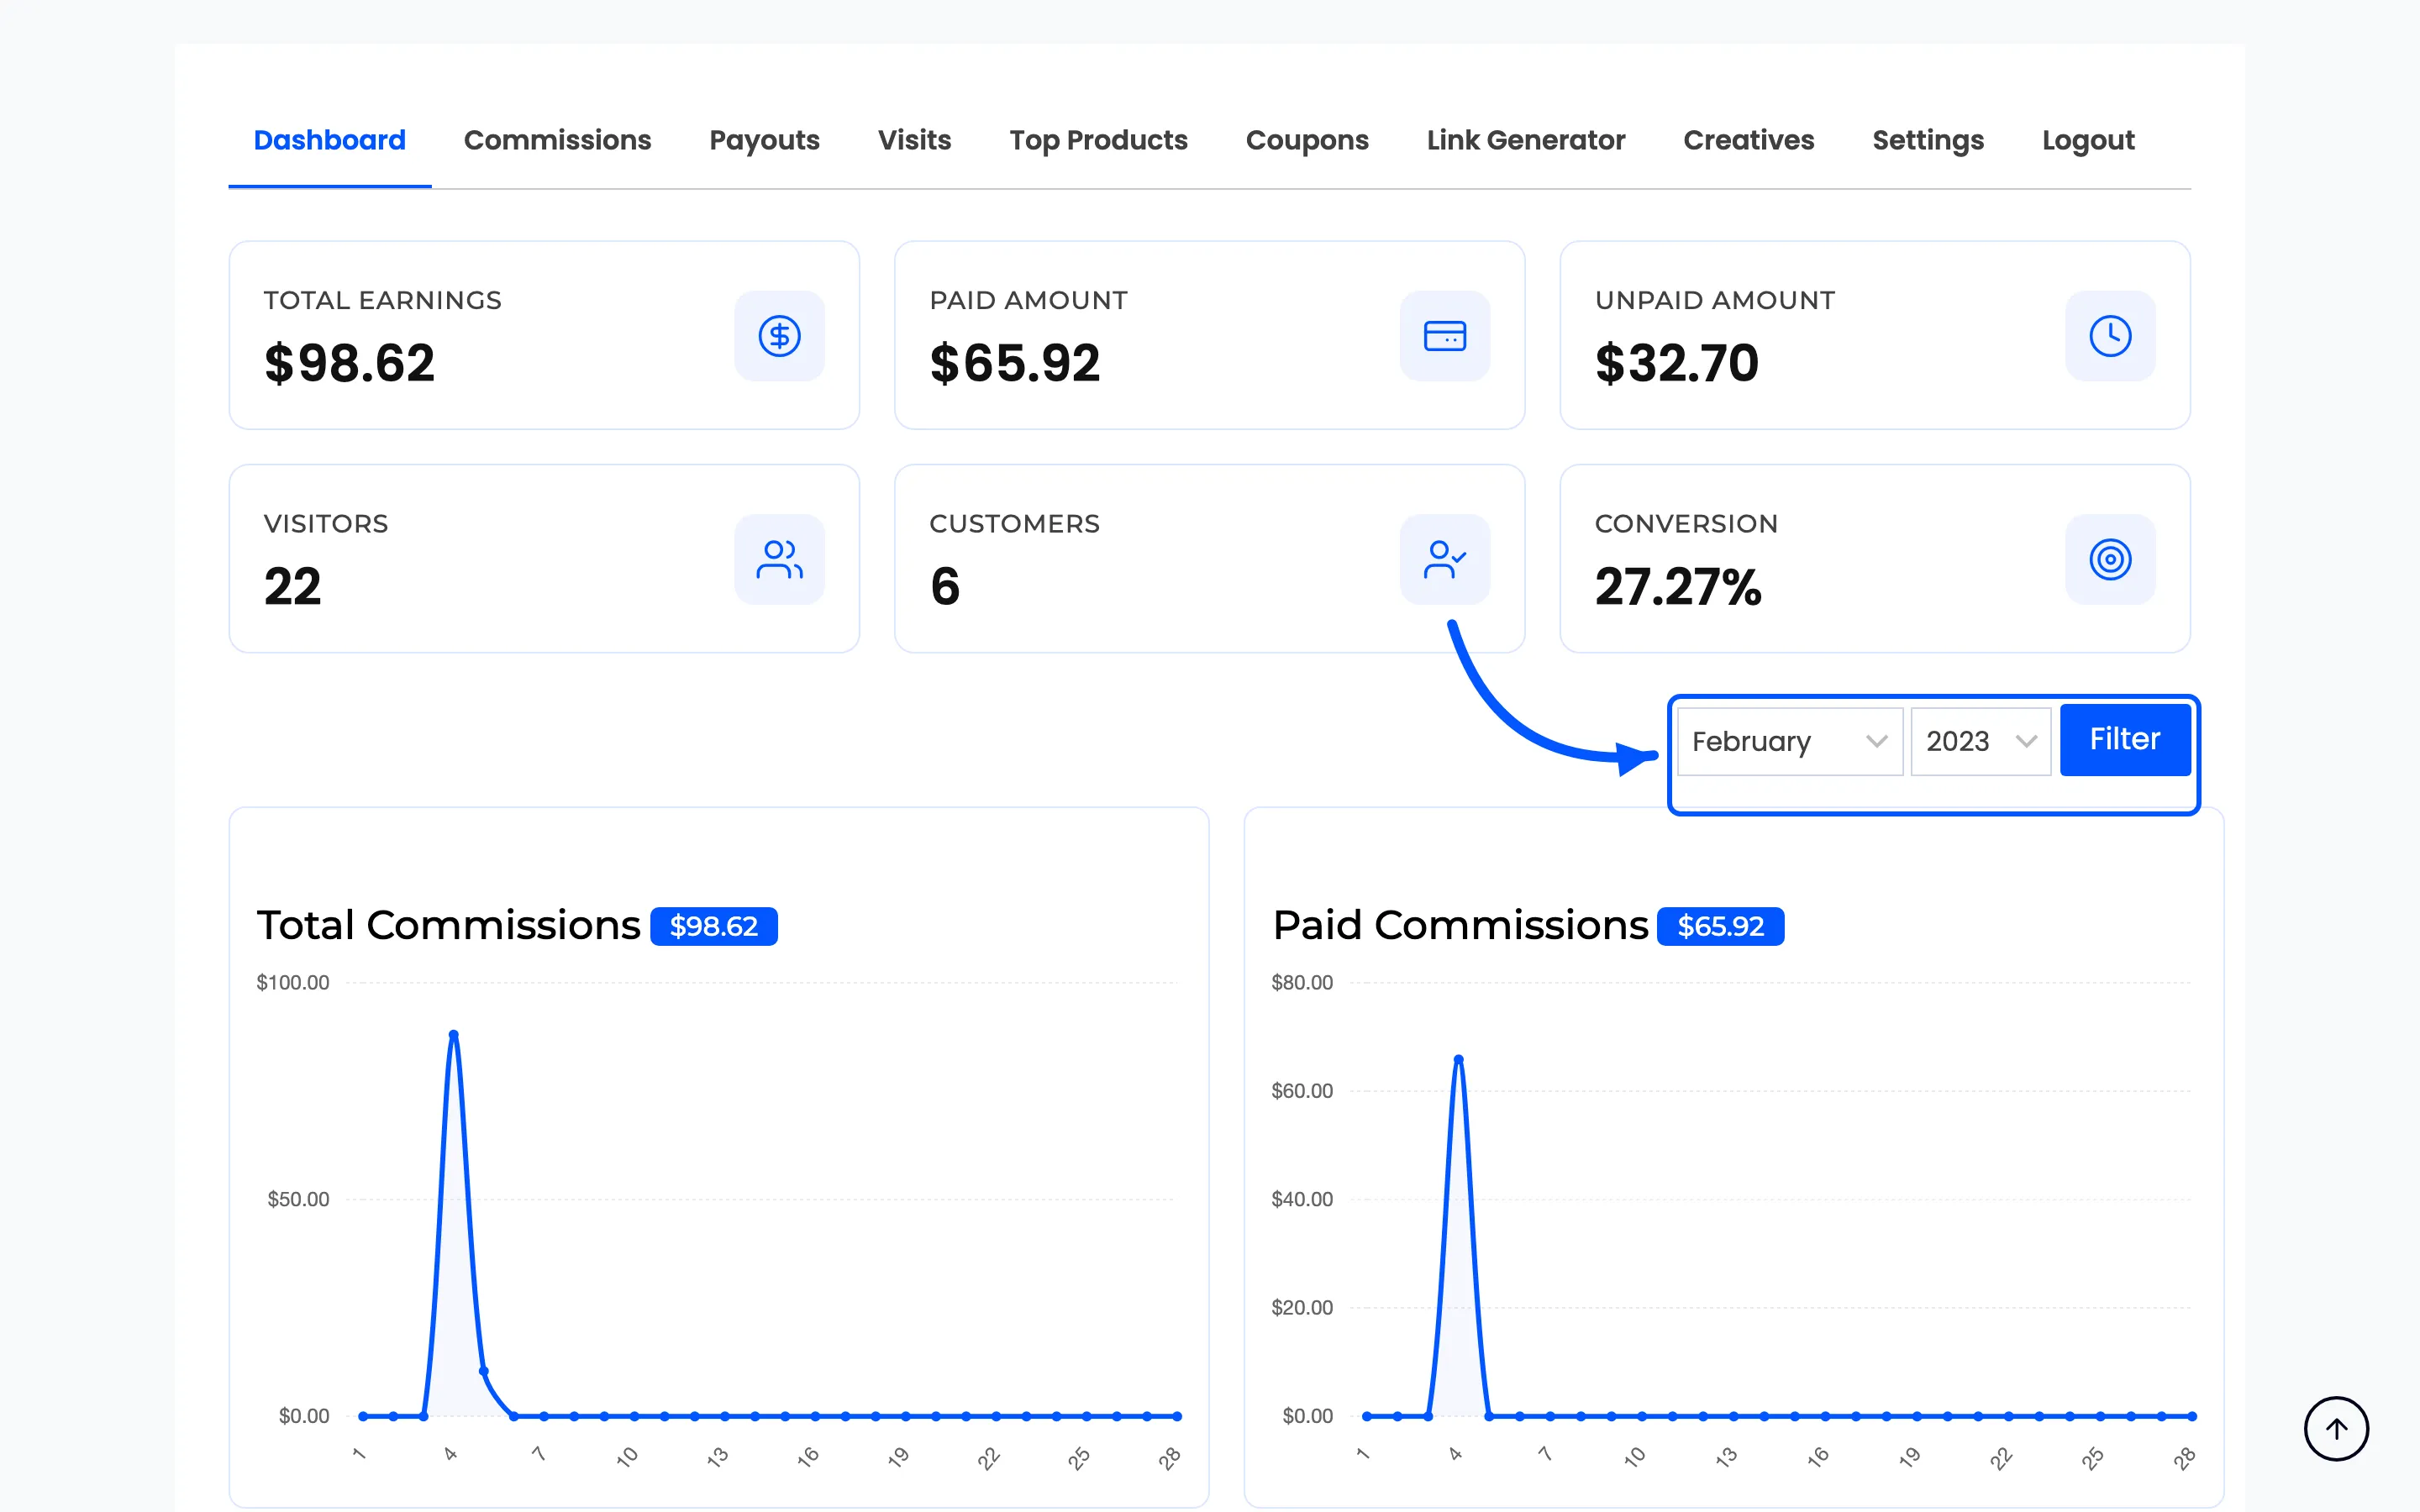
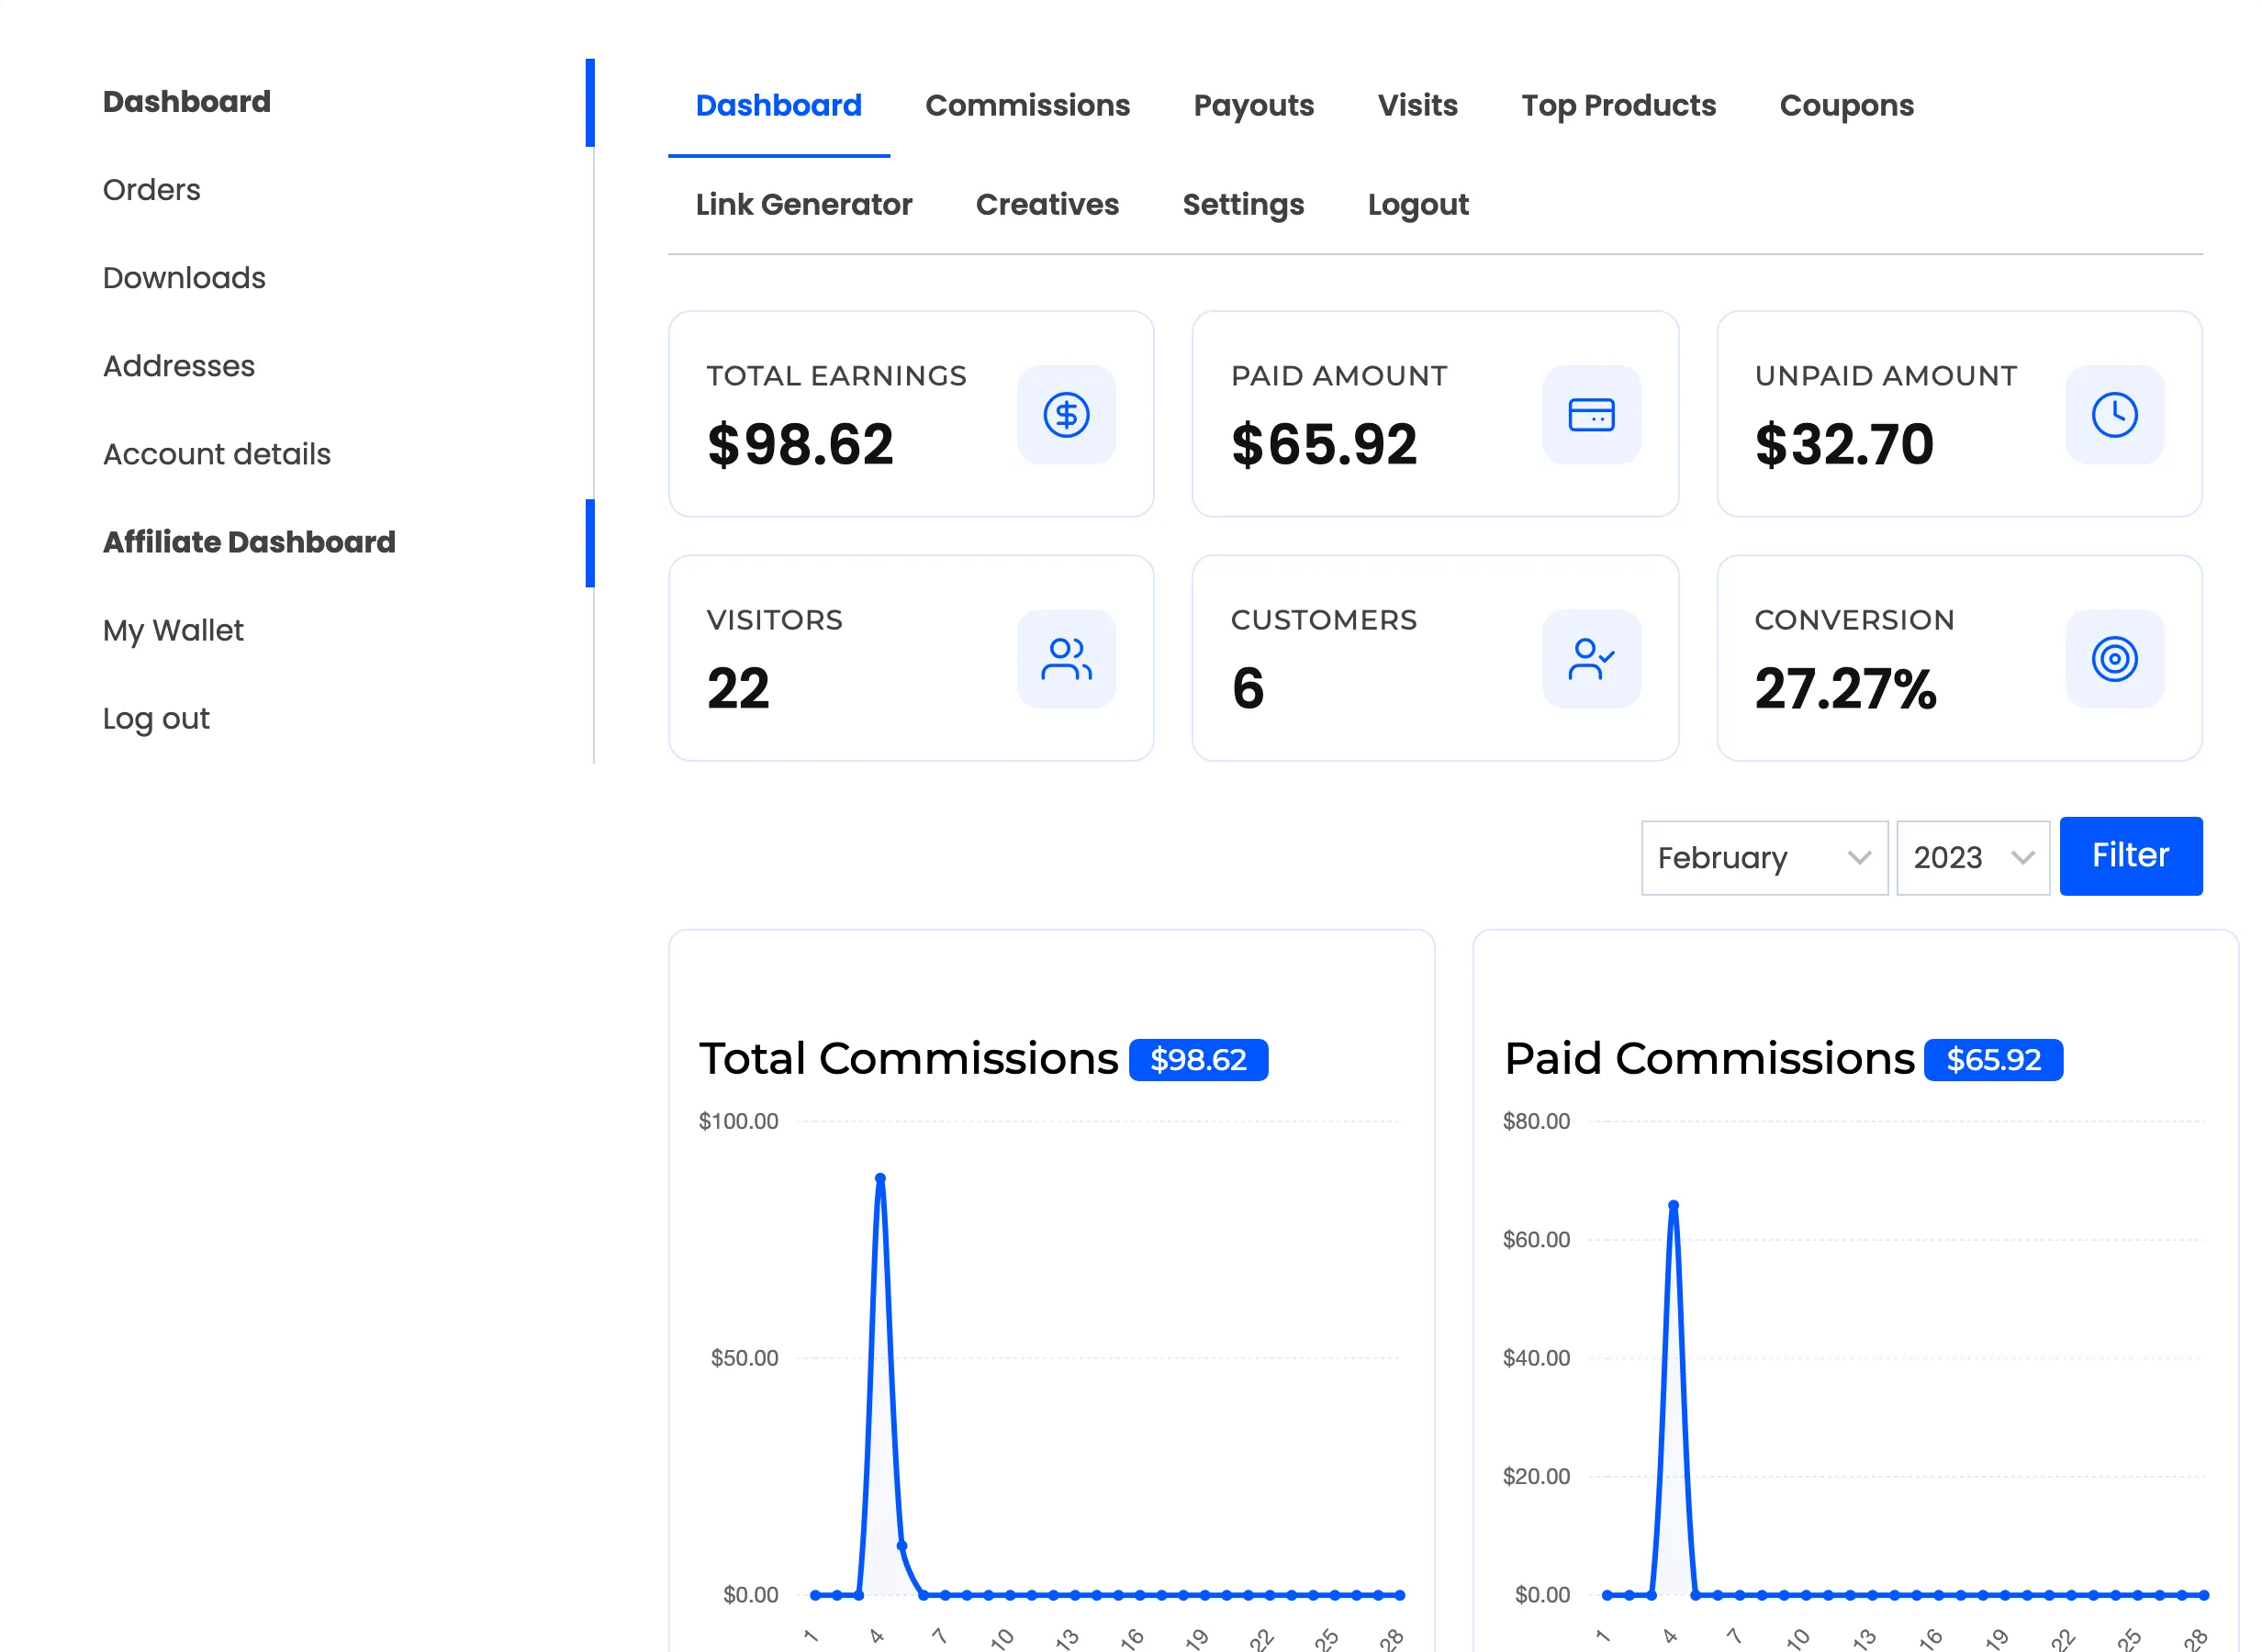
Six cards sit at the top: Total Earnings, Paid Amount, Unpaid Amount, Visitors, Customers and Conversion. Below them, a month and year selector filters a set of charts covering commissions, visits and conversions.
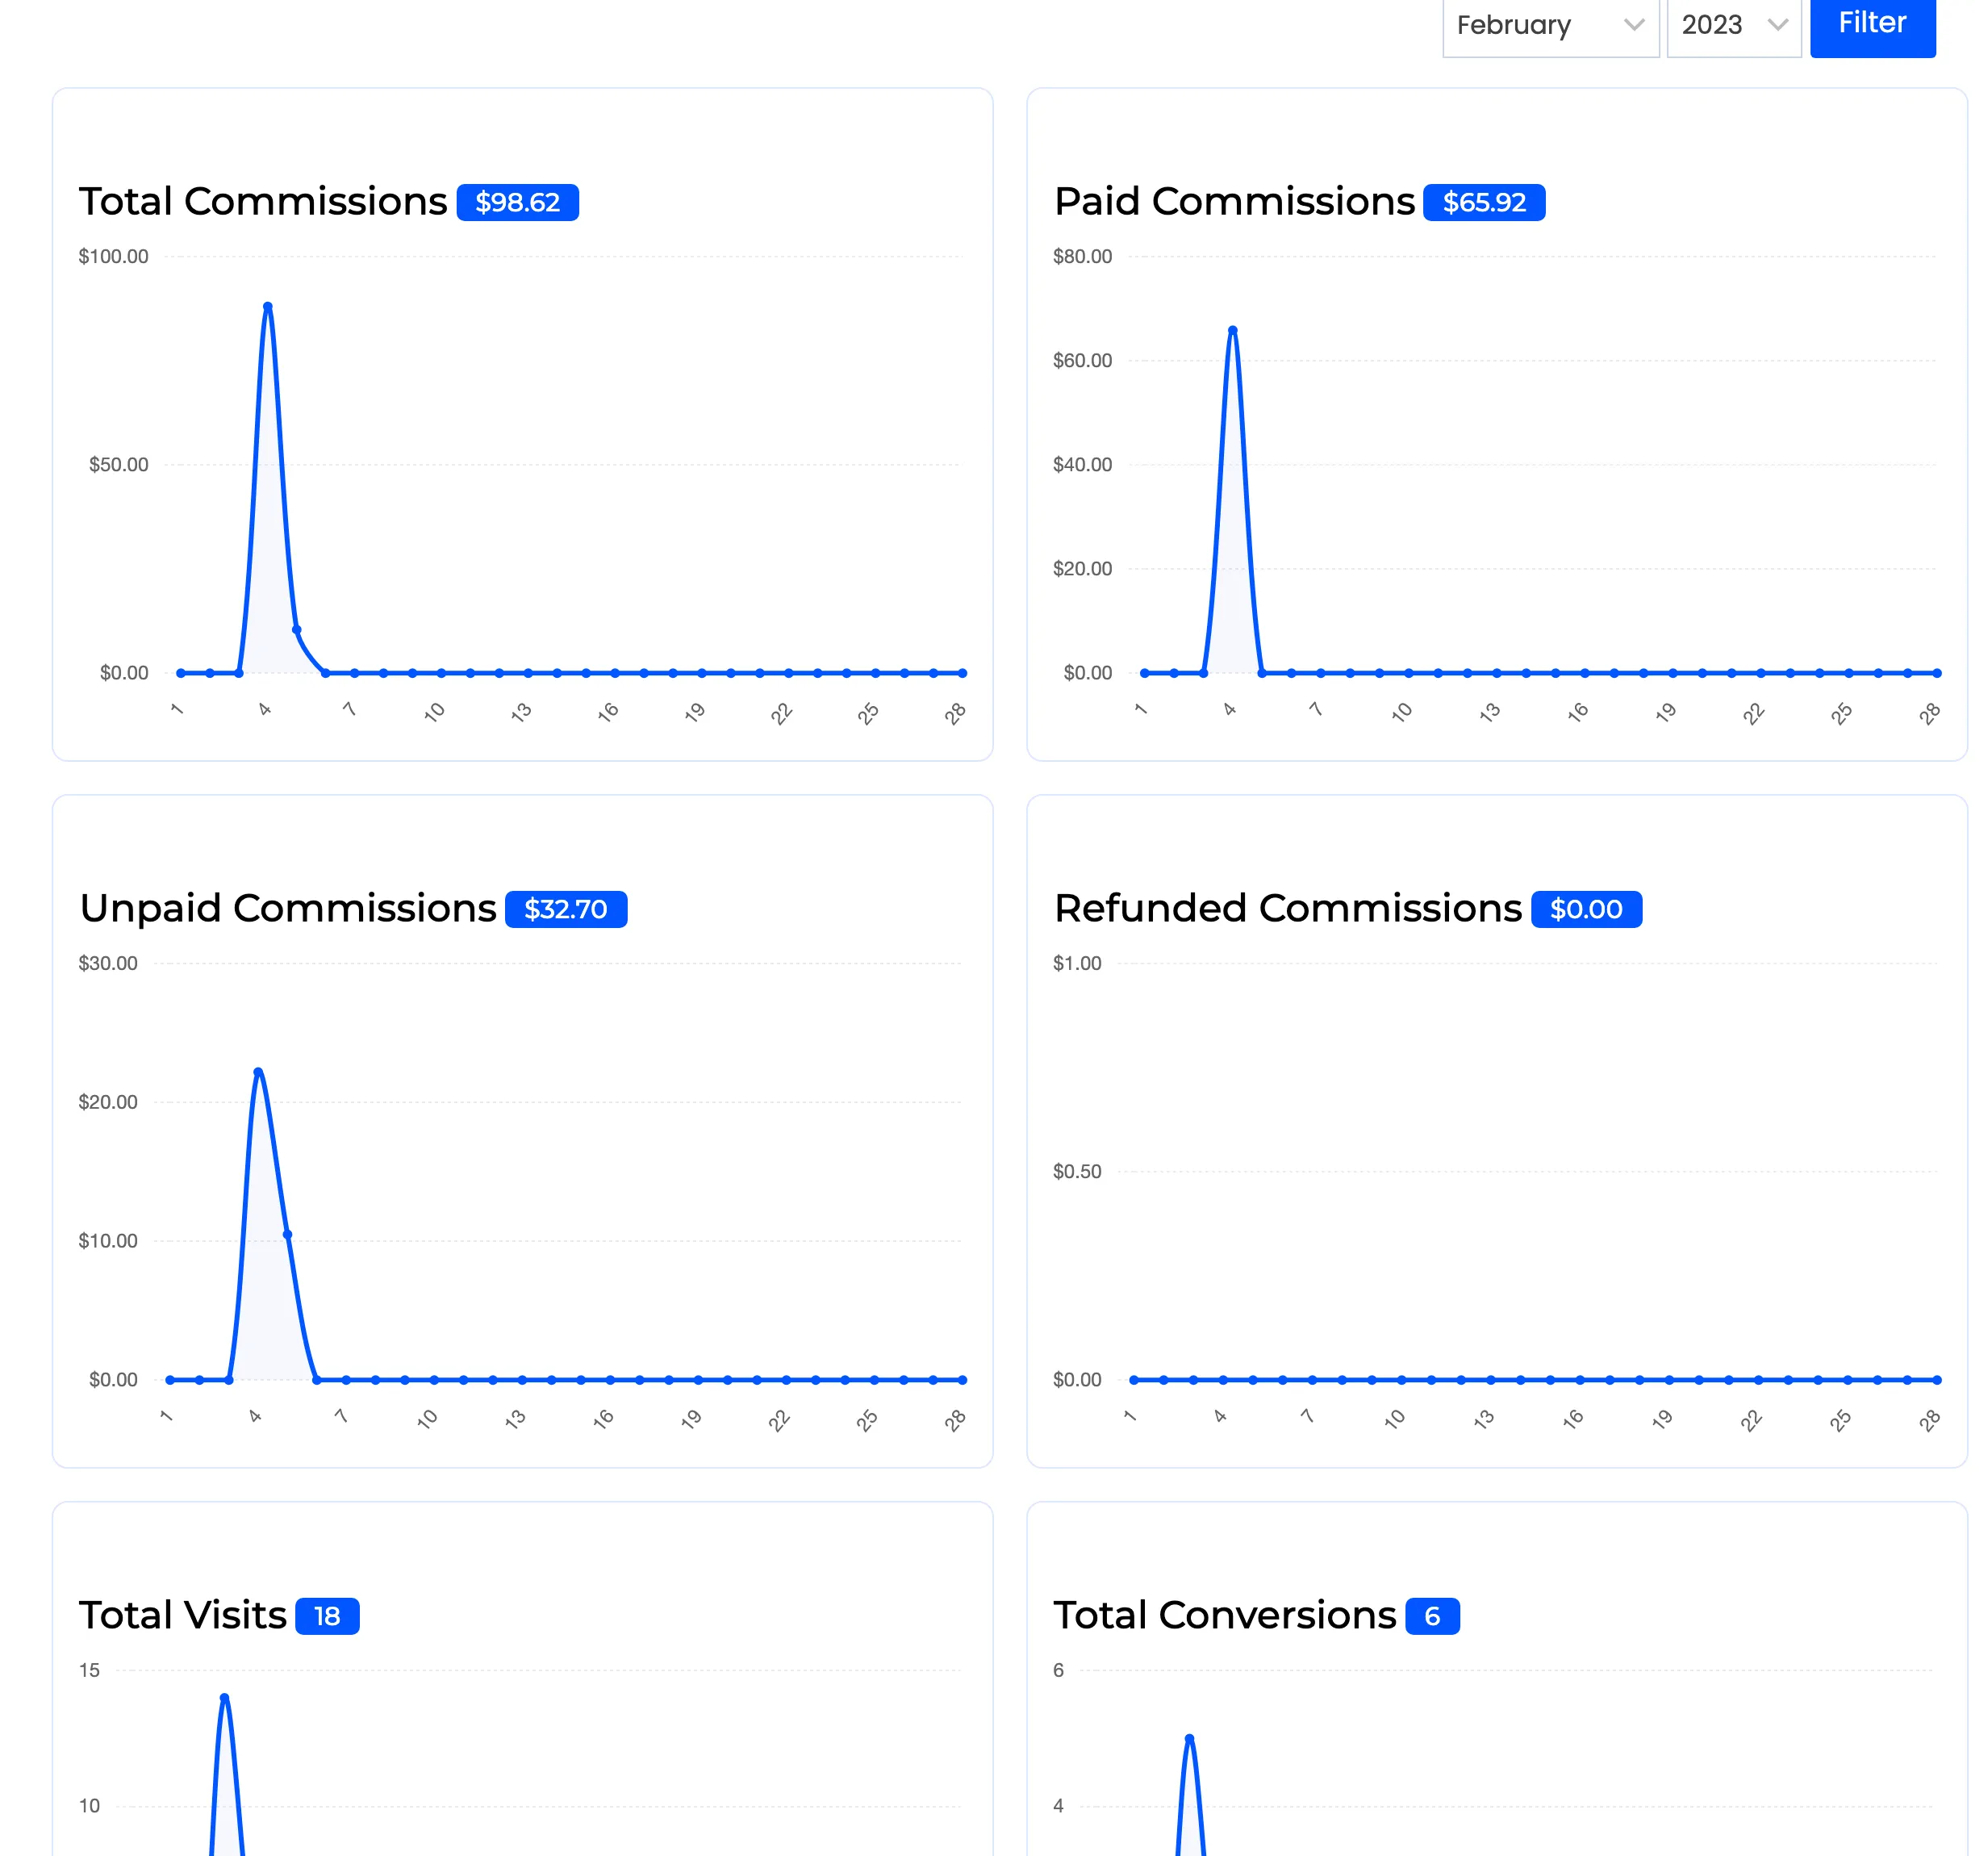
The cards are all-time totals and the charts are not. A partner opening the page early in a month sees flat charts under healthy cards, which reads as a bug until they change the month.
4. Getting a link
Section titled “4. Getting a link”The Link Generator section is where an affiliate gets the URL they will share.
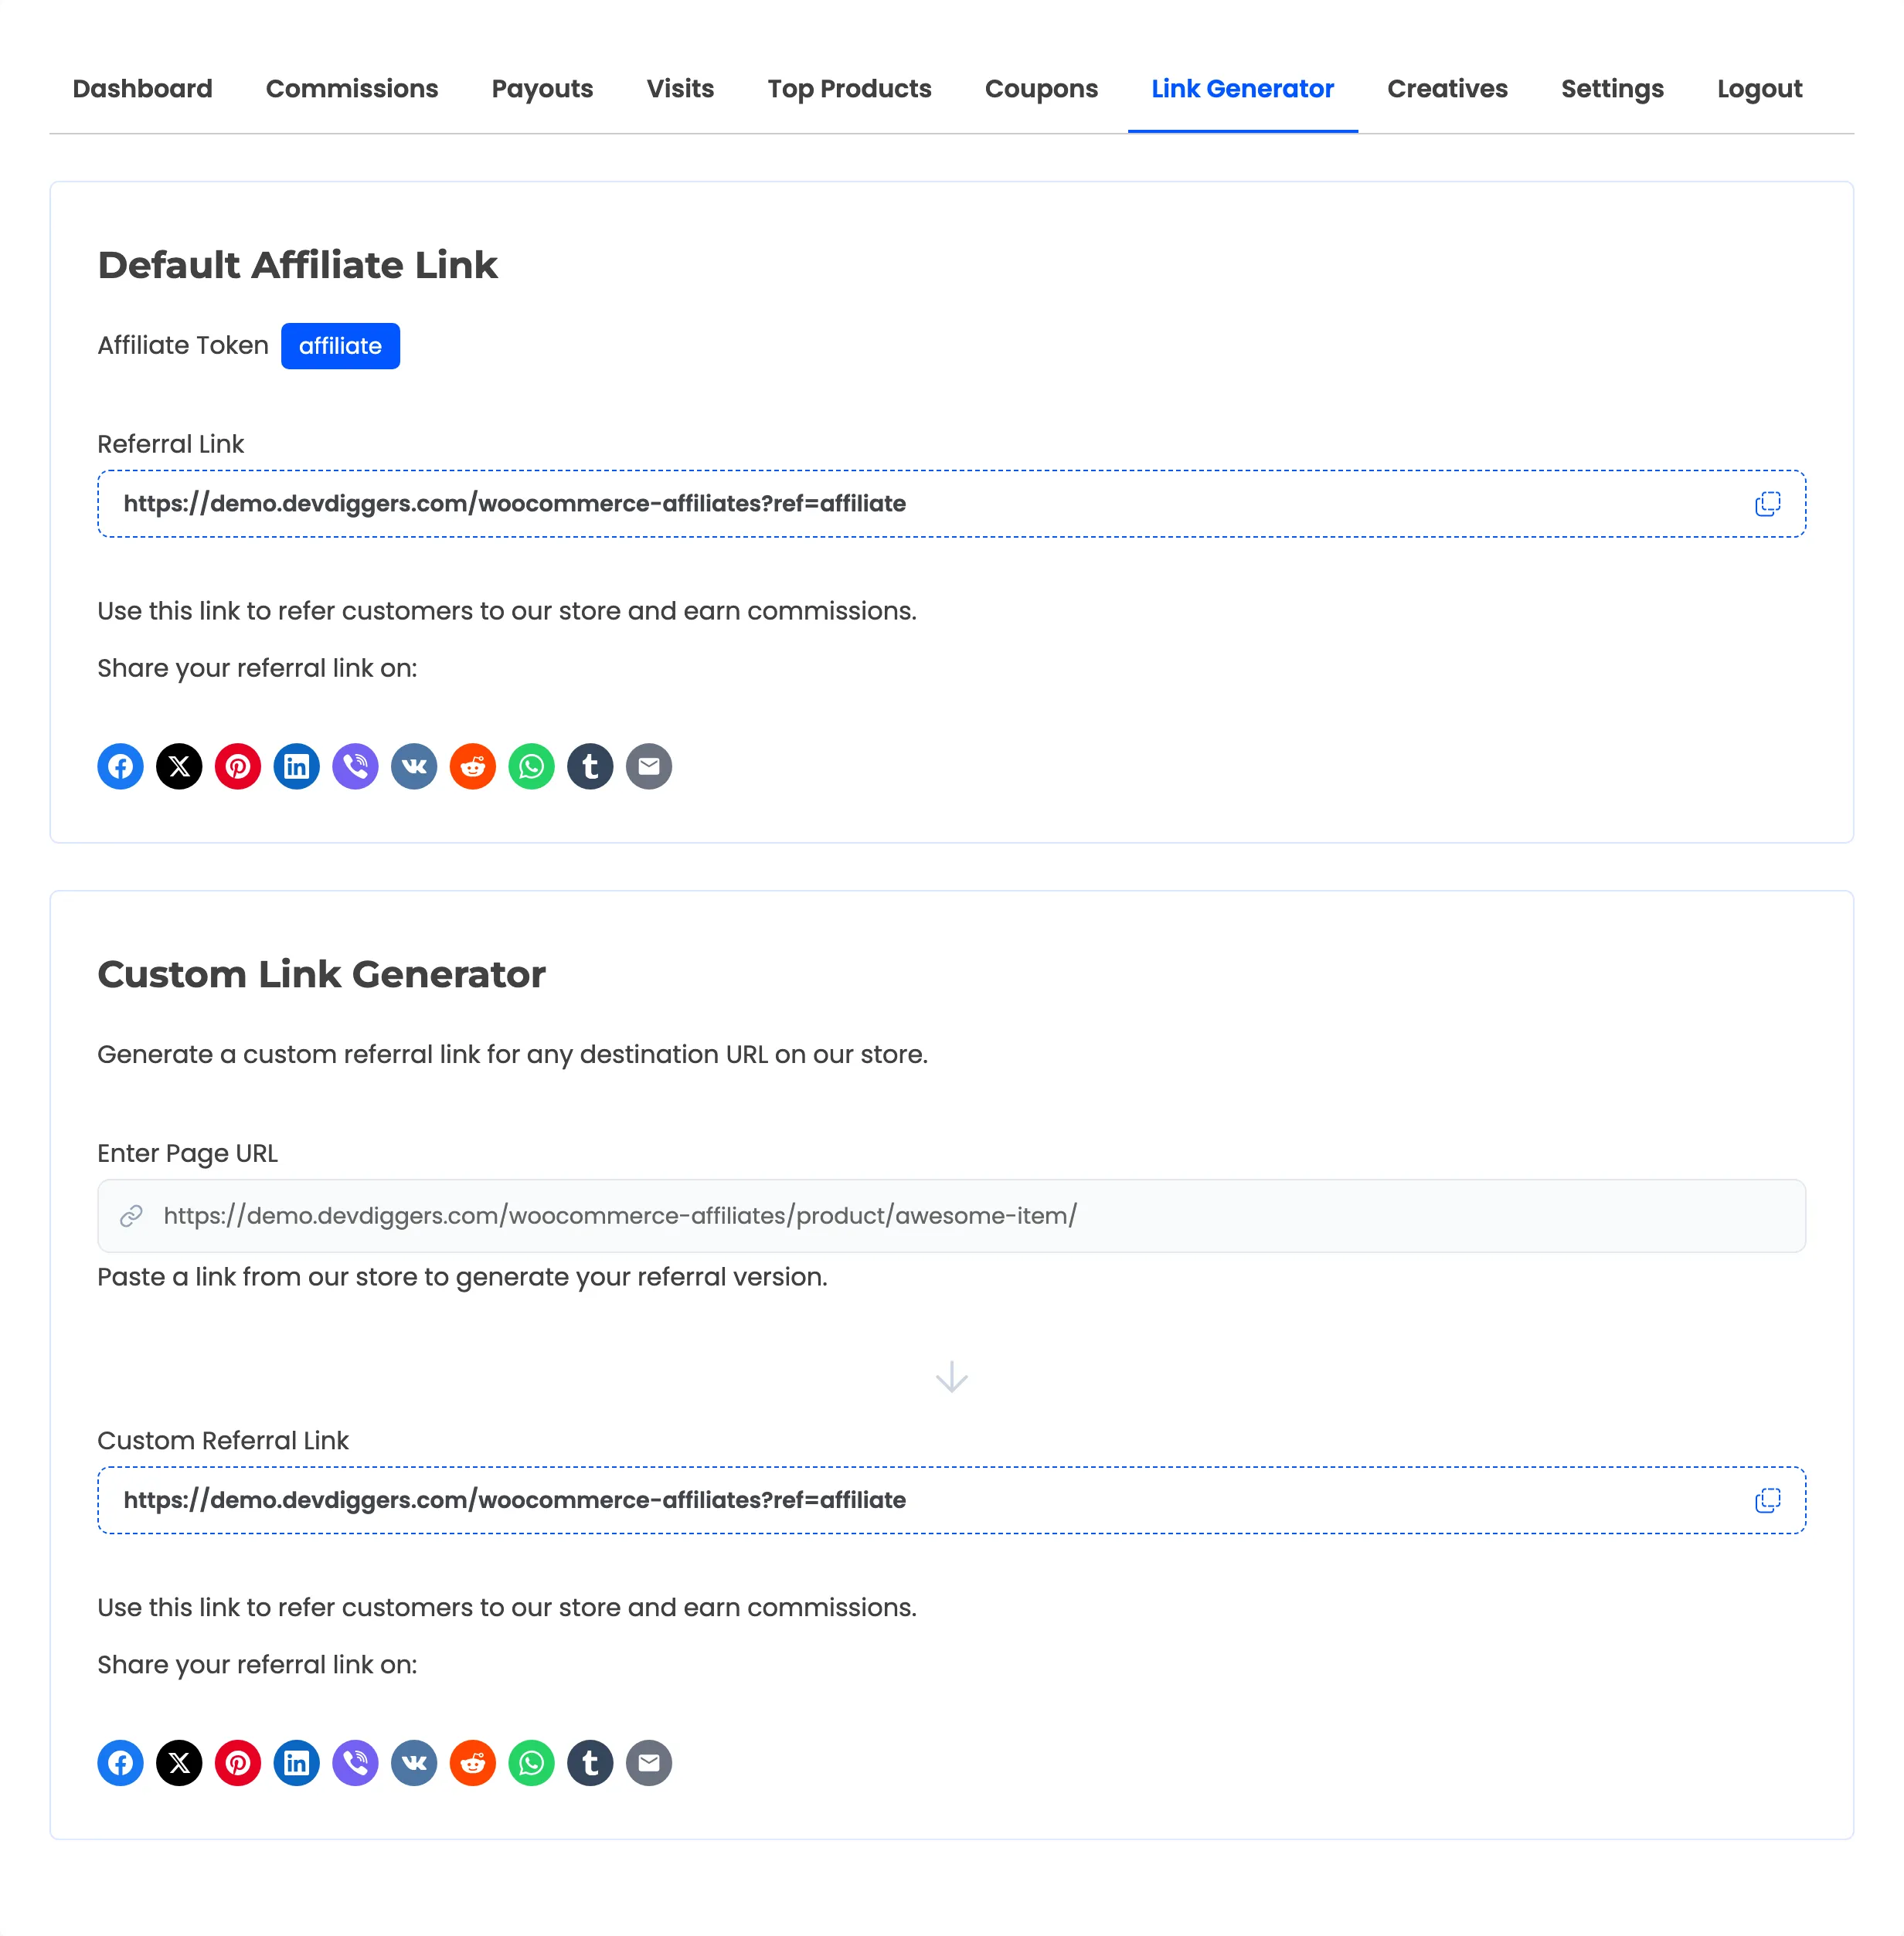
- Default Affiliate Link shows their token and a ready-made link to your home page, with a copy button.
- Custom Link Generator takes any URL on your store and appends the referral parameter, so an affiliate can link straight to a product or a category.
5. Tracking earnings
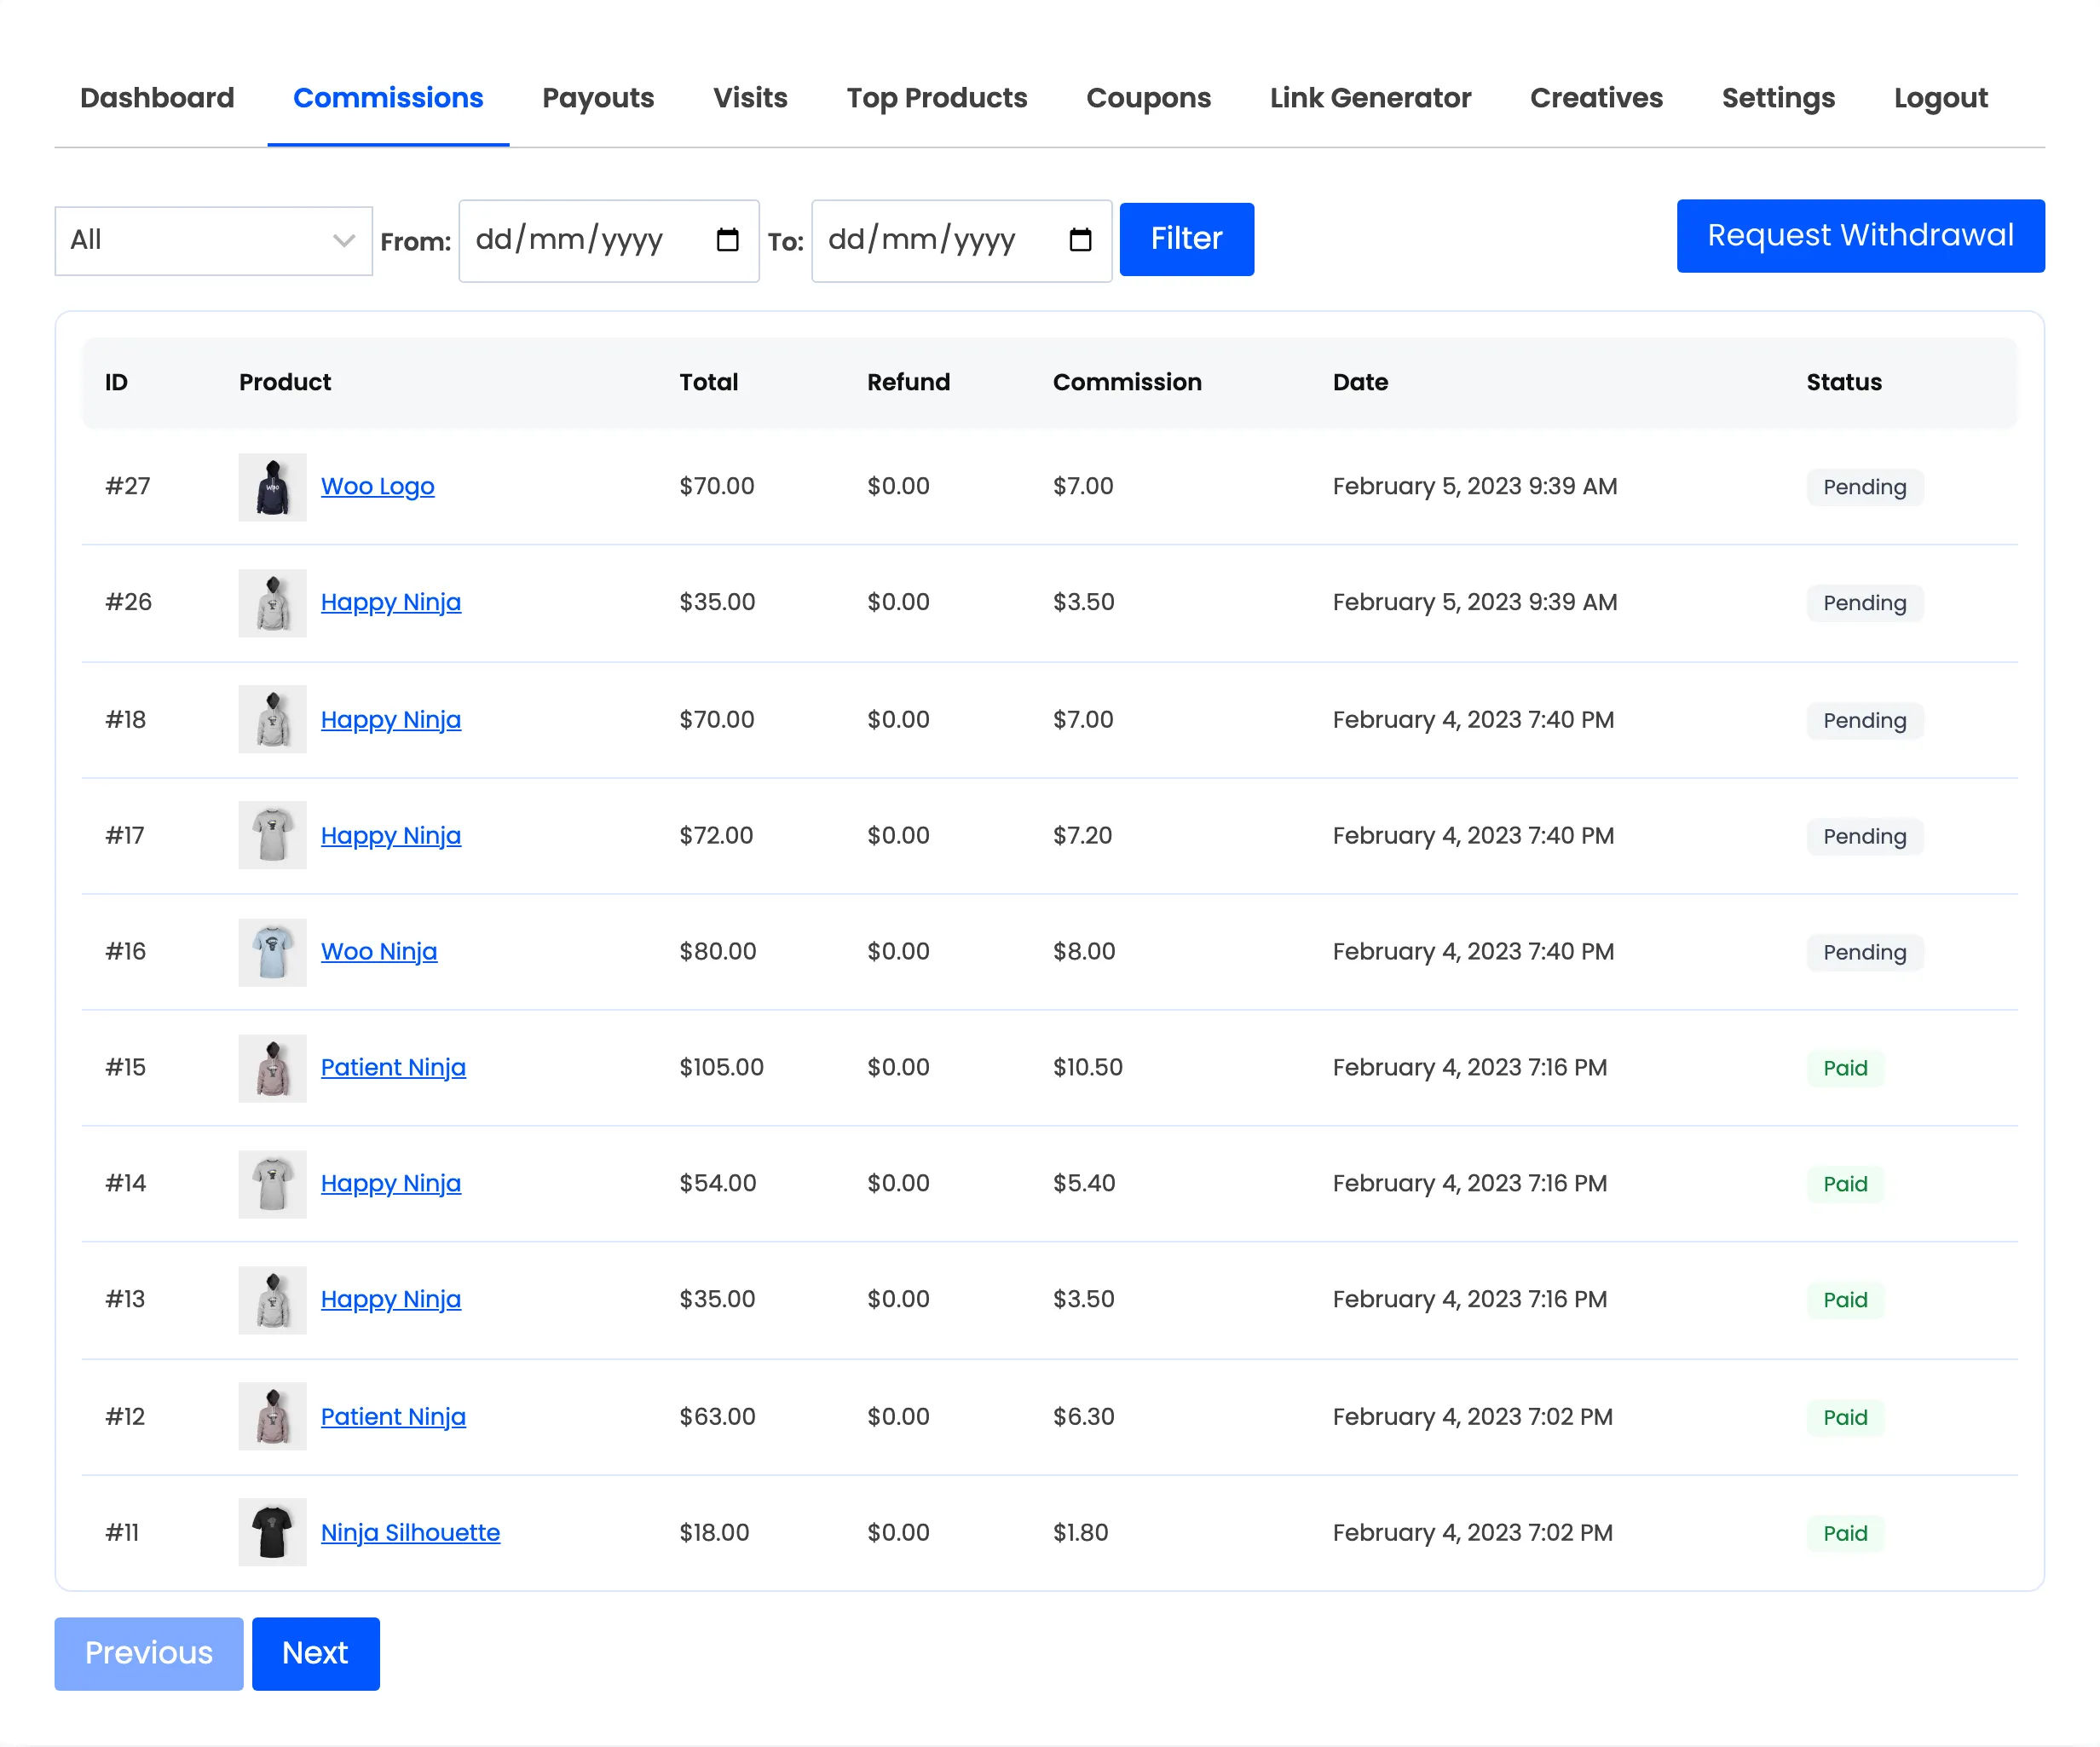
Section titled “5. Tracking earnings”Commissions lists every commission row with the product, the order total, any refund, the commission amount, the date and the status. Status tabs across the top filter to All, Pending, Pending Payment, Paid, Not Confirmed, Cancelled or Refunded, and a date range narrows it further.
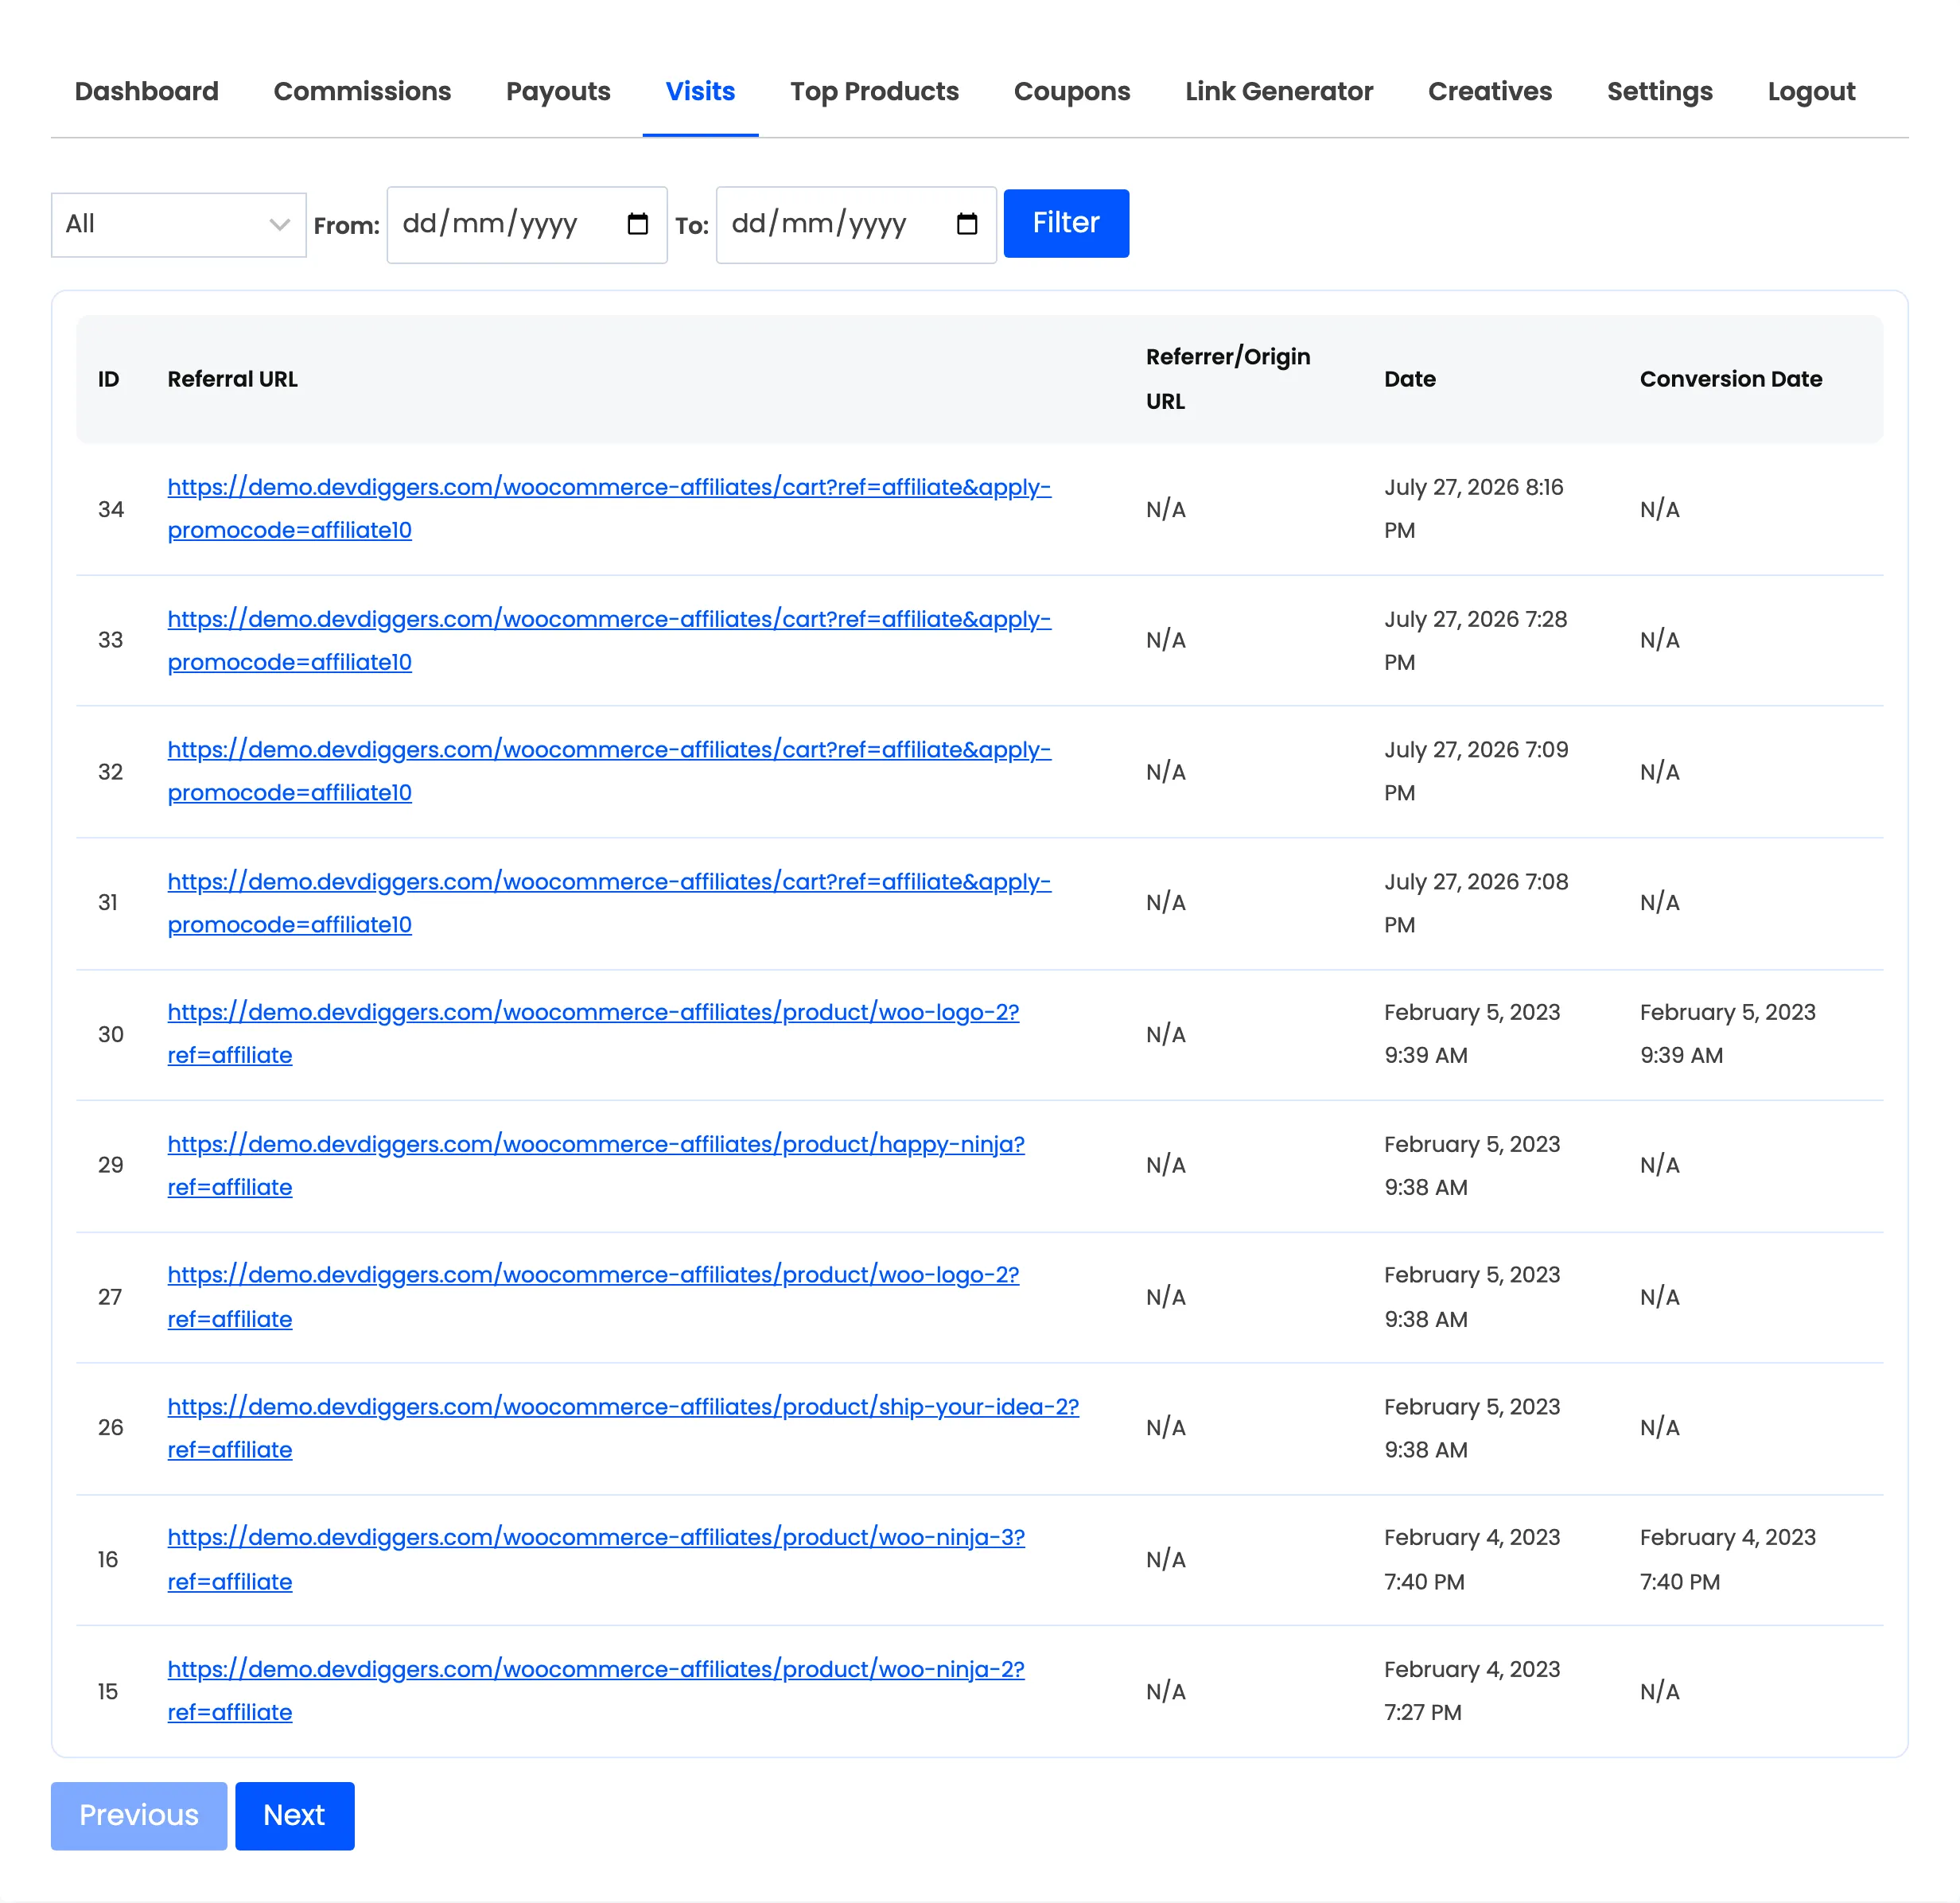
Visits shows the raw click log: the referral URL, where the visitor came from, when they landed and when they converted. Converted and Not Converted tabs split the two.
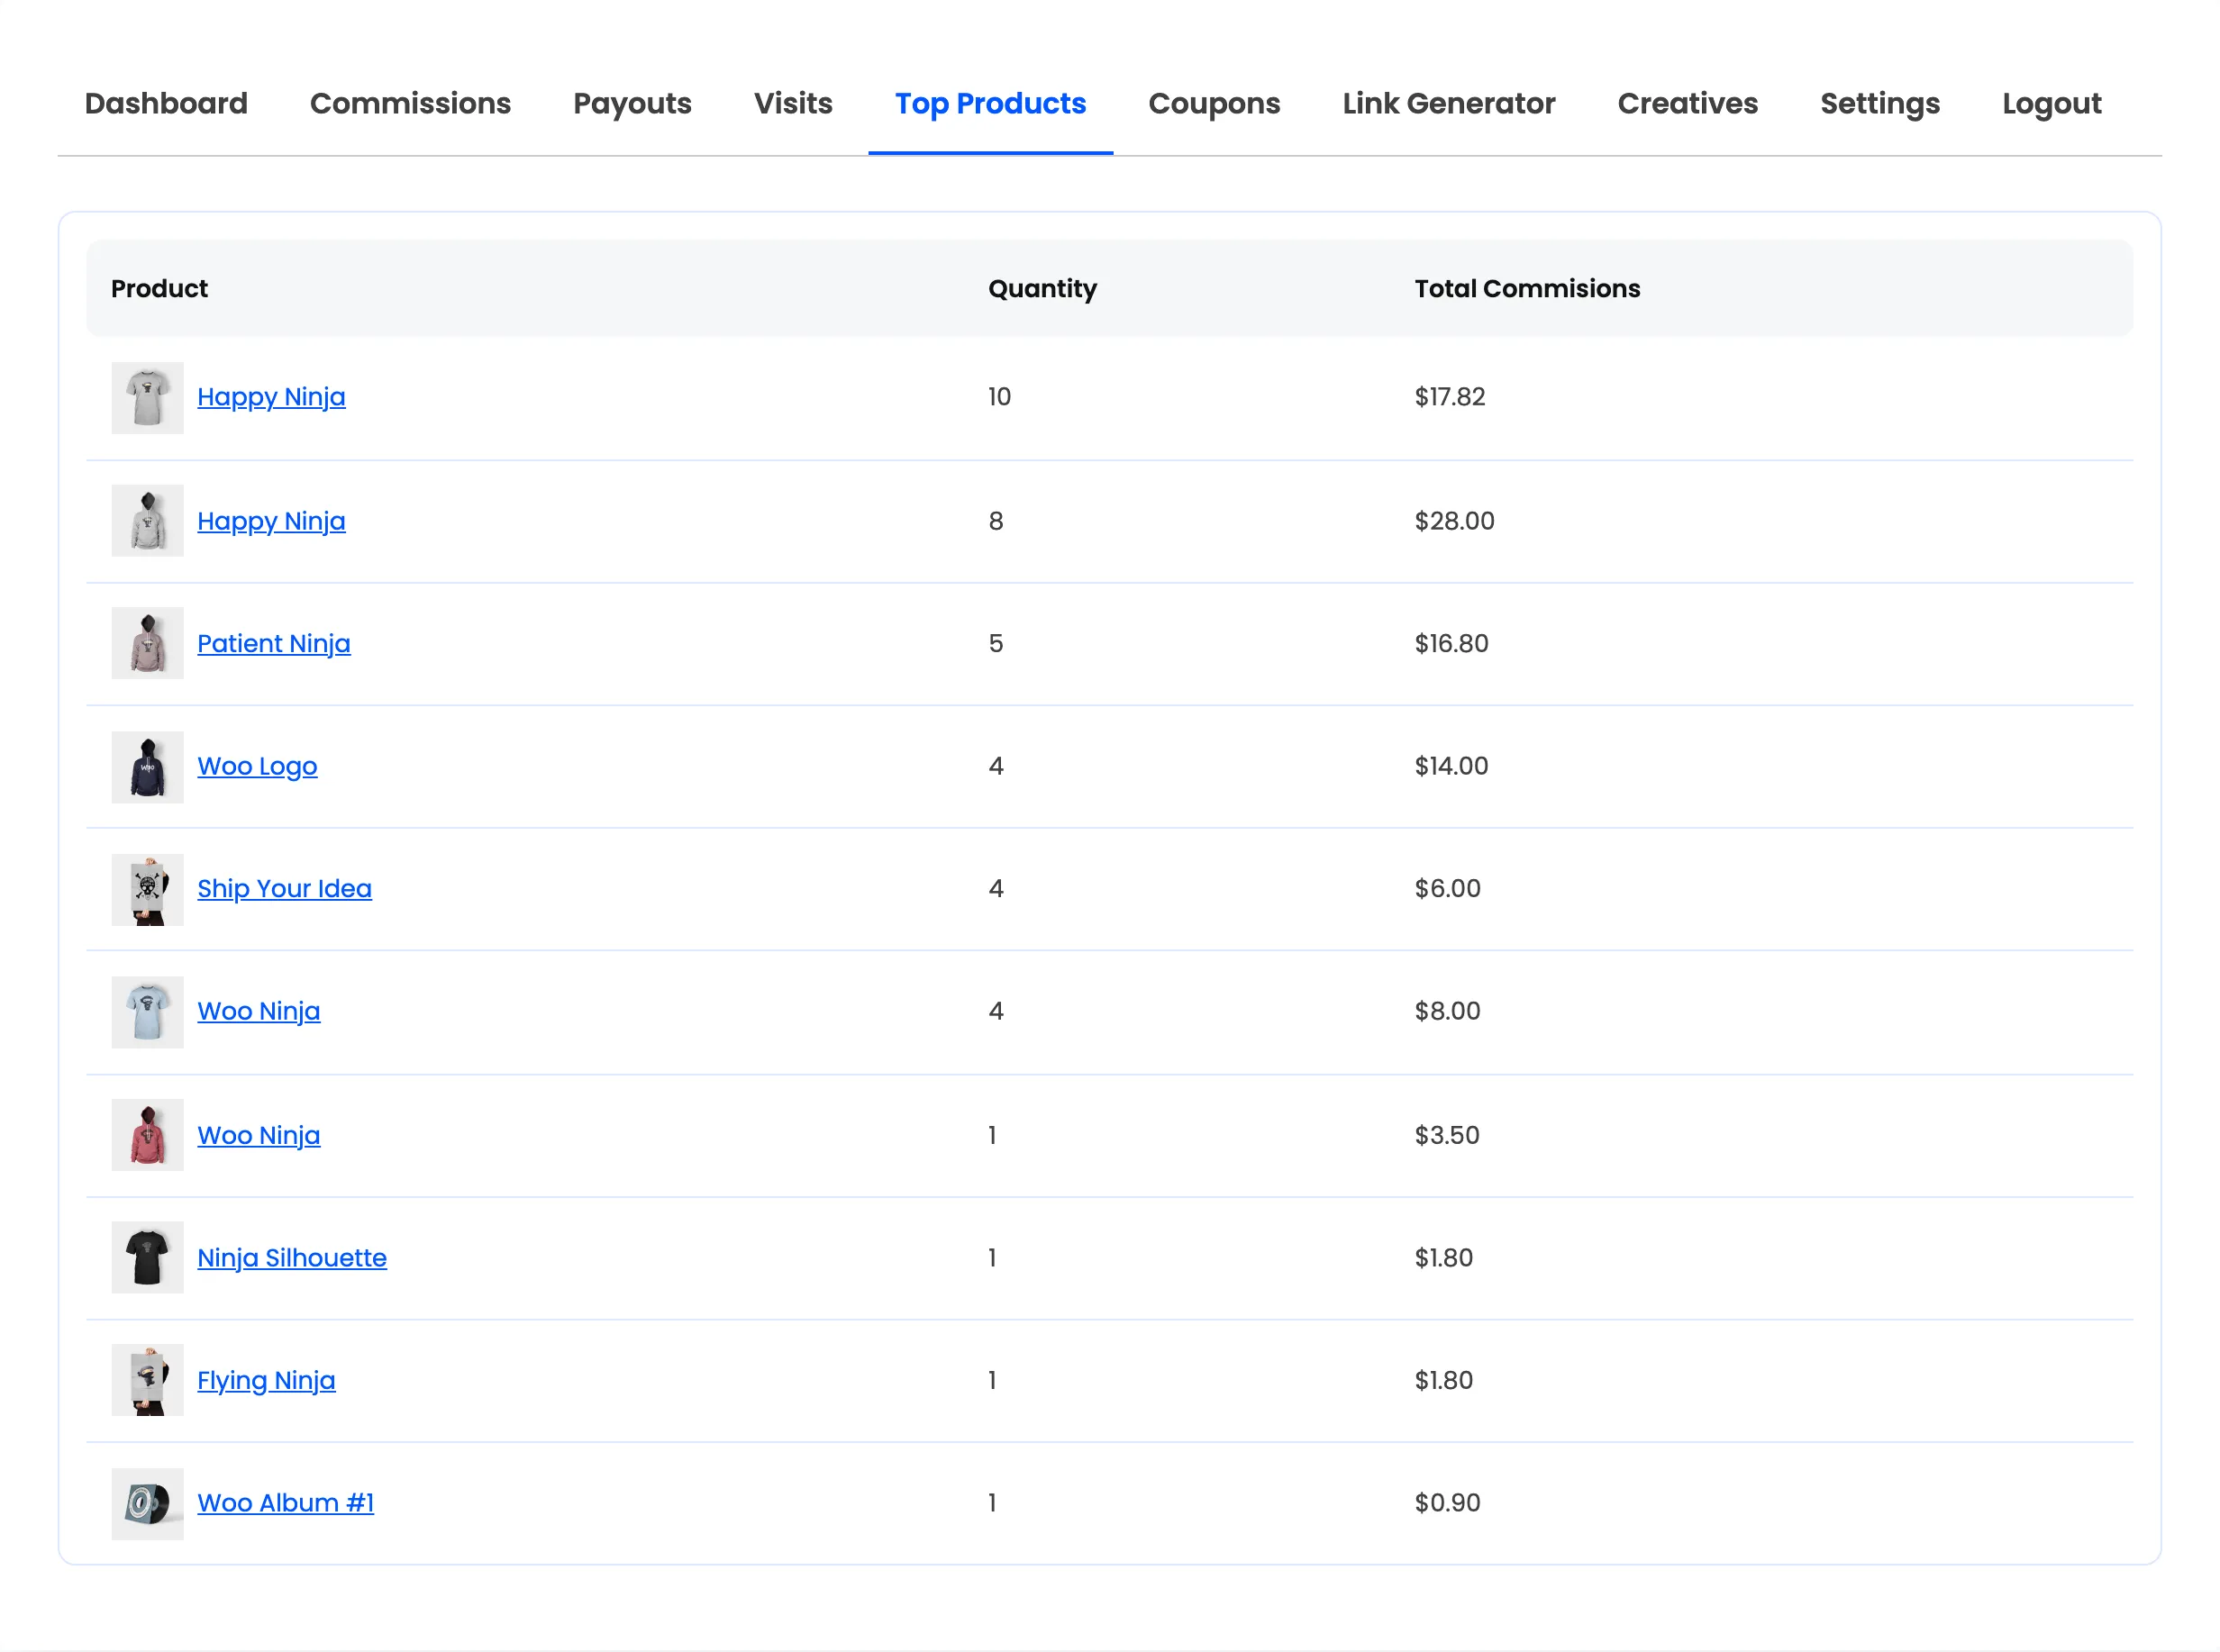
Top Products ranks what they actually sell, by quantity and total commission. It is the section that tells an affiliate what to promote next.
6. Getting paid
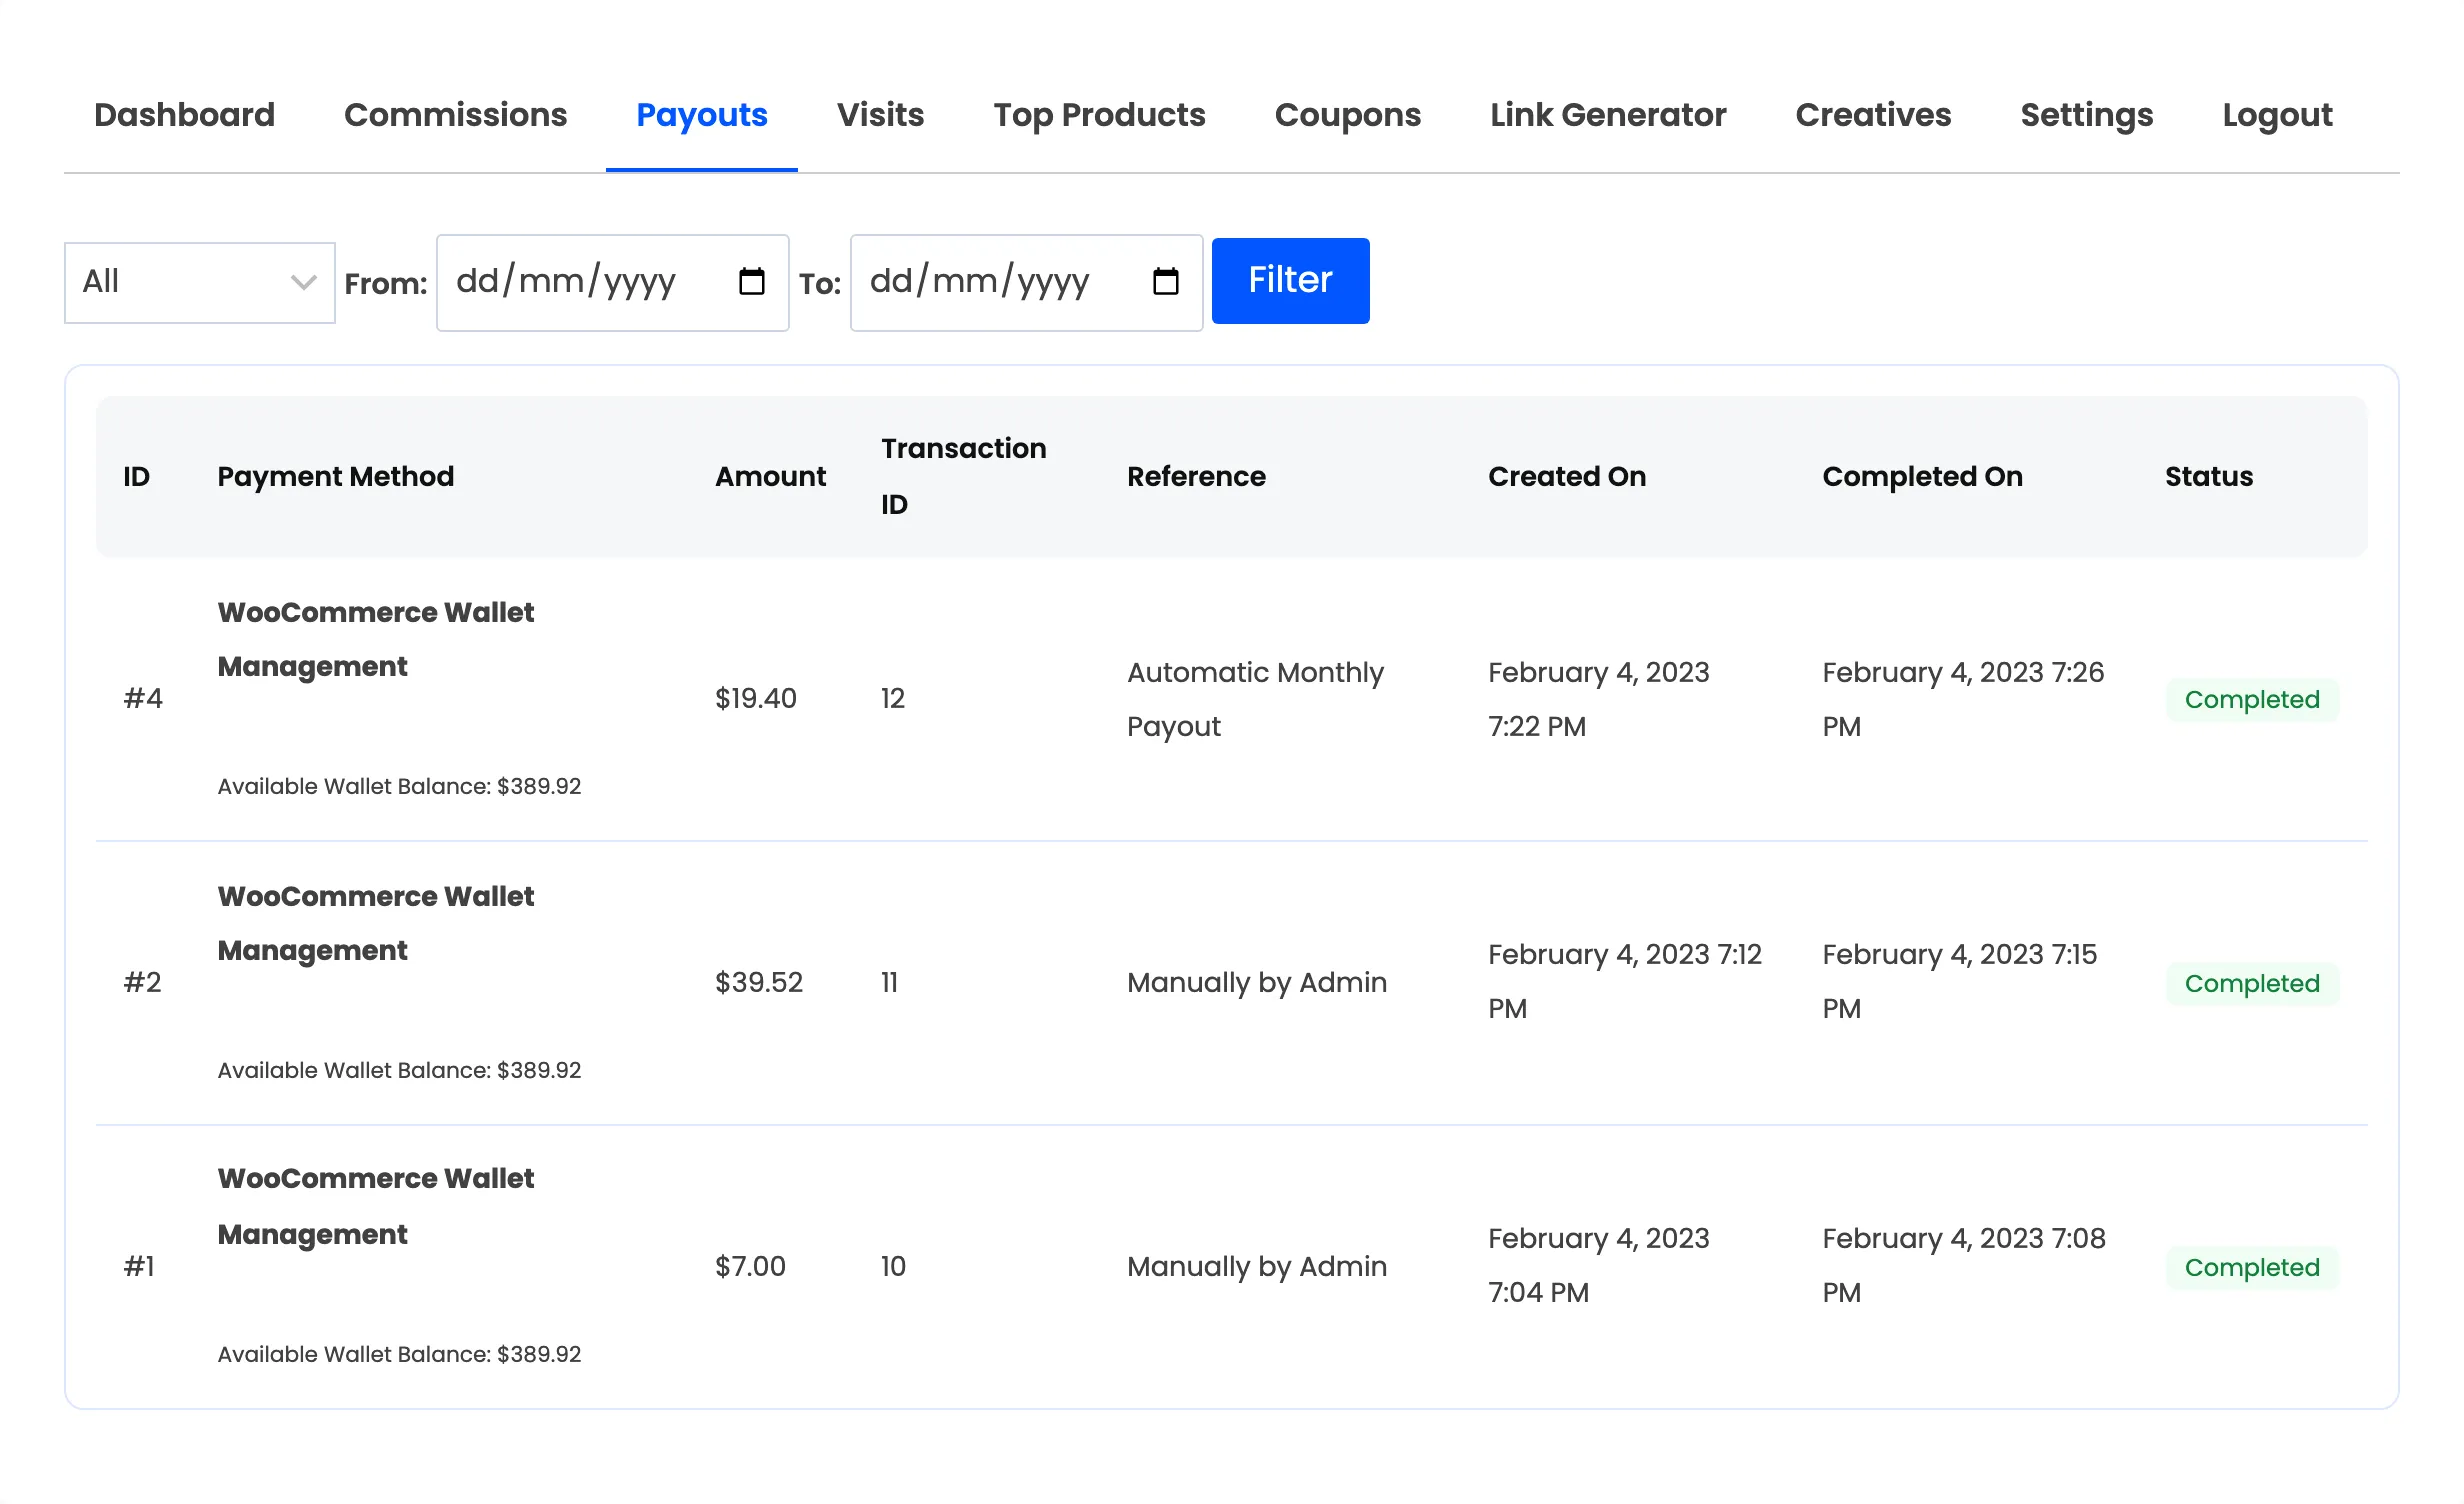
Section titled “6. Getting paid”Payouts lists every payment with its method, amount, transaction ID, reference and both dates.
Before a payout can run, the affiliate has to fill in Settings → Withdrawal Info. That means a default withdrawal method, plus the account name, IBAN and swift code for a bank transfer, or an email address for PayPal.
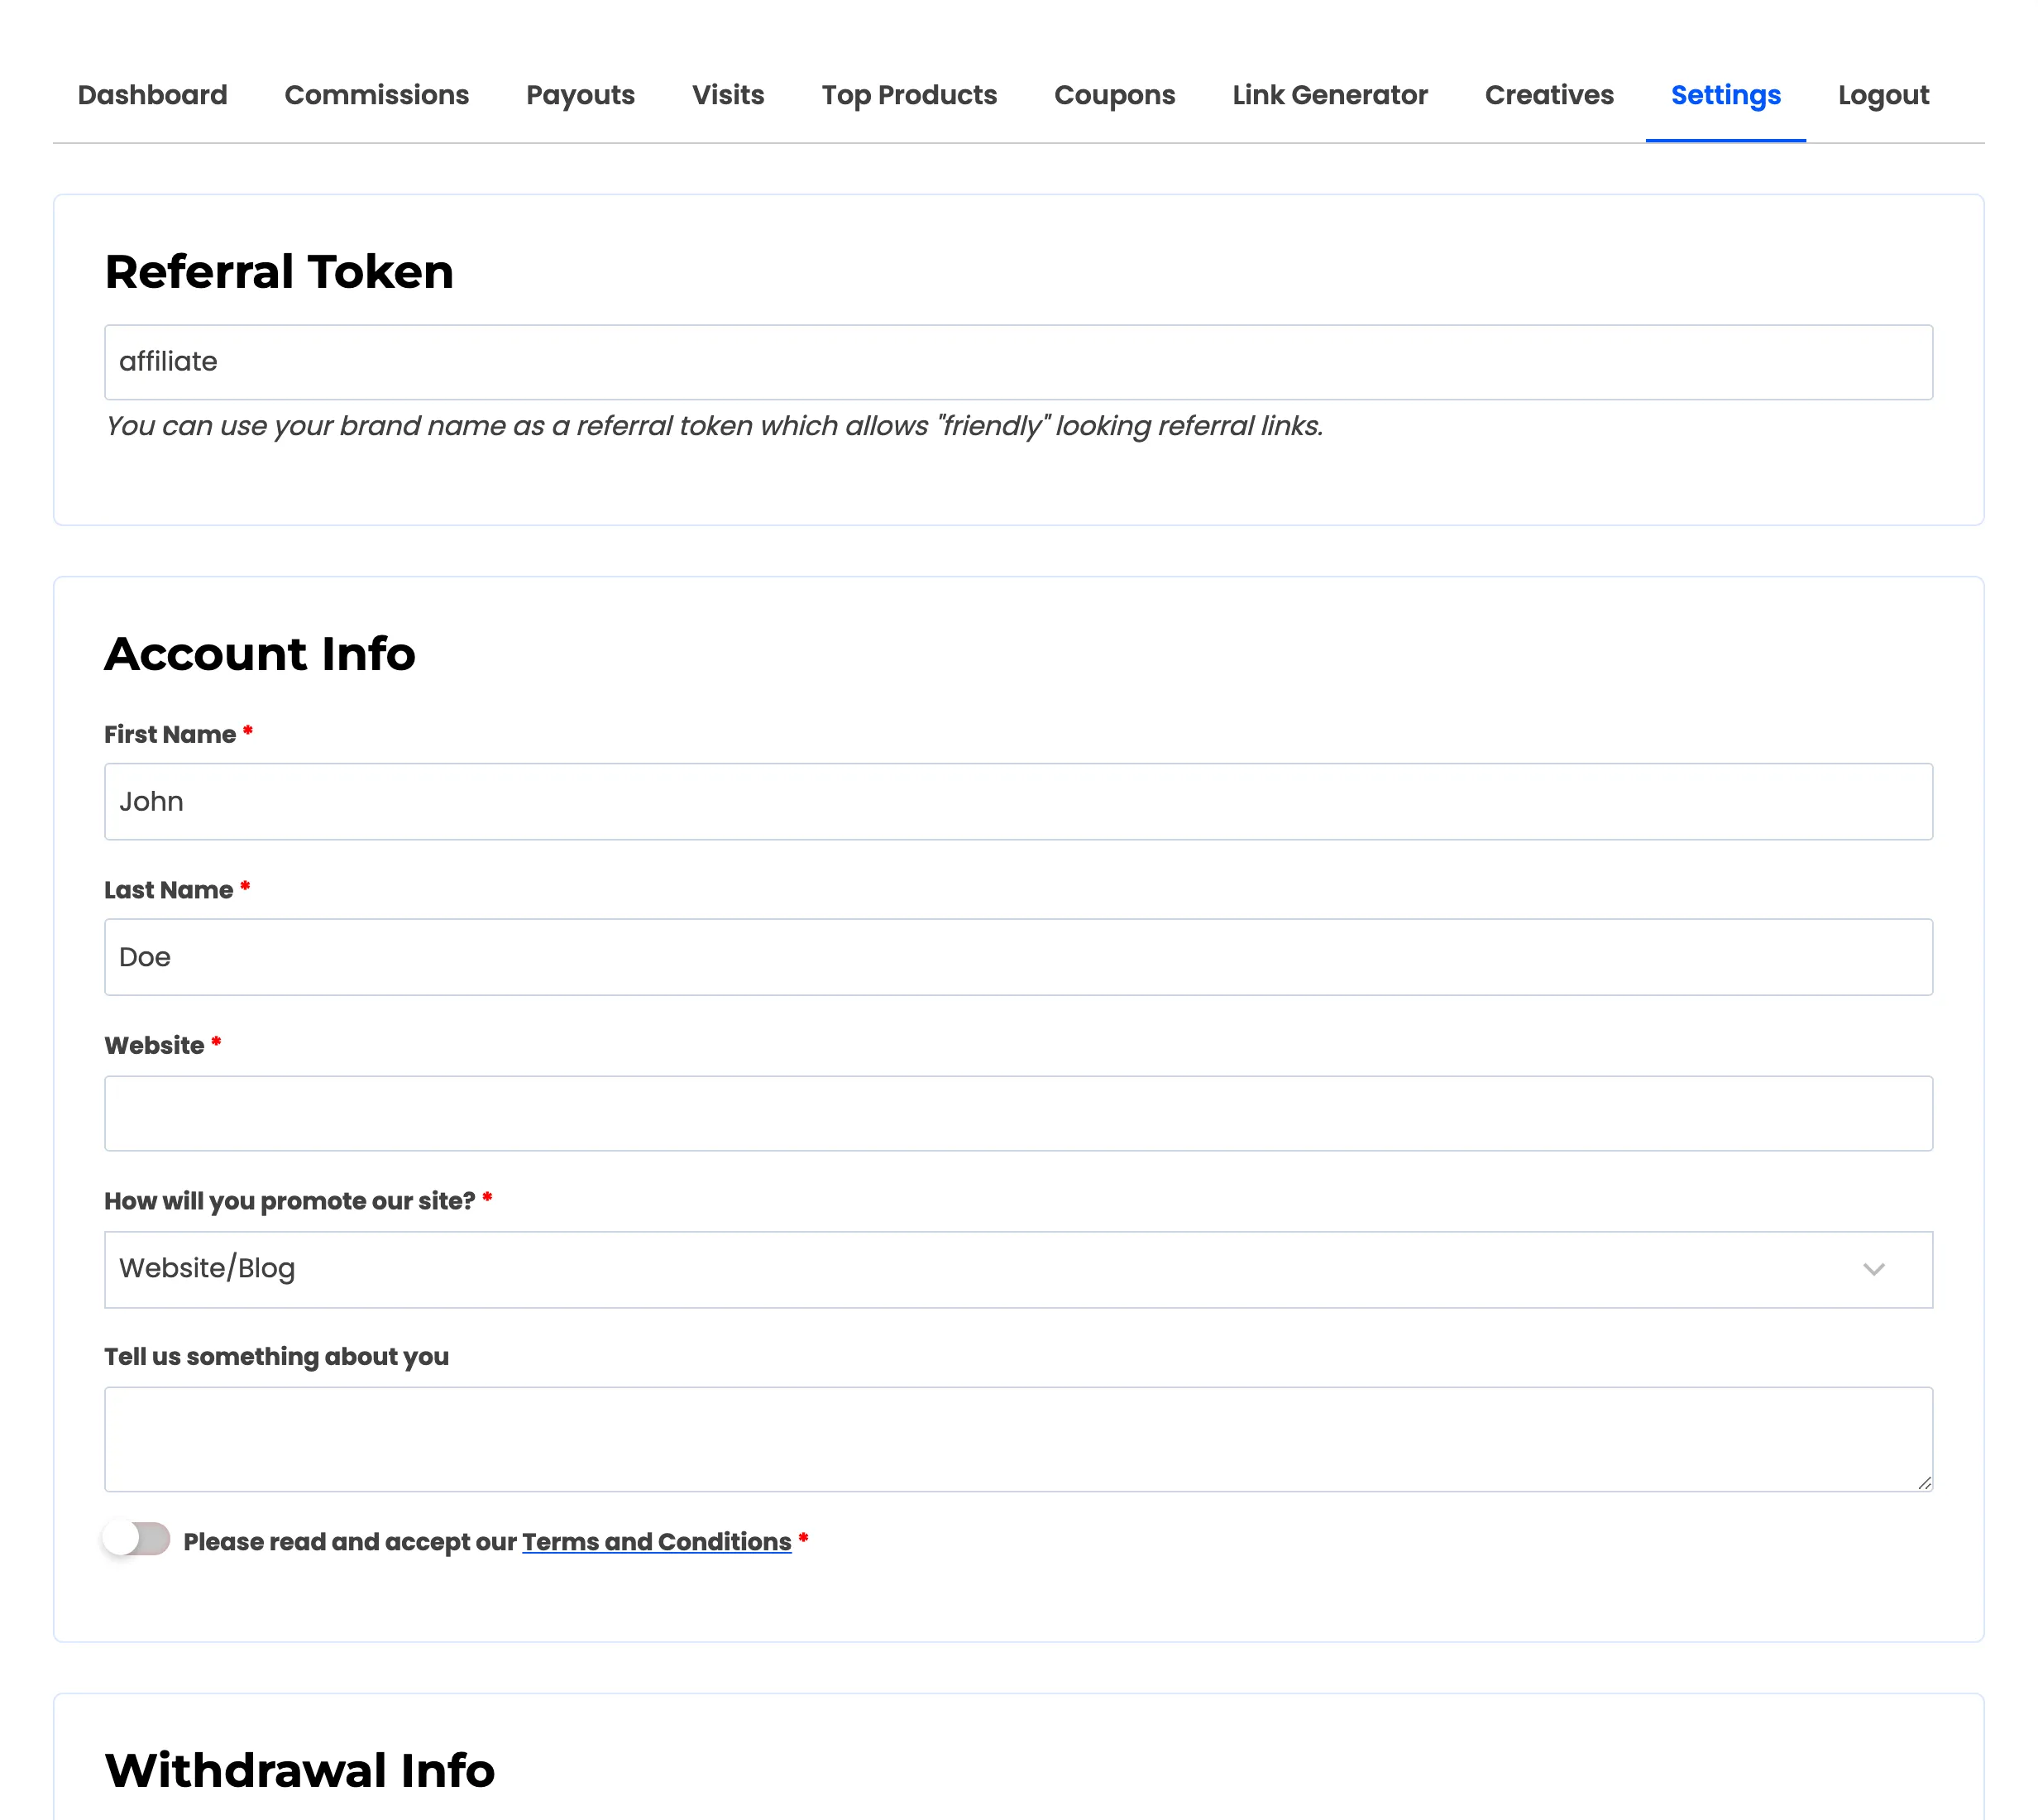
The withdrawal block changes its fields with the method. Bank transfer asks for an account name, IBAN and swift code, and PayPal asks for one email address.
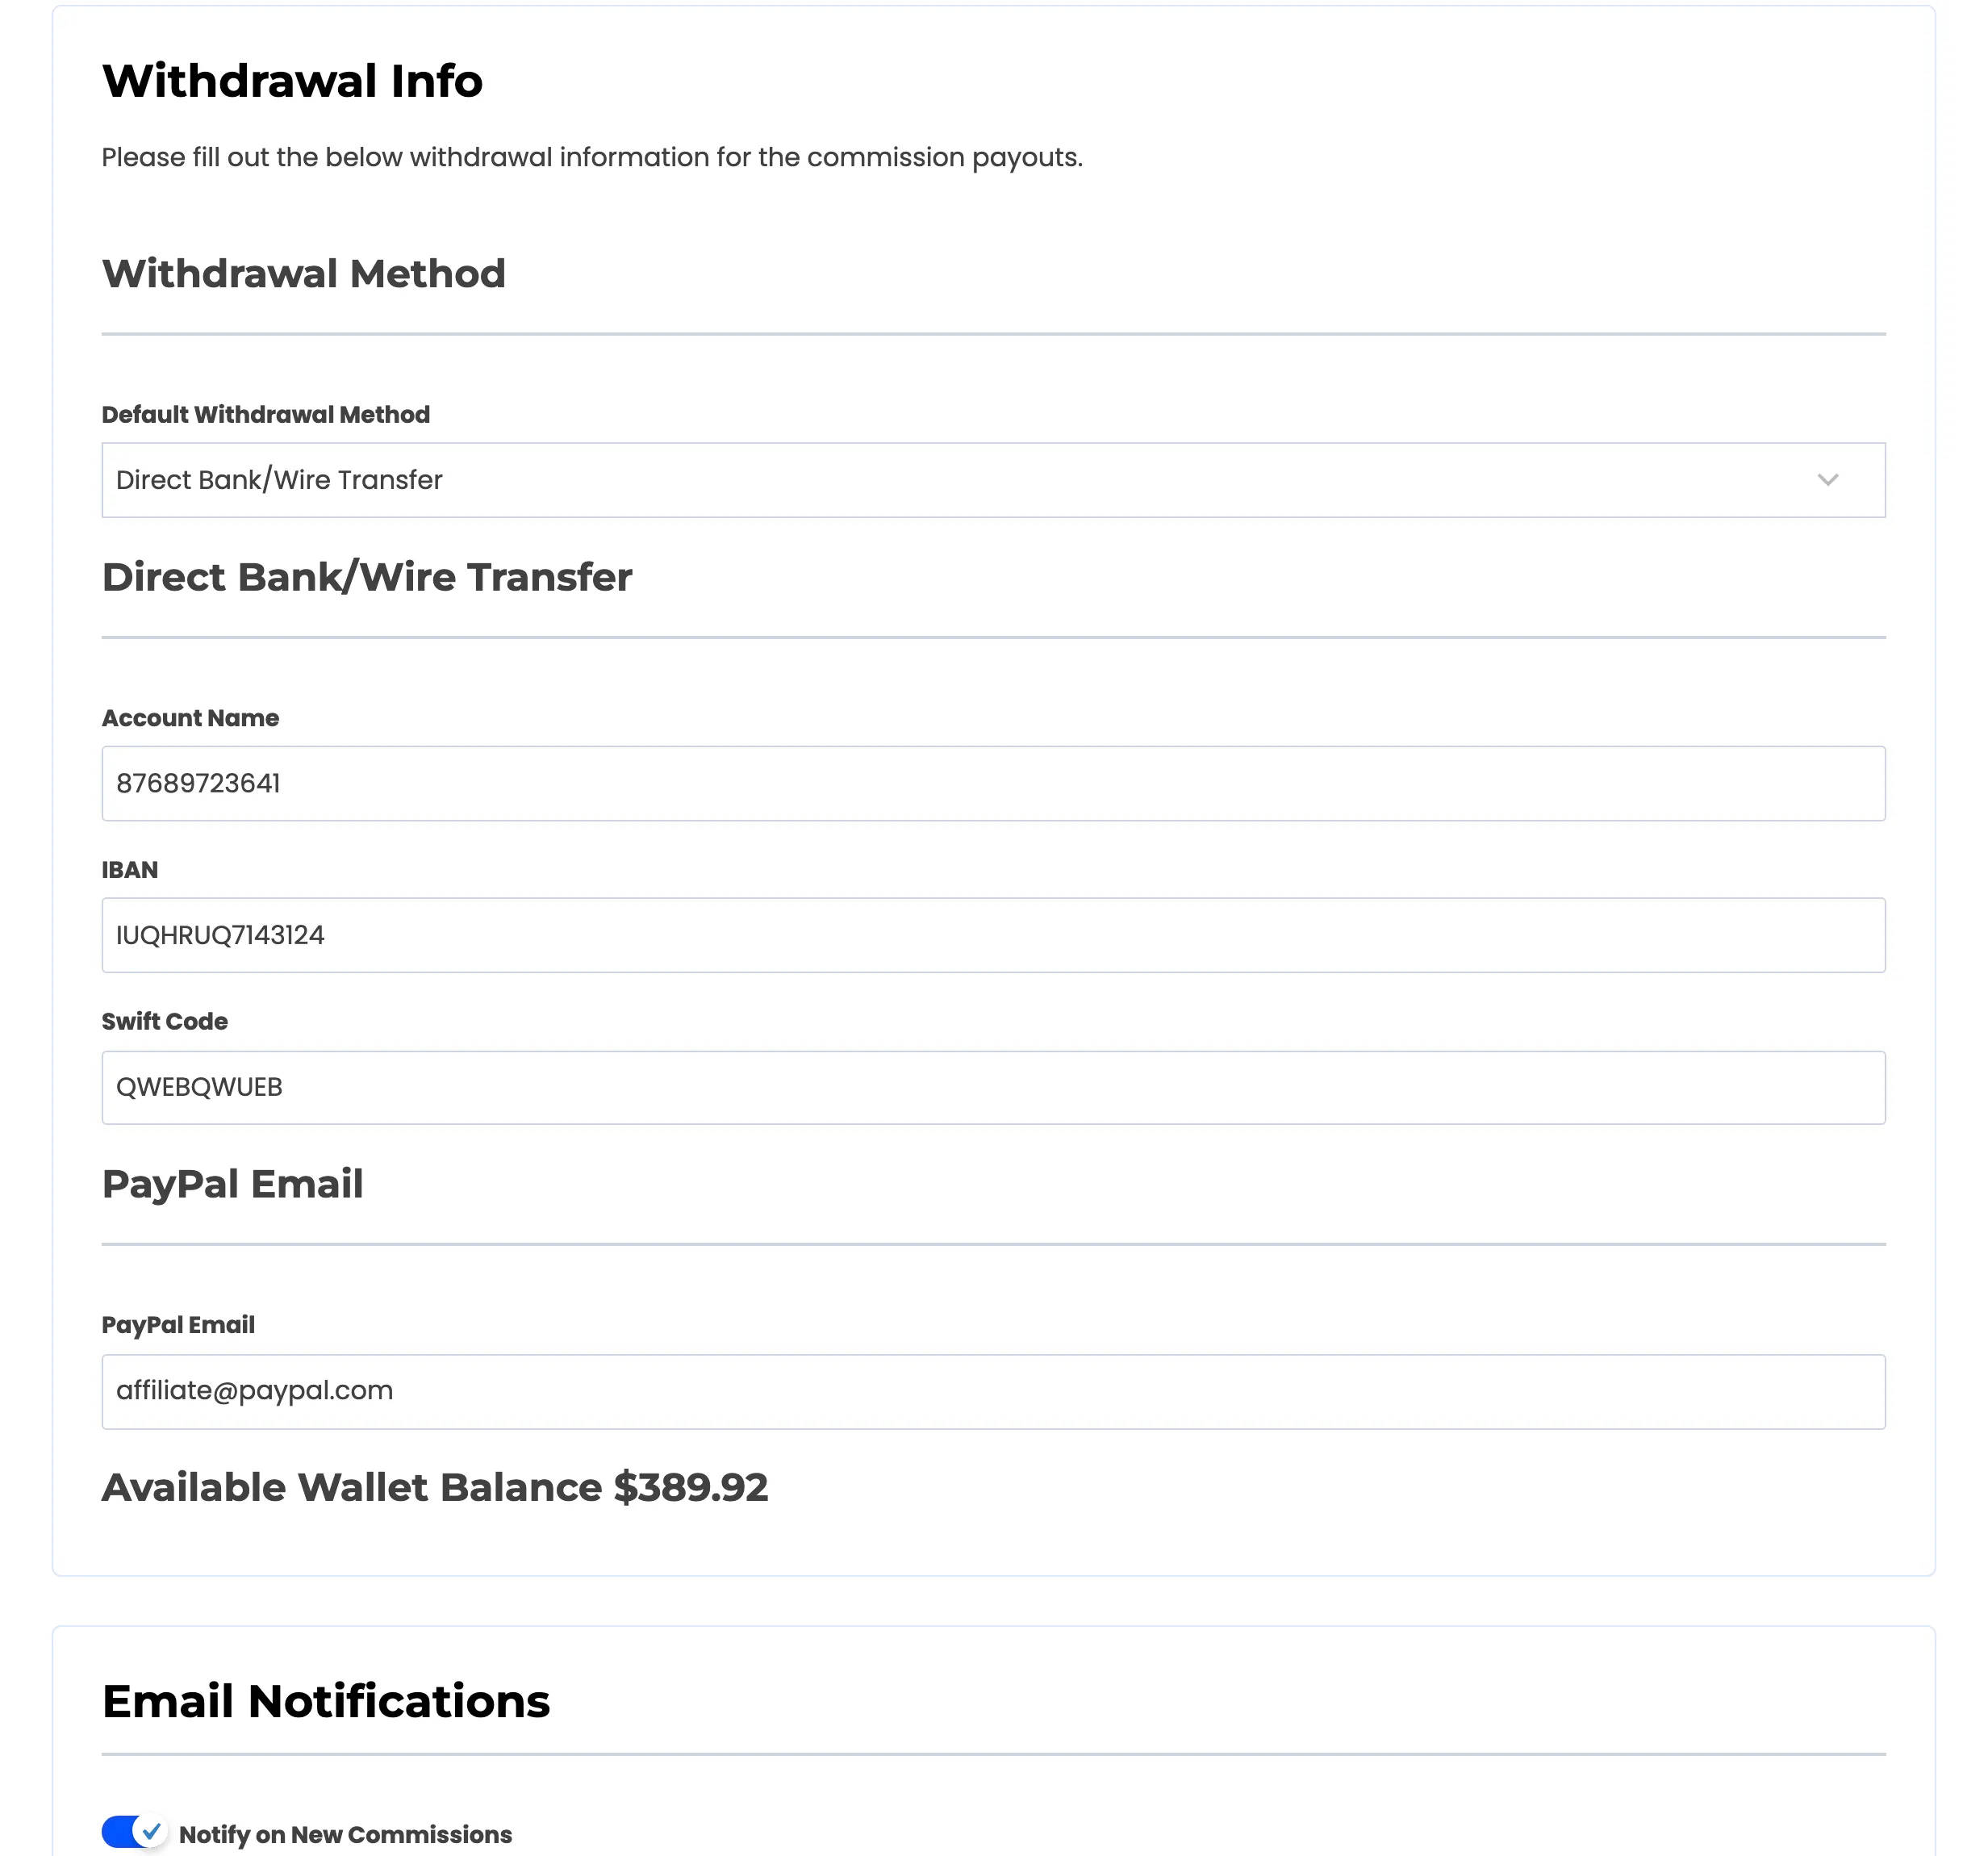
When you have connected Stripe Connect and ticked it as an available method, a Stripe Connect block appears here too. An affiliate who has not connected yet sees a short explanation and a Connect with Stripe button, which hands them to Stripe’s own hosted onboarding. Stripe collects their identity and bank details directly, so your store never sees either.
Underneath the button is an Or use an existing account field, for an affiliate who already connected a Stripe account to your store and should not have to create a second one.
The block changes with the account. Once Stripe has the account but has not enabled payouts on it, the affiliate sees Finish Stripe setup and Disconnect. Once payouts are enabled, they see the account id, Open Stripe dashboard and Disconnect.
Payout Readiness
Section titled “Payout Readiness”Below the withdrawal block sits a Payout Readiness panel. It exists to answer the question every affiliate eventually emails you: why has nothing arrived.

When the saved details match the chosen method, it says the details are complete and nothing is holding up the next payment. When something is missing, it lists exactly what: a bank account name and IBAN, a valid PayPal email, or a Stripe connection to finish. It checks only the method the affiliate has actually chosen, so a blank PayPal field is not reported to someone being paid by bank transfer.
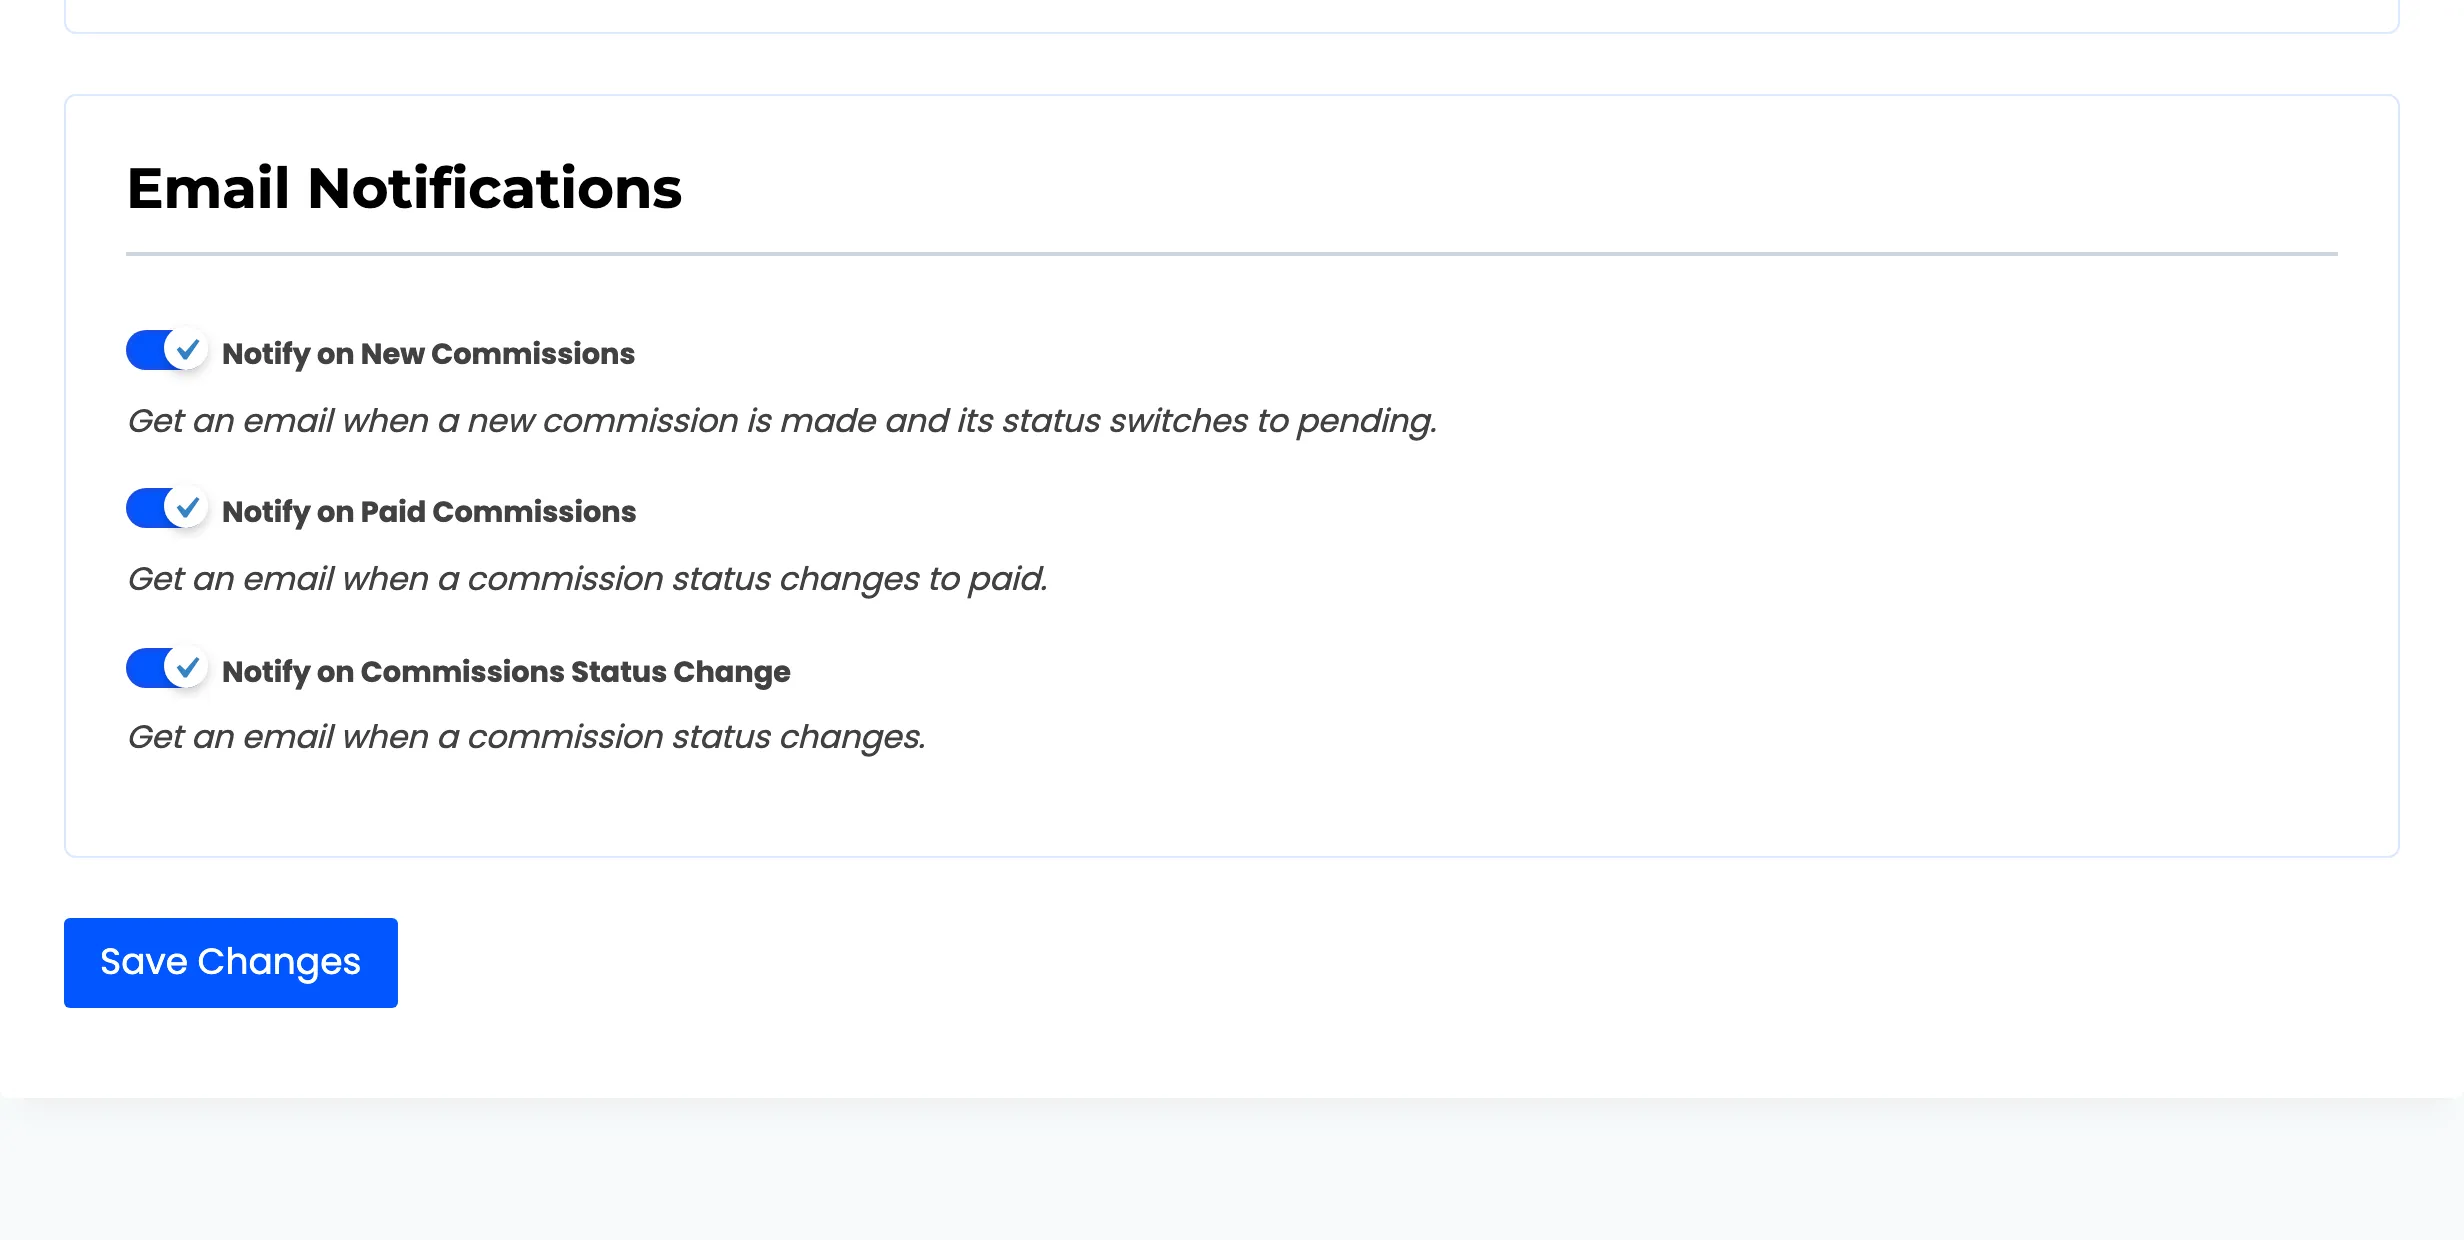
At the bottom sit three checkboxes letting the affiliate opt out of commission emails.
7. Pro-only sections
Section titled “7. Pro-only sections”Two dashboard sections exist only in Pro.
- Coupons lists the discount codes assigned to that affiliate, with type, amount and expiry. A customer using one of those codes credits the affiliate the same way a link does.
- Creatives gives affiliates ready-made banners and text links, each with a copy-ready integration snippet that already carries their referral token.
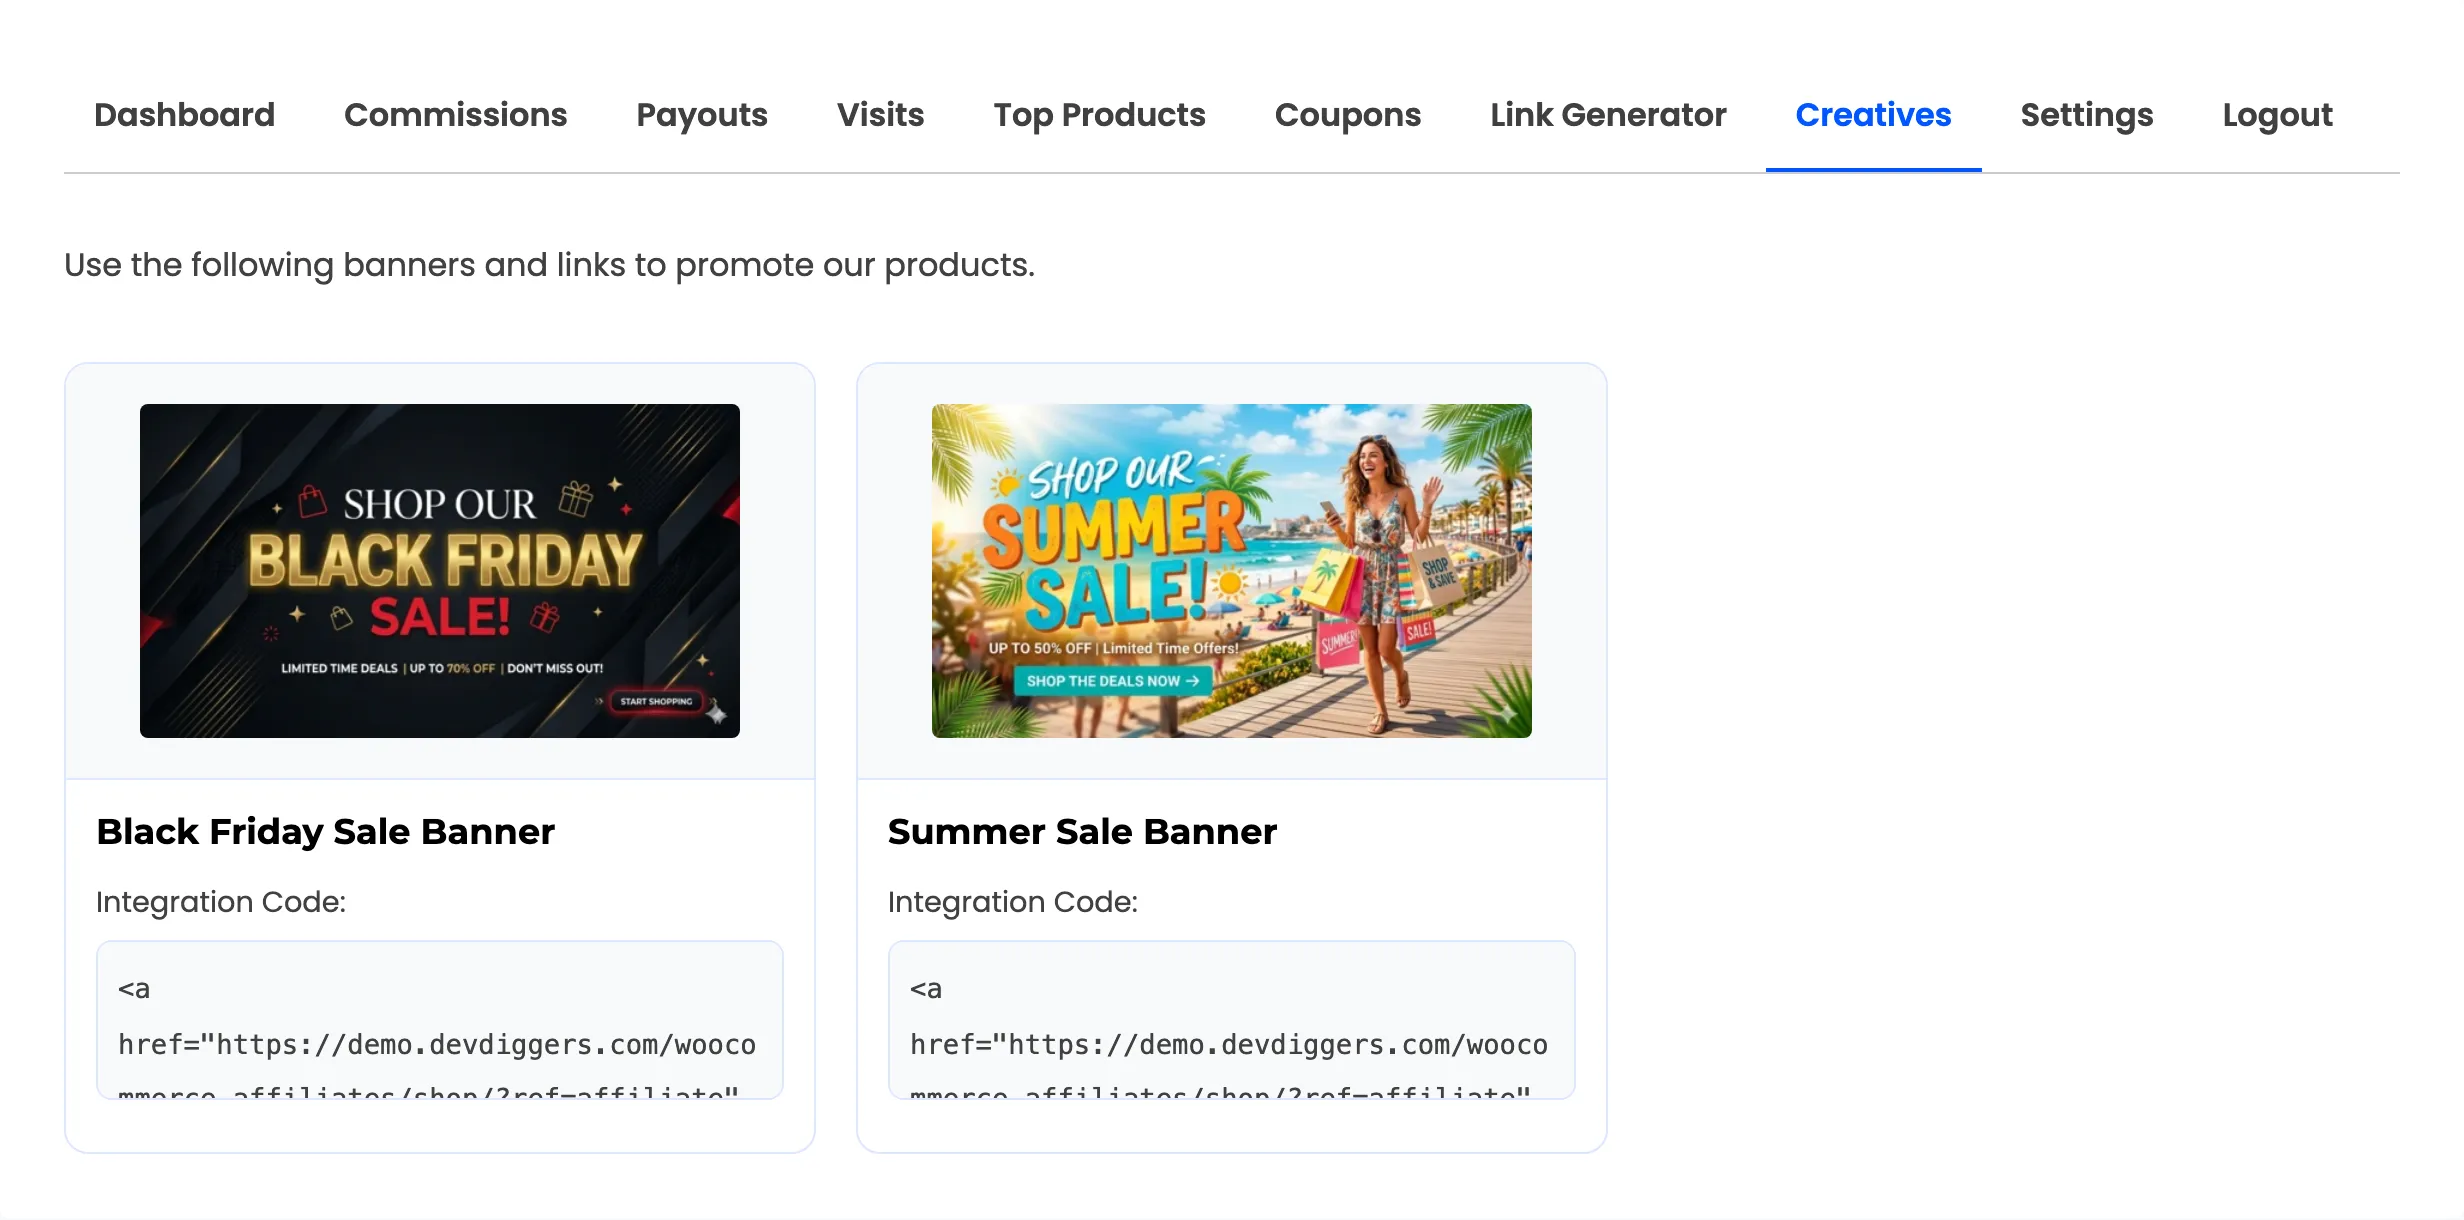
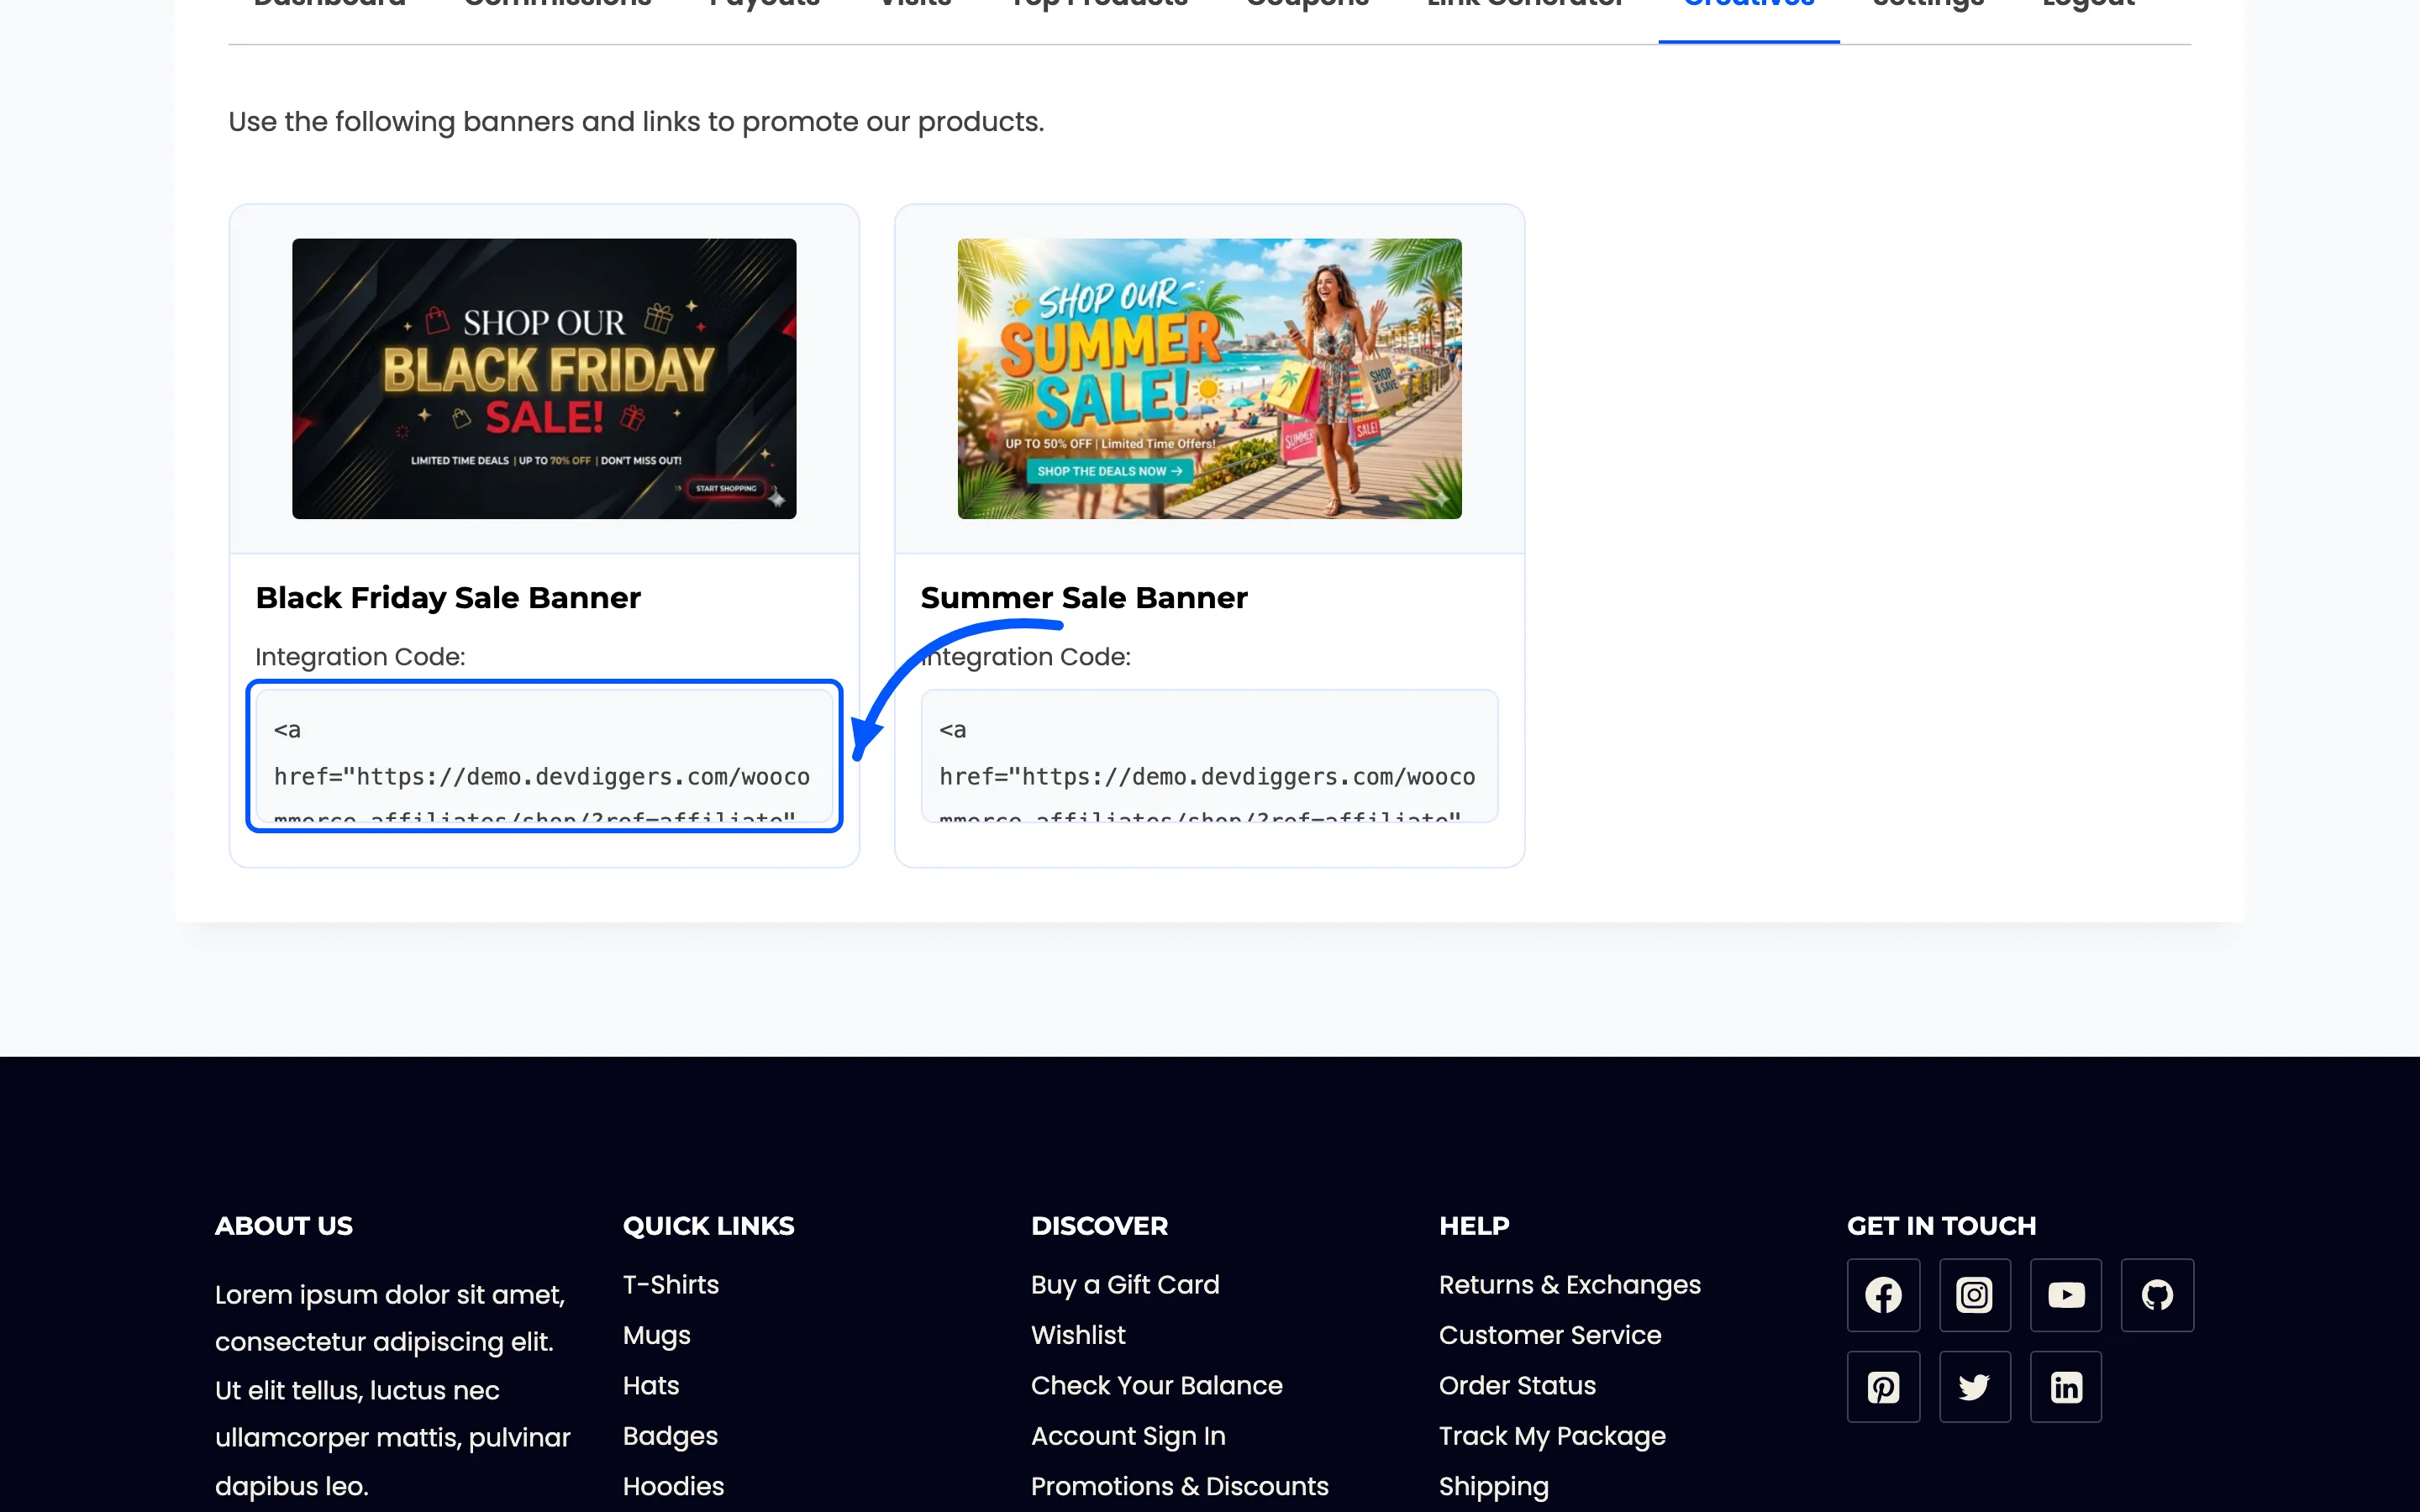
The integration code under each banner is the whole point. It already carries the affiliate’s token, so pasting it is all the setup a partner has to do.
8. Where they stand against everyone else
Section titled “8. Where they stand against everyone else”The leaderboard is not part of the dashboard. It is a shortcode you place on any page, and an affiliate who opens that page sees their own row picked out and their own name in full while everyone else is masked.

That is the point of the privacy setting. An affiliate can see where they rank without learning what anyone else earns.
The My Account route
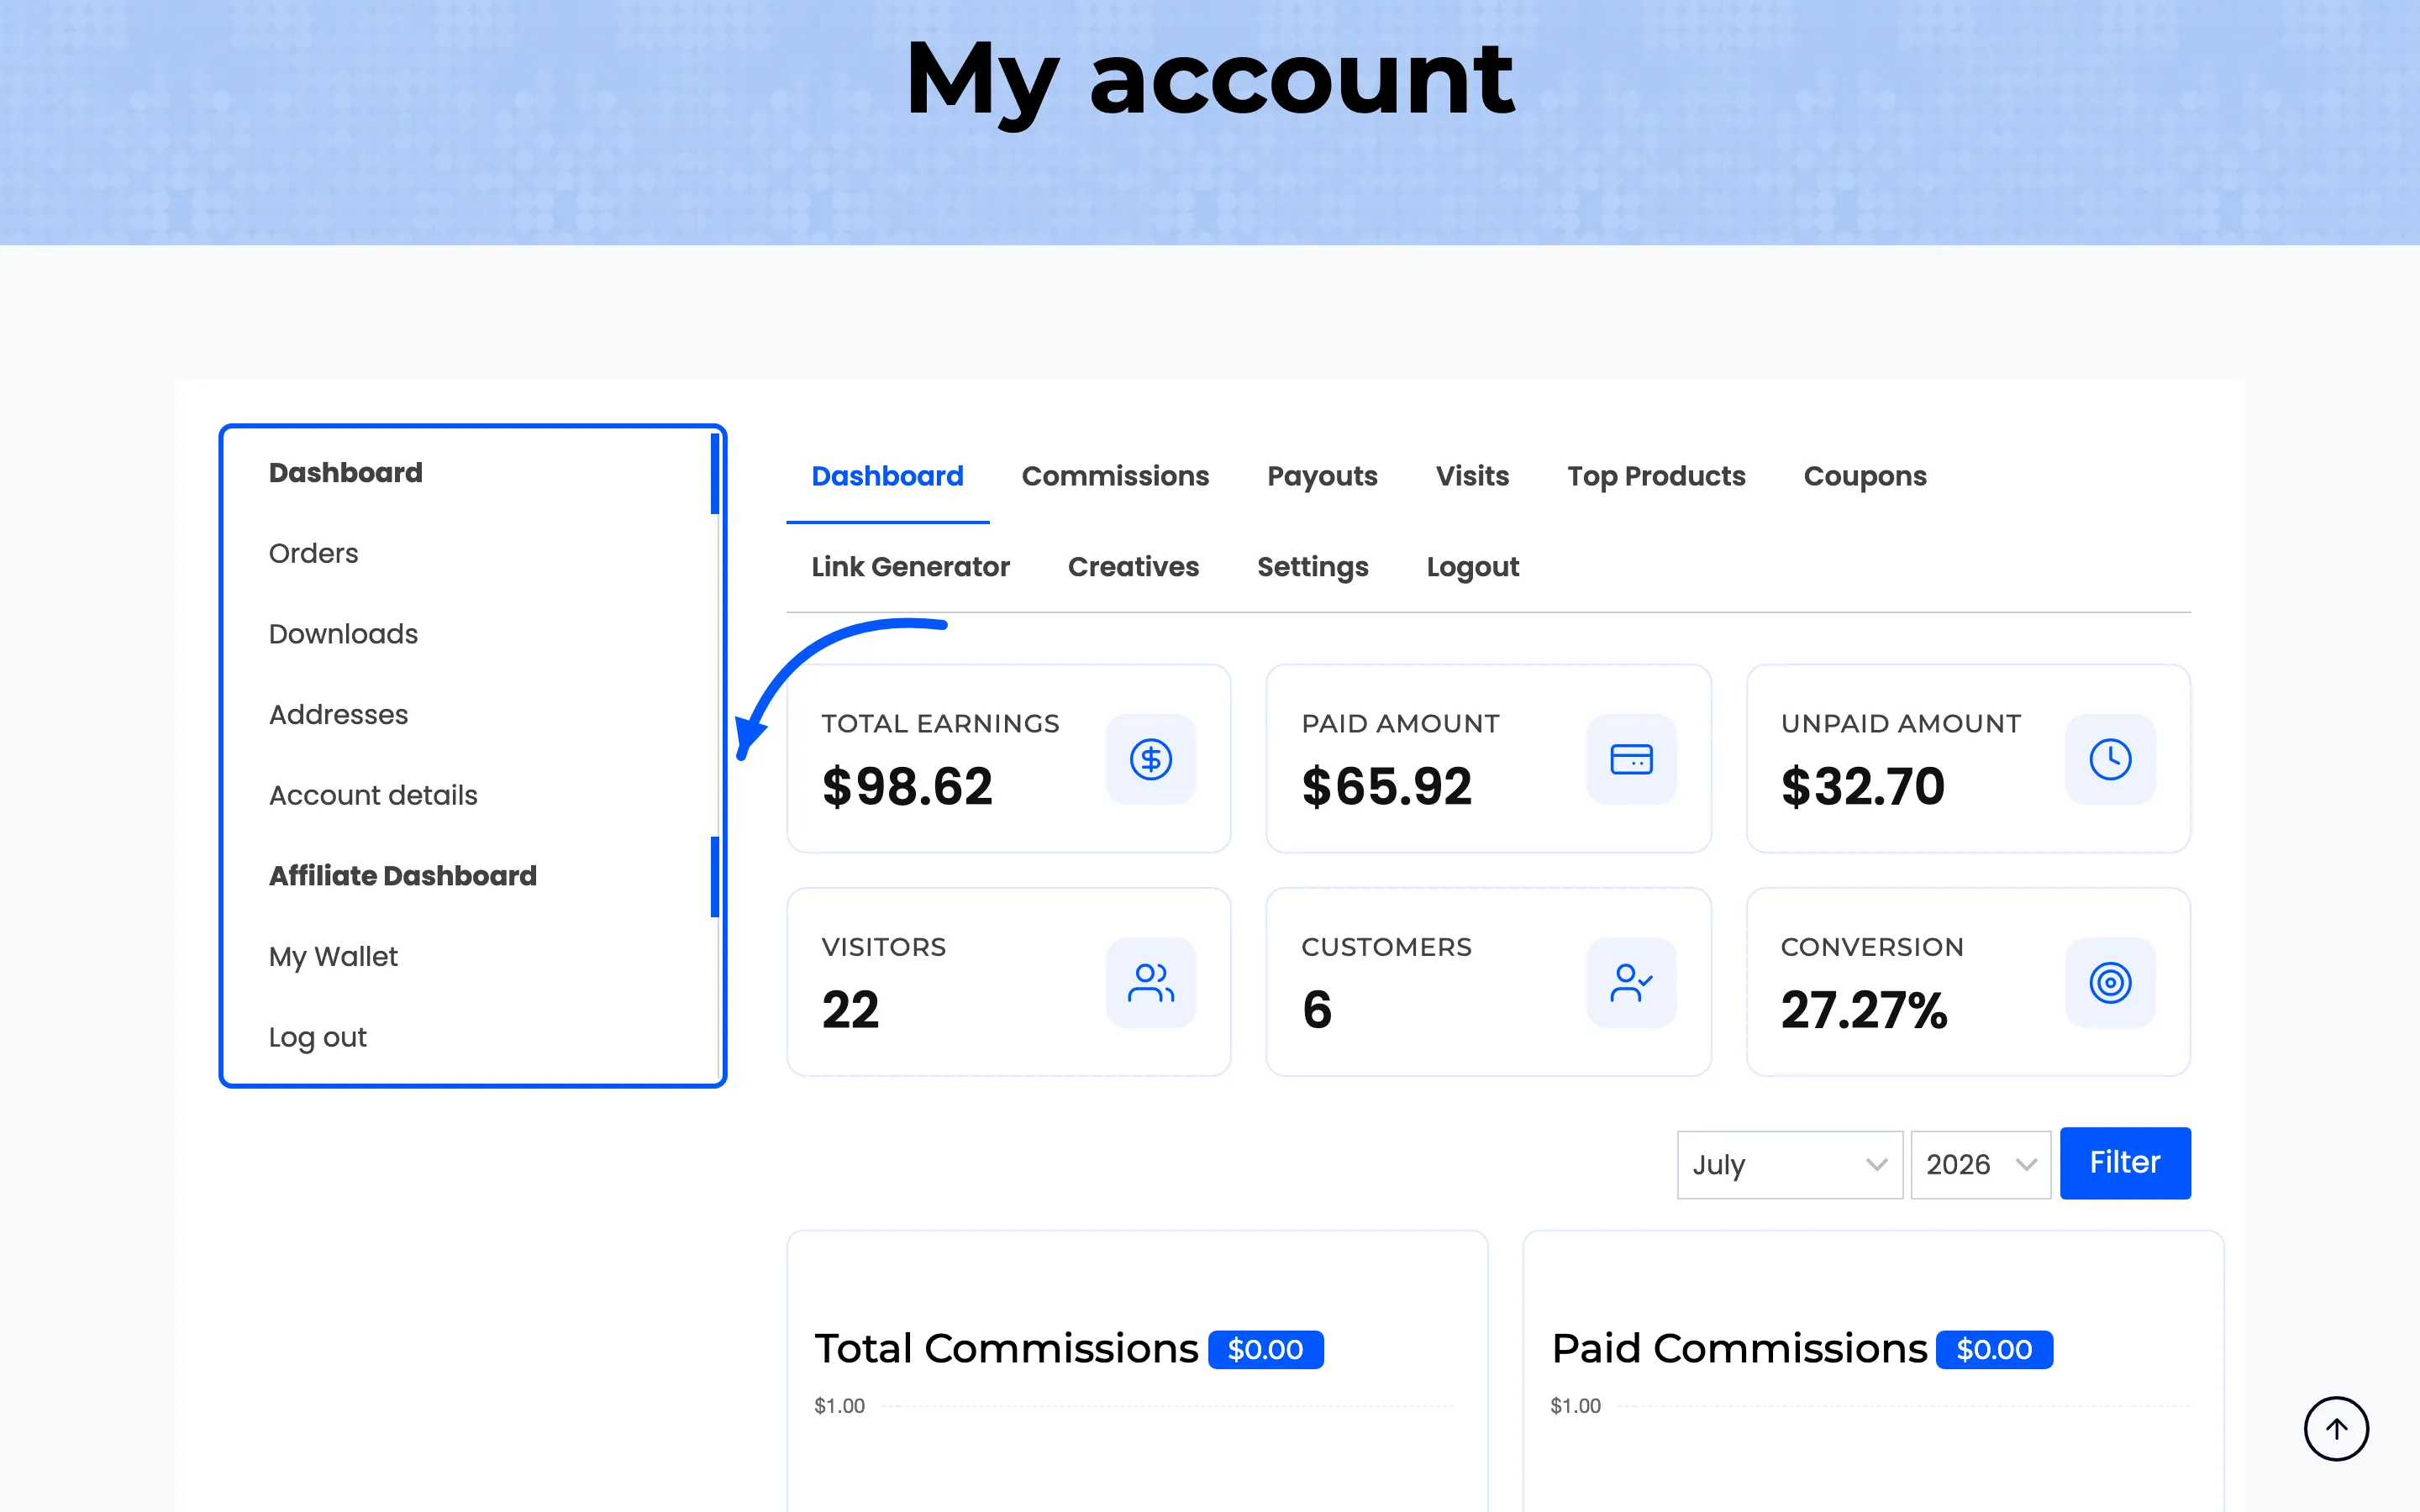
Section titled “The My Account route”If Enable My Account Menu is on, the same dashboard also appears as an Affiliate Dashboard tab inside WooCommerce My Account. It is the identical interface, wrapped in the account layout, so affiliates who are also customers only have one place to go.
The extra menu item is what most affiliates find first, since they usually have a customer account already.
Where to go next
Section titled “Where to go next”- How to Create the Affiliate Signup Page to publish the page affiliates land on.
- Layout Settings to match the dashboard to your brand colours.