

How to Match the Customer Area to Your Brand (Pro)
The Pay Later section ships in a clean DevDiggers style that suits most themes. These settings bring it in line with your brand without code.
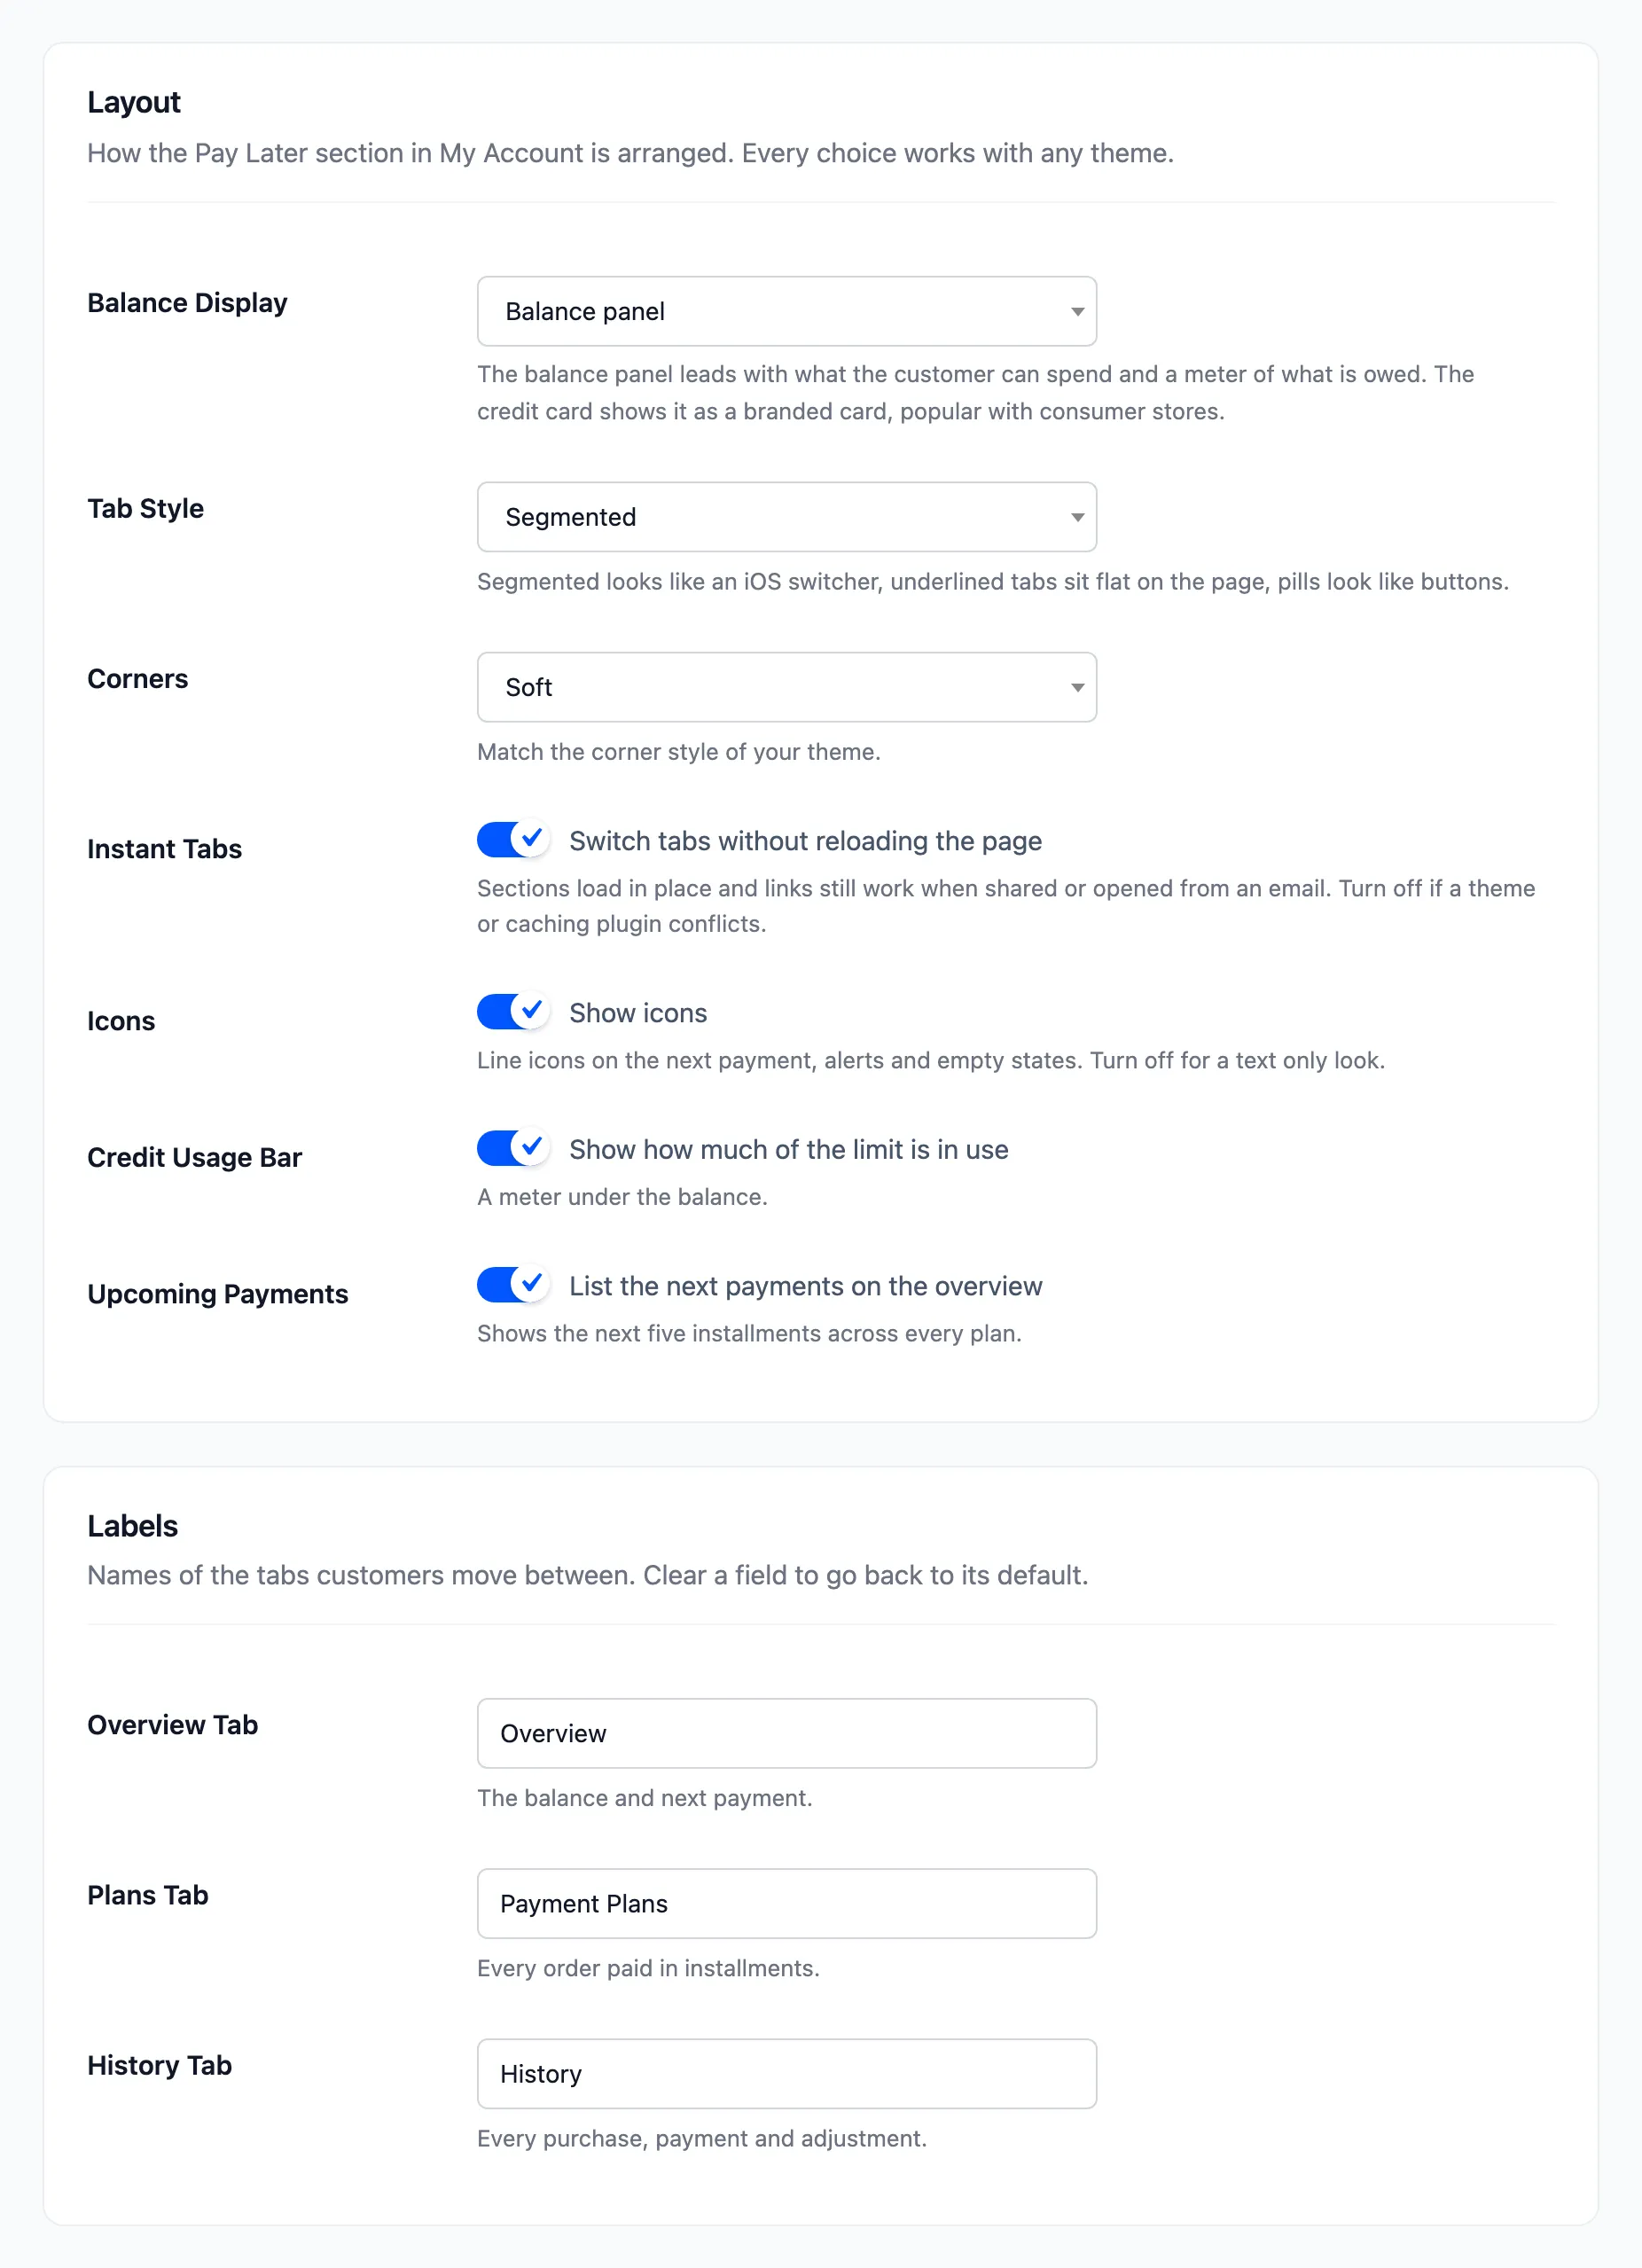
Step 1: Pick a layout
Section titled “Step 1: Pick a layout”Go to DevDiggers Plugins → Pay Later → Configuration → Appearance:
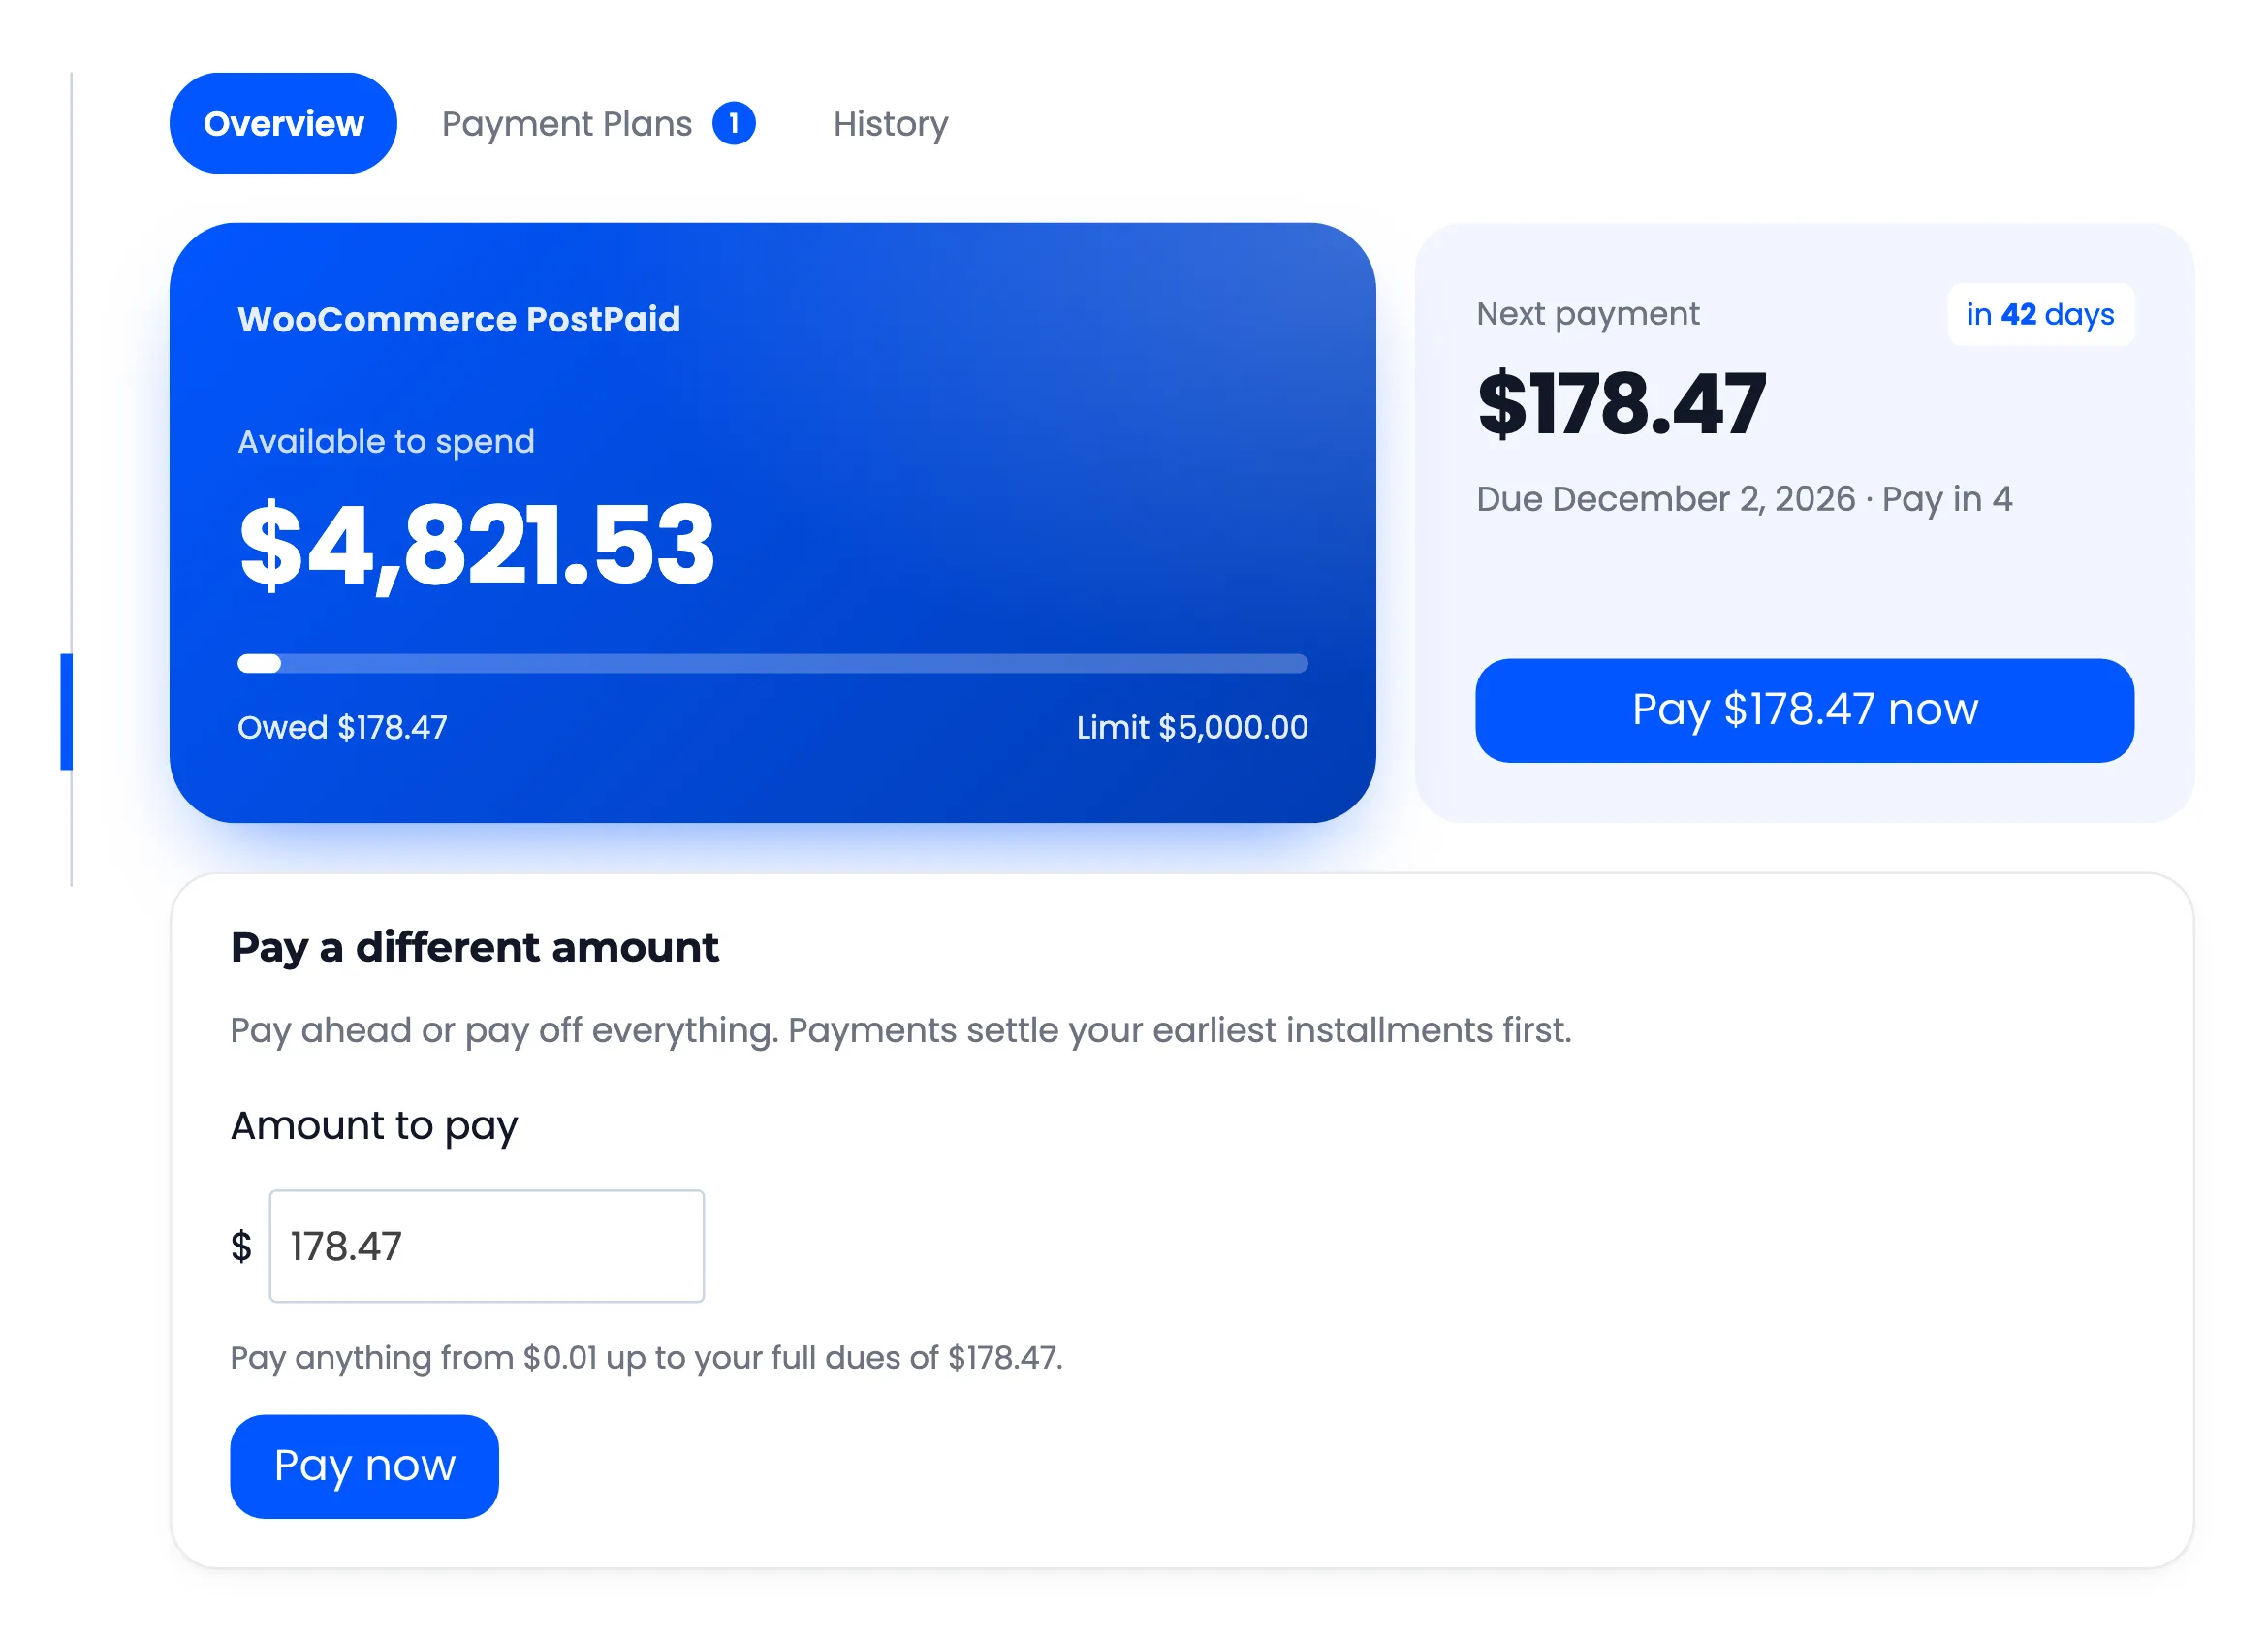
- Balance Display: Balance panel, or Credit card for a branded card.
- Tab Style: Segmented, Underline or Pills.
- Corners: Sharp, Soft or Round, to match your theme’s buttons.
The credit card with pill tabs and round corners:
Step 2: Rename the tabs
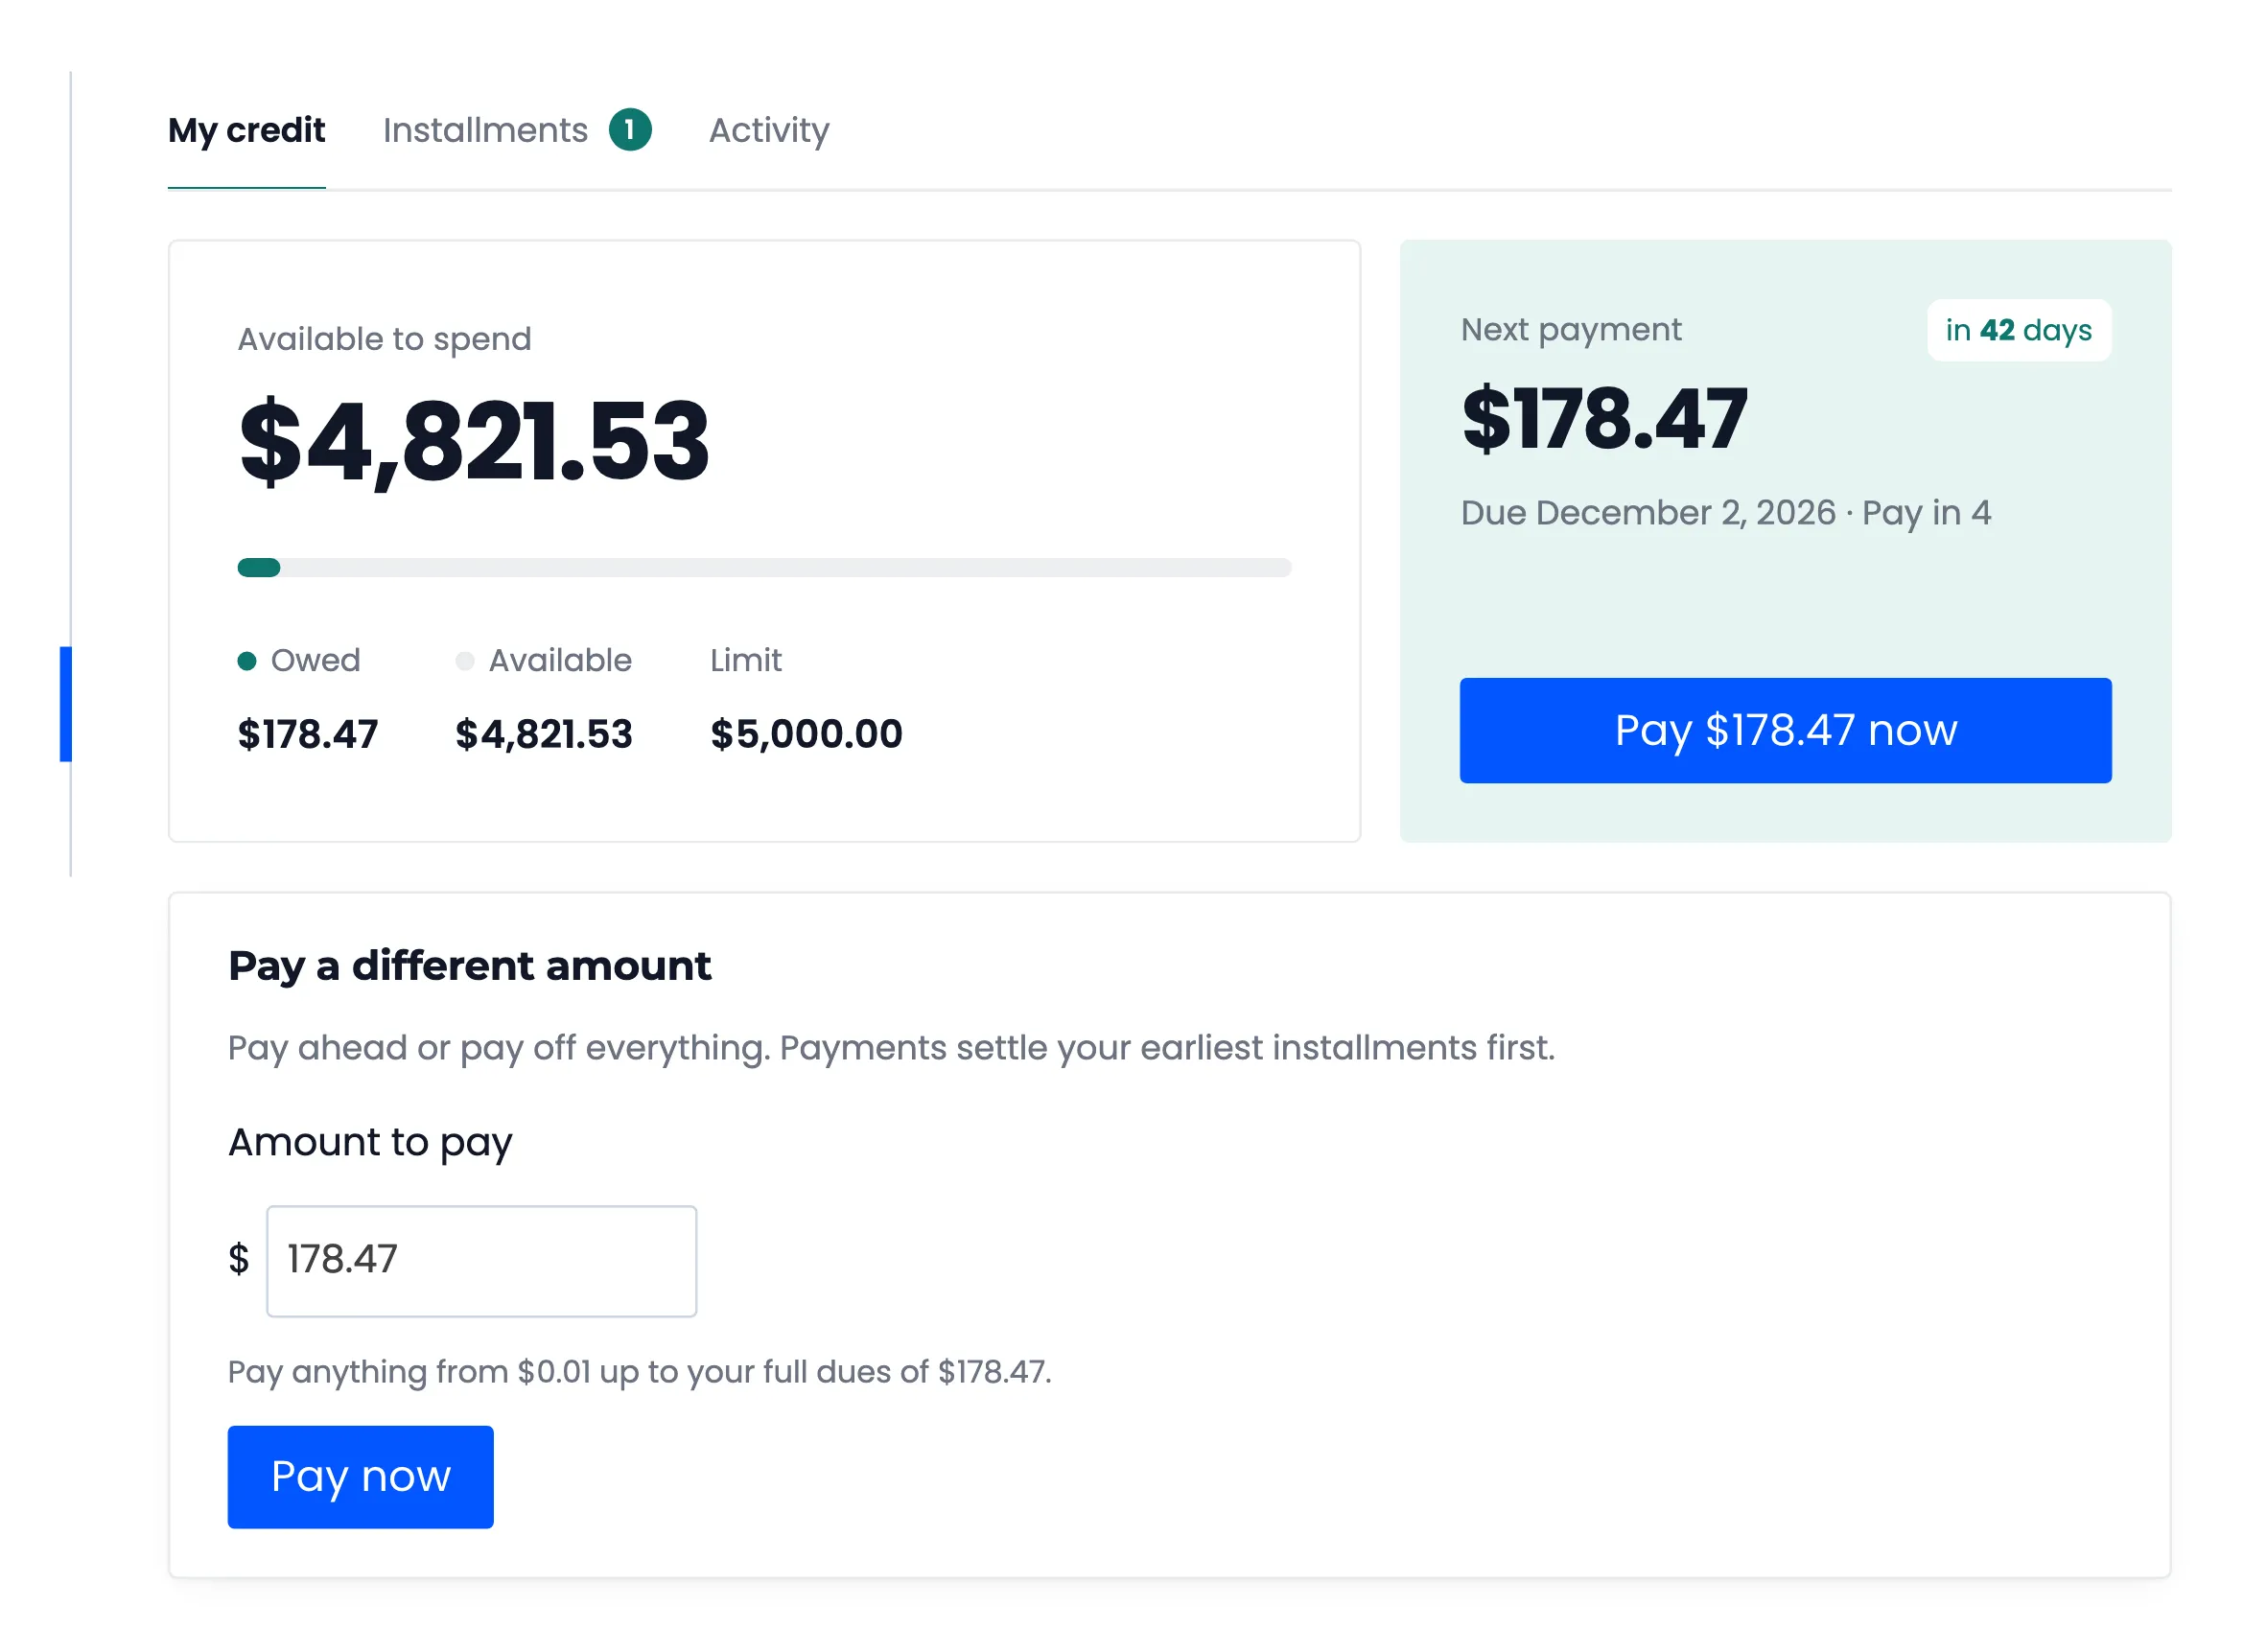
Section titled “Step 2: Rename the tabs”Under Labels, enter your own names for Overview, Payment Plans and History. Clear a field to go back to its default.
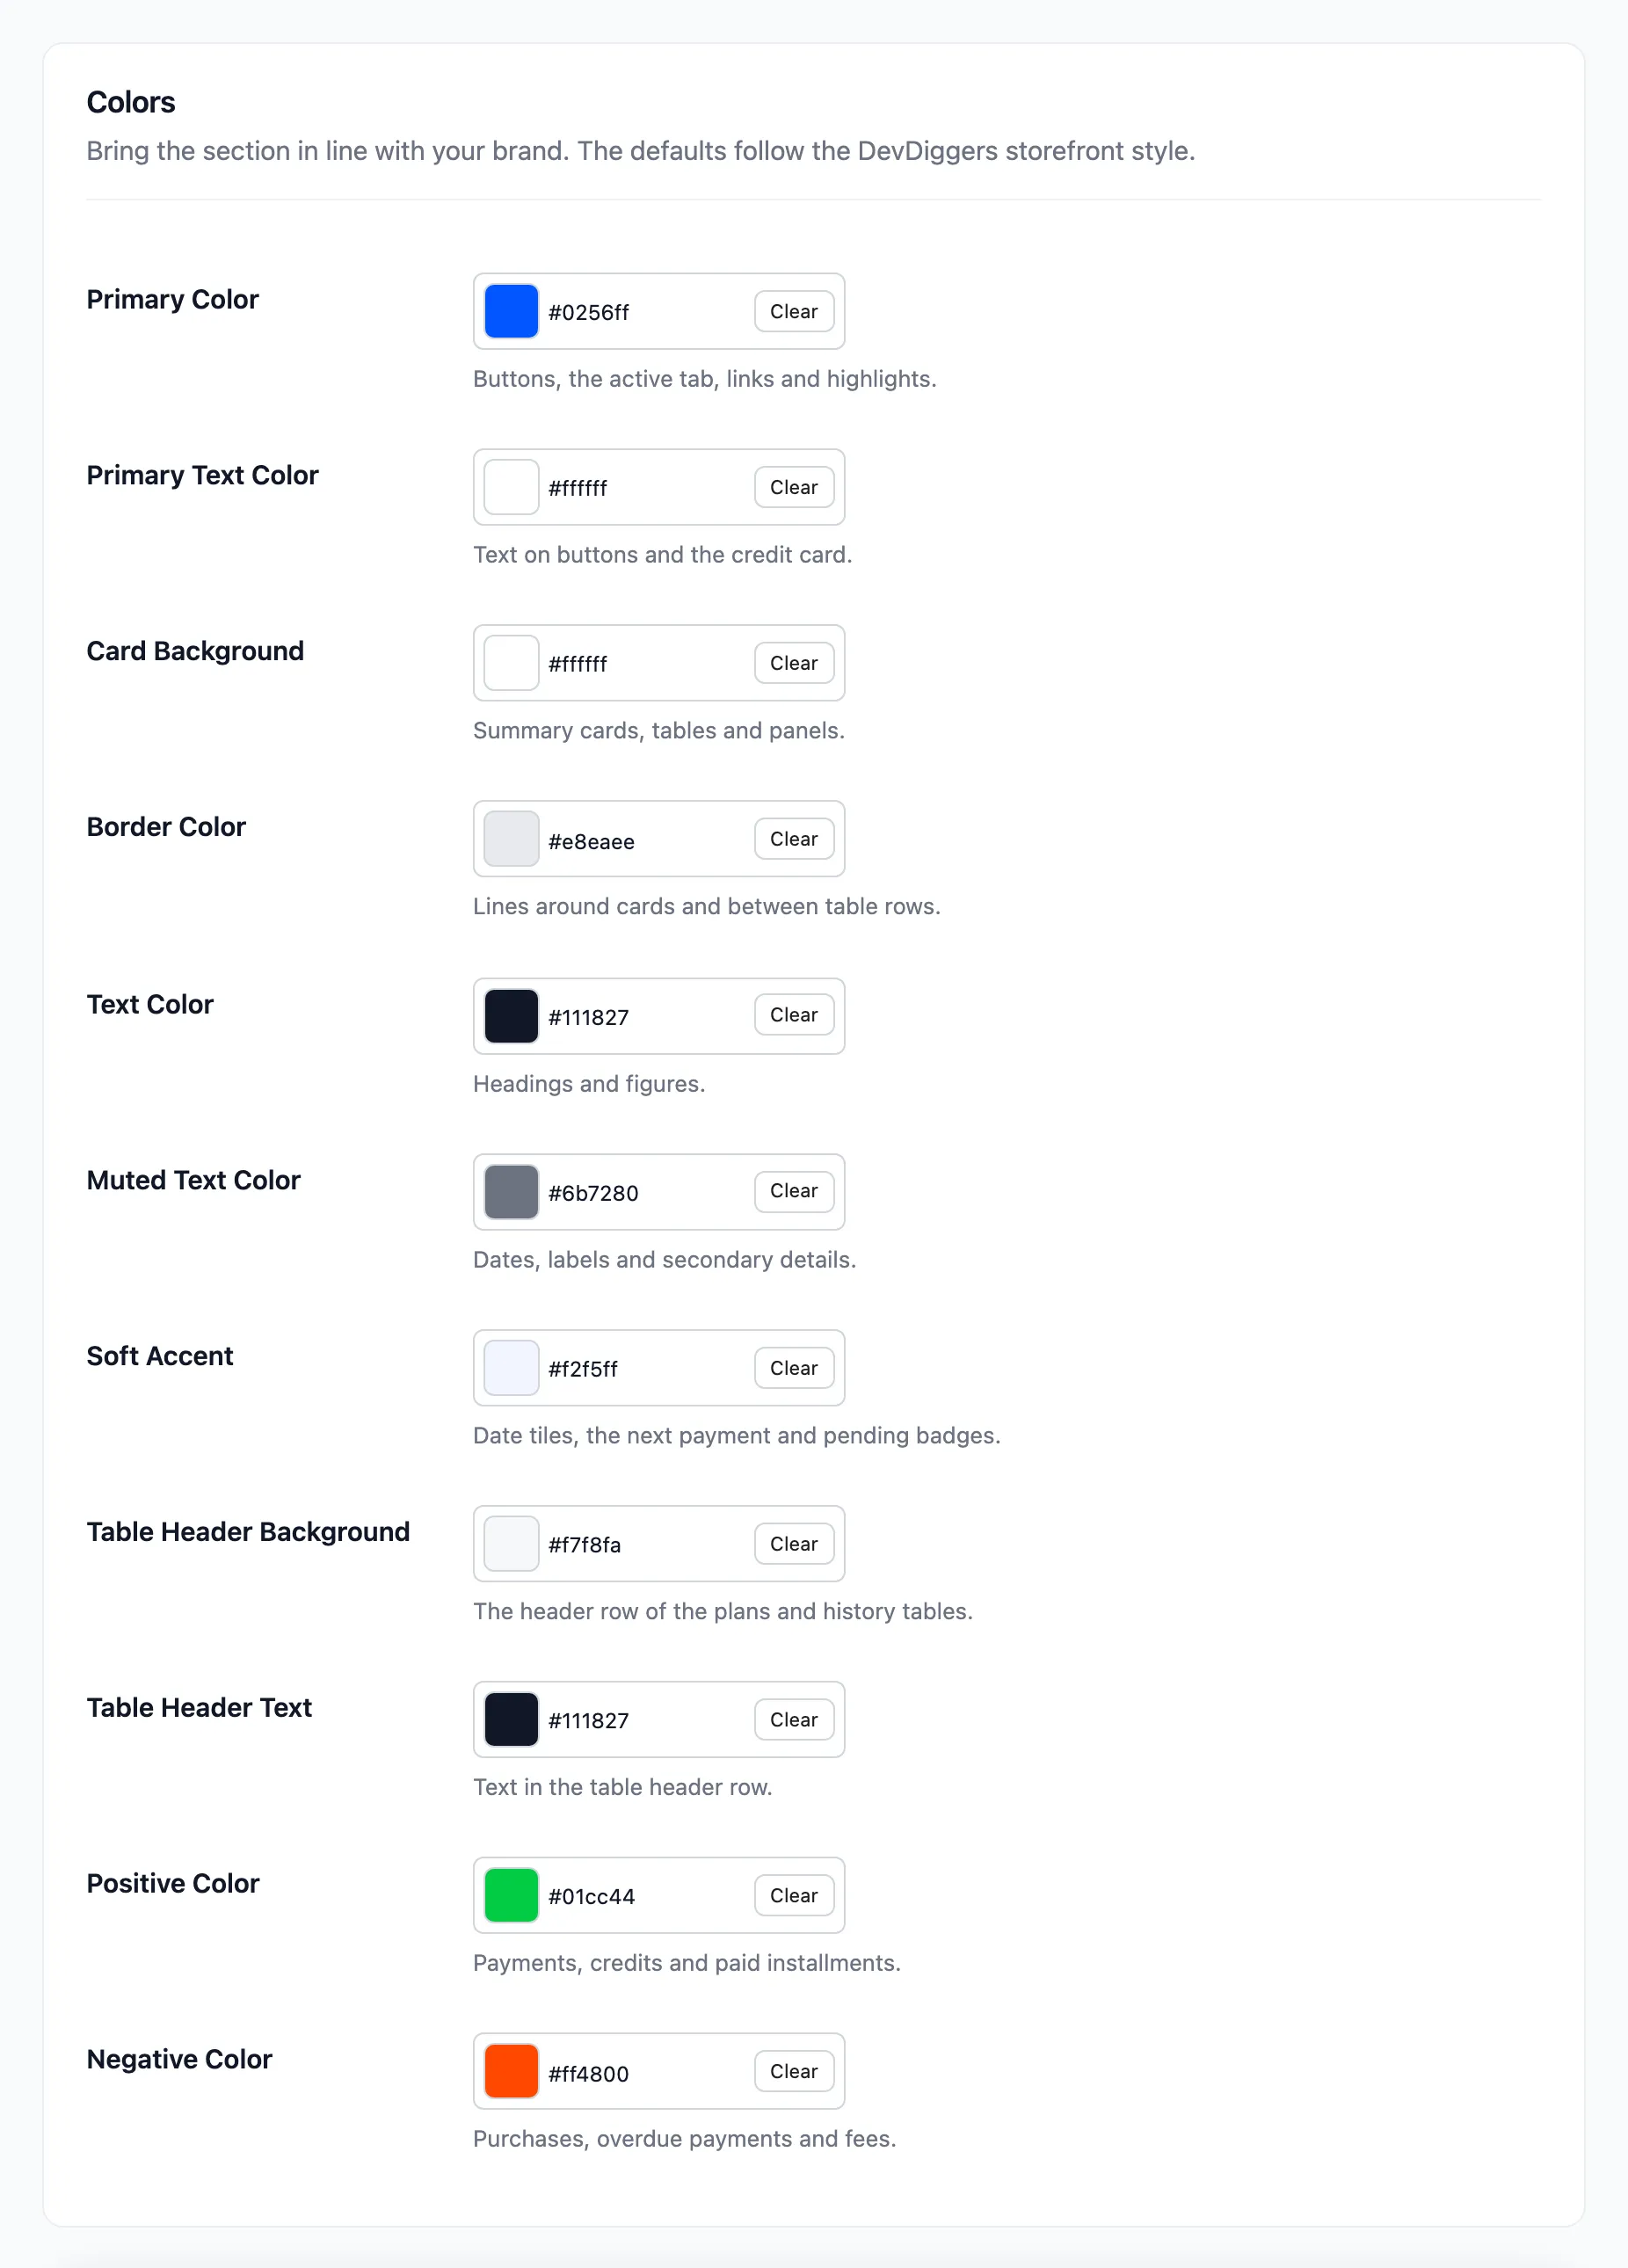
Step 3: Set your colors
Section titled “Step 3: Set your colors”Under Colors, the Primary Color does most of the work: buttons, the active tab, links and highlights. Soft Accent tints the next payment card and date tiles to match. Click Save Changes.
Step 4: Check My Account
Section titled “Step 4: Check My Account”The demo with a teal primary color, underline tabs, sharp corners and its own tab names:
To name the whole section, for example “Store Credit”, change My Account Menu Title under Configuration → General.