

How to Register Your WhatsApp Business Number in Twilio (Pro)
The sandbox is for testing. Your customers need a number that carries your business name and does not ask them to join anything first. In Twilio that is a WhatsApp sender.
Before you start
Section titled “Before you start”- A paid Twilio account. A trial cannot register a sender.
- Admin access to your Meta Business Portfolio, the business account Facebook keeps for your company. If you have none, you can create one during sign-up.
- A phone number you control that is not already on WhatsApp. It can be a Twilio number or your own landline or mobile, if it can receive a code by text or call. A number used in the WhatsApp or WhatsApp Business app has to be deleted from that app first.
- A display name that follows Meta’s display name rules. Use your store’s name.
Step 1: Upgrade your Twilio account
Section titled “Step 1: Upgrade your Twilio account”A trial account cannot submit a sender. Open Messaging → Senders → WhatsApp senders on a trial and Twilio says so plainly: “A paid account is required to submit a WhatsApp Sender.”
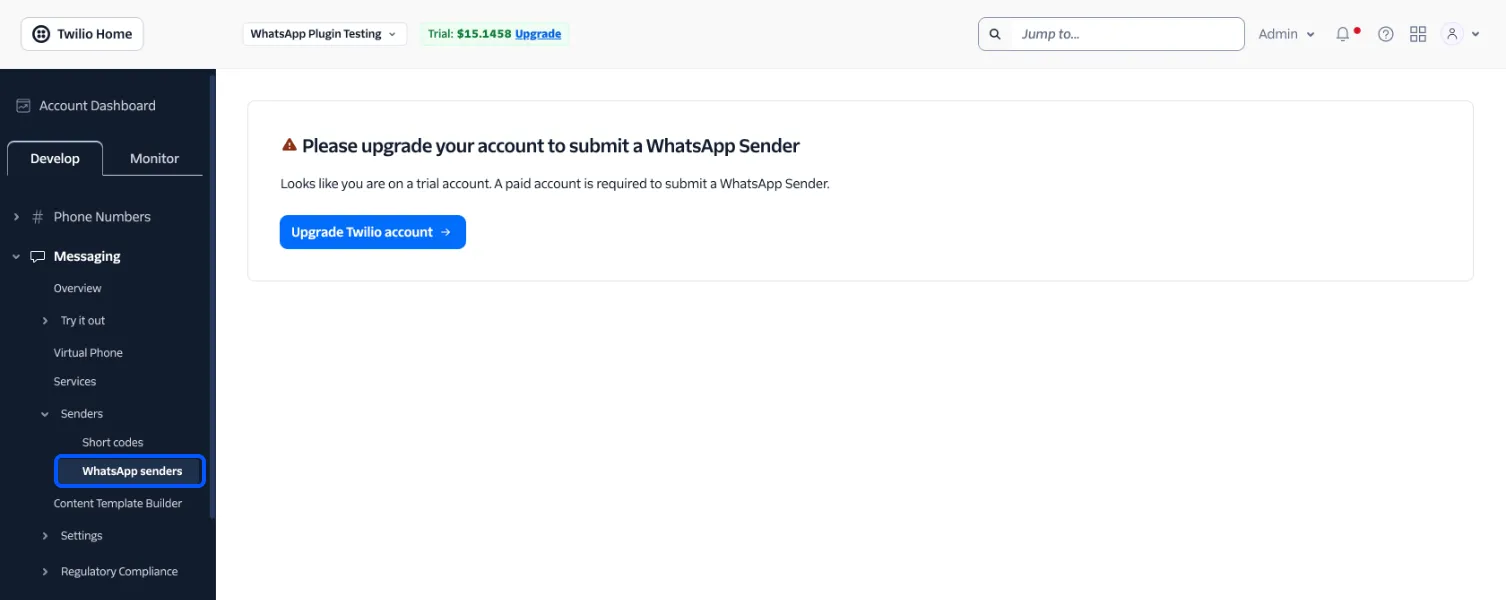
Click Upgrade Twilio account, add a payment method and some credit. Twilio charges per message, and Meta adds its own charge per conversation. Both are listed on Twilio’s pricing page.
Step 2: Start a new sender
Section titled “Step 2: Start a new sender”On Messaging → Senders → WhatsApp senders, click Create new sender. Under Select a phone number to register, choose a Twilio number or Non-Twilio phone number for your own, then click Continue.
Step 3: Link your WhatsApp Business Account
Section titled “Step 3: Link your WhatsApp Business Account”Click Continue with Facebook. Meta’s sign-up opens in a pop-up window. Keep both windows open and finish in the same browser, or the link between Meta and Twilio fails.
In the pop-up:
- Log in to Facebook, or click Continue as your name, then Get started.
- Choose your business portfolio, or create one. Its details fill in the form. Click Next.
- Create a new WhatsApp Business Account. Do not pick one made with another provider. Choose Create a new WhatsApp Business profile and click Next.
- Create the profile. Enter the account name, the display name customers see, and your category.
- Add your phone number. Choose Add a new phone number, never Use a display name only. Pick text message or phone call for the code.
- Enter the code. For a Twilio number with SMS, the code appears in the Twilio Console window. For your own number it arrives by text or call.
- Review Twilio’s access request and click Confirm.
The pop-up closes and Twilio registers the sender, which takes a few minutes. The senders list then shows your number.
Meta also reviews the display name. Until your business is verified with Meta, the number can start a limited number of conversations a day. Start Meta’s business verification early, because it can take weeks.
Step 4: Fill in the business profile
Section titled “Step 4: Fill in the business profile”Open the sender and click Edit Sender. Under Business profile information, add a profile photo, a short description, your address, email and website.
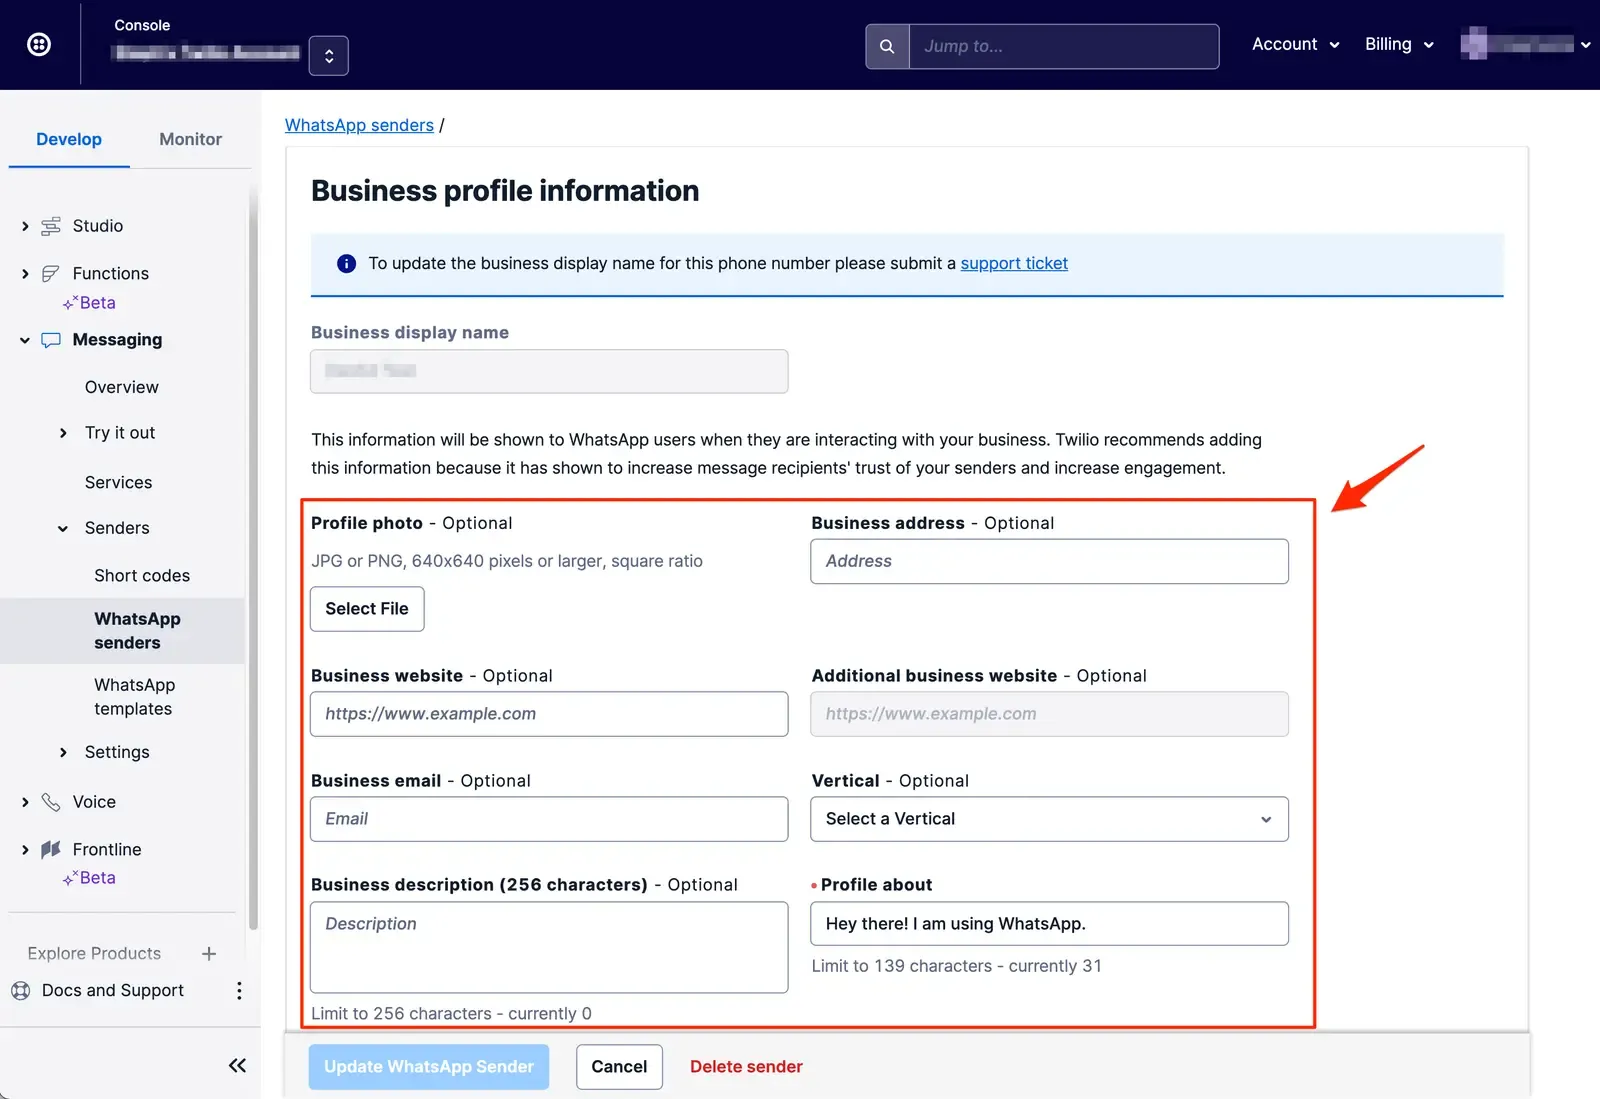
Image: Twilio documentation.
This is what customers see when they tap your name in WhatsApp, so a complete profile earns trust:
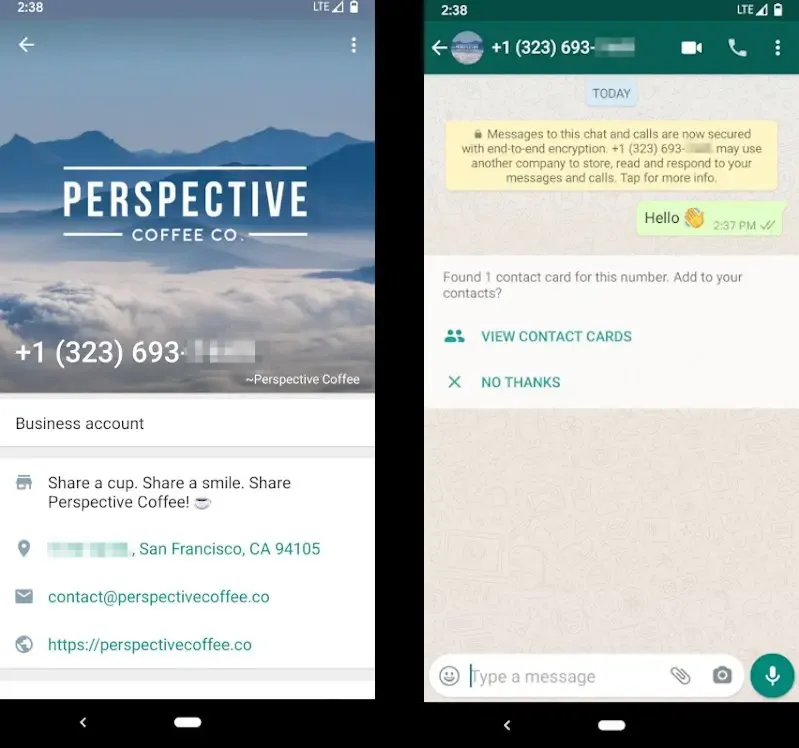
Image: Twilio documentation.
Step 5: Point the sender at your store
Section titled “Step 5: Point the sender at your store”Open the new sender and find its messaging endpoint settings. Paste the plugin’s Incoming Messages URL into When a message comes in with POST, exactly as you did for the sandbox.
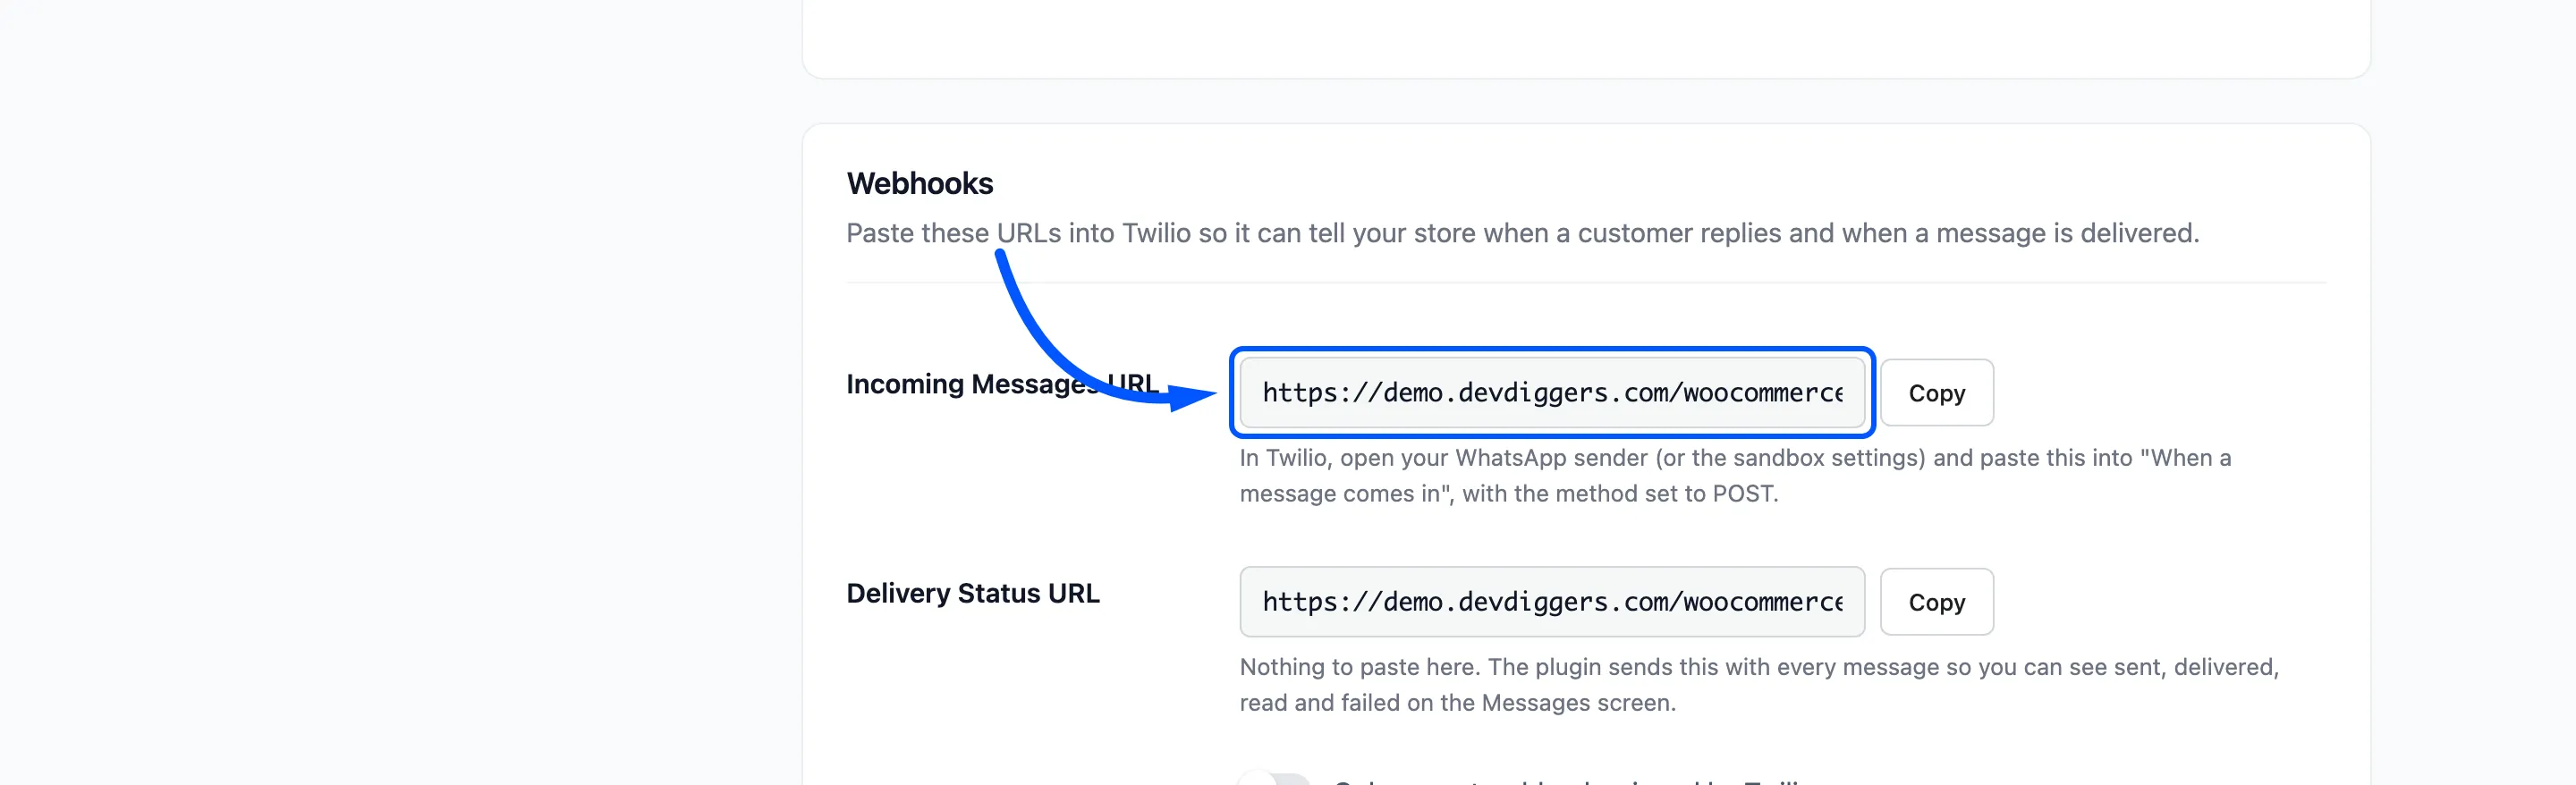
If you put the sender in a Messaging Service, set the URL on the service instead. Then copy the service’s SID, which starts with MG, into Messaging Service SID on the plugin’s Twilio tab.
Step 6: Switch the plugin to your number
Section titled “Step 6: Switch the plugin to your number”On Purchase via WhatsApp → Configuration → Twilio, replace the sandbox number in WhatsApp Sender Number with yours, including the country code. Save, then run the connection test with your own phone.
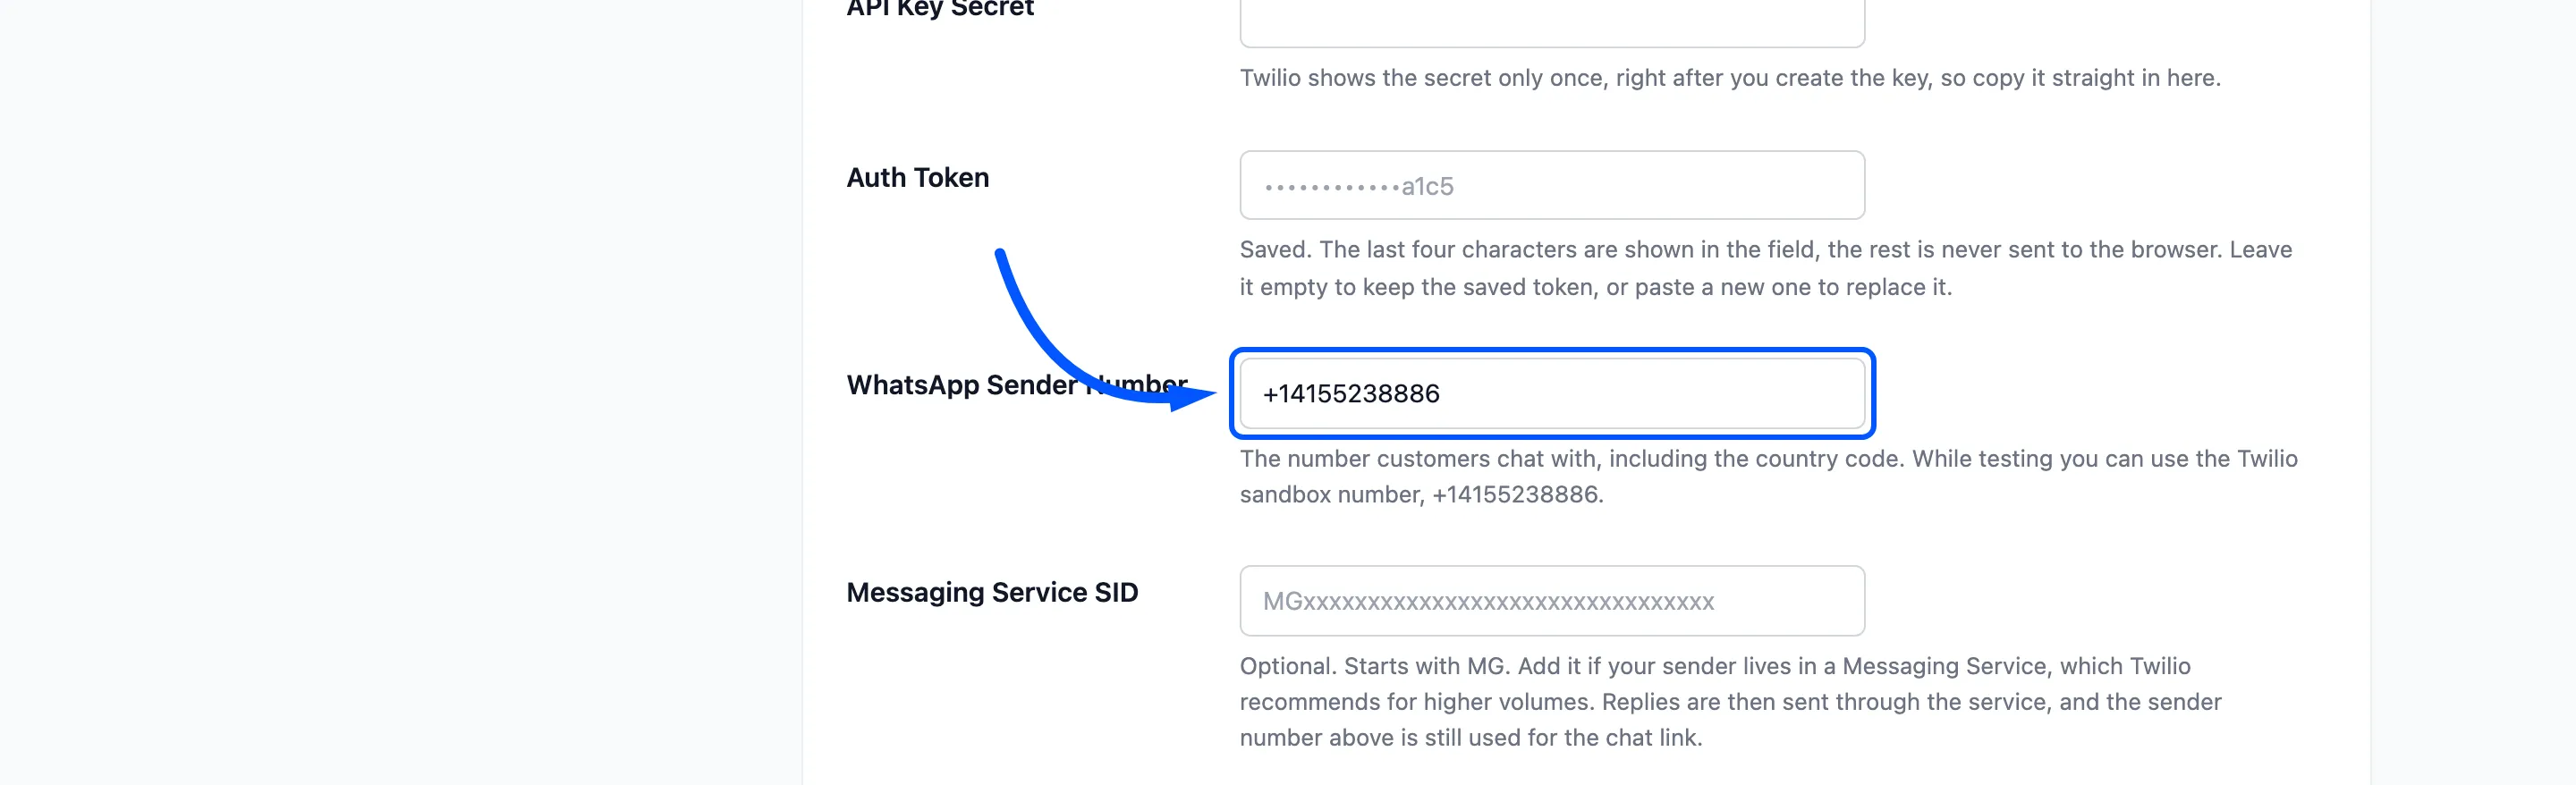
Every WhatsApp button now opens a chat with your number. The floating chat bubble follows it too, unless it has its own Chat Number.
After the switch
Section titled “After the switch”- Submit your templates for approval. With a sender in place, the Save and submit for WhatsApp approval button works in Twilio’s Content Template Builder. See How to Create WhatsApp Message Templates in Twilio.
- Place one real order with How to Place a Test Order on WhatsApp.
A trial account stops at the upgrade screen, so steps 2 to 4 follow Twilio’s own guide rather than show the screens. The two profile pictures come from Twilio’s documentation.