

How to Add the WhatsApp Button with a Block or Shortcode
The Display tab covers product, cart and shop pages. For a landing page, a campaign page or a page builder layout, place the button yourself. Both the block and the shortcode are in the free version too.
Step 1: Find the product ID
Section titled “Step 1: Find the product ID”Go to Products → All Products and hover the product. Its ID shows under the name, such as ID: 15.
On a product page, both options can skip the ID: they use the product the page shows.
Step 2: Add the block or the shortcode
Section titled “Step 2: Add the block or the shortcode”- Block editor: Add the Order on WhatsApp block from the WooCommerce group. Set Send to A product and type the ID in Product ID.
- Any other editor or page builder: Add the shortcode
[ddwcpvw_button id="15"], with your own ID.
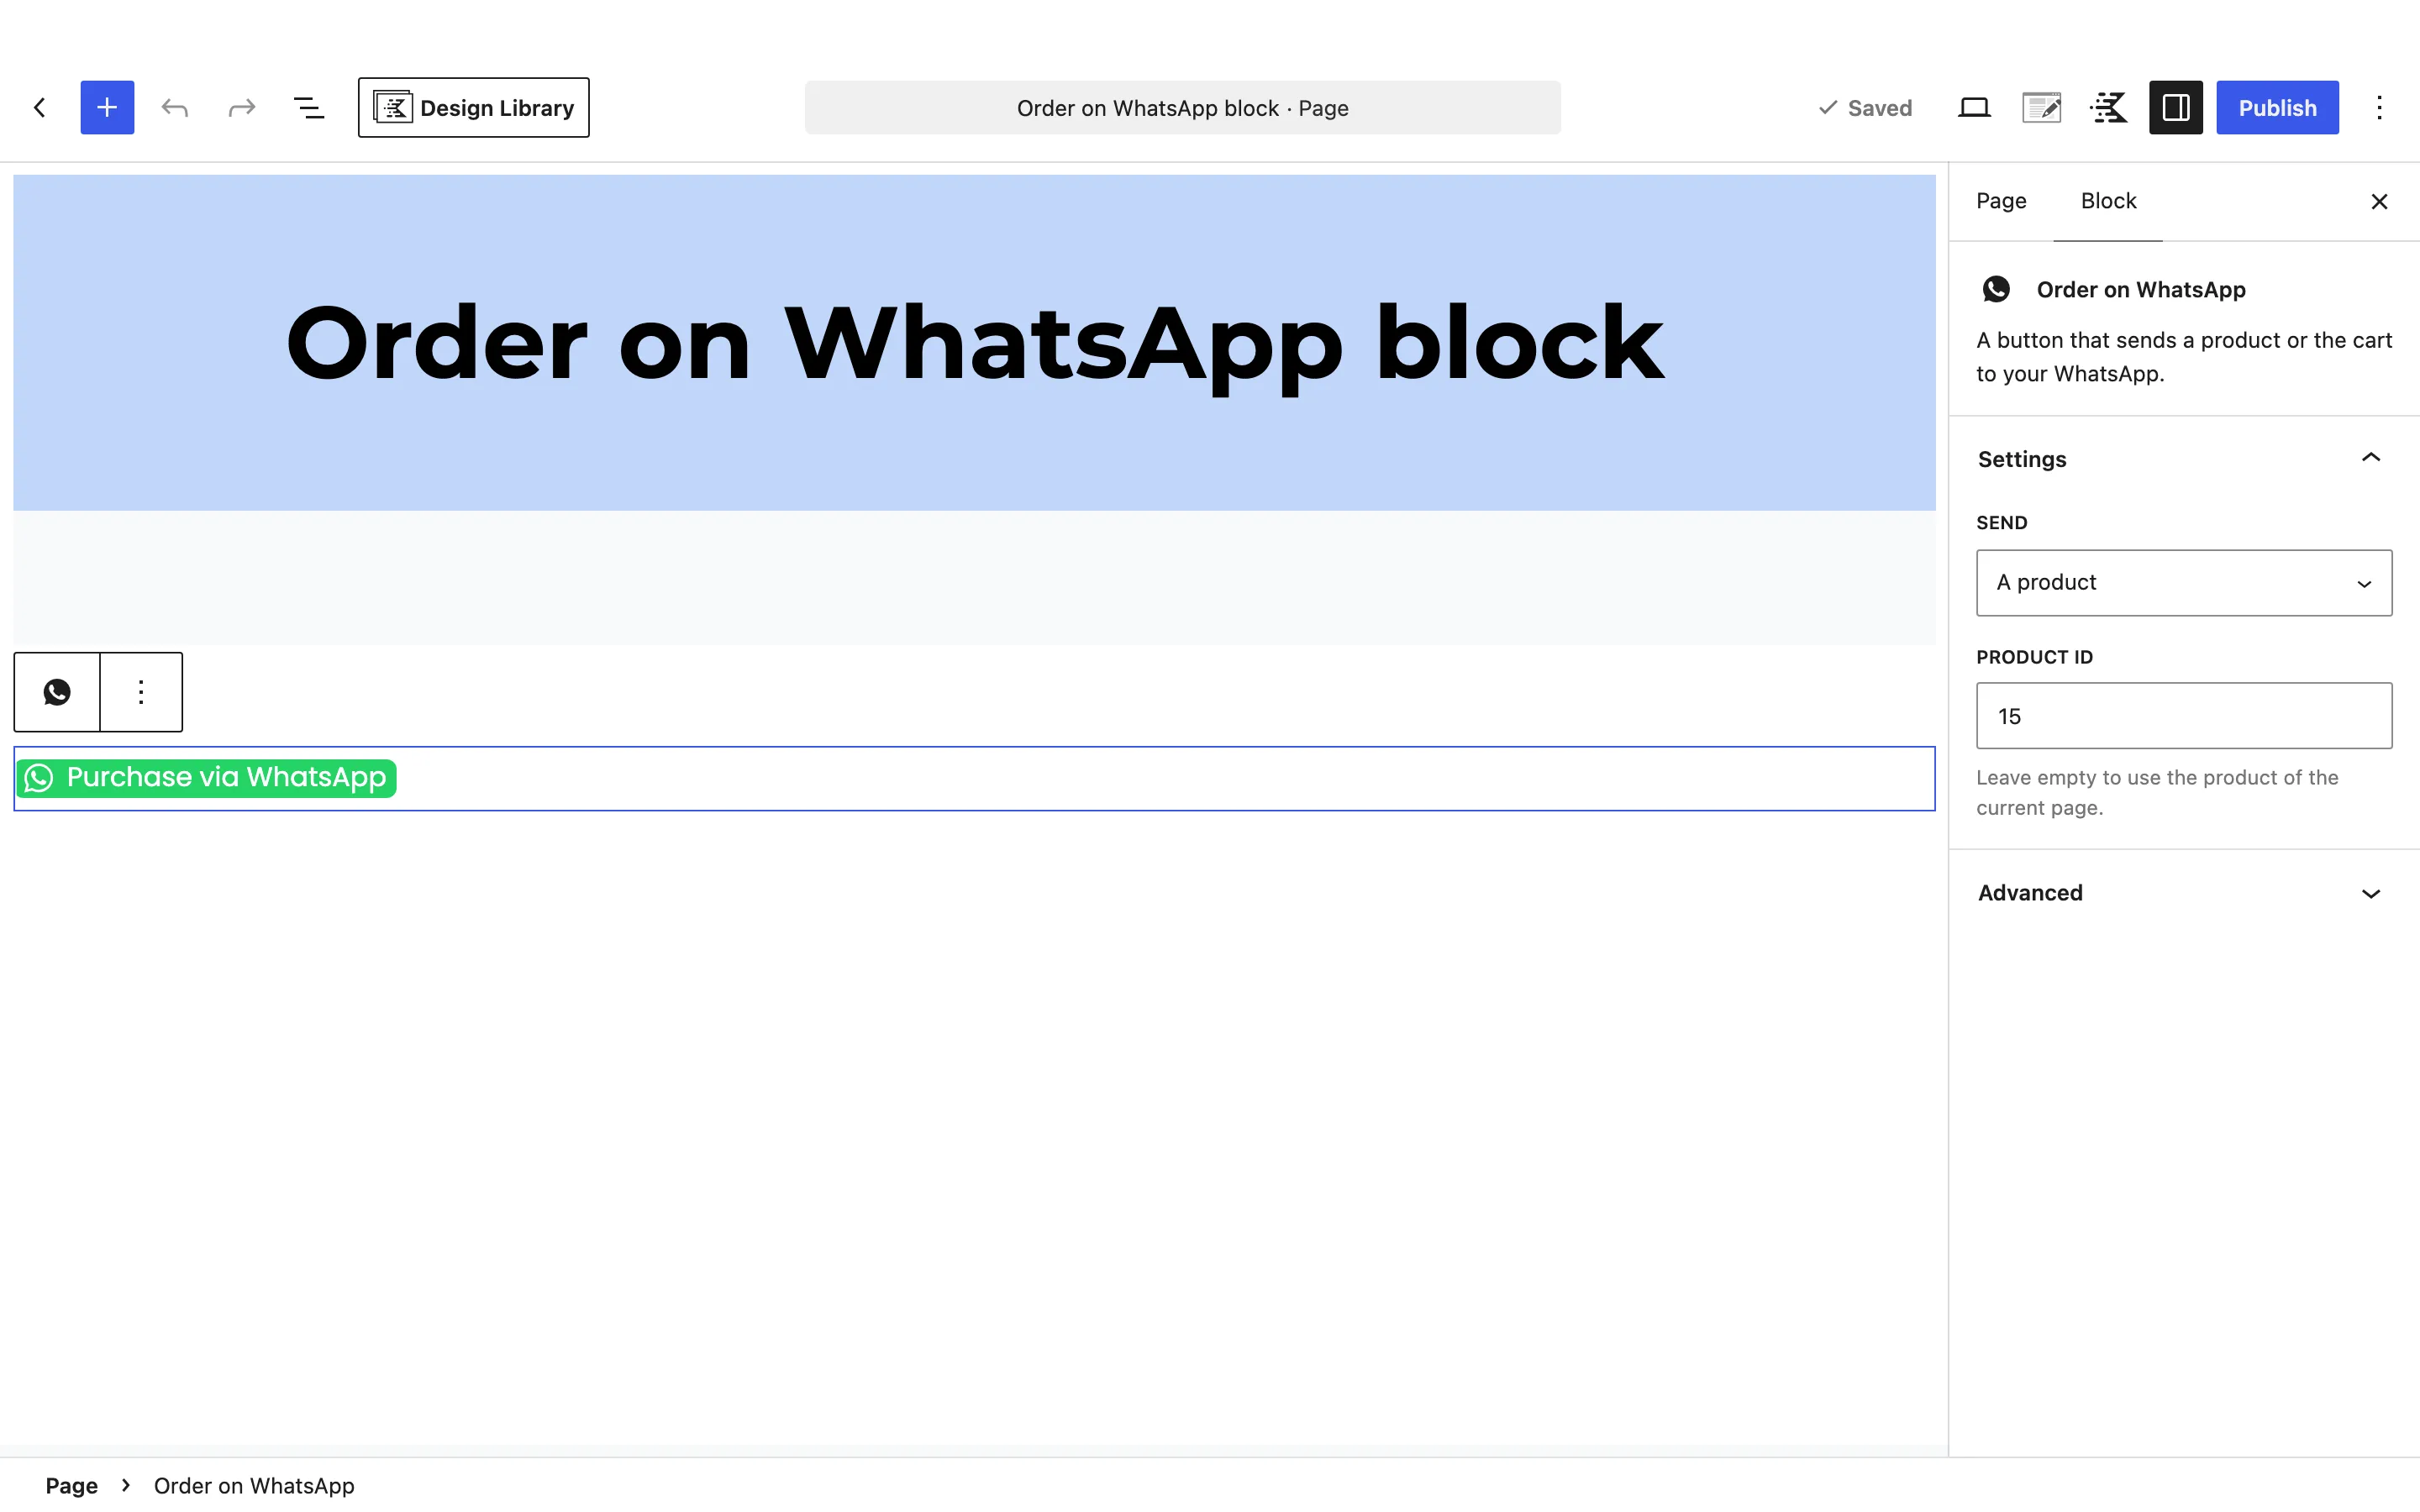
The block draws the same shortcode behind the scenes, so both behave the same.
Step 3: Send the whole cart instead
Section titled “Step 3: Send the whole cart instead”For a “send us your cart” button, set the block’s Send to The whole cart, or use
[ddwcpvw_button type="cart"]. The button only appears when the visitor’s cart has something in it.
Step 4: Publish and check the page
Section titled “Step 4: Publish and check the page”Publish and open the page logged out. A page with one of each looks like this:

The buttons take their text and colours from the Display tab. They behave like the product page button: the delivery popup for guests, then WhatsApp.
If the button does not appear
Section titled “If the button does not appear”The shortcode only works while the plugin can show buttons at all.
- Pro: the license must be active, Status on the General tab must be on, and a WhatsApp Sender Number must be saved. Without all three, the shortcode and the block output nothing.
- Free: Status must be on and Your WhatsApp Number filled in.
An excluded product, or one out of stock with Out of Stock Products ticked, gets no button either.