

How to Create WhatsApp Message Templates in Twilio (Pro)
WhatsApp only lets a business start a conversation with a template it approved. Order updates often arrive days after the customer last wrote, so without a template they are not delivered. This tutorial builds the template the plugin expects.
What the plugin fills in
Section titled “What the plugin fills in”The plugin sends five numbered values with every order message. Your template can use any of them.
| Variable | Filled with |
|---|---|
{{1}} |
Customer first name |
{{2}} |
Order number |
{{3}} |
Order status |
{{4}} |
Order total |
{{5}} |
Link to the order. In the Payment Reminder, the payment link |
Step 1: Open the Content Template Builder
Section titled “Step 1: Open the Content Template Builder”In the Twilio Console, open Messaging → Content Template Builder and click Create new.
Step 2: Name the template and pick Text
Section titled “Step 2: Name the template and pick Text”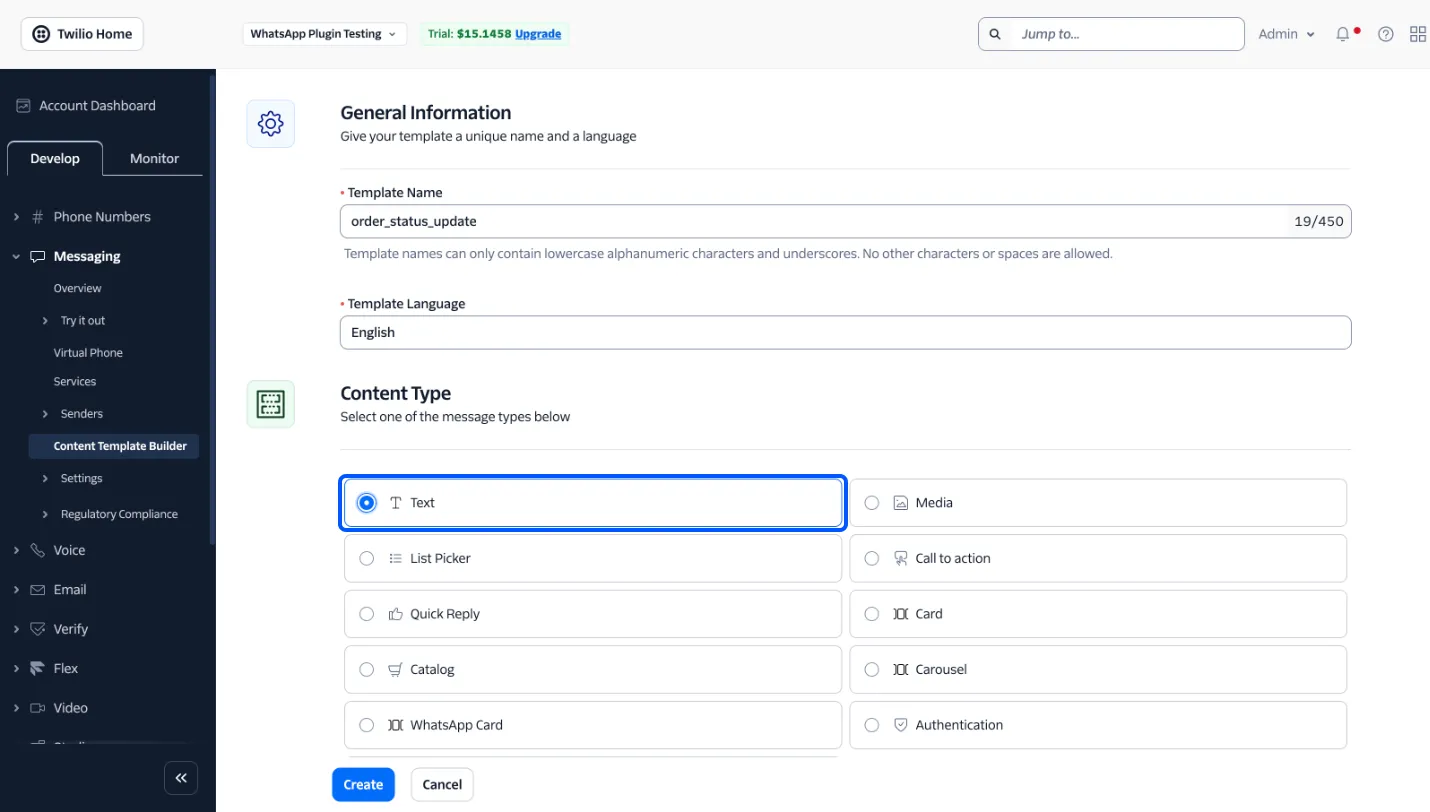
- Template Name: lowercase letters, numbers and underscores only, such as
order_status_update. - Template Language: the language your customers read.
- Content Type: Text.
Click Create.
Step 3: Write the body with variables
Section titled “Step 3: Write the body with variables”Type the message into Body. Put a variable wherever the plugin should fill something in:
Hi {{1}}, your order #{{2}} is now {{3}}. Total: {{4}}. Details: {{5}}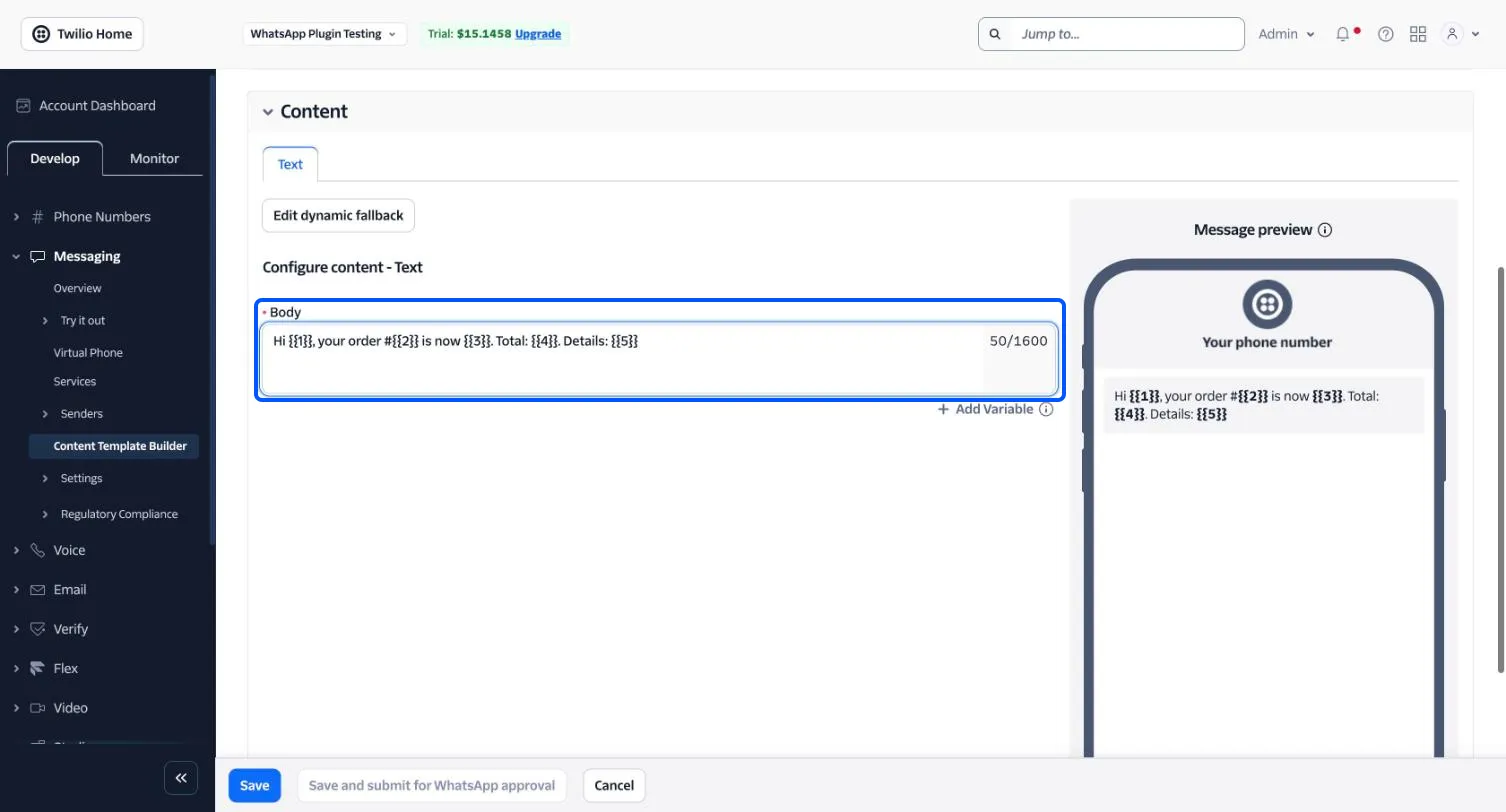
The preview on the right shows how it will look. Keep the wording neutral, because one template serves every status on the Notifications tab.
Step 4: Add sample values
Section titled “Step 4: Add sample values”Click Save. Twilio opens Add sample to variable and asks for an example of each variable. WhatsApp needs these samples to approve the template, and a template saved without them cannot be submitted later.
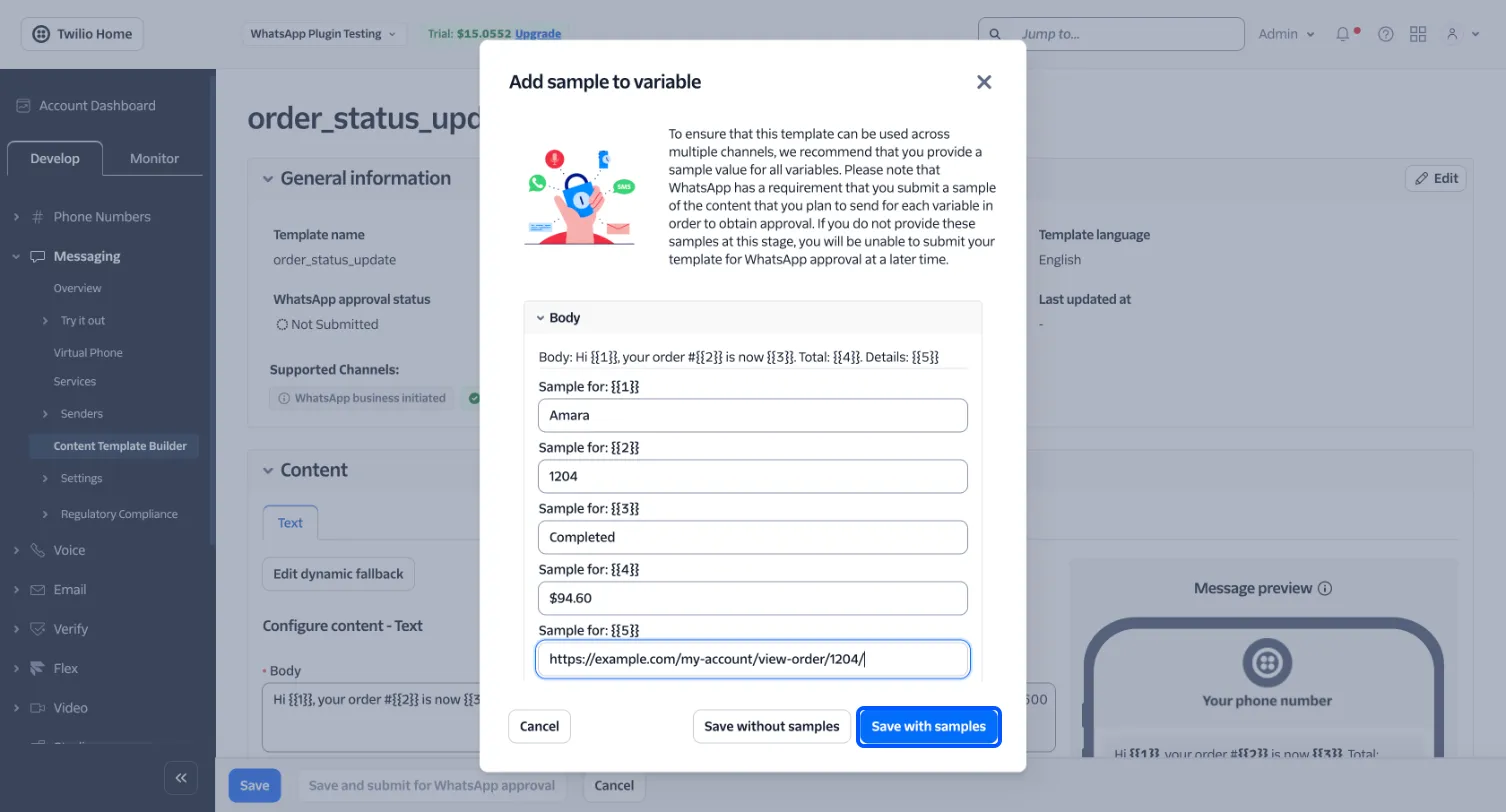
Use realistic values, such as Amara, 1204, Completed, $94.60 and a link to an order page. Click
Save with samples.
Step 5: Submit for approval
Section titled “Step 5: Submit for approval”With a WhatsApp sender in place, click Save and submit for WhatsApp approval and choose the Utility category, since an order update is not marketing. Approval usually takes minutes.
On the sandbox this button stays disabled. Twilio explains on hover: “You need a WhatsApp Sender before submitting for approval.” Register a sender first with How to Register Your WhatsApp Business Number in Twilio.
Step 6: Paste the SID into the plugin
Section titled “Step 6: Paste the SID into the plugin”Back on the Content Template Builder list, each template shows its Template SID, starting with HX. Copy it.
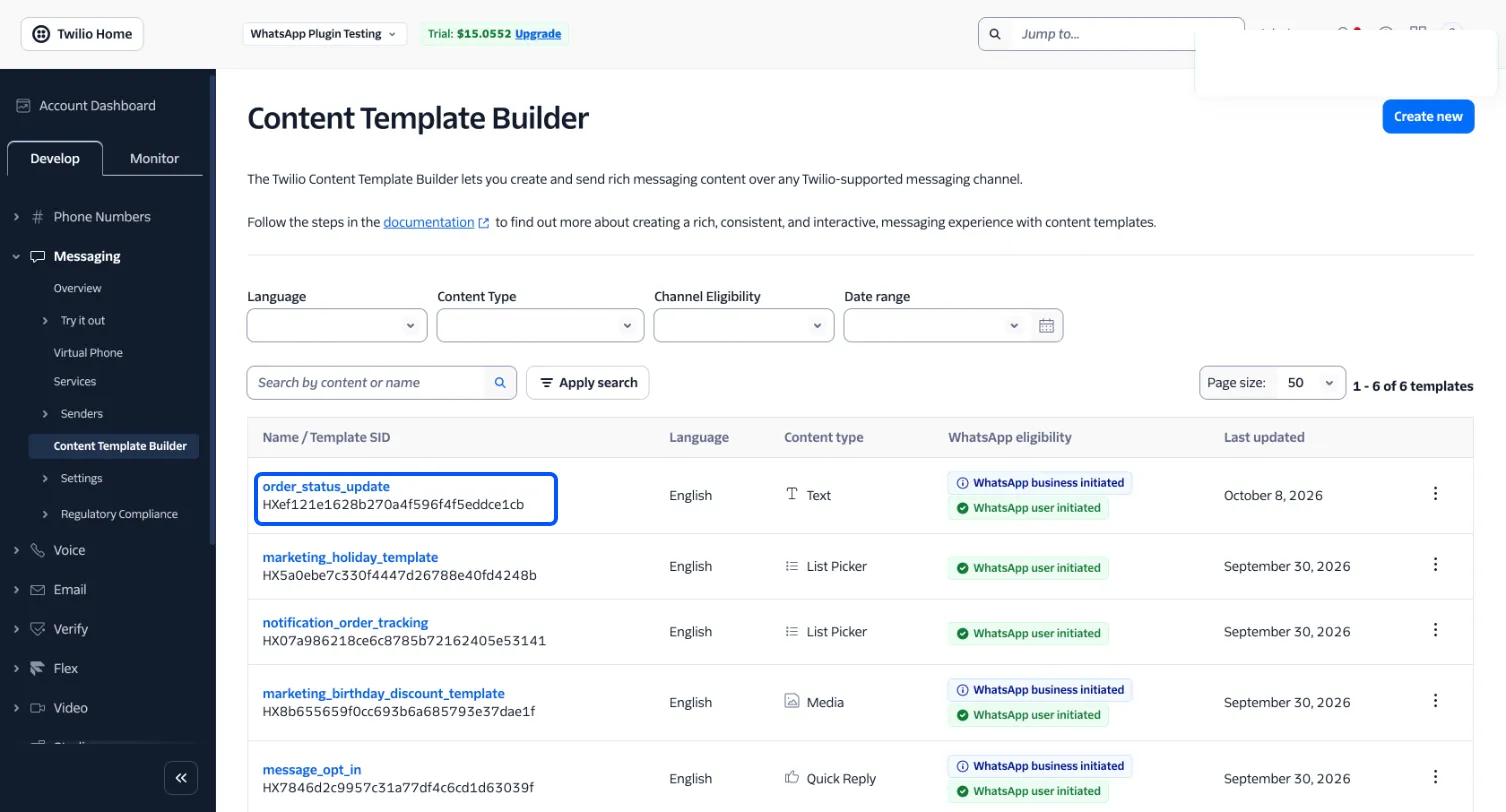
In WordPress, go to Purchase via WhatsApp → Configuration → Notifications and paste it into the Content Template SID of the section it belongs to. Click Save Changes.
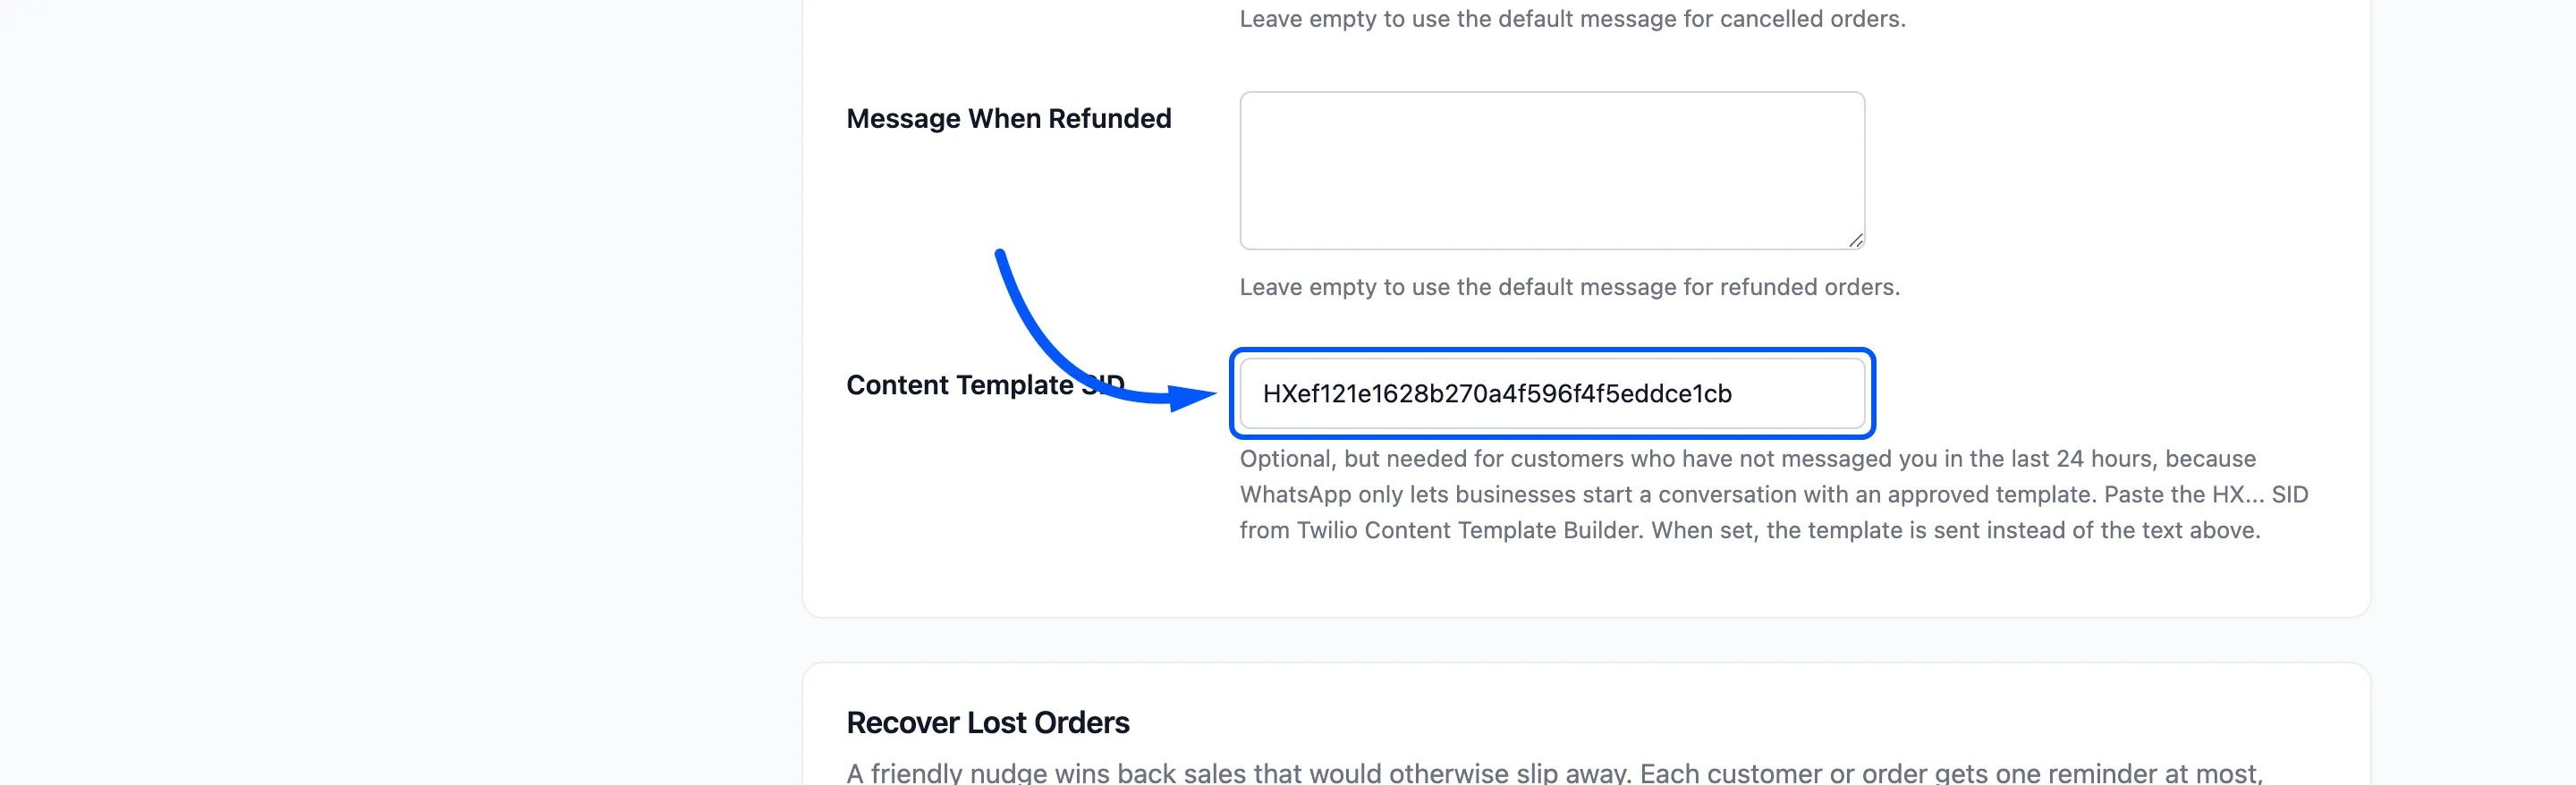
From now on that section sends the template instead of its text.
On the demo, completing order #1211 sent
the template with Amara, 1211, Completed, $99.55 and the order link, and it was Delivered within
seconds:
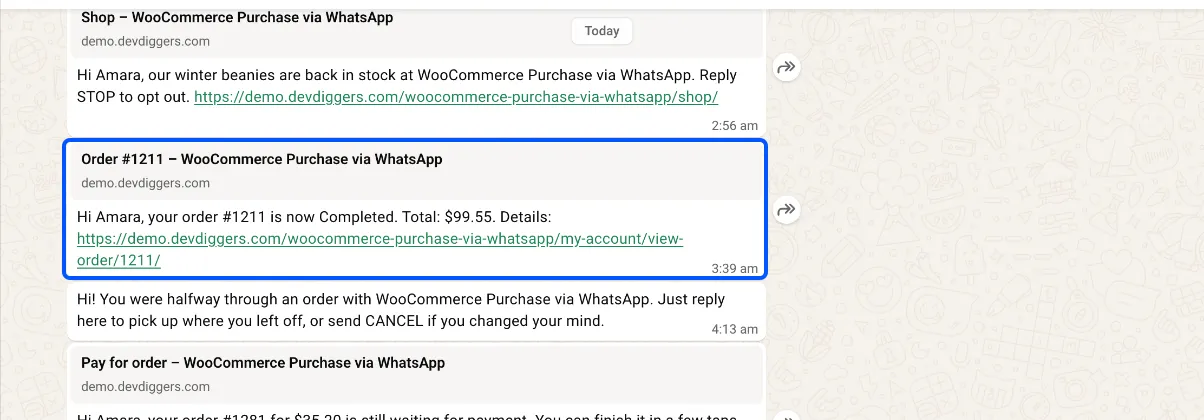
The Messages screen lists such a message as “Template” with its SID and the values sent, because the wording lives in Twilio. The dashboard’s Set up order updates step is ticked once every update you switched on has a SID.
Which sections take a template
Section titled “Which sections take a template”- Order Confirmation, Order Status Updates and New Order Alerts For You use the five variables above.
- Payment Reminder Template SID uses
{{5}}for the payment link. - Broadcast fills only
{{1}}, the first name. Make a separate Marketing template for it. - Wallet alerts use
{{1}}first name,{{2}}amount,{{3}}balance and{{4}}reason.