

How to Connect Twilio with an API Key (Pro)
The plugin can talk to Twilio with your Auth Token alone. An API key is the safer way, and Twilio recommends it. If a key leaks, you delete that key and nothing else changes.
This is optional. Do it once the store already works with the Auth Token, so you can tell a key problem from any other.
Step 1: Open API keys and tokens
Section titled “Step 1: Open API keys and tokens”In the Twilio Console, click Admin at the top right, then Account management. In the left menu, open Keys & Credentials → API keys & tokens.
Step 2: Enter the email code
Section titled “Step 2: Enter the email code”The page holds credentials, so Twilio asks you to prove it is you. It emails a code to the account’s address and shows Verification code required for access.
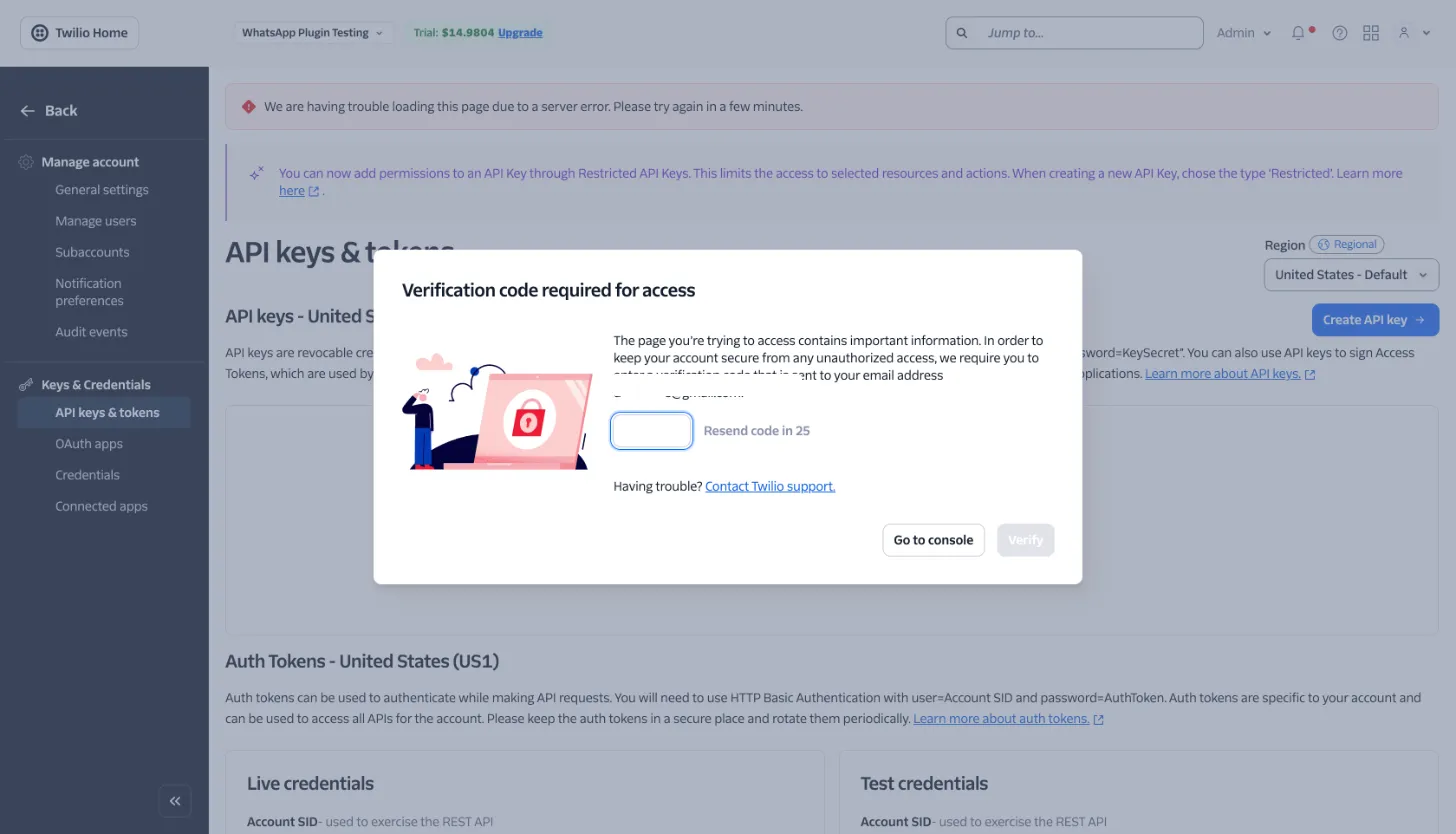
Type the code and click Verify. If it does not arrive, wait for Resend code to count down and click it.
Step 3: Create a Standard key
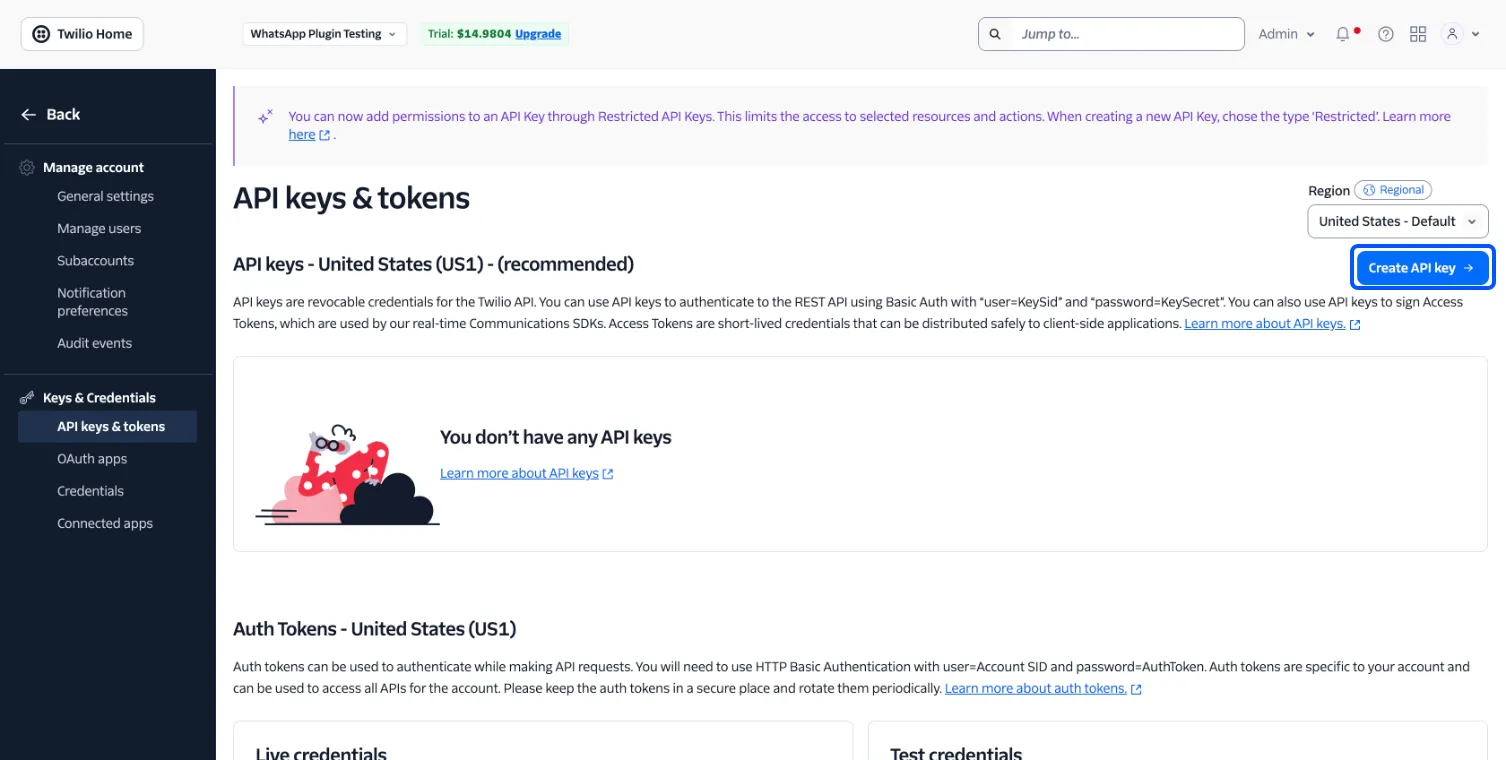
Section titled “Step 3: Create a Standard key”The page lists your keys. A new account has none. Click Create API key.
Fill in the form:
- Friendly name: anything you will recognise later, such as your store’s name.
- Key type: Standard. It can send messages and read their status, which is everything the plugin does.
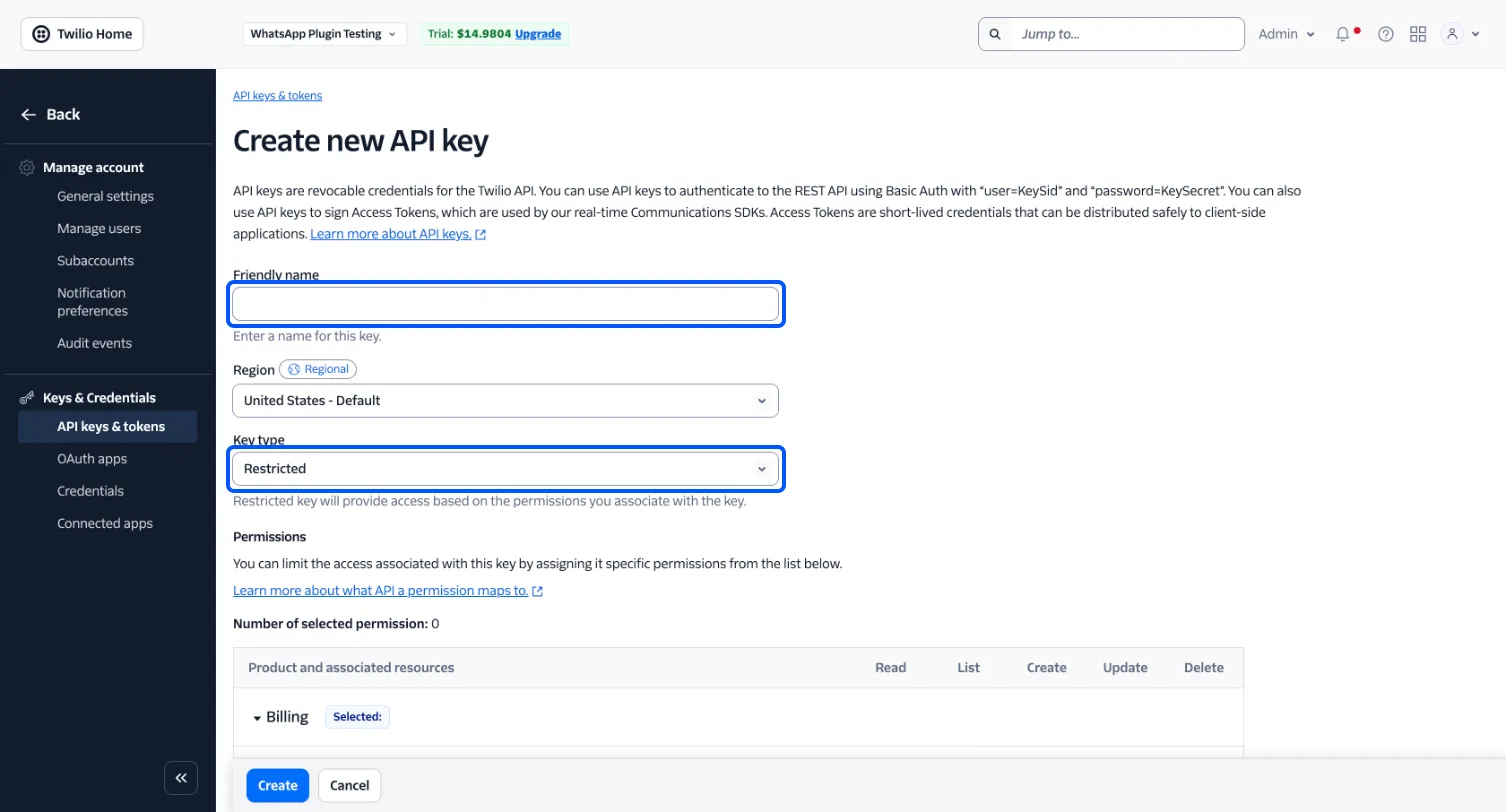
Leave Region on United States - Default. The plugin sends every request to Twilio’s US1 address, so a key made in another region is not recognised.
The form opens on Restricted. A restricted key works only if you tick read and create on Messages yourself, so Standard is the simple choice. Avoid Main, which can also manage keys and the whole account.
Click Create.
Step 4: Copy the SID and the secret
Section titled “Step 4: Copy the SID and the secret”Twilio shows the new key’s SID, which starts with SK, and its Secret. Copy both somewhere safe now. The secret is shown only this once. If you lose it, delete the key and make another.
Step 5: Paste both into the plugin
Section titled “Step 5: Paste both into the plugin”Go to Purchase via WhatsApp → Configuration → Twilio. Paste the SID into API Key SID and the secret into API Key Secret.
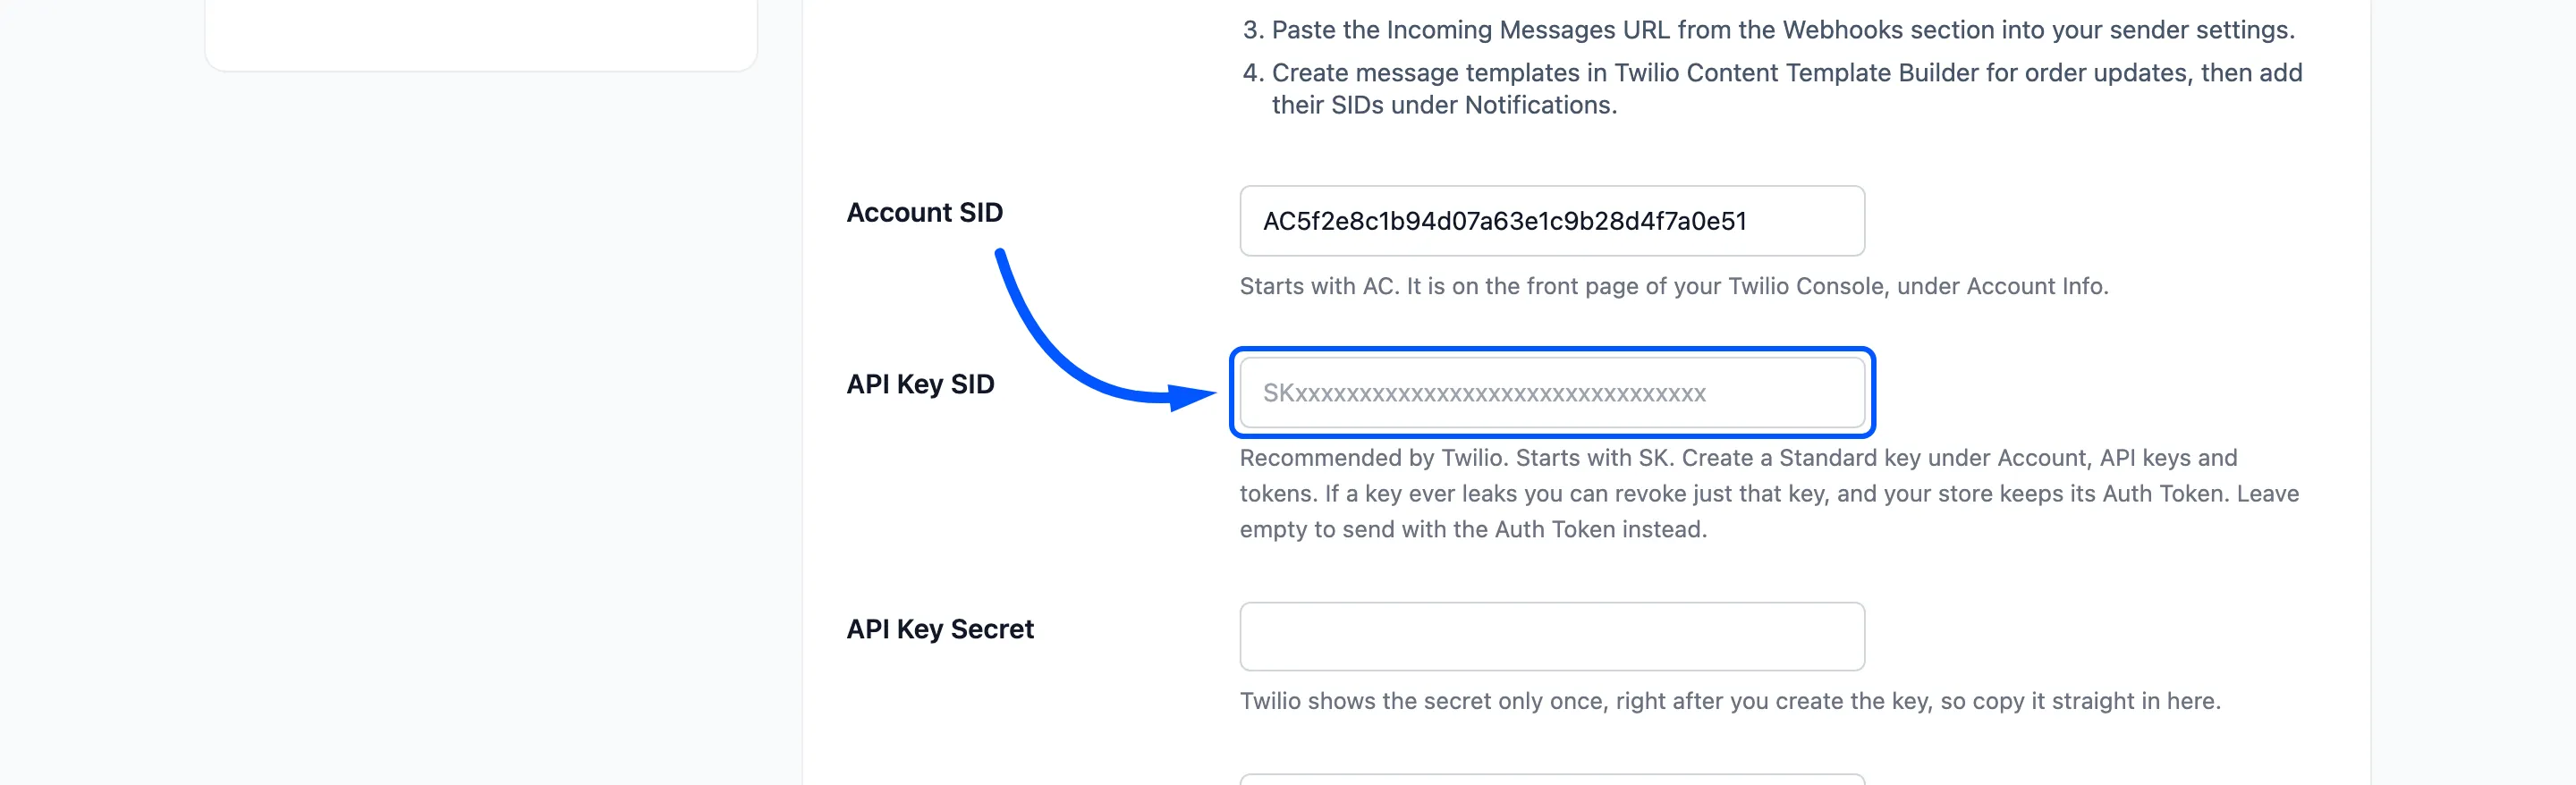
Keep the Account SID, since the key works inside that account. Keep the Auth Token saved too. Messages go out with the key, but Twilio signs every customer reply with the Auth Token, and the plugin checks that signature.
Click Save Changes. The secret field then shows only its last four characters, and its note starts “Saved.” Leave it empty from then on to keep the saved secret.
Step 6: Run the connection test
Section titled “Step 6: Run the connection test”Under Test Your Connection, click Run Test with the phone field empty. With a key saved, the result reads “Connected to Twilio with your API Key.”
If it adds “Add your Auth Token as well”, the Auth Token is missing. Customer replies would be refused until you save it.
Switch back to the Auth Token
Section titled “Switch back to the Auth Token”Clear API Key SID and save. The plugin clears the secret with it and sends with the Auth Token again. Then delete the key in Twilio.