

The Customer Wallet Experience
Everything a customer touches, in the order they meet it. Read this before you change a setting, so you know which screen the change lands on.
Before they have an account
Section titled “Before they have an account”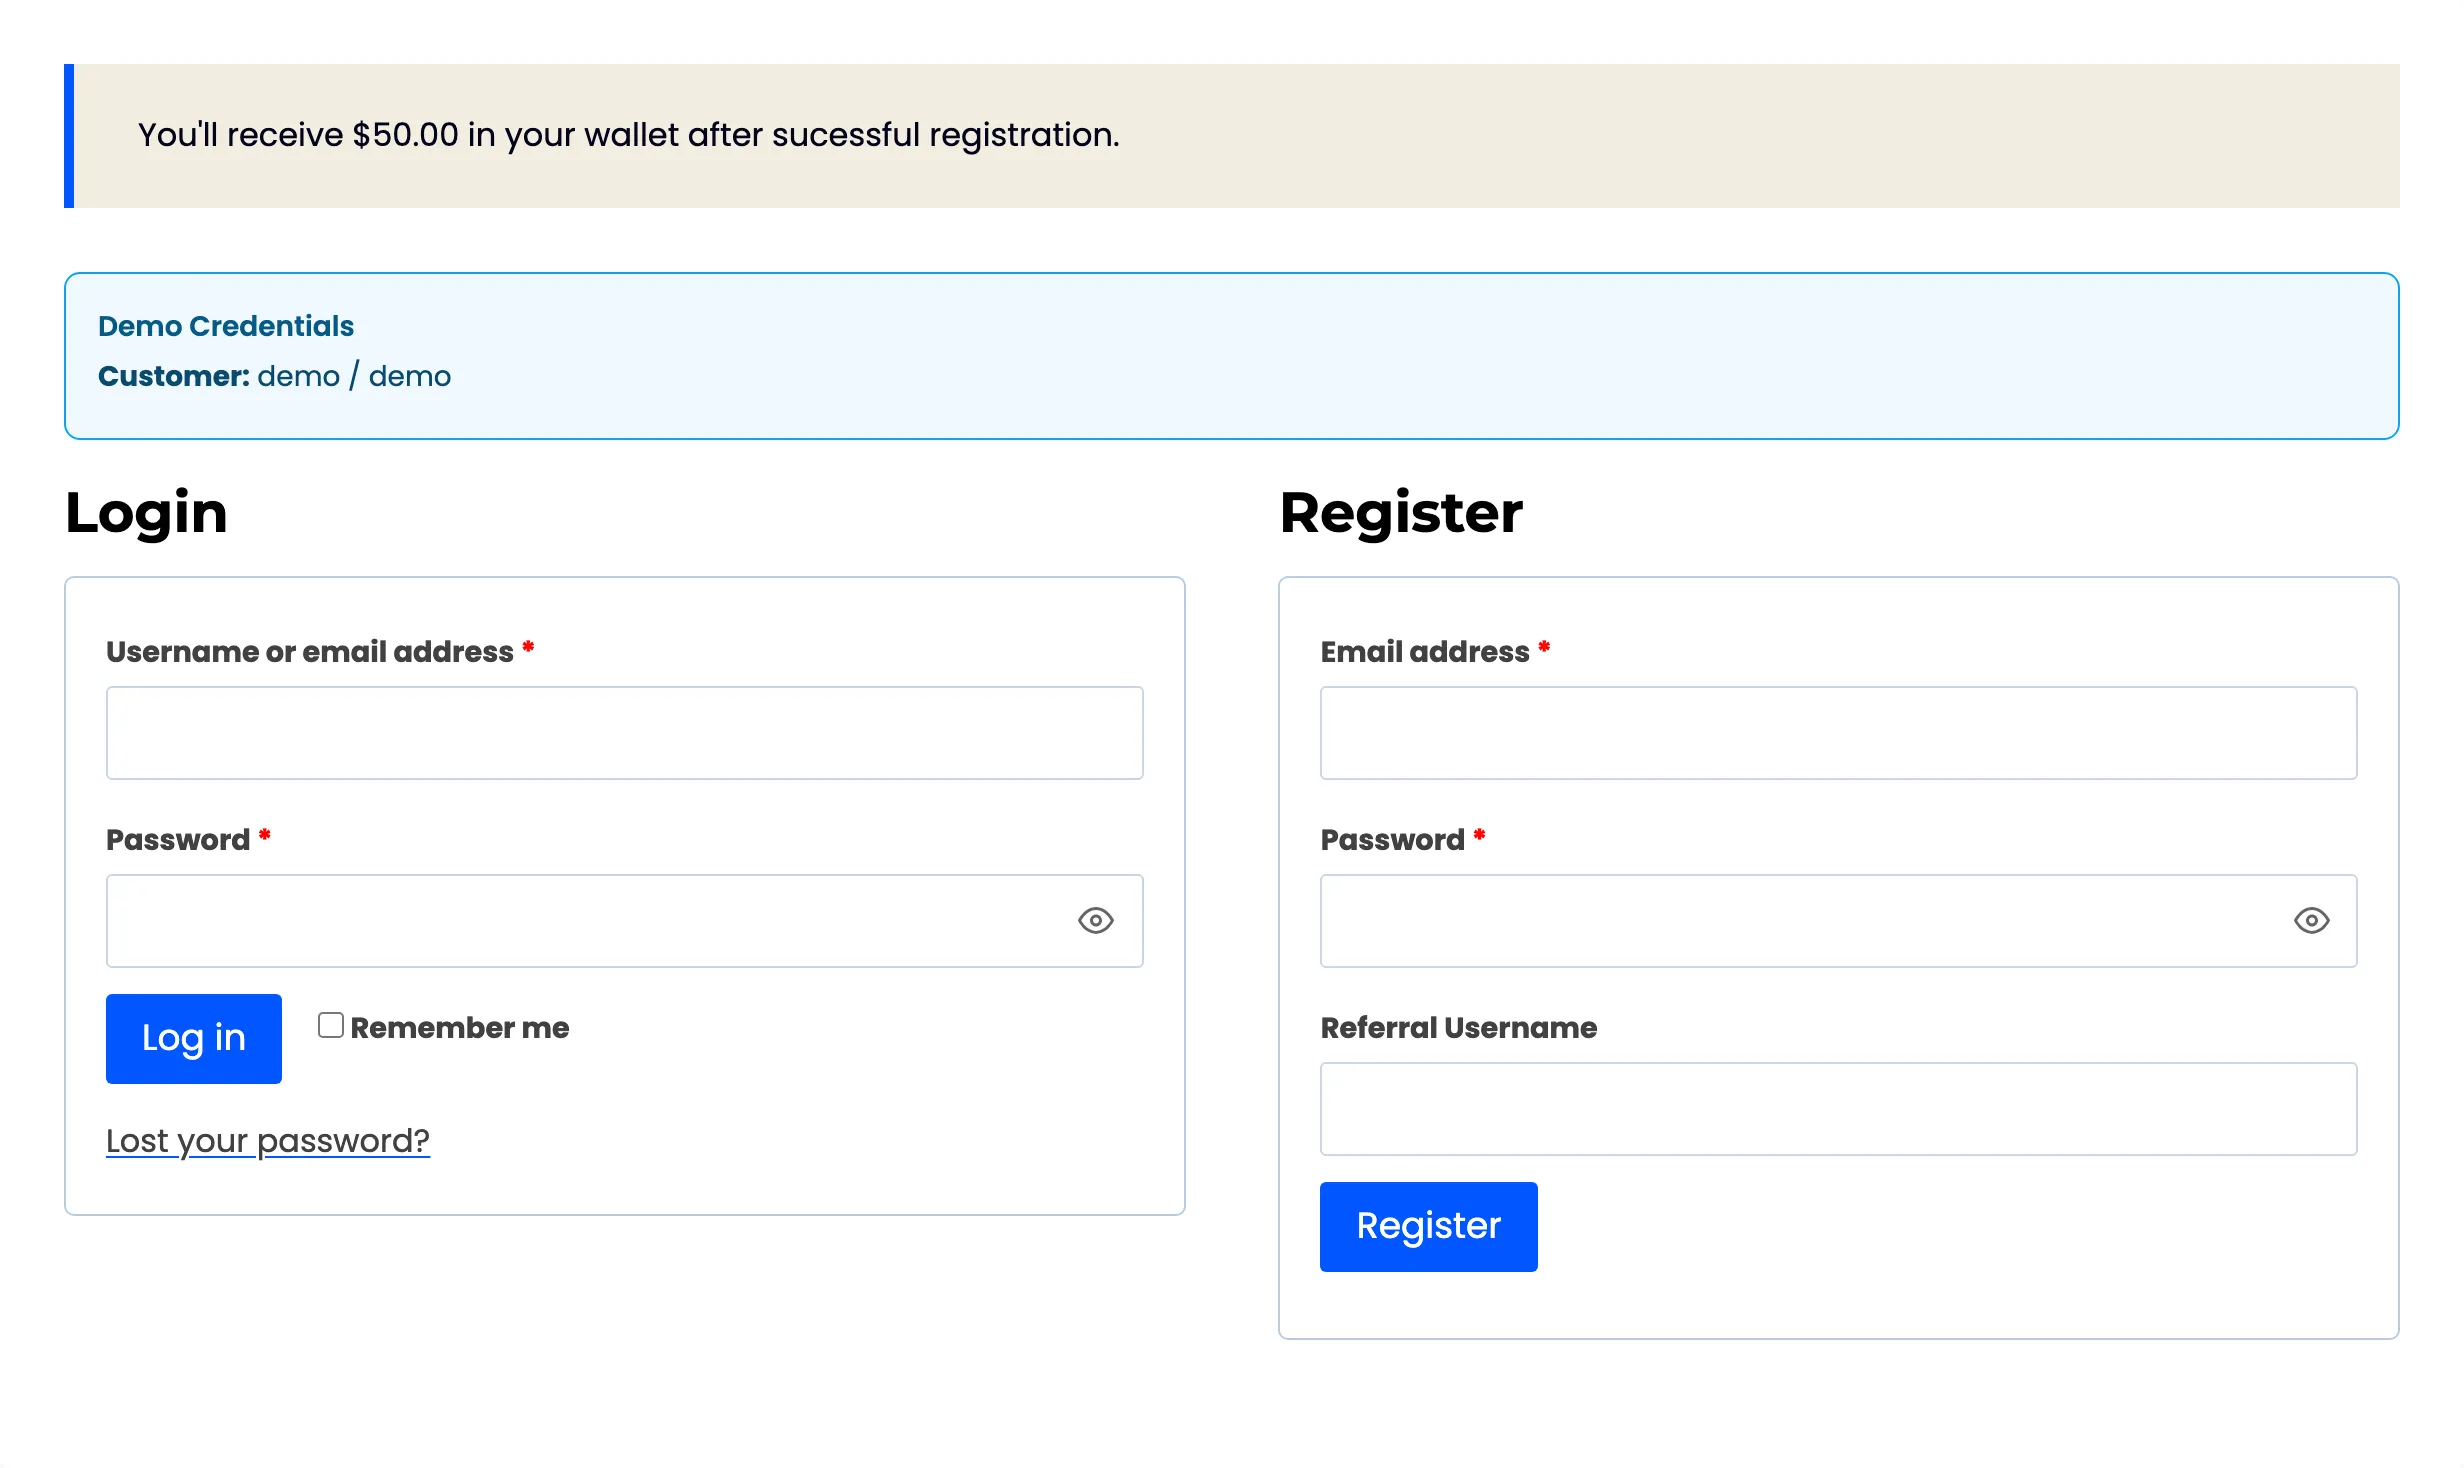
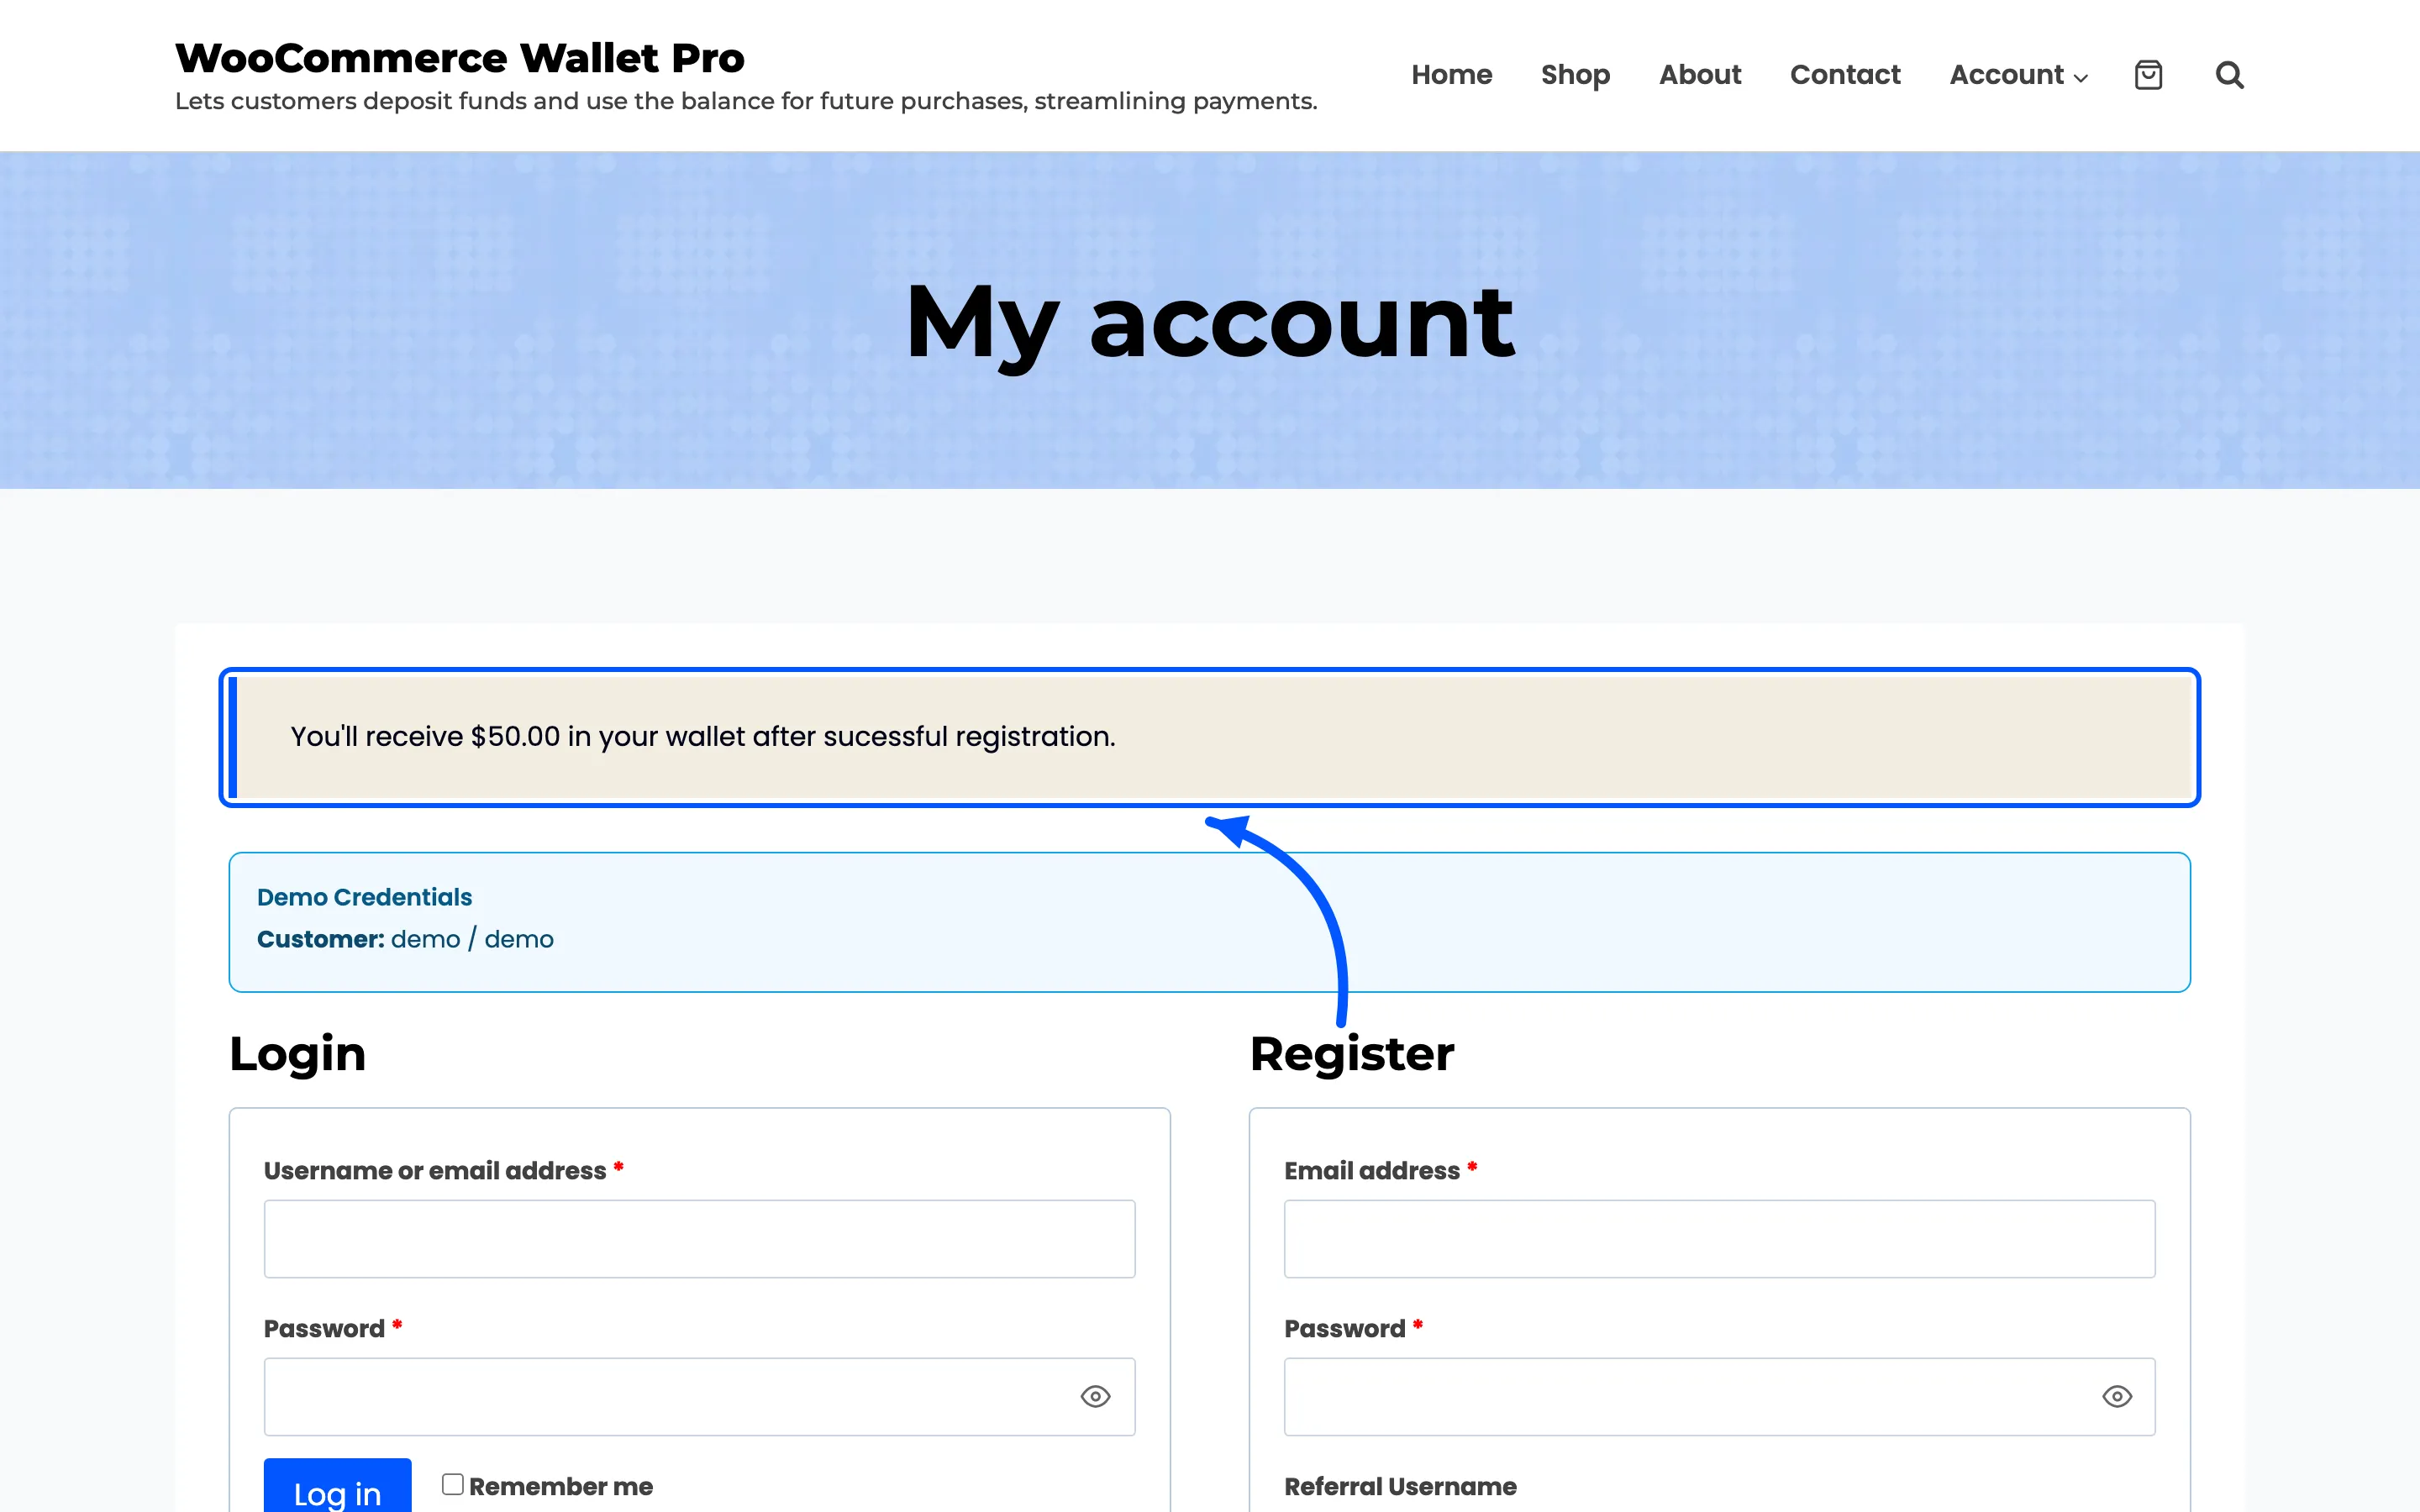
The account page carries a notice promising the signup credit, whenever Registration Credit is set above zero.
The registration form itself gains a Referral Username field when the referral program is on.
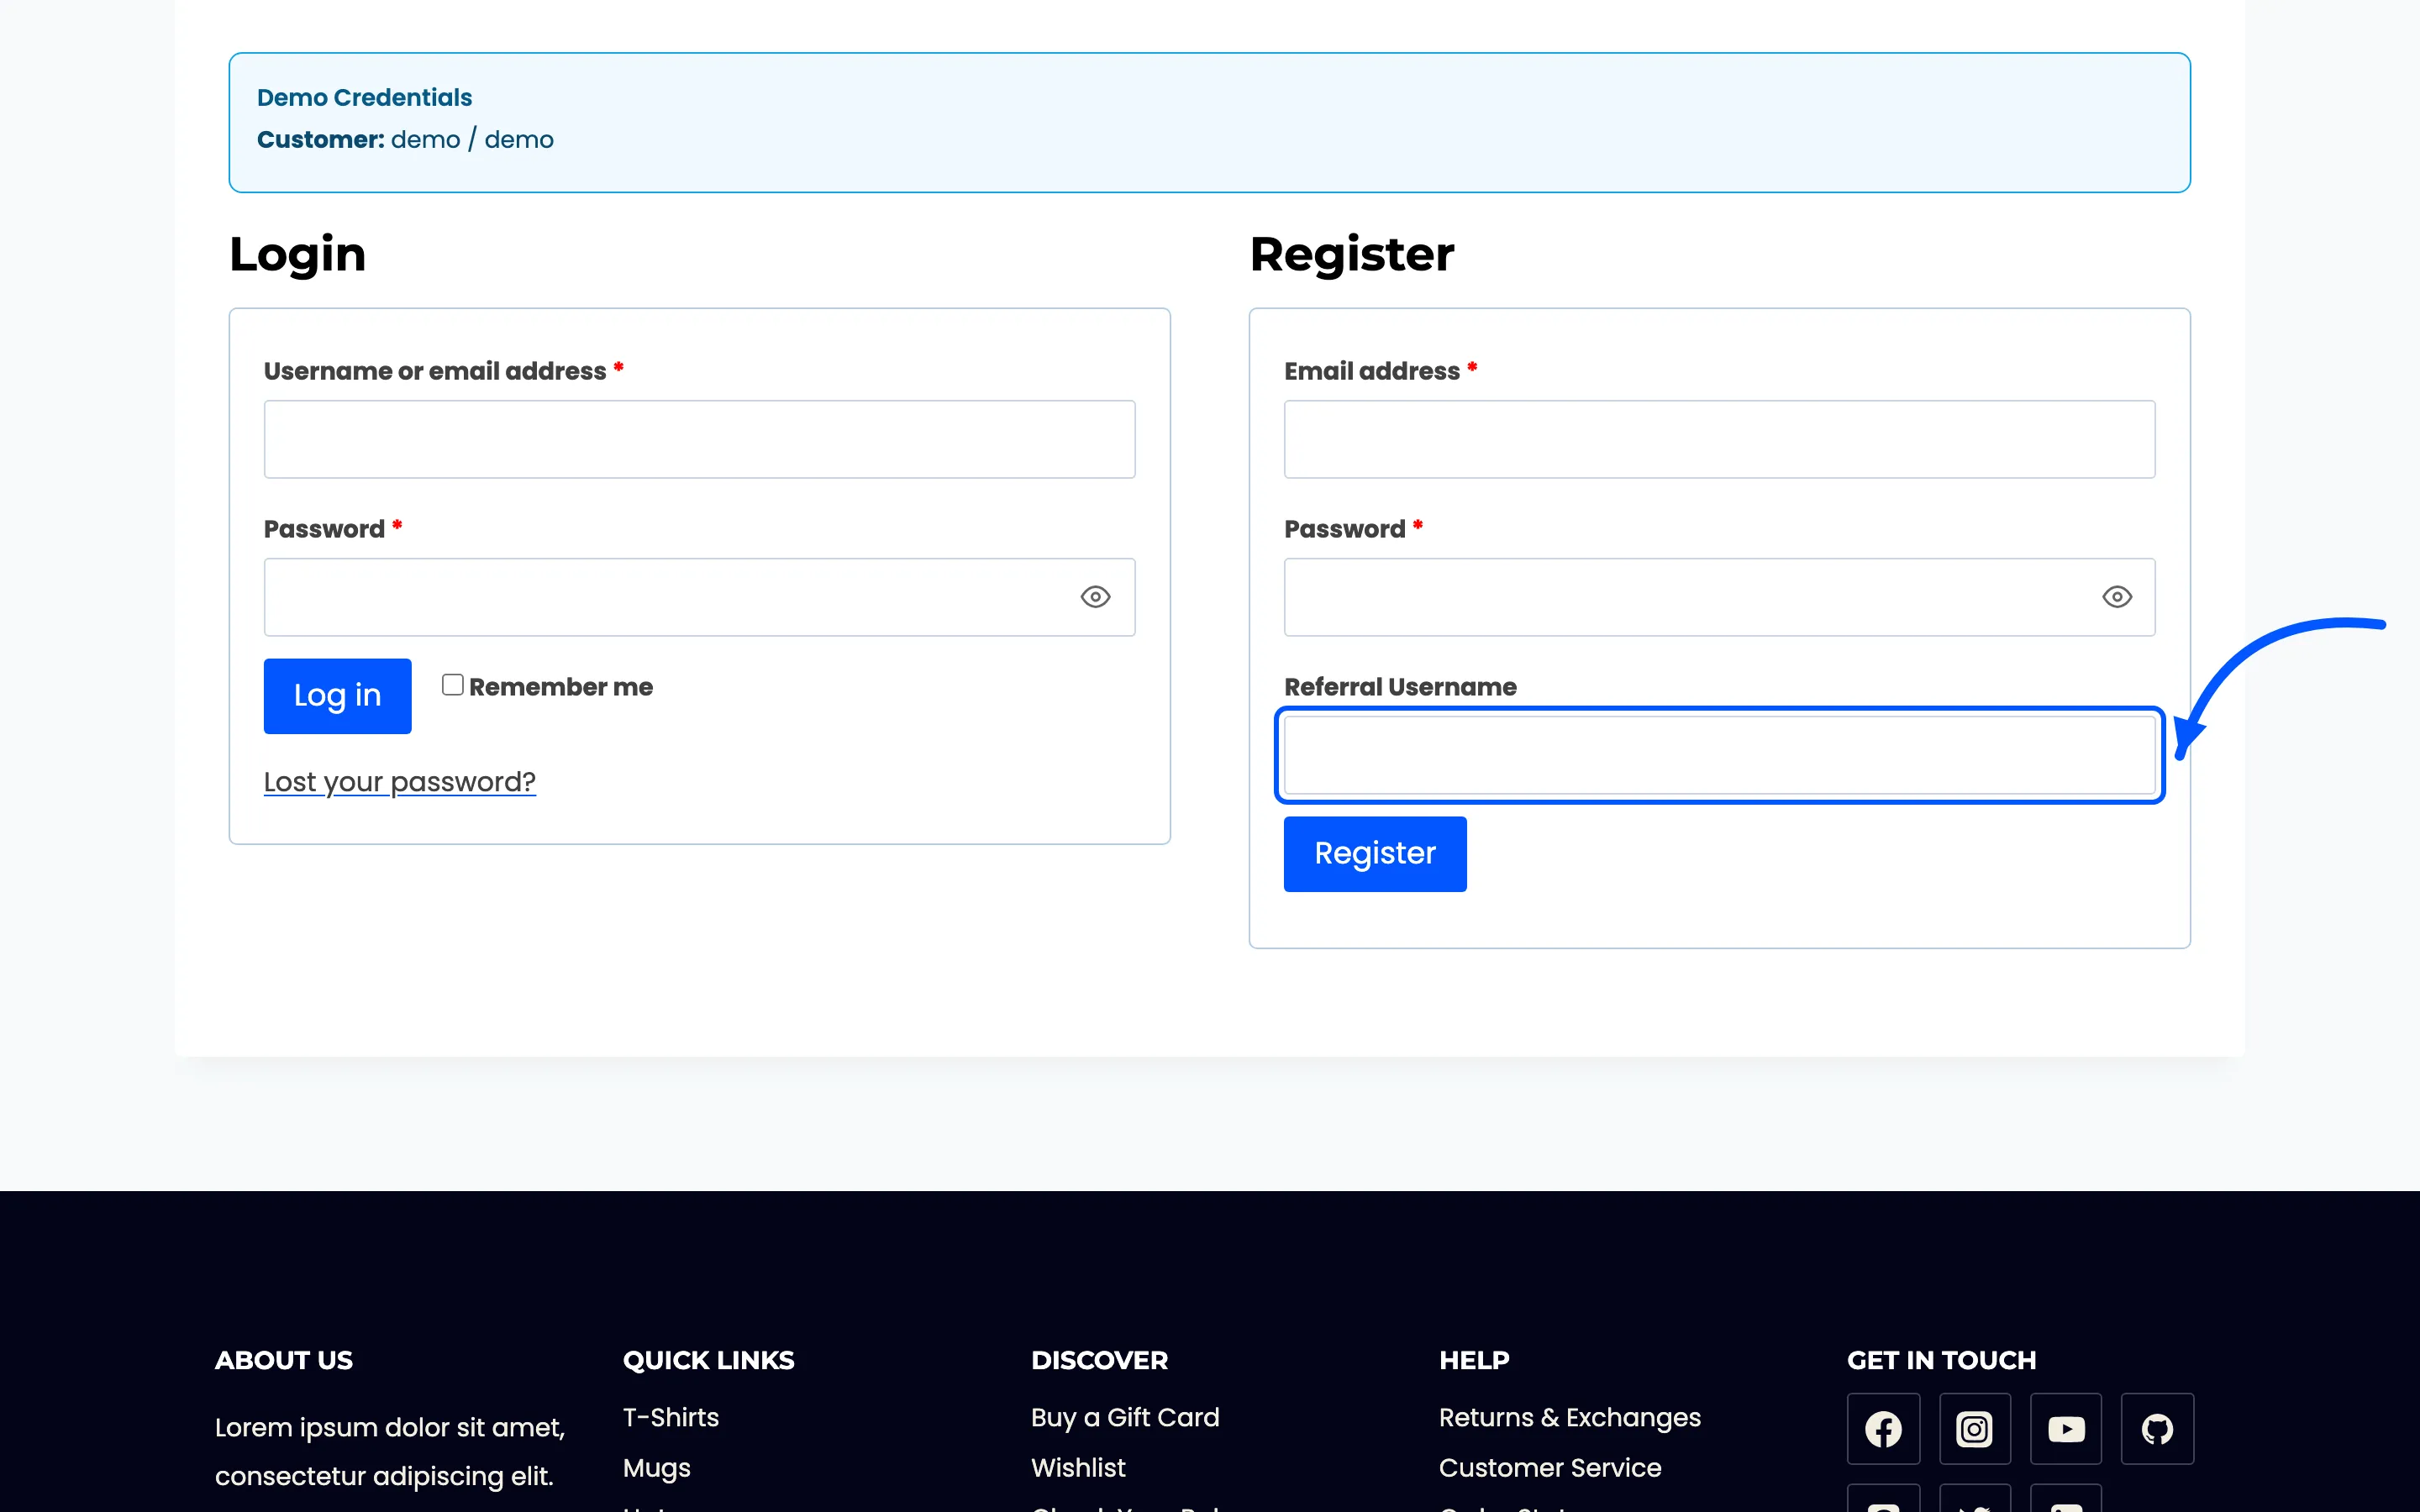
Someone arriving from a referral link has it filled in already. Typing another customer’s username by hand works just as well.
The My Wallet link
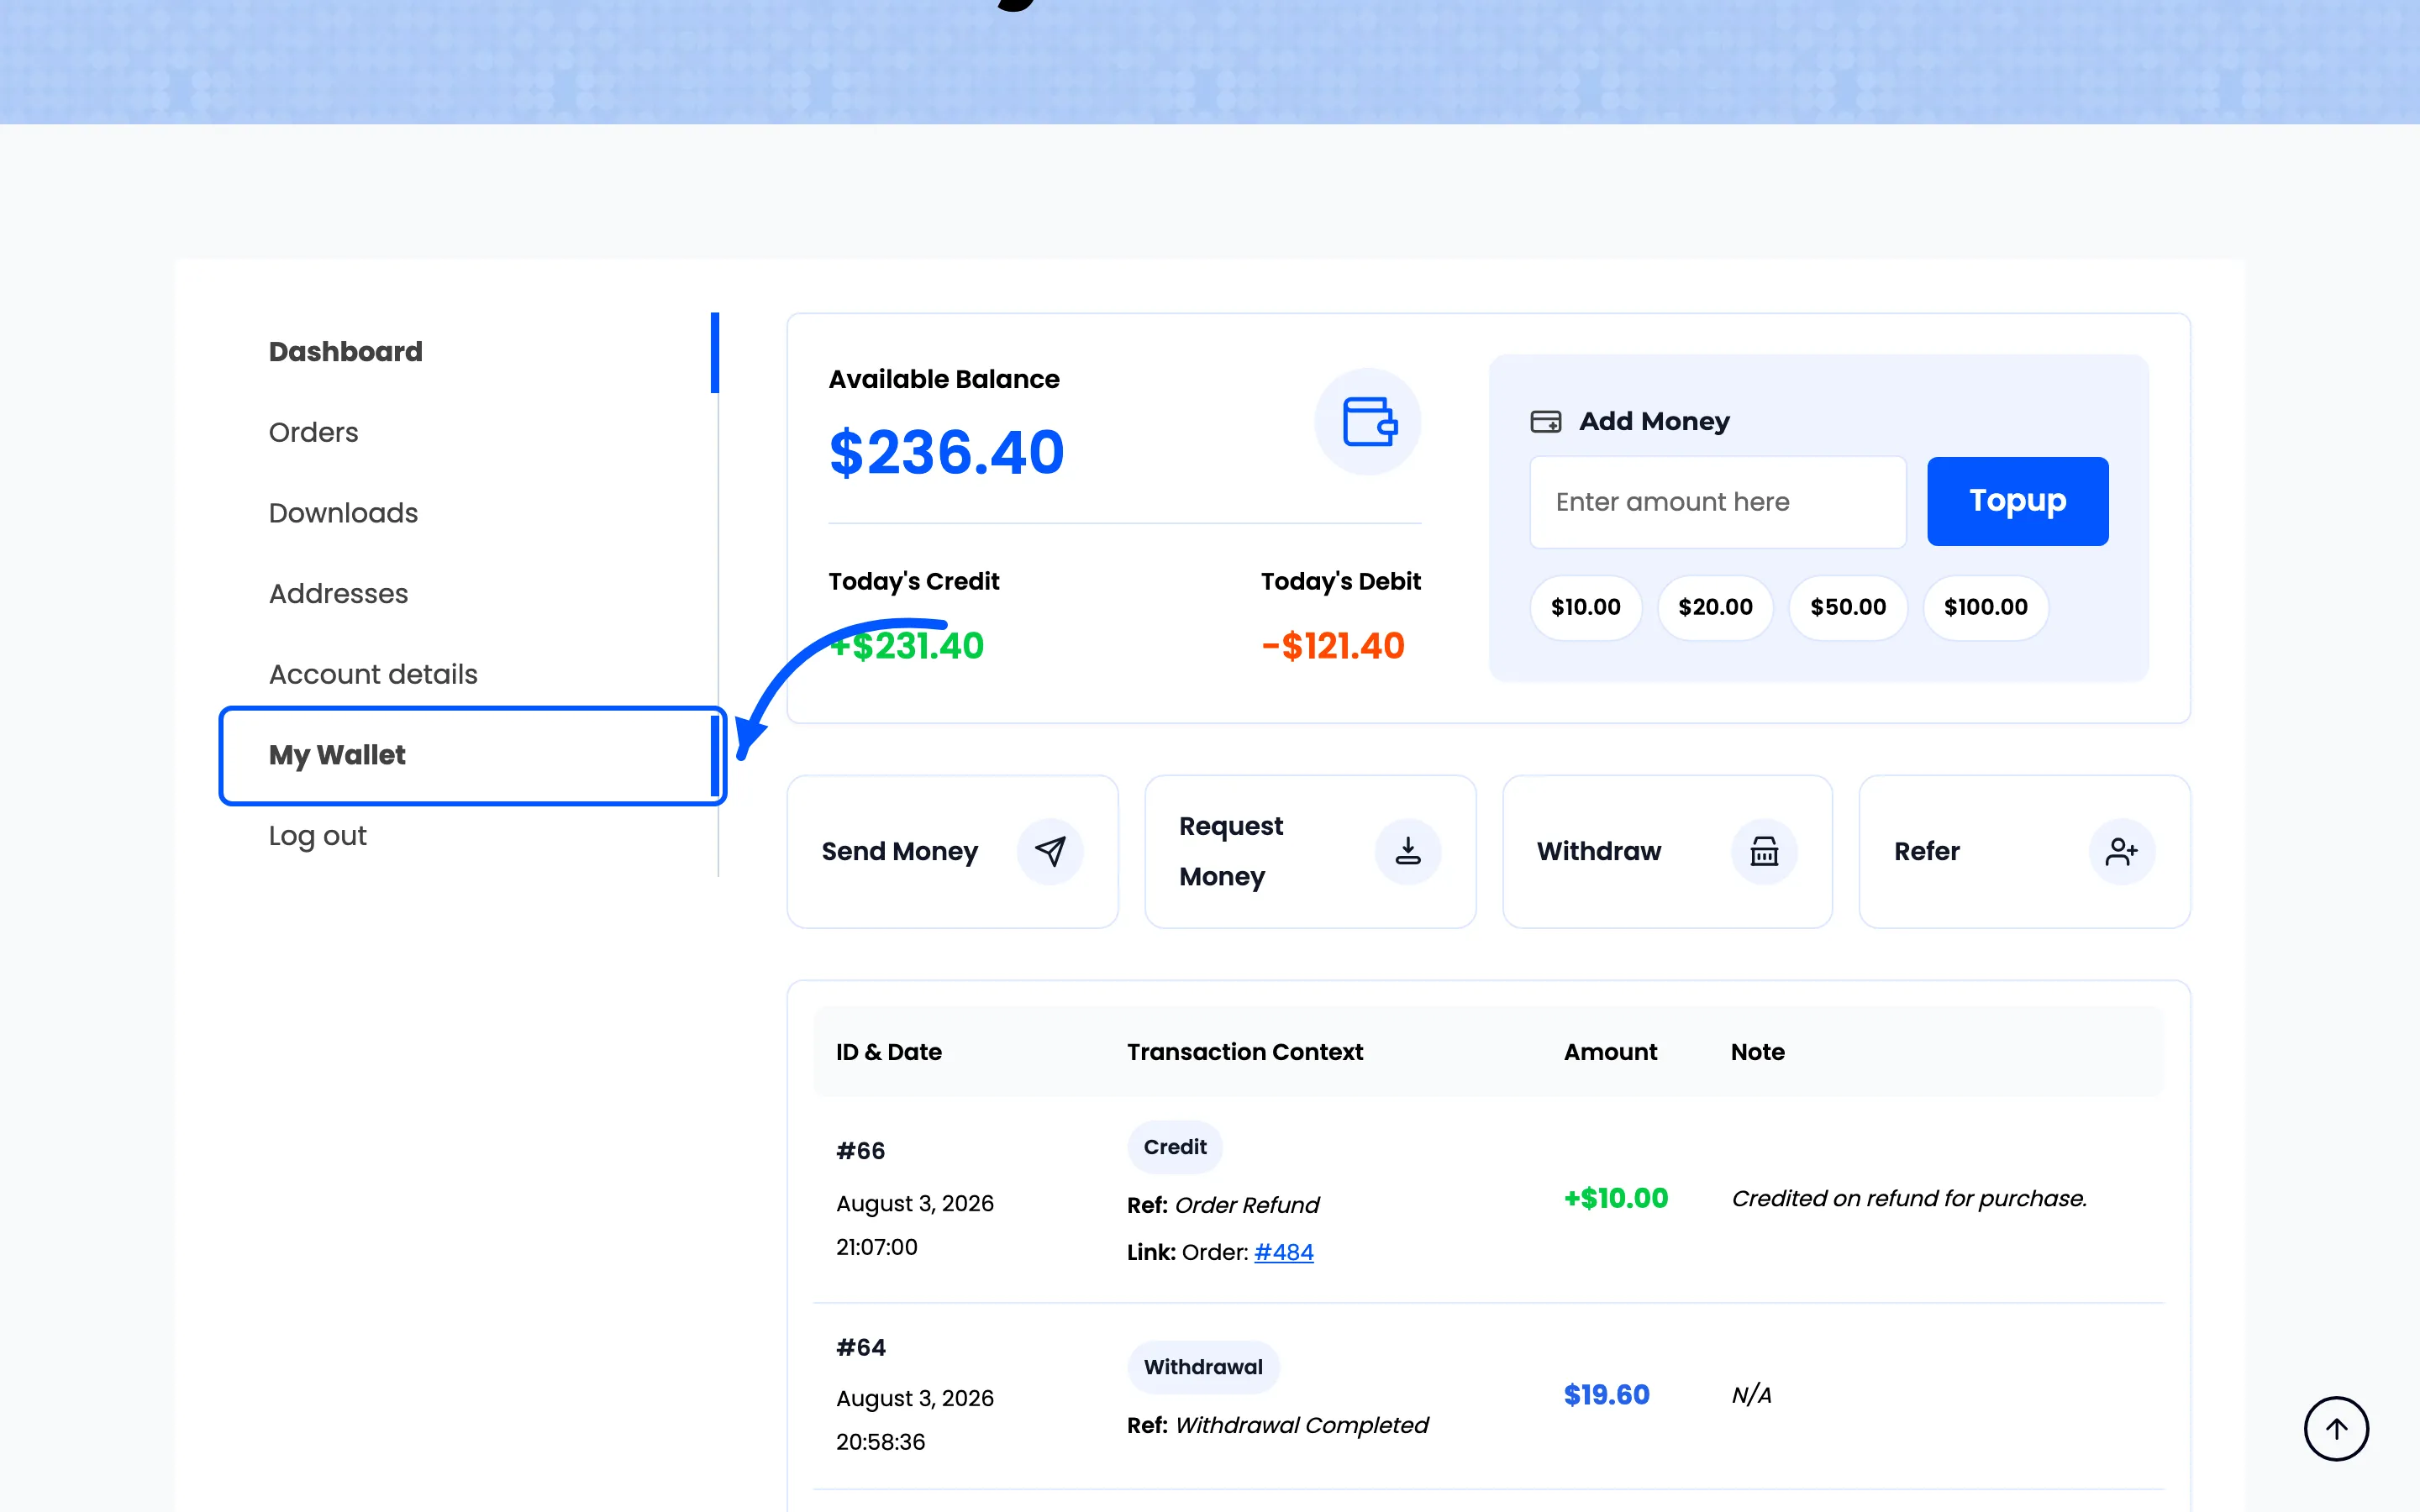
Section titled “The My Wallet link”After registering, the wallet appears in the My Account menu. The label and the URL are both yours to set under Configuration → Endpoints.
The wallet page
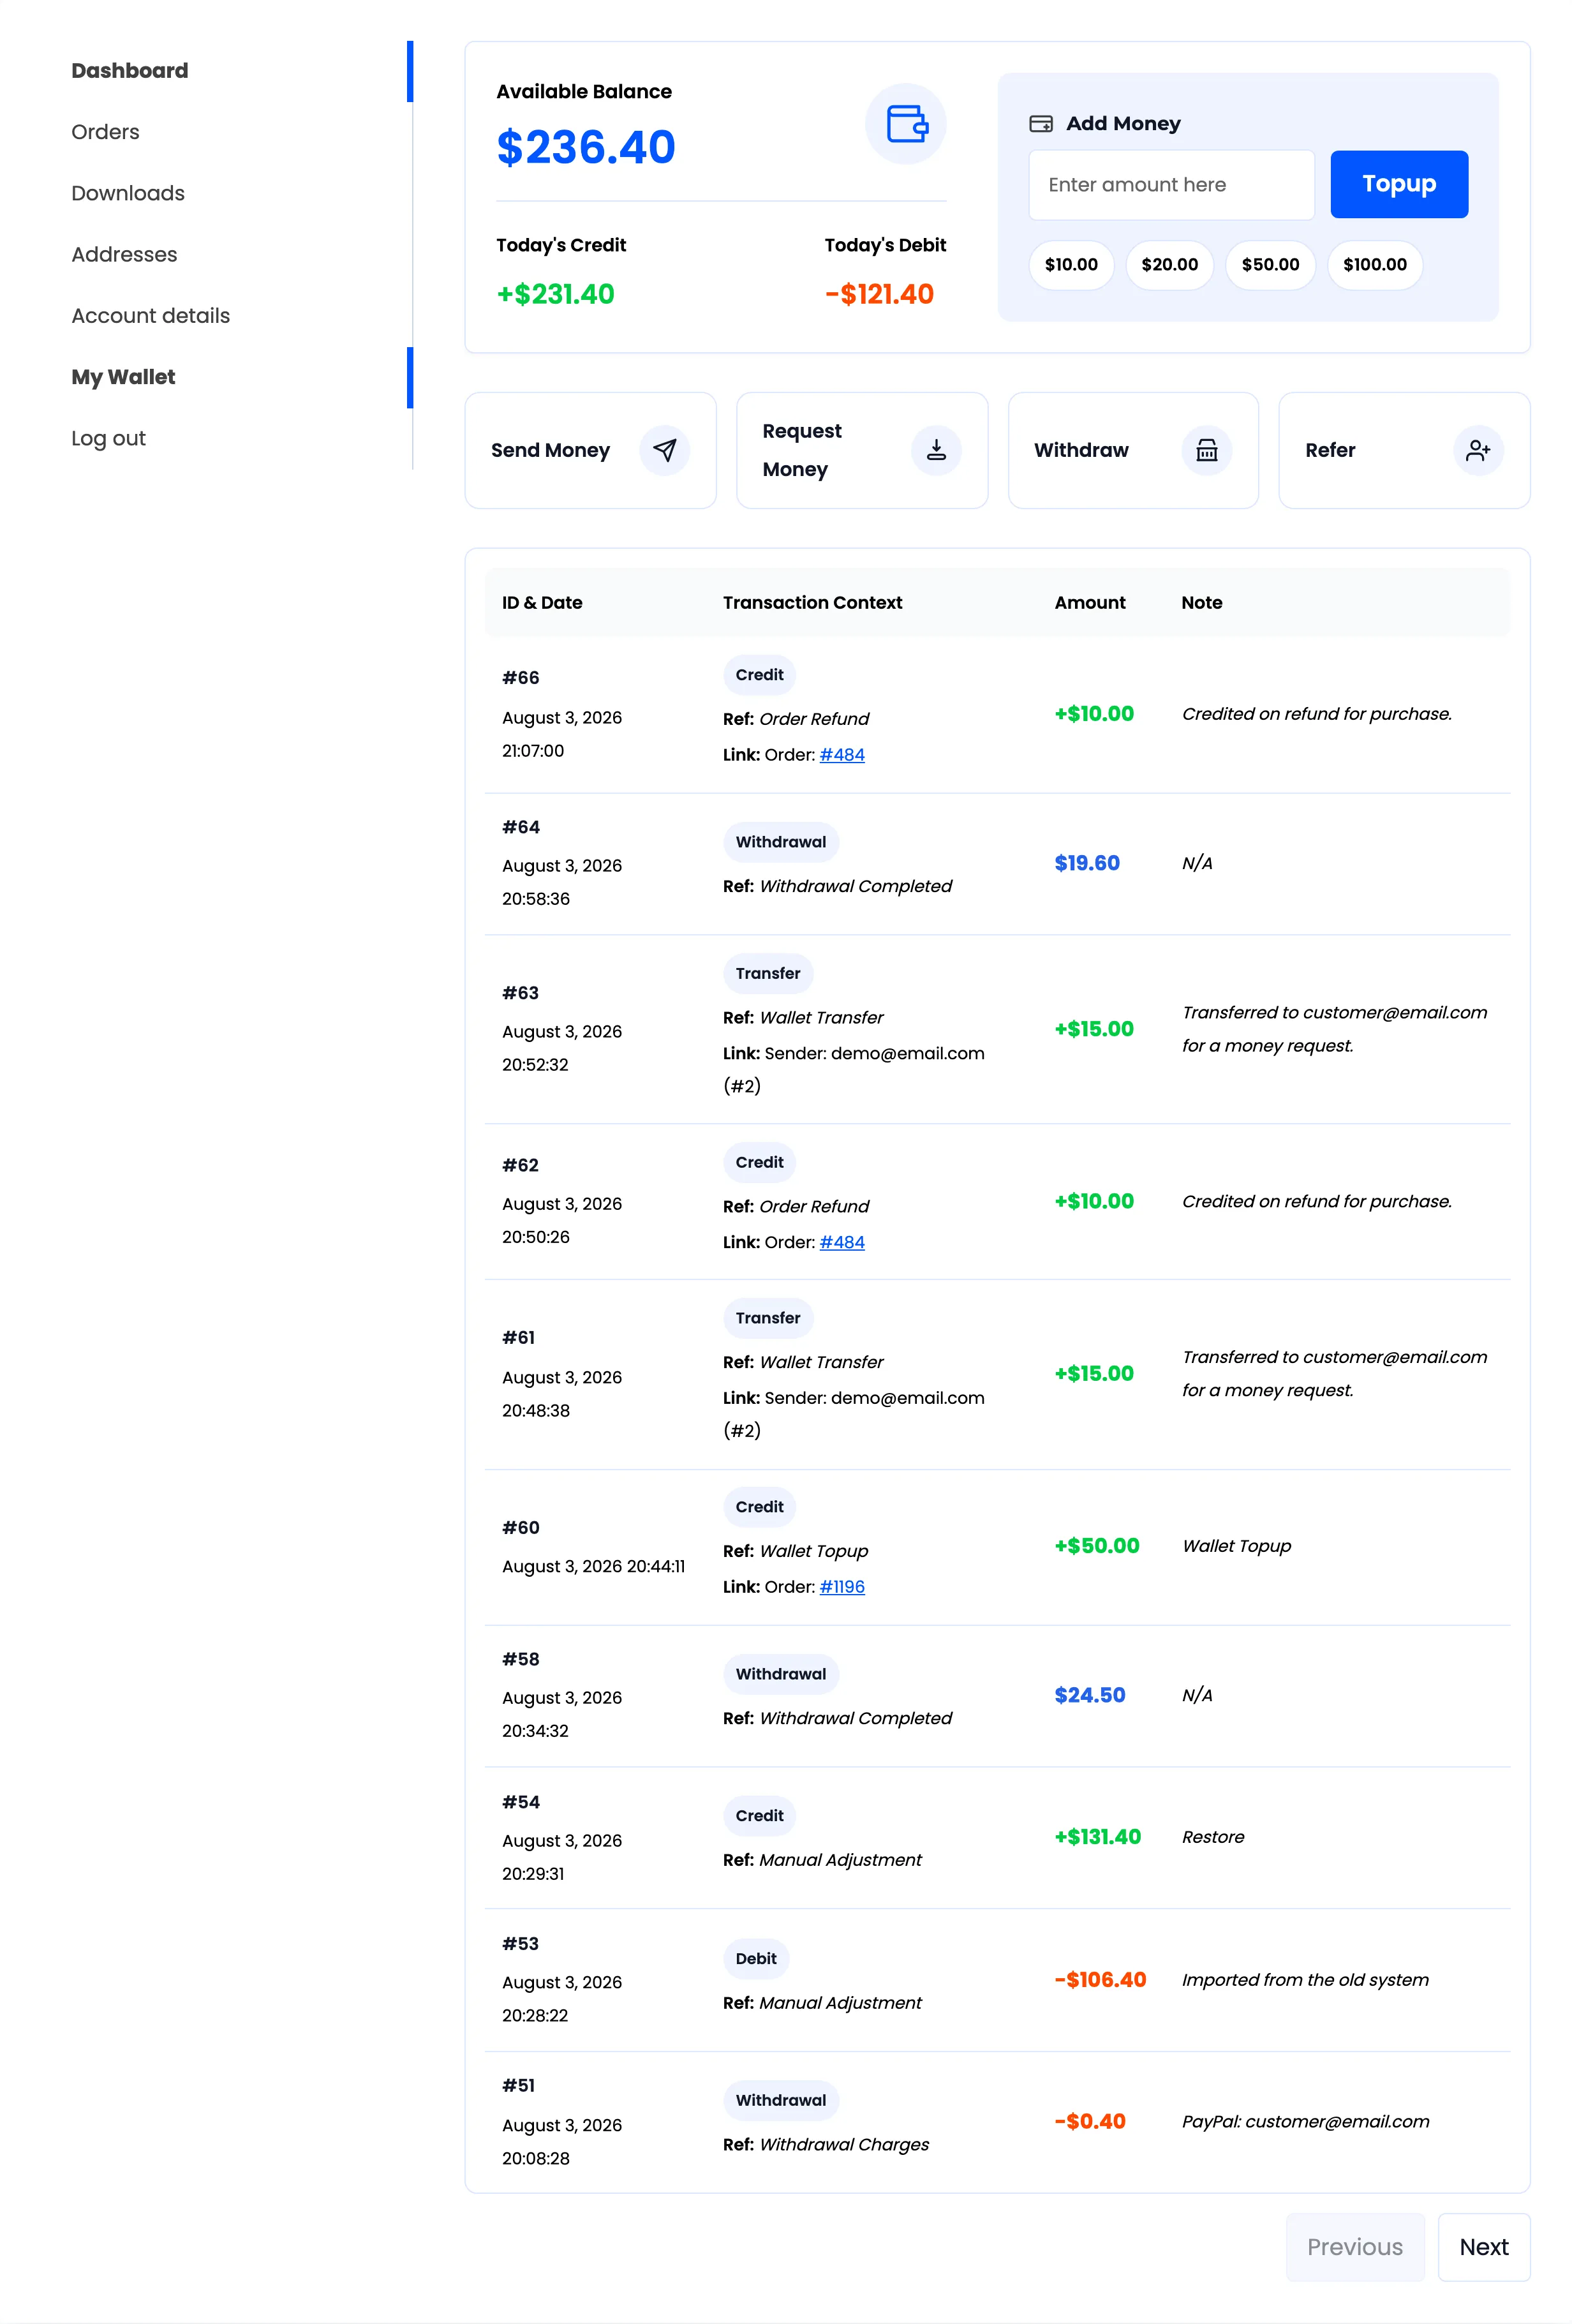
Section titled “The wallet page”One page, four blocks stacked down it.
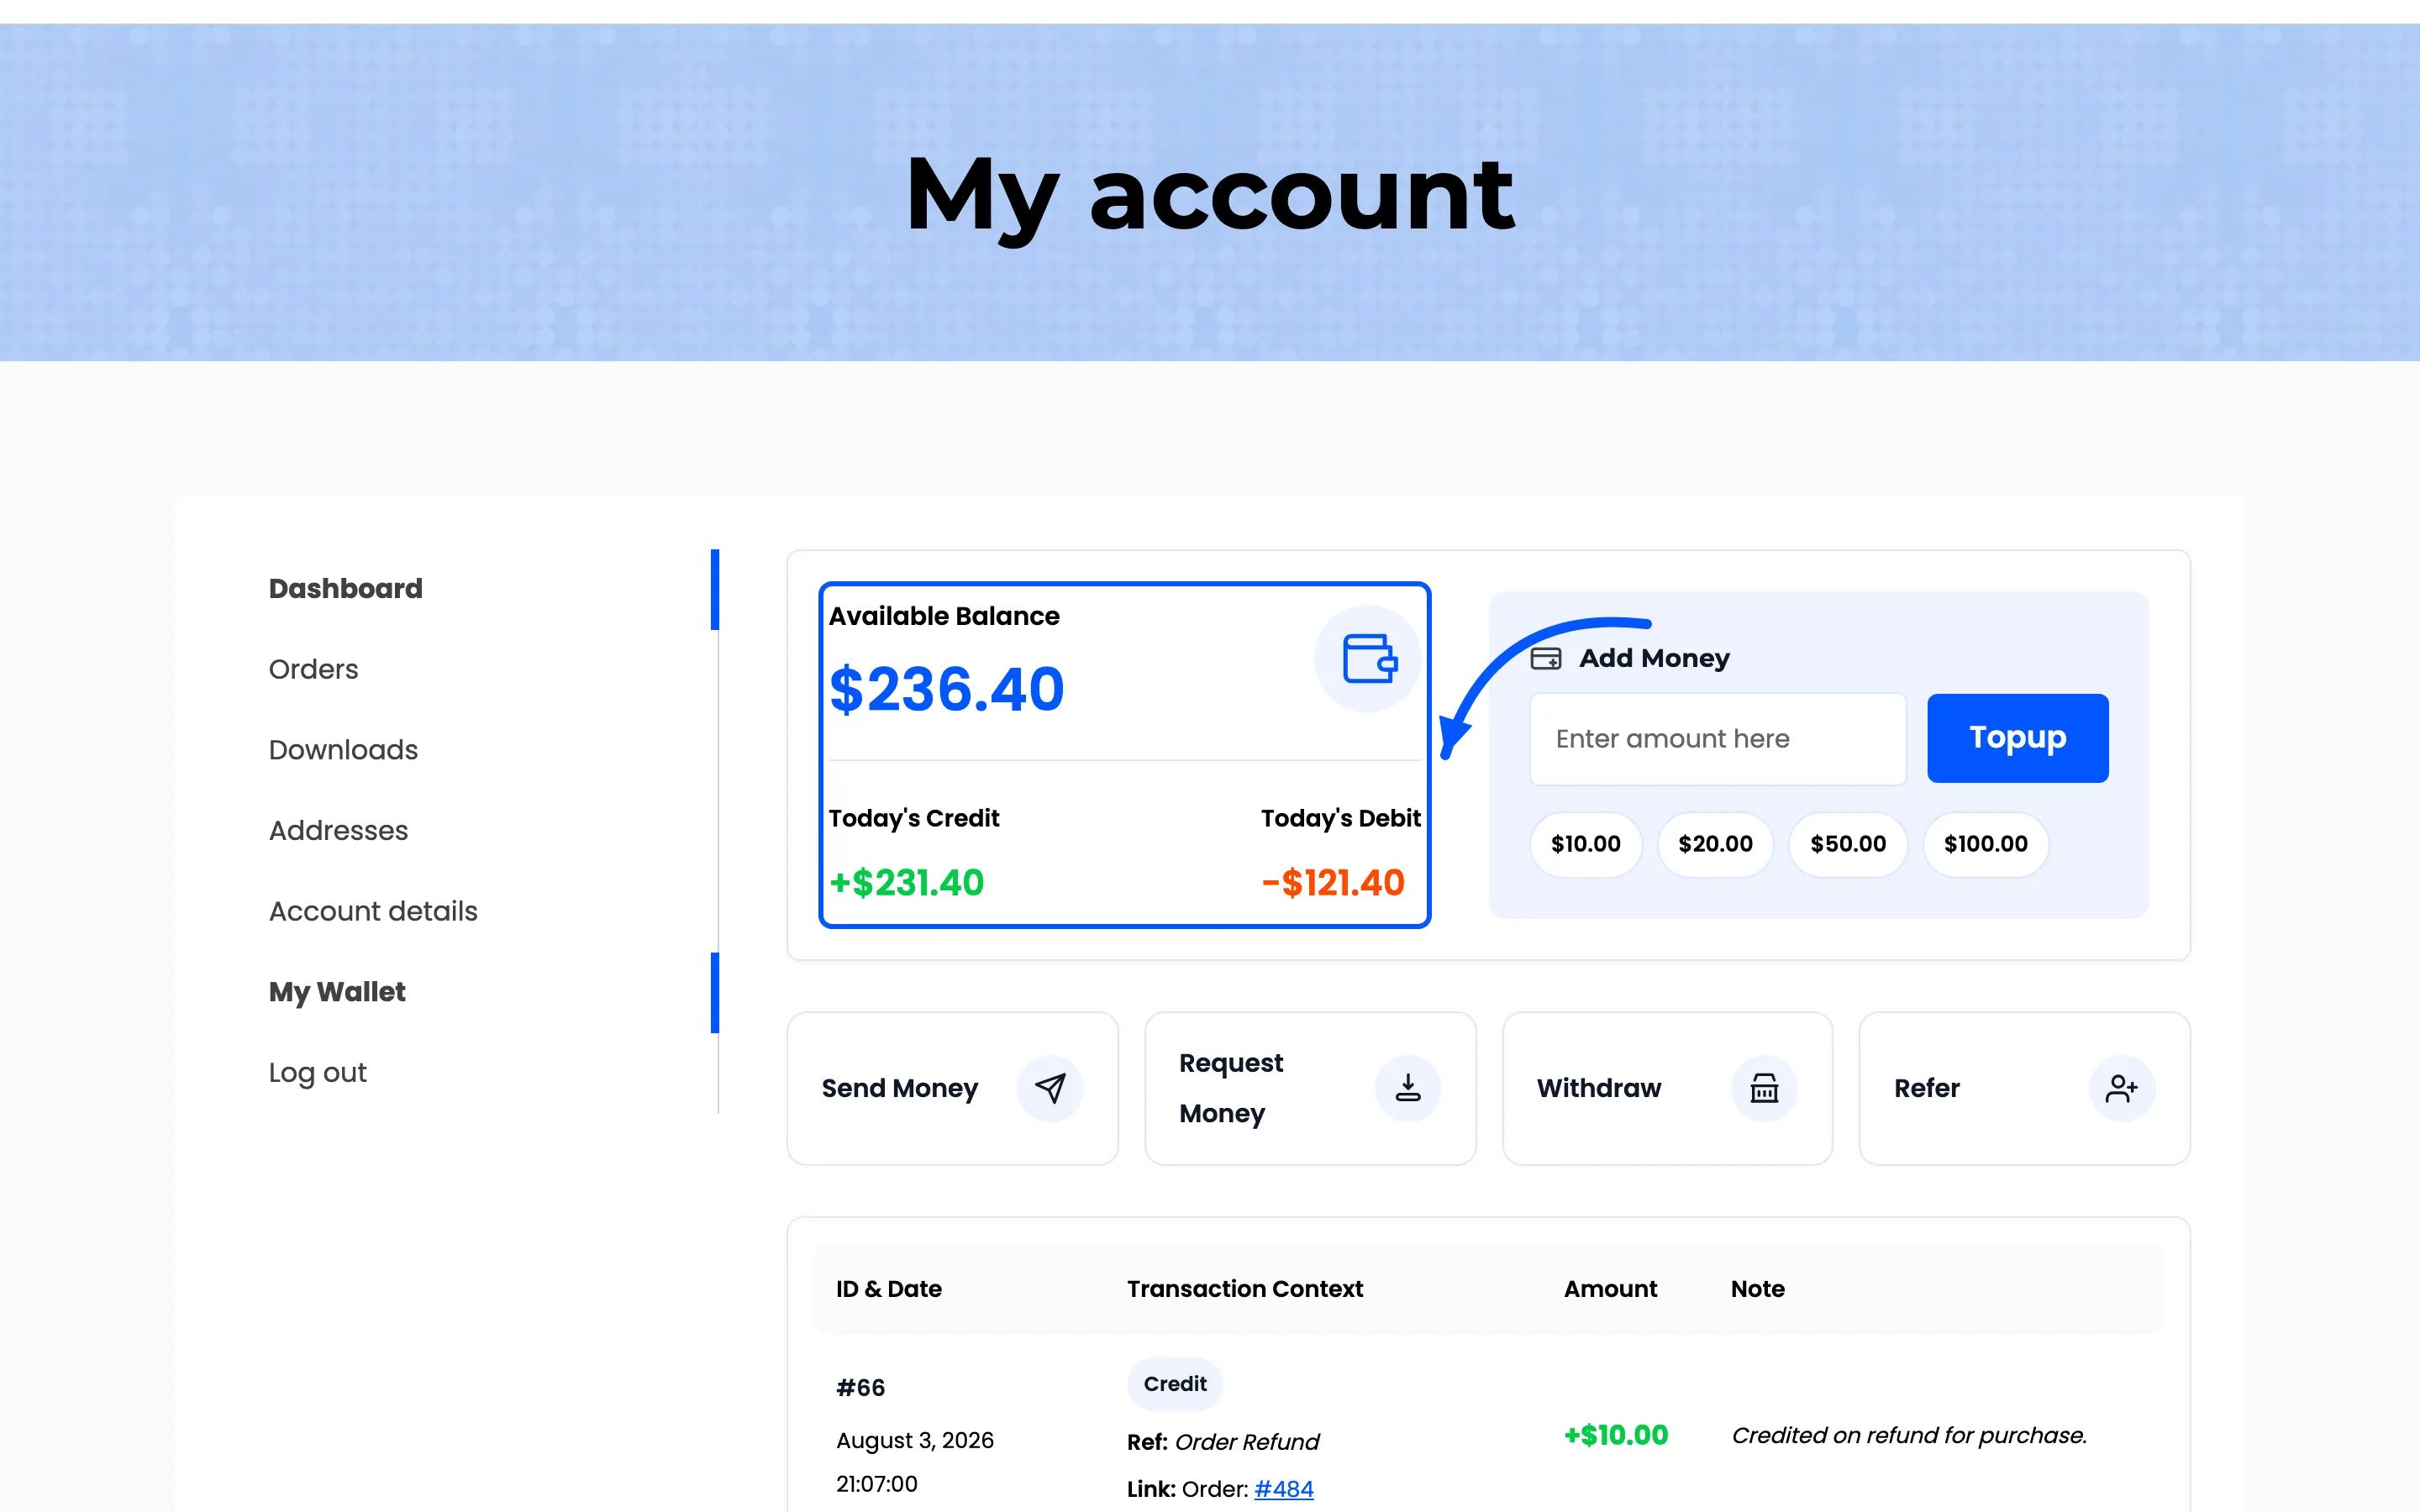
The balance card
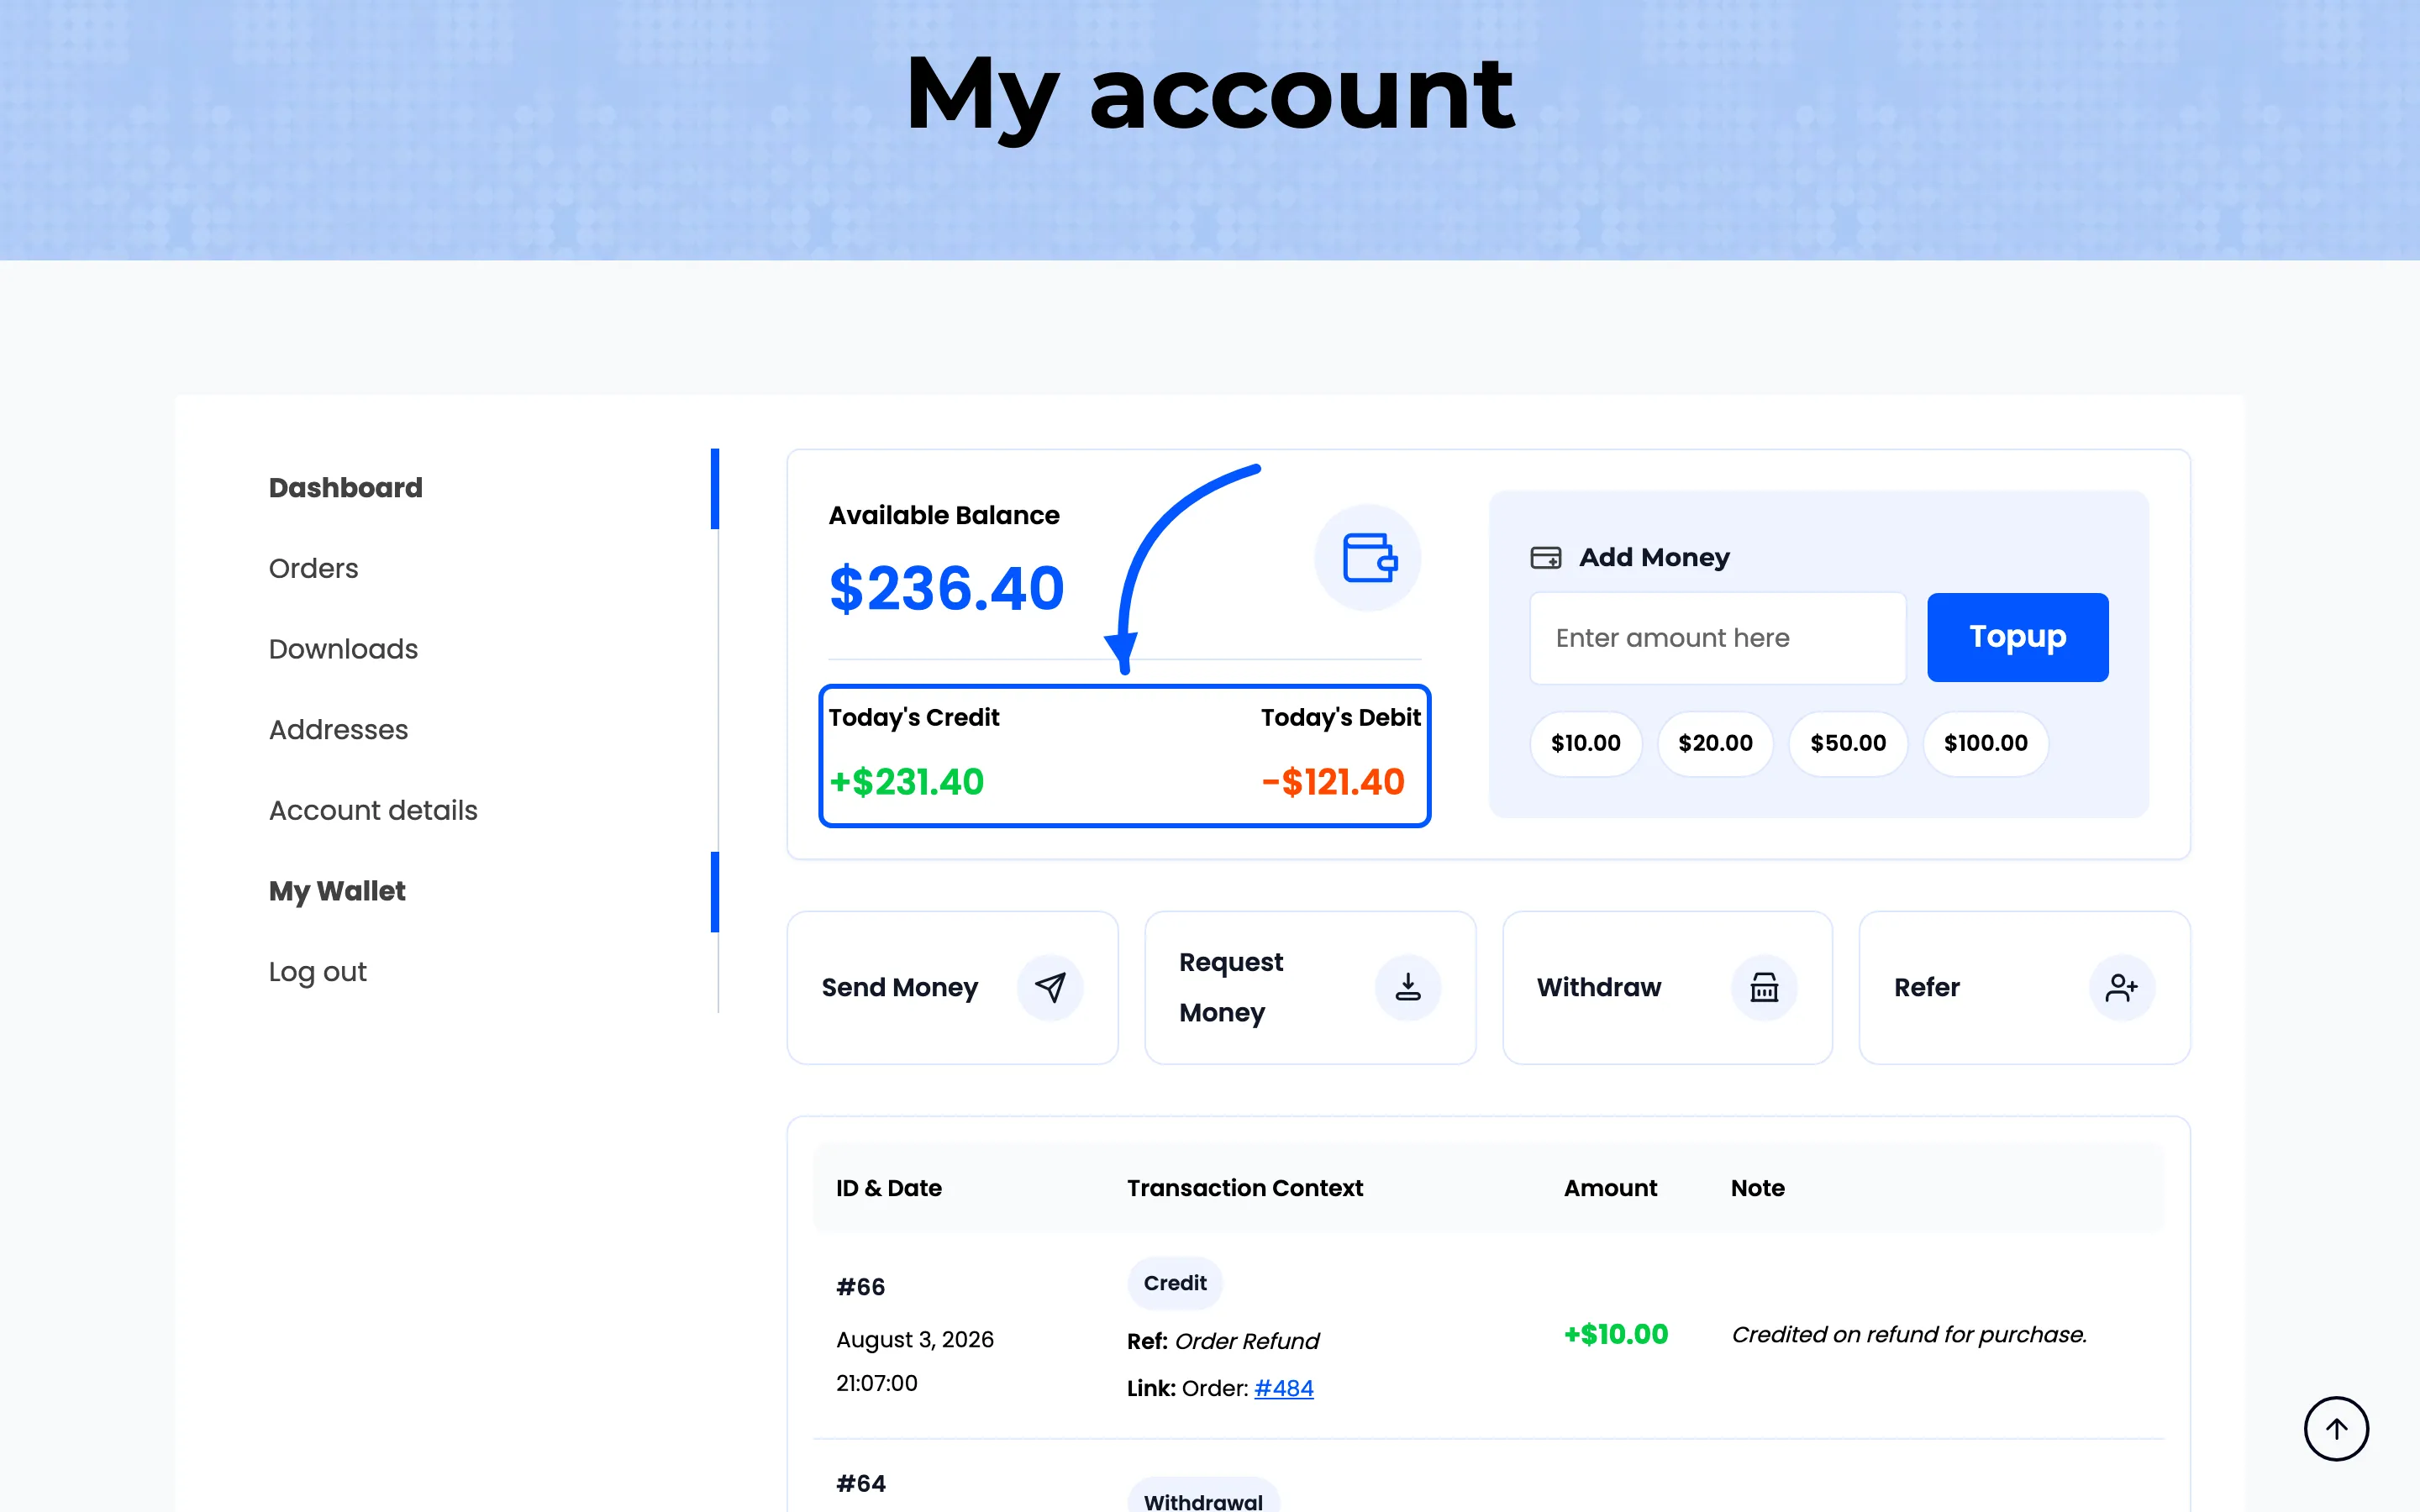
Section titled “The balance card”Available Balance with today’s credit and today’s debit beside it.
The two smaller figures reset at midnight, so a customer who tops up in the morning sees it there and sees it gone tomorrow. It is a movement reading, not a running total.
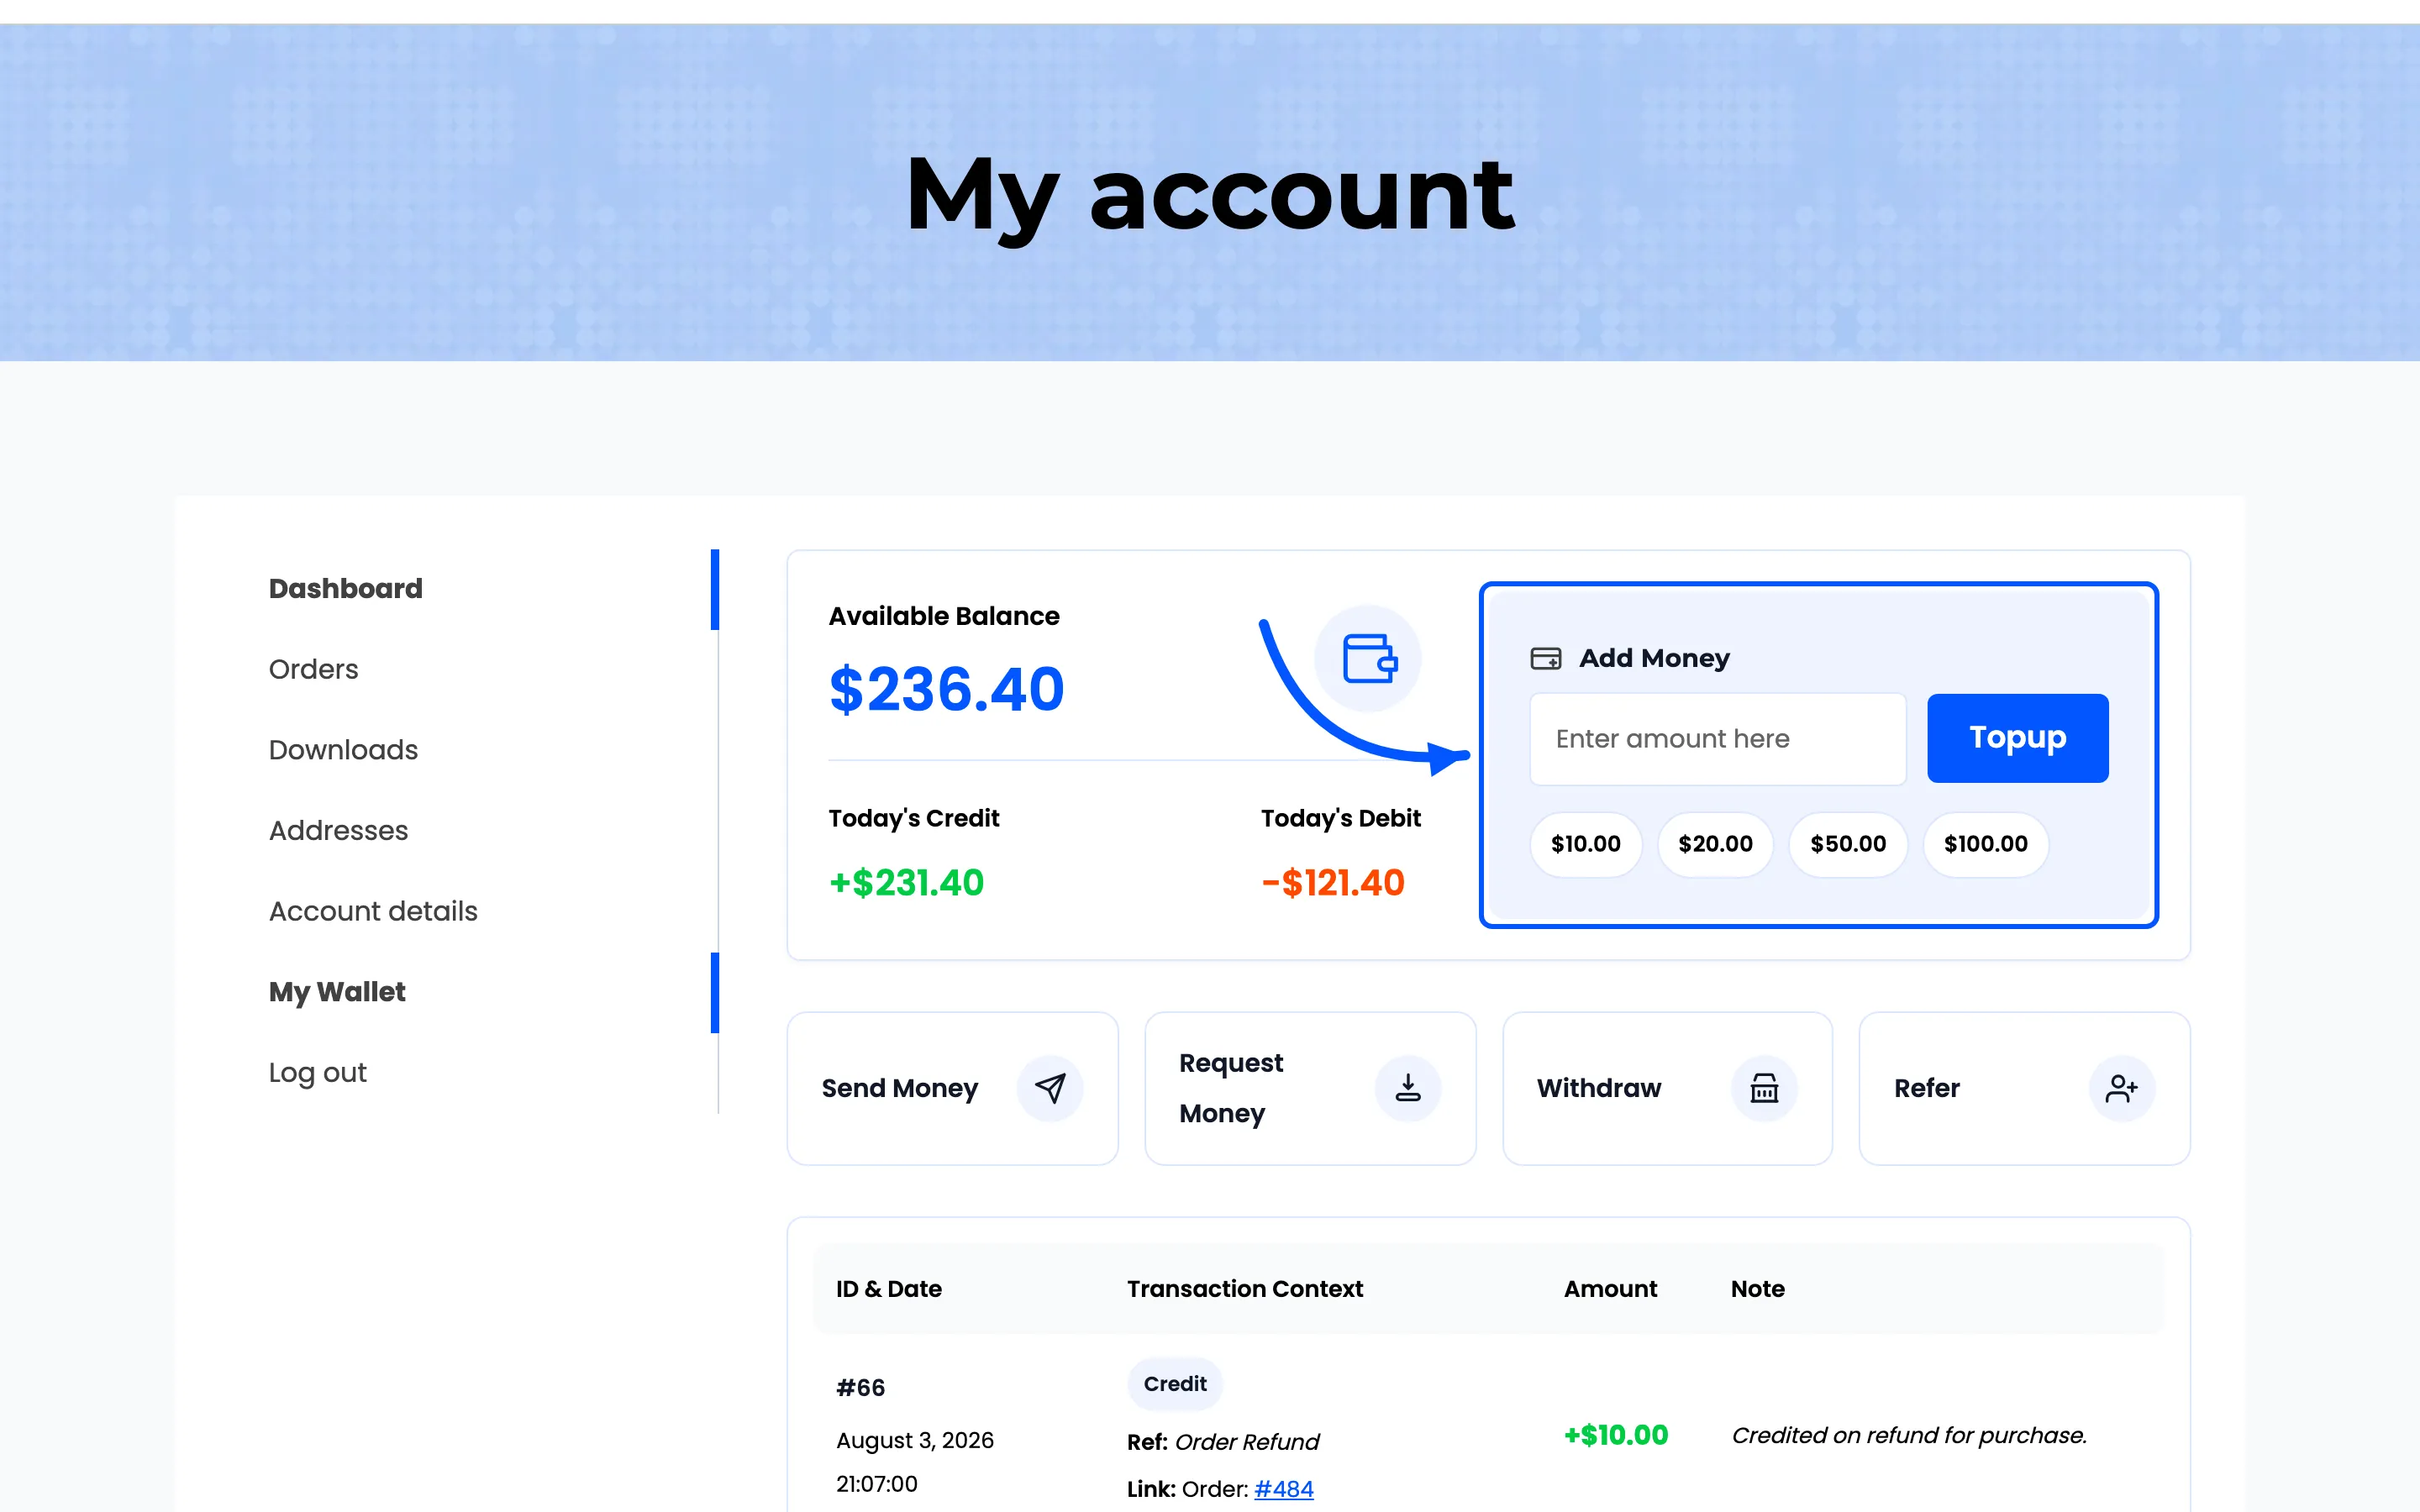
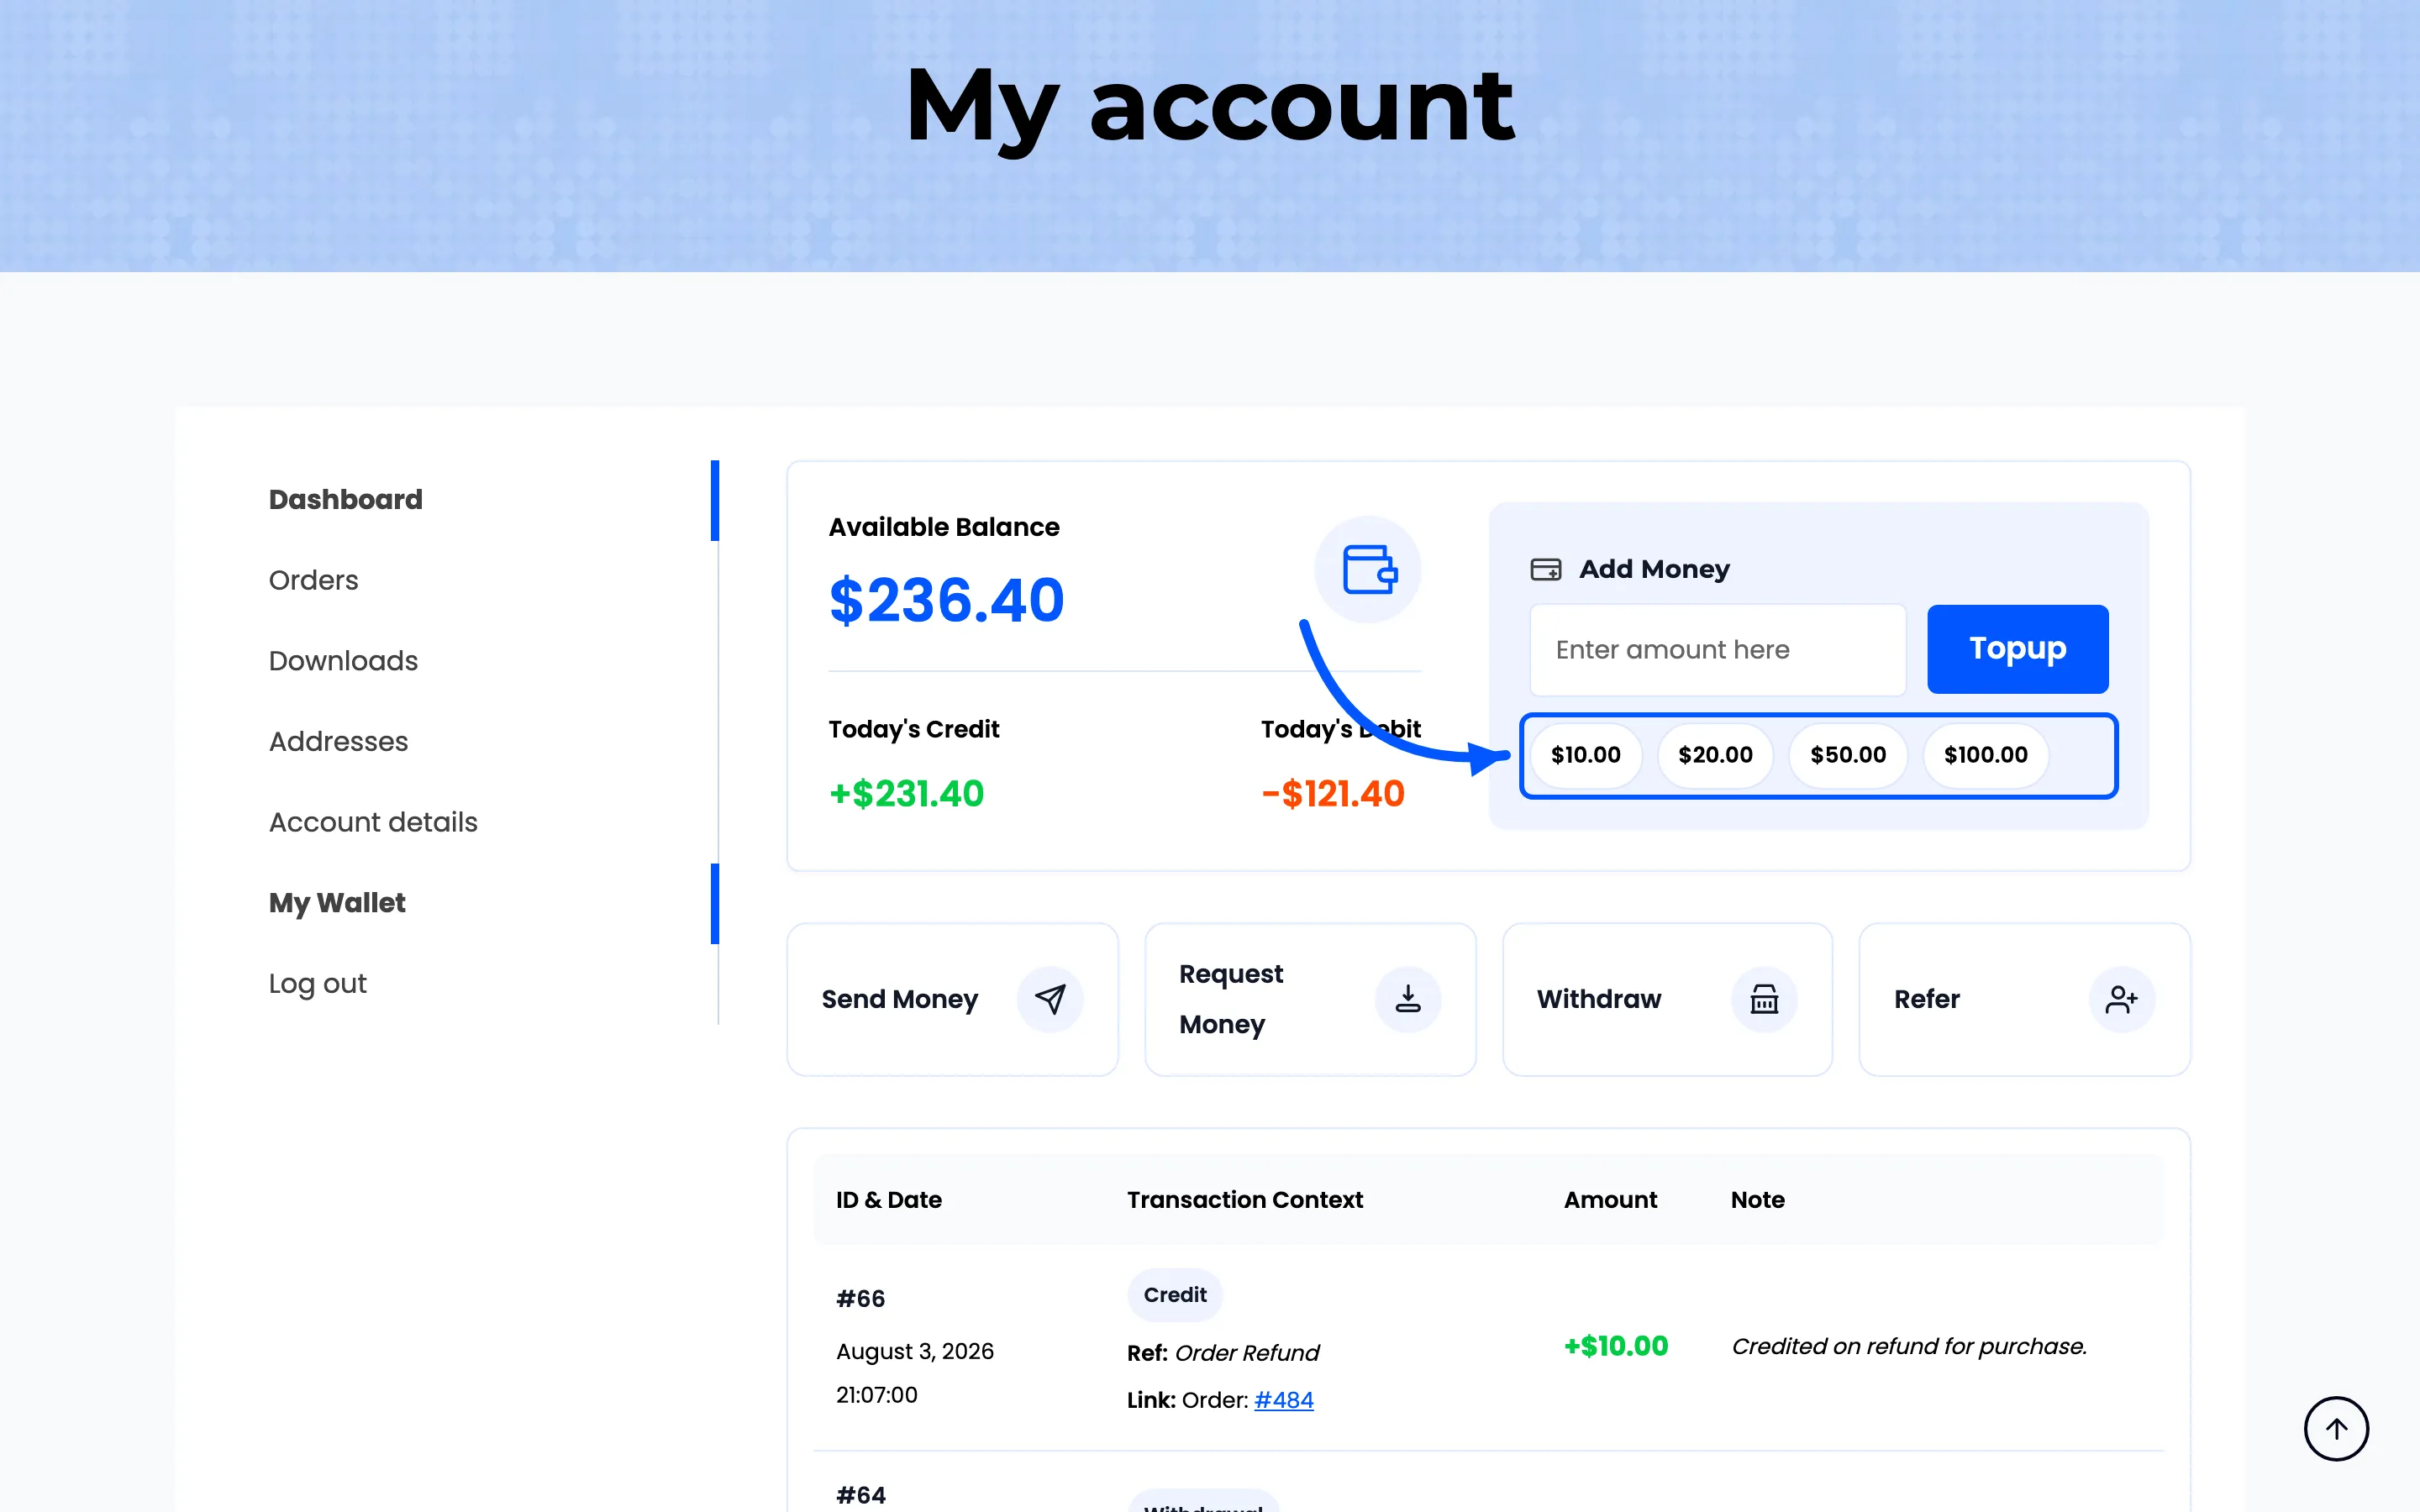
The Add Money box
Section titled “The Add Money box”An amount field, a Topup button, and the quick-select presets under it.
The operations row
Section titled “The operations row”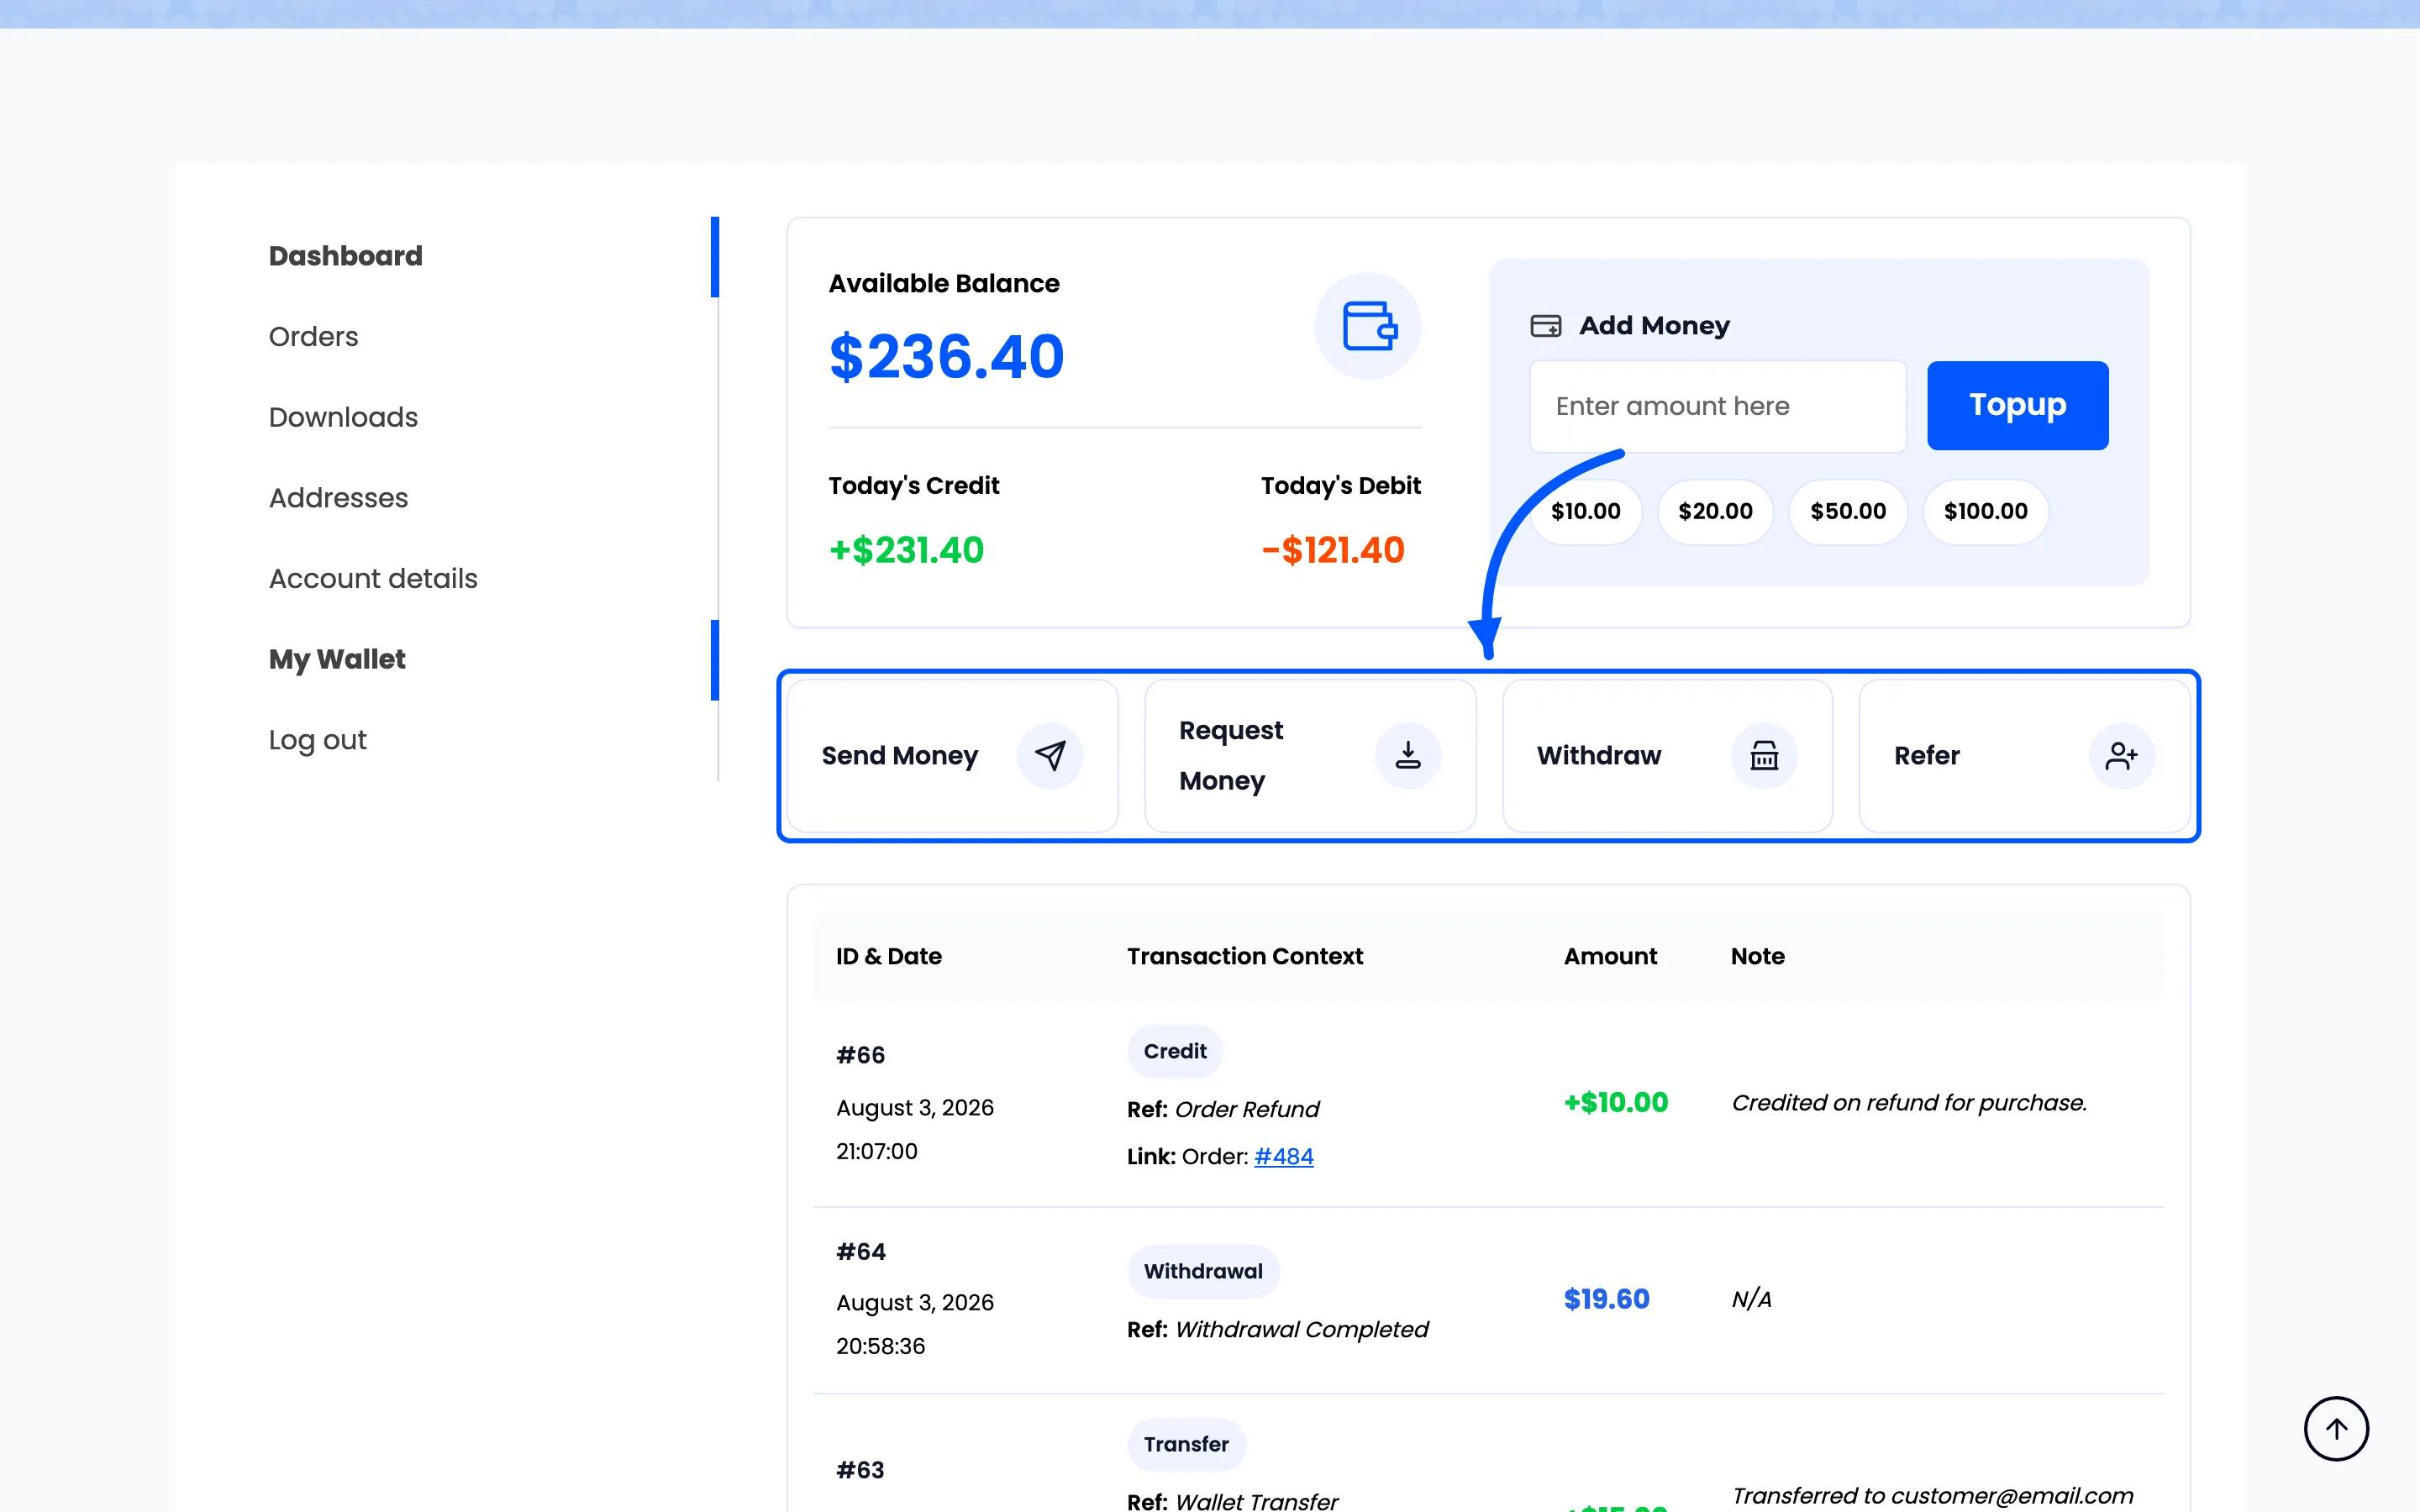
Up to four buttons, each opening a popup. Which ones appear depends on your settings: Withdraw only when withdrawals are enabled, Refer only when the referral program is on.
The transaction history
Section titled “The transaction history”Every movement, ten to a page, with a Previous and Next pair when there are more.
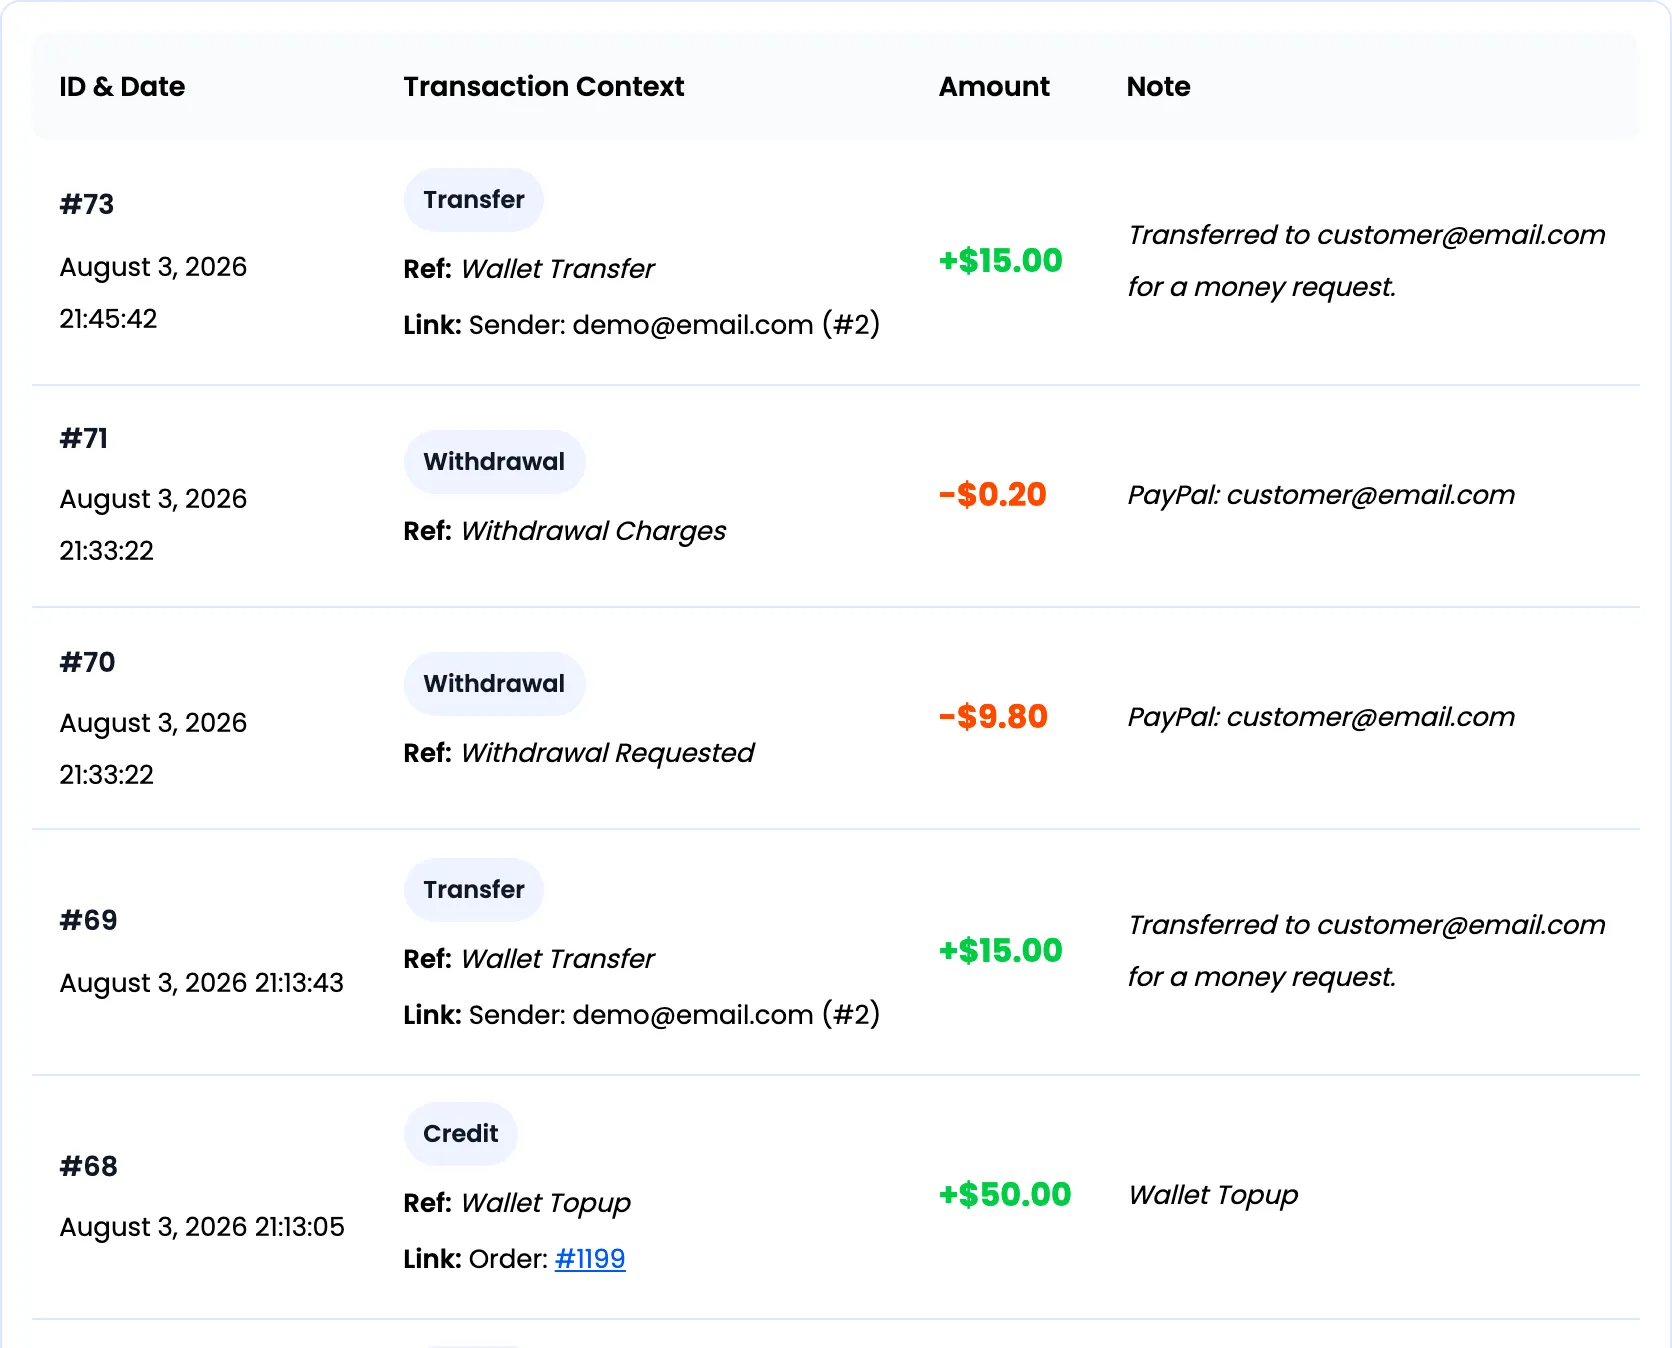
Four columns: ID & Date, Transaction Context, Amount and Note. The context column names the reason and links to the order.
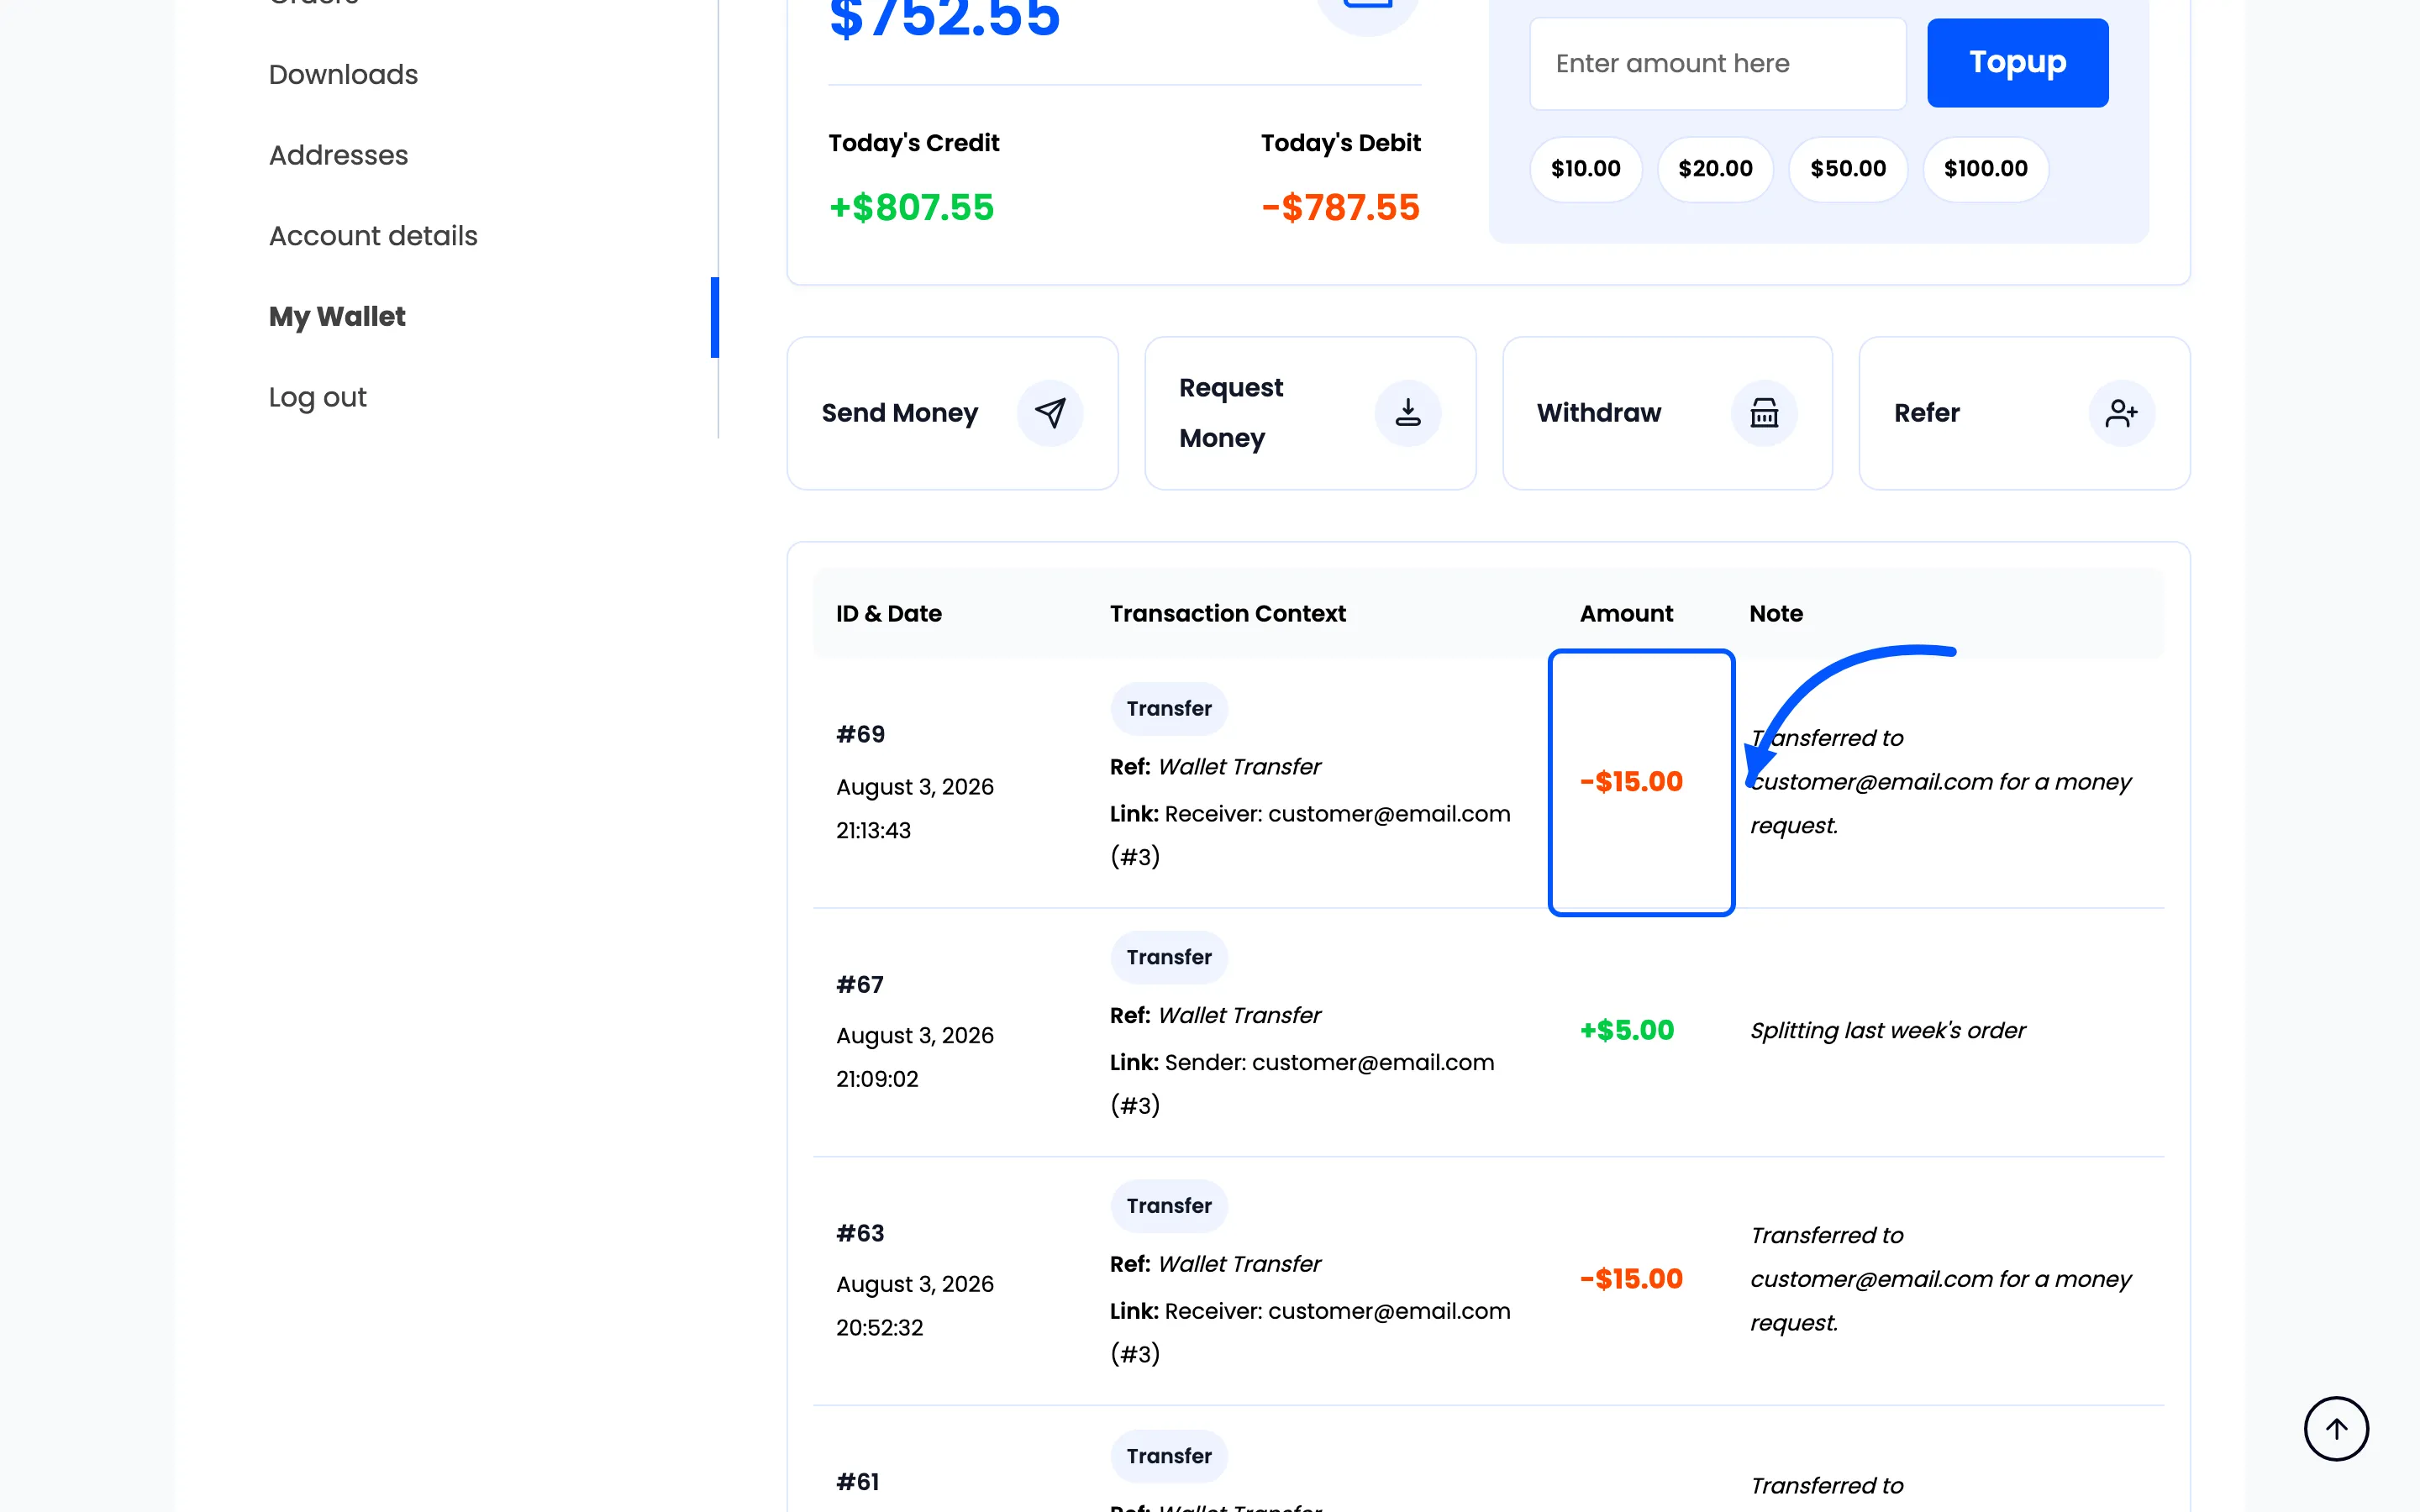
Credits are green and positive, debits red and negative, so the direction is readable without reading.
The four operation popups
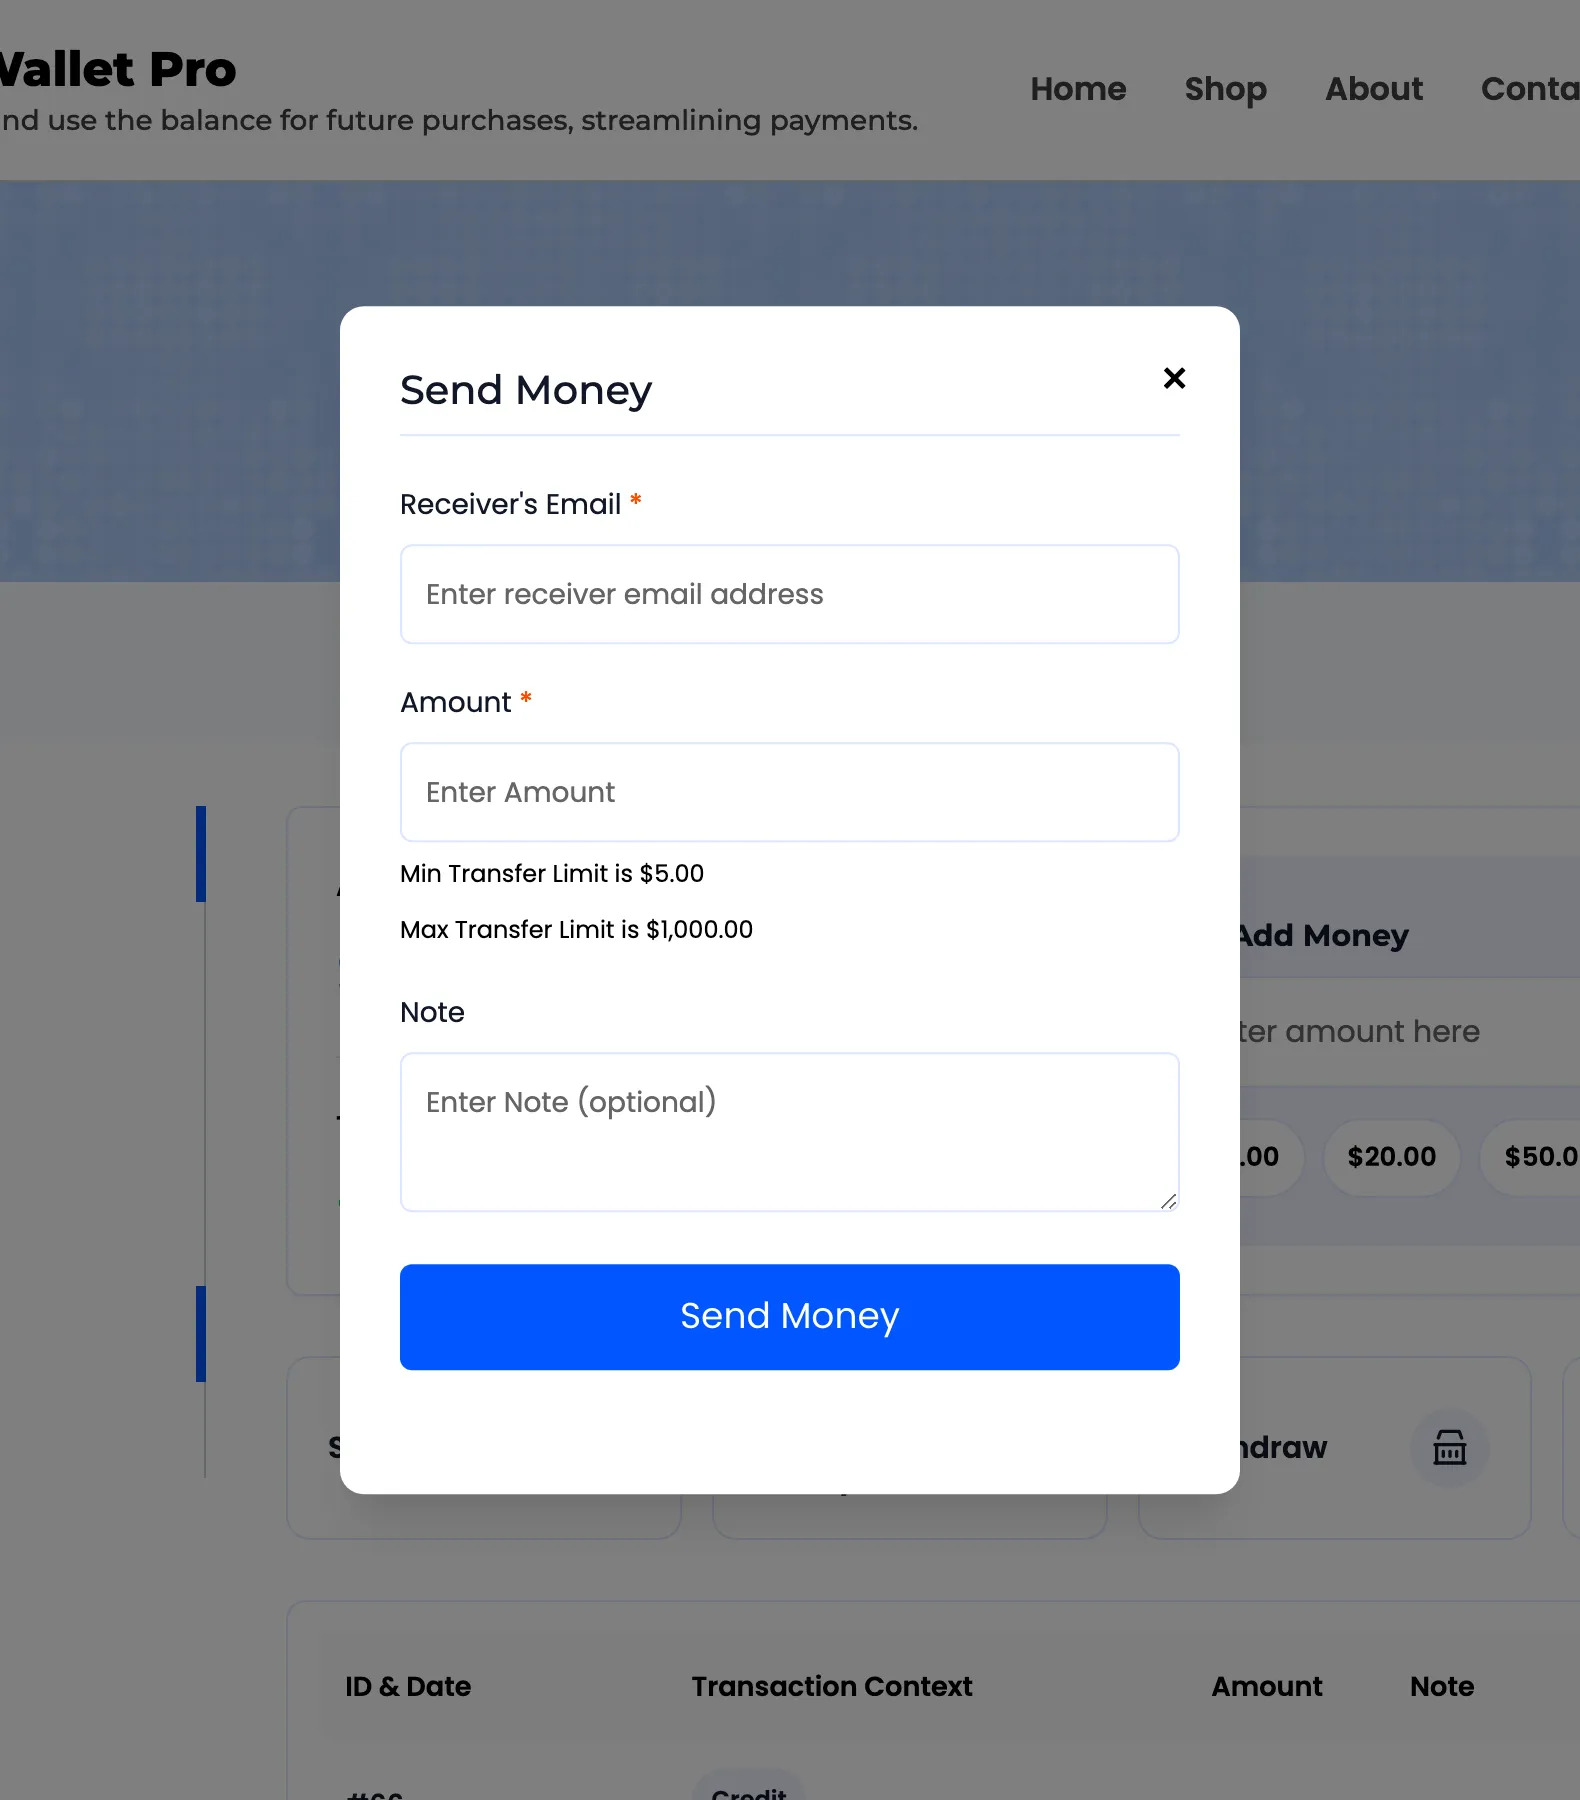
Section titled “The four operation popups”Send Money takes a receiver’s email, an amount and an optional note, and moves the money at once.
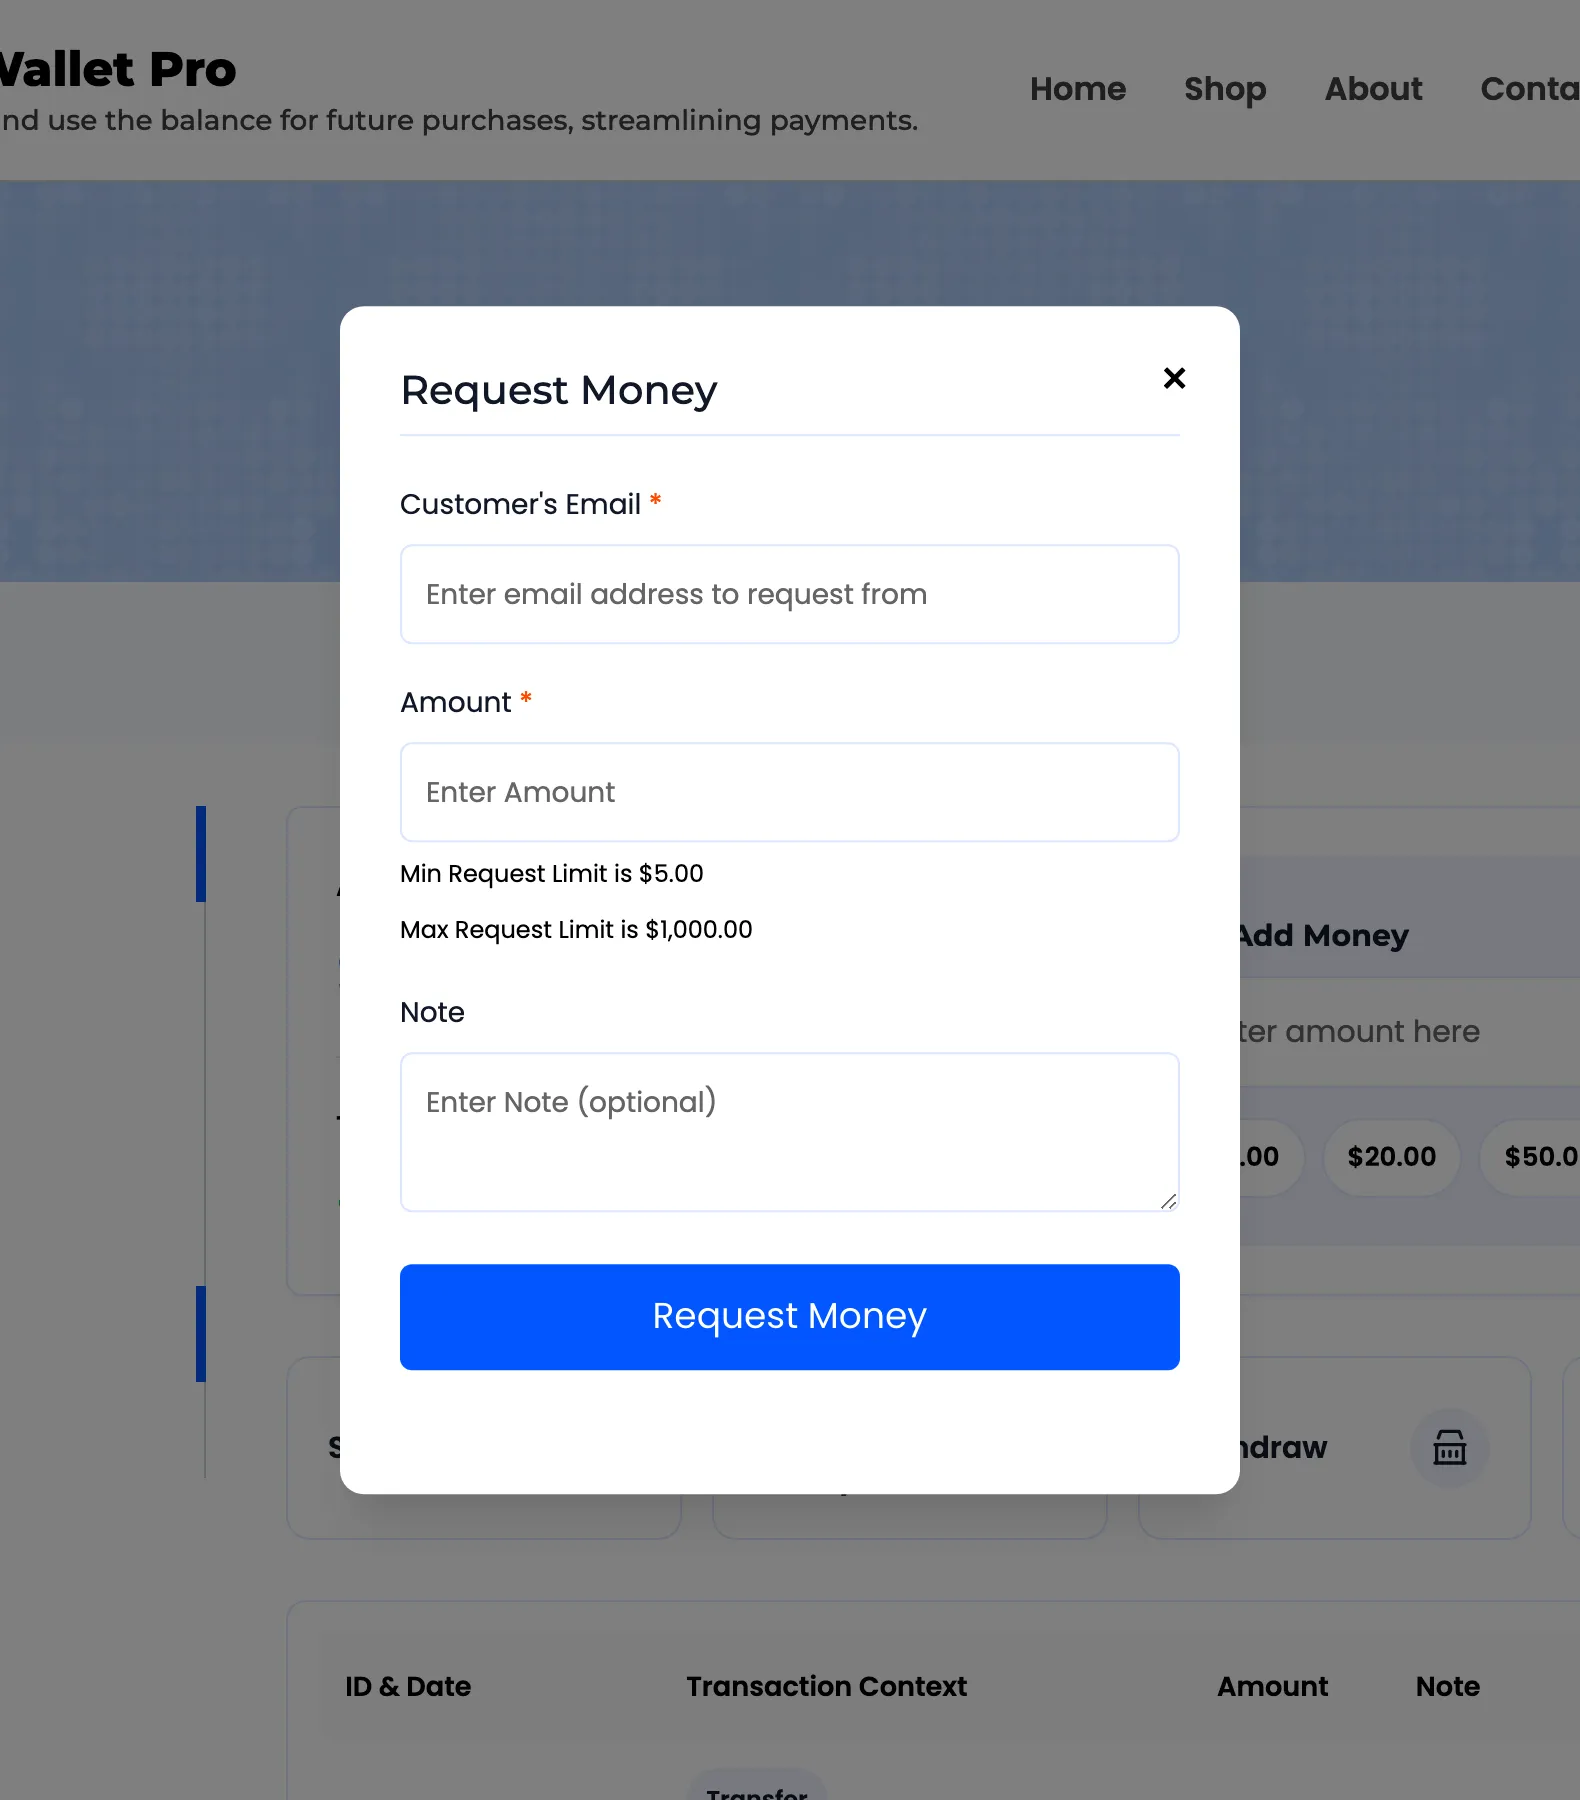
Request Money takes the same three fields and leaves a request on the other customer’s wallet.
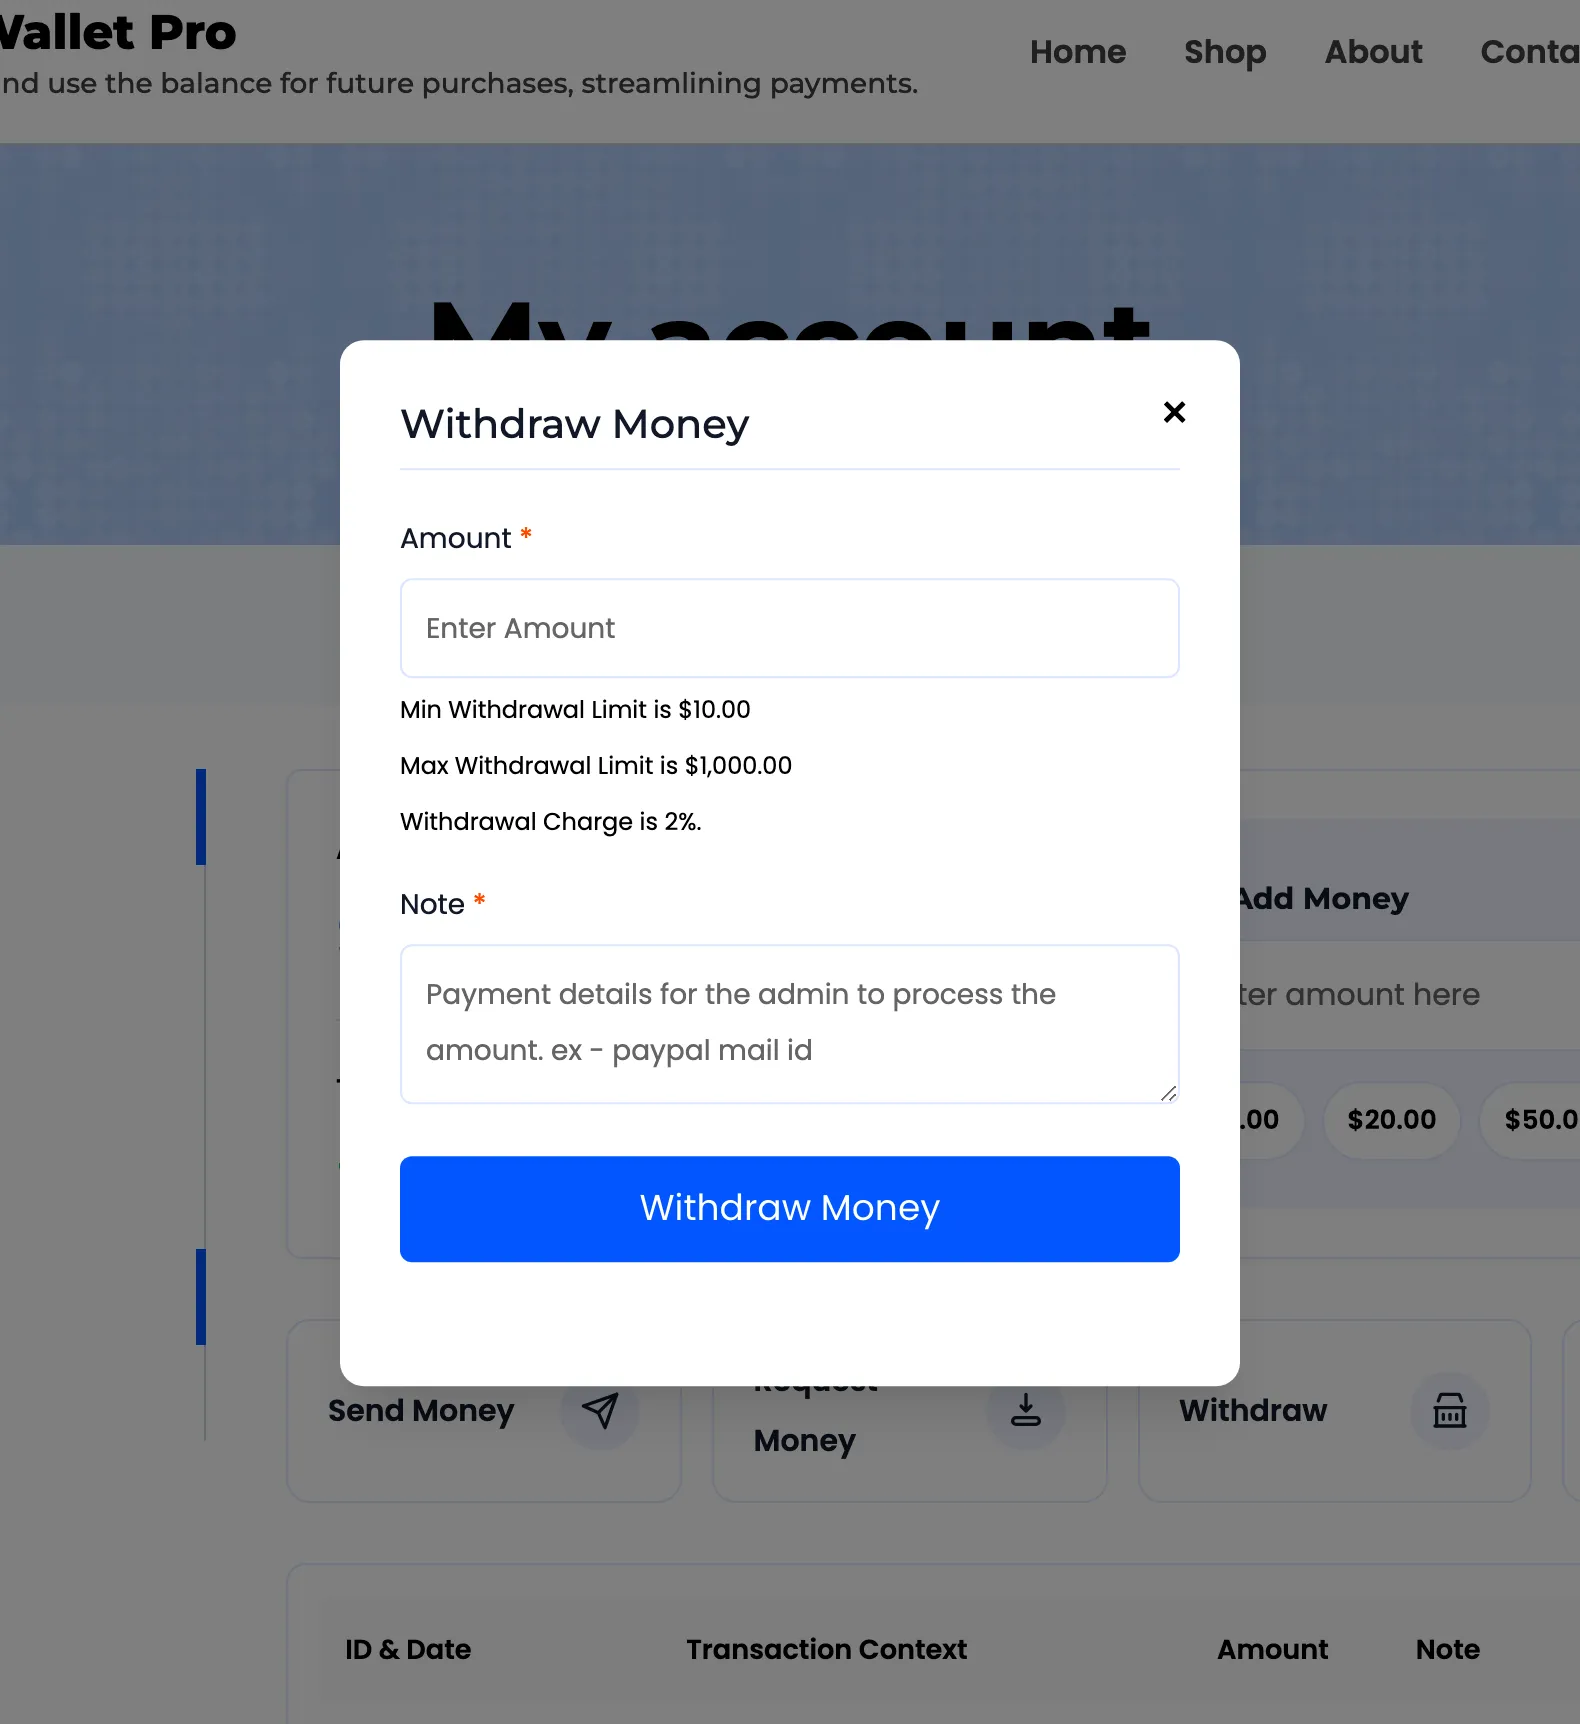
Withdraw Money takes an amount and a required note. The note is where the customer tells you how to pay them, so the form refuses to submit without it.
Refer a Friend takes one or more email addresses and an invitation message, prefilled from your settings.
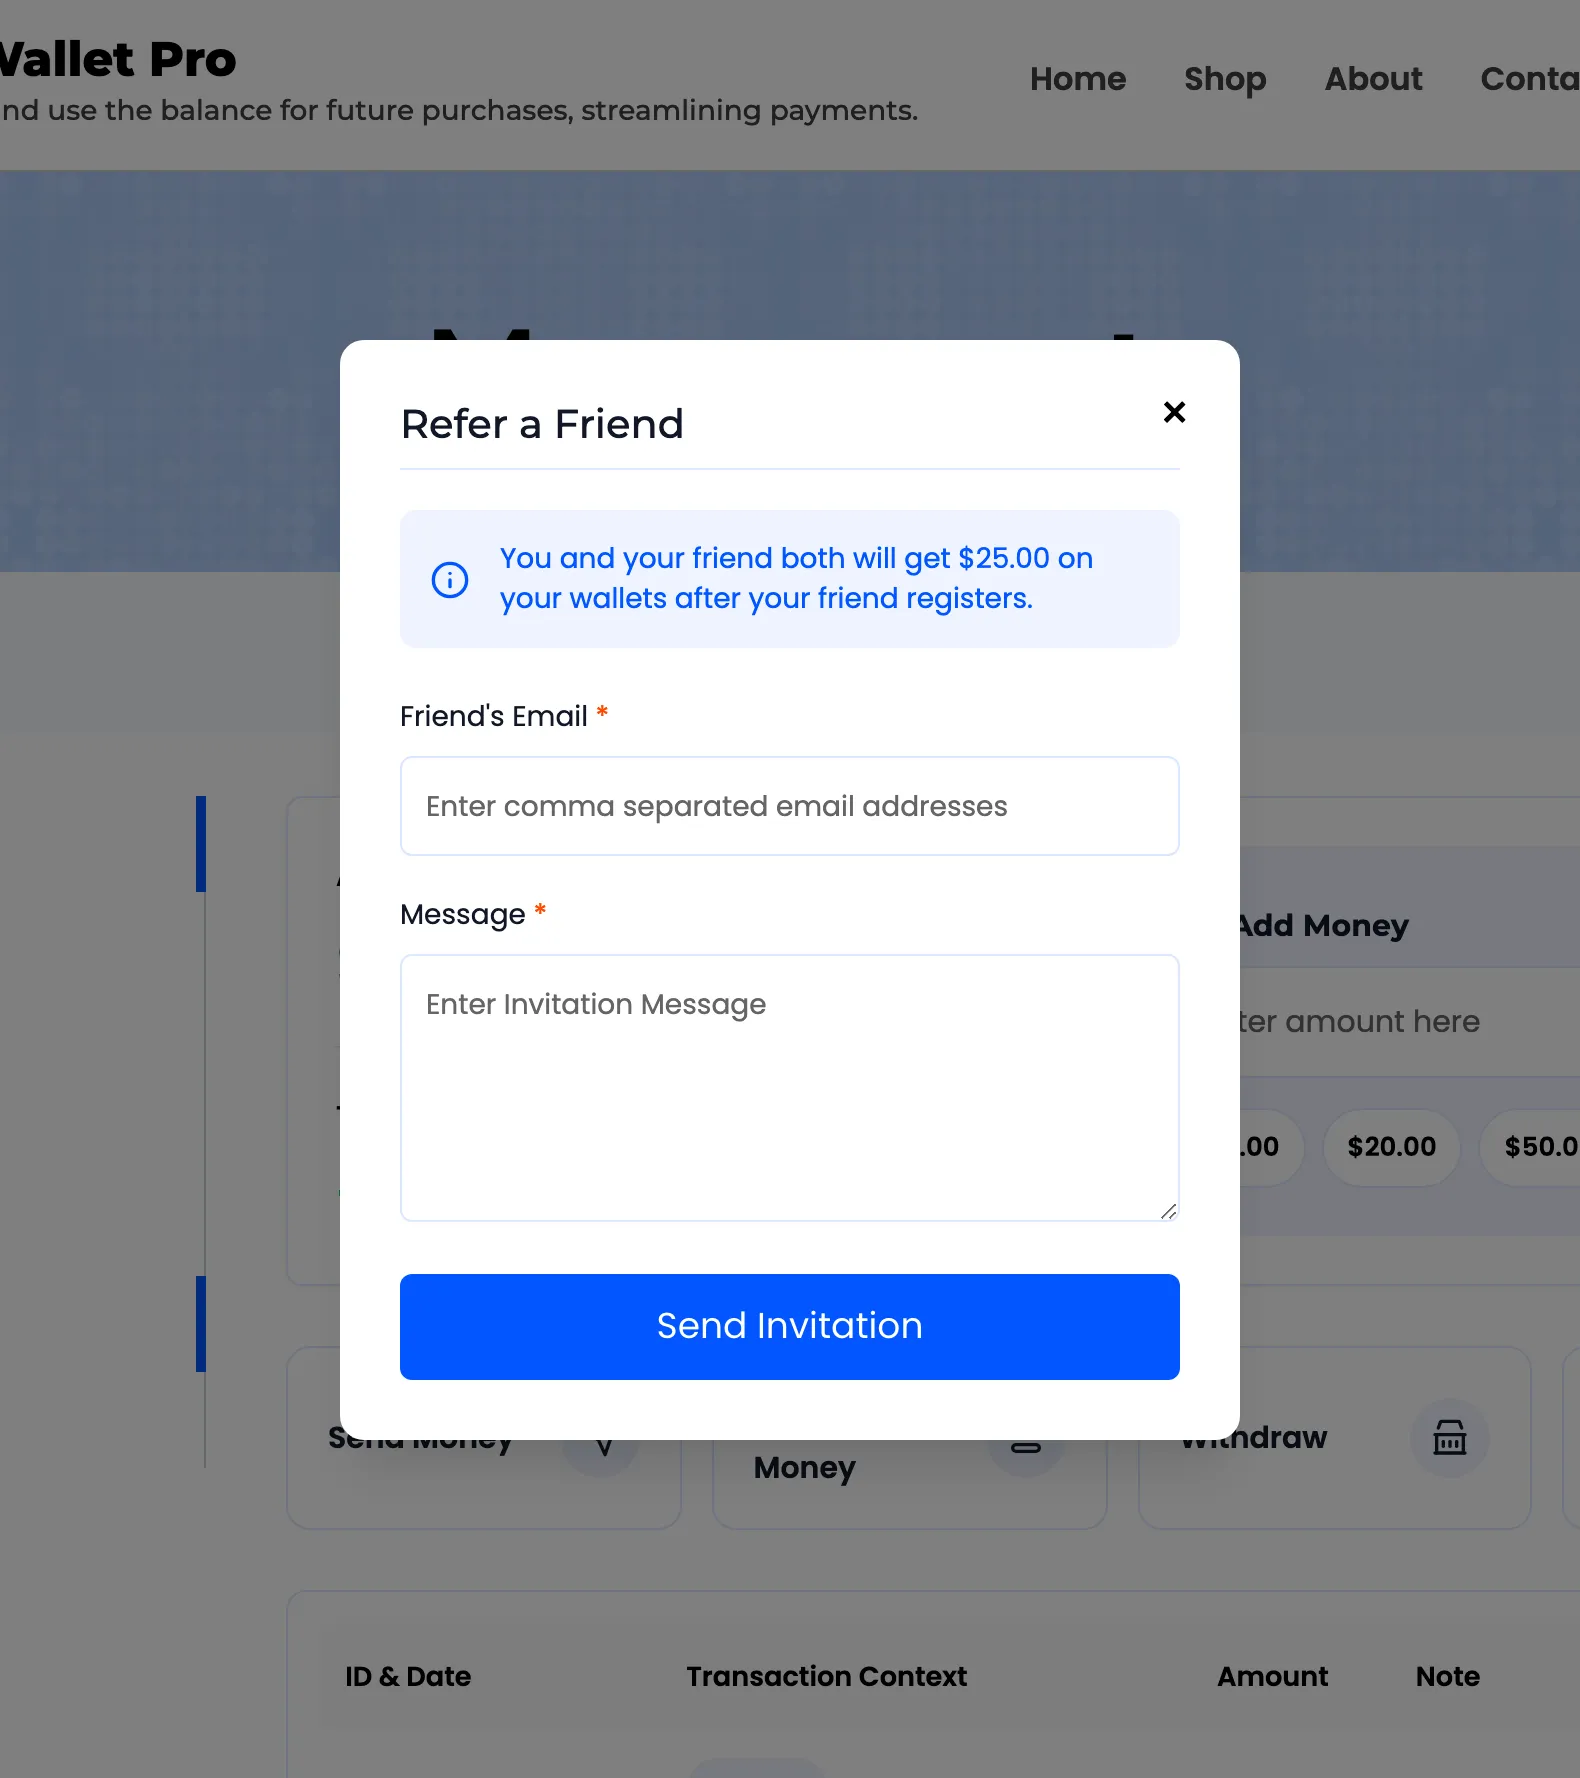
Each popup states the limits that apply to it, so a customer knows before they submit rather than after.
Incoming money requests
Section titled “Incoming money requests”A customer with a request waiting sees a Pending Requests card above their transaction history. One card per request, with the requester, the amount and the note.
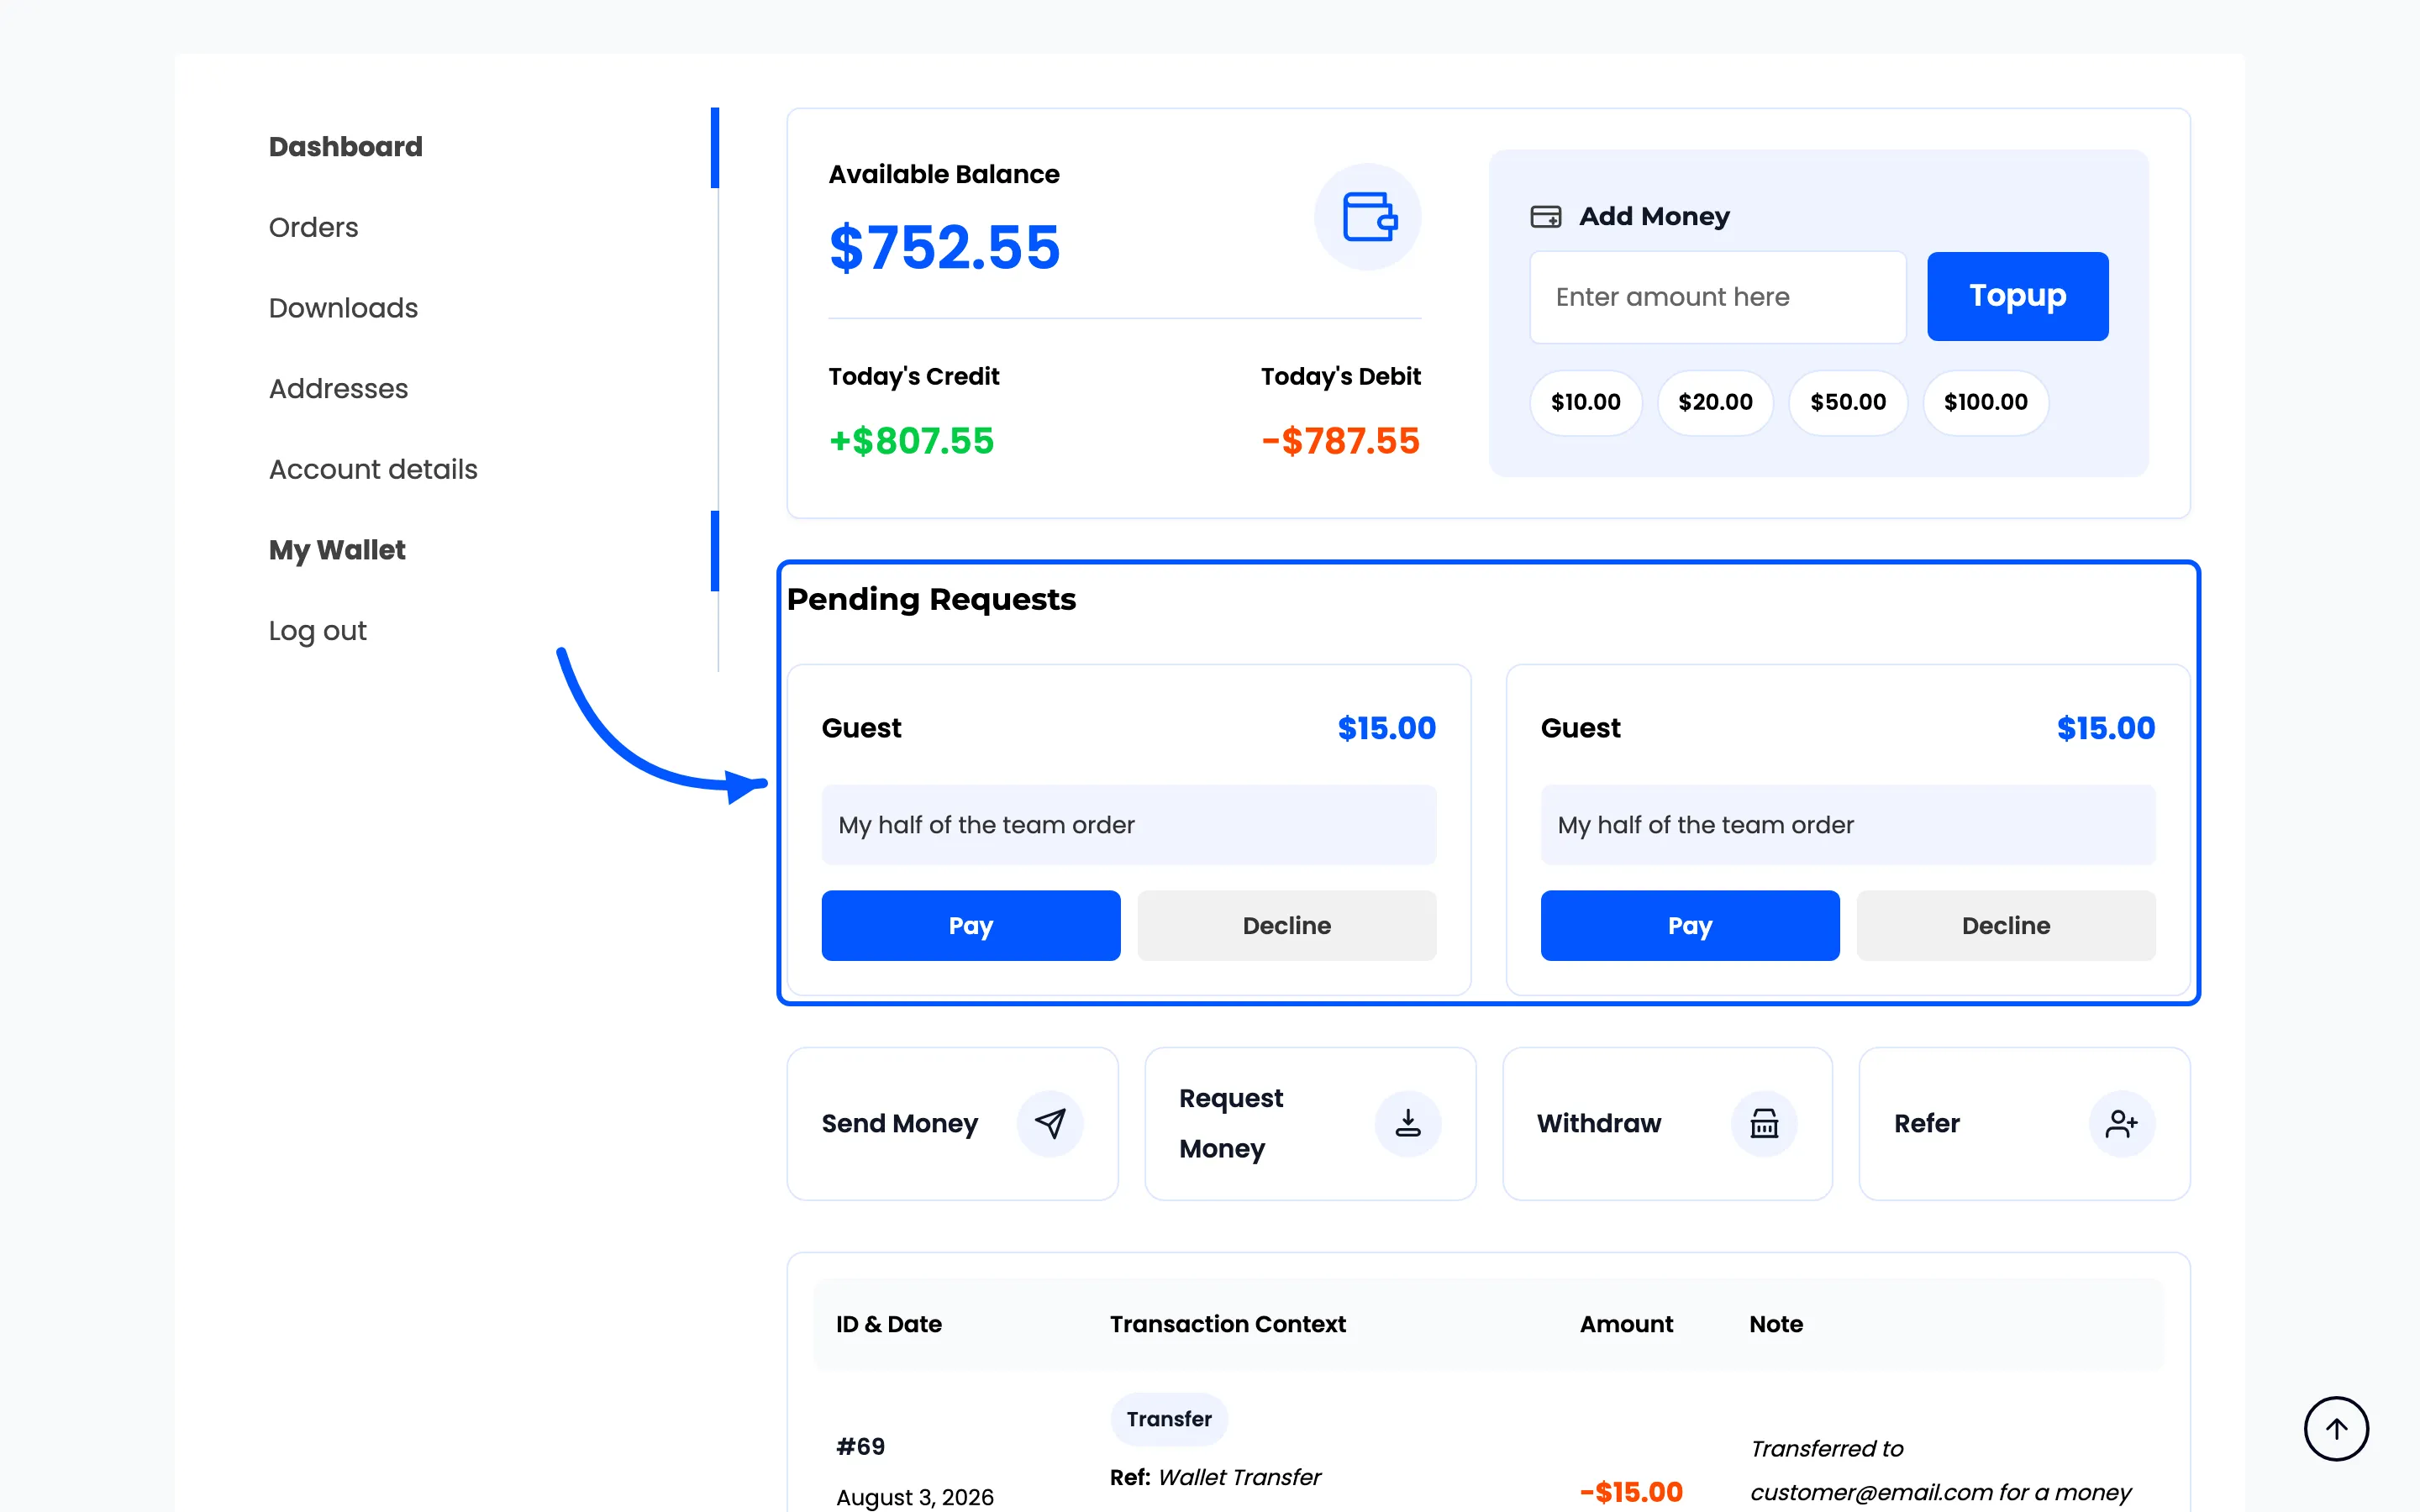
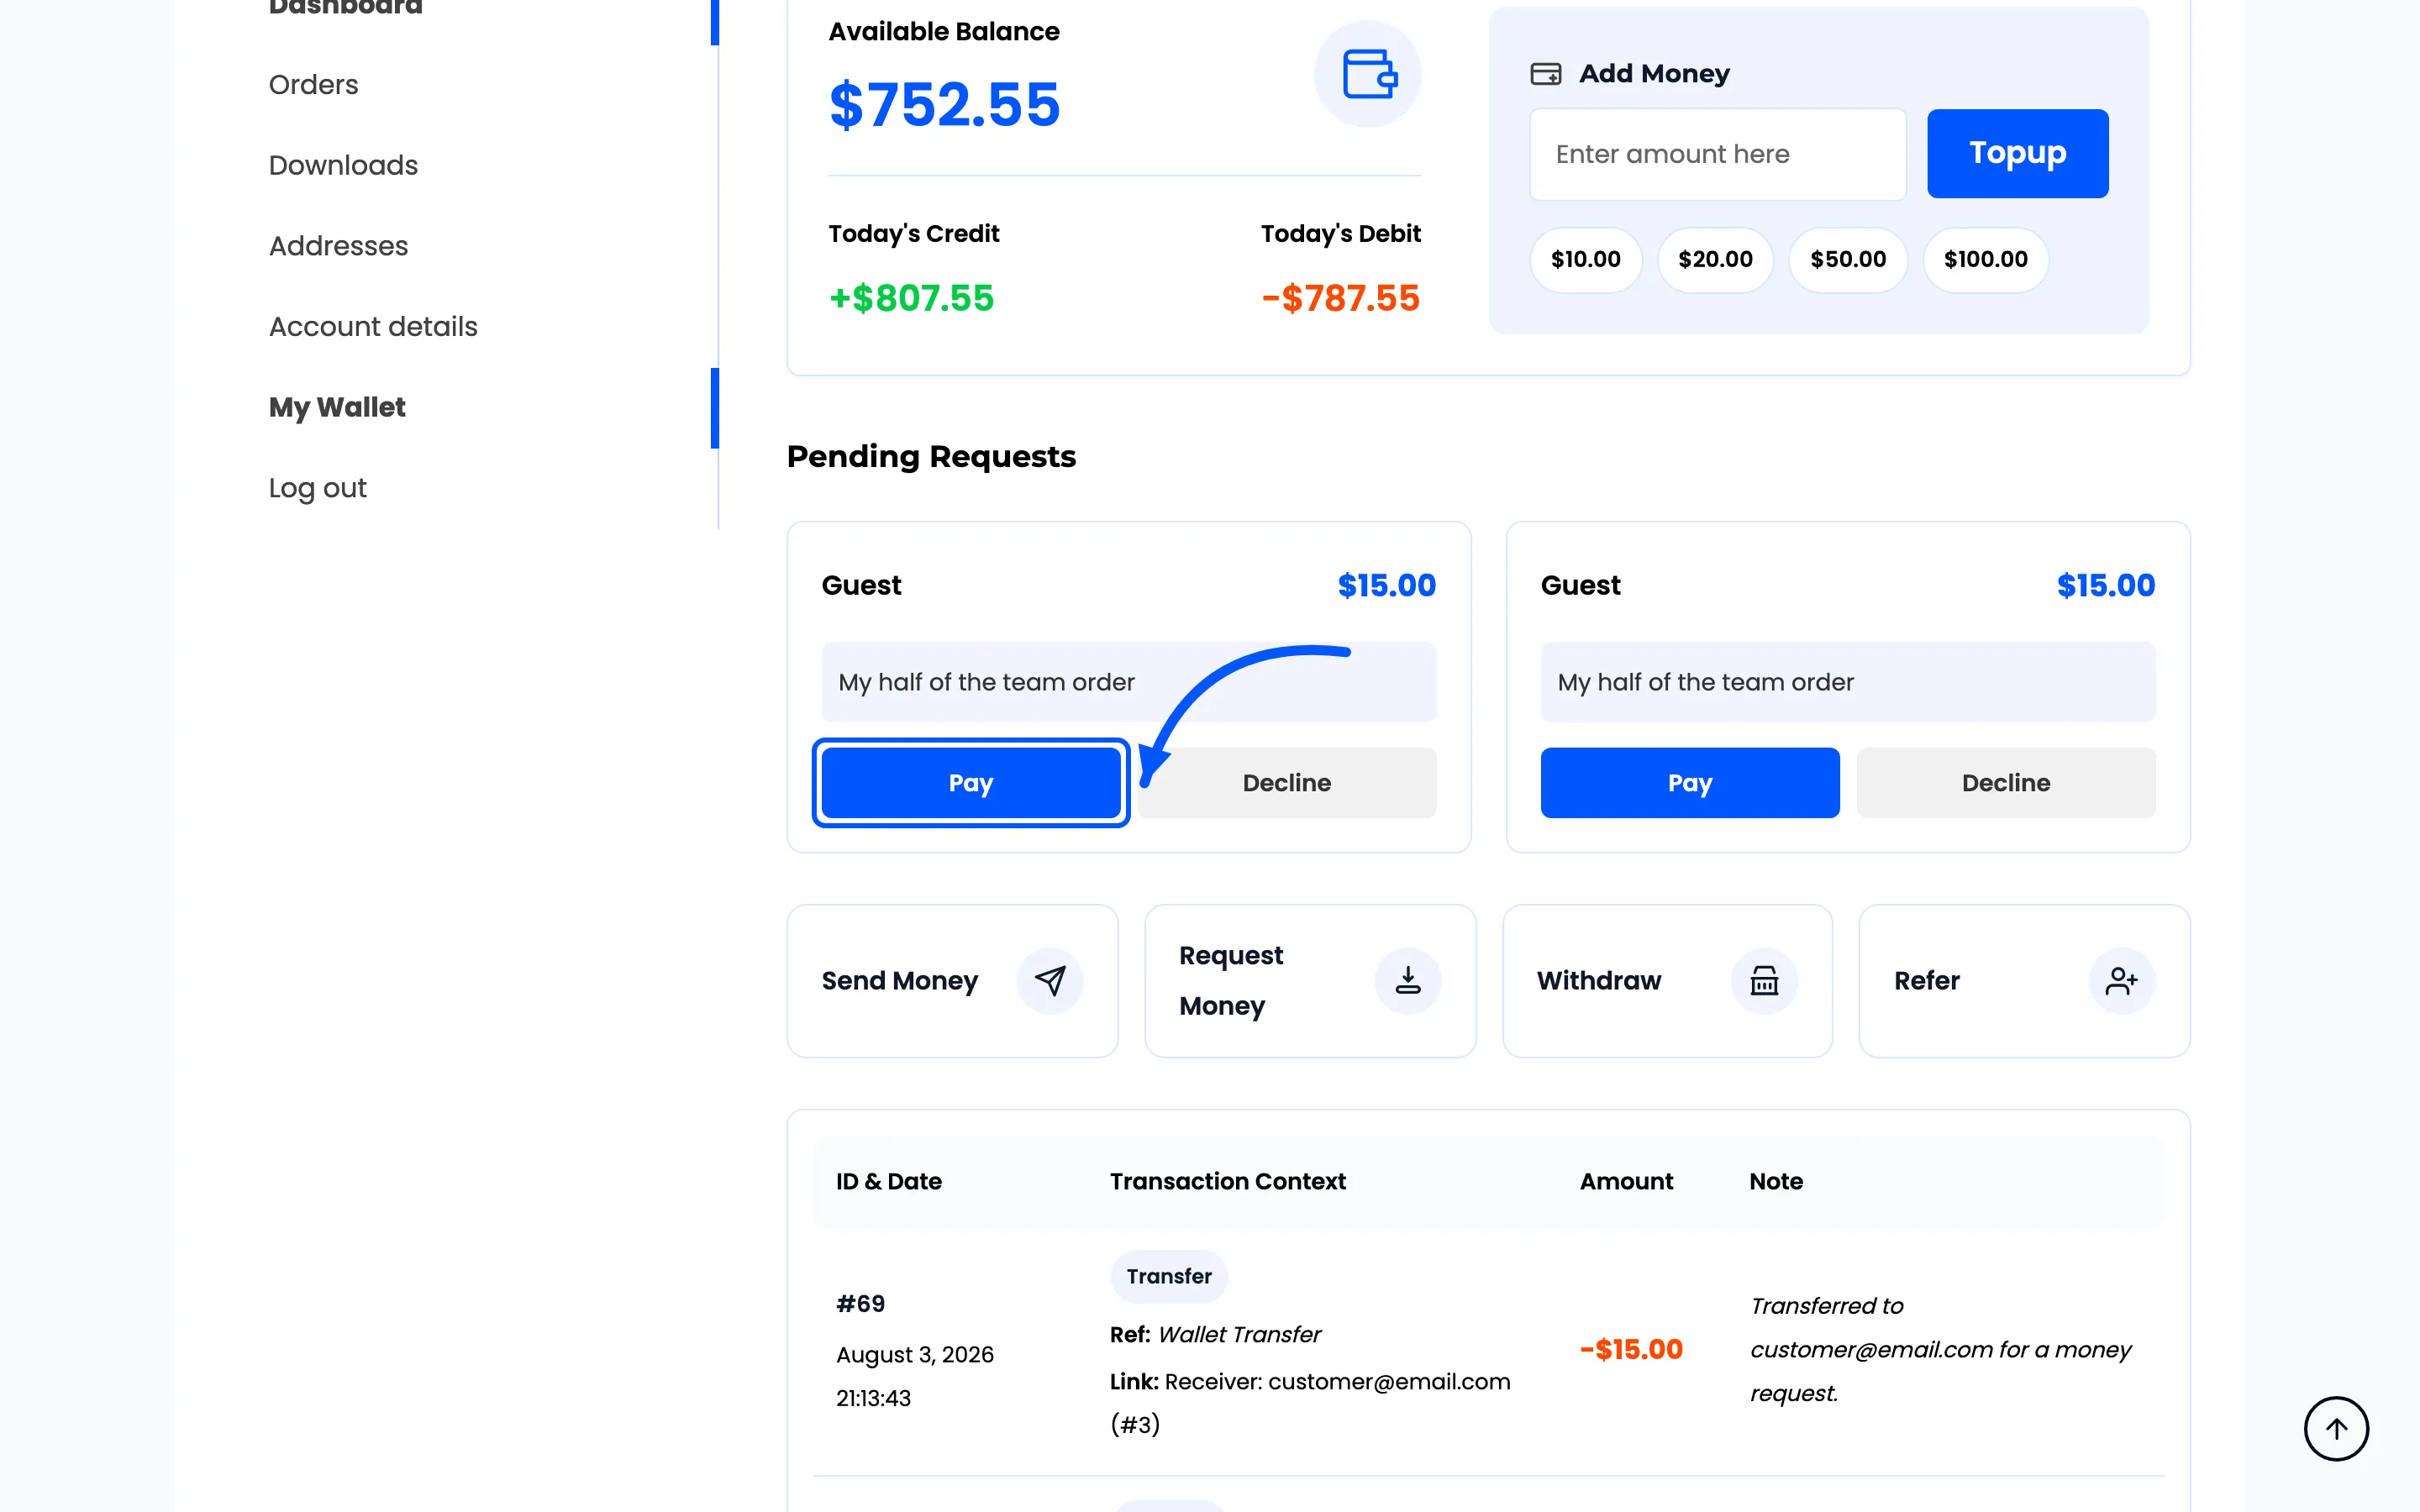
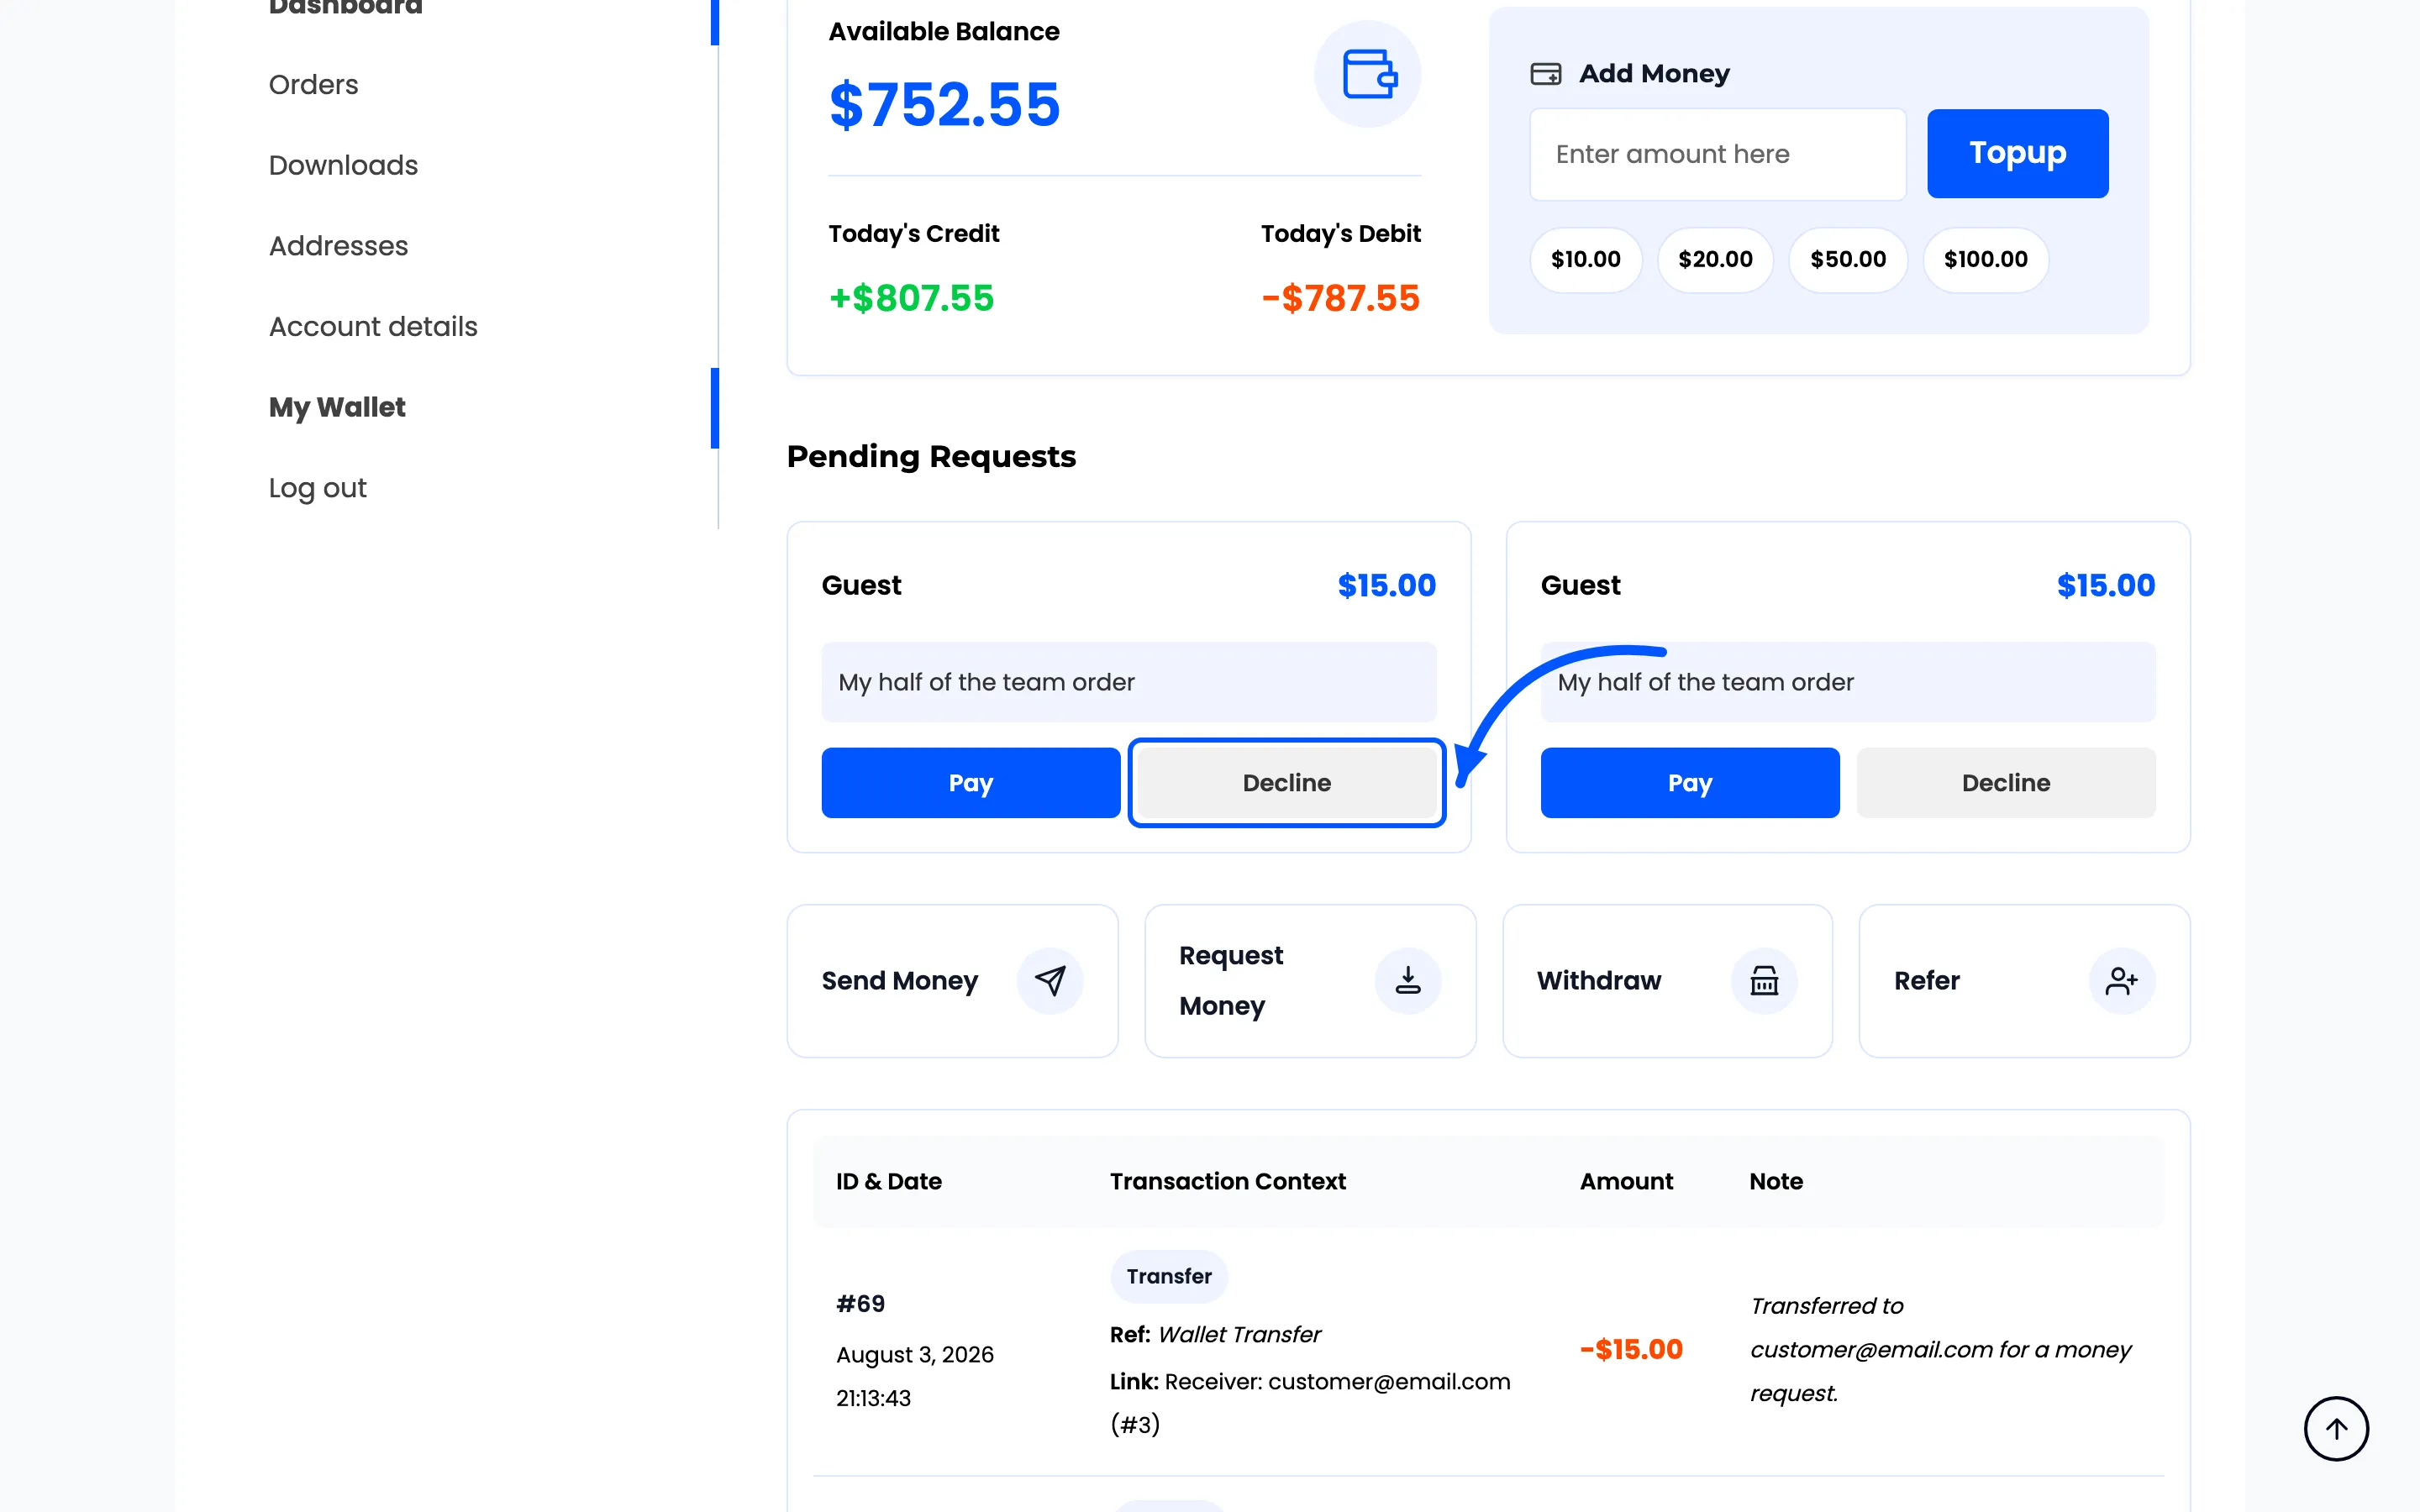
Both buttons ask the browser to confirm first. Pay then moves the money. Decline removes the request and emails the person who asked.
Cashback banners around the store
Section titled “Cashback banners around the store”With Enable Messages on, cashback is announced in six places.
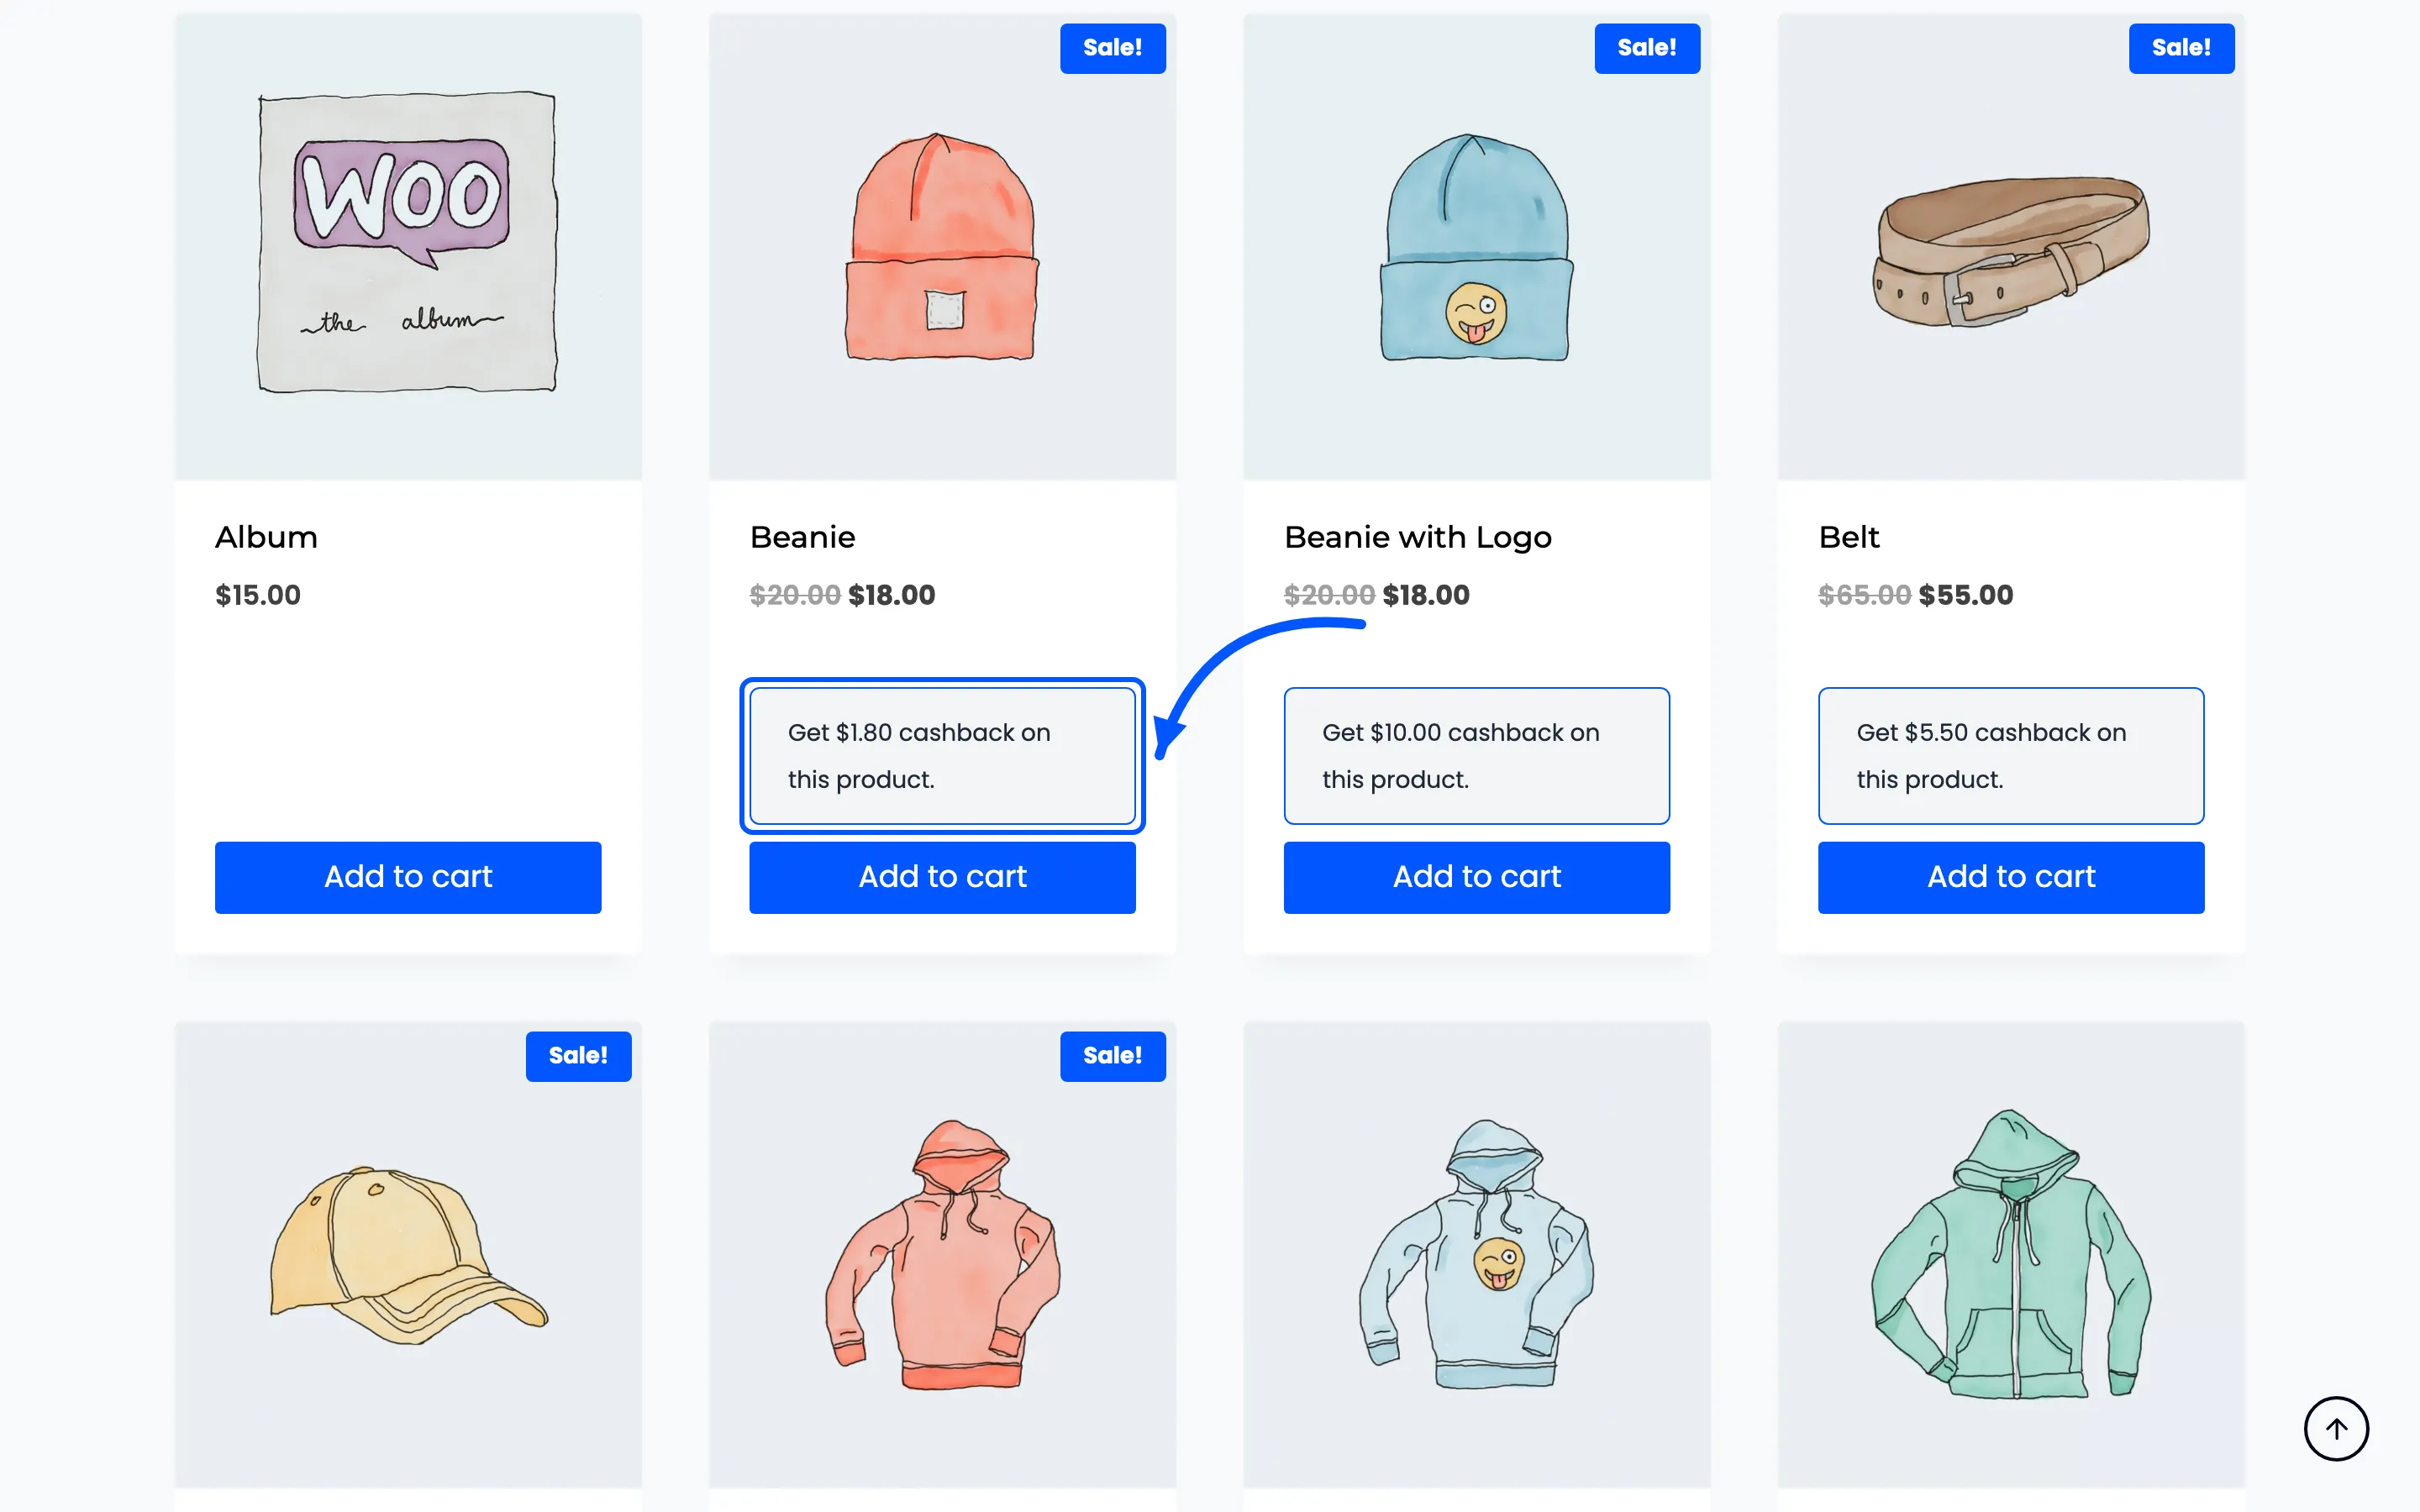
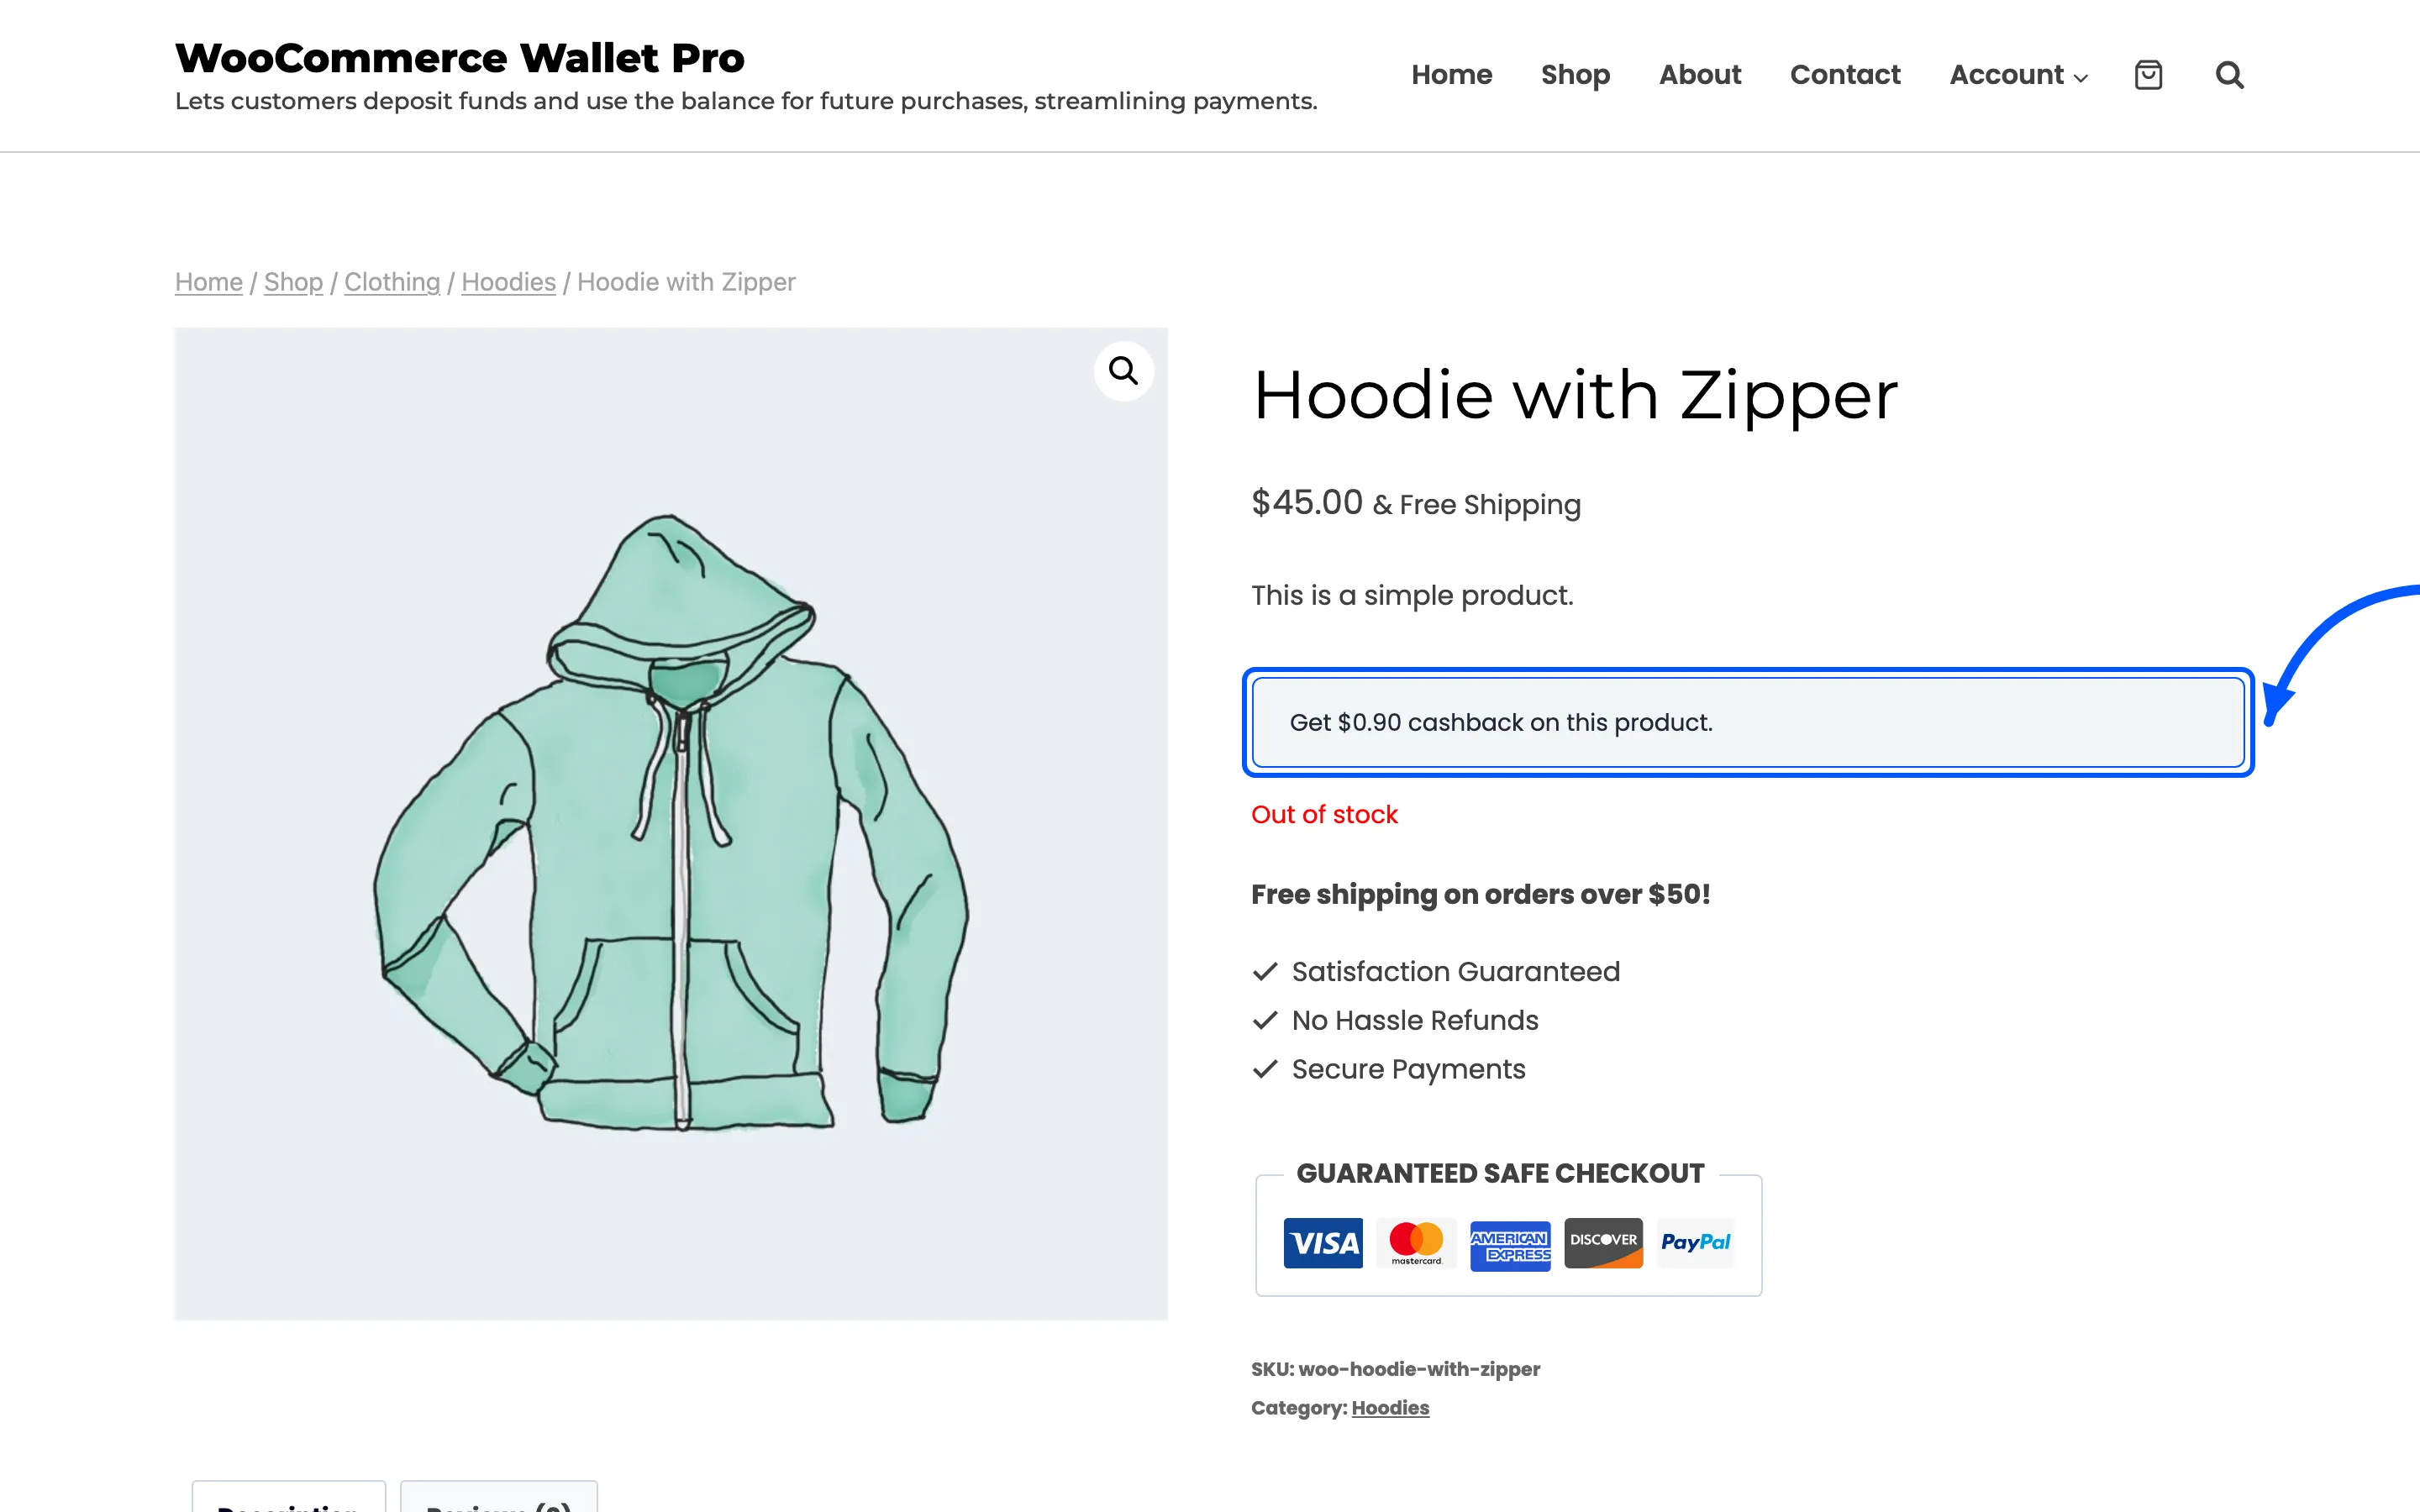
The wording, the colours and the font size are all yours under Configuration → Cashbacks.
At the checkout
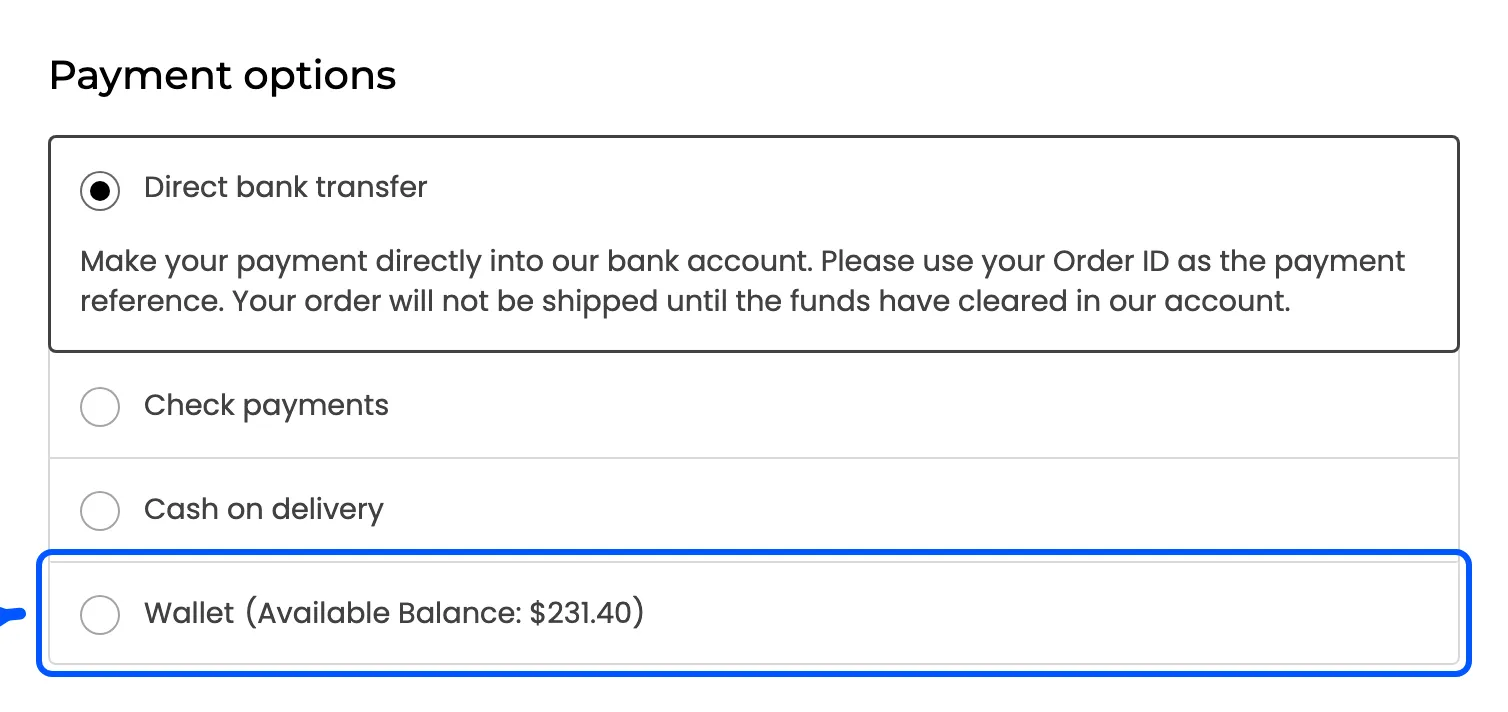
Section titled “At the checkout”The Wallet payment method carries the customer’s balance in its own name, so they do not have to go and look it up.
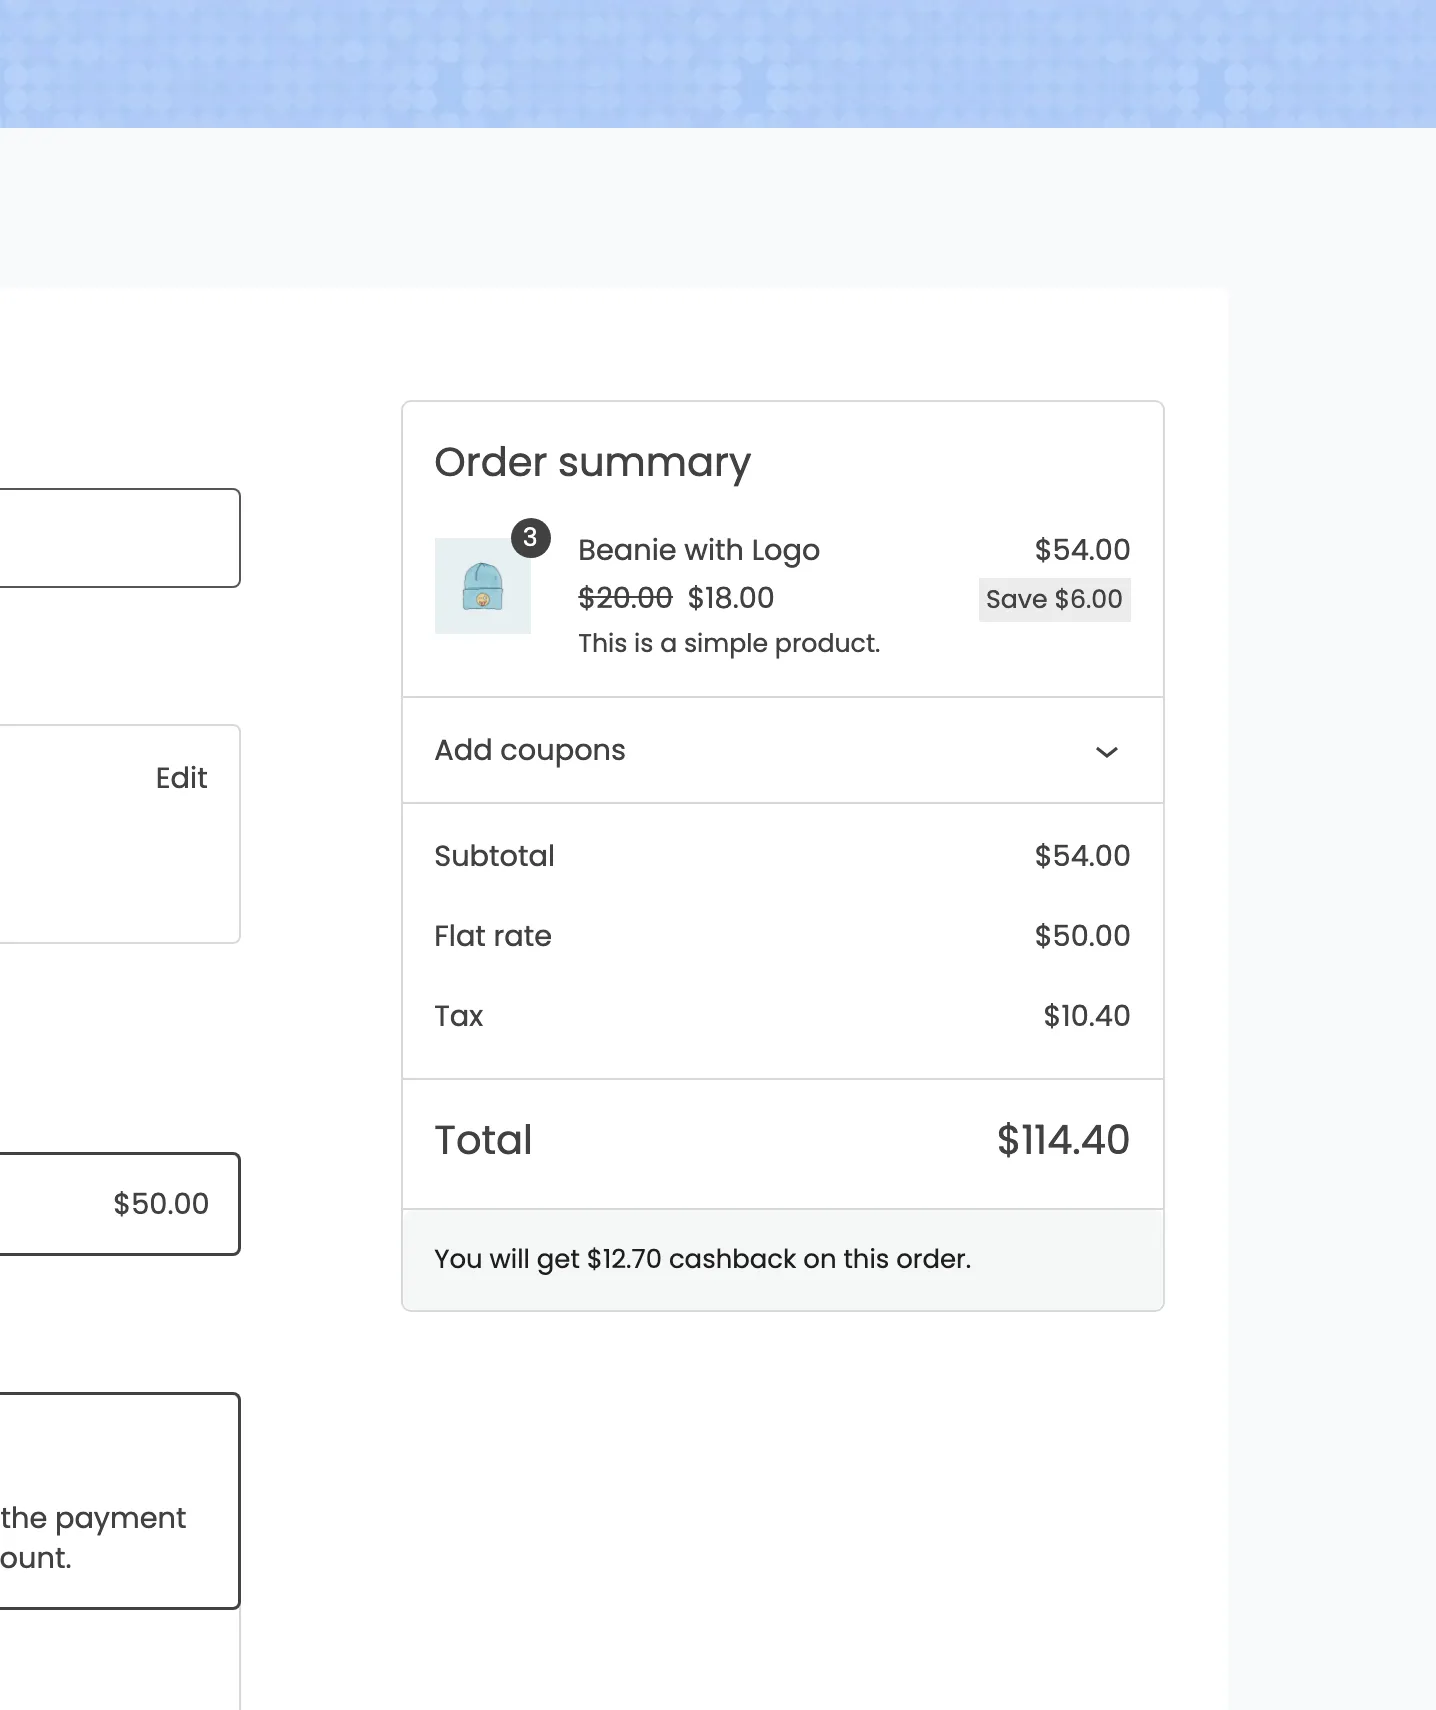
Above it, the order summary tells them what this order will earn.
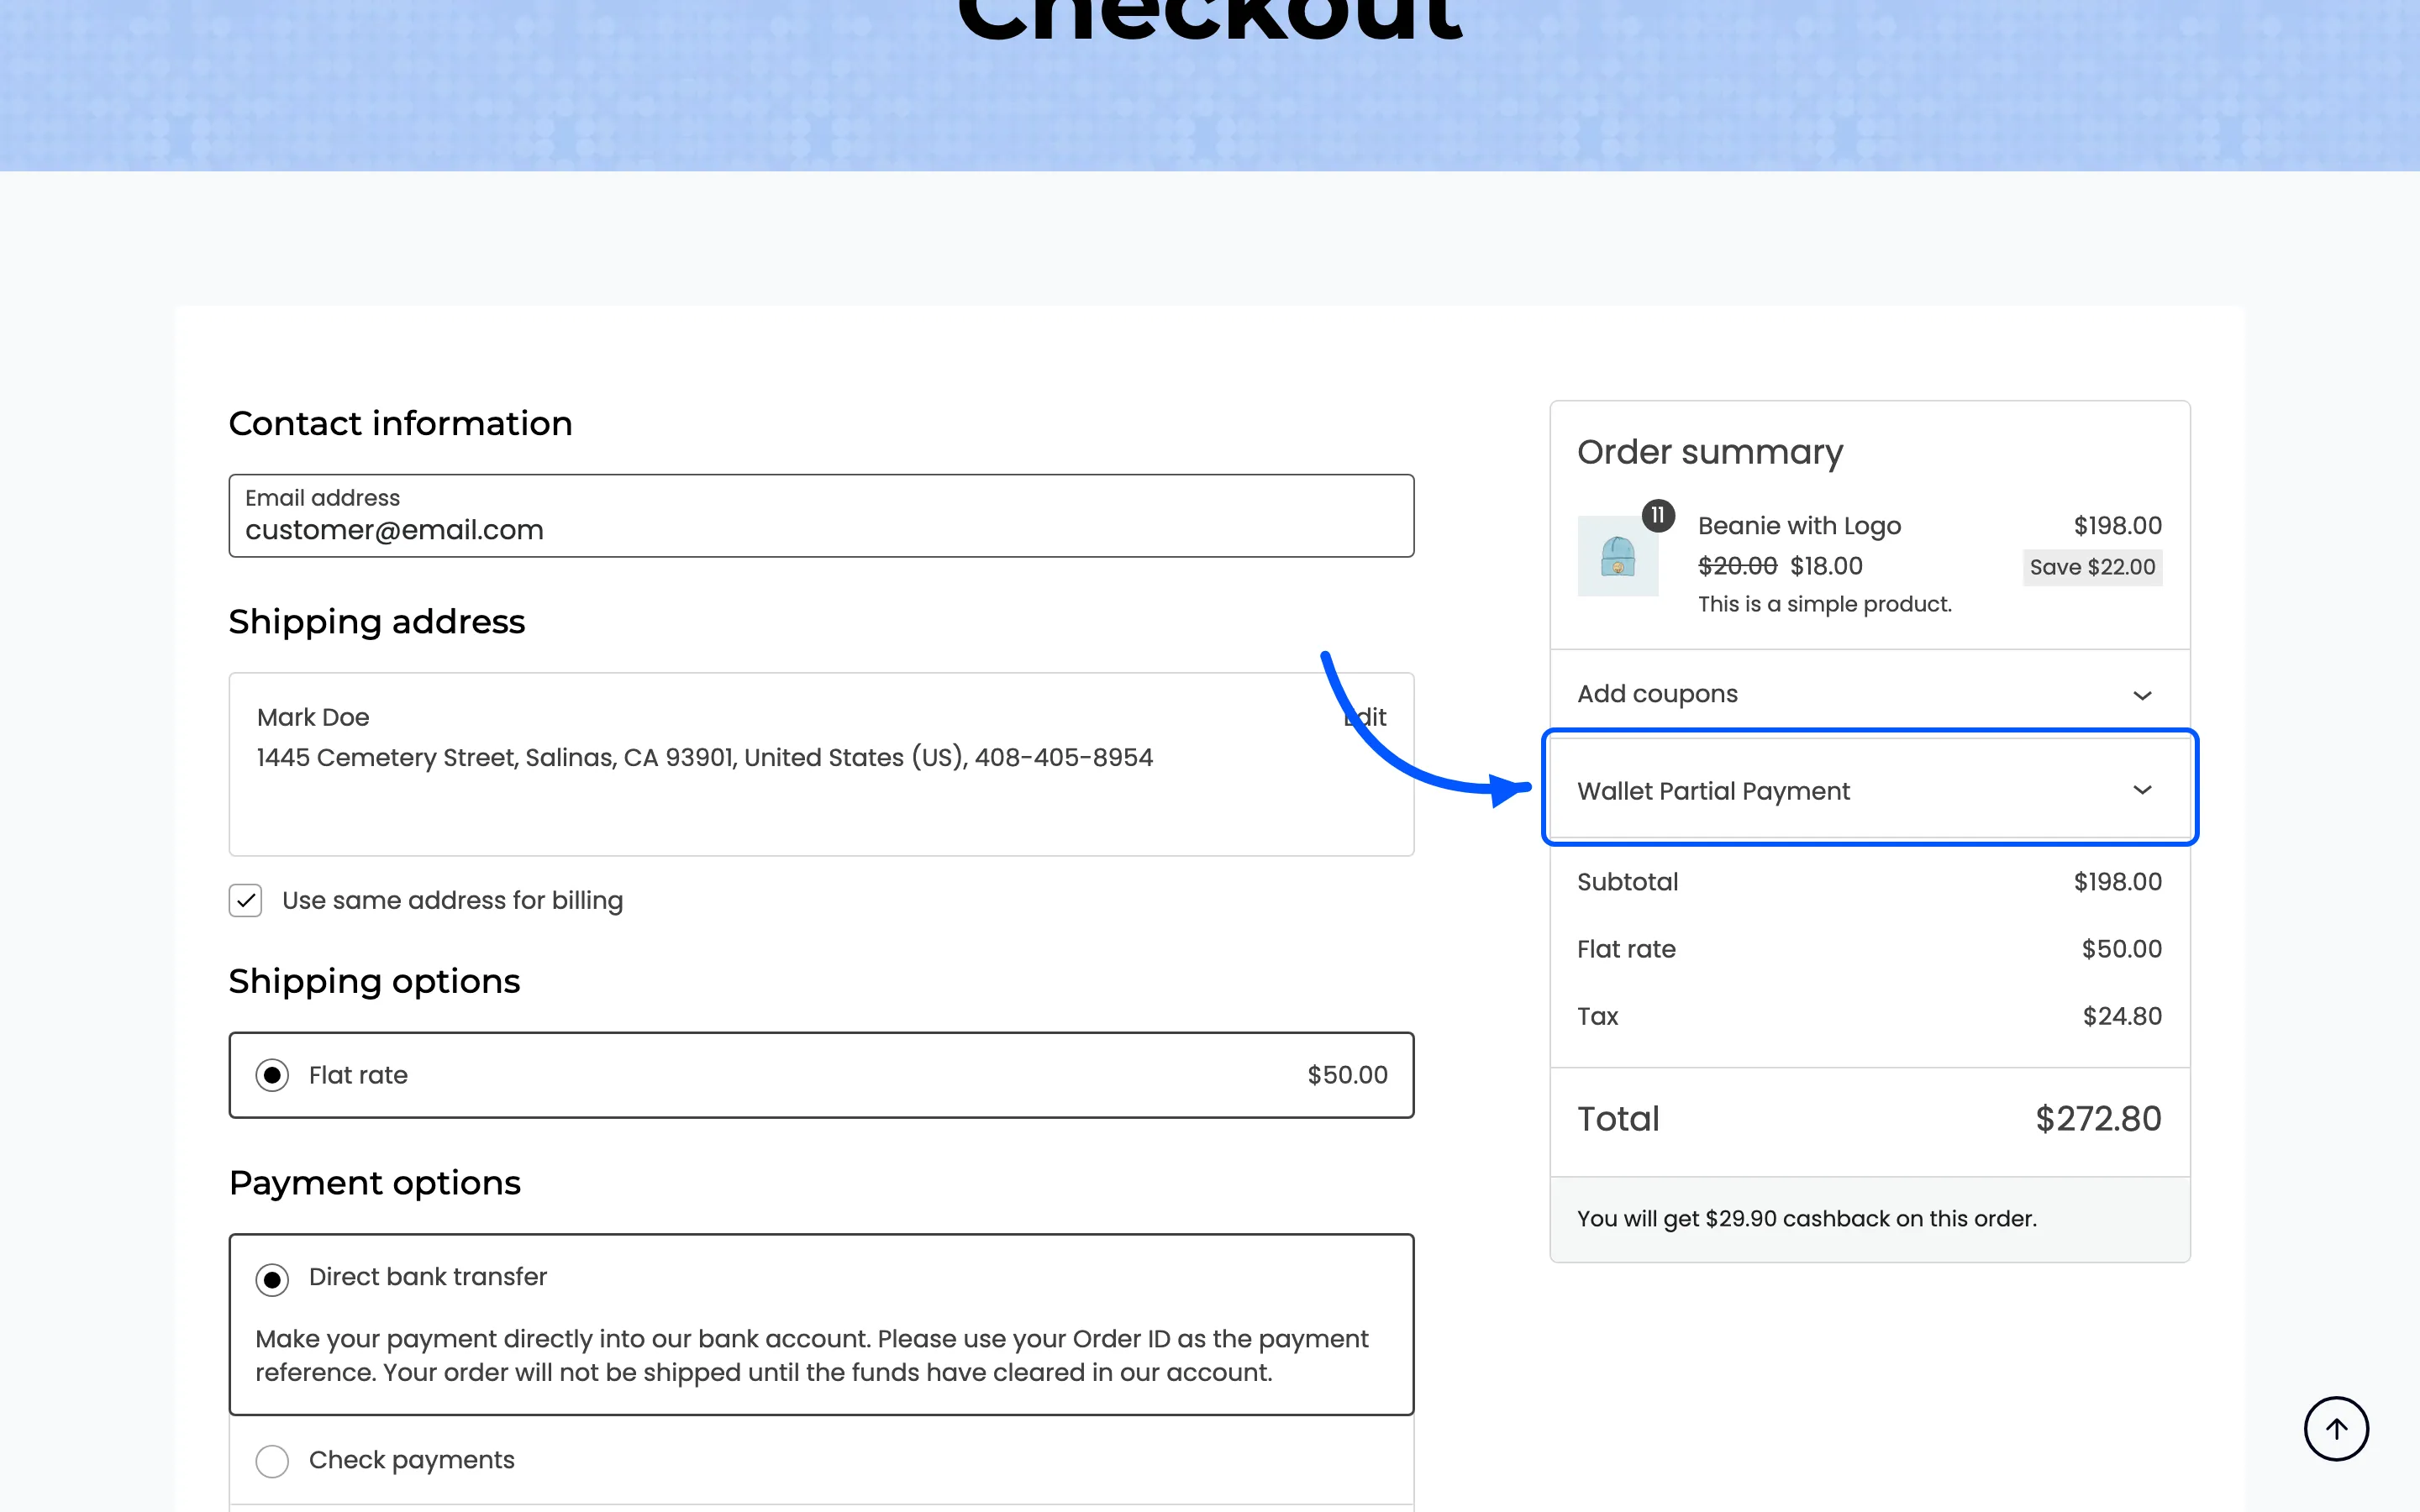
When the balance cannot cover the order, the method disappears and the Wallet Partial Payment panel takes over.
The emails
Section titled “The emails”A customer hears from the wallet on every movement. Credited, debited, adjusted by you, a money request, a declined request, a withdrawal status change, an expiry warning and an OTP code.
All of them are yours to reword under Configuration → Emails.