

How to Capture Guest Emails at Checkout
Most shoppers check out as guests. Without their email, an abandoned cart cannot be reminded. Guest Email Capture saves the address the moment it is typed, before any order exists.
Step 1: Switch on Guest Email Capture
Section titled “Step 1: Switch on Guest Email Capture”Under Configuration → Recovery, tick Guest Email Capture. It is on by default.
It works on both checkouts. On the classic checkout the email is saved when the shopper leaves the field. On the block checkout it is saved when the checkout updates the address.
Step 2: Write the checkout notice
Section titled “Step 2: Write the checkout notice”Checkout Notice is a line under the email field of the classic checkout. The default is “We save your cart so you can pick up where you left off.” WooCommerce shows a field’s description while the field is active, so it appears when the shopper clicks into the email field.
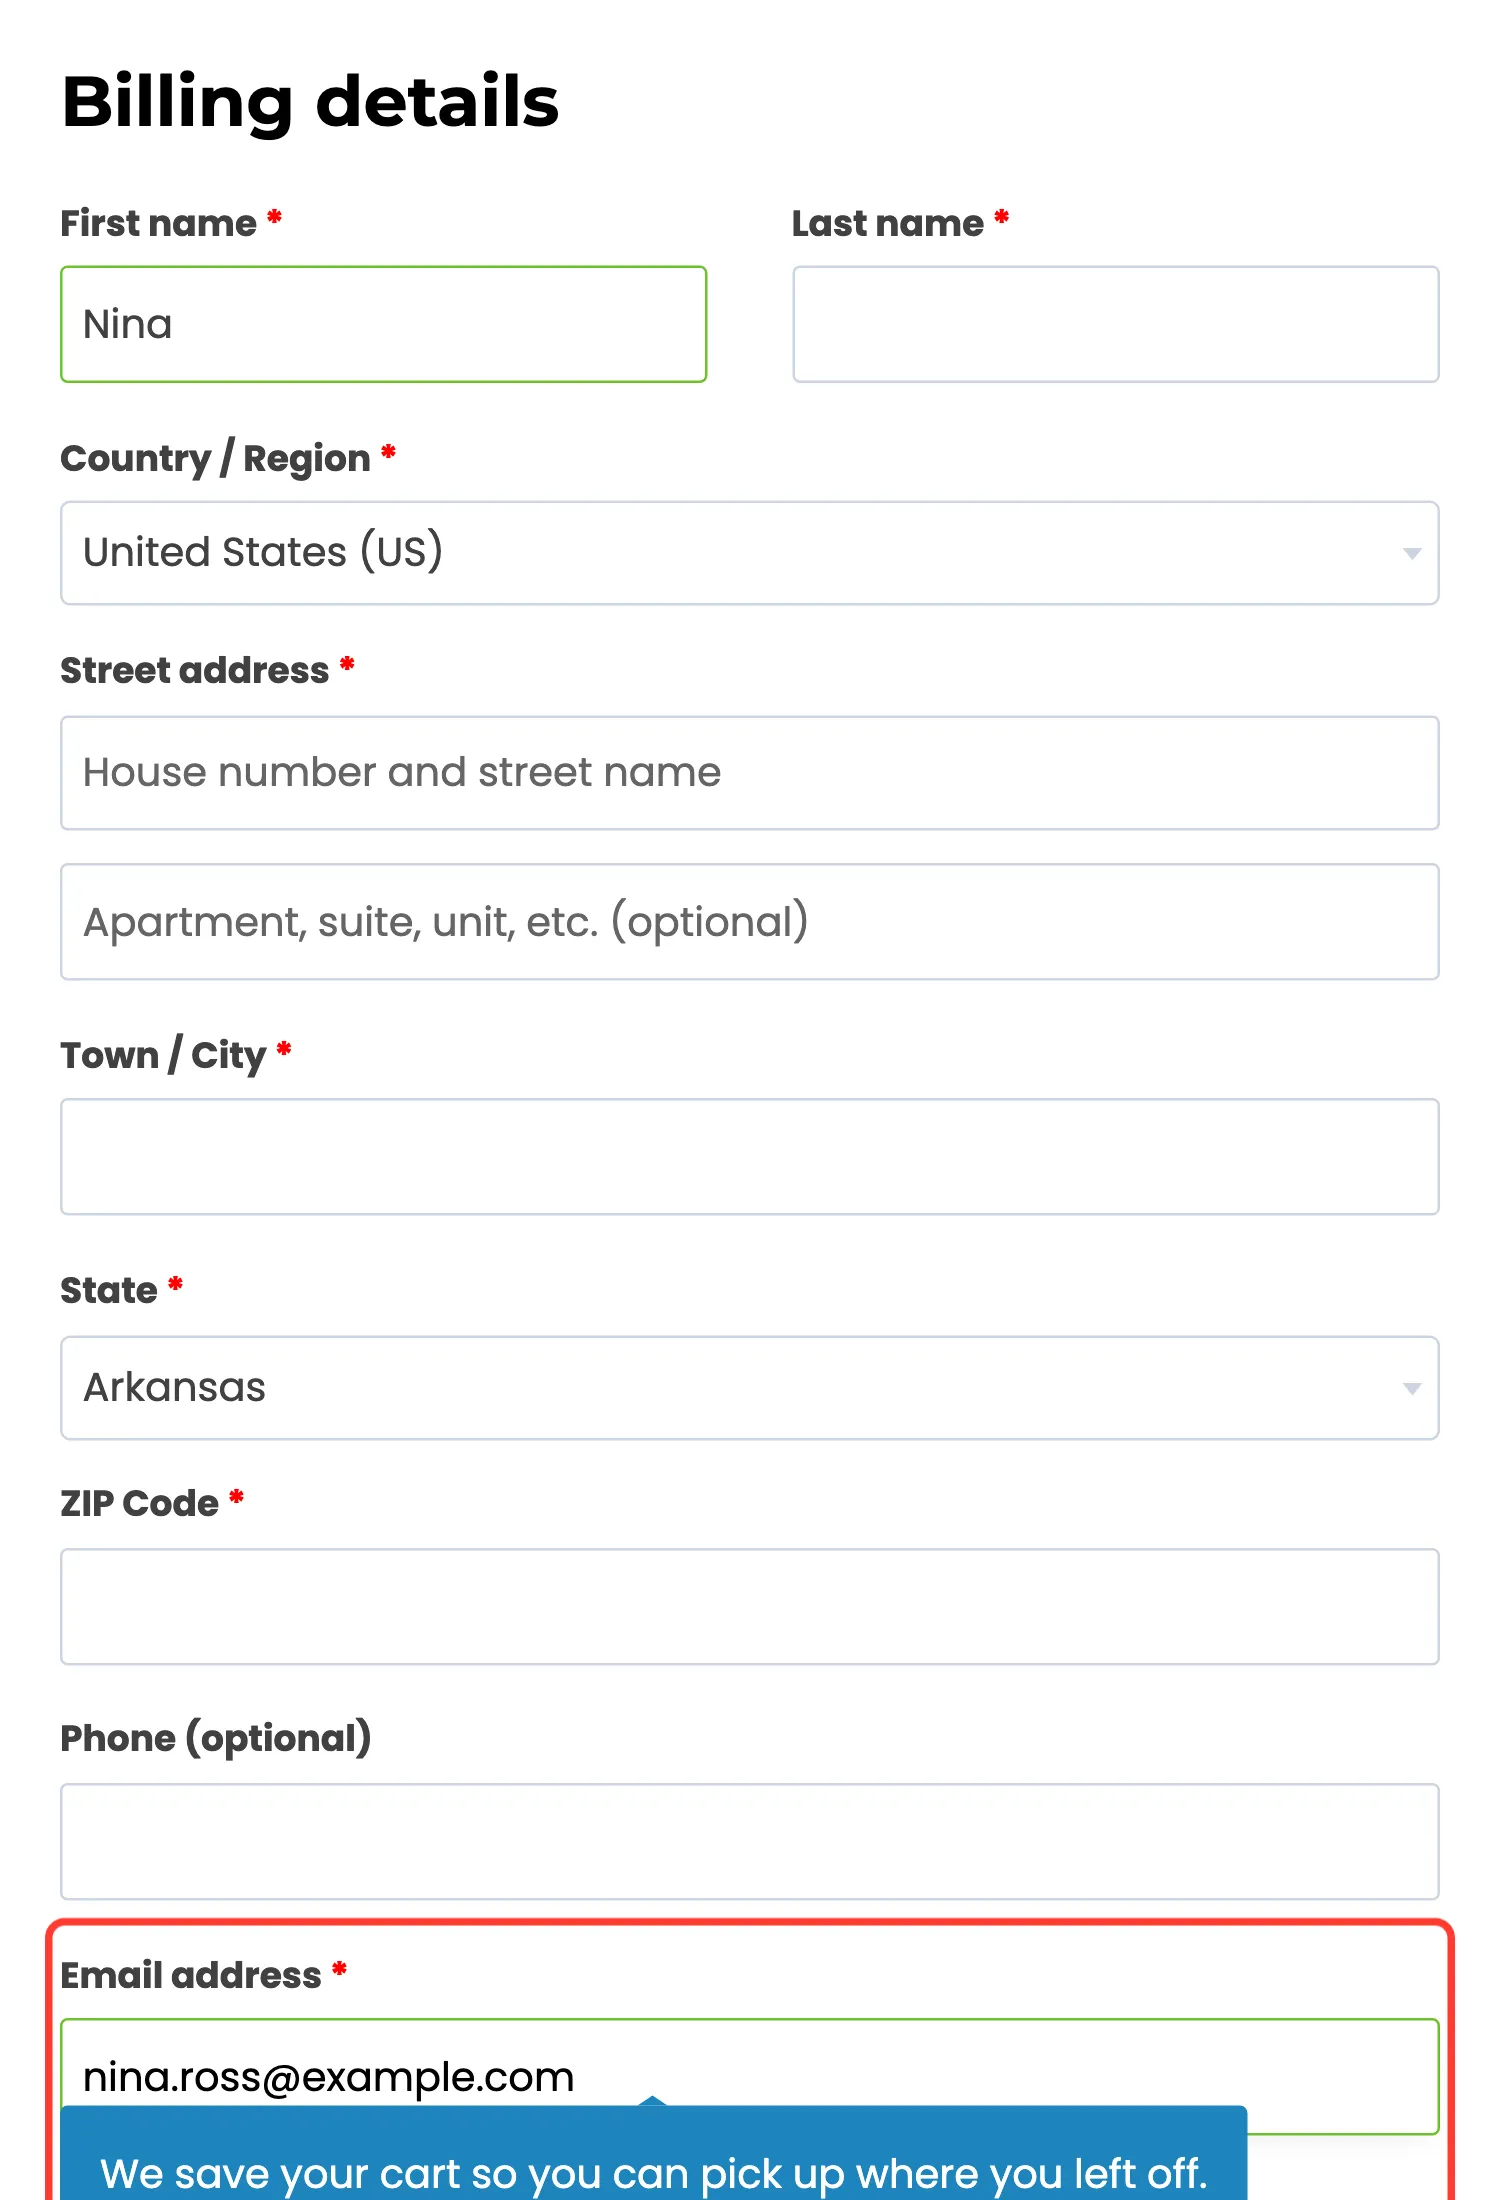
Empty the field to hide the line. The email is still saved.
Step 3: Save
Section titled “Step 3: Save”Click Save Changes.
Step 4: Check it on a cart
Section titled “Step 4: Check it on a cart”In a private window, add a product, go to checkout, type an email and a first name, and close the tab. On the Carts screen, the cart shows that email and name within a few seconds.
On the demo, Nina typed an email and left. The cart had Nina’s name on it, and the first reminder used it an hour after the cart was abandoned.
Good to know
Section titled “Good to know”- Logged in customers need no capture: their account email is used.
- The email is saved with the cart only. Nothing is added to a mailing list.
- Shoppers can stop the reminders from any of them. See How to Let Shoppers Stop Reminders.
- Say in your privacy policy that the checkout email is kept for cart reminders. The plugin’s suggested policy text already does.