

How to Turn On Double Opt-in
Double opt-in stops mistyped and fake addresses from collecting alerts. A guest’s alert only switches on once they click the link in their inbox.
Step 1: Turn on Double Opt-in
Section titled “Step 1: Turn on Double Opt-in”Open Configuration → Alert Form and tick Double Opt-in under Privacy & Spam Protection. Confirm Within (days) sets how long a guest has to confirm, 3 by default.
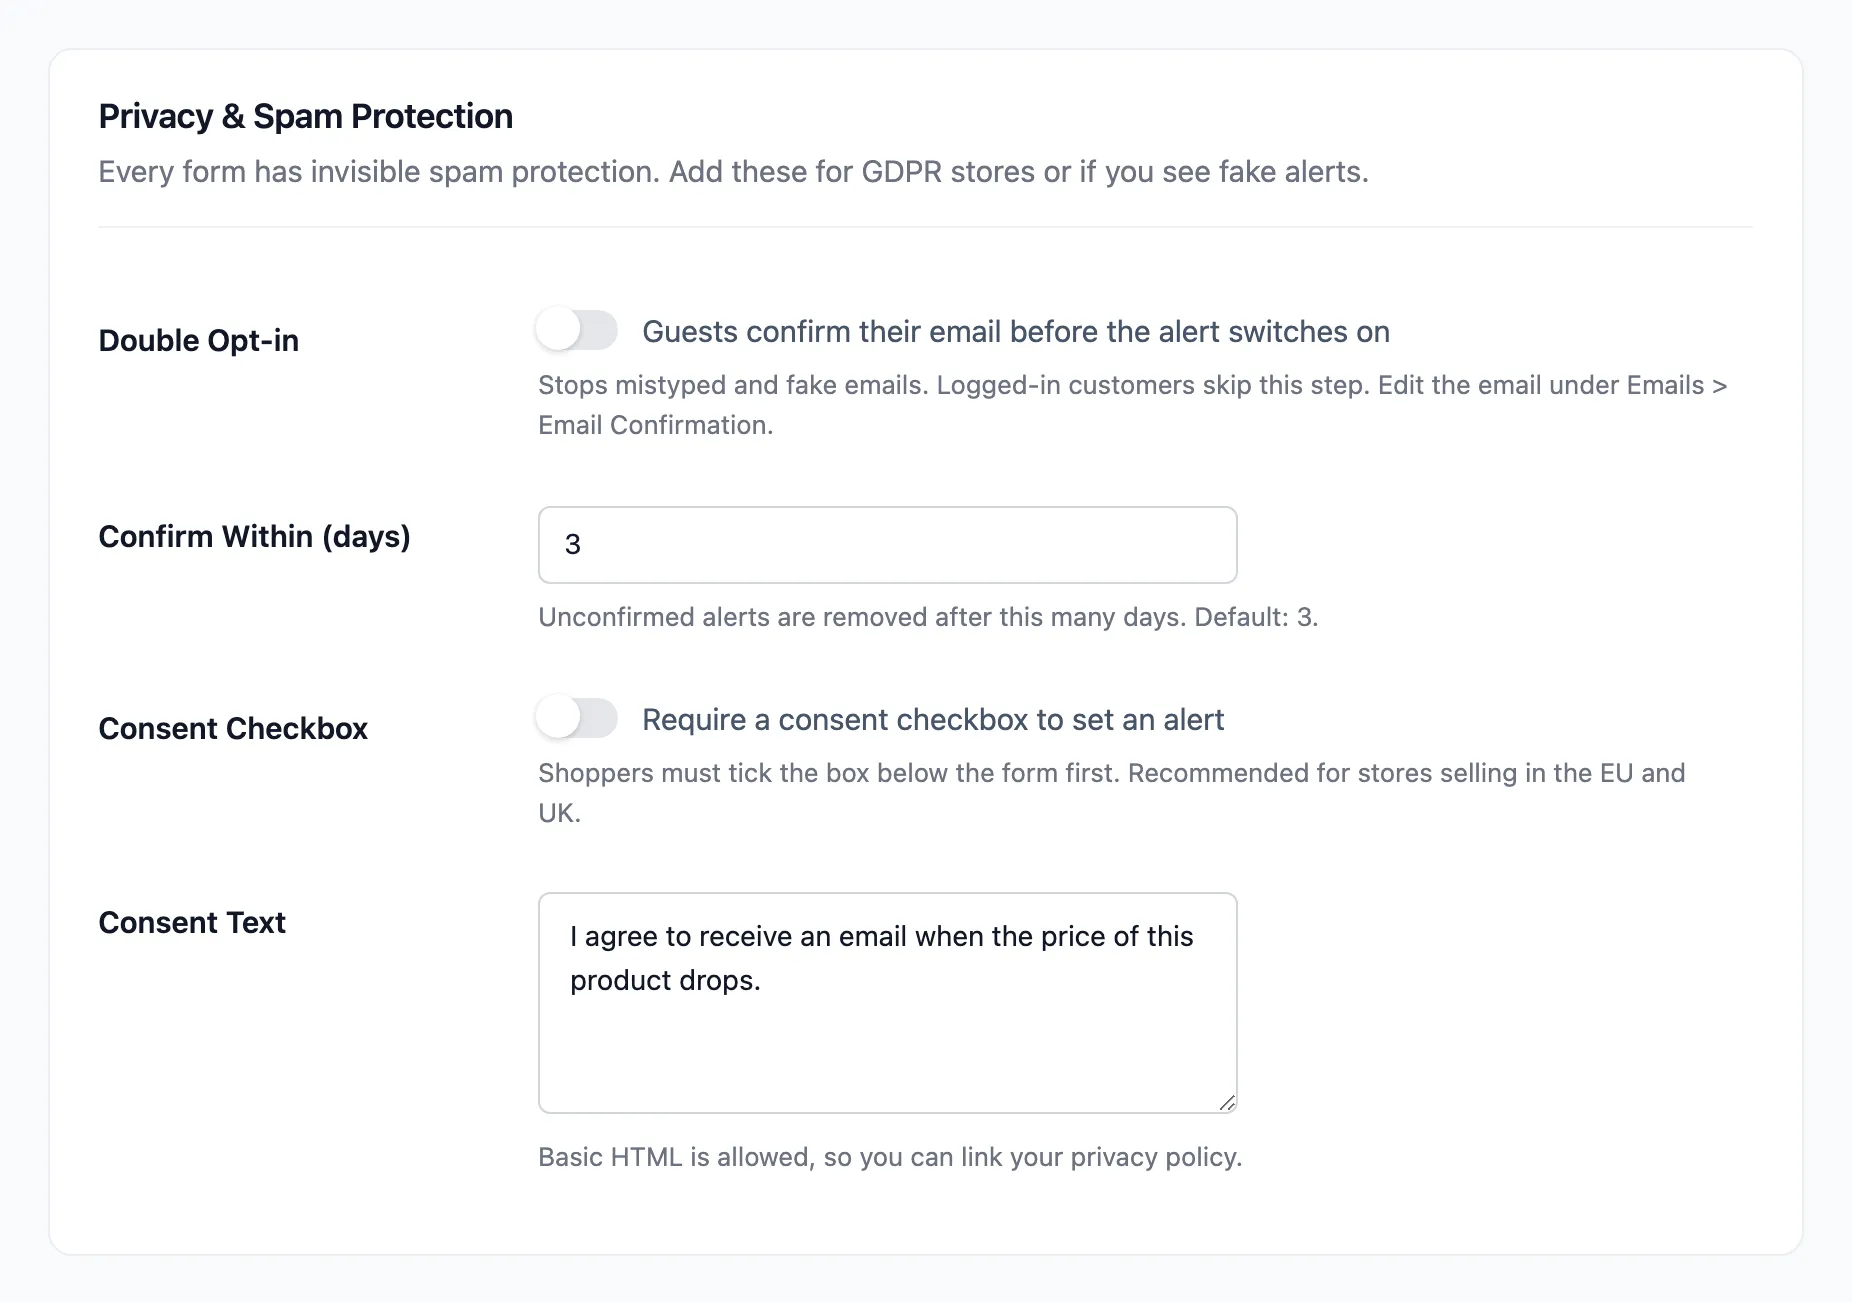
Logged-in customers skip the step. Their address is already known.
Step 2: Check the confirmation email
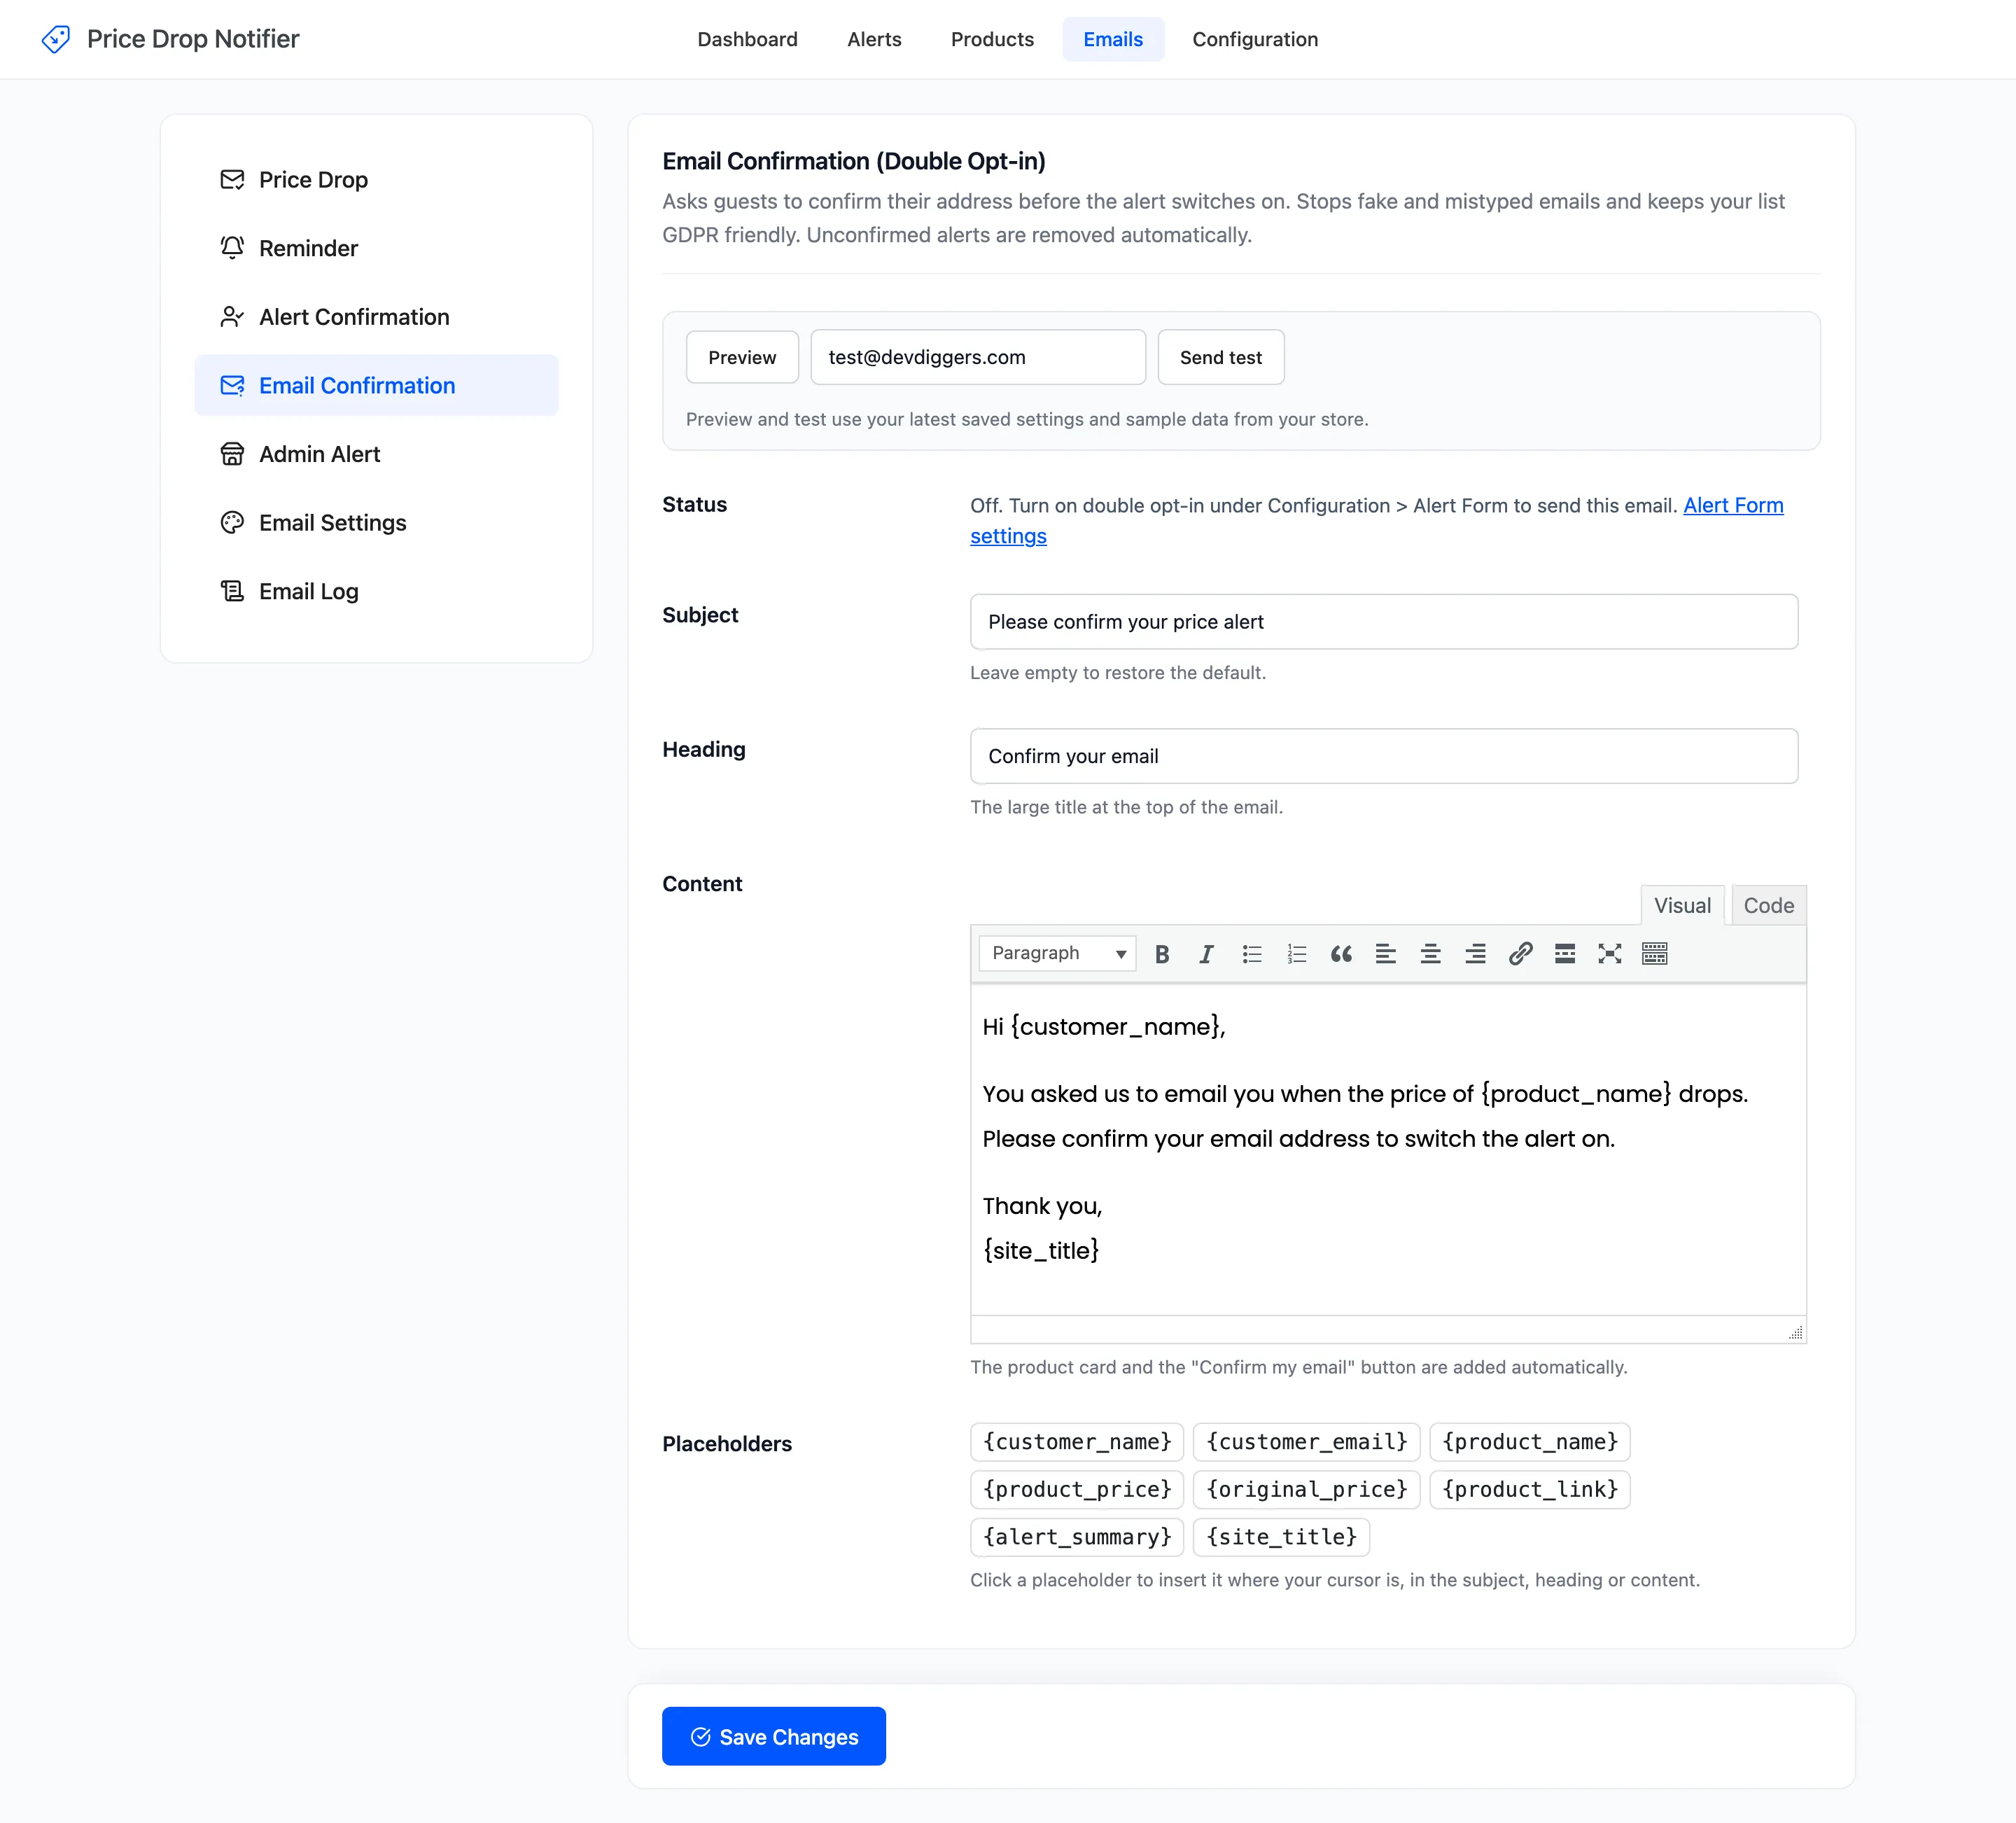
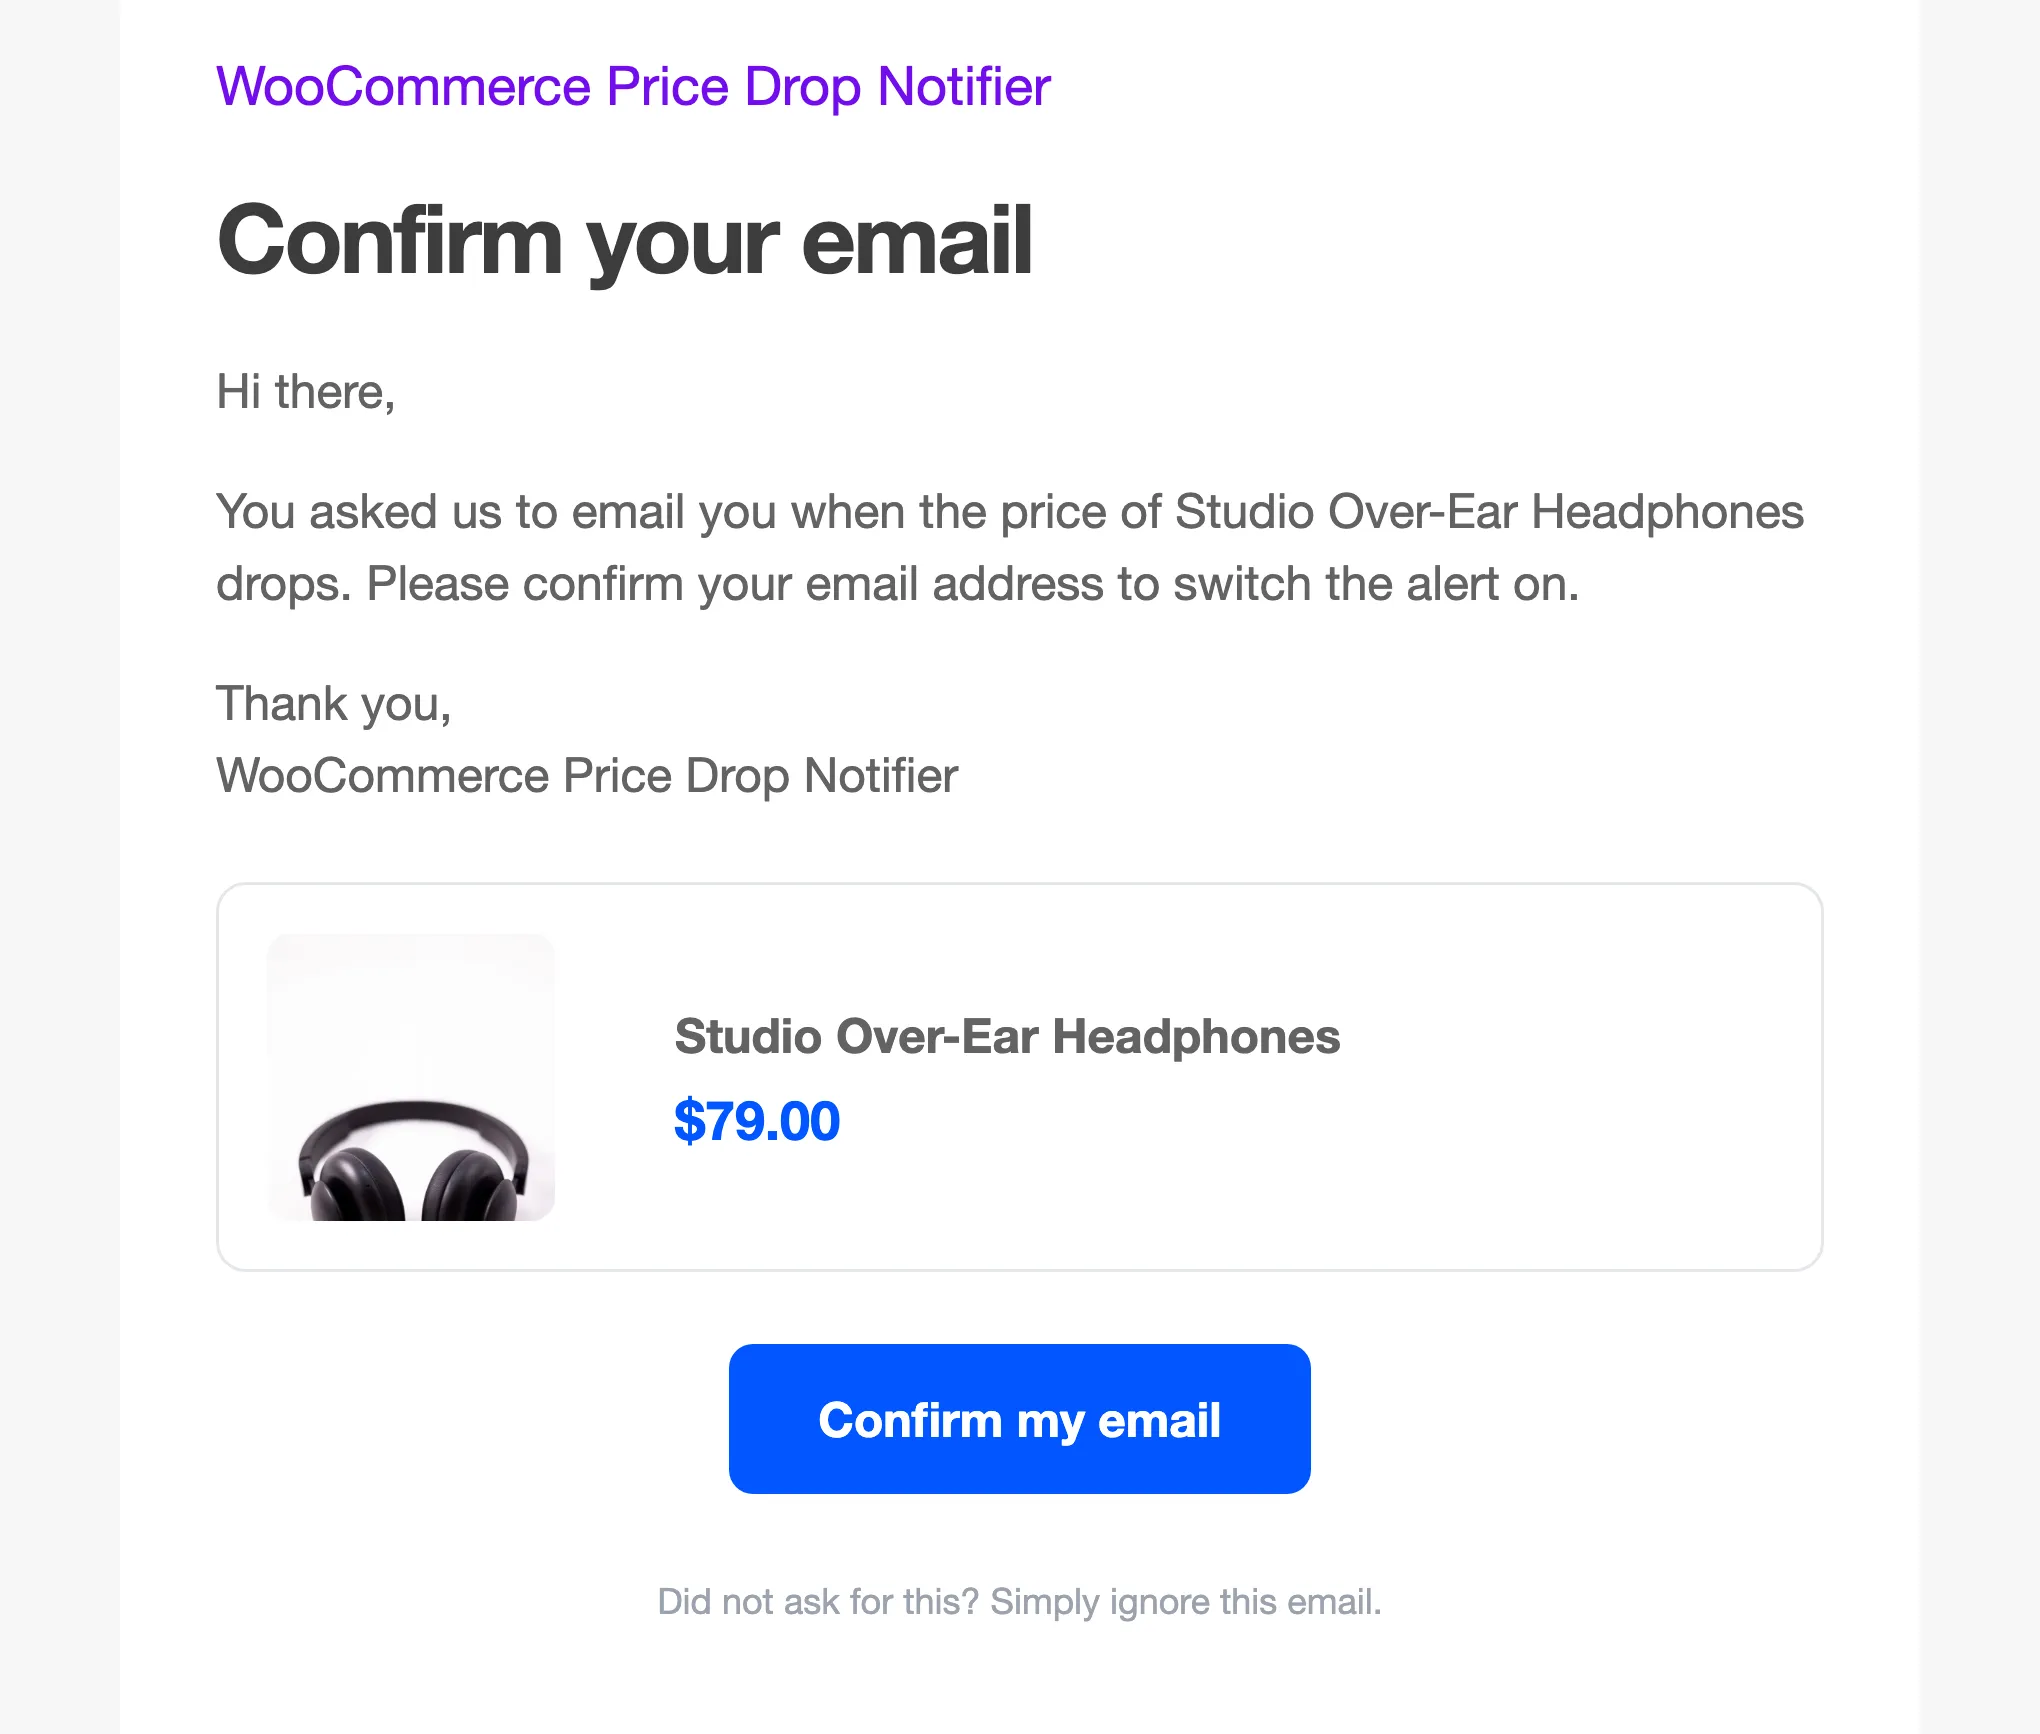
Section titled “Step 2: Check the confirmation email”Open Emails → Email Confirmation. Its Status line reads “On” once double opt-in is on. The email carries a Confirm my email button, added below your content.
Step 3: Set an alert as a guest
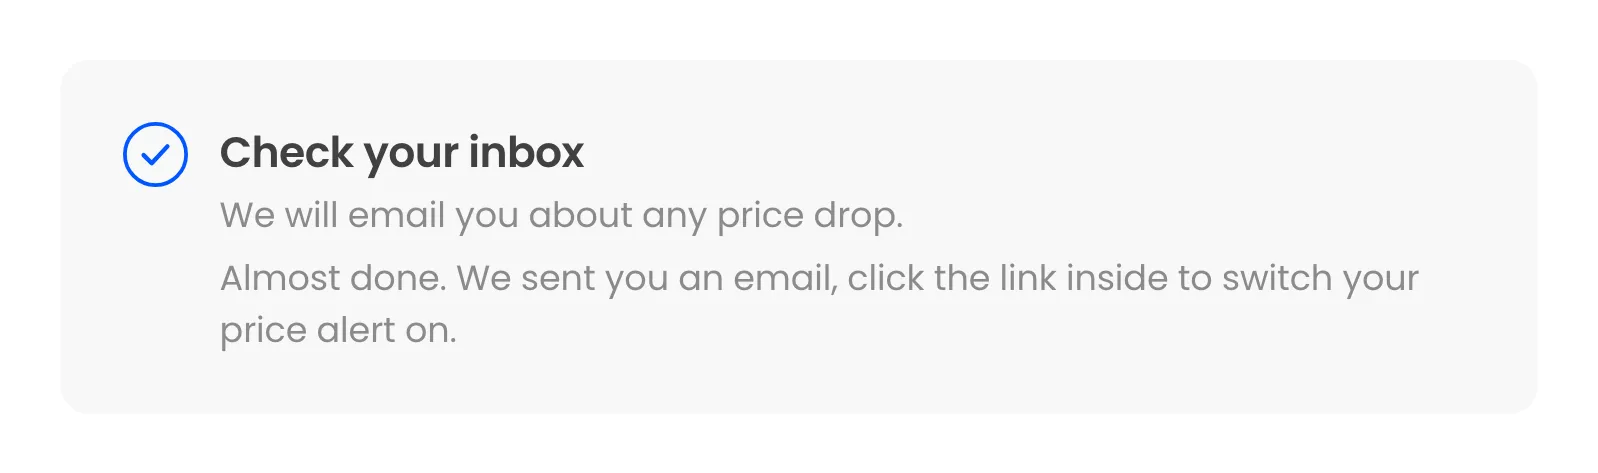
Section titled “Step 3: Set an alert as a guest”The form reads Check your inbox, with “Almost done. We sent you an email, click the link inside to switch your price alert on.”
The guest gets the confirmation email:
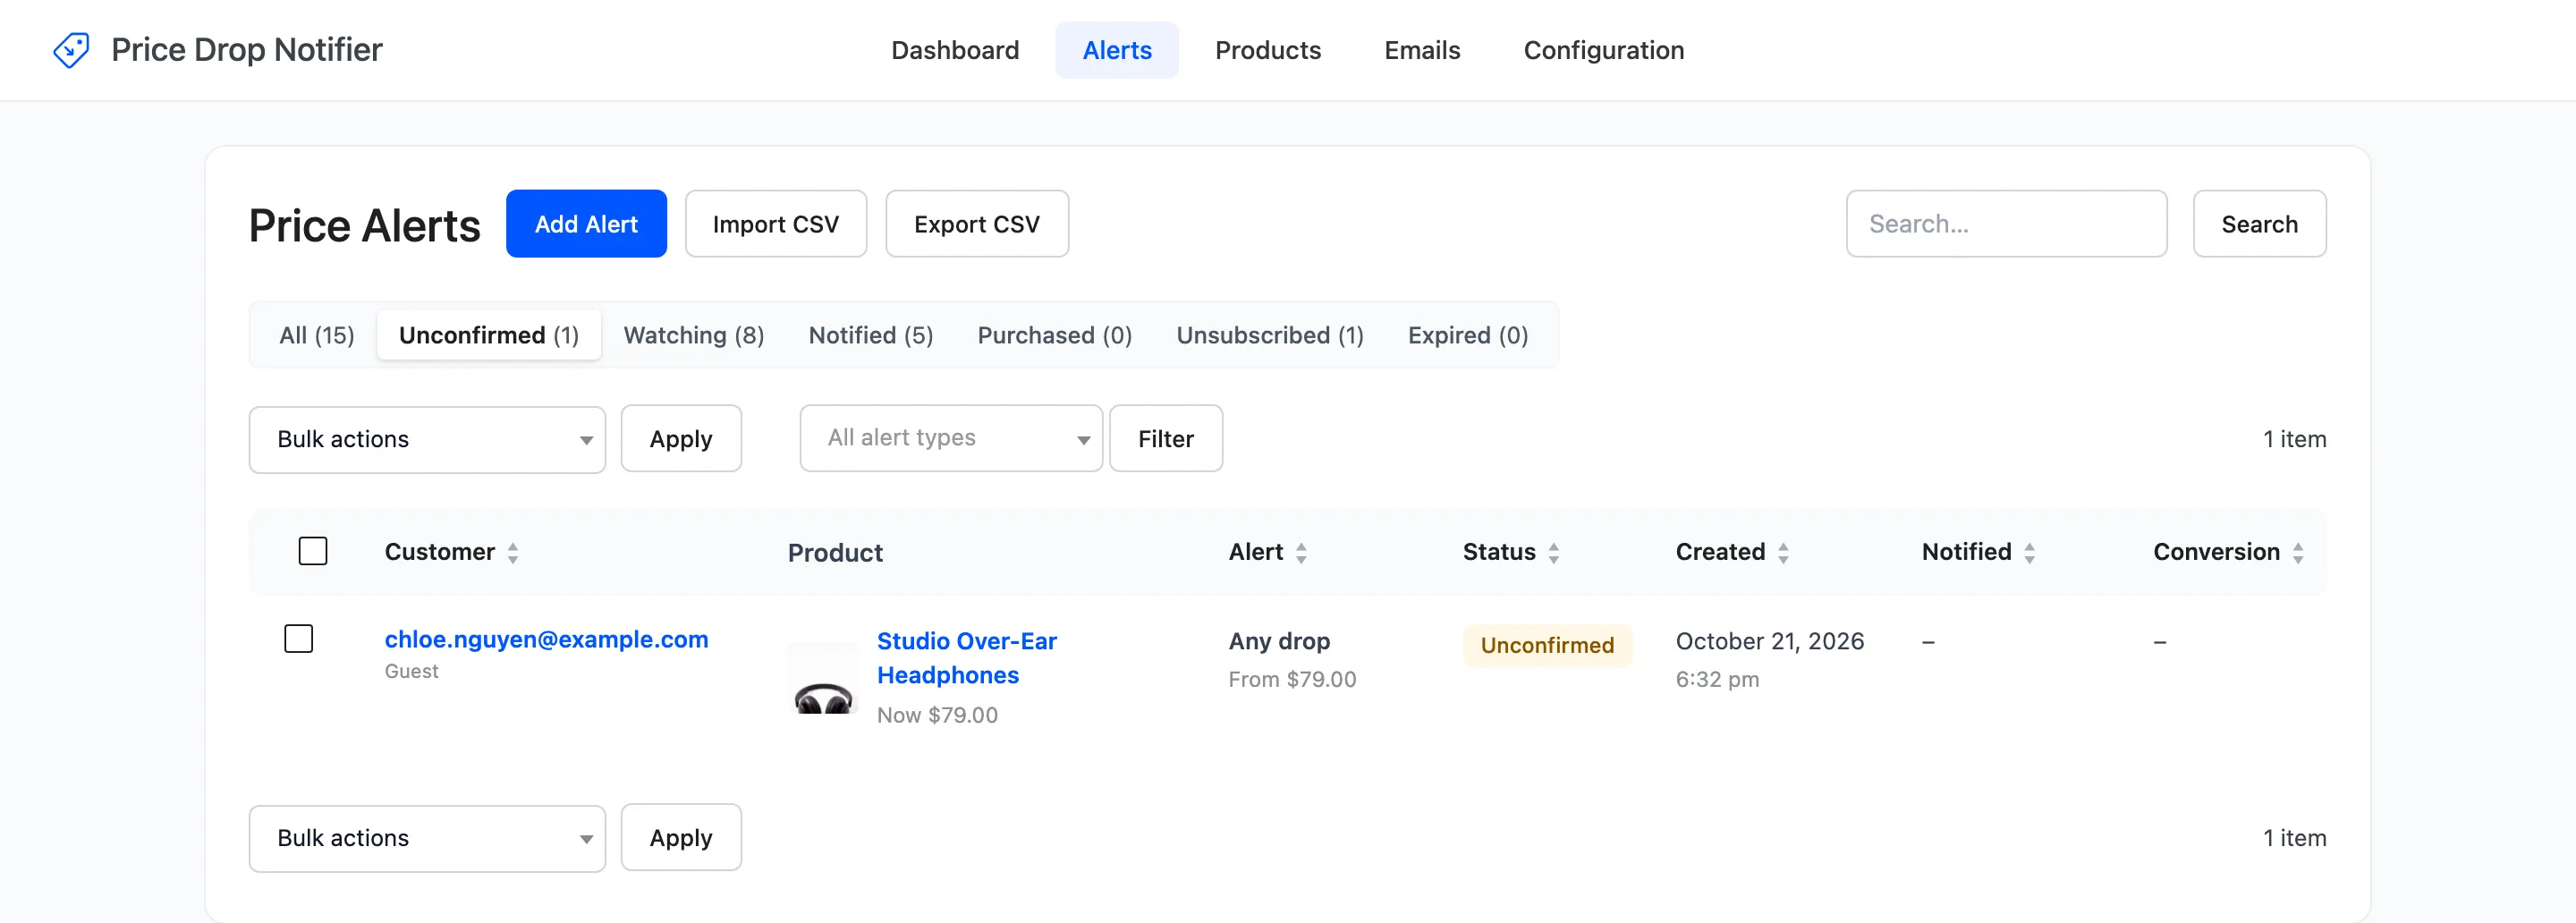
On the Alerts screen the alert sits under Unconfirmed. It does not count as watching and is never emailed a price drop.
Step 4: Confirm from the email
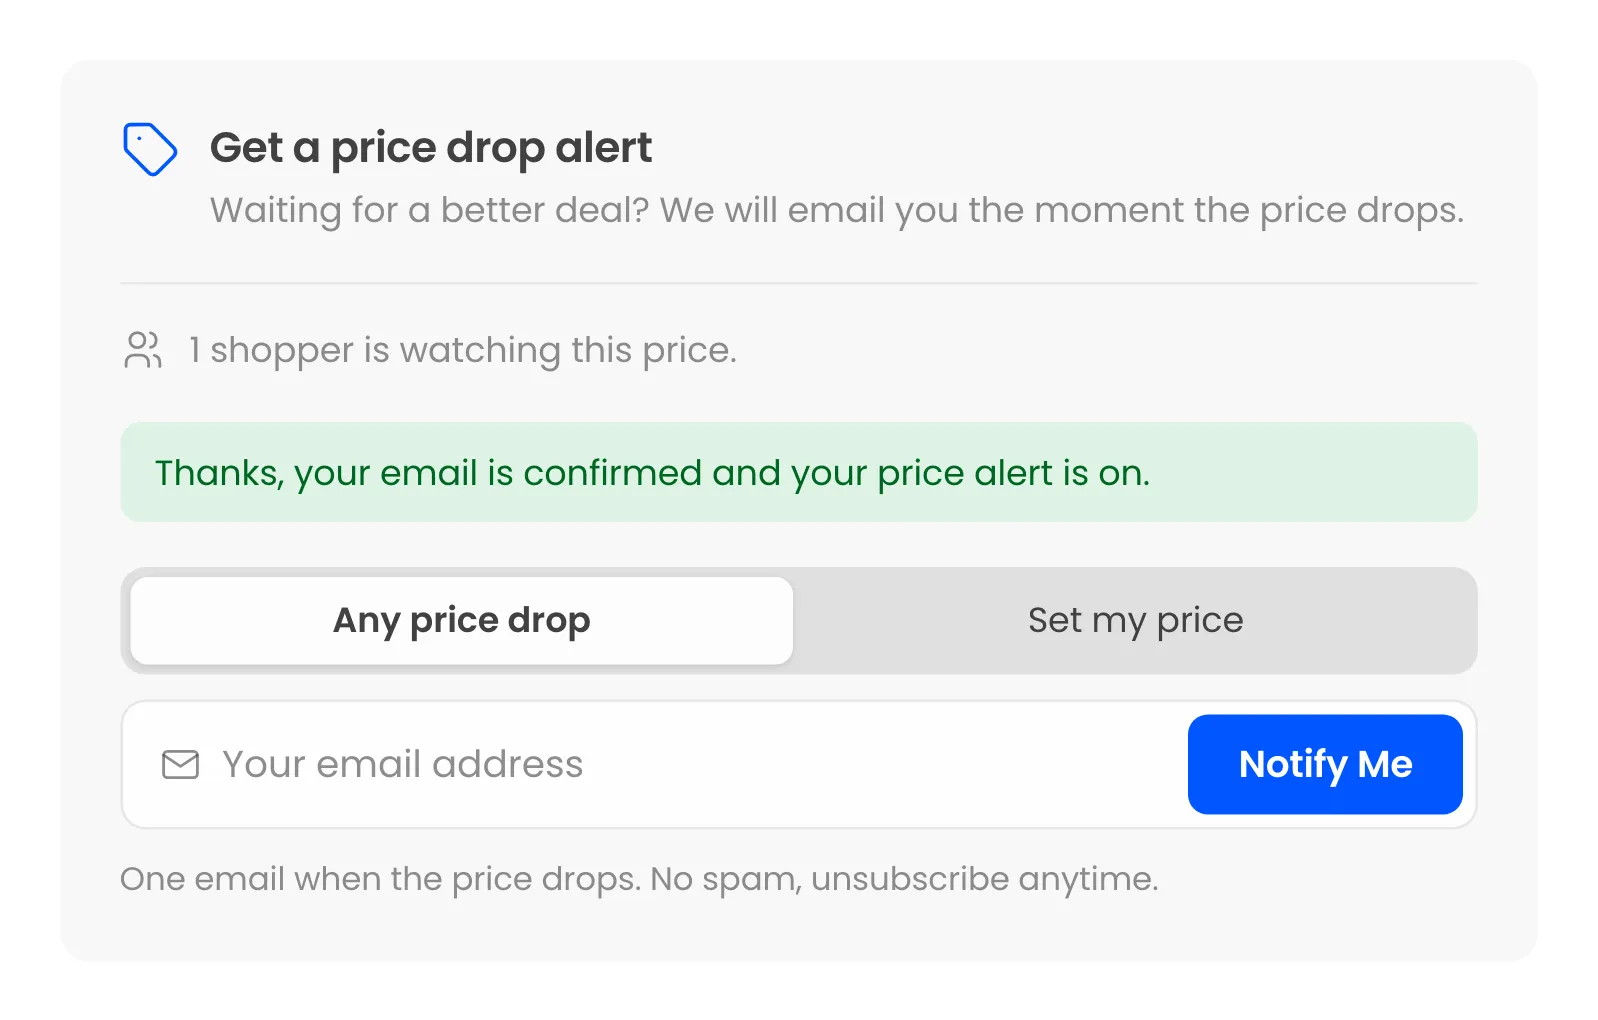
Section titled “Step 4: Confirm from the email”Confirm my email opens the product with “Thanks, your email is confirmed and your price alert is on.”
The alert turns Watching, and the Alert Confirmation email follows.
When nobody confirms
Section titled “When nobody confirms”The hourly task deletes unconfirmed alerts older than Confirm Within (days). They never reach the watchers count, the dashboard or a webhook.
The Admin Alert and the subscribed webhook are sent when the guest confirms, not when they first submit.