

How to Customize the Price Alert Emails
Each email has its own wording, and all of them share your WooCommerce email design. This walk through edits the Price Drop email, but every email screen works the same way.
Step 1: Open an email
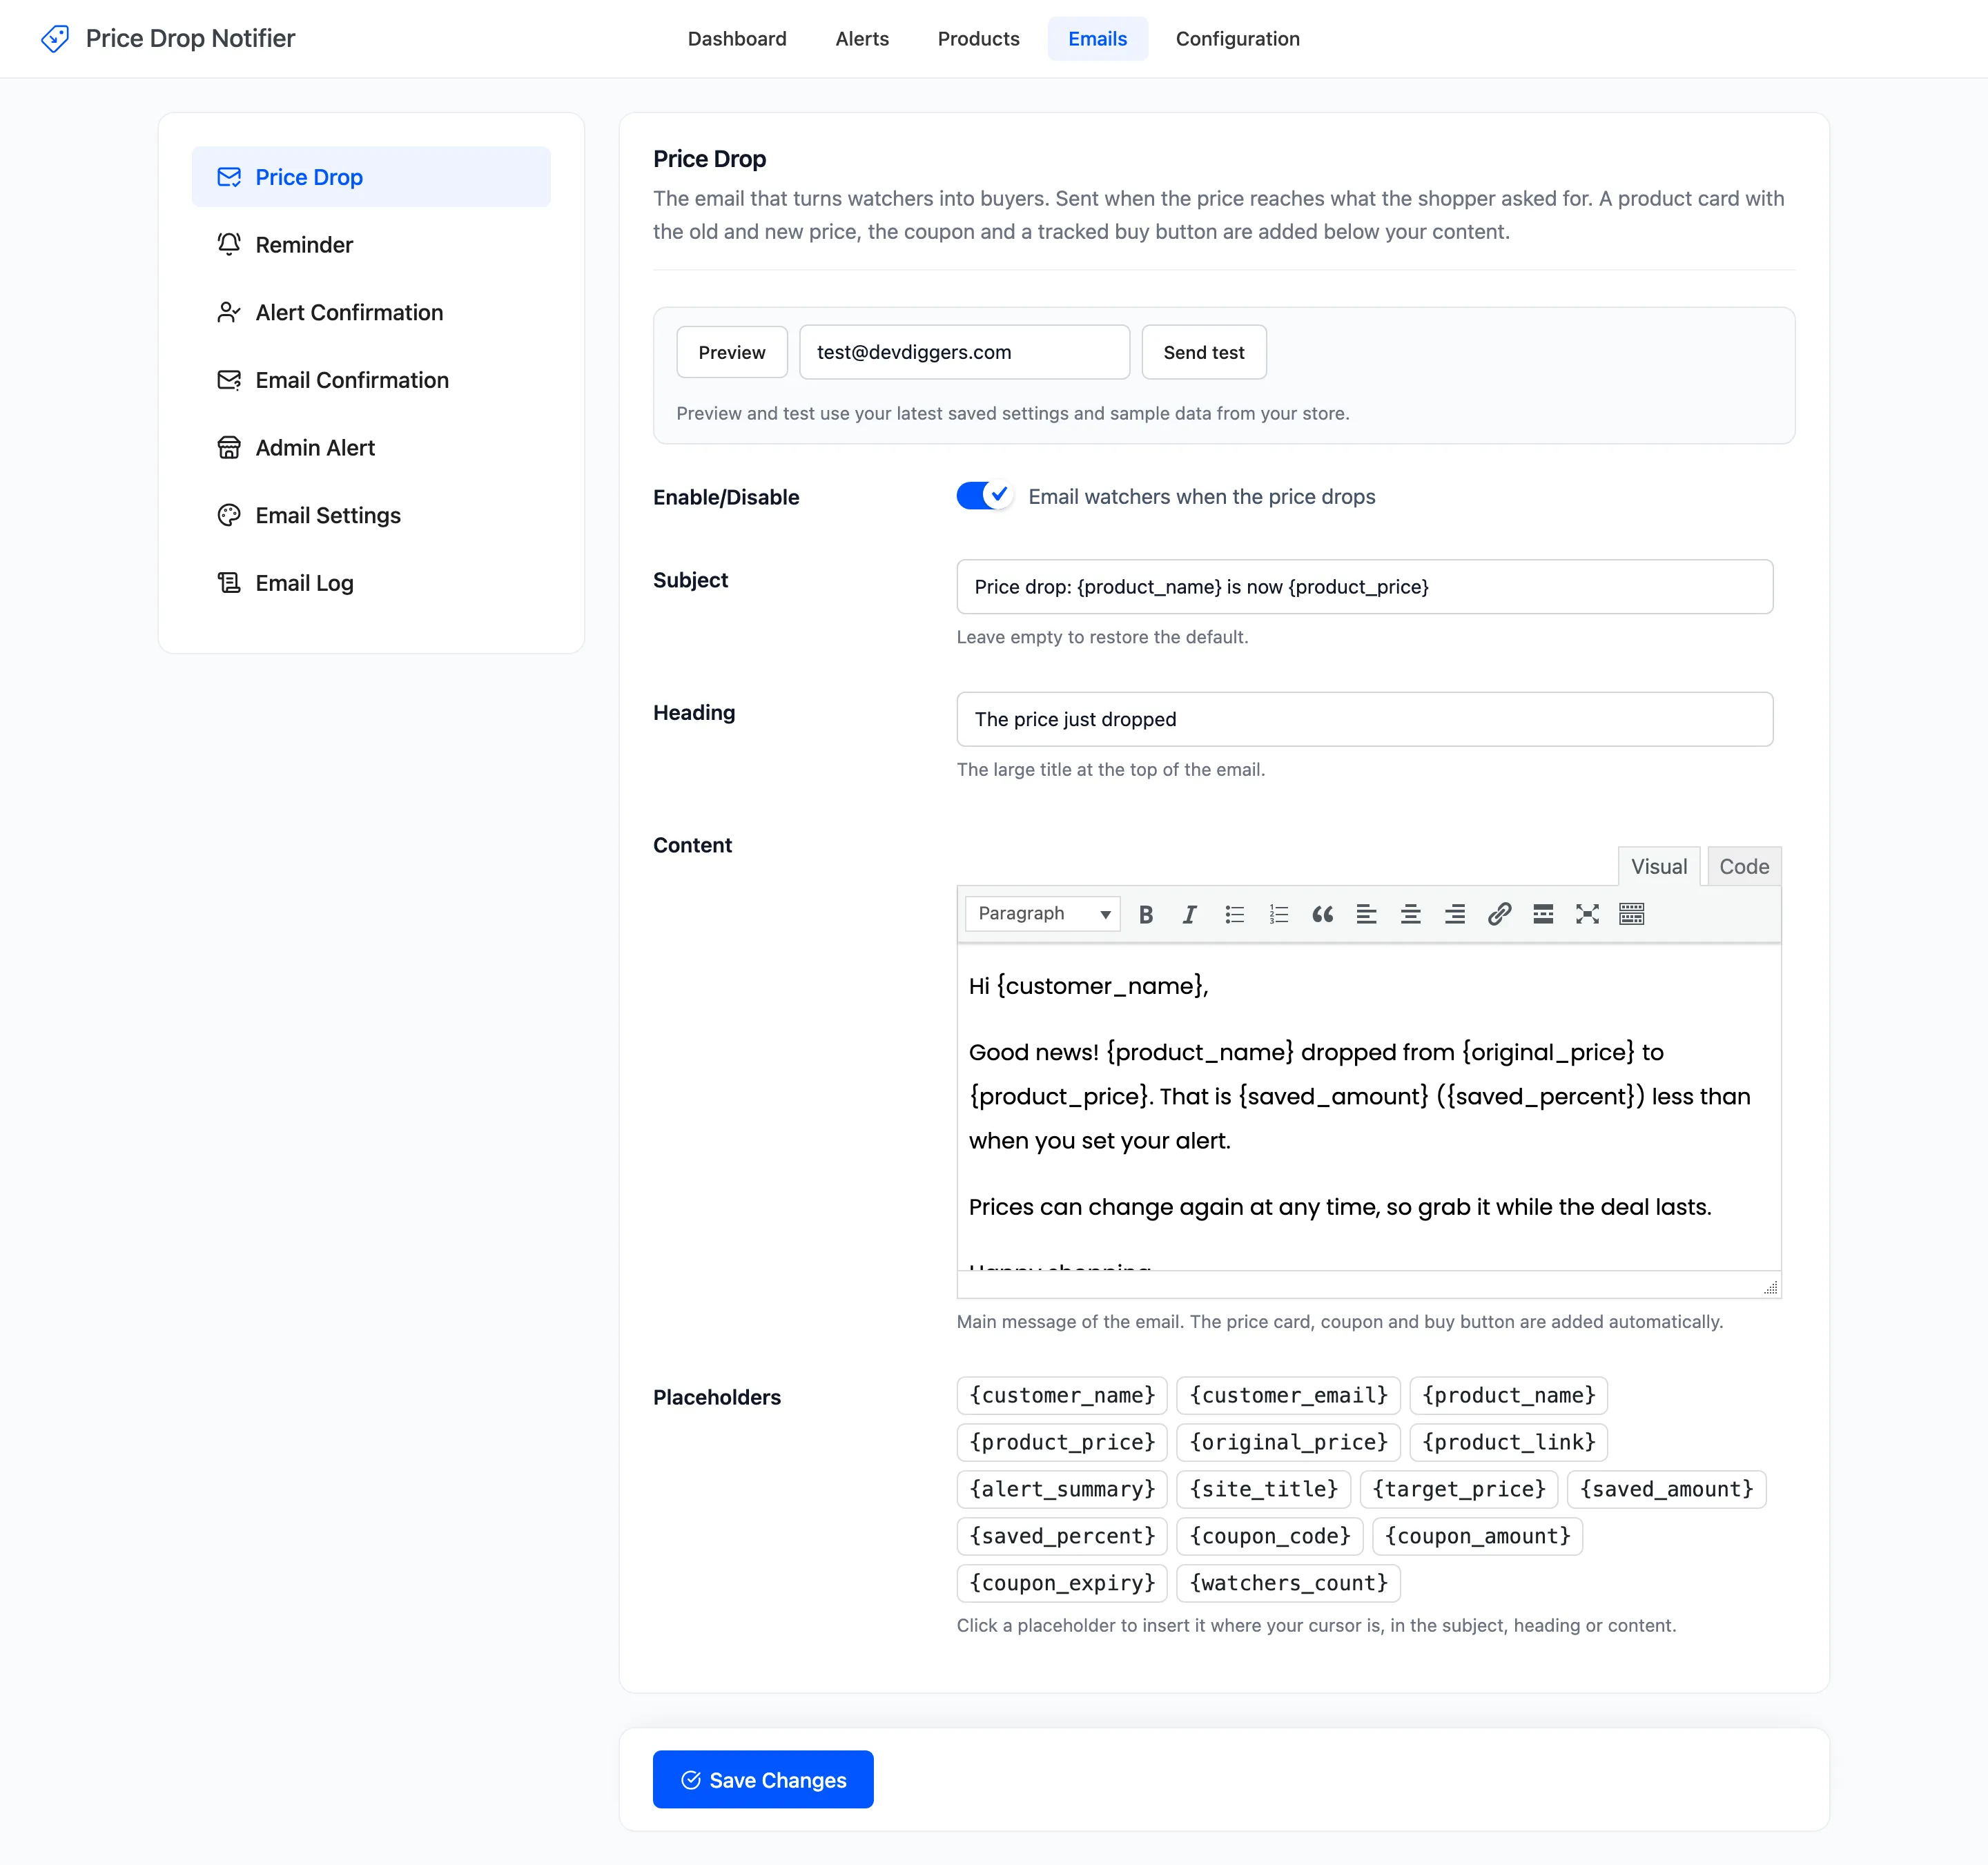
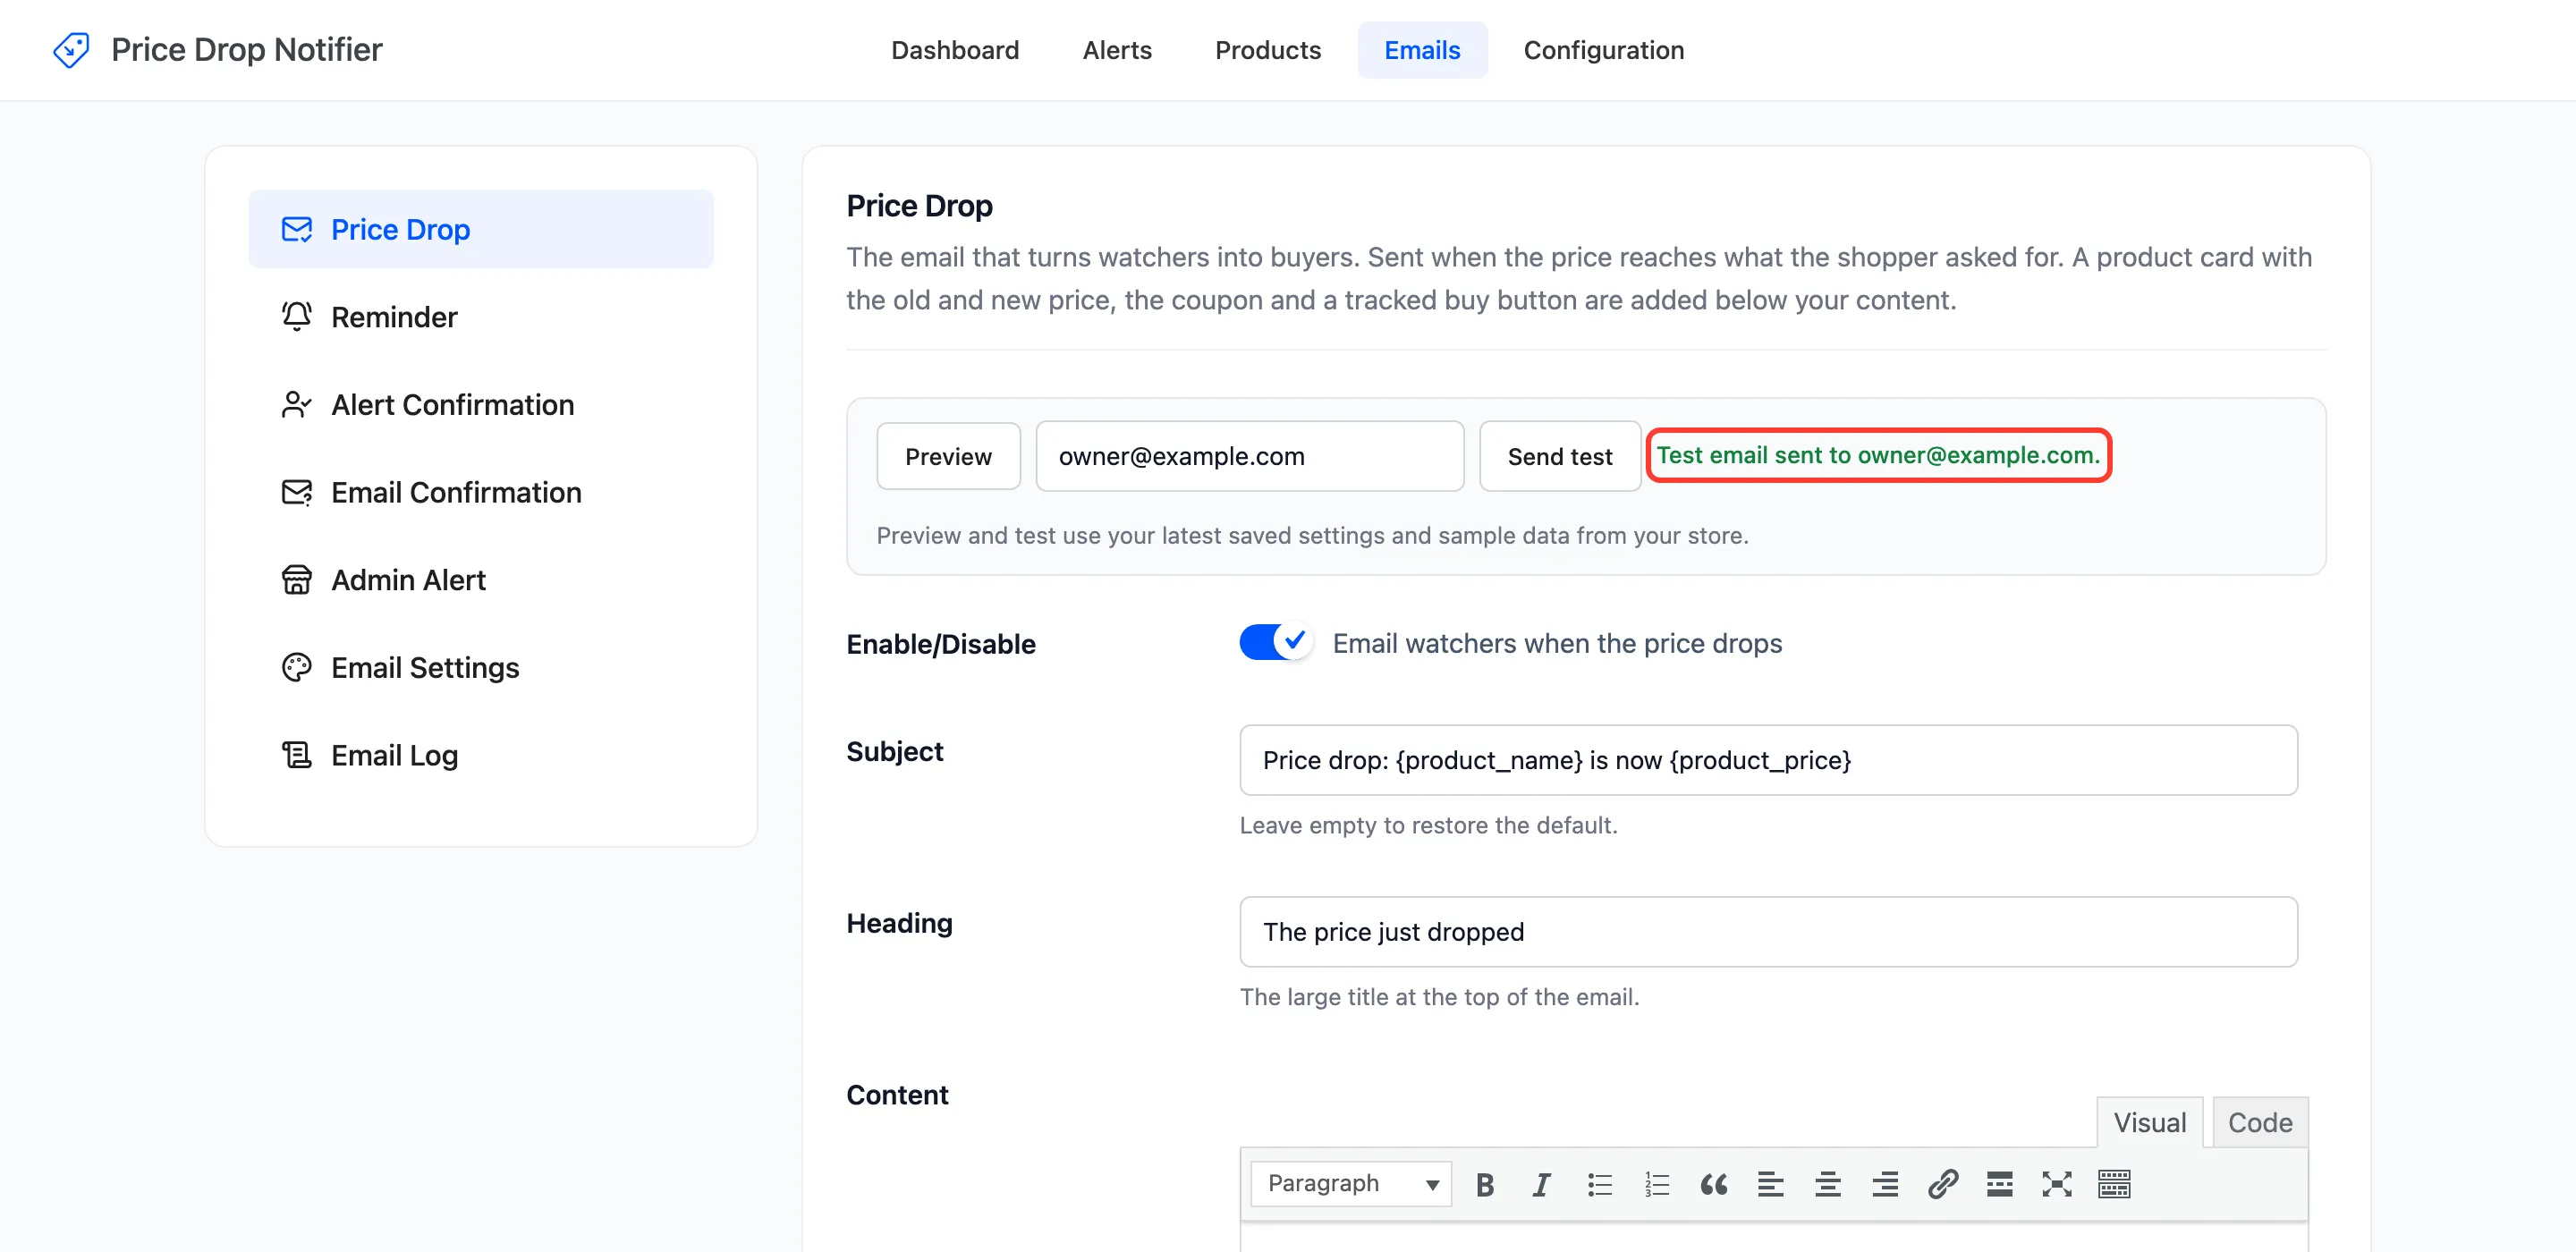
Section titled “Step 1: Open an email”Go to DevDiggers Plugins → Price Drop → Emails and pick an email in the left column. The five are Price Drop, Reminder, Alert Confirmation, Email Confirmation and Admin Alert.
Step 2: Edit the subject and heading
Section titled “Step 2: Edit the subject and heading”Type your own Subject and Heading. Leave a field empty and save to get the default back. The default subject is “Price drop: {product_name} is now {product_price}”.
Step 3: Edit the content
Section titled “Step 3: Edit the content”Write the message in Content. Click a placeholder button to insert it where your cursor is, in the subject, heading or content.
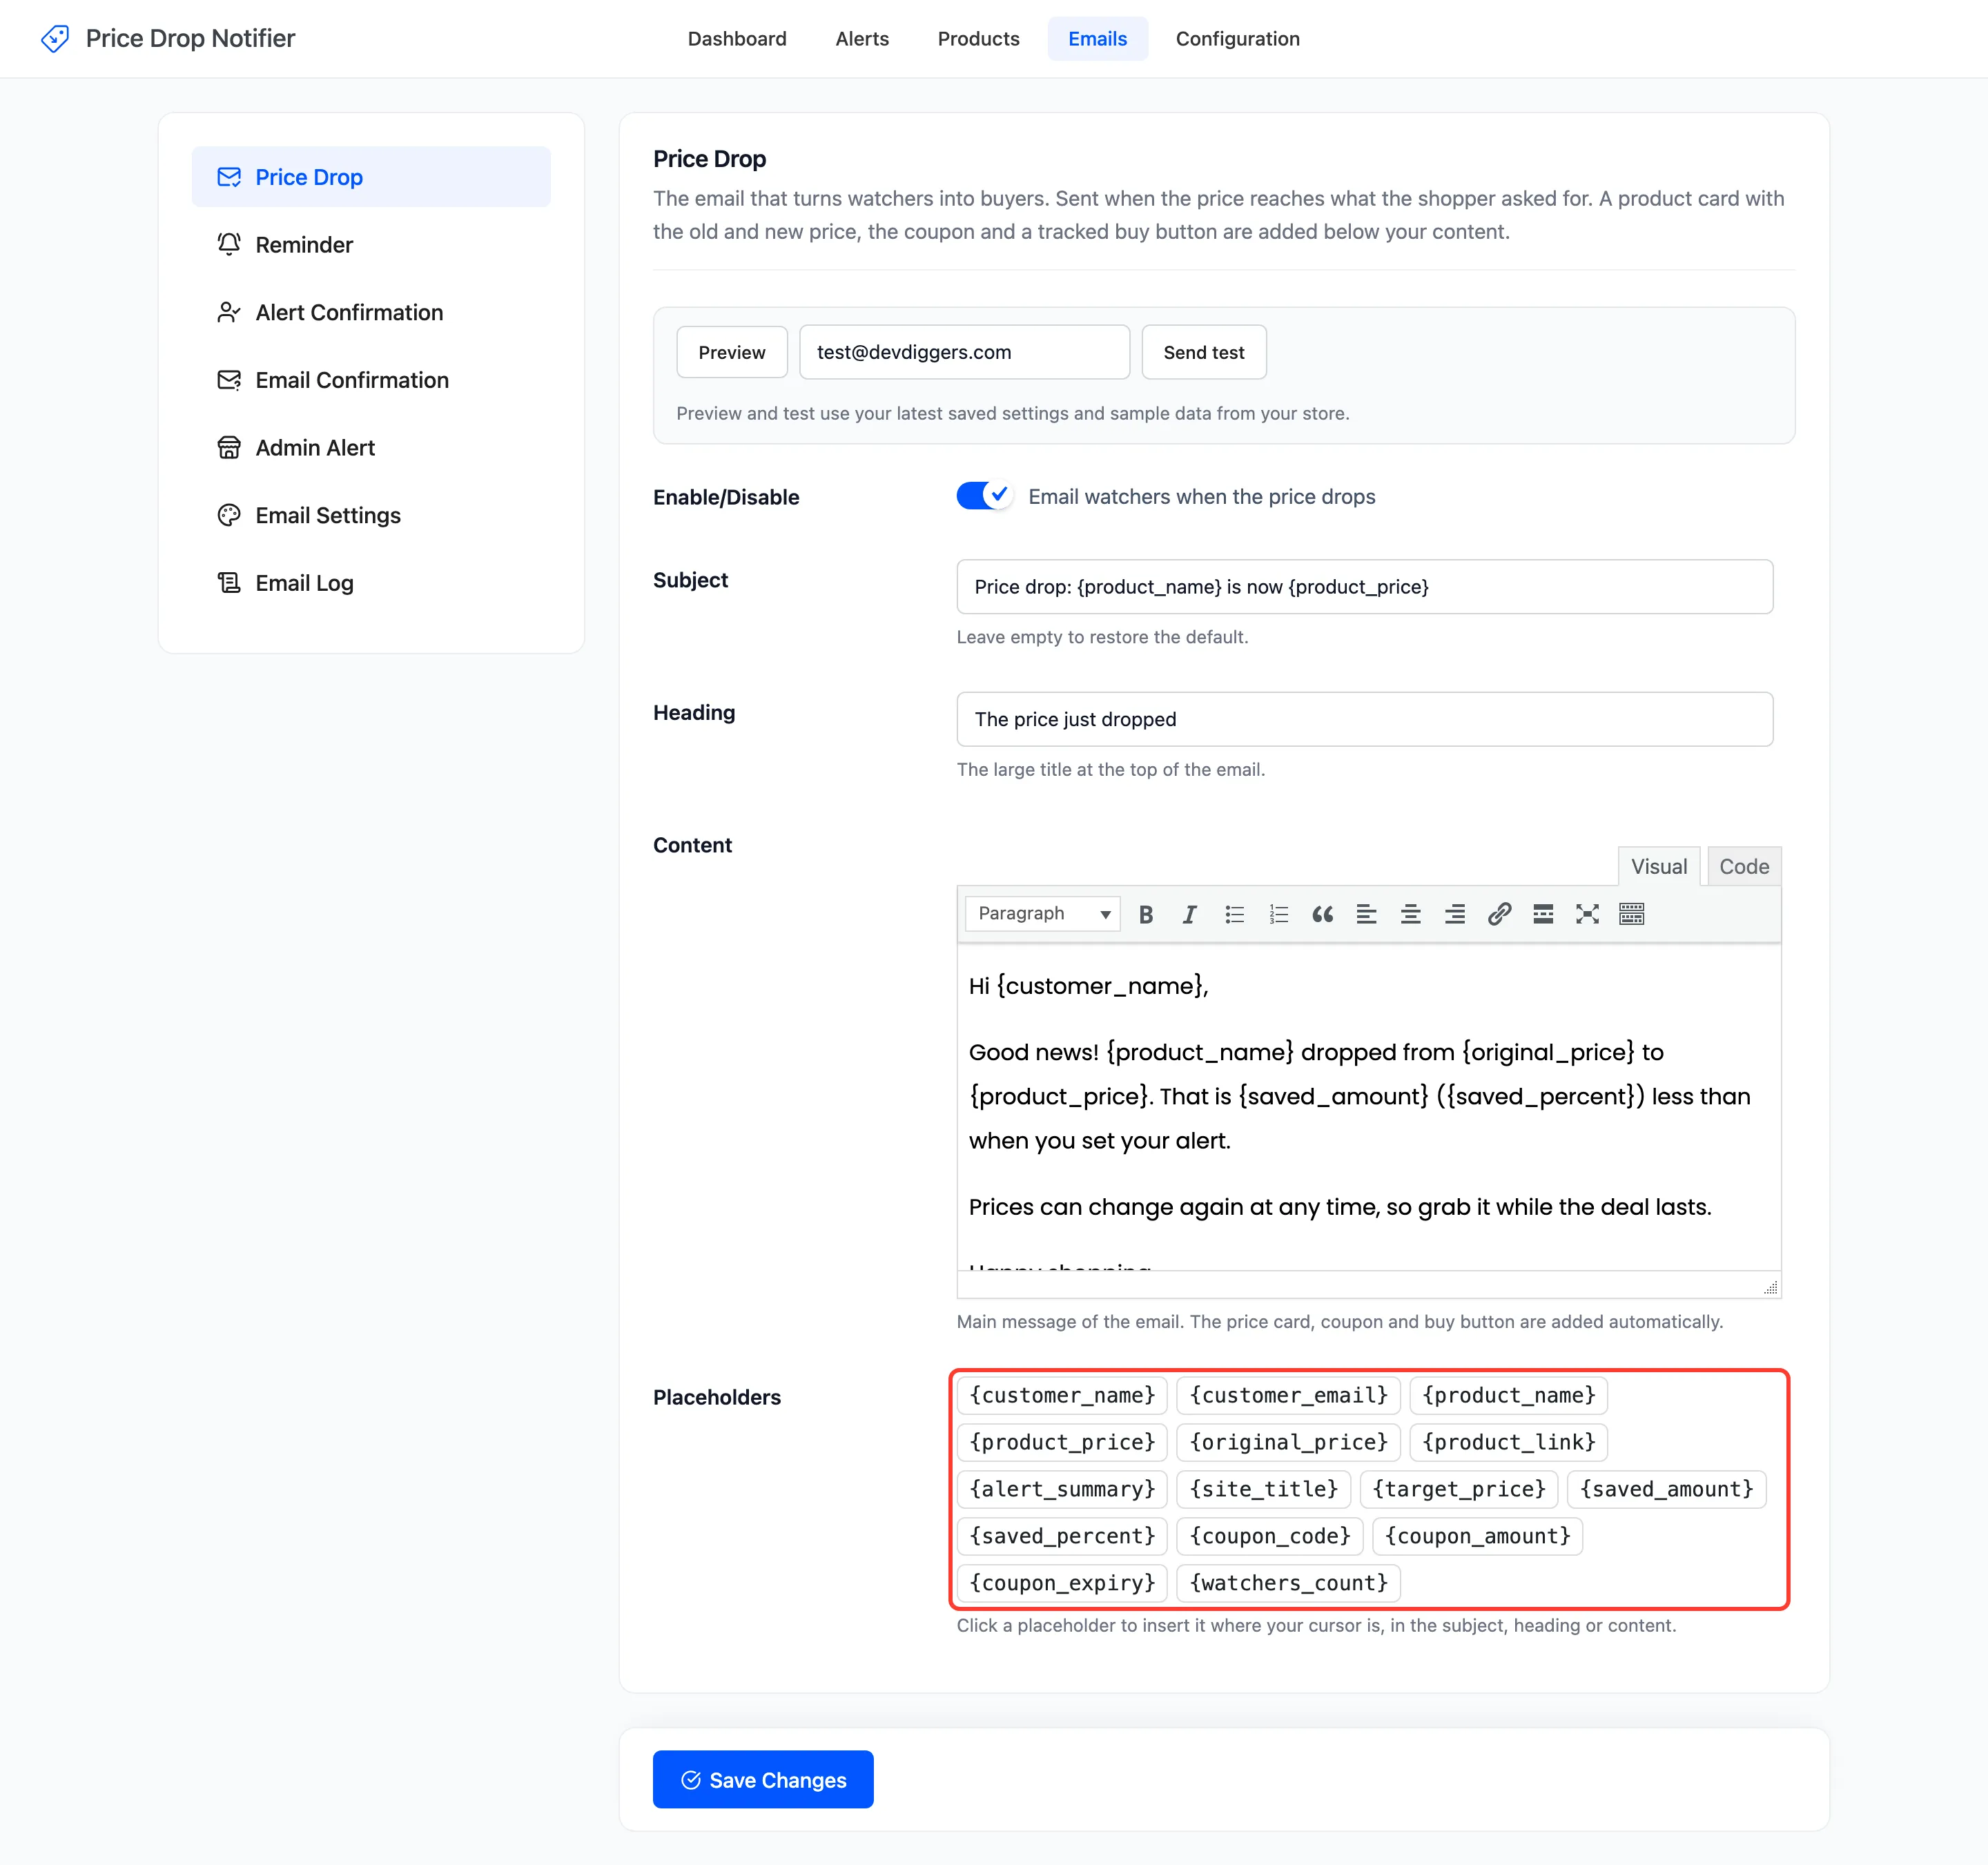
You do not need to add the product, the coupon or the button yourself. The product card with the old and new price, the coupon box and Buy Now are added below your content on their own. Click Save Changes.
Step 4: Set the shared button and color
Section titled “Step 4: Set the shared button and color”Open Email Settings. Button Text is the call to action in the Price Drop and Reminder emails, Buy Now by default. Accent Color paints the button and the coupon box.
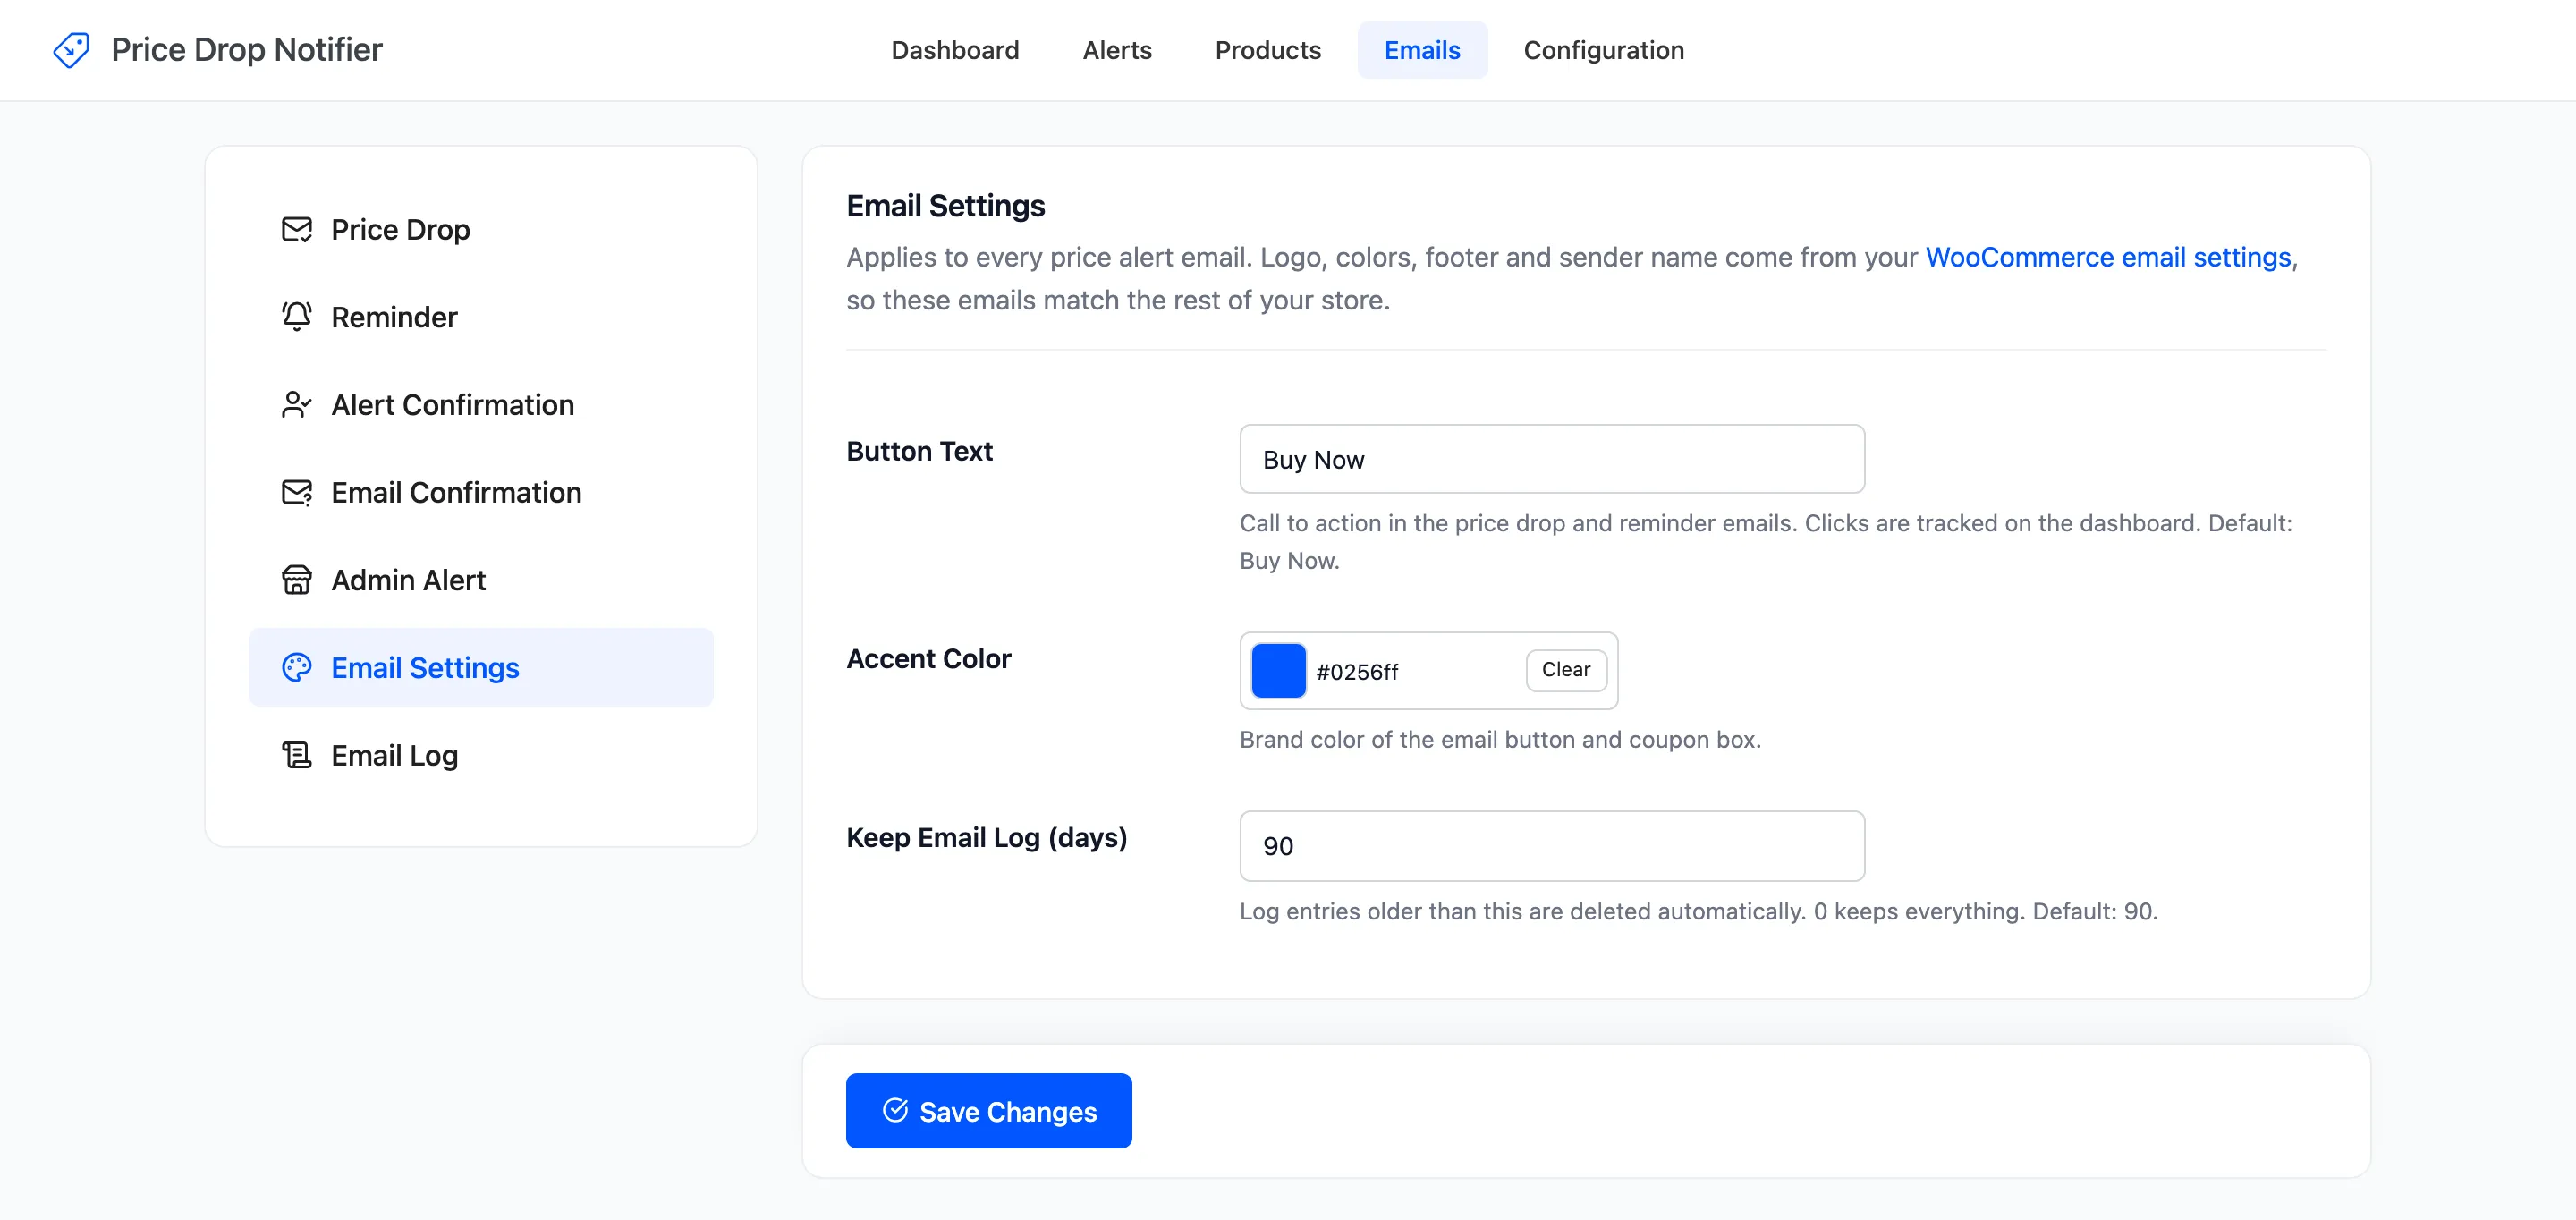
The logo, background, footer and sender name come from WooCommerce → Settings → Emails, the same as your order emails.
Step 5: Preview and test
Section titled “Step 5: Preview and test”Back on the email’s screen, press Preview. It uses your last saved settings and your newest alert.
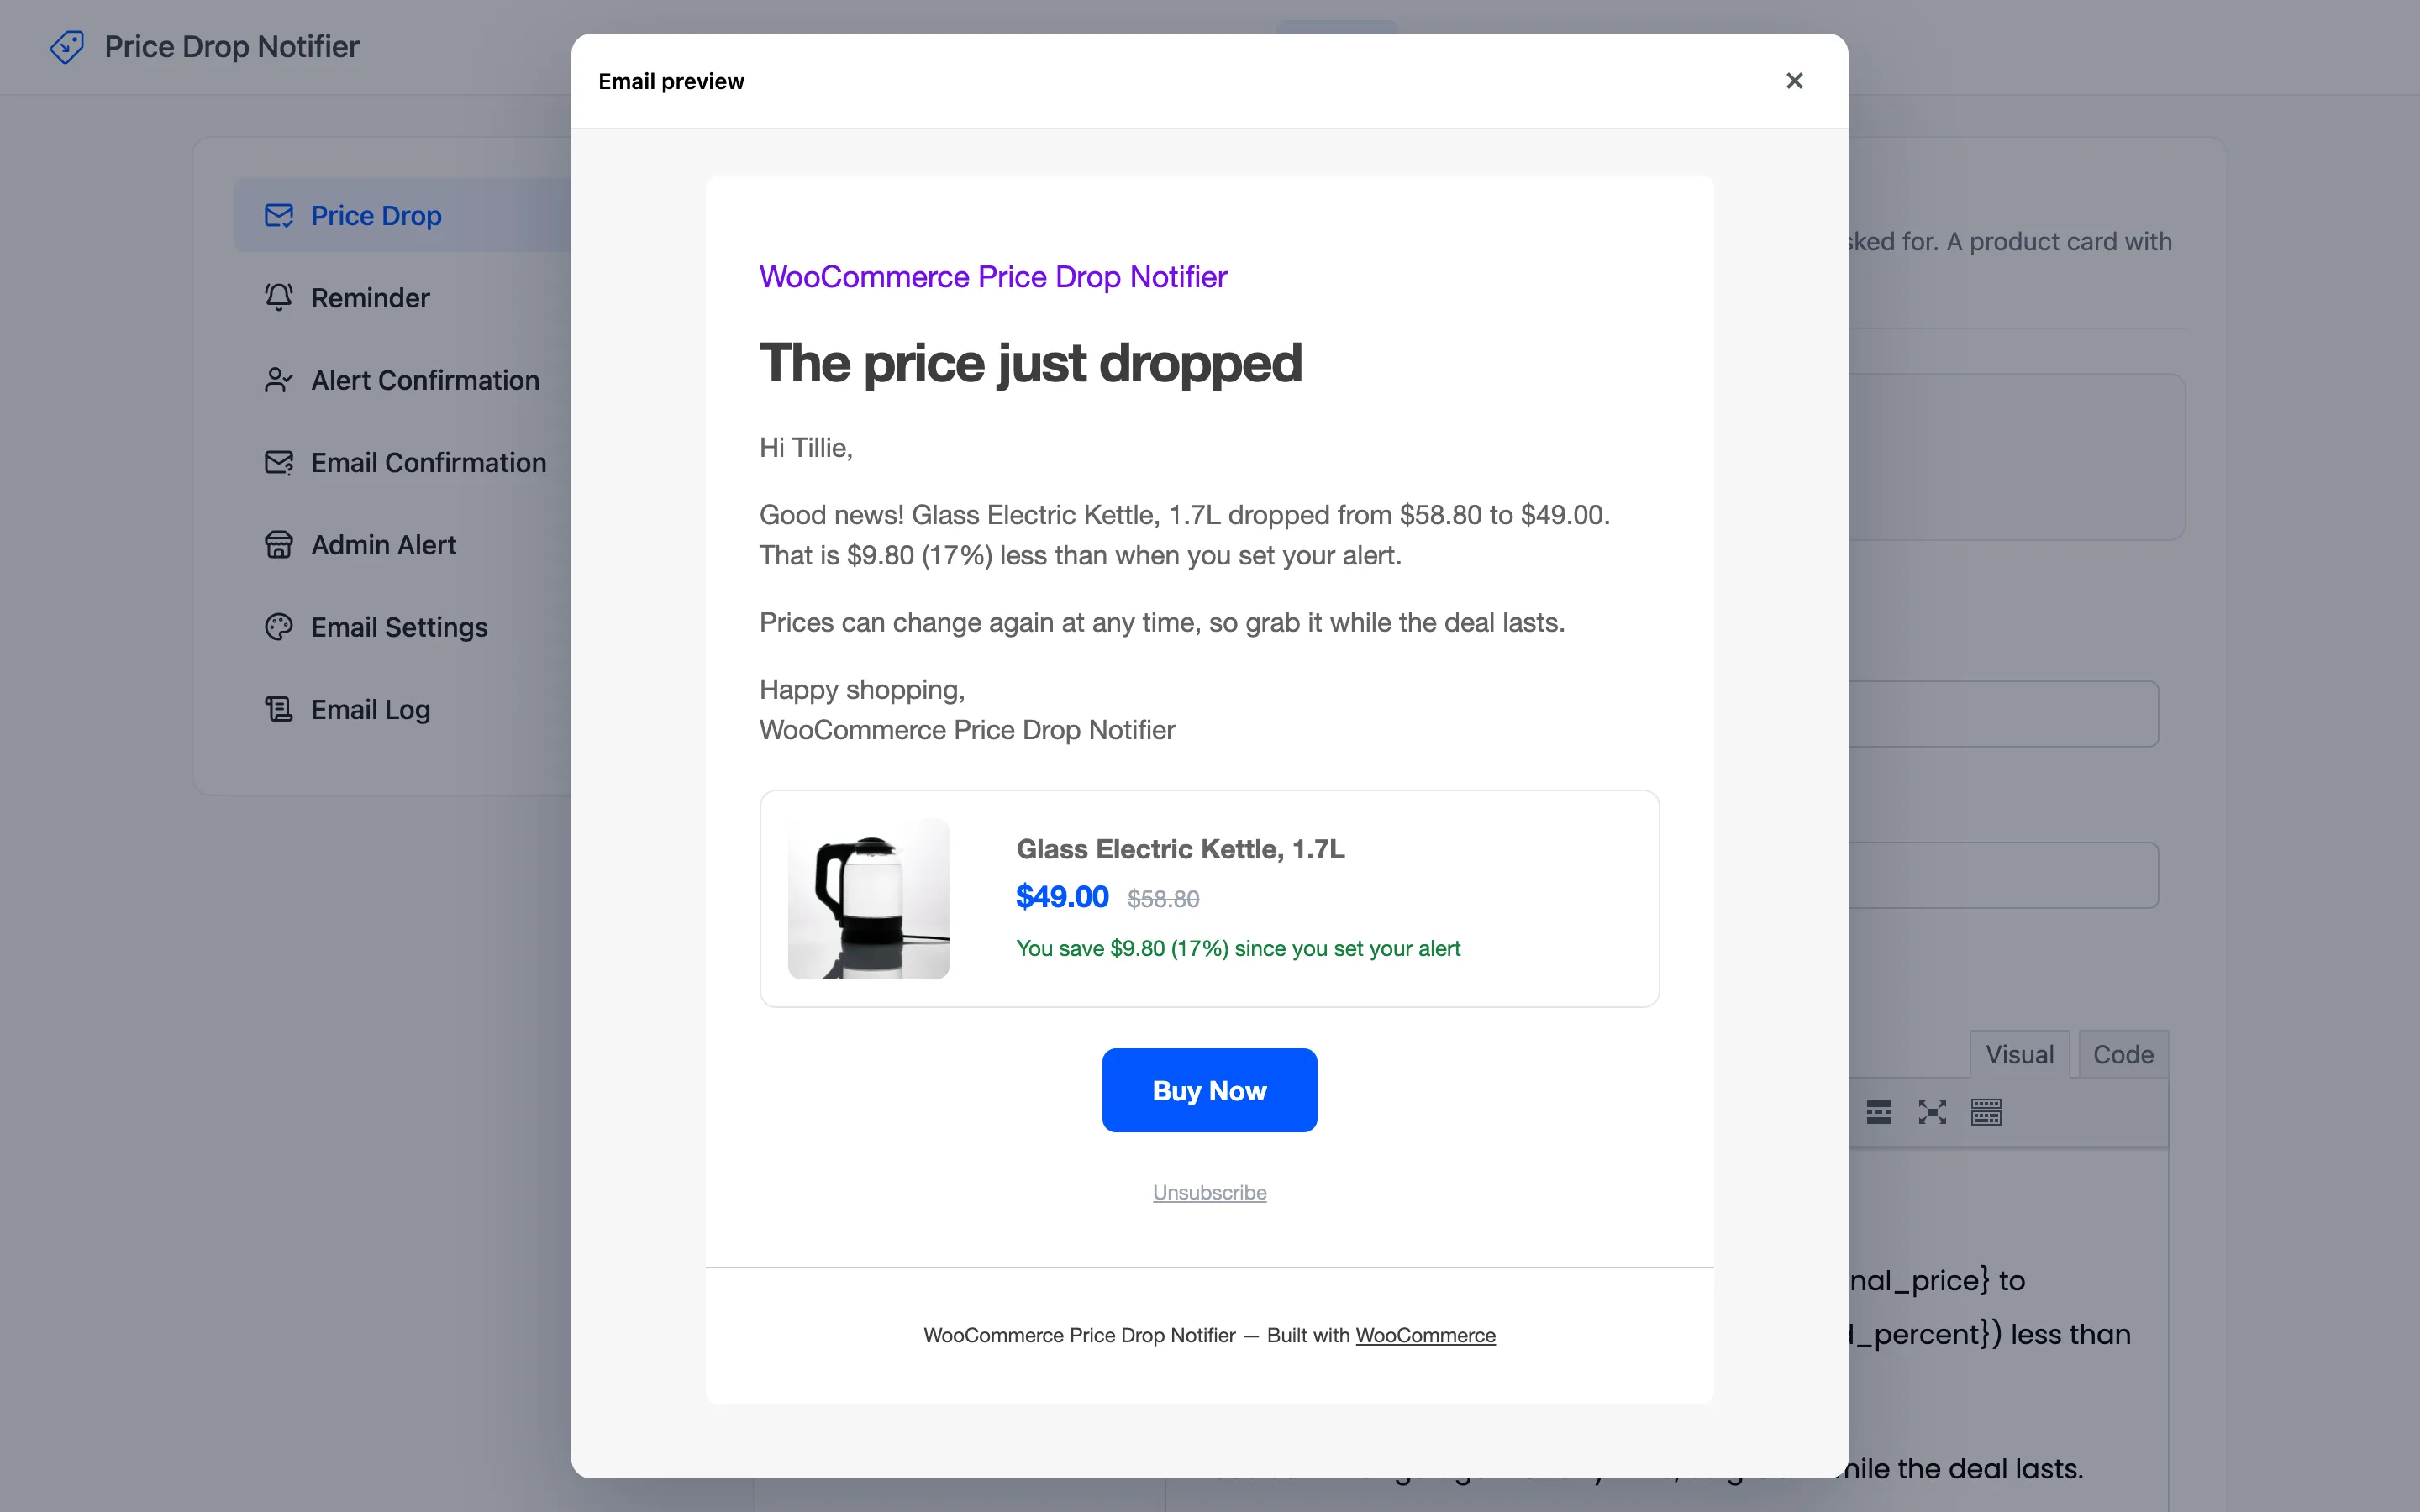
Then type an address next to Send test and click it. The result shows next to the button, and the send is listed in the Email Log as Test Email.
The other emails
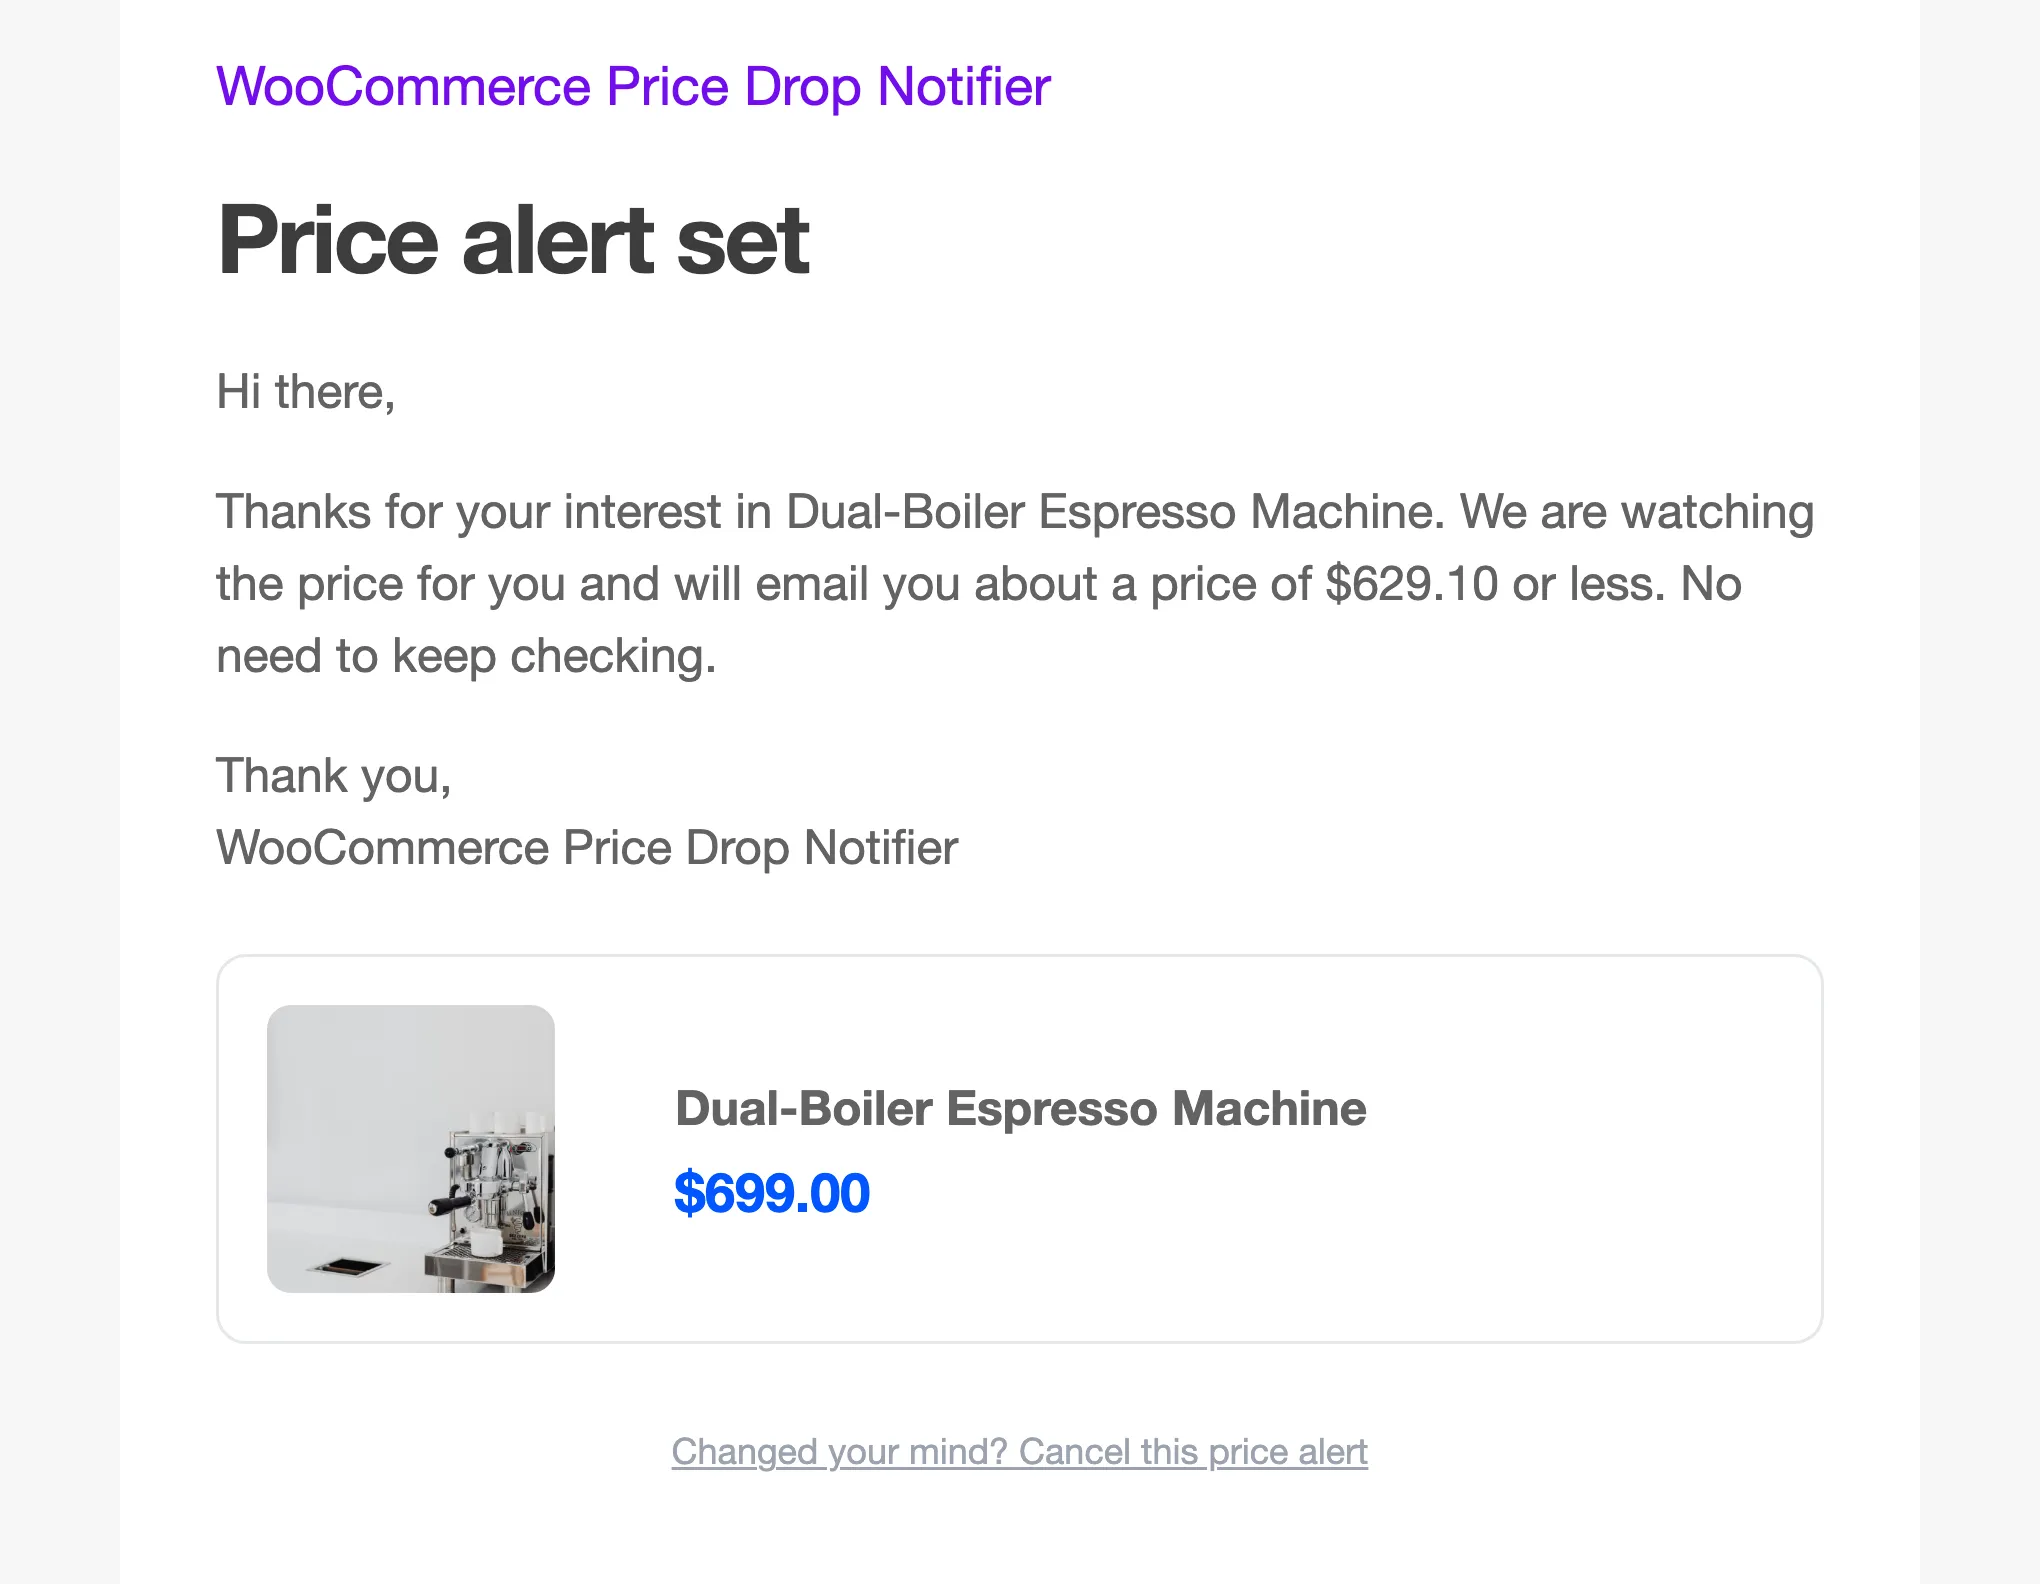
Section titled “The other emails”The Alert Confirmation email tells the shopper what the alert waits for, and gives a way to cancel:
The Email Confirmation email only goes out with double opt-in, and the Admin Alert only once you switch it on. See Email Settings for every placeholder.