

How to Customize the Waitlist Emails
Every waitlist email is written in the plugin. You change the words. The product card, the button and the unsubscribe link are added for you, and the design comes from your WooCommerce email settings.
Step 1: Open the email
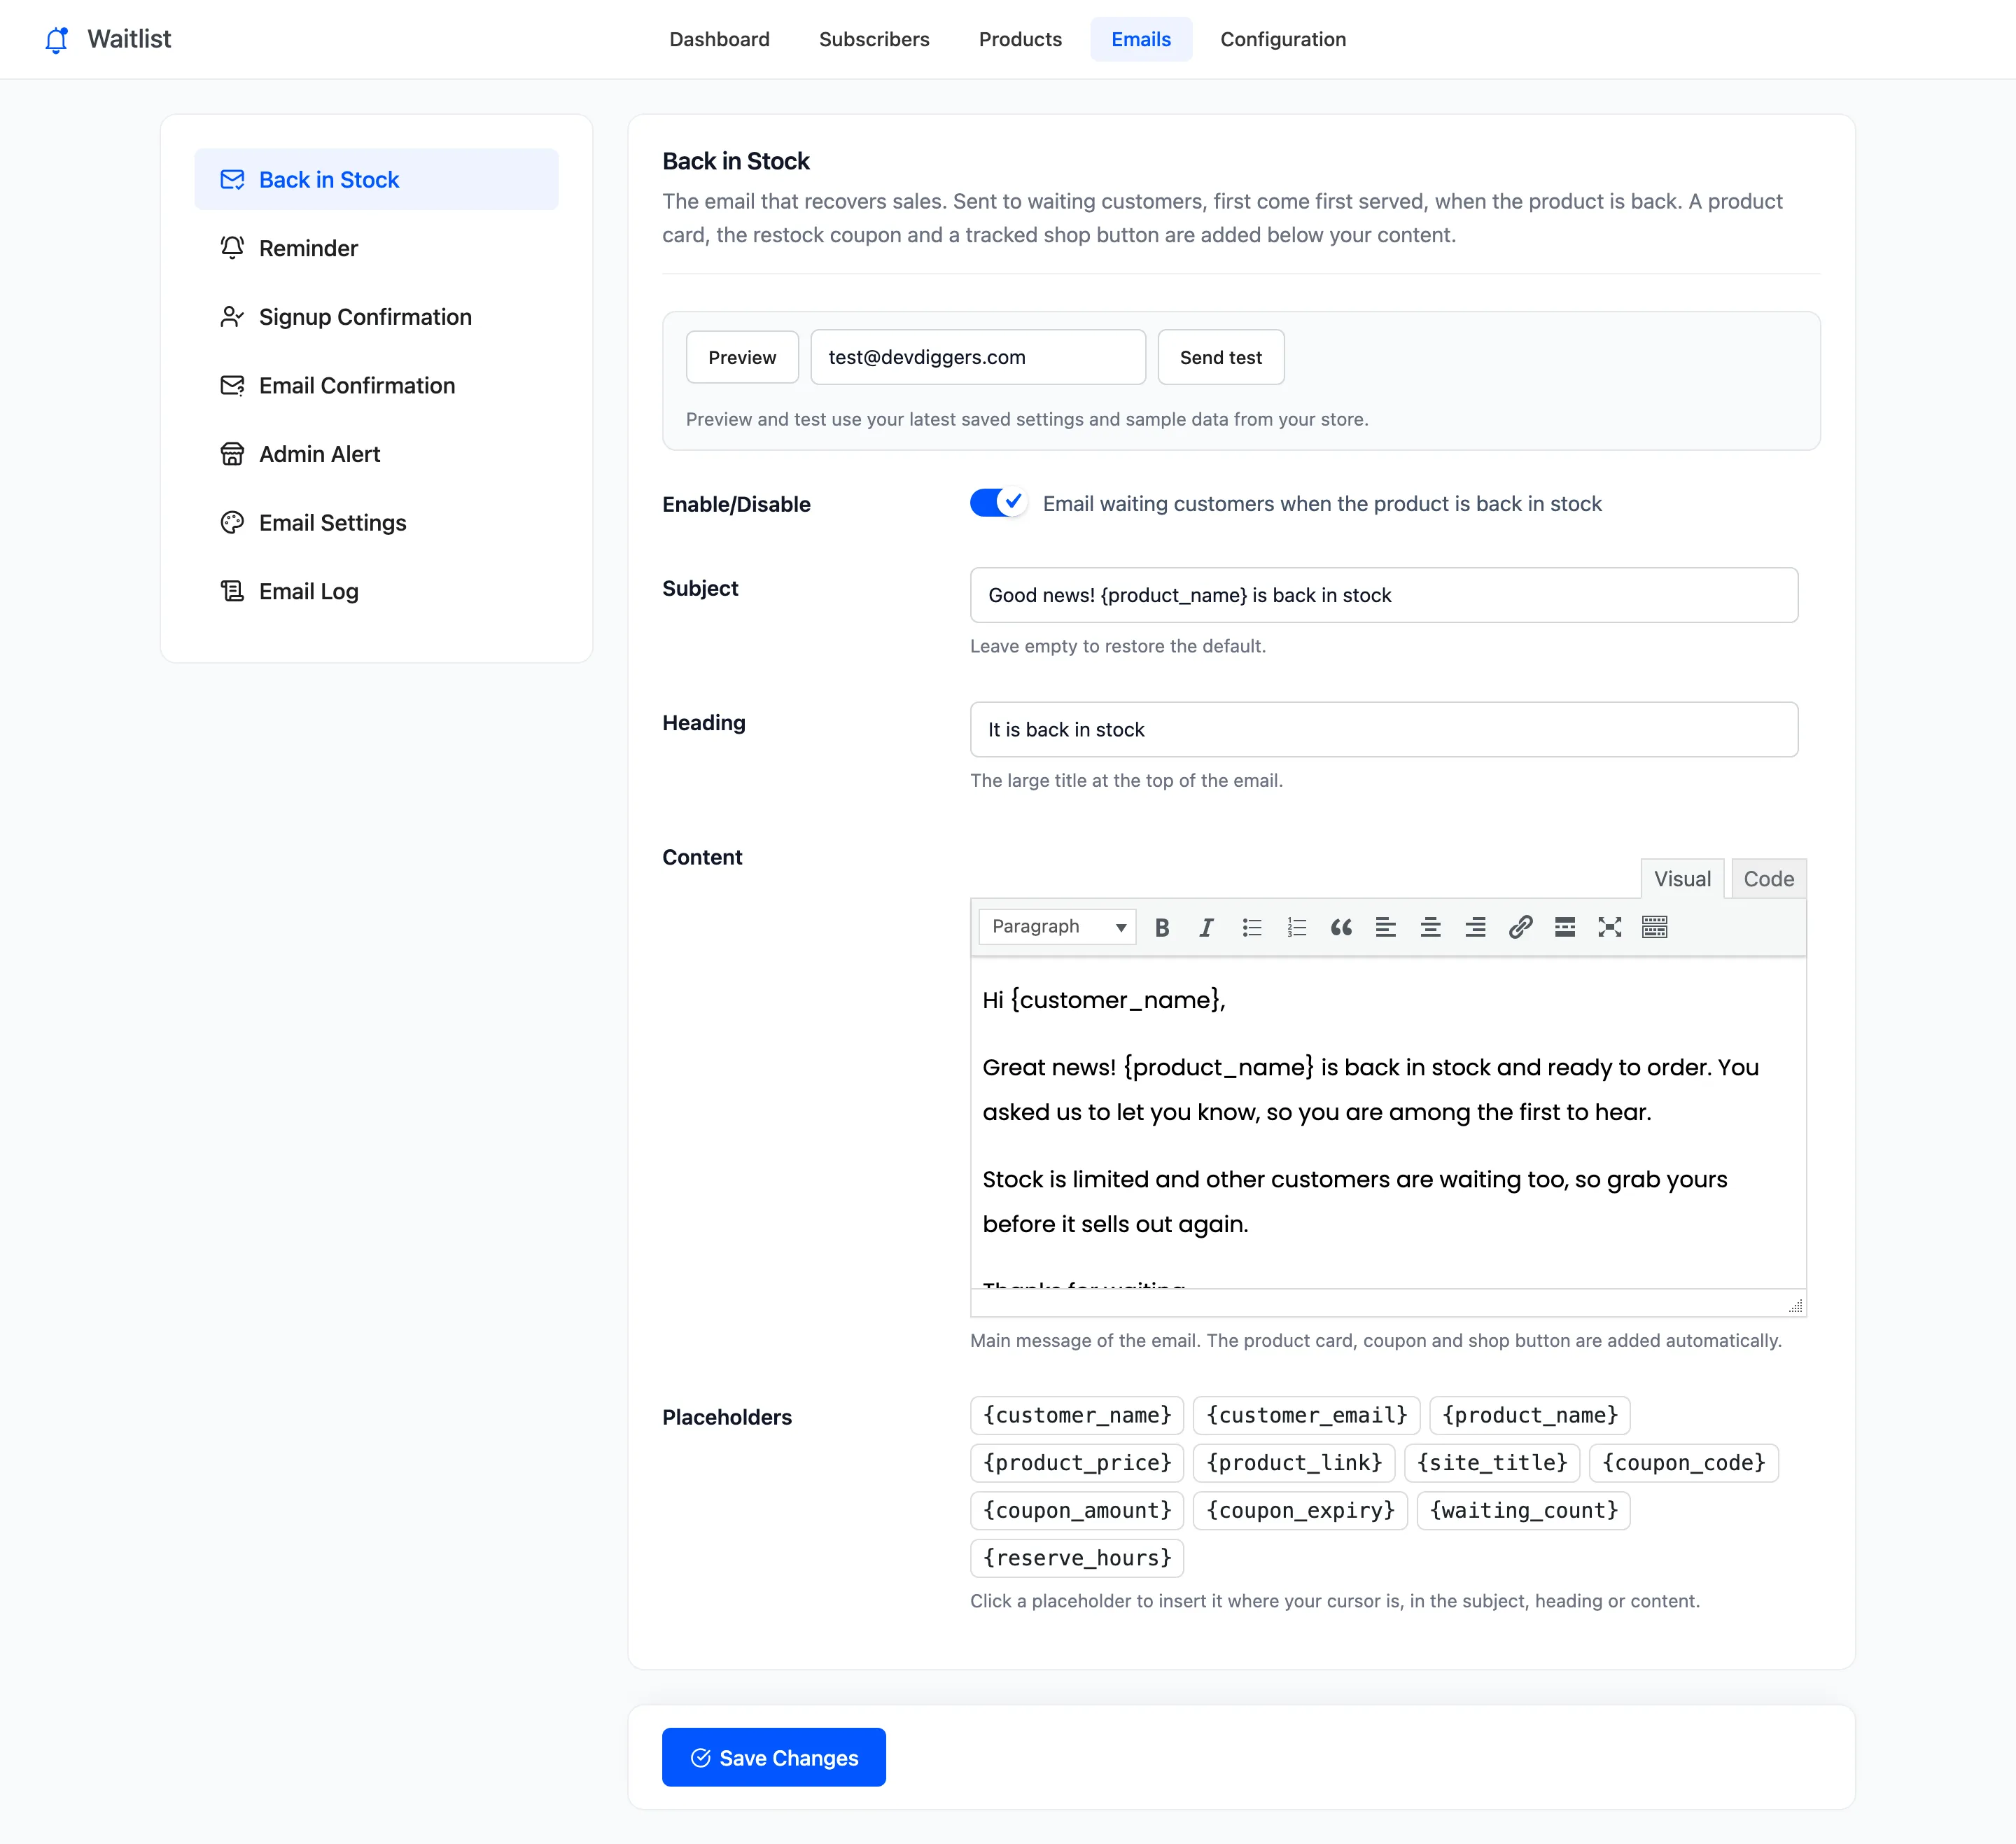
Section titled “Step 1: Open the email”Go to DevDiggers Plugins → Waitlist → Emails and pick one from the left: Back in Stock, Signup Confirmation or Admin Alert. Pro adds Reminder and Email Confirmation.
Step 2: Edit subject, heading and content
Section titled “Step 2: Edit subject, heading and content”- Subject: The default for Back in Stock is “Good news! {product_name} is back in stock”.
- Heading: The large title in the email. Default “It is back in stock”.
- Content: The message, in a visual editor. Switch to Code to edit HTML.
Click a placeholder under the editor to insert it where your cursor is:
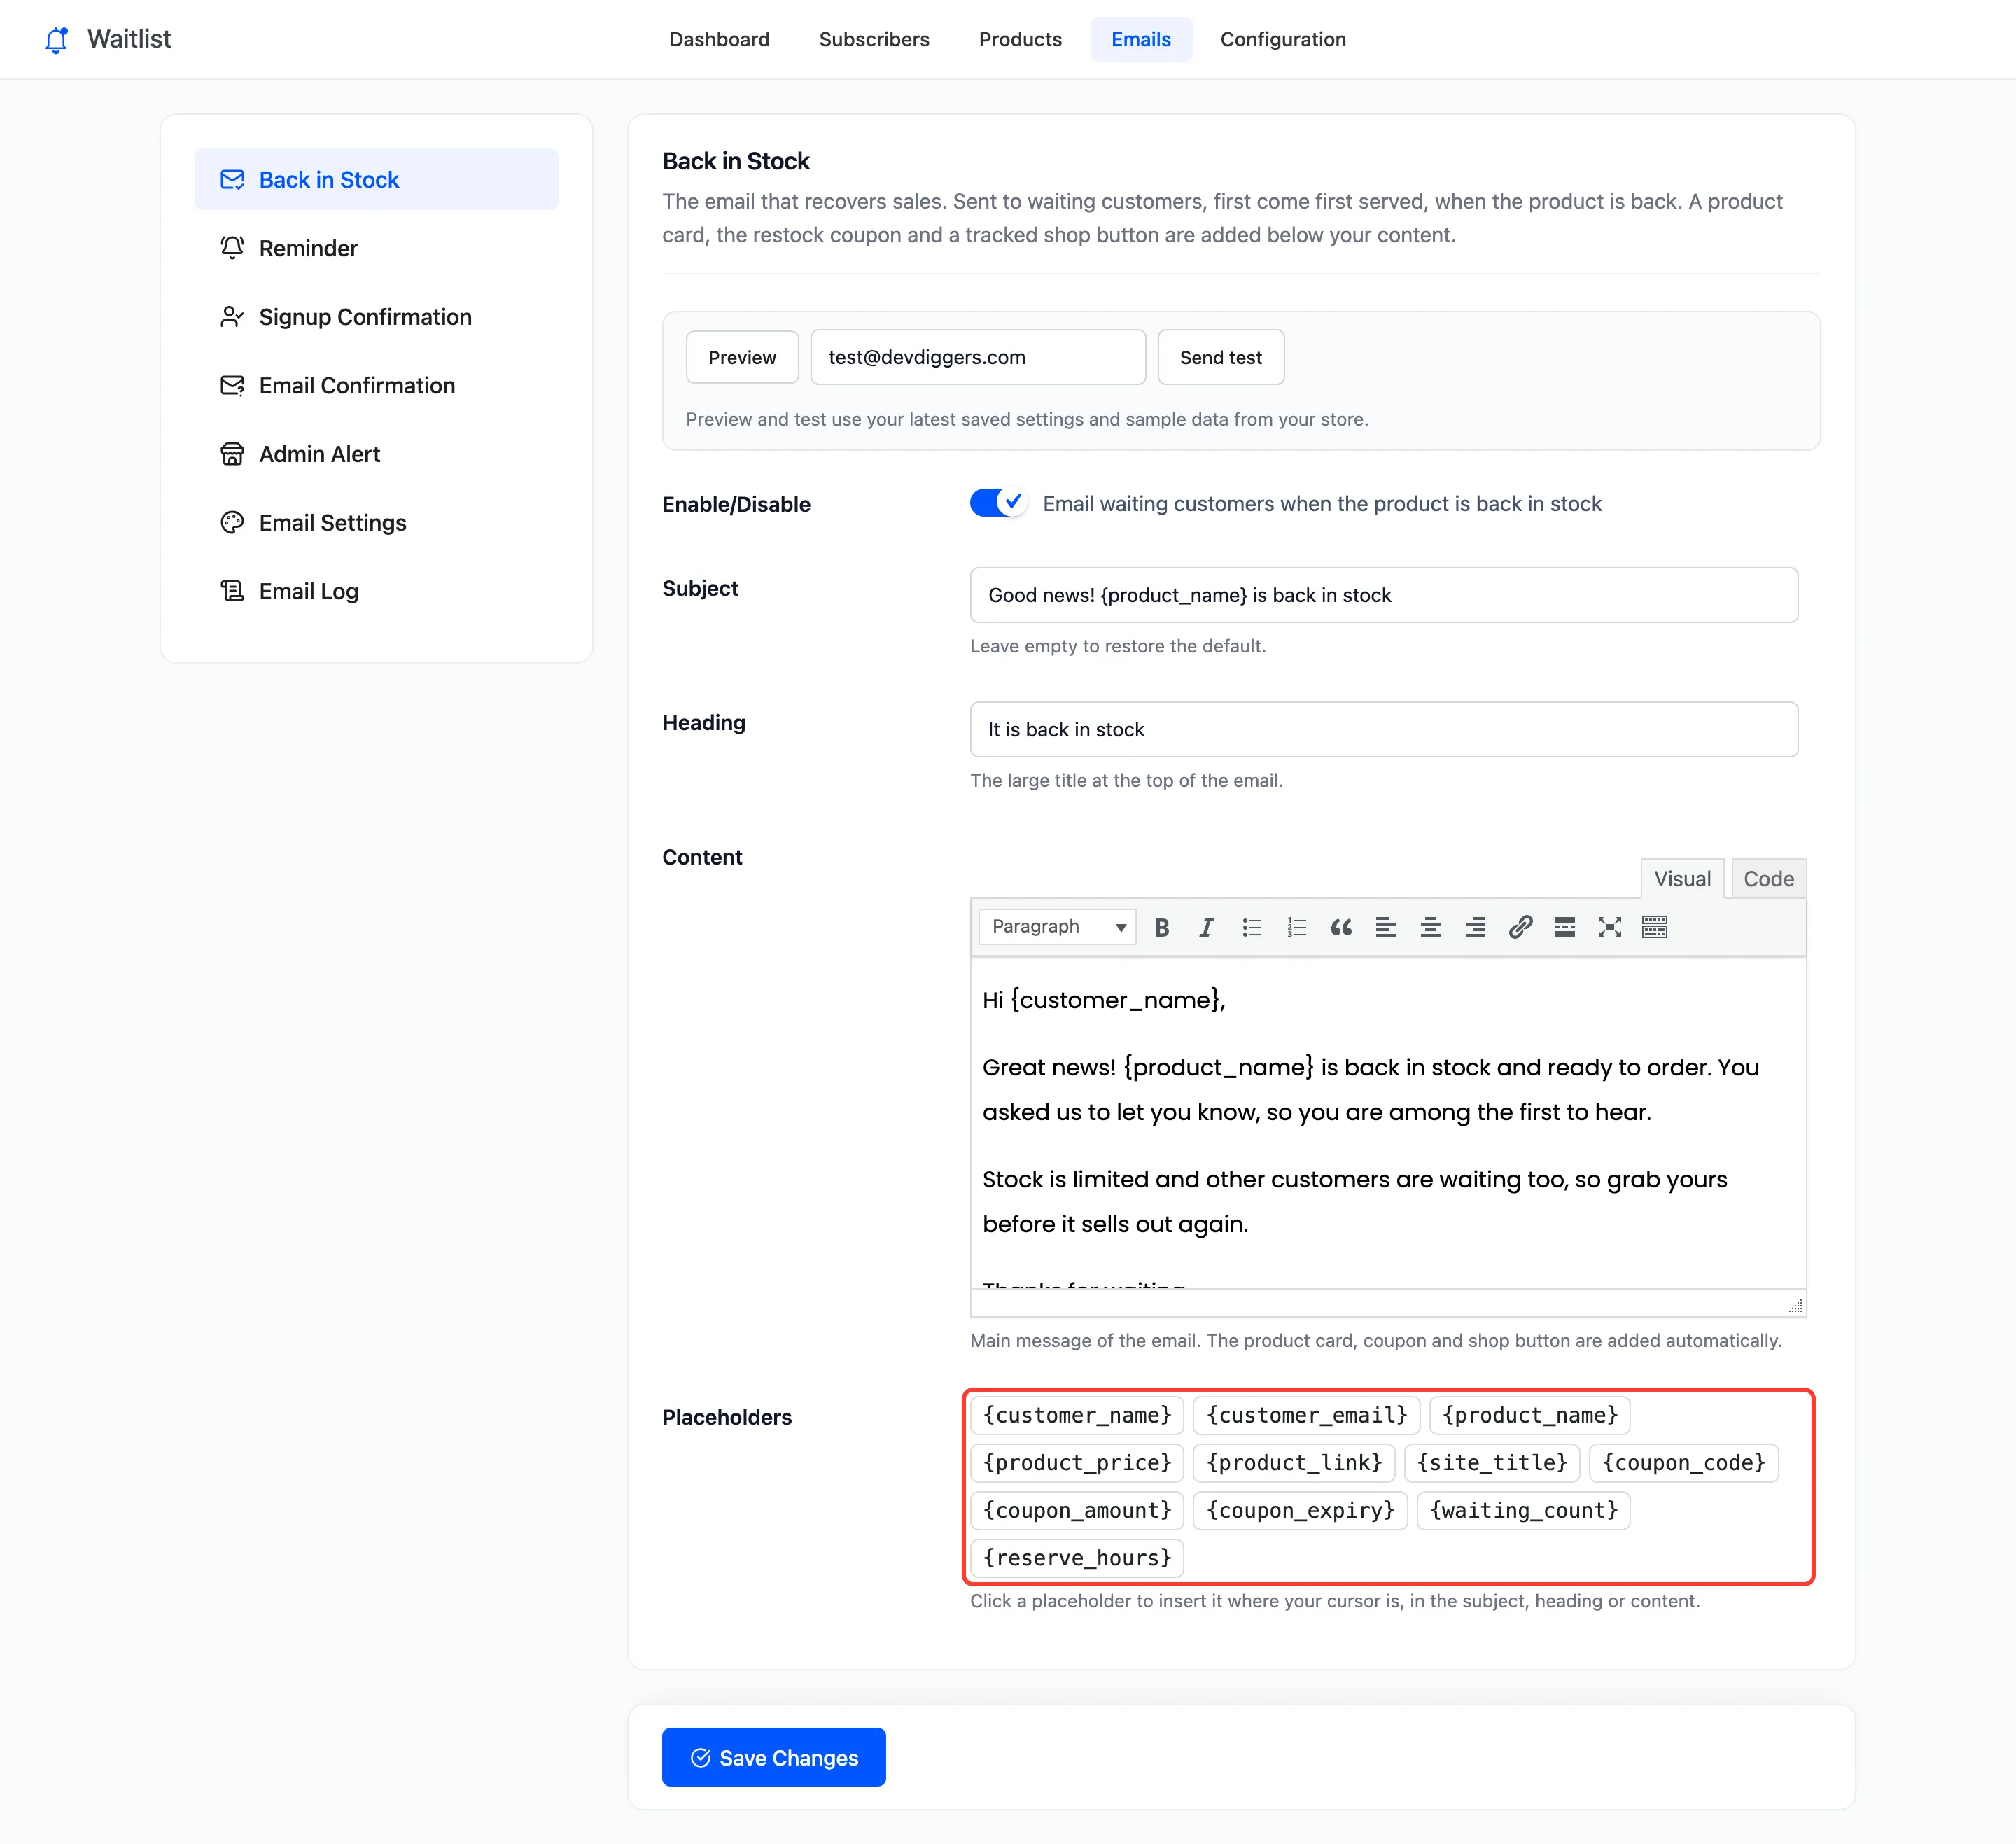
Leave the subject or heading empty to go back to the default. Click Save Changes.
Step 3: Change the button
Section titled “Step 3: Change the button”Open Email Settings:
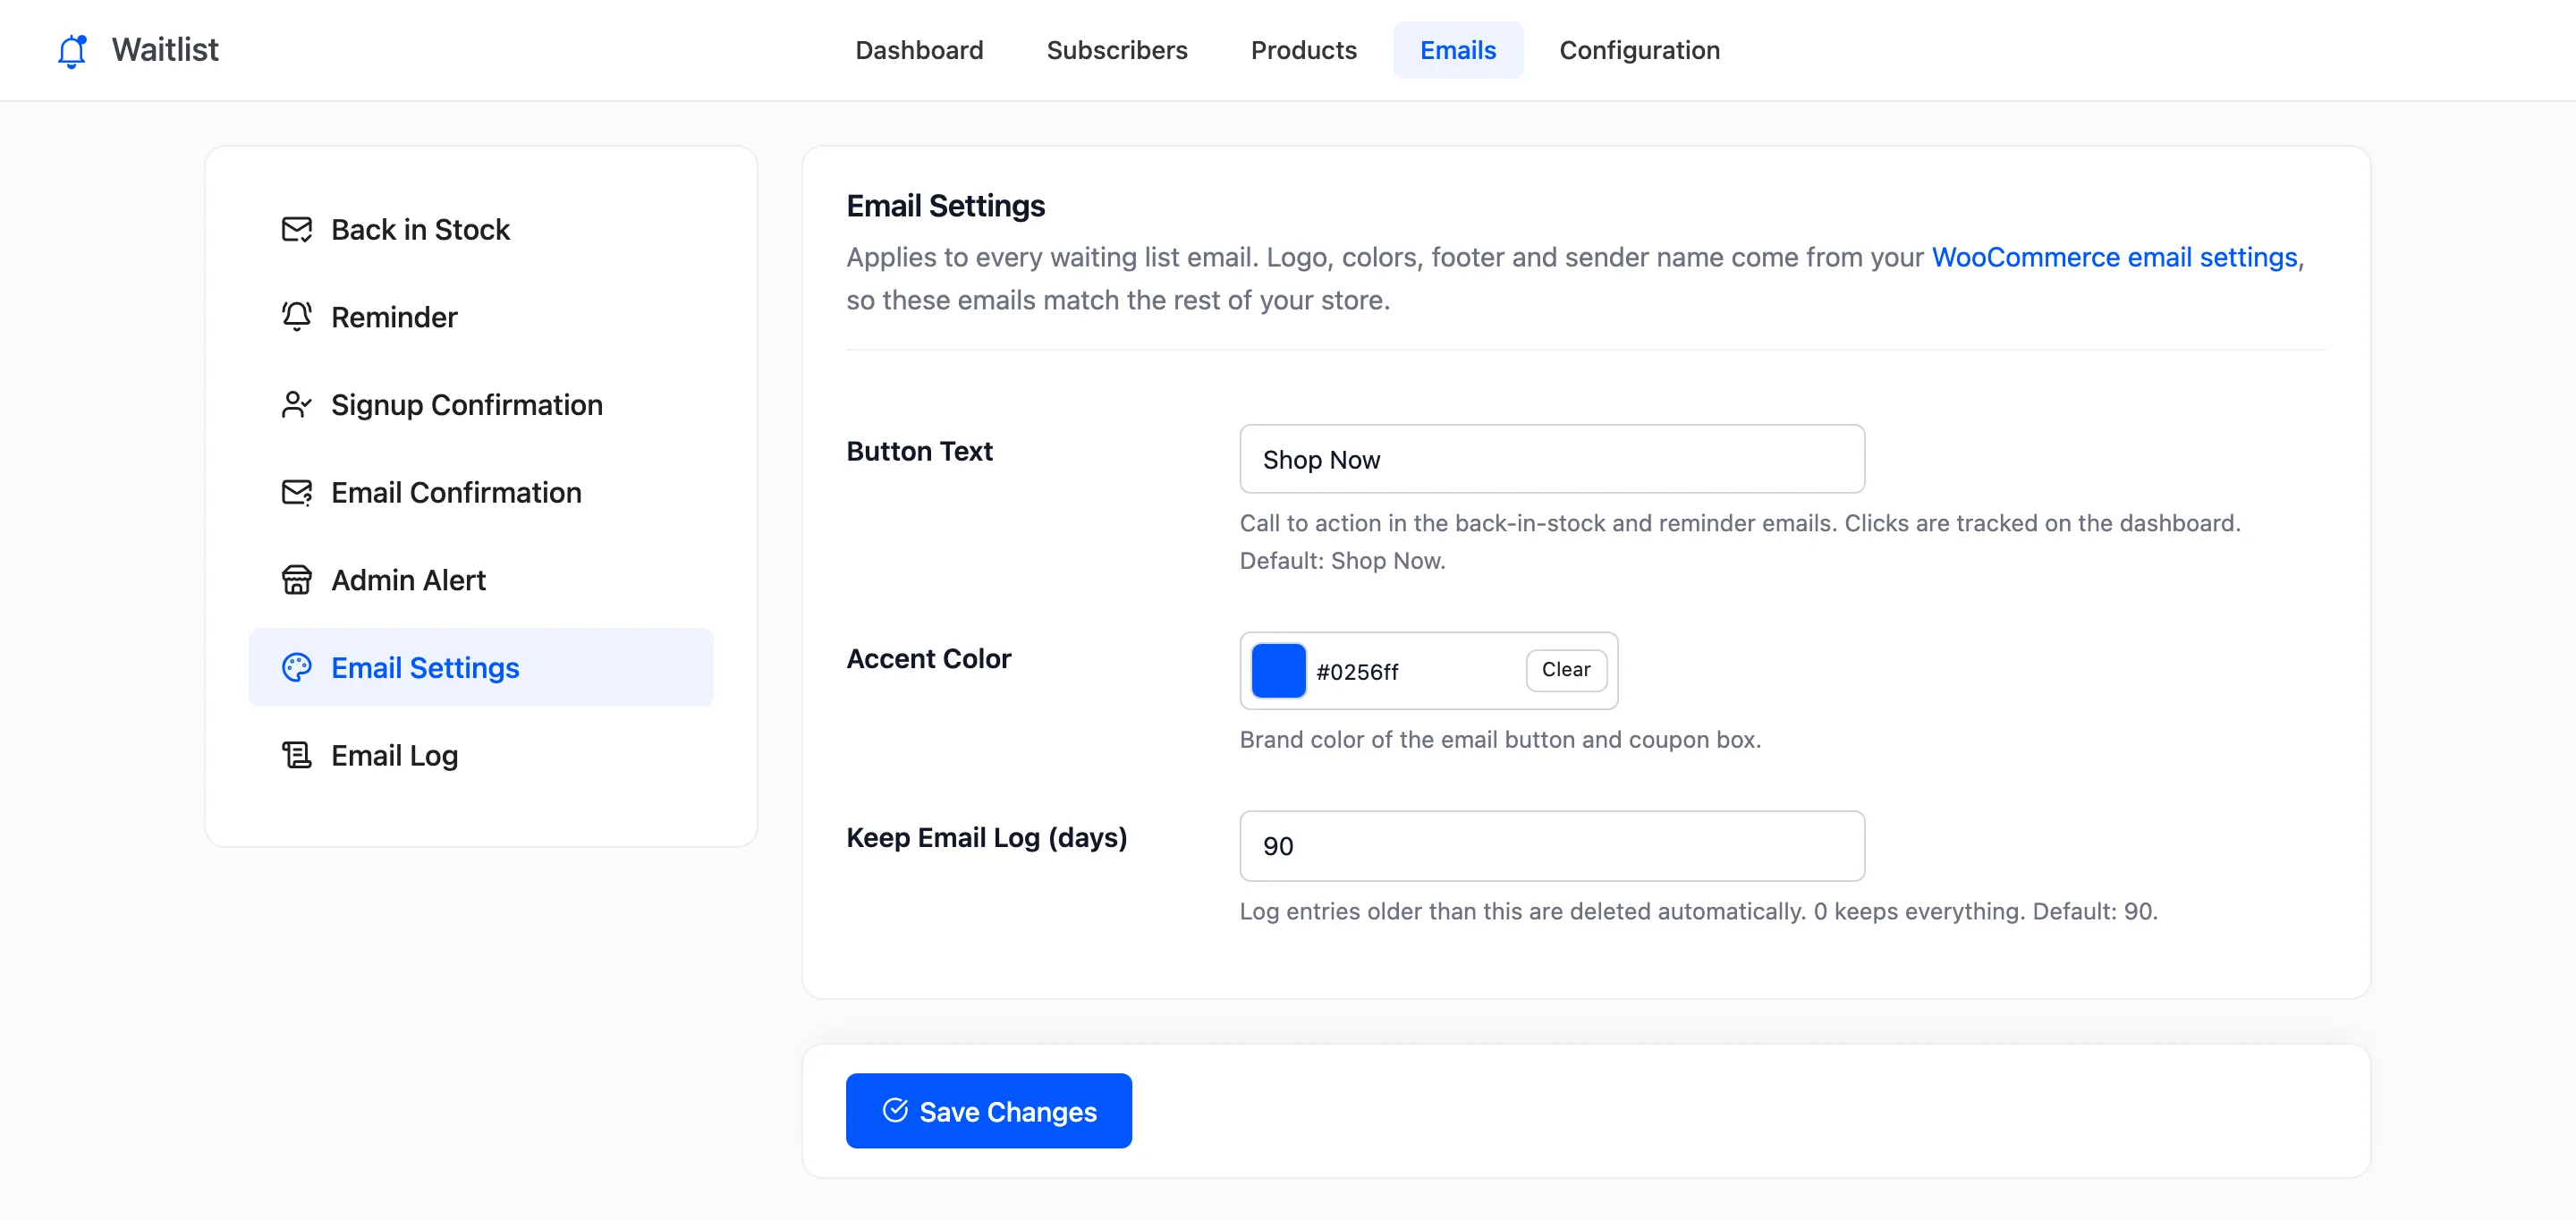
- Button Text: Default Shop Now.
- Accent Color: The button’s colour. Default #0256ff.
The logo, header colour and footer are set under WooCommerce → Settings → Emails, for all your store’s emails at once.
Step 4: Preview and test
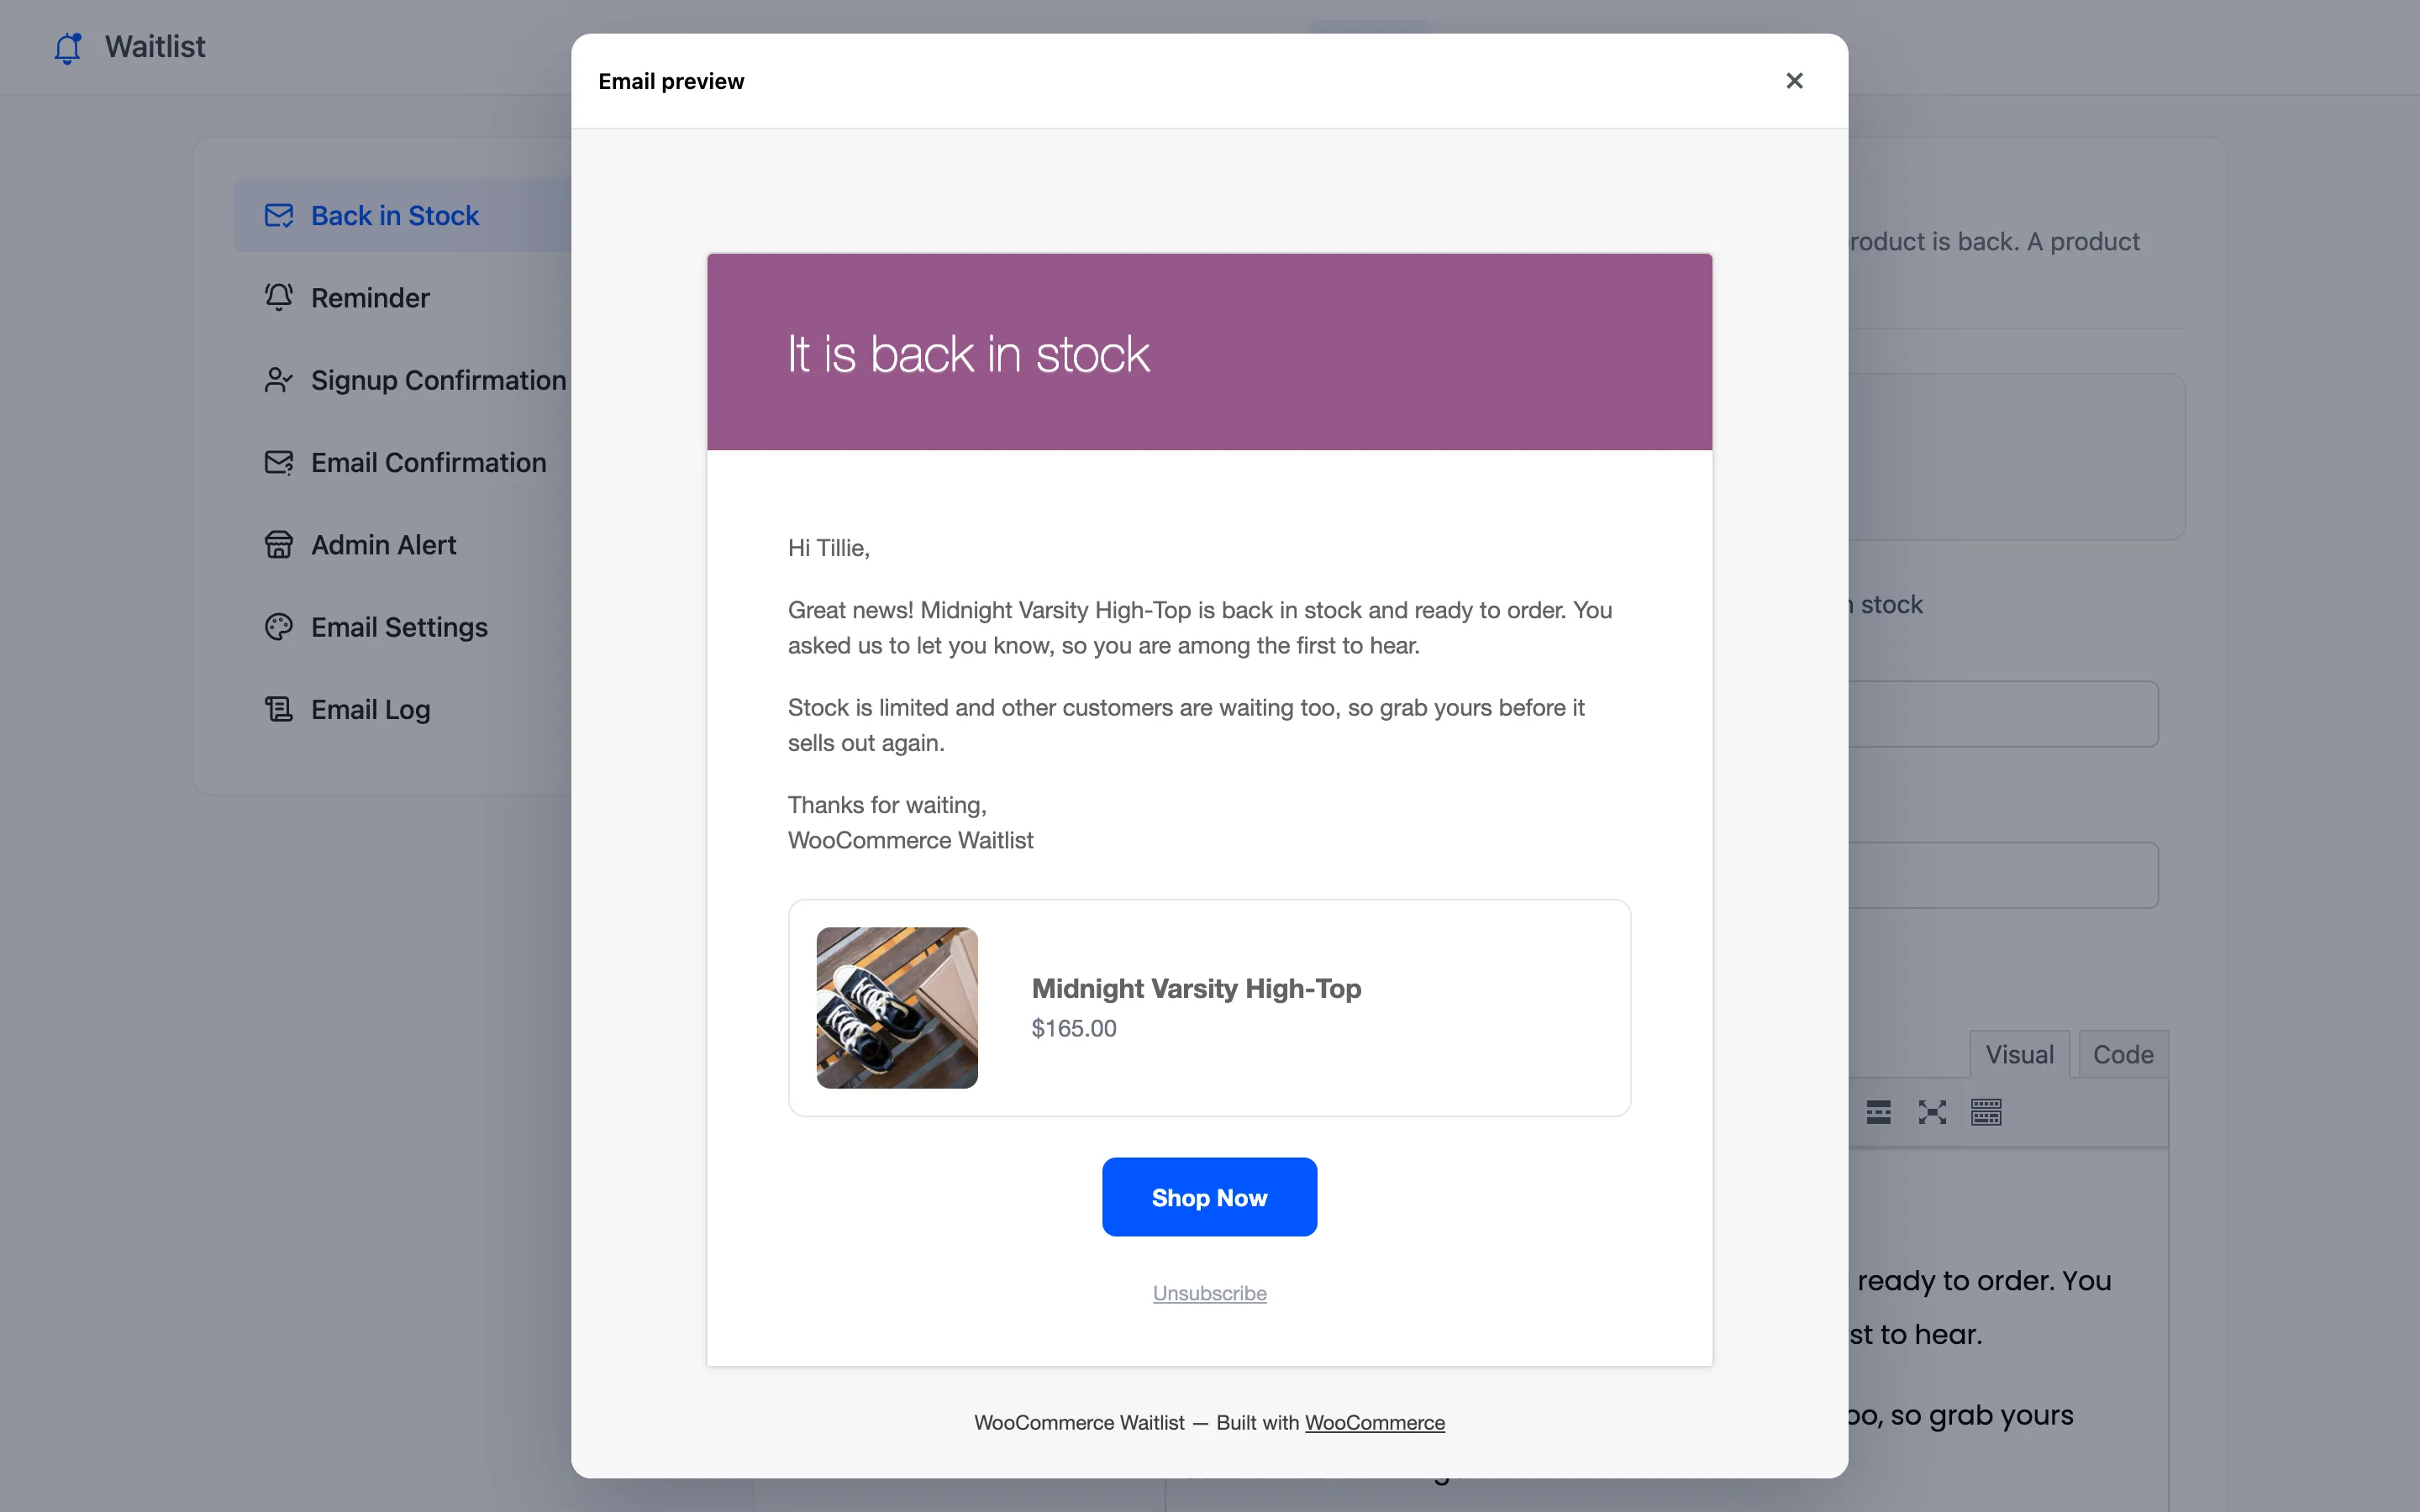
Section titled “Step 4: Preview and test”Preview shows the email as it will arrive, with your newest signup’s product and name:
To see it in a real inbox, type your address next to Send test and press it:
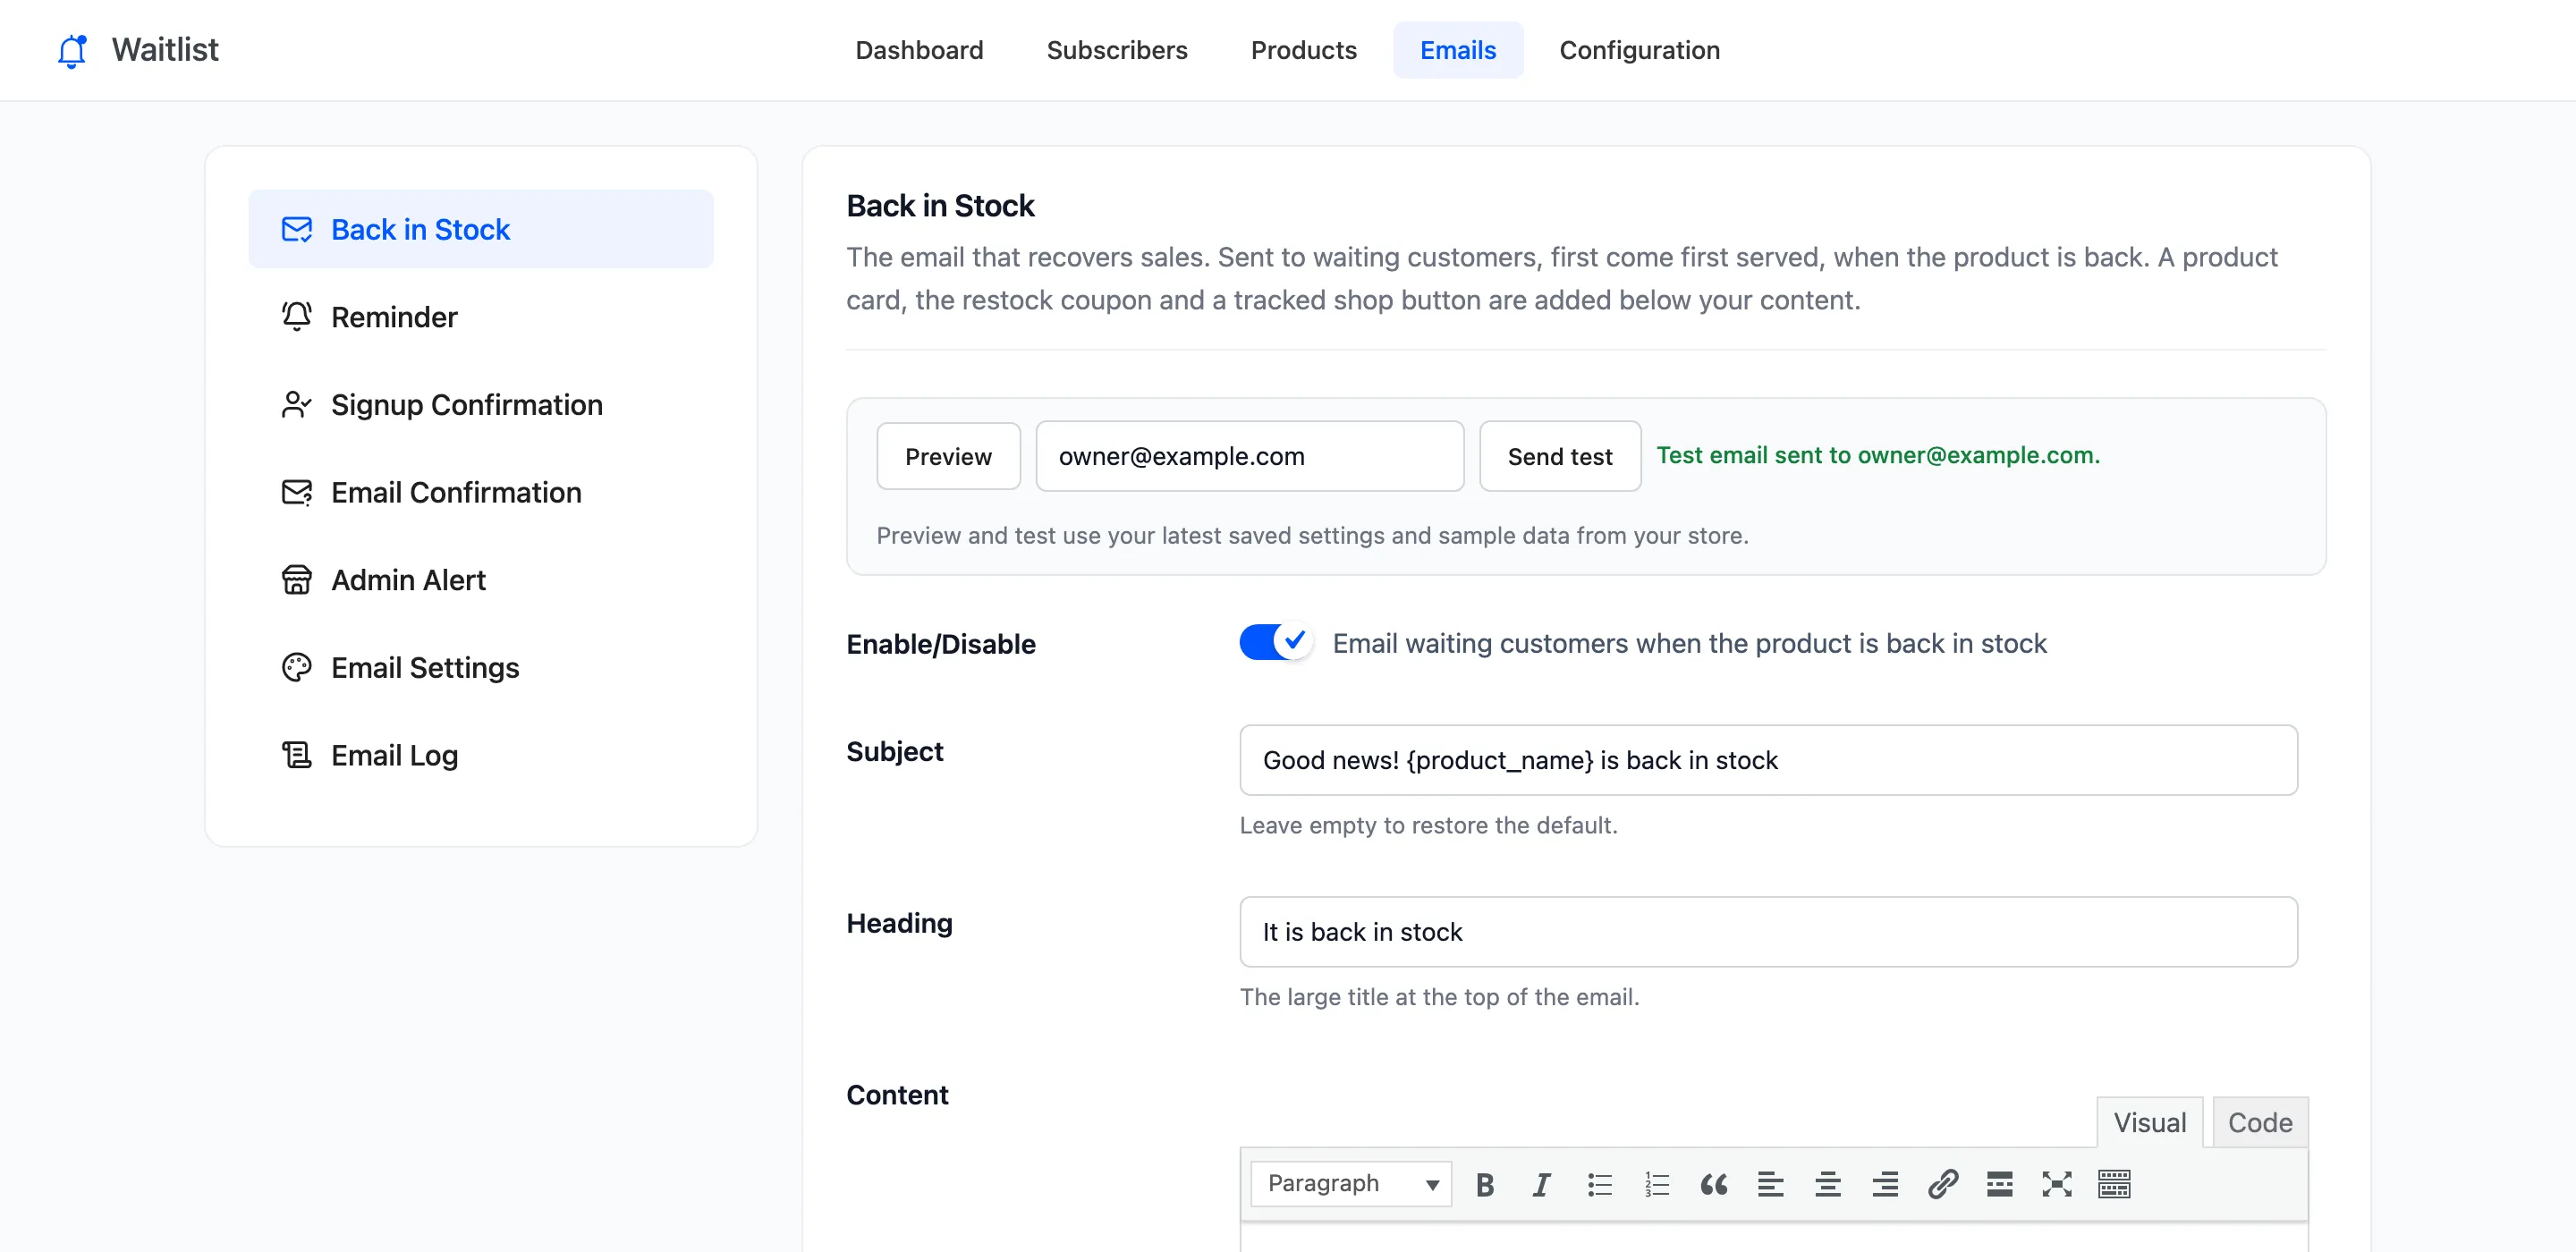
Both use your saved settings, so save before you preview.
If the test never arrives
Section titled “If the test never arrives”The plugin hands every email to WordPress, which needs a working mail setup. Install an SMTP plugin and send the test again. In Pro the Email Log shows whether the server accepted it.
Changing the layout
Section titled “Changing the layout”The layout itself is a WooCommerce email template. A developer can copy
templates/emails/waiting-list.php from the plugin to yourtheme/ddwc-waiting-list/emails/waiting-list.php
and edit it there.