

The Subscribers Screen
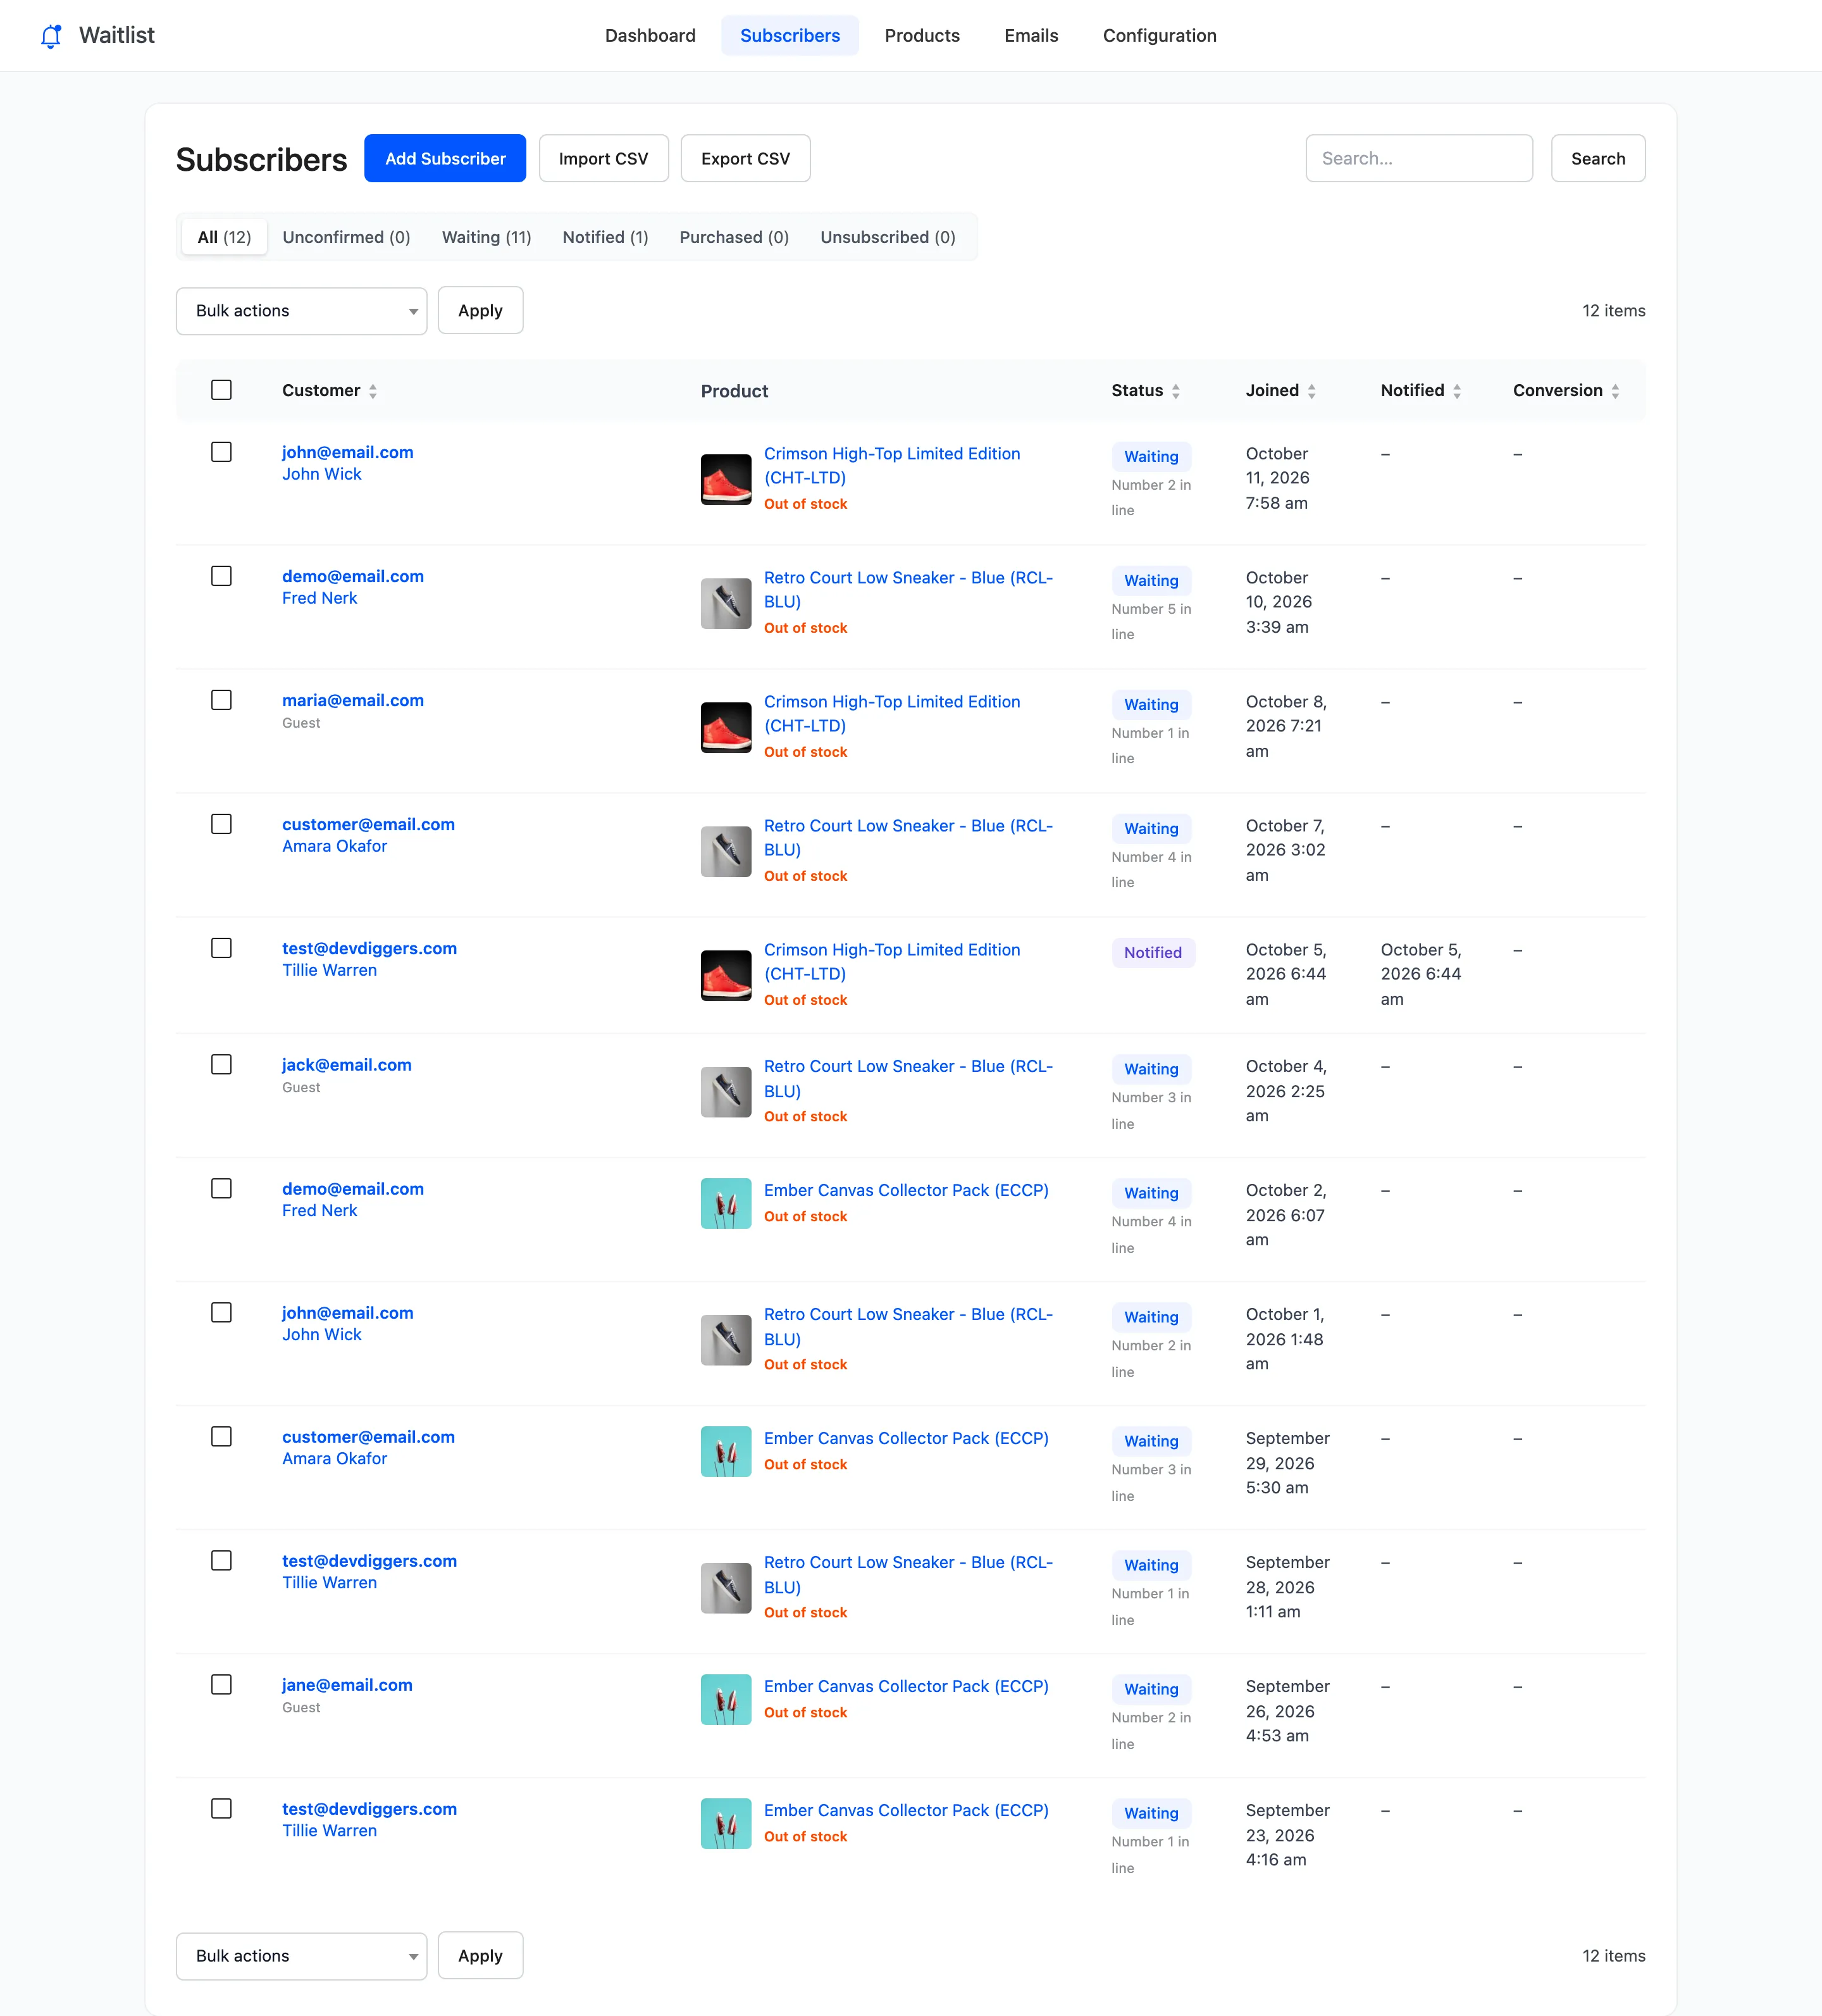
The Subscribers screen lists every signup: who, for which product, where they stand and, in Pro, what they bought. Open DevDiggers Plugins → Waitlist → Subscribers.
Status views
Section titled “Status views”The tabs above the list filter by status, with a count on each. They are All, Unconfirmed (Pro, double opt-in guests who have not confirmed), Waiting, Notified, Purchased (Pro) and Unsubscribed.
Columns
Section titled “Columns”- Customer: The email, and the account name for a logged-in customer or Guest. In Pro, the phone number follows when the customer gave one.
- Product: The product or variation with its SKU, and its stock status. In Pro, “3 units wanted” when the customer asked for more than one.
- Status: For a waiting customer, their place in line: “Number 2 in line”. In Pro, “Clicked email” once a notified customer opened the product from the email.
- Joined: When they joined.
- Notified: When the back in stock email went out. In Pro, their coupon code shows under it.
- Conversion (Pro): The order they placed, linked, and its value for this product.
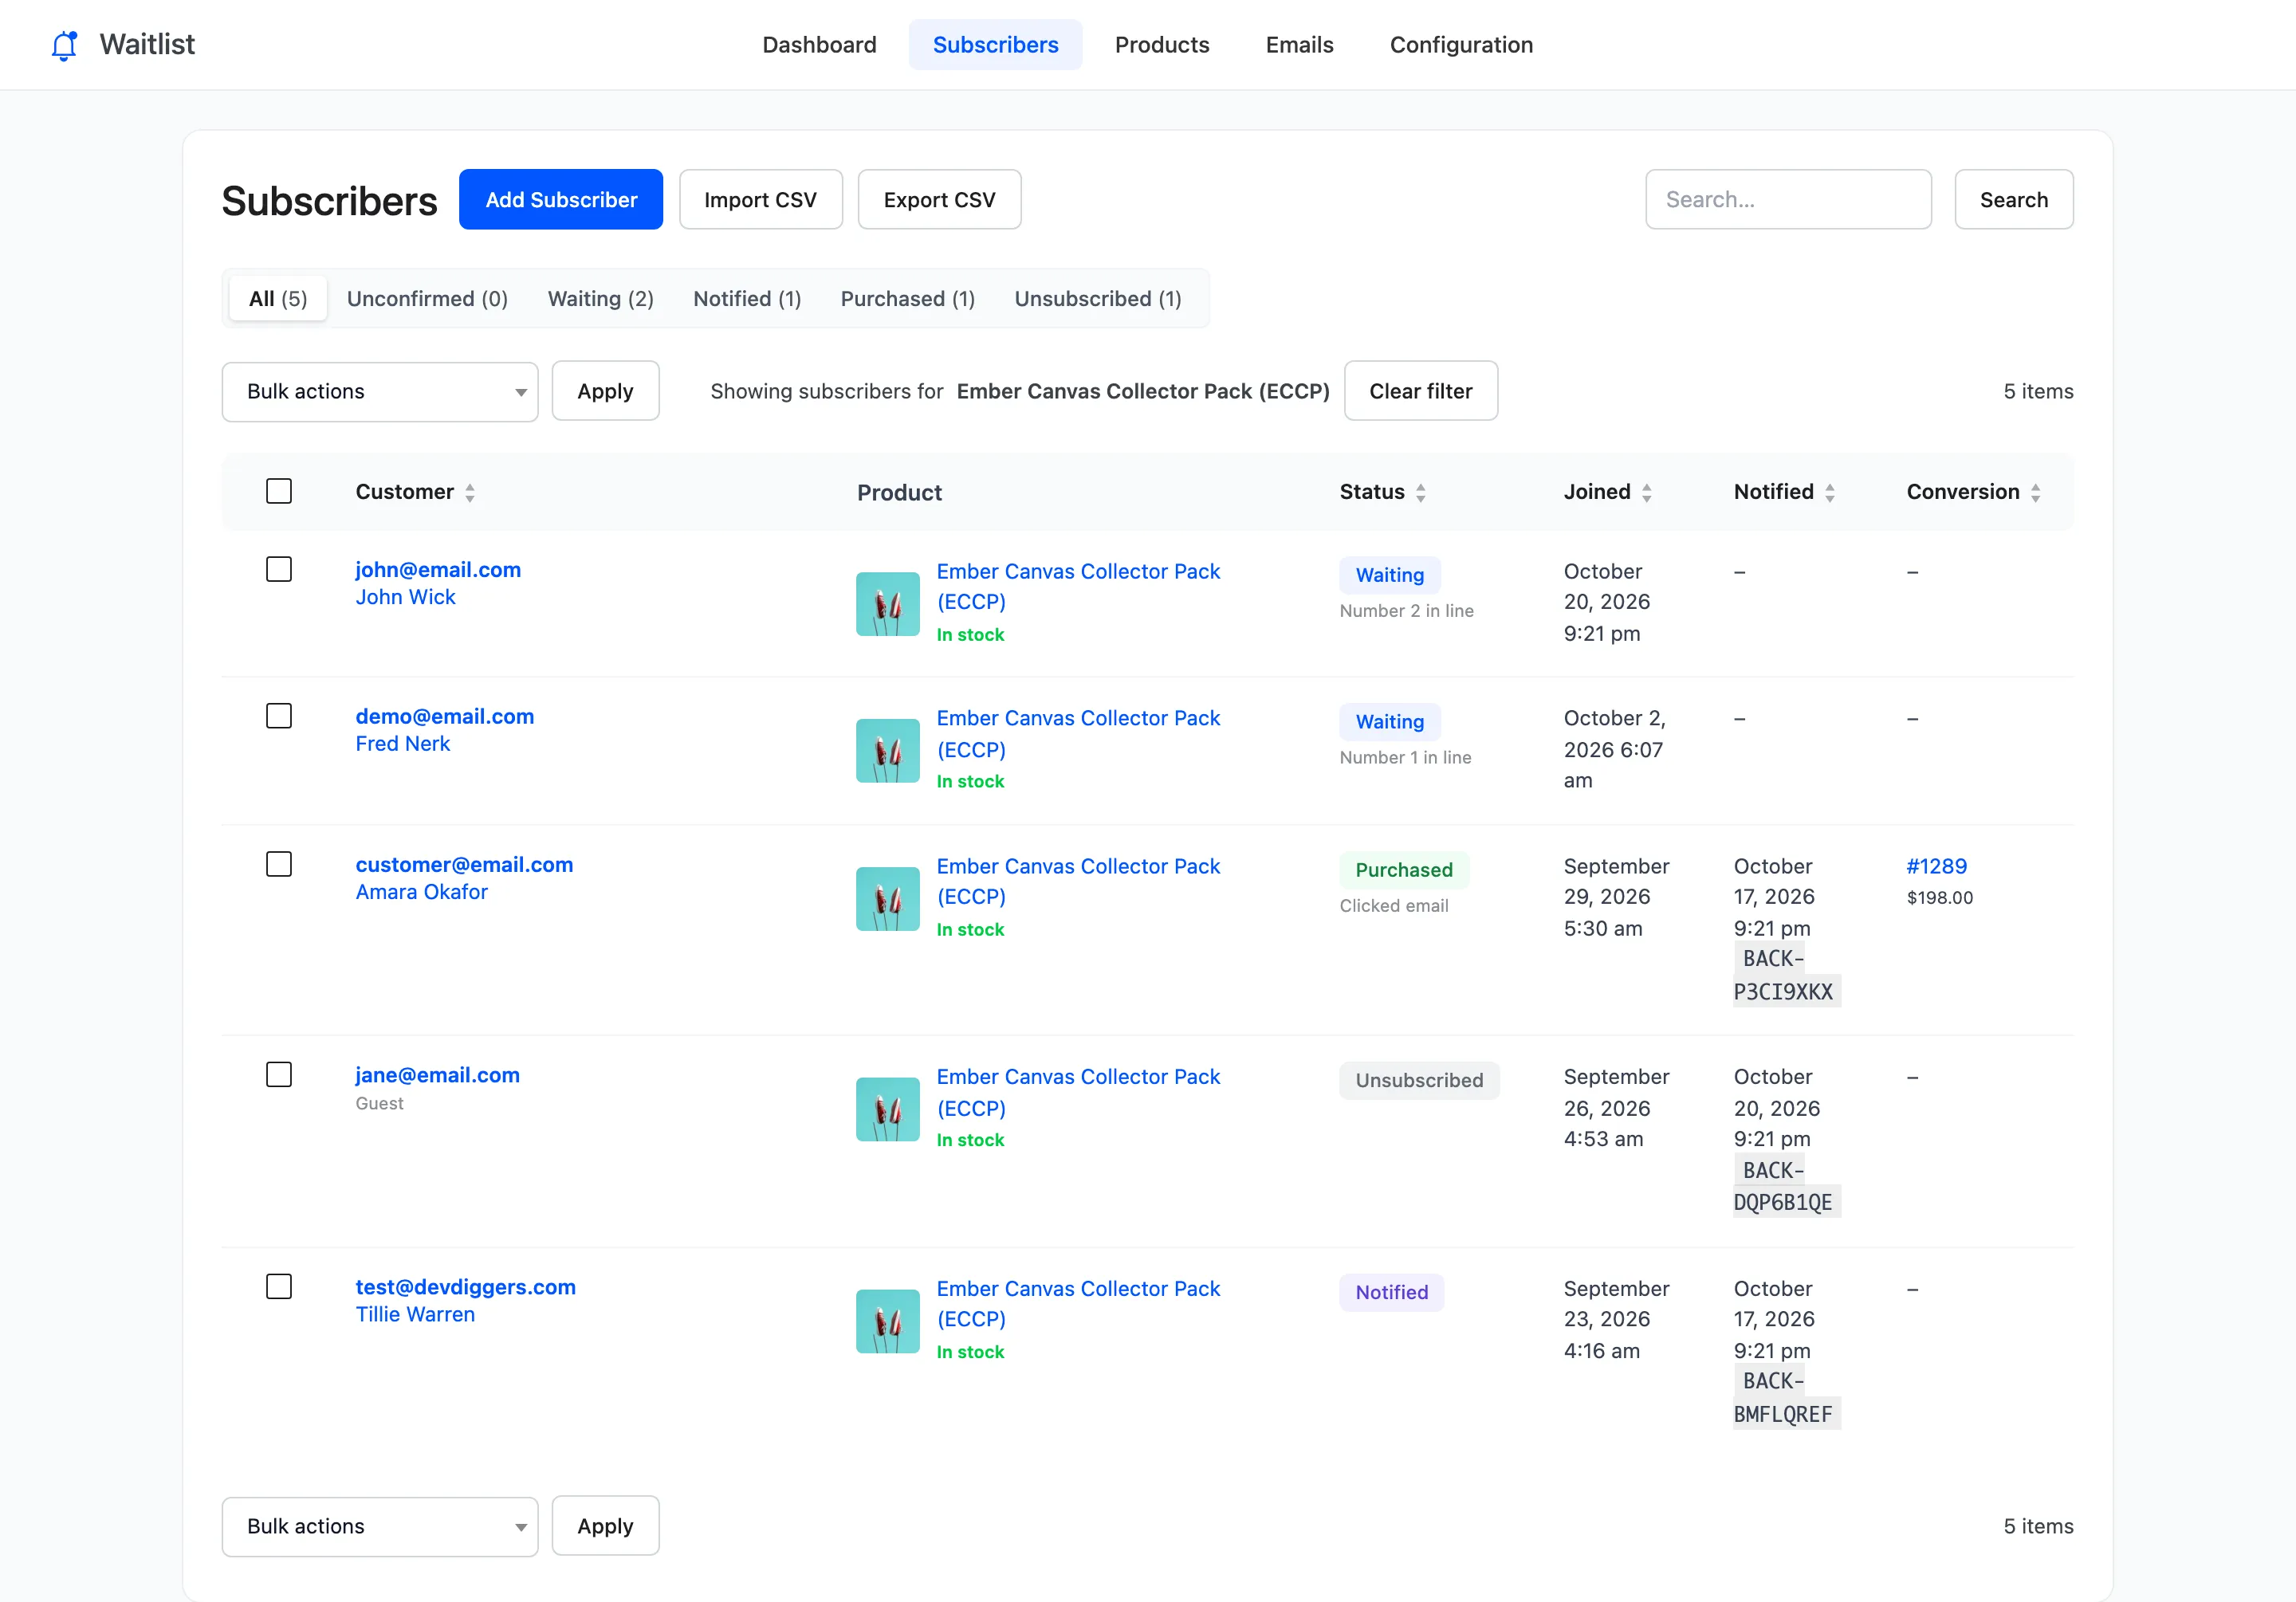
Click Customer, Status, Joined, Notified or Conversion to sort.
Search and filter
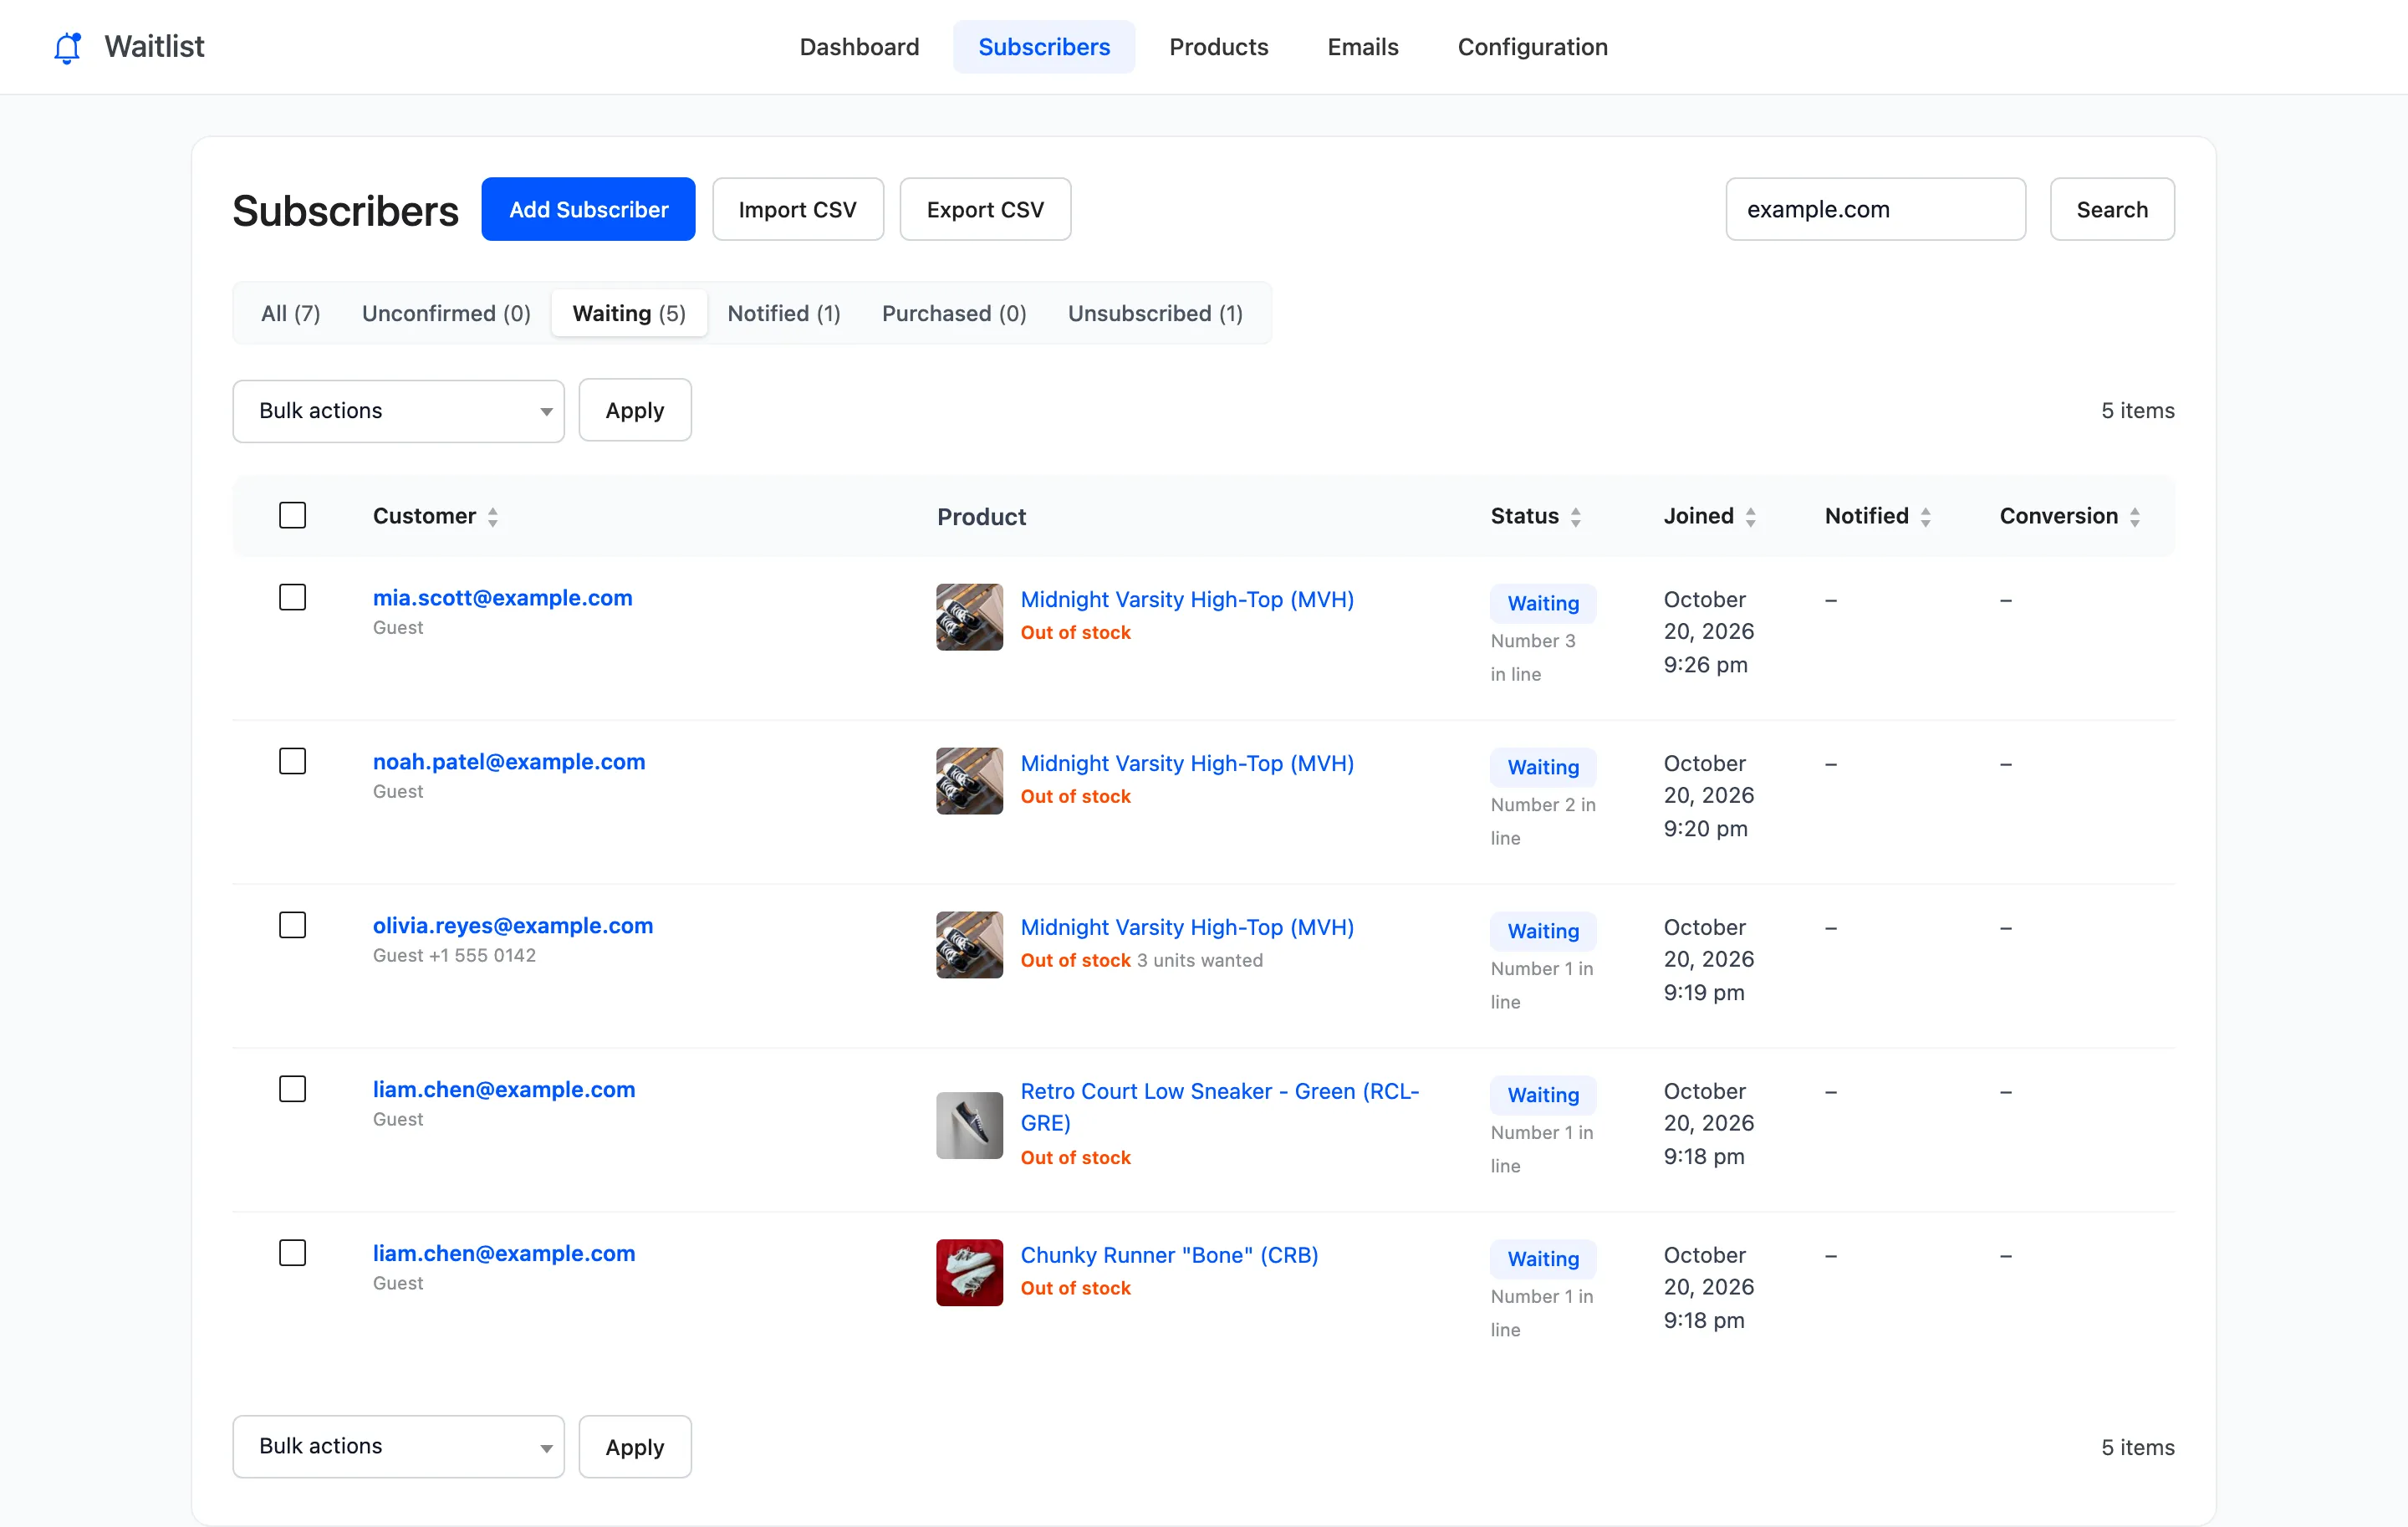
Section titled “Search and filter”Search matches the email and the product name. A product filter comes from the Products screen’s View subscribers link, or the count in the WooCommerce Products list’s Waitlist column. It shows “Showing subscribers for” the product, with Clear filter.
Row actions
Section titled “Row actions”Hover a row for its actions.
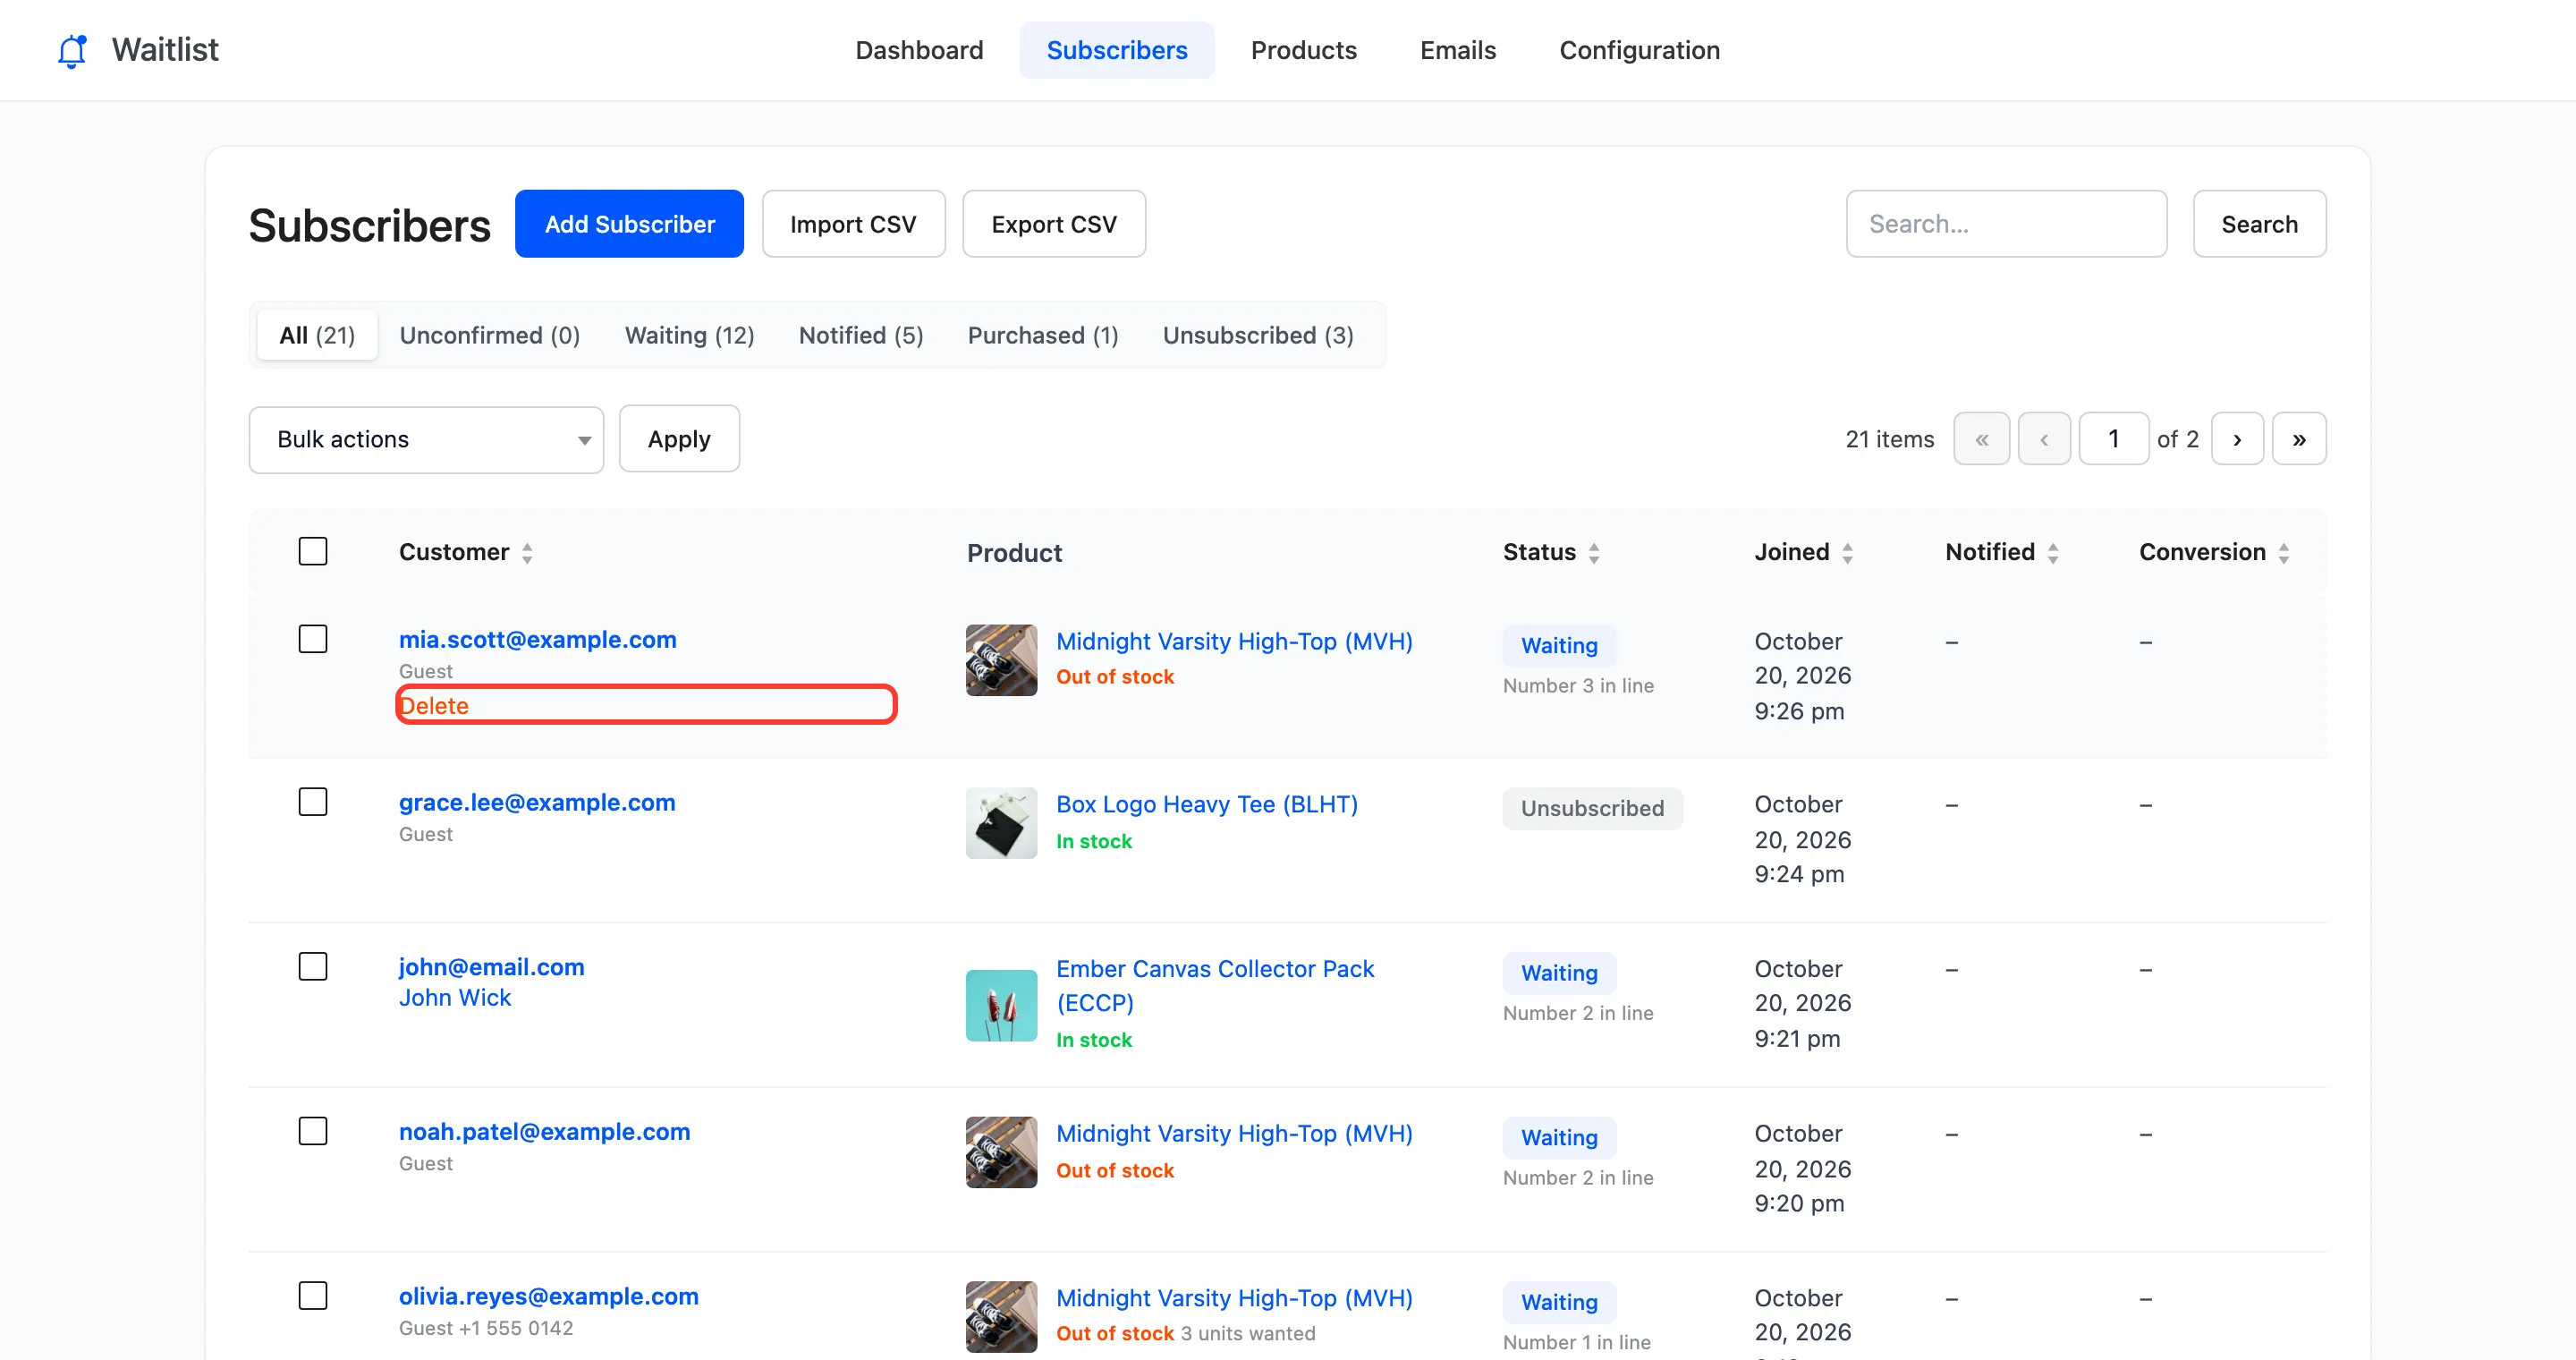
- Send email: Sends this customer the back in stock email now, and marks them Notified. Shown on Waiting and Notified rows while the product is in stock, since the email tells them it is back.
- Move to waiting: Puts a Notified customer back in line, for example after a restock that fell through. Their place goes by the date they joined.
- Delete: Removes the signup for good. The customer gets no email.
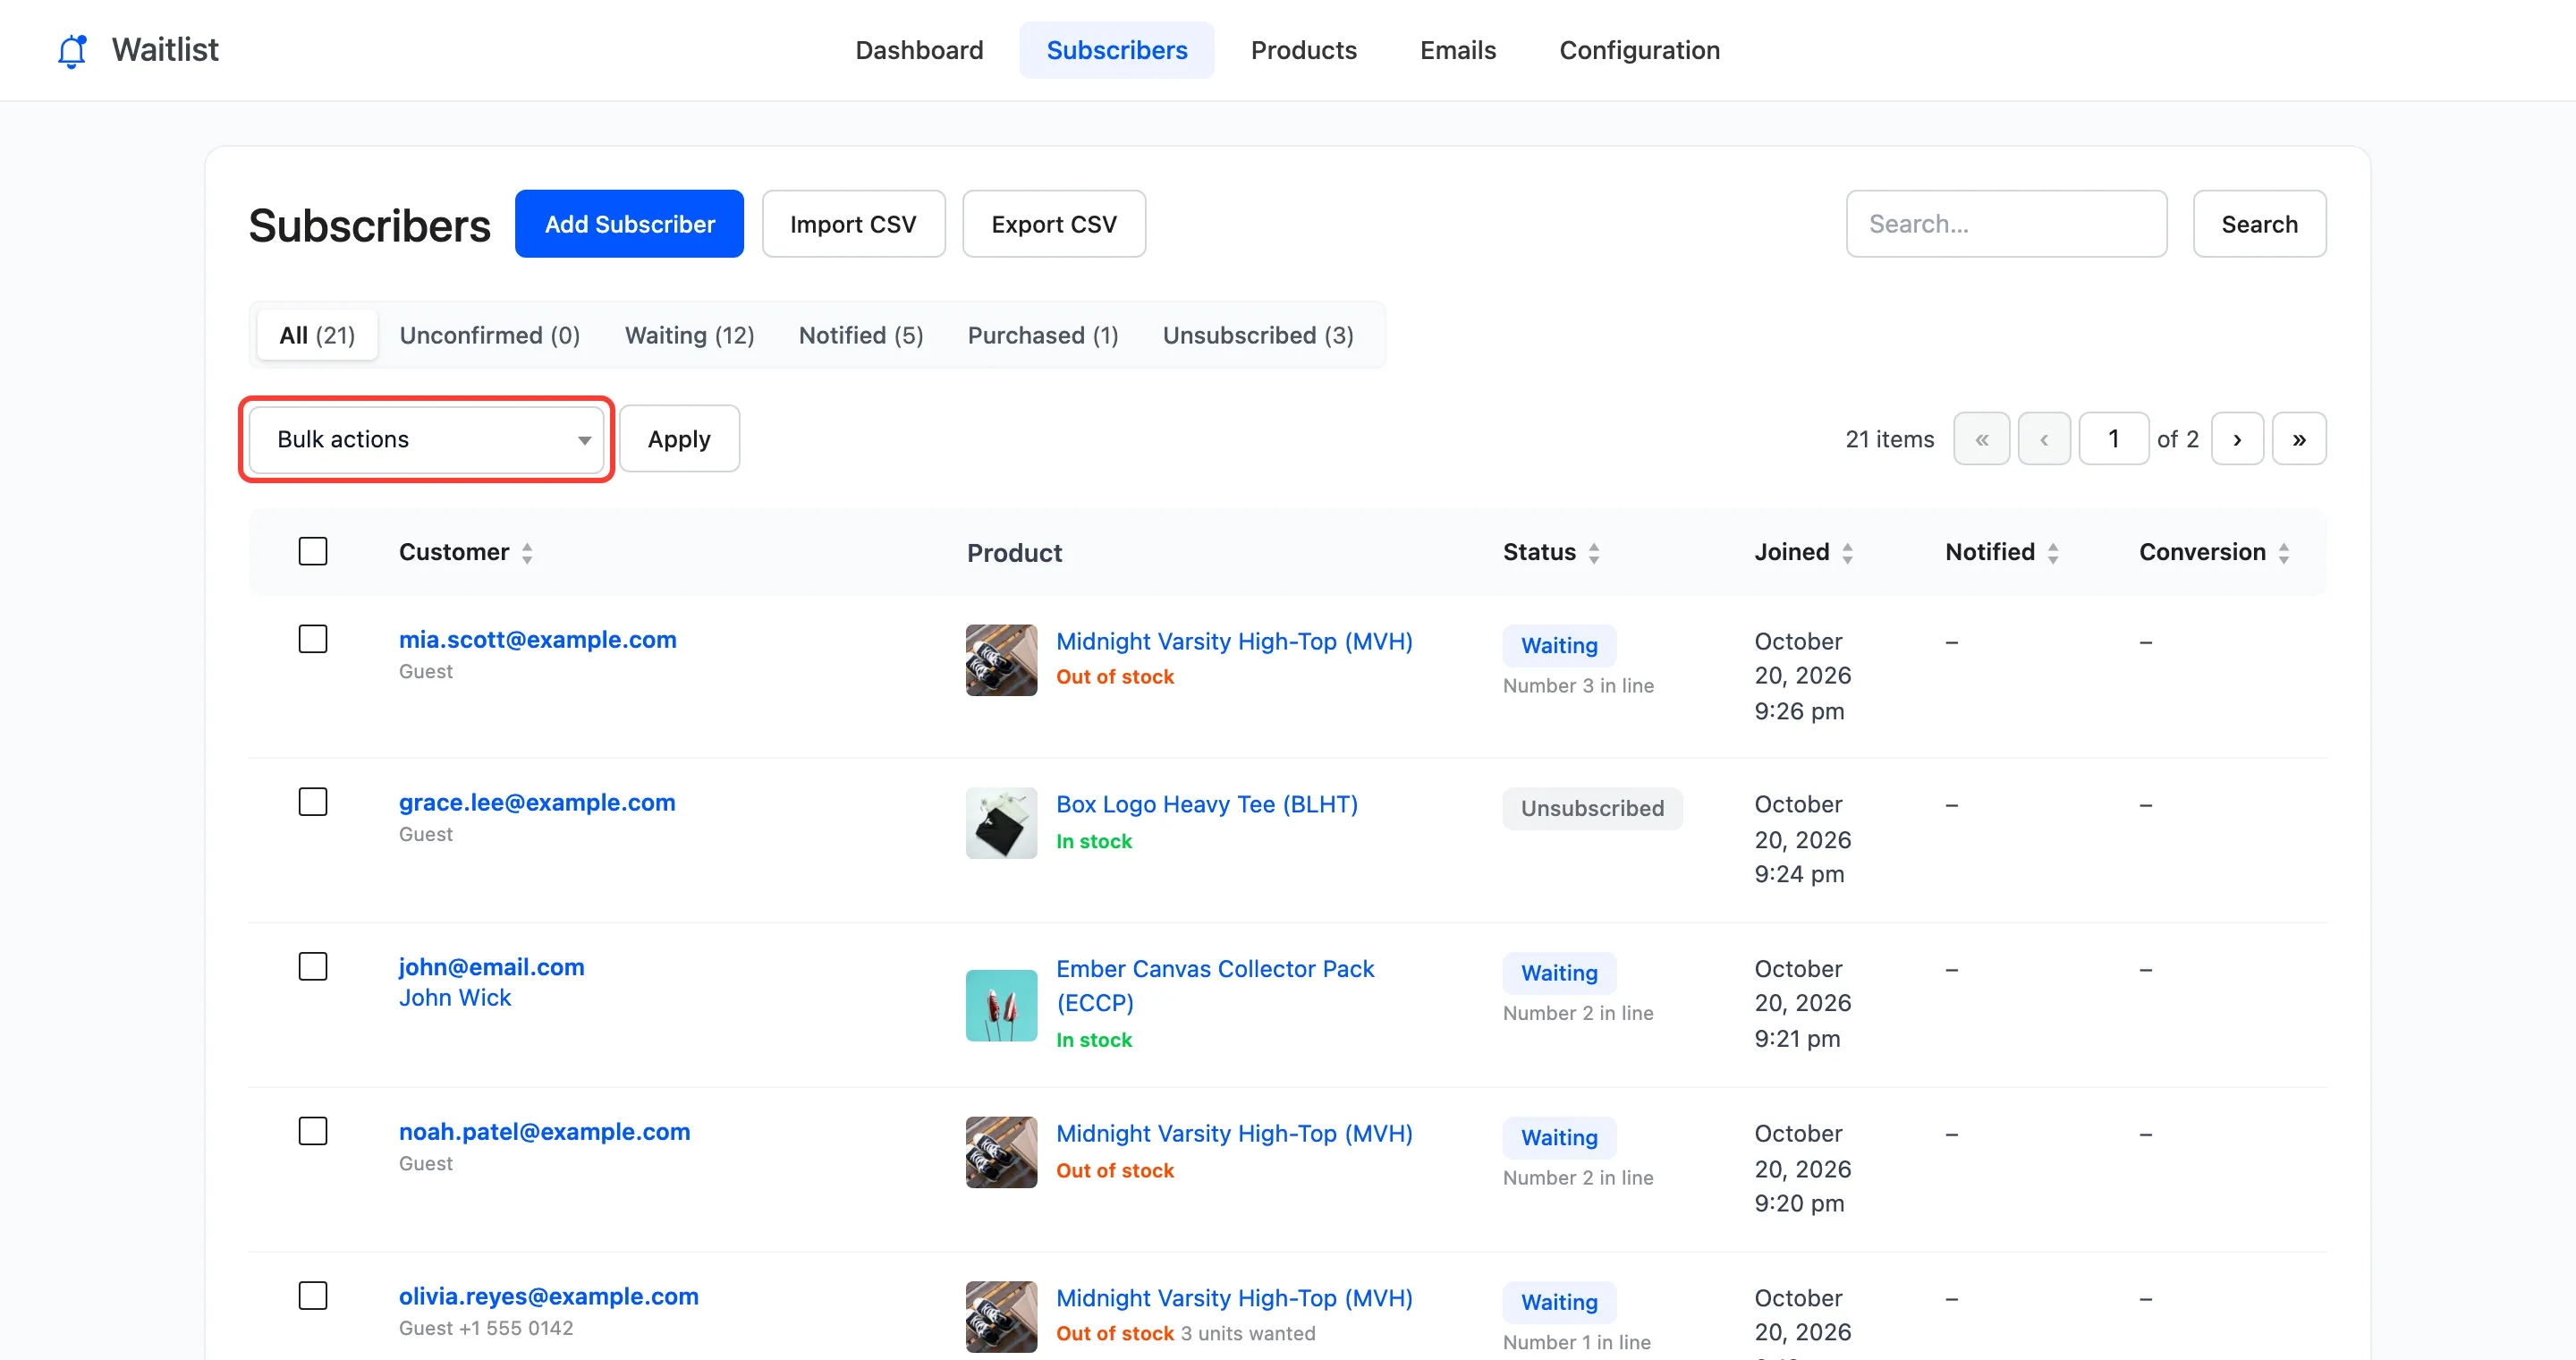
Bulk actions
Section titled “Bulk actions”Tick rows, choose from Bulk actions and click Apply: Send back-in-stock email, Move back to waiting or Delete. Send back-in-stock email skips rows whose product is still sold out, and the notice says how many customers were emailed.
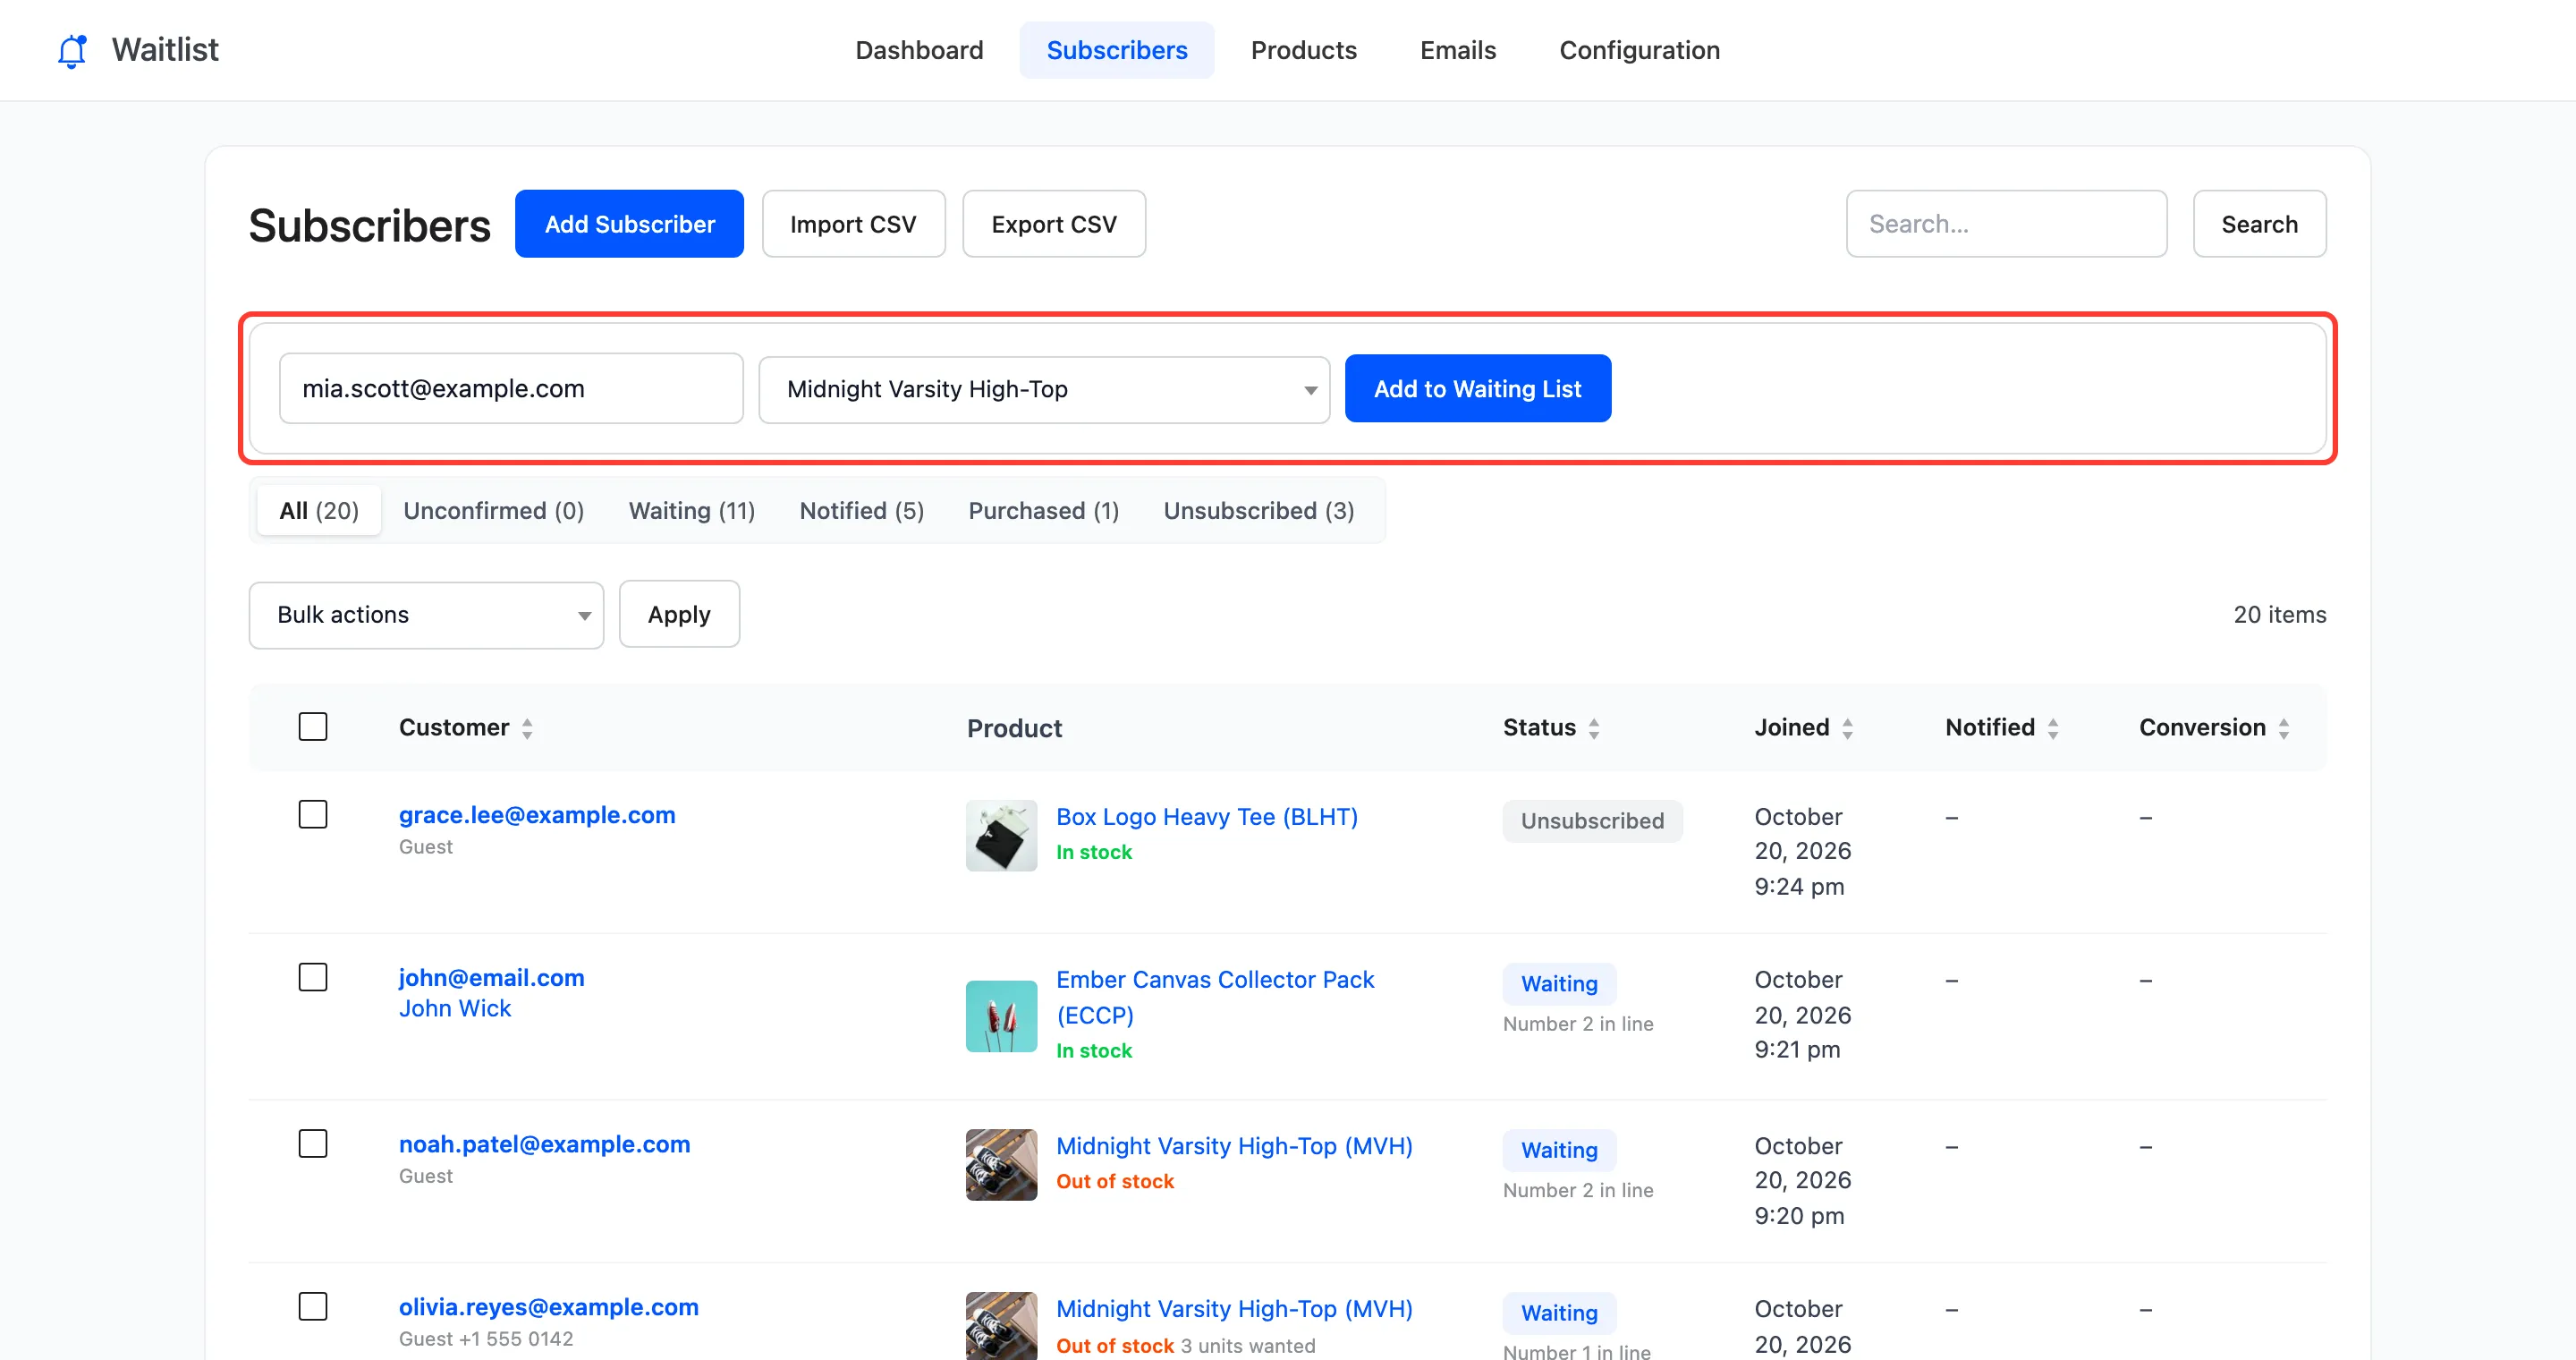
Add Subscriber
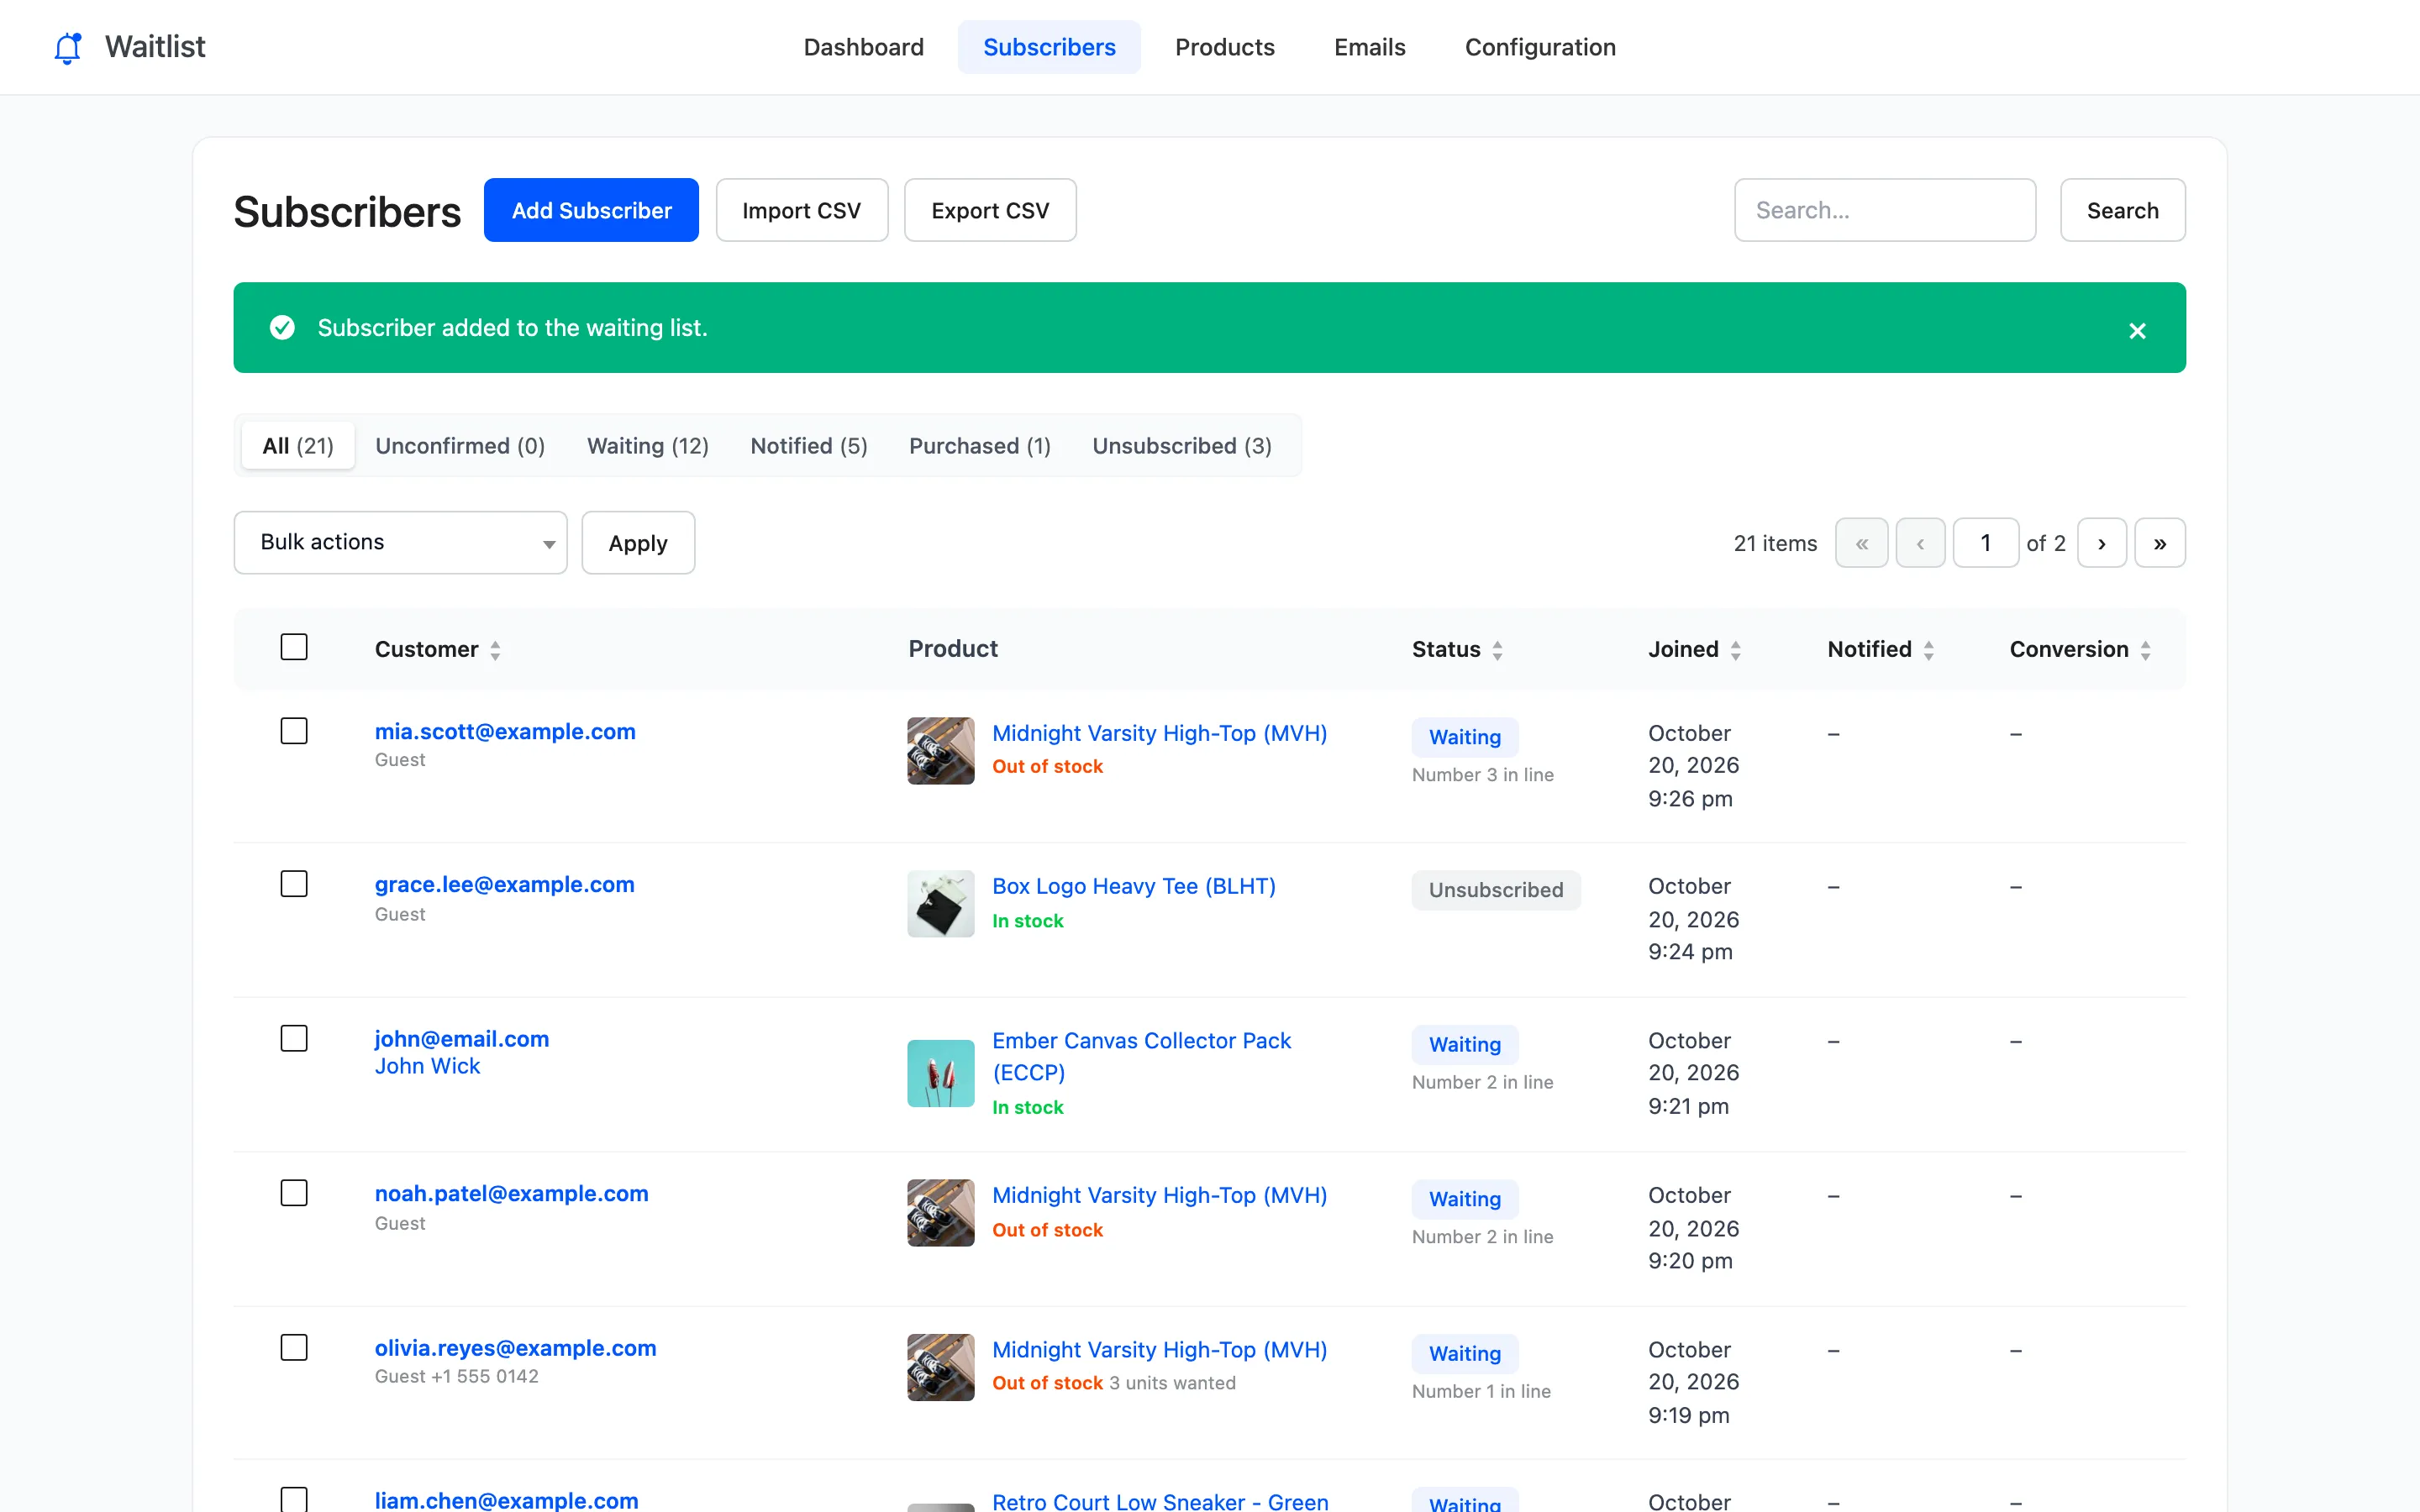
Section titled “Add Subscriber”Add Subscriber opens a short form above the list: an email and a product or variation picker. Add to Waiting List puts the customer at the end of the line.
A customer you add gets the same Signup Confirmation as someone who joined on the product page. Your team gets the Admin Alert too, if it is on. Adding works for any product, in stock or not.
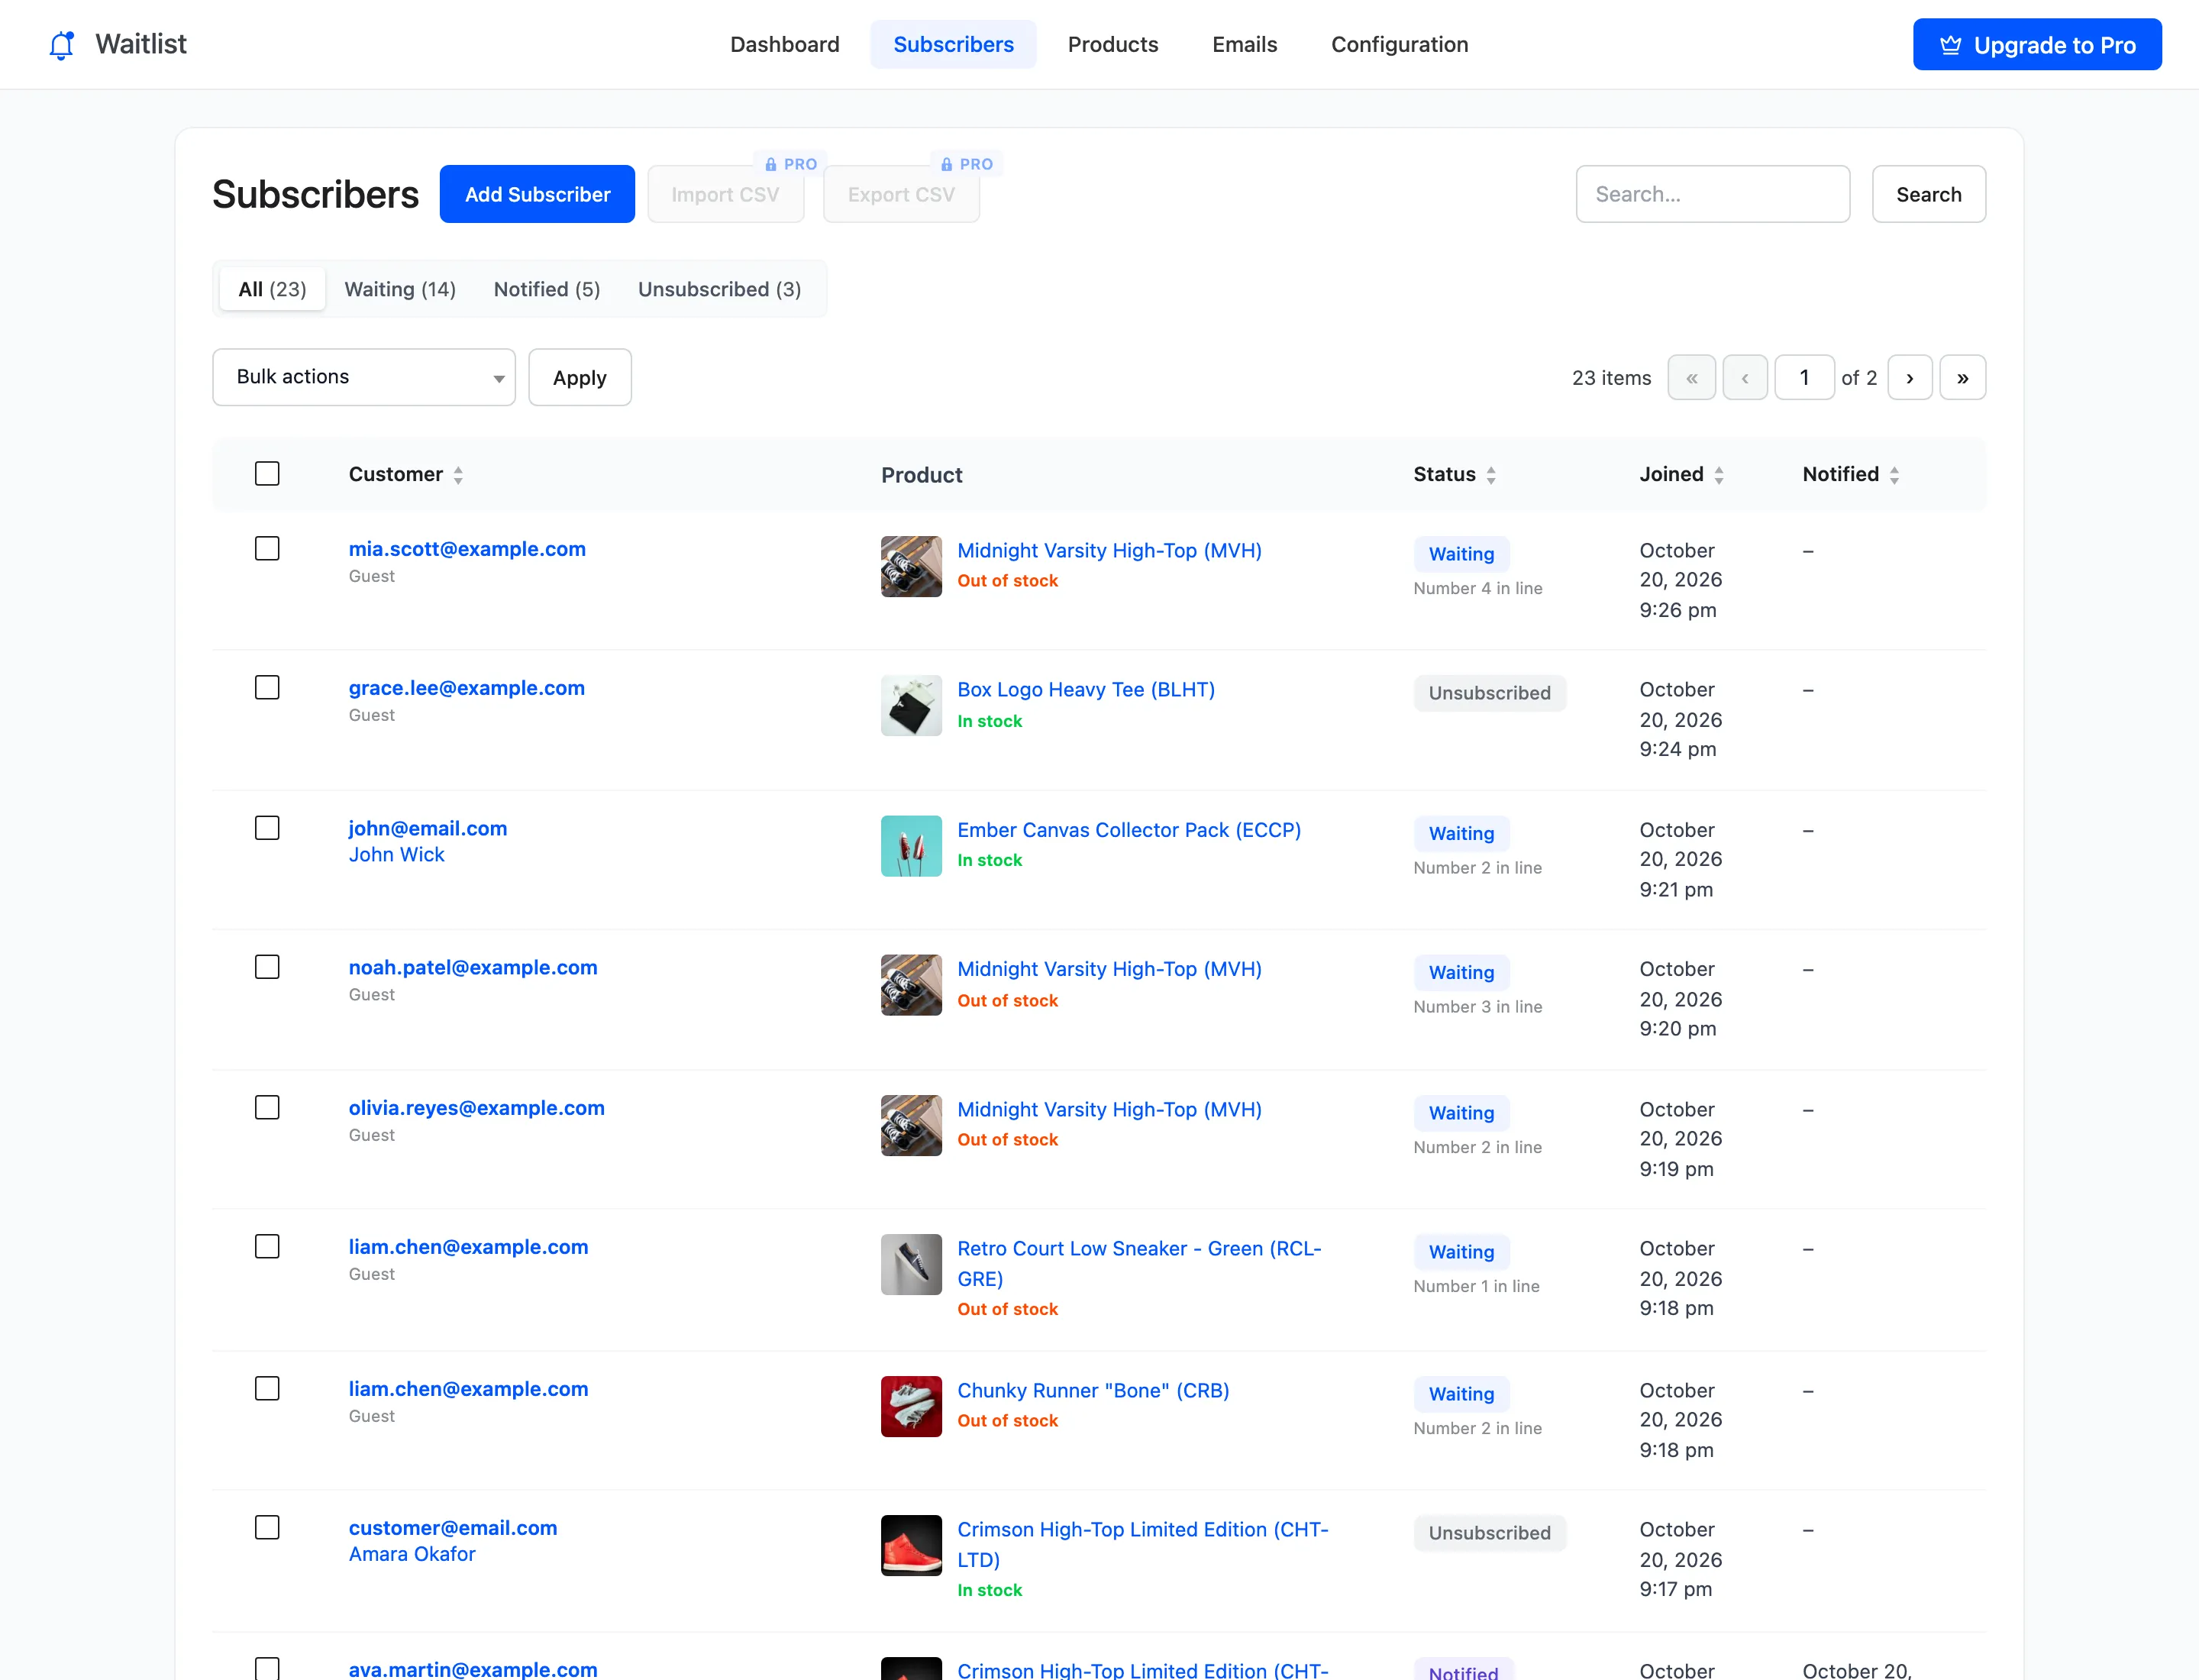
Import CSV and Export CSV (Pro)
Section titled “Import CSV and Export CSV (Pro)”Pro adds Import CSV and Export CSV next to Add Subscriber. See Import and Export (Pro).
When the list changes on its own
Section titled “When the list changes on its own”- A customer who orders the product after being emailed becomes Purchased (Pro).
- Unconfirmed guests are deleted after Confirm Within (days) (Pro).
- With Data Retention (days) set, old Notified, Purchased and Unsubscribed rows are deleted (Pro).
- Deleting a product in WooCommerce deletes its signups.