

How to Add a Consent Checkbox
Stores selling in the EU and the UK often need a clear yes before they email someone. The consent checkbox asks for it on every signup. Both editions have it.
Step 1: Turn on the checkbox
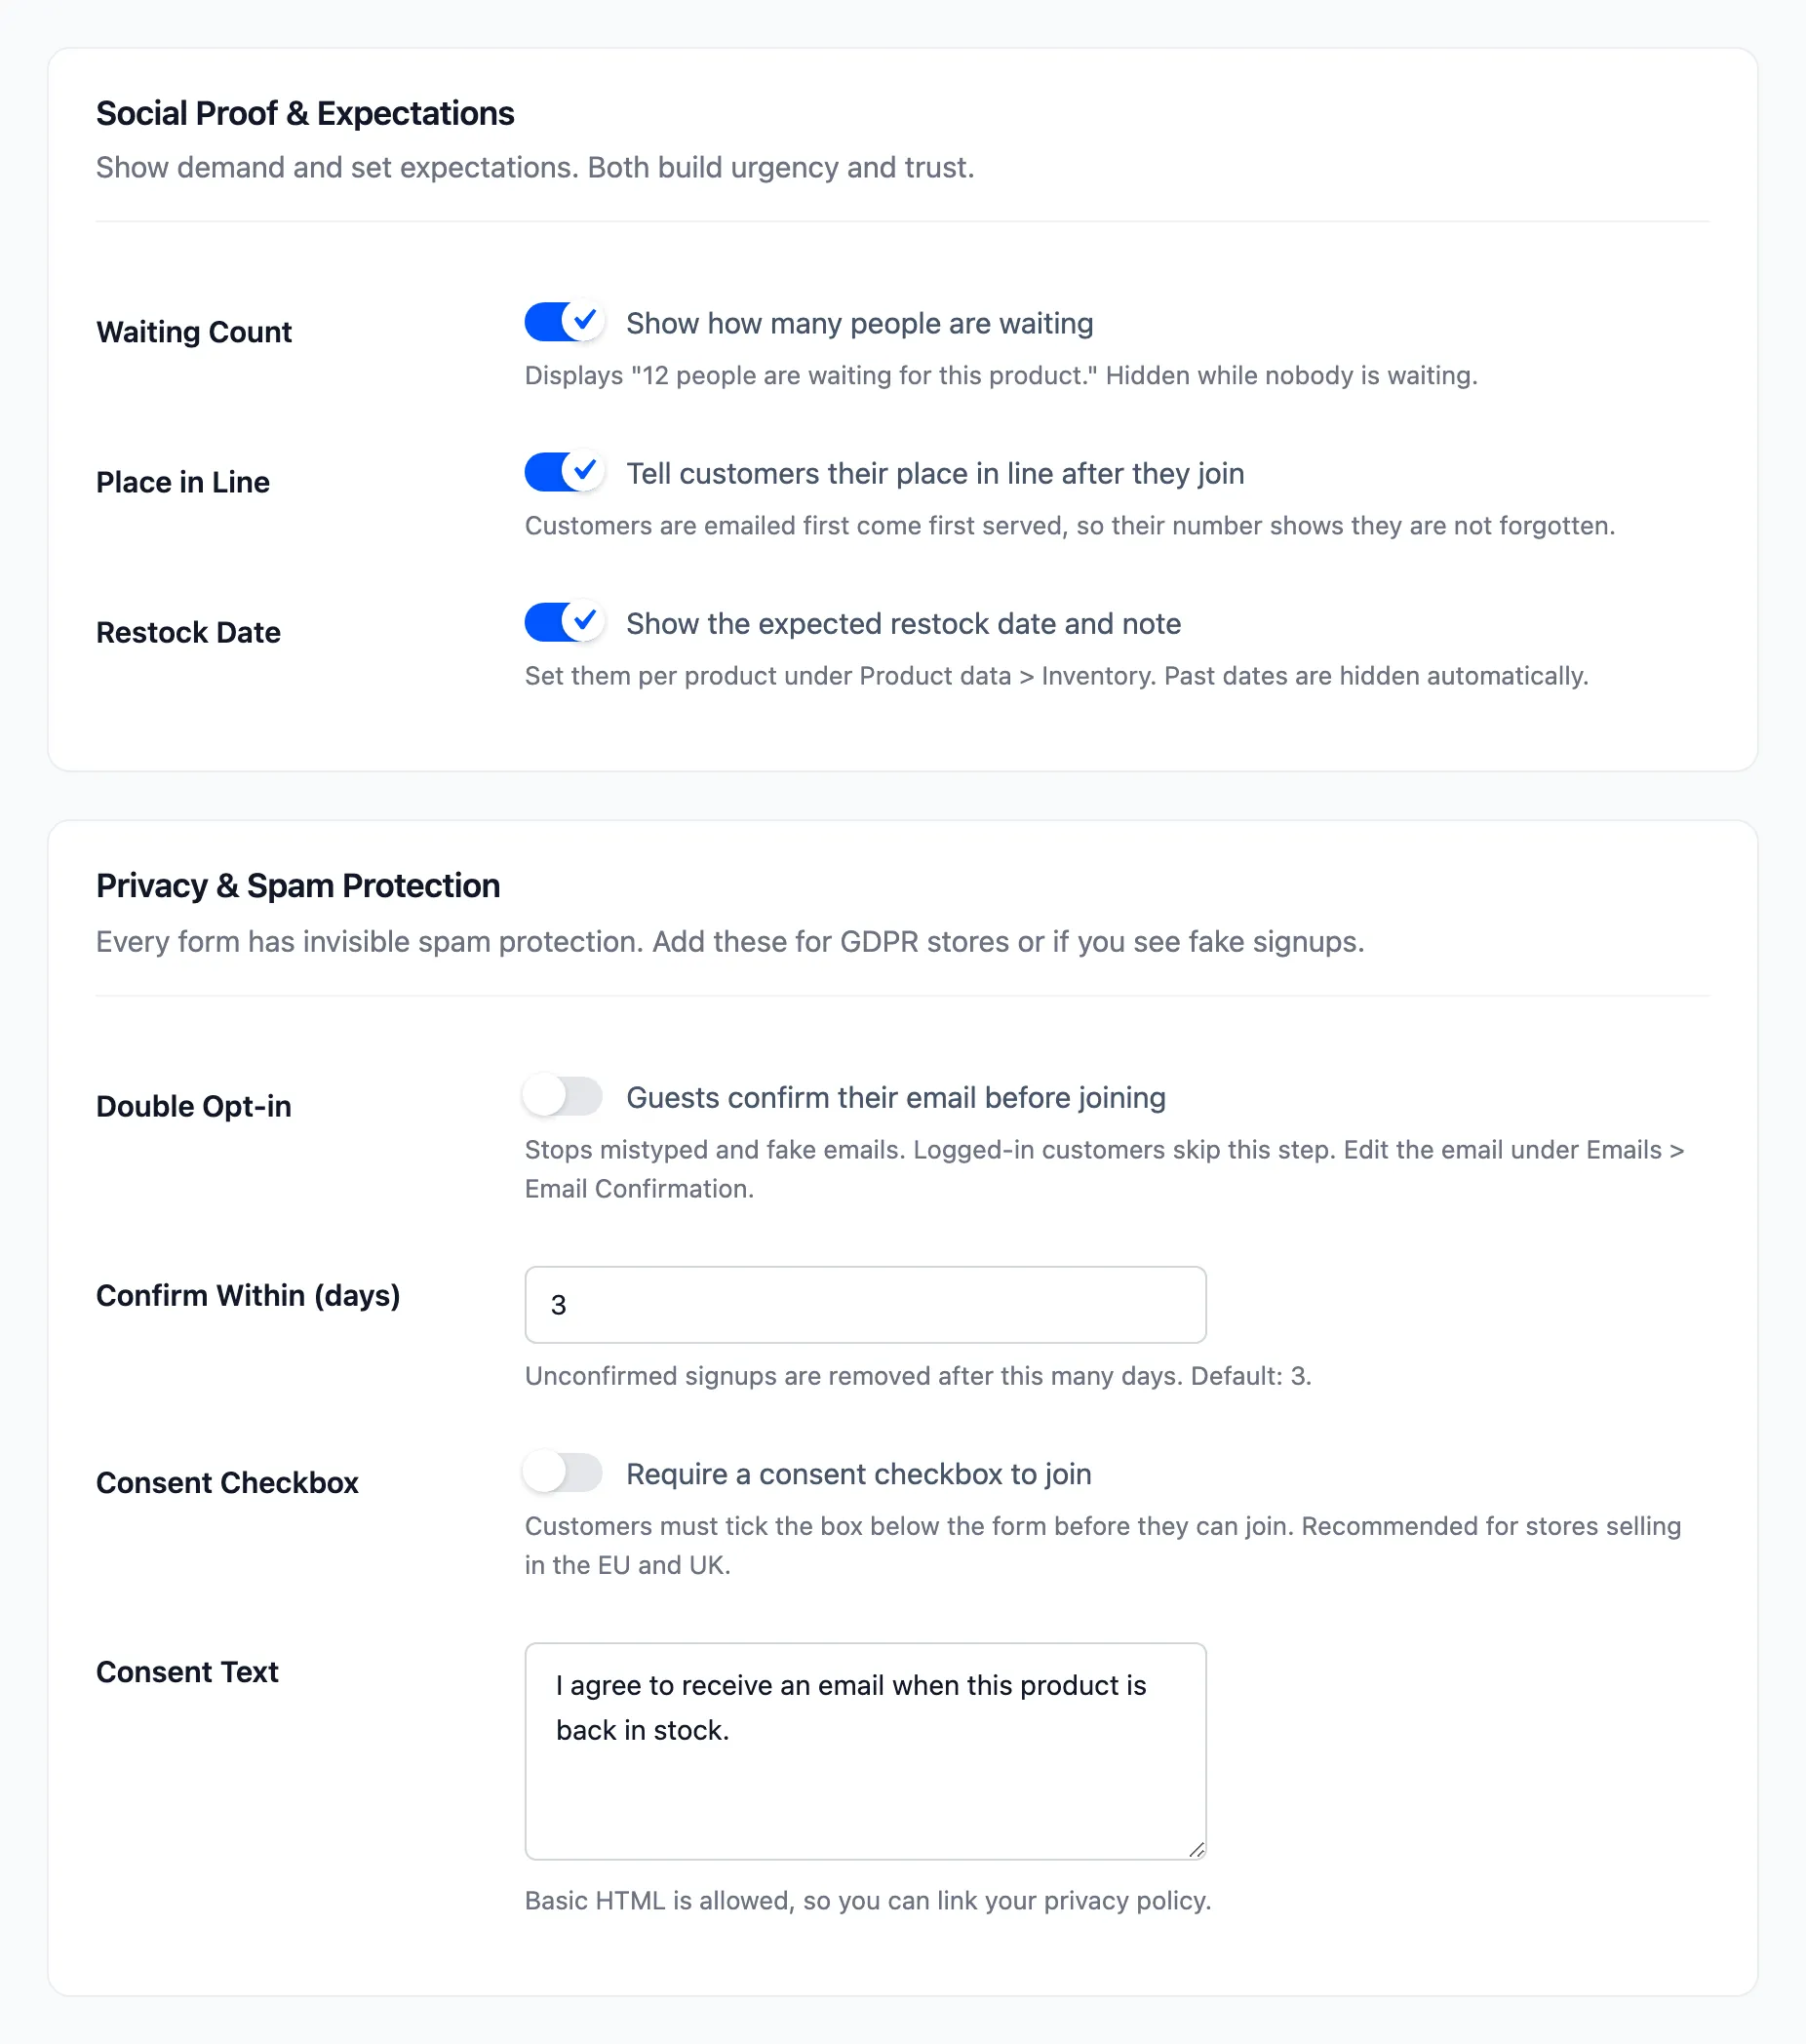
Section titled “Step 1: Turn on the checkbox”Open Configuration → Signup Form and go to Privacy & Spam Protection. Tick Consent Checkbox (“Require a consent checkbox to join”).
Step 2: Write the label
Section titled “Step 2: Write the label”Consent Text is the checkbox’s label. The default is “I agree to receive an email when this product is back in stock.” You can add a link:
I agree to receive an email when this product is back in stock. See our <a href="/privacy-policy/">privacy policy</a>.Click Save Changes.
Step 3: Check the form
Section titled “Step 3: Check the form”The checkbox sits under the email field:
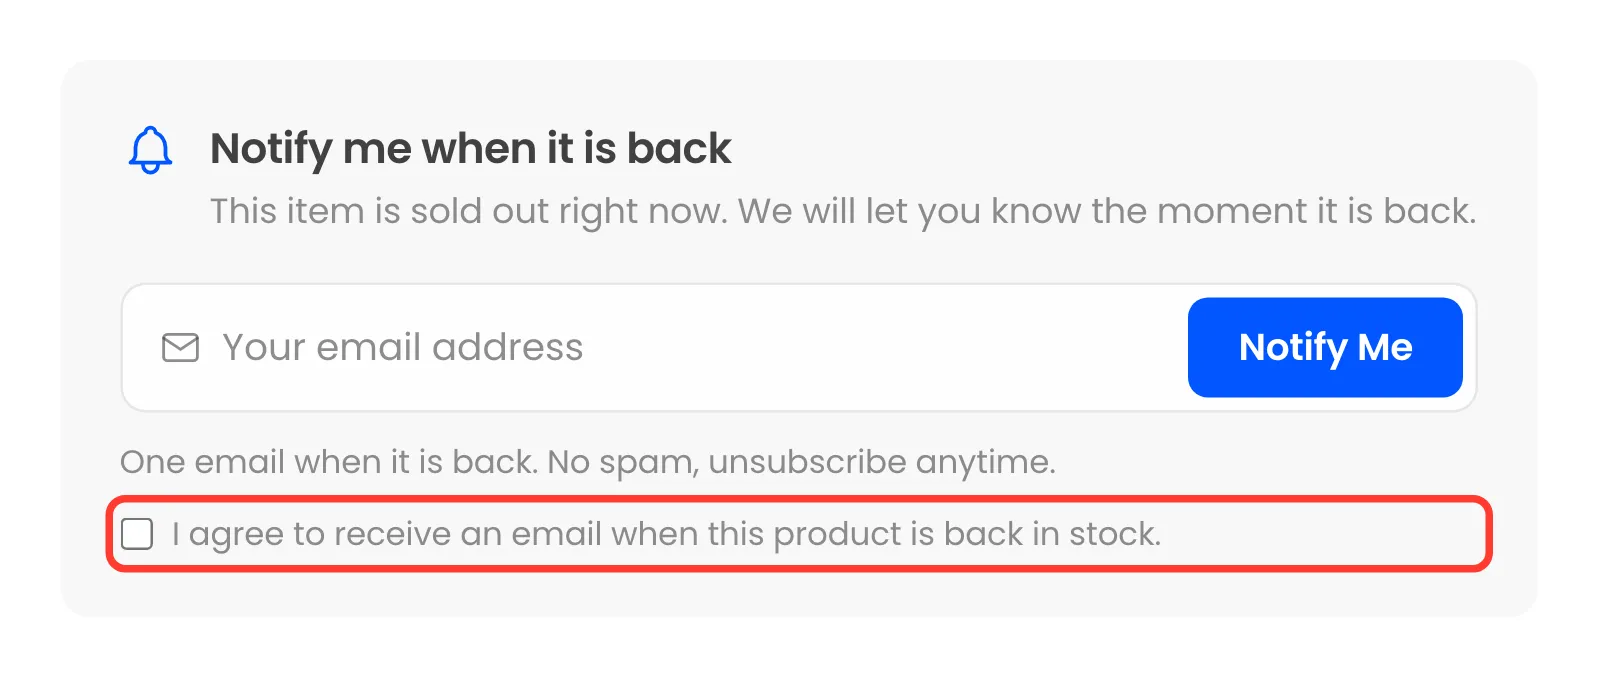
Pressing Notify Me without ticking it stops the form and points at the box. Nothing is saved until it is ticked.
What else protects the list
Section titled “What else protects the list”- Invisible spam protection is always on. A hidden field catches bots, which are told they joined and saved nowhere.
- Unsubscribe links in every customer email work without logging in.
- Personal data: Tools → Export Personal Data and Erase Personal Data include each customer’s waitlist signups under “Waiting List Subscriptions”. See How to Handle Unsubscribes and Privacy Requests.
- Double opt-in (Pro) makes guests confirm their address. See How to Turn On Double Opt-in (Pro).