

How to Add a Restock Coupon (Pro)
A small discount thanks people for waiting and gives them a reason to buy now rather than later. Each email gets its own code, so it cannot be shared on a coupon site.
Step 1: Turn the coupon on
Section titled “Step 1: Turn the coupon on”Open Configuration → Coupons.
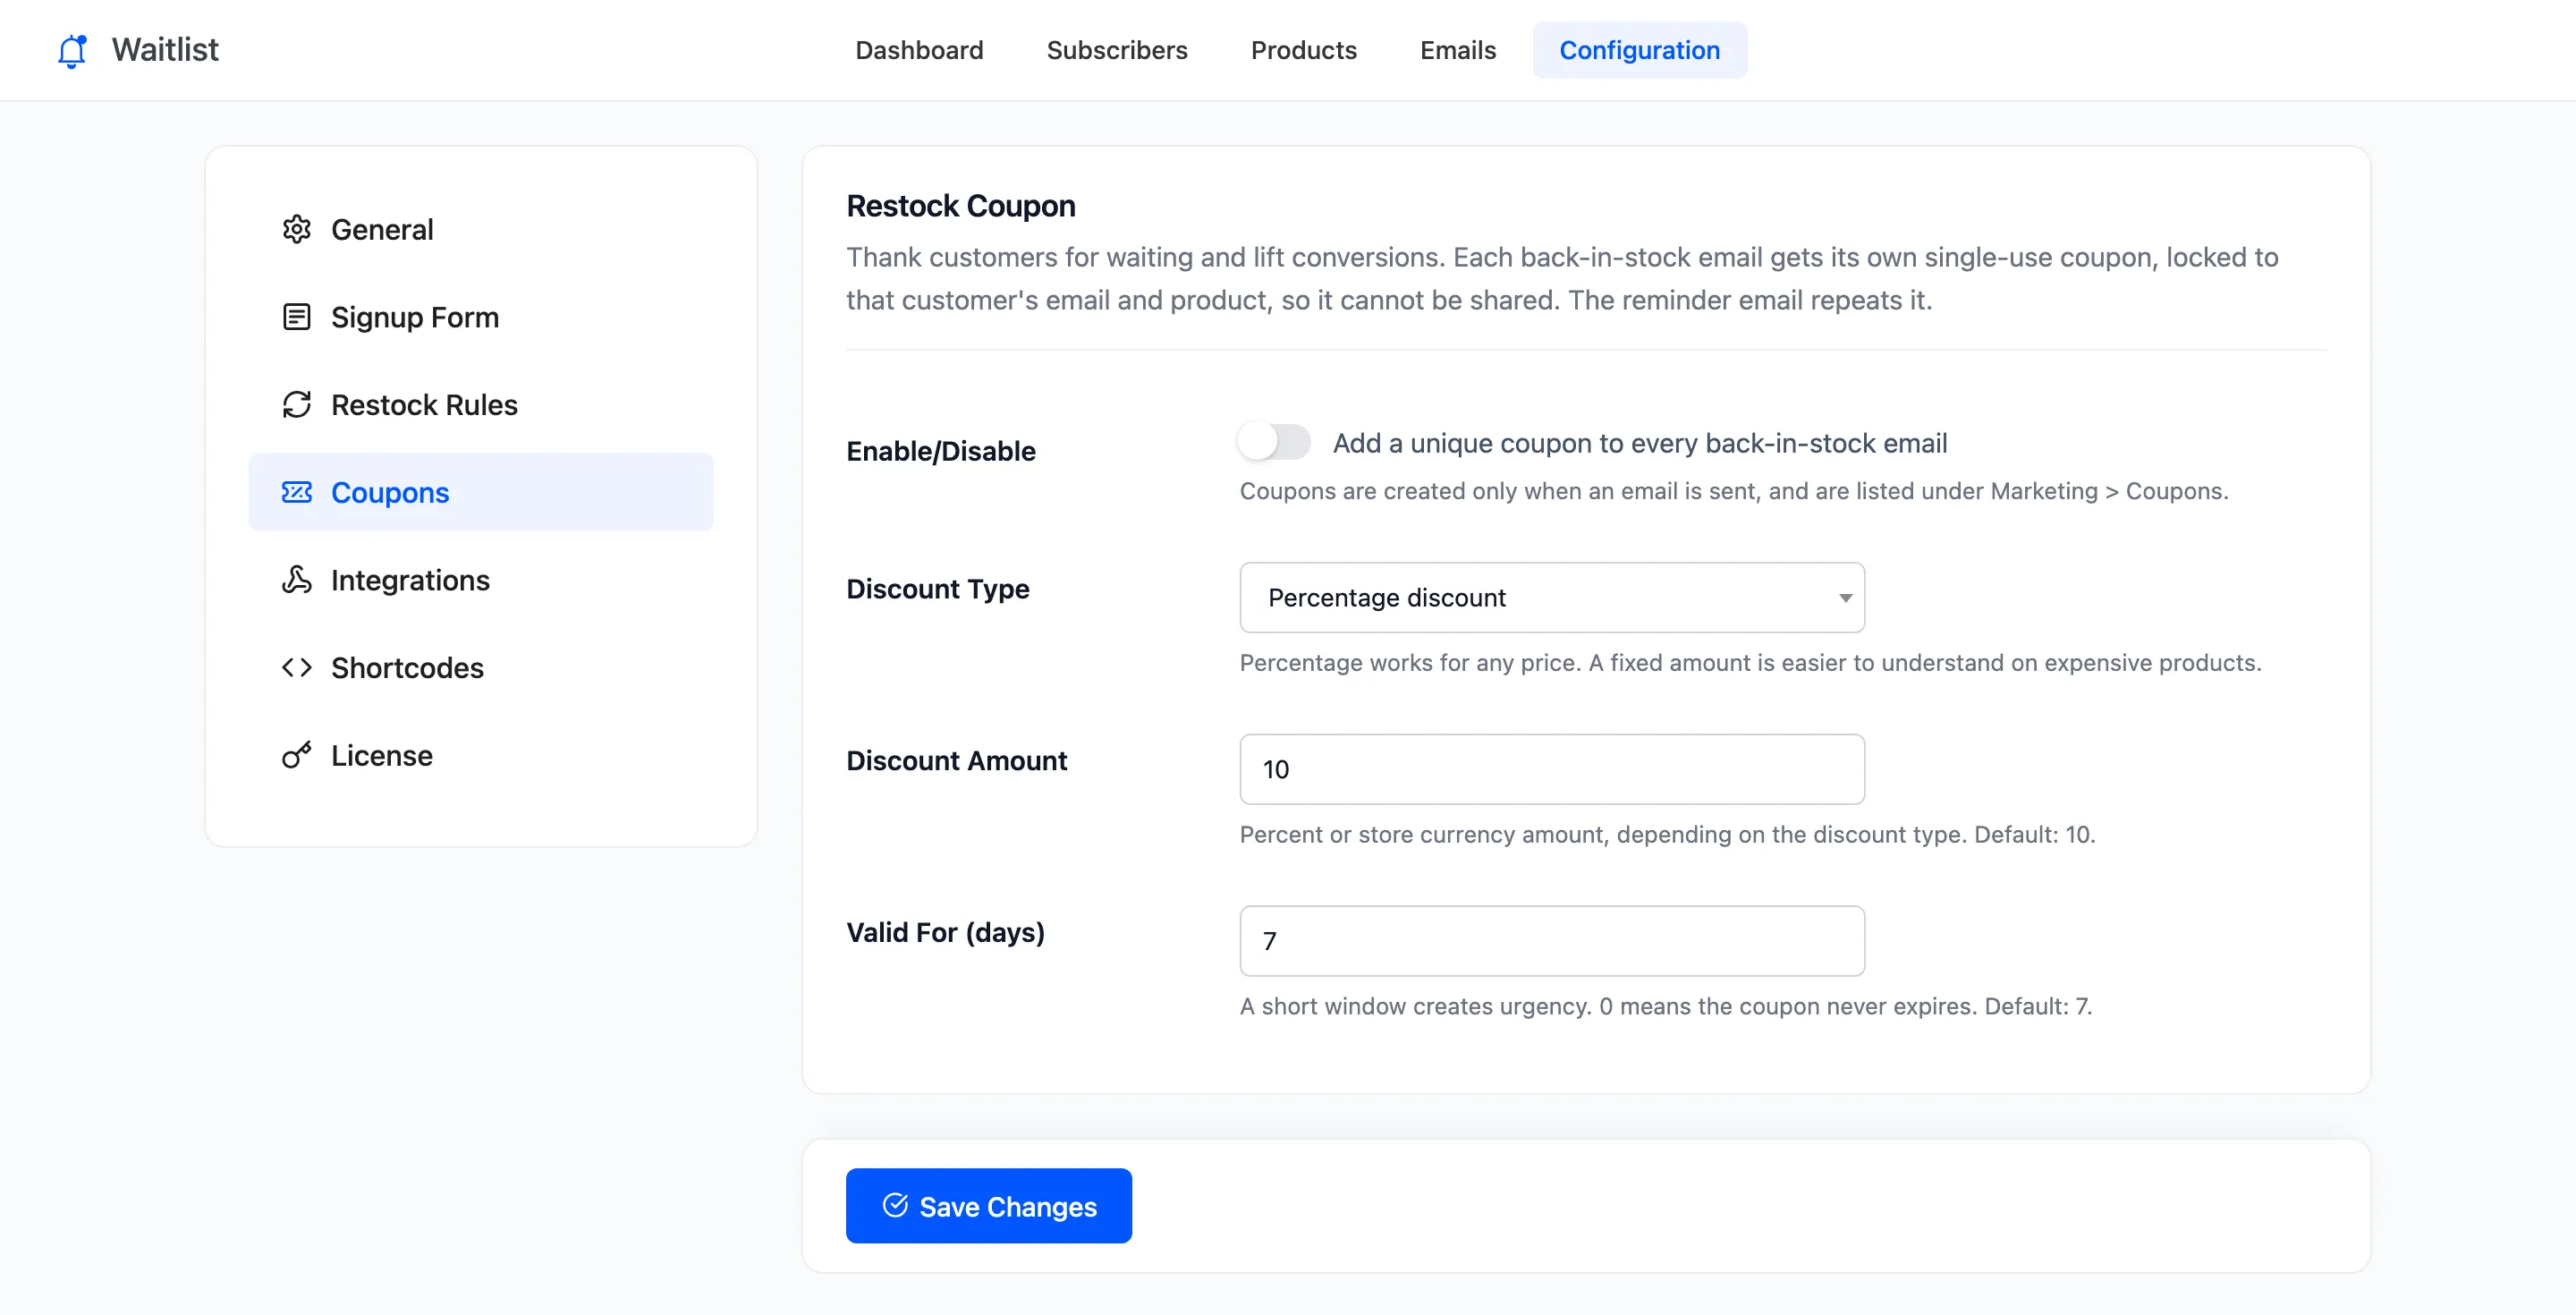
- Tick Enable/Disable.
- Discount Type: Percentage discount or Fixed cart discount.
- Discount Amount: 10 means 10% or 10 in your currency.
- Valid For (days): 7 by default. A short window adds urgency.
Click Save Changes.
Step 2: Restock the product
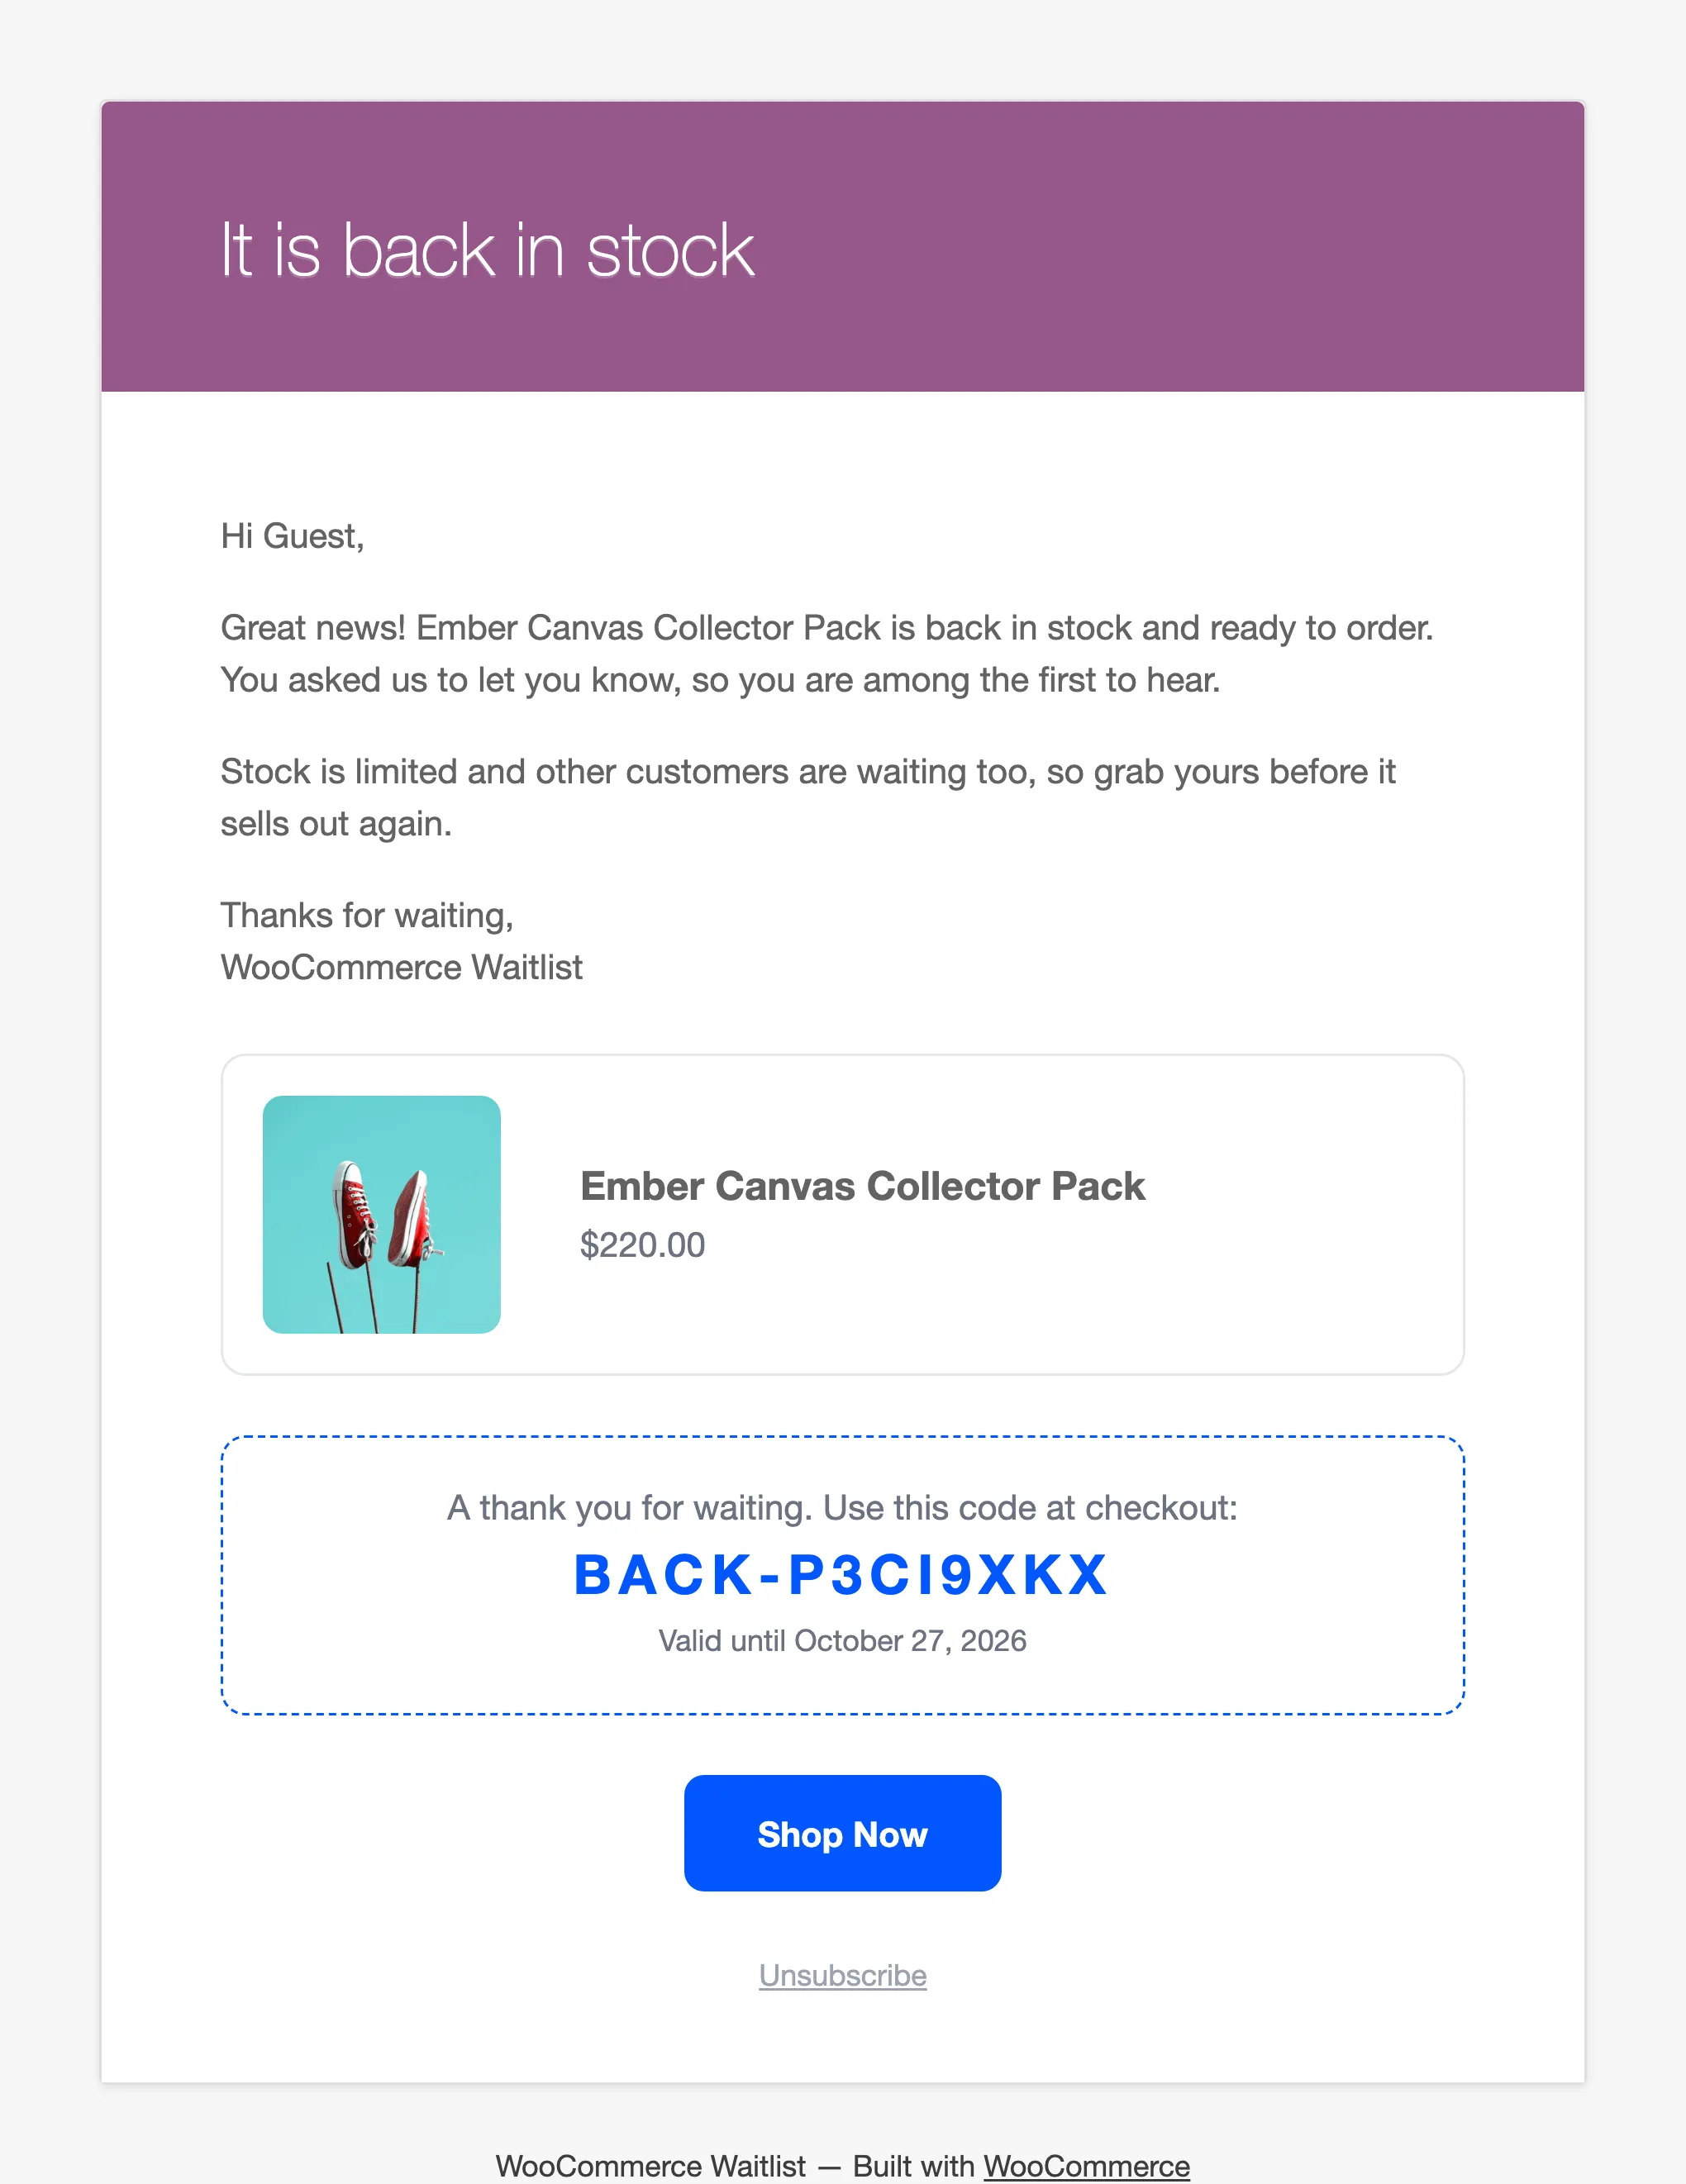
Section titled “Step 2: Restock the product”Restock as usual. As each email is sent, a code like BACK-P3CI9XKX is created for that customer. The email shows it in a box above the button:
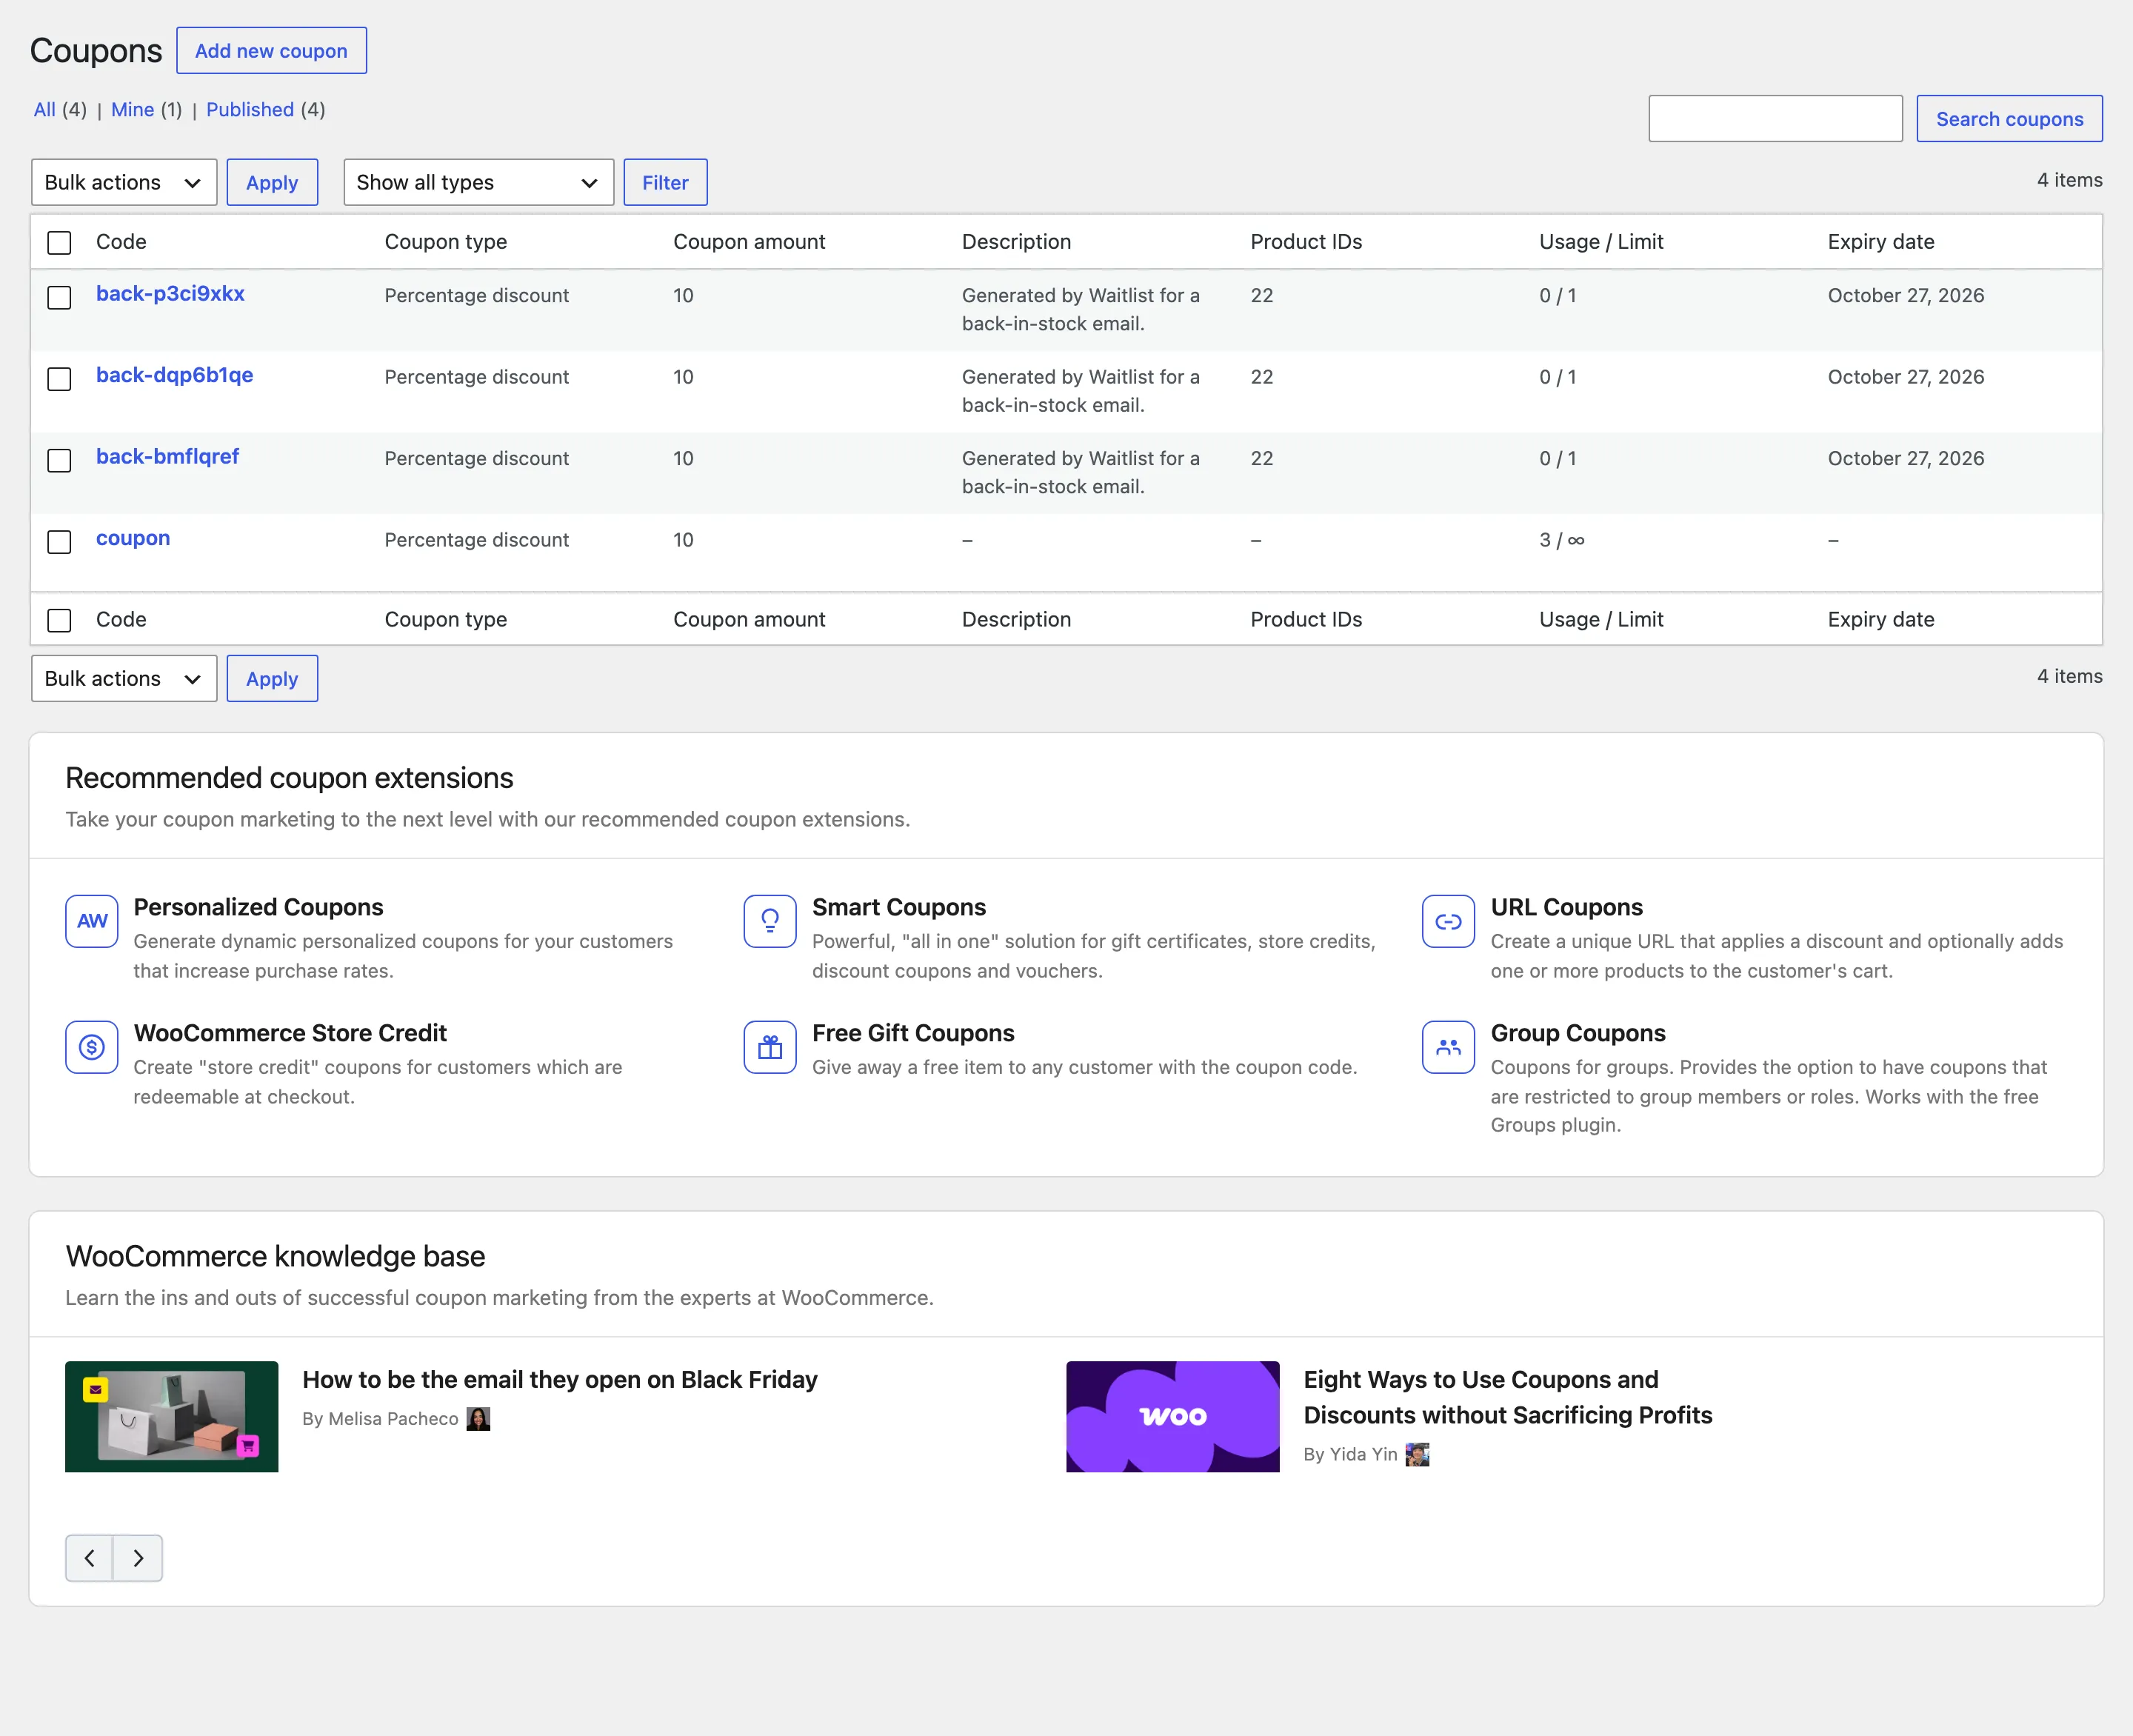
The codes are ordinary WooCommerce coupons under Marketing → Coupons:
Step 3: Apply the code at the cart
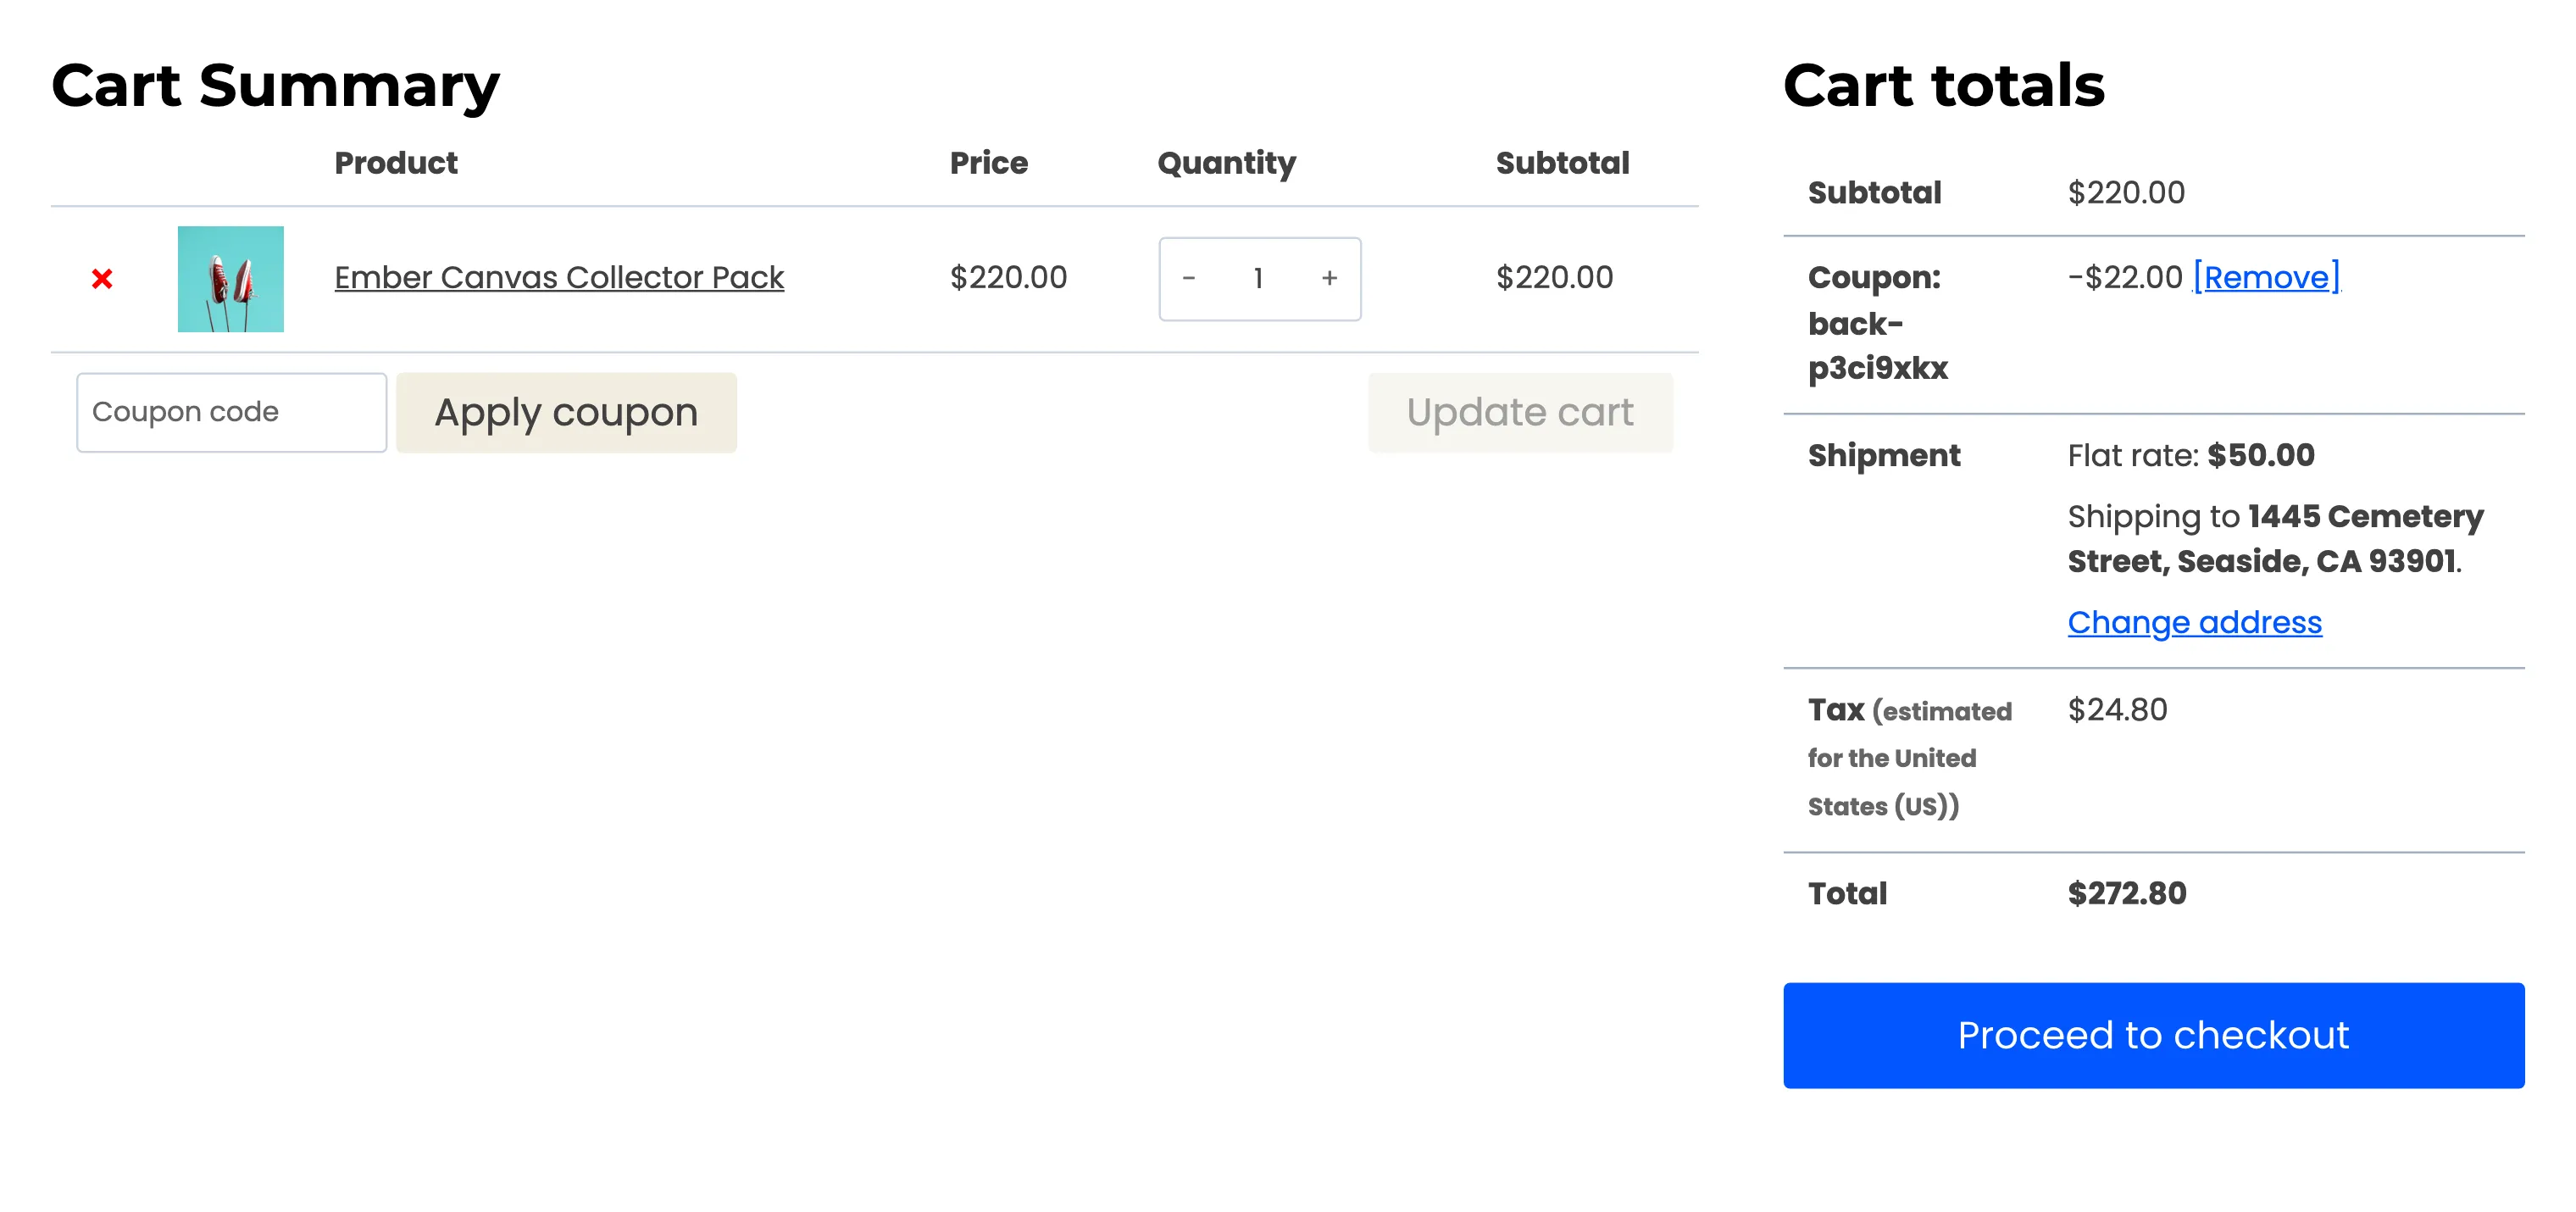
Section titled “Step 3: Apply the code at the cart”The customer adds the product and enters the code in the cart. On the demo, 10% came off the $220 Ember Canvas Collector Pack:
The code works only:
- once,
- with the email it was sent to, checked against the billing email,
- on that product, or its variation,
- before it expires,
- and on its own, not with another coupon.
Step 4: See the sale
Section titled “Step 4: See the sale”When the order reaches Processing or Completed, the signup changes to Purchased with the order number and what it paid after the discount, $198 here:
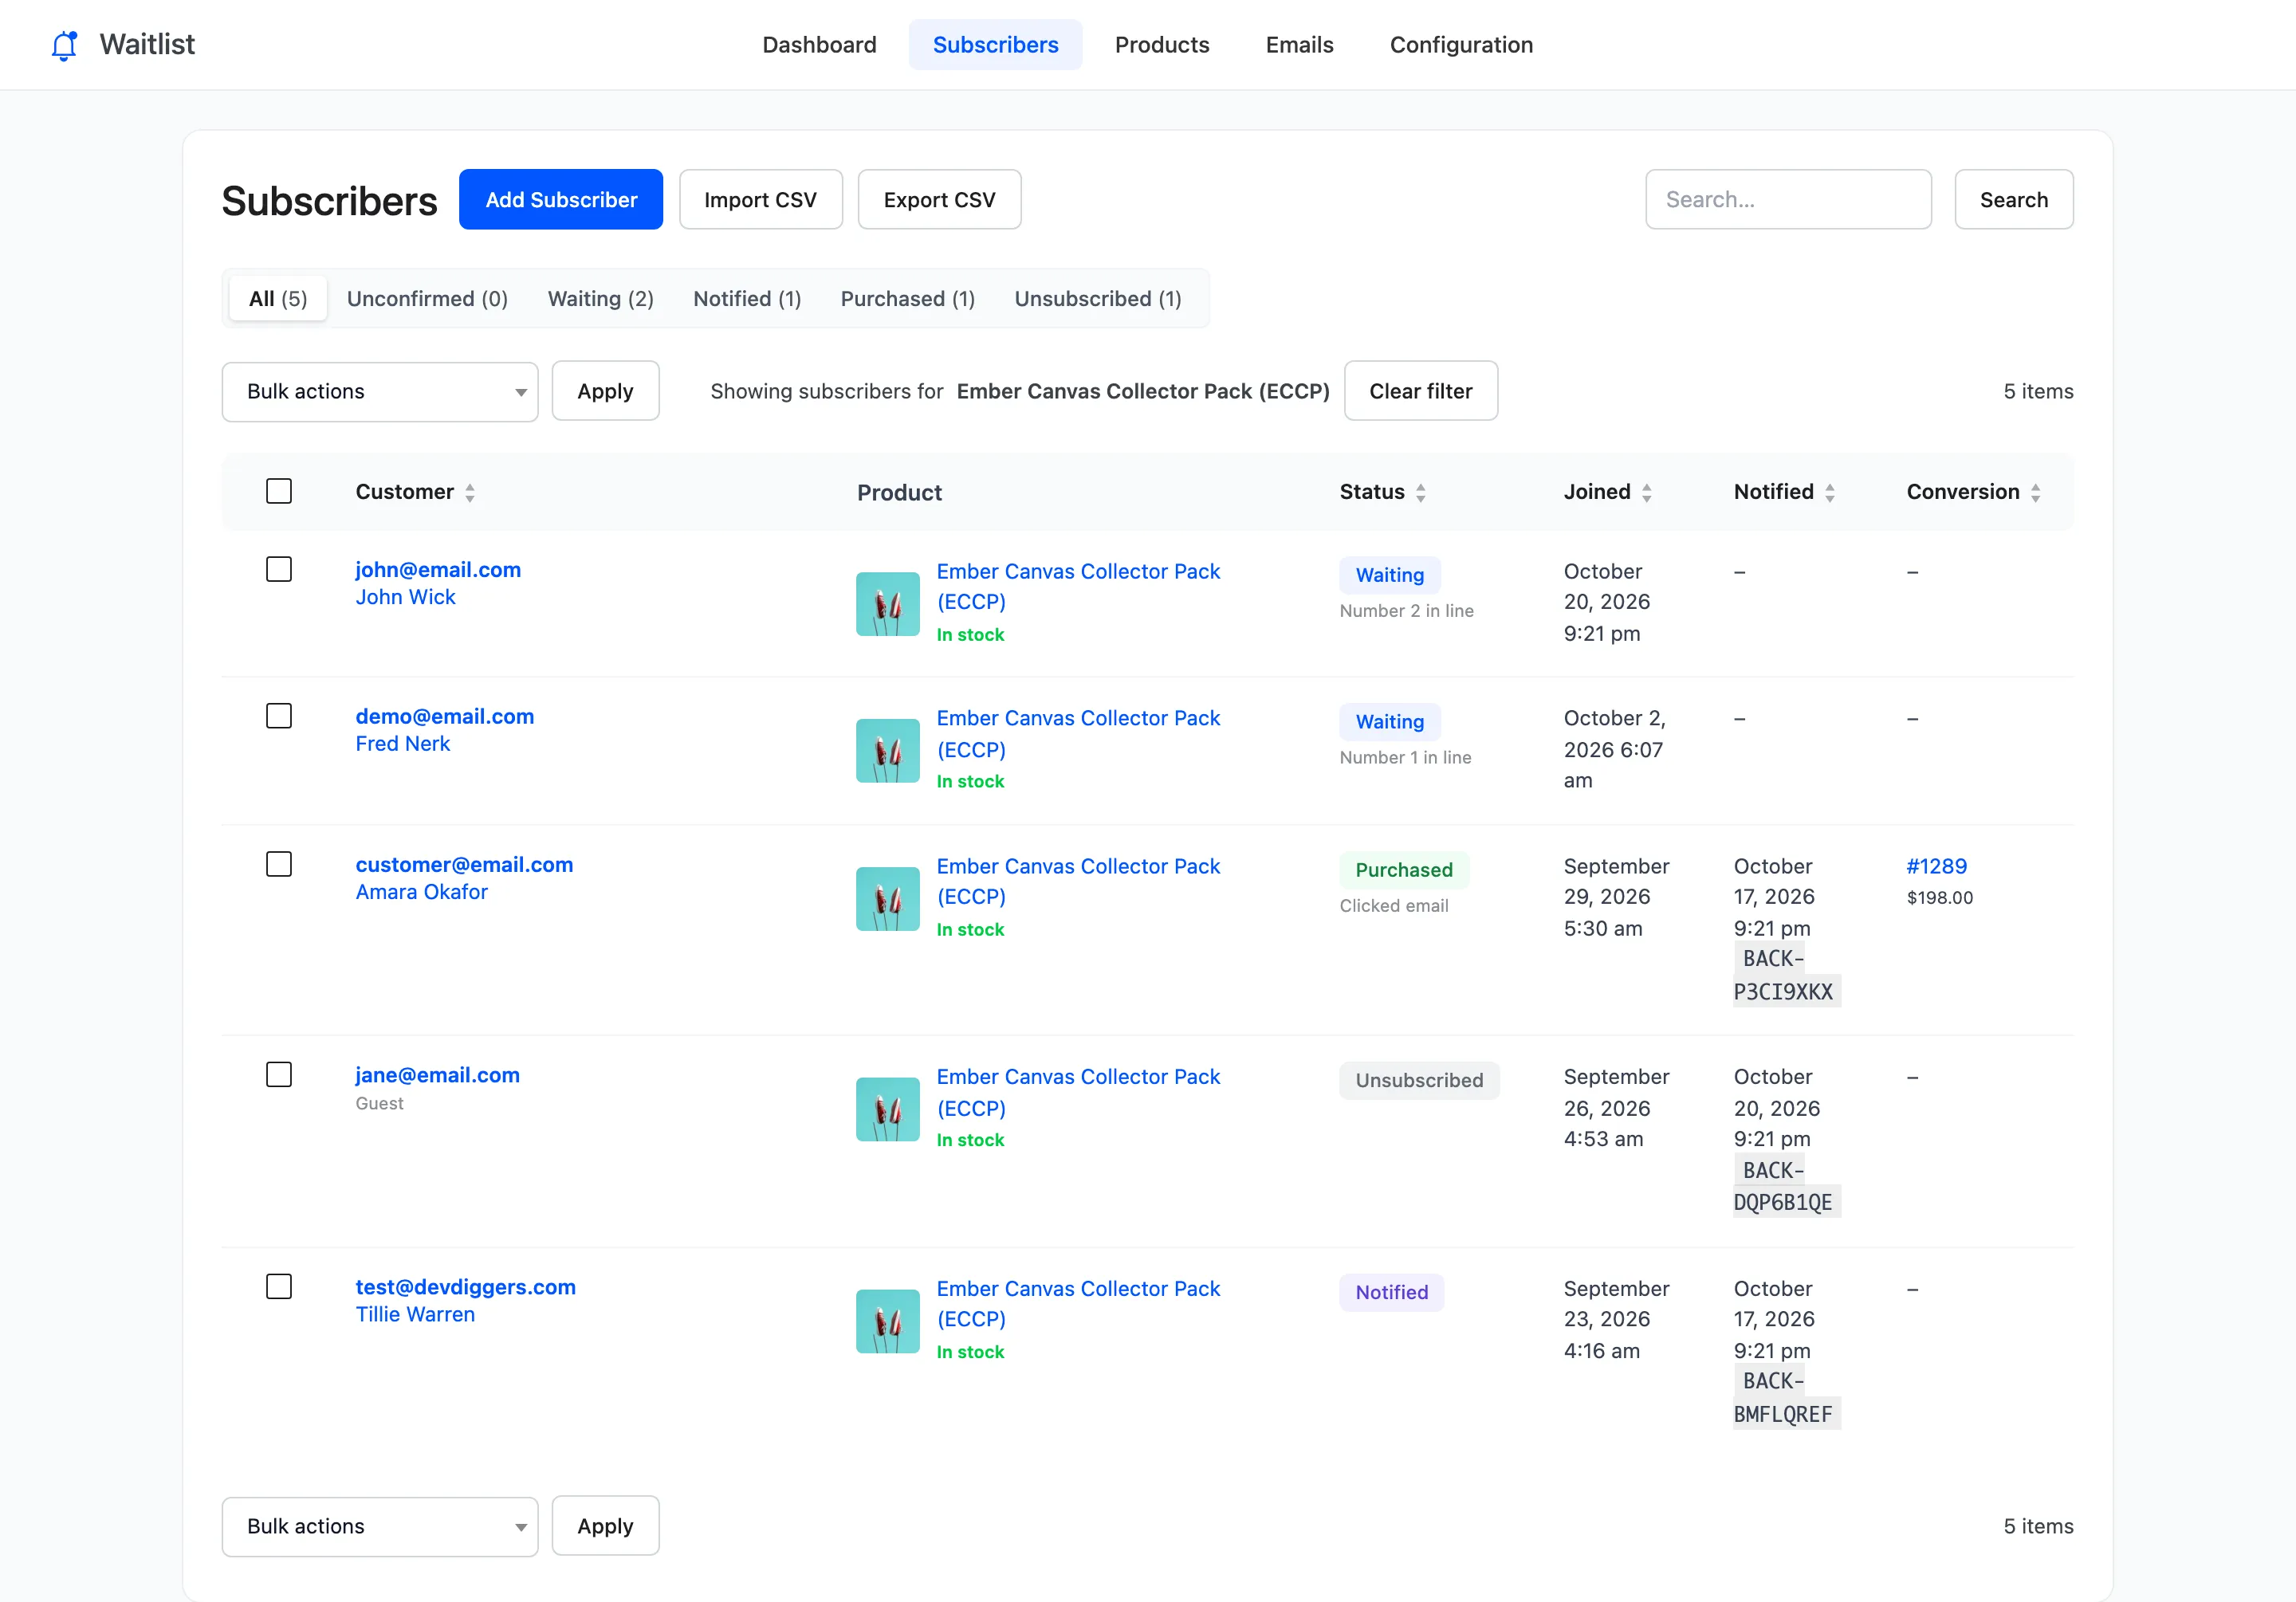
An order paid by bank transfer stays On hold until you confirm the payment and mark it Processing. It counts from then.
The reminder repeats it
Section titled “The reminder repeats it”If the customer has not bought after two days, the Pro reminder email shows the same code again. See How to Send a Reminder to Customers Who Did Not Buy (Pro).