

How to Set Up Order Update Notifications (Pro)
An order notification is the one push a customer never resents, because they asked for it by buying something. It also removes the “where is my order” email before it is written.
WooCommerce has to be active. Push has to be working, so connect Firebase first.
Step 1: Open the Automations tab
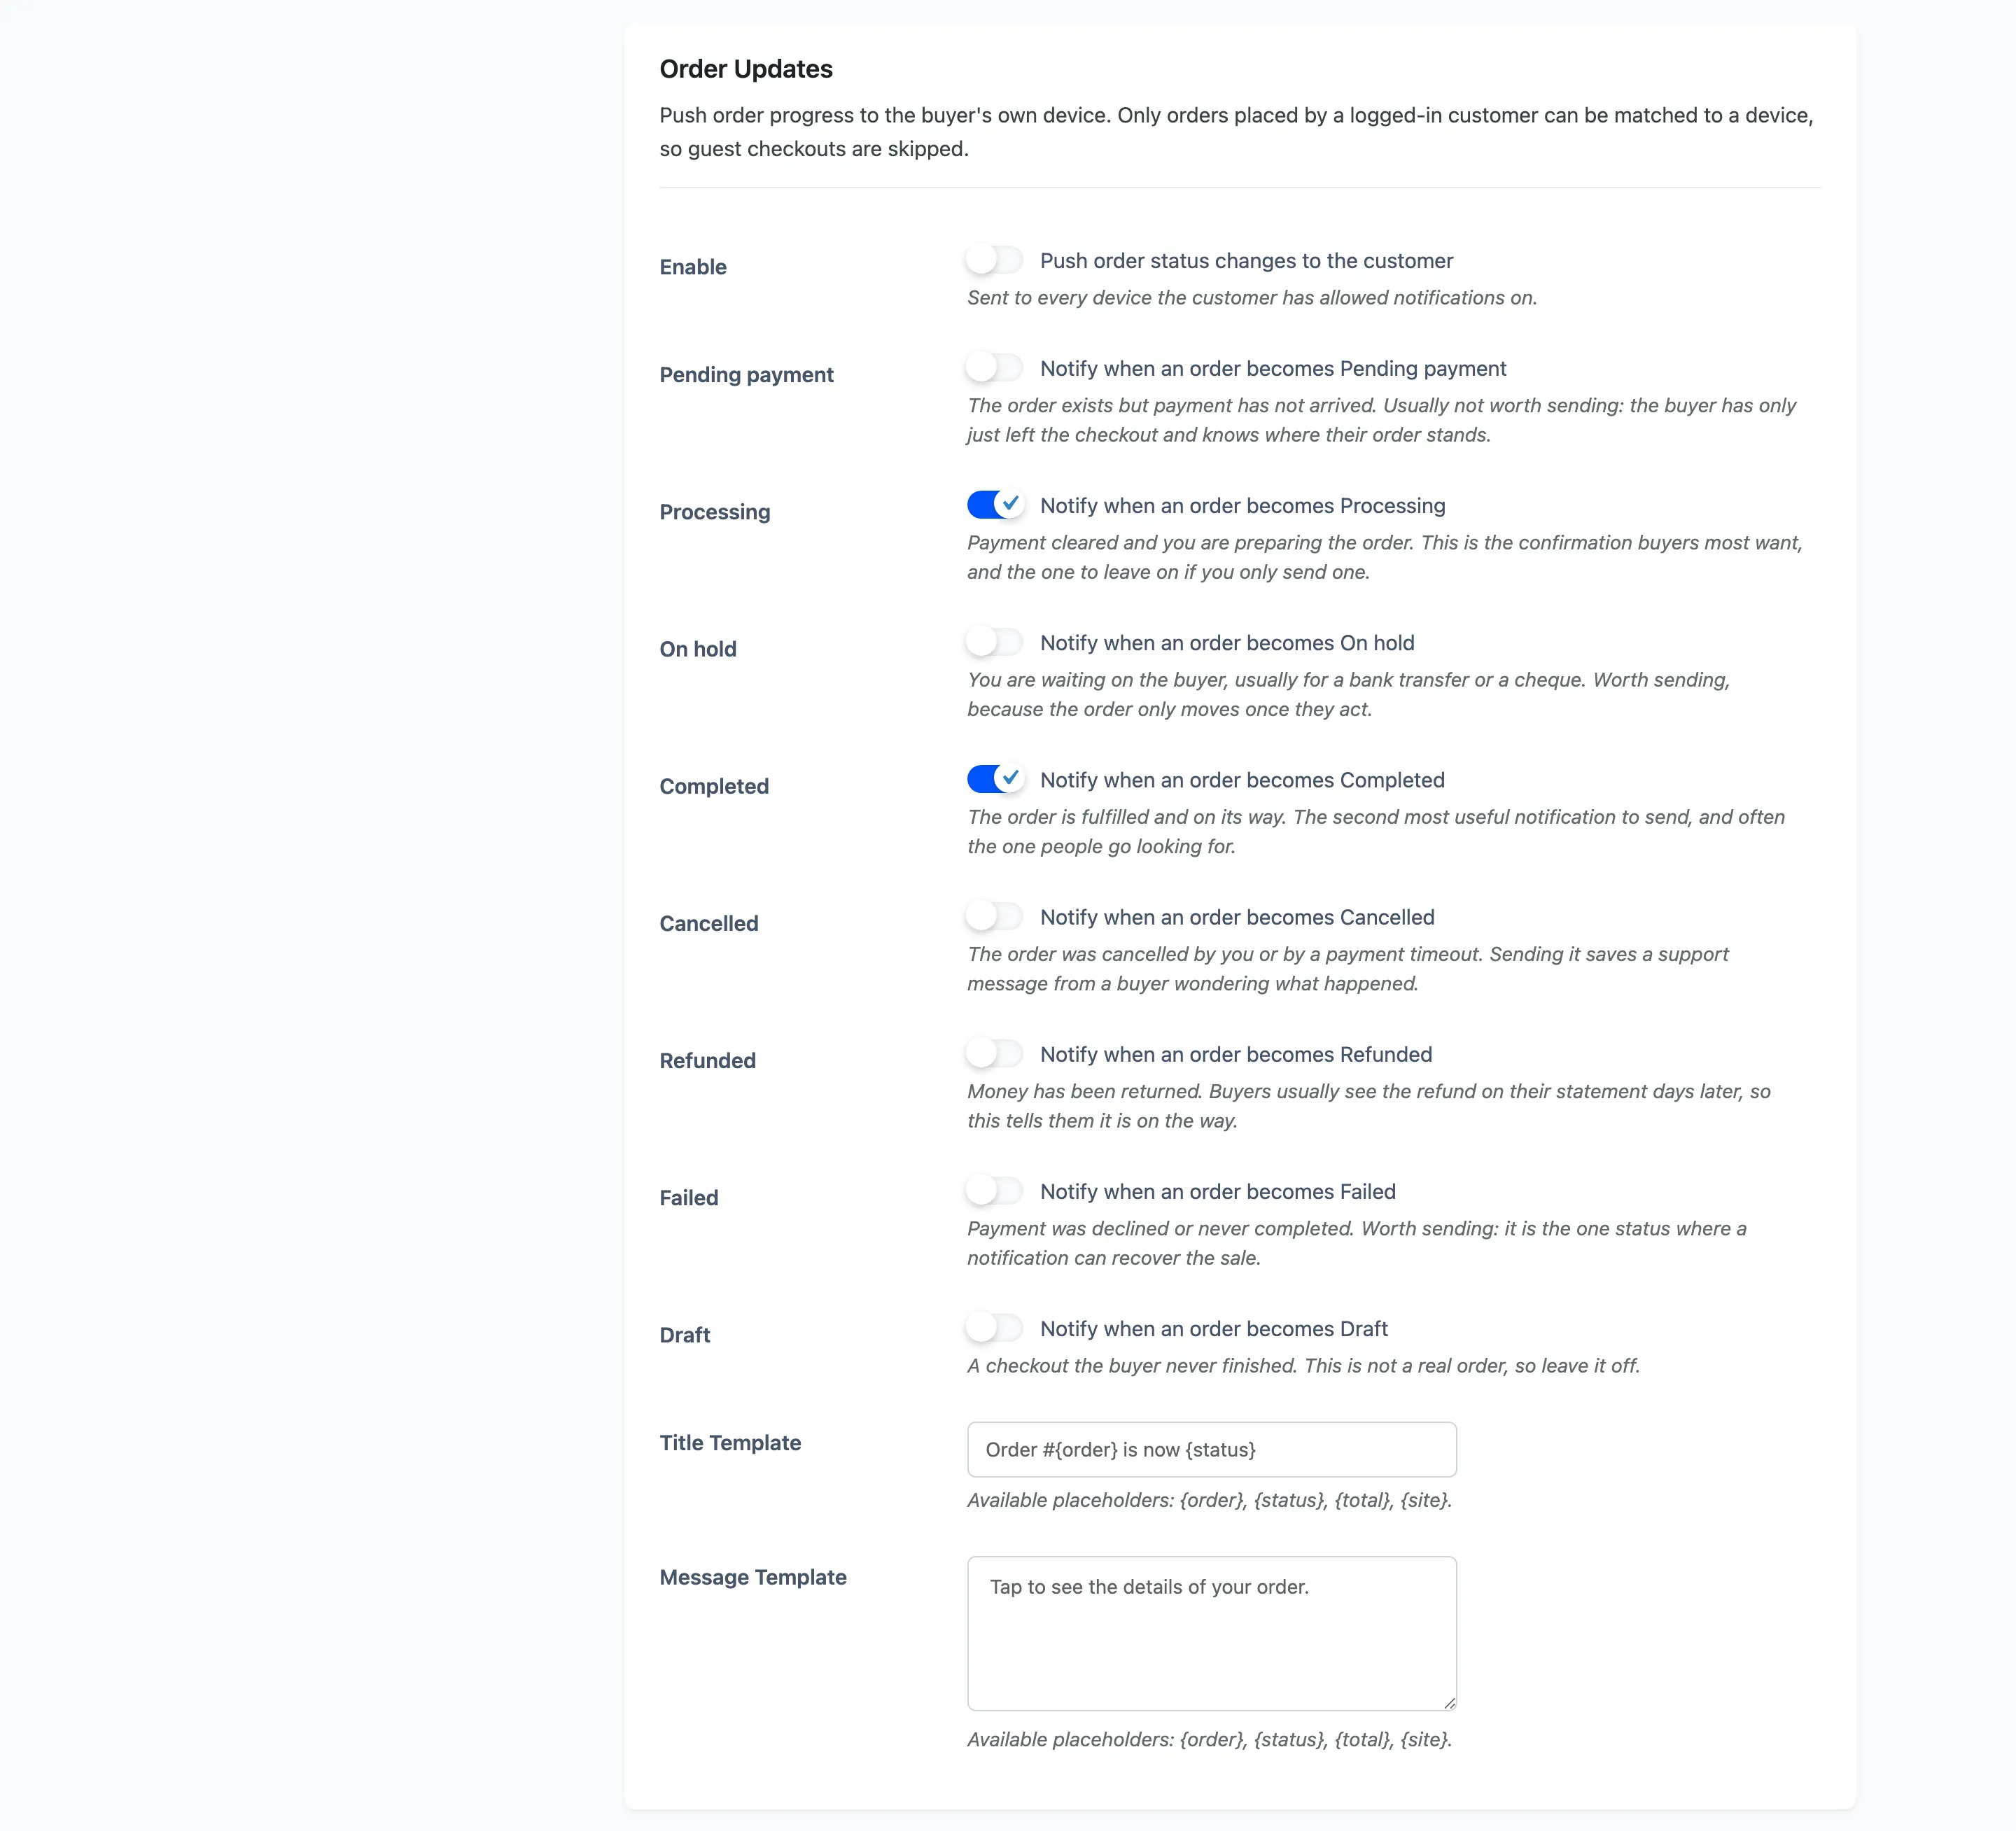
Section titled “Step 1: Open the Automations tab”Go to DevDiggers Plugins → Progressive Web App → Configuration → Automations and scroll to Order Updates.
Step 2: Switch order updates on
Section titled “Step 2: Switch order updates on”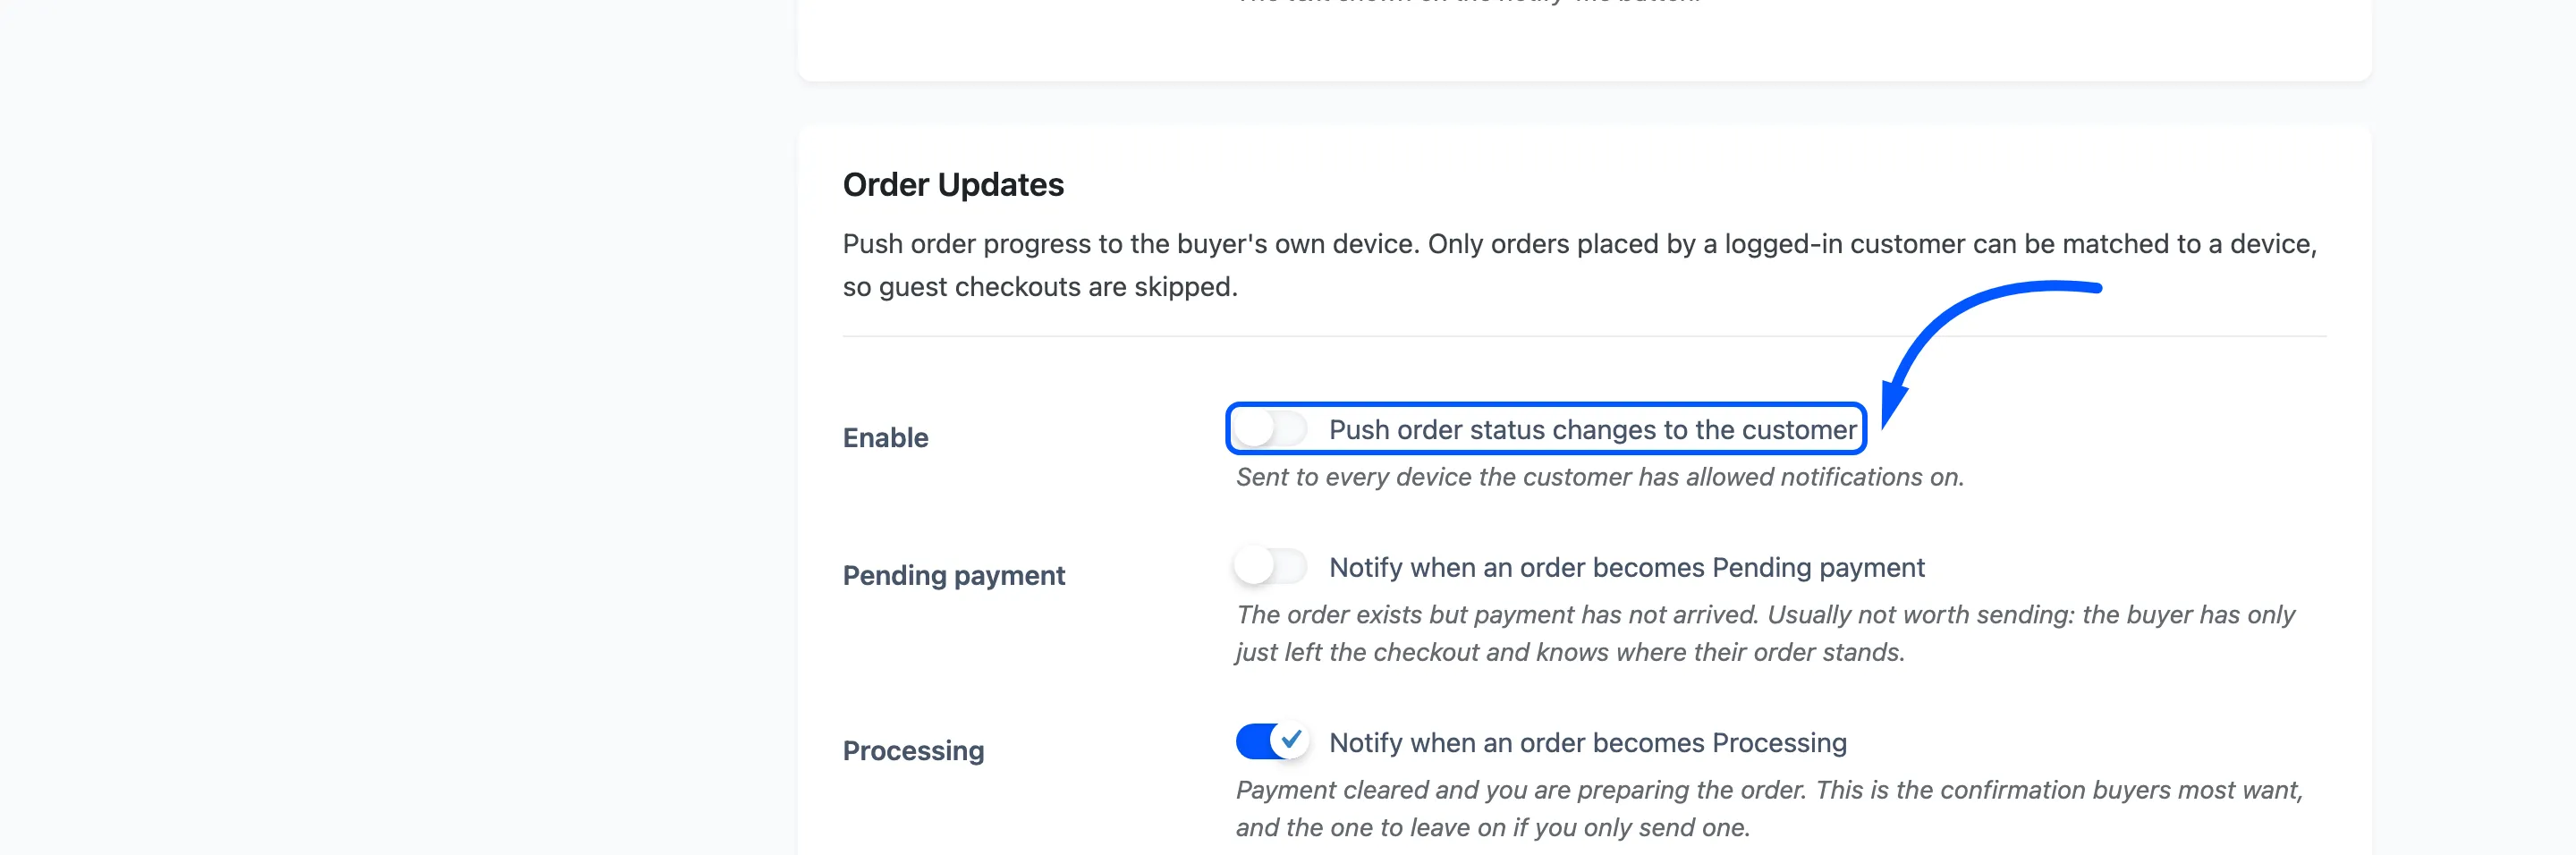
It is sent to every device that customer has allowed notifications on, so a buyer with a phone and a laptop gets it on both.
Only orders placed by a signed-in customer can be matched to a device. A guest checkout has no account behind it, so those orders are skipped silently. On a store where most checkouts are guest checkouts, this automation reaches fewer people than you expect.
Step 3: Choose the statuses
Section titled “Step 3: Choose the statuses”Under the switch is one checkbox per WooCommerce order status, each with a line on whether it is worth interrupting somebody for.
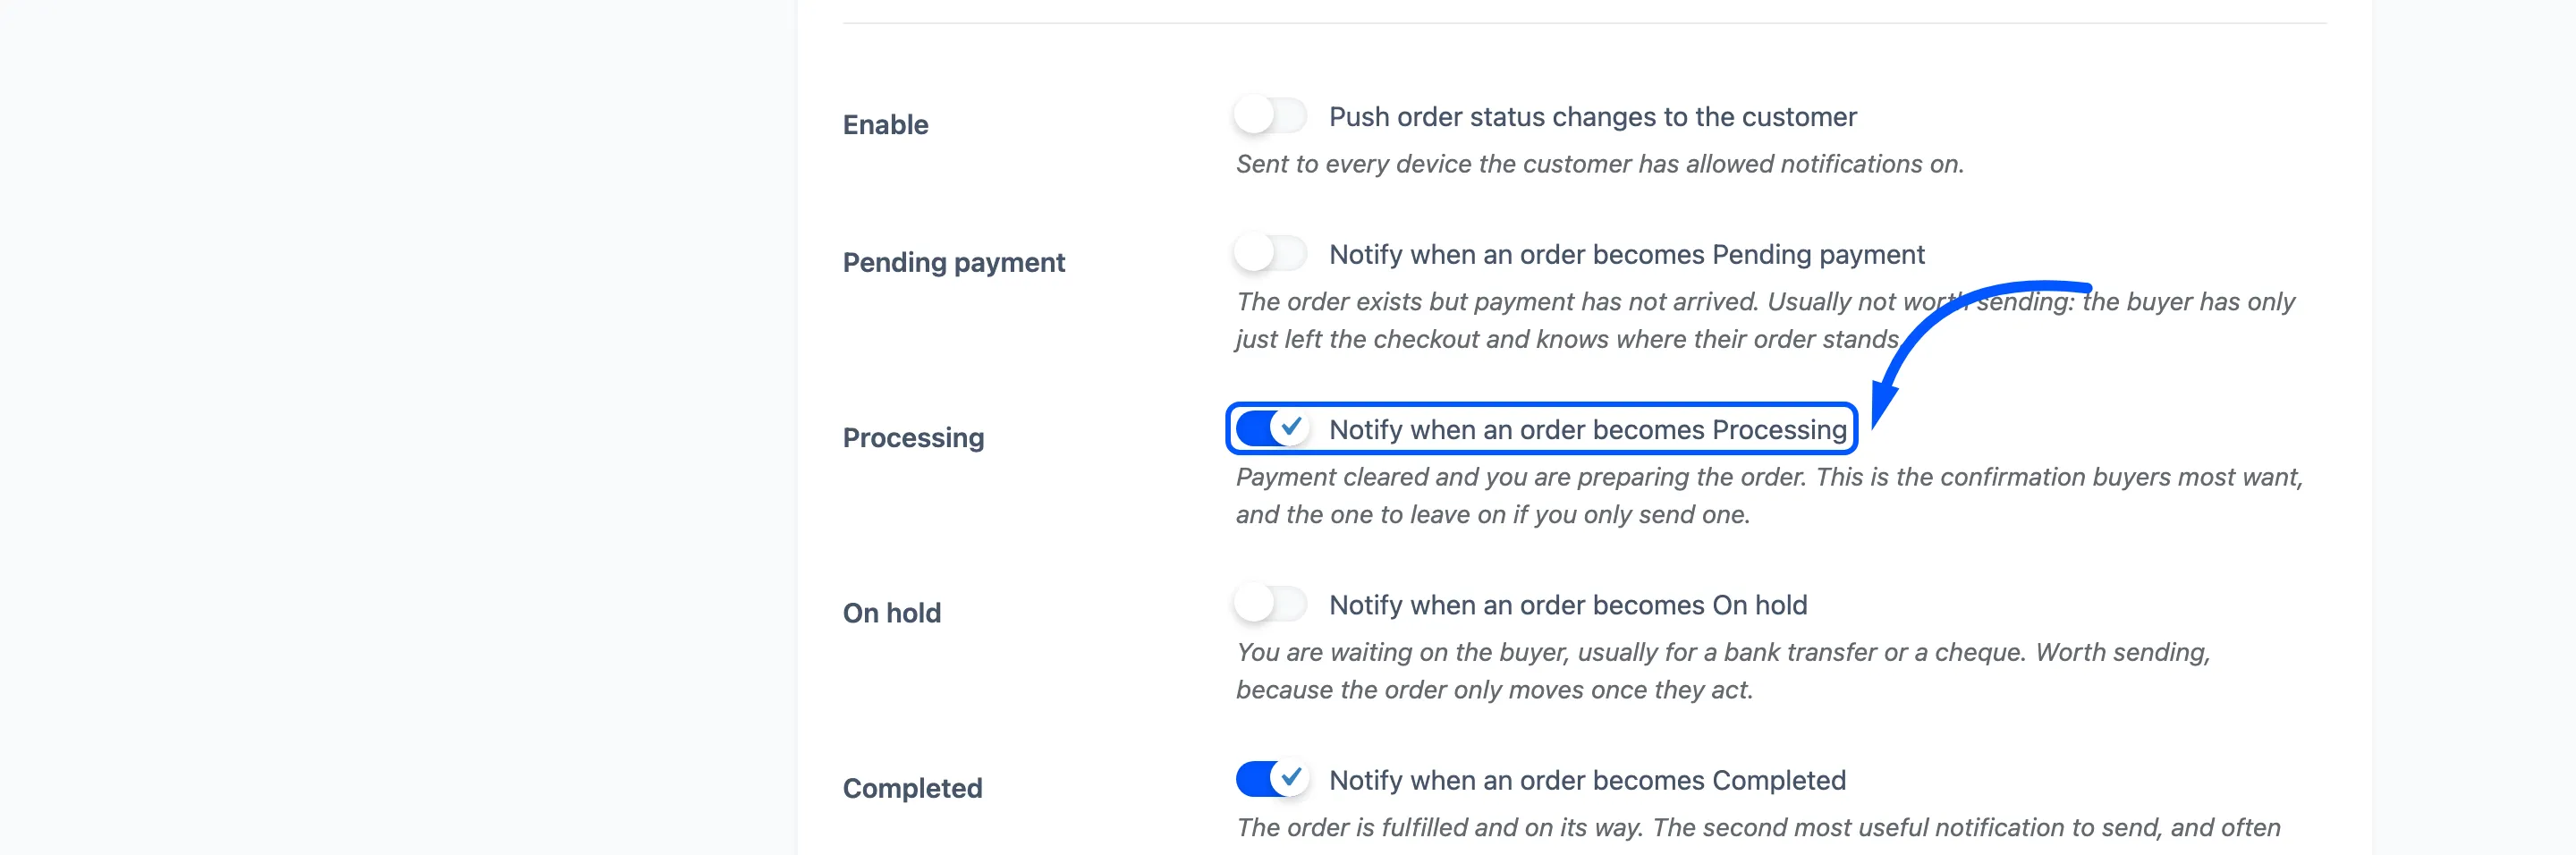
Processing and Completed are ticked by default, and they are the right two to start with. Processing is the confirmation buyers most want. Completed is the one people go looking for.
Three more are worth adding, for different reasons.
- Failed: The one status where a notification can recover the sale. The buyer can usually fix a declined card in a minute if they know about it.
- Refunded: Buyers see a refund on their statement days later, so this tells them it is on the way and prevents a support message.
- On hold: The order only moves once the buyer acts, usually on a bank transfer.
Two to leave off. Pending fires the moment somebody leaves the checkout, when they already know where their order stands. Draft is not a real order at all.
A custom status added by another plugin gets a generic line. Send it only if the buyer would understand what it means.
Step 4: Write the templates
Section titled “Step 4: Write the templates”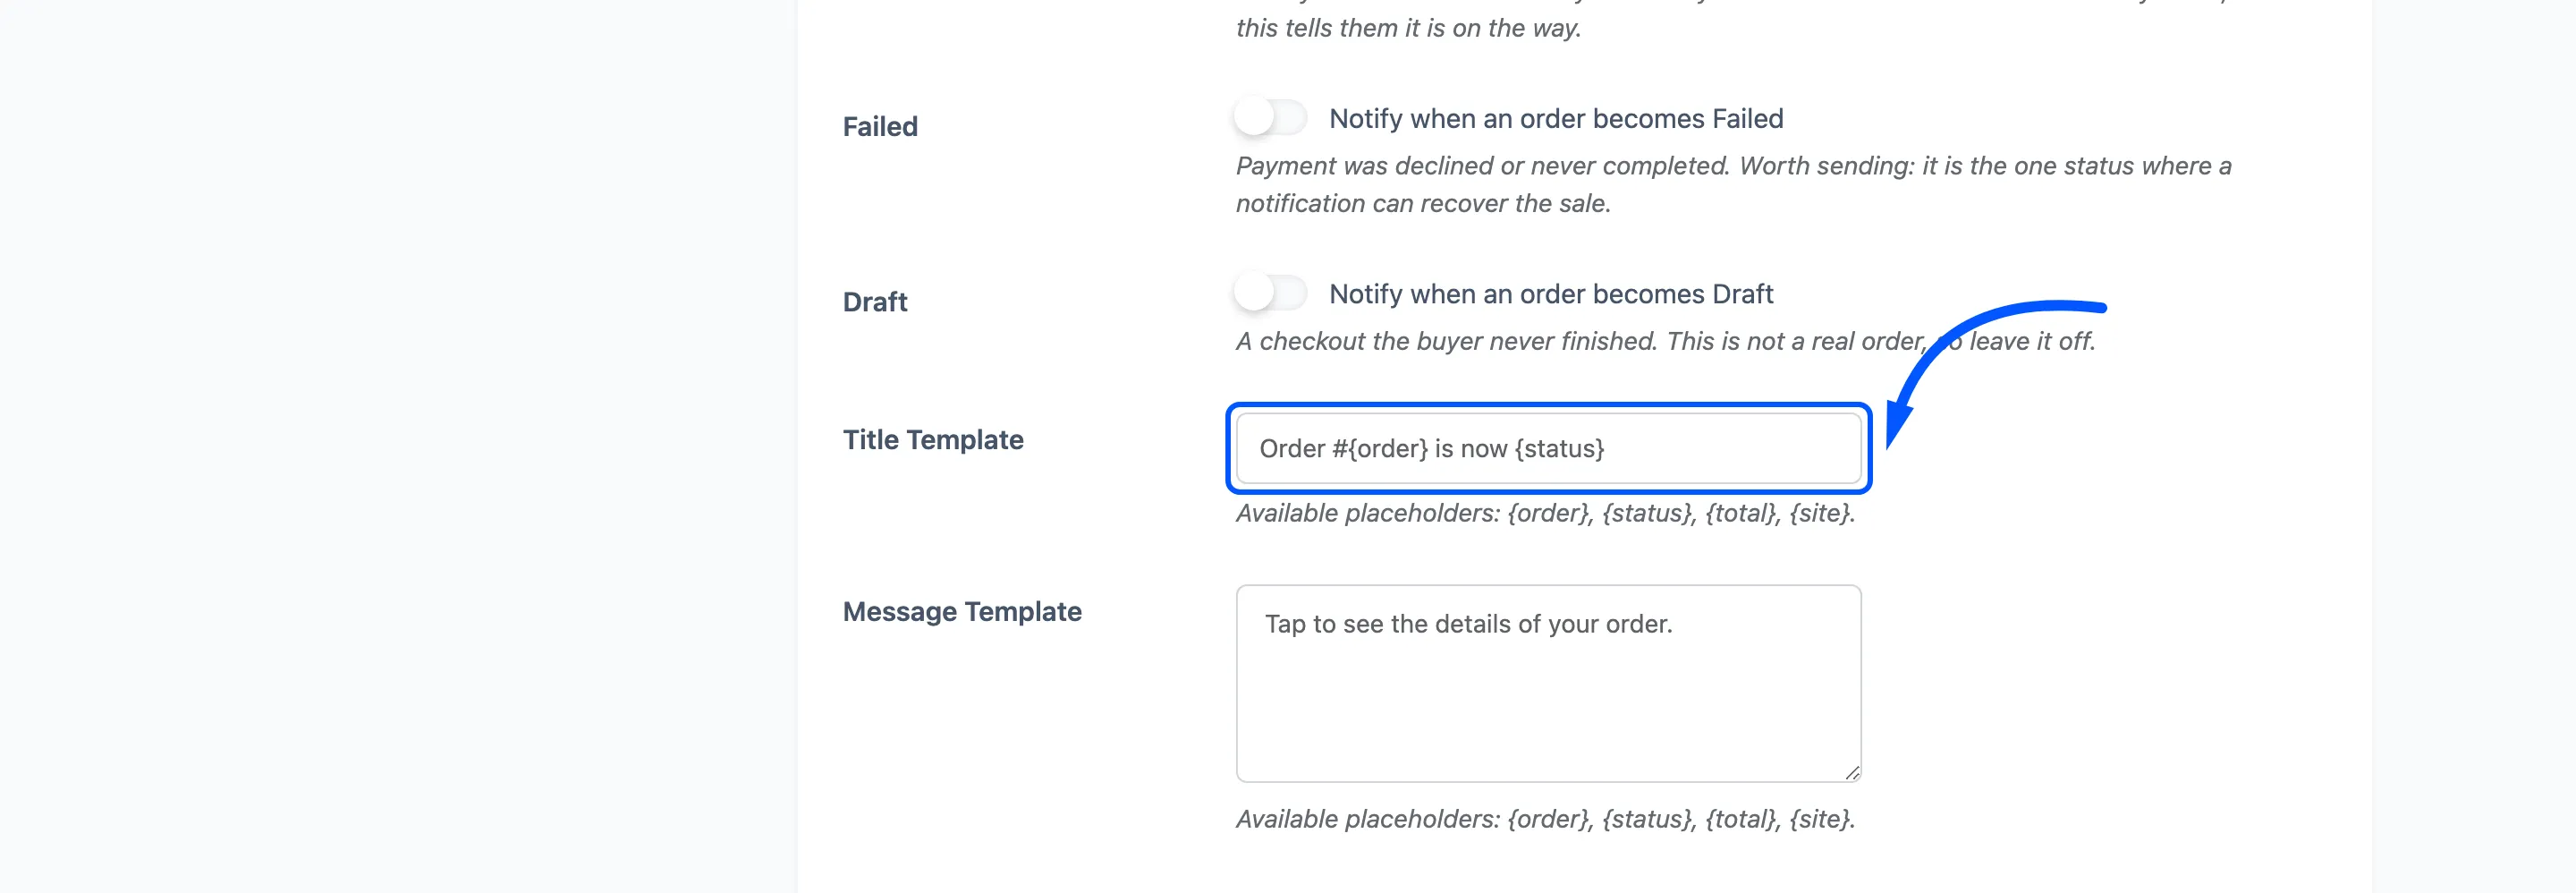
Title Template defaults to Order #{order} is now {status}.
Message Template defaults to Tap to see the details of your order.
Four placeholders in both: {order}, {status}, {total} and {site}.
Keep the order number in the title. It is the one piece of information that lets a customer with three open orders know which one this is about, and a phone shows about 40 characters of it. Press Save Changes when the templates read well.
Step 5: Confirm it fires
Section titled “Step 5: Confirm it fires”Place a test order as a signed-in customer who has allowed notifications, then move it along in WooCommerce → Orders.
Go to Delivery Log and set the type filter to Order Update.
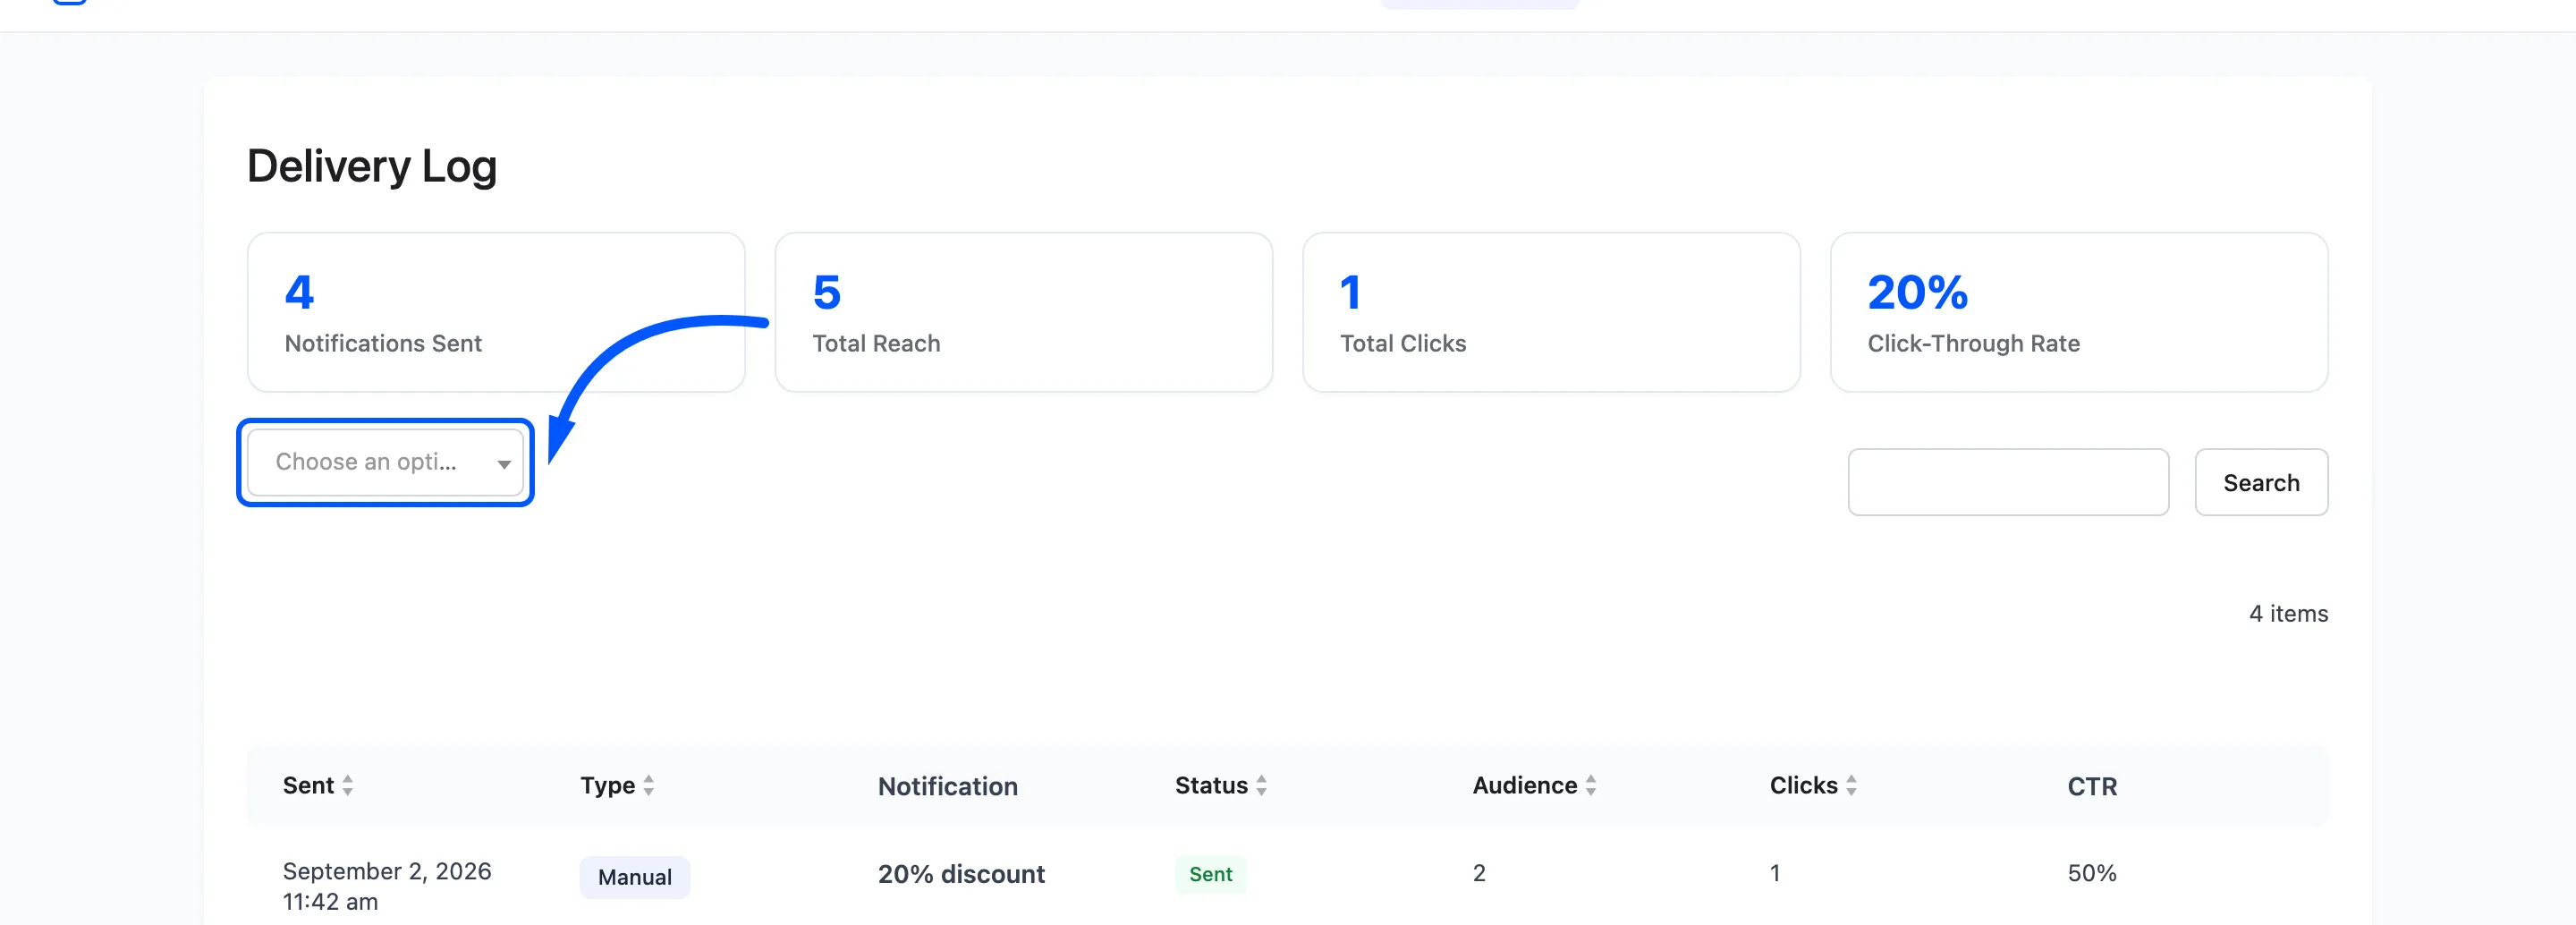
If nothing appears, work through it in this order.
- The buyer is a guest. Nothing to match.
- The buyer has never allowed notifications. Check the Subscribers screen for their account in the User column.
- That status is not ticked.
- Push credentials are wrong. The Status tab checks this live.
What the customer sees
Section titled “What the customer sees”The notification arrives on the lock screen with your title as the first line and your message under it. Tapping opens the order in their account.
Nothing changes for a customer who has never allowed notifications, and no email is replaced. Order emails keep going out exactly as WooCommerce sends them.