

How to Send Your First Push Notification
A notification here is written once and kept. You save it, and then you decide when it goes out. That separation is why the list has both a status and a last-sent column.
Push has to be working first. If you have not connected Firebase, start there: the form will save without it and the send will fail.
Step 1: Open the Notifications screen
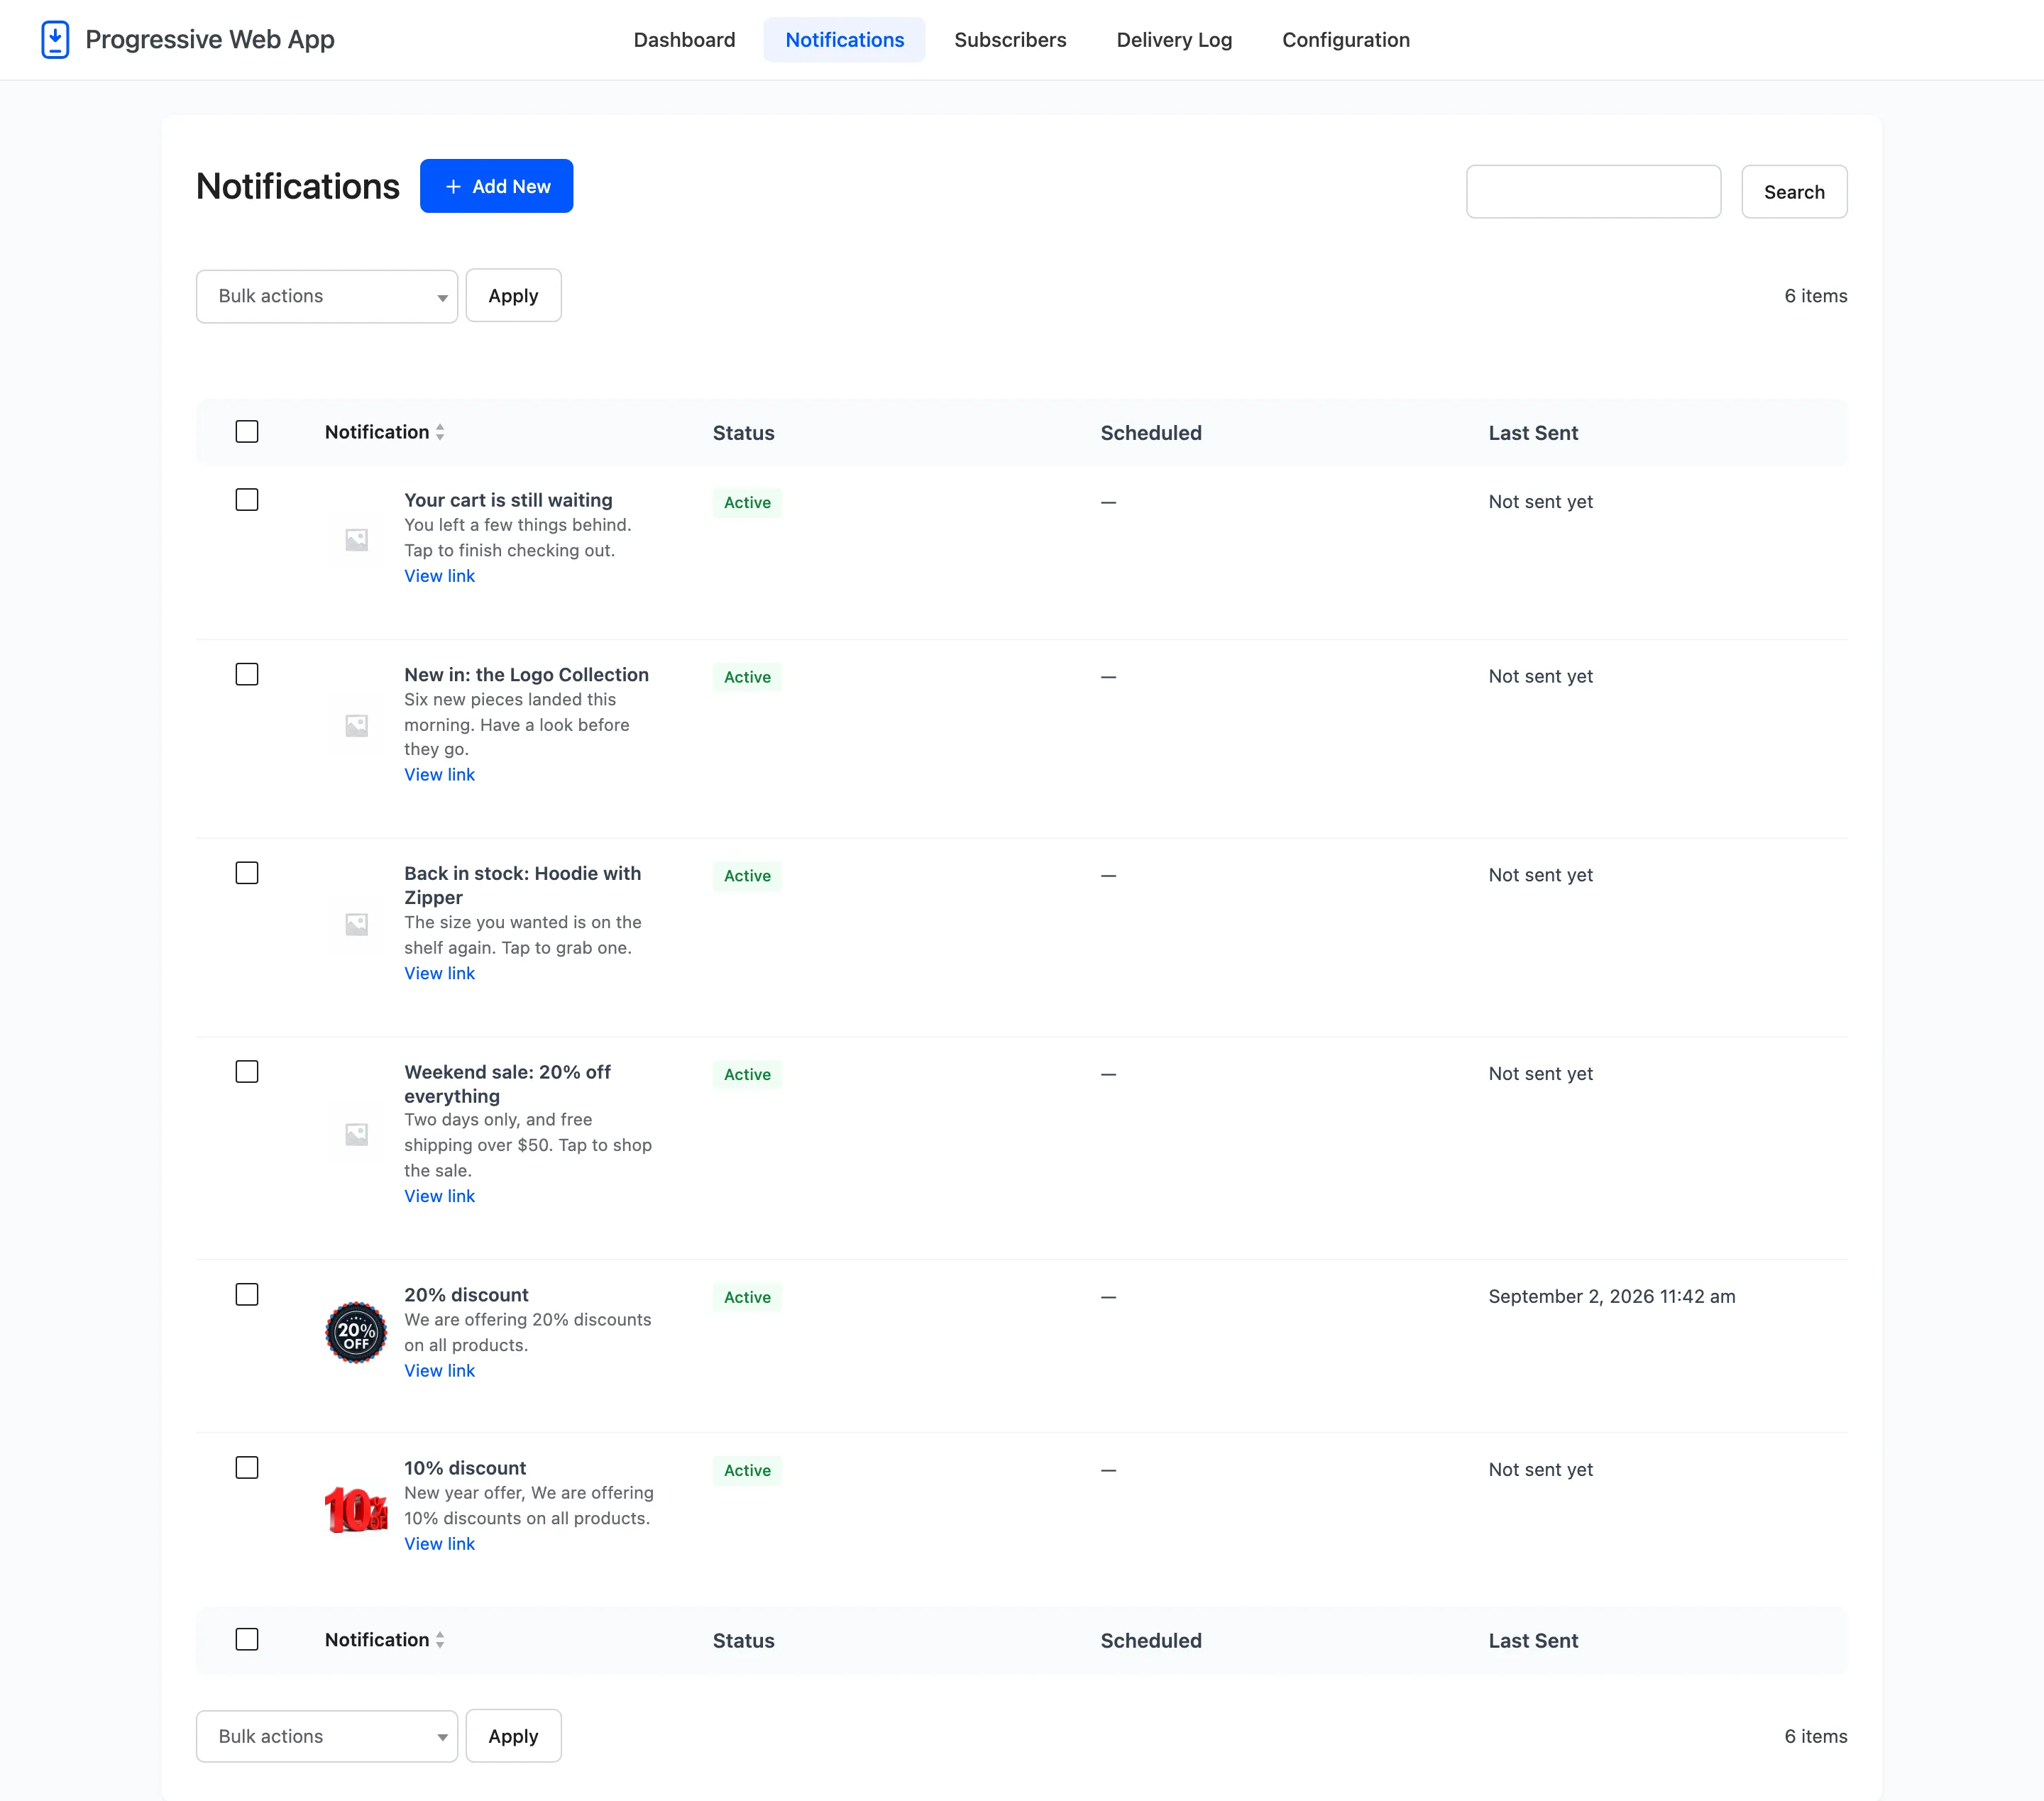
Section titled “Step 1: Open the Notifications screen”Go to DevDiggers Plugins → Progressive Web App → Notifications.
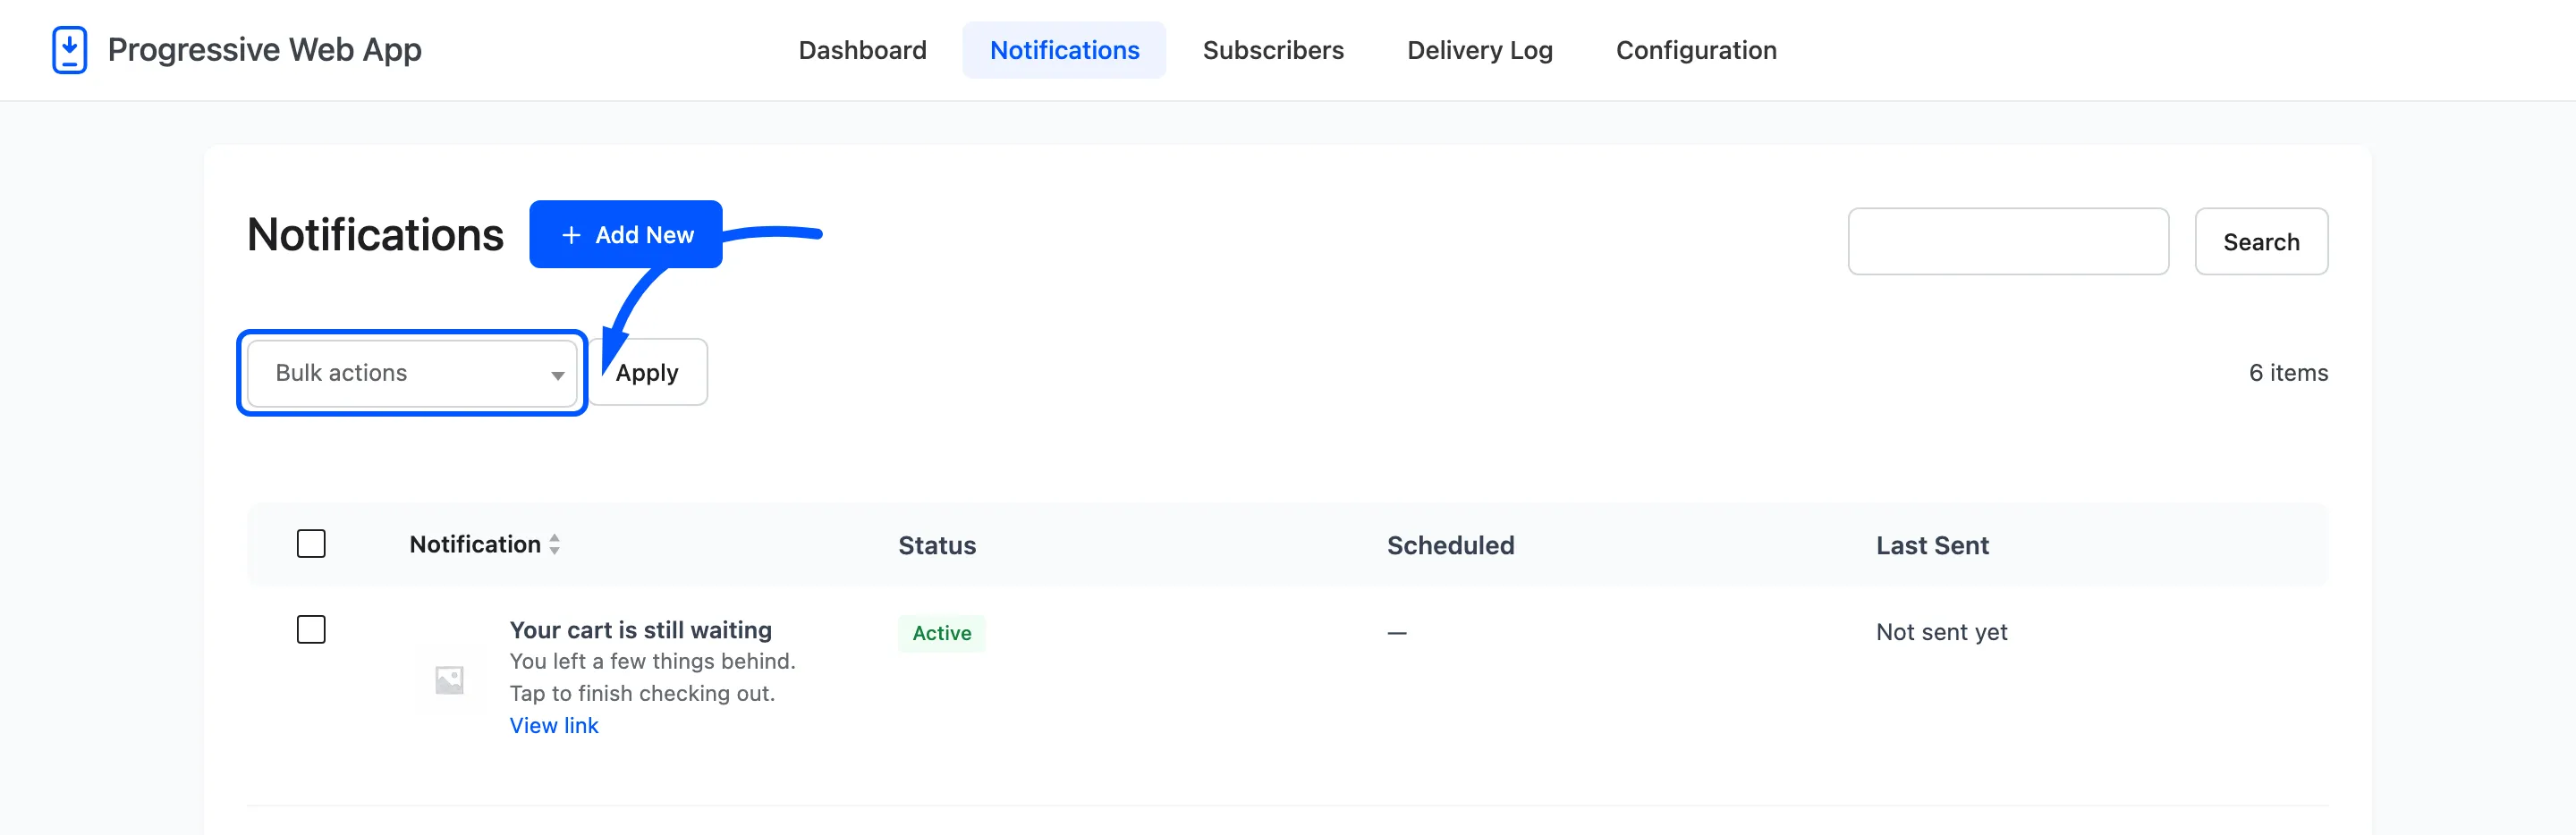
Step 2: Press Add New
Section titled “Step 2: Press Add New”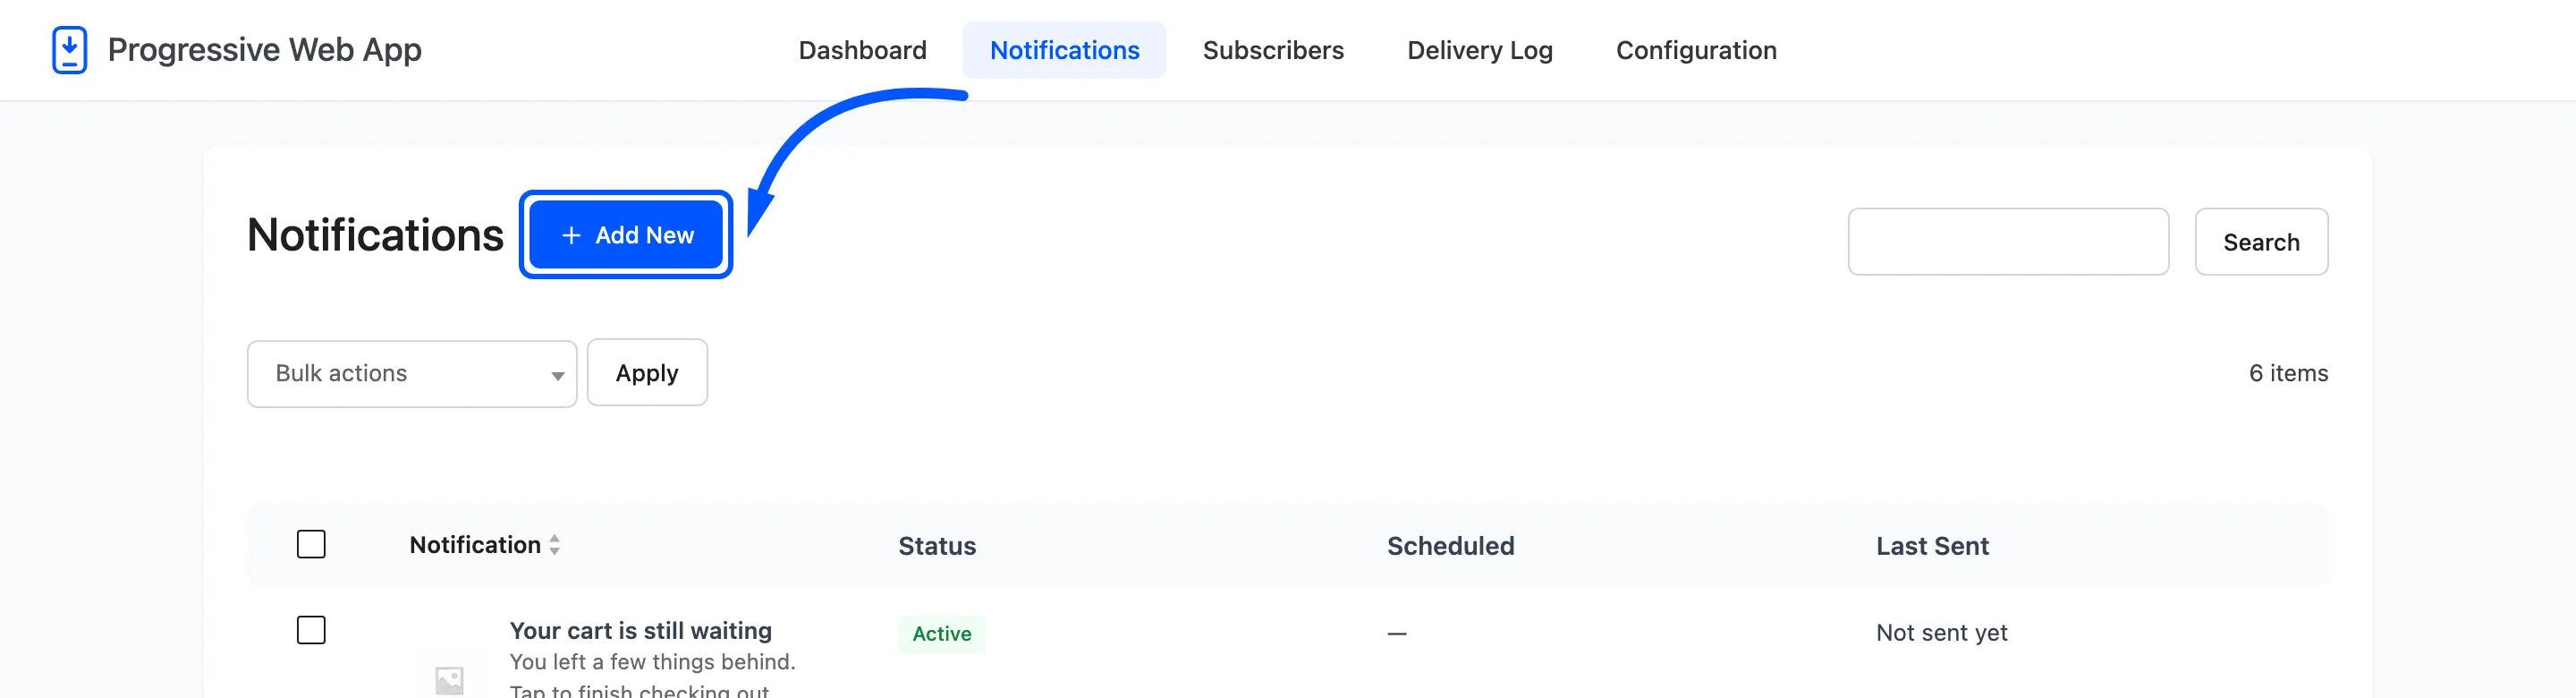
Step 3: Write the title and the message
Section titled “Step 3: Write the title and the message”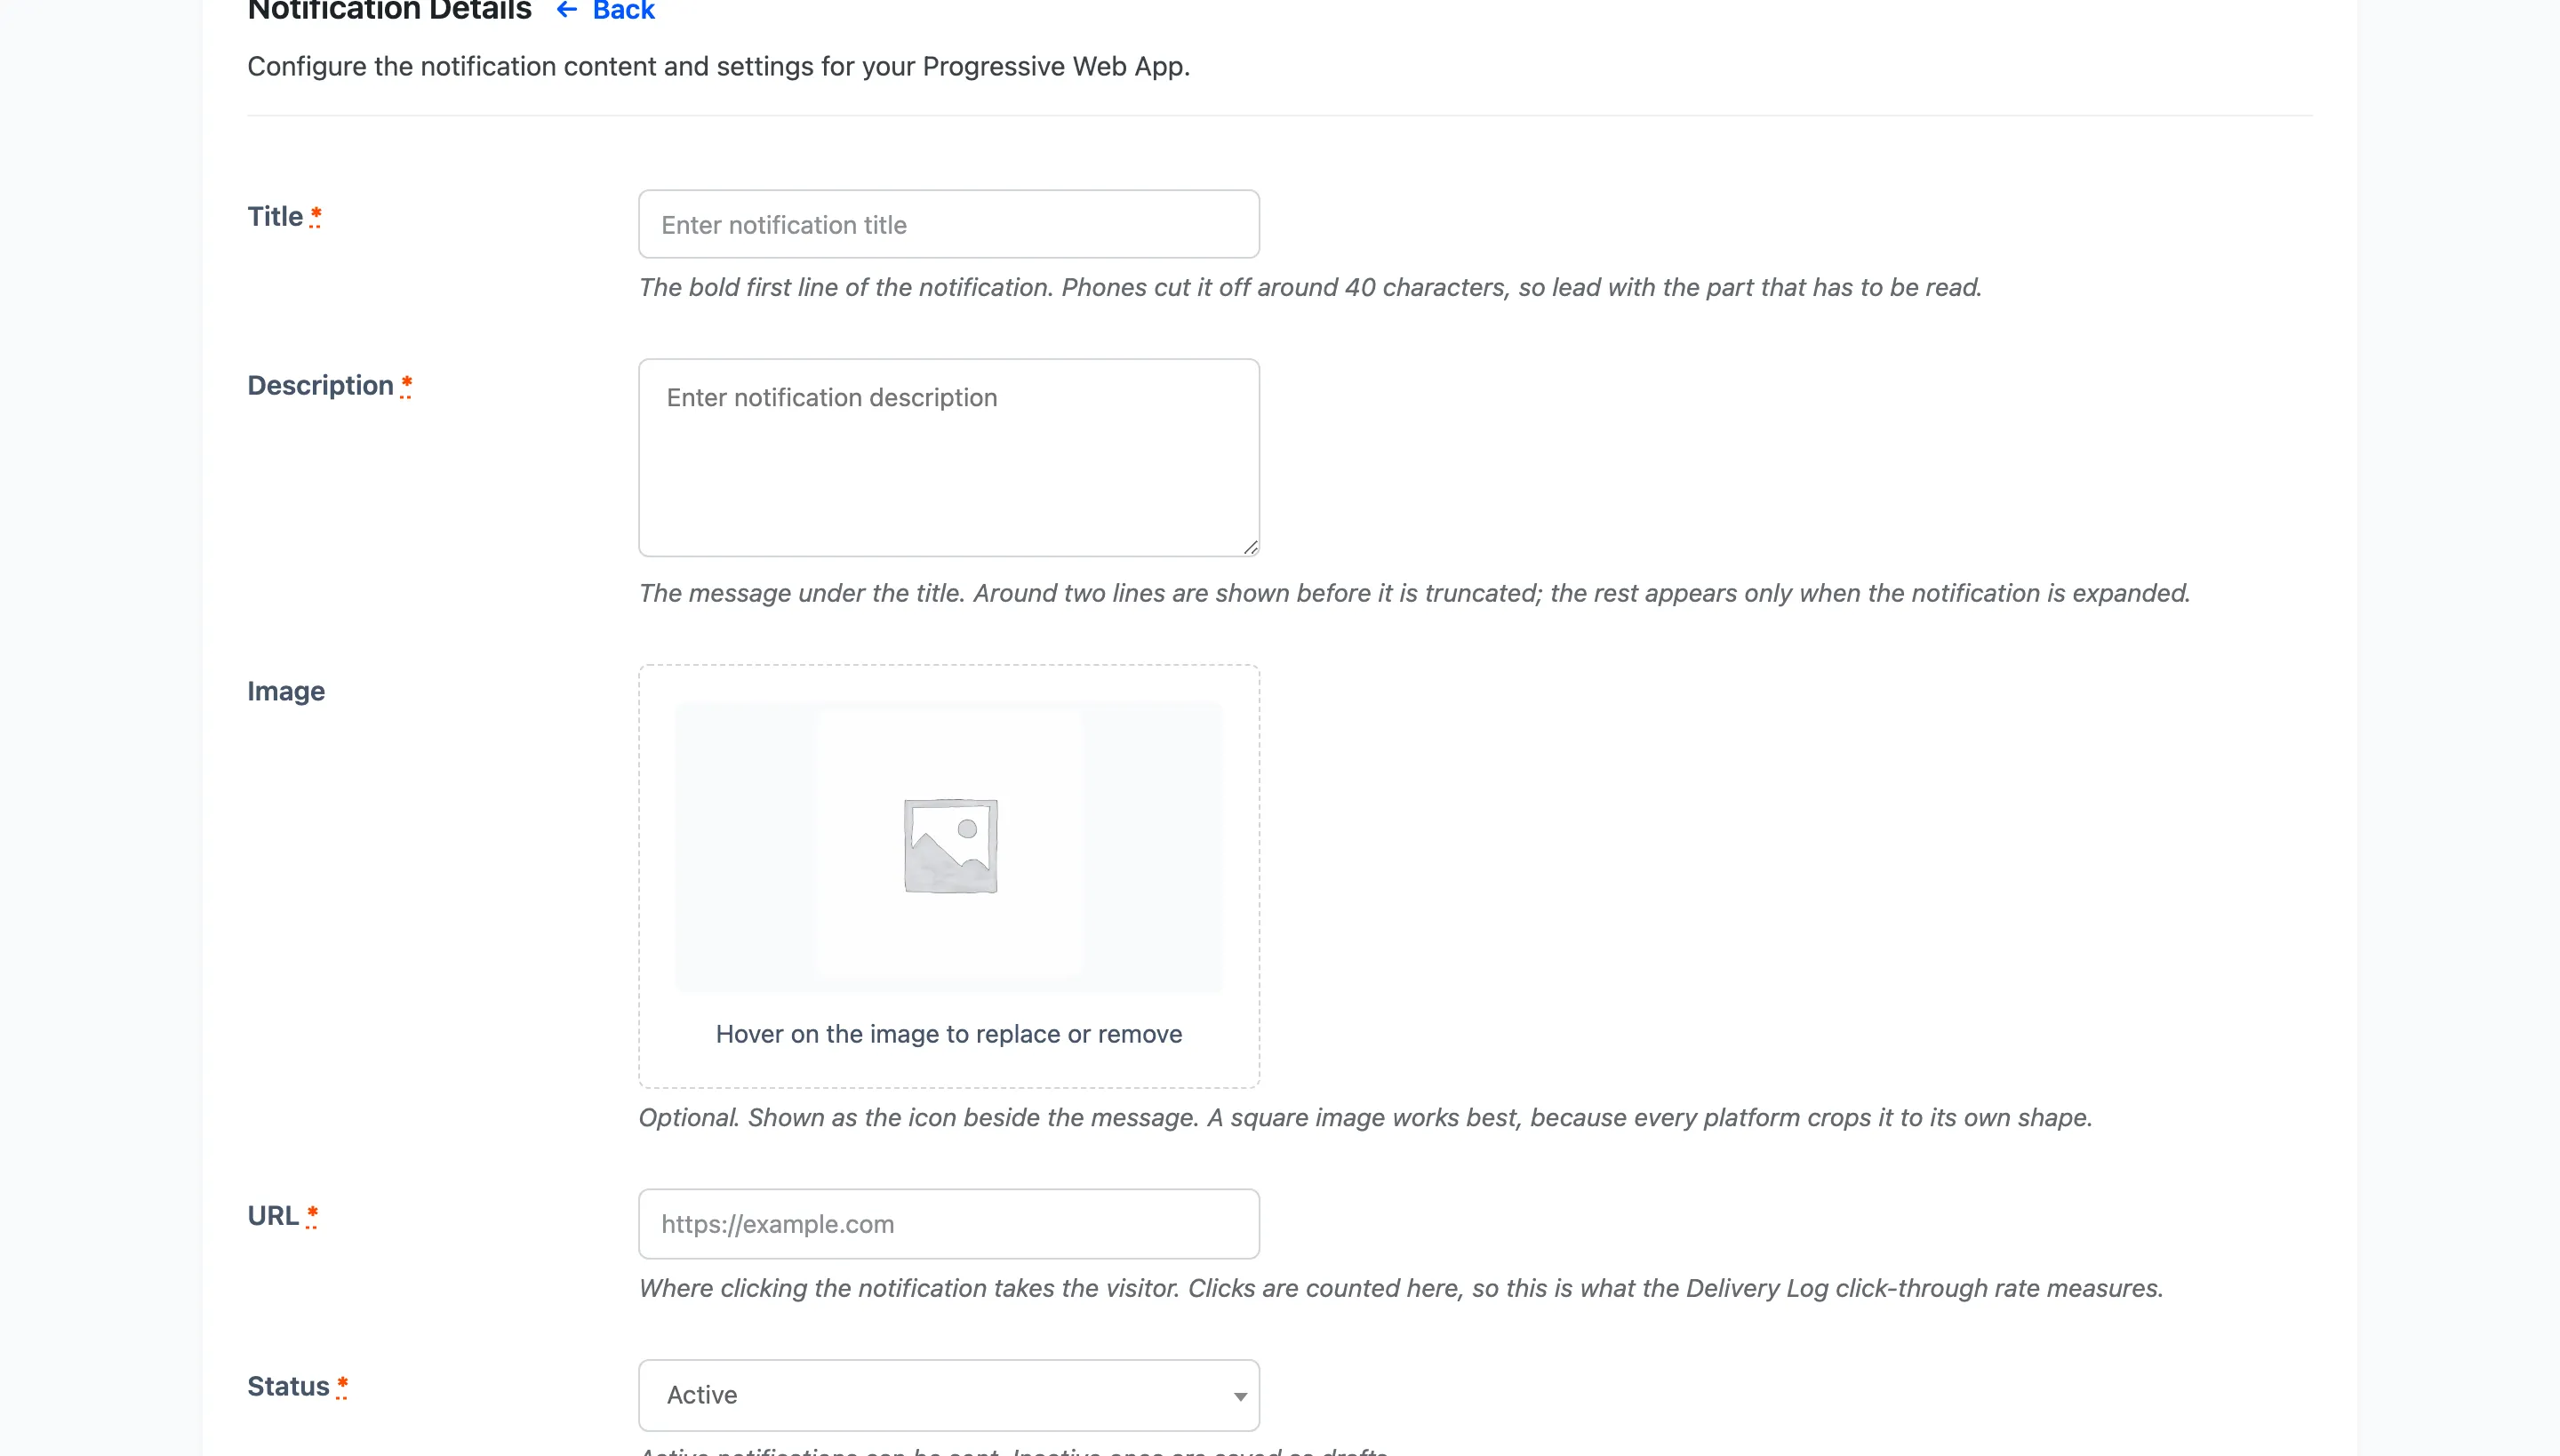
Title is the bold first line. Phones cut it off around 40 characters, so lead with the part that has to be read. “Weekend sale: 20% off everything” survives the cut. “A message from our team about this weekend” does not.
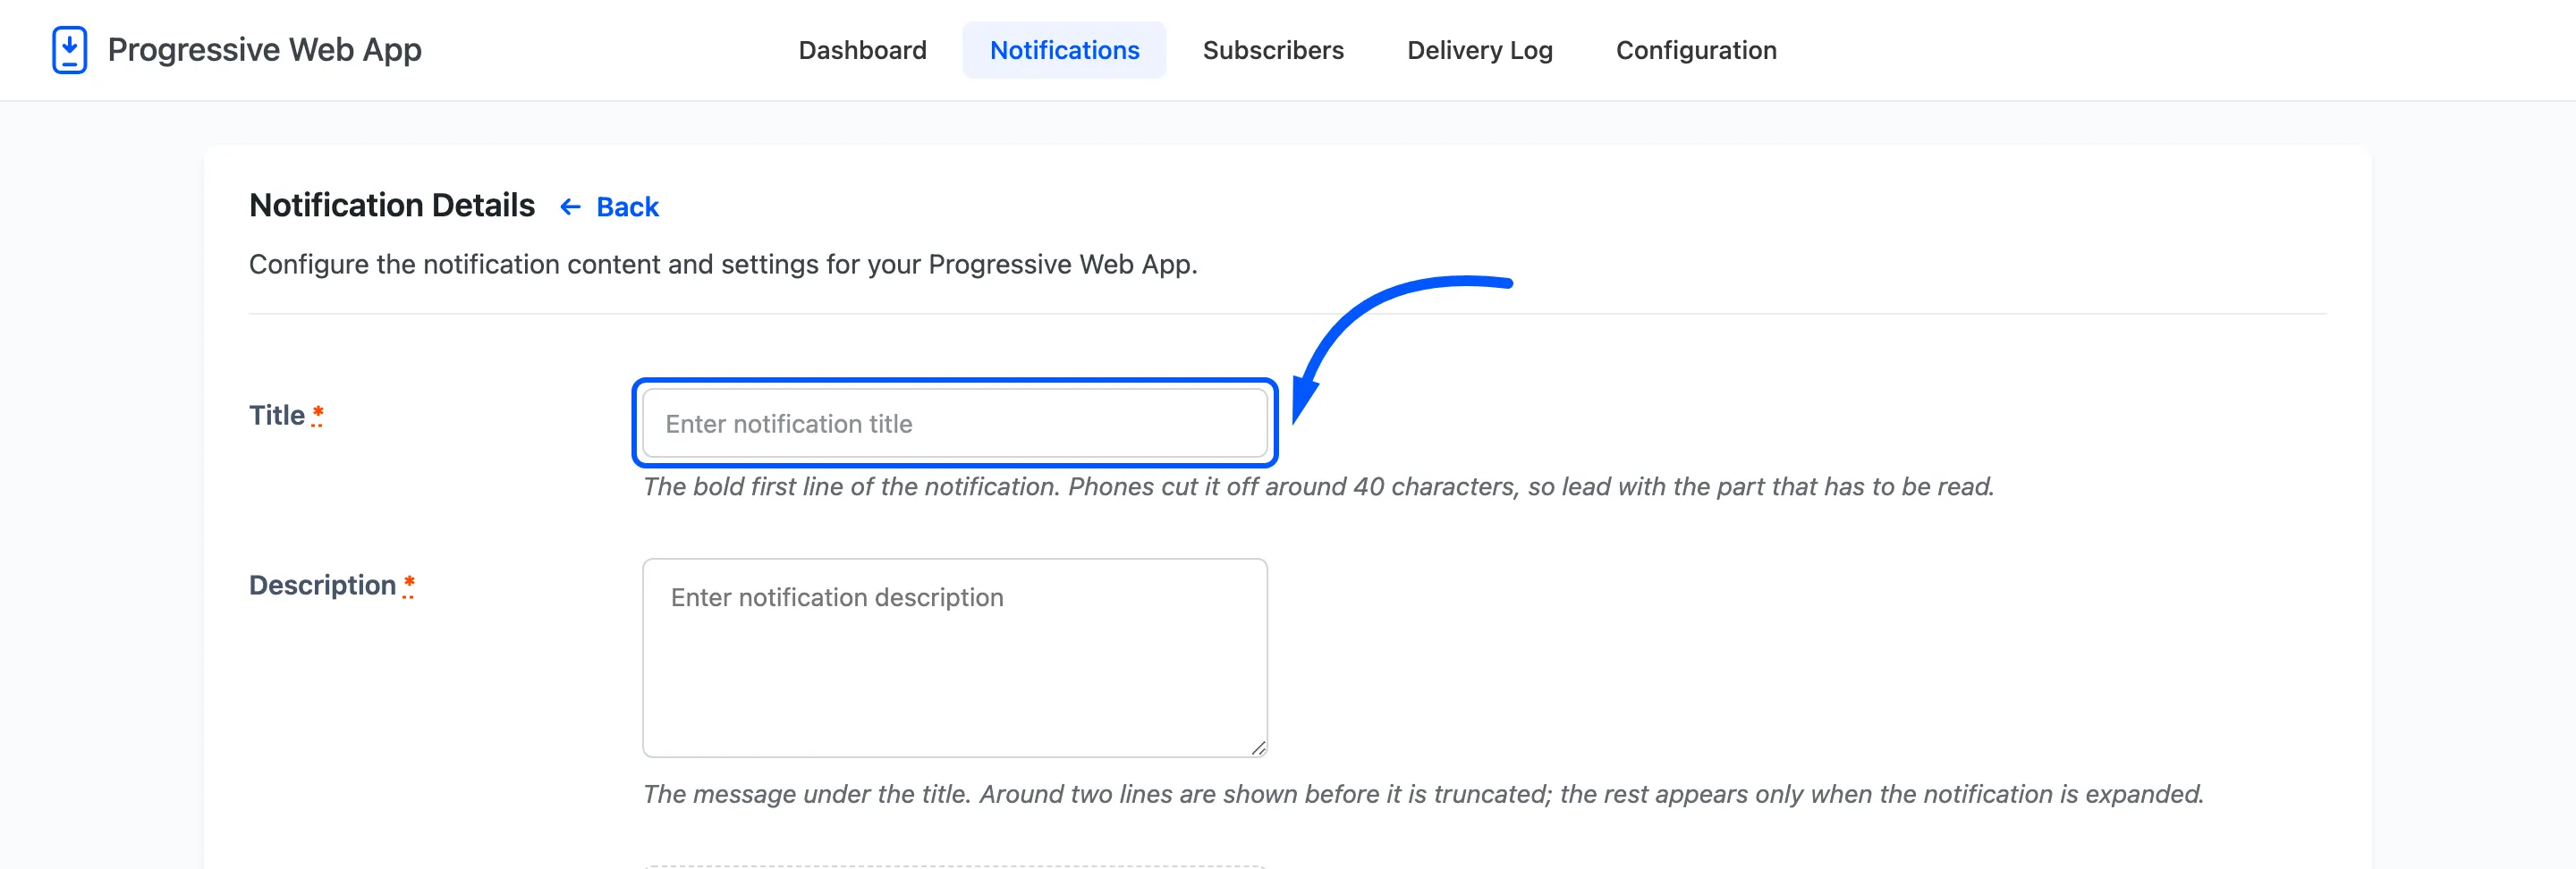
Description is the message under it. Around two lines are shown before it is truncated, and the rest appears only if the reader expands the notification. Put the offer in the title and the detail here, not the other way round.
Step 4: Set the URL and the image
Section titled “Step 4: Set the URL and the image”URL is where a tap lands. This is also what the Delivery Log’s click-through rate measures, so send people to the thing you are telling them about rather than to your home page.
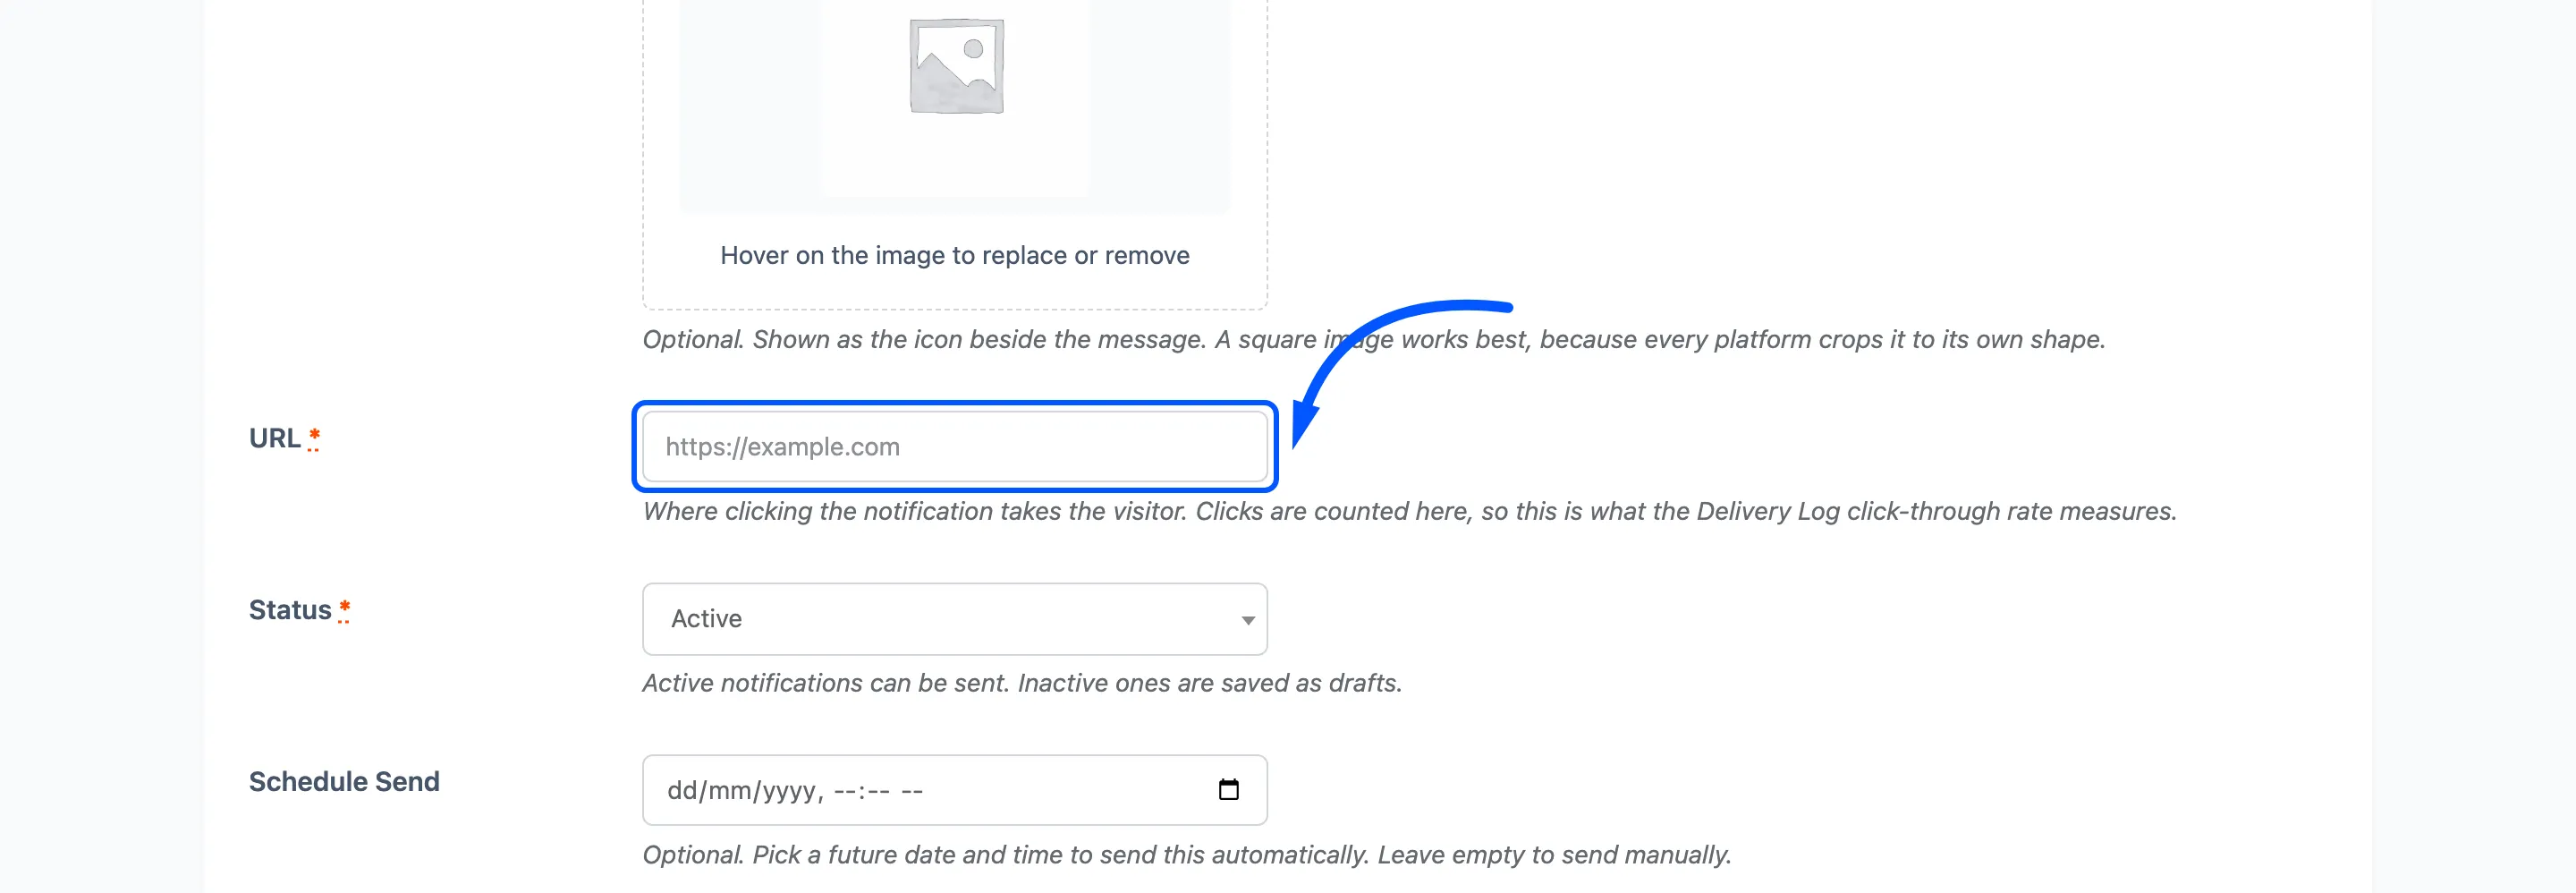
Image is optional and shown as the icon beside the message. Use a square: every platform crops it to its own shape, and a wide image loses its ends.
Step 5: Save it as Active
Section titled “Step 5: Save it as Active”Set Status to Active and press Save Notification.
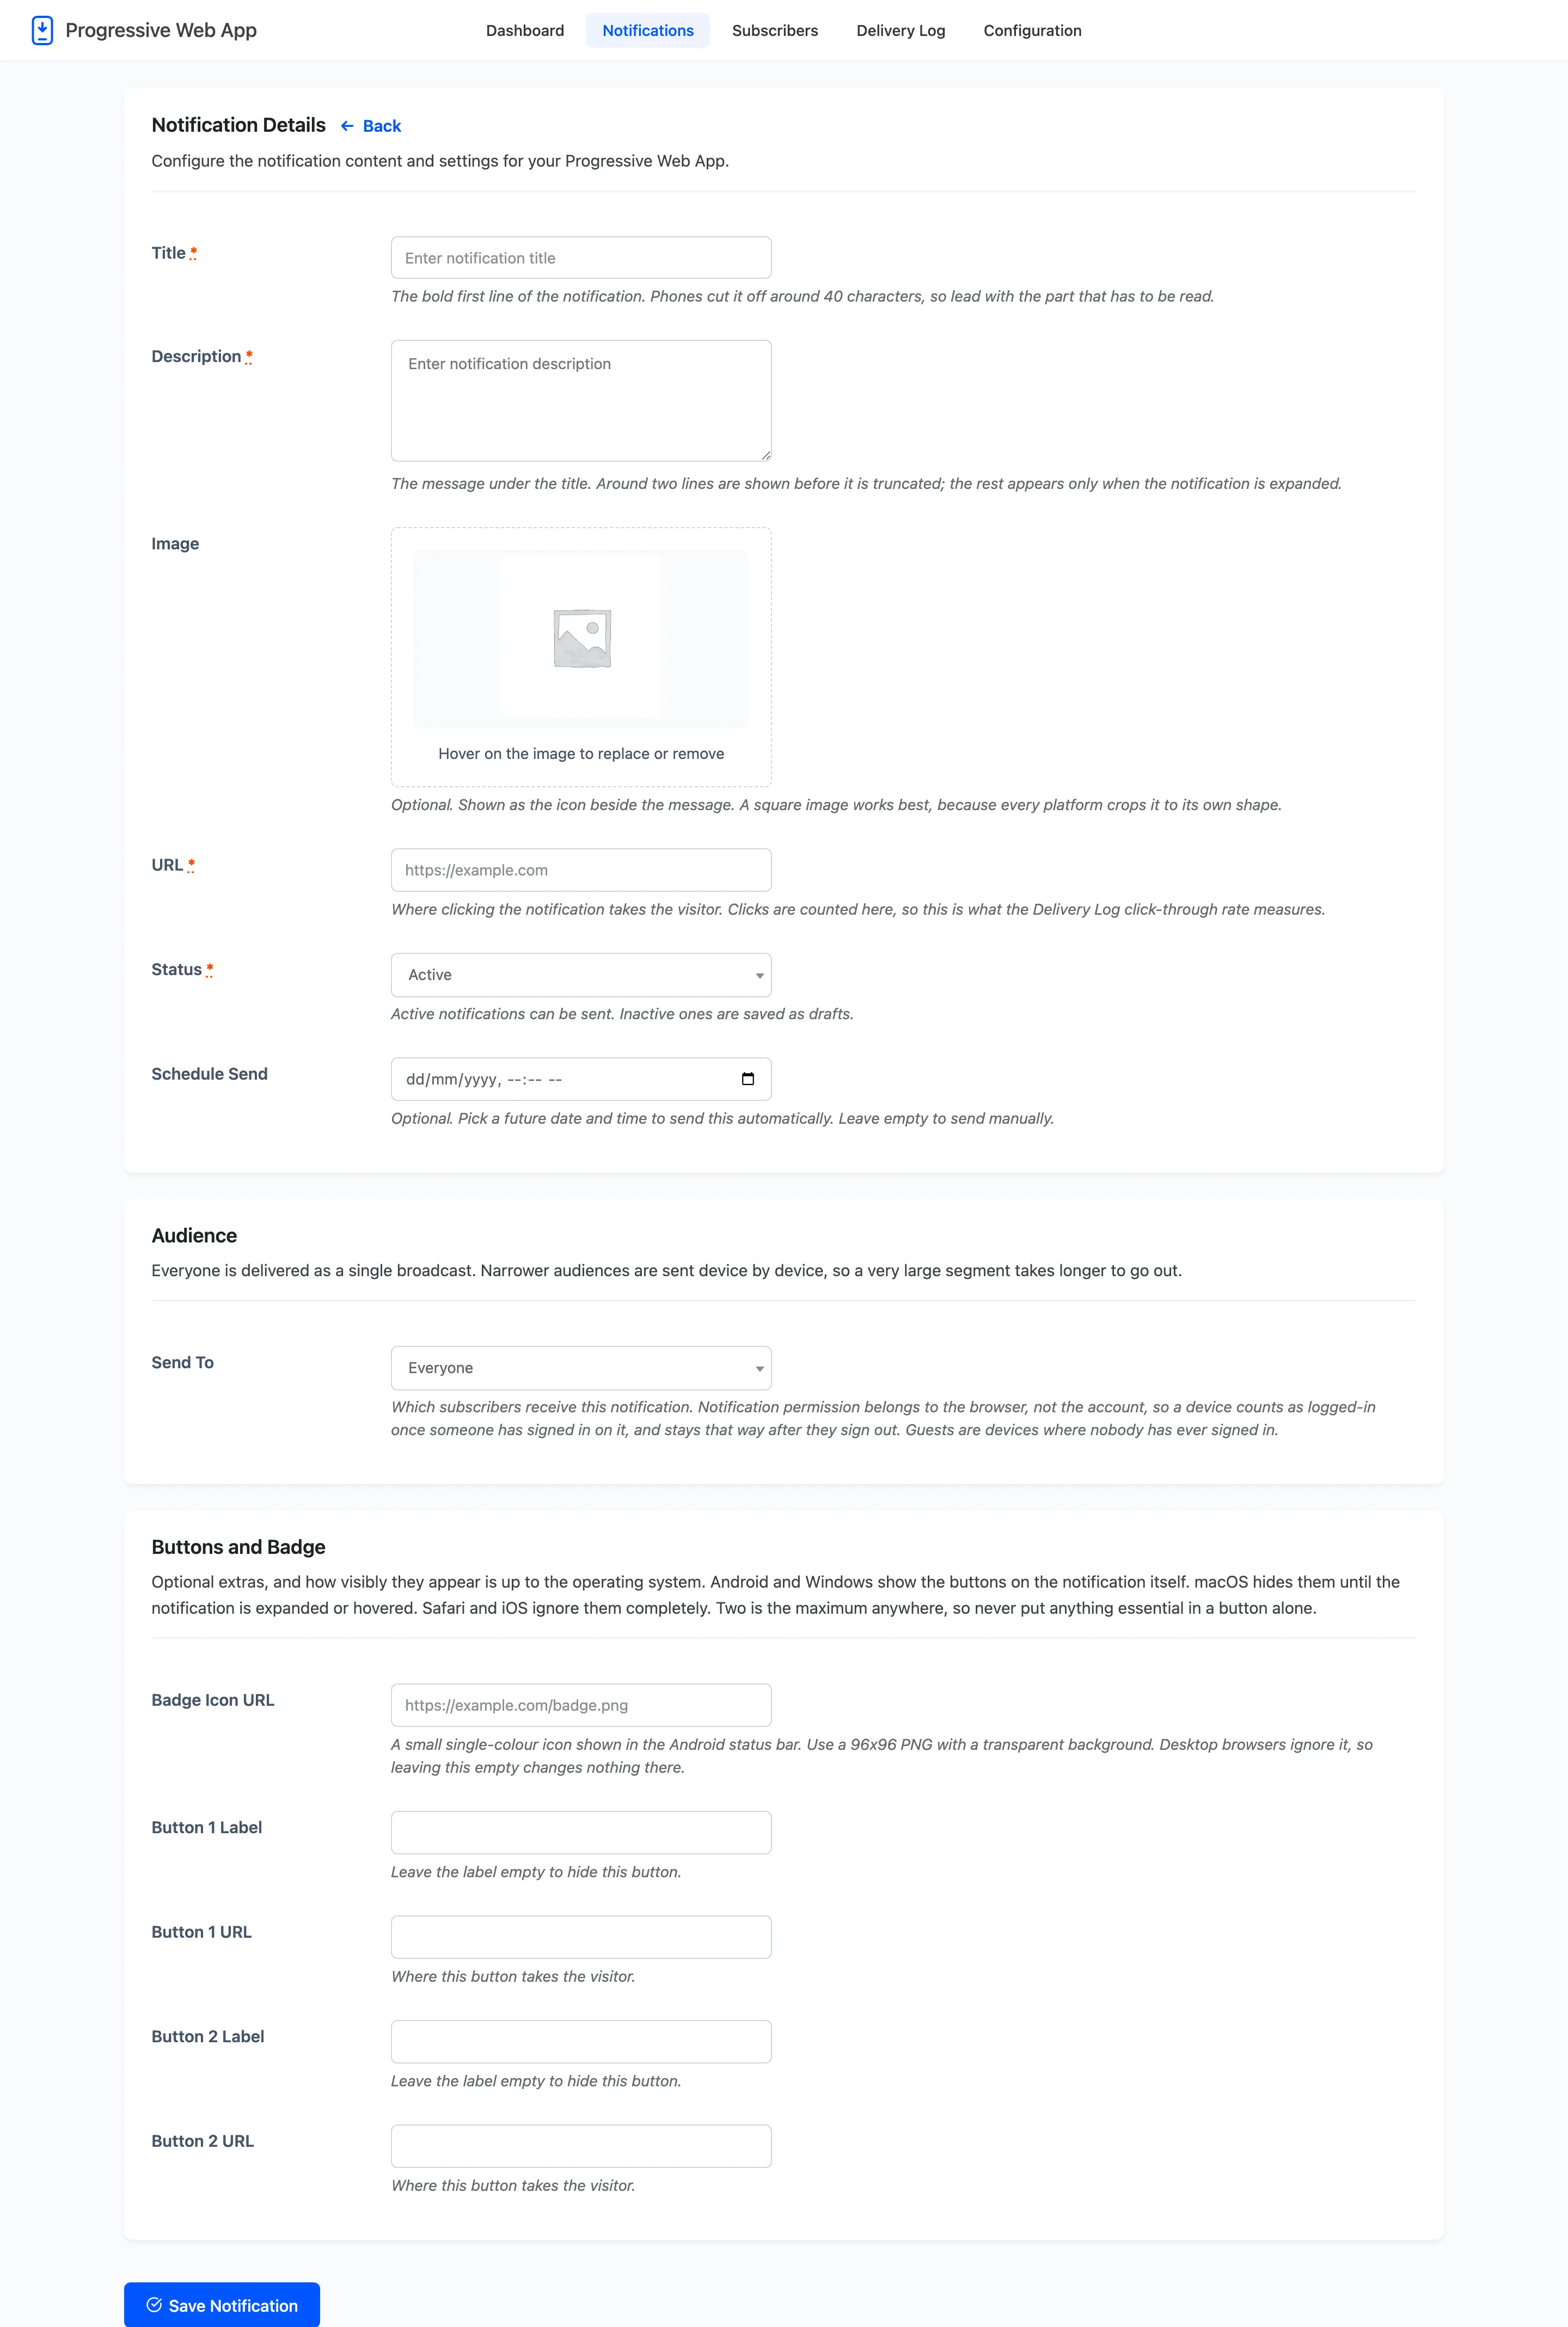
Inactive saves it as a draft. It stays in the list, its checkbox is disabled so a bulk send cannot pick it up, and no Send Now action appears on its row. It does not hold back a schedule. That is the safe place to leave something you are still writing.
Step 6: Send it
Section titled “Step 6: Send it”Back on the list, hover the row.
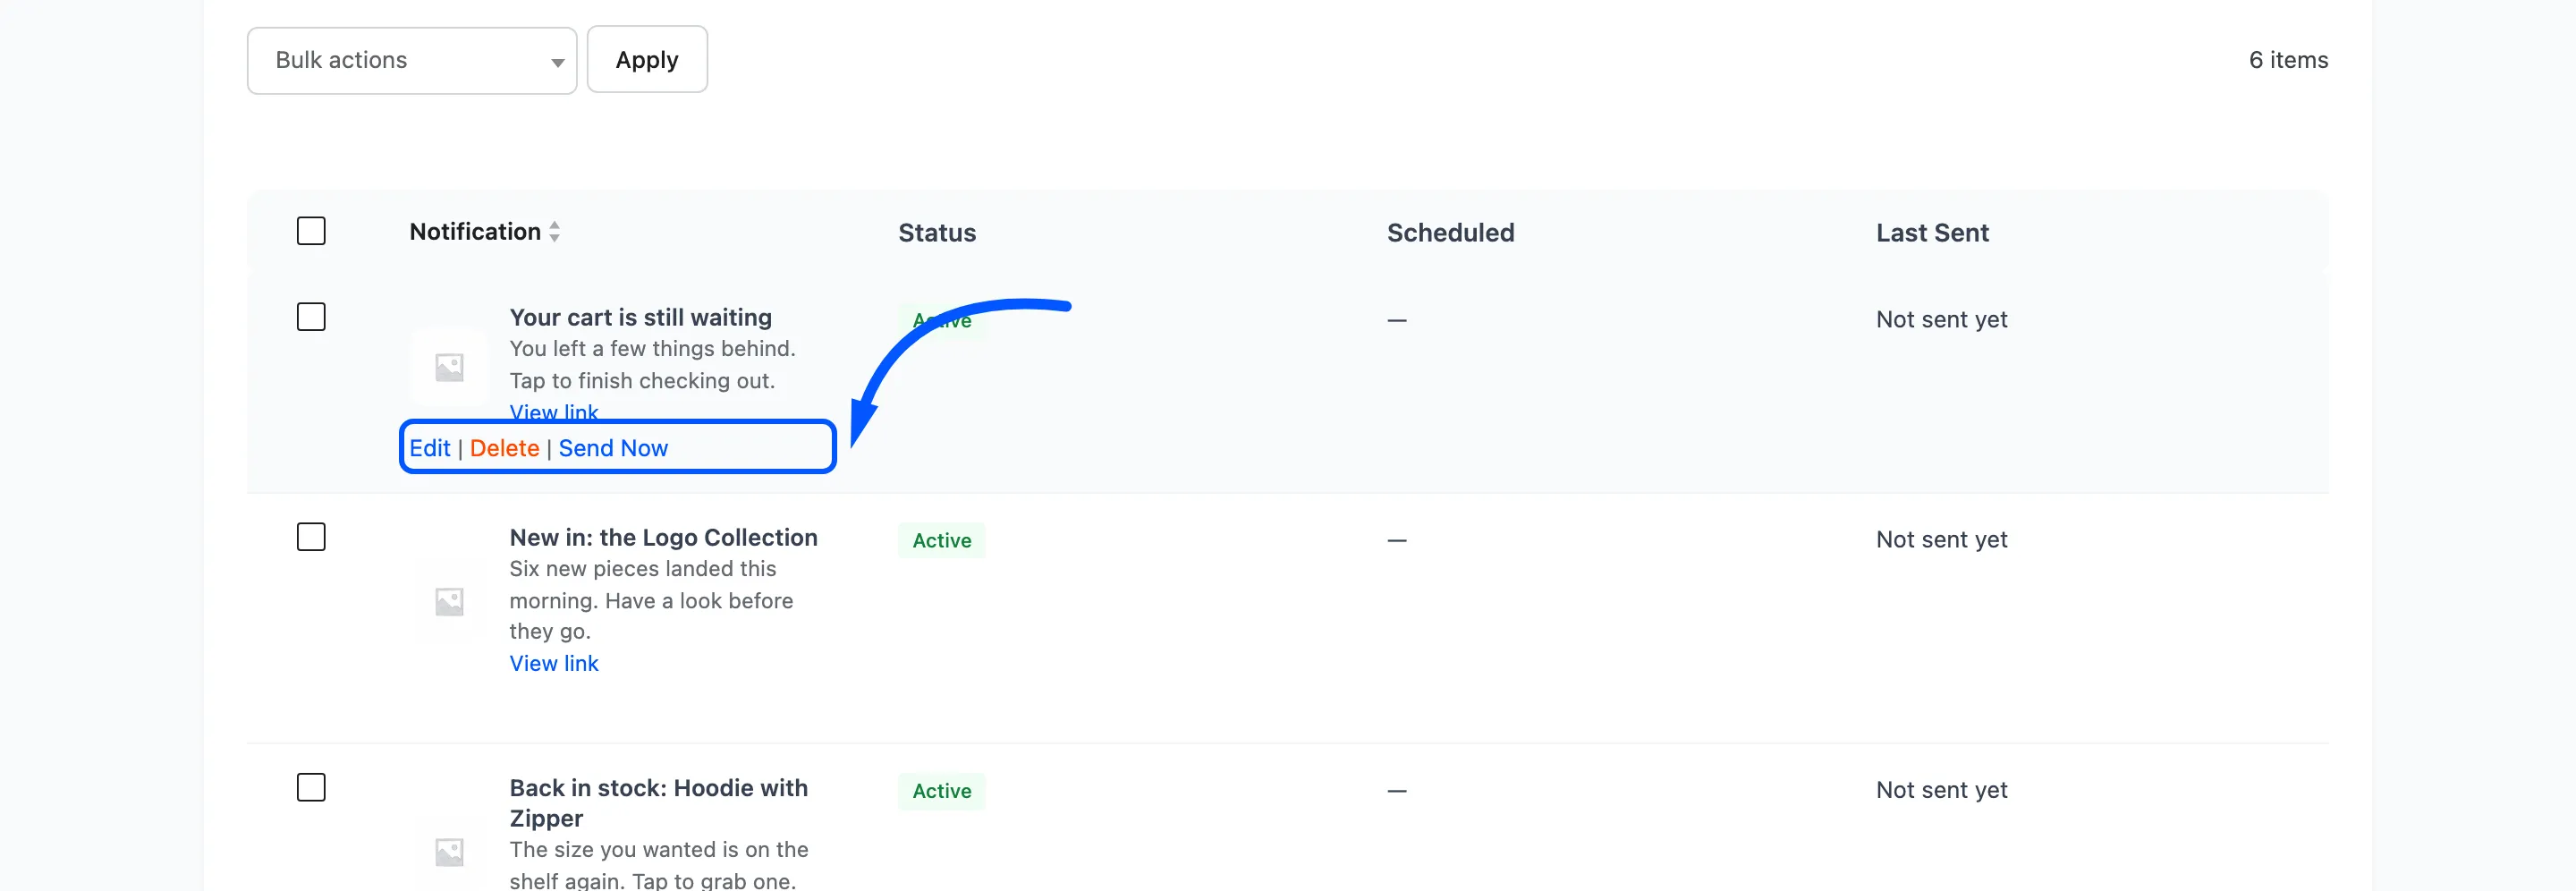
Send Now broadcasts immediately. There is no confirmation step and no recall, so read the row before you press it.
To send several at once, tick their checkboxes and choose Send Bulk Notifications from the bulk actions dropdown.
Step 7: Check the Delivery Log
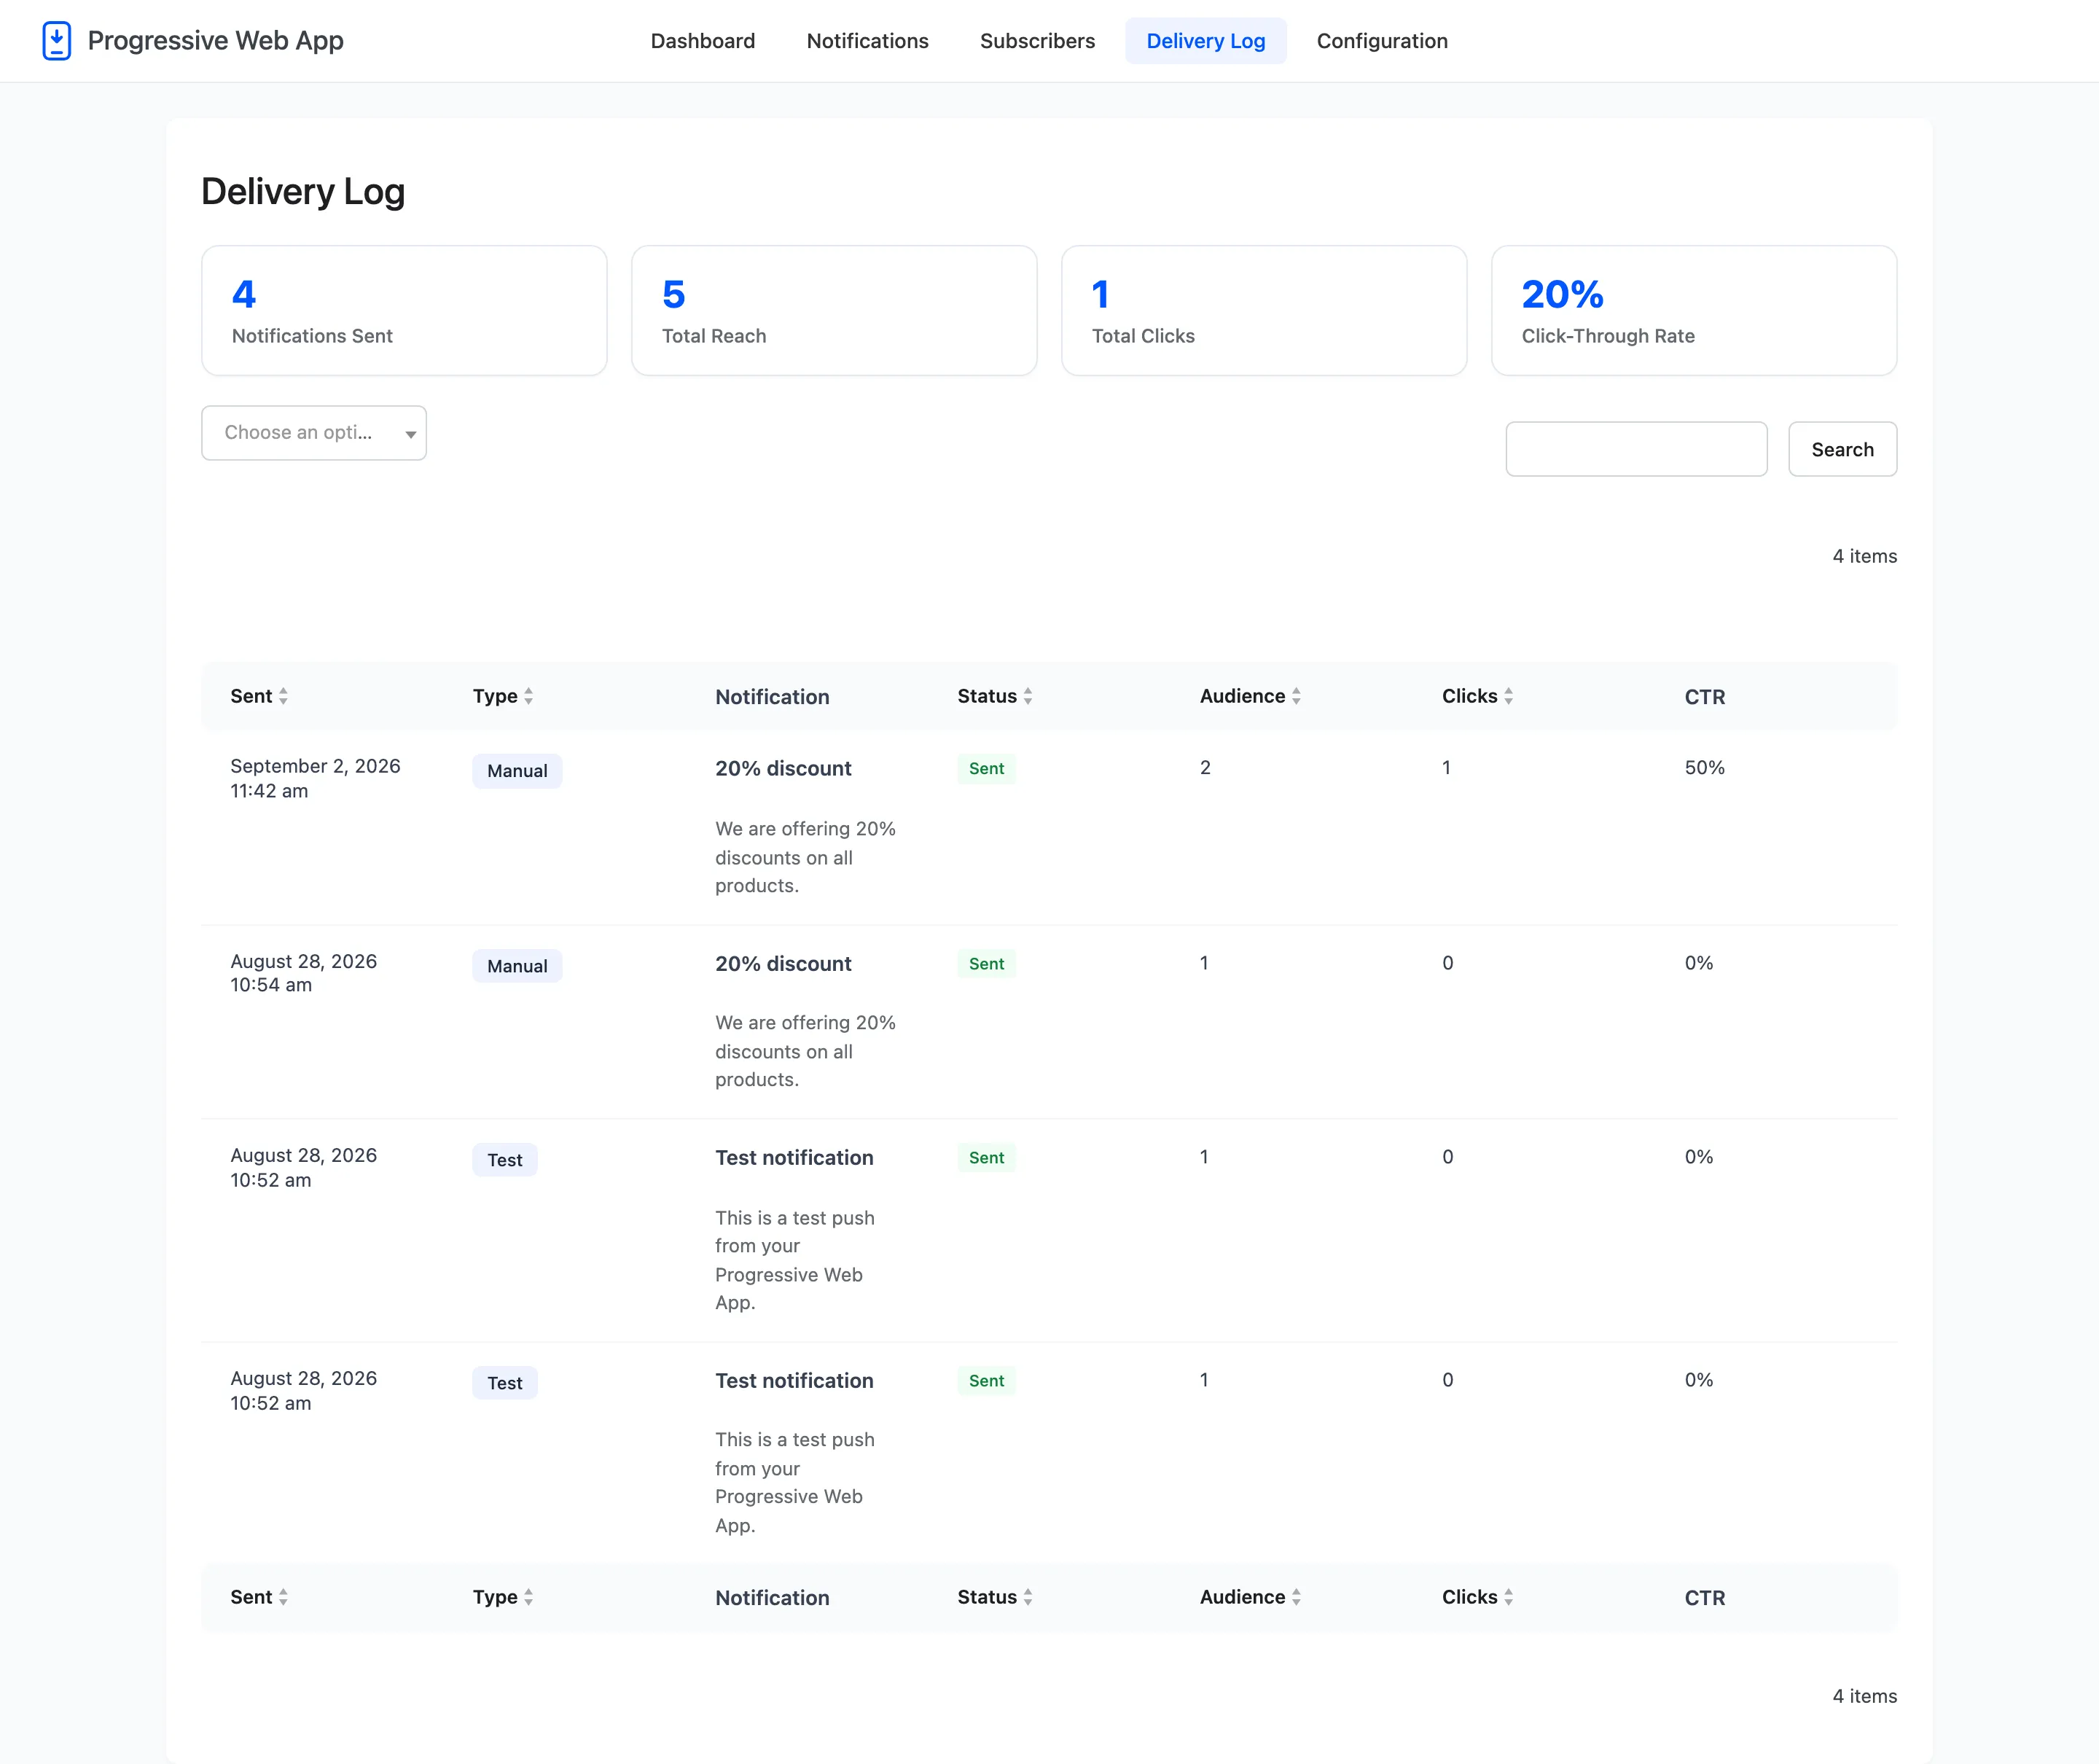
Section titled “Step 7: Check the Delivery Log”Go to Delivery Log. The send is the newest row, with the type Manual.
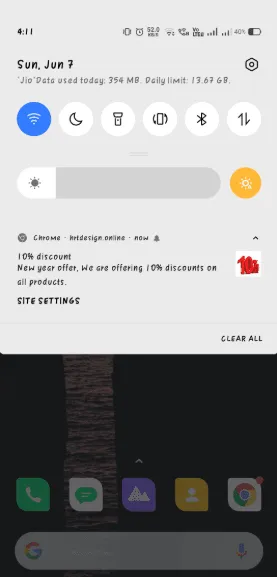
On a subscribed device the message arrives in the operating system’s own notification area, whether or not your site is open.
Three things to read on it.
- Audience is how many devices it reached. If that is zero, the send worked and you have no subscribers yet.
- Status is Sent or Failed. Hovering a failed row shows the reason Firebase gave.
- Clicks and CTR fill in over the following hours as people tap it.
Back on the Notifications screen, Last Sent on that row now carries the date and time, so the list itself tells you what has already gone out.
What a good first notification looks like
Section titled “What a good first notification looks like”Three habits, all of which show up in the numbers within a day.
- Send it to a page that answers the title. The biggest single cause of a low click-through rate is a notification about a product that opens the shop index.
- Send it when people are awake. A push arrives immediately, unlike an email that waits in an inbox.
- Send few. A browser permission is granted once and revoked in one tap. Two notifications a week is a rhythm; two a day is an unsubscribe.