

How to Connect Firebase for Push Notifications
Push notifications are delivered through Firebase Cloud Messaging. It is Google’s own service, it is free at the volume a WordPress site sends, and the whole job is copying four values across.
Set aside ten minutes. Nothing here has to be done twice.
Before you start
Section titled “Before you start”Your site has to be served over HTTPS. Browsers refuse to register a service worker or grant notification permission on plain HTTP. On an insecure site the four values below save happily and nobody can ever subscribe.
The Status tab checks this and says so in its first row.
Step 1: Create a Firebase project with a web app in it
Section titled “Step 1: Create a Firebase project with a web app in it”That is a job of its own and it has its own page, screen by screen: How to Create a Firebase Project.
The short version. Sign in at console.firebase.google.com, press Create a project, name it, and let Firebase build it. Then register a Web app inside it, because the credentials below belong to the app rather than to the project. Leave Firebase Hosting unticked when it offers.
Come back here with Project settings open.
Step 2: Know which four values you are looking for
Section titled “Step 2: Know which four values you are looking for”Three tabs on that settings screen hold everything, and the plugin wants all four before it can send anything.
| Value | Where it lives in Firebase | Plugin field |
|---|---|---|
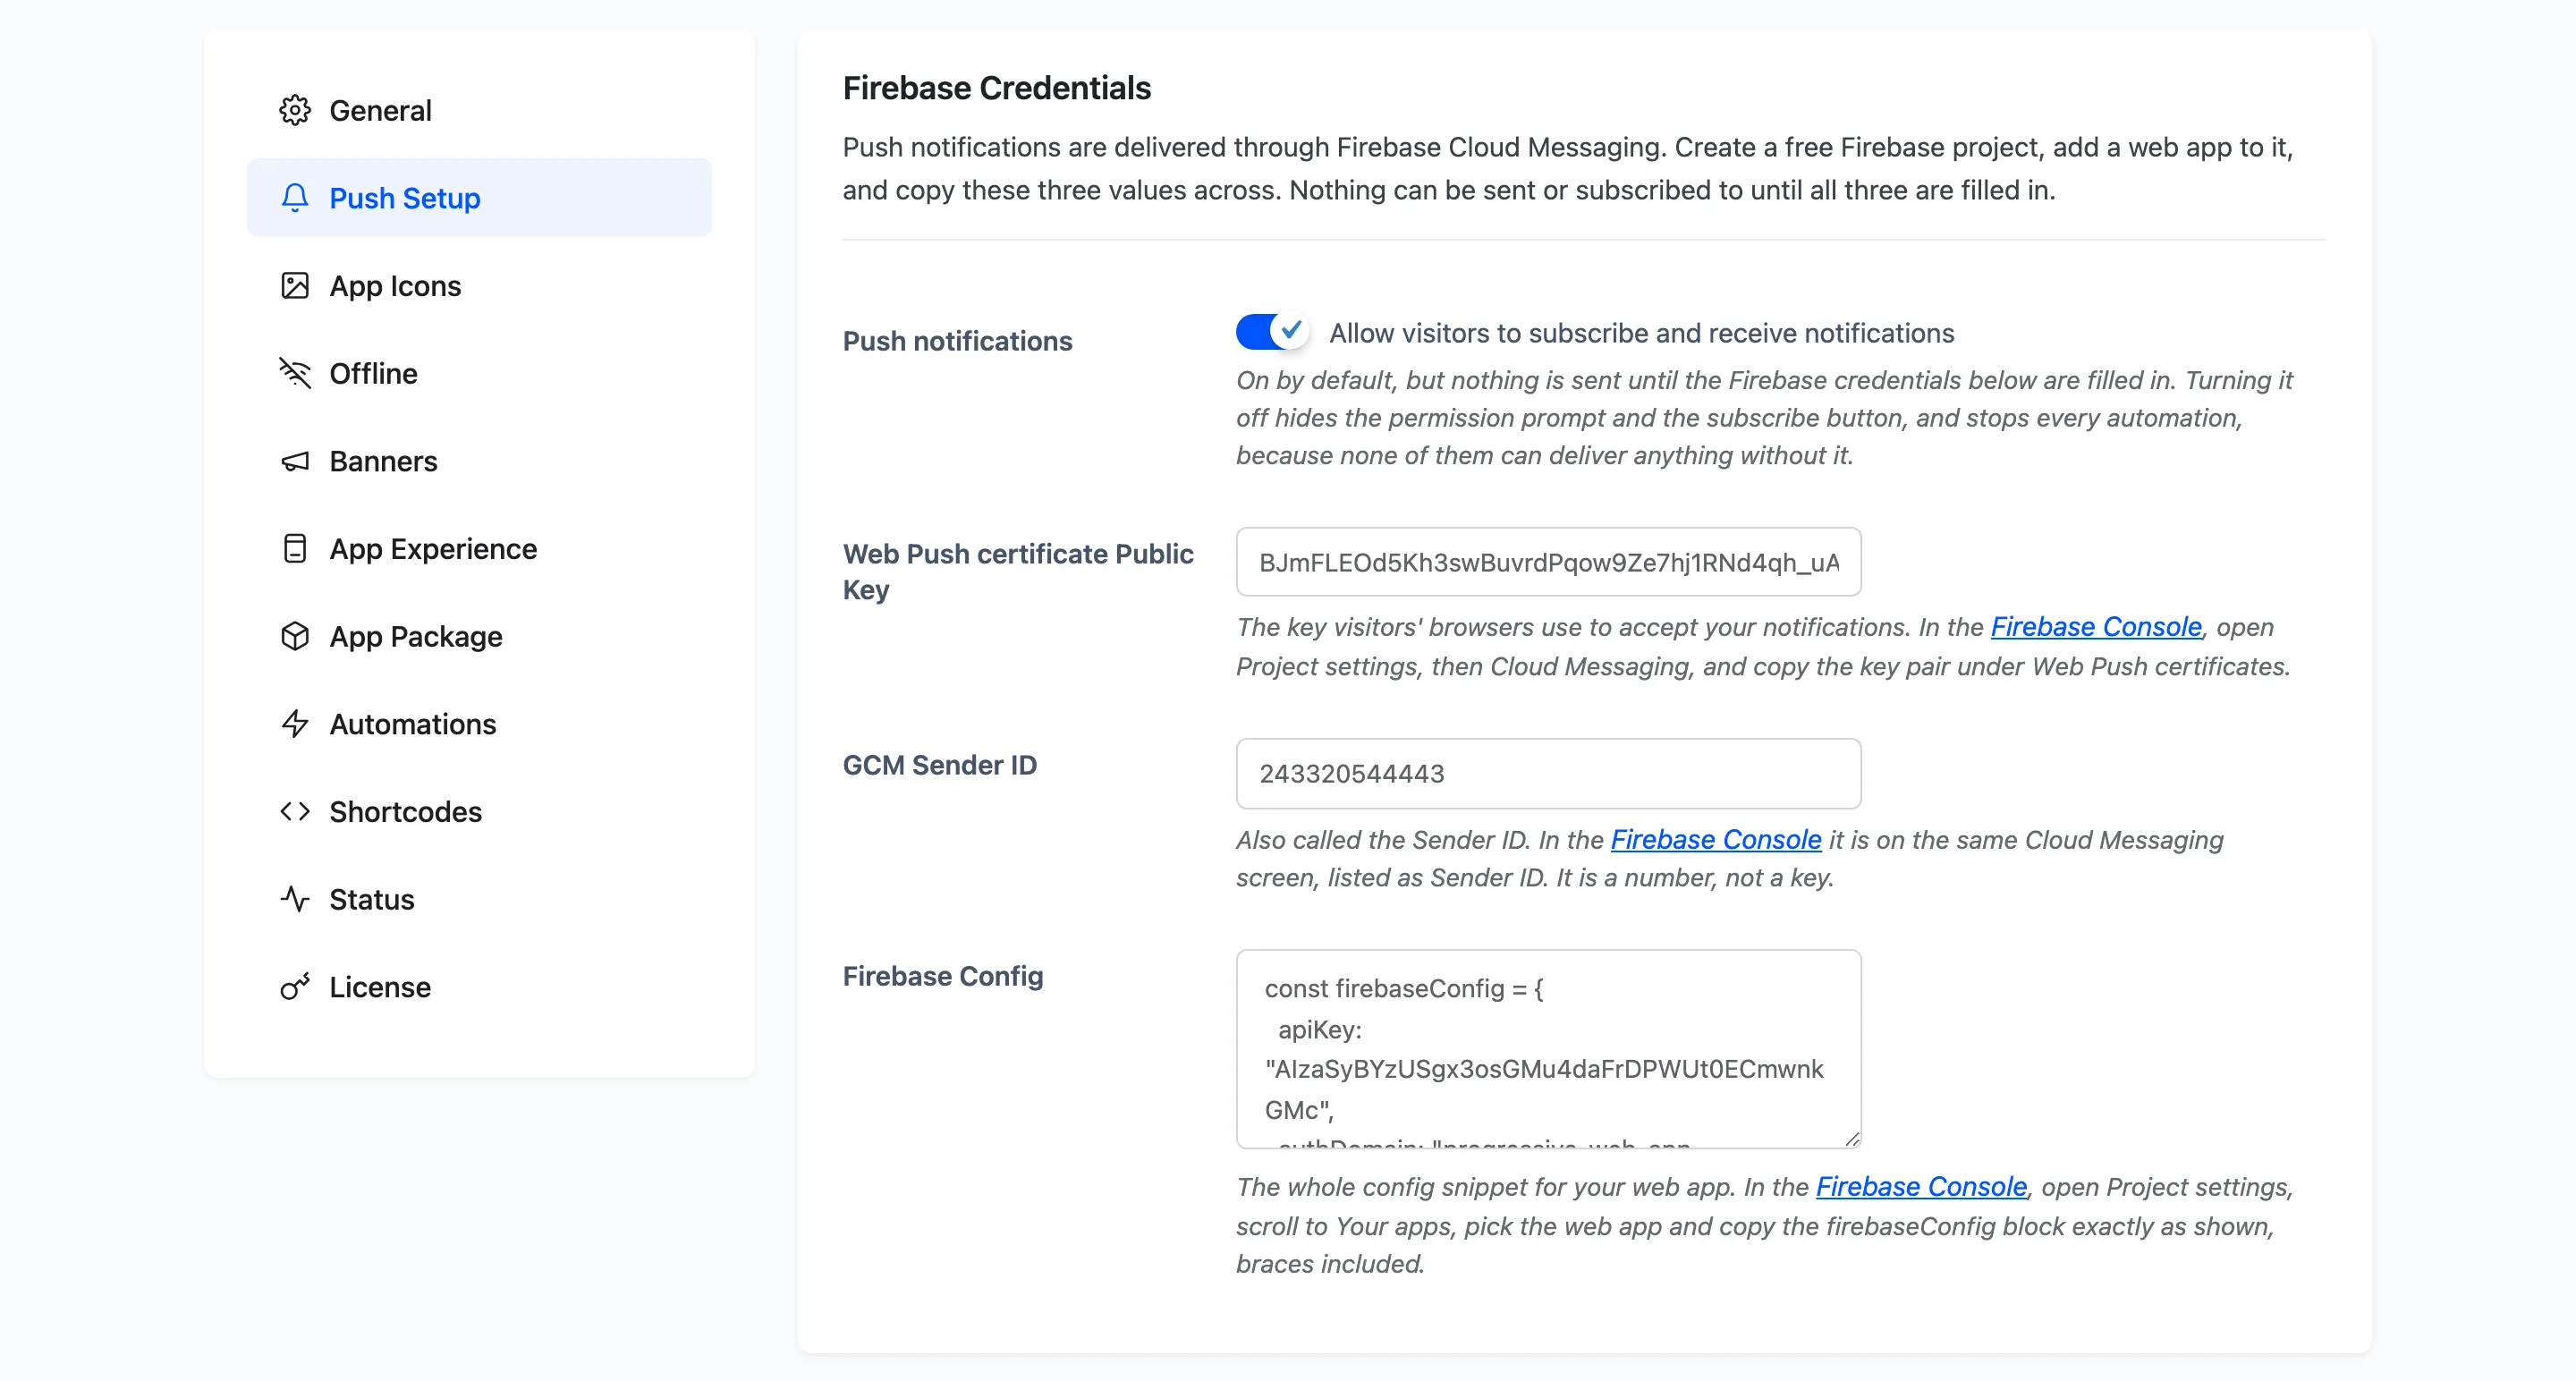
| Web push key pair | Cloud Messaging, Web Push certificates | Web Push certificate Public Key |
| Sender ID | Cloud Messaging | GCM Sender ID |
firebaseConfig block |
General, Your apps | Firebase Config |
| Private key file | Service accounts | Service Account JSON File |
The first three let a browser subscribe to you. The fourth is what lets your server deliver to those browsers, which is why a site can collect subscribers and still send nothing.
Step 3: Copy the web push key and the sender ID
Section titled “Step 3: Copy the web push key and the sender ID”Open Project settings → Cloud Messaging. Two values live on that screen.
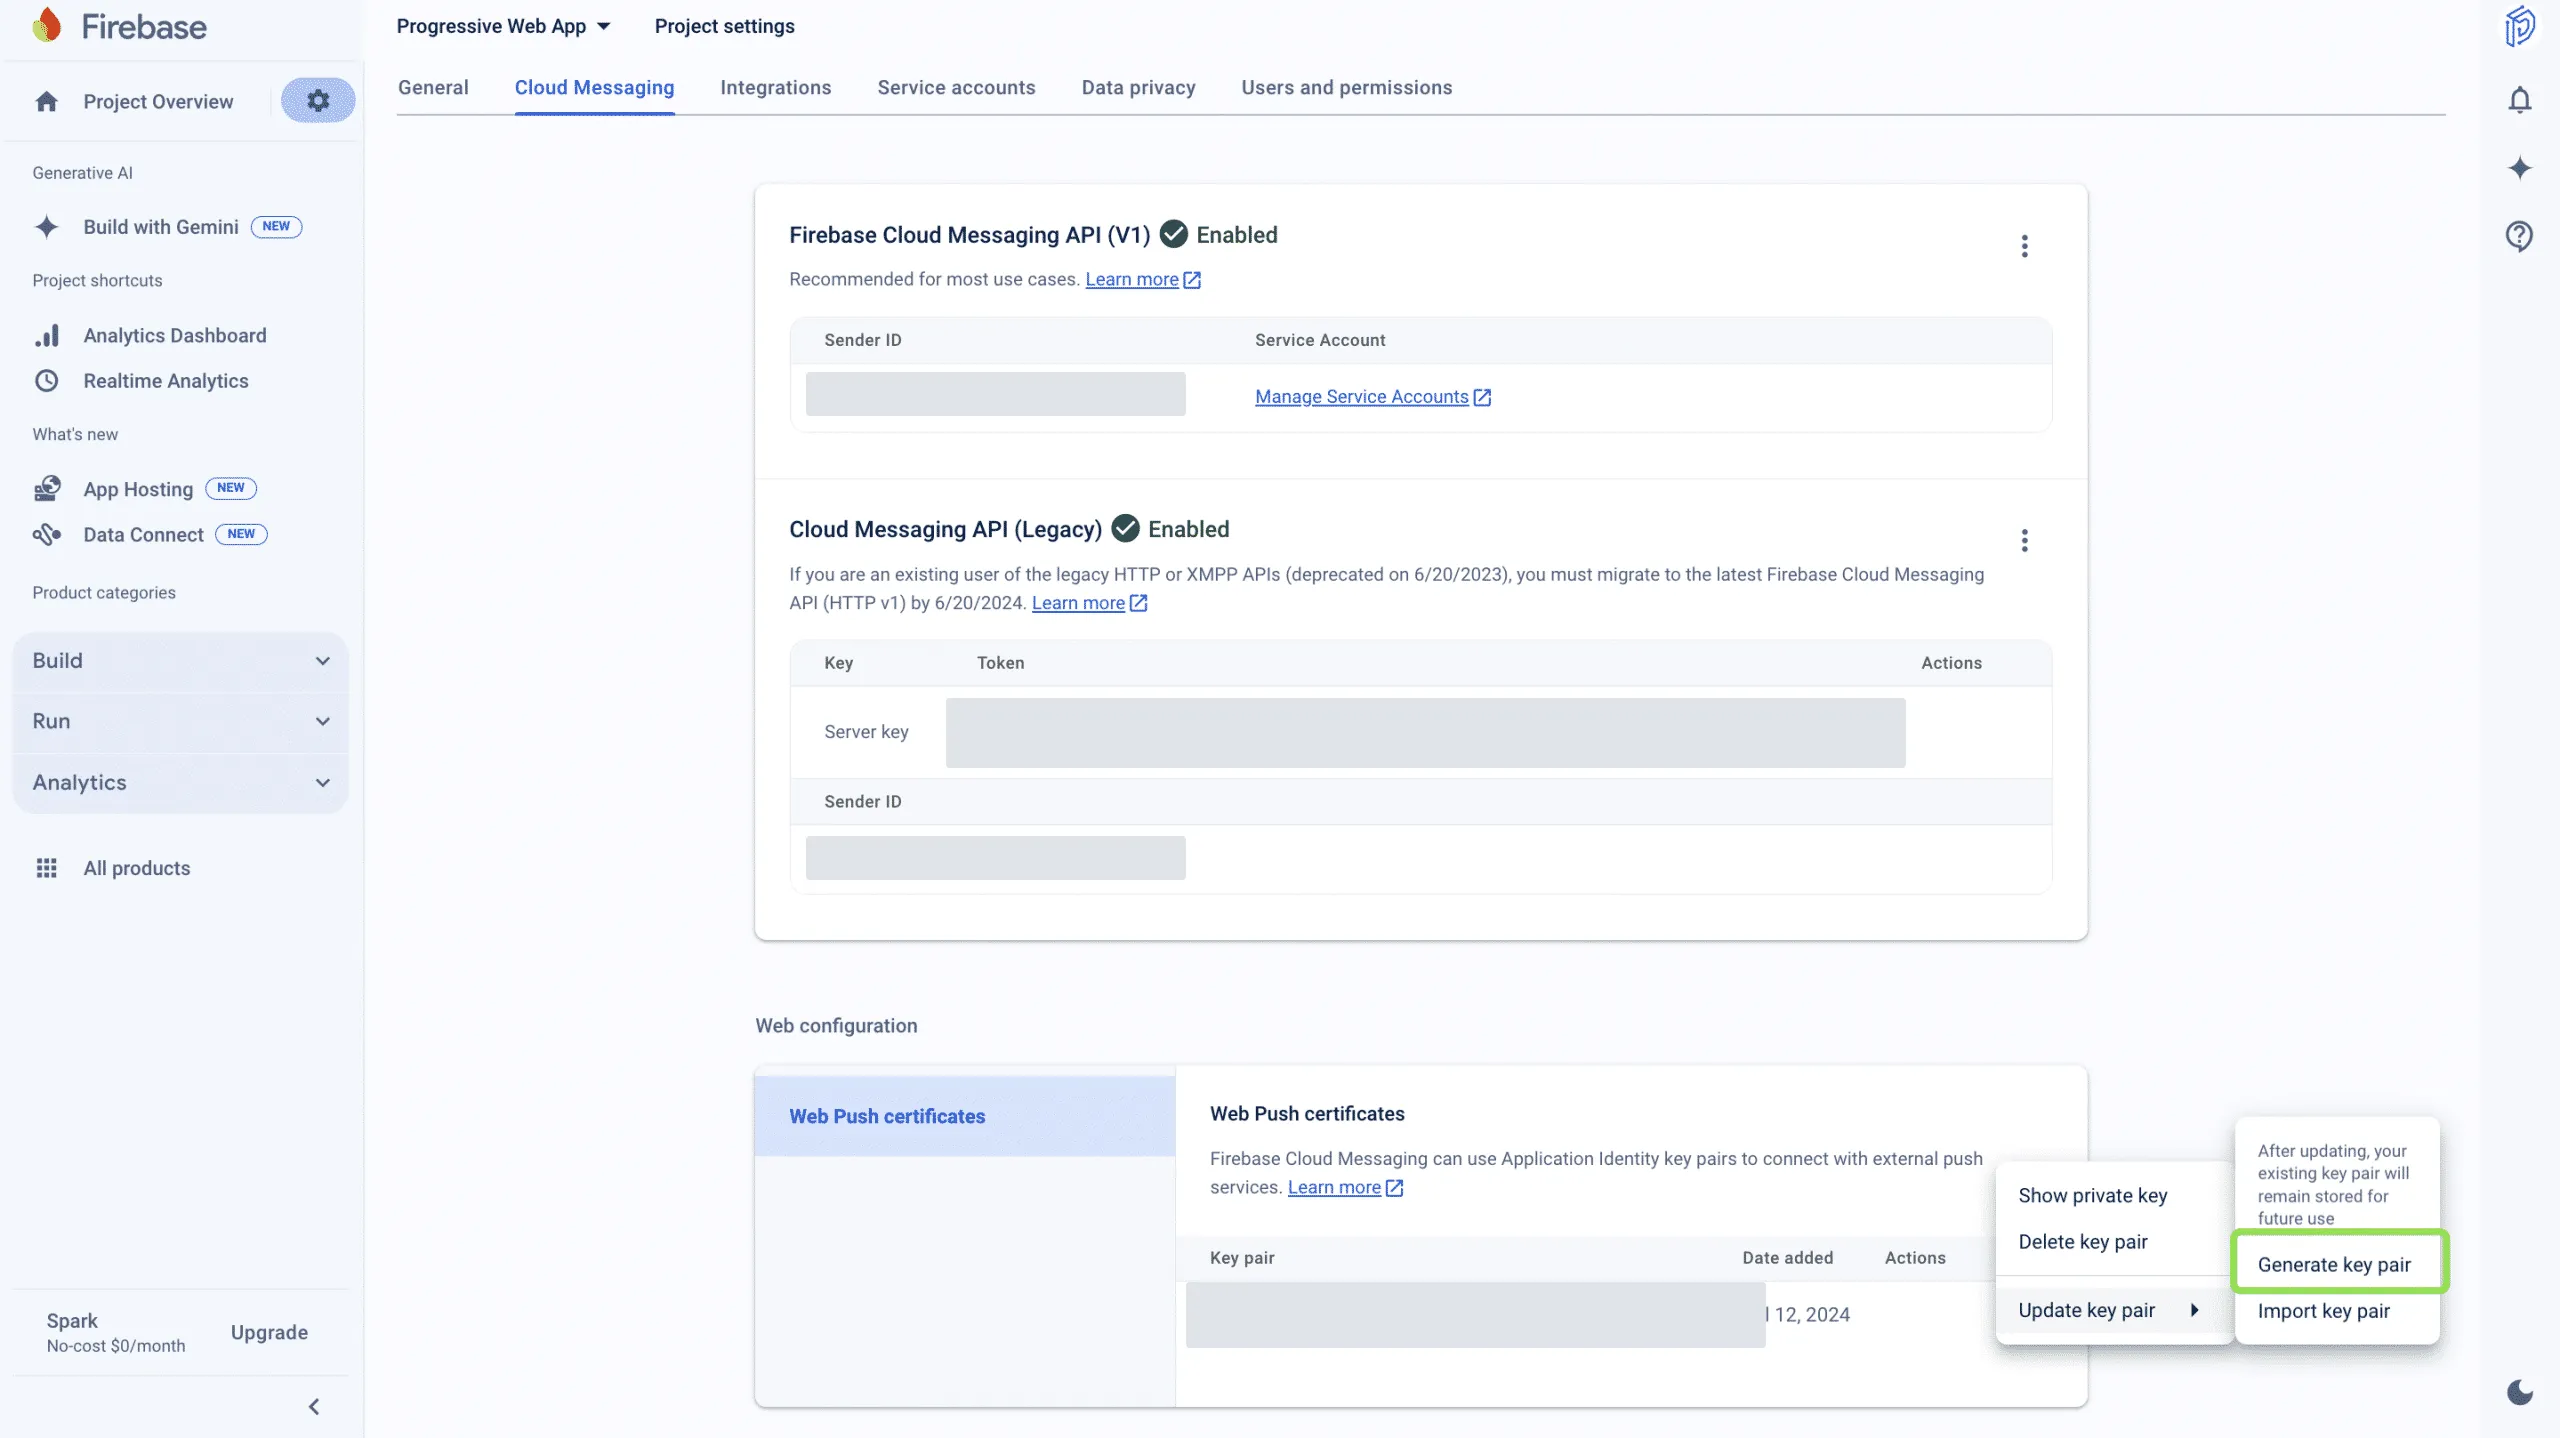
Under Web Push certificates, generate a key pair if there is not one already, and copy the key string. In WordPress, go to DevDiggers Plugins → Progressive Web App → Configuration → Push Setup and paste it into Web Push certificate Public Key.
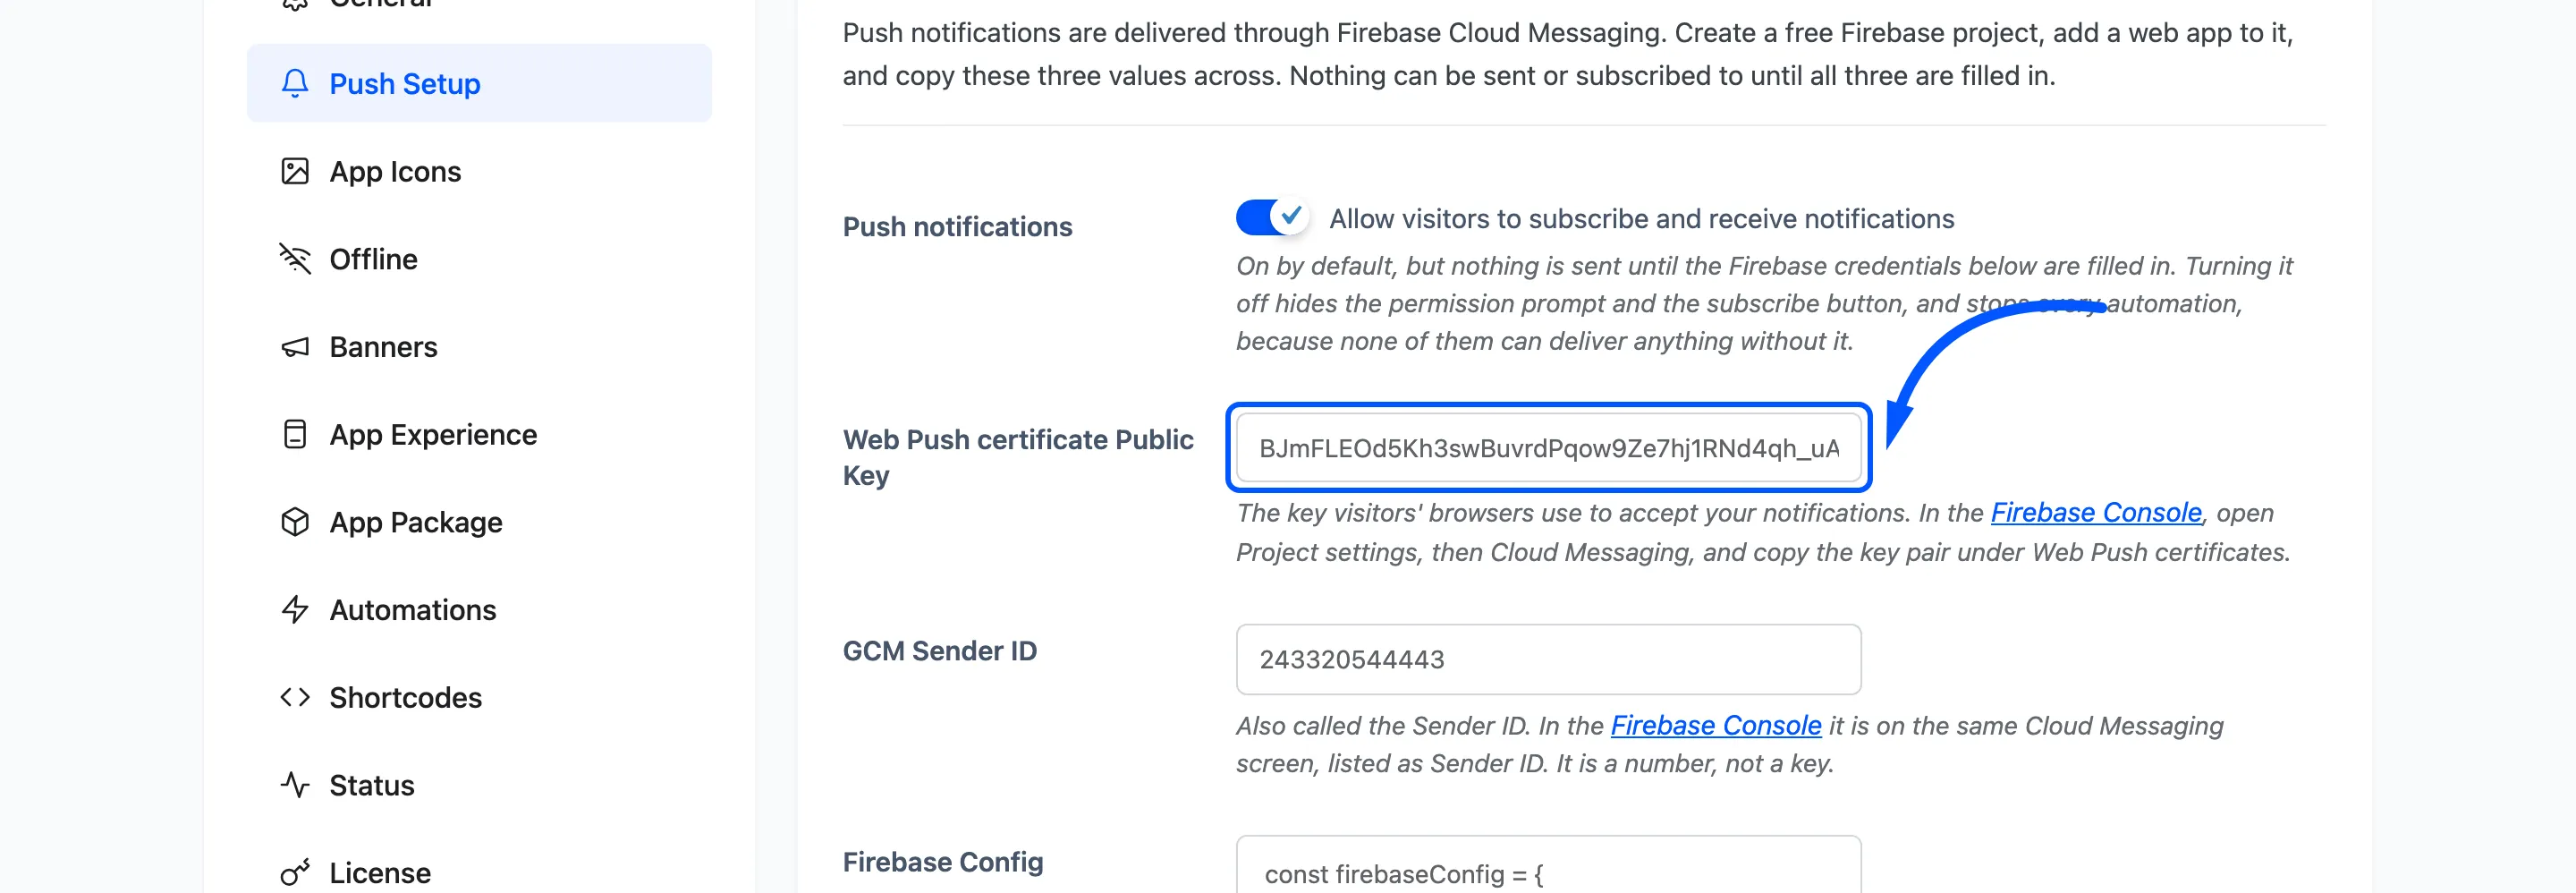
On the same Firebase screen, copy the Sender ID. It is a long number, not a key.
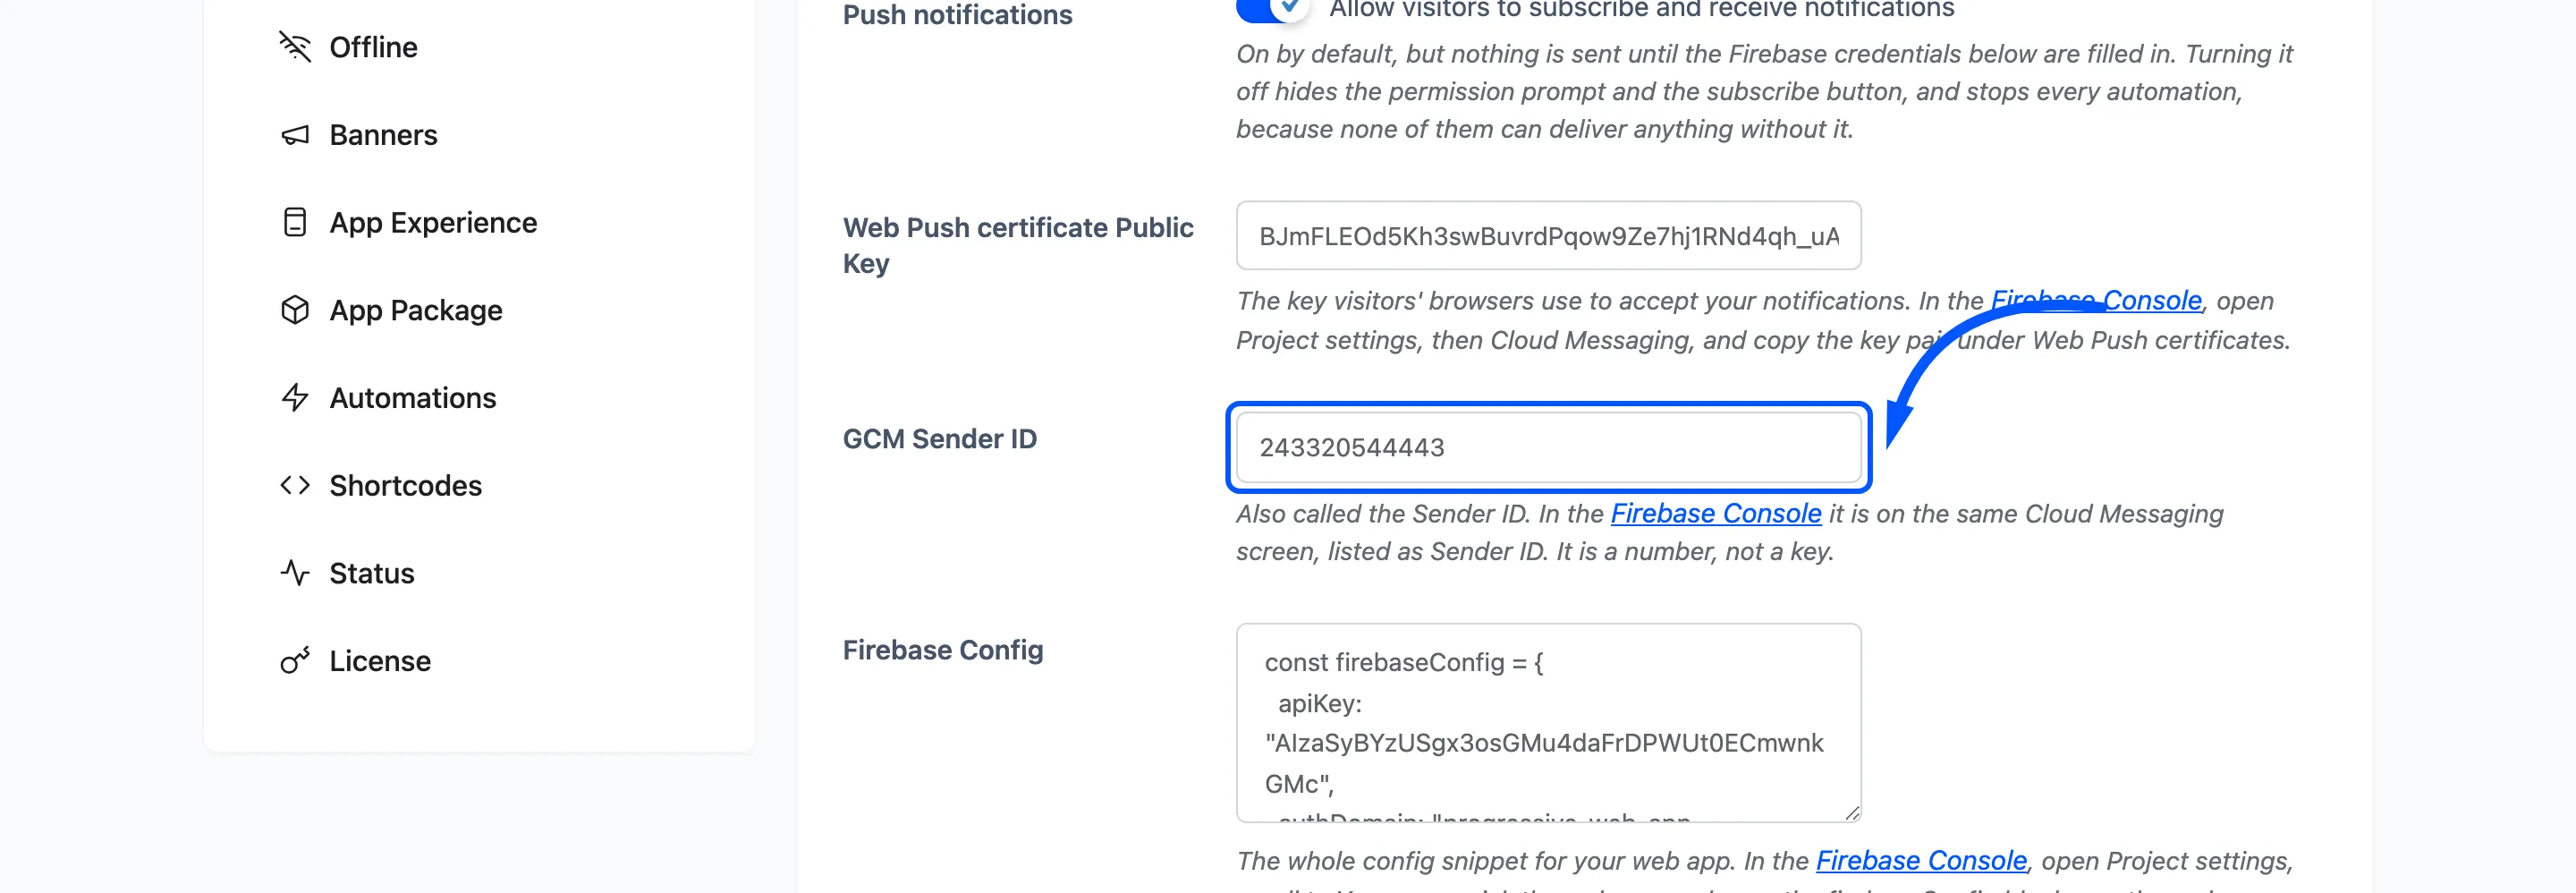
Step 4: Copy the Firebase config block
Section titled “Step 4: Copy the Firebase config block”Open Project settings → General, scroll to Your apps, pick the web app you registered and
choose Config. Copy the whole firebaseConfig block exactly as shown, braces included.
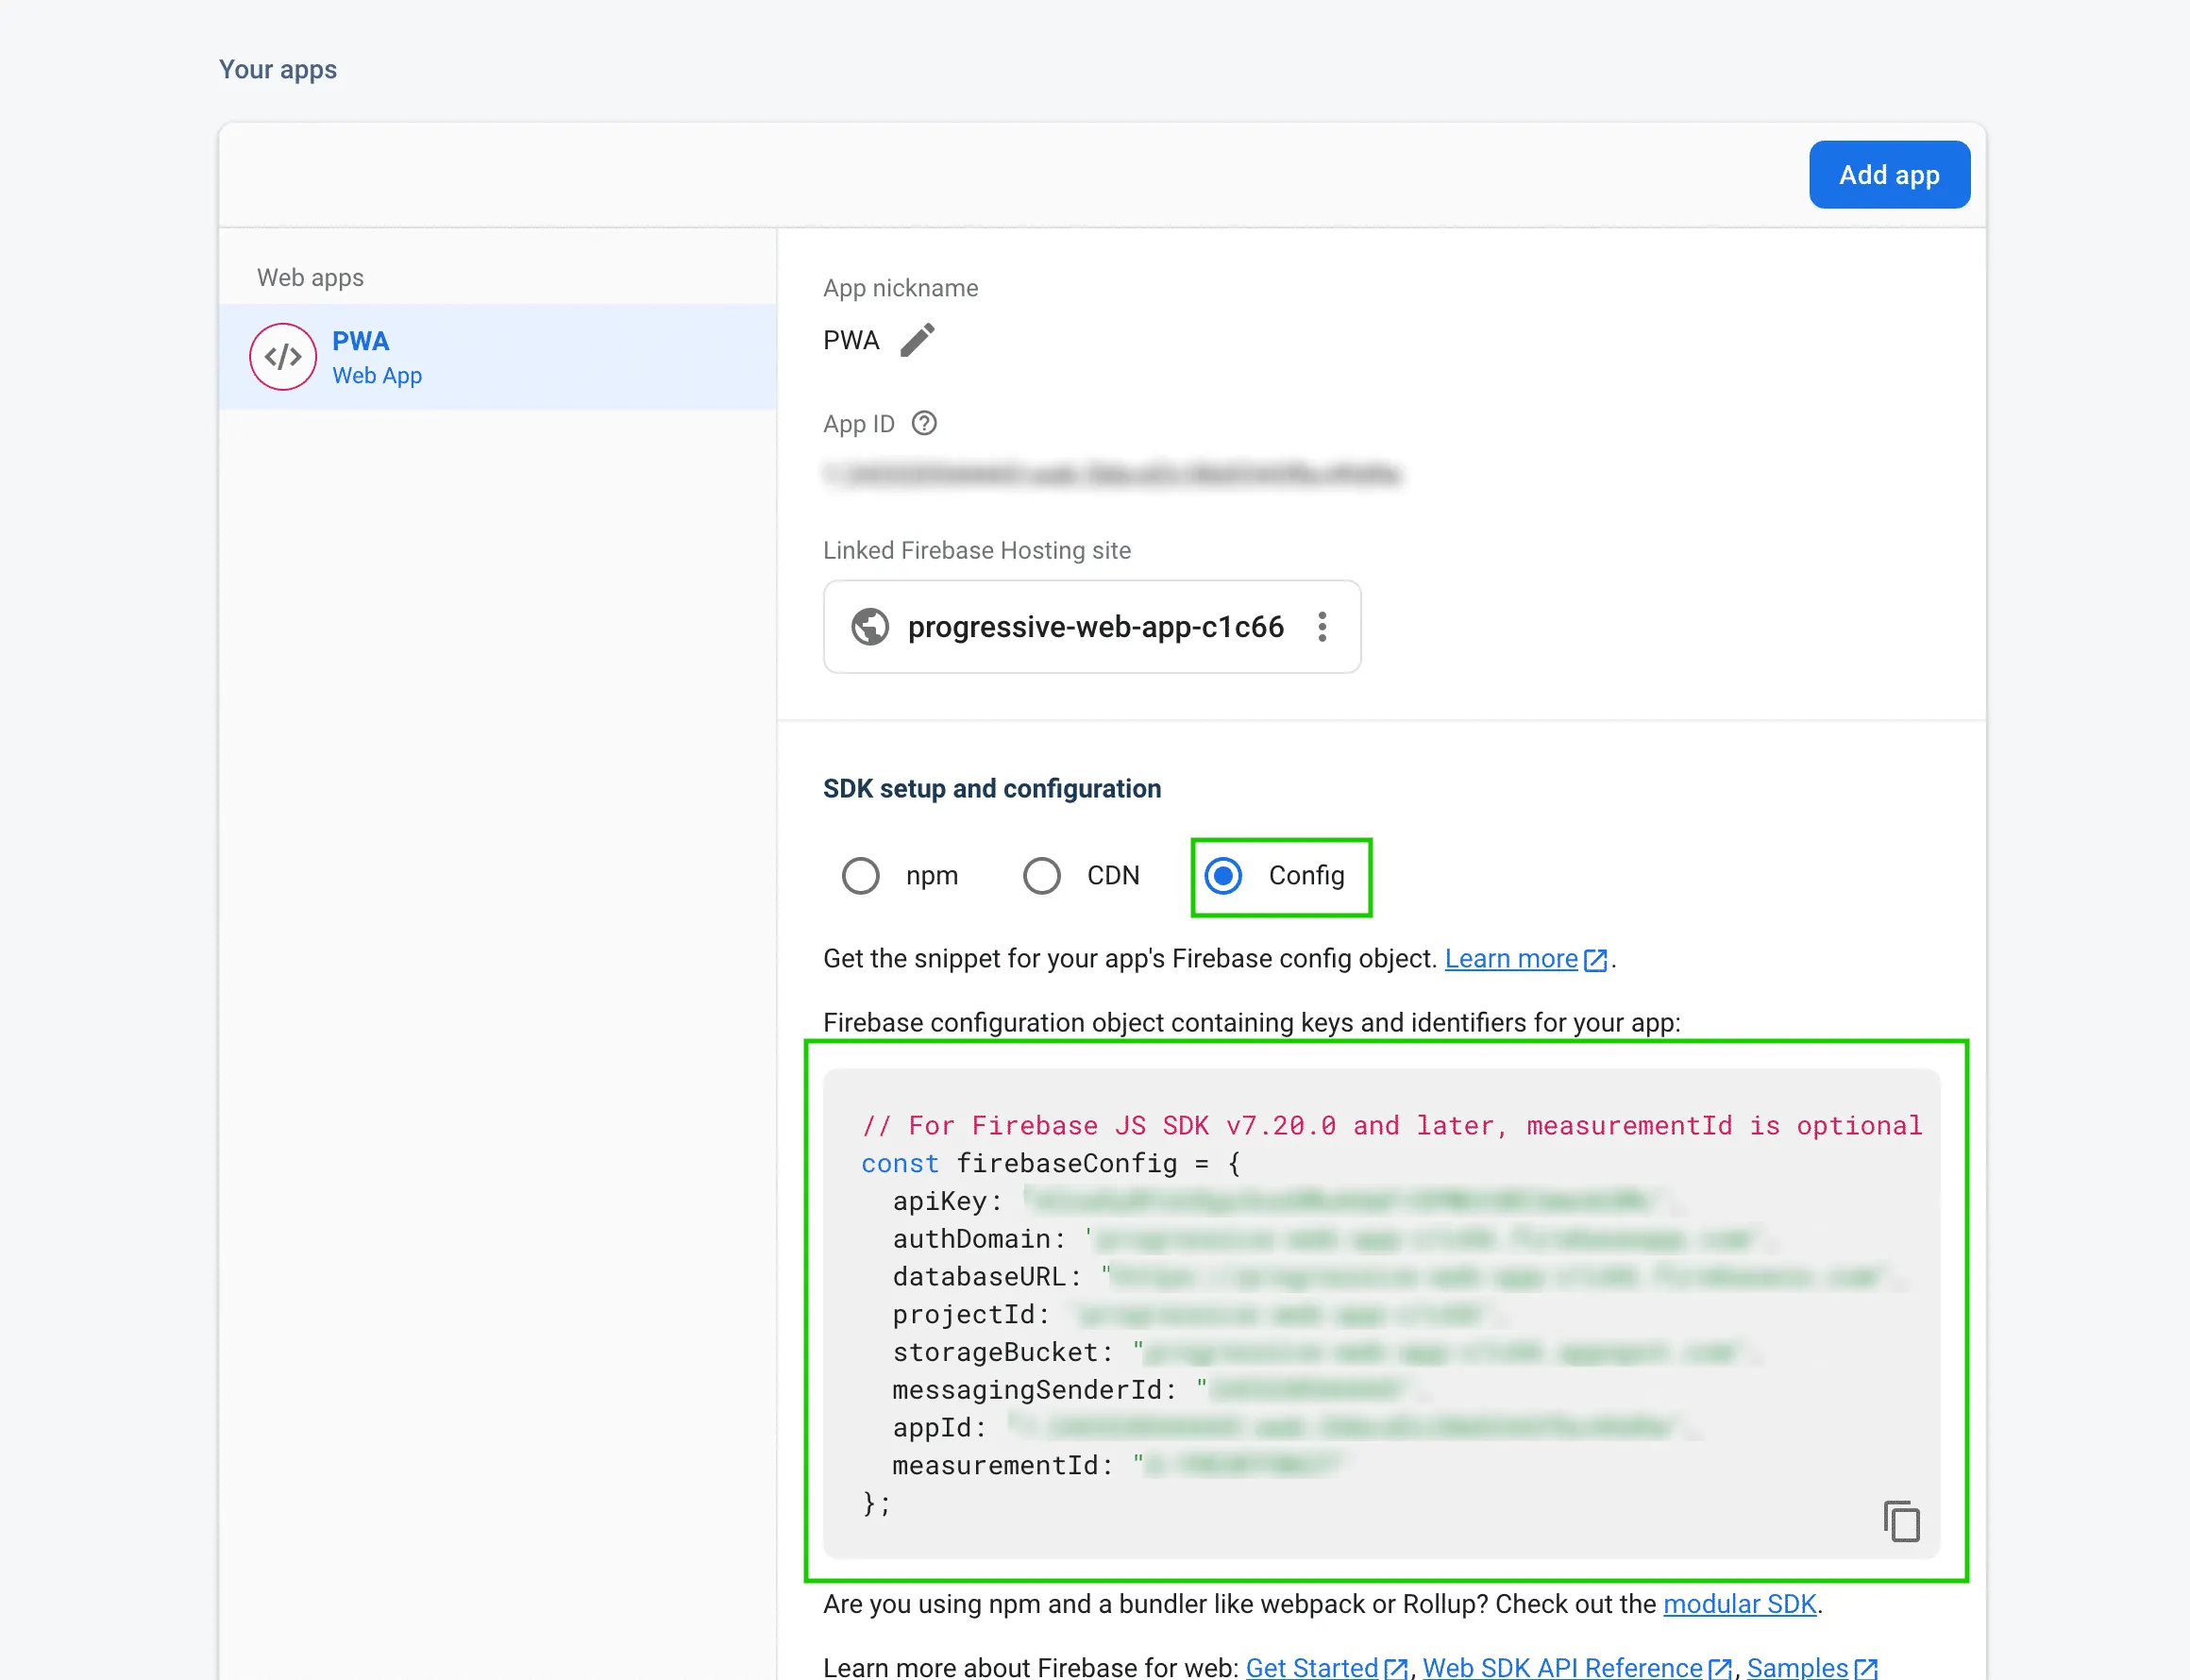
The values are blurred in that screenshot on purpose. They identify one Firebase project and yours will differ on every line. The key names are what you are checking against: all eight, exactly as Firebase prints them.
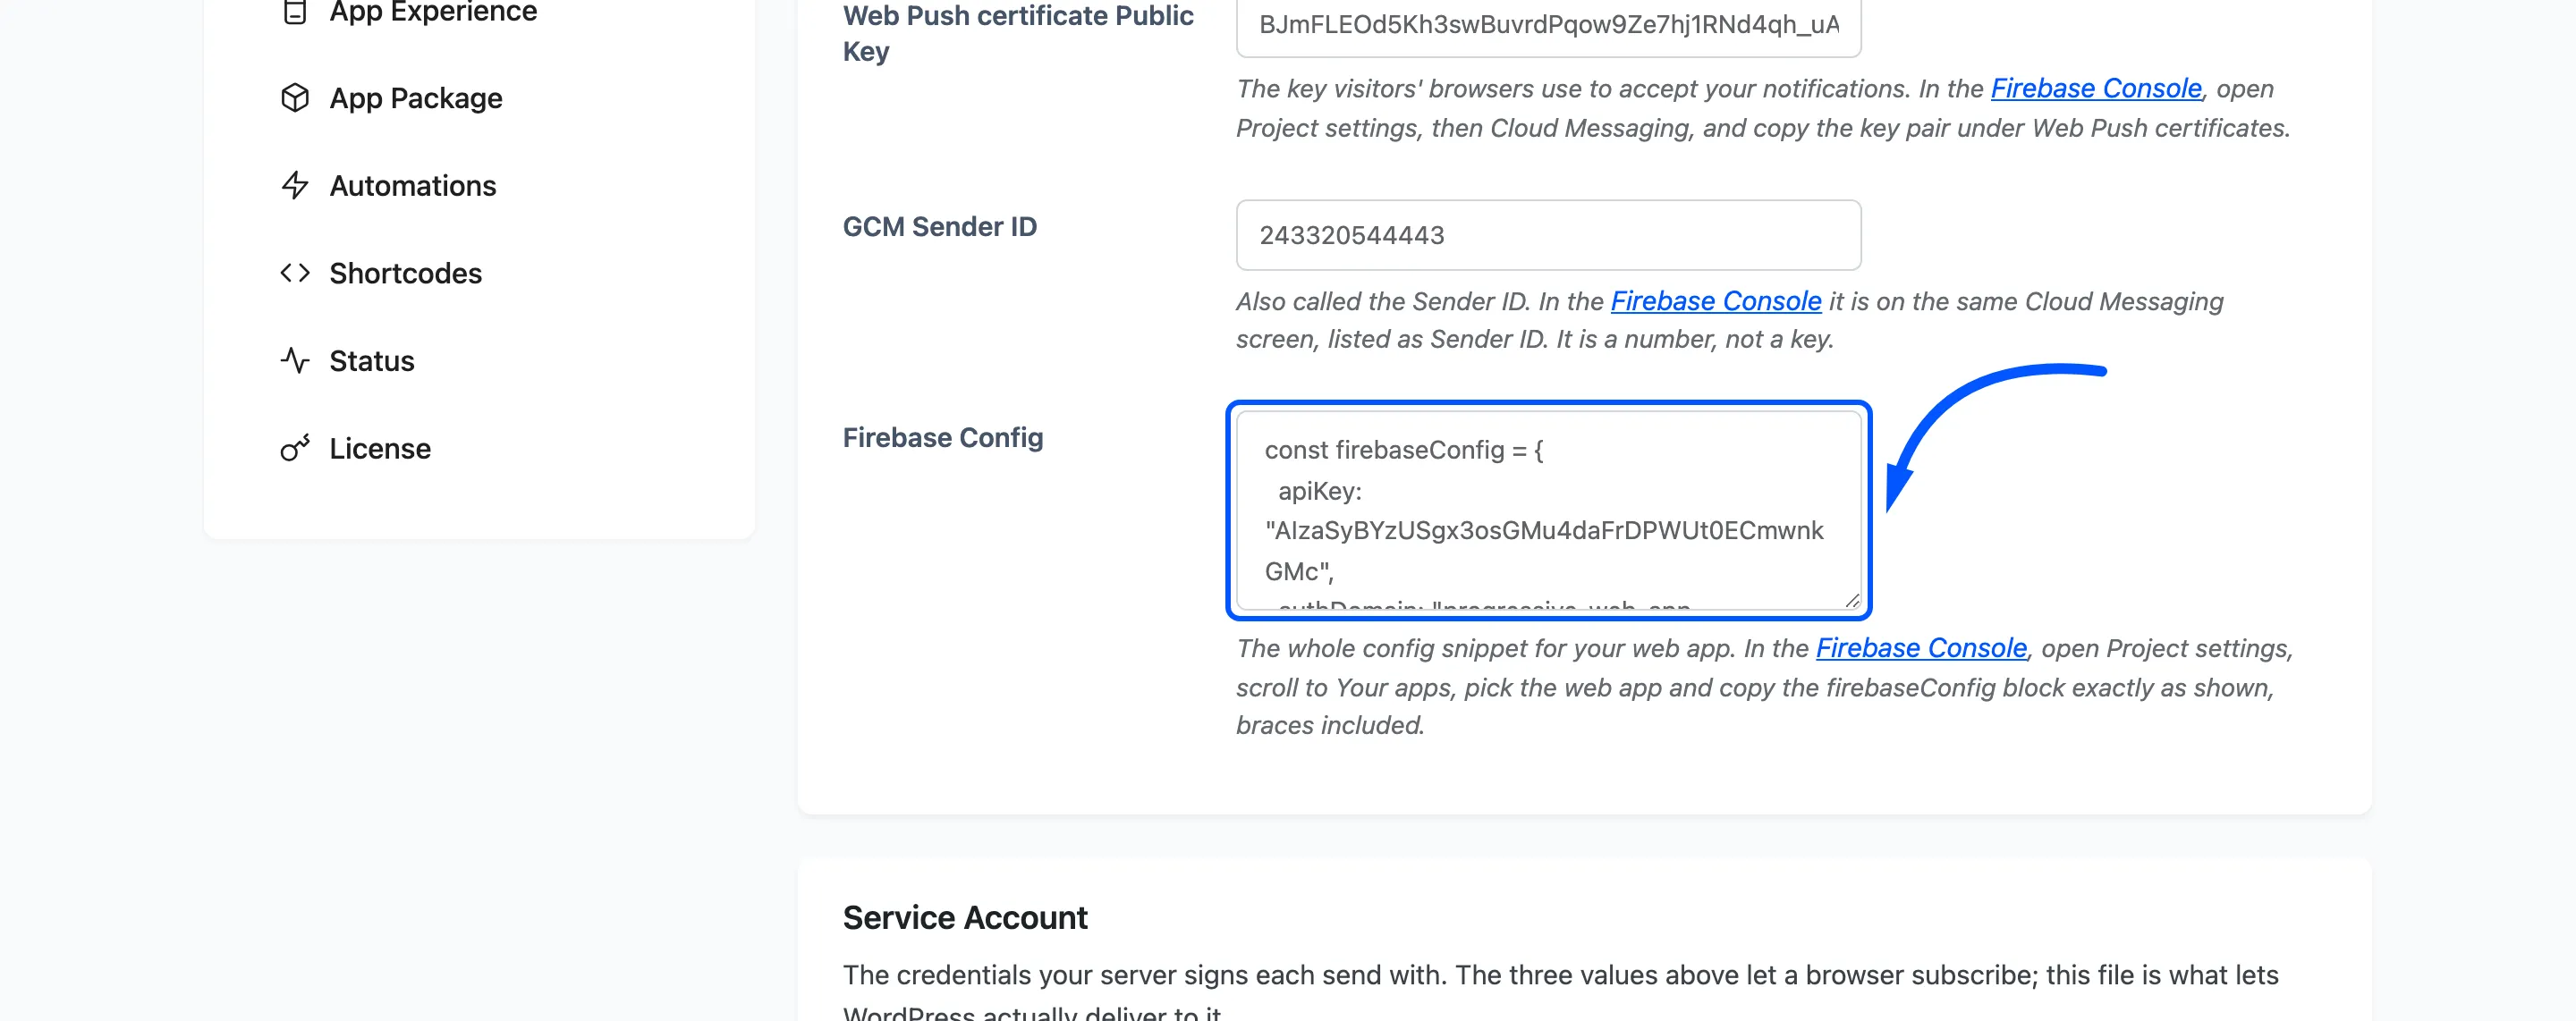
Paste the whole thing. The plugin reads the values out of it, so trimming it down to the ones you think matter is how this step usually goes wrong.
Your Push Setup tab should now look like this.
Step 5: Upload the service account JSON
Section titled “Step 5: Upload the service account JSON”The three values above let a browser subscribe. This file is what lets your server actually deliver to it, and skipping it is the single most common reason a site collects subscribers and sends nothing.
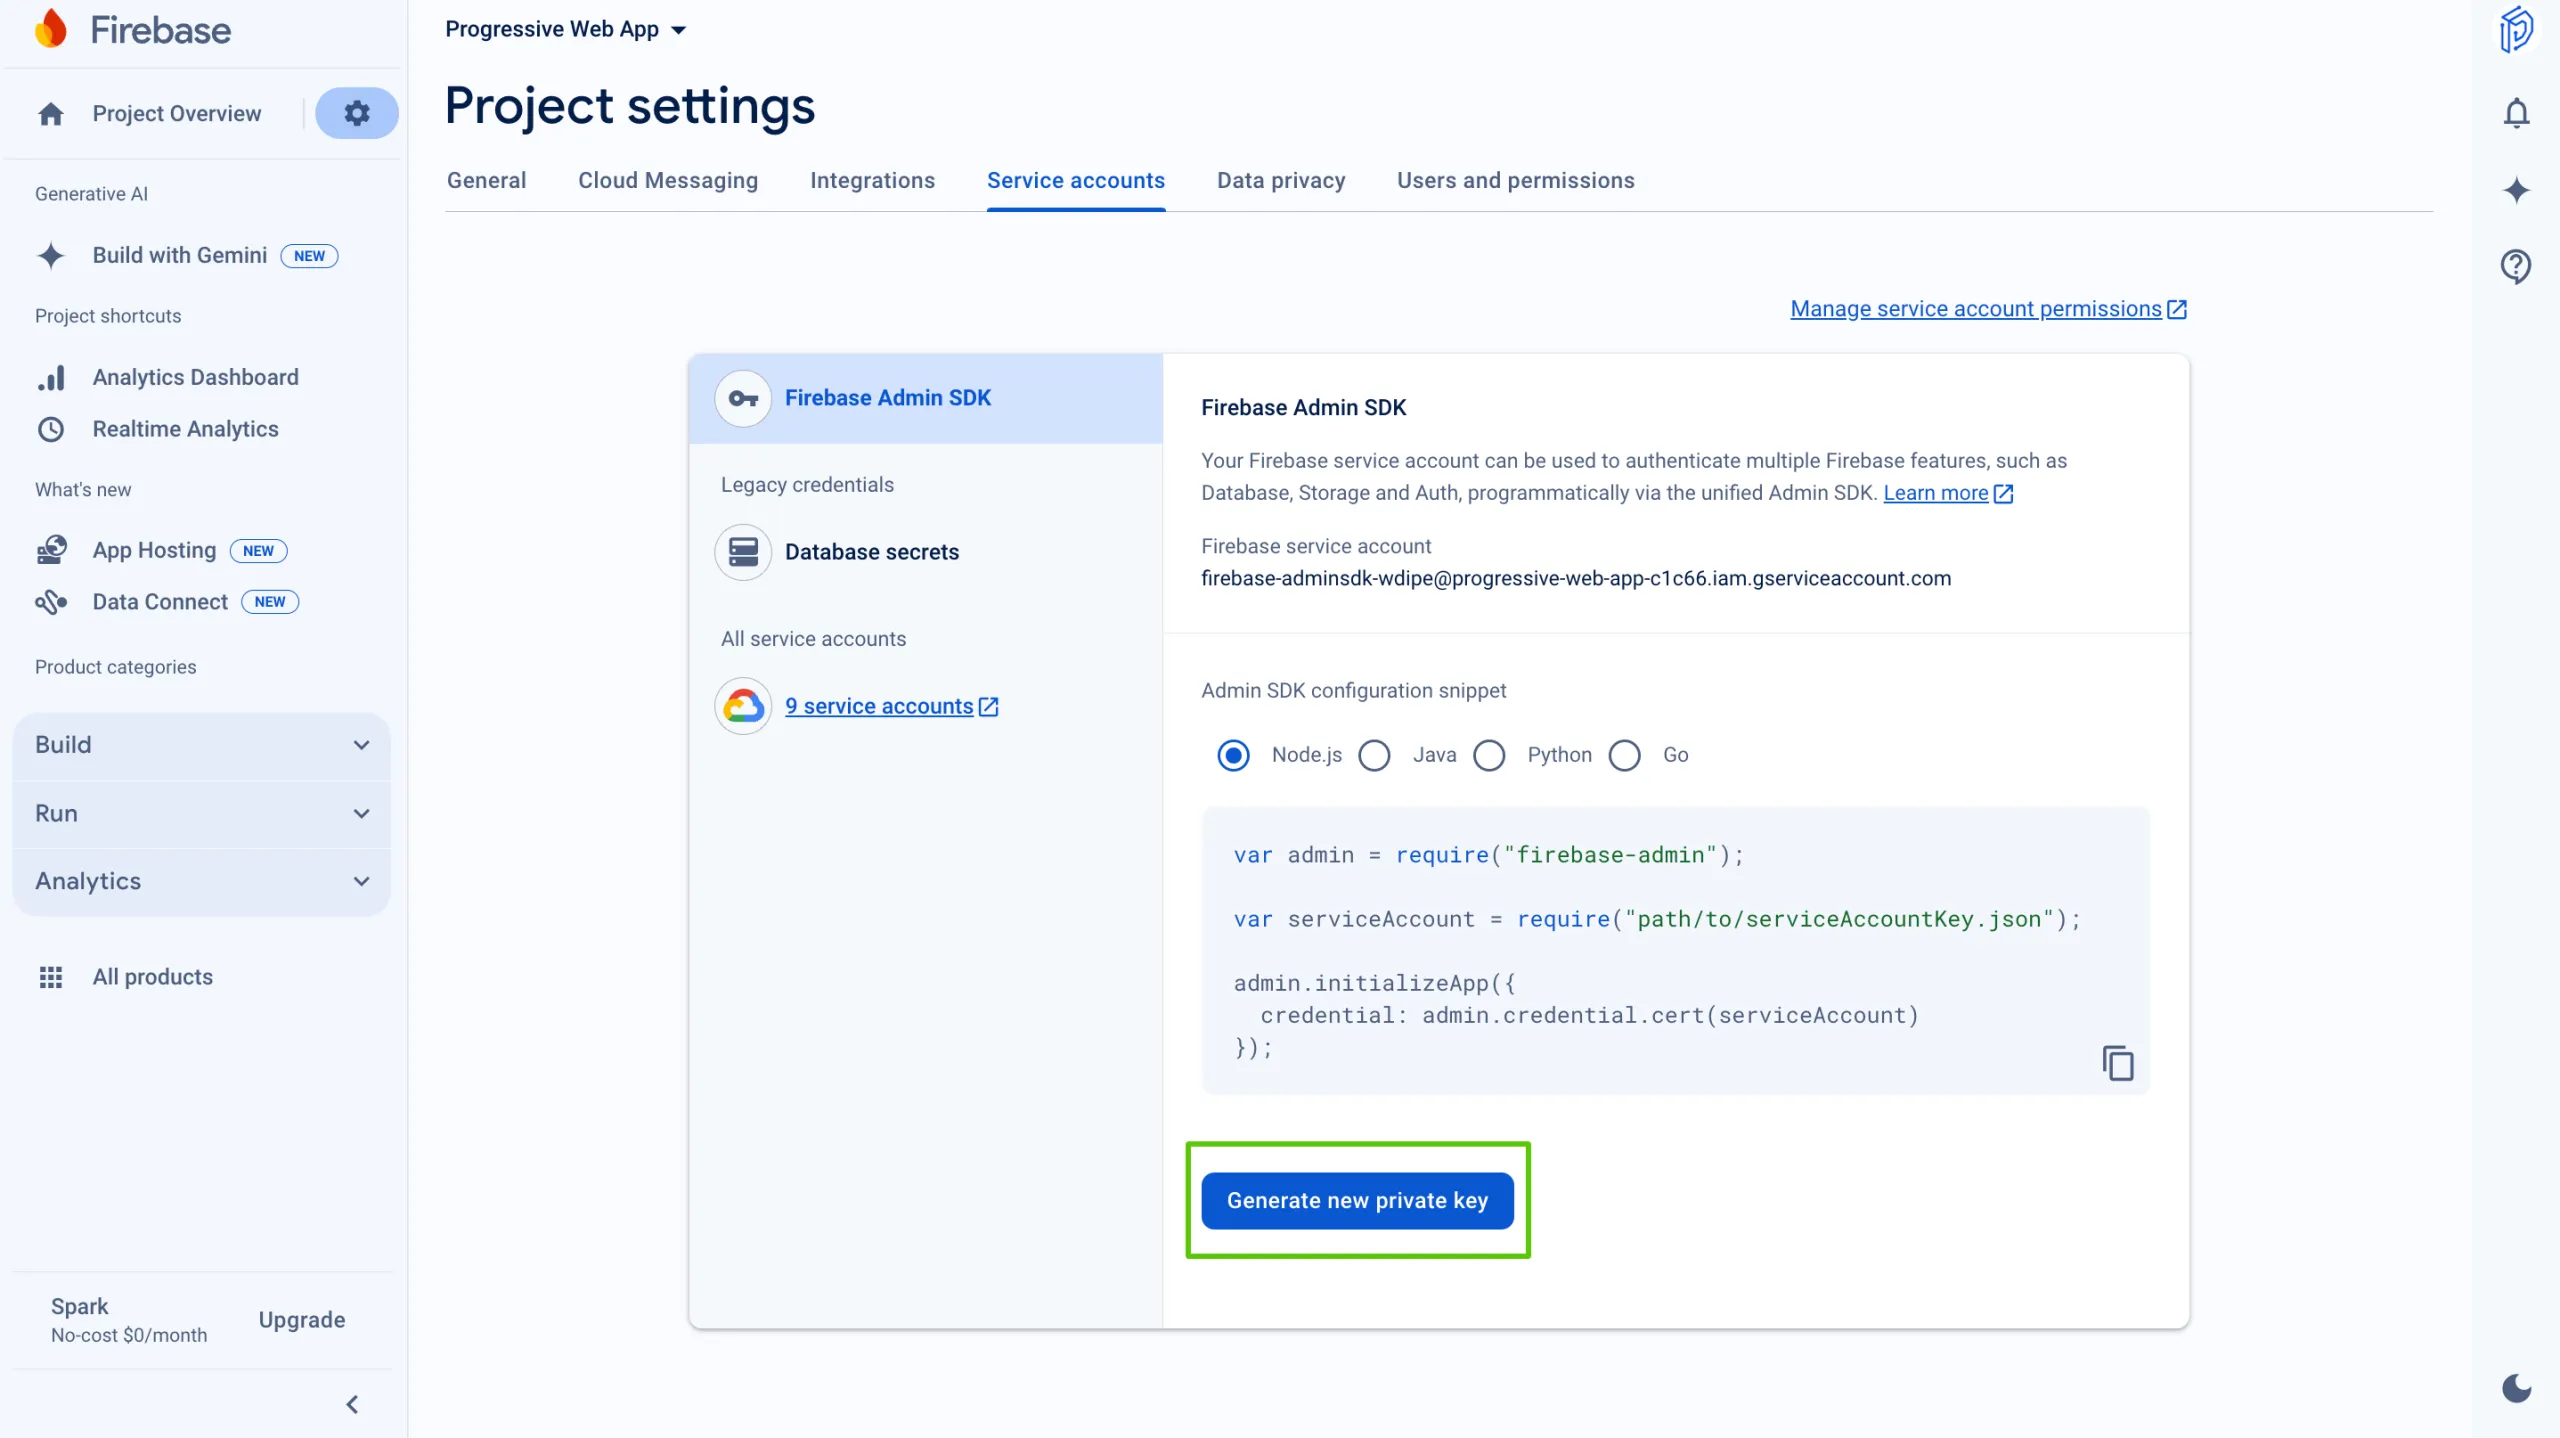
Open Project settings → Service accounts in Firebase and press Generate new private key.
Firebase downloads a .json file.
Back in WordPress, press Upload JSON and choose it.
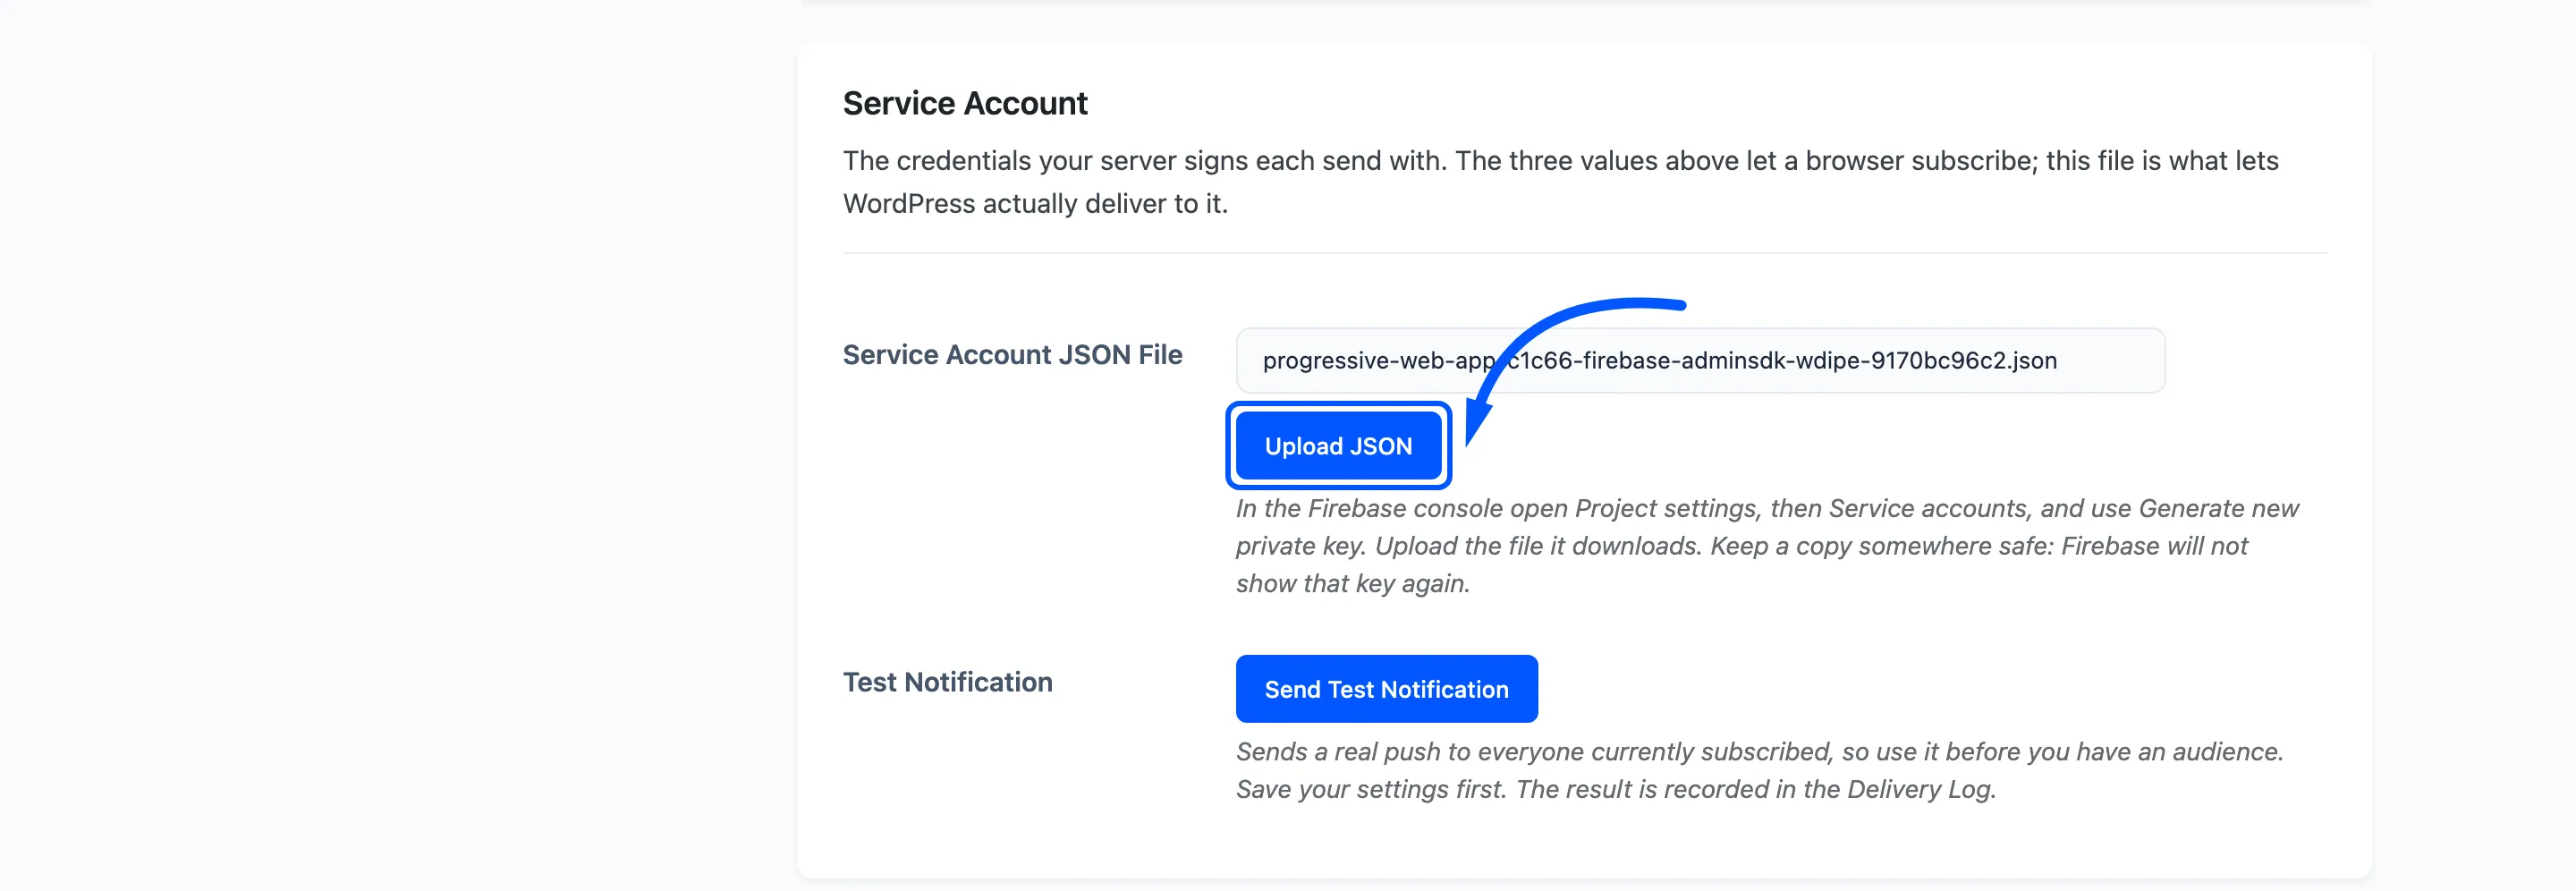
Press Save Changes before going any further. The test button reads what is saved, not what is on screen.
Step 6: Check the credentials without sending
Section titled “Step 6: Check the credentials without sending”The Status tab verifies the service account against Google directly. A key from the wrong Firebase project is caught here rather than on your first real send.
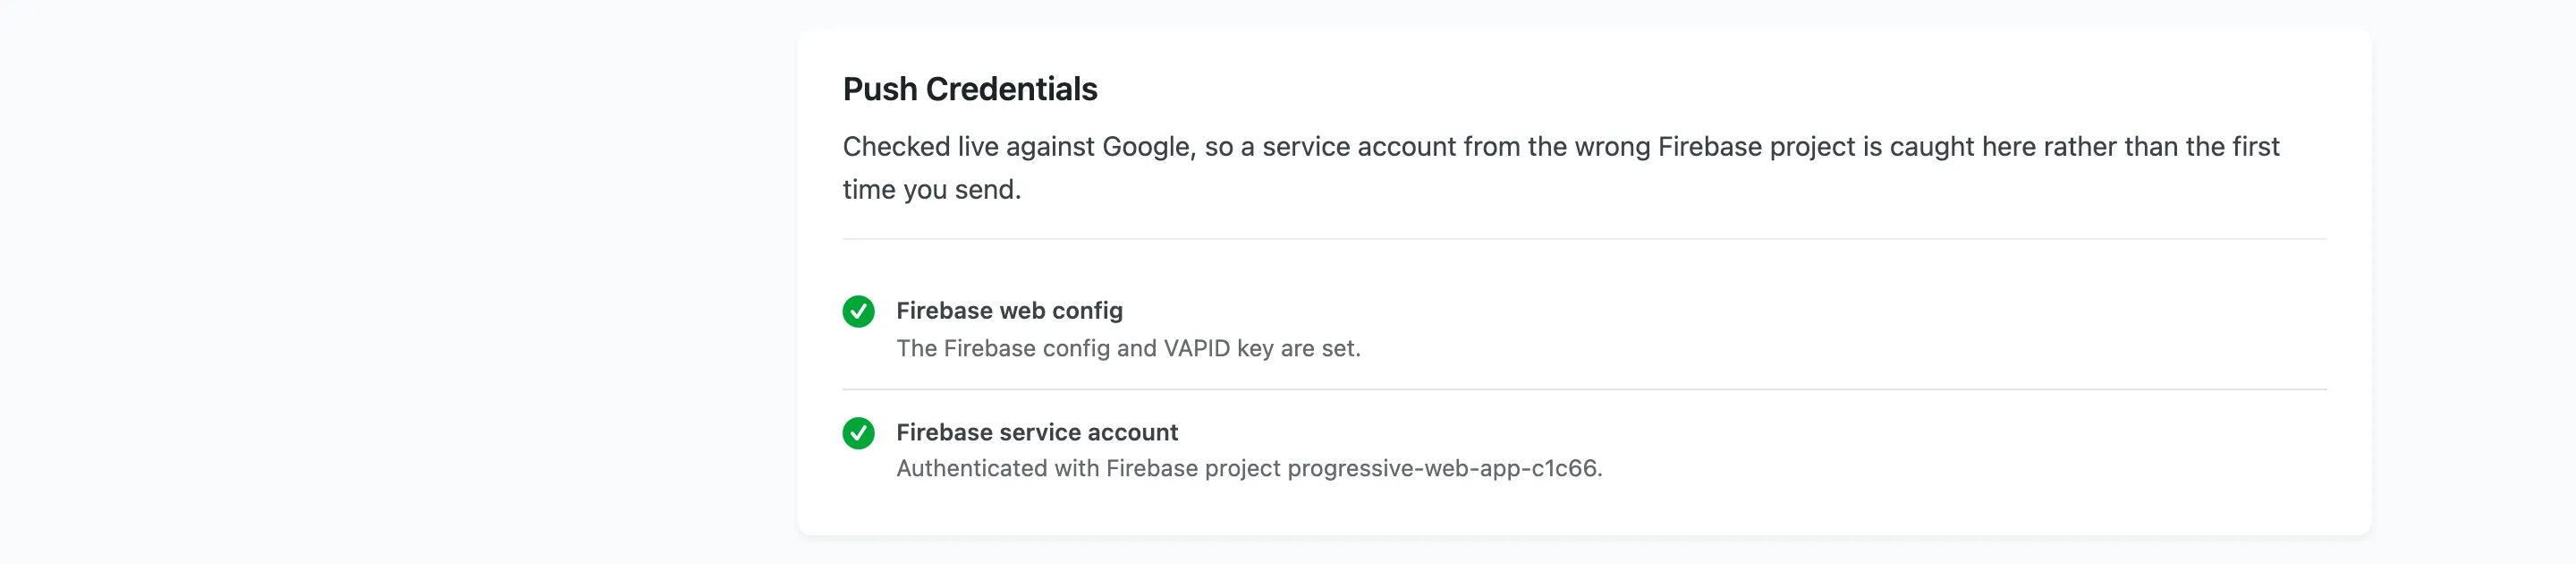
When it passes it names the Firebase project it authenticated with. If that is not the project you just set up, you have uploaded the key from a different one.
Step 7: Send a test notification
Section titled “Step 7: Send a test notification”Back on Push Setup, press Send Test Notification.
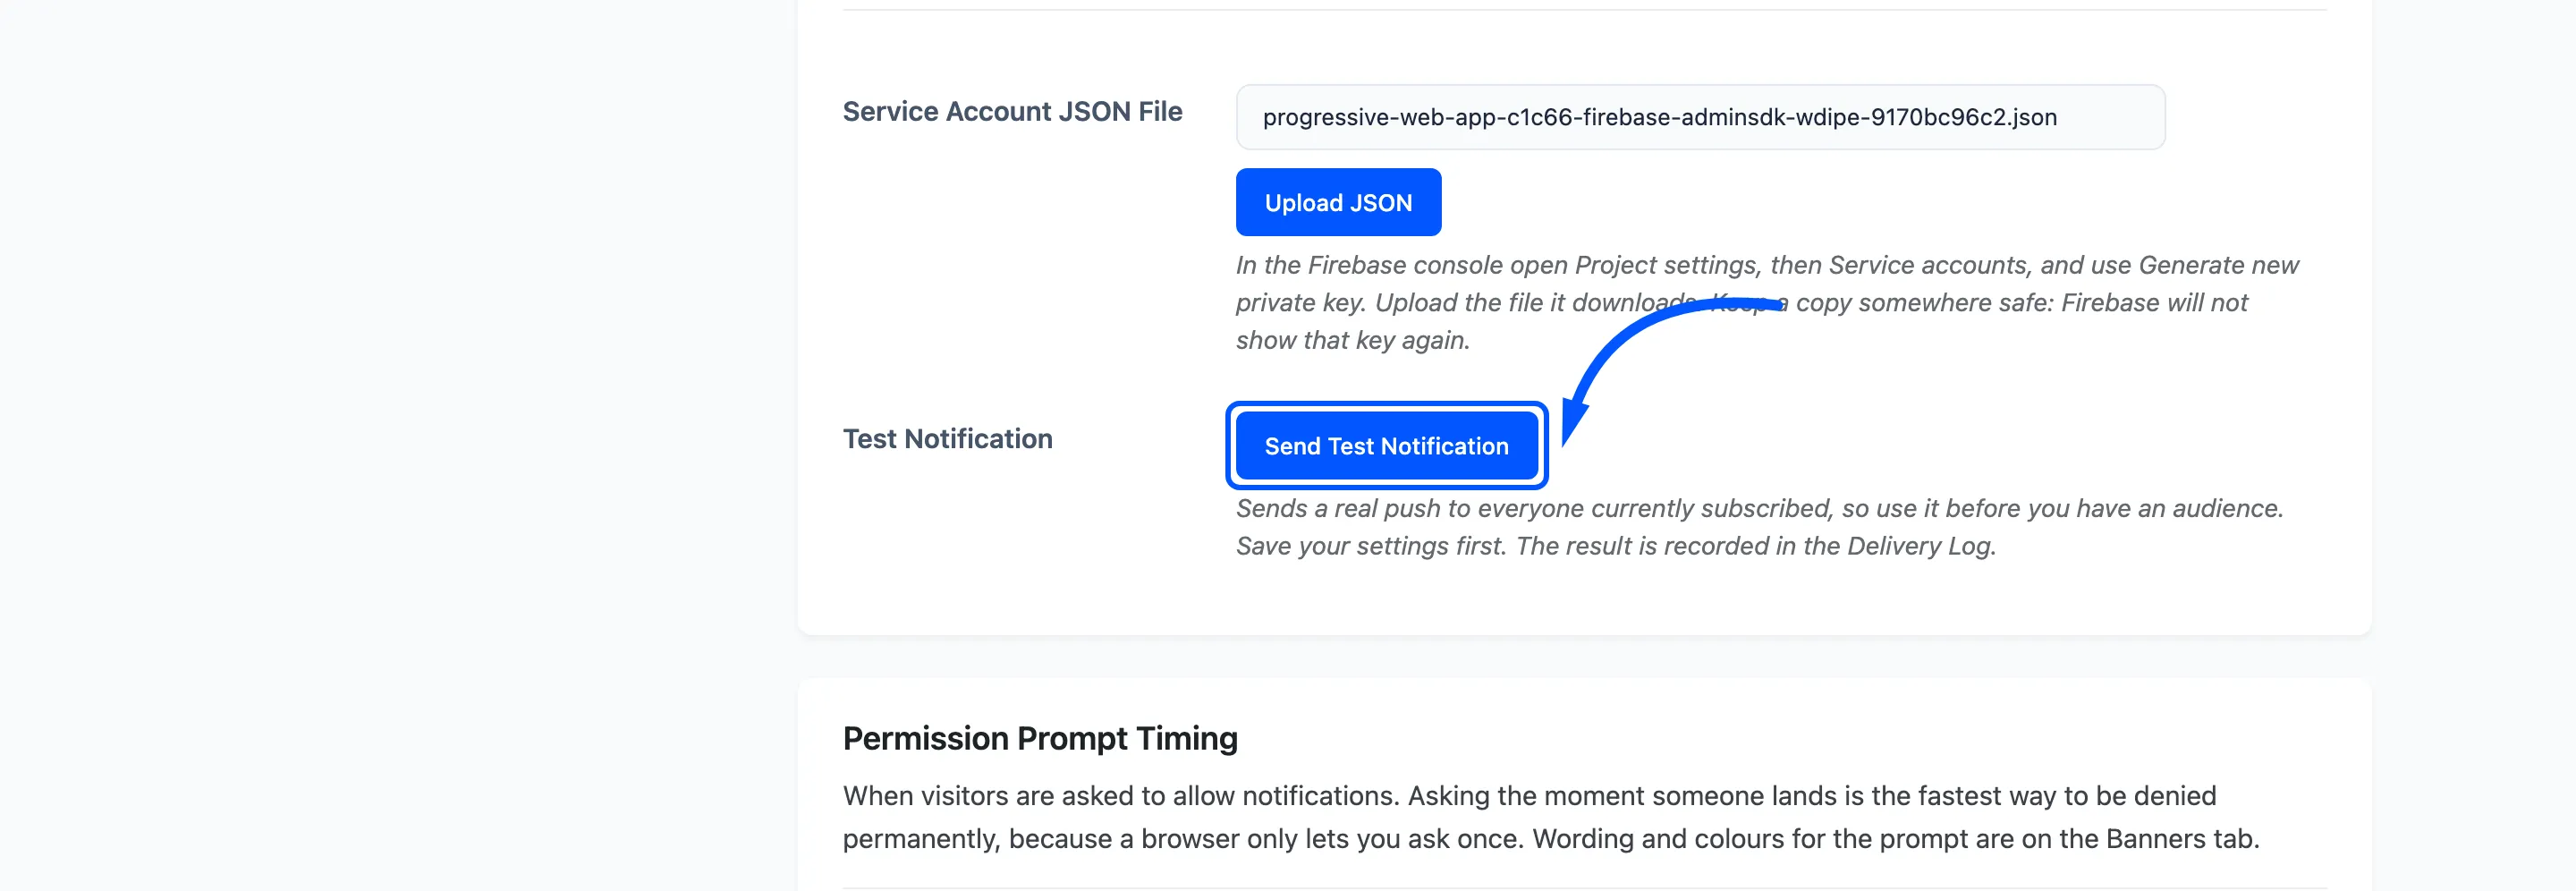
This is a real push to everyone currently subscribed, so use it before you have an audience rather than after.
Step 8: Confirm it in the Delivery Log
Section titled “Step 8: Confirm it in the Delivery Log”Go to Delivery Log. The test appears as its own row with the type Test.
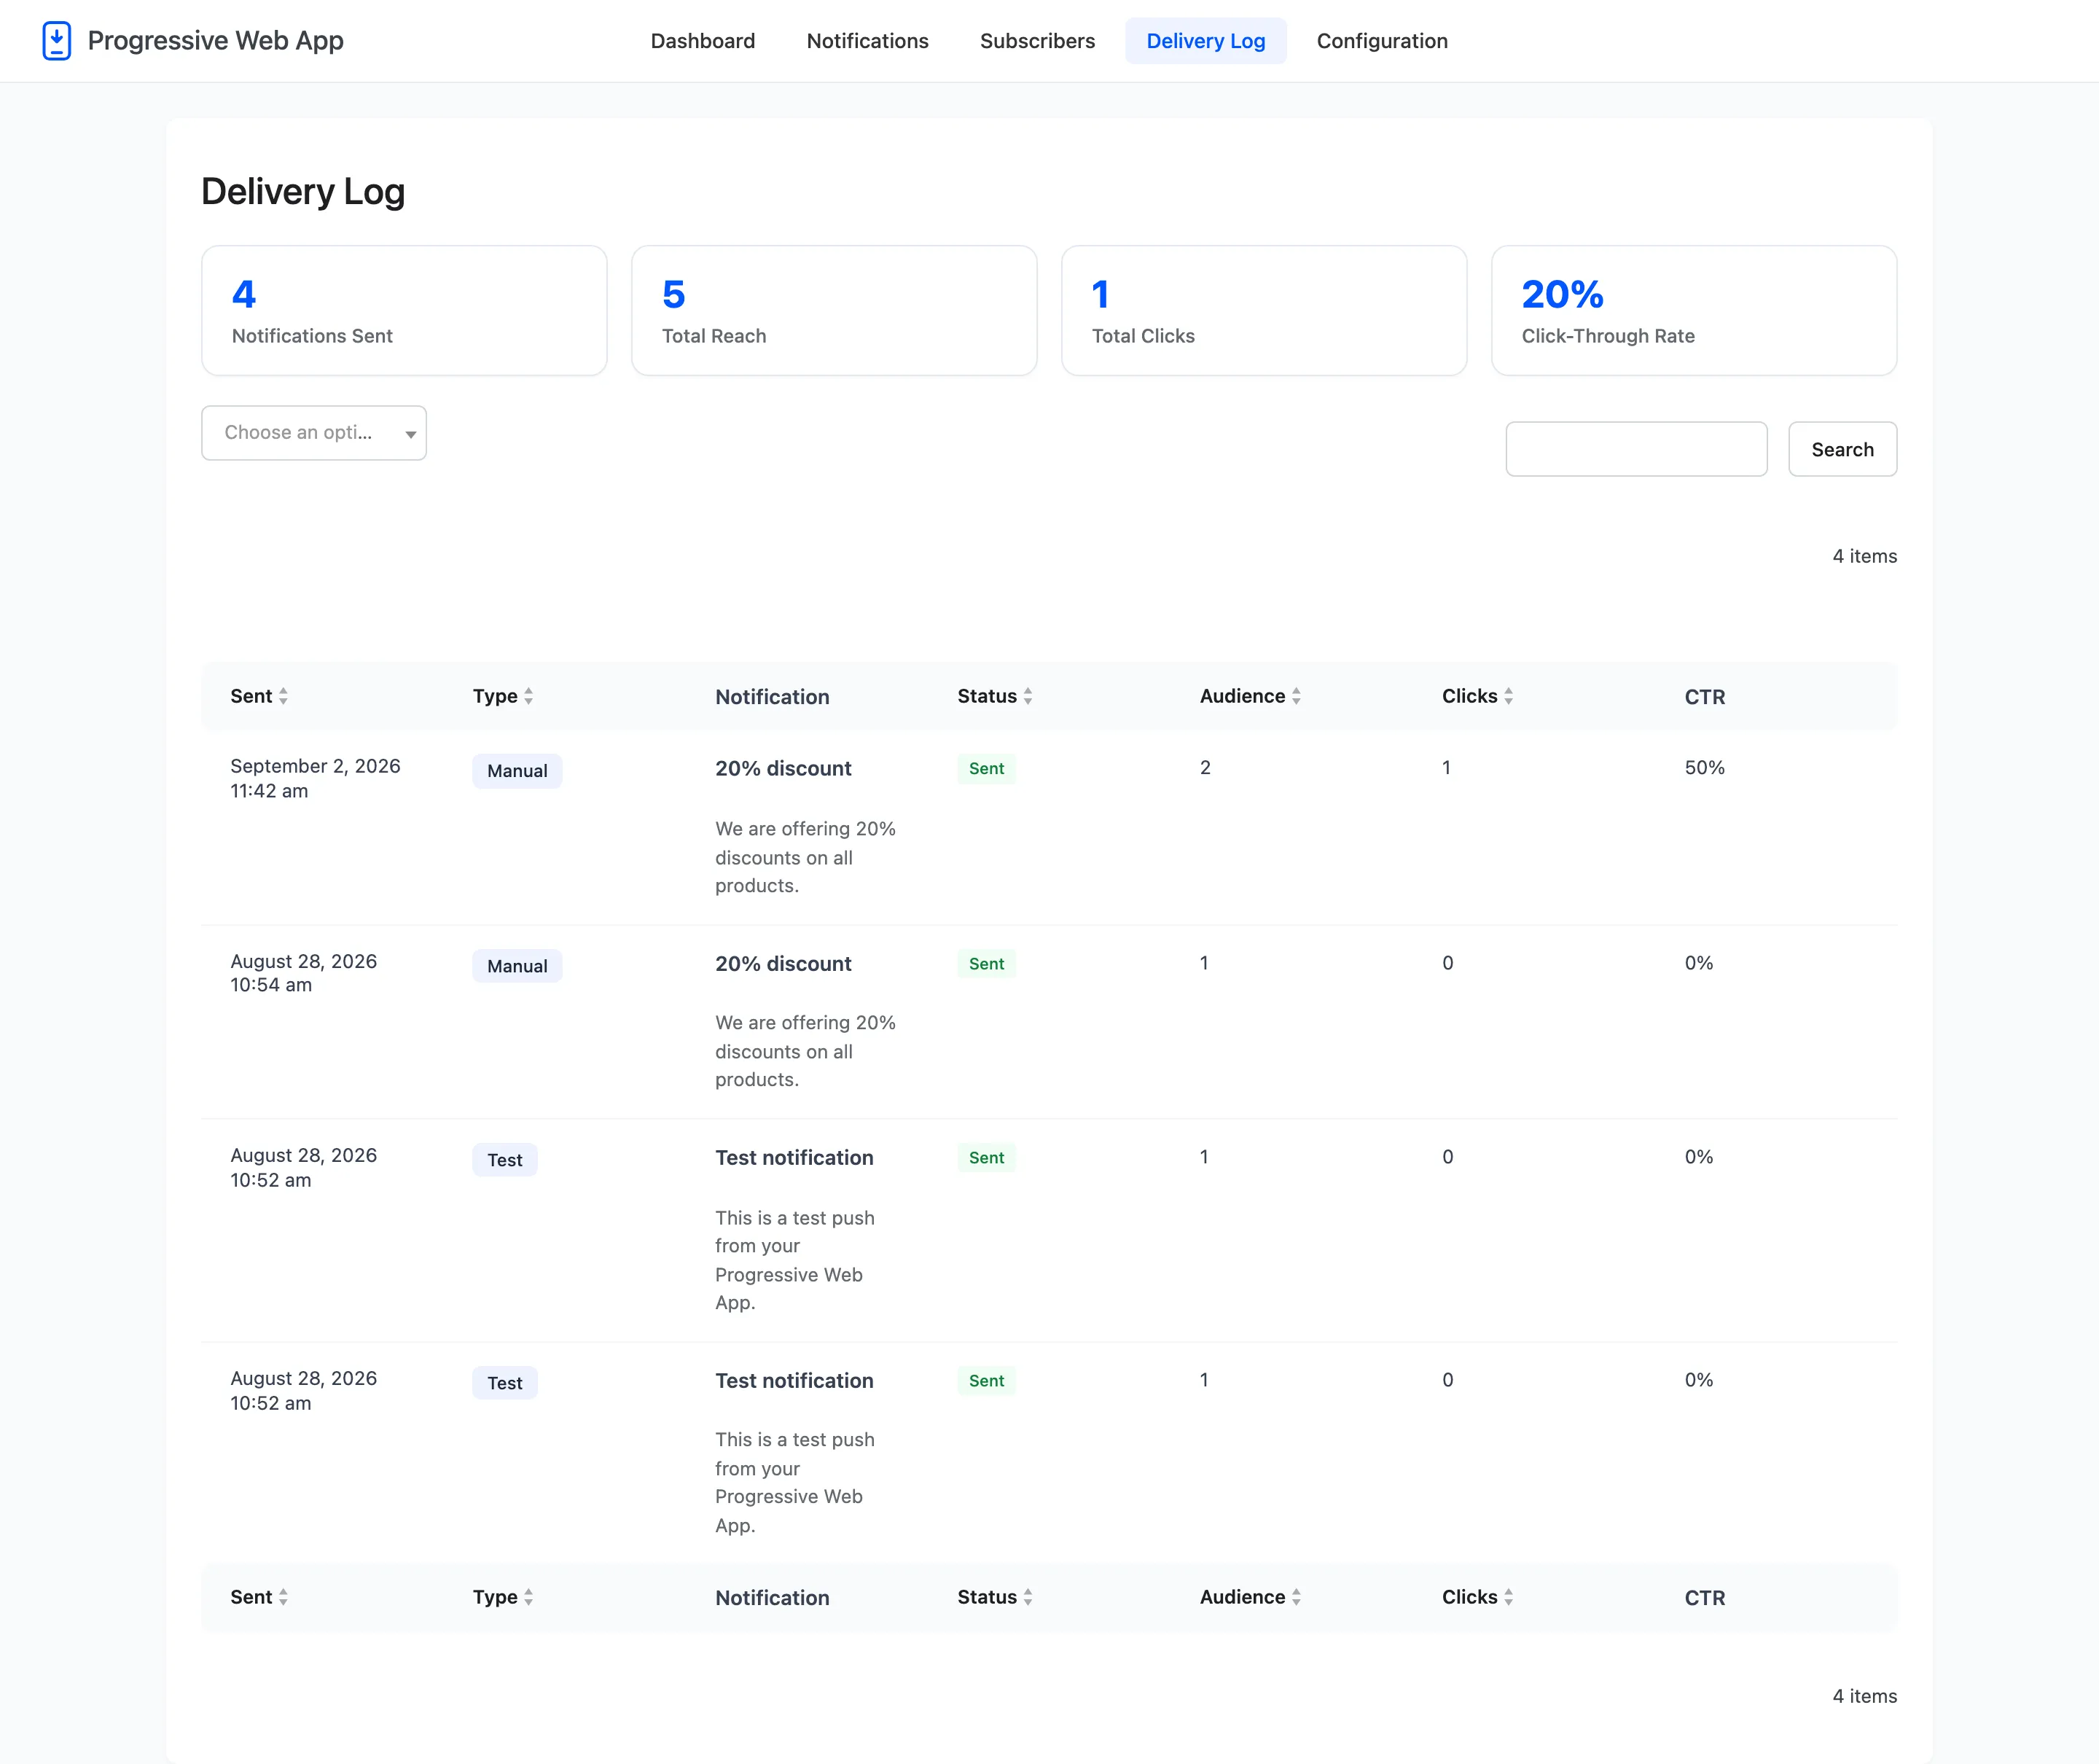
- Sent with an audience of zero means the credentials are right and nobody has subscribed yet. That is a success, not a failure.
- Failed carries the reason on hover. A service account from another project is the usual one.
Step 9: Subscribe yourself, then test again
Section titled “Step 9: Subscribe yourself, then test again”Open your own site in a browser that supports push, wait for the prompt and allow it. You appear on the Subscribers screen as one device.
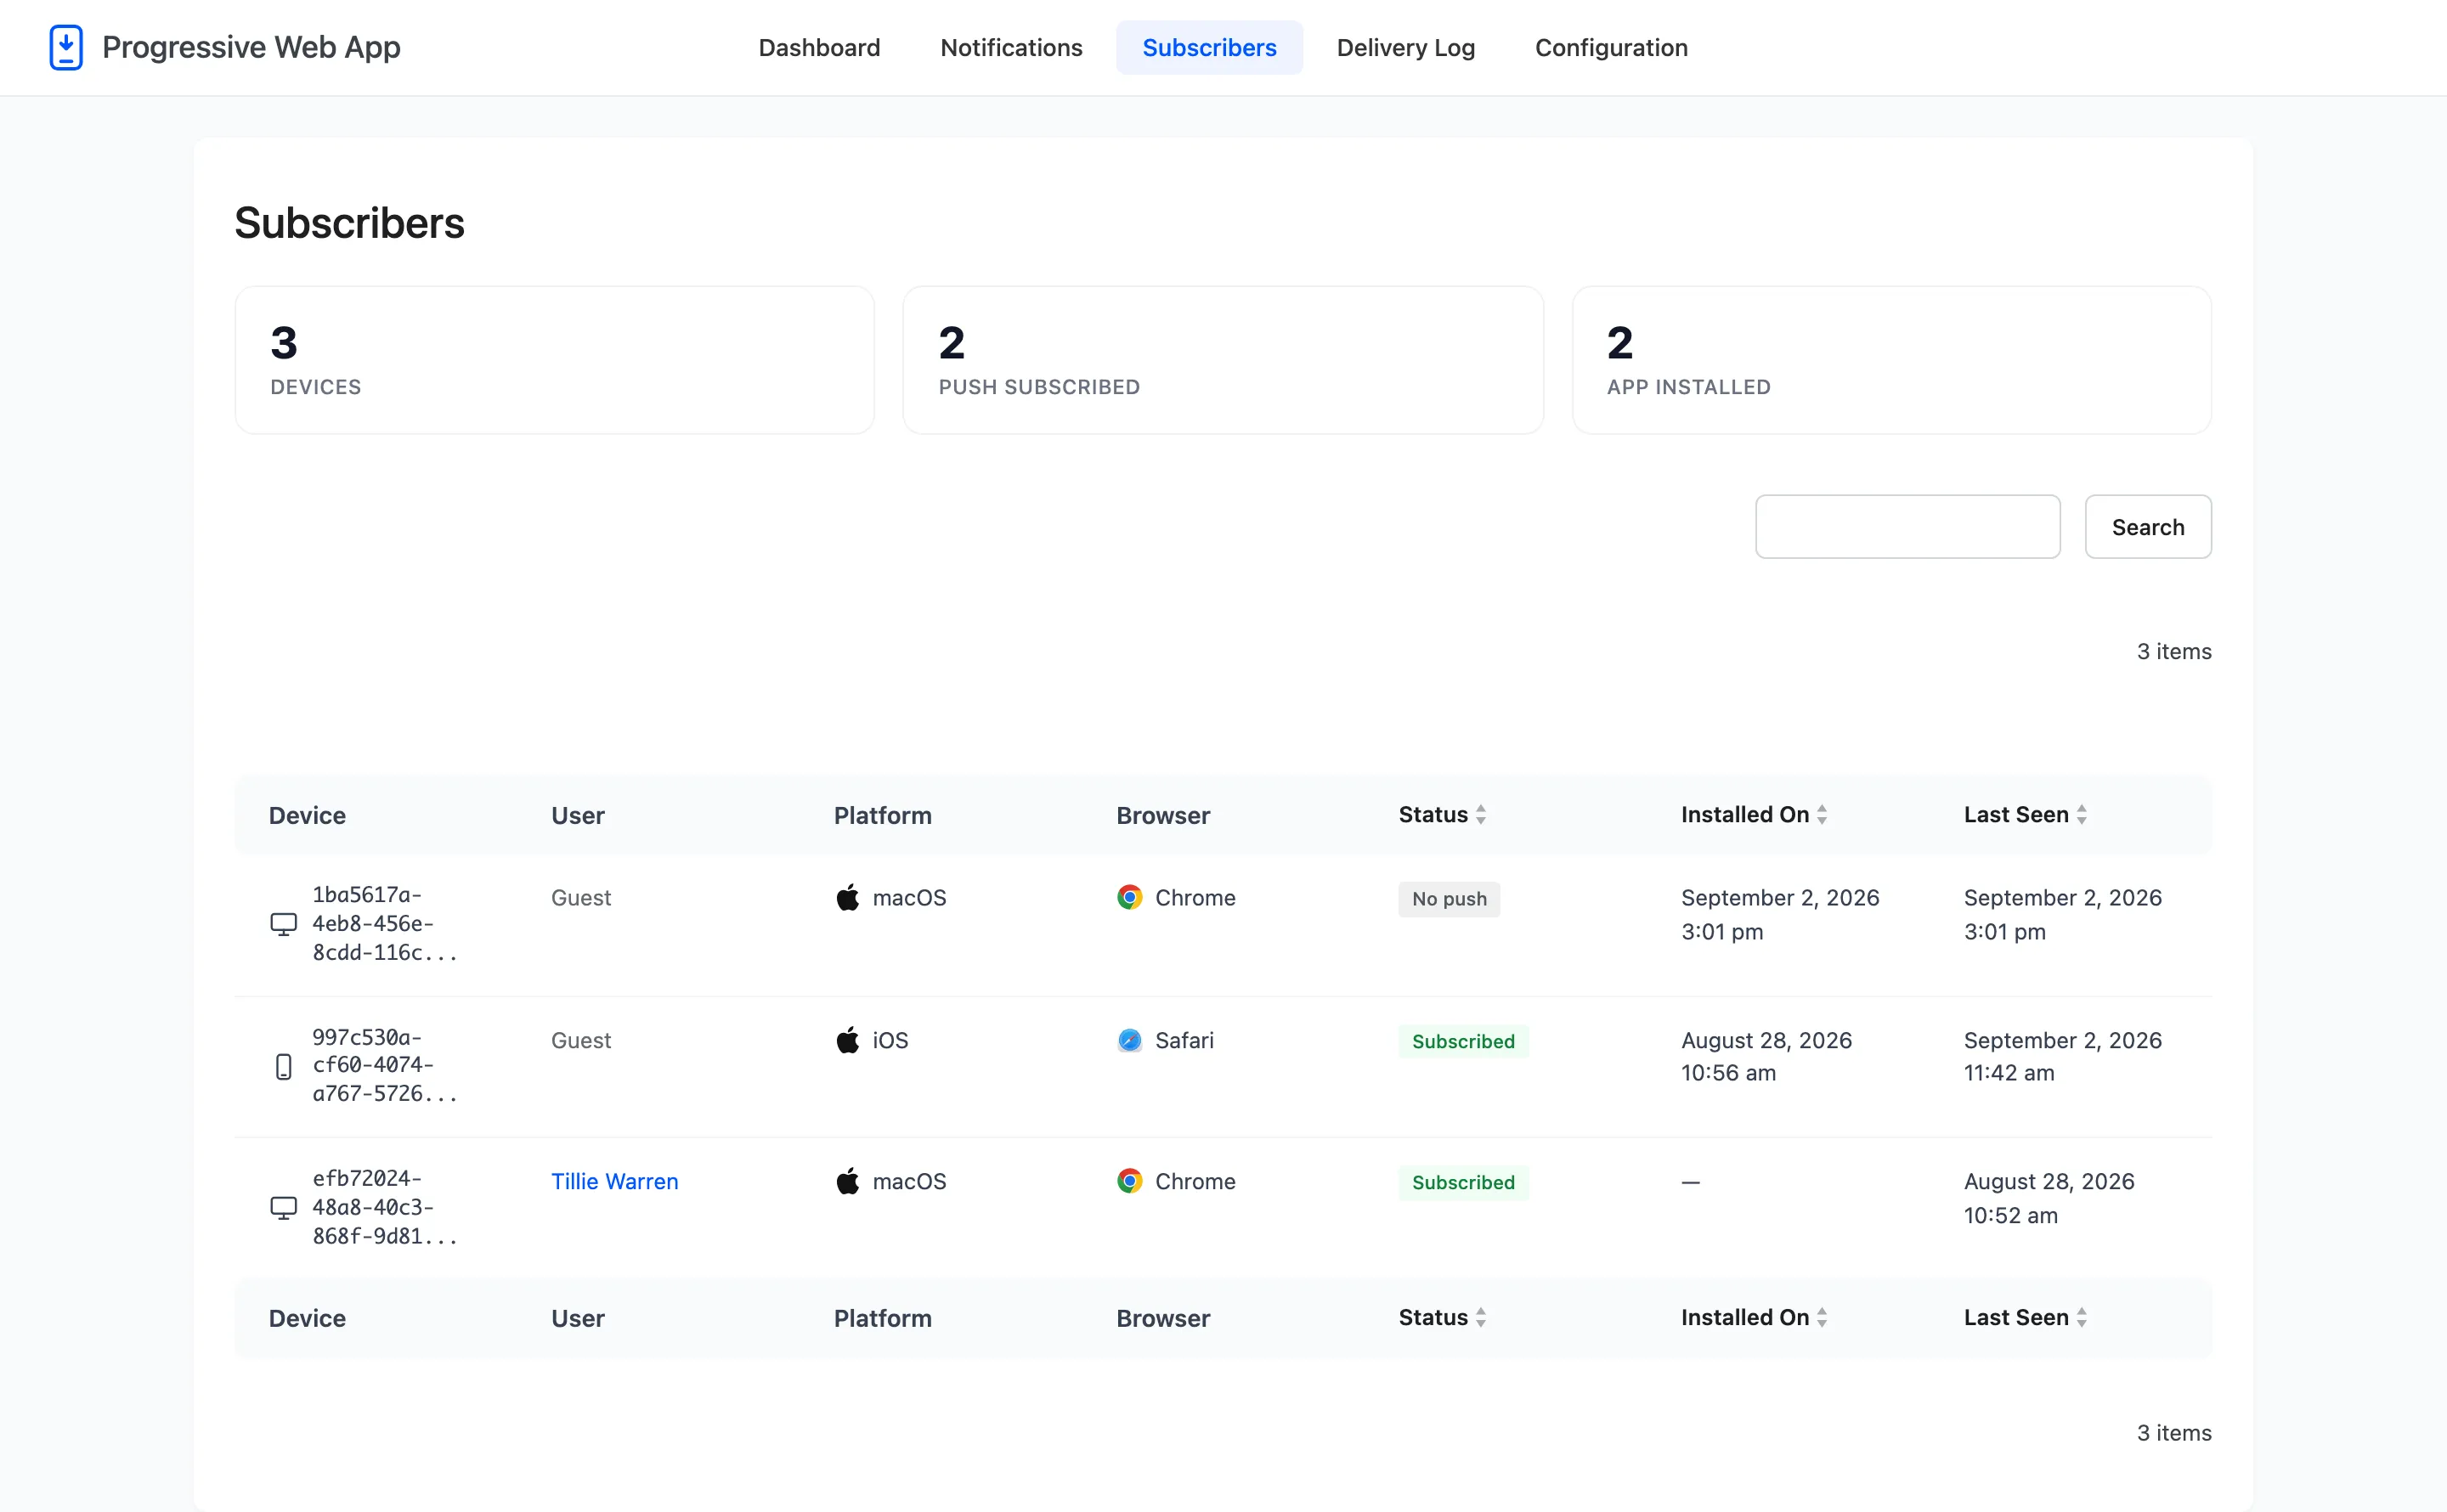
Send the test again. This time it should reach an audience of one, and land on your own screen.
What this has and has not set up
Section titled “What this has and has not set up”Push now works. What you have not done yet is decide when visitors are asked, what the prompt says, or whether anything sends automatically.