

How to Set Up Points Earning
Points earning is the first half of a loyalty program. This guide sets up purchase-based earning in LoyaltyX, so every order awards points at a rate you control.
By the end you will have a working earning rate, sensible rules about what counts, and a confirmed test order.
Before you start
Section titled “Before you start”Make sure WooCommerce is active and LoyaltyX is installed. You need at least one purchasable product and a way to place a test order, such as a test payment gateway or a manual order.
Step 1: Enable LoyaltyX
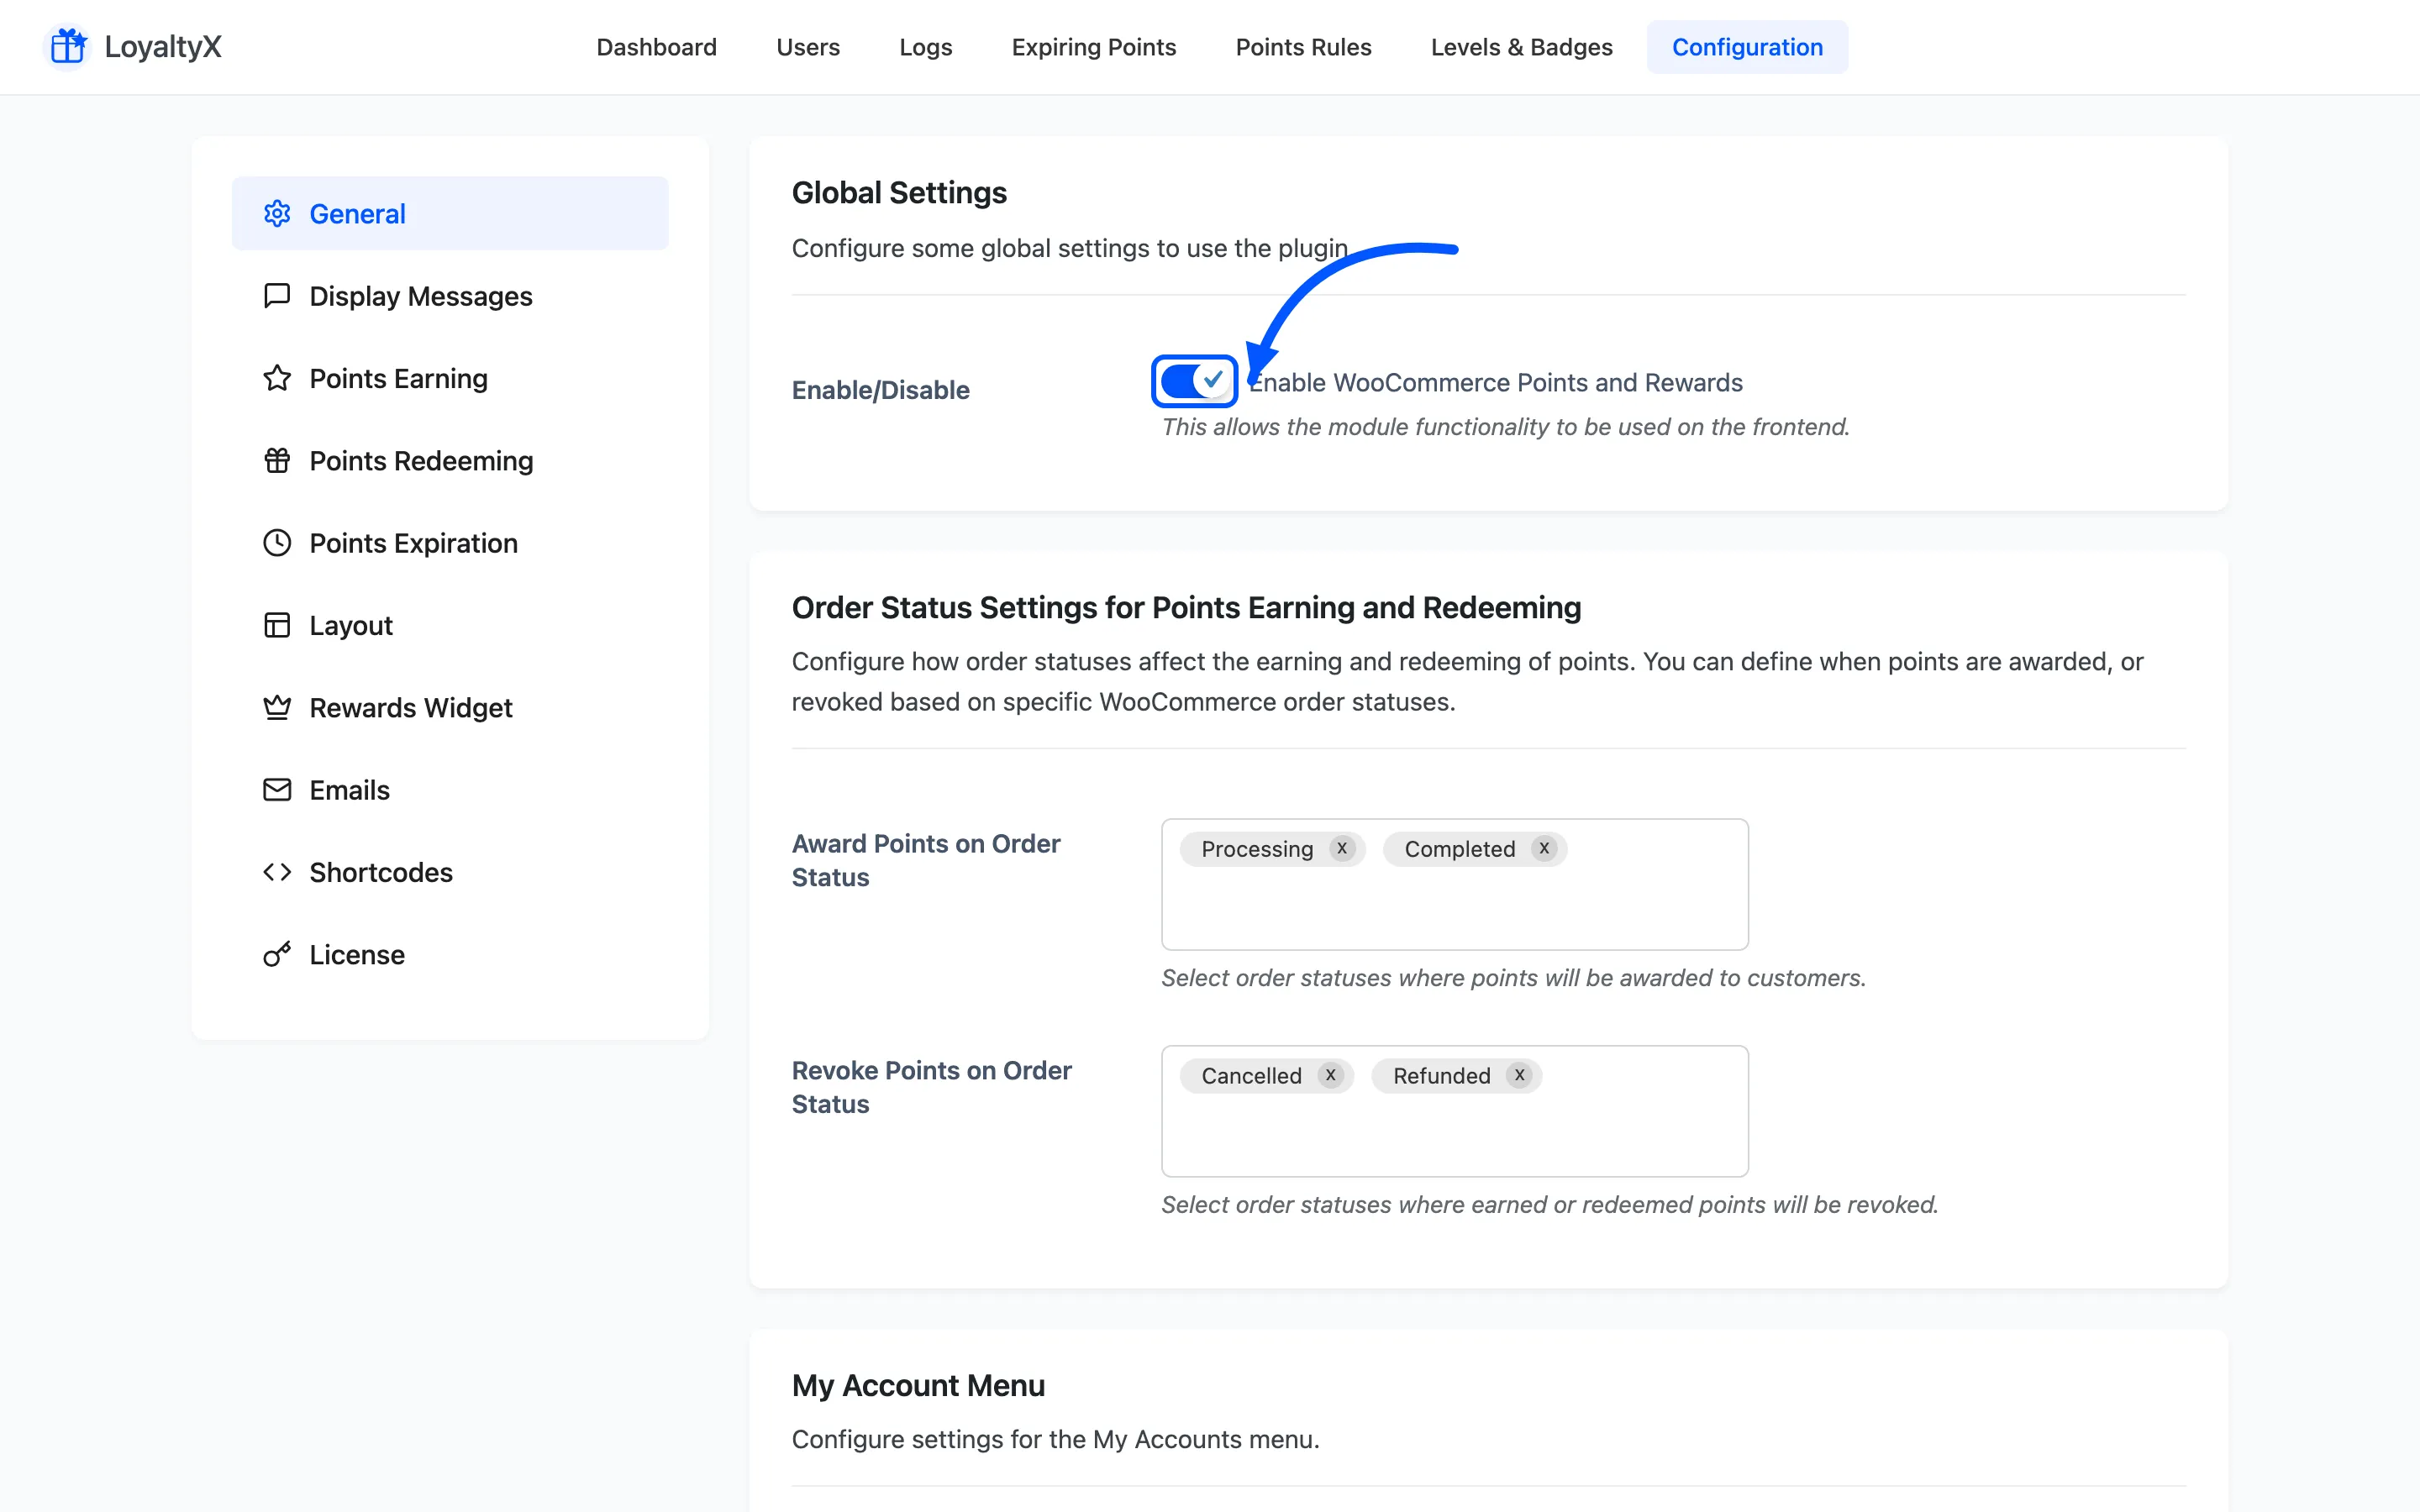
Section titled “Step 1: Enable LoyaltyX”Go to DevDiggers Plugins → LoyaltyX → Configuration. On the General tab, turn on Enable WooCommerce Points and Rewards. This switch runs the program on the front end. Leave it off and no points move, whatever else you set.
Step 2: Set the global earning rate
Section titled “Step 2: Set the global earning rate”Open Configuration → Points Earning. Under Global Points Value, set the Earn Points rate. Read it as “for each unit of currency spent, award this many points”.
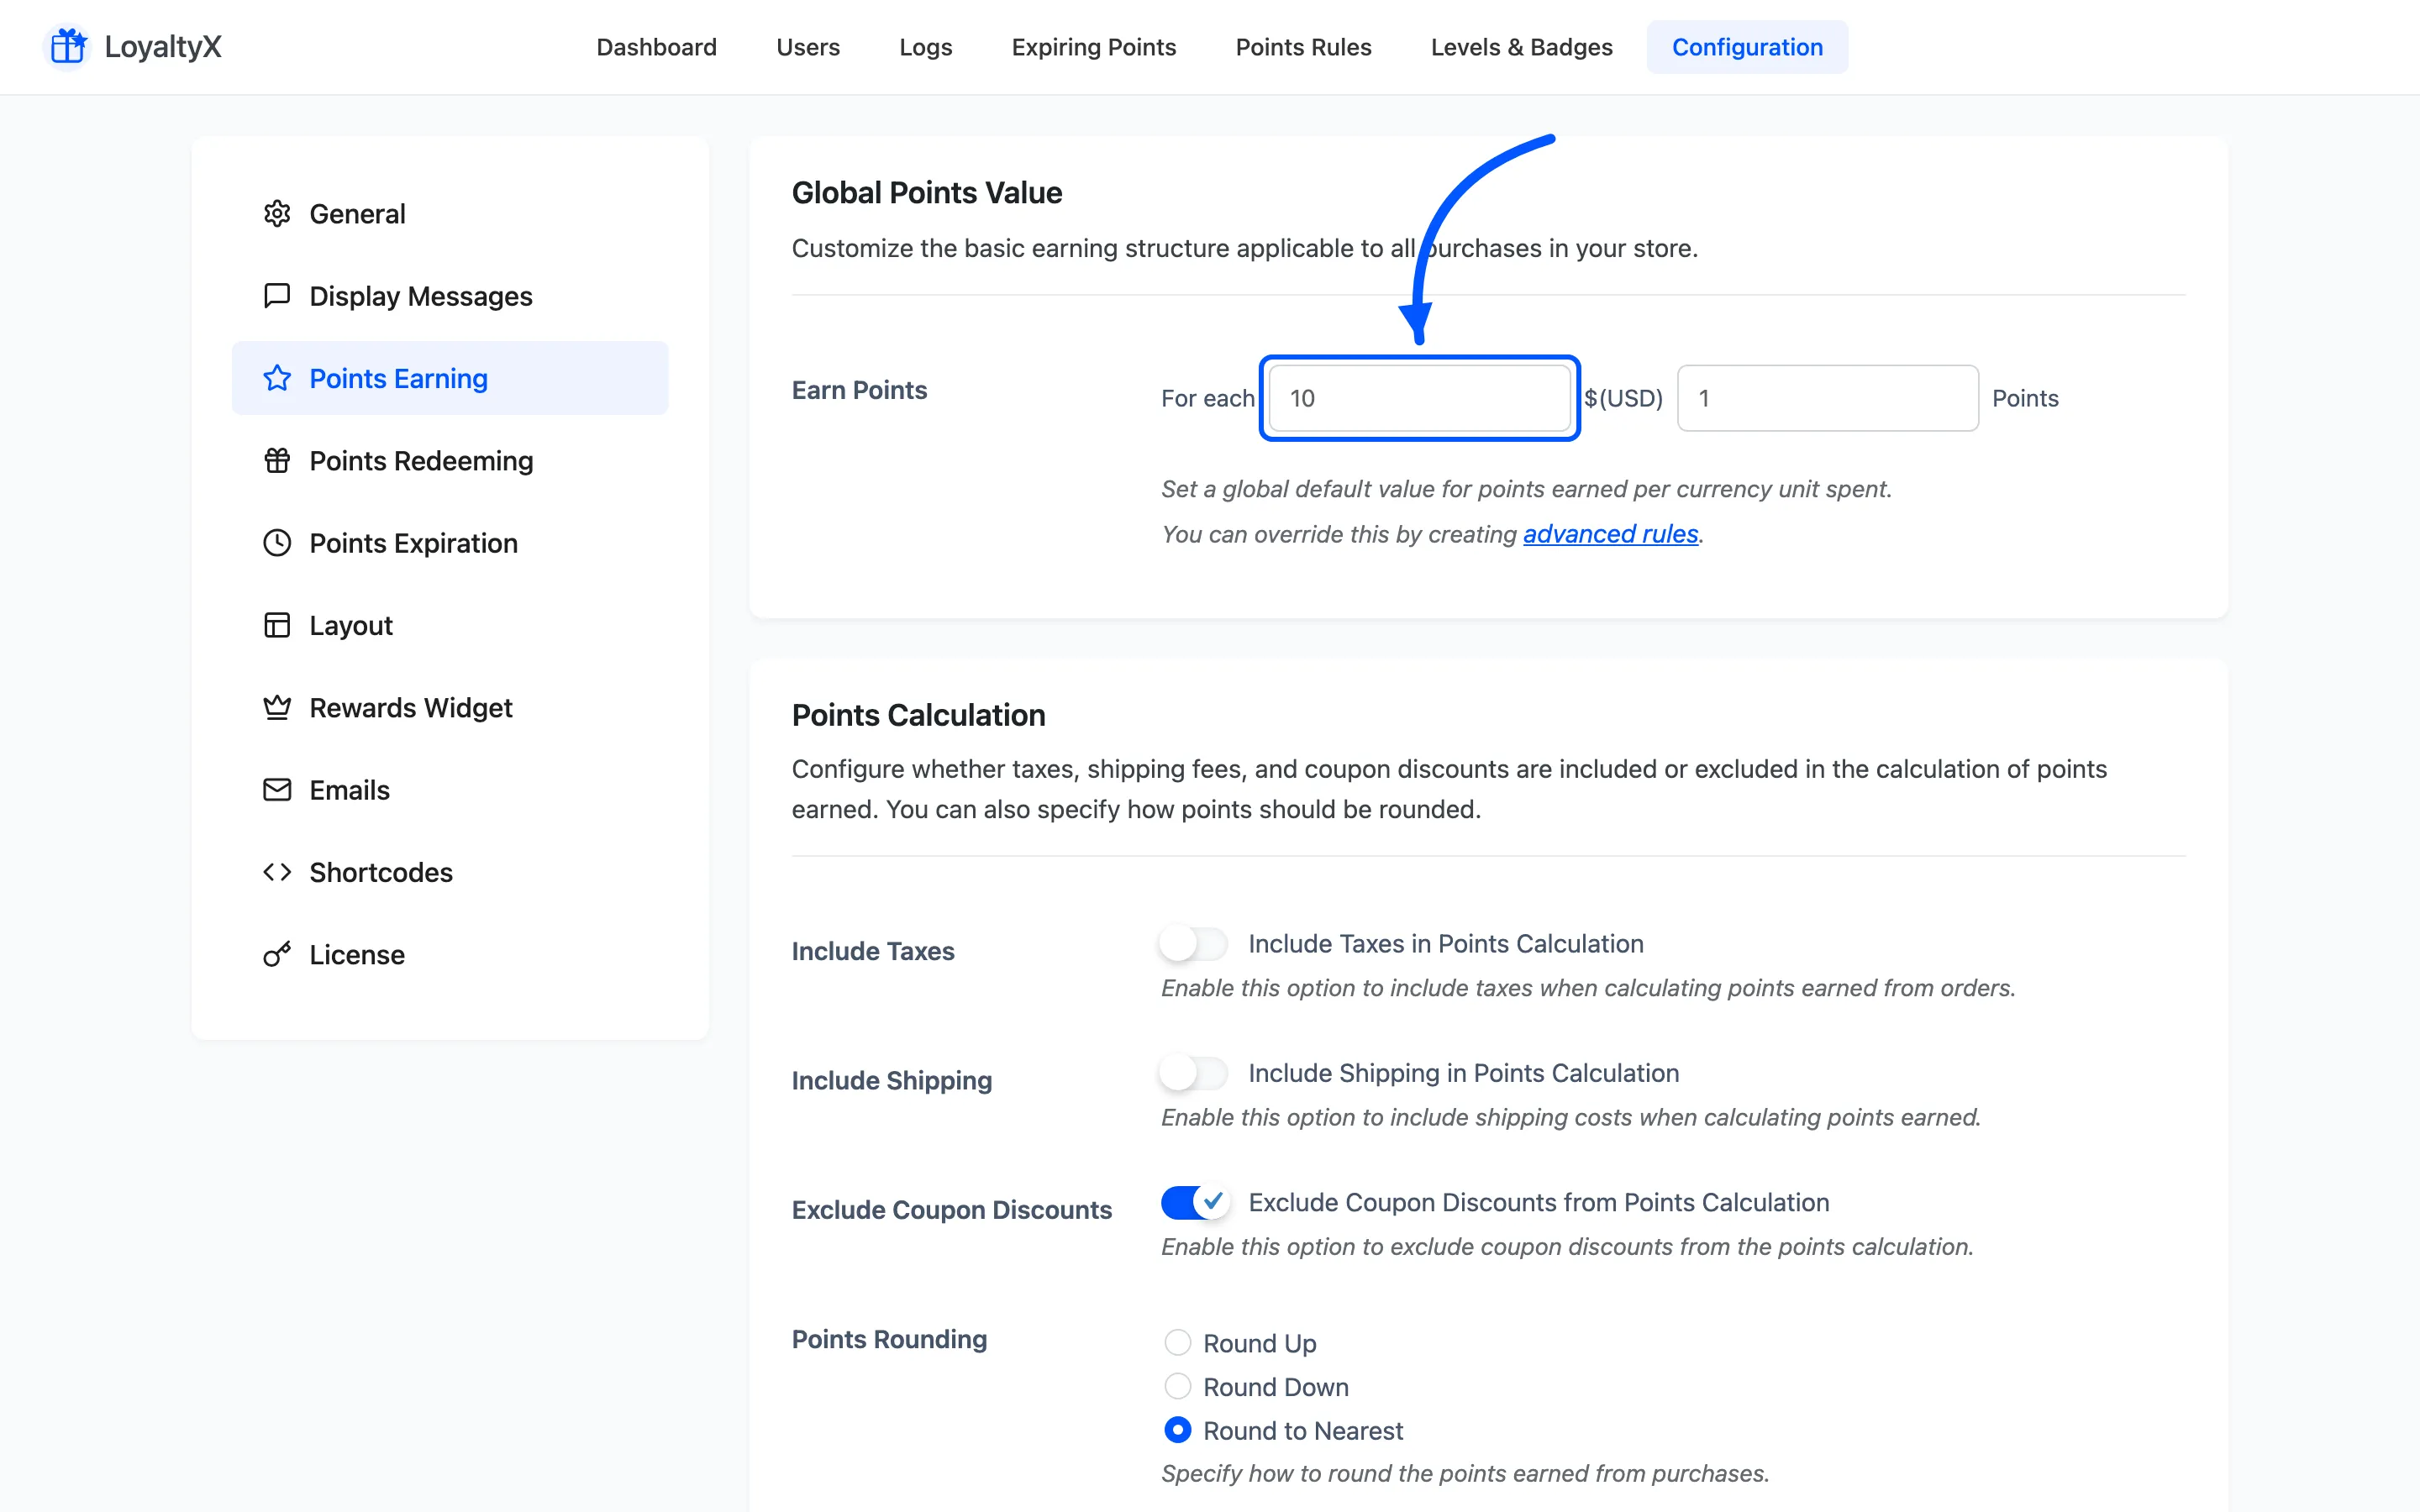
A simple starting point is 1 point per 1 unit of currency. Round numbers are easier for customers to follow. If you plan to let 100 points equal a small discount, one point per currency unit keeps the maths clear.
Step 3: Choose what counts toward points
Section titled “Step 3: Choose what counts toward points”Still on Points Earning, set the Points Calculation options:
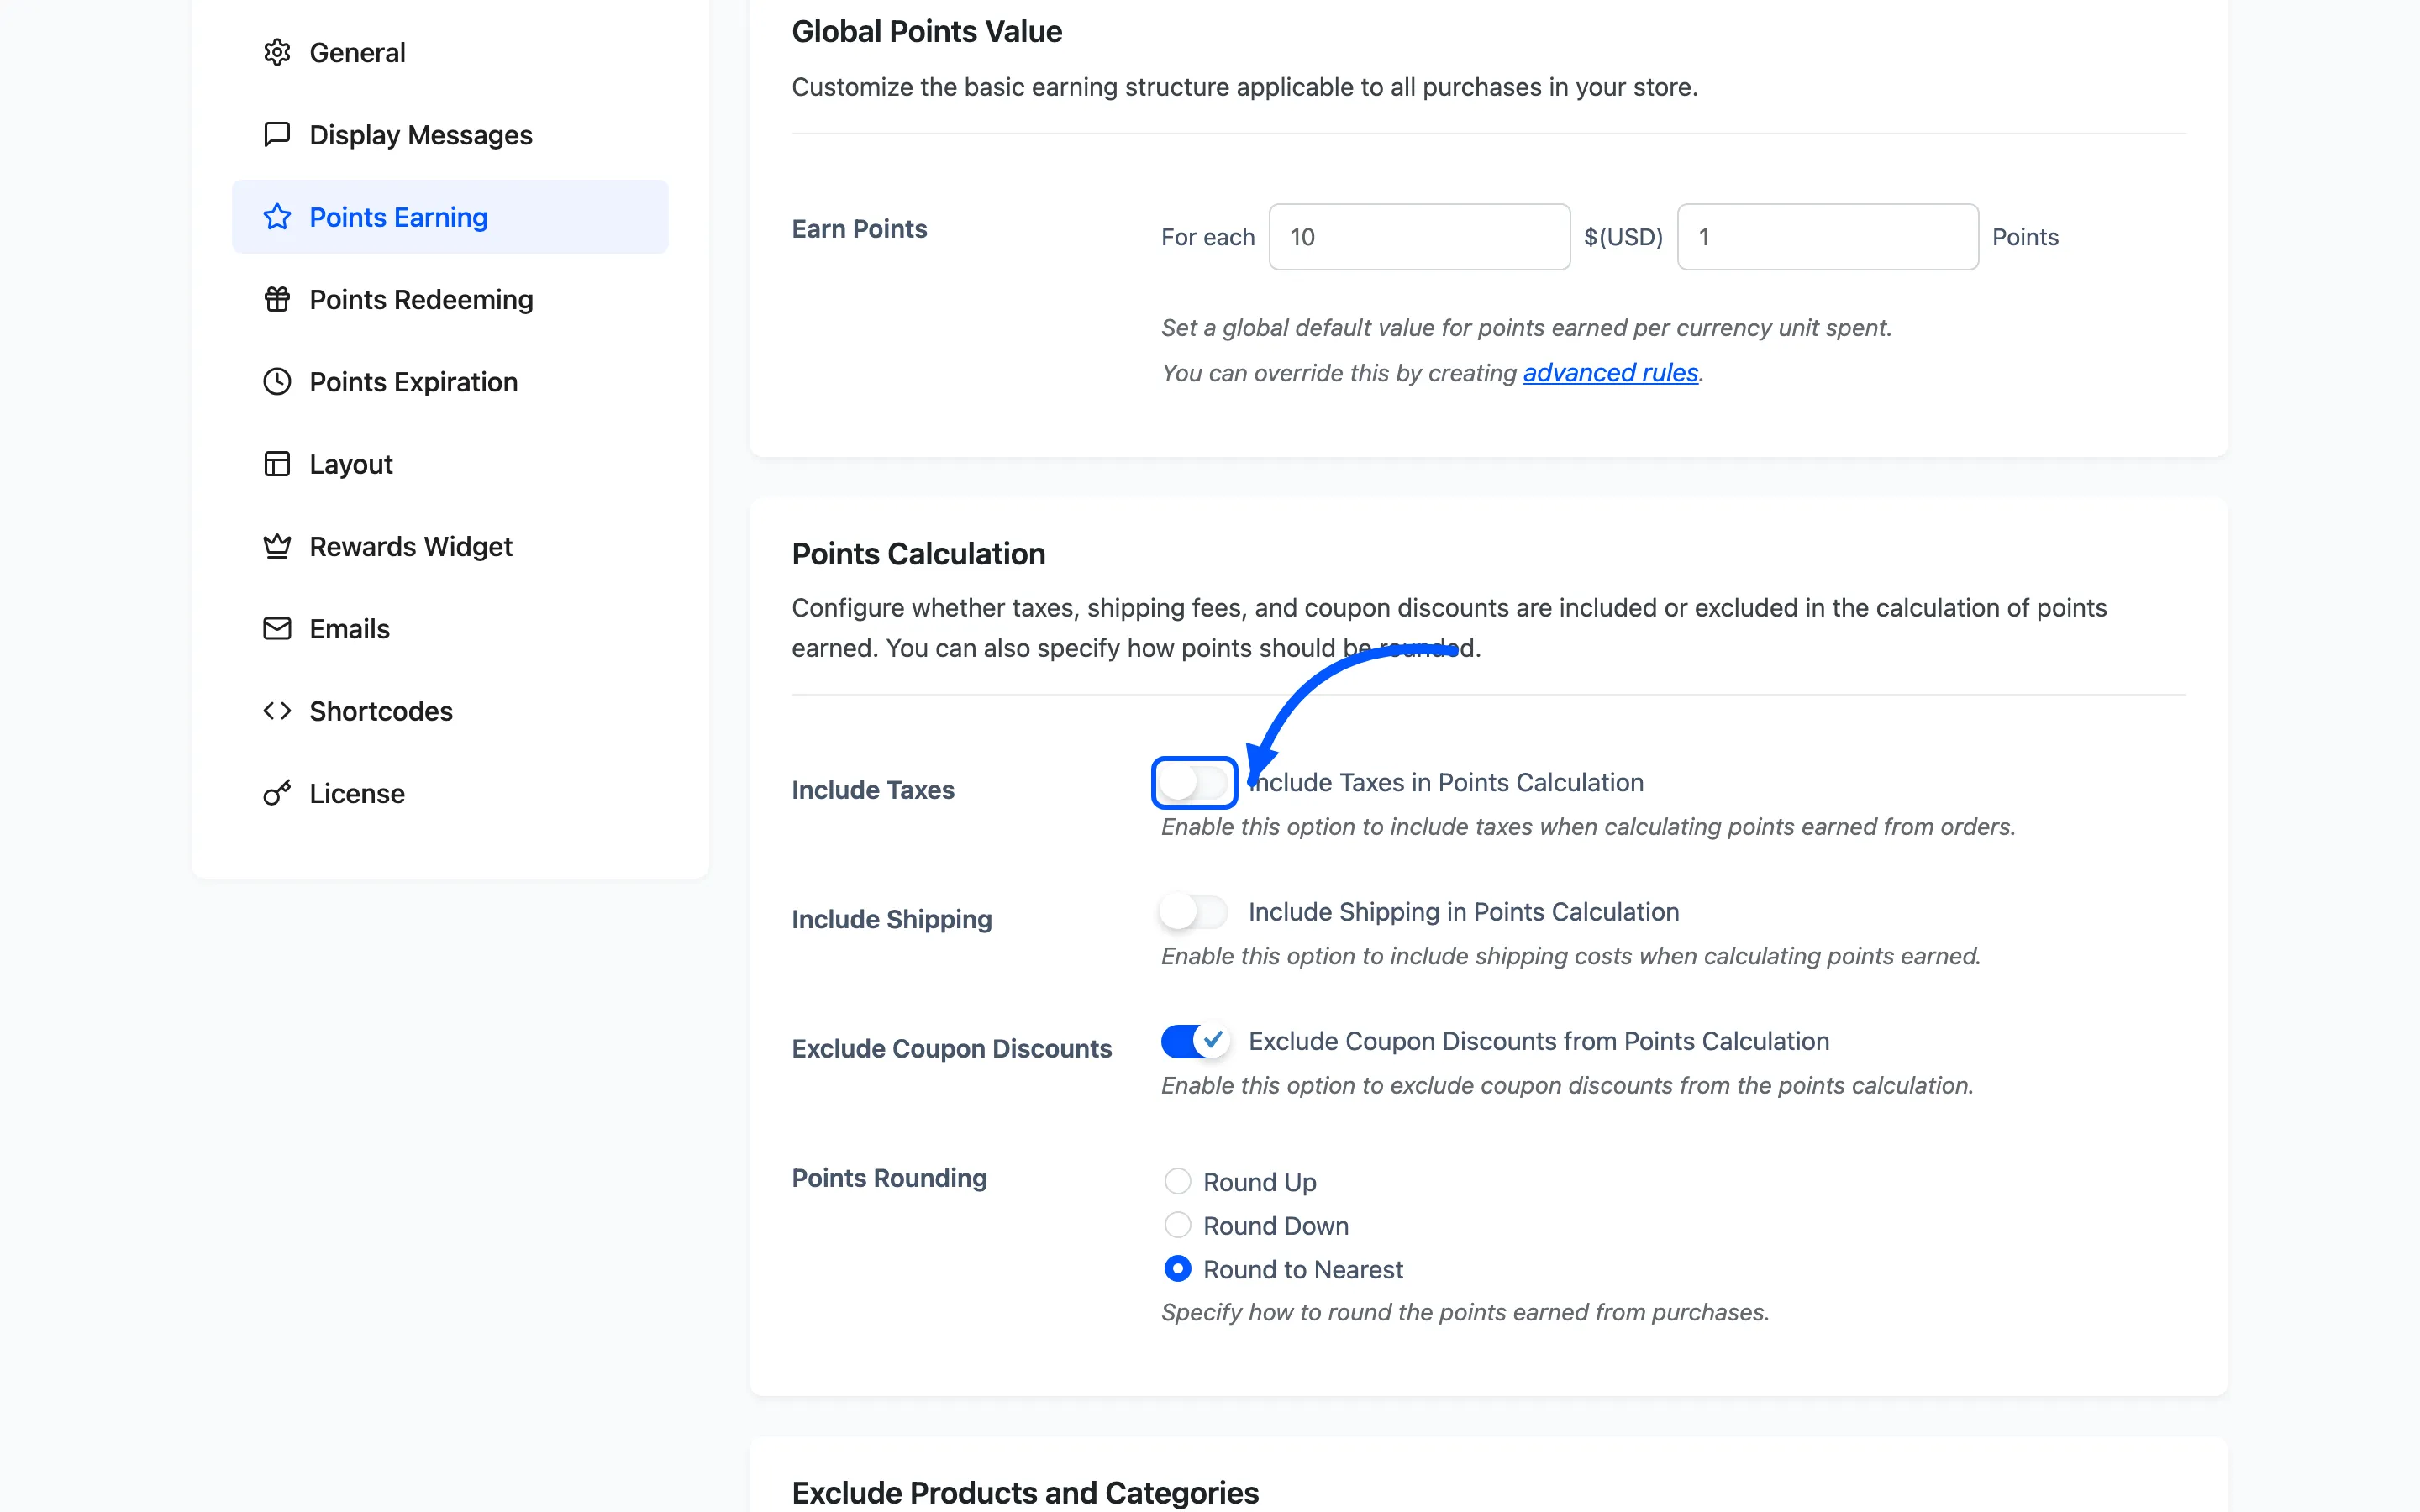
- Include Taxes counts tax in the amount that earns points. Leave it off to reward the pre-tax subtotal only.
- Include Shipping counts shipping cost. Most stores leave this off, so customers earn on products rather than delivery.
- Exclude Coupon Discounts works out points on the discounted total, so a coupon order earns less. Turn it on if you do not want to reward already-discounted spend.
- Points Rounding decides how a fractional result is handled. Round Down is the safest default, since it never awards more than the customer spent.
Step 4: Exclude products or categories
Section titled “Step 4: Exclude products or categories”Under Exclude Products and Categories, add anything that should not earn points:
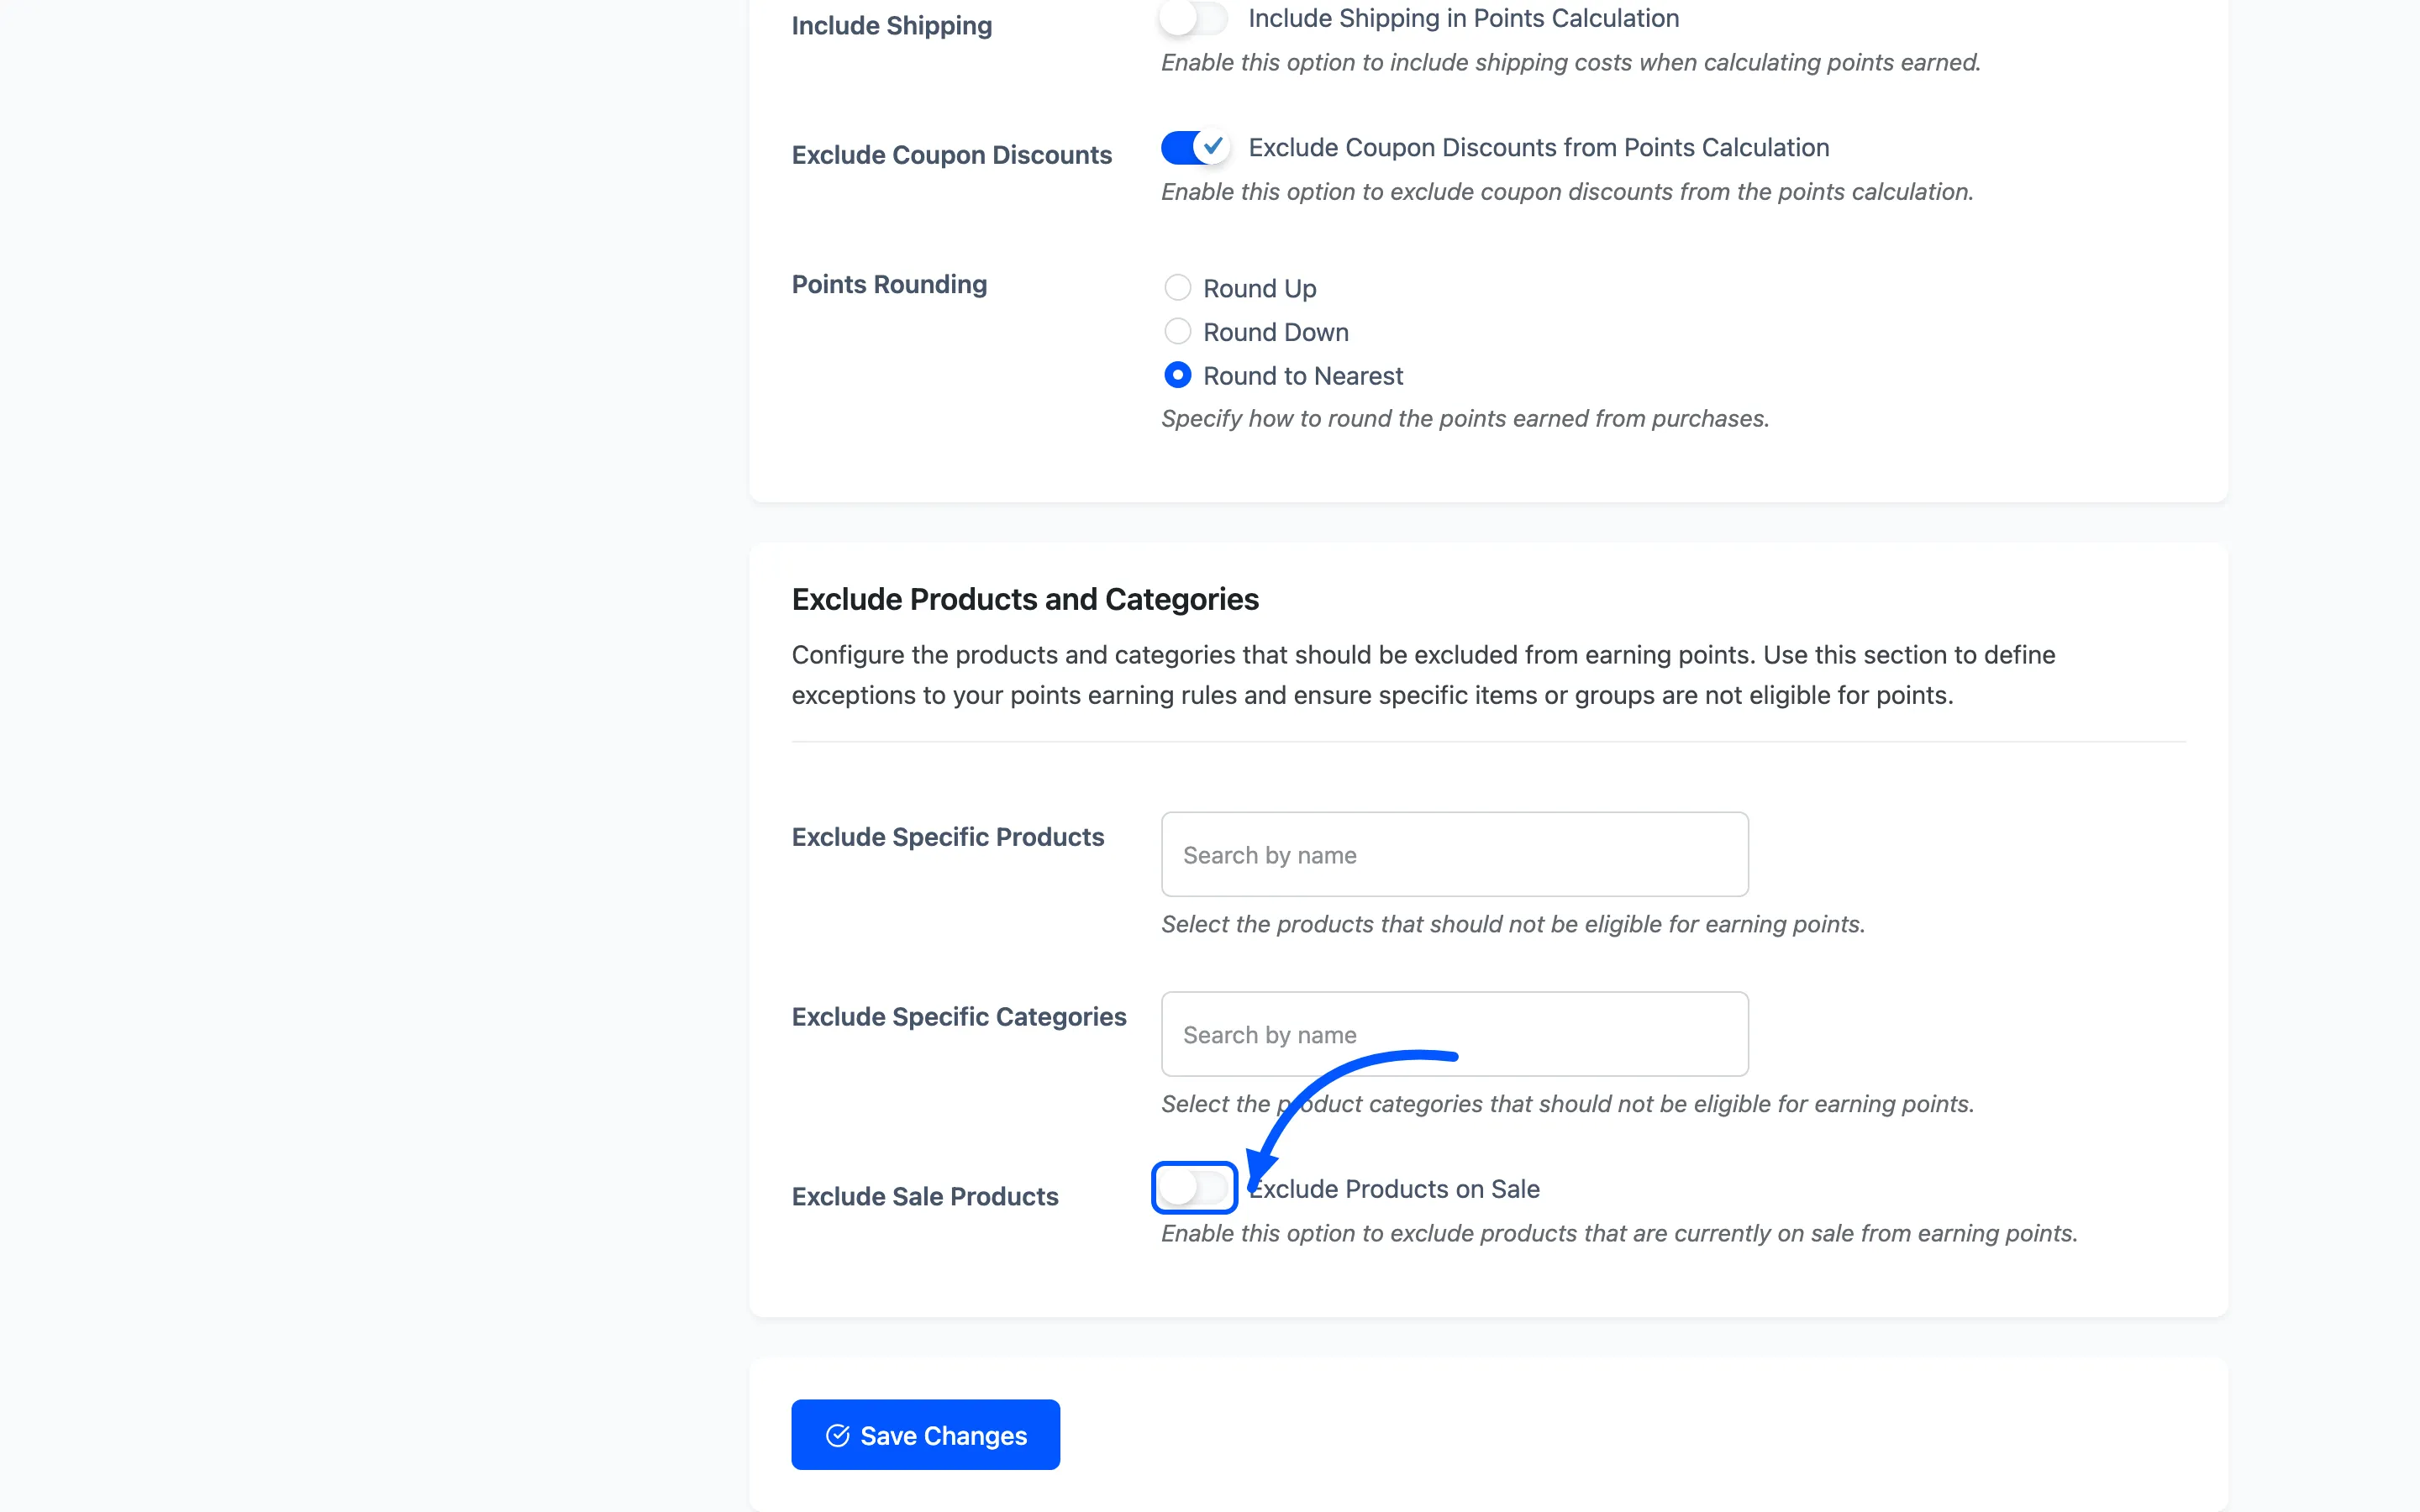
- Exclude Specific Products for individual items, such as gift cards.
- Exclude Specific Categories for whole groups, such as clearance.
- Exclude Sale Products to stop discounted items earning on top of their markdown.
Skip this section if every product should earn. You can return to it any time.
Click Save Changes to store your earning rules.
Step 5: Pick the order statuses that award points
Section titled “Step 5: Pick the order statuses that award points”Go back to Configuration → General, to Order Status Settings.
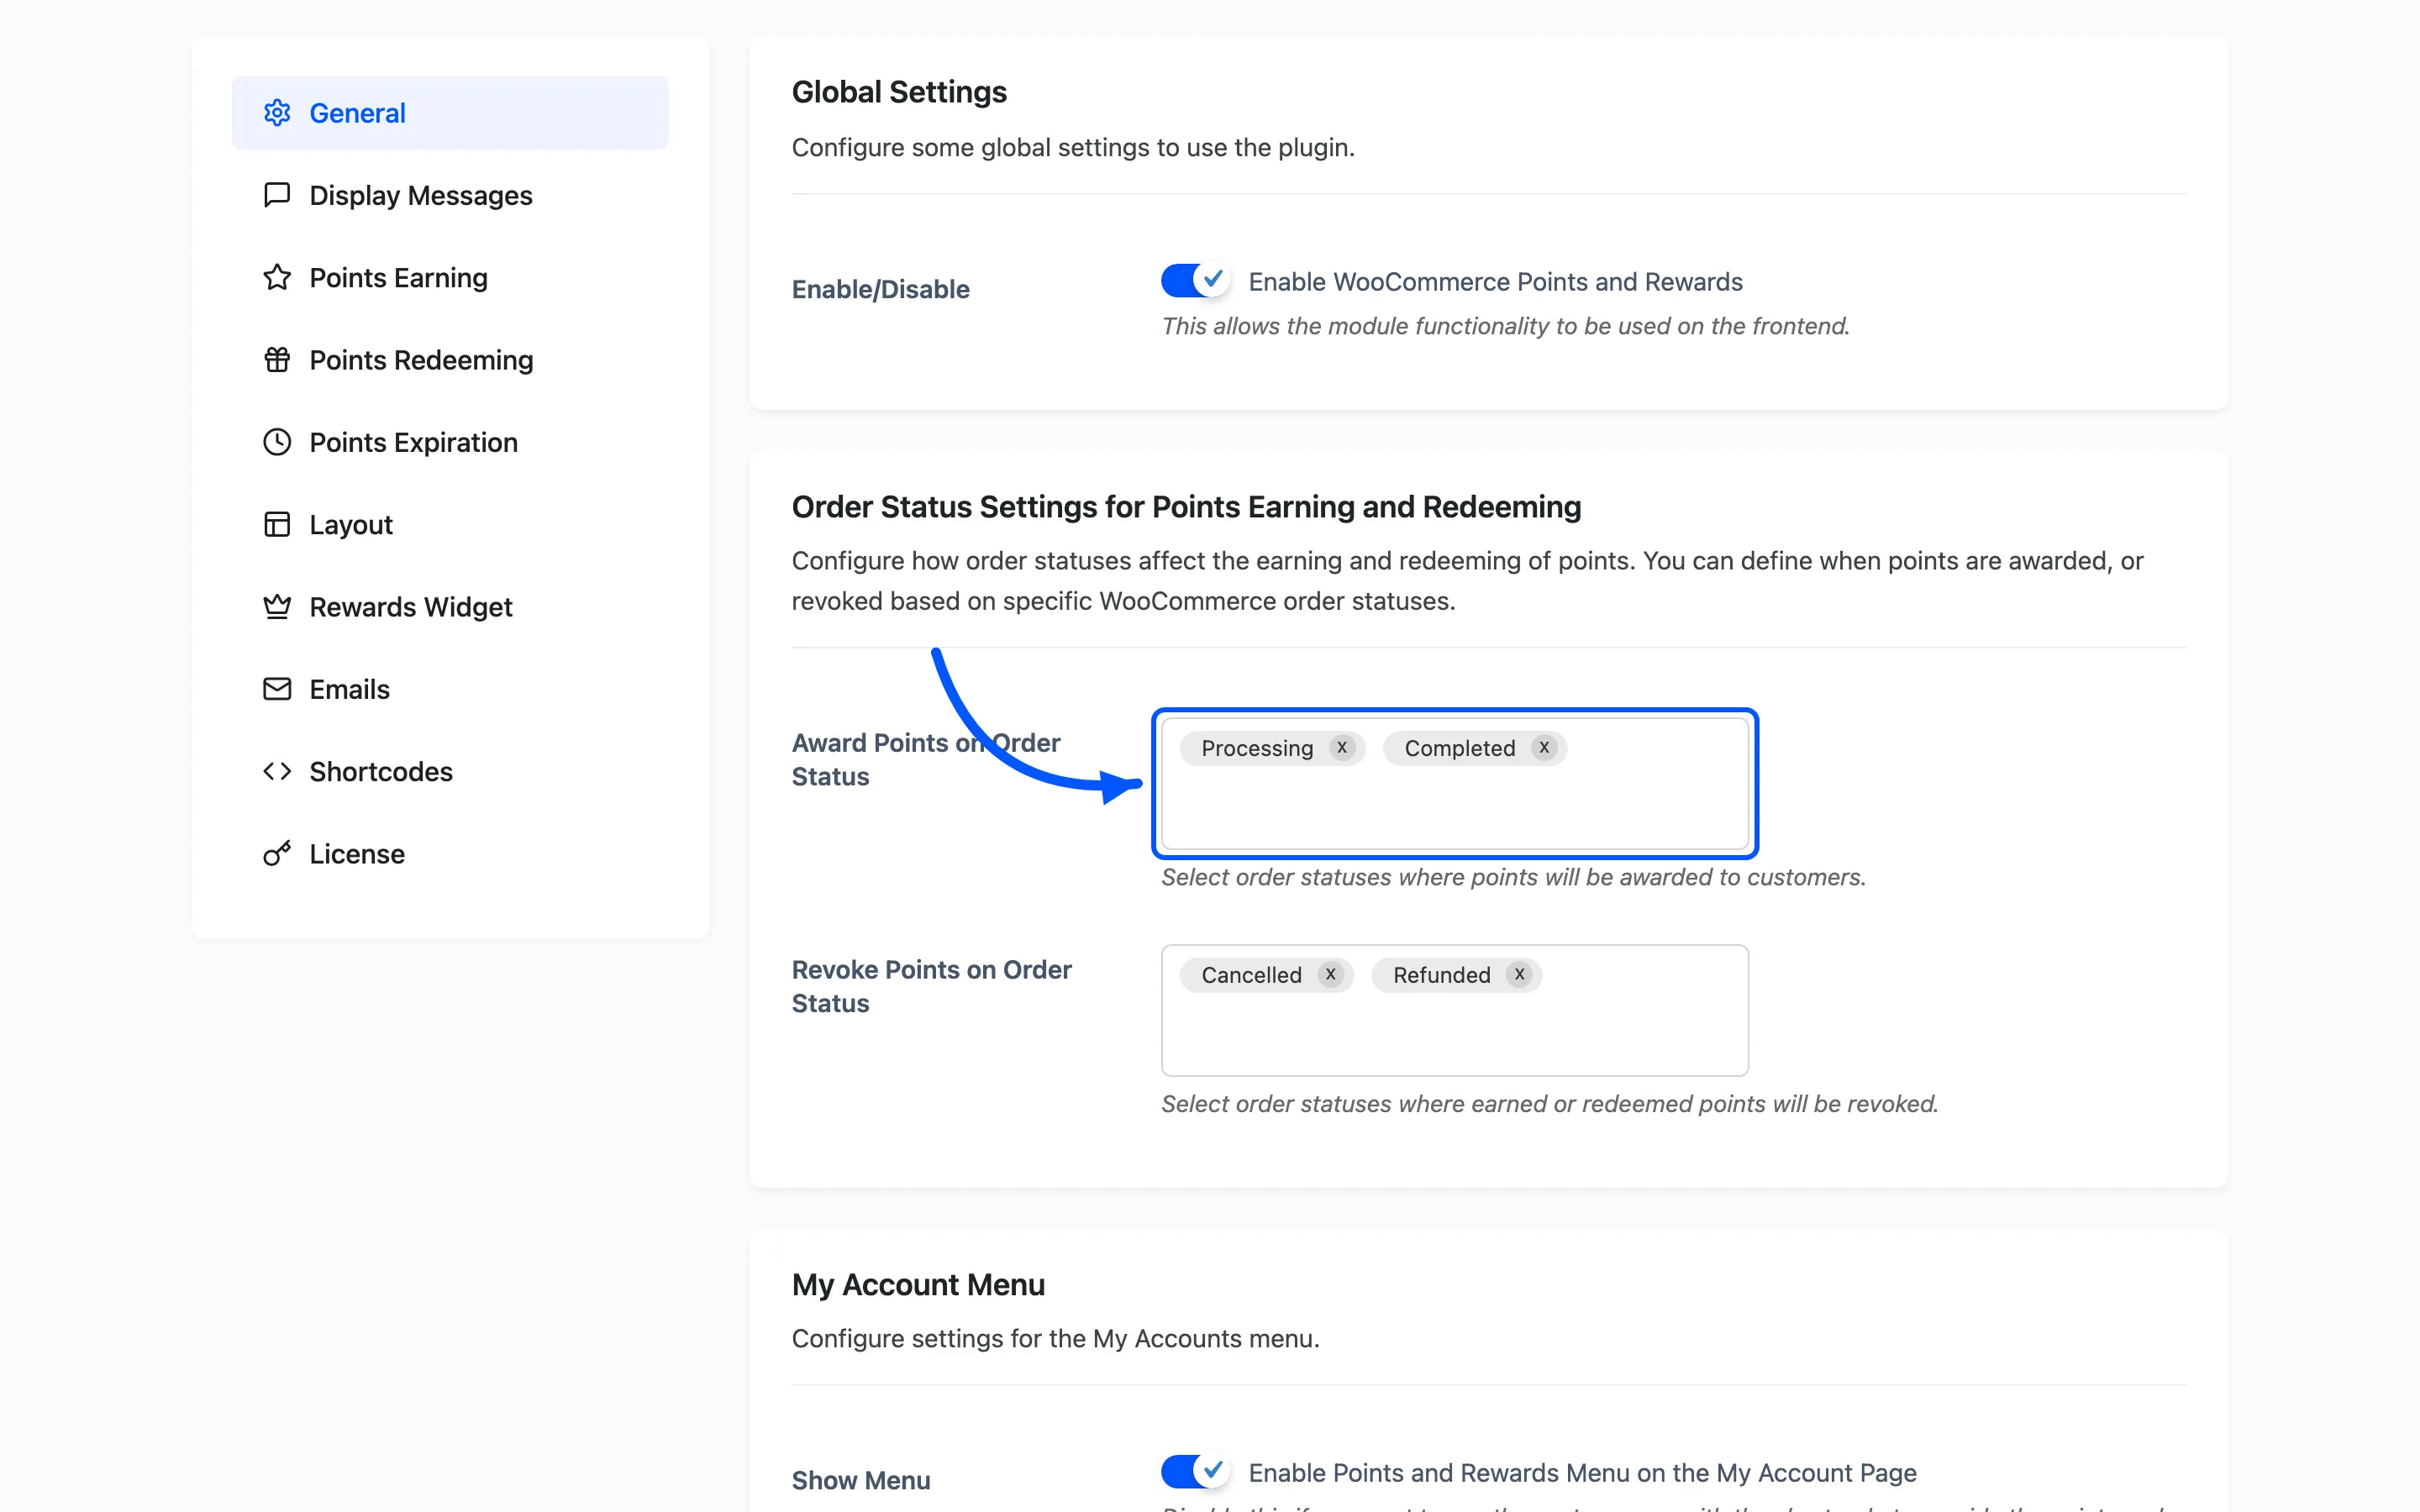
- Award Points on Order Status lists the statuses that grant points. The defaults are Processing and Completed. Award on Processing to grant points as soon as payment clears, or use Completed only if you hold points until fulfilment.
- Revoke Points on Order Status reverses points. The defaults Cancelled and Refunded make sure a returned order does not keep its points.
Click Save Changes.
Step 6: Place a test order
Section titled “Step 6: Place a test order”Buy a product as a test customer, then move the order to a status you set to award points. Open the customer’s My Account → Points and Rewards area and confirm the balance went up by the amount you expect.
If the total looks wrong, check your rate in Points Earning and whether taxes or shipping are counted. If nothing was awarded, confirm the order reached an Award Points on Order Status status.
Adjust points by hand
Section titled “Adjust points by hand”You can also grant points outside an order. Go to LoyaltyX → Users and click Manual Adjustment to add or deduct points for one customer or many, with a note. This is useful for goodwill gestures or fixing a balance. See Manual Points Adjustment for the full walkthrough.
Where to go next
Section titled “Where to go next”- How to set up points redemption so customers can spend what they earn.
- Points Earning Settings for a reference on every field.