

How to Set Up Loyalty Tiers (Pro)
Loyalty tiers give customers a goal beyond the next discount. As they earn, they climb ranks, collect badges, and can earn faster at higher levels. This guide builds a tiered program in LoyaltyX Pro.
Before you start
Section titled “Before you start”Have your tier names and badge images ready. A simple three-tier structure, such as Silver, Gold and Platinum, is enough to start. Set up earning first, so customers have points that move them up.
Step 1: Open Levels and Badges
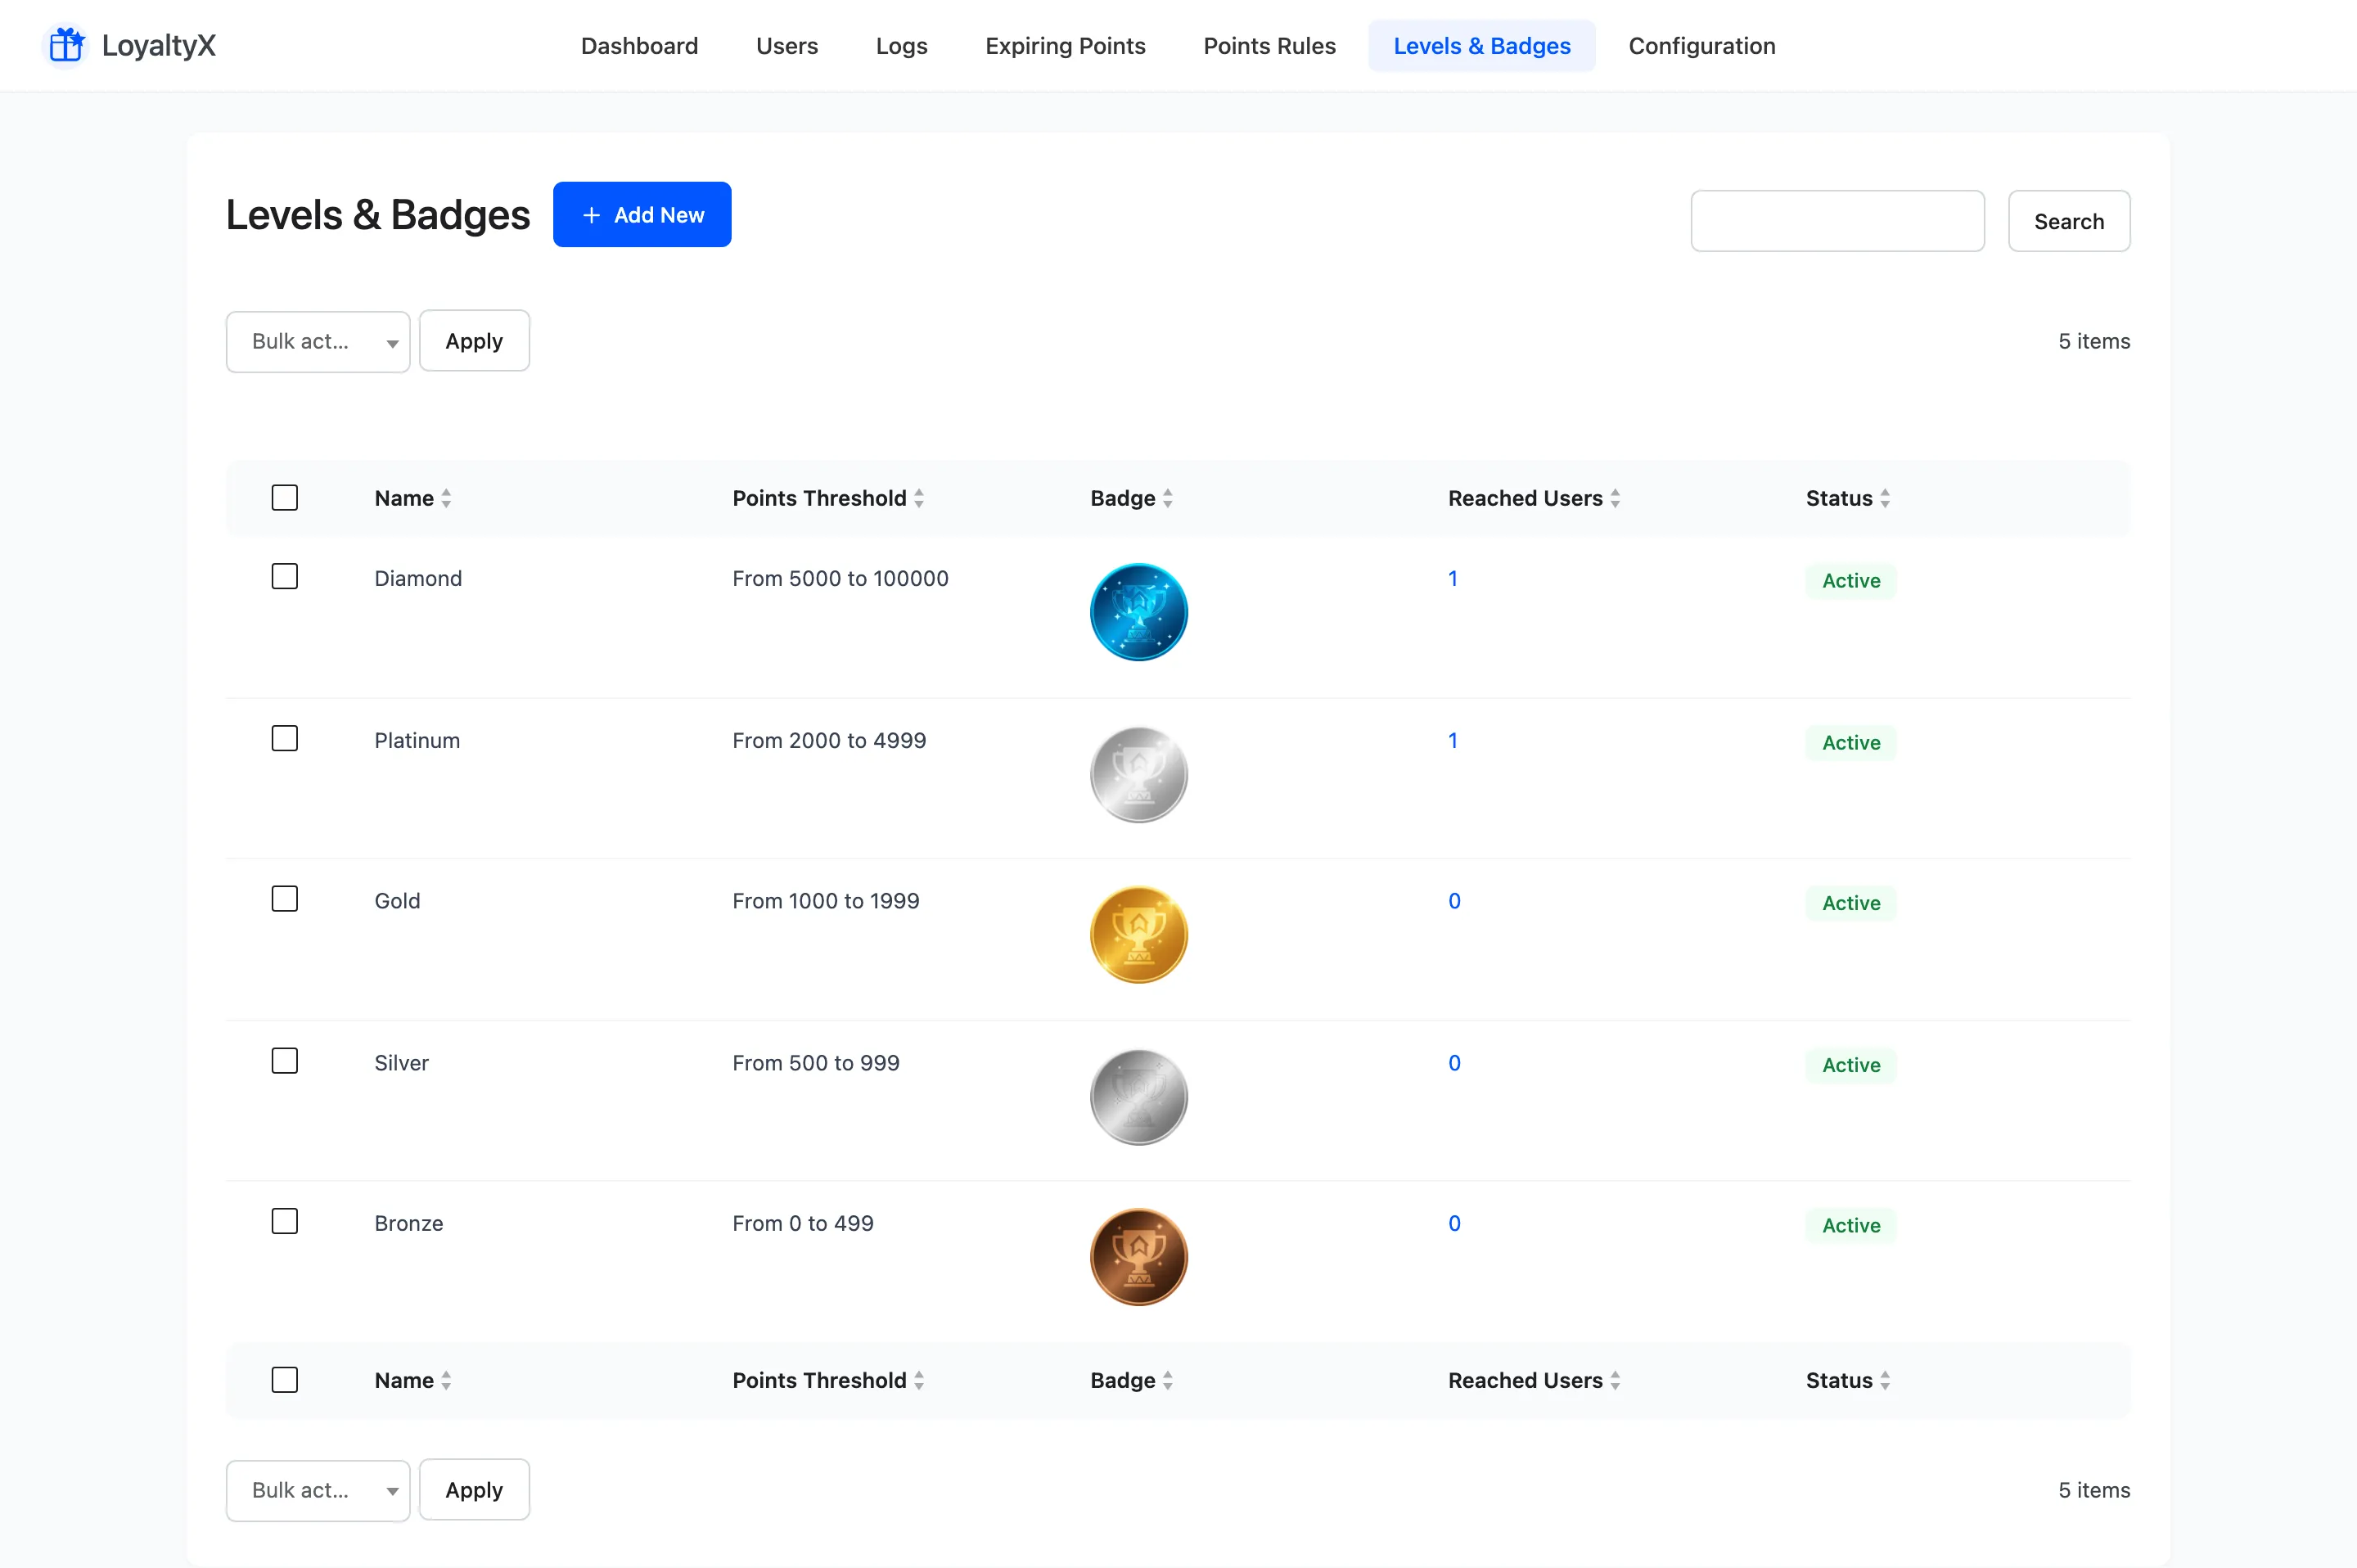
Section titled “Step 1: Open Levels and Badges”Go to DevDiggers Plugins → LoyaltyX, then open the Levels & Badges tab.
Step 2: Create your tiers
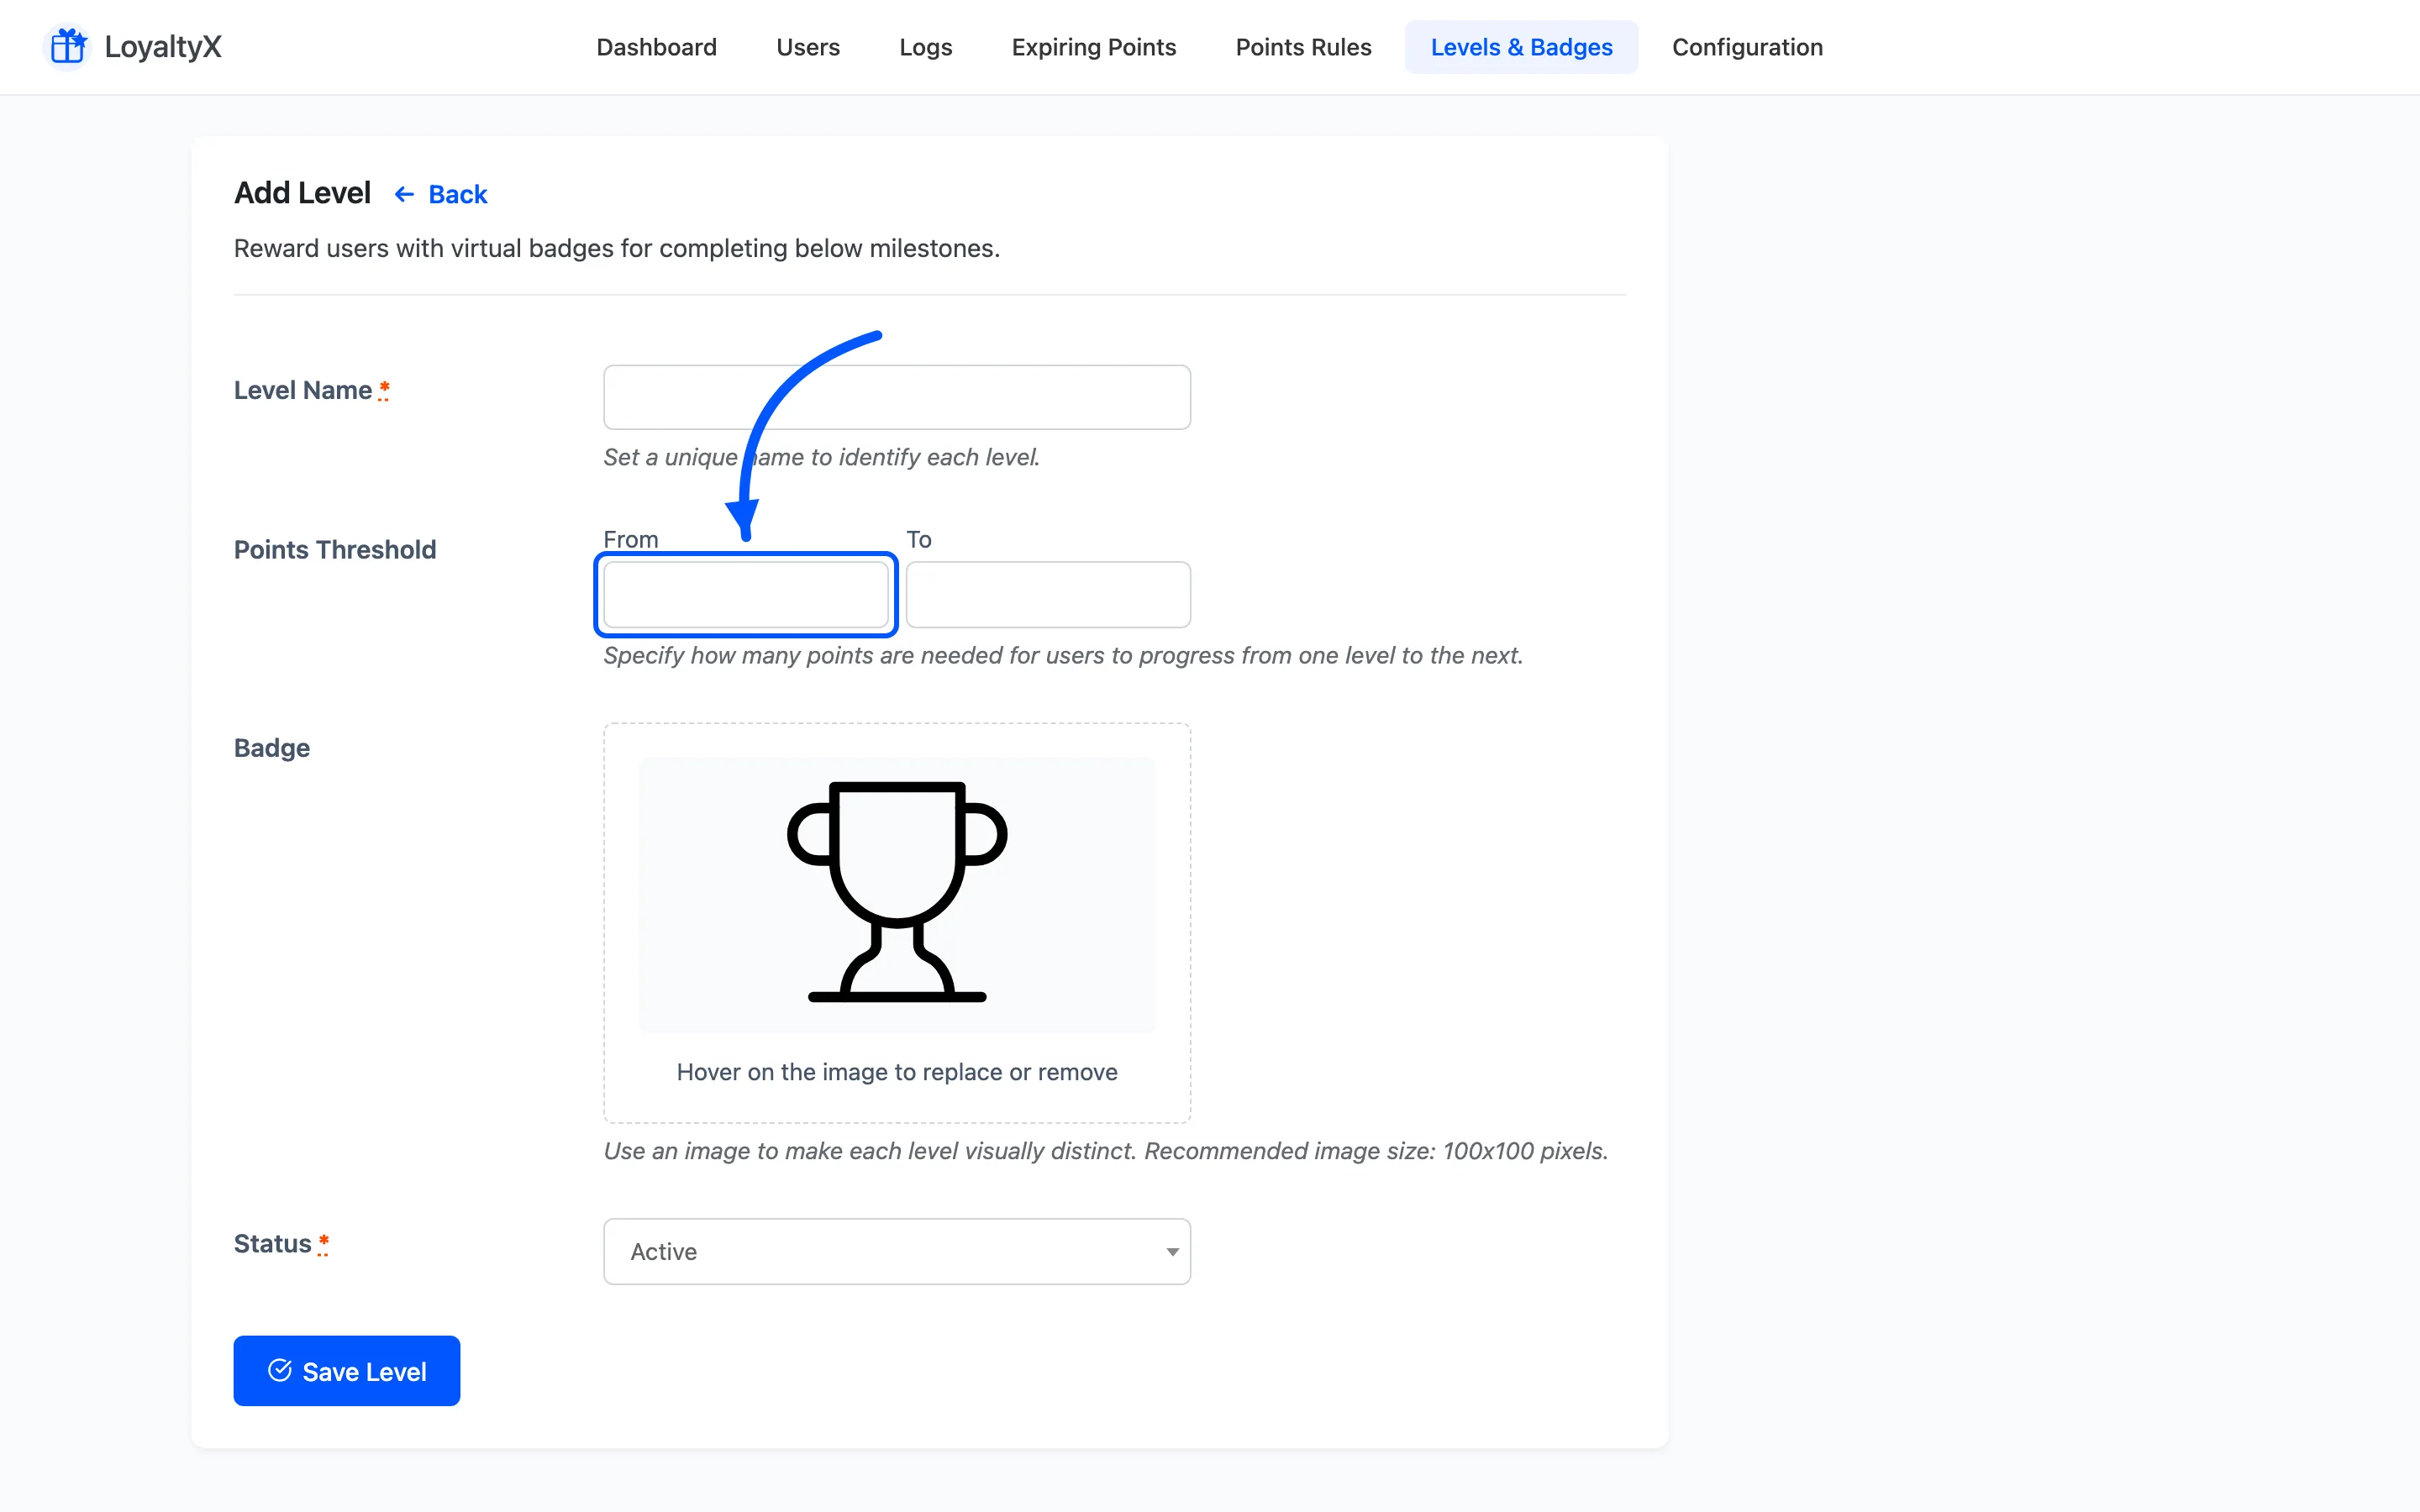
Section titled “Step 2: Create your tiers”Click Add New for each tier and set:
- Level Name, such as Gold.
- Points Threshold, the From and To points range that puts a customer in the tier.
- Badge, the image members at that tier display. Use 100x100 pixels, or leave it empty for the default badge.
- Status, which you set to Active.
Space your thresholds so each tier feels reachable but takes real spending, and make the ranges tile the whole scale. A working three-tier set is Silver 0 to 1999, Gold 2000 to 4999, Platinum 5000 to 100000.
Step 3: Add a level-up reward
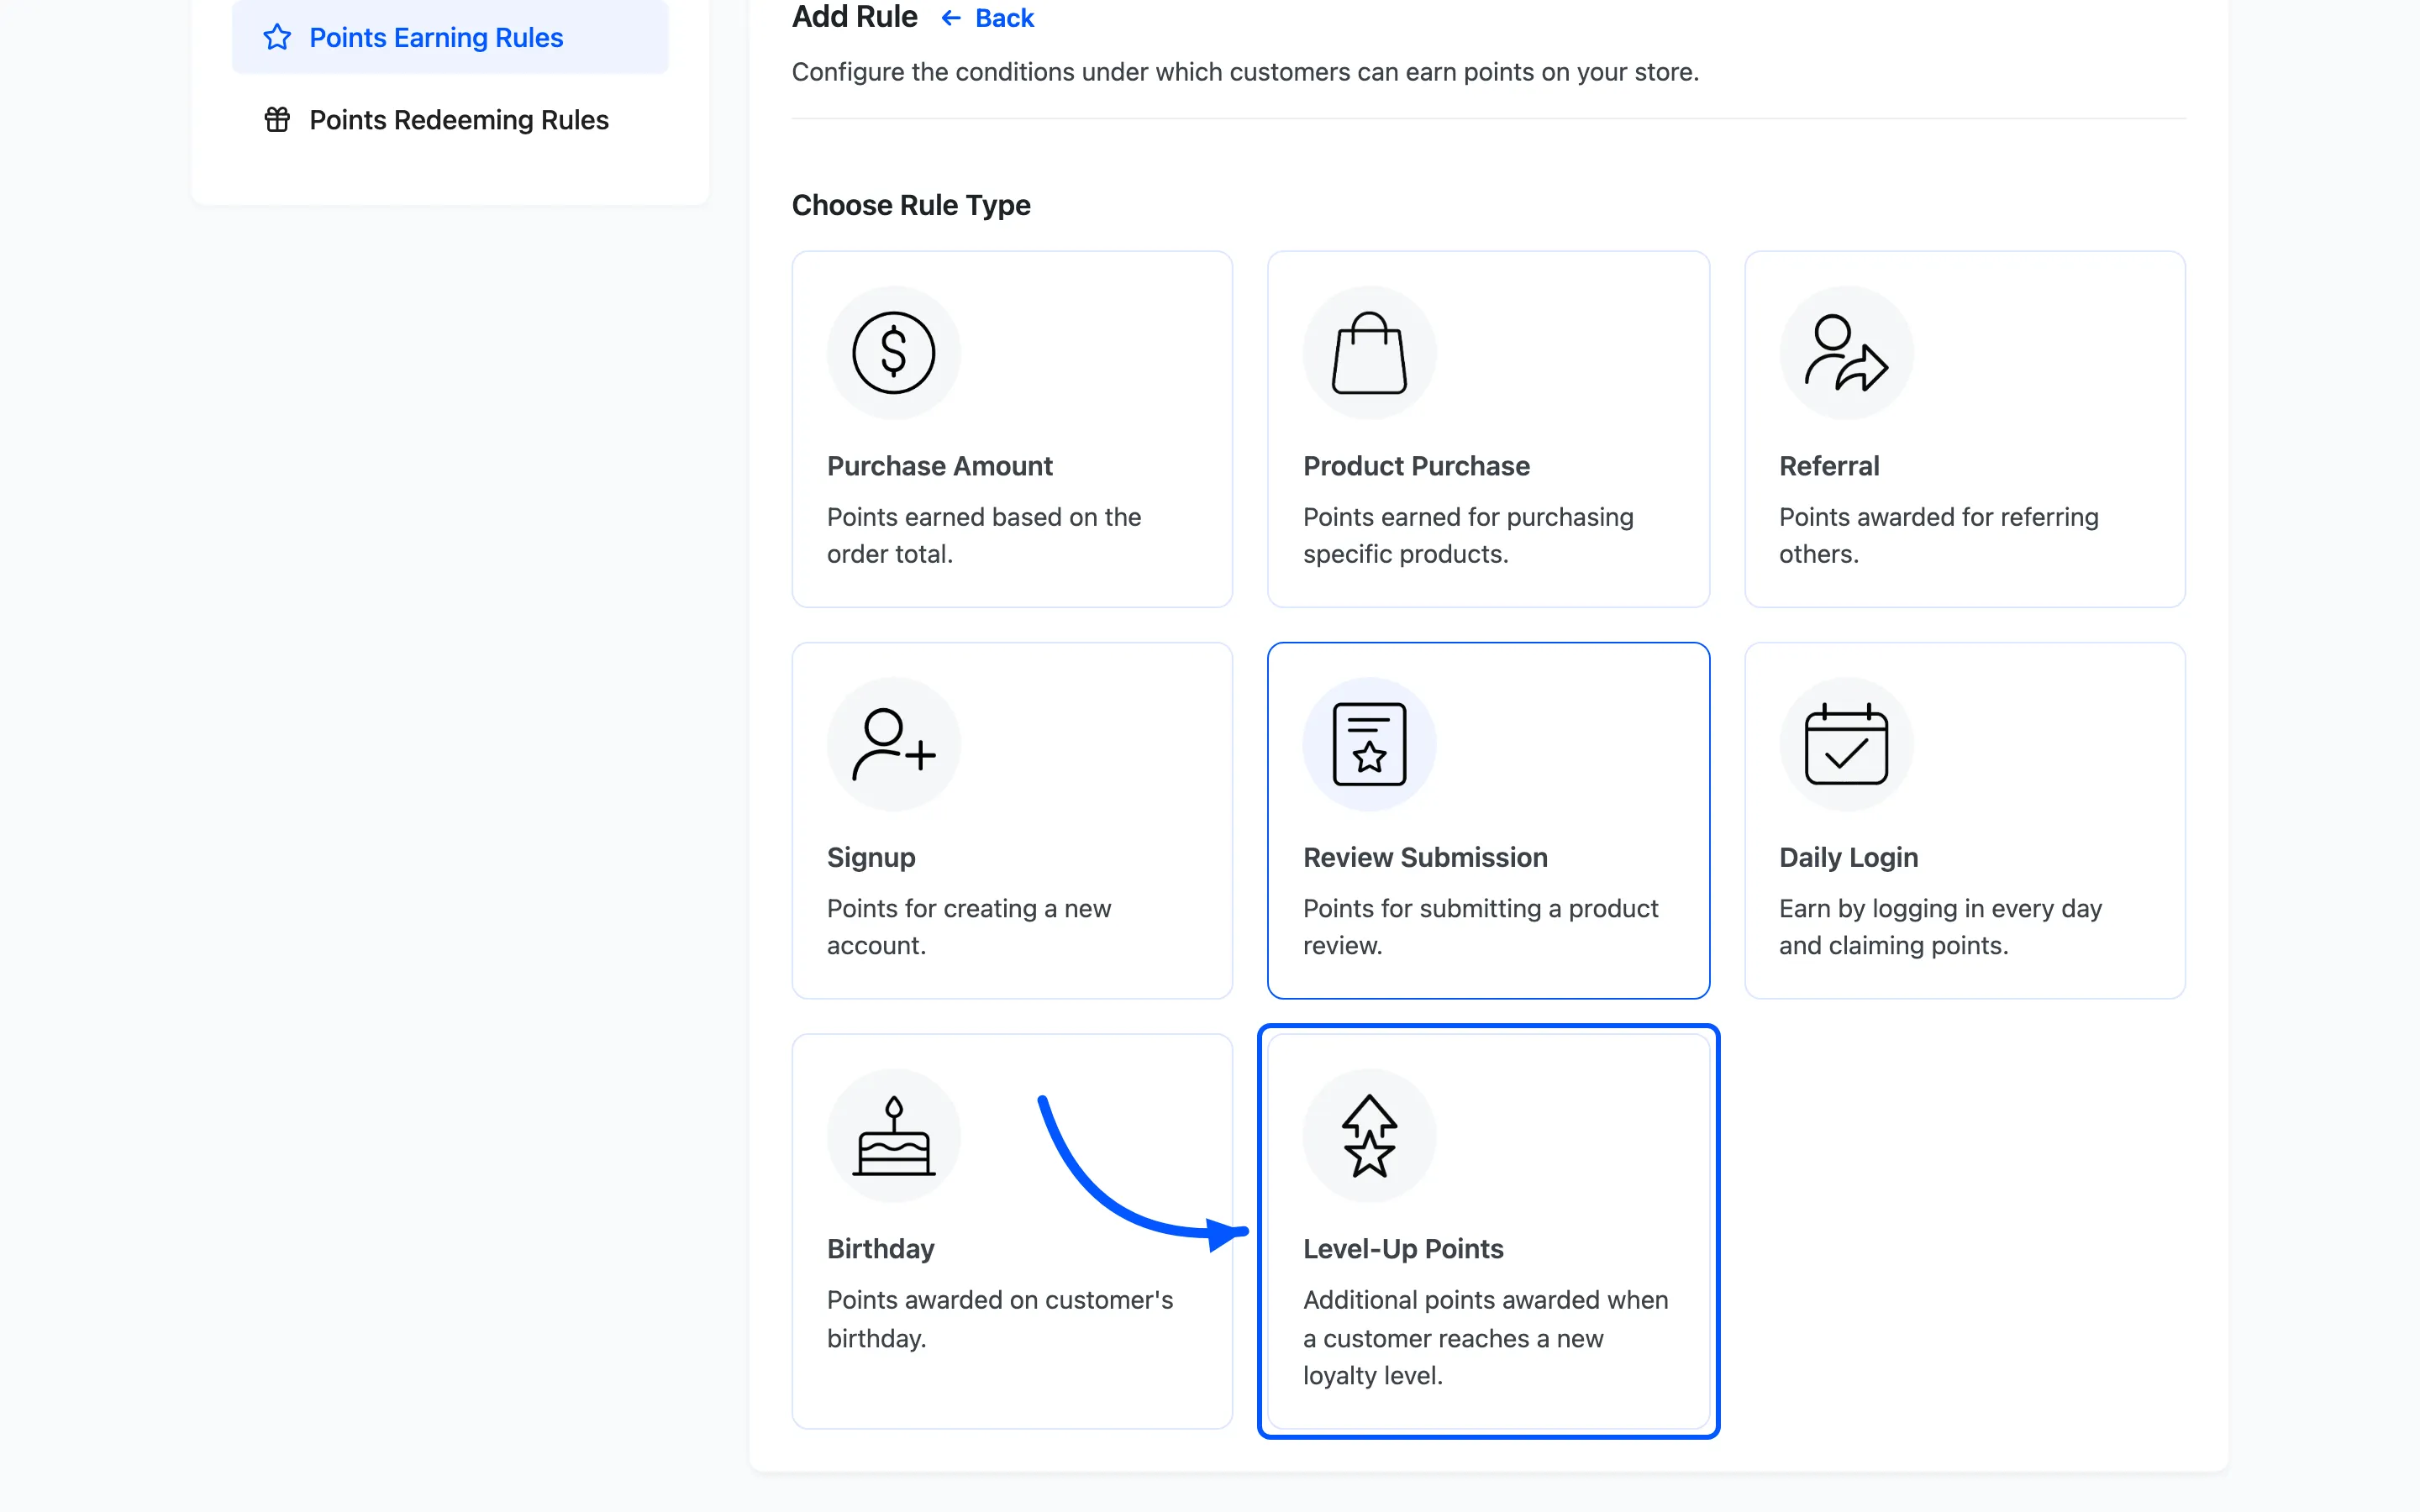
Section titled “Step 3: Add a level-up reward”A tier is more motivating when reaching it pays off. Go to Points Rules → Points Earning and click Add New. On the Choose Rule Type screen, pick Level-Up Points. The rule then shows Configure Level Points, where you set a separate bonus for each level you created in Step 2. That is how reaching Gold can pay more than reaching Silver.
Tiers also work as a condition on any other earning rule. Every rule form carries a Choose Levels field under its conditions. So a double-points weekend can run for Gold and Platinum members only, leaving the rest of the store on the normal rate.
Step 4: Set the level-up email
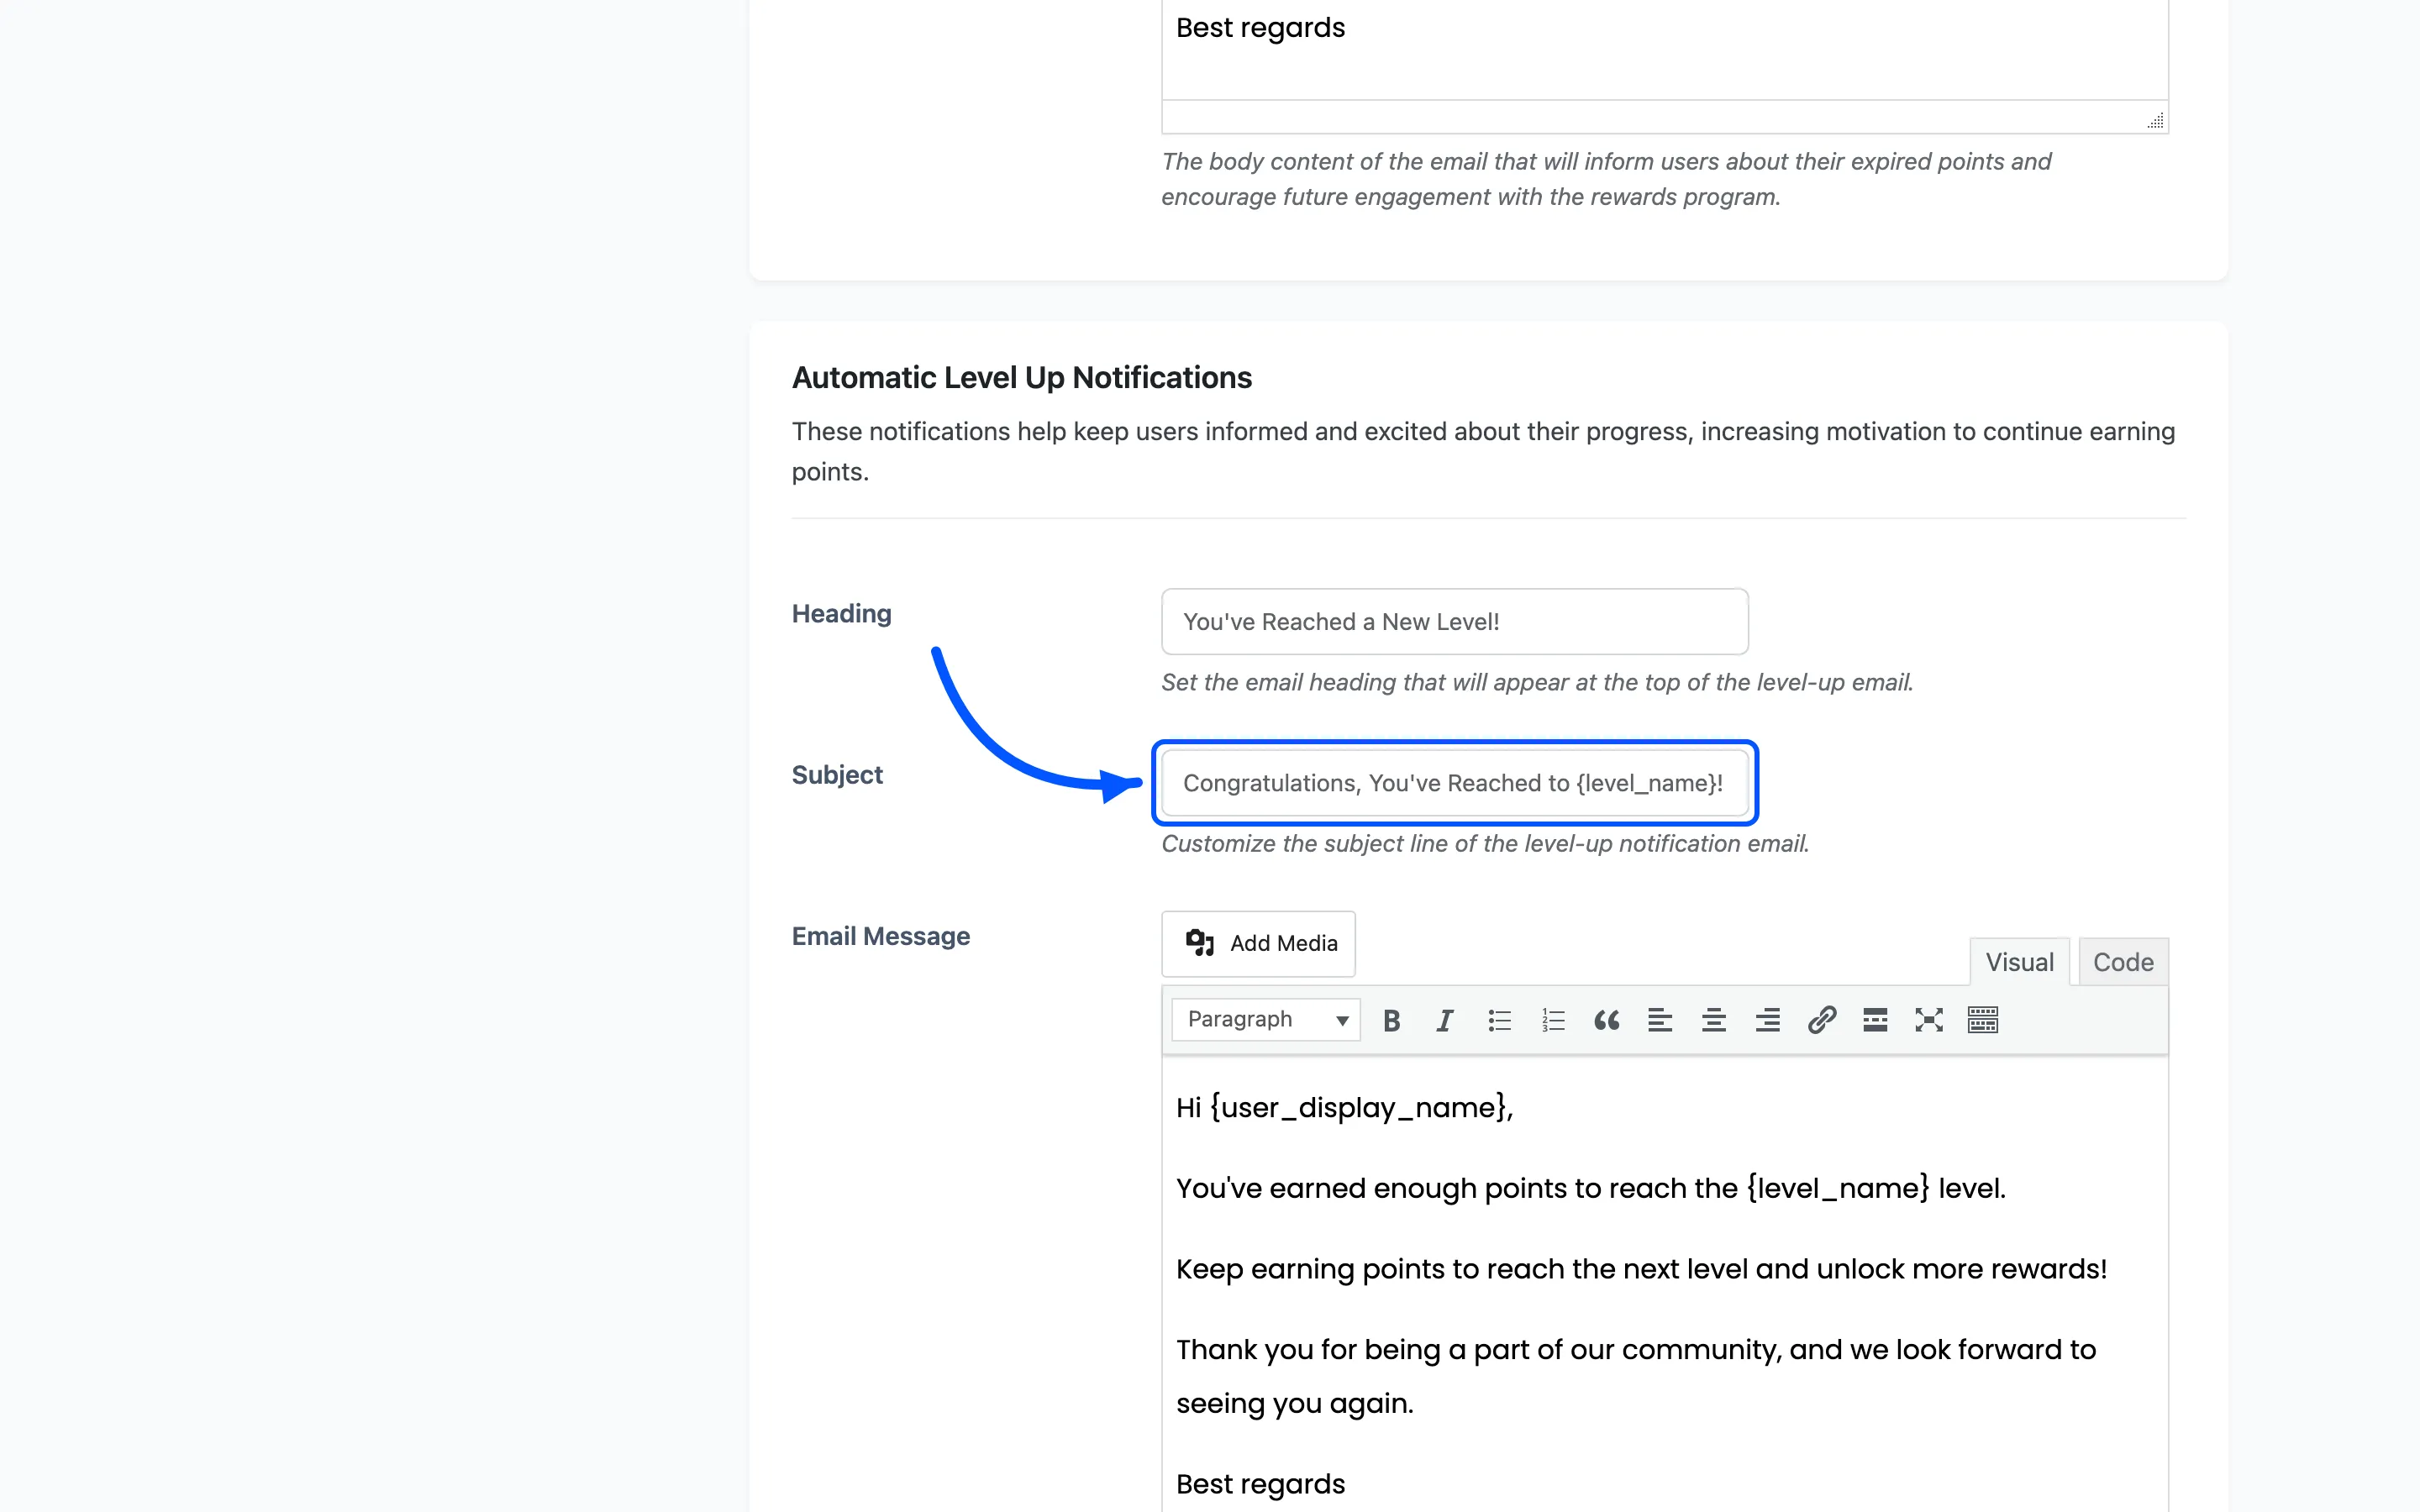
Section titled “Step 4: Set the level-up email”Tell customers when they climb. Go to Configuration → Emails and edit Automatic Level Up Notifications. Set the Heading, Subject and Email Message to congratulate the customer and name their new tier.
Step 5: Activate and test
Section titled “Step 5: Activate and test”Confirm the tiers work end to end:
- Sign in as a test customer below your first threshold.
- Earn or manually add enough points to pass it. Use LoyaltyX → Users → View to adjust a balance quickly.
- Confirm the customer’s Level updates on the Users list and in their rewards area.
- Check that the level-up email arrives.
If a customer does not move up, re-check the Points Threshold on each tier and that the tiers are active.
What the customer sees
Section titled “What the customer sees”The customer opens the rewards area, from My Account or the floating widget, and opens the My Level tab. It shows their badge, their current tier, and how many points are left to reach the next one, with a progress bar.

That remaining count is what makes tiers work. A customer who can see they are 116 points from the next rank has a reason to place one more order. On the top tier the panel says so instead, with no progress bar.
Where to go next
Section titled “Where to go next”- Levels and Badges for a reference on the tier fields.
- How to configure points expiration to keep balances active.