

Expiring Points (Pro)
The Expiring Points tab shows balances that are counting down to their expiry date. Use it to plan a reminder campaign or to see who is about to lose points.
Open the Expiring Points tab
Section titled “Open the Expiring Points tab”Go to DevDiggers Plugins → LoyaltyX, then open the Expiring Points tab.
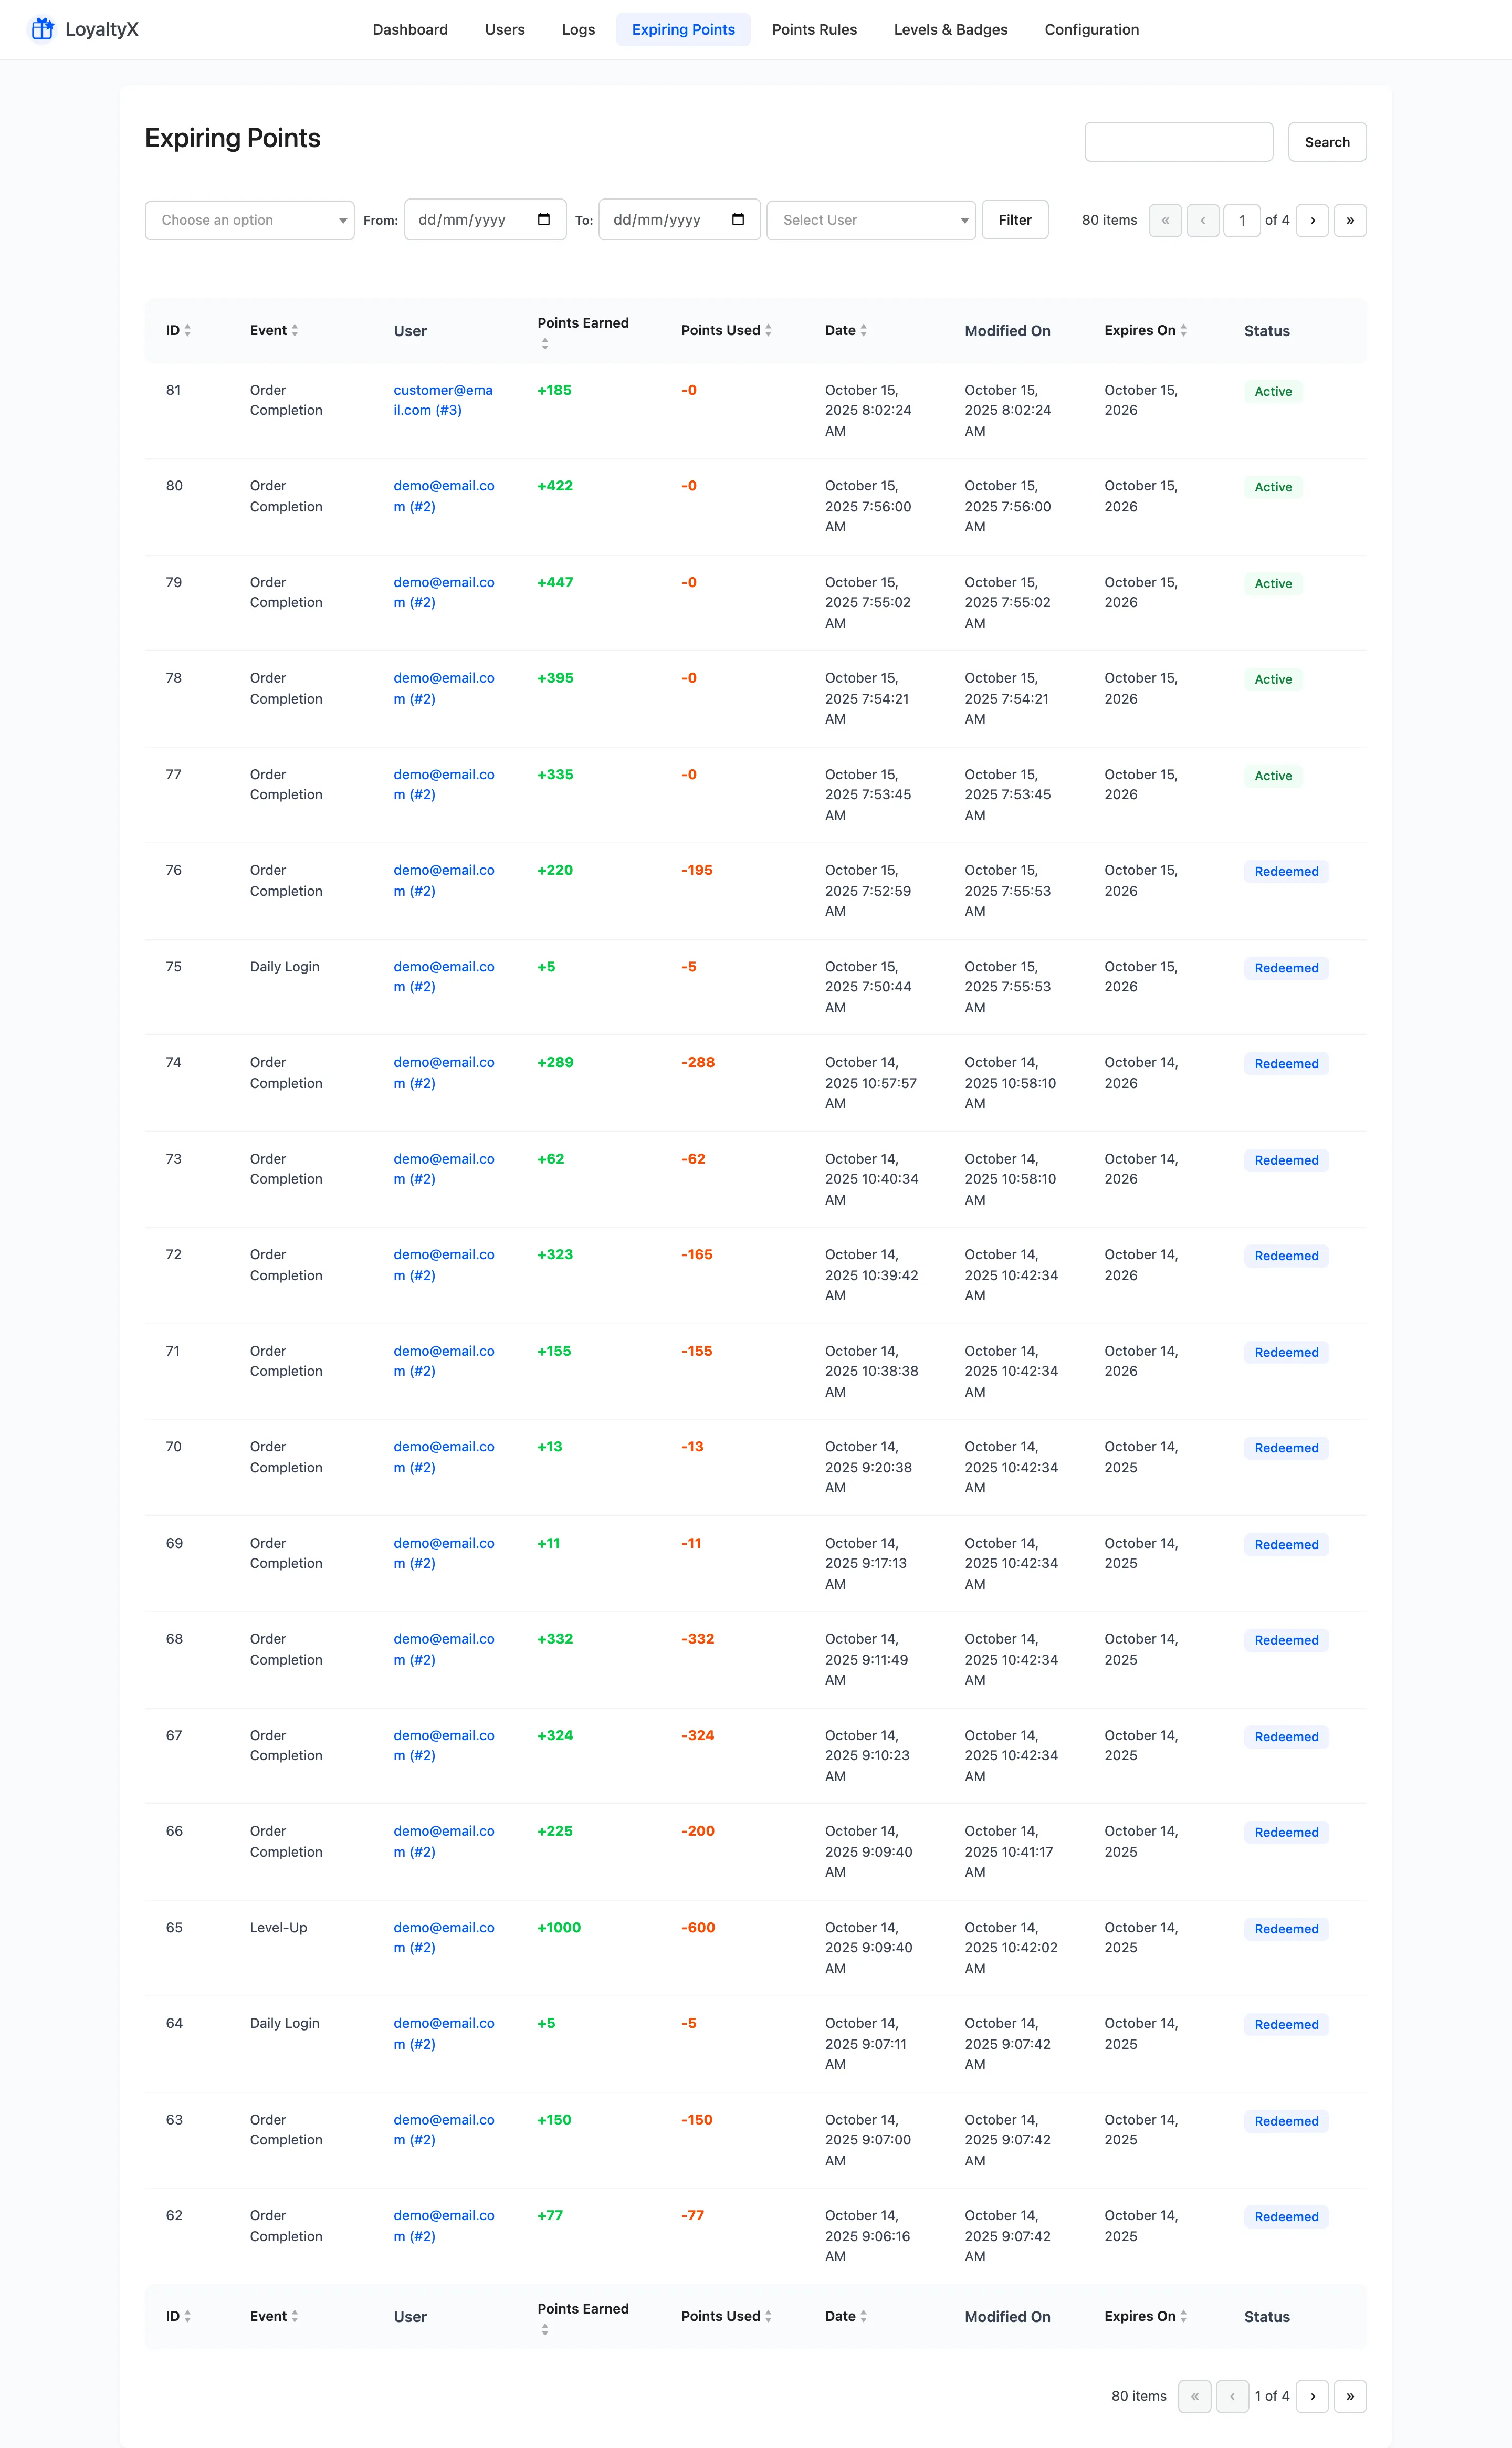
Read the list
Section titled “Read the list”Each row tracks one batch of points earned by one customer. The columns show:
- ID is the batch reference.
- Event is how the points were earned, such as Order Completion.
- User is the customer’s email with their user ID.
- Points Earned and Points Used show the original amount and how much of it has been spent,
such as
+422earned against-0used. - Date is when the points were earned and Modified On is the last change to the batch.
- Expires On is the date the remainder clears.
- Status is Active, Redeemed or Expired.
Points are spent soonest-to-expire first. LoyaltyX takes from the batch with the nearest Expires On. When two share a date it falls back to the oldest batch, and never-expiring points come last. That order is deliberate: a customer’s redemption always burns the points they were about to lose. A batch flips to Redeemed once it is fully spent.
Filter the list
Section titled “Filter the list”The All Status dropdown narrows the list to Active, Redeemed or Expired batches, and the user filter shows one customer. Sort by Points Earned, Expires On or Date with the column arrows. Filtering to Active and sorting by Expires On gives you the campaign list: everyone about to lose points, soonest first.
Turn expiration on first
Section titled “Turn expiration on first”This tab fills in only after you enable expiration under Configuration → Points Expiration. Set the expiry window there, then batches appear here as they earn their expiry dates.
Where to go next
Section titled “Where to go next”- Points Expiration Settings to set the expiry window and reminder email.
- How to configure points expiration for a full walkthrough.