

Export Points to CSV (Pro)
Import brings balances in. Export sends them out. Use it to back up balances before a big change, to report on your program in a spreadsheet, or to move data to another store.
Open the Export wizard
Section titled “Open the Export wizard”Go to DevDiggers Plugins → LoyaltyX, open the Users tab, then click Export at the top of the list, next to Import.
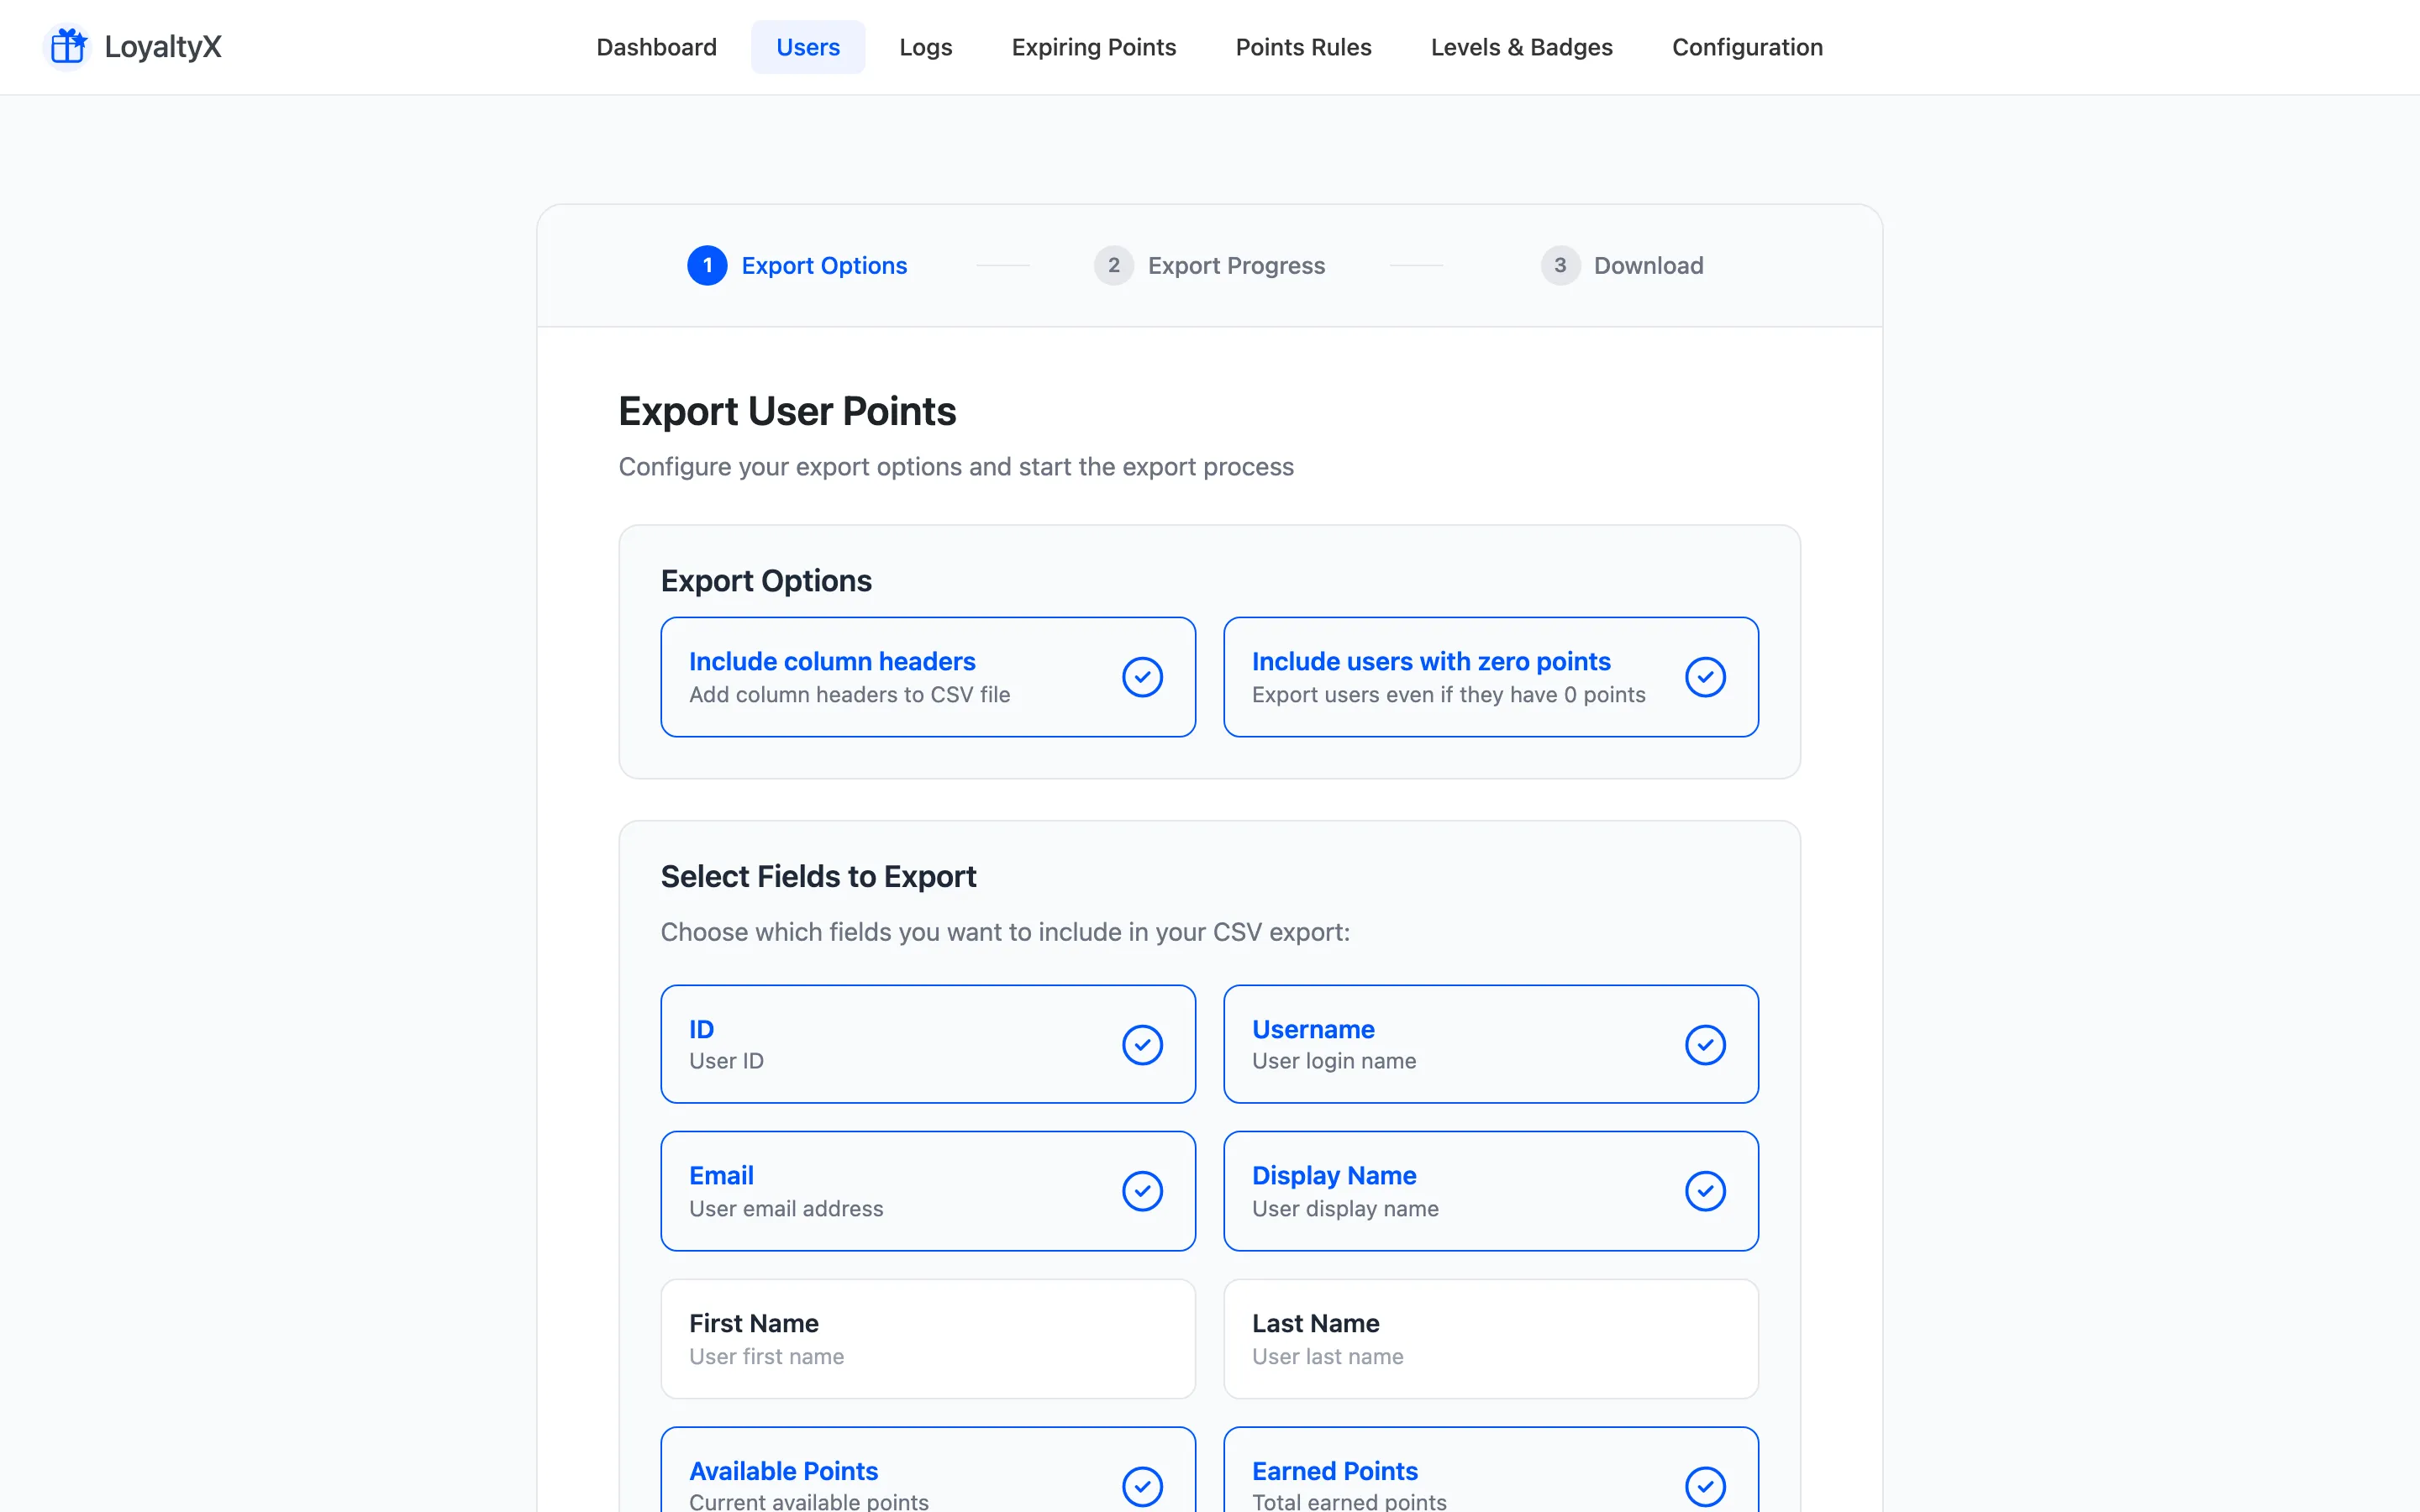
The export runs in three steps: Export Options, Export Progress and Download.
Step 1: Set the export options
Section titled “Step 1: Set the export options”Two options sit at the top, both on by default:
- Include column headers writes a header row into the CSV. Leave it on unless the system you are feeding the file to expects raw rows.
- Include users with zero points exports every customer, not only those holding a balance. Turn it off to get a file of active members only.
Step 2: Choose the fields
Section titled “Step 2: Choose the fields”Under Select Fields to Export, tick the columns you want. Ten are available:
| Field | What it holds |
|---|---|
| ID | The WordPress user ID |
| Username | The user login name |
| The user email address | |
| Display Name | The name shown on the account |
| First Name and Last Name | The billing name fields |
| Available Points | The balance the customer can spend now |
| Earned Points | The lifetime total earned |
| Last Description | The description on their most recent points event |
| Registration Date | When the account was created |
Pick the fields for the job. A backup wants Email, Available Points and Earned Points, because those are the columns Import Points can read back. A report for the marketing team probably wants the name fields and the registration date as well.
Step 3: Start the export and download
Section titled “Step 3: Start the export and download”Click Start Export. LoyaltyX works through your customers in batches and shows the count as it goes. The Download step then reports how many users were exported and how many held zero points. Download the file from there.
If the export fails, the wizard shows Export Failed with the reason and a Try Again button, so nothing is left half-written.
Round-trip with Import
Section titled “Round-trip with Import”Export the balances, edit them in a spreadsheet, then load them back through Import Points. Match your exported Email column to the import’s user identification field. Pick Override points on the import so the edited values replace the old ones rather than stacking on top.
Where to go next
Section titled “Where to go next”- Import Points from CSV to load balances from a file.
- Users and Balances to read balances on screen.