

The Customer Experience
A loyalty program only works if customers notice it, understand it, and use it. LoyaltyX puts the program in front of customers at every step of shopping. On the shop, on each product, in the cart and at checkout, and in their account. A floating widget follows them across the store.
This page walks the whole journey a customer sees, so you know exactly what each setting produces on the storefront. Every surface here is driven by a setting you control, and each section links to the tab that controls it.
Points on the shop page
Section titled “Points on the shop page”The first place a customer meets the program is the shop. LoyaltyX adds a short “Earn points” message to every product card, so a shopper sees the reward while browsing, before they open a single product.
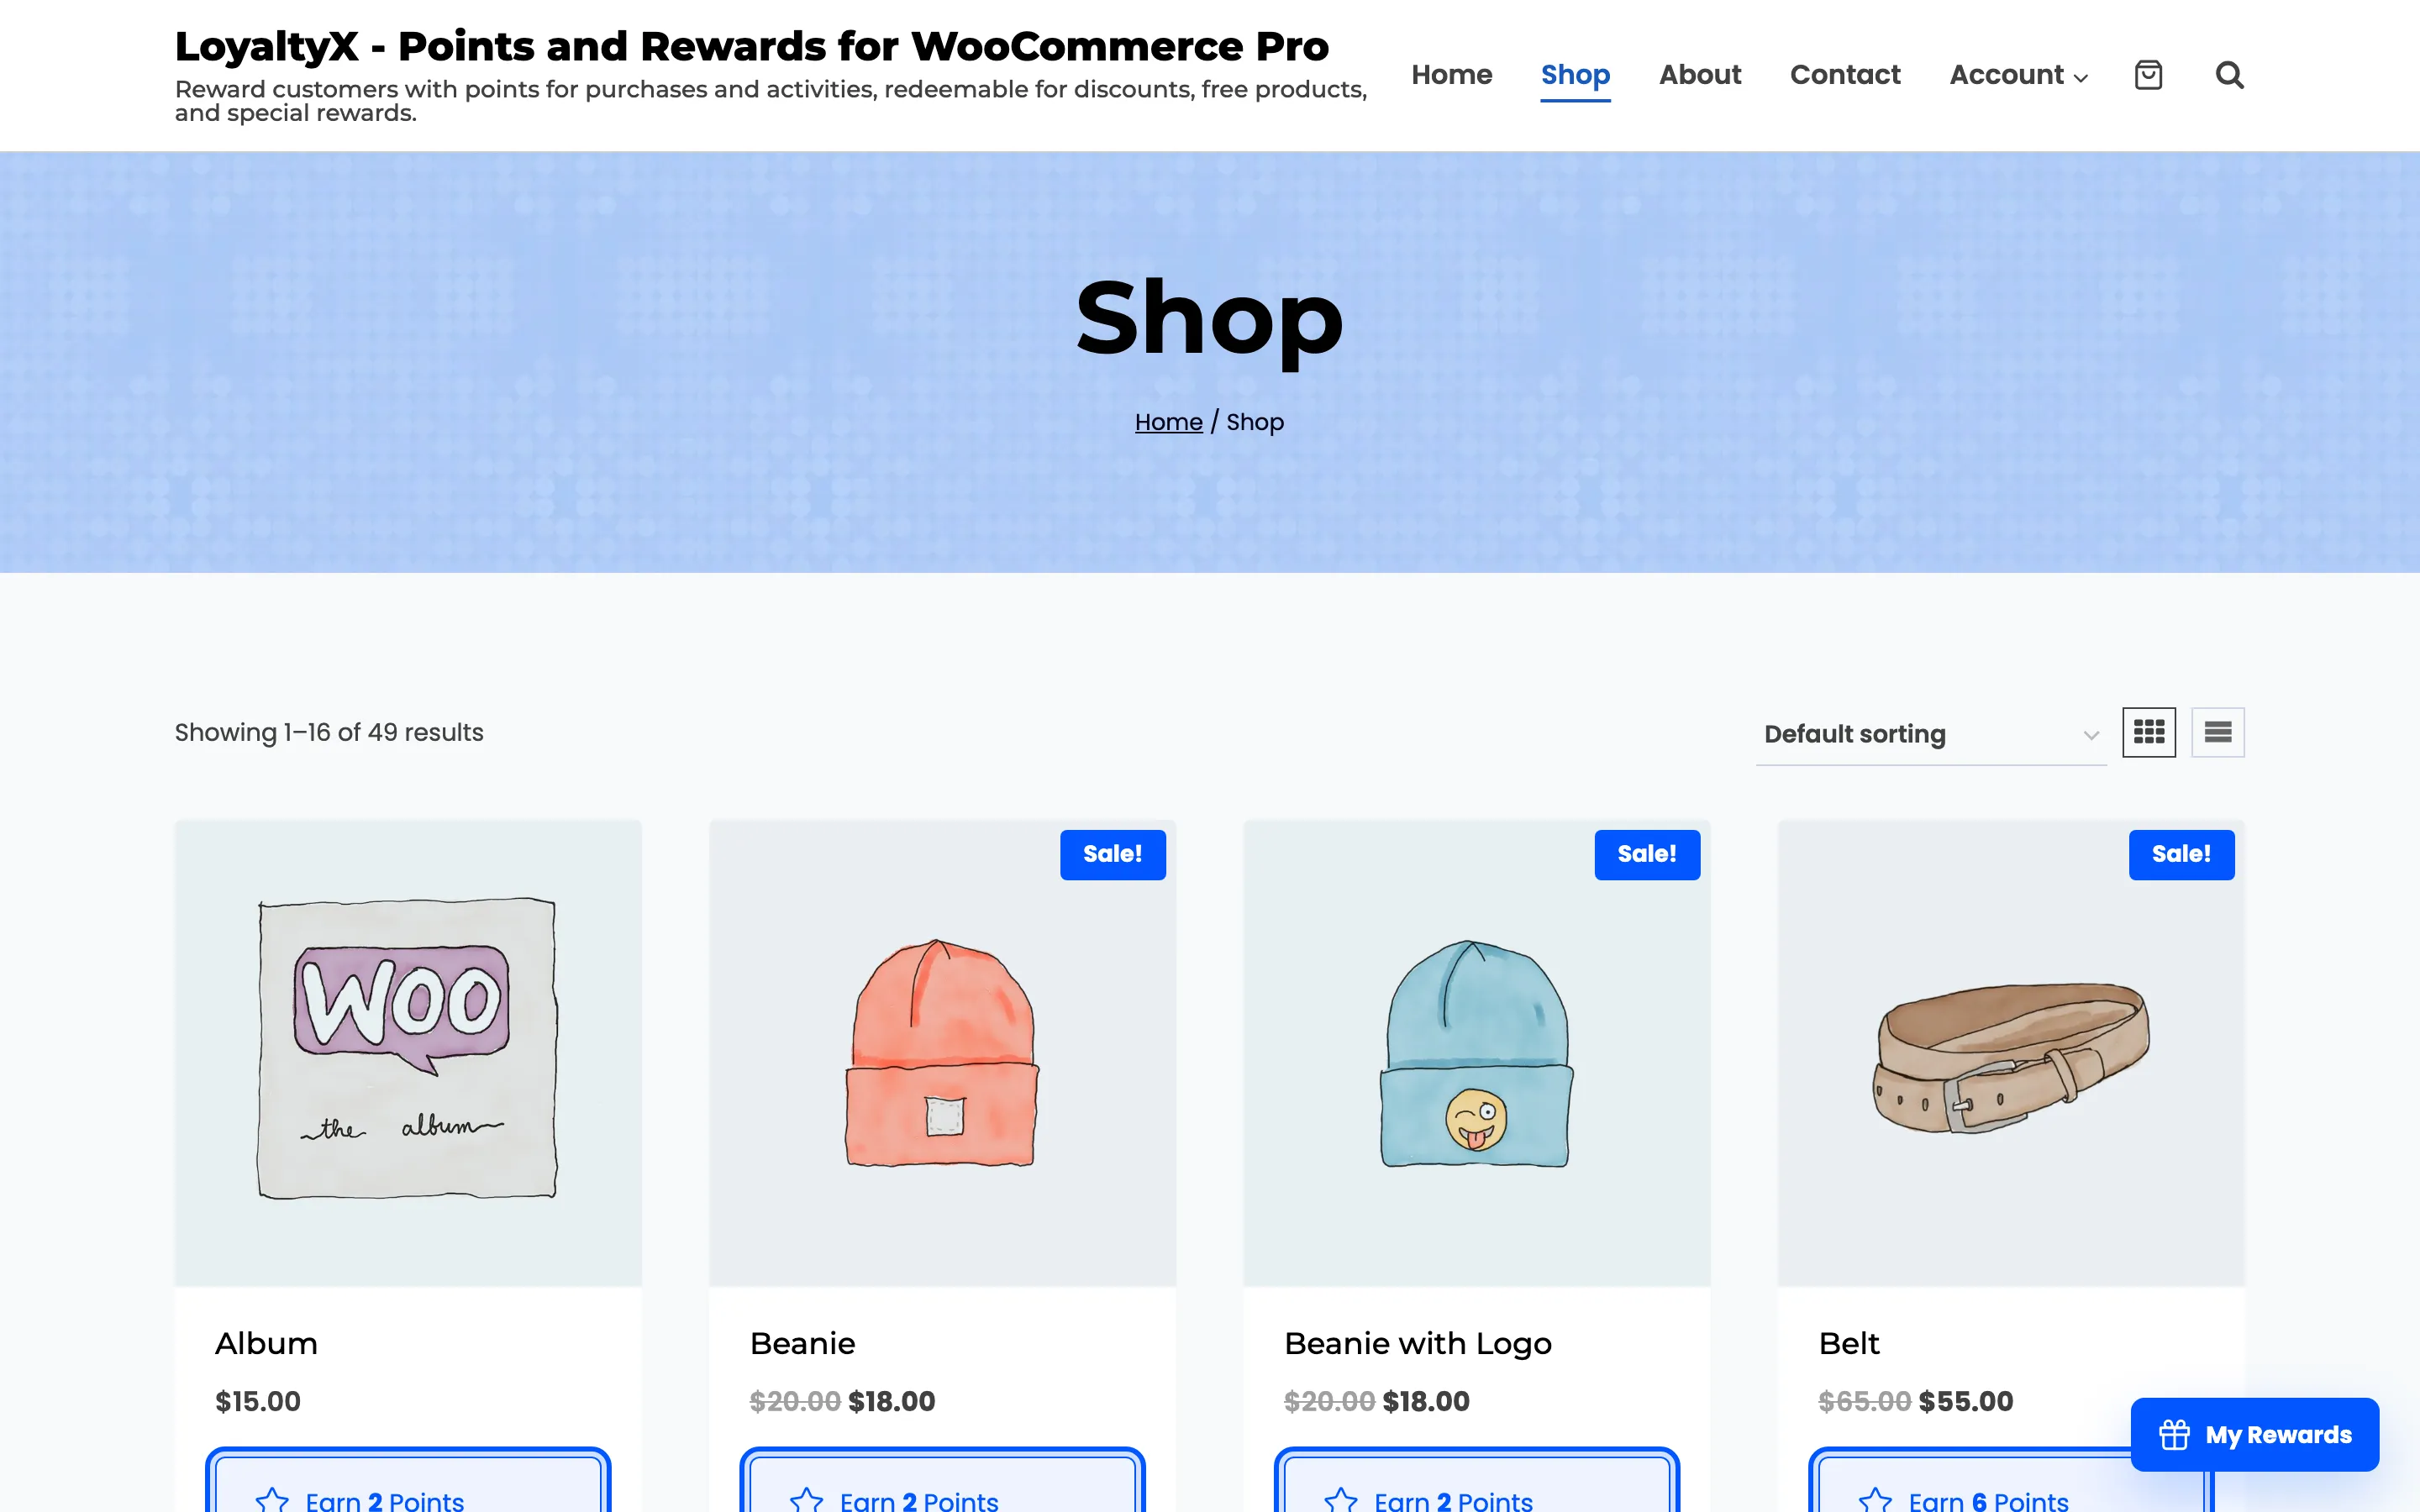
The message reads from the product’s price and your earning rate, so it updates on its own. You turn it on and set its wording and position under Display Messages, in the Shop section.
Points on the product page
Section titled “Points on the product page”On a single product page, the same message appears near the price. This is the moment a customer is deciding to buy, so showing the reward here nudges the purchase.
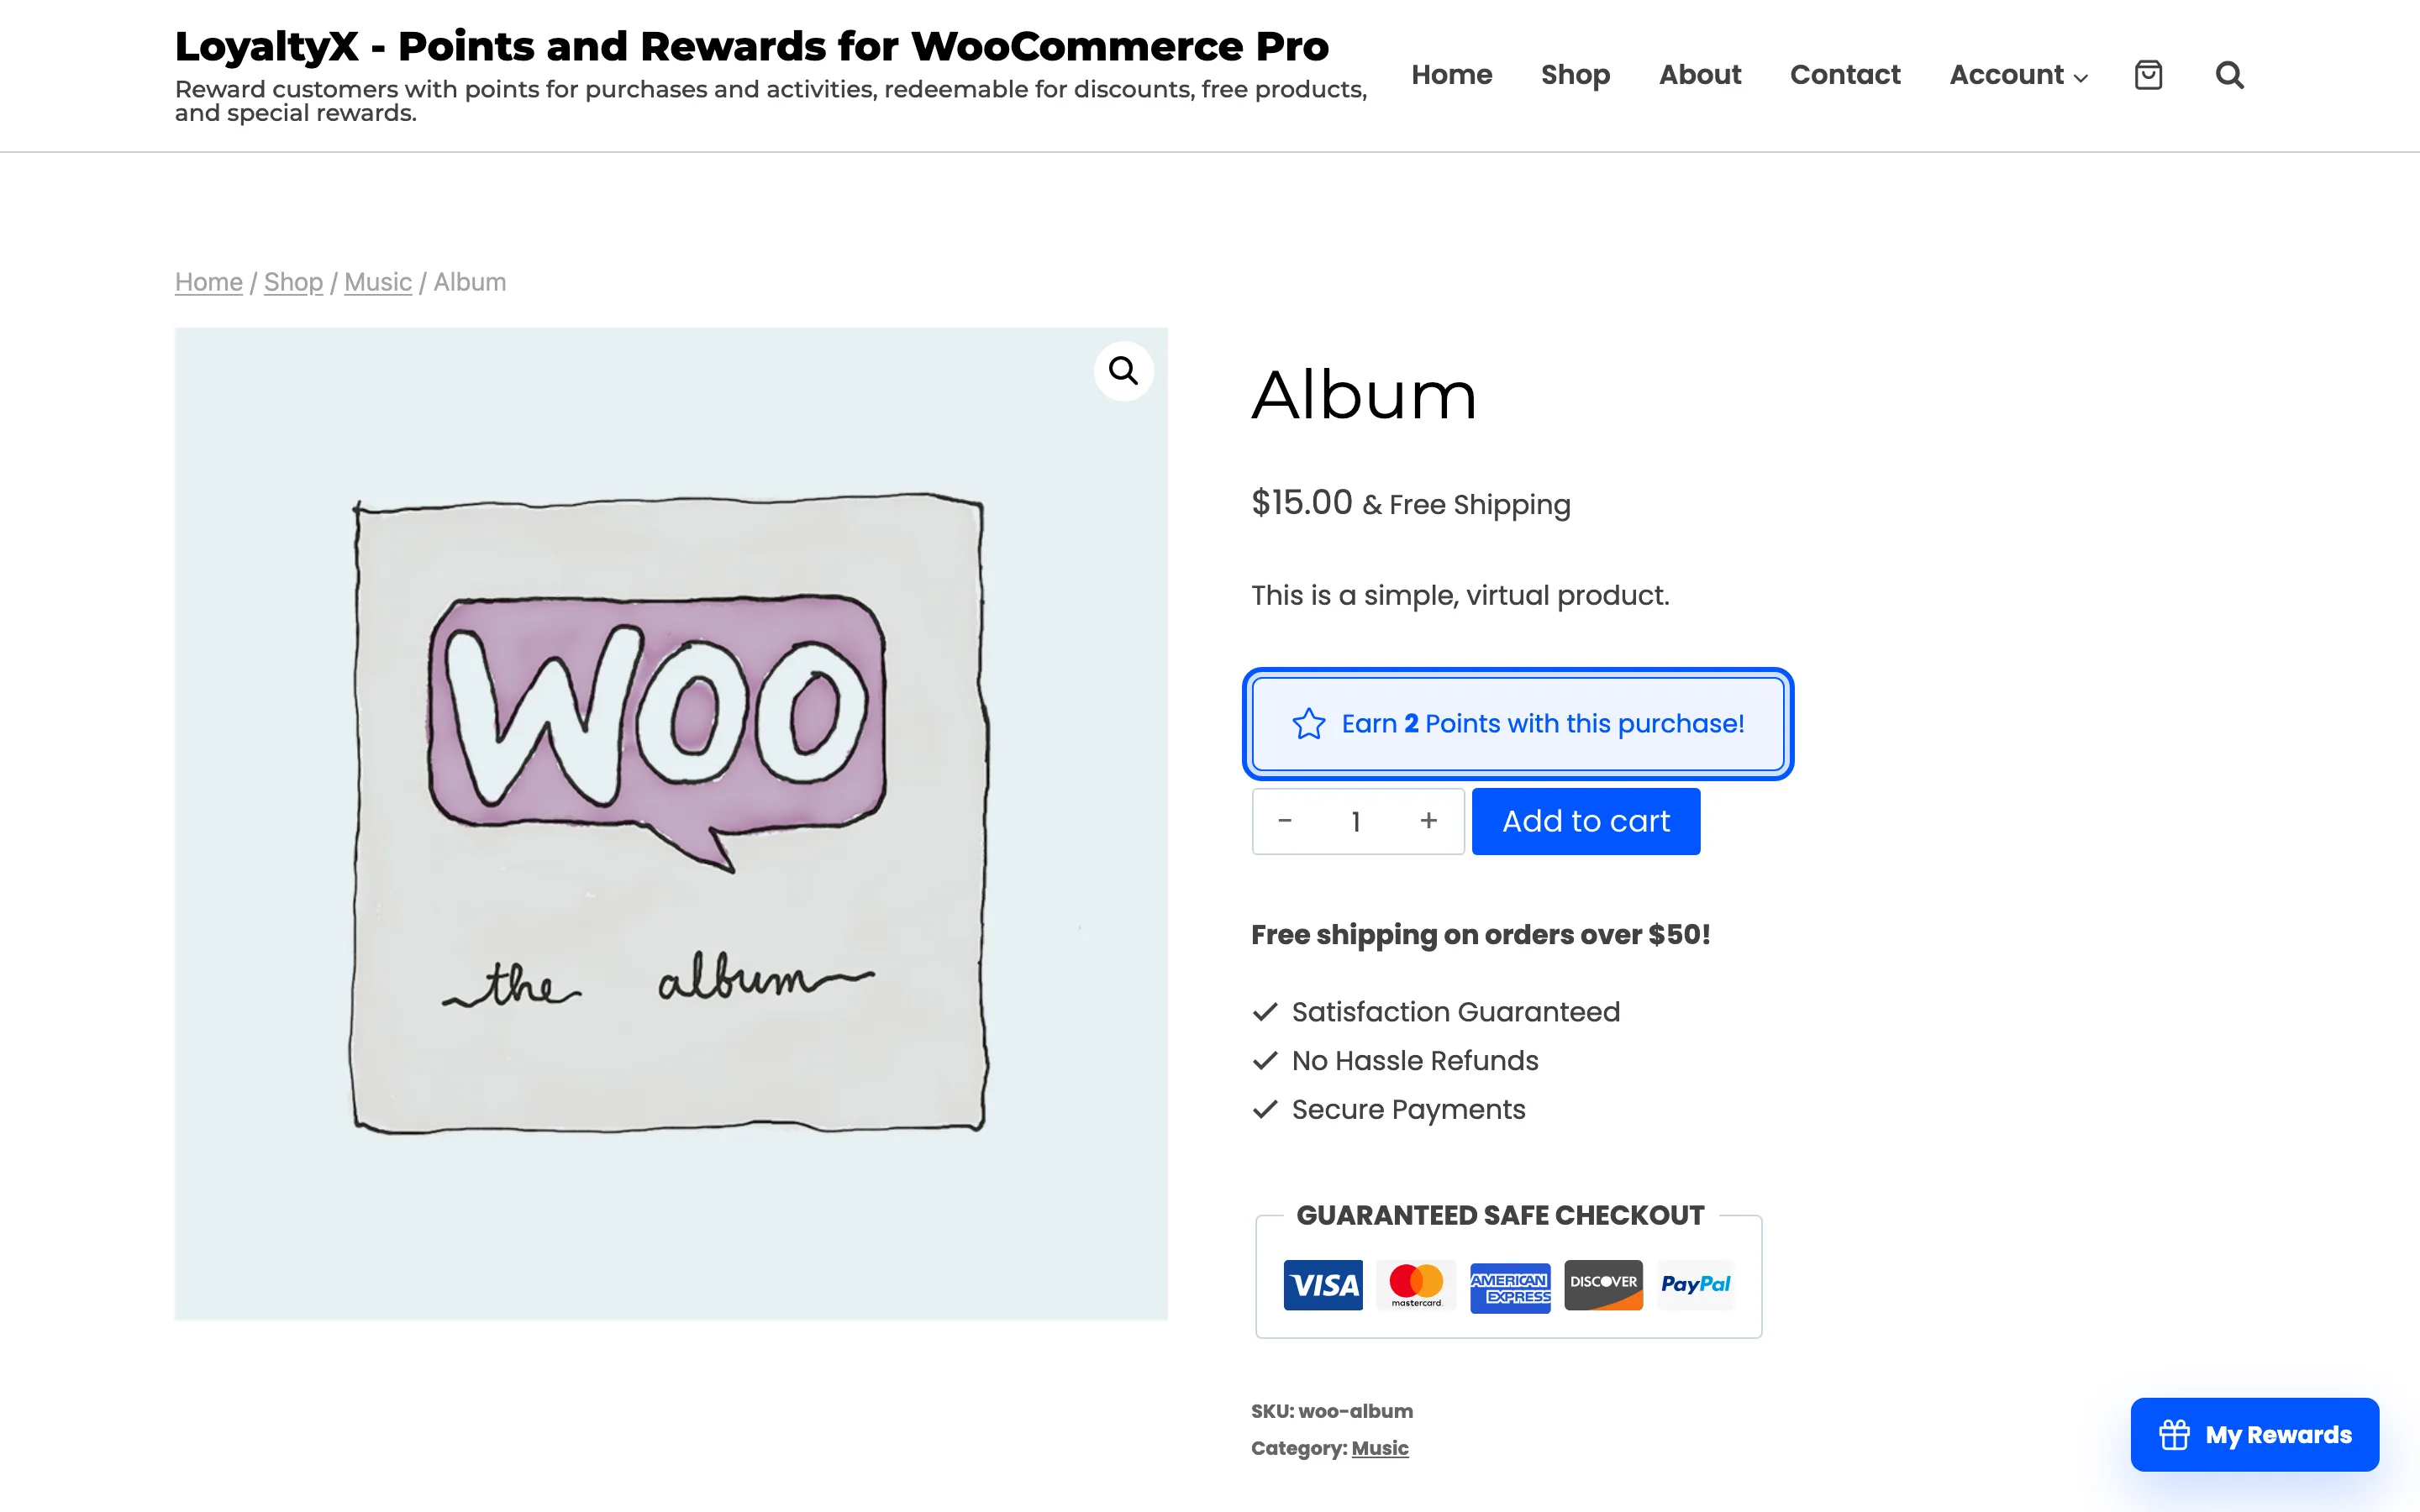
The Product section of Display Messages controls this message. You can move it above or below the add-to-cart button with the Display Position setting.
Points in the cart and at checkout
Section titled “Points in the cart and at checkout”In the cart and at checkout, LoyaltyX shows two things. How many points the order will earn, and a prompt to redeem points for a discount when the customer already has a balance. The redemption field lets the customer choose how many points to spend, and the discount applies to the order total straight away.
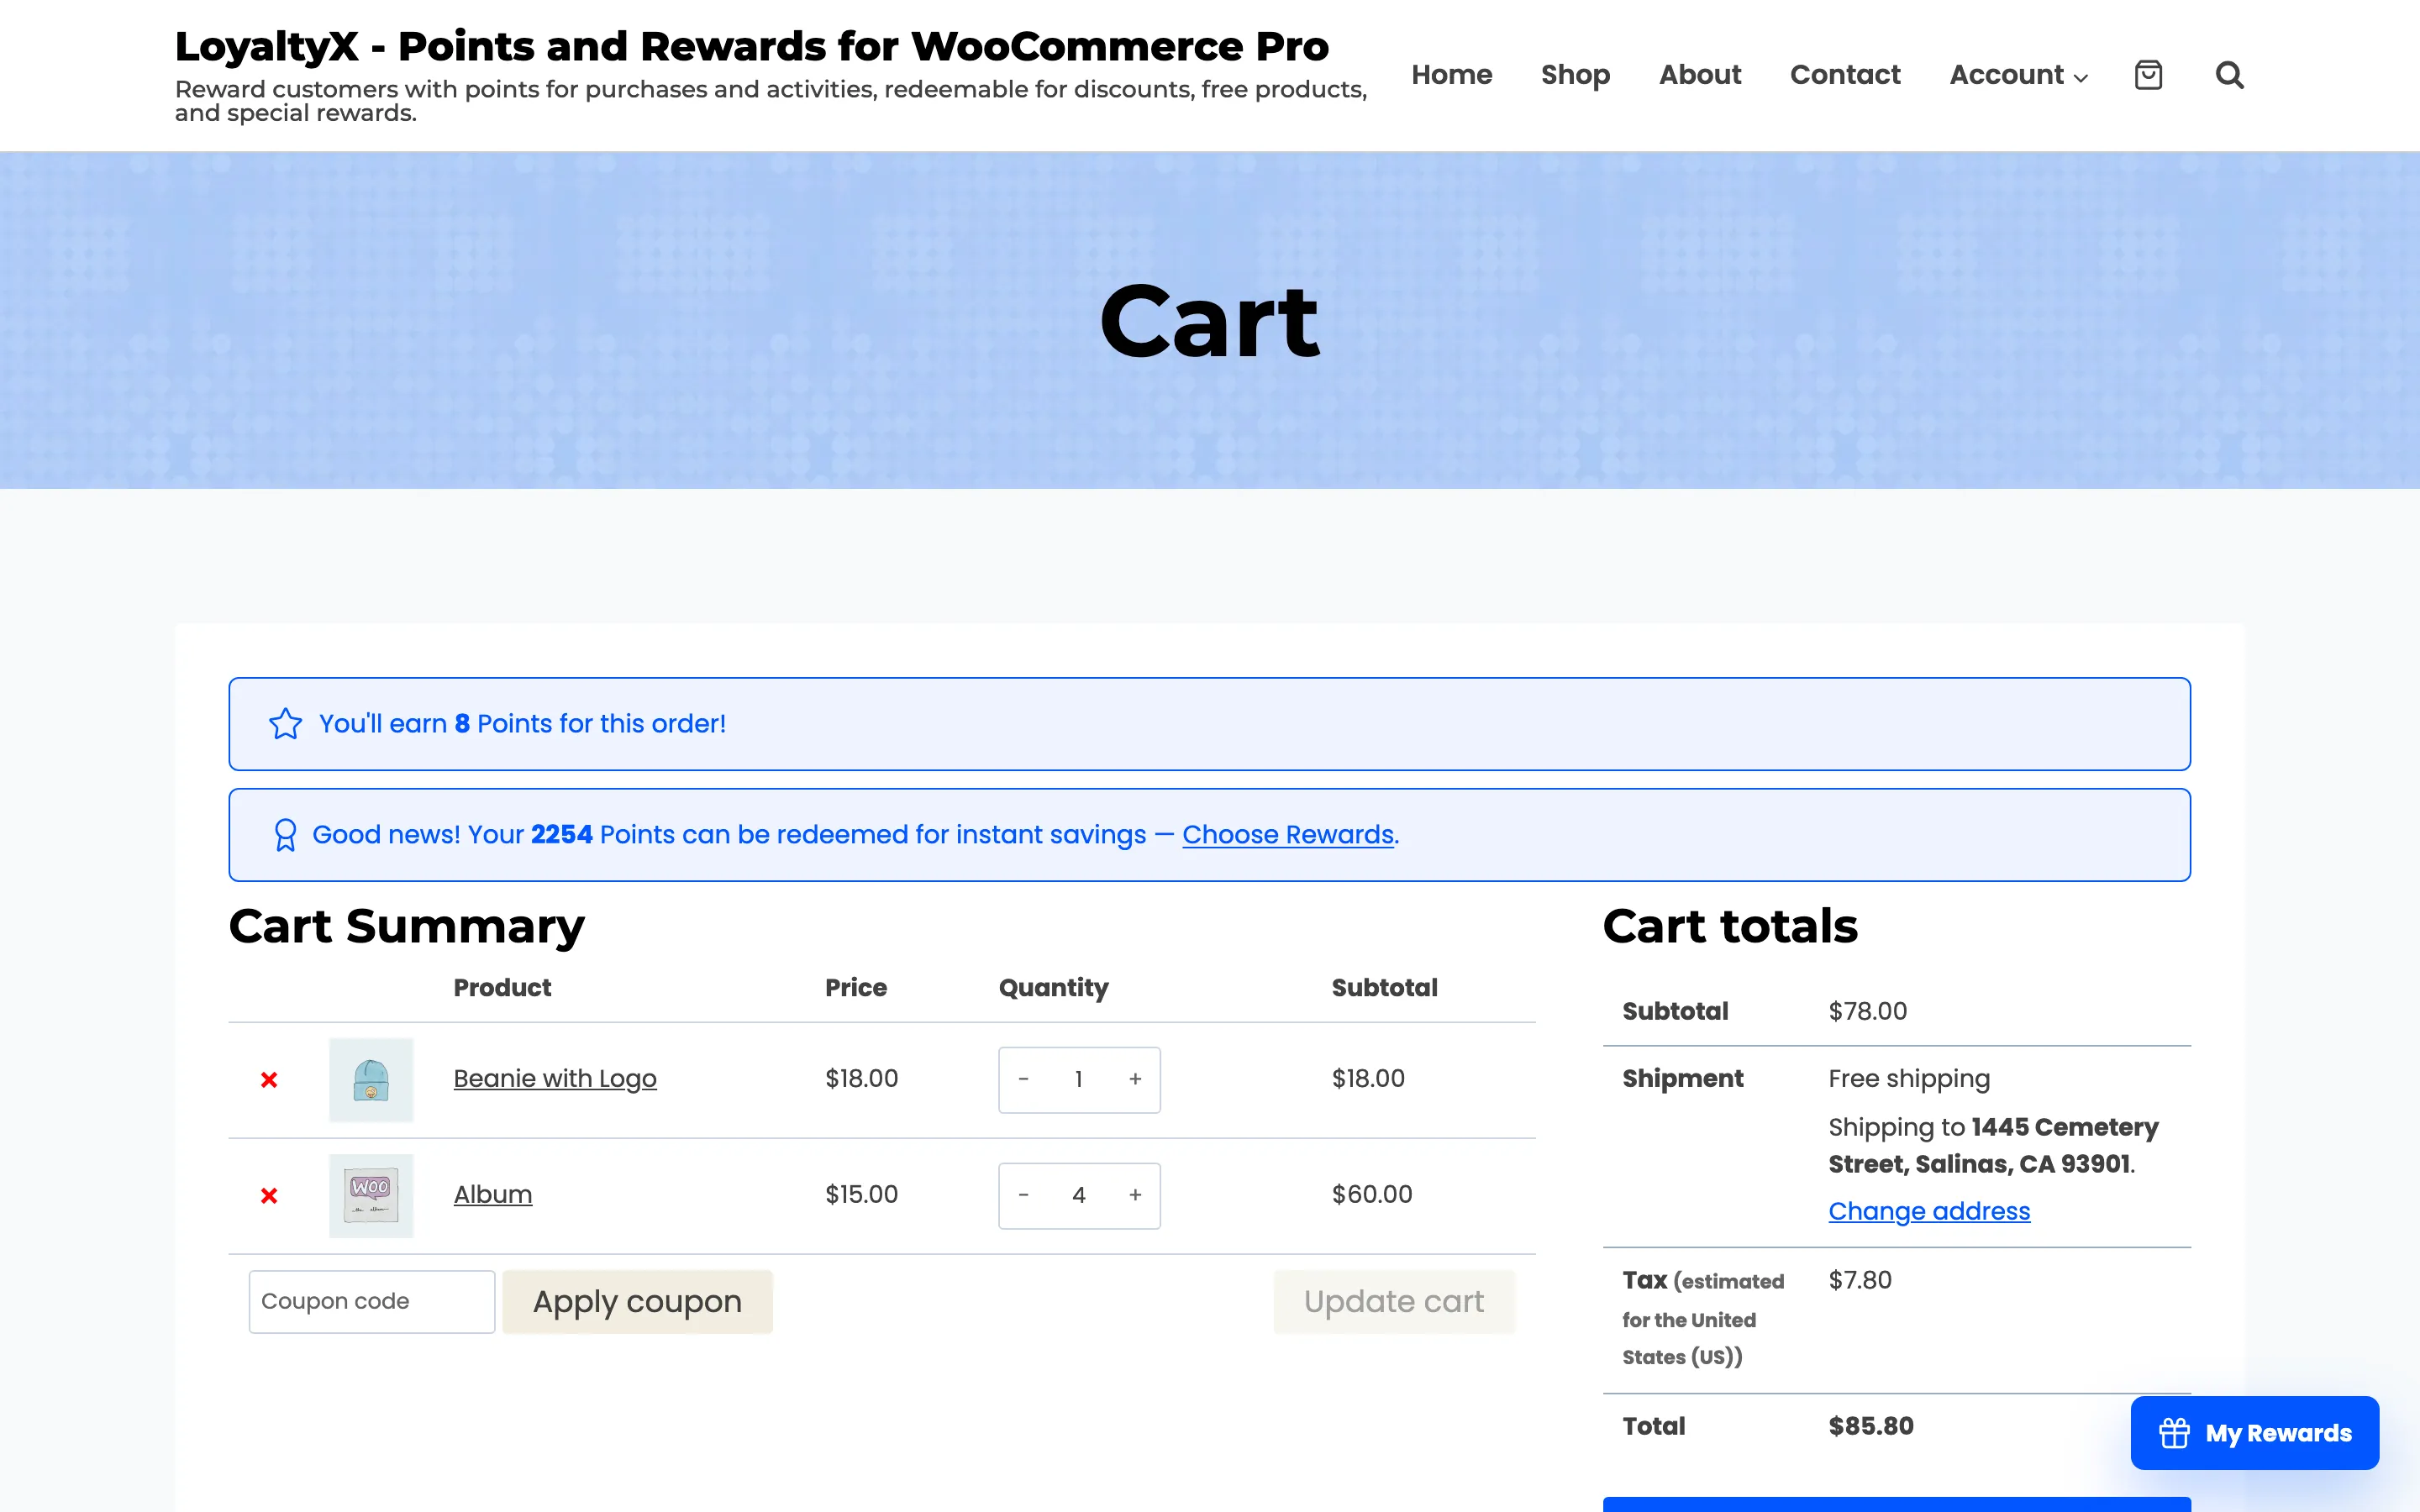
The earn and redeem messages are the Cart and Checkout sections of Display Messages. The redemption rate and limits behind the field are set under Points Redeeming Settings.
The rewards dashboard in My Account
Section titled “The rewards dashboard in My Account”Signed-in customers get a Points and Rewards area inside My Account. This is the home of the program for a customer: their balance, their history, and everything they can do with points.
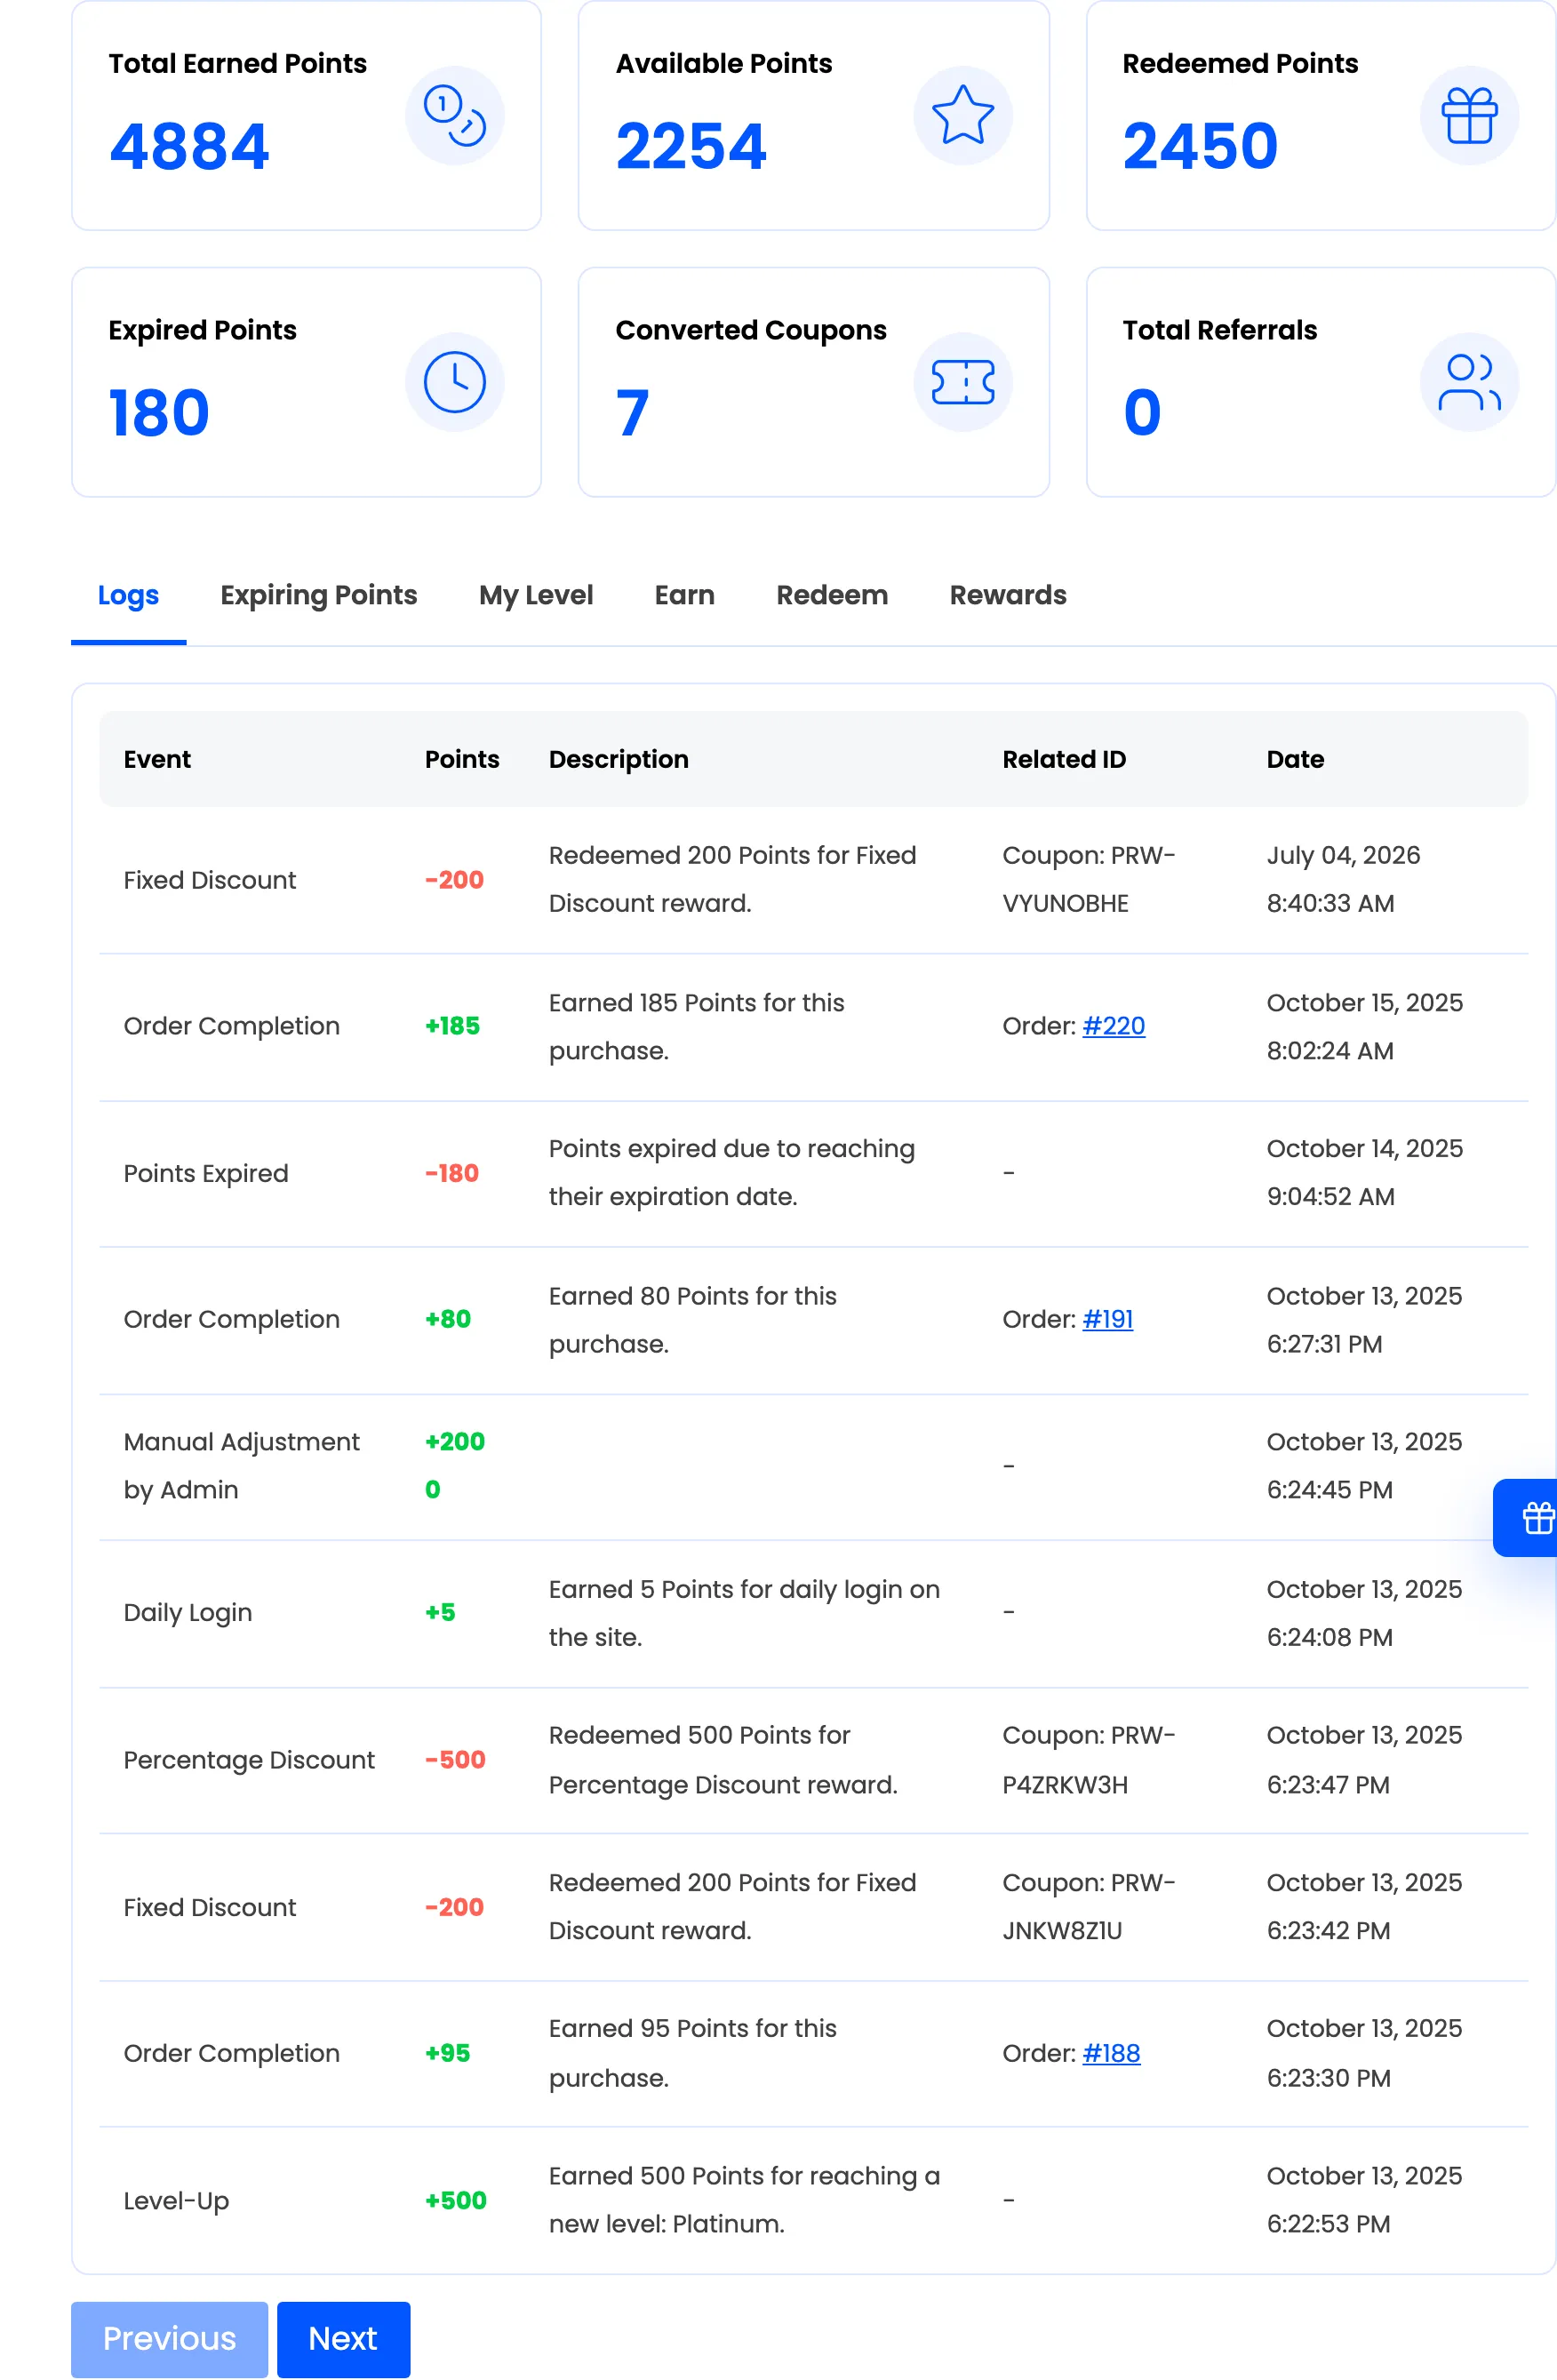
The summary cards at the top show Total Earned Points, Available Points, Redeemed Points, Expired Points, Converted Coupons and Total Referrals. A customer sees their whole standing at a glance. Below the cards, a set of tabs breaks the detail down:
- Logs is the full history of every point event on the account.
- Expiring Points lists balances with an expiry date, when points expiration is on.
- My Level shows the customer’s loyalty tier and progress to the next one, in Pro.
- Earn lists every way the customer can collect points.
- Redeem lists the rewards they can claim now with their balance.
- Rewards shows coupons they have already generated.
The Earn tab is the one customers act on most. Each card names a way to collect points, what it is worth, and the action that starts it. Claim Points for a daily check-in, Set Birthday for a birthday bonus, Get Referral Link for referrals.
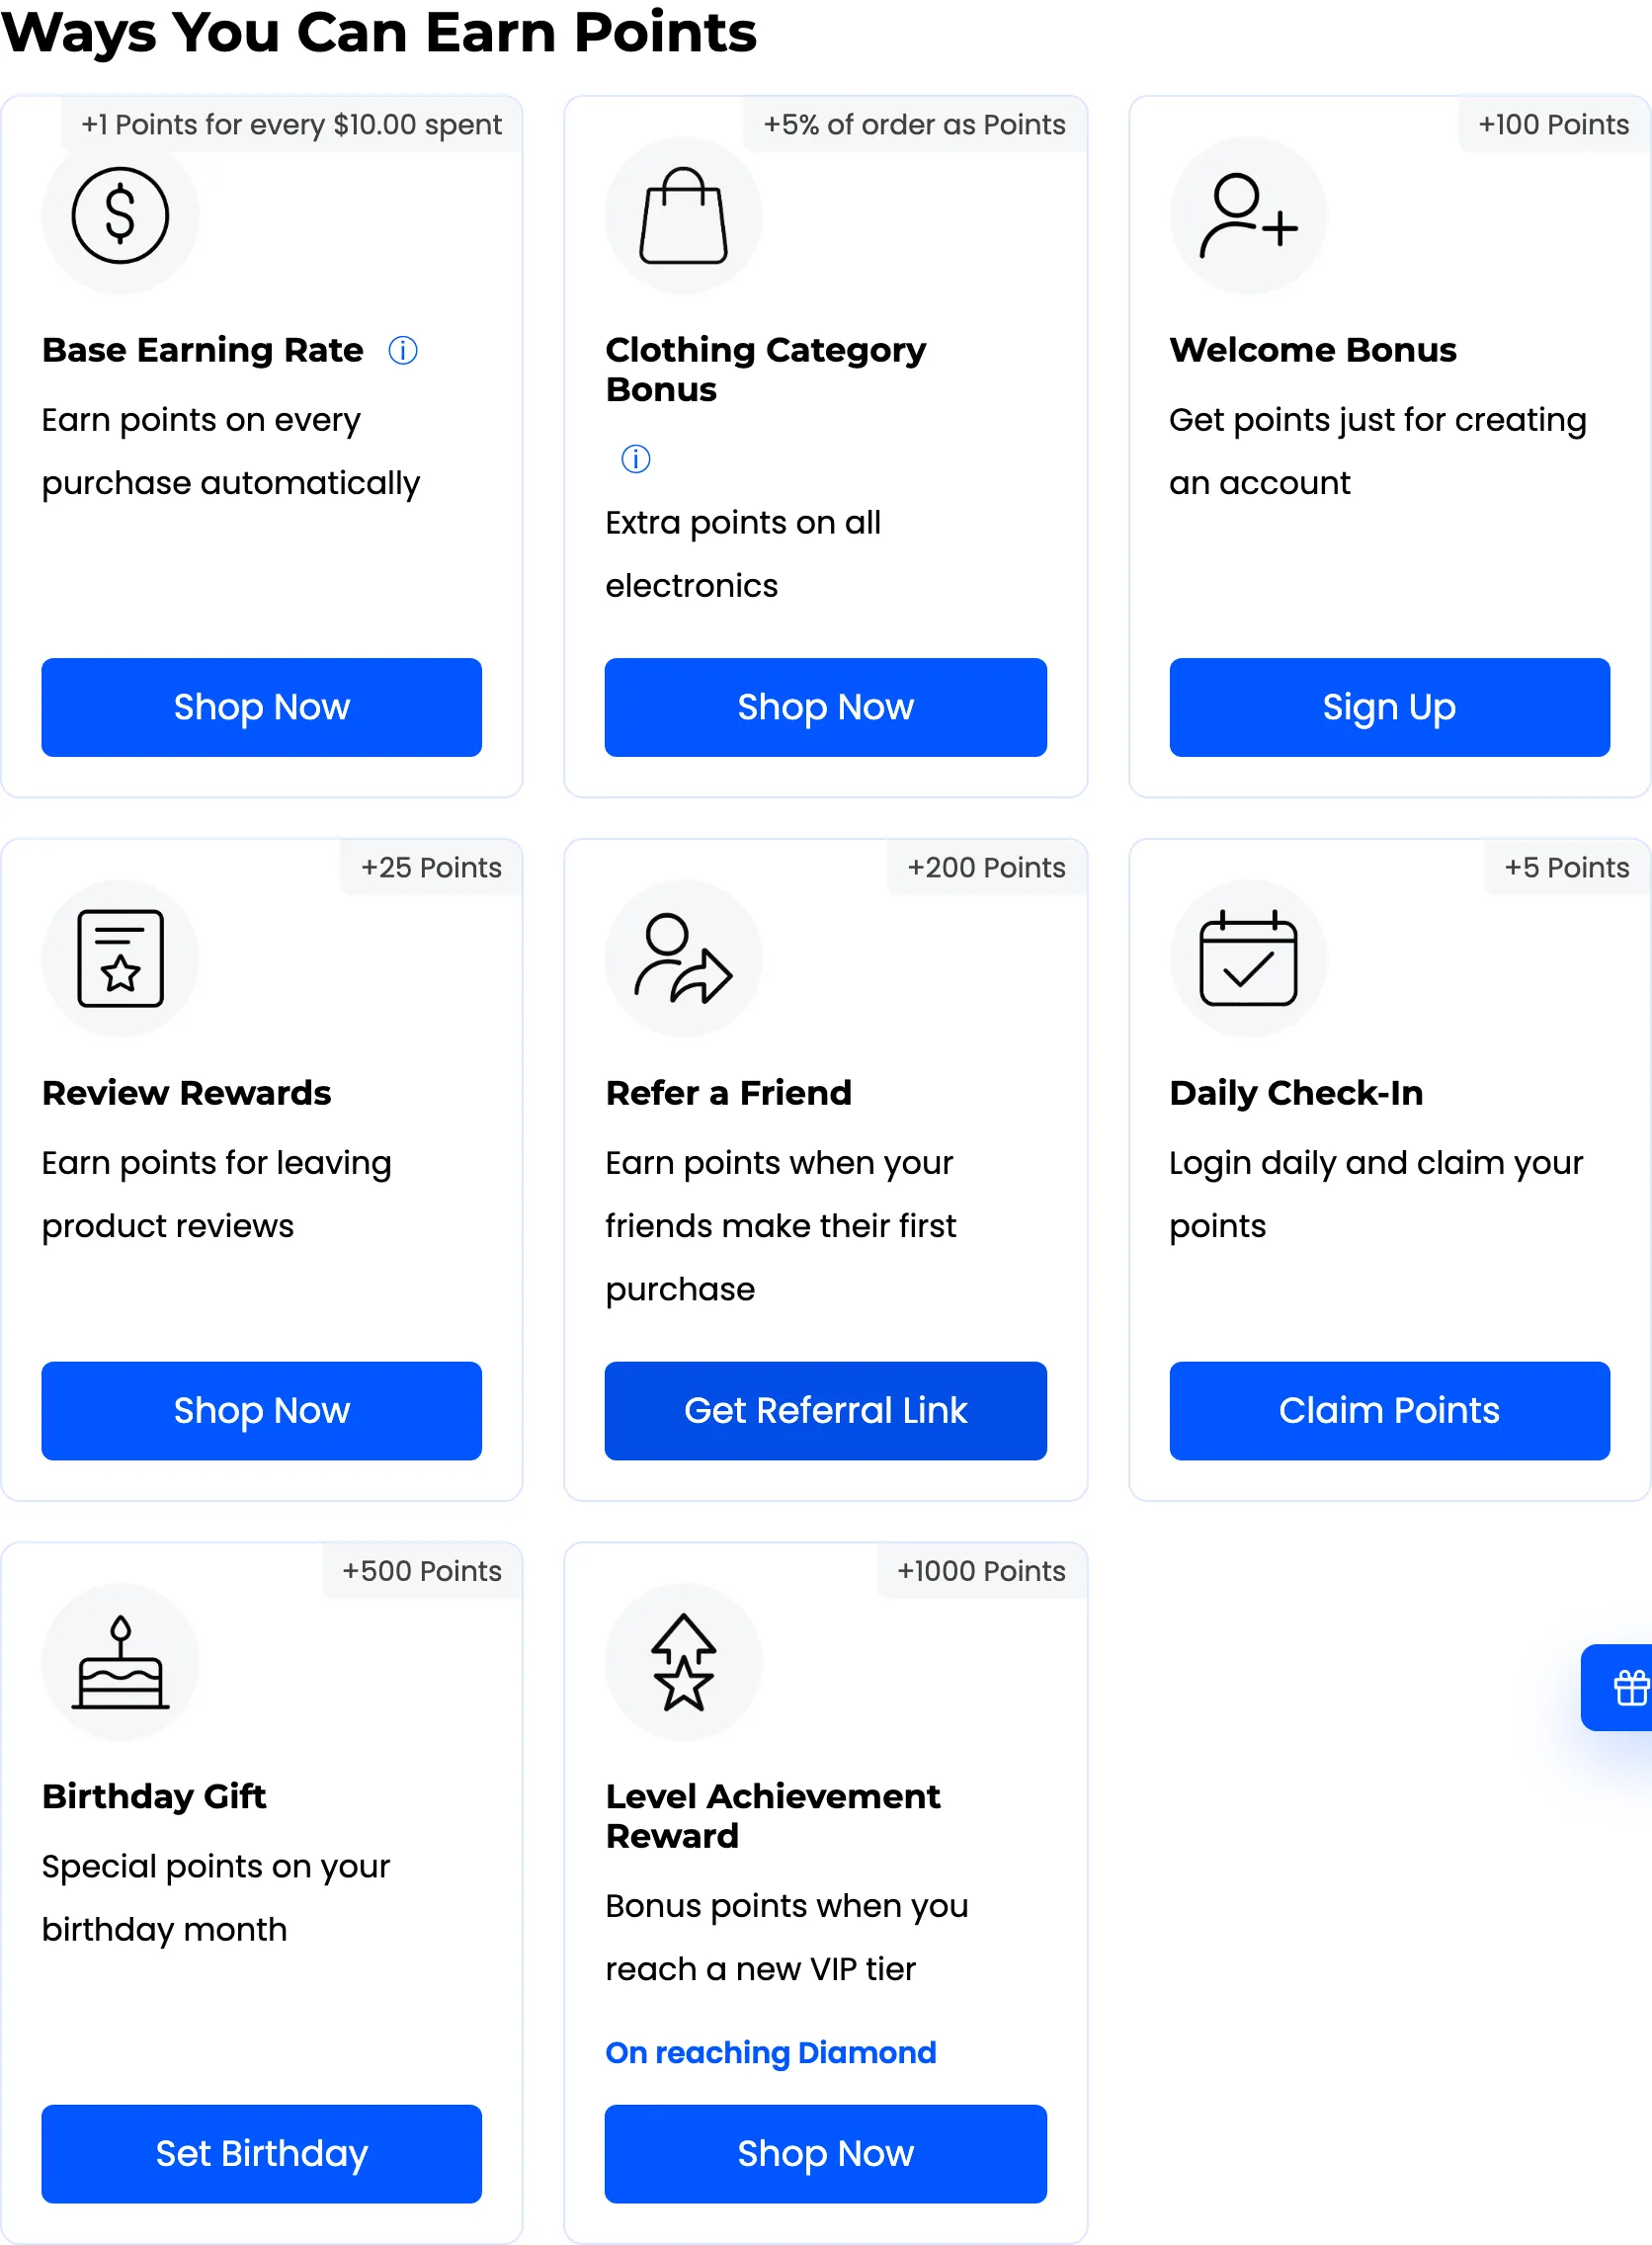
Style this whole area to match your theme under Layout Settings. You can also place the dashboard on any page instead of My Account with the dashboard shortcode.
The floating rewards widget
Section titled “The floating rewards widget”A floating My Rewards button sits in the corner of every page. It keeps the program one click away without taking over the layout. A customer opens it to check their balance, see ways to earn, and redeem a reward, all without leaving the page they are on. A guest who has not joined sees a prompt to sign up instead.
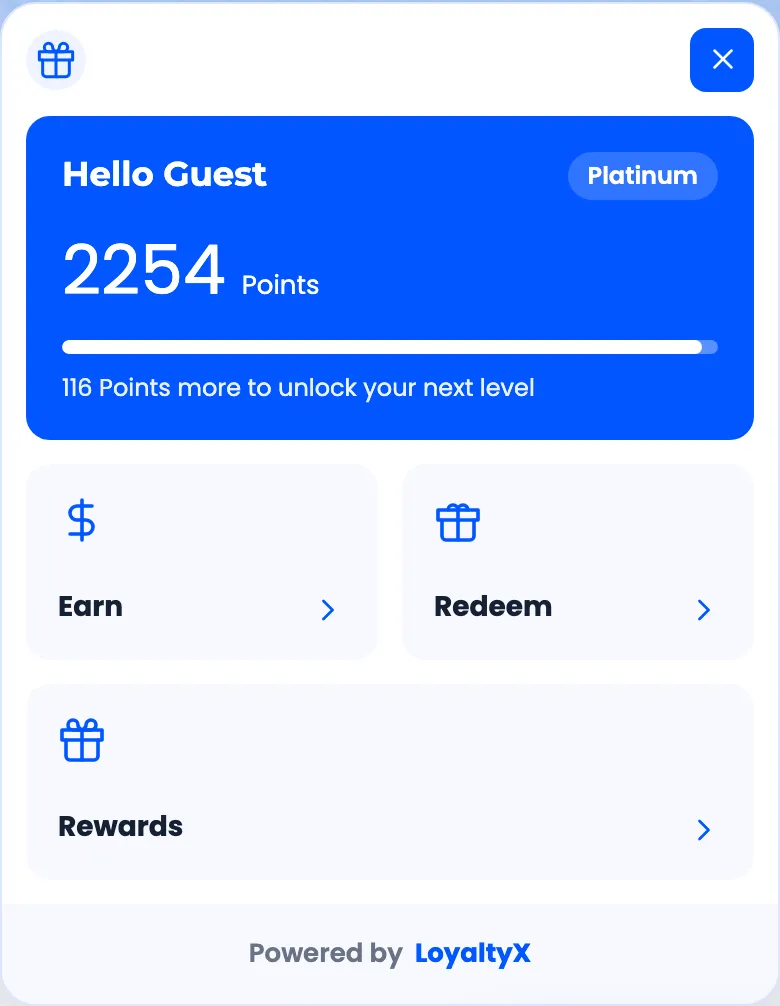
Set the launcher position, the panel wording and your brand colors under Rewards Widget.
How a customer redeems points
Section titled “How a customer redeems points”Redemption is the payoff, so it is worth understanding end to end. A customer has two ways to spend points.
- From the cart or checkout. With enough points, a prompt appears with the order. The customer converts points into a discount, and the total drops. Partial redemption is supported, so they can spend part of a balance and keep the rest.
- From the rewards dashboard. On the Redeem tab, every reward they can afford shows as a card with its points cost.
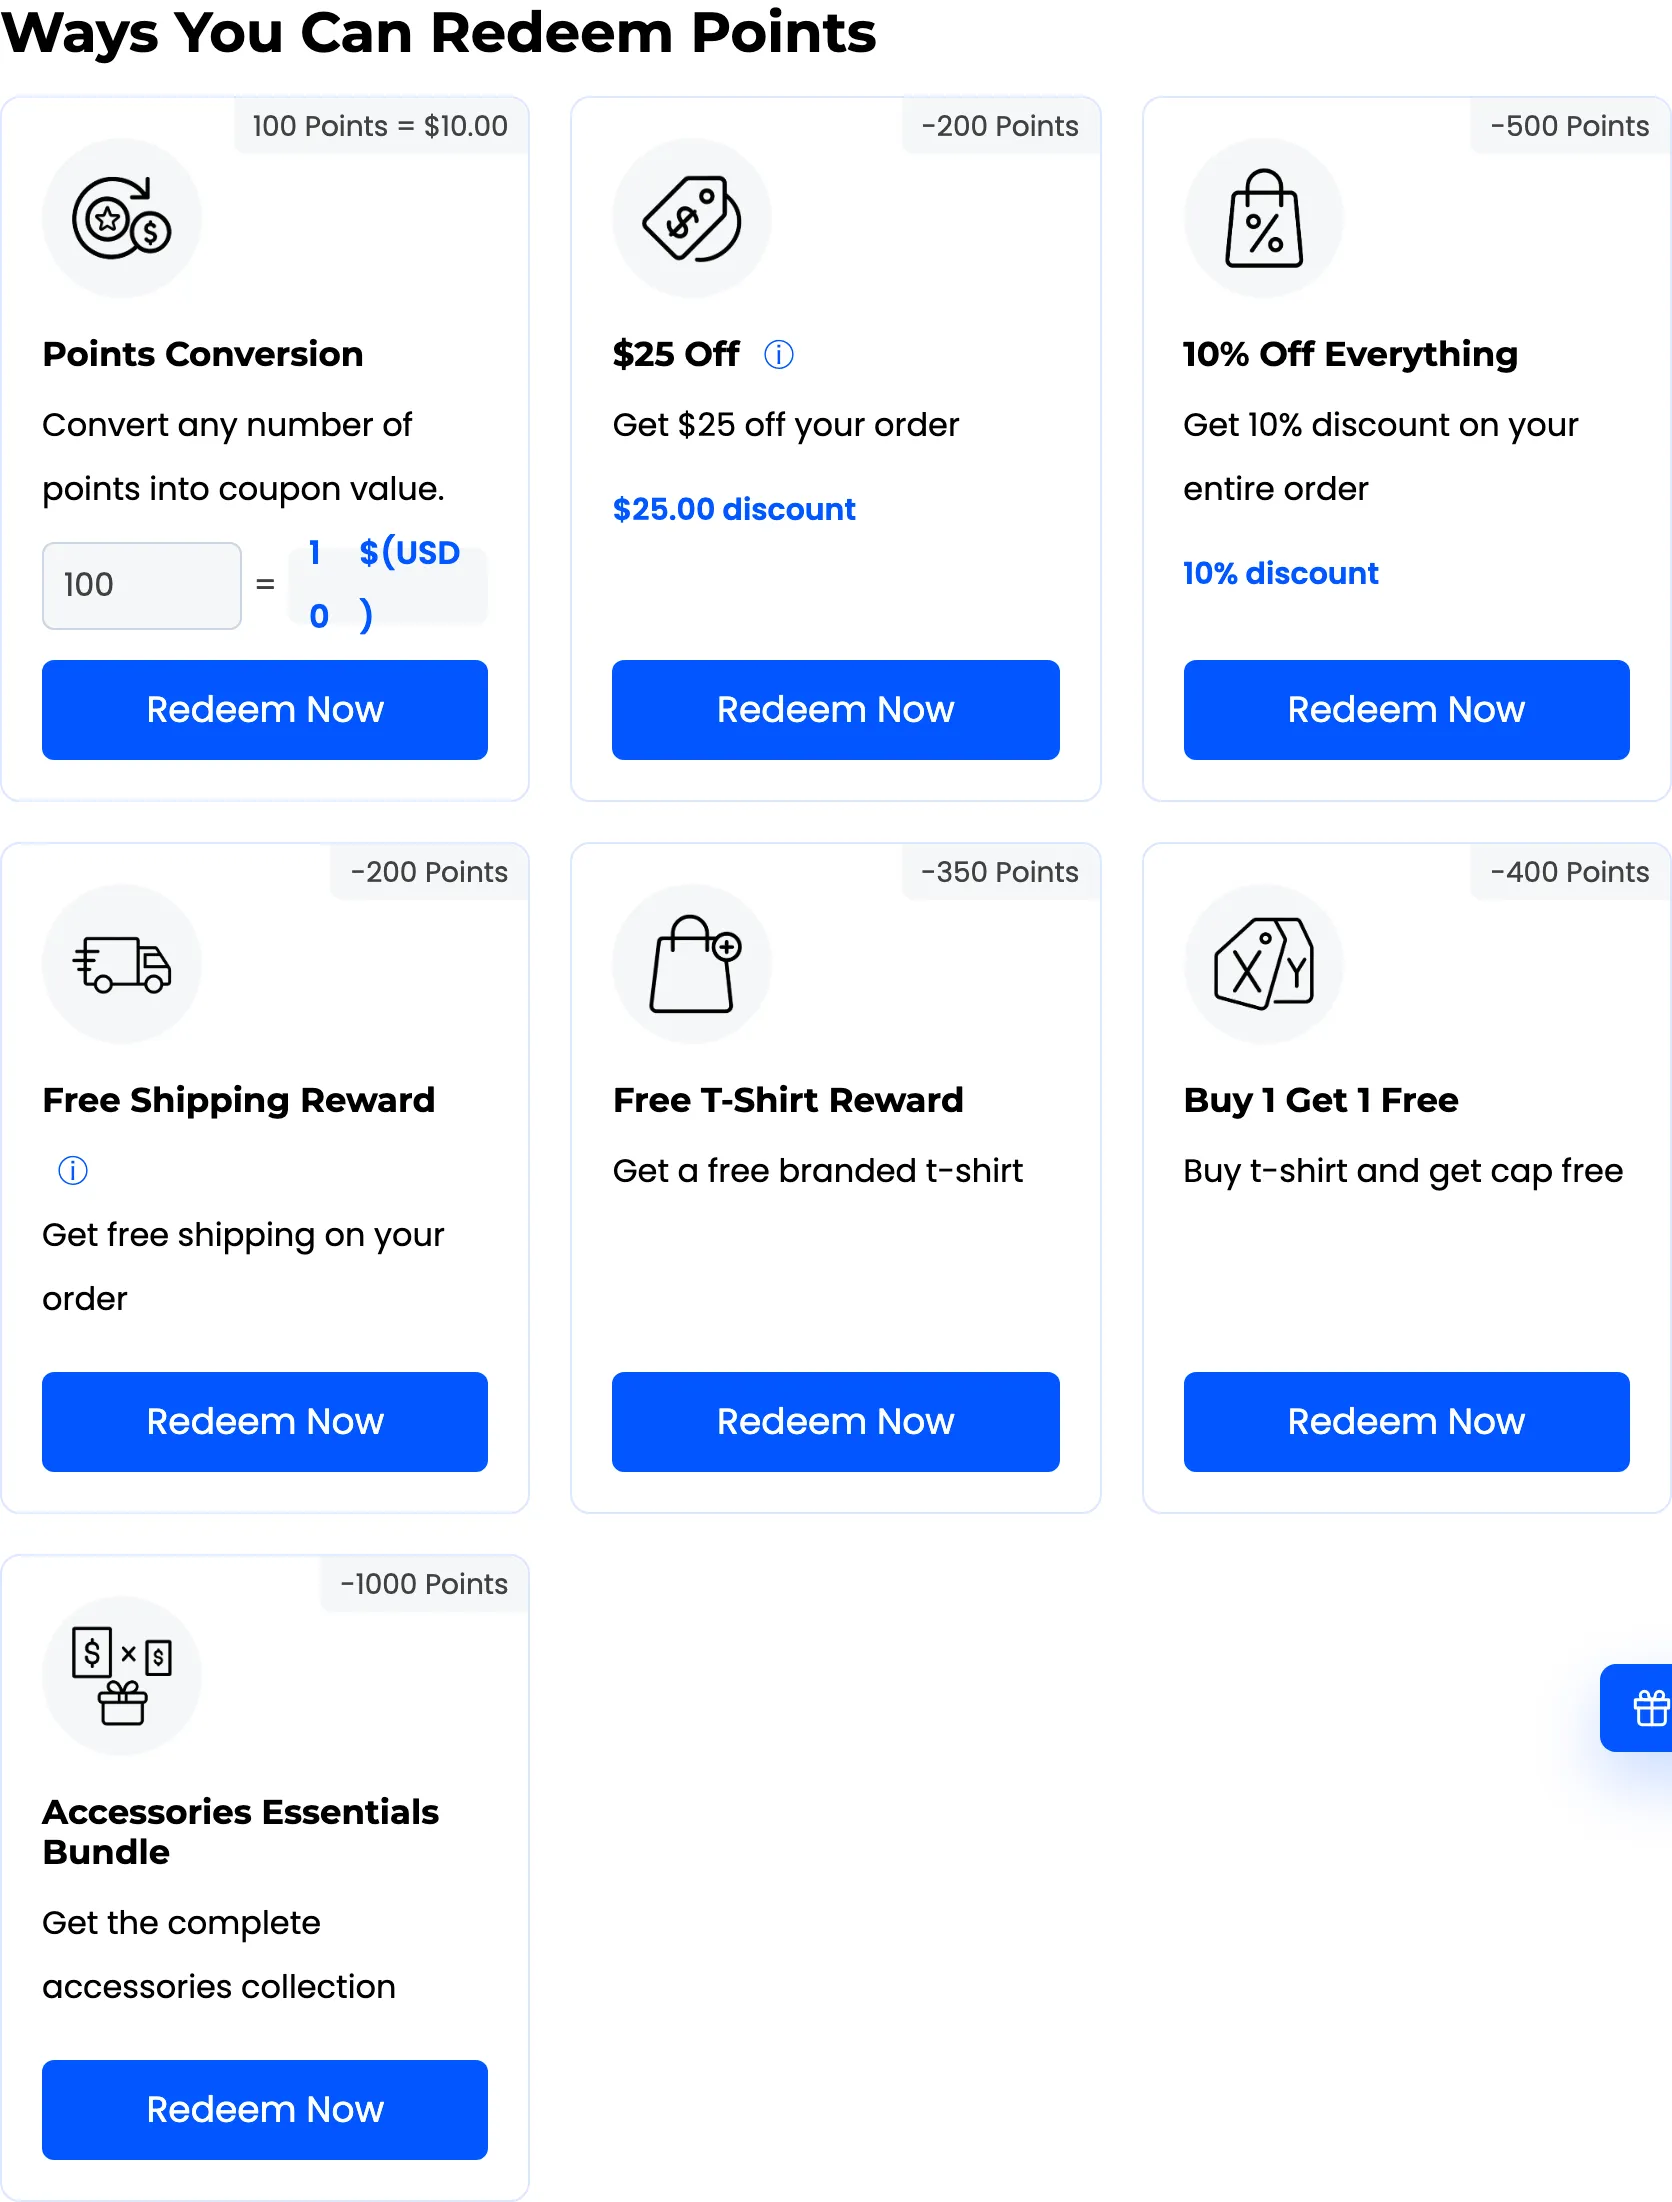
Clicking Redeem Now deducts the points, creates the coupon and applies it to the cart in one step. There is no code to copy and nothing to apply by hand. What lands in the cart depends on the reward type. A discount reward adds a Reward line to the cart totals. A Free Product, Bundle or Buy X Get Y reward adds the product itself at $0.00.
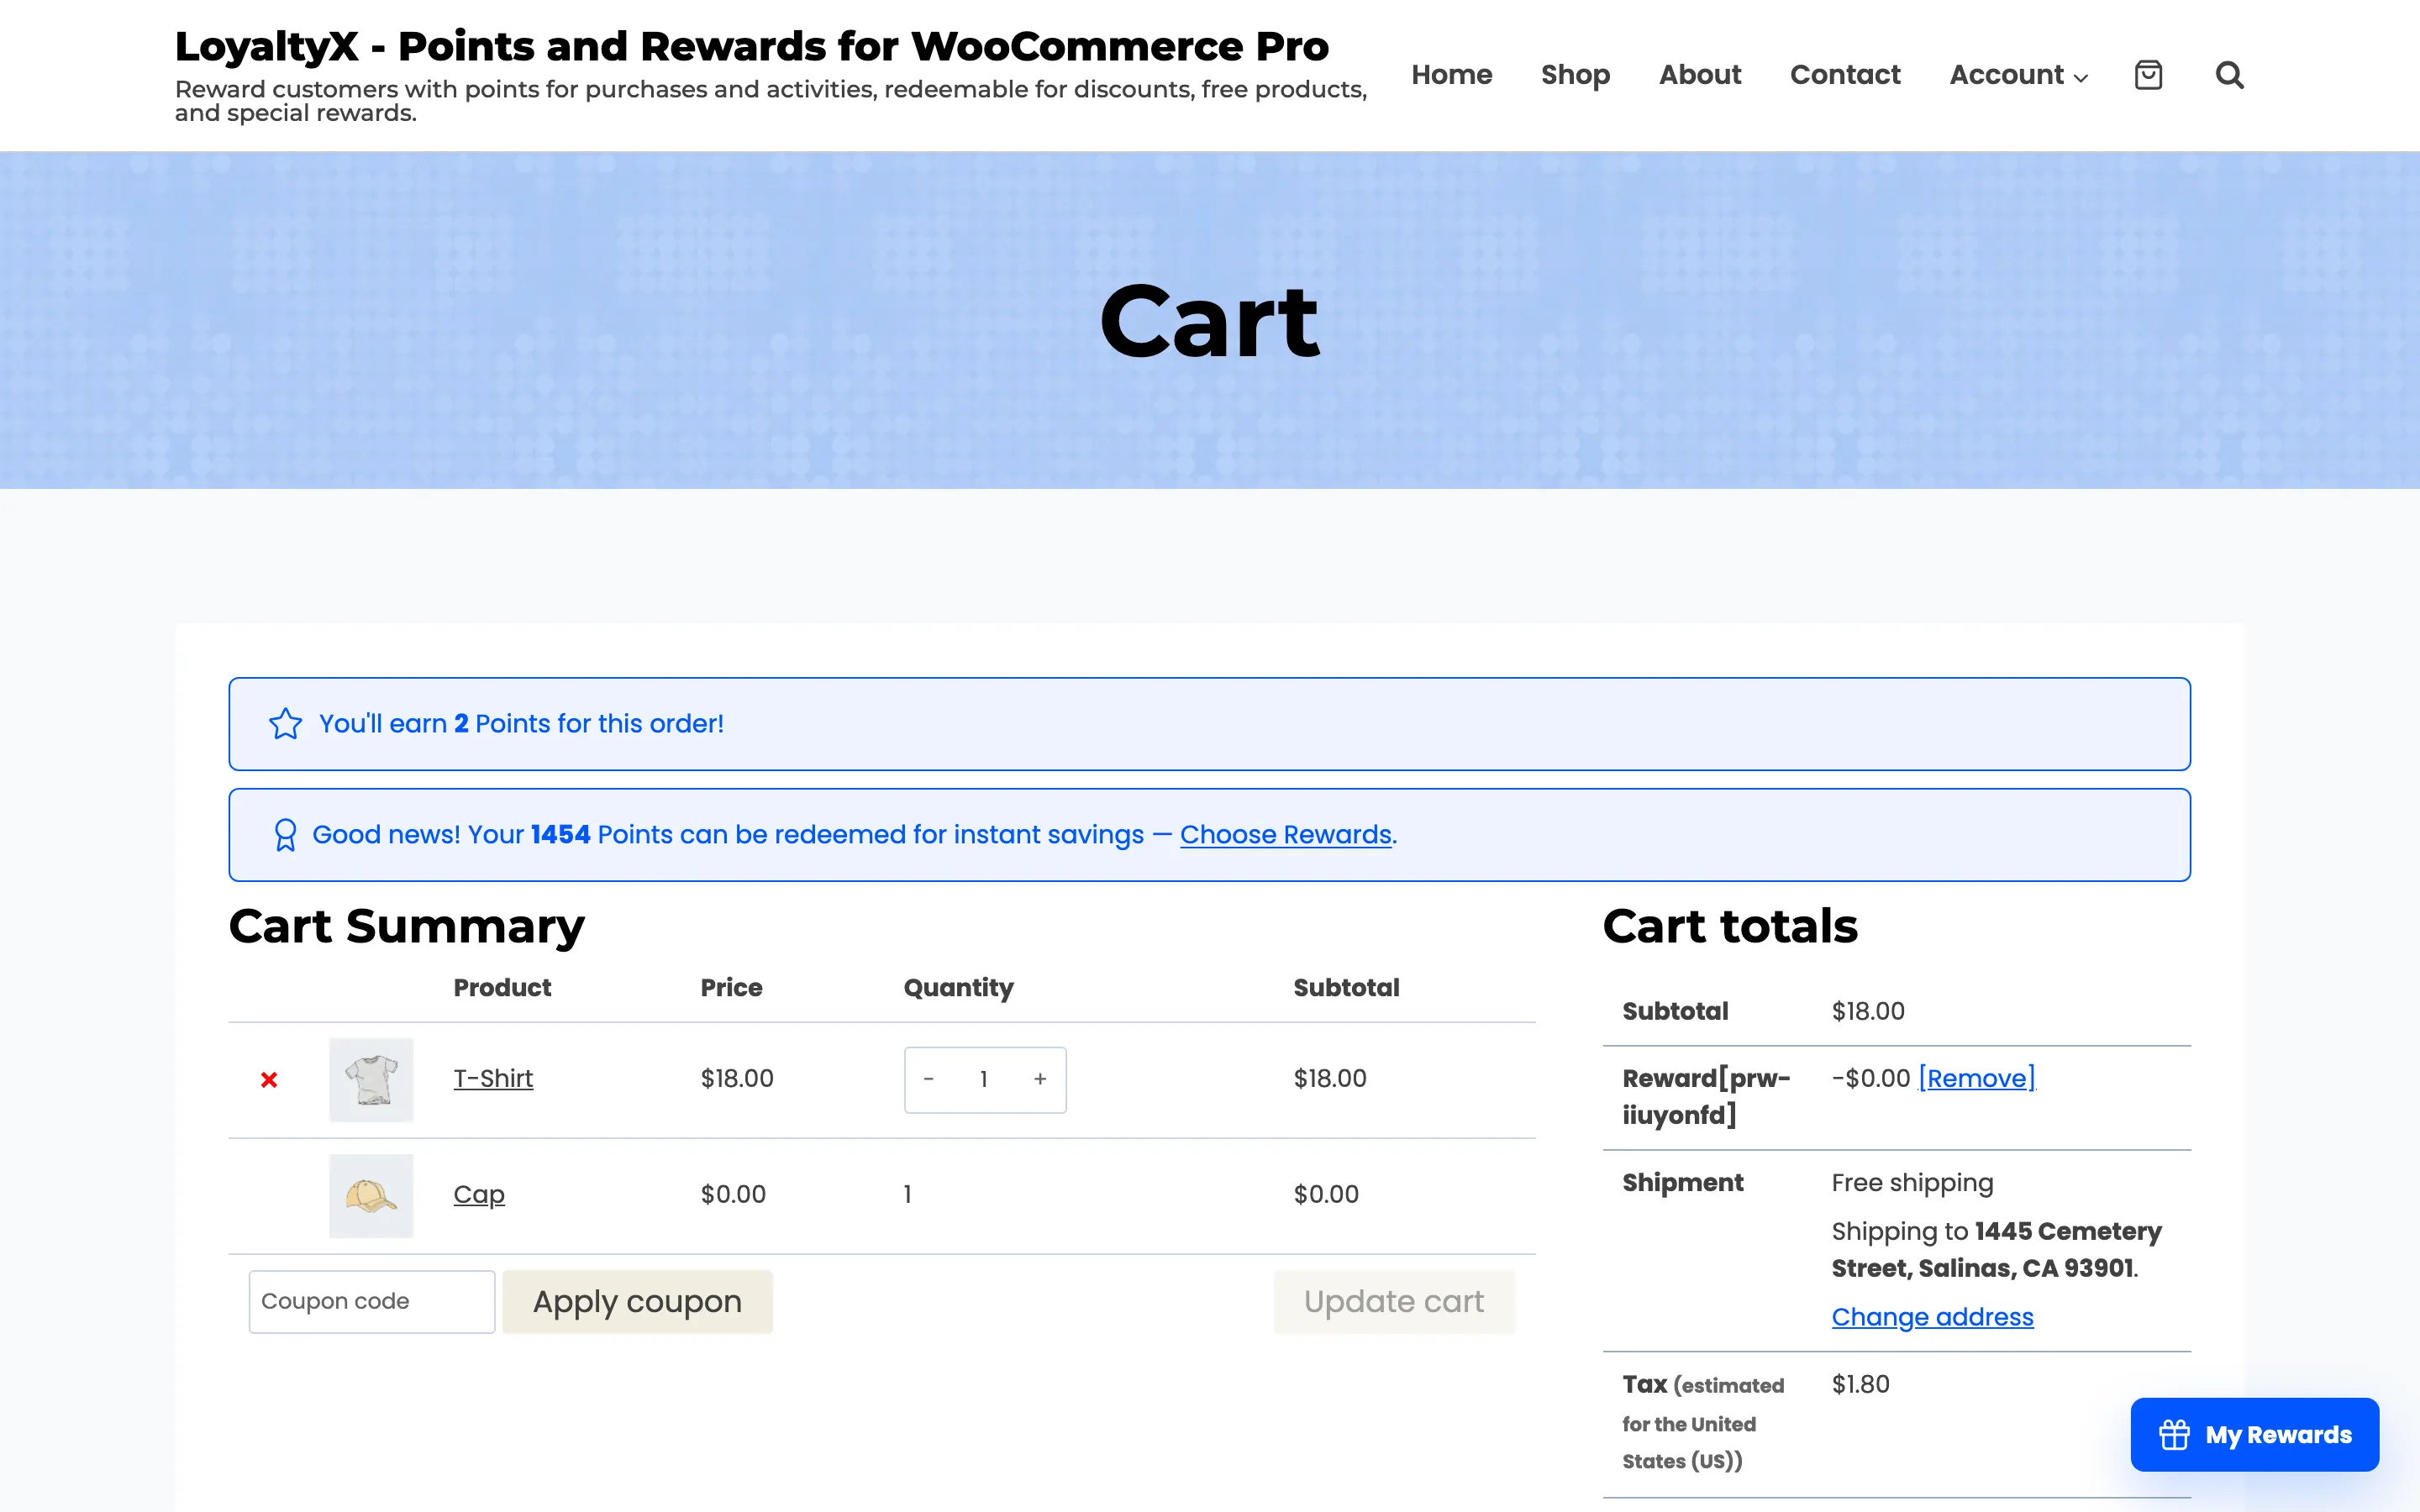
The reward then appears on the Rewards tab, and the event is recorded in Logs, so both you and the customer can trace it.
Renaming points to fit your brand
Section titled “Renaming points to fit your brand”Everything above calls the currency “points” by default. You can rename it to Stars, Credits, Coins or any label under Display Messages. The new word then shows everywhere a customer sees it: the messages, the dashboard and the widget.
Summary
Section titled “Summary”From the shop to the checkout to My Account, LoyaltyX keeps the loyalty program visible and easy to use at every step. Each surface is optional and fully controlled by a setting, so you can show as much or as little as fits your store. Set earning and redemption first, then use Display Messages and the Rewards Widget to decide where the program appears.
Where to go next
Section titled “Where to go next”- How to set up points earning to control what customers earn.
- How to set up points redemption to control how they spend it.