

Levels and Badges (Pro)
Levels and Badges turn a flat points balance into a tiered program. Customers move up as they earn, collect a badge at each tier, and can earn faster at higher levels. Tiers give customers a goal beyond the next discount.
Open the Levels and Badges tab
Section titled “Open the Levels and Badges tab”Go to DevDiggers Plugins → LoyaltyX, then open the Levels & Badges tab.
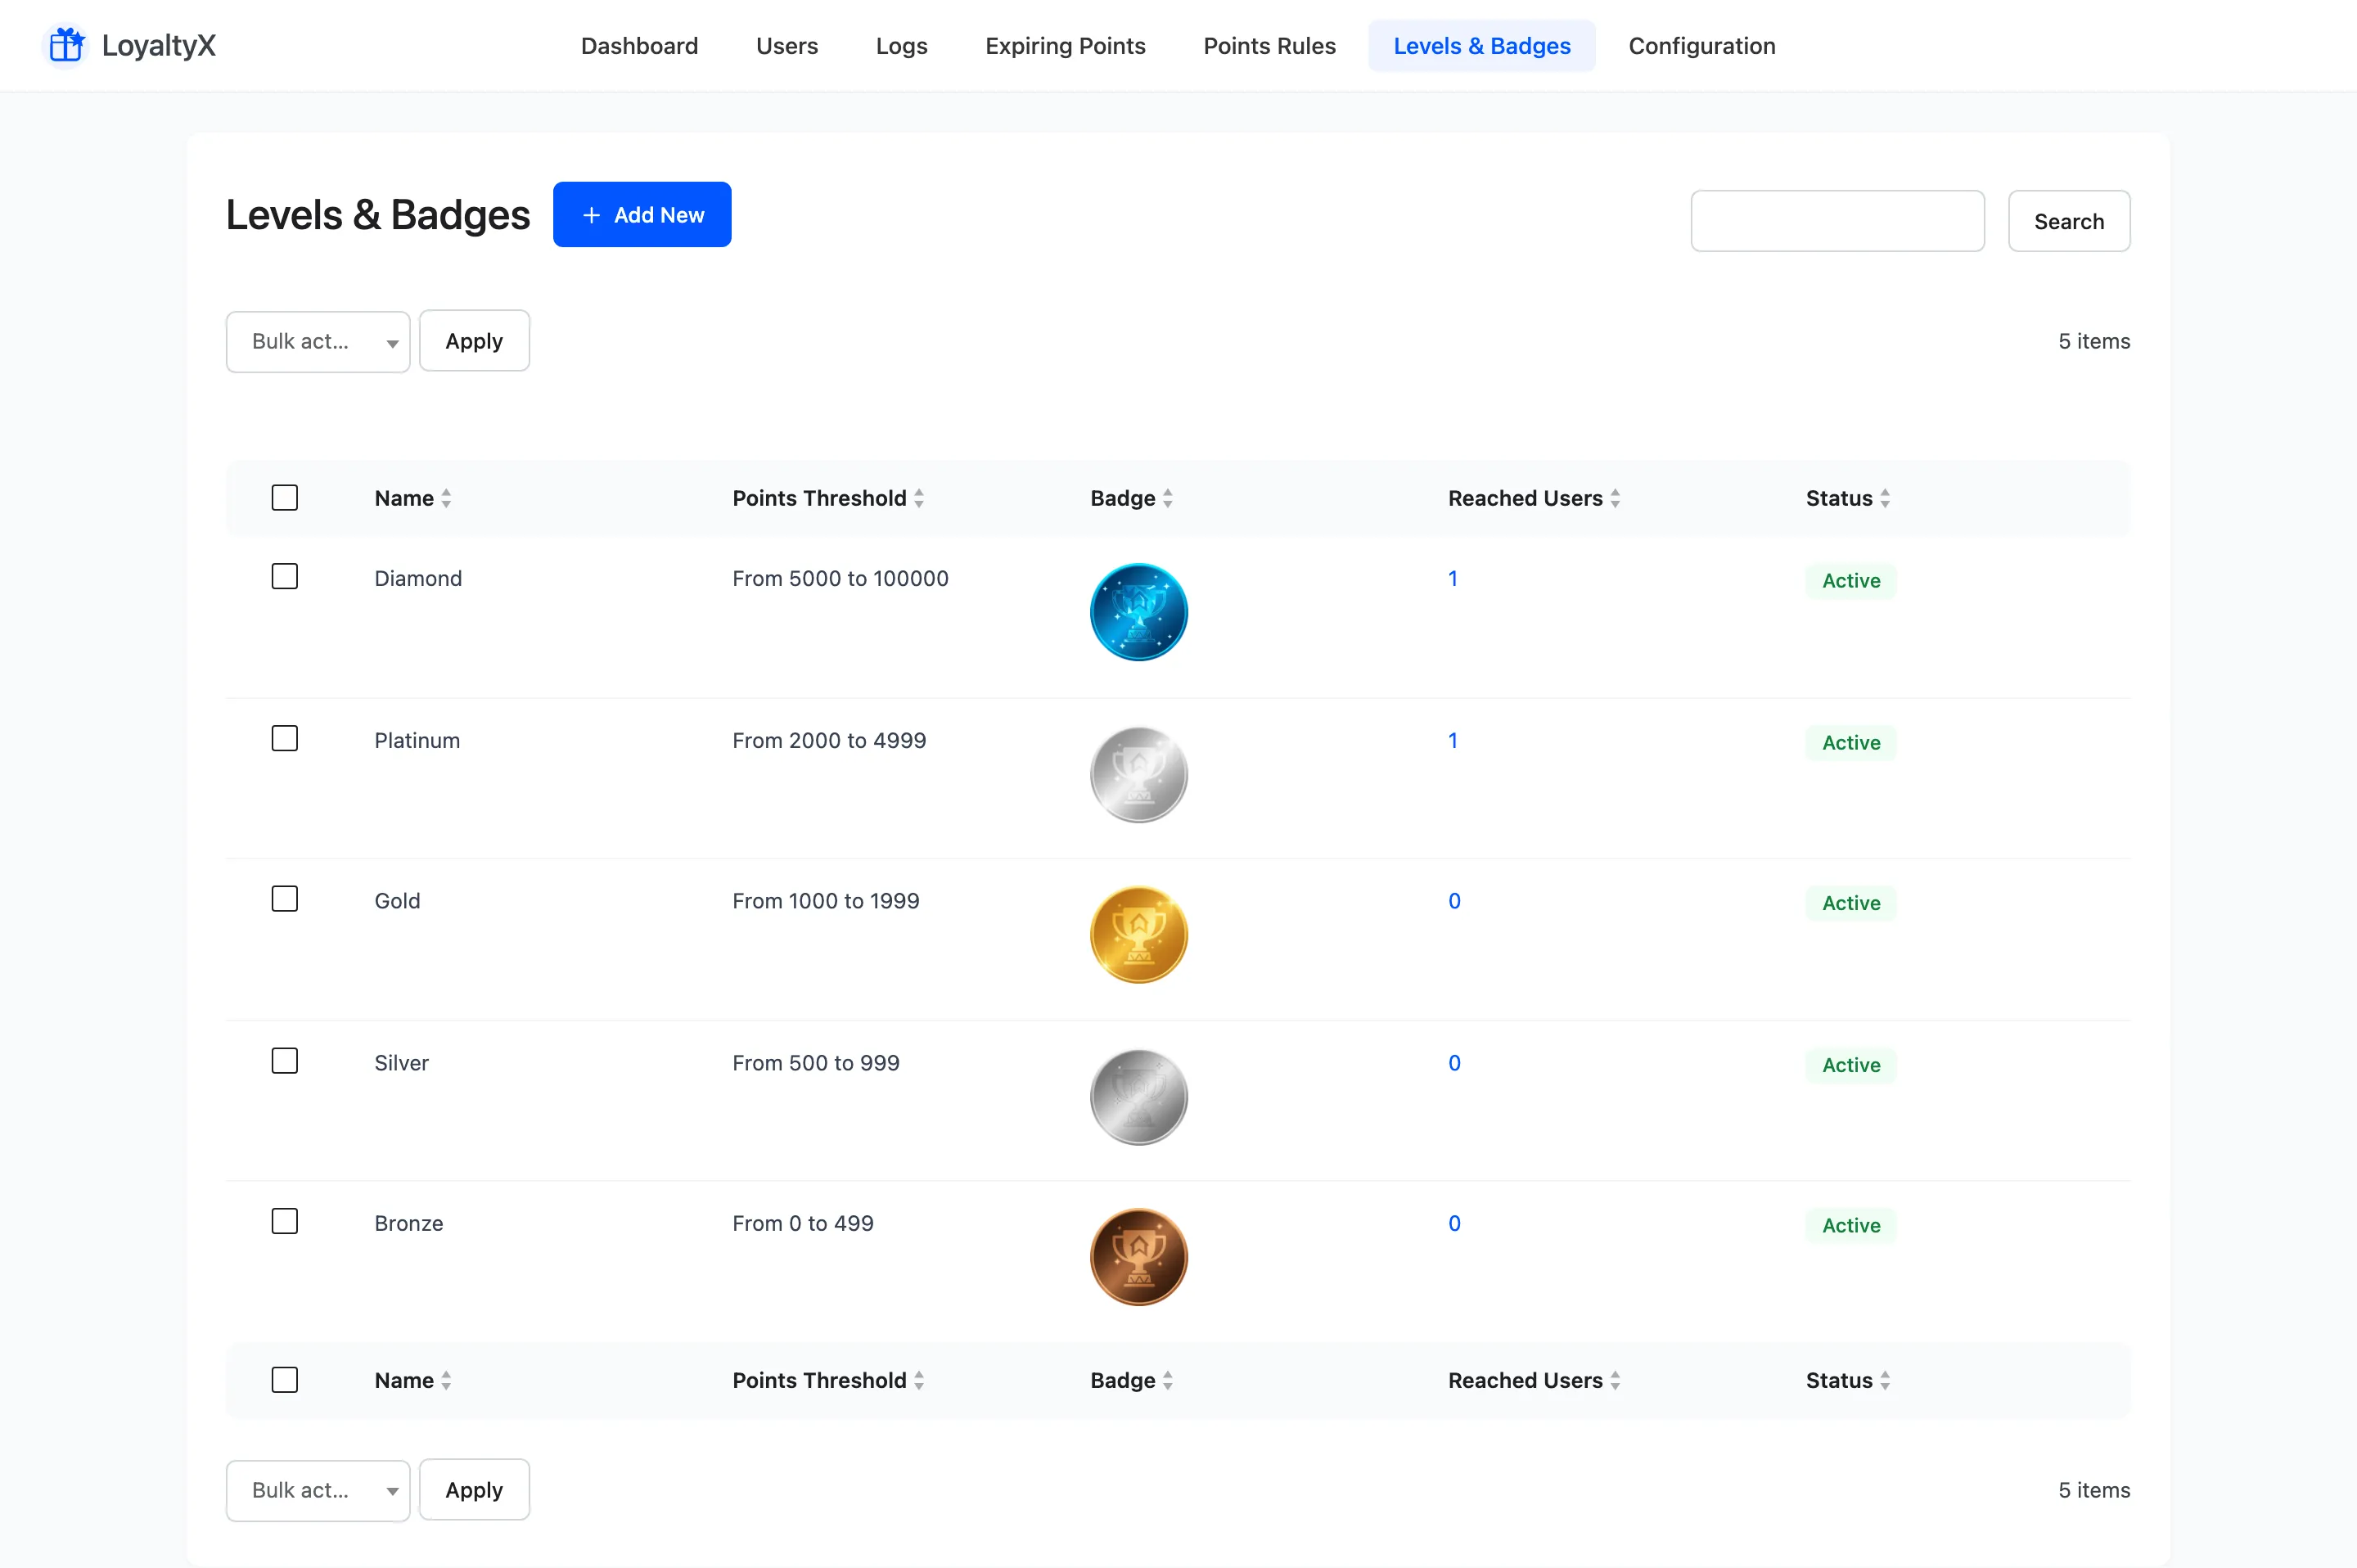
Read the list
Section titled “Read the list”Each row is one tier. The columns show:
- Name is the tier label, such as Silver or Gold.
- Points Threshold is a range, shown as From 1000 to 1999. A customer sits in the tier whose range holds their balance.
- Badge is the image shown for members at that tier.
- Reached Users counts how many customers hold the tier.
- Status is Active or Inactive.
Add or edit a tier
Section titled “Add or edit a tier”Use Add New to create a tier. The form has four fields:
- Level Name identifies the tier. Keep it unique.
- Points Threshold takes a From and a To value.
- Badge is an image upload. Use 100x100 pixels. Leave it empty and LoyaltyX uses its own default badge.
- Status sets the tier Active or Inactive.
Because thresholds are ranges rather than single cut-offs, they need to tile the whole scale with no gaps and no overlaps. The demo store is a good model: Bronze 0 to 499, Silver 500 to 999, Gold 1000 to 1999, Platinum 2000 to 4999, Diamond 5000 to 100000. Leave a gap between two tiers and a customer whose balance lands in it holds no tier at all. Make each From the previous To plus one. Set the top tier’s To far higher than anyone will reach.
Use Edit to change a tier and Delete to remove one. The bulk actions above the list are Set Active, Set Inactive and Delete.
Tell customers when they level up
Section titled “Tell customers when they level up”When a customer reaches a new tier, LoyaltyX can email them. Edit that message under Configuration → Emails, in Automatic Level Up Notifications.
Where to go next
Section titled “Where to go next”- How to set up loyalty tiers for a full walkthrough.
- Email Settings to edit the level-up email.