

How to Configure Points Expiration (Pro)
Points that never expire become a growing liability and give customers no reason to hurry back. Expiration fixes both. This guide sets an expiry window and a reminder email in LoyaltyX Pro.
Before you start
Section titled “Before you start”Have your program running with earning set up, so there are balances to expire. Decide on a window first. Twelve months is a common choice that rewards regulars without holding points forever.
Step 1: Enable points expiration
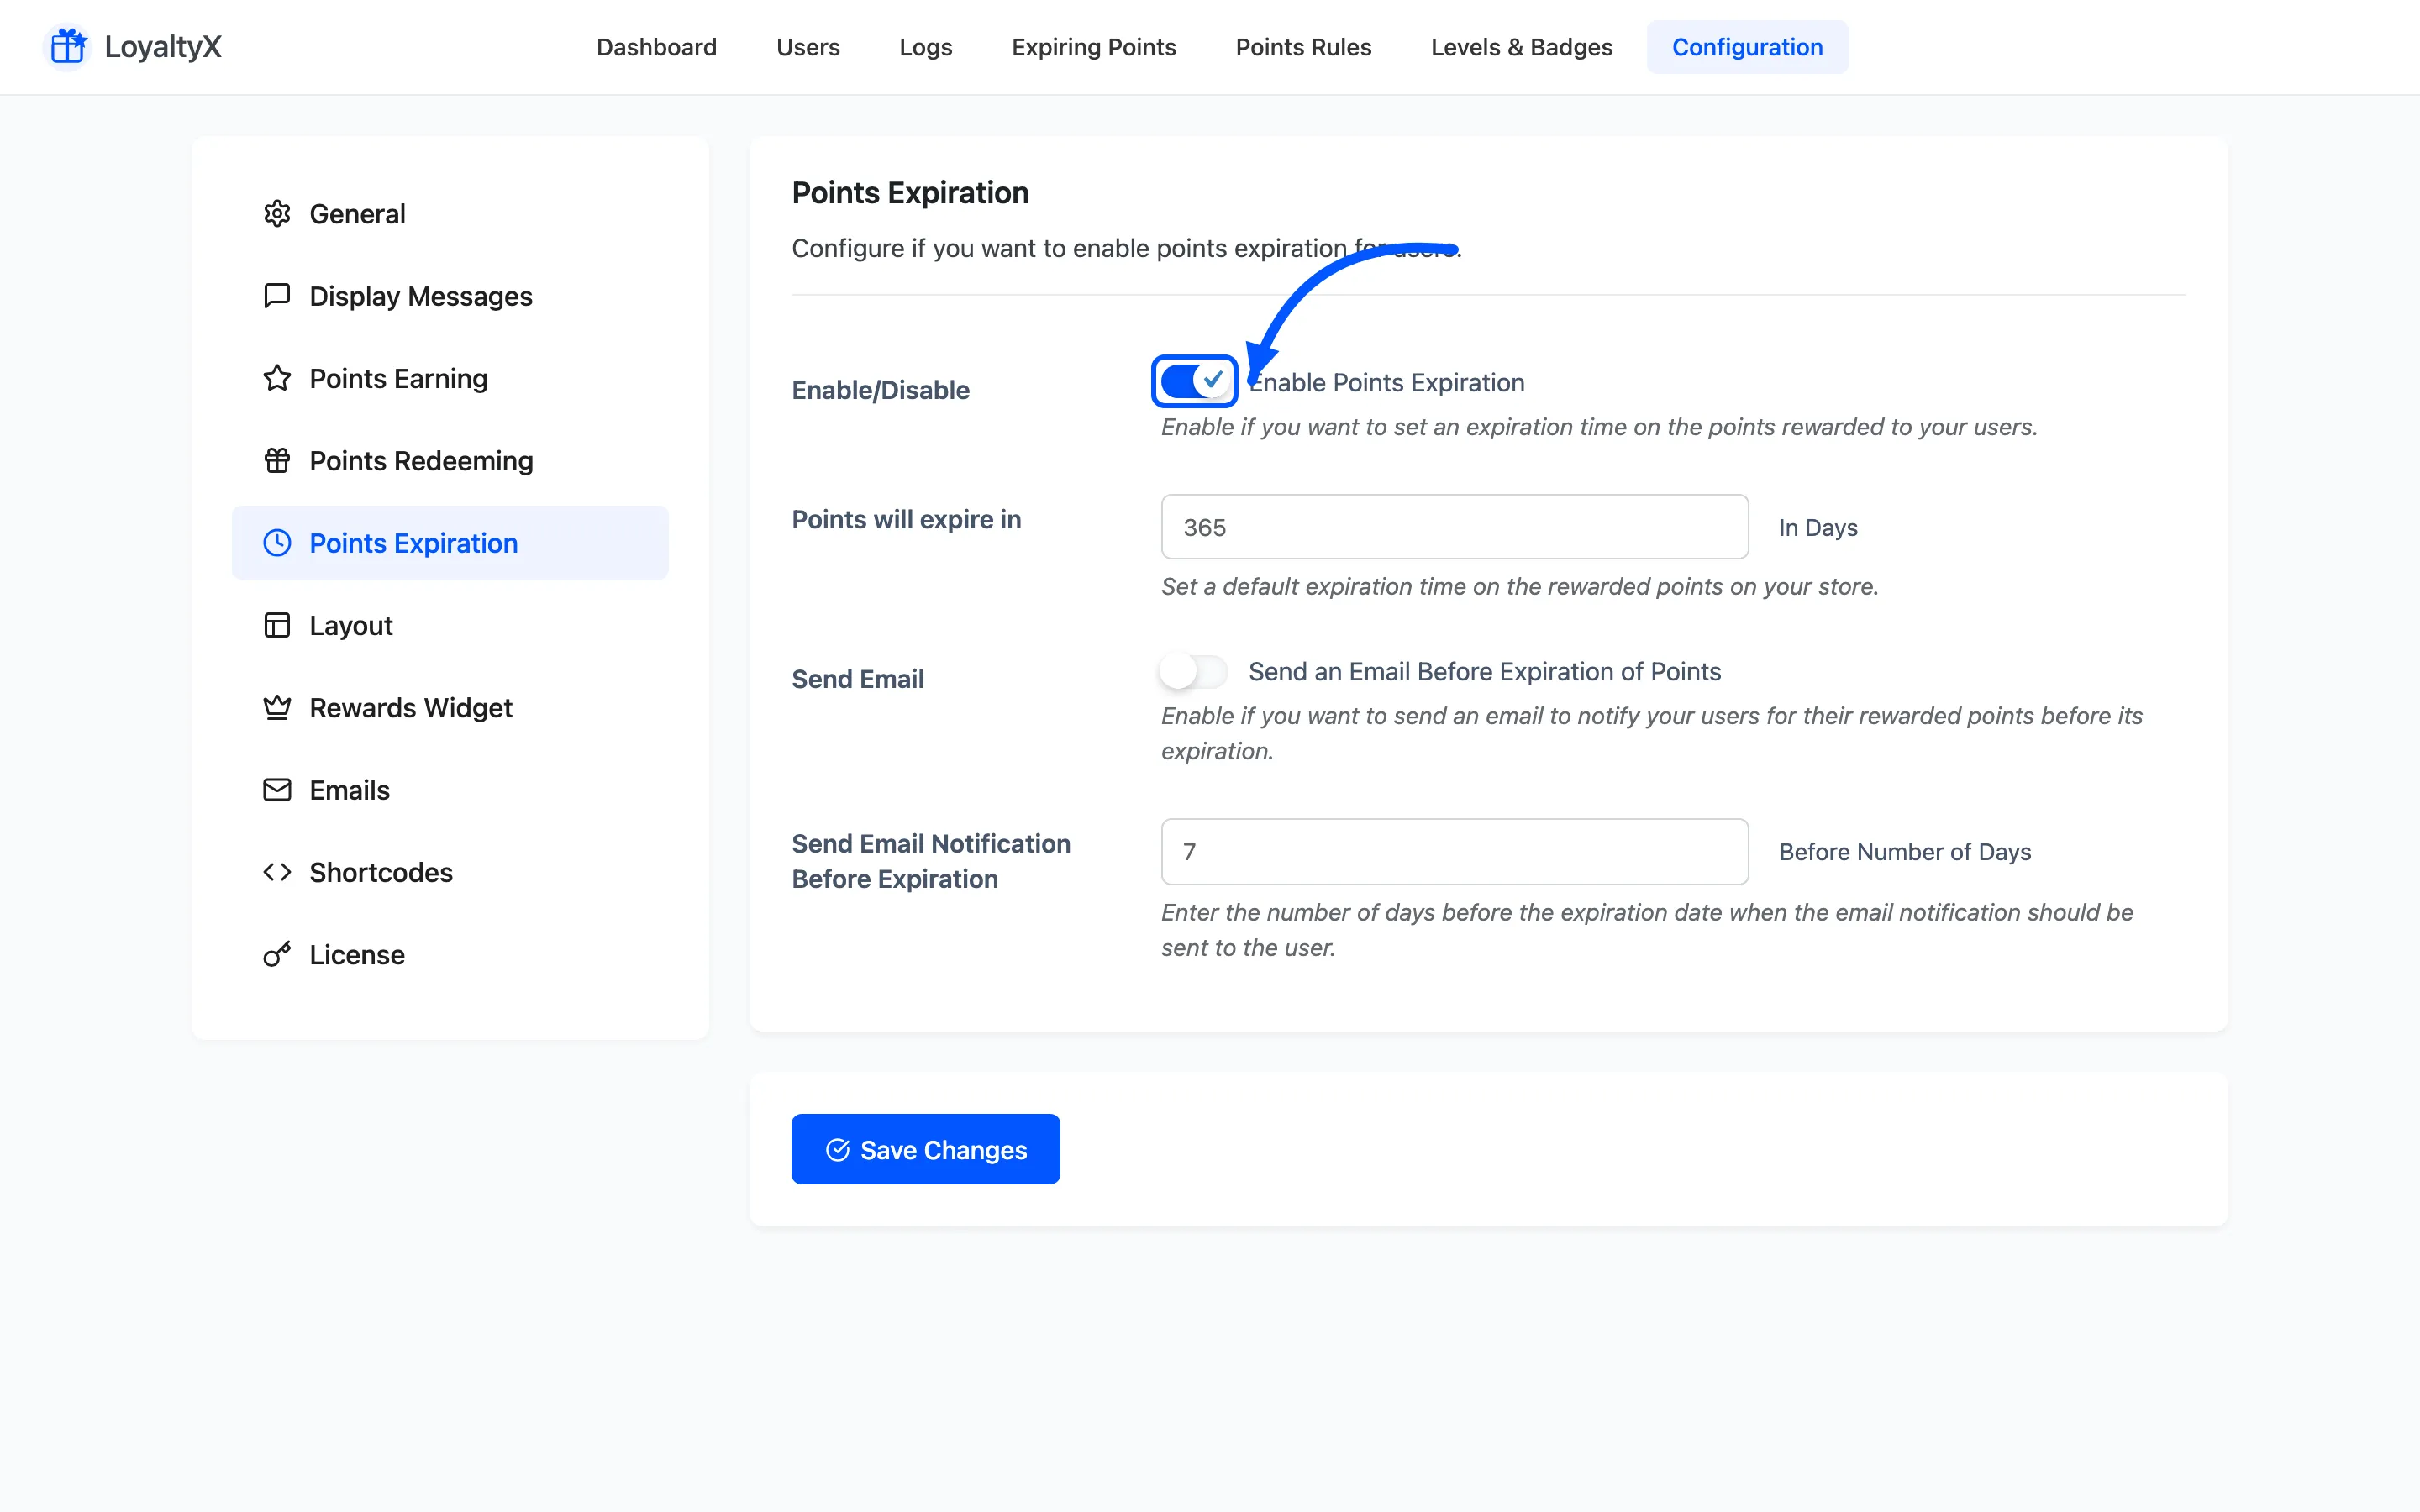
Section titled “Step 1: Enable points expiration”Go to DevDiggers Plugins → LoyaltyX → Configuration → Points Expiration. Turn on Enable Points Expiration.
Step 2: Set the expiry window
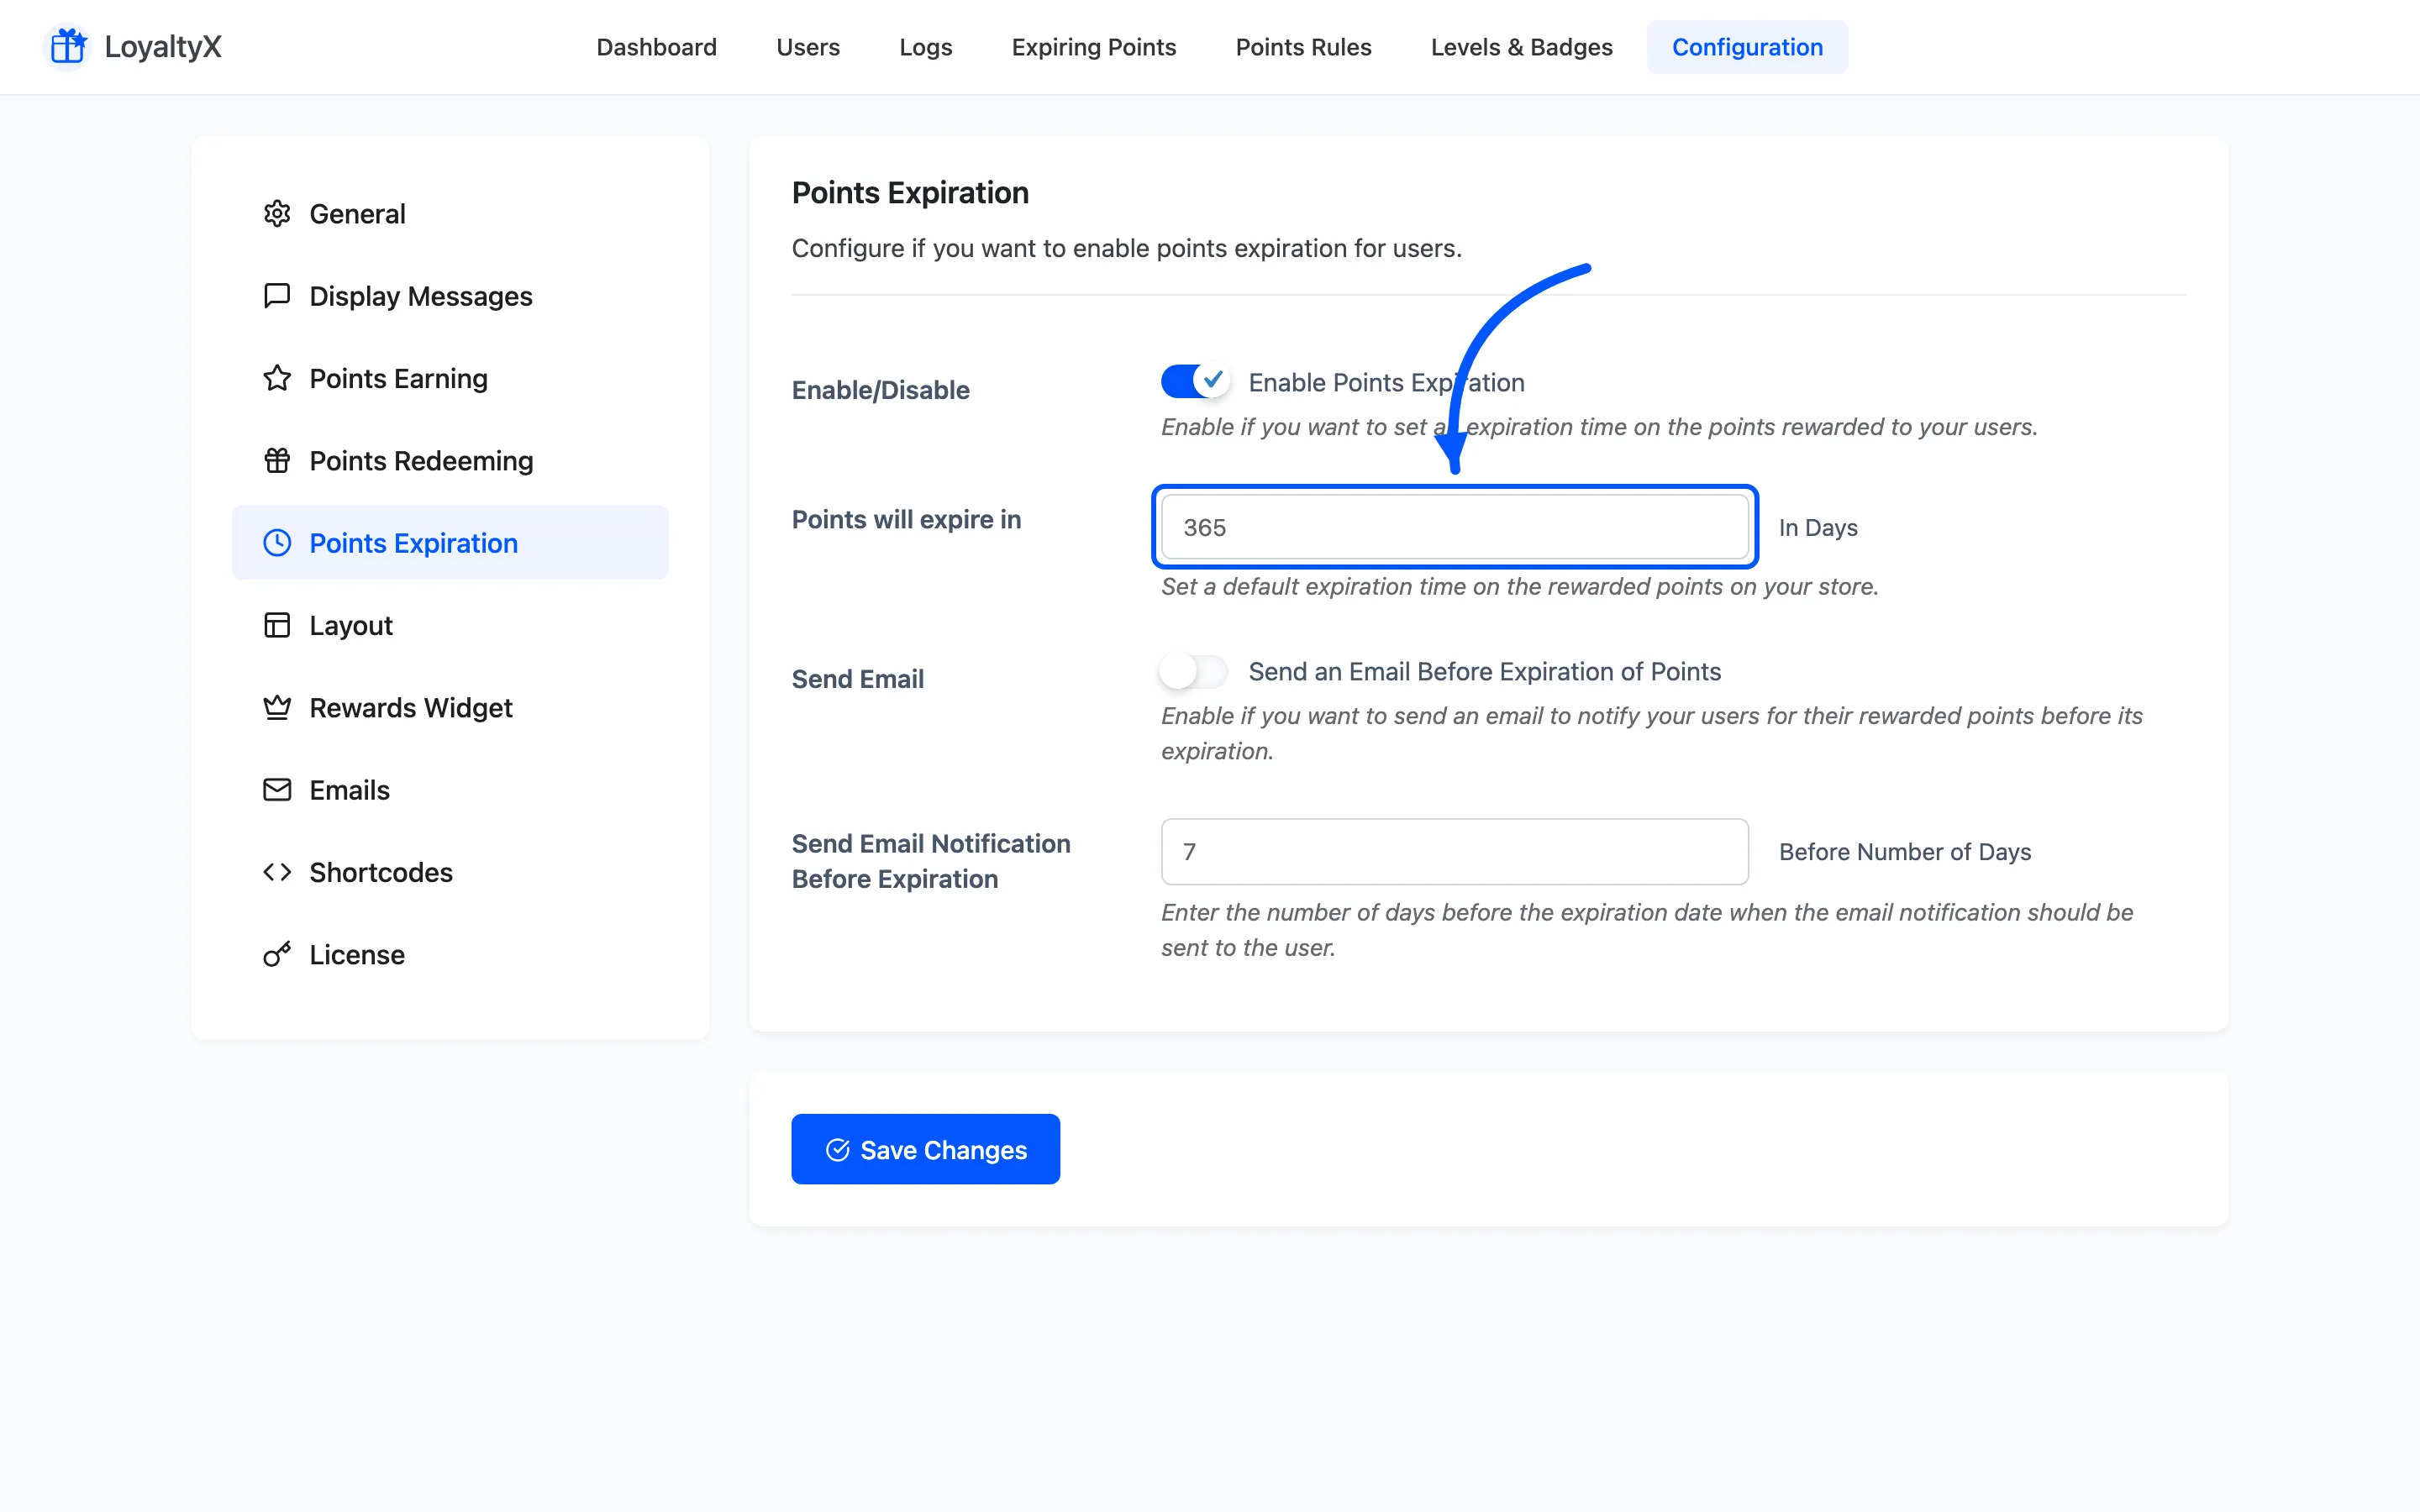
Section titled “Step 2: Set the expiry window”Set Points will expire in to the number of days points last. For a twelve-month window, enter
365. Points count toward this window from when they are earned, so a balance clears a year after
the points that made it up.
Pick a window that fits your buying cycle. A store customers visit monthly can use a shorter window than one they visit once a year.
Step 3: Turn on the reminder email
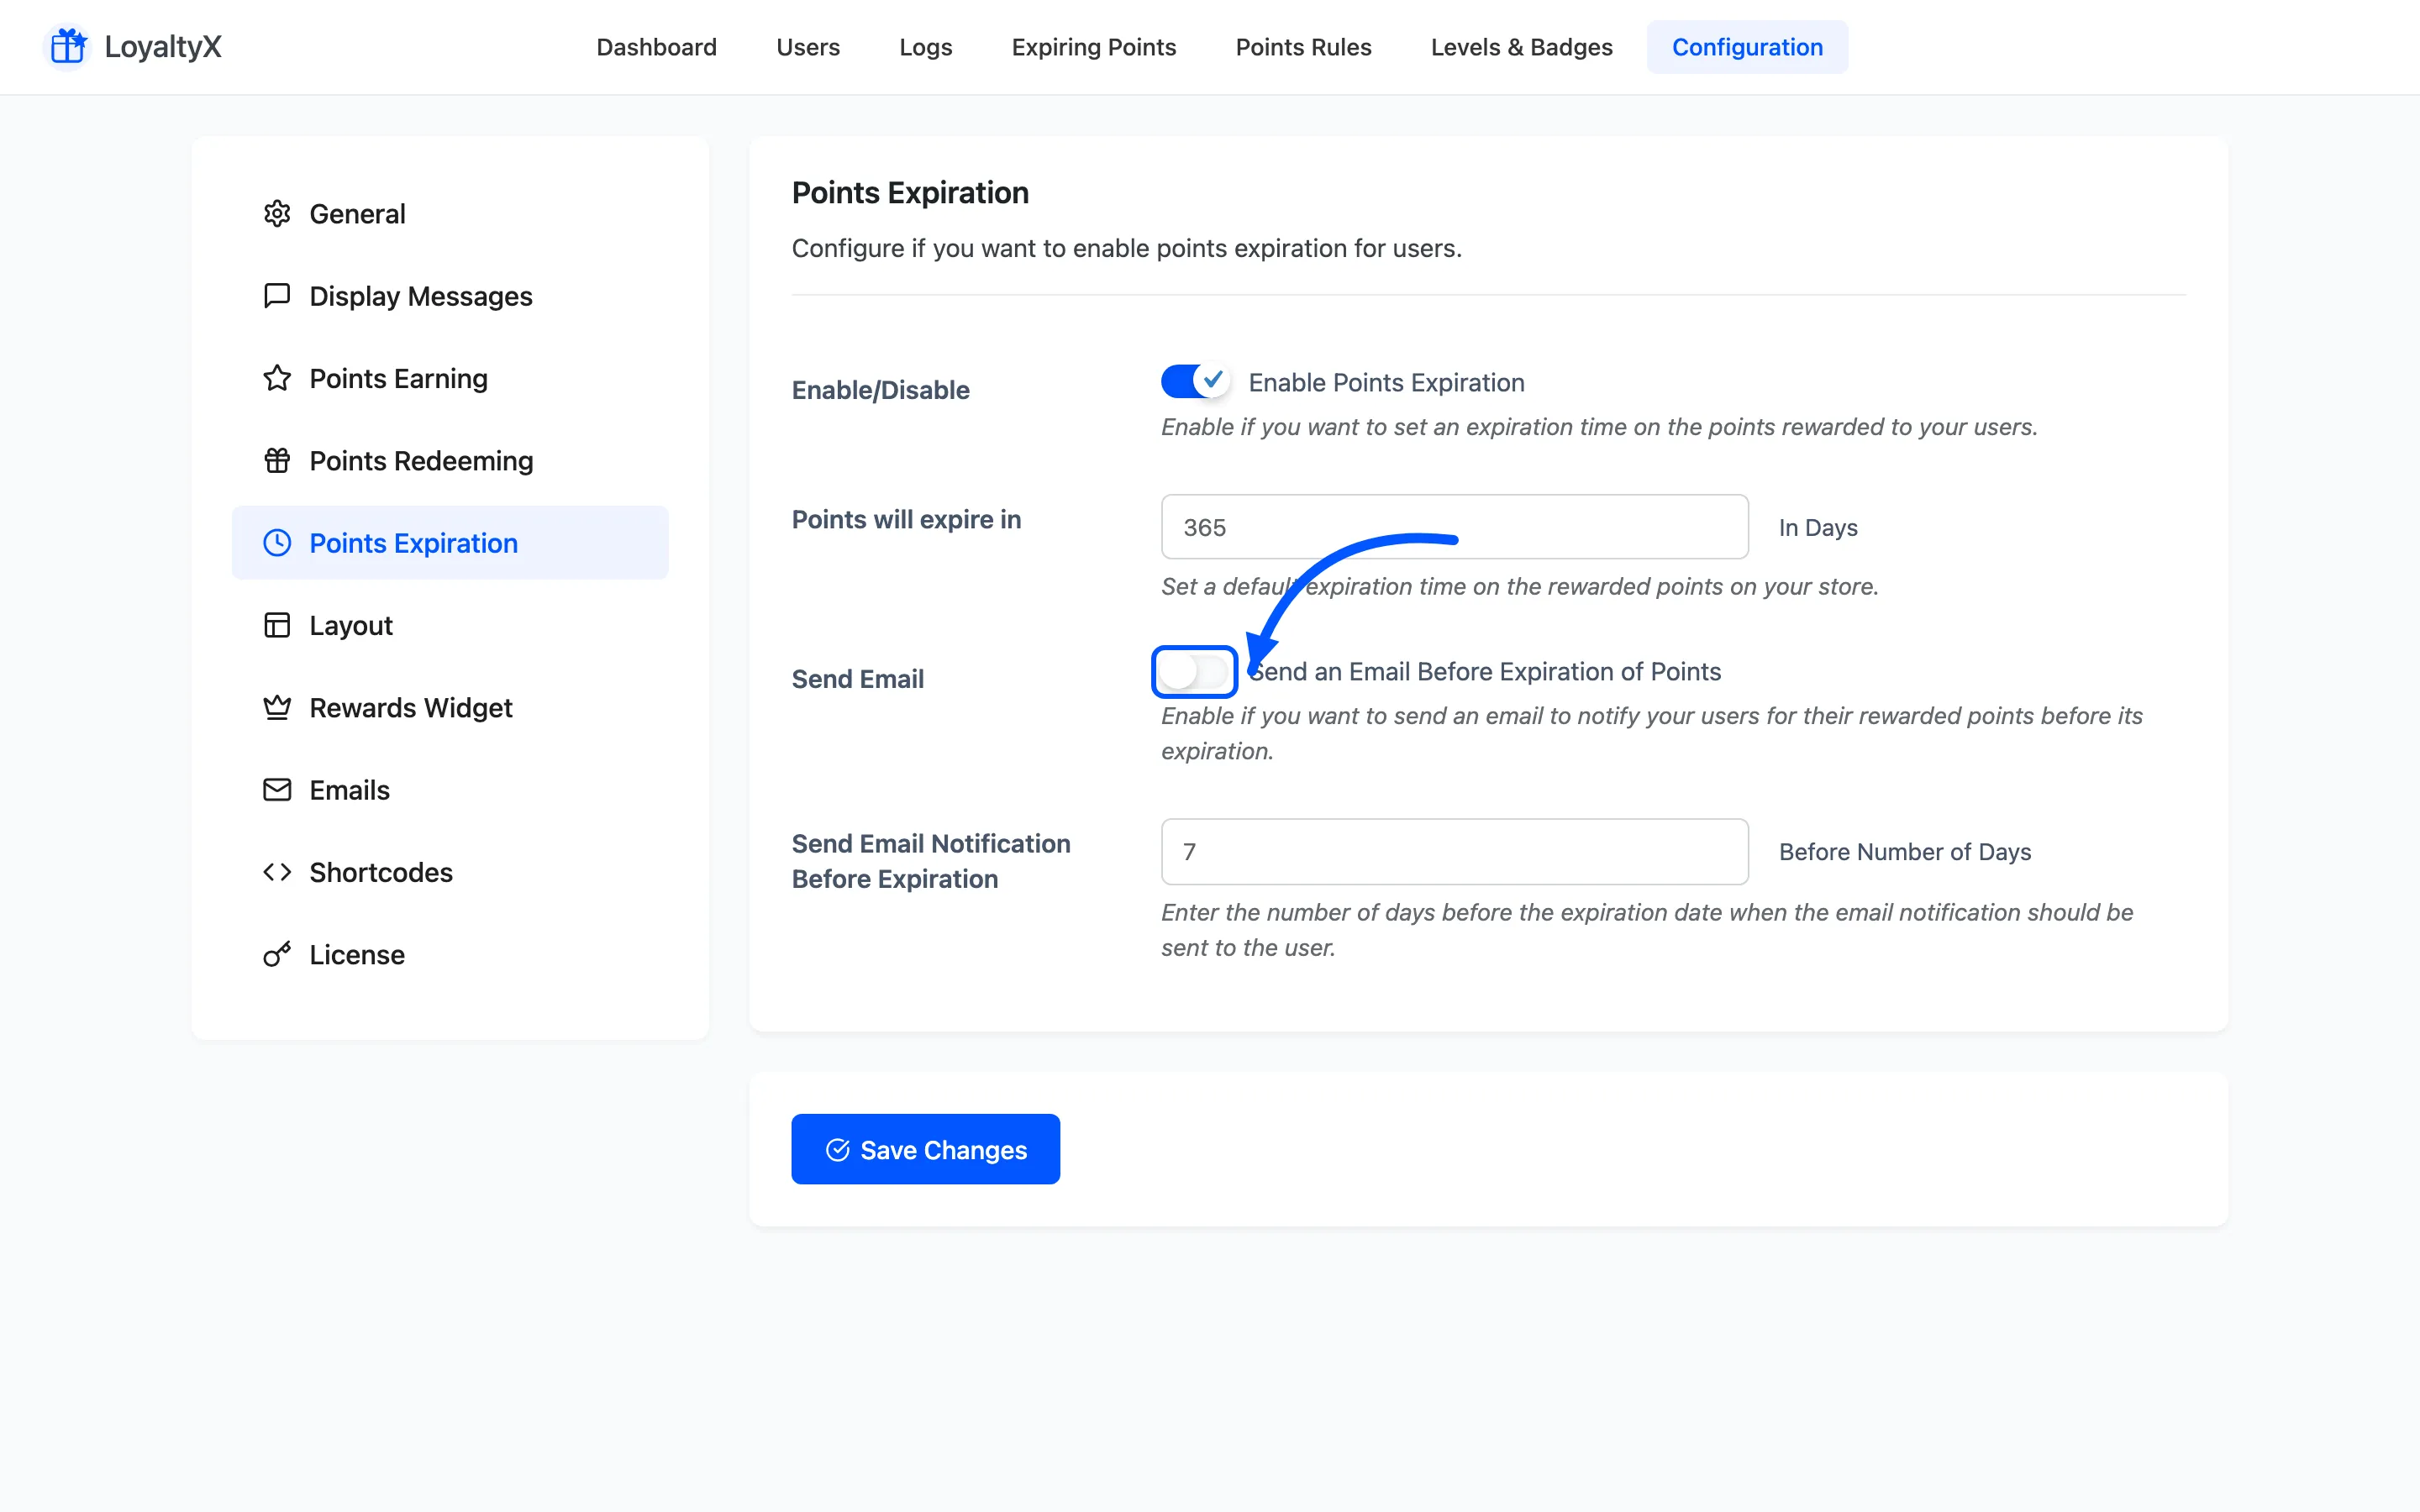
Section titled “Step 3: Turn on the reminder email”A balance that vanishes without warning frustrates customers. Turn on Send an Email Before
Expiration of Points, then set Send Email Notification Before Expiration to how many days
ahead the warning goes out. A value of 14 gives customers two weeks to spend their points.
Click Save Changes.
Step 4: Edit the email content
Section titled “Step 4: Edit the email content”Go to Configuration → Emails and edit two messages:
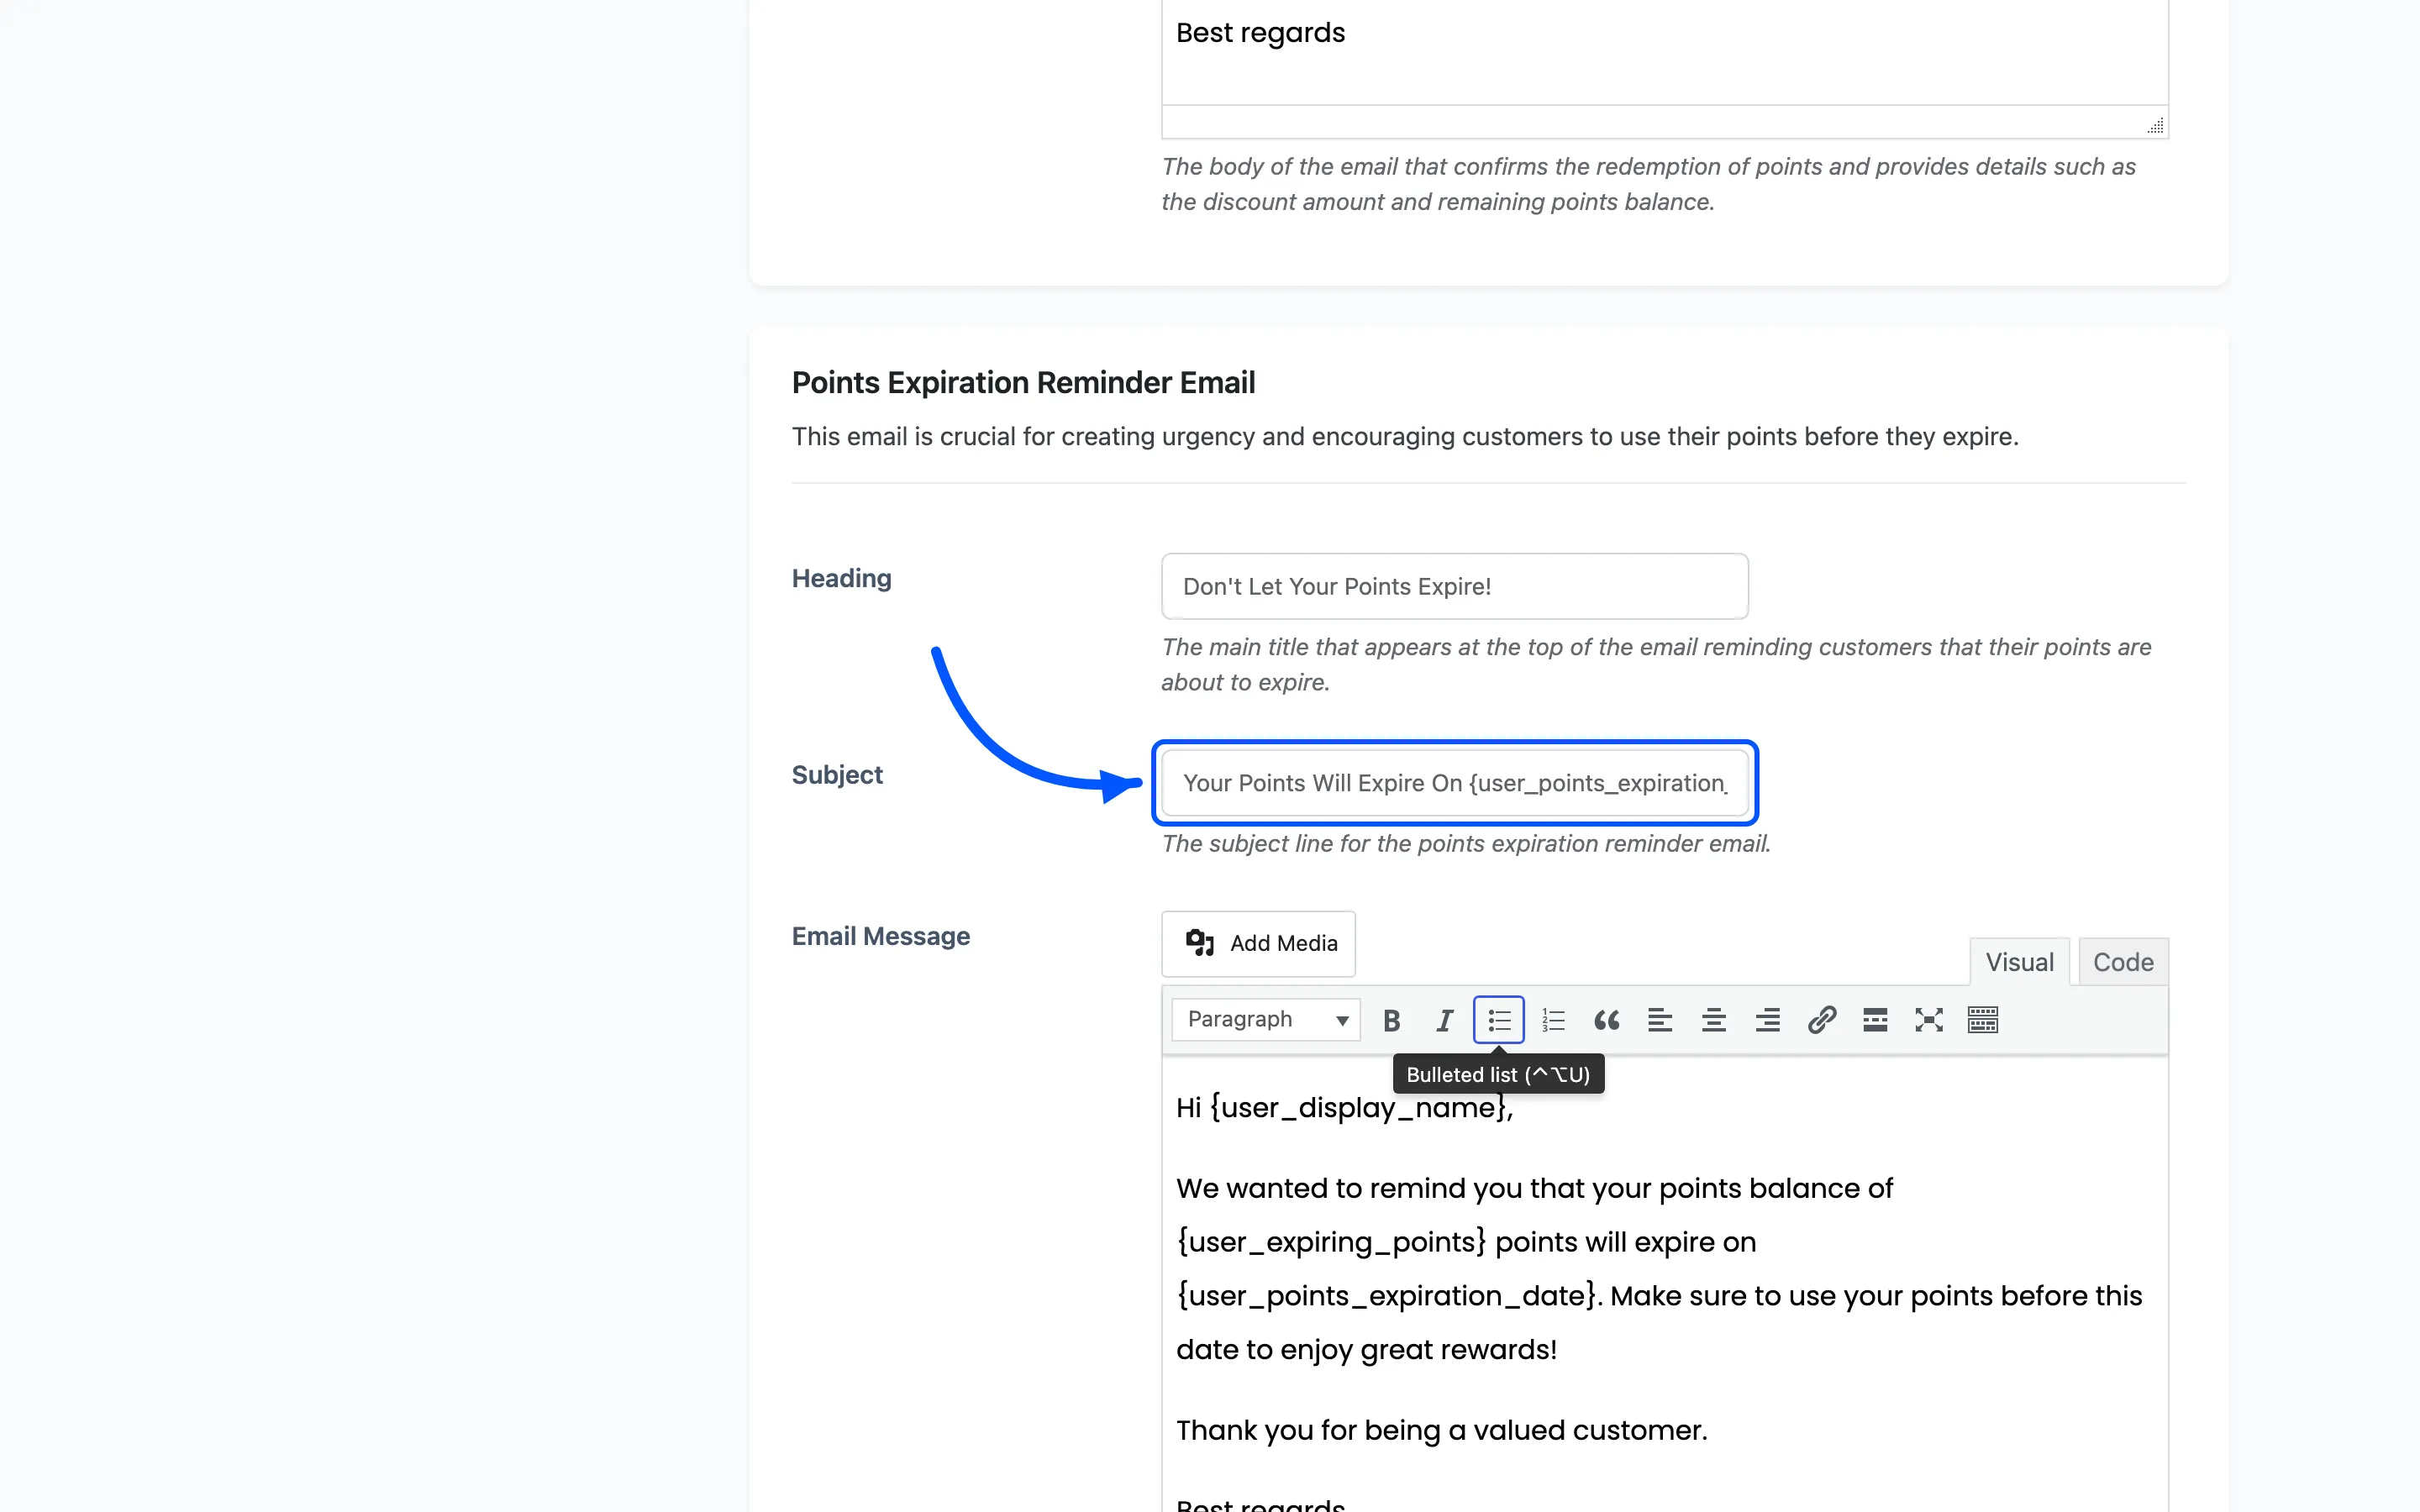
- Points Expiration Reminder Email is the warning. Set a clear subject and tell the customer how long they have and how to redeem.
- Points Expired Email confirms points have gone. Keep it brief and point the customer back to the store to earn more.
The reminder email carries two placeholders of its own, and they work in the Heading and Subject as well as the body:
{user_expiring_points}is the number of points about to clear.{user_points_expiration_date}is the date, written out asOctober 15, 2026.
Putting {user_expiring_points} in the subject is what makes the email work. “Your 2,254 points
expire on October 15, 2026” earns an open where “Your points are expiring” does not.
Step 5: Check the Expiring Points tab
Section titled “Step 5: Check the Expiring Points tab”Go to LoyaltyX → Expiring Points. Balances now show an Expires On date and a status. This is where you check who is about to lose points.
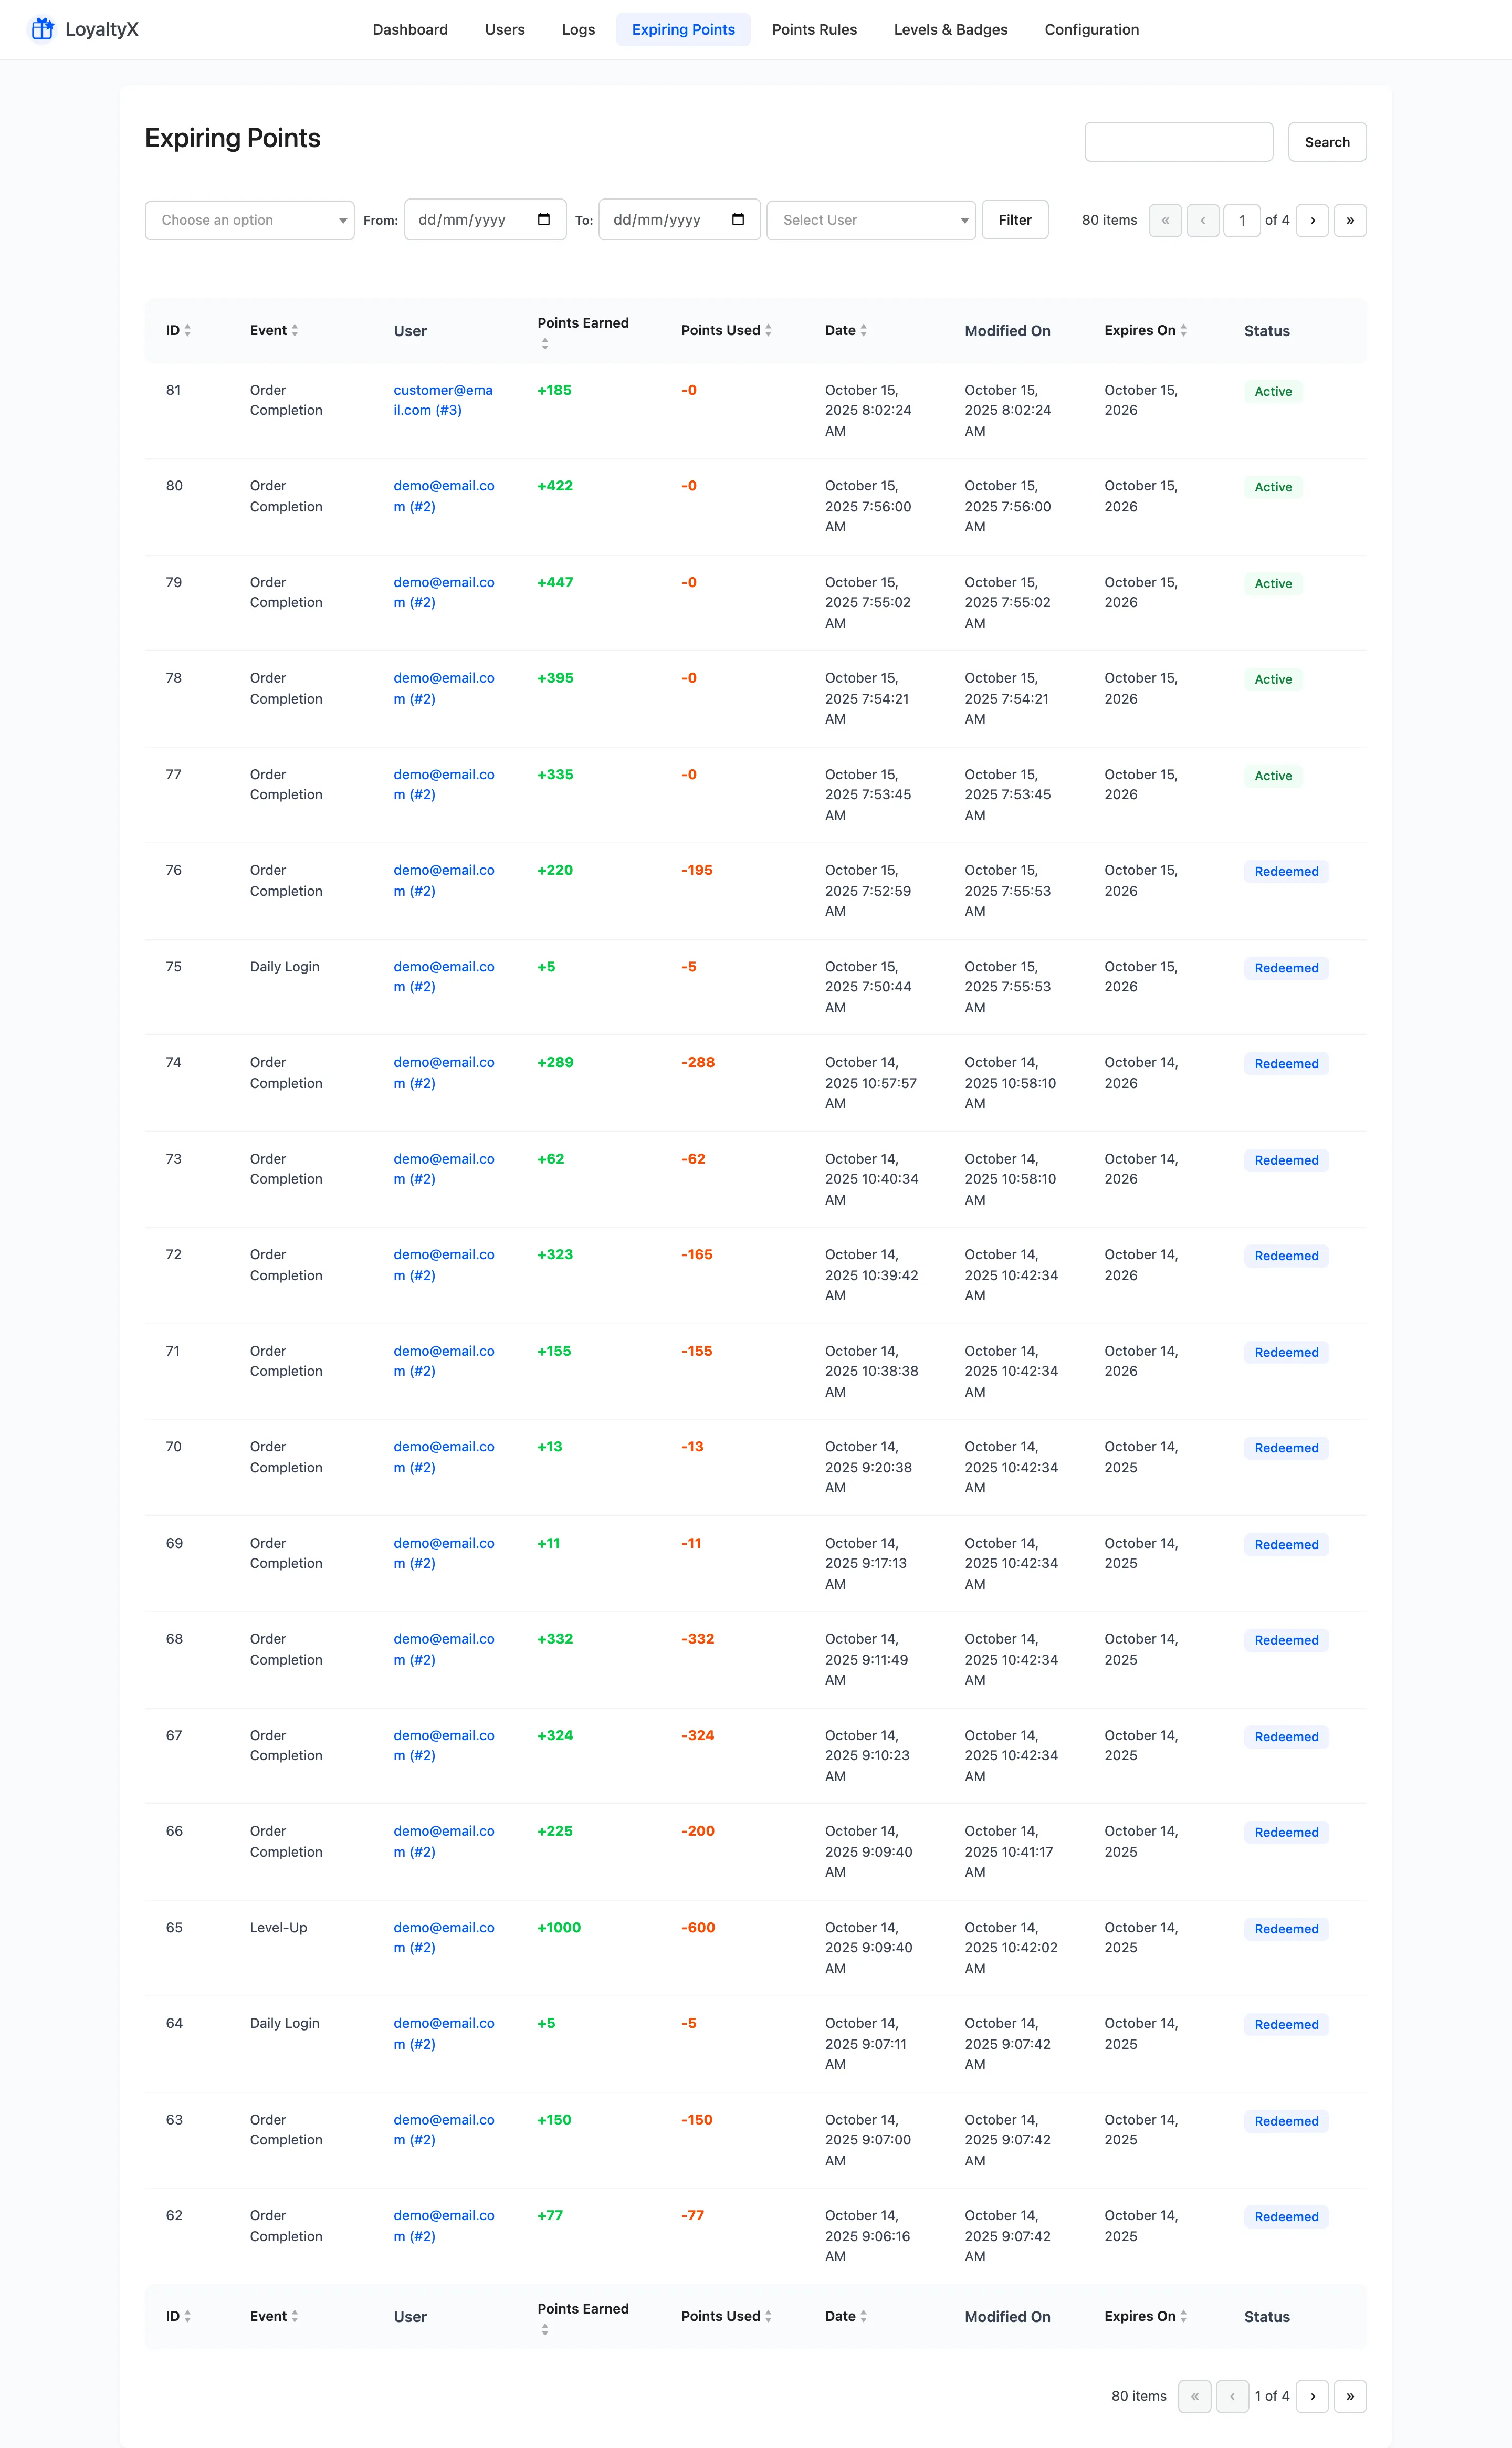
Expiration runs on a daily schedule, so newly earned points pick up their expiry dates from now on. Both the clearing and the reminder emails happen on that one daily run, which means neither is instant. Test with a short window rather than waiting on a real one.
How points are spent against the window
Section titled “How points are spent against the window”When a customer redeems, LoyaltyX takes from the batch with the nearest Expires On date first, then the oldest batch, and touches never-expiring points last. That order matters: a redemption always burns the points the customer was about to lose, so a regular customer rarely loses anything at all. Expiration only bites the customers who stopped buying, which is the point of it.
Troubleshooting
Section titled “Troubleshooting”- No expiry dates appear: confirm Enable Points Expiration is on and you saved the settings. Existing balances take their dates from the daily run, not from the moment you save.
- No reminder email: check that the reminder is enabled and the days-ahead value is not larger than the expiry window. The email also needs a body, since LoyaltyX skips the send when the Email Message is empty.
Where to go next
Section titled “Where to go next”- Expiring Points for a reference on the tab.
- Email Settings to edit every points email.