

How to Turn On Passkey-Only Sign In
Passkey-only sign in turns the password off for the roles you choose, as soon as each user has a passkey. A leaked or phished password then opens nothing.
Step 1: Make sure recovery codes are on
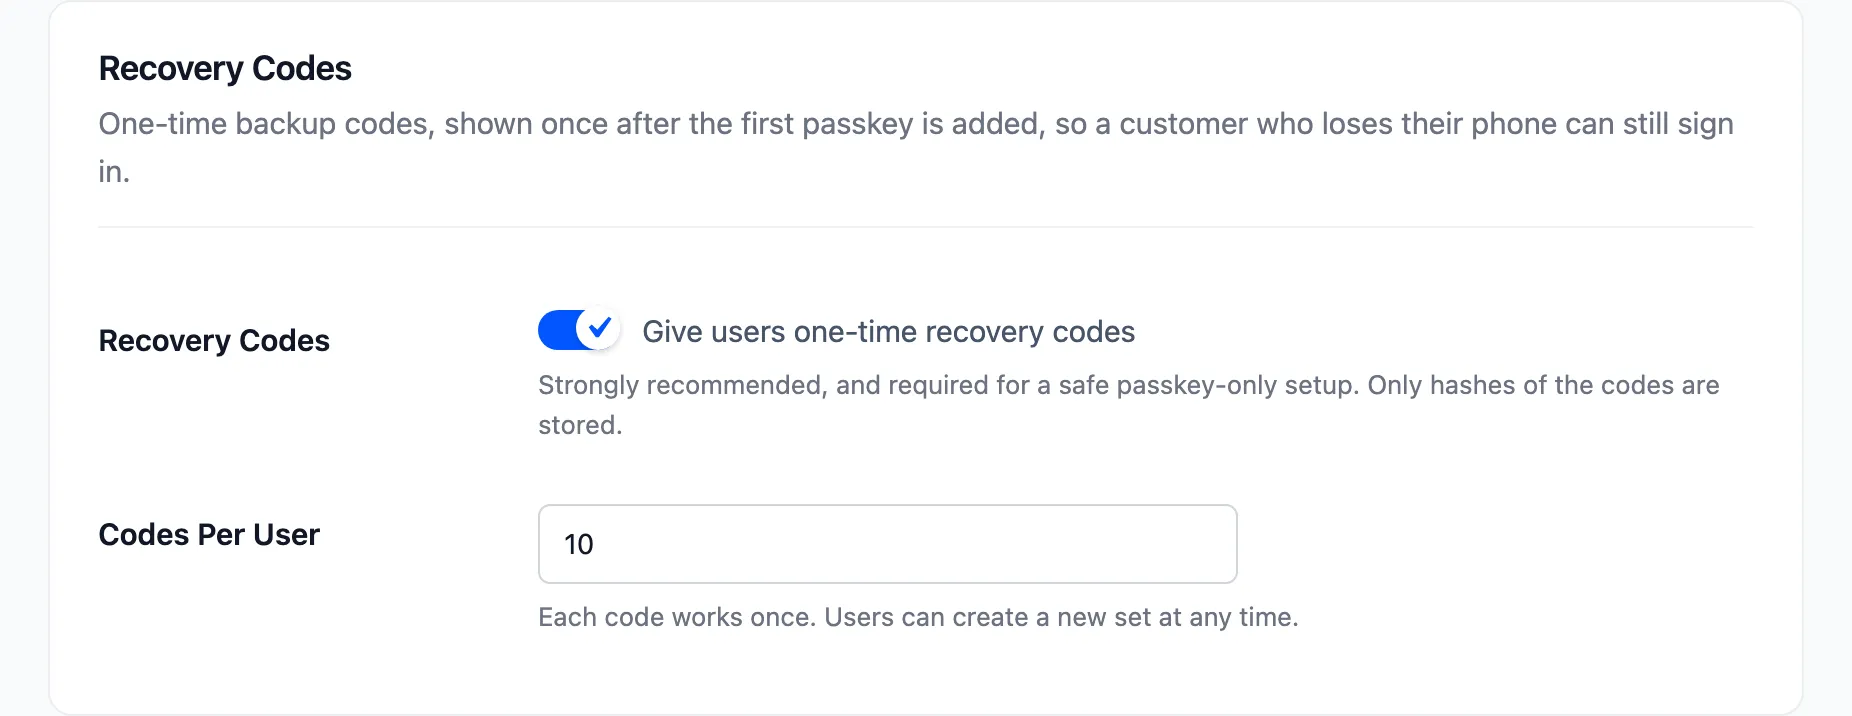
Section titled “Step 1: Make sure recovery codes are on”Open Configuration → Security. Recovery Codes is ticked by default. Leave it on: it is the way back for a user who loses their device.
Step 2: Add your own passkey
Section titled “Step 2: Add your own passkey”Add a passkey on Users → Profile before you add your own role. Keep your recovery codes somewhere safe.
Step 3: Pick the roles
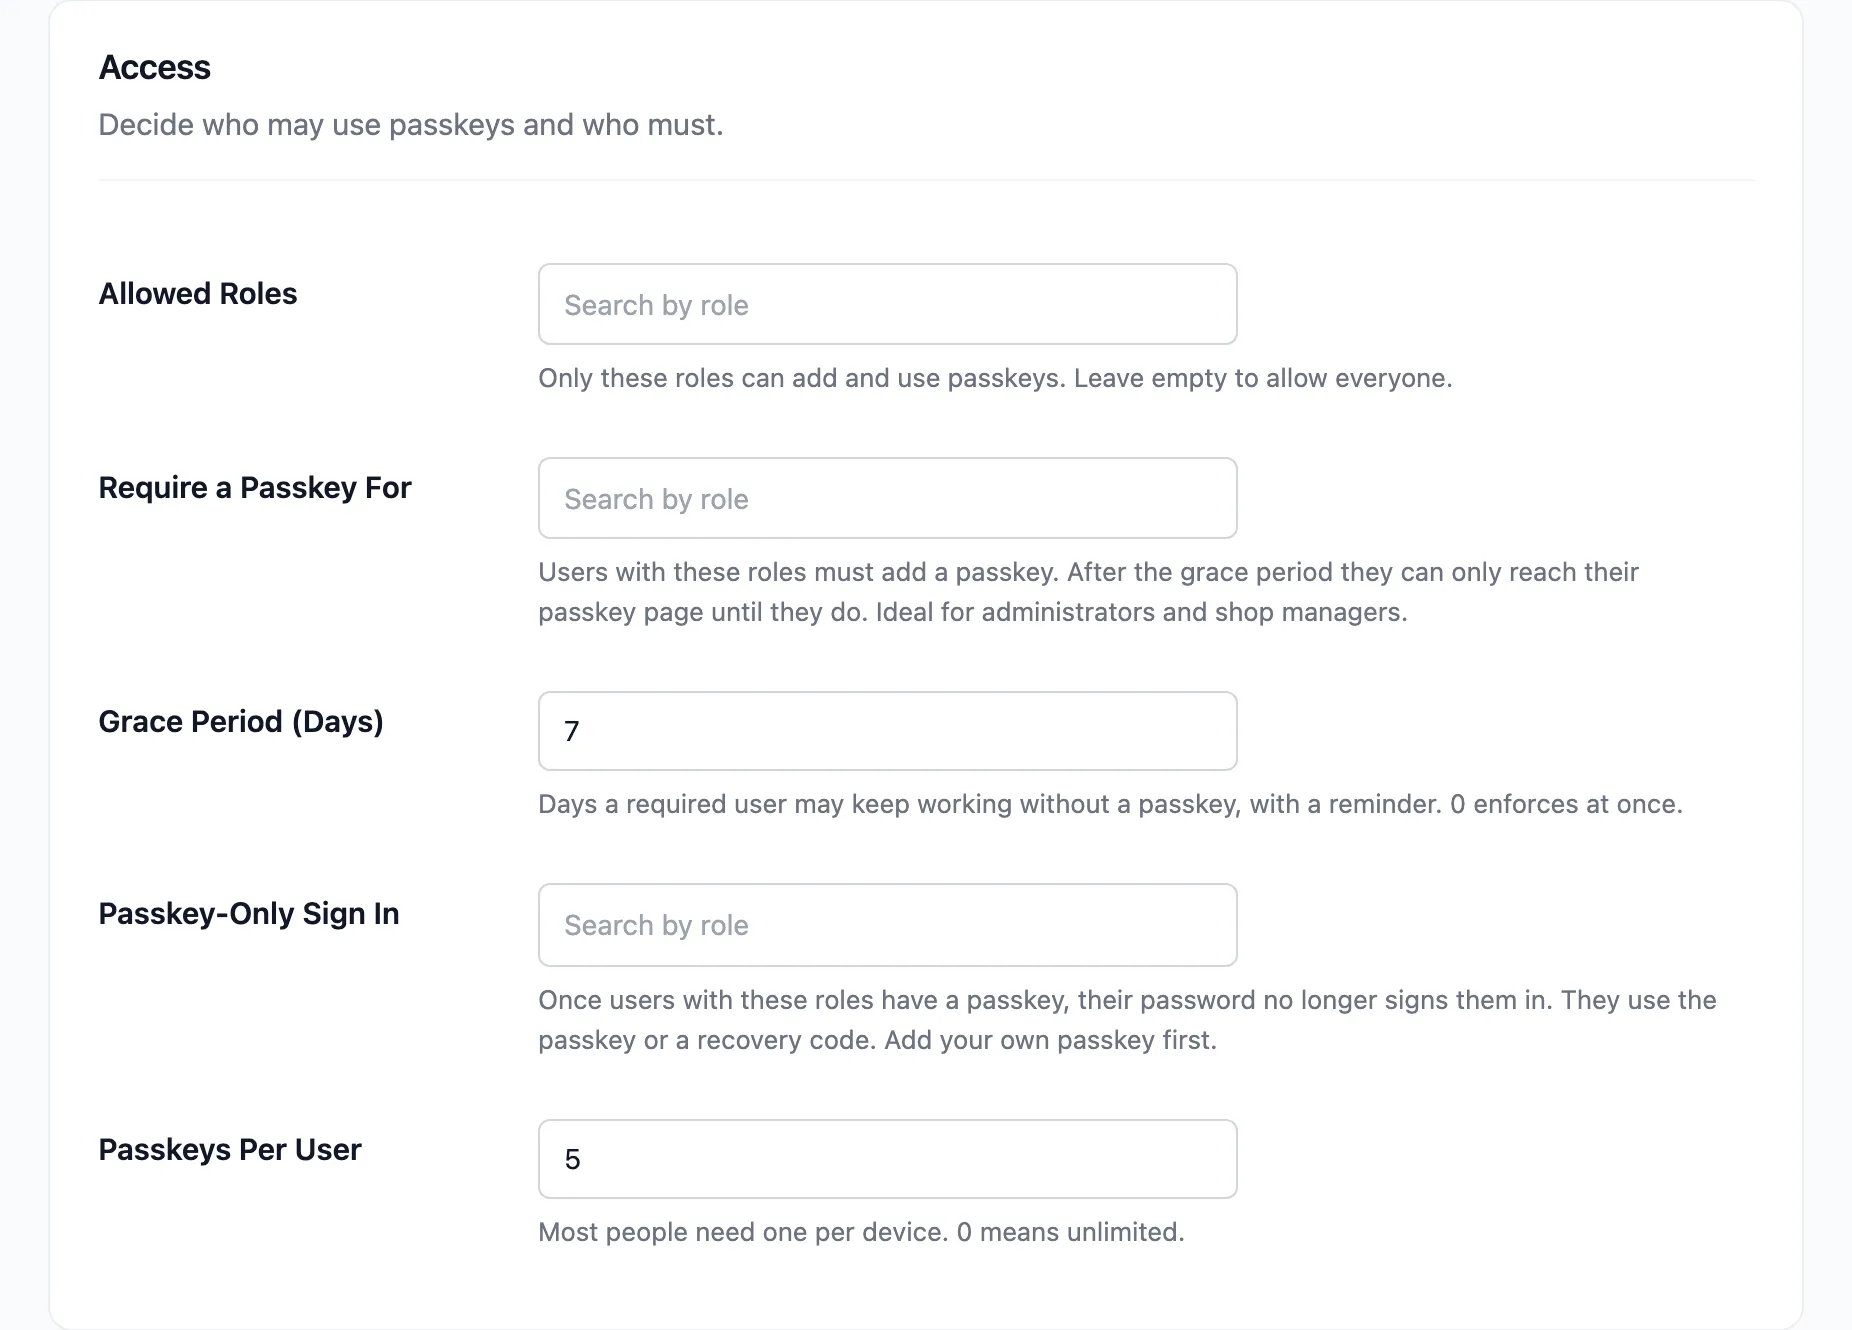
Section titled “Step 3: Pick the roles”Add roles to Passkey-Only Sign In and click Save Changes. A user of those roles without a passkey is not affected until they add one.
Step 4: Check a password sign in
Section titled “Step 4: Check a password sign in”On the demo, customers were made passkey-only. Typing Amara’s username and any password got:
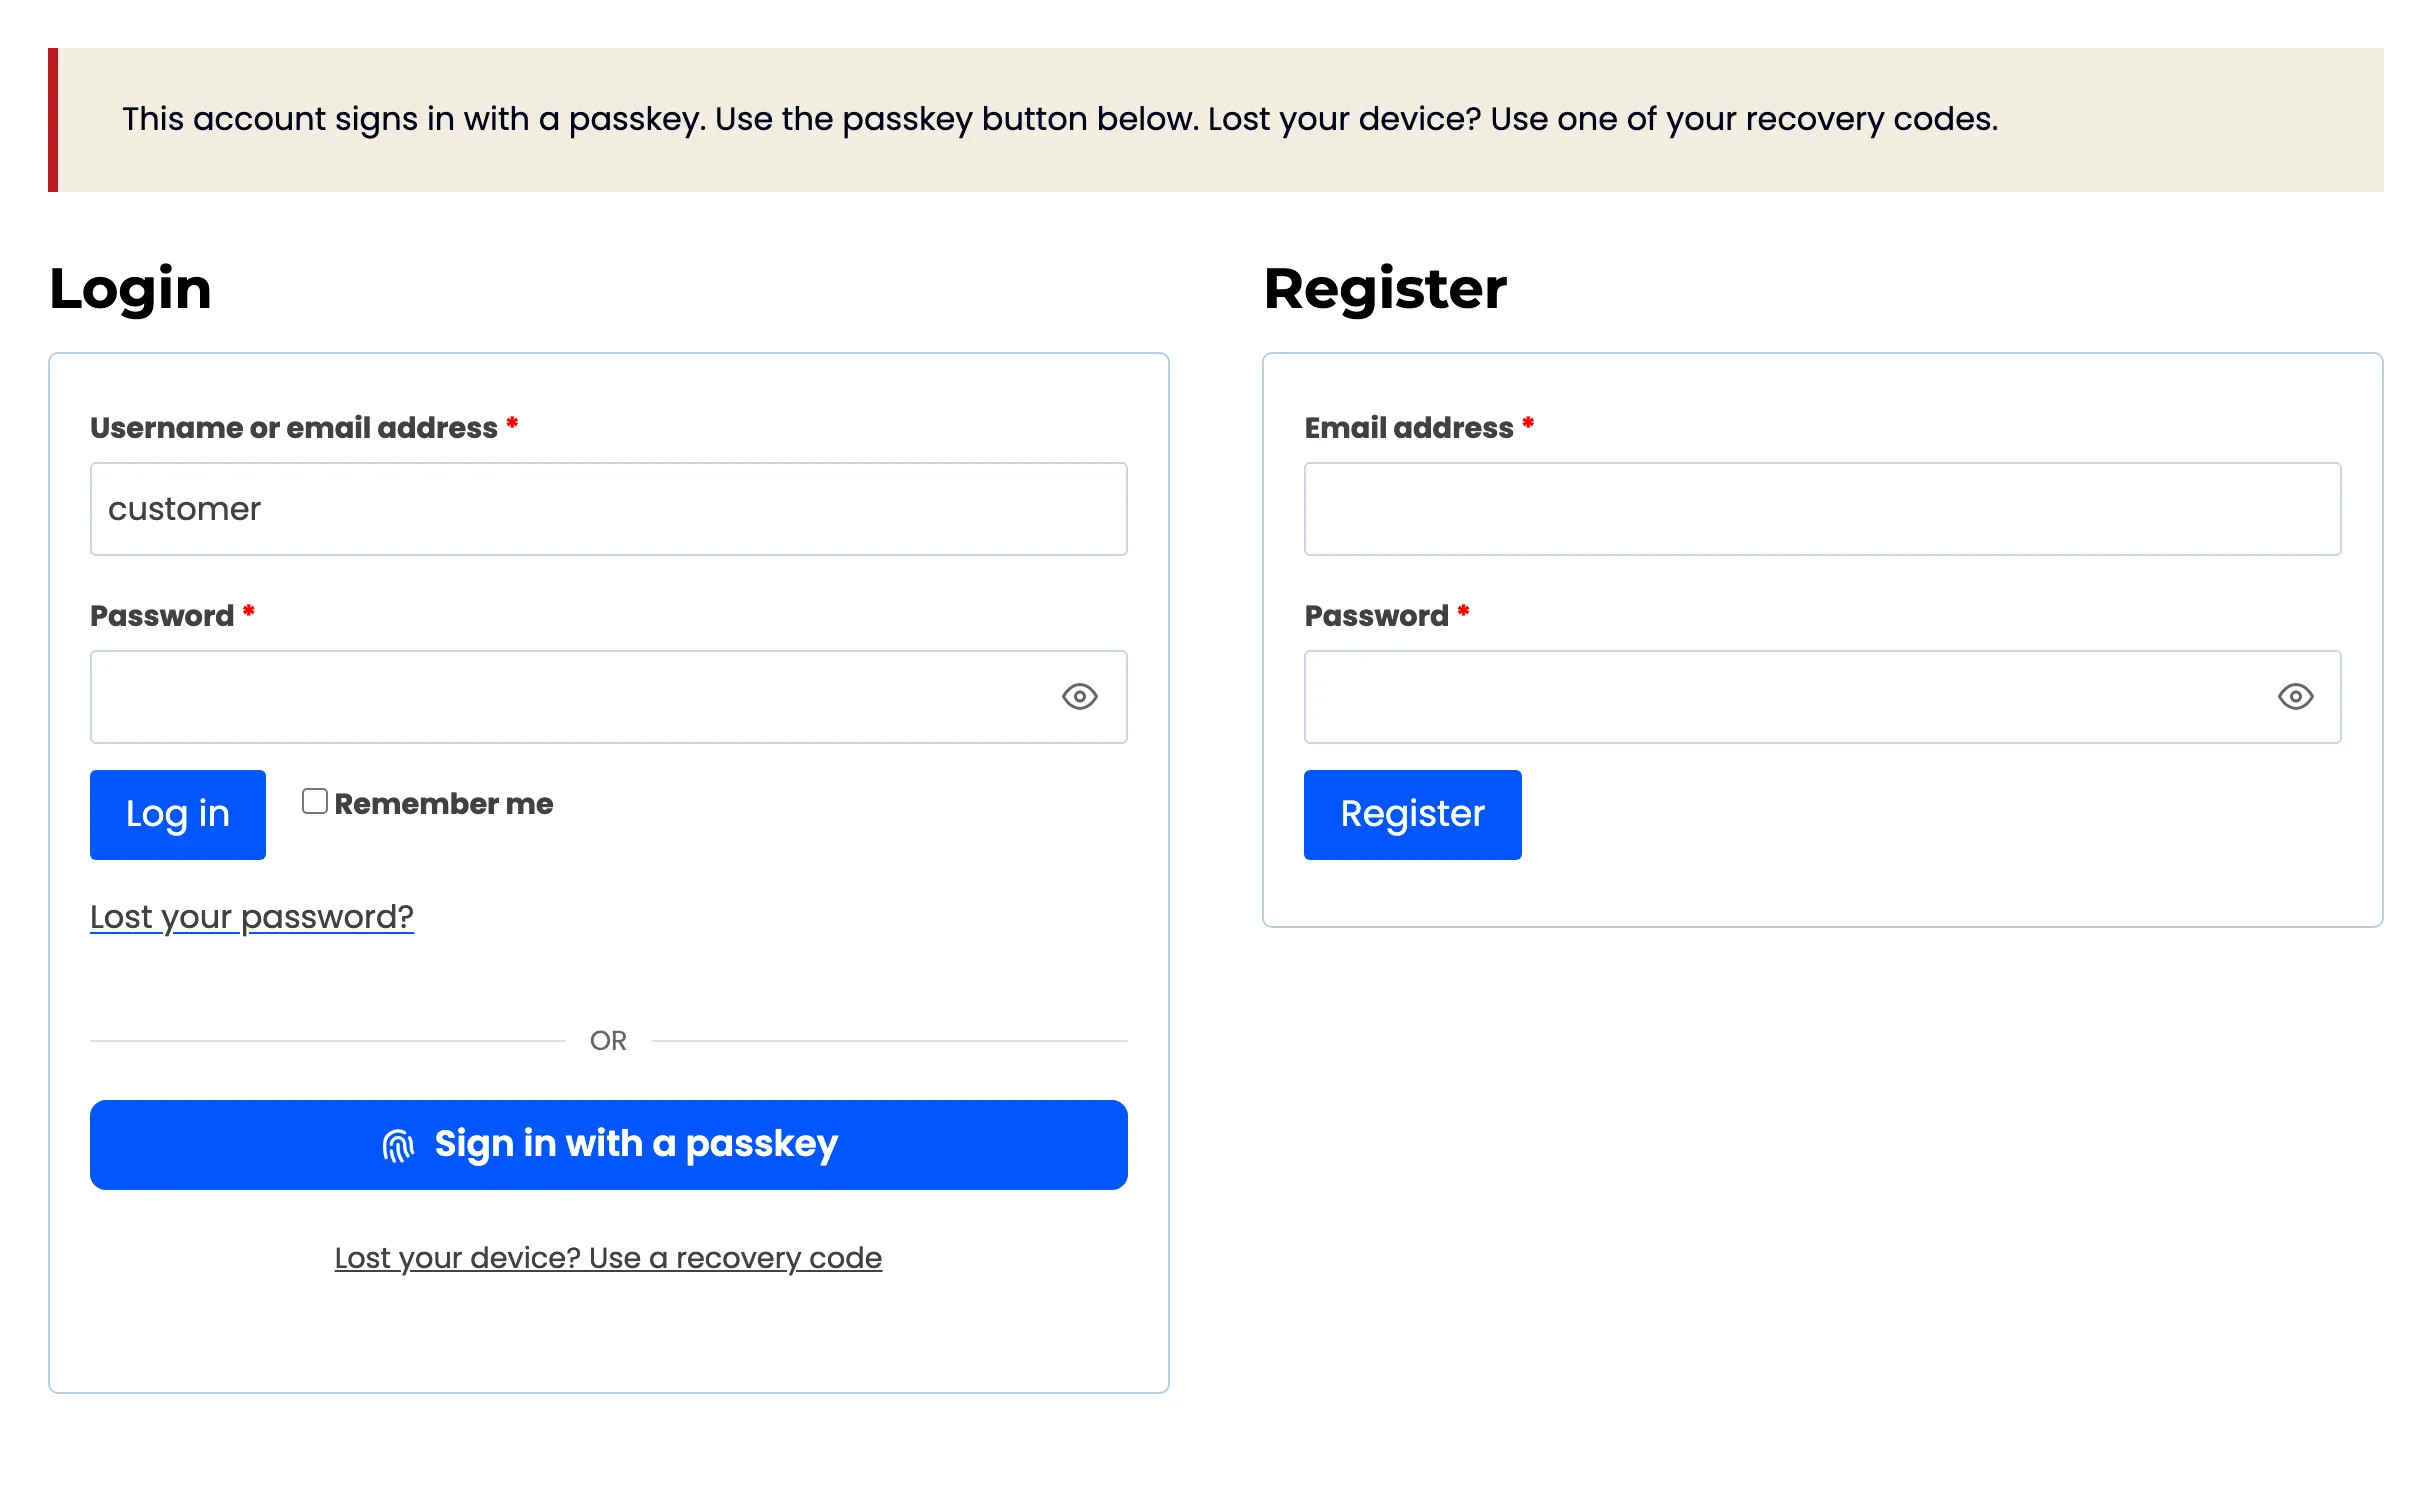
“This account signs in with a passkey. Use the passkey button below. Lost your device? Use one of your recovery codes.” The password is refused before it is even checked, so the message does not reveal whether it was right.
What else it covers
Section titled “What else it covers”- The WordPress login screen refuses the password the same way.
- Application passwords stop working for those users, because they skip the login form.
- Lost password emails still go out, but a new password does not sign them in either.
If a user is locked out
Section titled “If a user is locked out”They sign in with a recovery code. If they have none left, remove their role from the list for a moment, or revoke their passkeys on the Passkeys screen: with no passkey, their password works again.