

How to Show an Estimated Delivery Date
Customers ask “when will it arrive?” more than anything else. The estimate answers it on the bar and in every email, and it moves with the order.
Step 1: Switch the estimate on
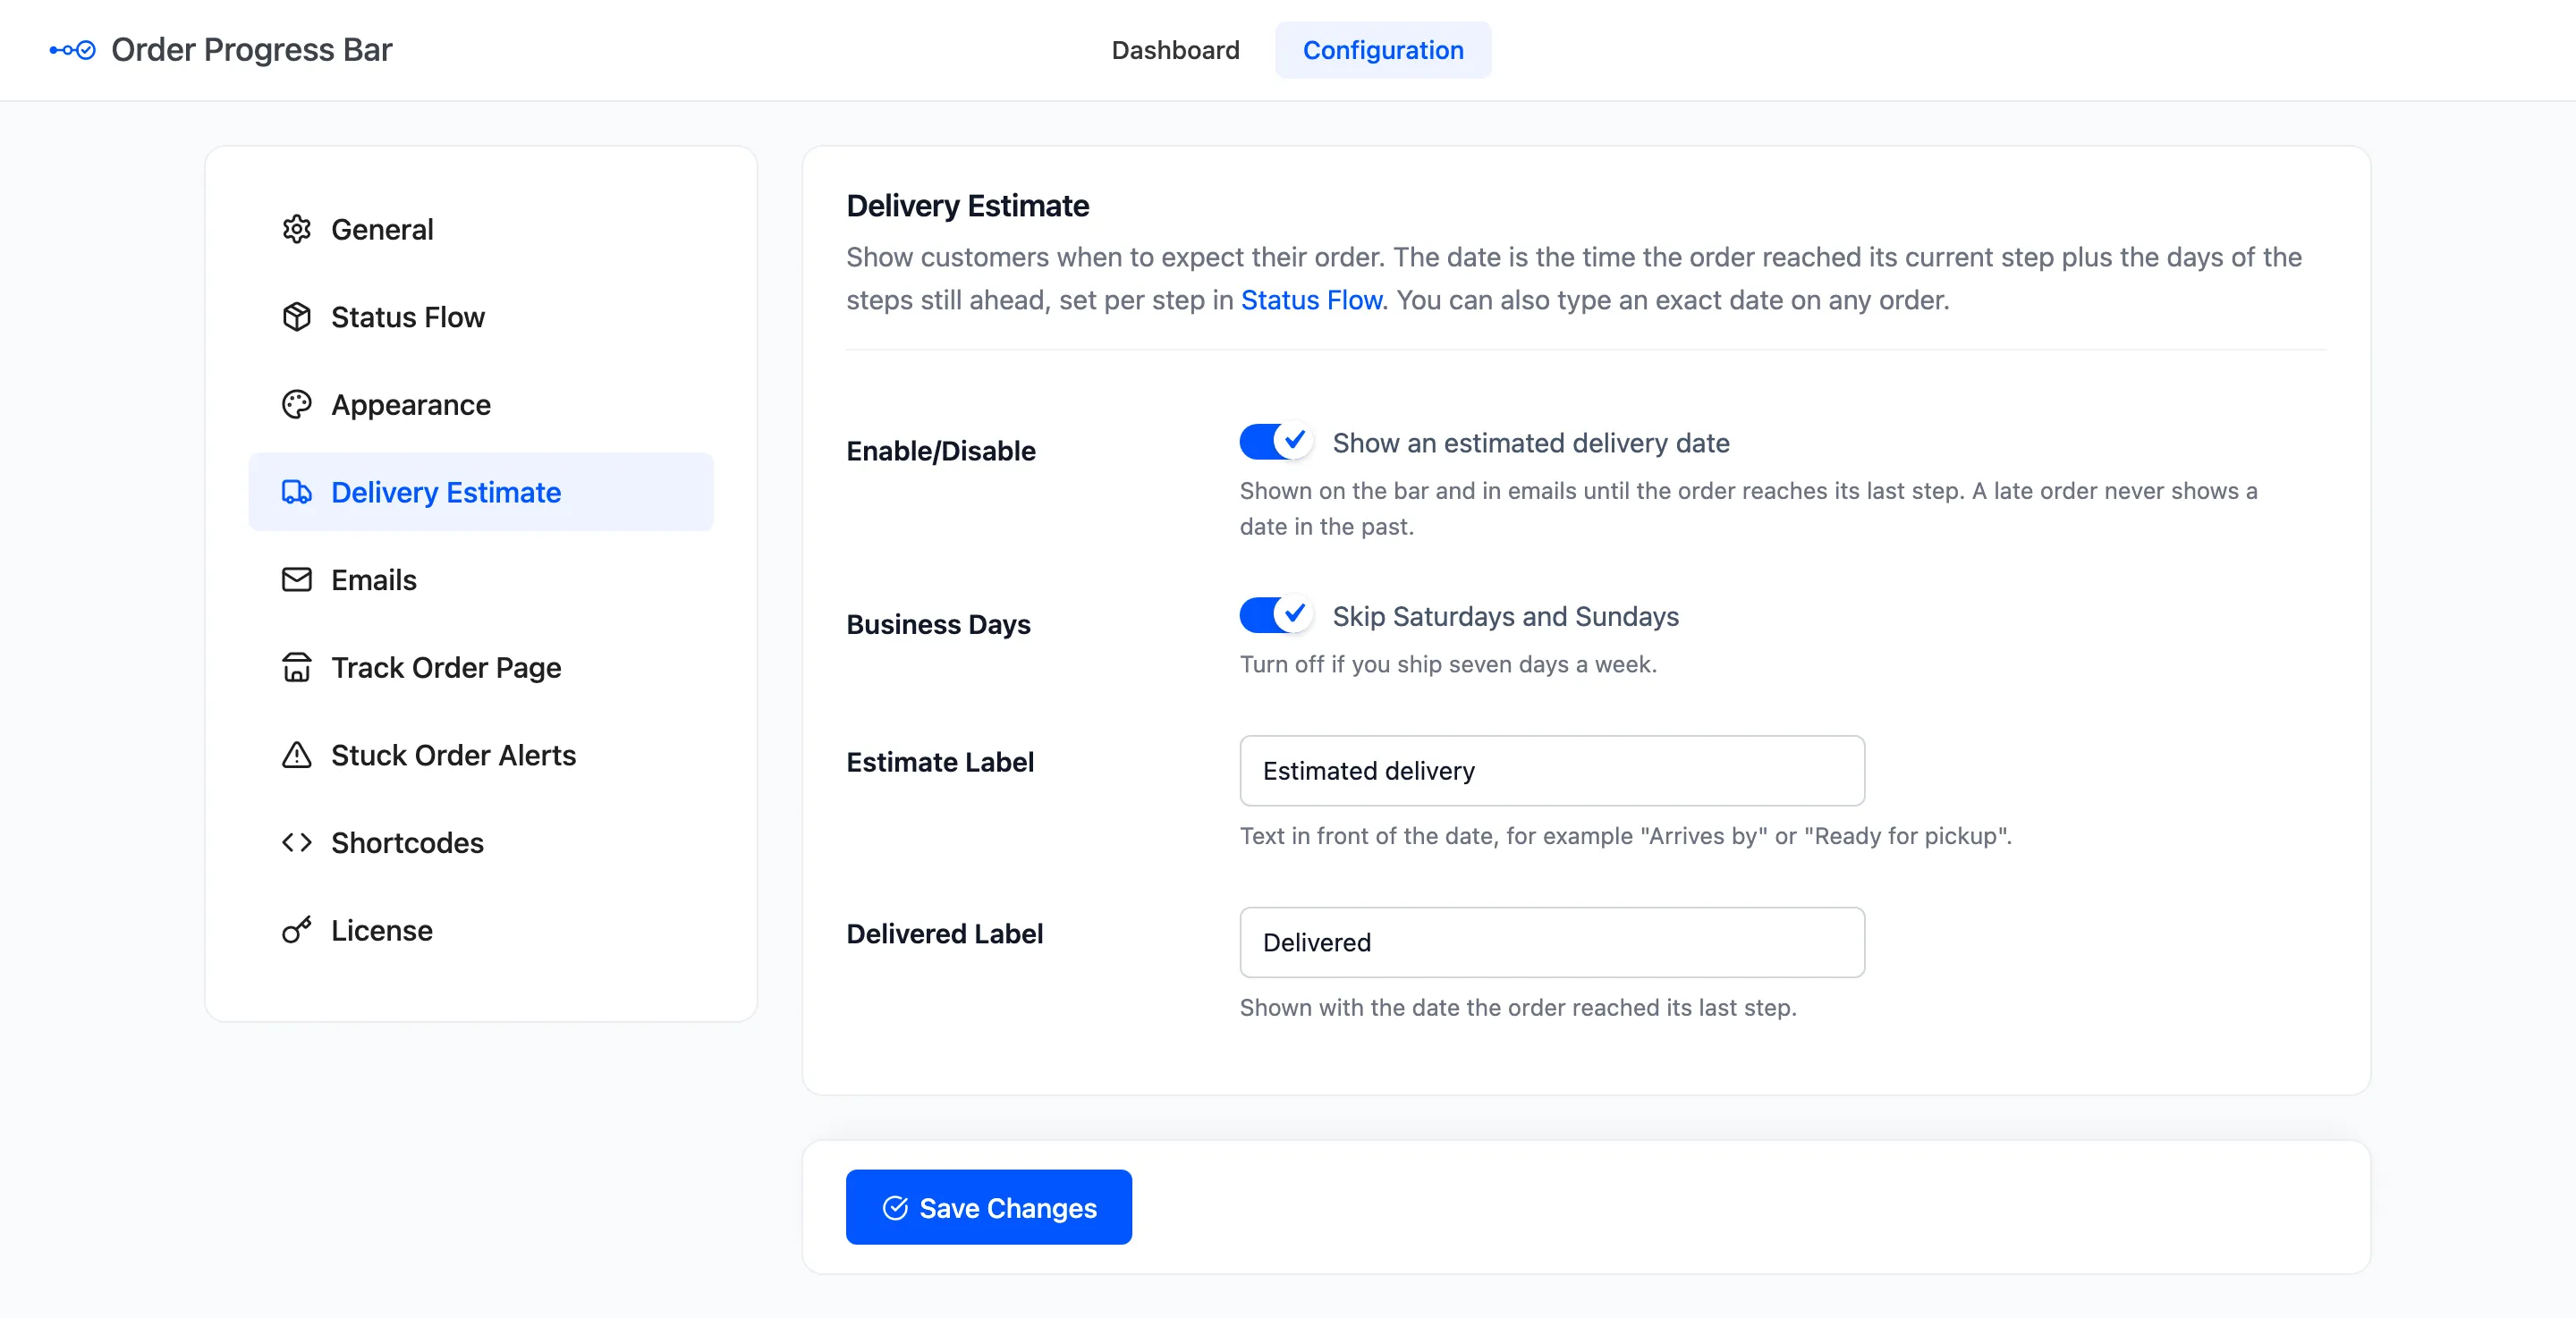
Section titled “Step 1: Switch the estimate on”Open Configuration → Delivery Estimate. Enable/Disable is on by default.
Step 2: Set the days of each step
Section titled “Step 2: Set the days of each step”Under Status Flow, open each step and set Days to reach this step: how long it usually takes after the step before. The shipped days are 1 for Processing and 3 for Completed.
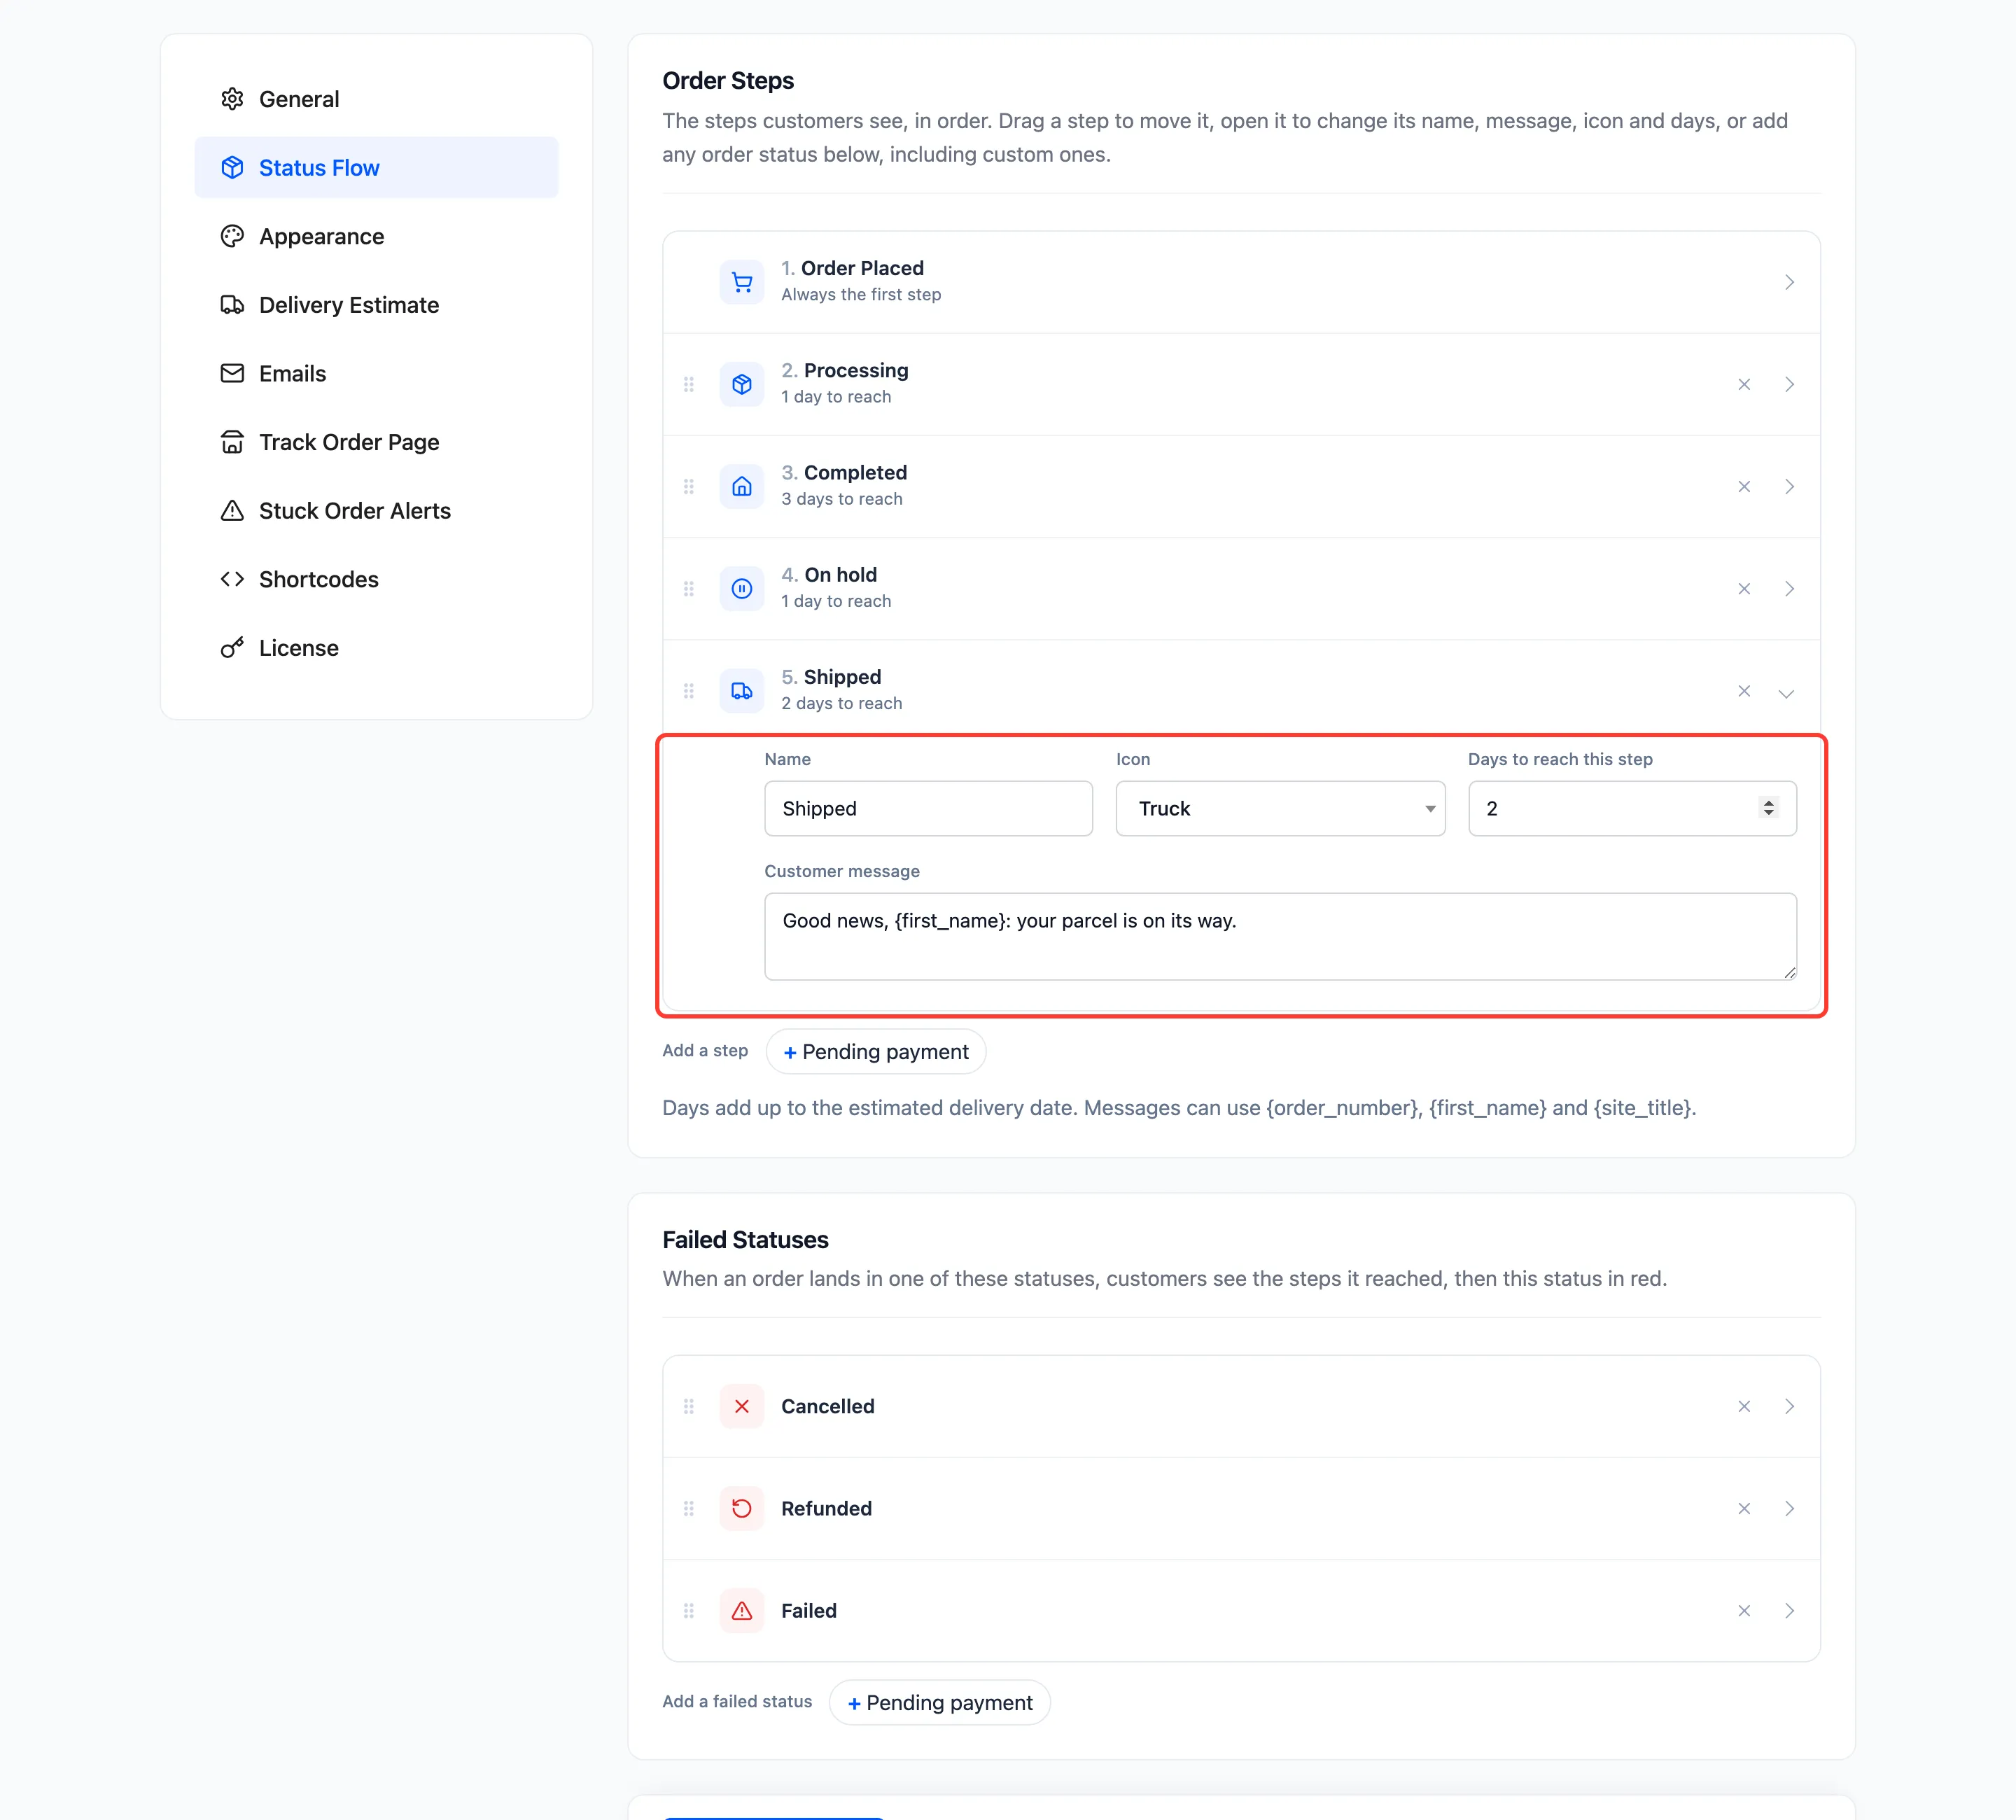
The estimate is the date of the current step plus the days of every step still ahead.
Step 3: Choose business days
Section titled “Step 3: Choose business days”Business Days skips Saturdays and Sundays, and is on by default. Turn it off if you ship seven days a week. Public holidays are not skipped.
Step 4: Set the labels
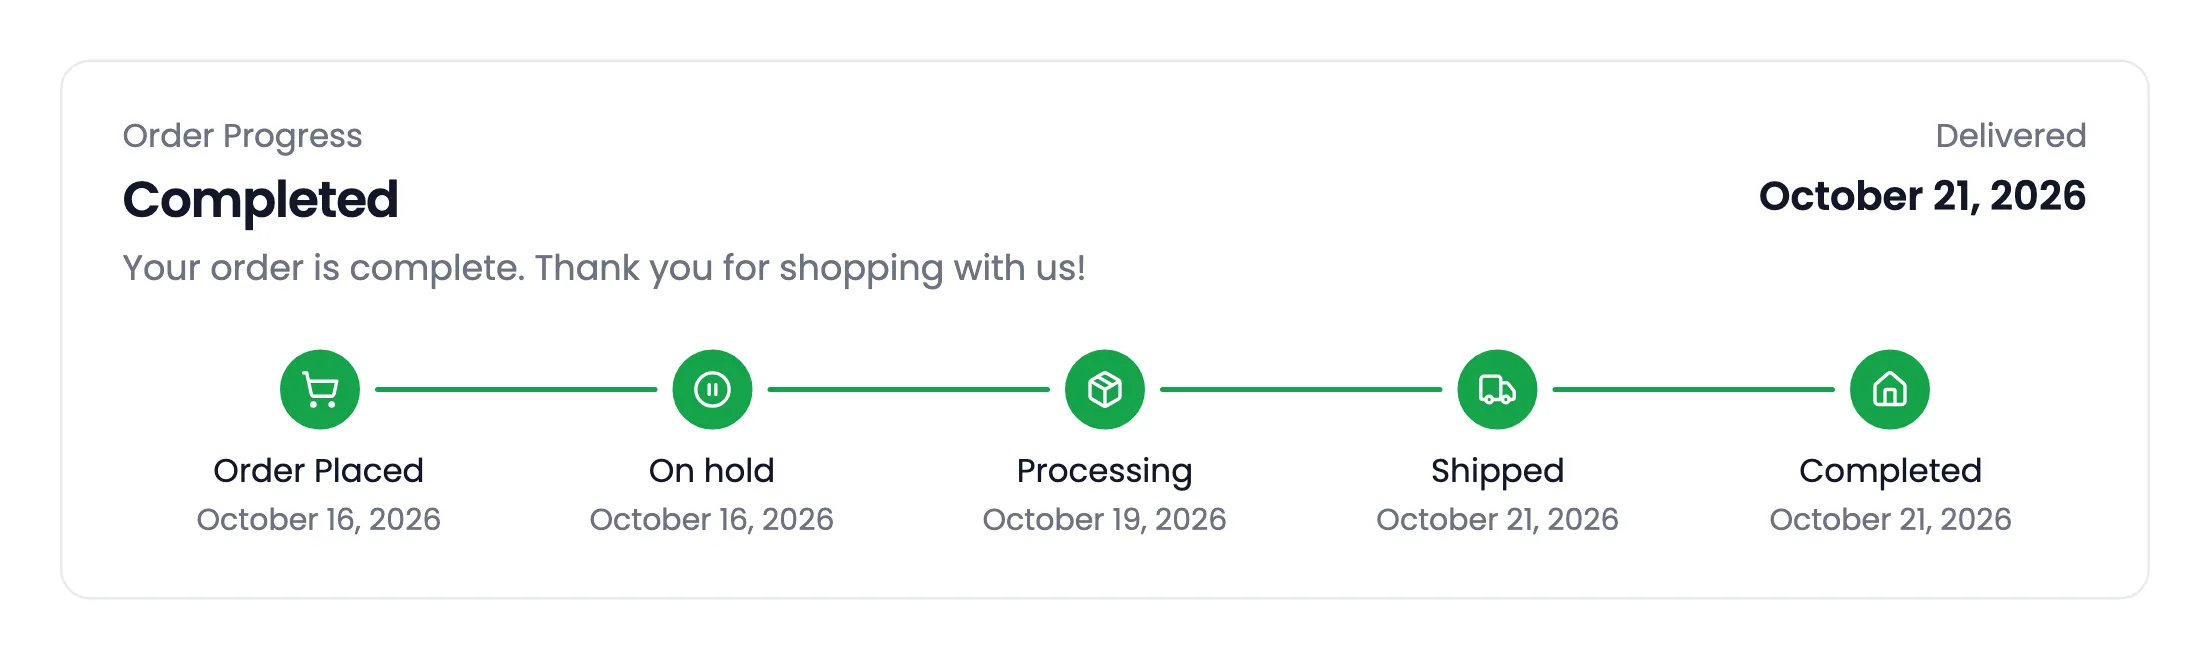
Section titled “Step 4: Set the labels”Estimate Label reads Estimated delivery by default. “Arrives by” or “Ready for pickup” work too. Delivered Label is shown, with the date, once the order reaches its last step.
Step 5: Check an order
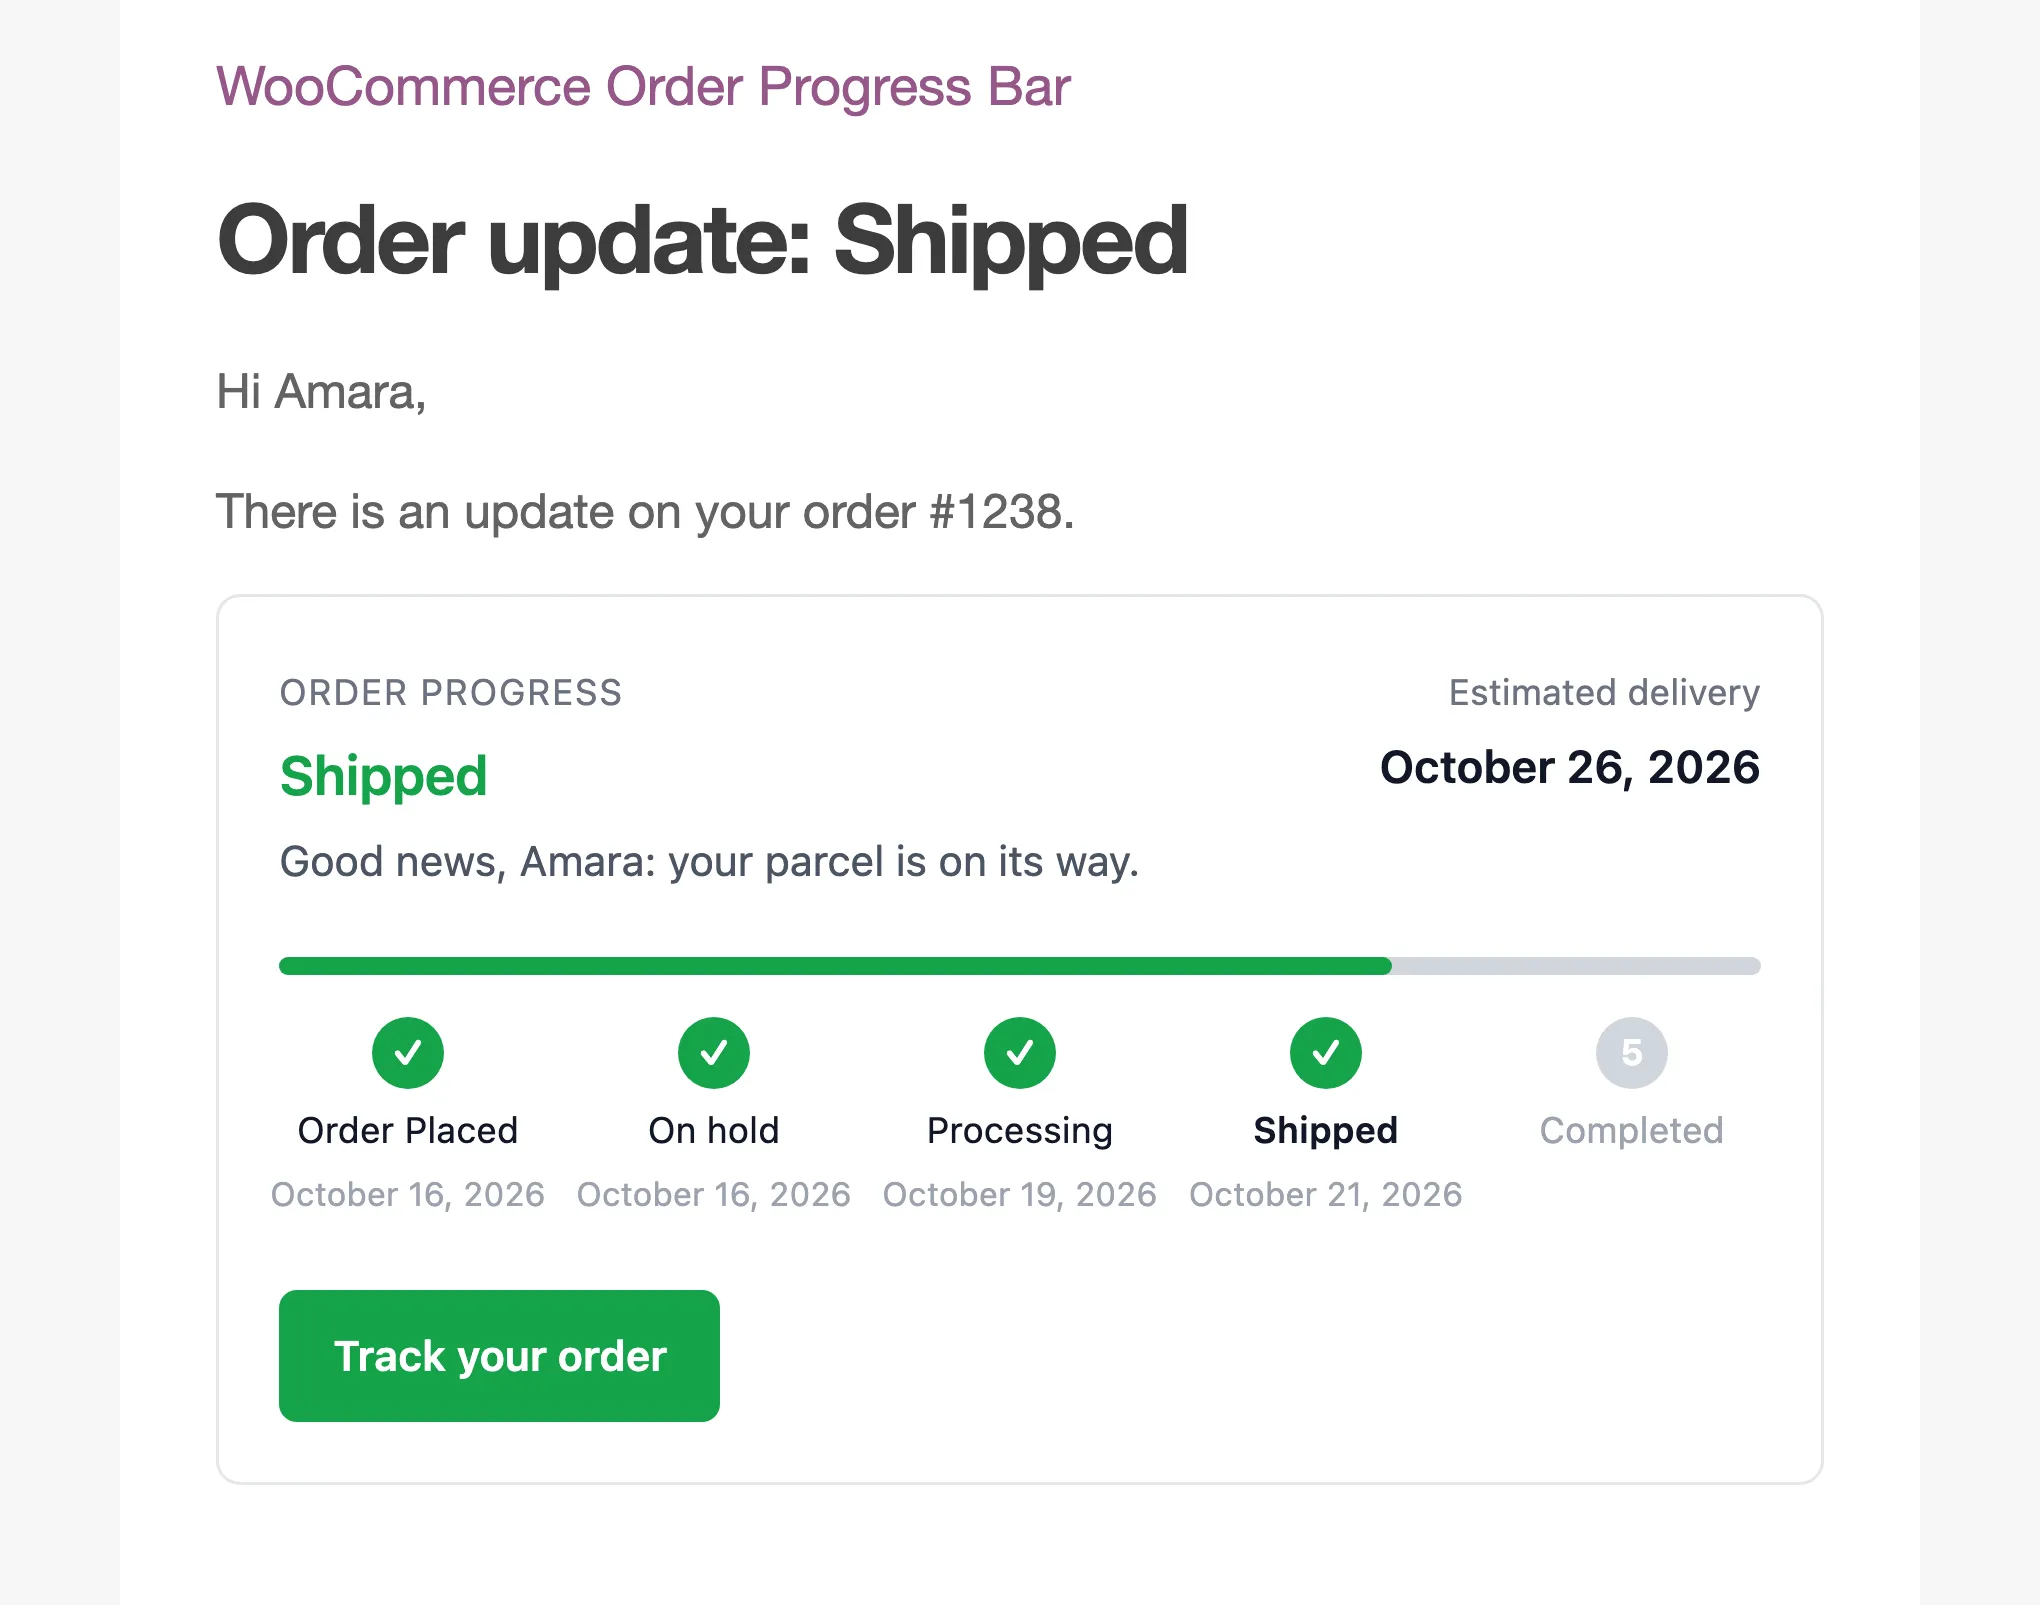
Section titled “Step 5: Check an order”The date sits on the right of the bar. On the demo, Amara’s order reached Shipped on Wednesday 21 October, with 3 days for Completed still ahead. The estimate was Monday 26 October, after the weekend.
On the last step it becomes the delivered date:
Good to know
Section titled “Good to know”- The estimate is worked out again at every step, so a slow step pushes it back and a fast one pulls it in.
- A late order shows today, never a date in the past.
- A step with 0 days adds nothing. With every step at 0 there is no estimate.
- Set one order’s date by hand on its order screen. See How to Set a Delivery Date on One Order.