

How to Add the Progress Bar to Order Emails
Most customers never log in to check an order, but they all read the confirmation email. The email bar puts the progress there, and its button brings them back when they want more.
Step 1: Open Emails
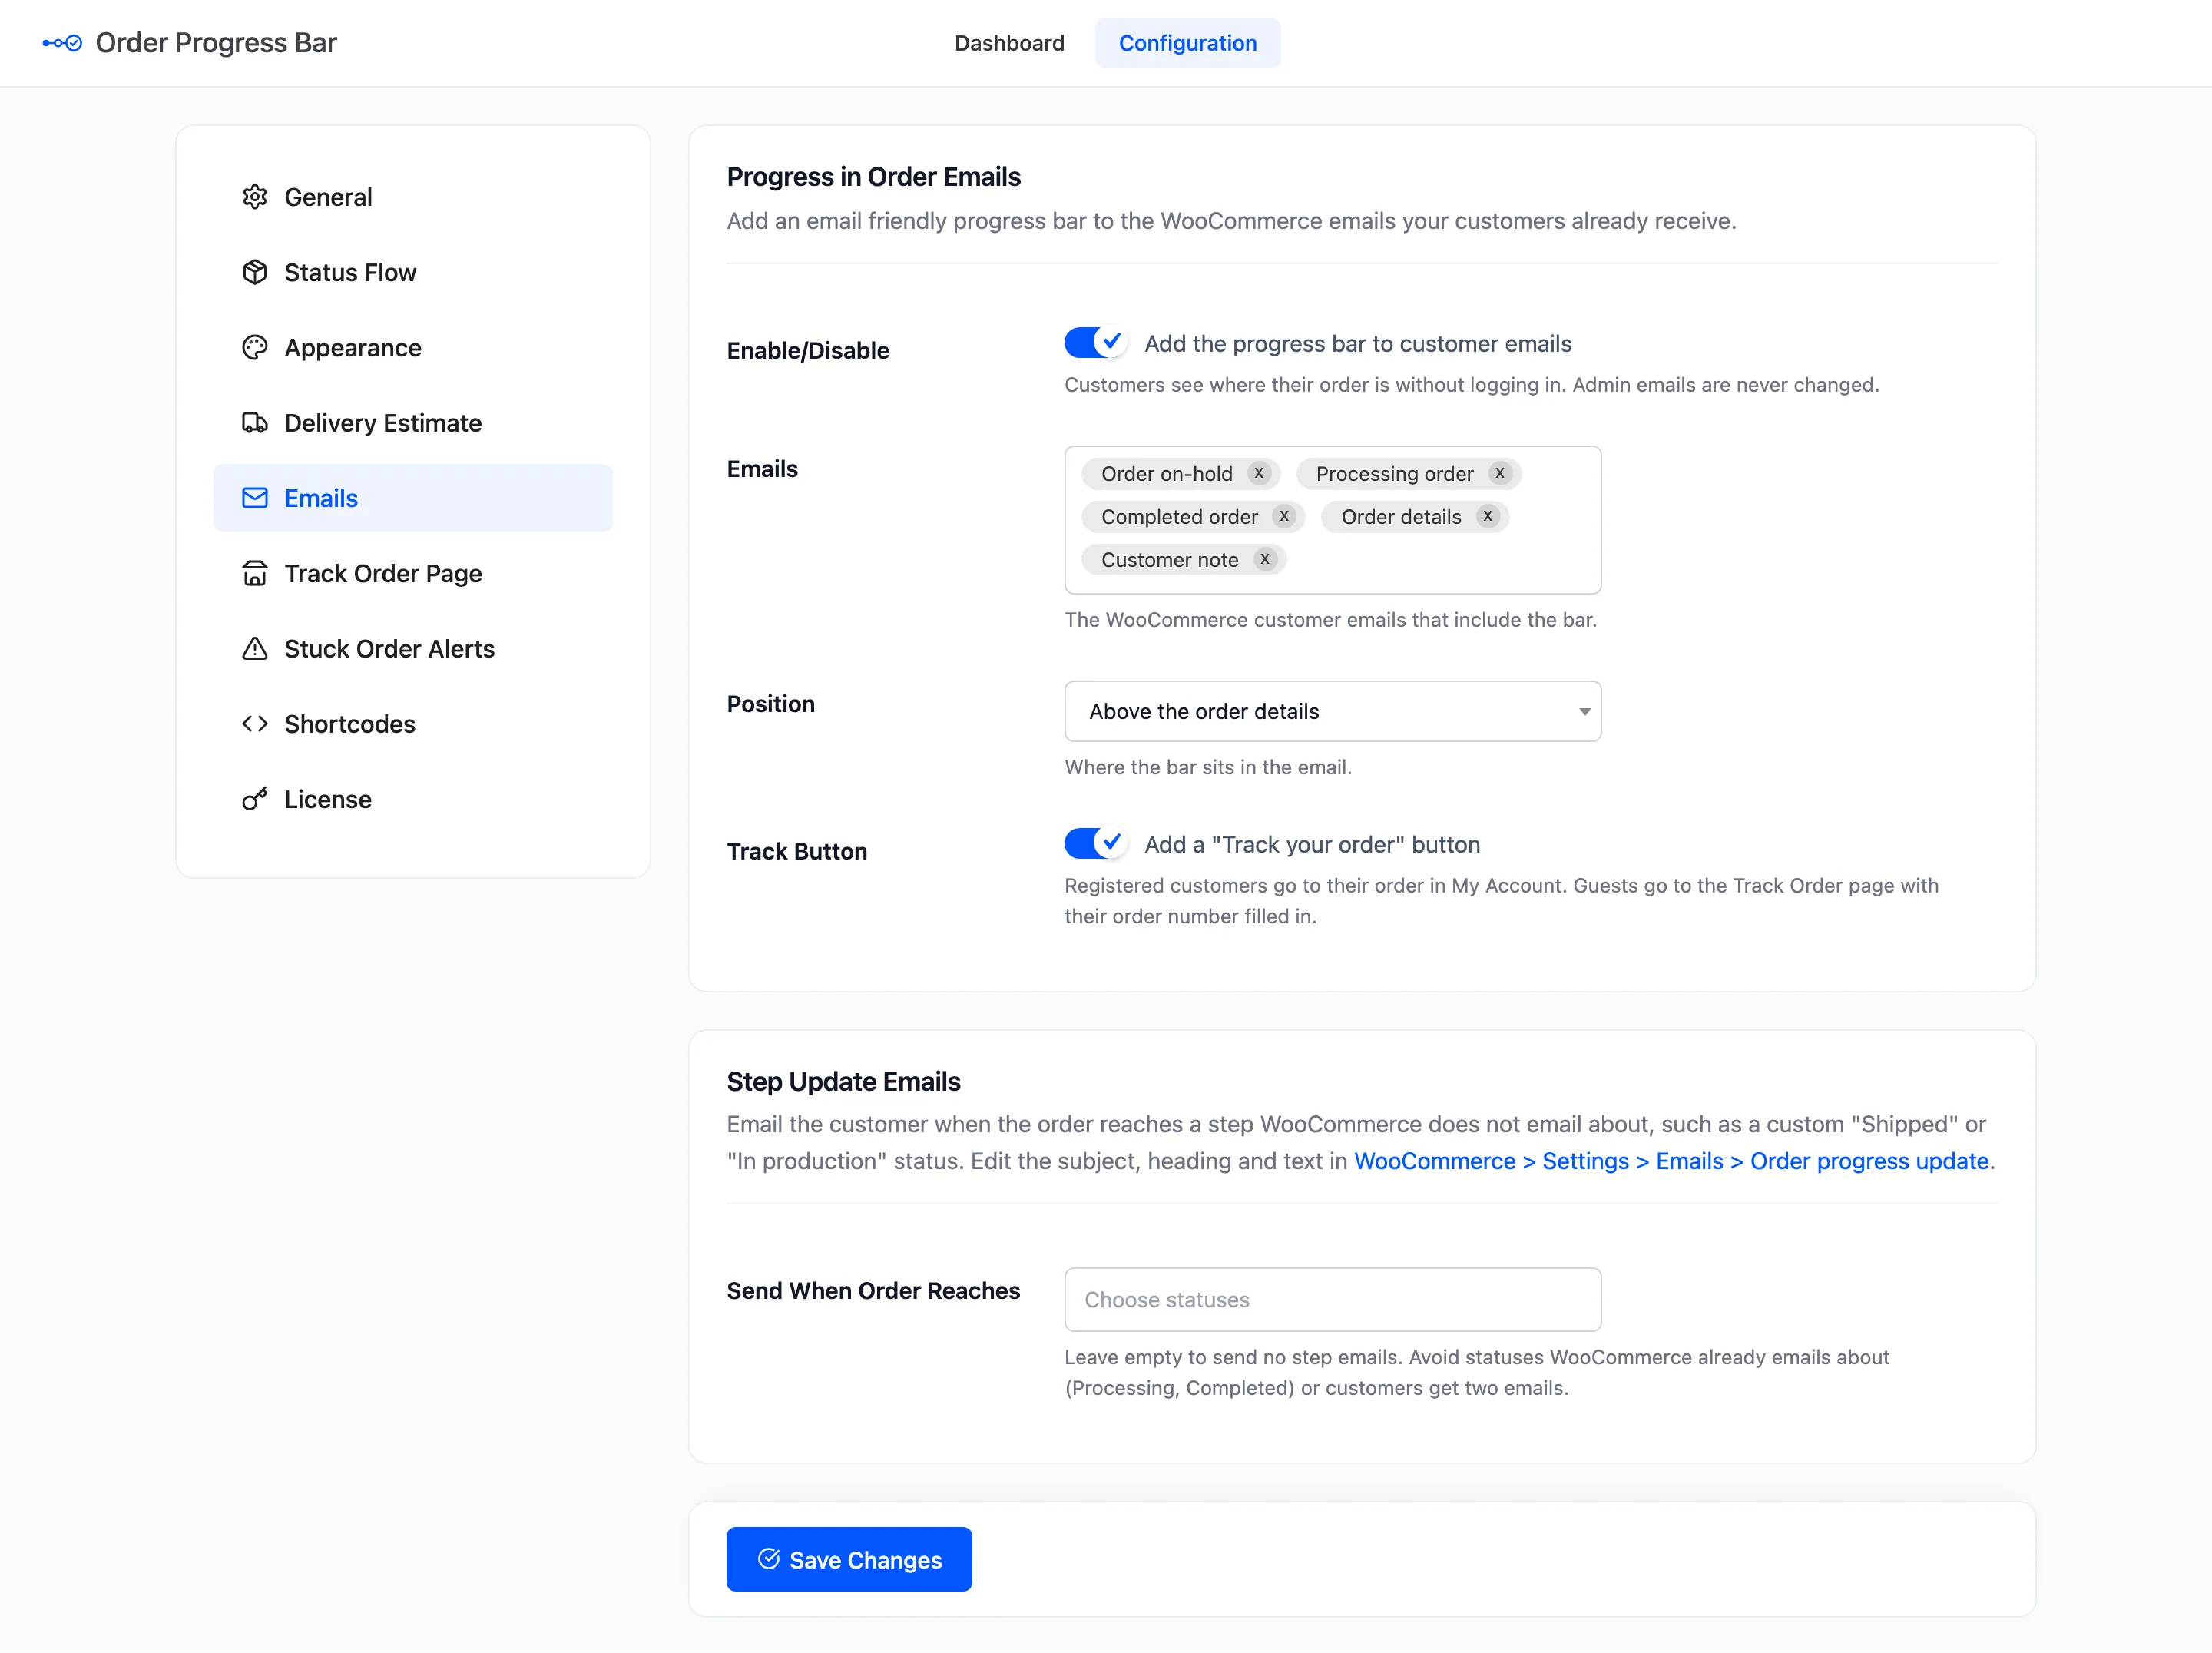
Section titled “Step 1: Open Emails”Go to Configuration → Emails.
Step 2: Check the switch
Section titled “Step 2: Check the switch”Enable/Disable under Progress in Order Emails is on by default. Admin emails are never changed.
Step 3: Choose the emails
Section titled “Step 3: Choose the emails”The shipped list is Order on-hold, Processing order, Completed order, Order details and Customer note. Add Cancelled order, Failed order or Refunded order to show the red state in those emails too.
Step 4: Pick the position and the button
Section titled “Step 4: Pick the position and the button”- Position: Above the order details (default) or Below the order details.
- Track Button: A Track your order button under the bar. Registered customers go to the order in My Account, guests to the Track Order page with the number filled in.
Step 5: Send a test
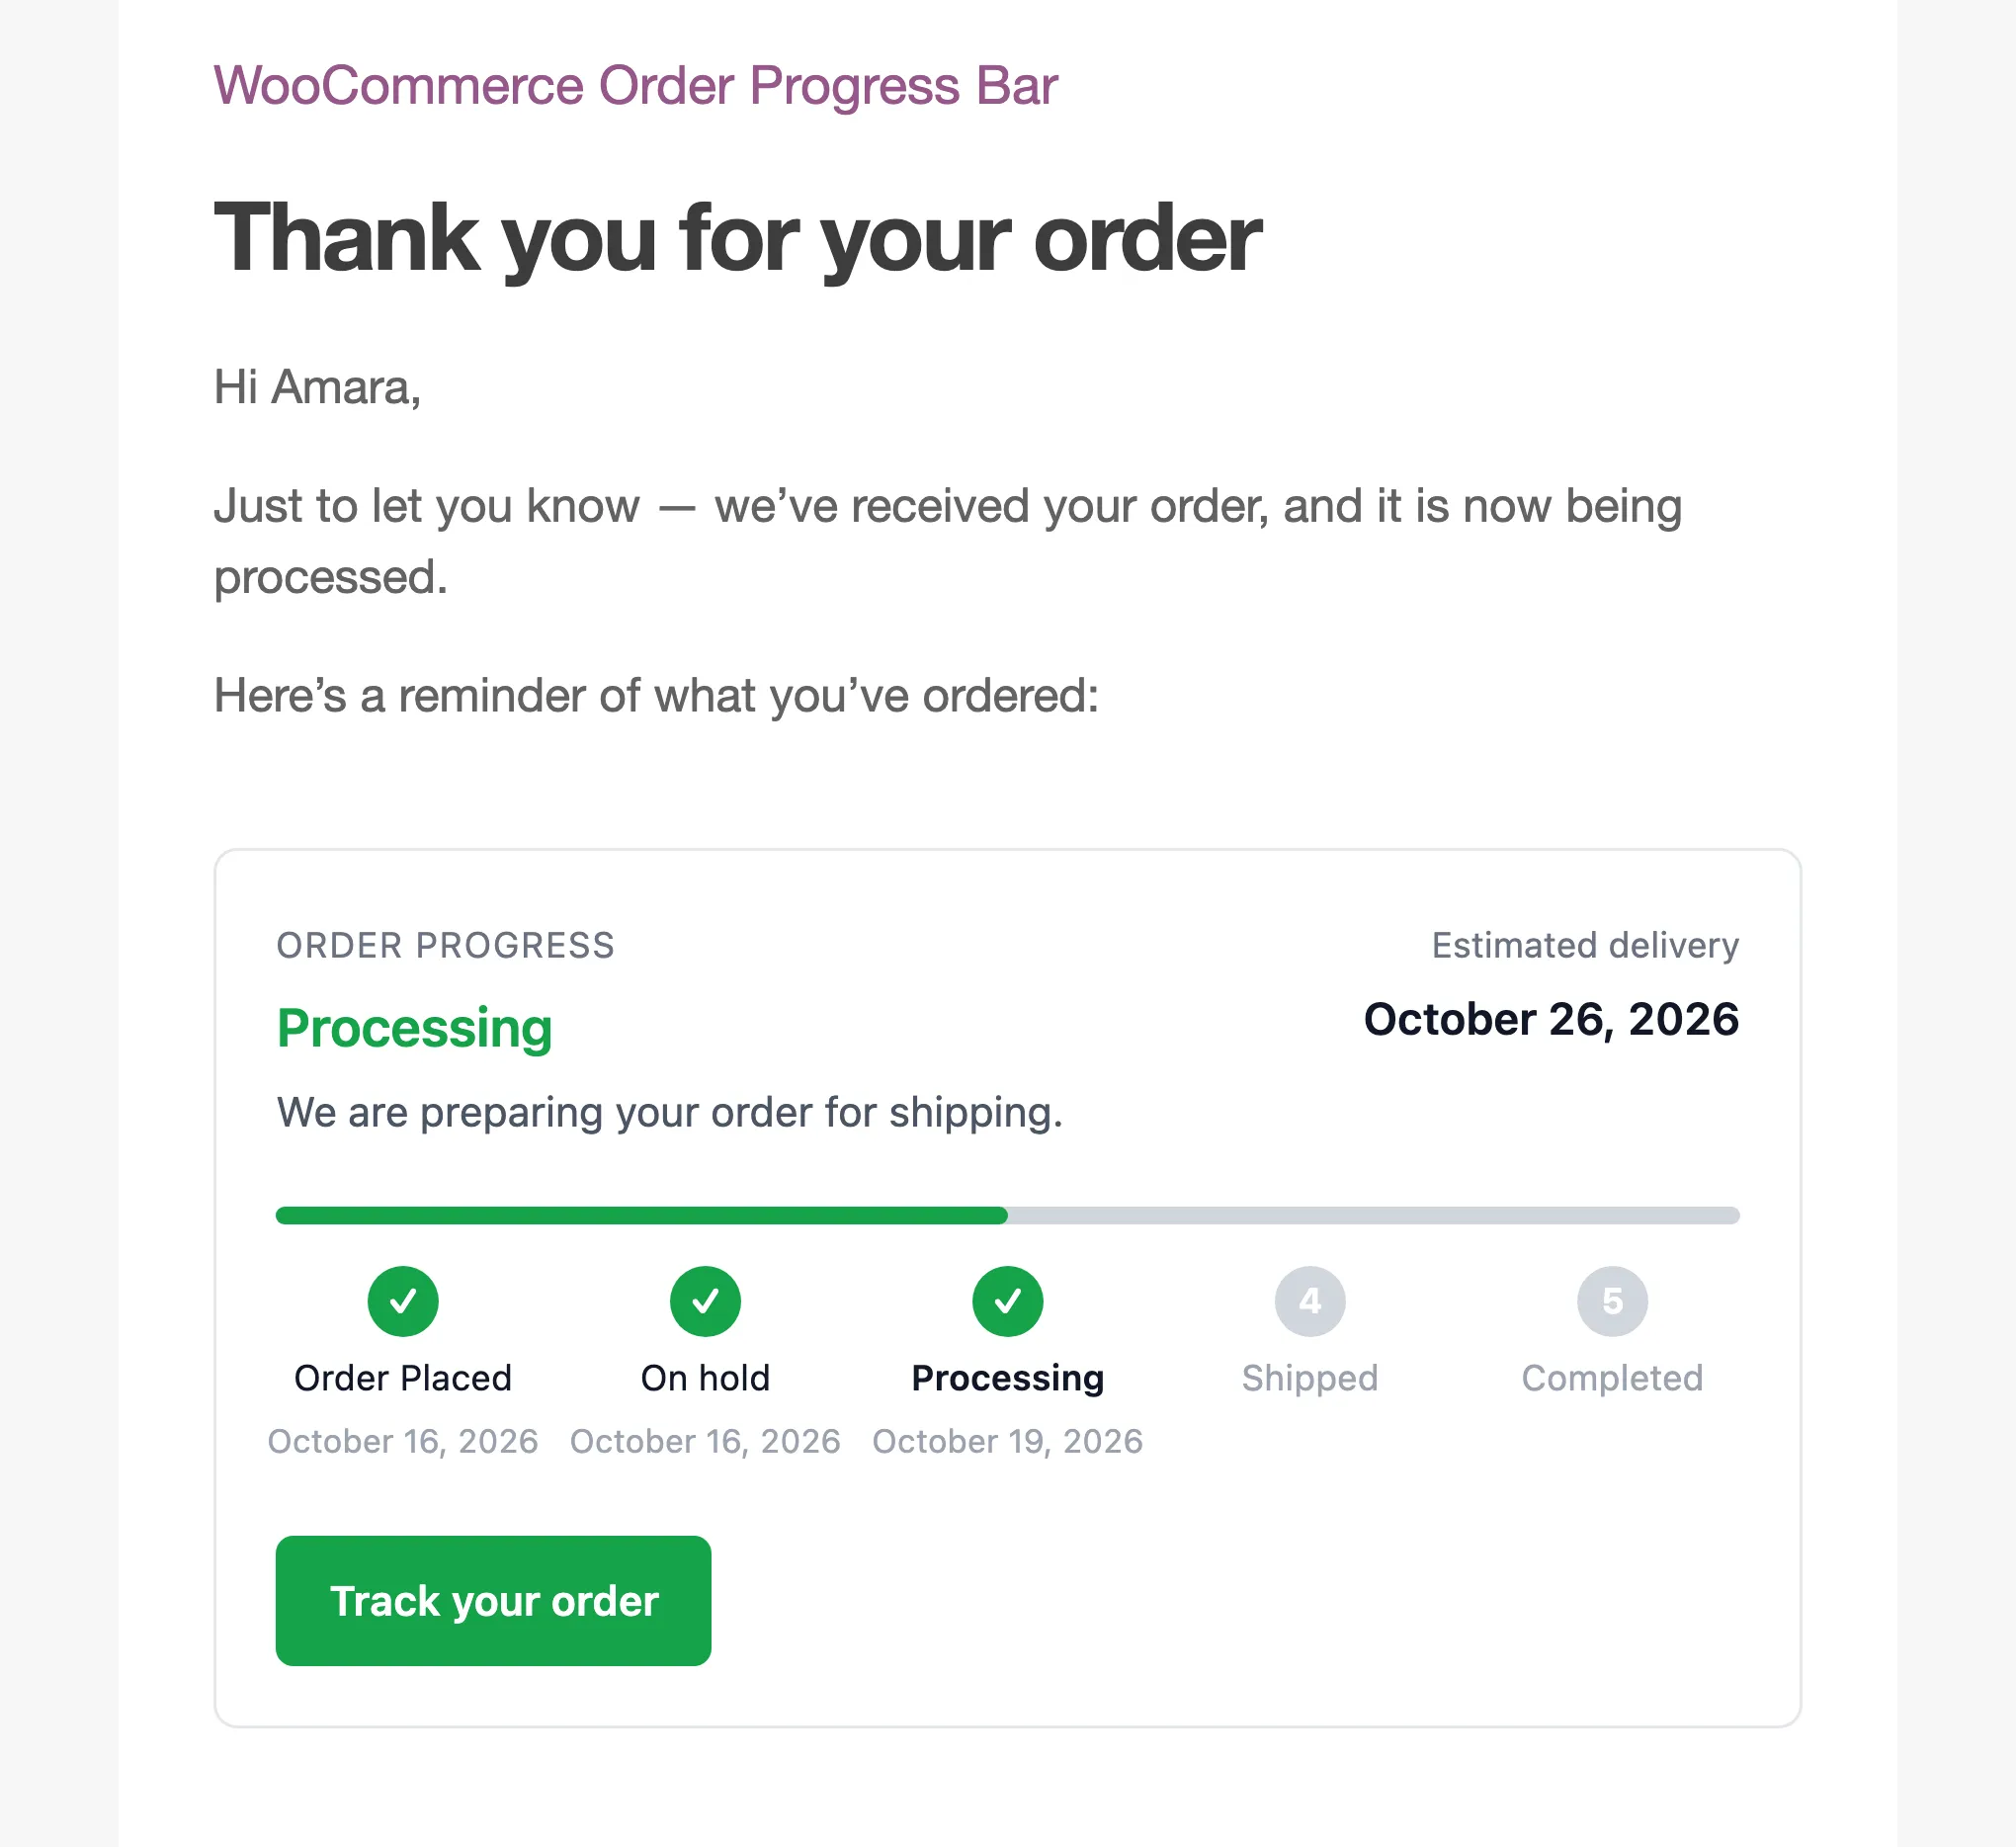
Section titled “Step 5: Send a test”Move a test order to Processing. On the demo, Amara’s processing email carried the bar above the order summary, with the estimated delivery and the button.
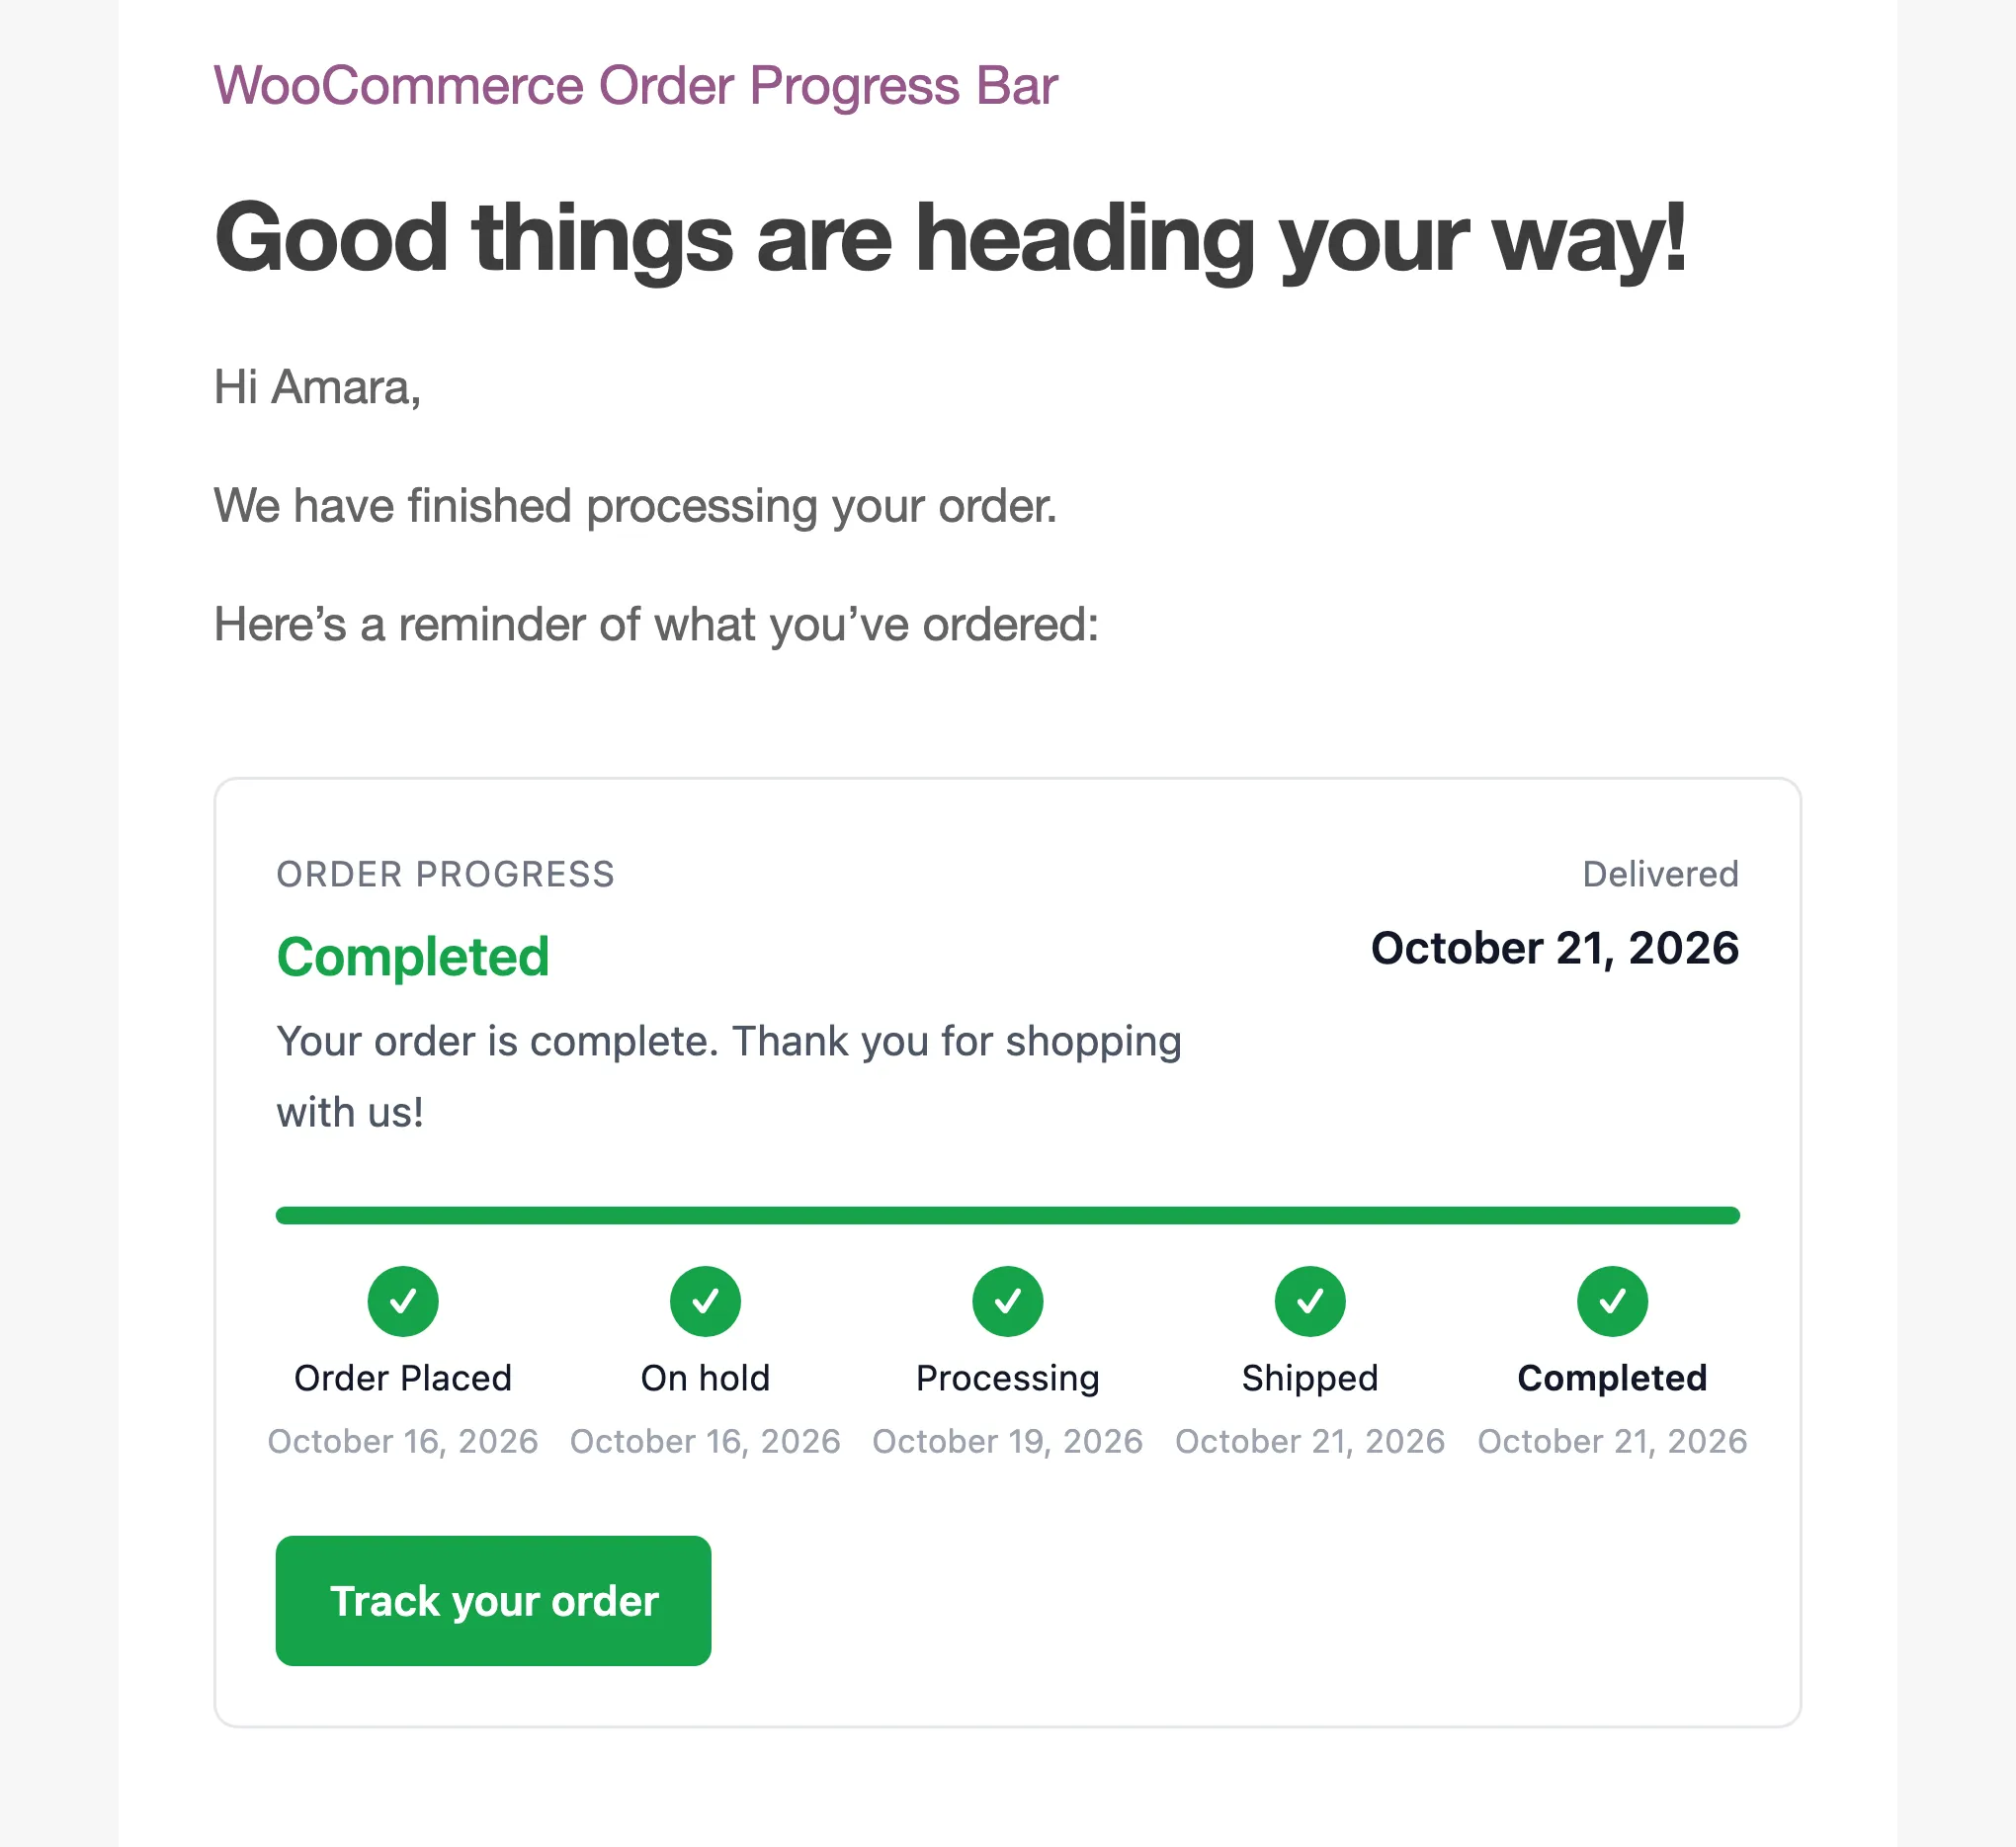
The completed email showed every step done:
Good to know
Section titled “Good to know”- The email bar uses check marks and step numbers, which every email app shows the same way.
- It takes the Success, Failed and Upcoming colors, and the step message.
- An order outside the flow gets no bar, so a Pending payment invoice is left as WooCommerce sends it.
- WooCommerce’s email preview, under WooCommerce → Settings → Emails, shows the bar on its sample order.