

How to Place the Progress Bar with a Shortcode or Block
The automatic positions cover WooCommerce’s own pages. A custom thank-you page, a help center or a page builder layout needs the bar placed by hand.
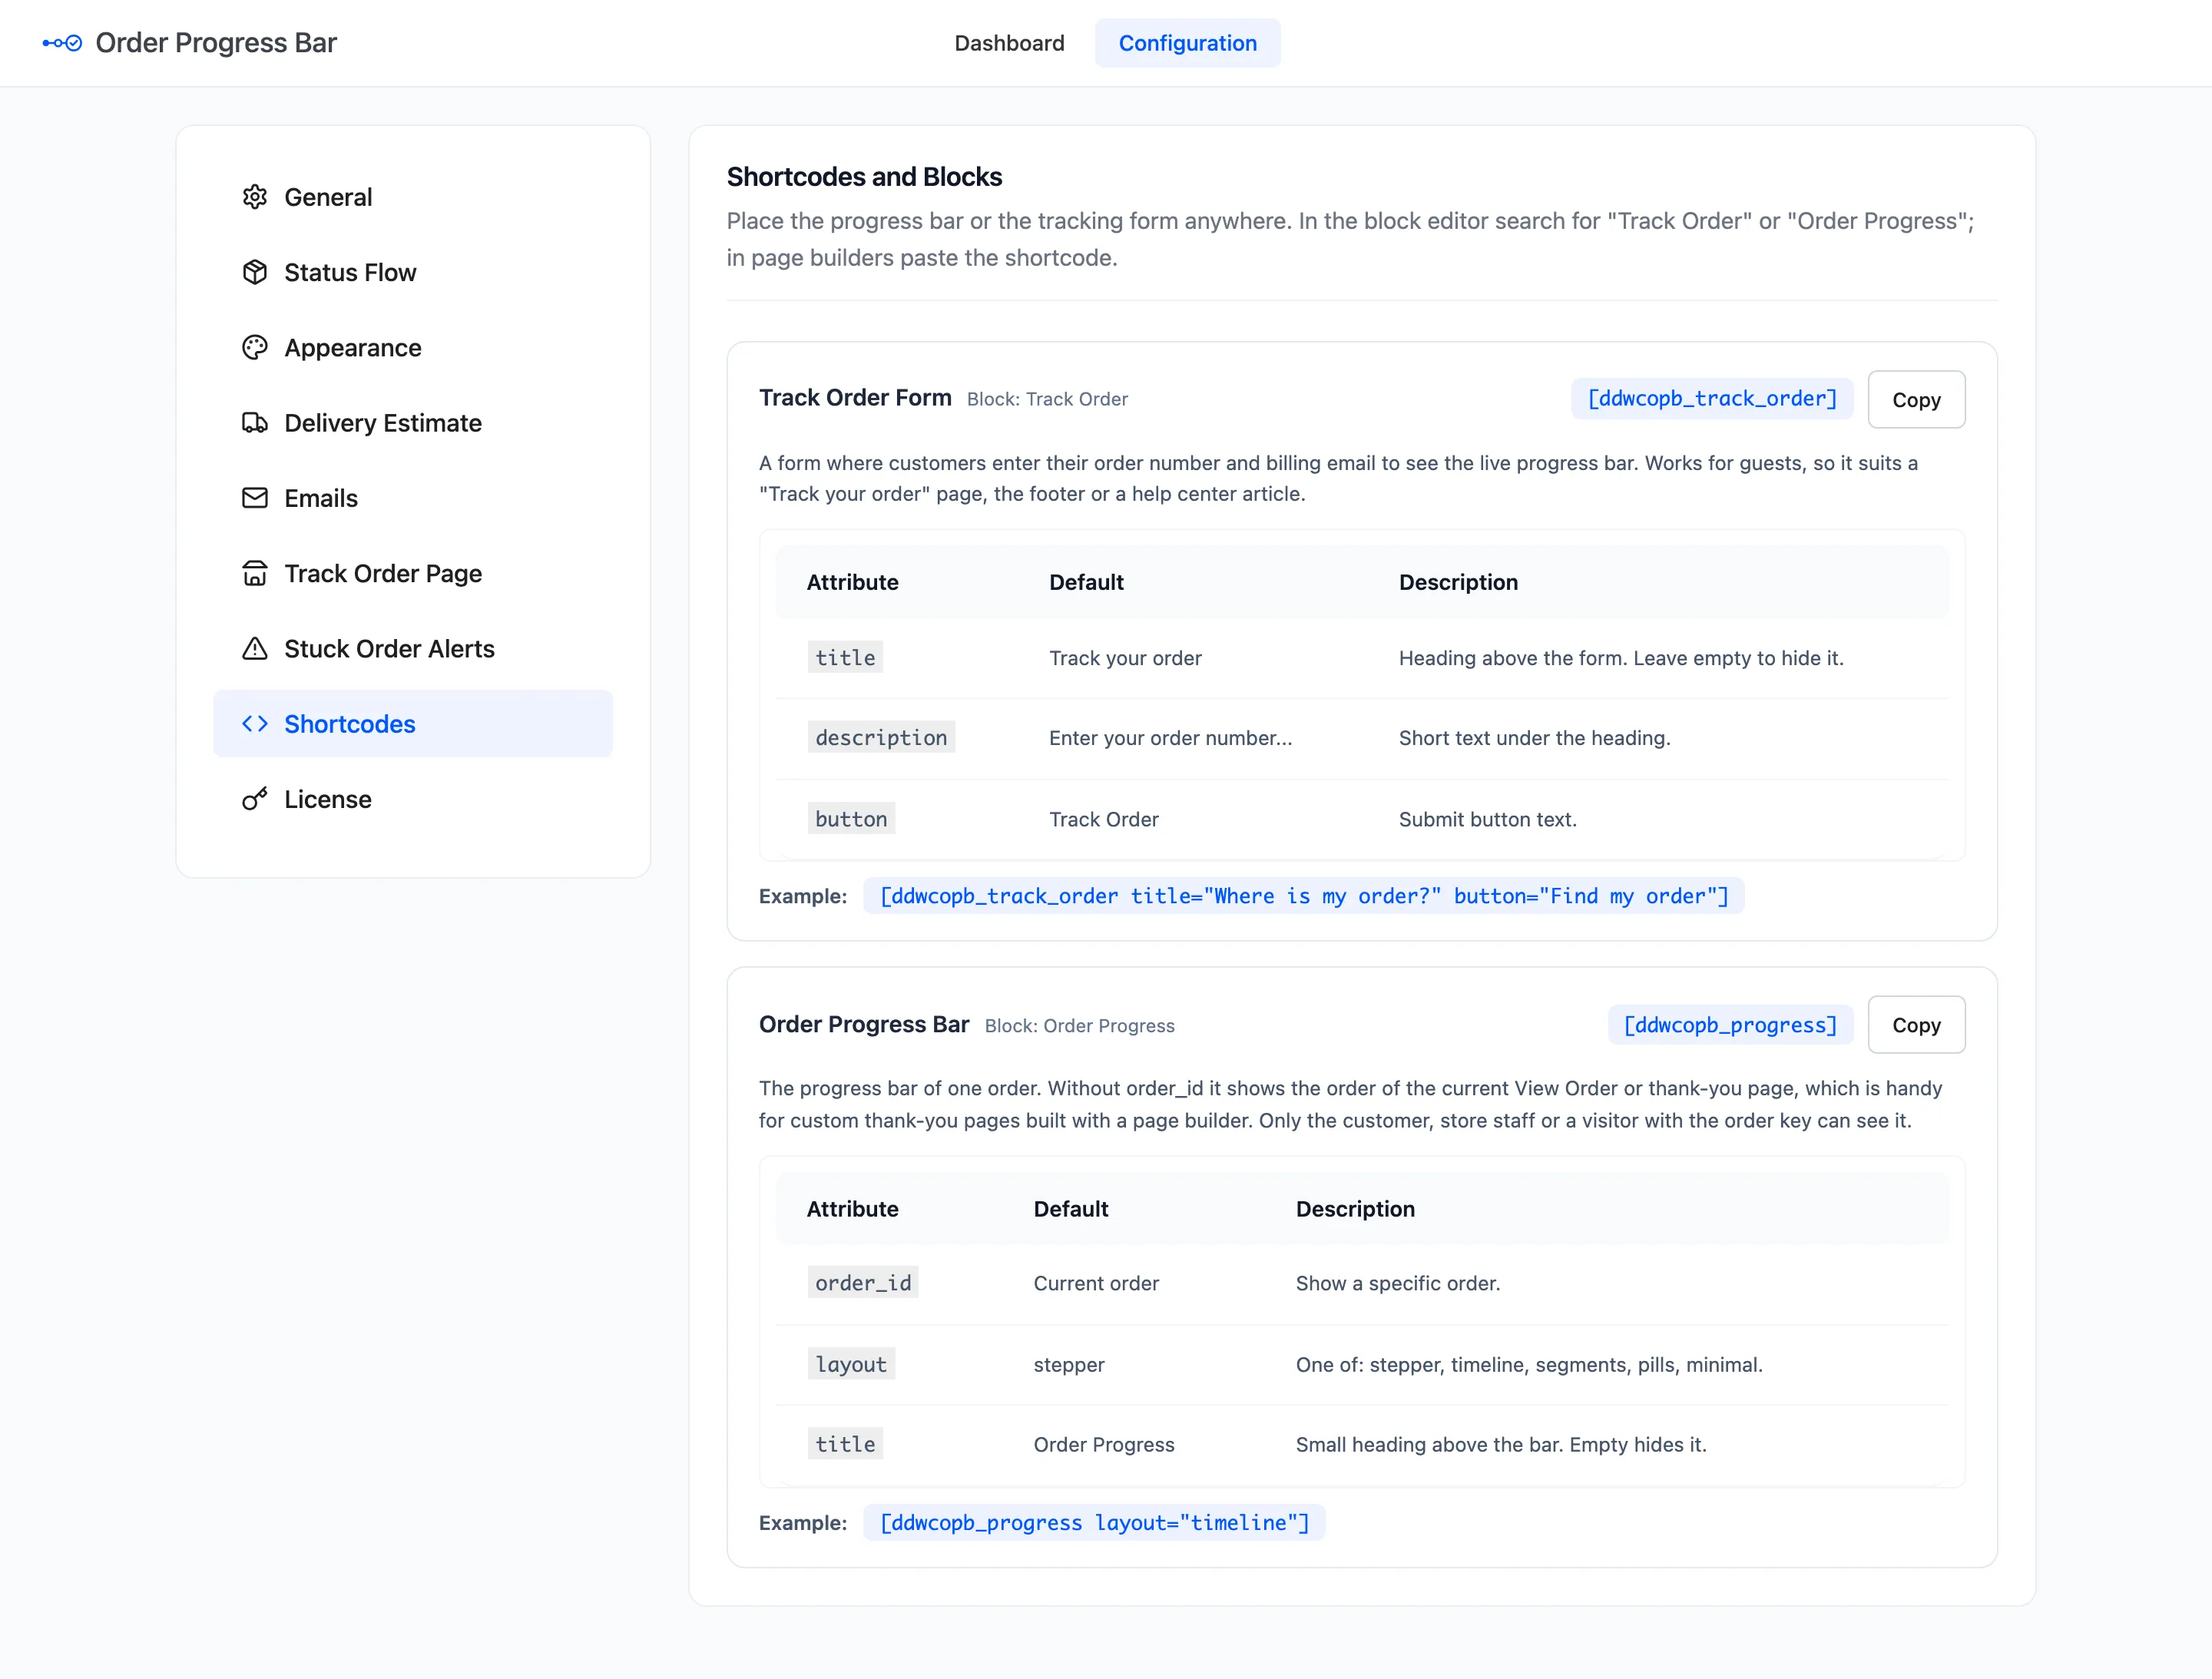
Step 1: Pick the shortcode or block
Section titled “Step 1: Pick the shortcode or block”- Order Progress block, or
[ddwcopb_progress]: one order’s bar. - Track Order block, or
[ddwcopb_track_order]: the lookup form.
Every attribute and default is on the Shortcodes tab, with copy buttons.
Step 2: Add it to the page
Section titled “Step 2: Add it to the page”In the block editor, search for Order Progress or Track Order. In a page builder, paste the shortcode into a text or shortcode element.
Step 3: Set the attributes
Section titled “Step 3: Set the attributes”For a custom thank-you page, leave out order_id. The bar then shows the order of the page it is on:
[ddwcopb_progress layout="timeline" title="Your order"]To show one particular order, add its number. The demo put this on an ordinary page:
[ddwcopb_progress order_id="1238" layout="timeline"]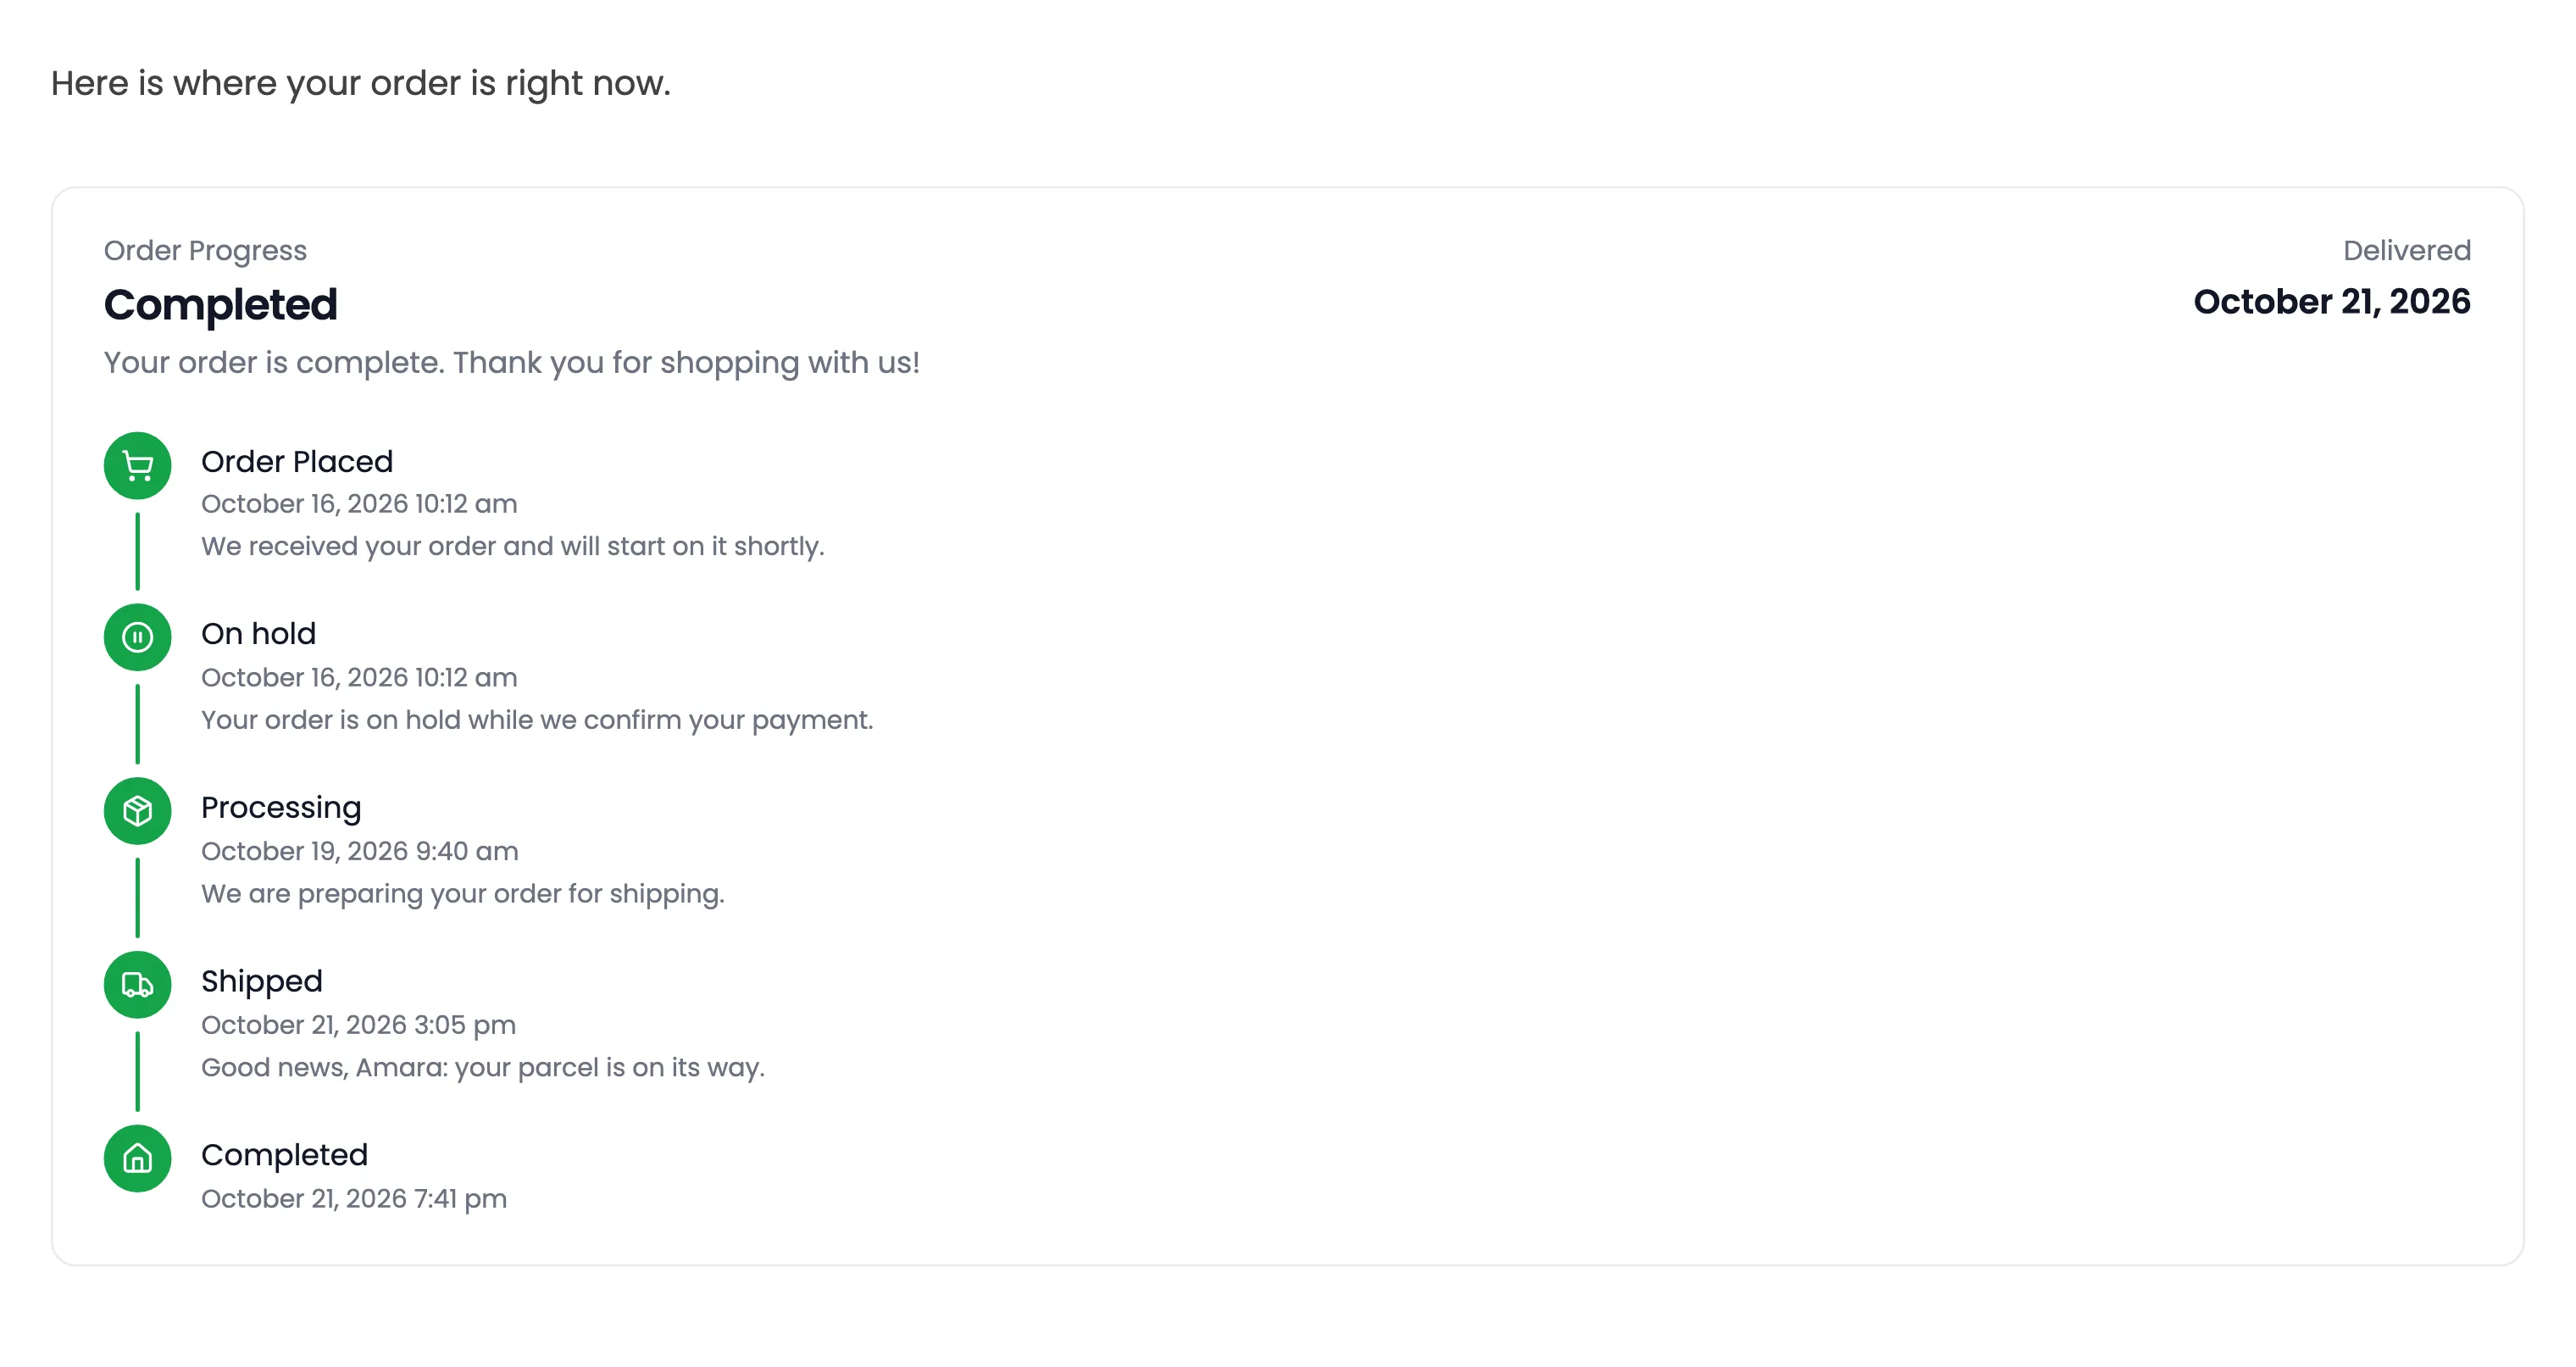
Step 4: Check who sees it
Section titled “Step 4: Check who sees it”The bar shows only to the customer who placed the order, store staff, or a visitor whose link carries the order key. On the demo, Amara saw the bar above. A logged-out visitor on the same page saw nothing, with no error.
The tracking form shows to everyone. That is its job.
Good to know
Section titled “Good to know”layoutandtitleoverride the Appearance tab for that one bar only.- Both print nothing while the plugin is switched off or the license is inactive, never their raw tags.
- The automatic bar and a shortcode can show on the same page. Set the position to Disabled under General if you place the bar yourself there.