

How to Rename Steps and Write Step Messages
Status names are written for the shop, not for customers. “Processing” tells a customer very little. Each step can have its own name and message, and they change nothing on the order itself.
Step 1: Open a step
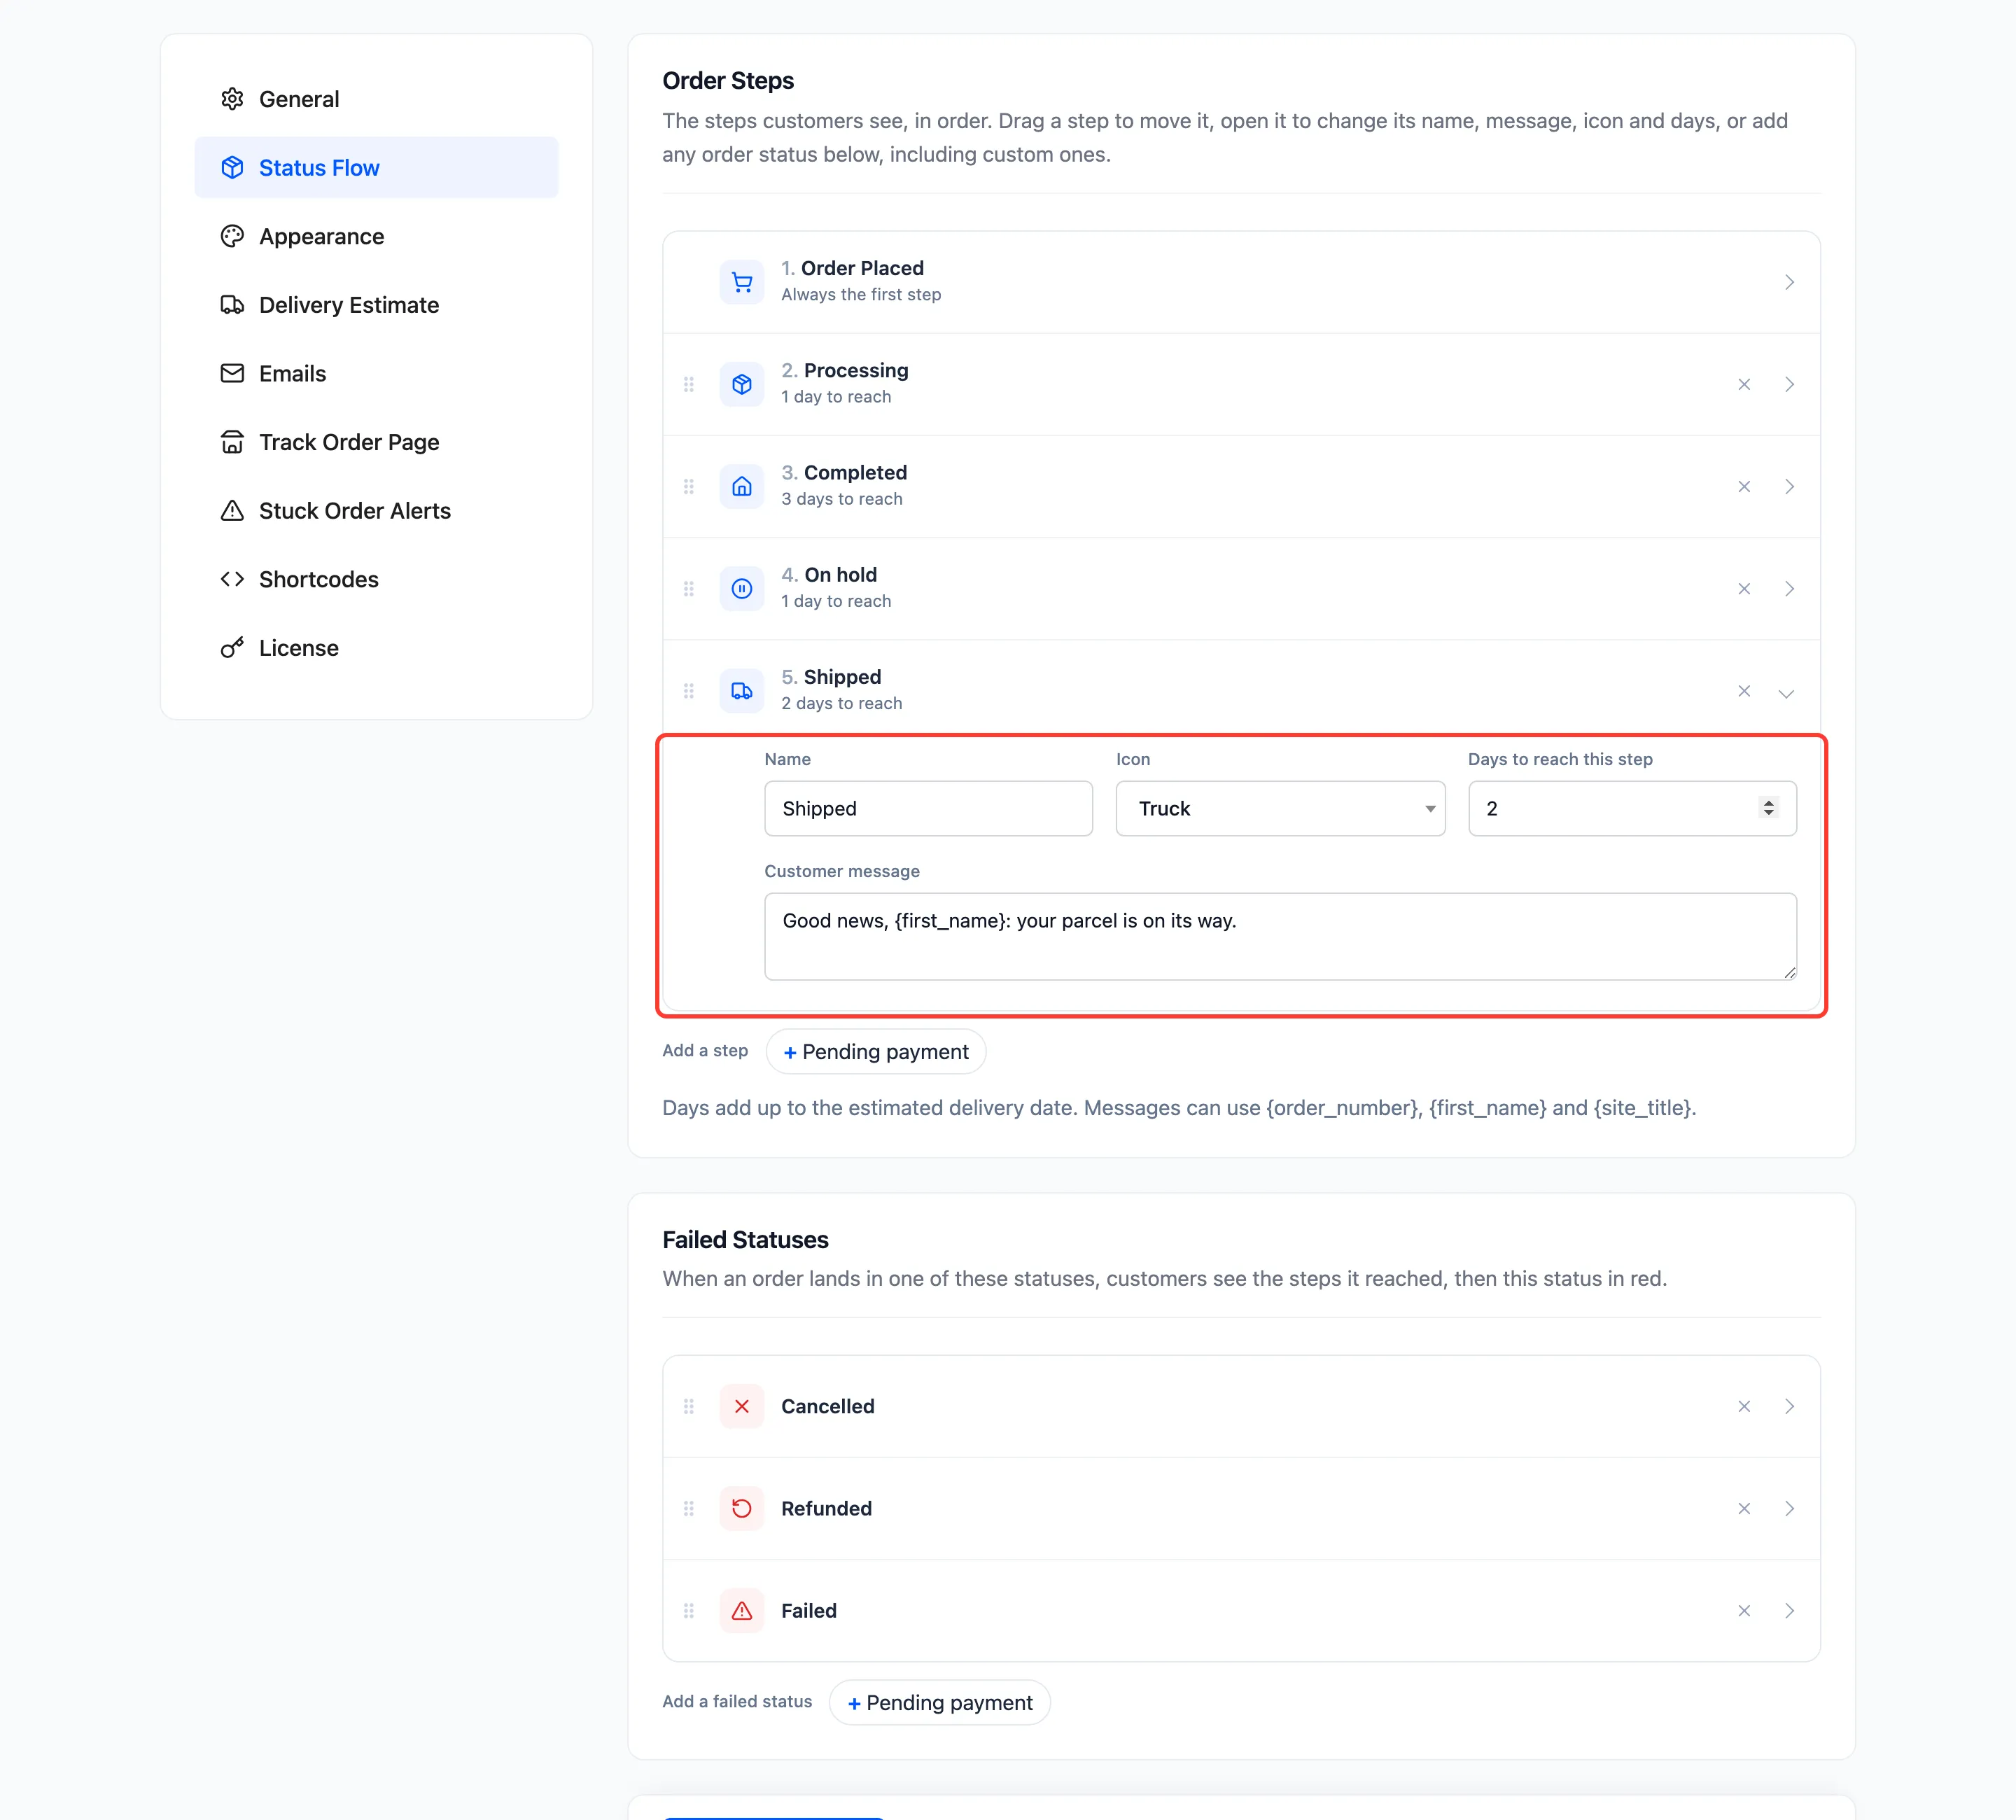
Section titled “Step 1: Open a step”Go to Configuration → Status Flow and click the step’s row. Order Placed, the first step, has a name and a message only.
Step 2: Rename it
Section titled “Step 2: Rename it”Type the name customers should read, for example Packing your order for Processing. The row’s summary changes as you type, and shows the real status name beside it. An emptied name goes back to the status name.
Step 3: Write the message
Section titled “Step 3: Write the message”The message shows under the step name while the order is in this step. Keep it to one sentence that says what happens next. Three placeholders are filled in for each order:
{order_number}: the order number, for example 1238.{first_name}: the billing first name.{site_title}: your store’s name.
The demo’s Shipped message is “Good news, {first_name}: your parcel is on its way.”
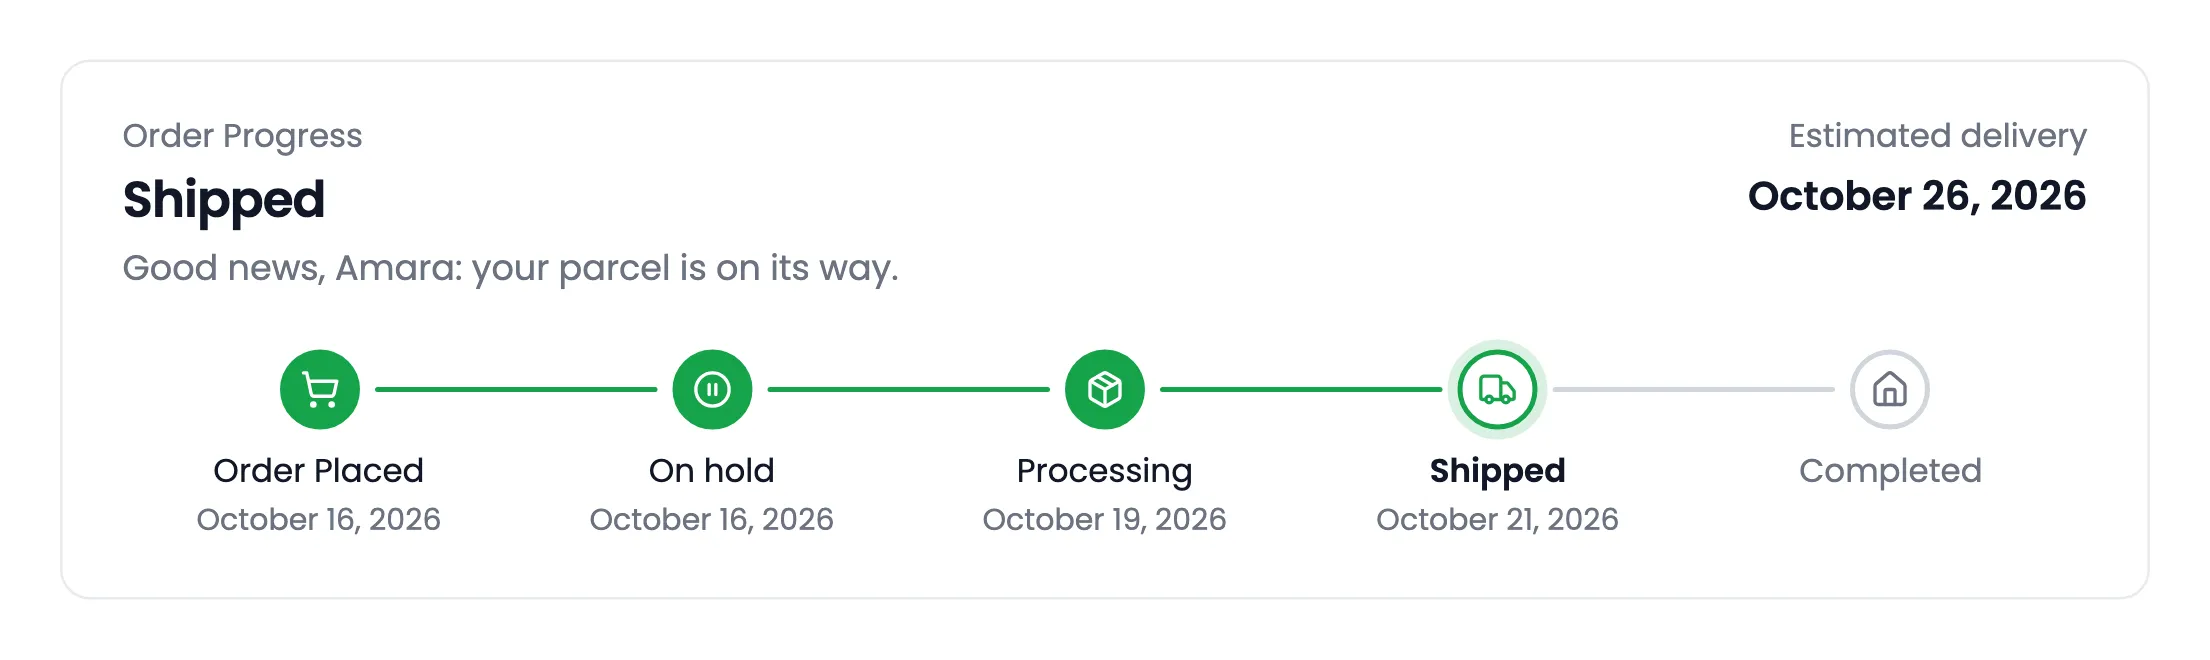
Leave the message empty to show none for that step. Unlike the name, an empty message stays empty.
Step 4: Pick an icon
Section titled “Step 4: Pick an icon”The Icon menu has 14: Cart, Clock, Pause, Payment, Package, Production, Truck, Store pickup, Delivered, Gift, Check, Cross, Warning and Refund. Store pickup and Production suit stores that do not ship.
Step 5: Save and check
Section titled “Step 5: Save and check”Click Save Changes. Every order in that step shows the new name and message straight away. The emails,
the Track Order page and the order screen use them too, and so does {step} in the Order update email.
Good to know
Section titled “Good to know”- The bar’s own title, Order Progress by default, is set on the Appearance tab.
- Step Message on the Appearance tab hides every message at once.
- The names and messages are stored as you type them. For a store in several languages, translate them with your translation plugin’s string tools.