

How to Upgrade From the Free Version to Pro
The two editions read the same settings, so an upgrade keeps your audience, message, button, exclusions, protection options and per-product settings exactly as they were. The one thing Pro does differently is which products are protected: it uses rules, so it turns your free Hide Prices On setting into its first rule.
Step 1: Install Pro
Section titled “Step 1: Install Pro”Go to Plugins → Add New Plugin → Upload Plugin, choose the Pro zip from your DevDiggers order, and click Install Now, then Activate Plugin.
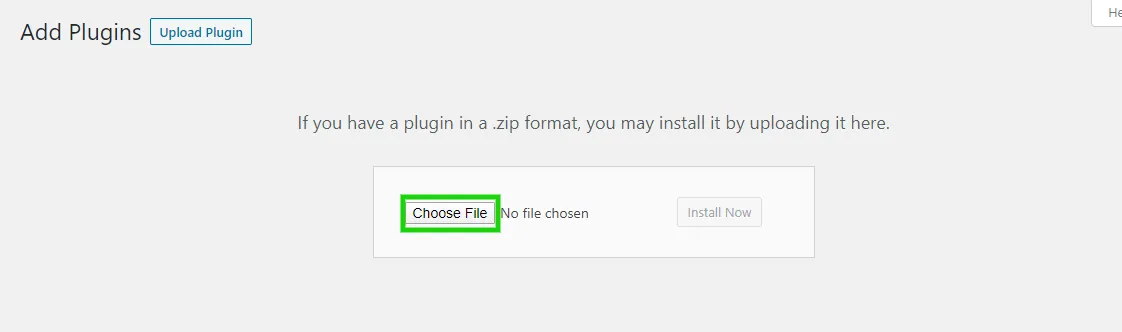
You do not have to deactivate the free plugin first. While Pro is active, the free plugin stands aside and loads nothing, so there is never a second menu or a second set of buttons on the storefront.
Step 2: Activate your license
Section titled “Step 2: Activate your license”Go to DevDiggers Plugins → Hide Price For Guest → Configuration → License, enter your purchase code and email, and click Activate License. Until the license is active, Pro hides no prices, so do this straight away. See License Activation (Pro).
Step 3: Check the rule Pro built
Section titled “Step 3: Check the rule Pro built”On its first load, Pro reads the free version’s Where to Hide and creates one rule:
| Free setting | Pro rule |
|---|---|
| All products | All products, with no conditions, so every product is covered |
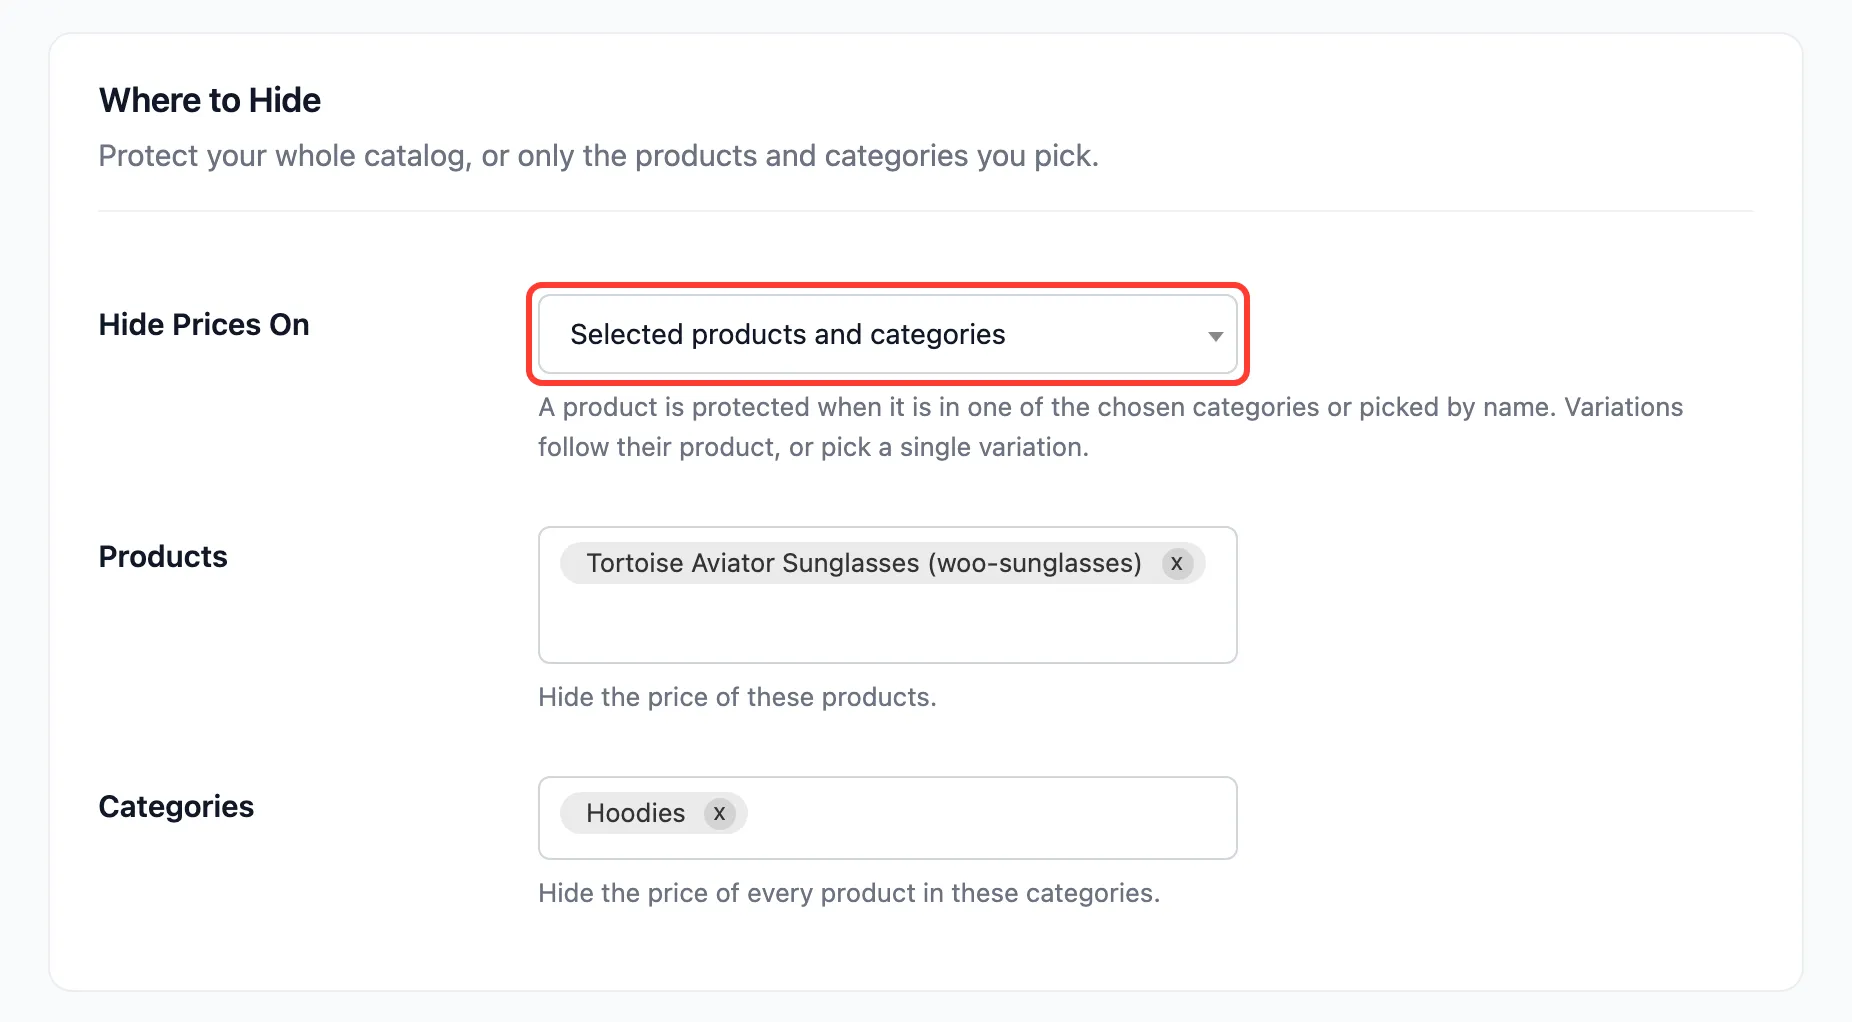
| Selected products and categories | Migrated rules, set to Any condition, with a Product condition for your products and a Category condition for your categories |
Open Rules. On the demo, the free version had Tortoise Aviator Sunglasses and the Hoodies category selected:
and Pro listed them as one rule:
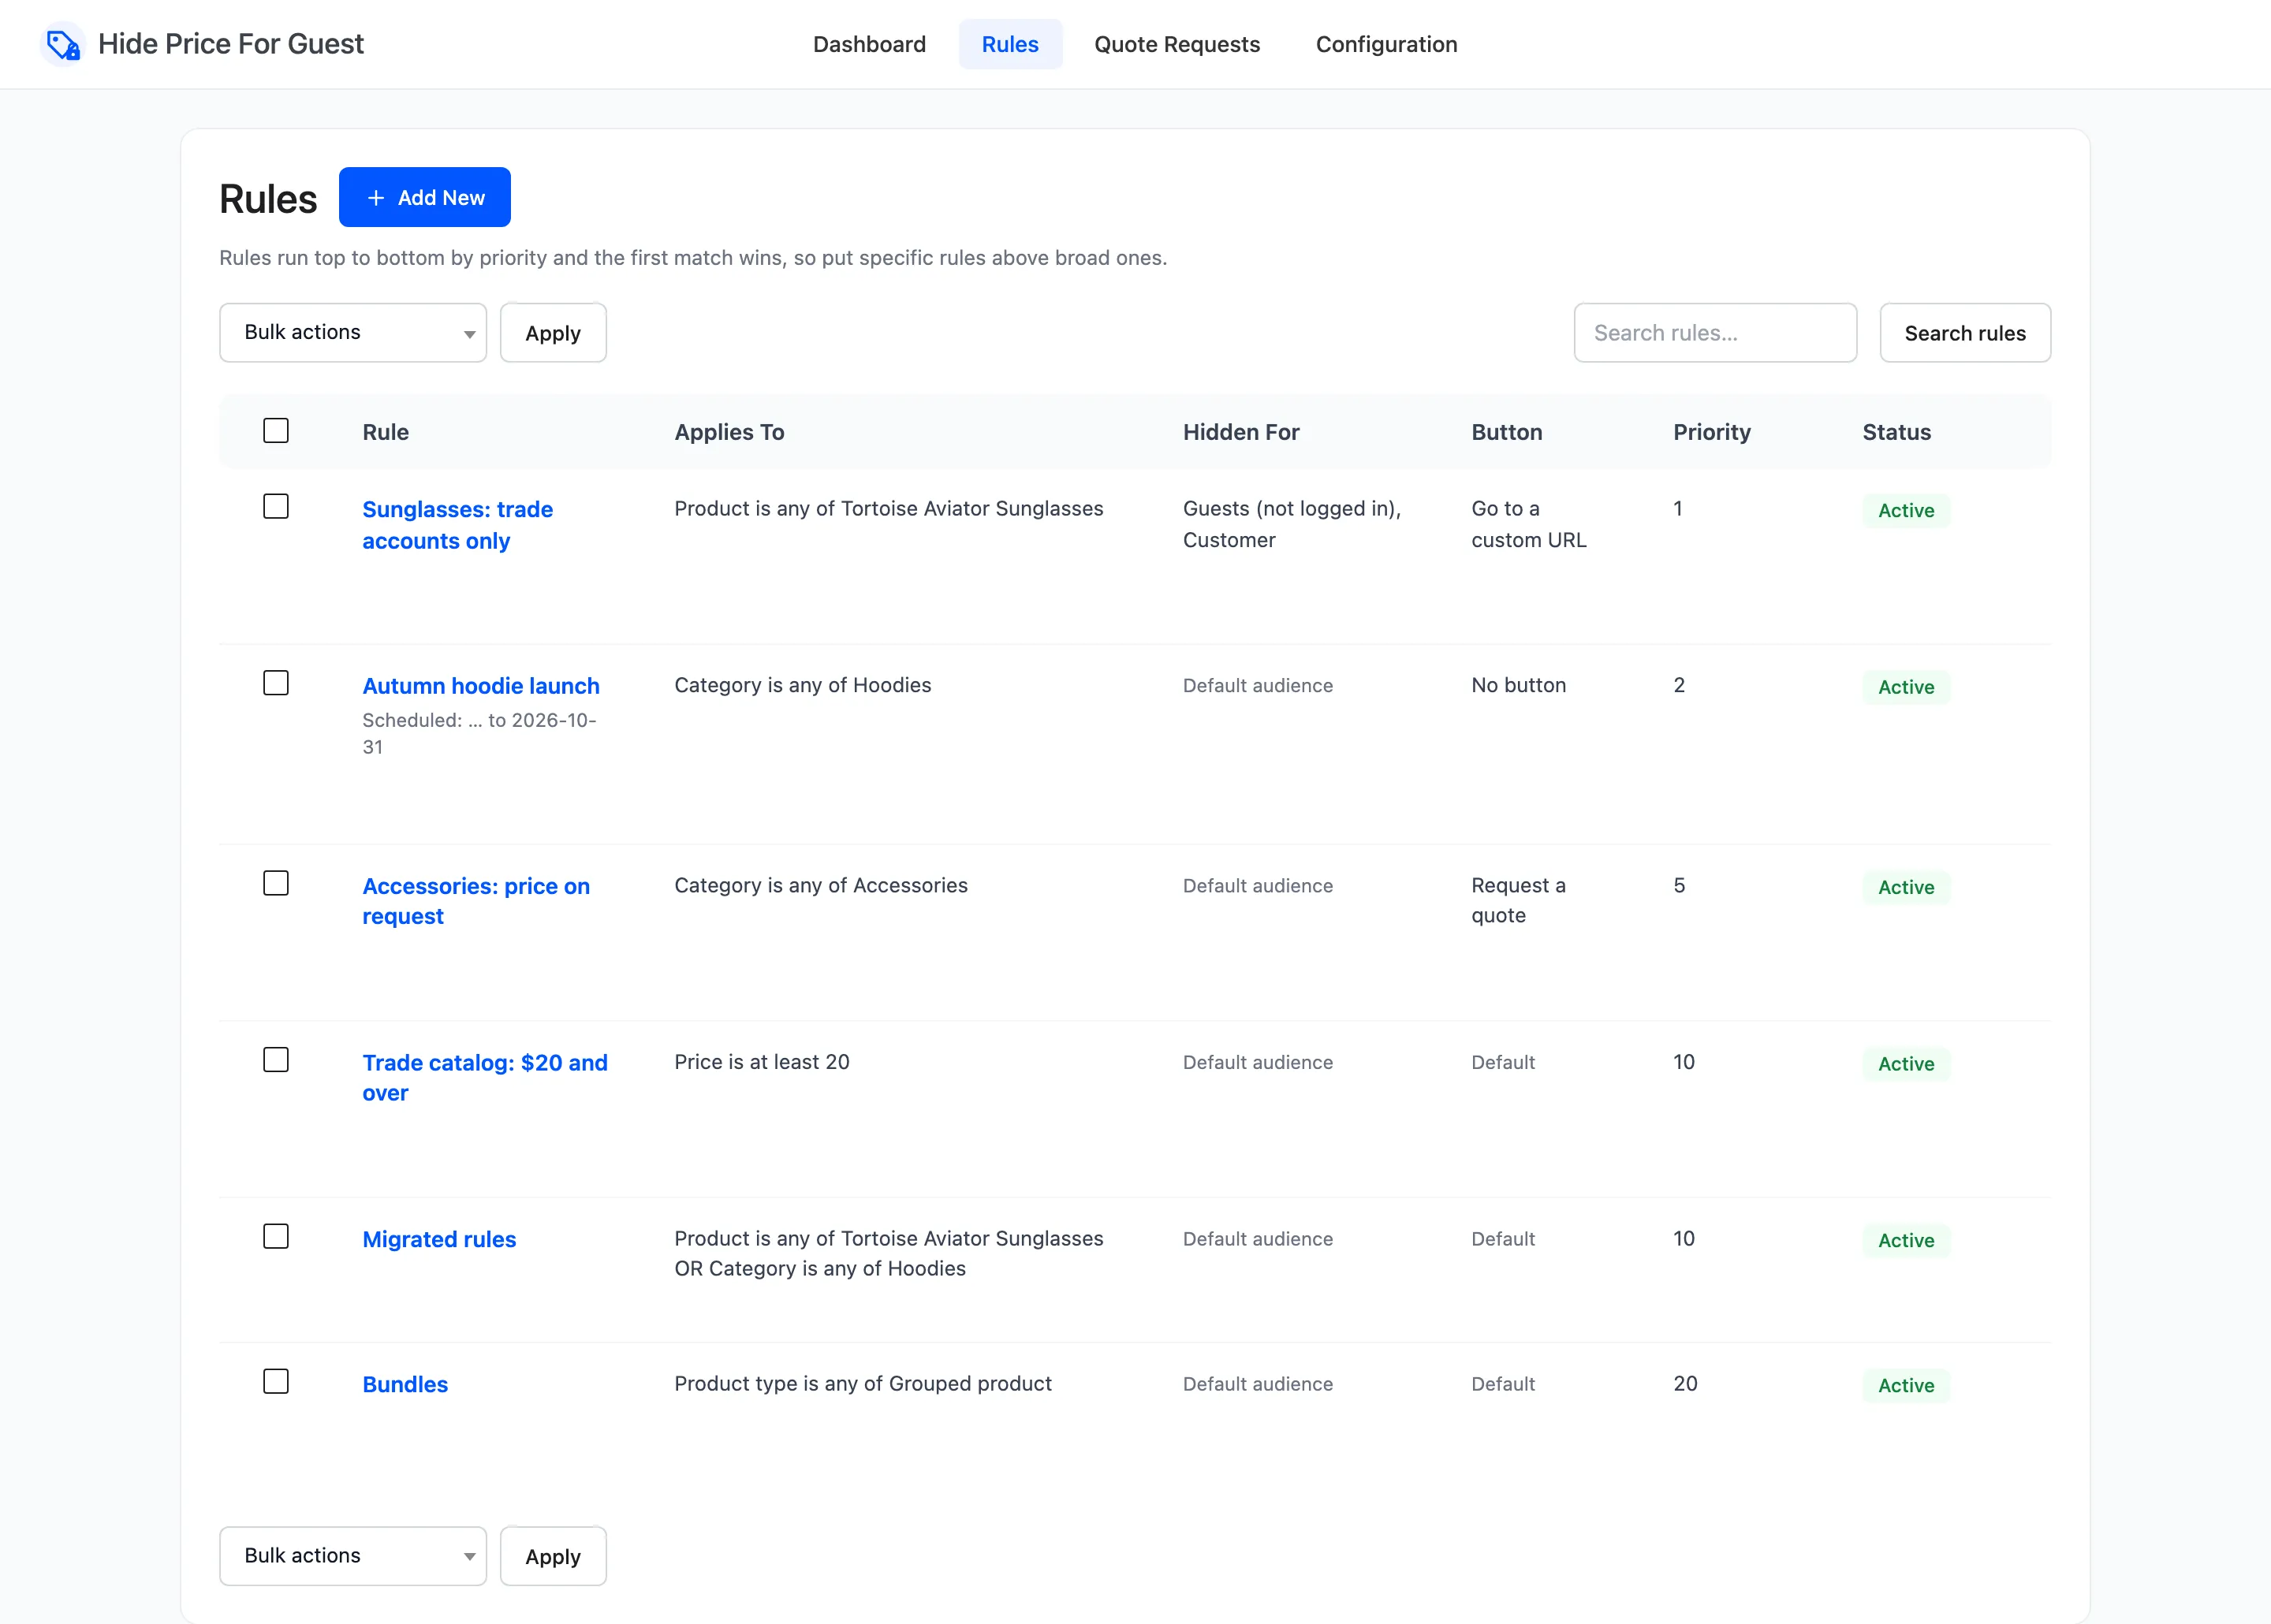
The demo store already had five rules of its own, which is why there are six. On your store the migrated rule is the only one. It uses the Display tab’s message and button, as the free version did.
The conversion runs once. A store whose free scope was Selected products and categories with nothing picked gets no rule, because nothing was protected.
From here you can rename the rule, split it, or give each part its own message, button, audience or dates. See How to Create a Price Hiding Rule (Pro).
Step 4: Remove the free plugin
Section titled “Step 4: Remove the free plugin”Once Pro is working, go to Plugins, deactivate DevDiggers Hide Price for WooCommerce and delete it. Your settings stay, because they belong to both editions.
What carries over
Section titled “What carries over”- Hide Prices For, What to Hide, exclusions, and the four protection options.
- The Display tab: message, colours, button action and text, login popup, custom URL and button classes.
- Every product’s own Always hide price or Always show price setting.
The free Click Counter’s figures do not carry over. Pro’s dashboard starts counting clicks, logins and quote requests from the day it is activated.
Going back to the free version
Section titled “Going back to the free version”Deactivate Pro and activate the free plugin. It reads the same settings, so the message, button, audience and exclusions are unchanged. Pro’s rules, quote requests and country rules stay in the database but do nothing. The free version protects products by its own Hide Prices On setting, and if the Display tab’s action was Request a quote, it shows the login button instead.
If the store never ran the free version, Hide Prices On has never been saved and starts at All products, so every product is hidden from your audience. Check Configuration → General → Where to Hide straight after switching.