

How to Add the Switcher to the Mini Cart
Most themes show a small cart in the header, as a dropdown or a panel sliding in from the side. With the mini cart switched on, shoppers can fix a size from there, on any page, without going to the cart.
Step 1: Add Mini cart widget
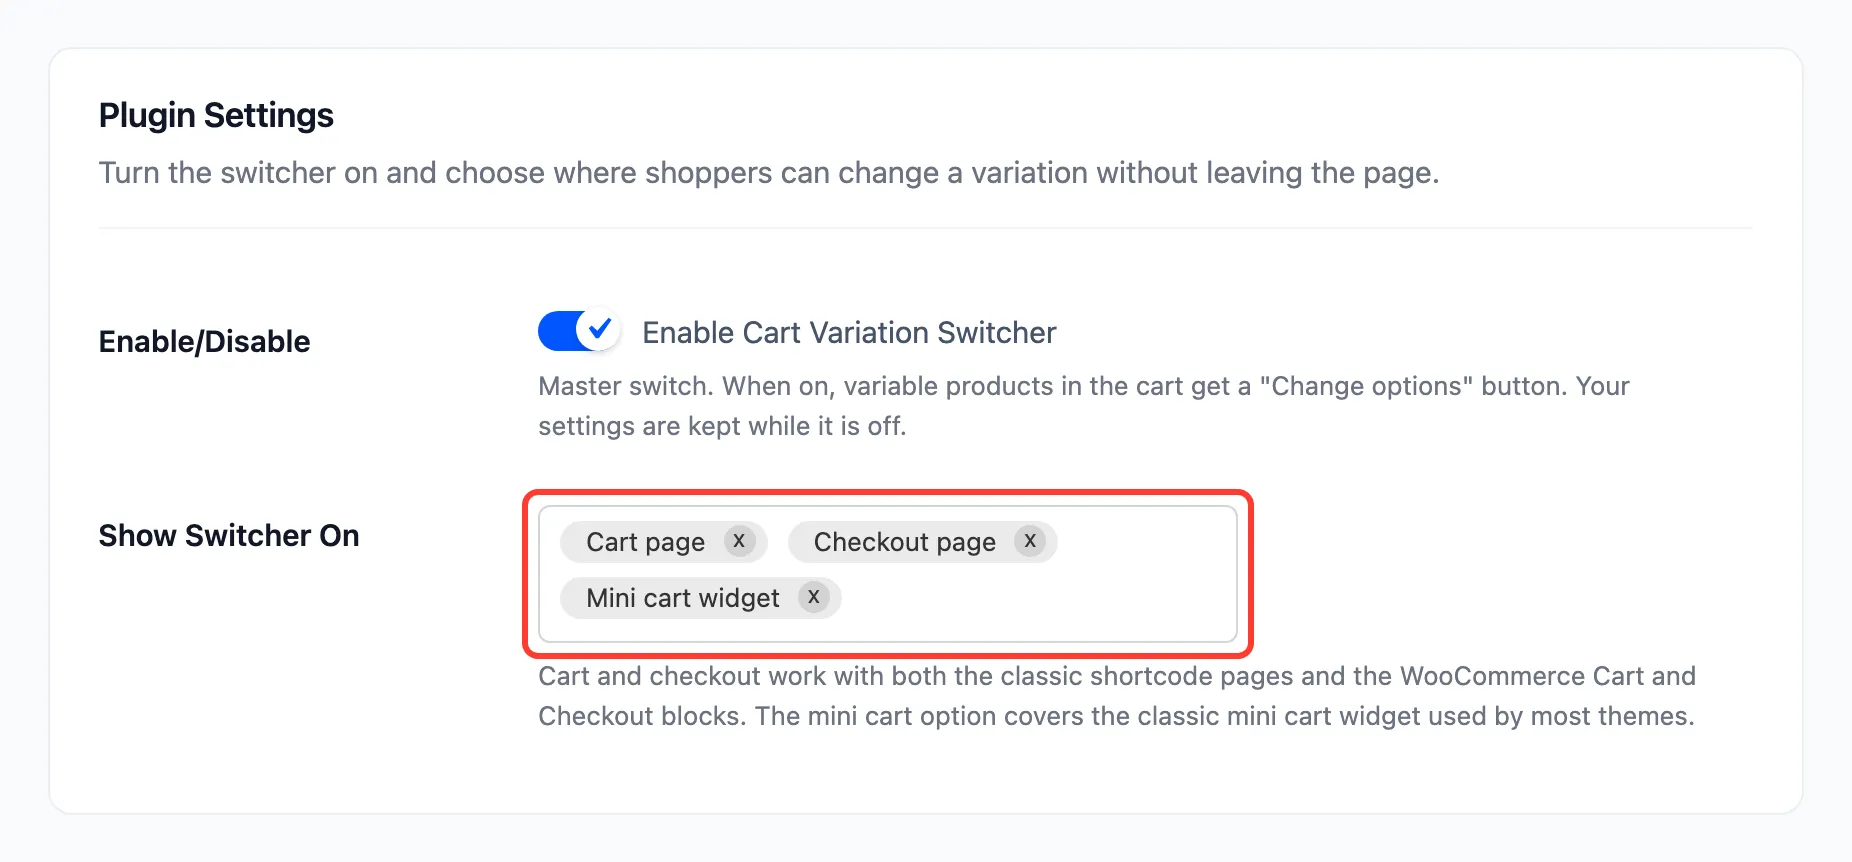
Section titled “Step 1: Add Mini cart widget”Open Configuration → General, click into Show Switcher On and add Mini cart widget. Click Save Changes.
Step 2: Open the mini cart as a shopper
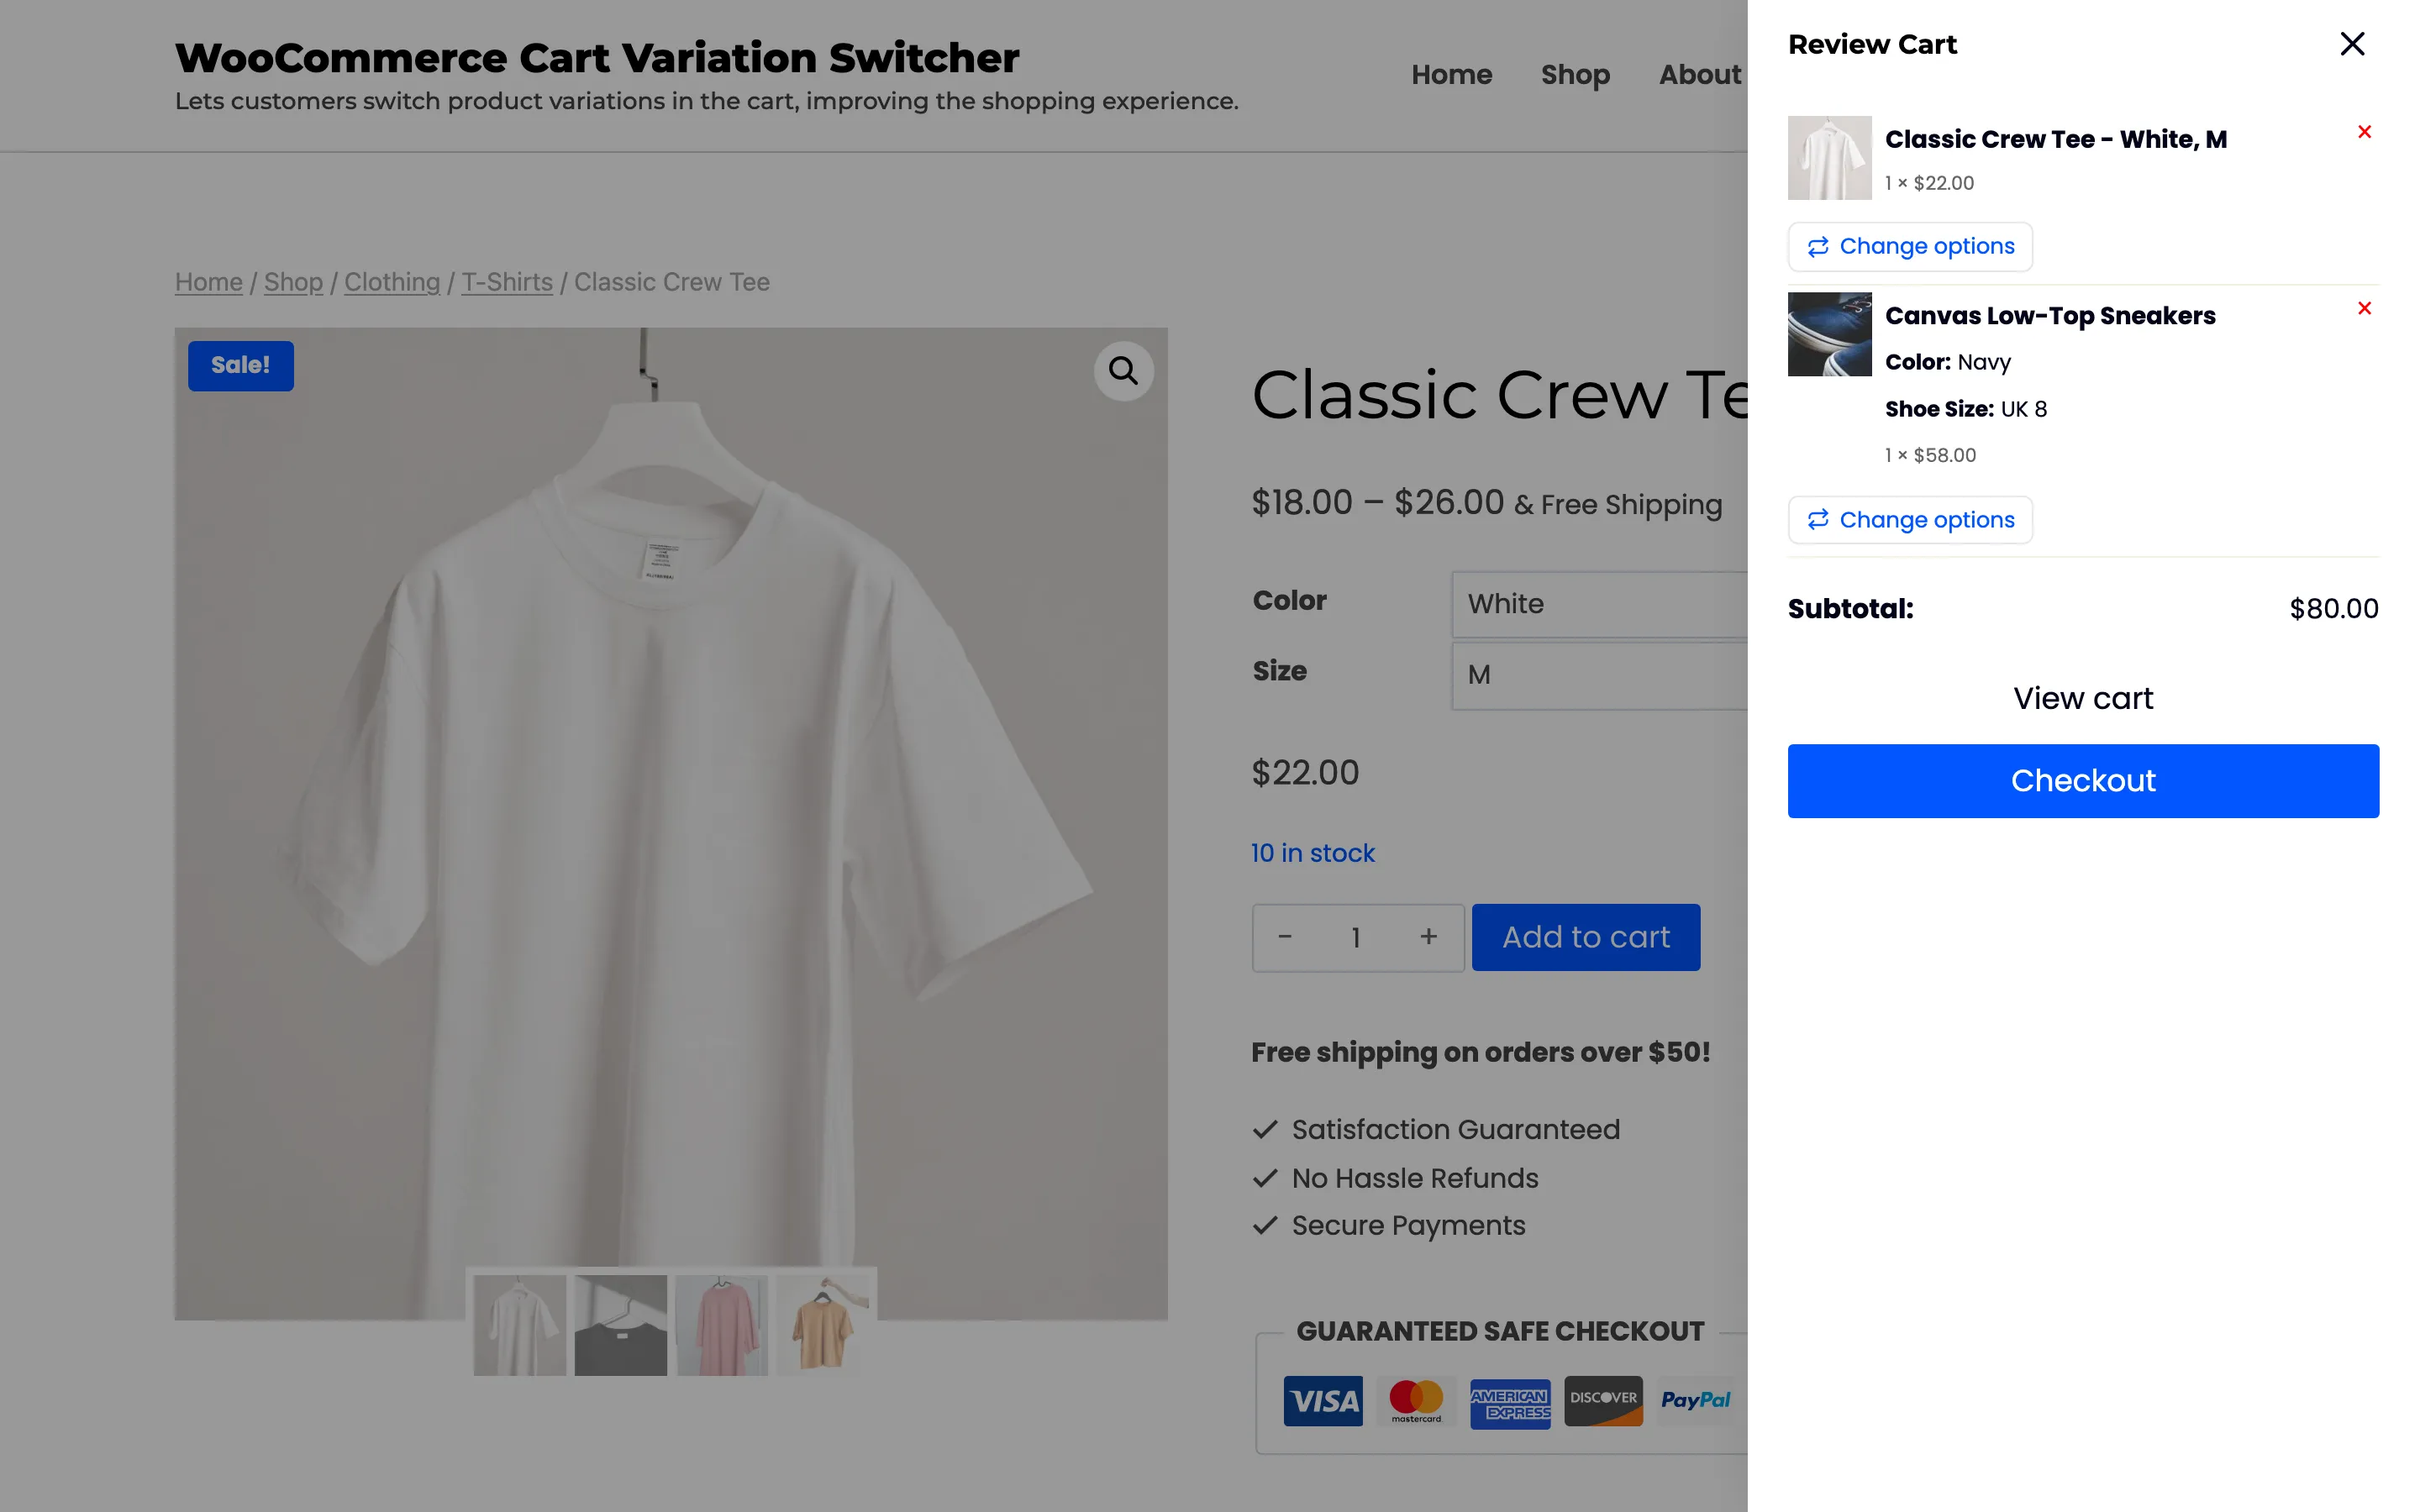
Section titled “Step 2: Open the mini cart as a shopper”On the demo store, the theme’s cart icon slides a Review Cart panel in from the right. Each variable product in it shows Change options.
Step 3: Switch an item
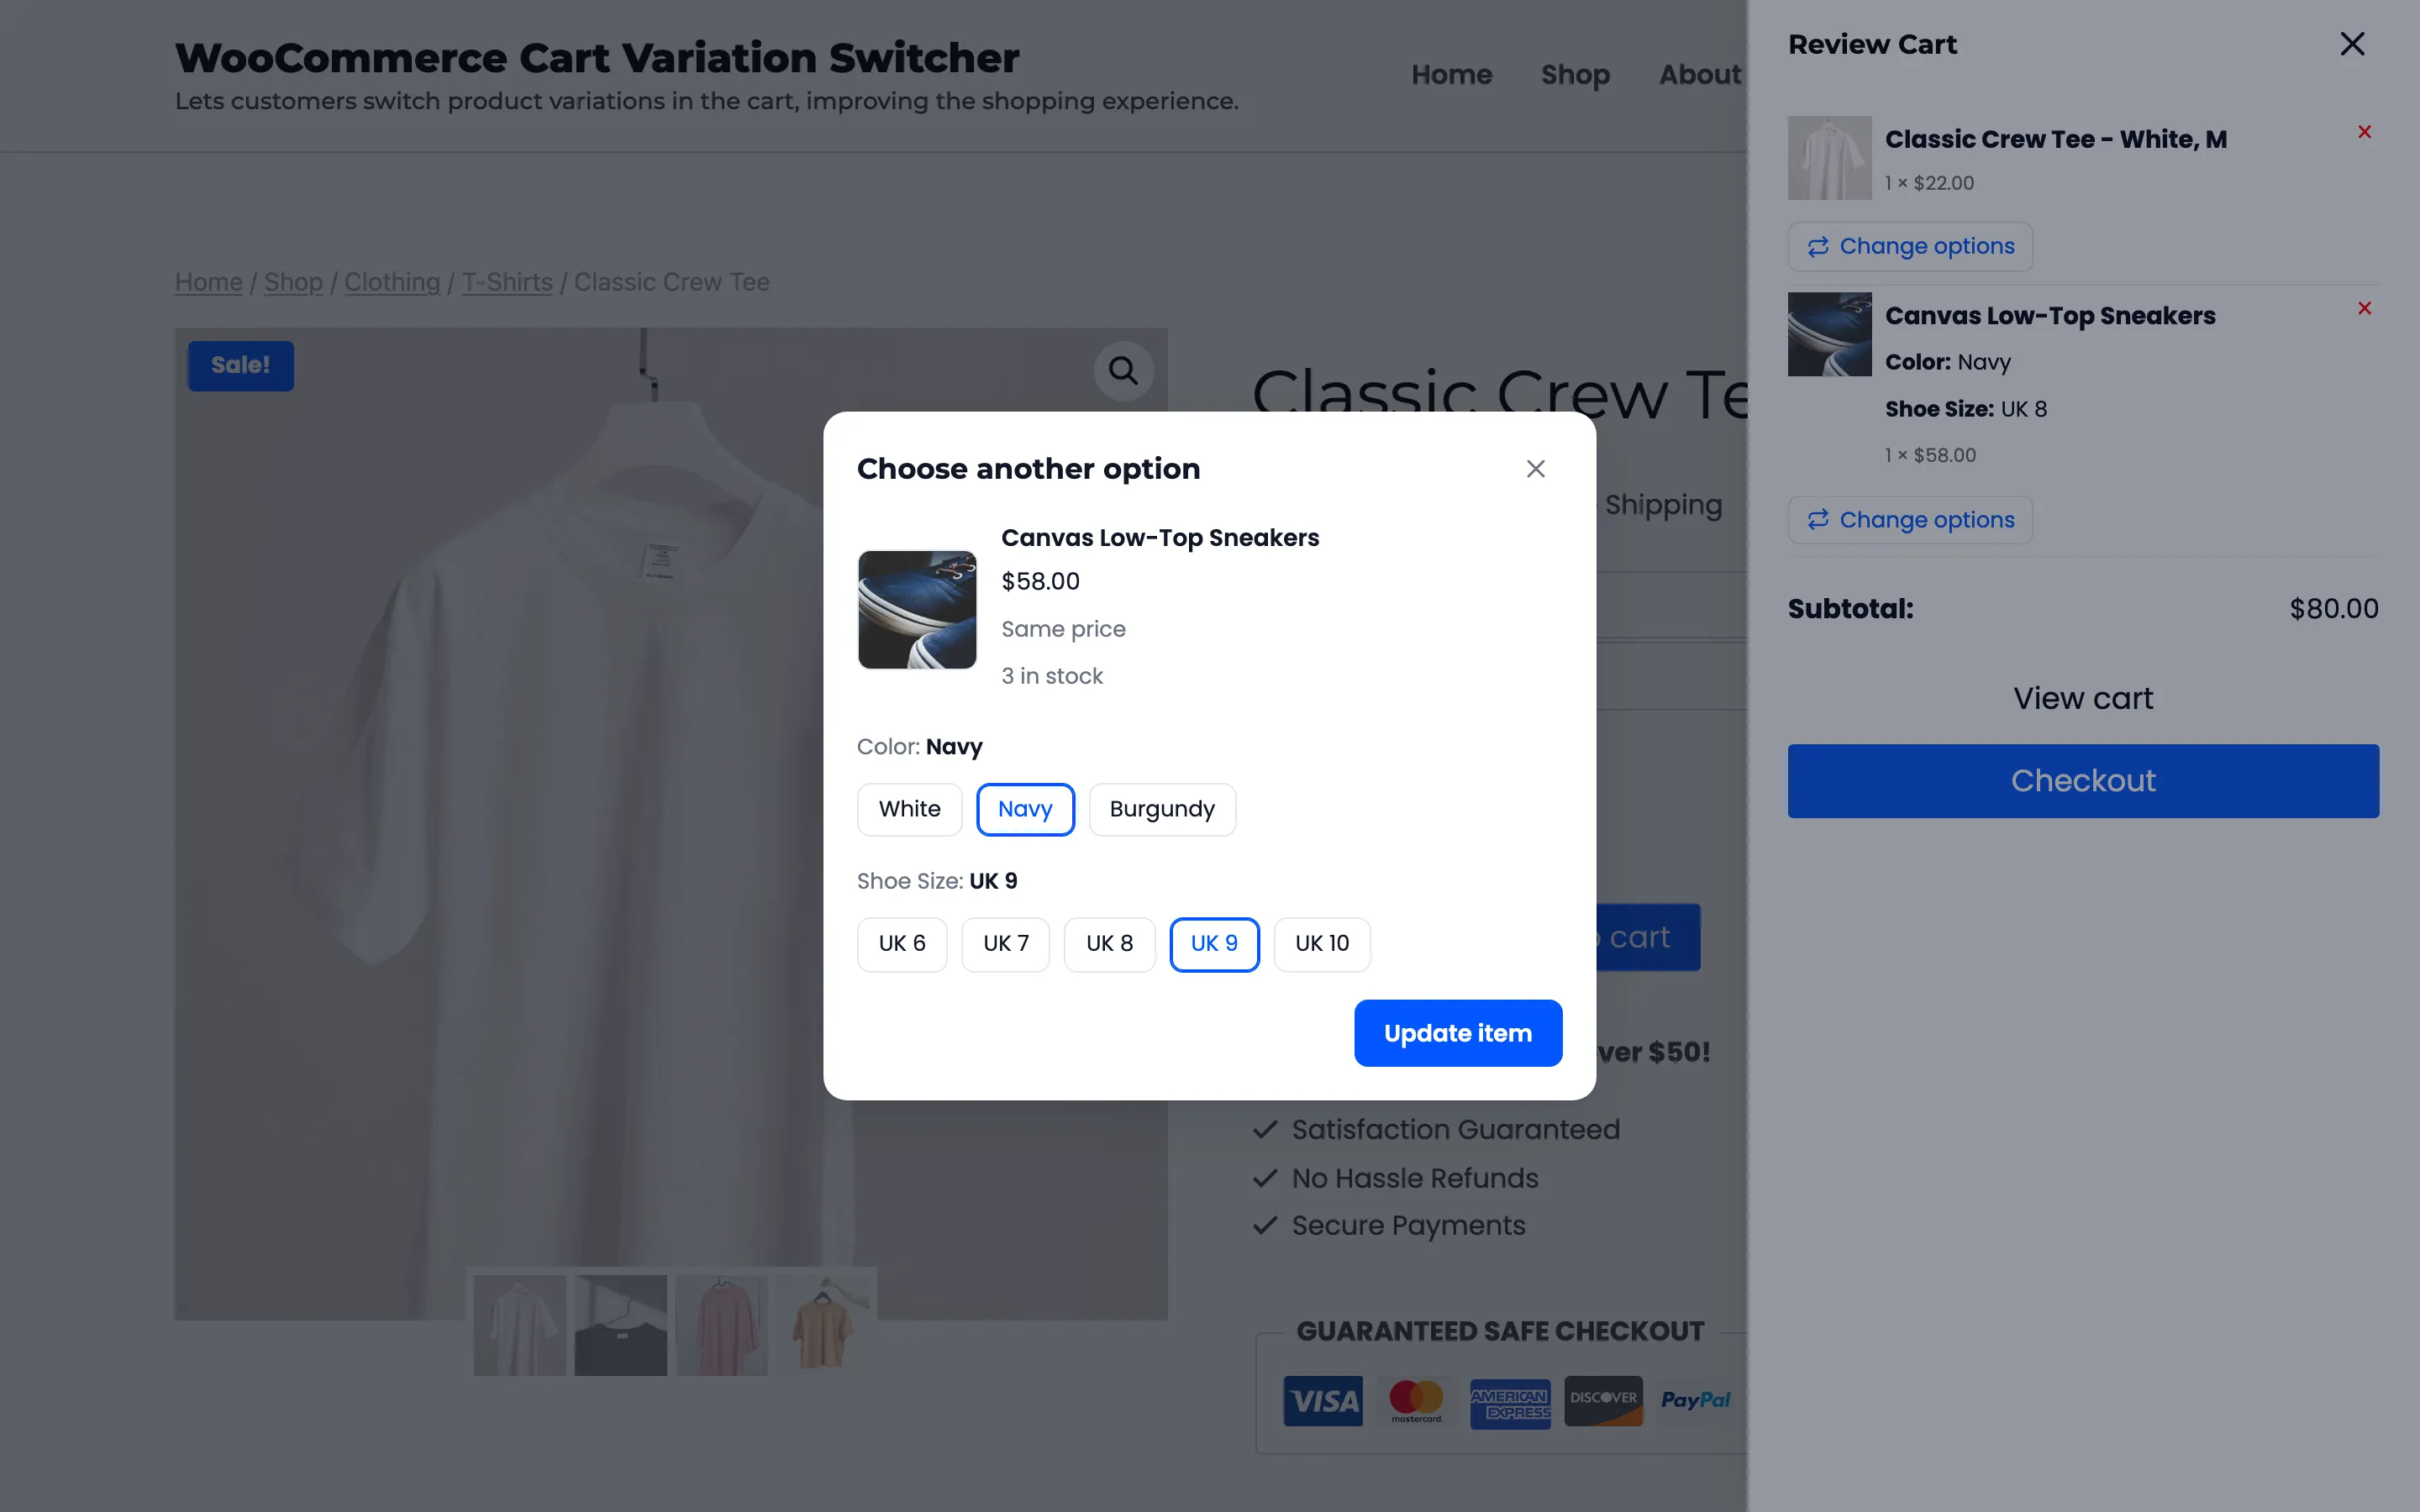
Section titled “Step 3: Switch an item”Press Change options. The popup opens over the page and the side cart. The demo shopper changed their sneakers from UK 8 to UK 9.
Step 4: Check the result
Section titled “Step 4: Check the result”The side cart refreshes with the new option.
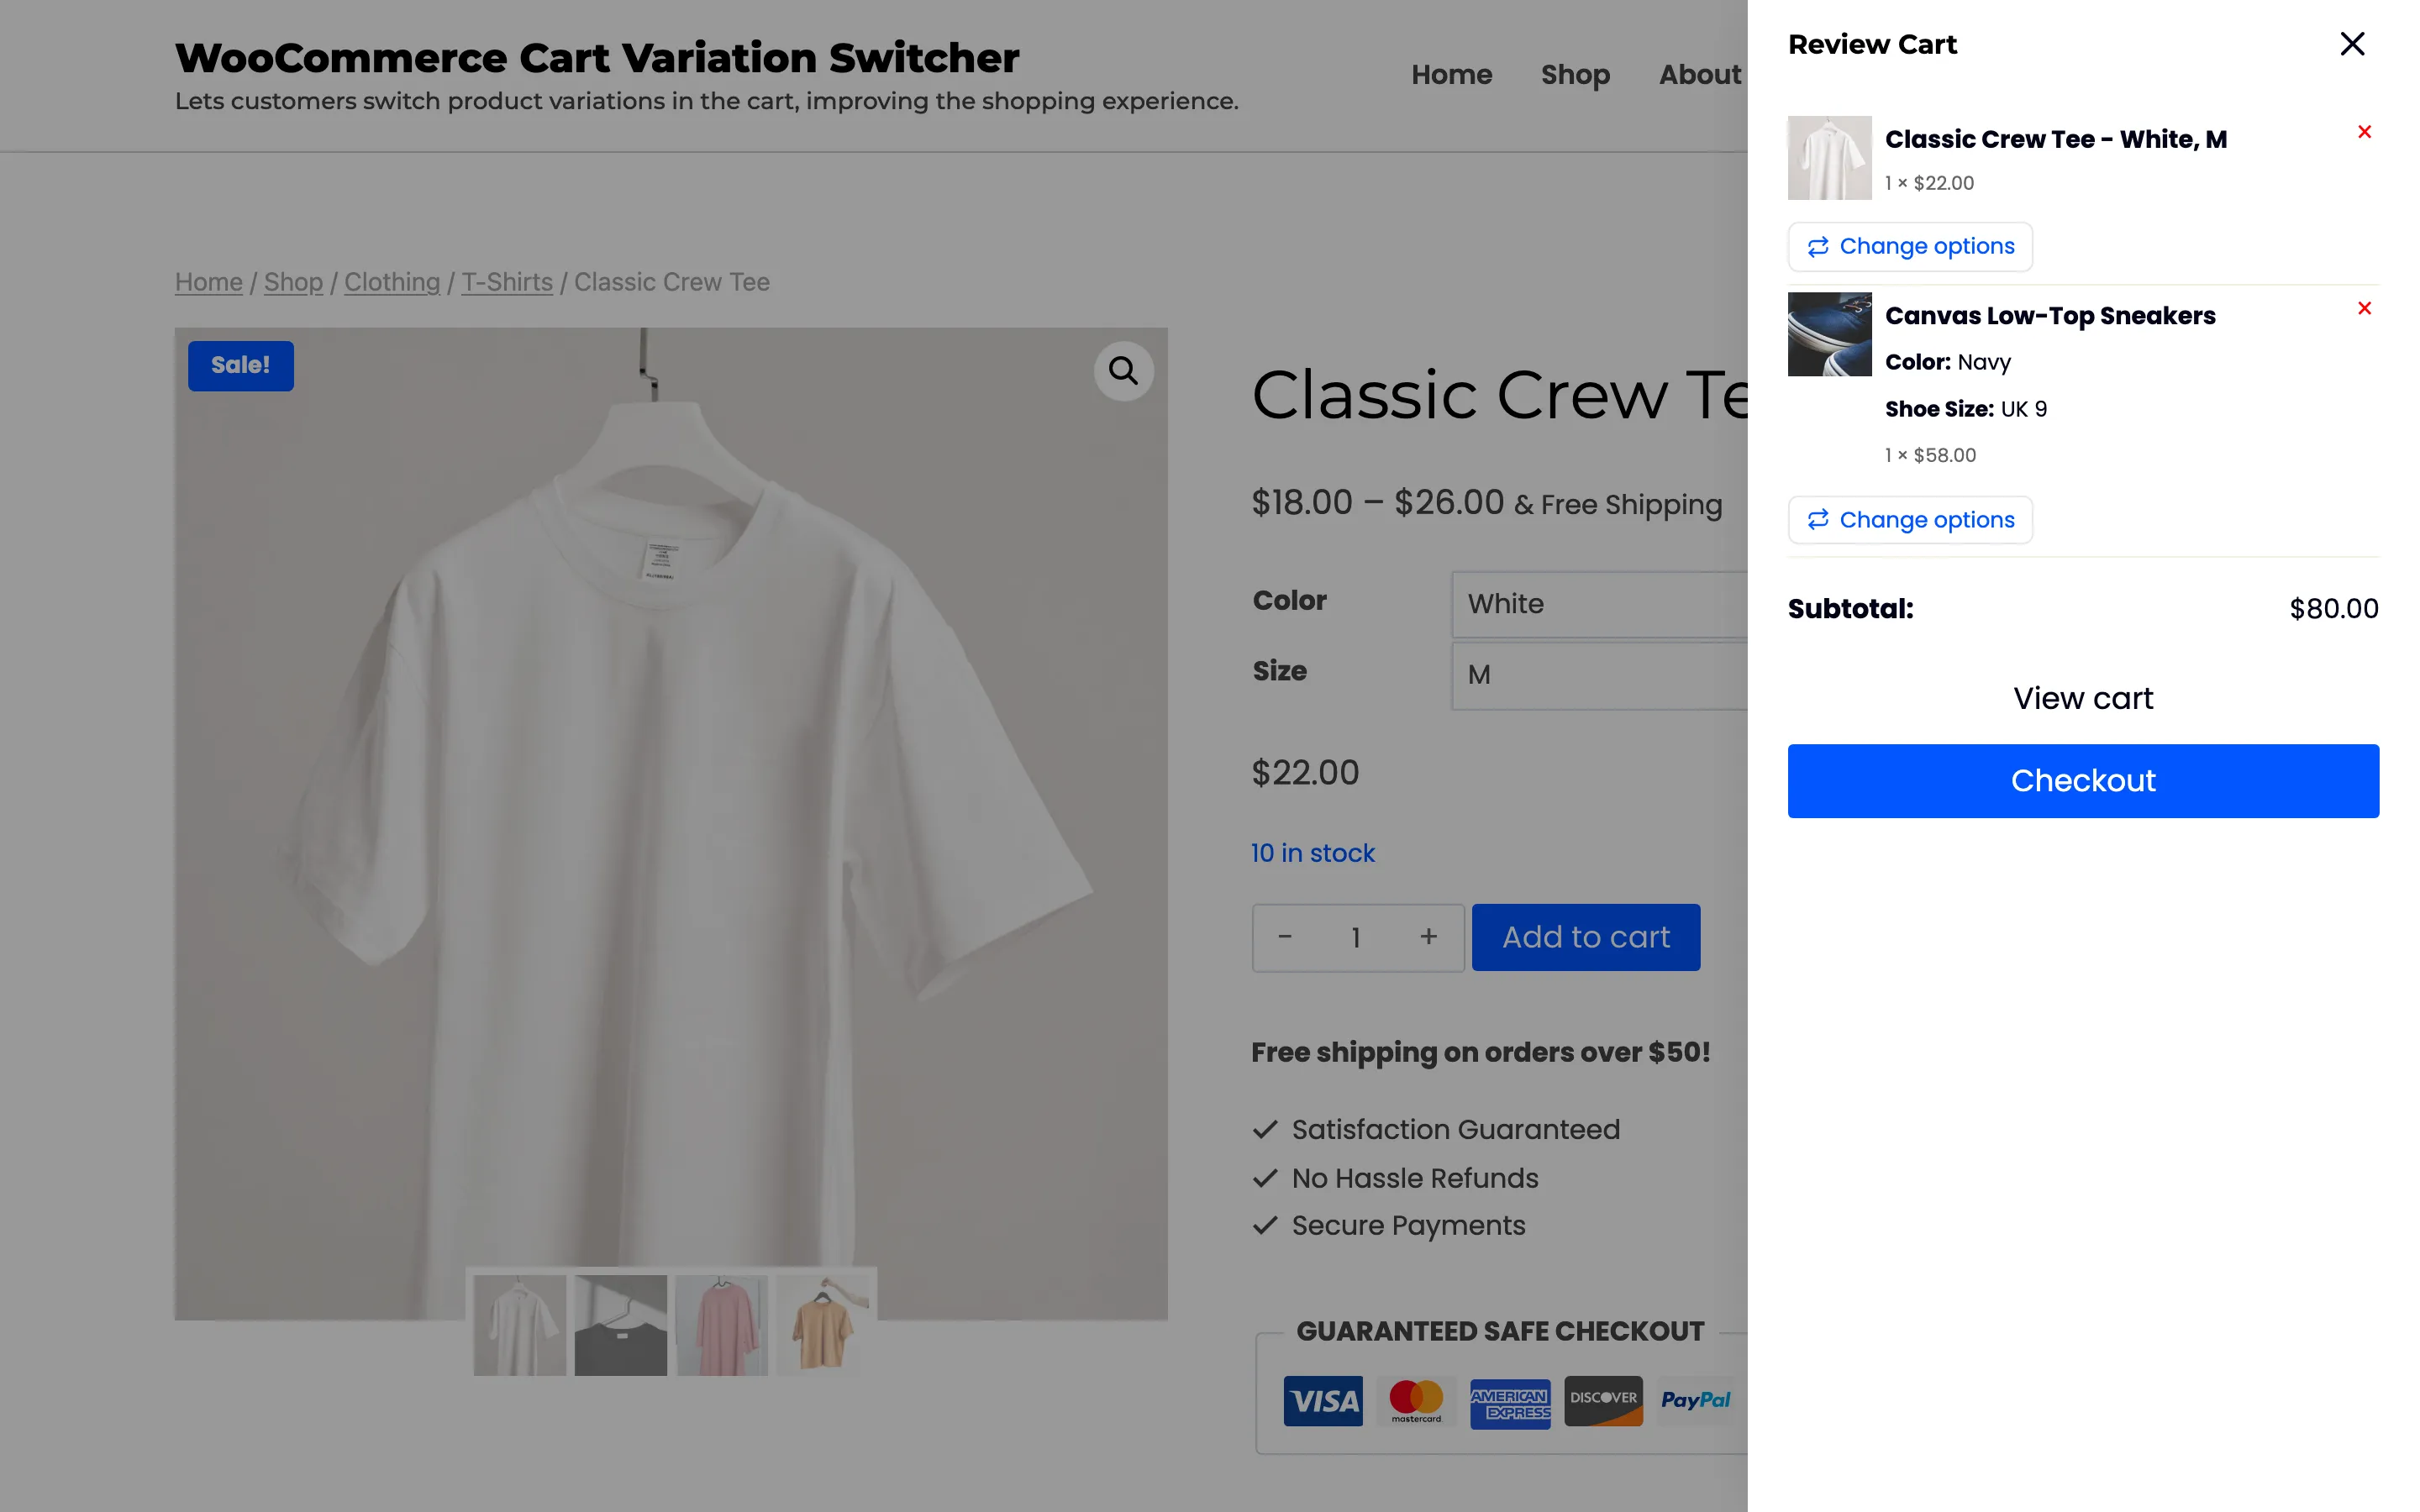
On the cart or checkout page, the page’s own cart table or order summary refreshes as well, so the two never disagree.
Good to know
Section titled “Good to know”- This covers the classic WooCommerce mini cart, which is what most themes put in their header. A theme or plugin that draws its own cart from scratch may not show the button.
- With the mini cart on, the switcher’s script and style load on every page, not only on the cart and checkout.
- The mini cart always uses the popup.