

How to Add the Switcher to the Checkout Page
The checkout is where a shopper reads their order one last time, and often the moment they spot the wrong size. Checkout page is on out of the box, so this is mostly a check.
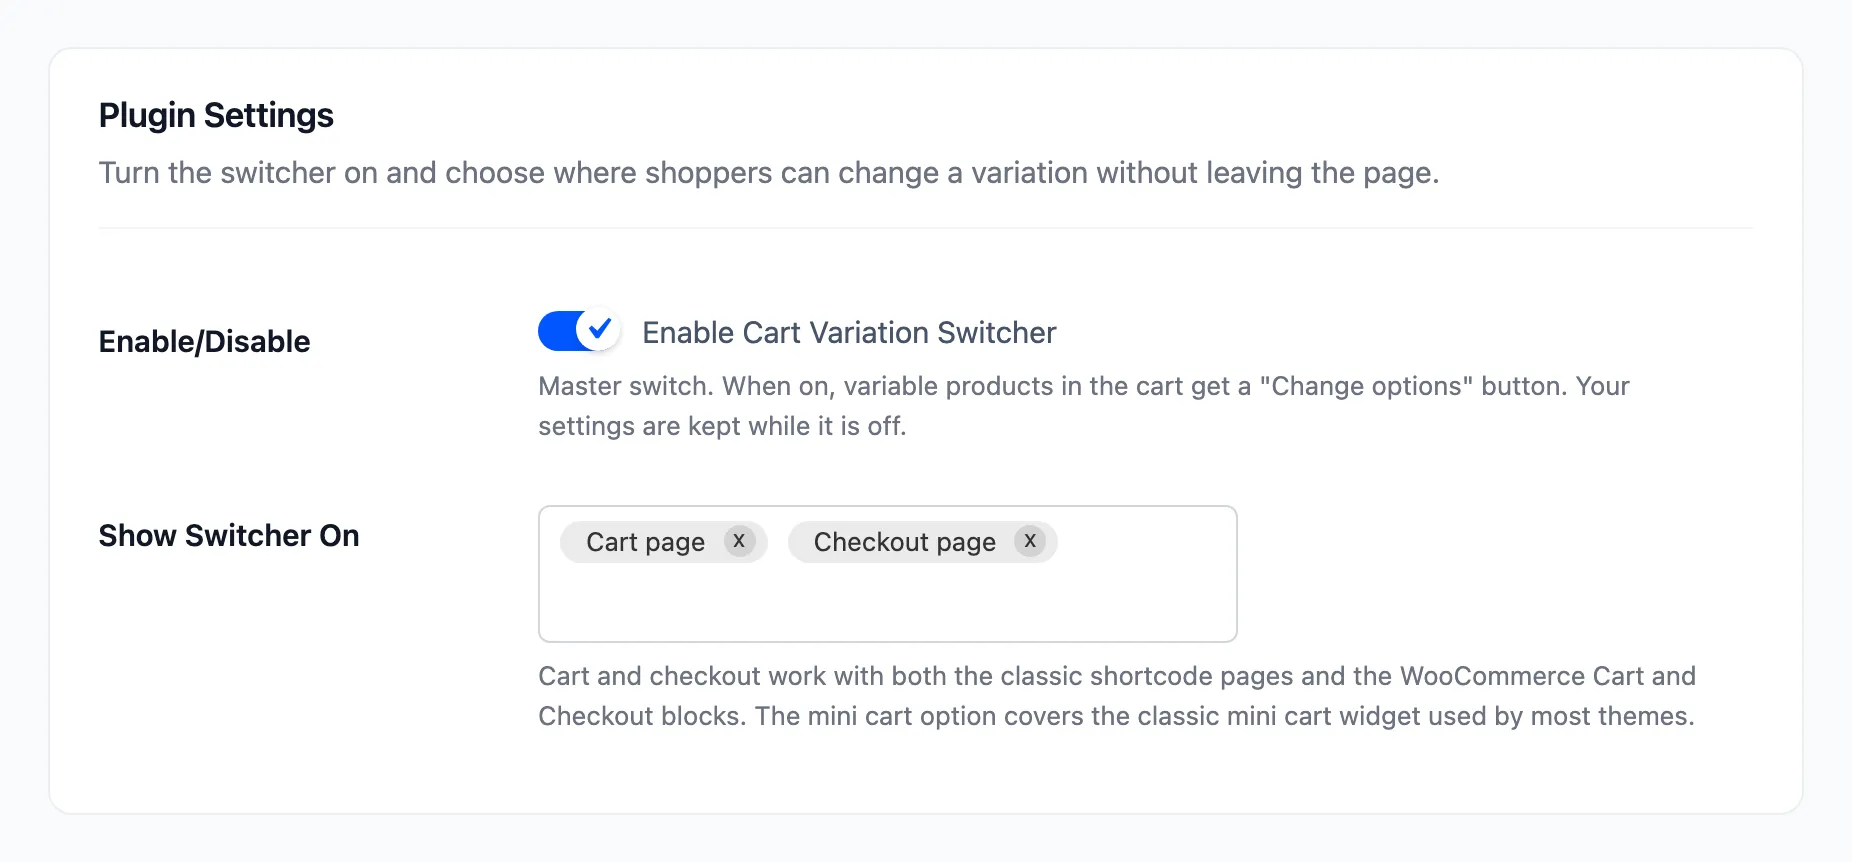
Step 1: Check Show Switcher On
Section titled “Step 1: Check Show Switcher On”Open Configuration → General. Show Switcher On should list Checkout page. Add it if not, and click Save Changes.
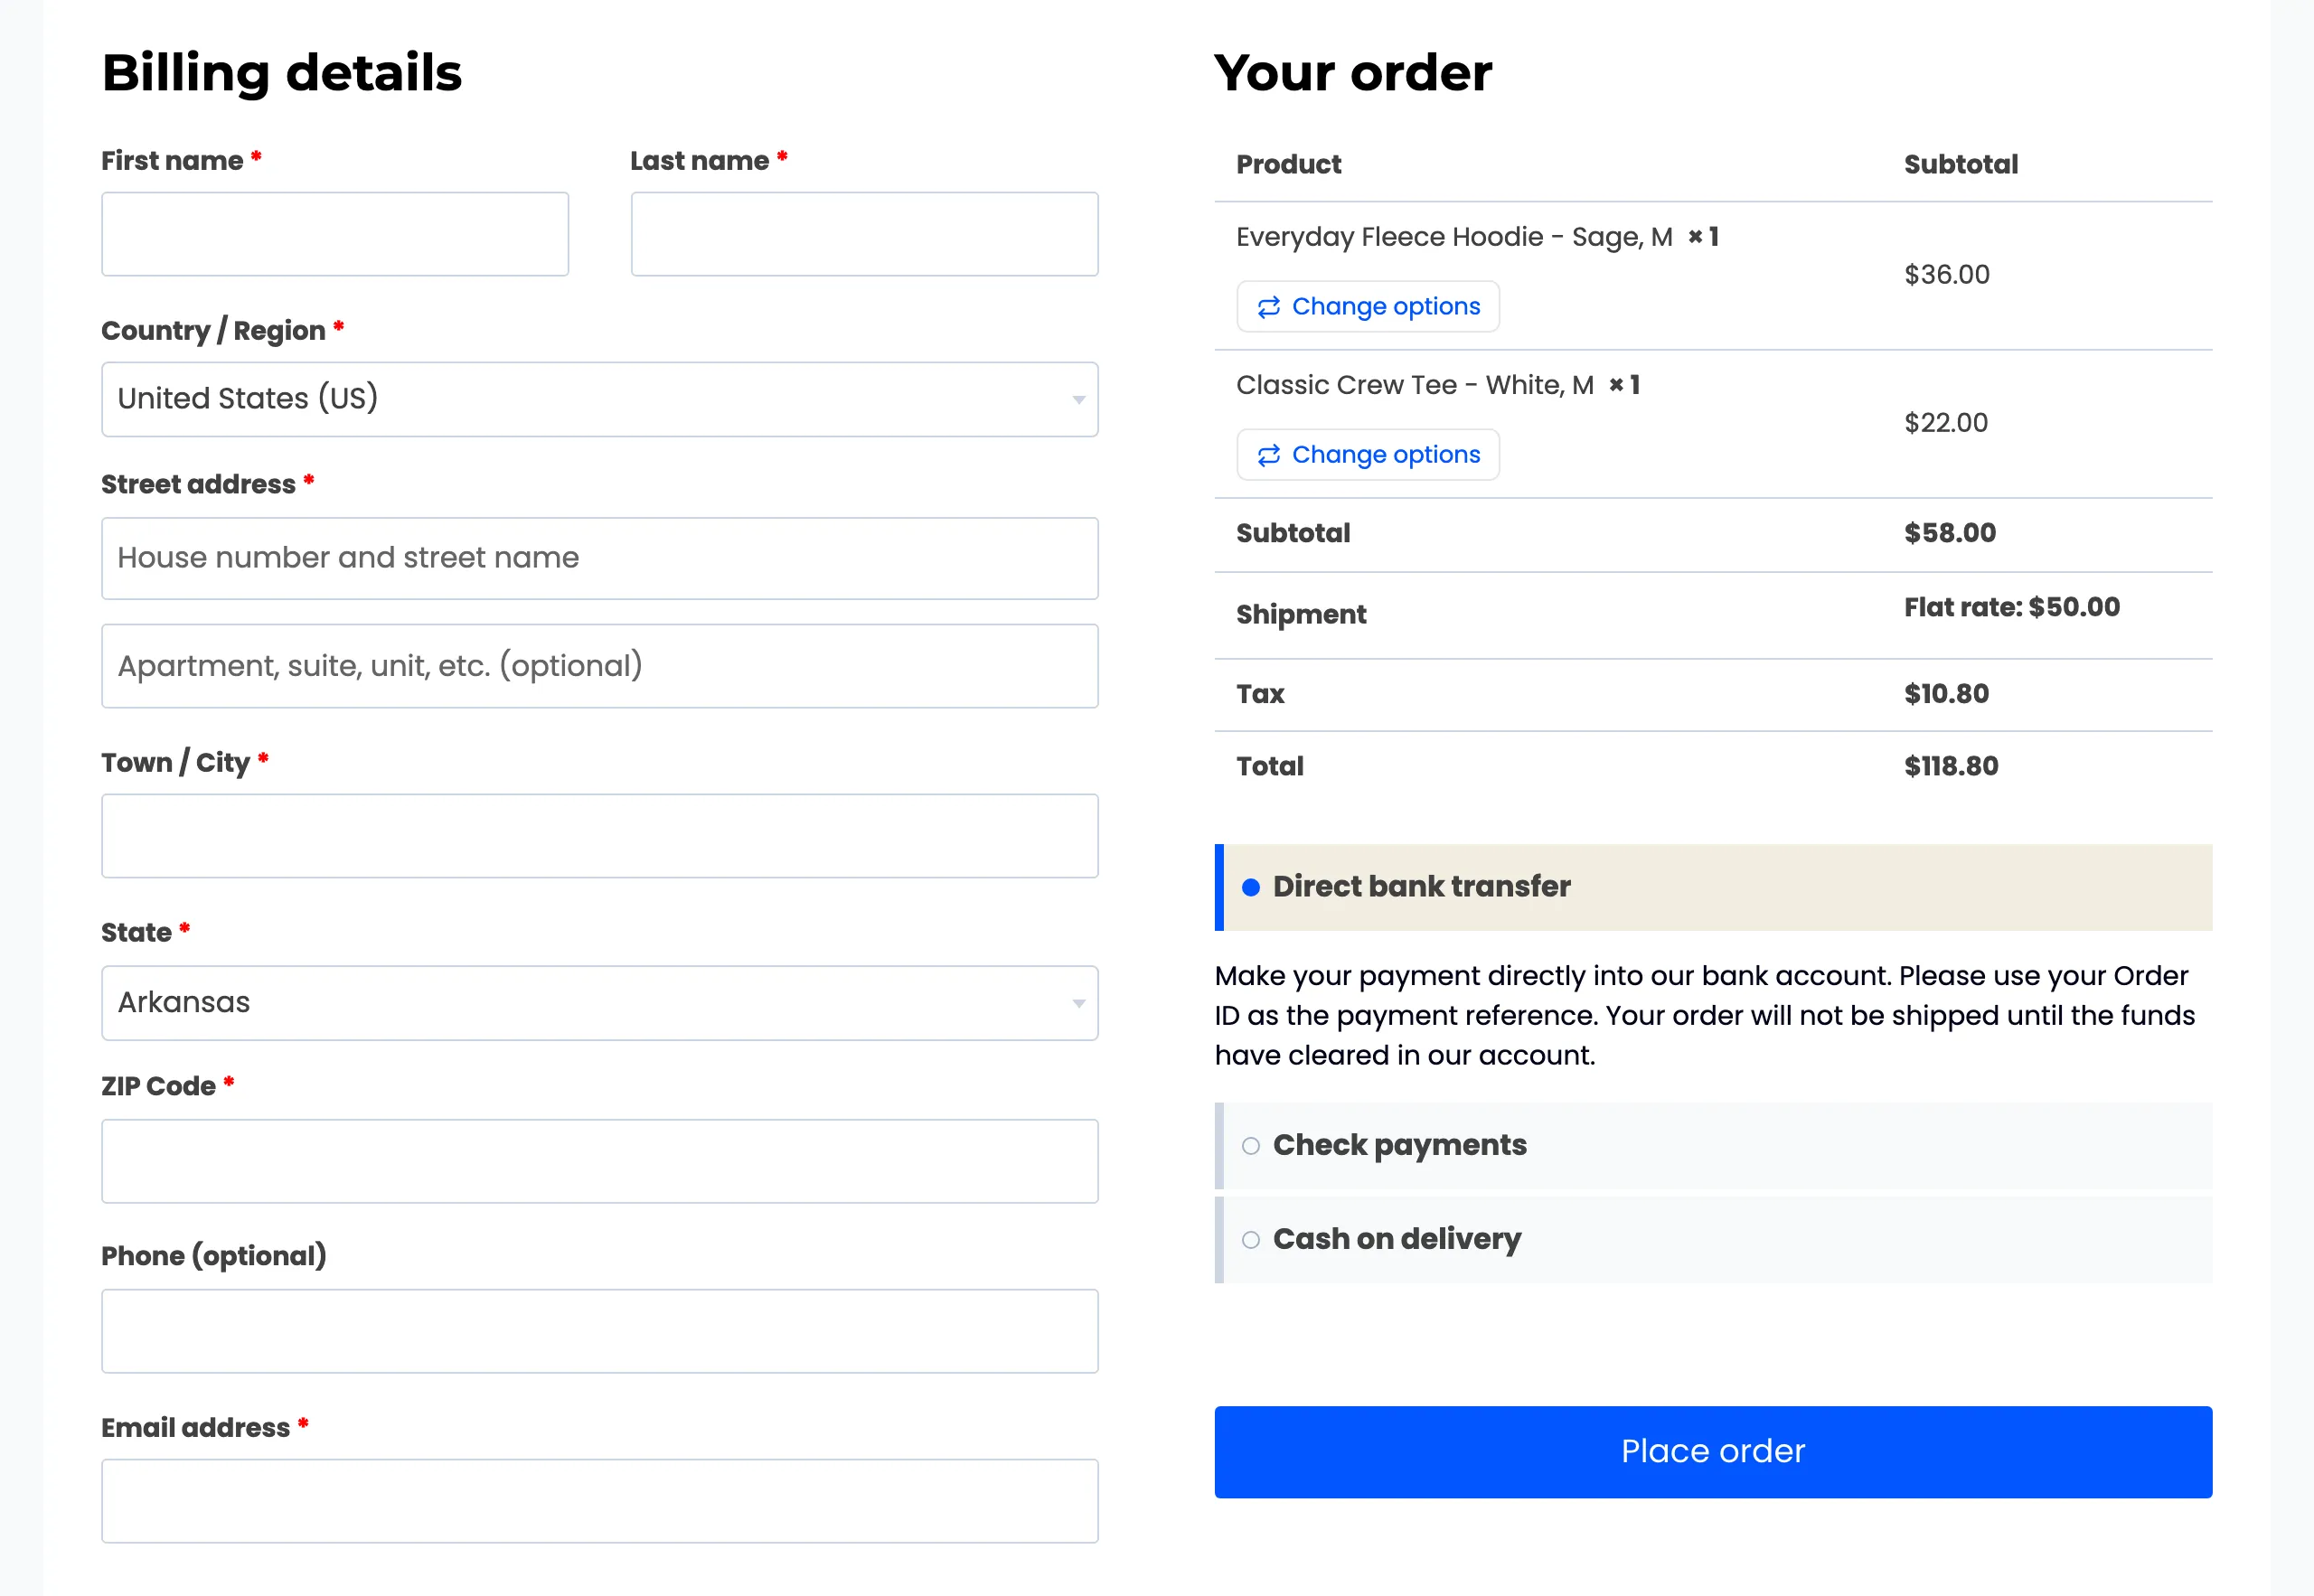
Step 2: Open the checkout as a shopper
Section titled “Step 2: Open the checkout as a shopper”With a variable product in the cart, open the checkout. In Your order, Change options sits under each item’s quantity.
Step 3: Switch the item
Section titled “Step 3: Switch the item”Press Change options. The popup opens over the checkout. On the demo, an Everyday Fleece Hoodie was in the cart in Sage, on sale at $36.00. Black costs $42.00, so the popup shows +$6.00.
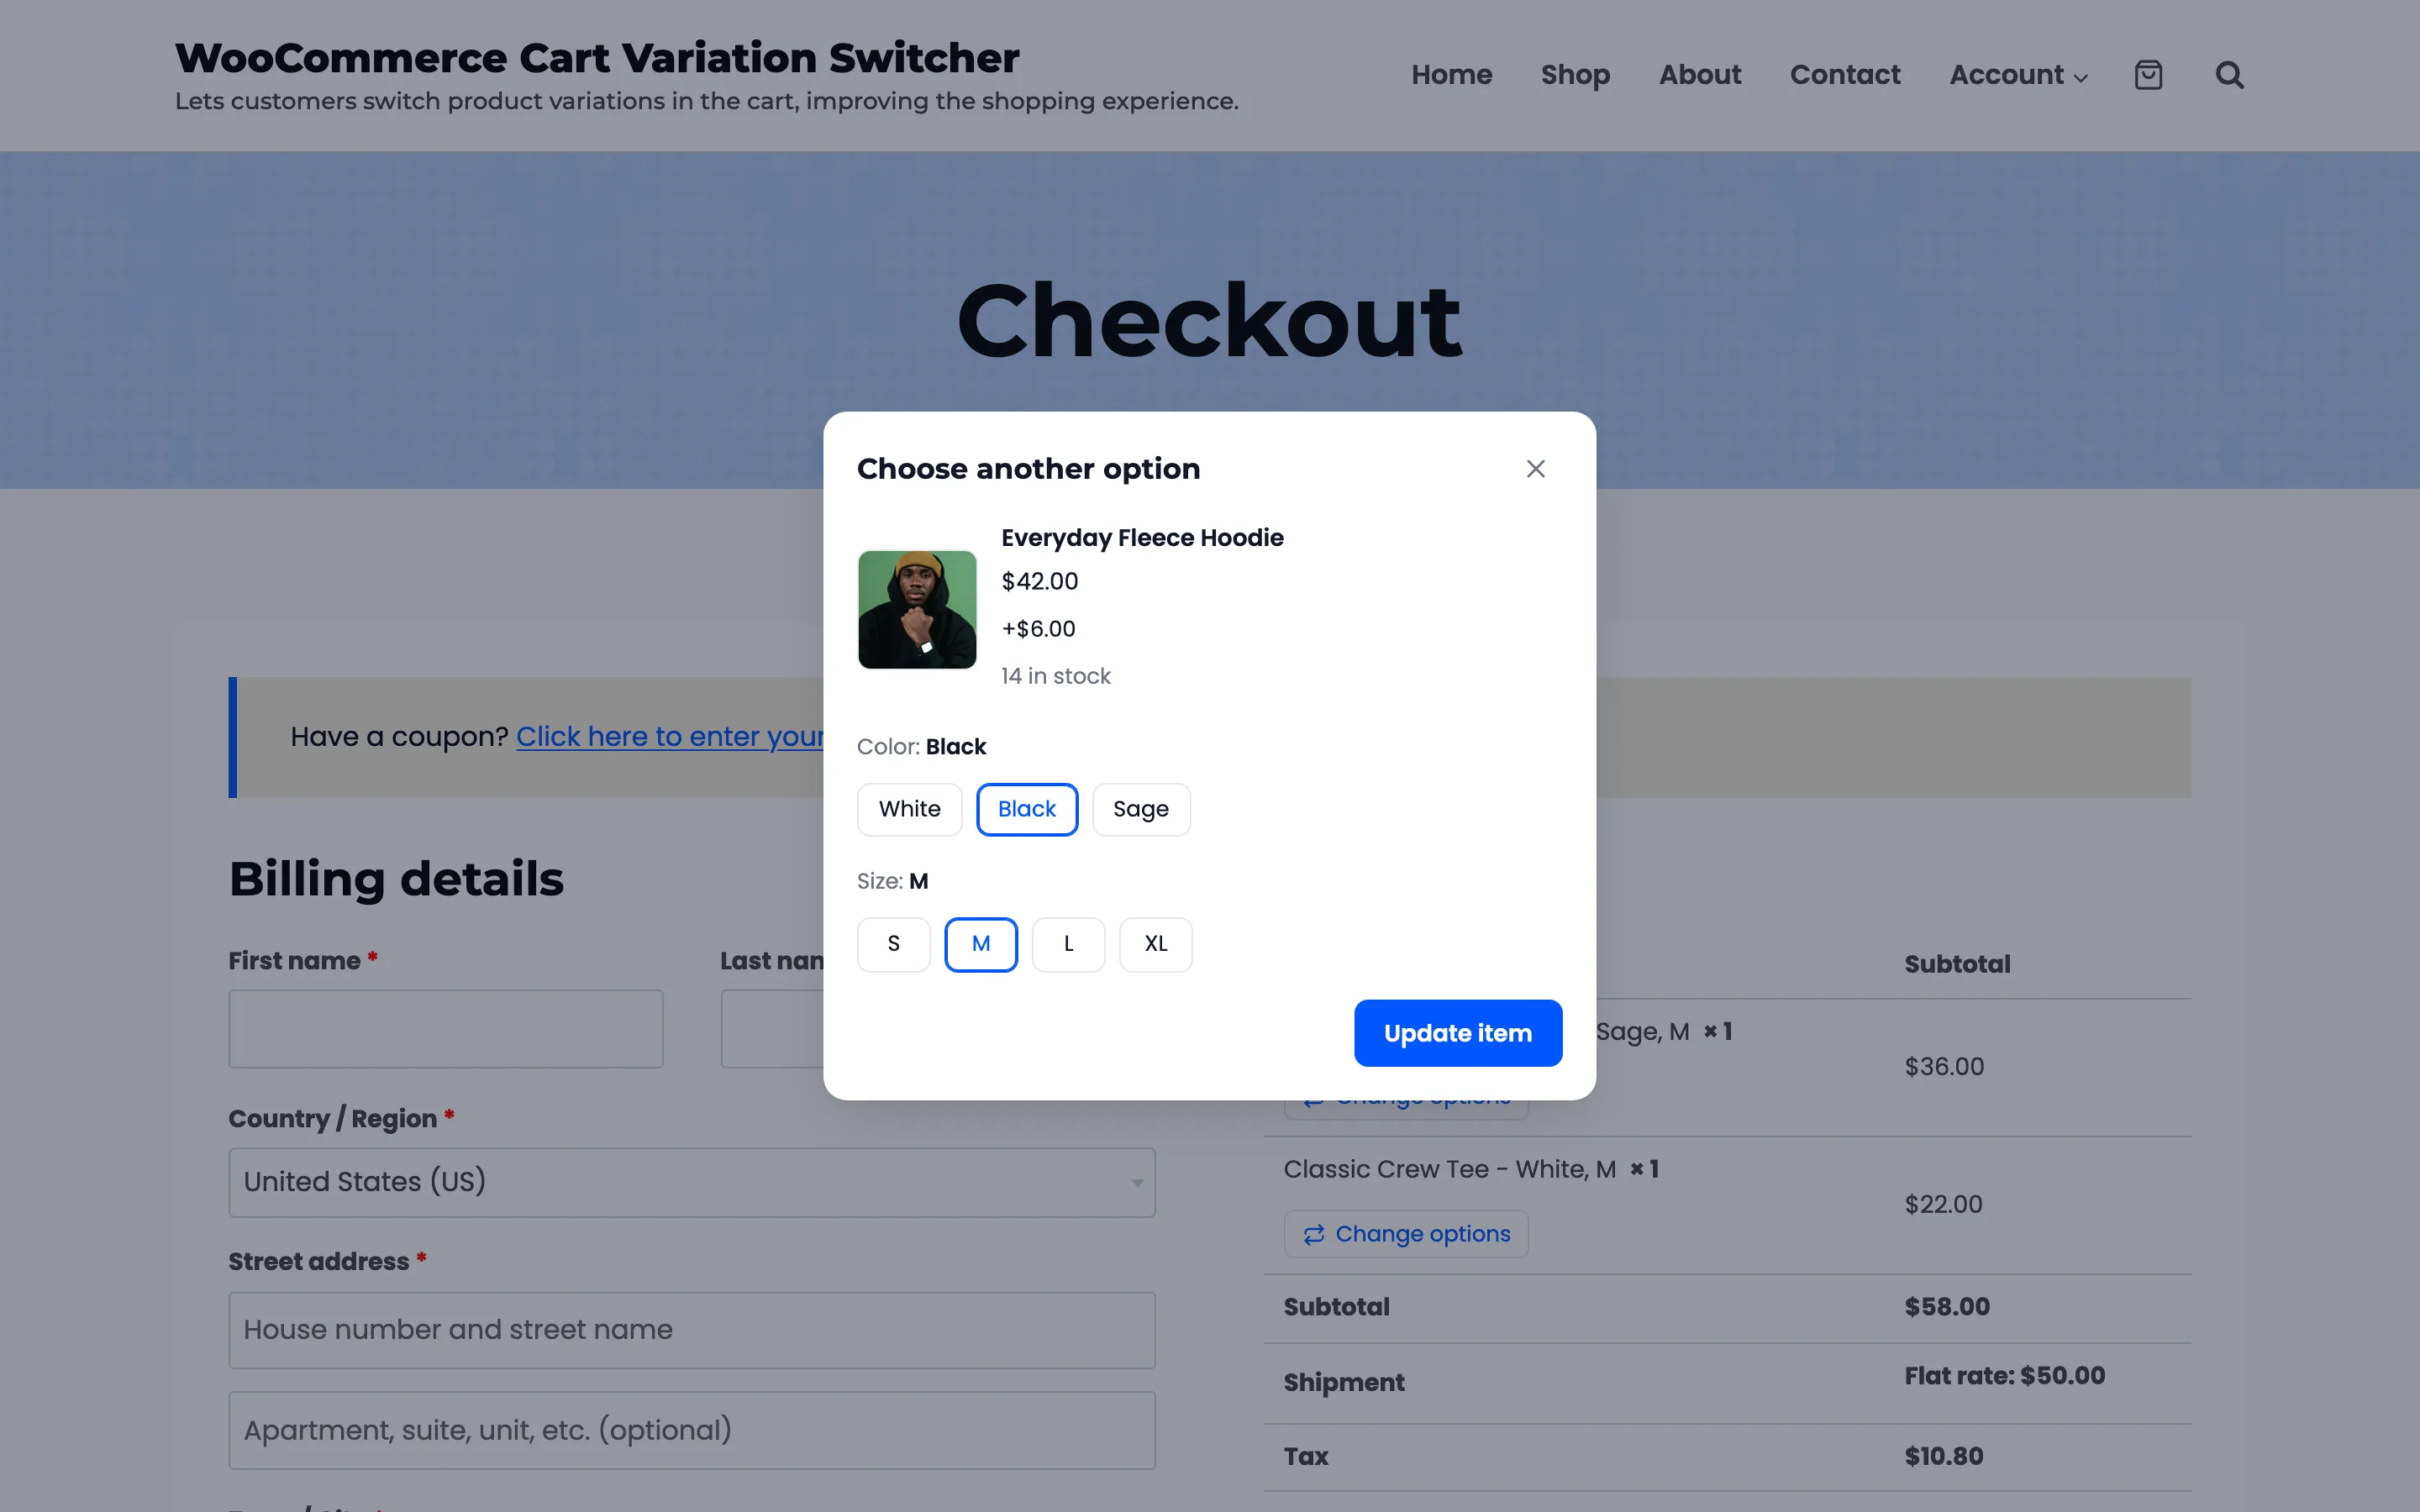
Press Update item.
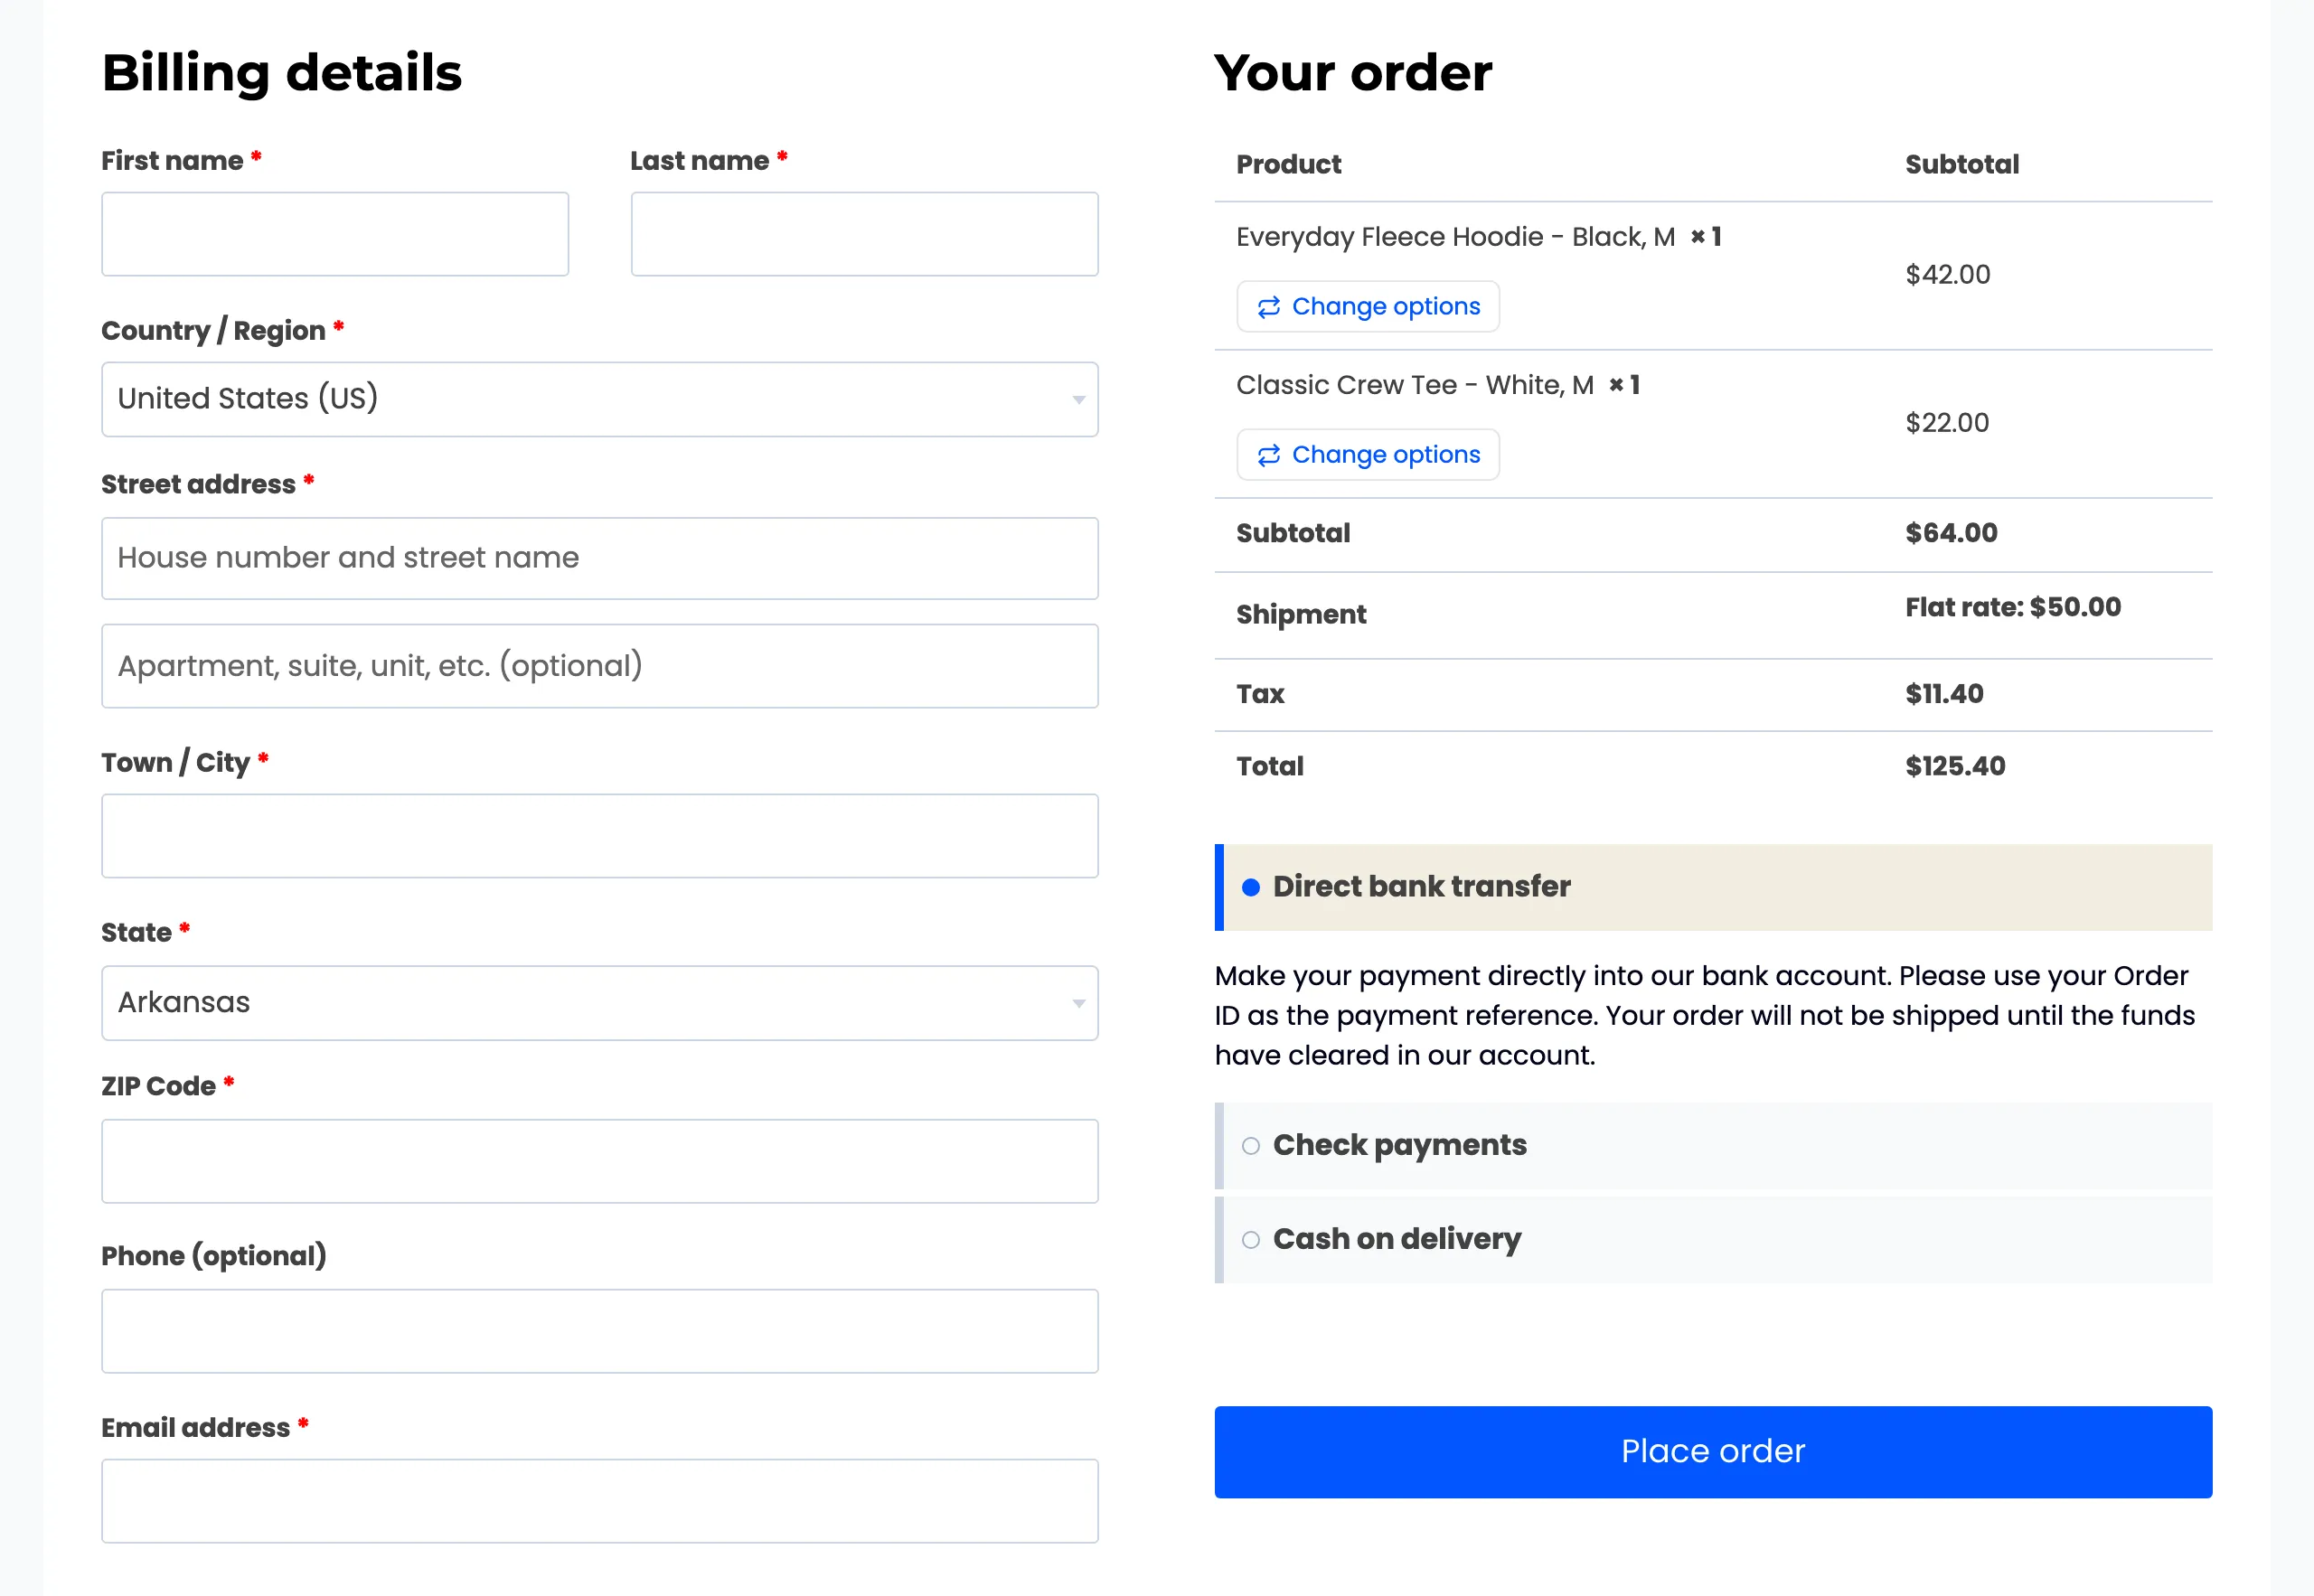
Step 4: Check the order summary
Section titled “Step 4: Check the order summary”The order summary reloads with the new option, the new subtotal, and the shipping and tax worked out again. The shopper stays on the checkout, and anything they typed in the billing fields stays put.
Good to know
Section titled “Good to know”- The checkout always uses the popup, even with Open Switcher In set to Inline.
- The Checkout block gets the same button. See How to Use the Switcher with the Cart and Checkout Blocks.