

Installing and Activating Product Search by Image AI
Product Search by Image AI installs like any other WordPress plugin. Activate WooCommerce first: the plugin adds its icon to the WooCommerce product search form, so without WooCommerce it prints an admin notice and stops there.
Step 1: Upload the plugin
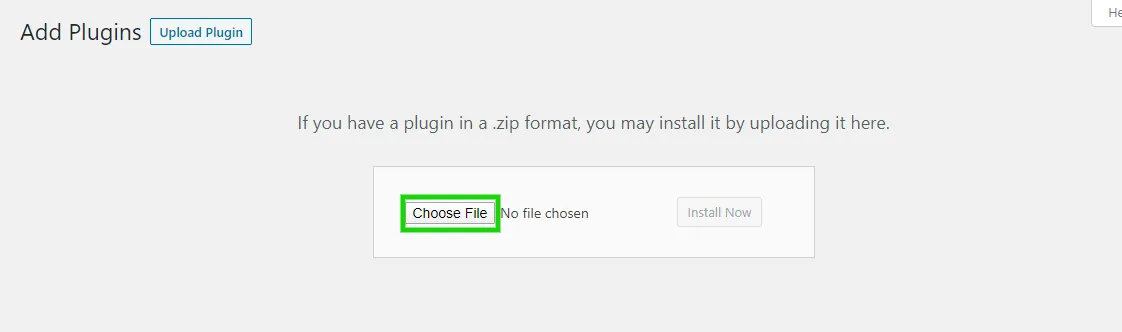
Section titled “Step 1: Upload the plugin”Go to Plugins → Add New and press Upload Plugin.

Press Choose File and pick the zip you downloaded.
Step 2: Install and activate
Section titled “Step 2: Install and activate”Press Install Now and wait for WordPress to unpack the zip.

Then press Activate Plugin.

A Product Search By Image AI entry appears under DevDiggers Plugins in the admin menu. Activating also creates the two analytics tables the dashboard reads.
Step 3: Activate your license
Section titled “Step 3: Activate your license”Go to DevDiggers Plugins → Product Search By Image AI → Configuration → License and enter the purchase code and email from your order.
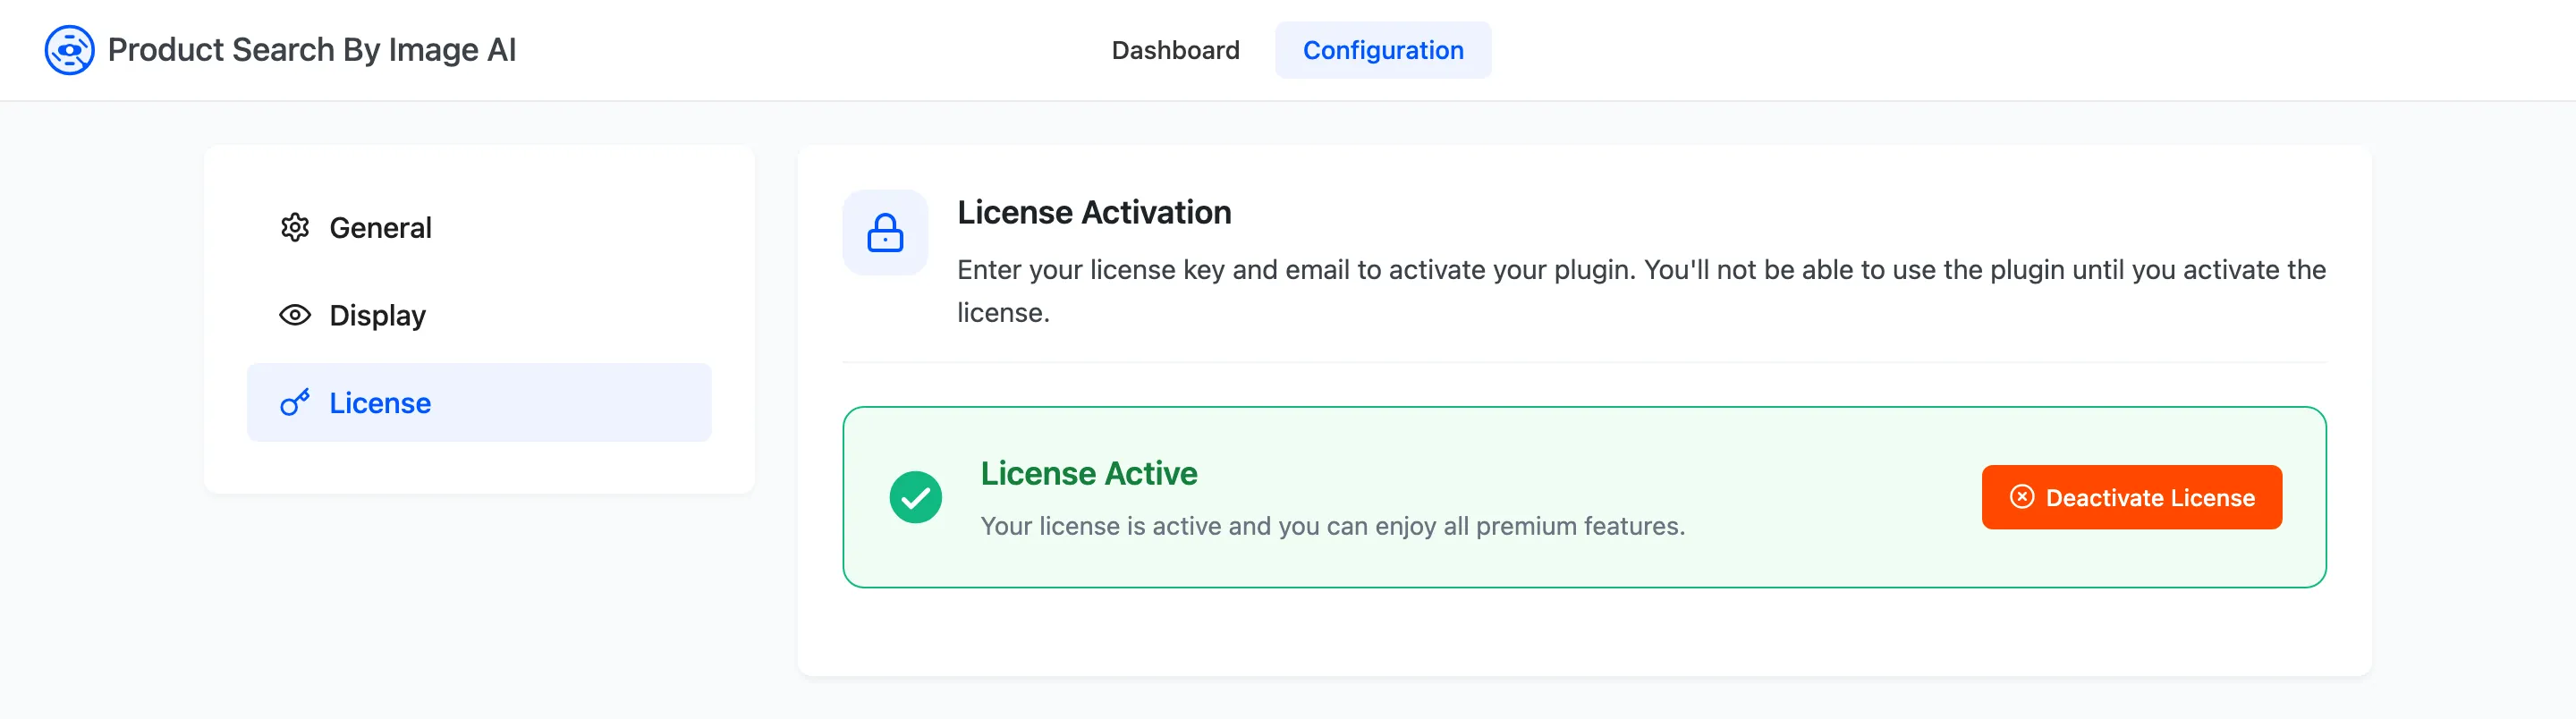
Do not skip this. Until the license is active the plugin loads nothing on the storefront. No camera icon, no loader and no keywords box, whatever the settings say. Every admin screen keeps working, which is what makes it hard to spot. If the settings look right and the search box still has no icon, check this tab before anything else.
Step 4: Switch image search on
Section titled “Step 4: Switch image search on”Go to Configuration → General and tick Enable WooCommerce Product Search By Image AI, then press Save Changes.
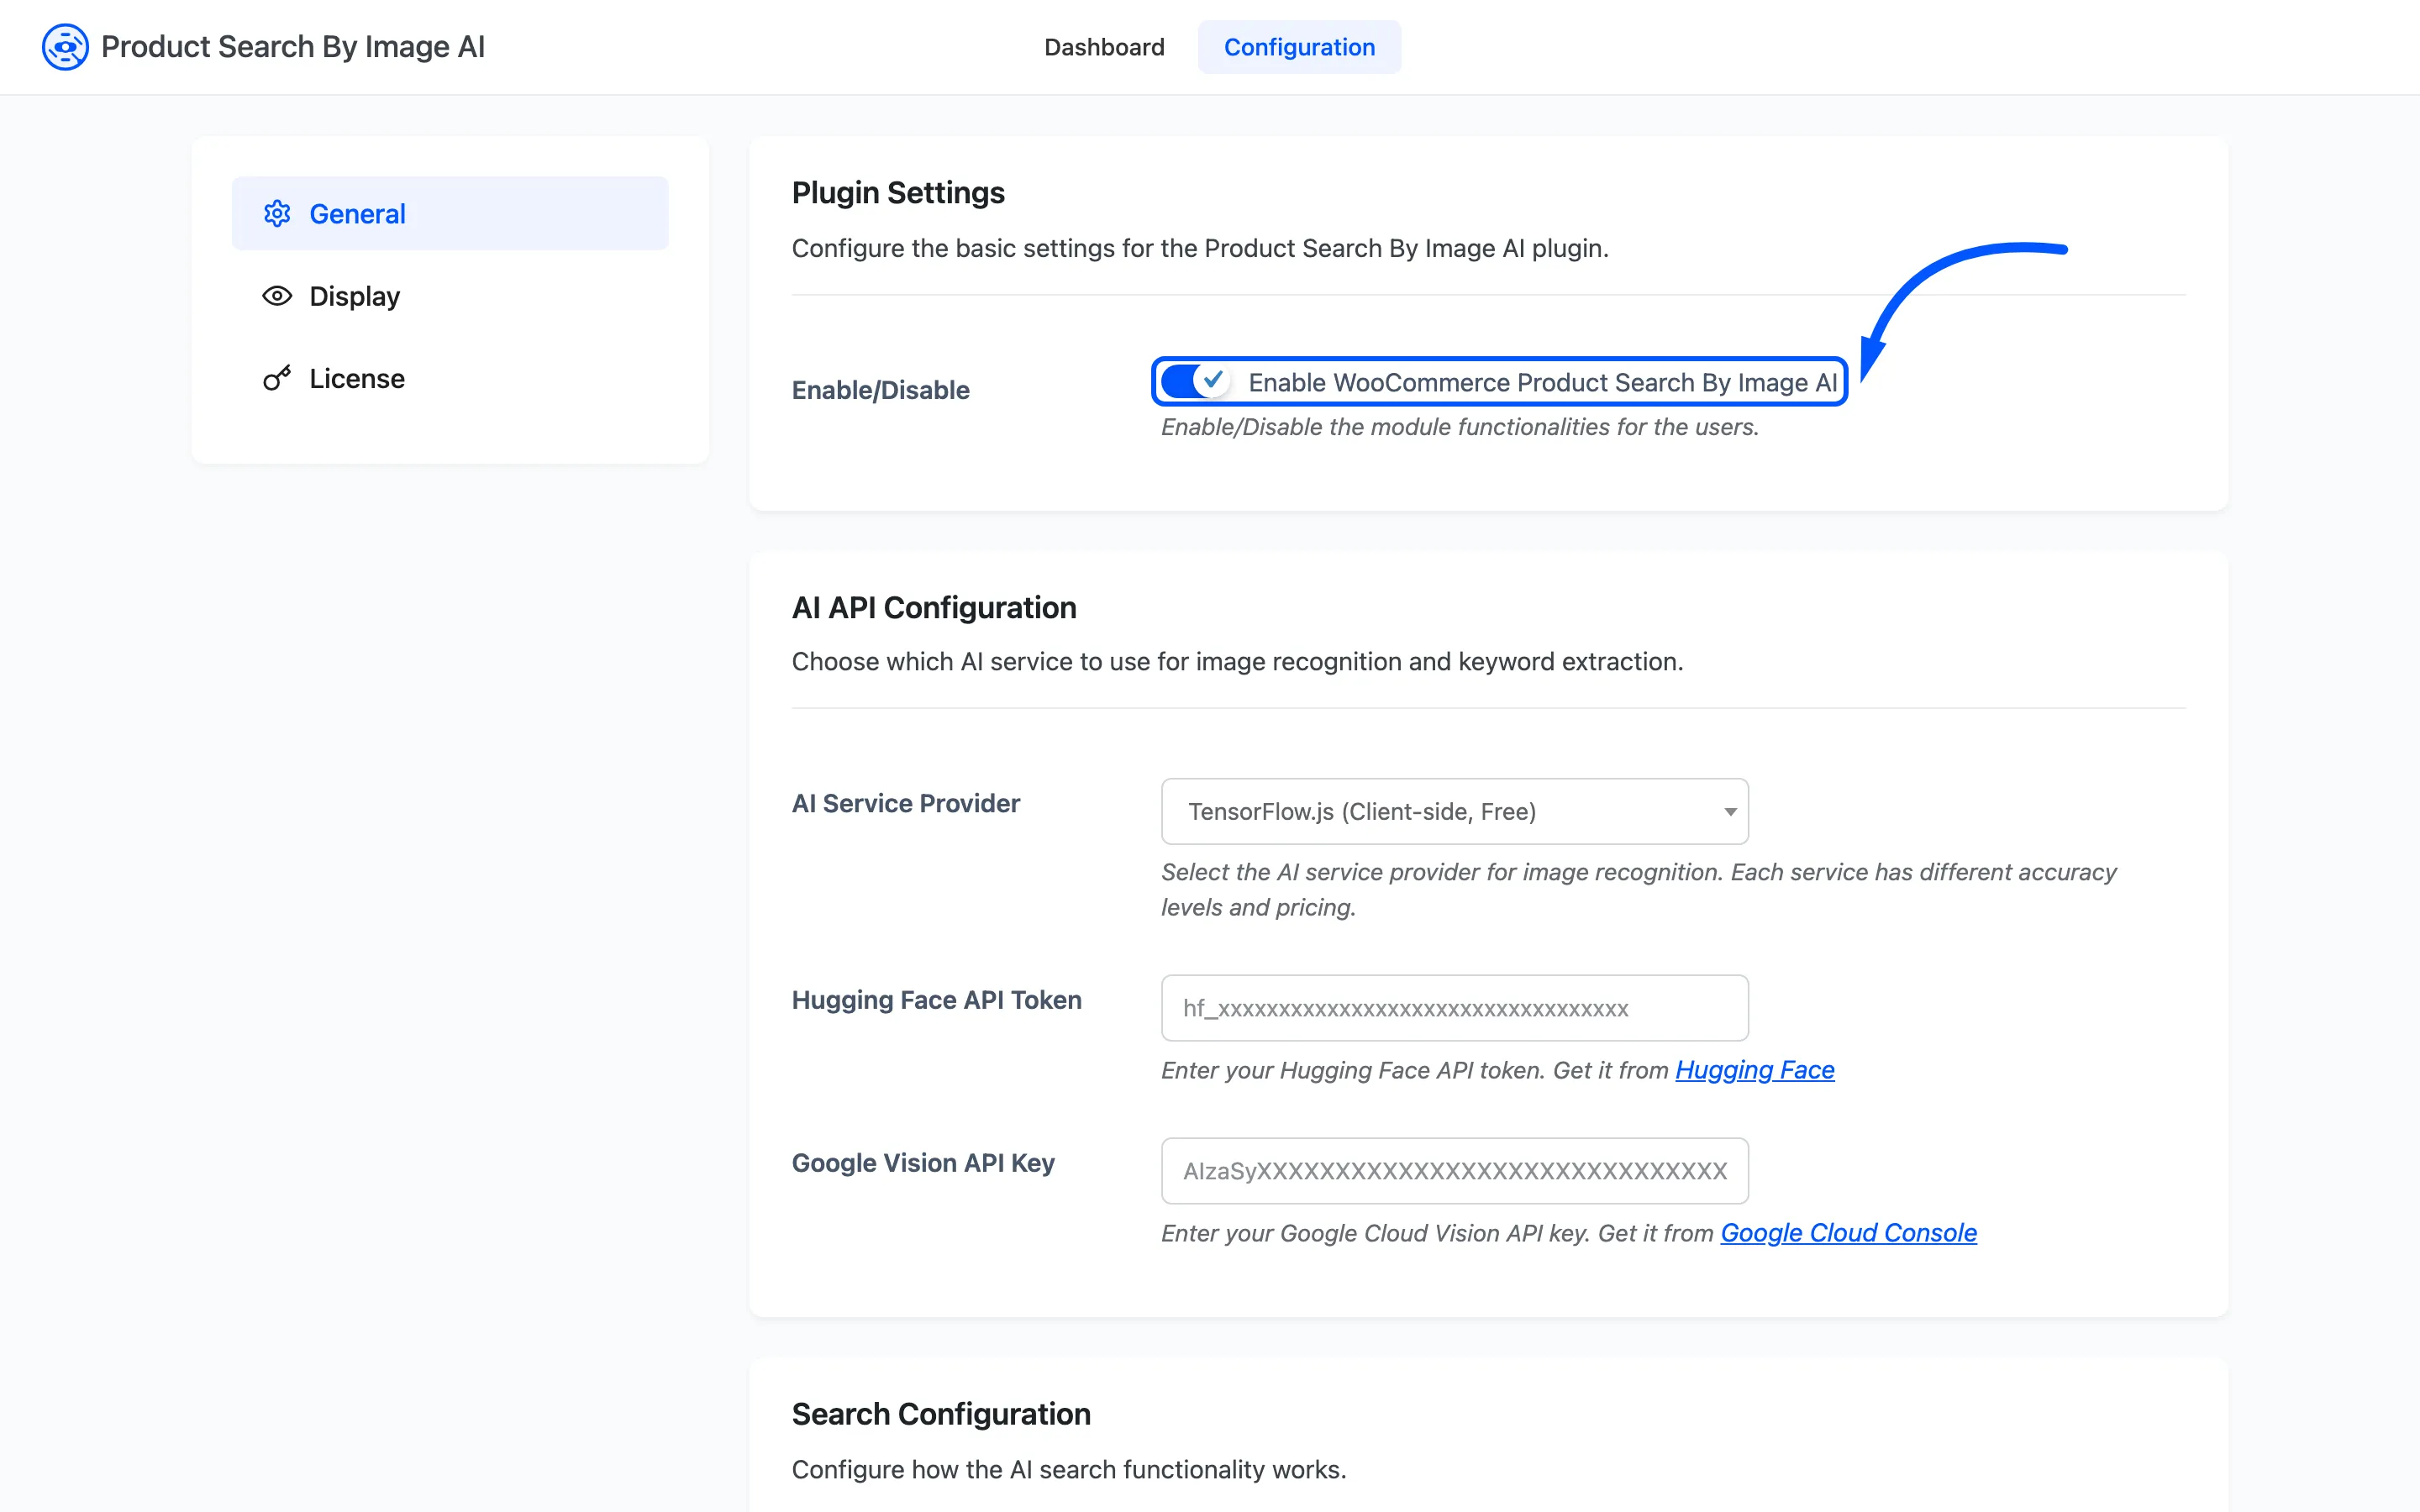
The icon appears in your product search box straight away. Nothing else has to be set: the plugin ships with TensorFlow.js selected, which needs no account and no key.
What to do next
Section titled “What to do next”- How to Set Up Image Search walks the first real search end to end.
- General Settings documents every field on that tab.
- How Image Search Works explains what happens between the photo and the results.